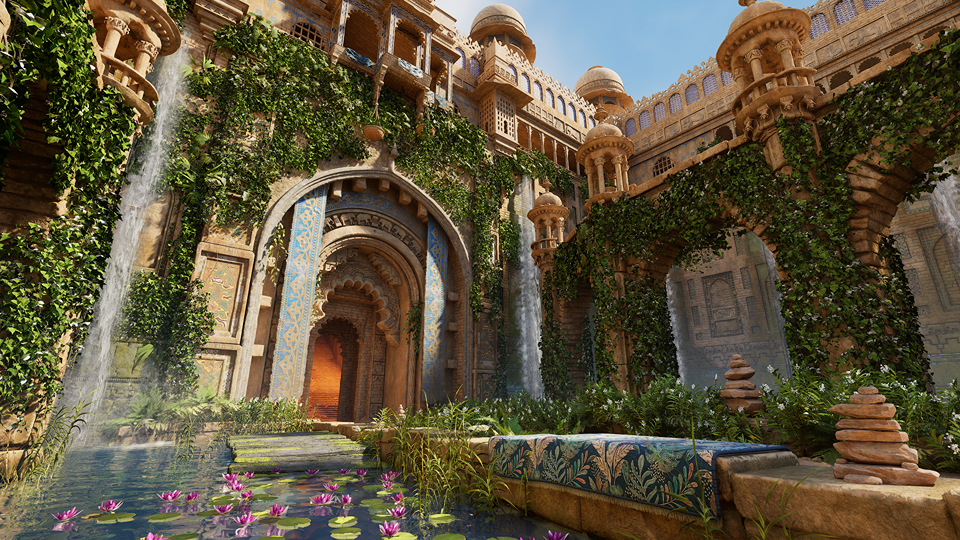
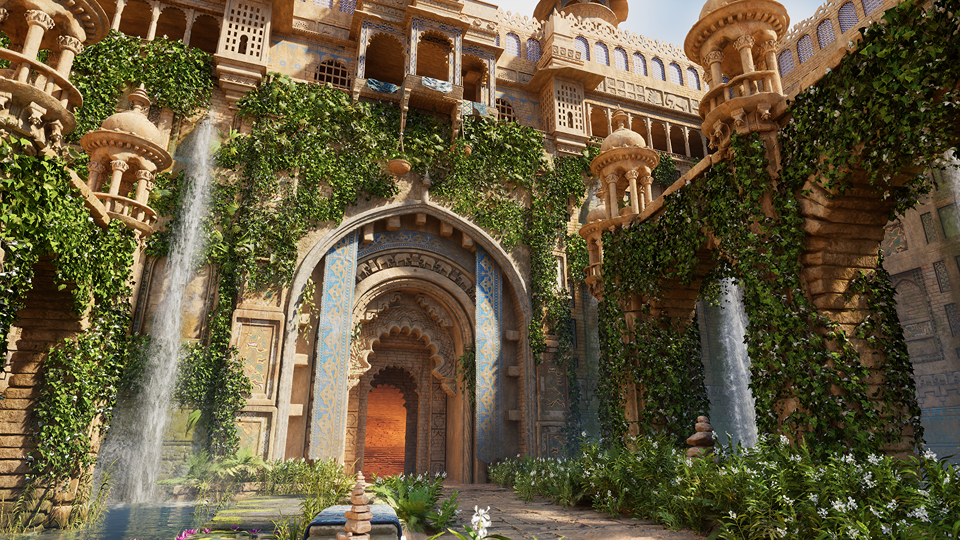
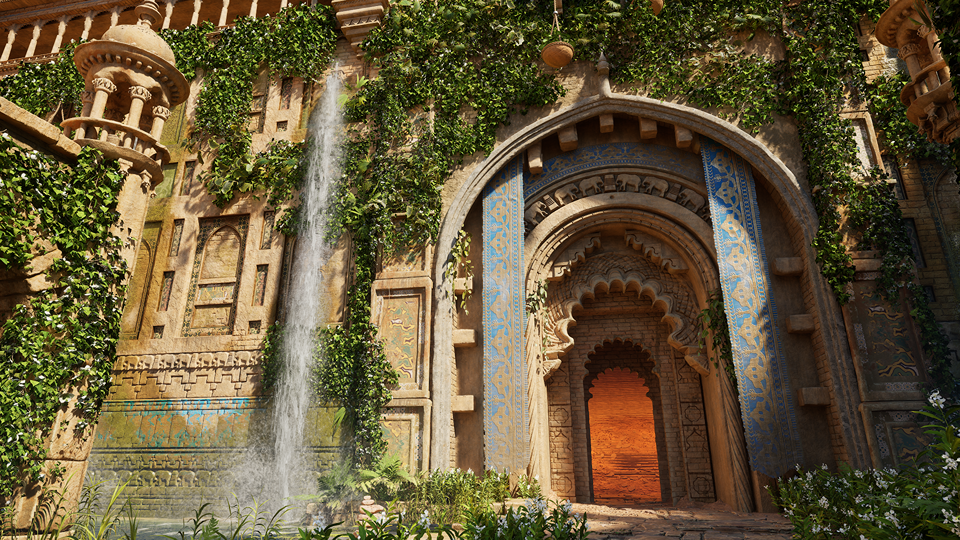
Meditation Garden

Introduction
My name is Alexander Bulkin, and I am a 3D Environment/Prop Artist. I started as a game jam participant.
I enjoyed creating art and began learning by watching tutorials to become a 3D Artist.
I love creating 3D art and continuously learning new things to improve my visuals.
Goals
This environment project must look good, and I want to make a breakdown of my process in creating this environment.
- Create an environment that I would be proud to have in my portfolio.
- Use every technique I know and learn more things in the process.
- Use fewer pieces by utilizing modularity.

Tools
Below is a list of all the software I used for this project:
- Blender
- ZBrush
- Substance Designer
- Substance Painter
- Marmoset Toolbag
- SpeedTree
- Unreal Engine 5
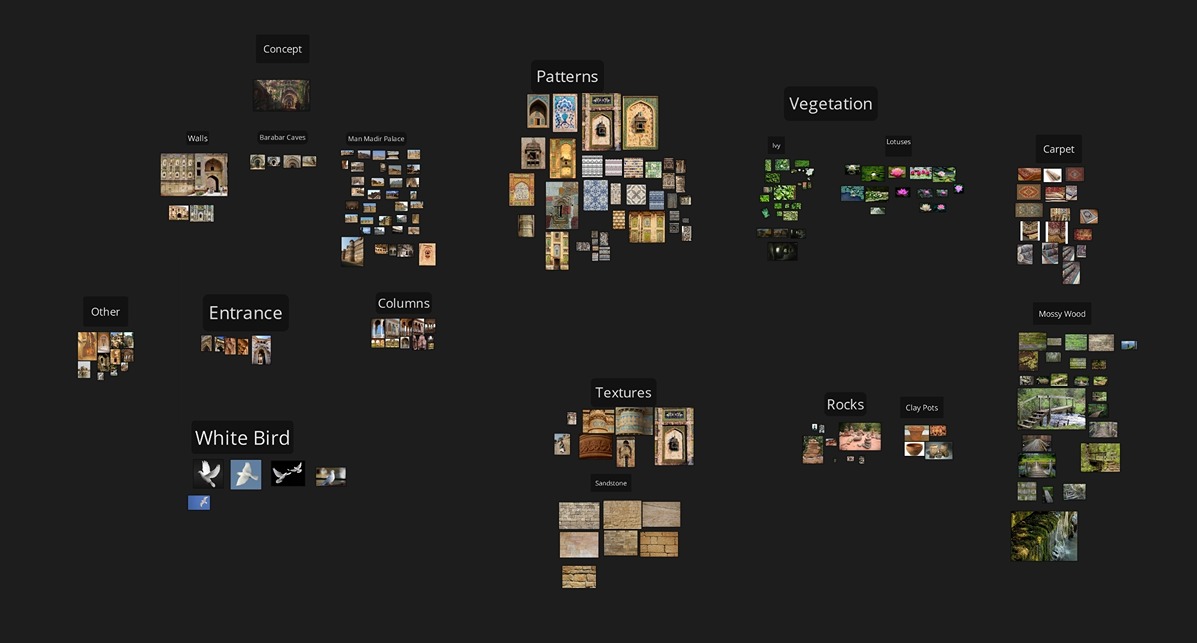
References
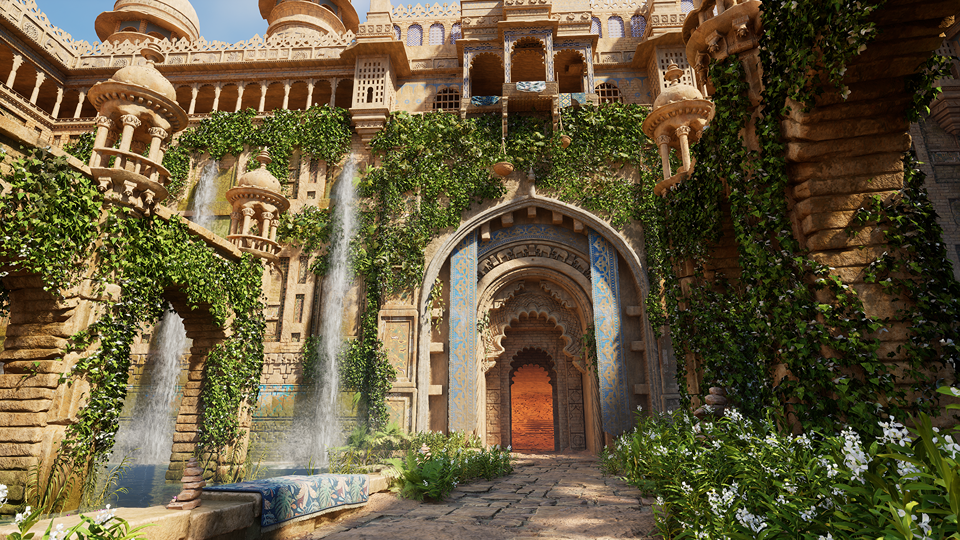
I found amazing concept art by Eddie Mendoza.
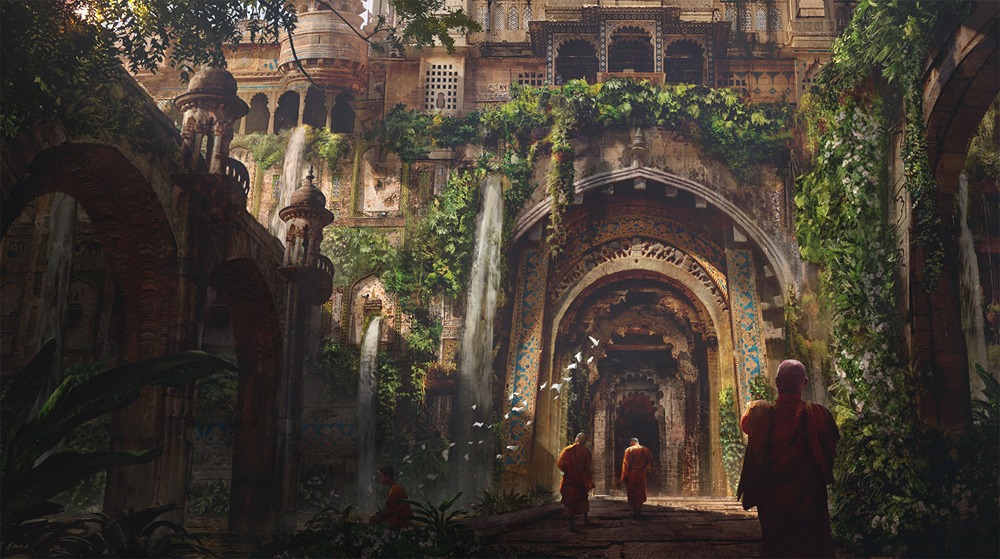
The concept contains several real-world places, so I tried to find references that were used to create this concept, along with some references for foliage, texture surfaces and carpets.
Blockout
The first thing is to get the scale of the scene and try to match the reference. In this environment, I actually divided my work into 3 parts:
- Objects that will be close to the camera (big arches, columns, floor)
- Walls with entrance
- Top section with arches and decorations
I use cubes, simple meshes, and mannequins for the first pass of blockout.
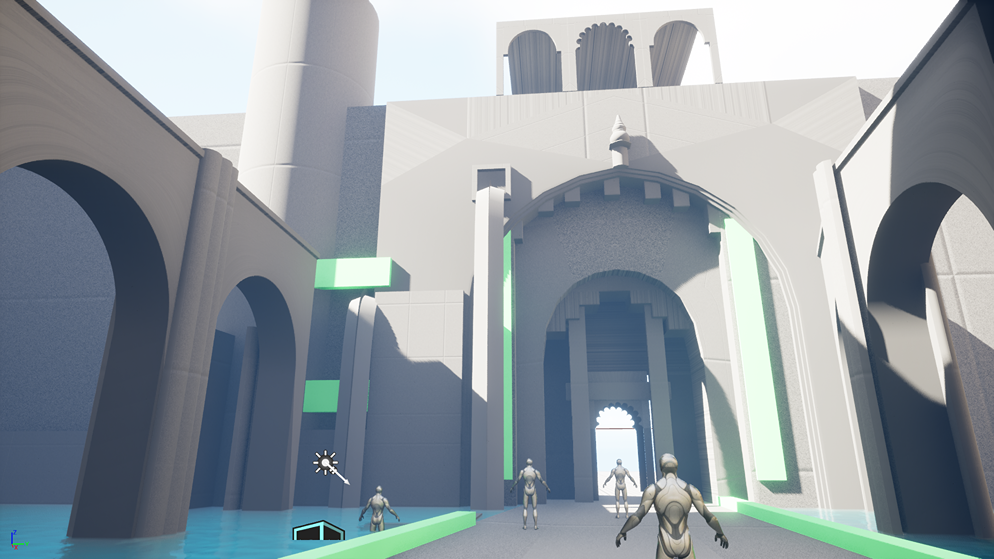
Then, I change blockout meshes into modular pieces.

From this point, I know how many objects I need to create. I can always switch to other things and not get bored with this project.
Modeling
Everything that will be close to the camera must be high-detail meshes. Objects that are far from the camera focus more on silhouette and do not require a lot of details.
This is important for time management as it can take too long to create everything.
Arc
Instead of sculpting every single stone for an arc, I made a rough sculpt of 4 pieces of stone.
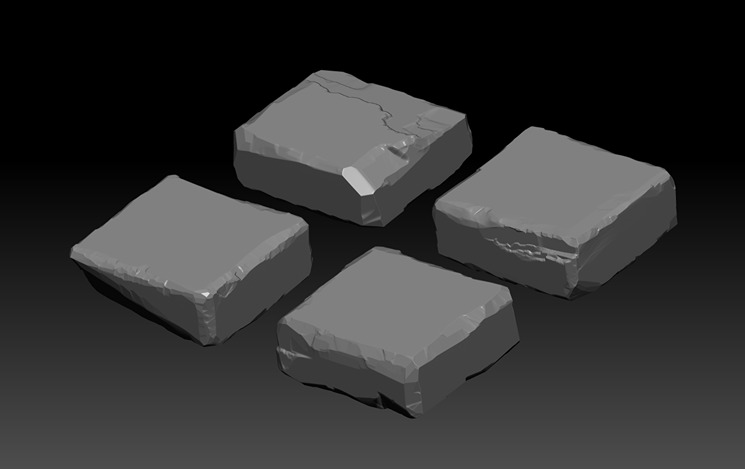
Then I exported them into Blender and created a stack of stones on top of each other with different rotations to prevent repetition.
Using my blockout mesh, I get a curve that I use to deform my stones into the needed arc shape.
I am using a Blender Curve modifier to match the shape of the arc.
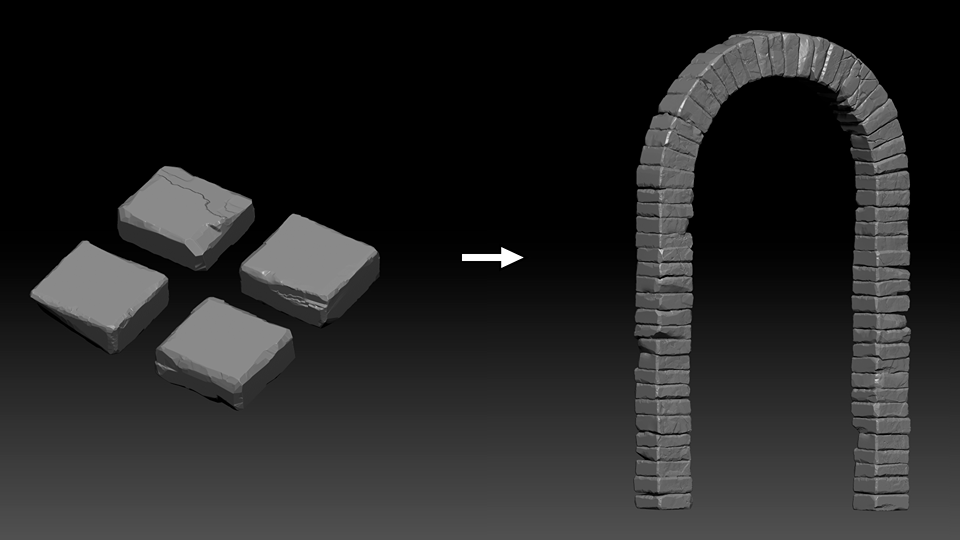
After getting the shape done, I imported the arc back into ZBrush and did the polishing phase.
In this phase, I added fine details, cracks and noise.
Floor
I knew from the start that the floor would use displacement based on a height map. I sculpted a few stones to get the information for my textures.

I spread them across a 4-meter plane to bake down the details in Marmoset Toolbag.
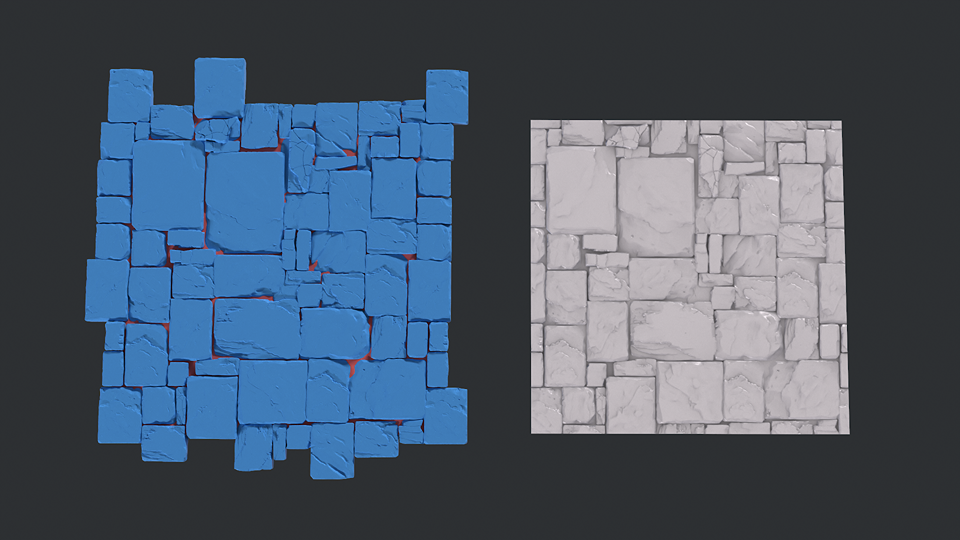
It is important that the meshes on the edges of the plane match to make sure your texture is tiling. Then I imported the baked maps into Substance Designer and did a texture pass.
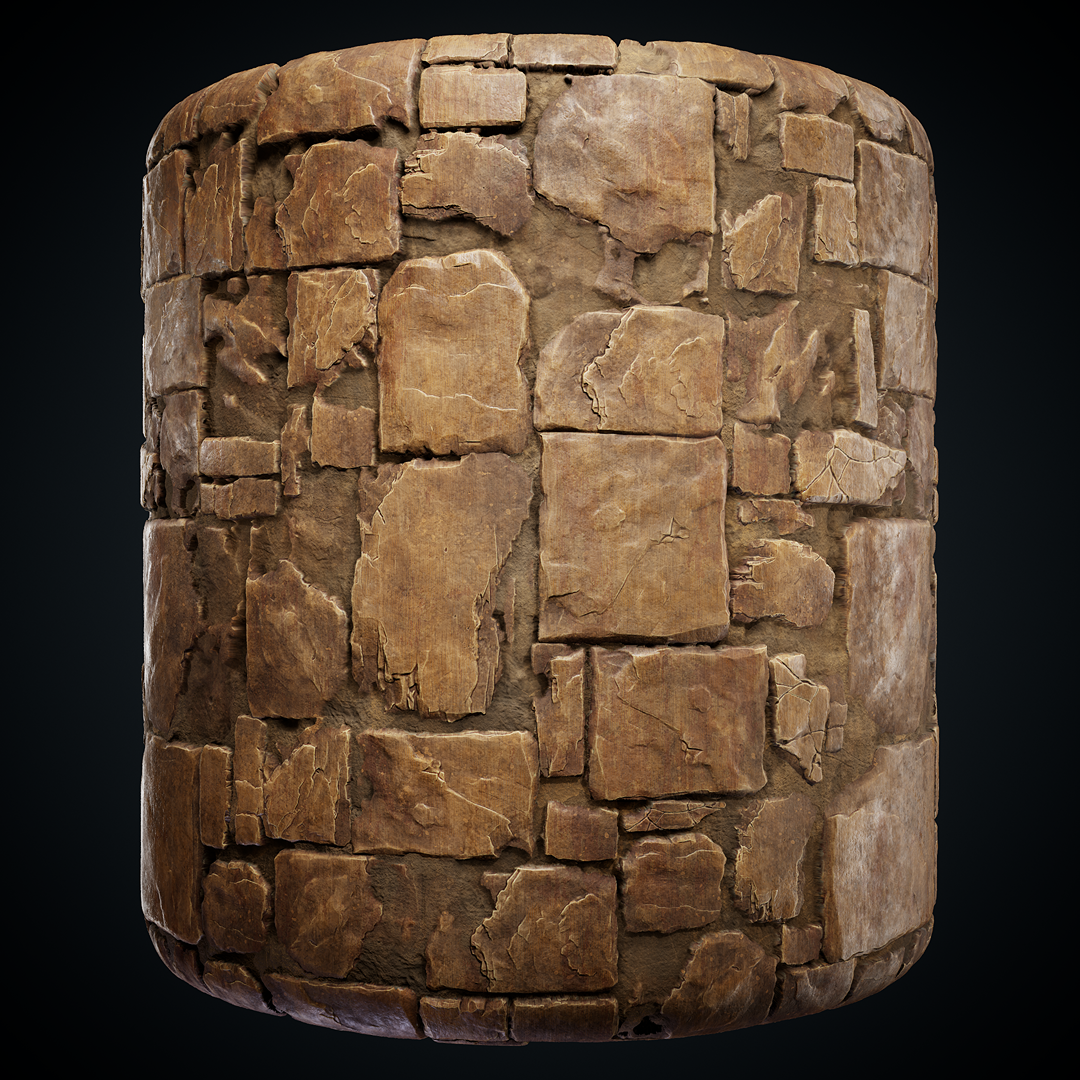
The final result of texturing:
The blockout floor is a subdivided plane, UV mapped so it would tile after duplication in the scene.
Then I displaced the plane using UE modeling tools.
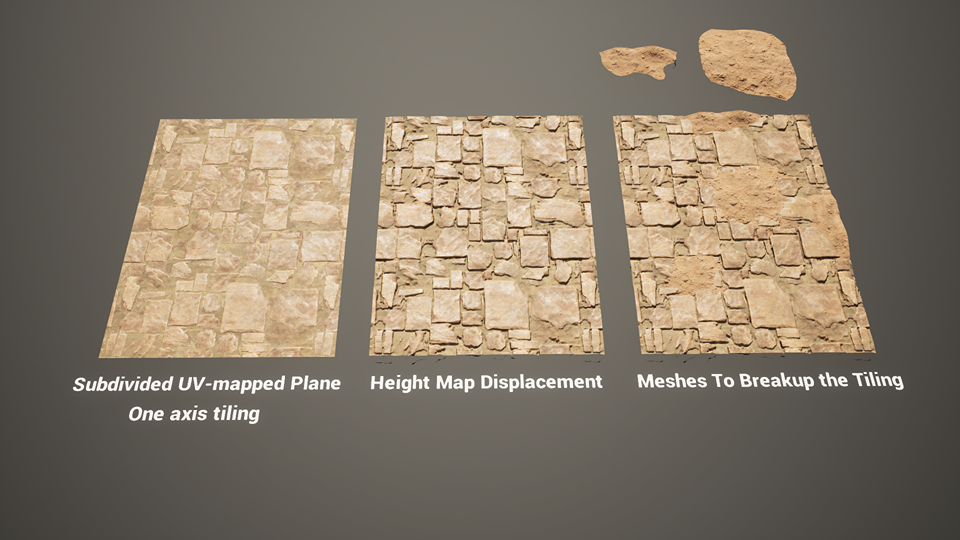
I used simple blob meshes to break the tiling of the floor, one for the flat surface and another for the connection with the walls.
And there you have it!
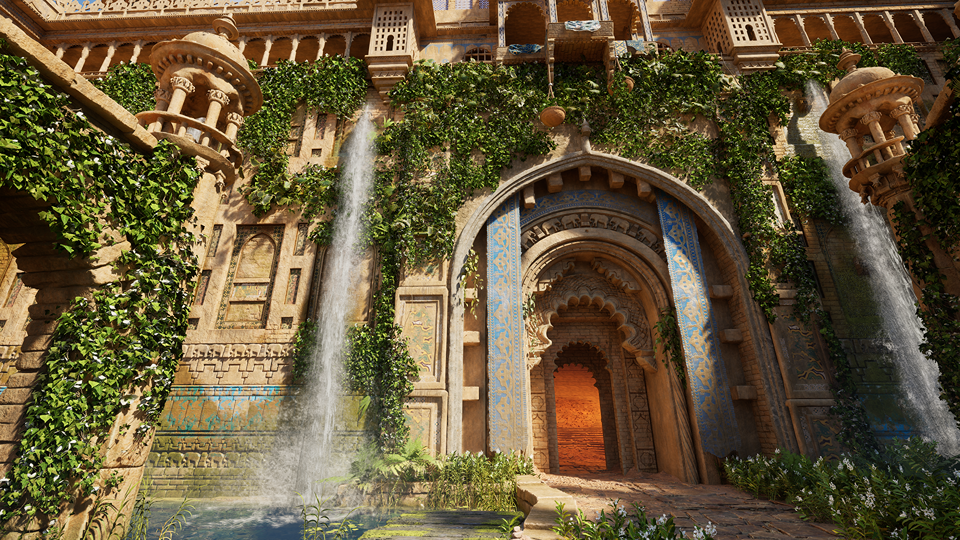
Foliage
From the start, I was thinking about using only Megascans for foliage, but it didn’t give me the desired look for the ivy I wanted, so I had to create my own with SpeedTree.
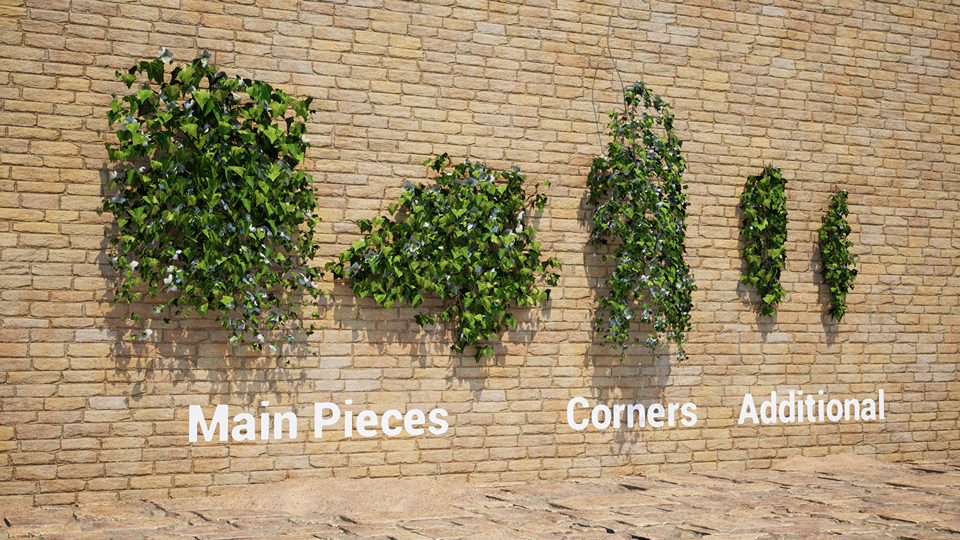
I created foliage keeping in mind that it would be a modular kit, where pieces could be used multiple times.
For the leaves, I found textures on the internet.
I sculpted one flower and baked it down to a low-poly mesh. Then I did the texturing in Painter and assembled everything in SpeedTree.
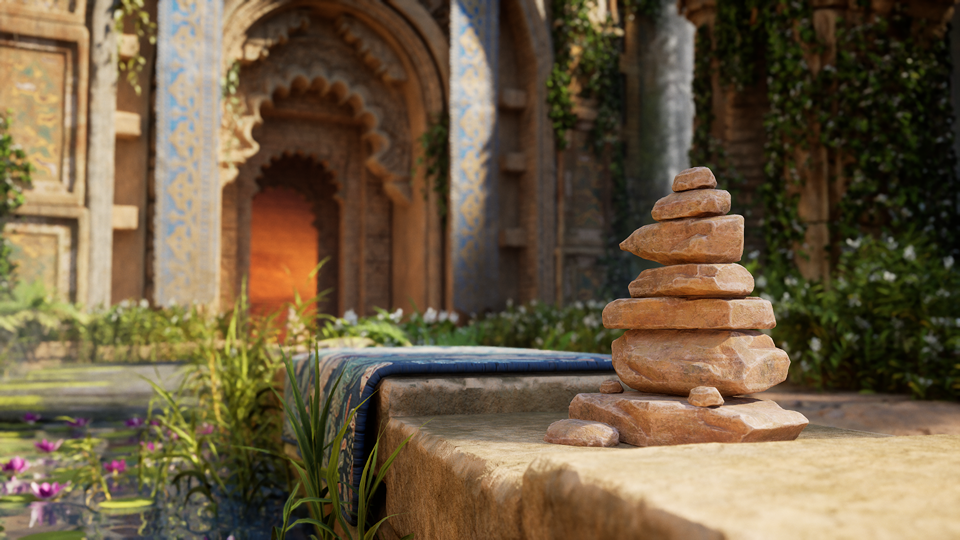
Carpet
For the meditation scene feeling, I needed a carpet that I would imagine sitting on and that would give my scene more storytelling. I used the tutorial by Louise Melin on how to create fabric in Substance Designer.
To go even further, I used a tile sampler to create stitched edges on ornaments.
Some early tests of the material:
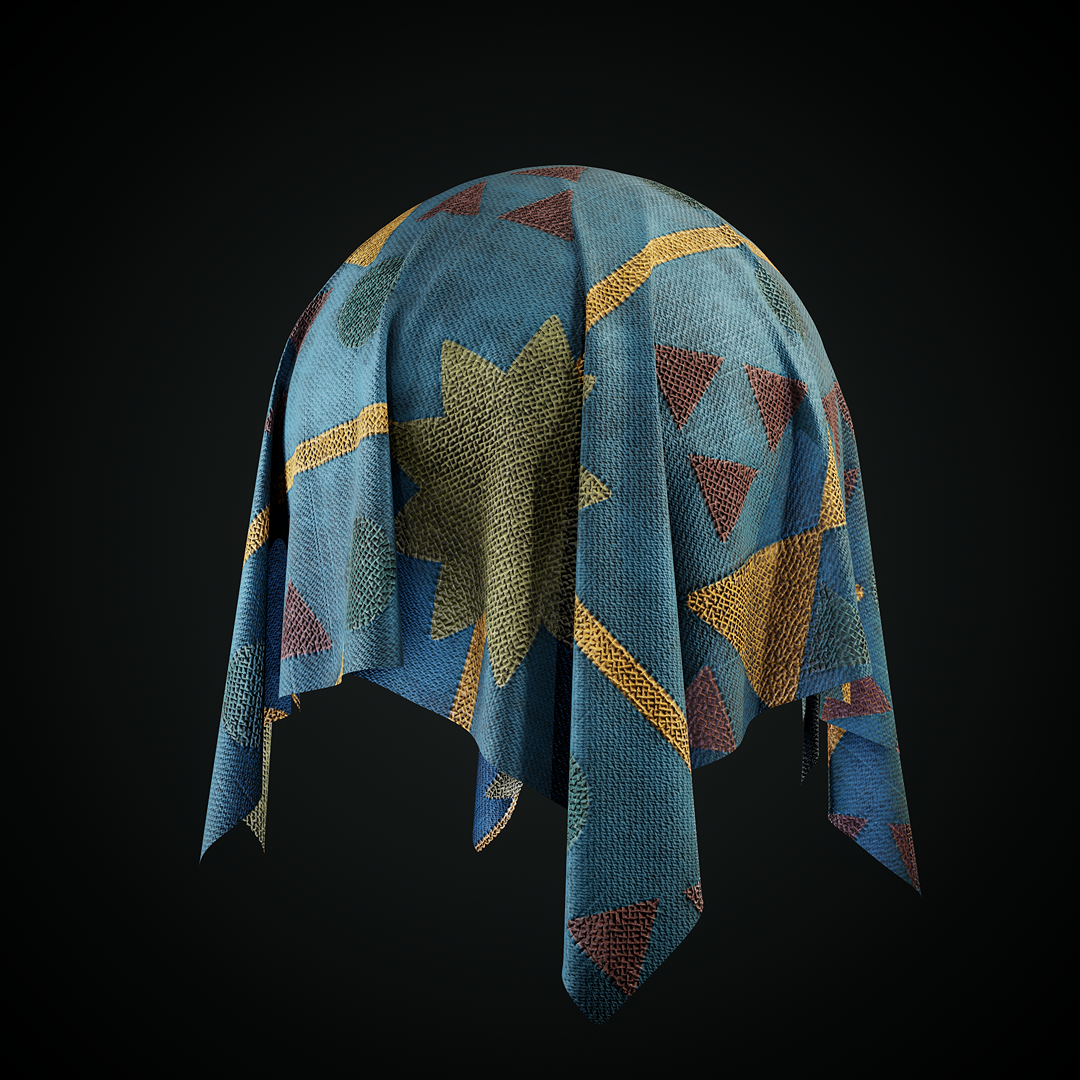
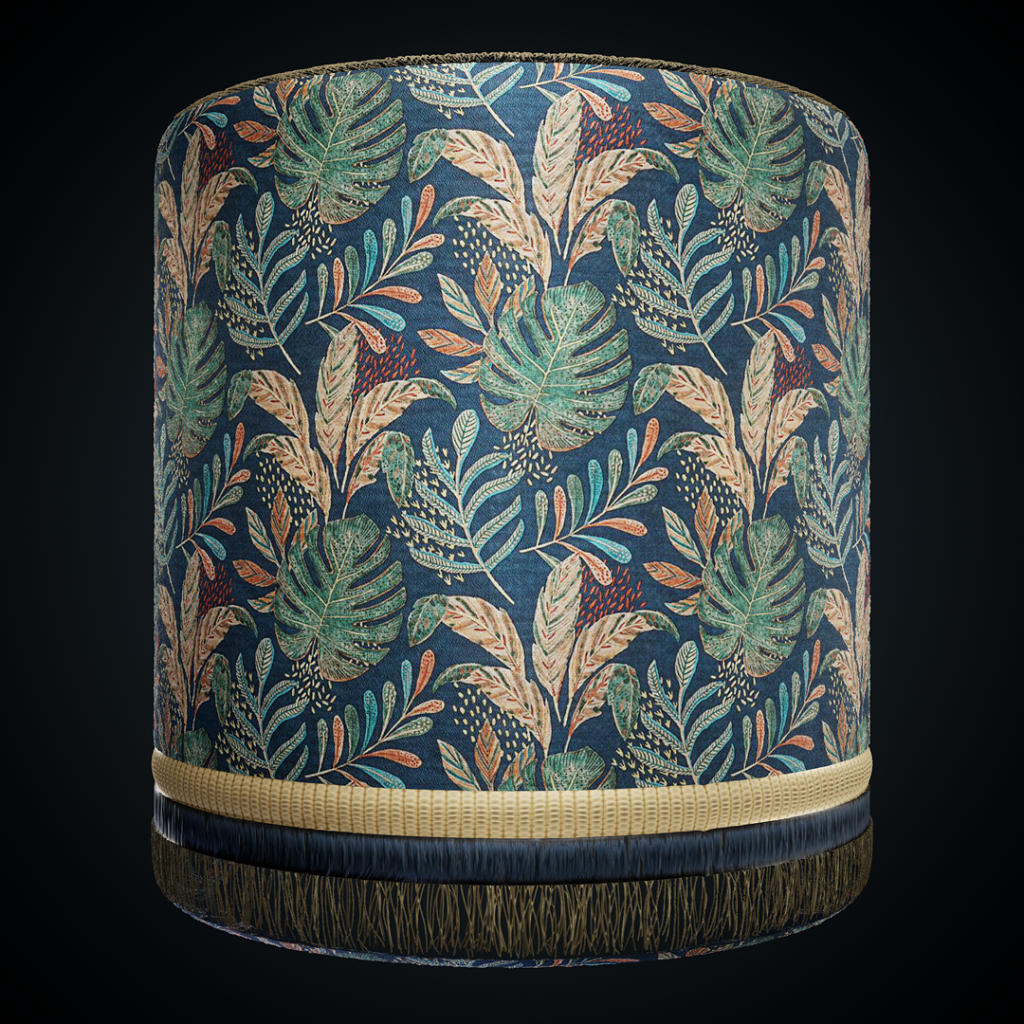
Then I found a nice tiling picture that would be used as a base color and alpha mask. I desaturated the image and used a histogram scan to get an alpha from the picture.
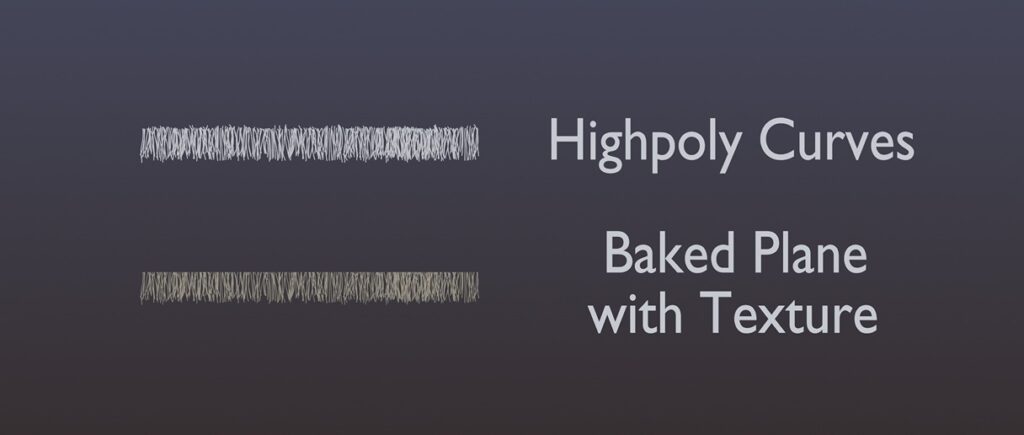
To complete the carpet material, I made a trim for the edges of the carpet and small hanging ropes. It was easier to make changes to the plane than to the rope meshes.
Using curves, I made some variations of the ropes. I used a 4-meter plane to get a correctly UV-mapped piece that I could use to bake curves into the plane.
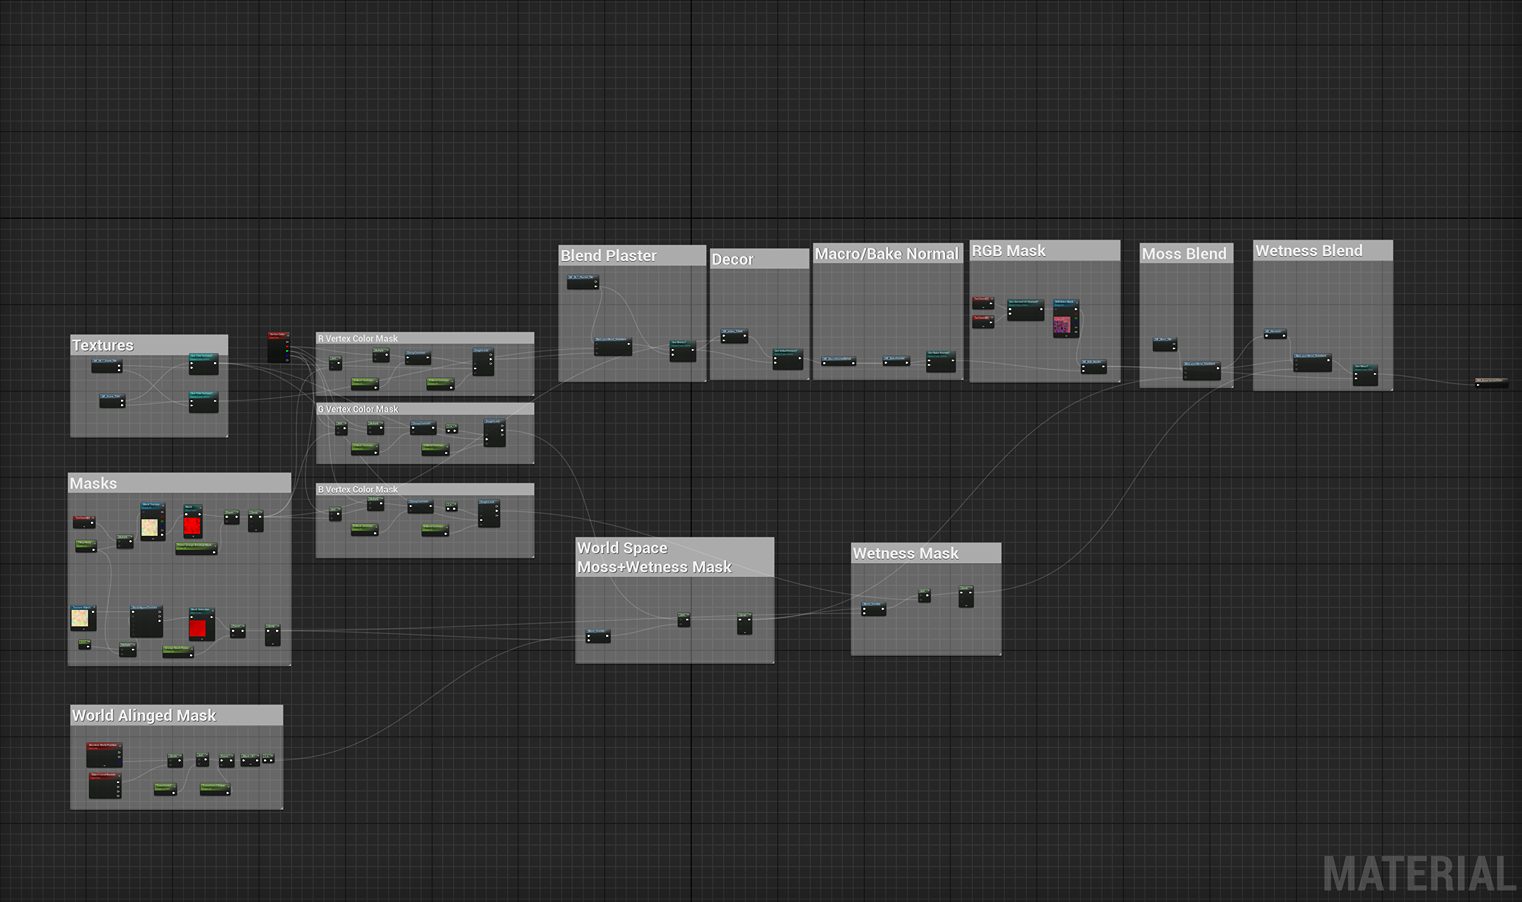
Shader Graph
This is a large topic, as I rely heavily on its features. My shader includes:
- Stone Tile/Stone Trim
- Plaster
- Vertex Paint (plaster, moss, wetness)
- Decorative Texture
- Macro Normal Detail
- Bake Normal (if needed)
- RGB Mask (if needed)
- Moss
- Wetness
Stone Tile, Trims & Plaster
I use material functions to separate each material in a graph, making it easier to work with a shader graph.
Each material function has base settings, such as color tint, normal intensity, and tiling.
I used triplanar projection for textures (except the trim) to prevent seams between the modules in the scene.

Vertex Paint
Vertex Paint is used to create variation between materials. Make sure your meshes have enough vertex points to paint information into them.
Decoration Texture & Edge Decals
In this scene, I used two different approaches. The first is mesh decals with different materials on top of the base mesh using an opacity mask.
I broke the opacity mask with a grunge map to give it some aging effects, like worn paint.
Here are some examples using mesh decals and edge normal decals.
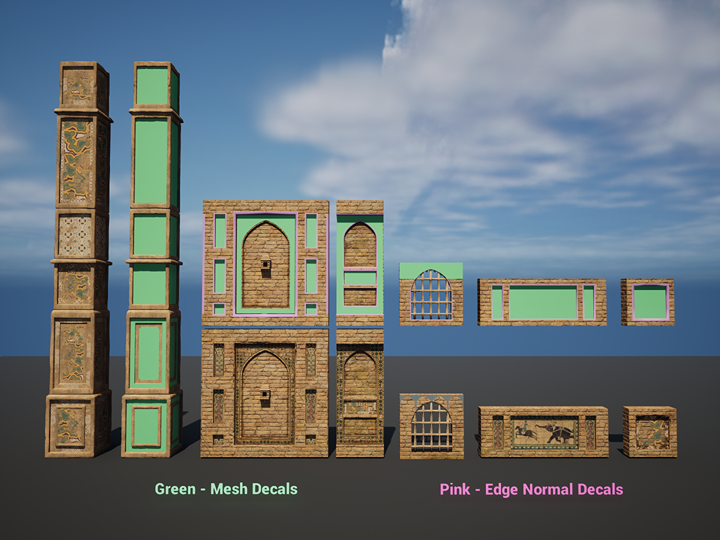
Make sure your edge normal decal mesh is smoothed to prevent seams on the corners.
The second approach uses a second UV map. It works well with displaced meshes because it is based on UV coordinates rather than different mesh data.
It follows the shapes of displaced mesh, and material blending works correctly.
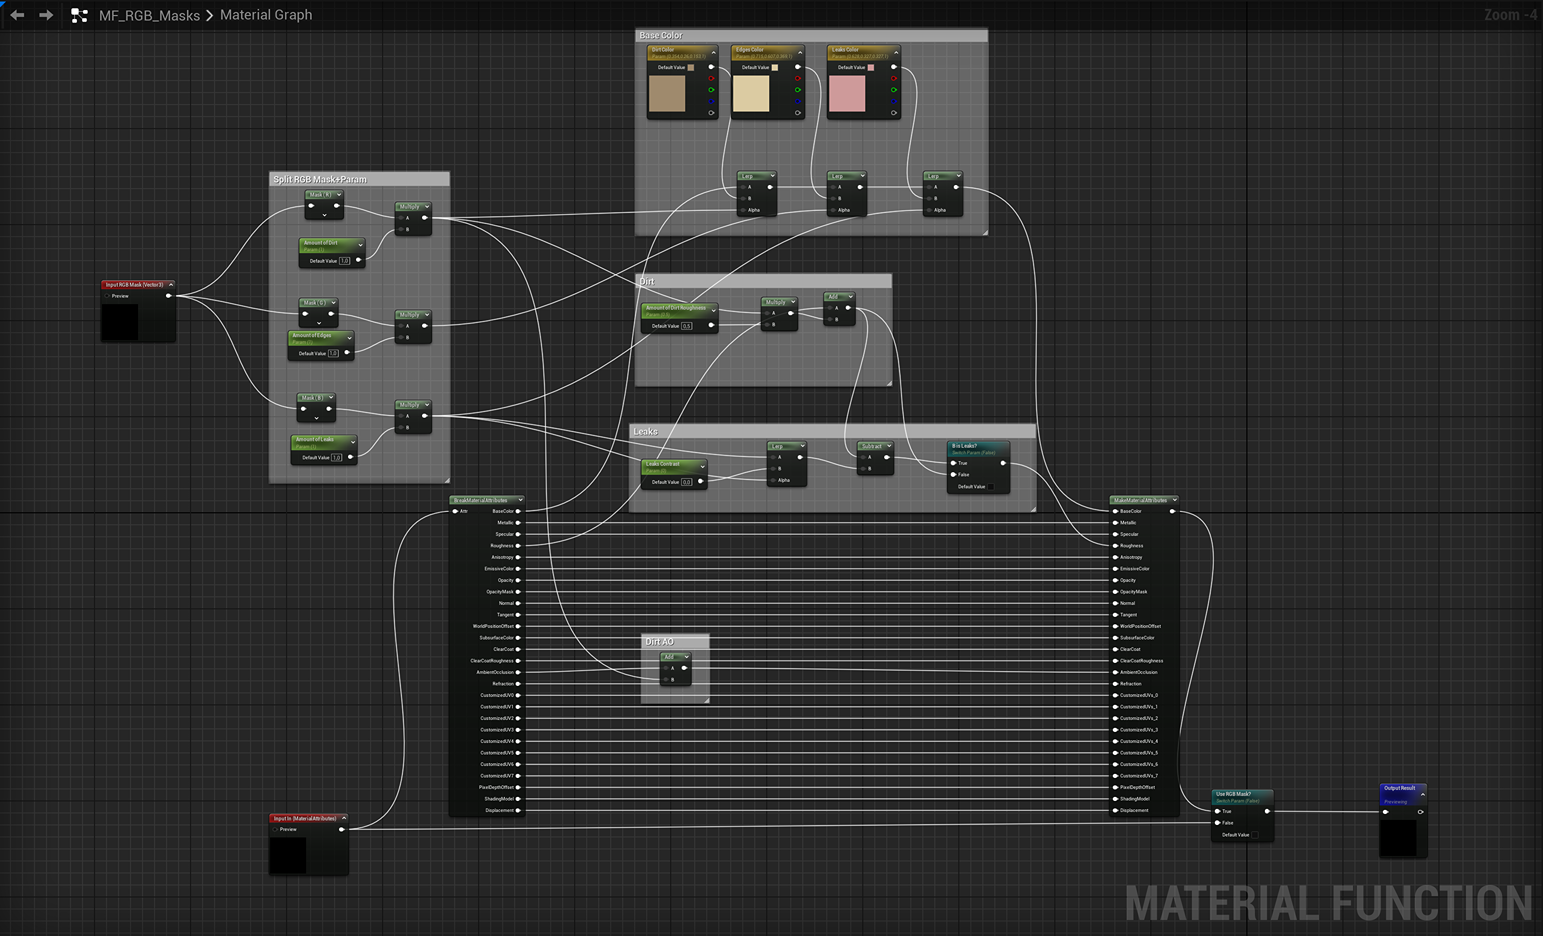
RGB Mask
The mask is used to create variation in colors for the mesh and roughness changes. I created the masks in Substance Painter, where I could apply smart masks or paint unique details into the mask.
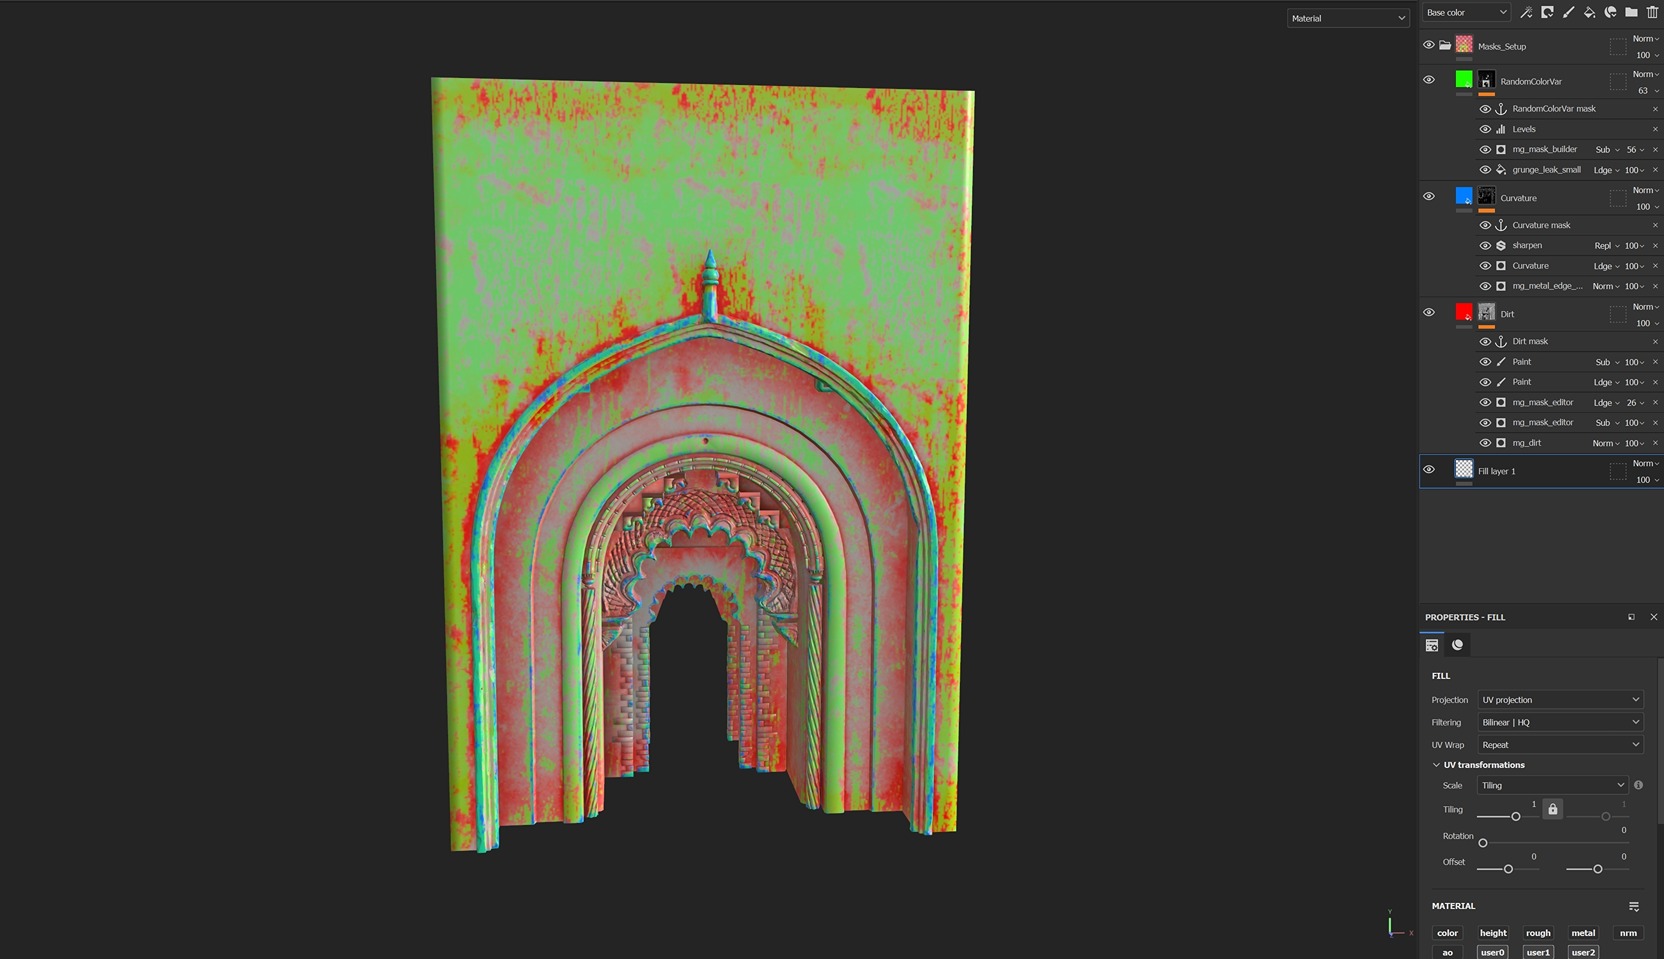
Packing them into one texture makes it easier to work with and more optimized for the engine. Since this is my personal project, I used high resolution, so the mask has a 1024×1024 resolution. It uses the second UV channel where the mesh is uniquely unwrapped, but I can always switch to the first UV. In the shader, I can adjust the intensity and the colors themselves.
Moss
The moss needed to work with nanite meshes, so I thought about creating a mask based on world coordinates.
It worked great in my scene, where I have a lot of water on the same level.
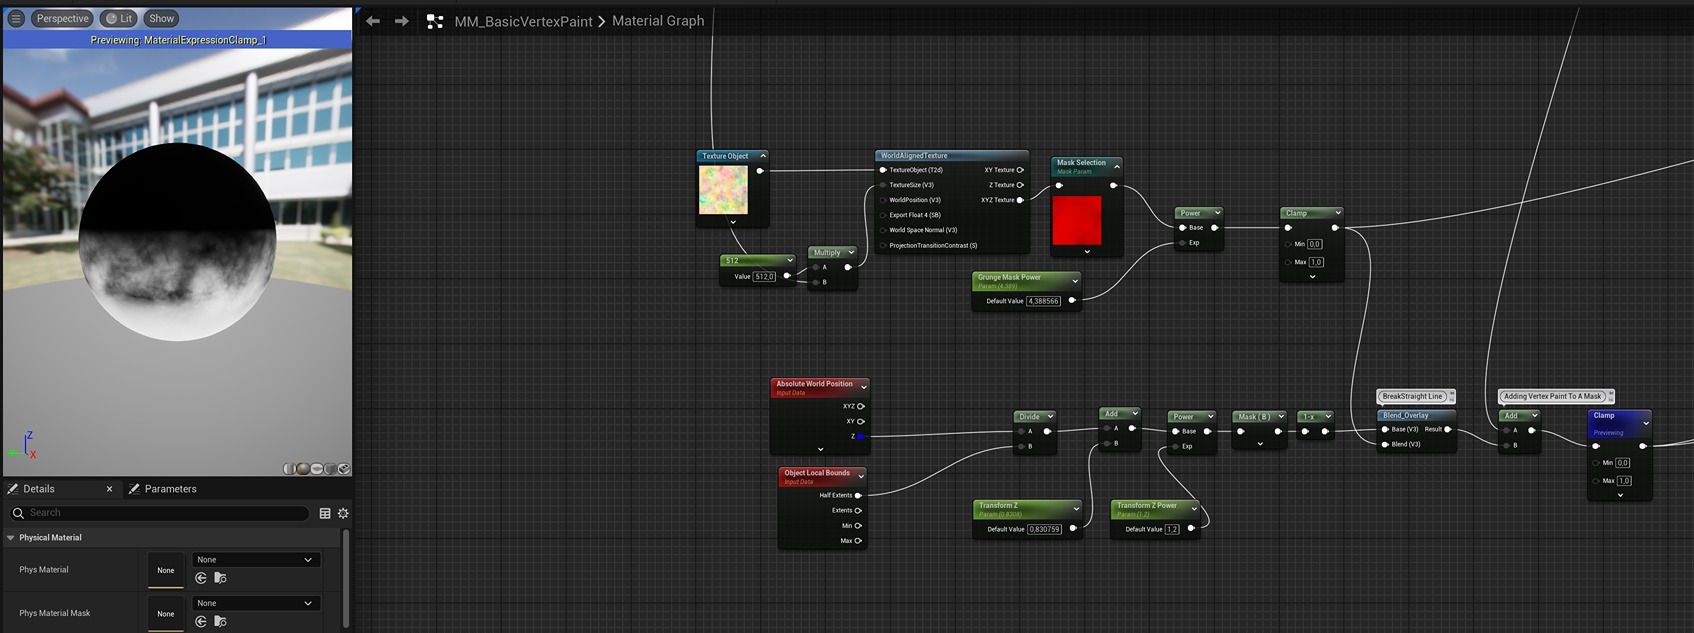
The mask gives you a straight line, so I blended it with a grunge map to break it up. The grunge map has 4-channel packed maps, and I can always switch between them.
Here is a video that shows how it works in the engine.
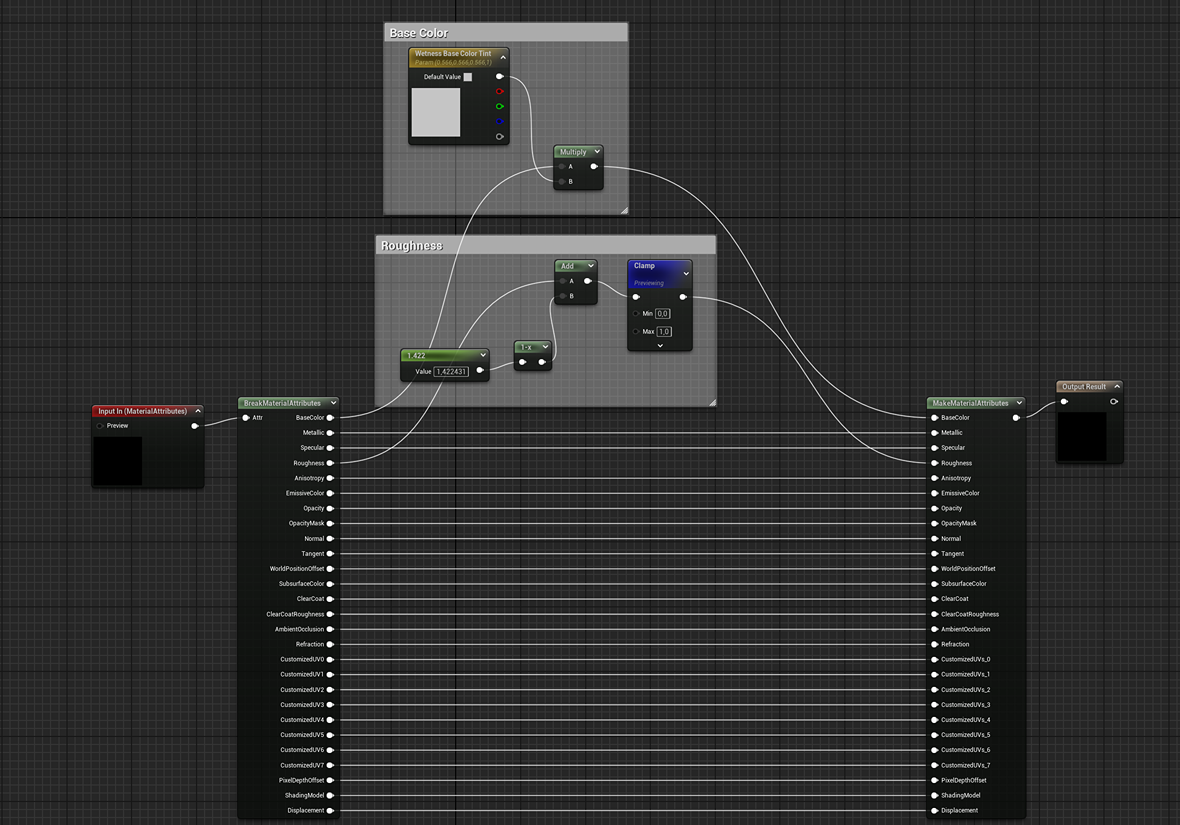
Wetness
The wetness material darkens the base color and makes the roughness shinier.
Lighting & Composition
I wanted both day and night scenes to practice my lighting skills. The rule of thirds helped create a strong composition.
The blue carpet creates a complementary contrast with the rest of the scene.
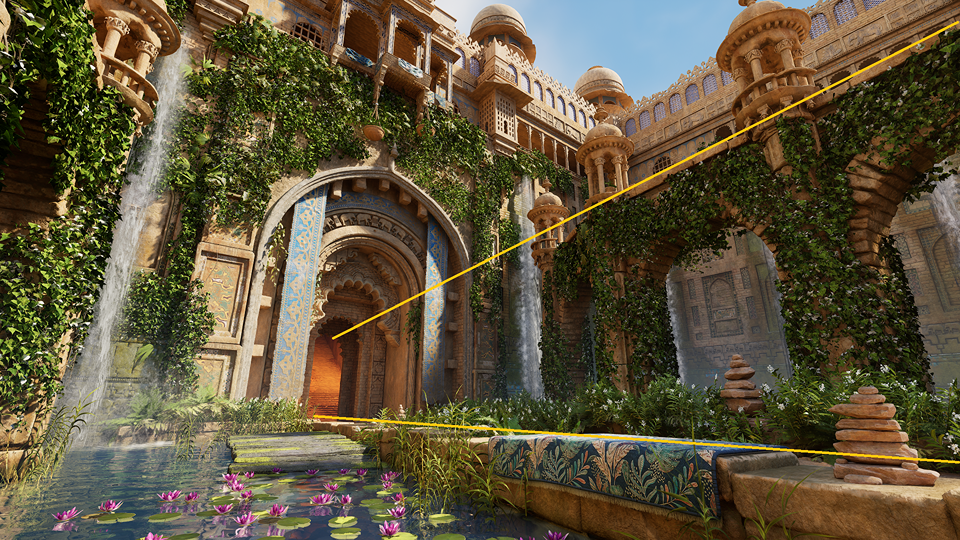
I used local height fog to separate the front pillars from the walls behind them, adding contrast and depth.
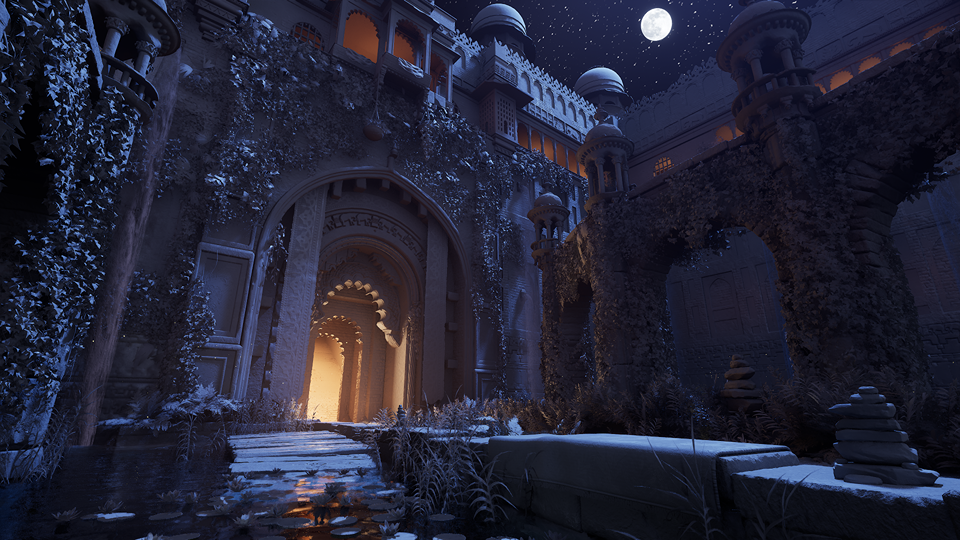
My inspiration for the night scene came from Elden Ring’s River Siofra, which featured a beautiful night sky with stars and orange firelight.
I used a circular mask for the moon to blend emissive colors.

I ensured the lighting wasn’t too dark by checking the Detail Lighting viewport mode.
Conclusion
I am pleased with the final result and happy to have created a nice wallpaper. I particularly like how the night scene turned out.
Thanks to the Leoluch Discord community for their feedback in improving my scene, and special thanks to Evgeniy Vegera for his input.
Read more articles
You might also like these articles.