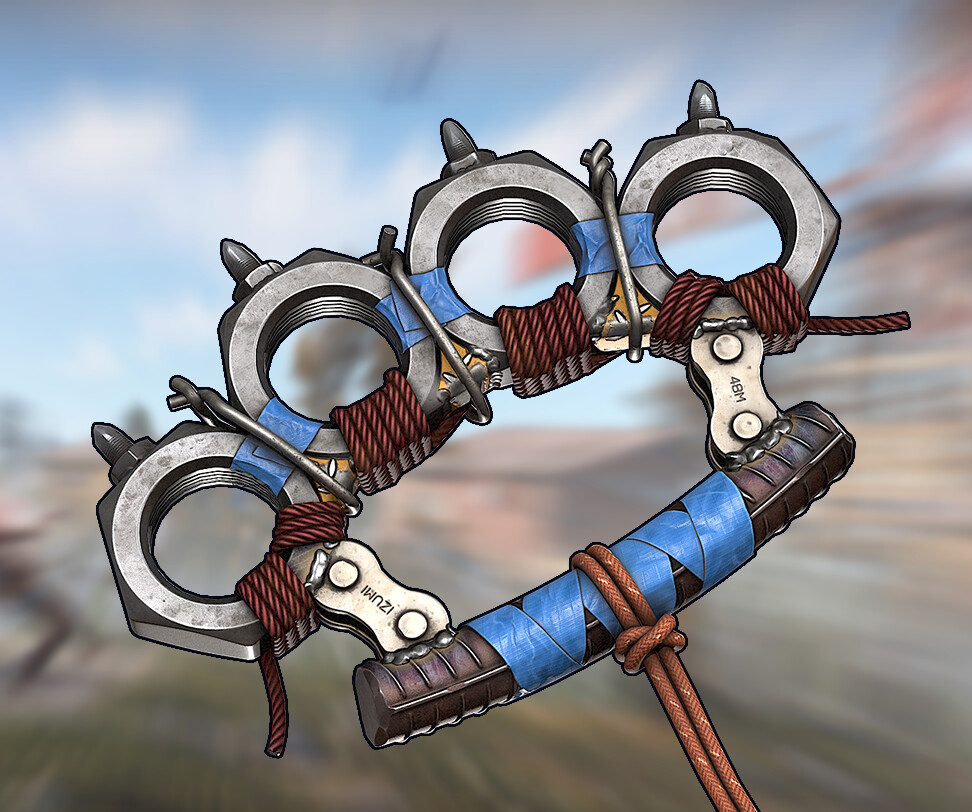
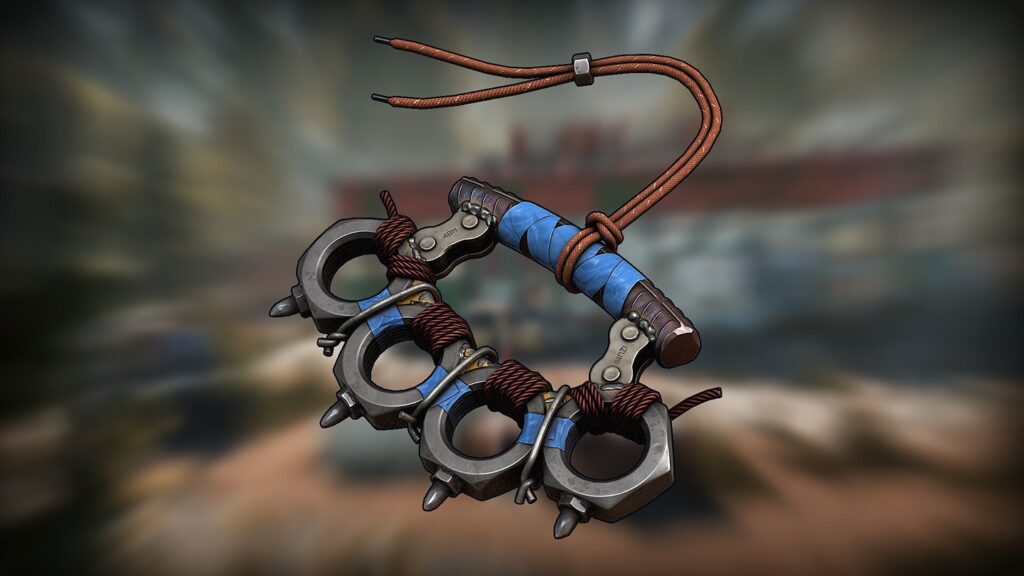
Knuckle Duster

Introduction
Hello everyone, my name is Barış Marangoz.
I’m a 3D Artist from Ankara, Turkey, with over 2 years of experience in the gaming industry.
My passion lies in hard surface and prop modeling, and I’m constantly working to improve my skills and create even better models.
Goals
I set out to design a unique model to enhance my skills and push the limits of my imagination.
Drawing inspiration from a post-apocalyptic world, I created a knuckle duster using materials such as metal, rope, and tape.
Tools
• PureRef – Gathering references
• Blender – Modeling blockout, low poly and high poly, UV
• Substance Painter – Texturing and baking
• Marmoset Toolbag – Rendering
• Photoshop – Creating Alphas
References
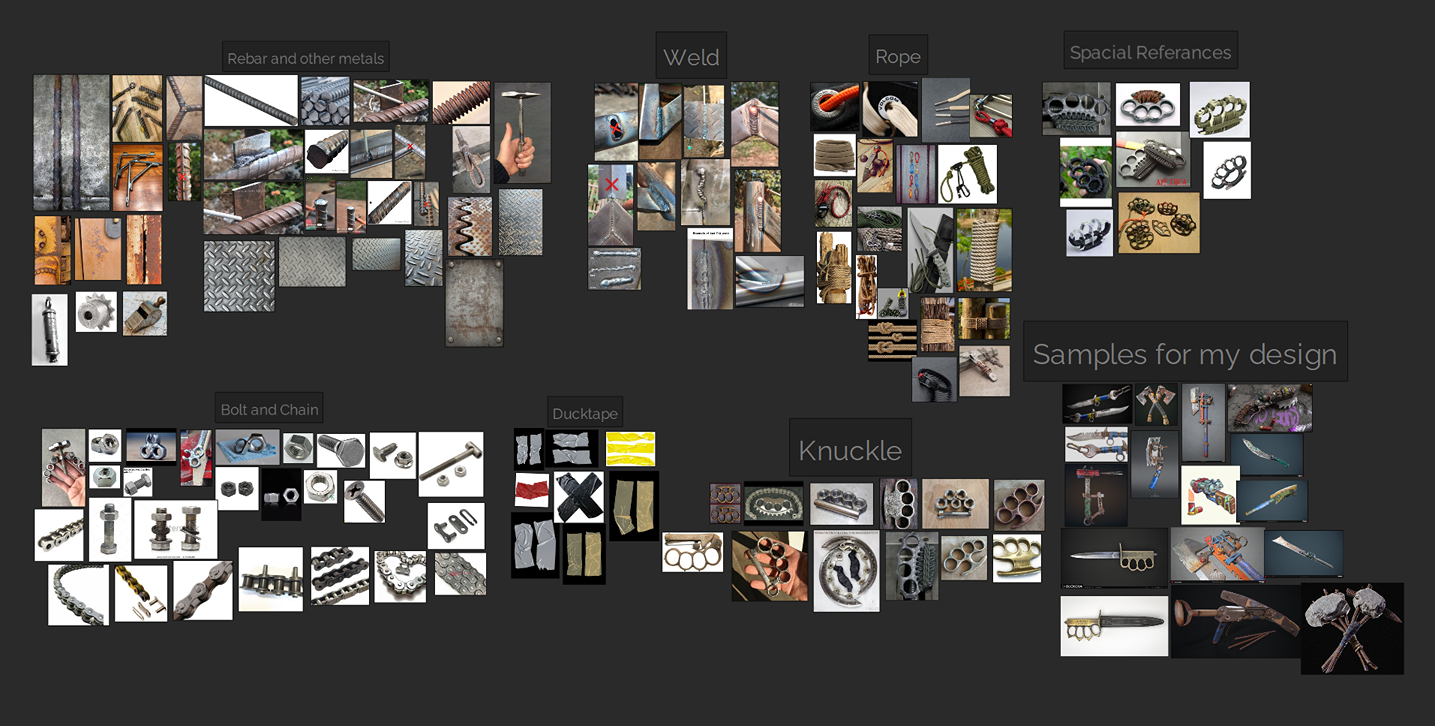
During this phase, I collected a variety of references, focusing on different materials and combination details.
My collection included both real-life photographs and weapon props created by some of my favorite artists for games. These references not only guided my work but also provided valuable ideas during the design, lighting, and texturing stages.
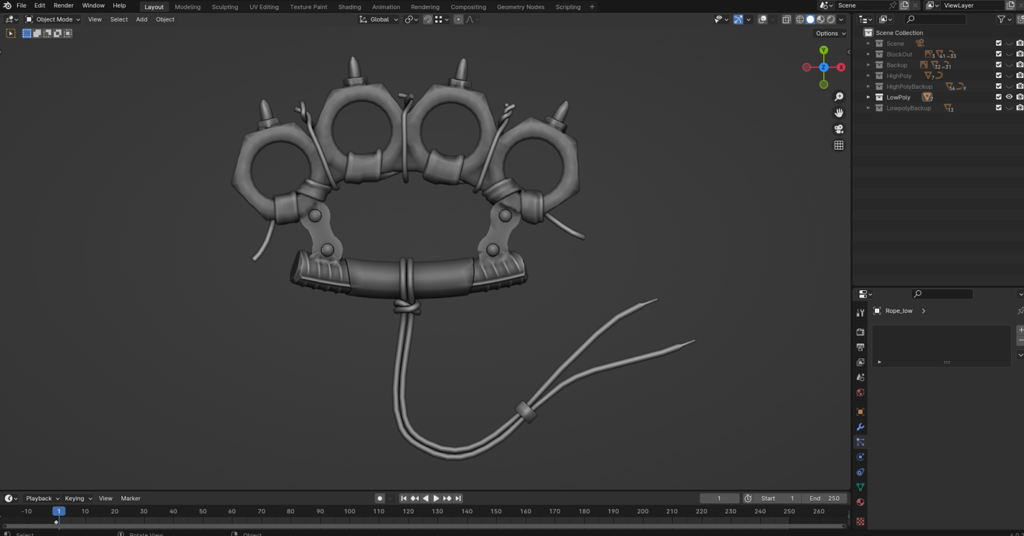
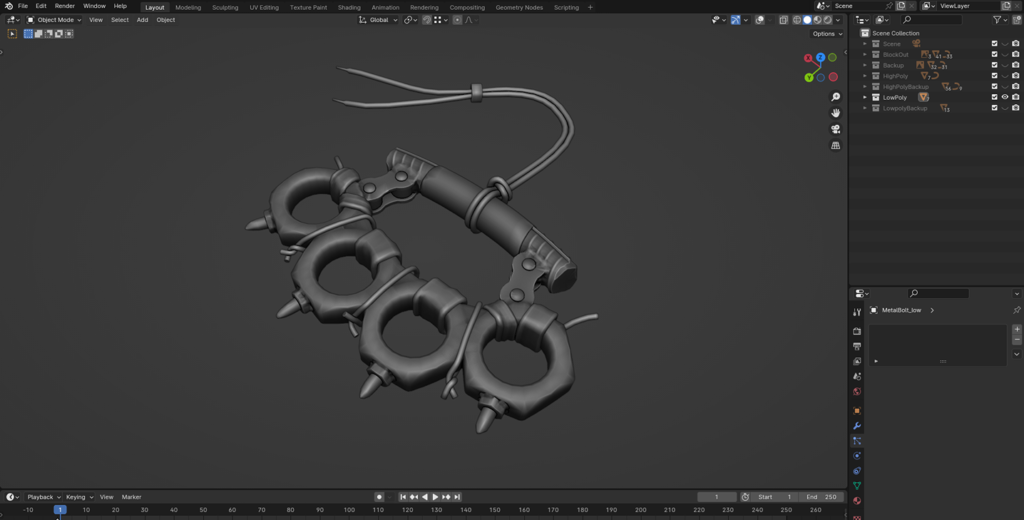
Blockout
I started the project by creating a blackout in Blender. This step allowed me to define the model’s basic shapes and proportions, ensuring the overall design looked balanced and functional before moving on to the details.
It was also helpful for visualizing how different elements, like the metal and rope, would come together in the final model.
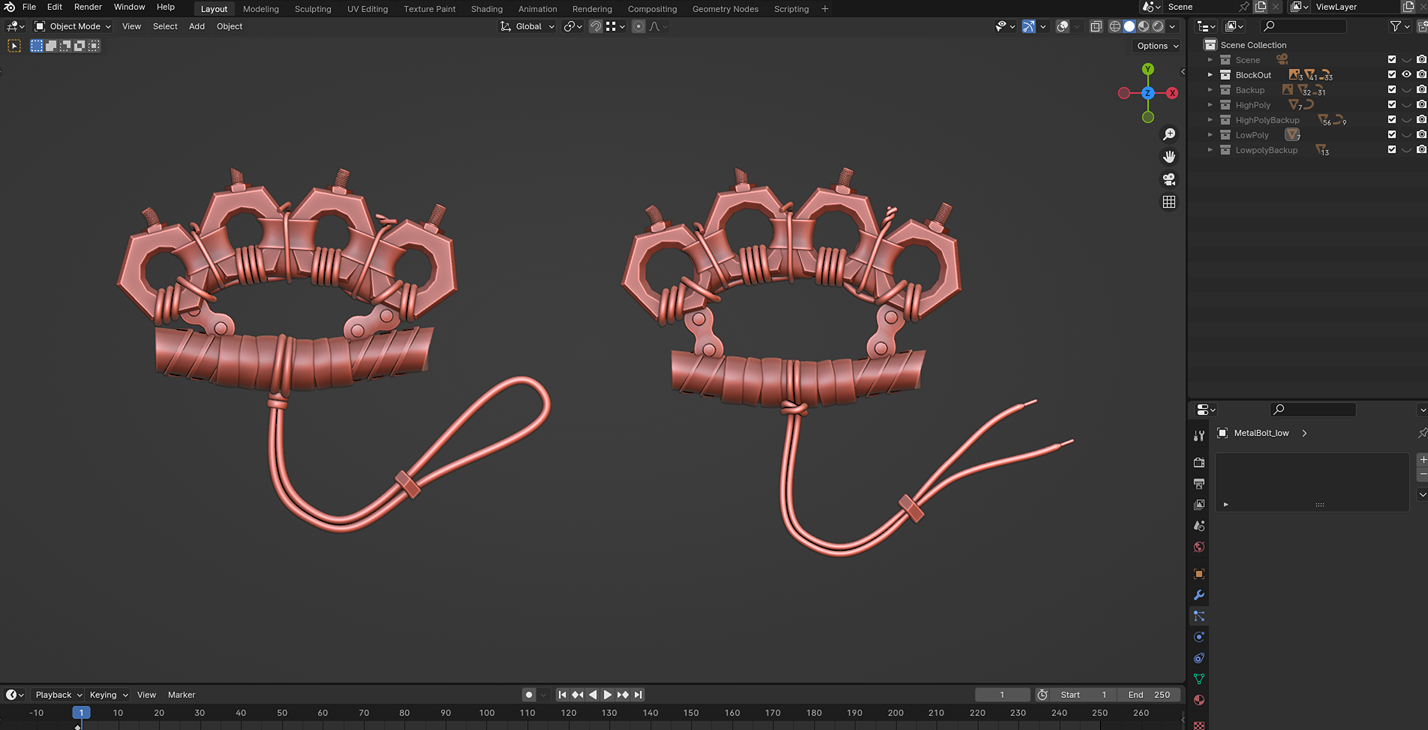
The development and appearance of the blockout modeling process are shown below. This stage focused on defining the basic structure and proportions of the model before adding details.
Modelling
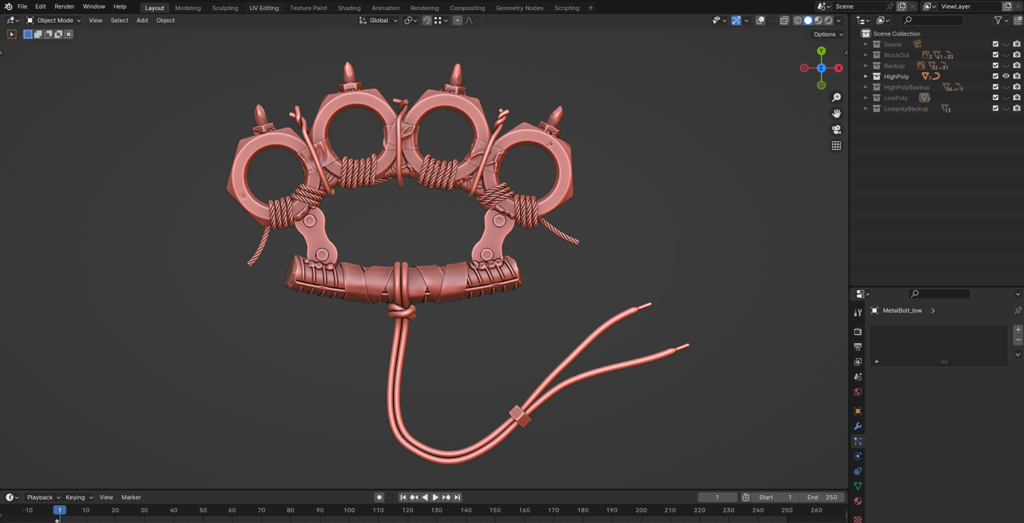
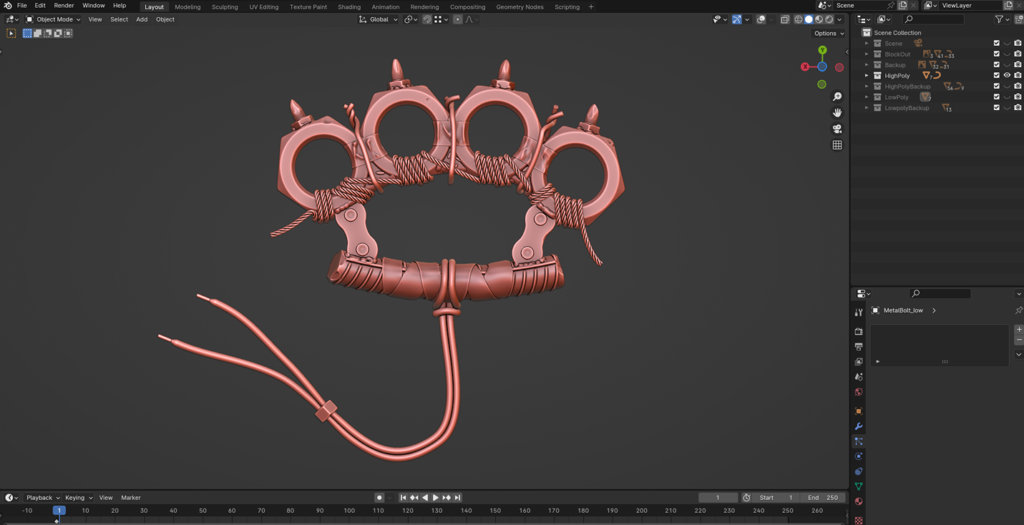
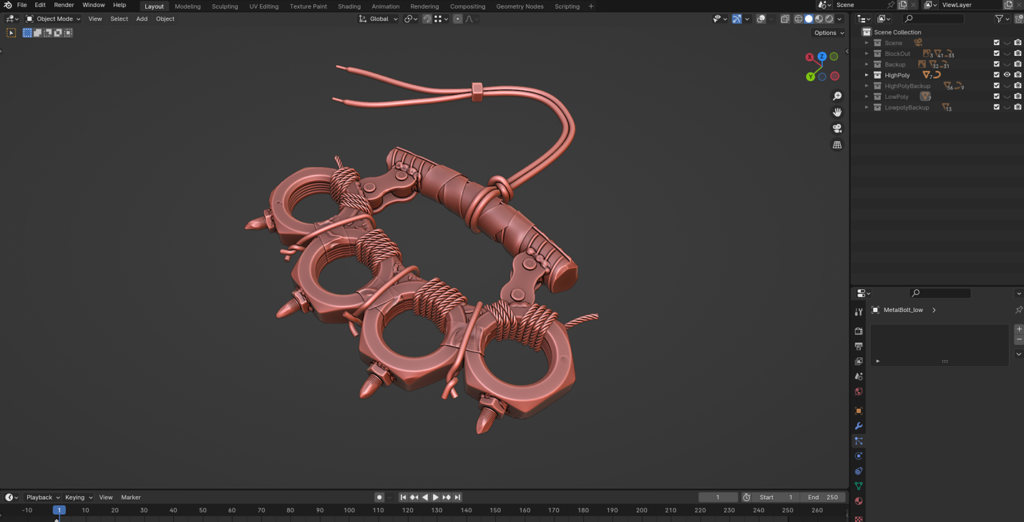
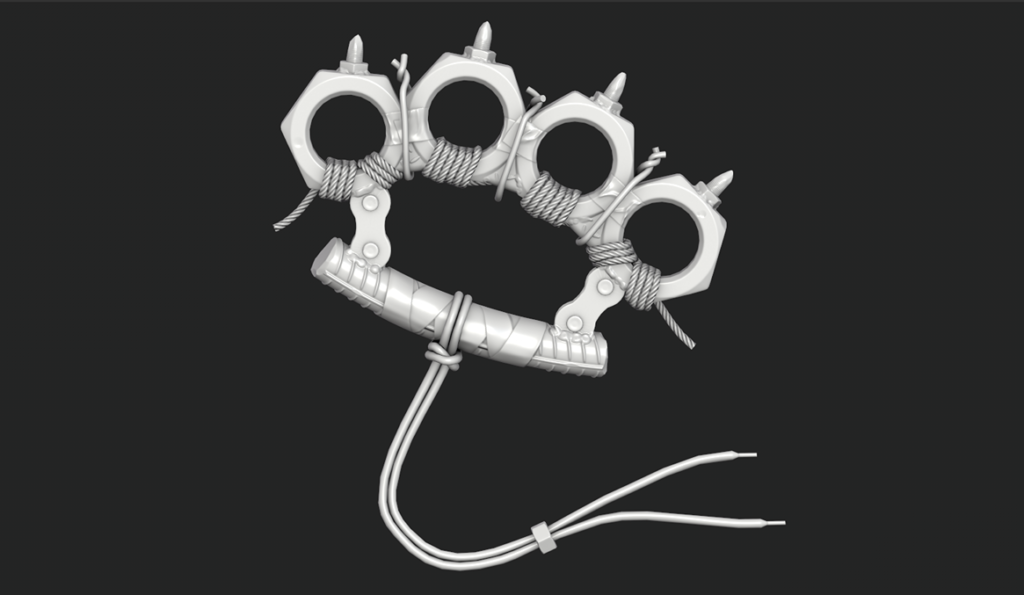
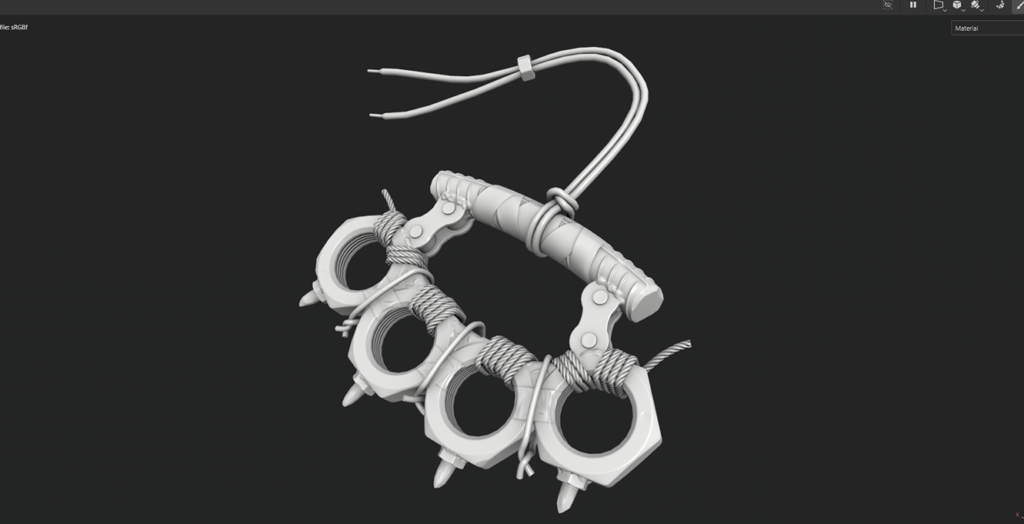
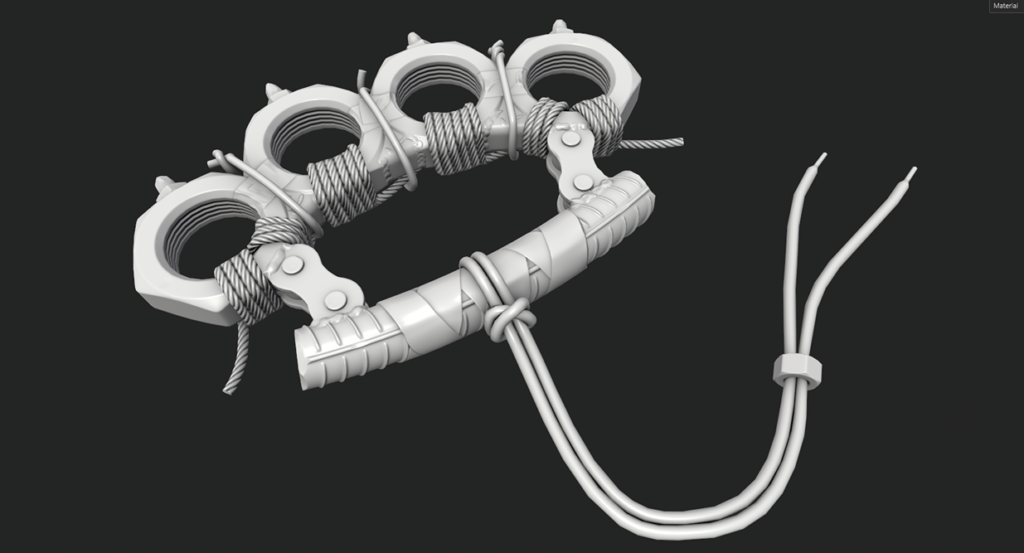
After finishing the block out, I started creating the high-poly version of the model in Blender.
Then, I used Blender’s sculpting mode to add welds between the metal parts, as well as dents, cracks, and wear on the metal surfaces.
I added these details to enhance the model’s realism and give it the worn, aged look of something crafted in a post-apocalyptic world.
For the duct tape, I added wrinkles using the same method. Sculpting details on the high poly model helped me add more realistic and uneven features, making the model look more natural and
Baking
While baking the model, I carefully examined the process for any errors and made corrections where needed to ensure clean results.
Once the baking process was complete, I adjusted the ambient occlusion channel values to enhance the depth and shadow details, bringing a more realistic feel to the model.
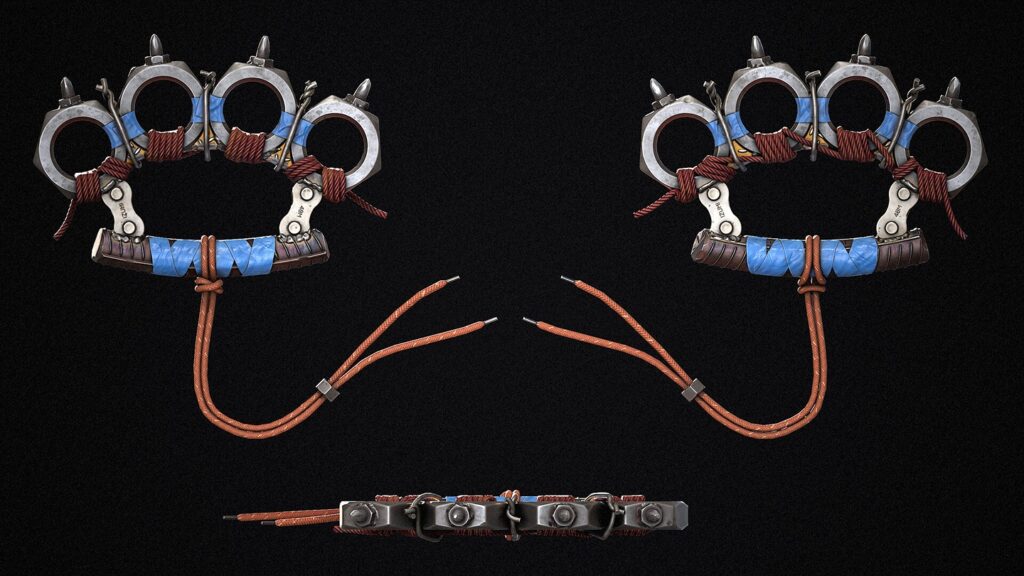
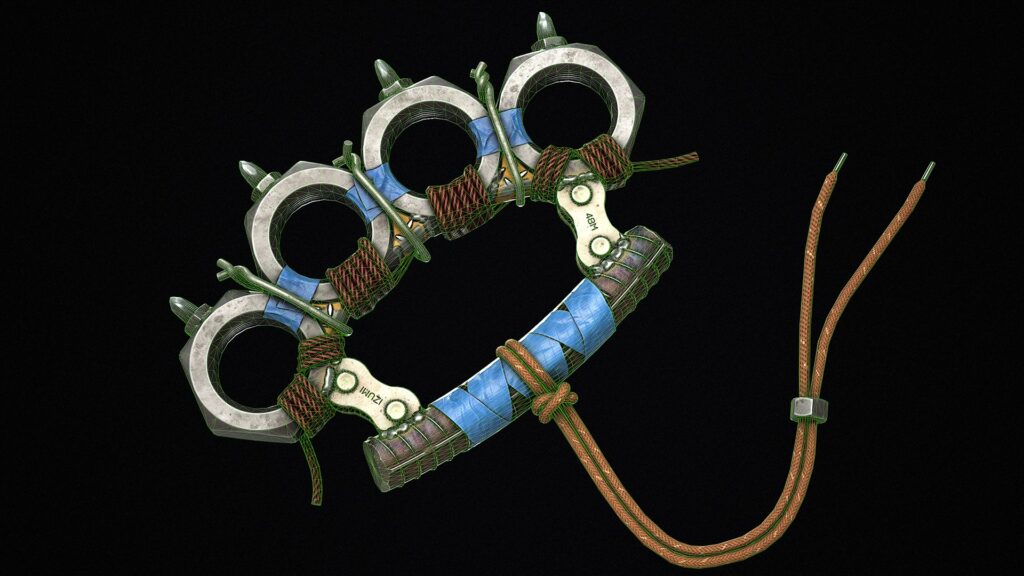
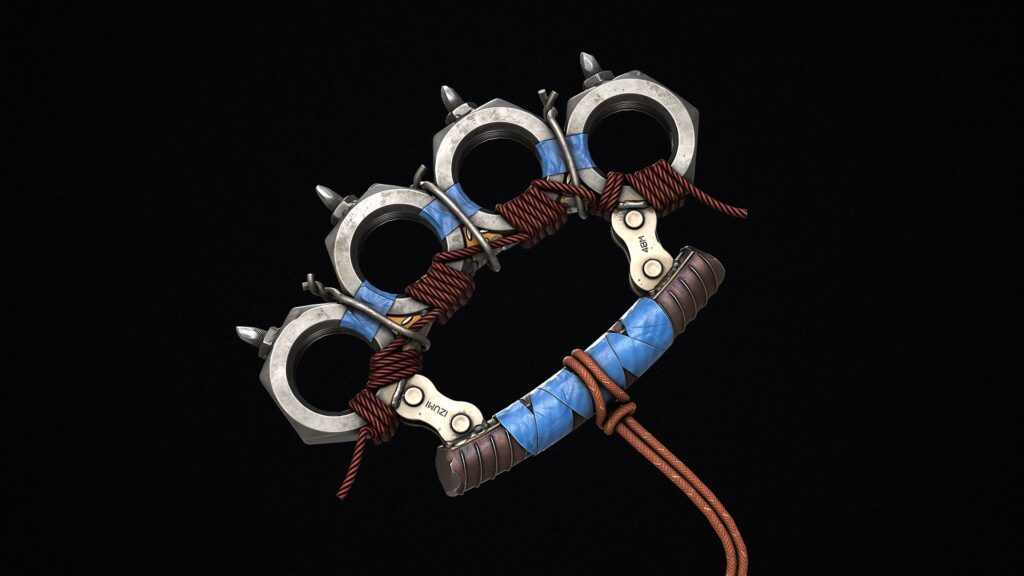
Texturing
My goal was to make every part of the model stand out, so the colors I chose were crucial.
I aimed for a palette that is both visually appealing and suitable for games.
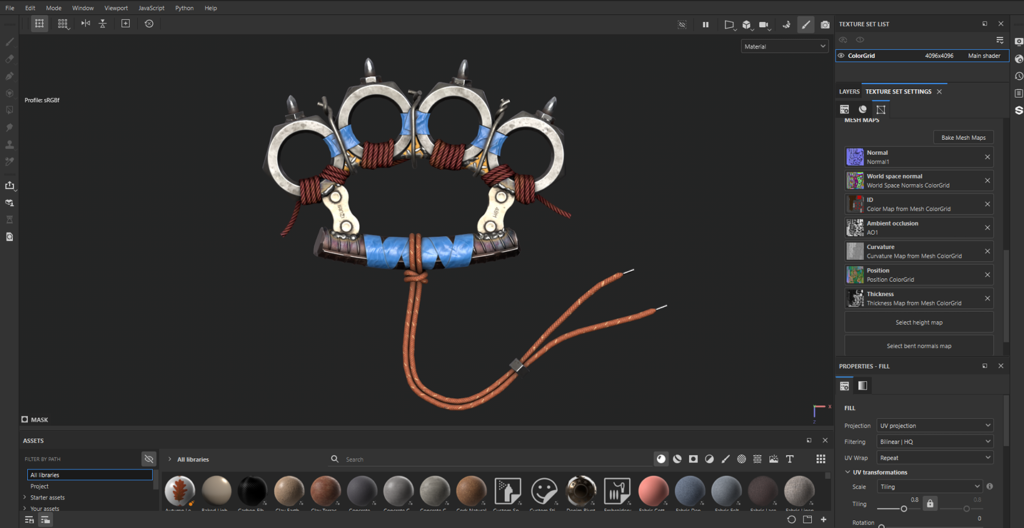

In this step, I used some textures to create a more realistic tape.
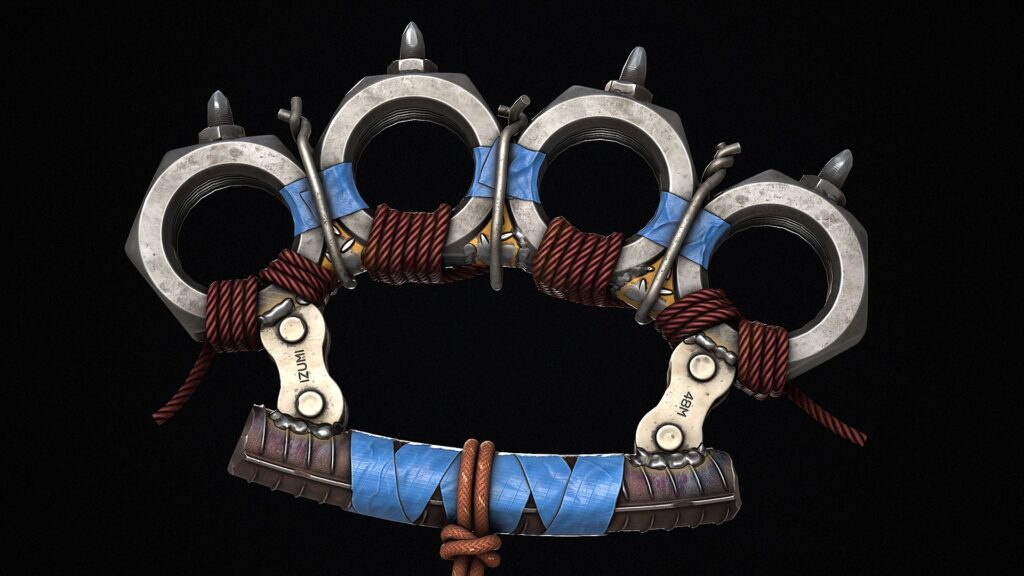
This model was made from scrap materials, so it needed to look old and worn. To achieve this, I added dirt, scratches, dust, and similar details.
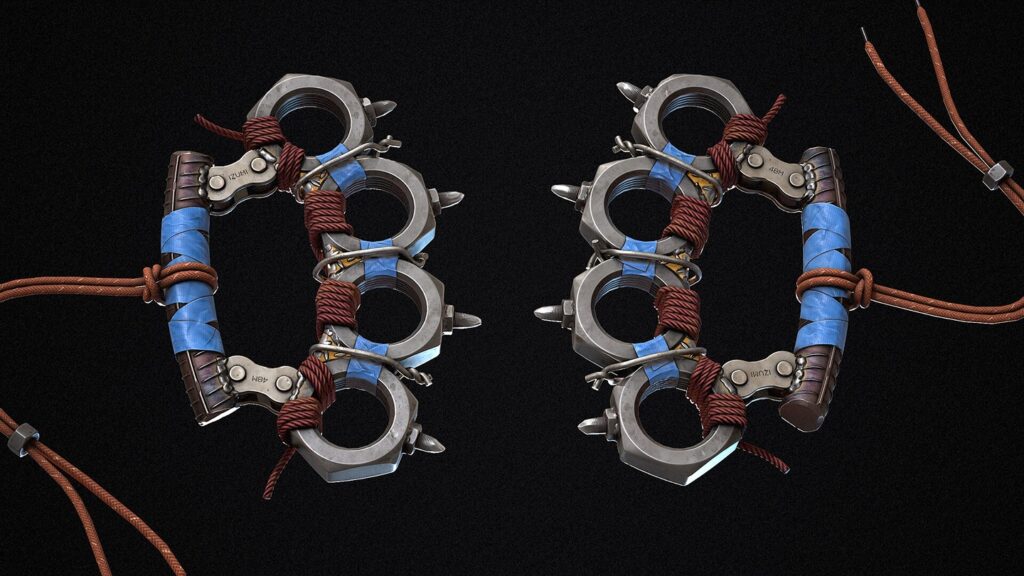
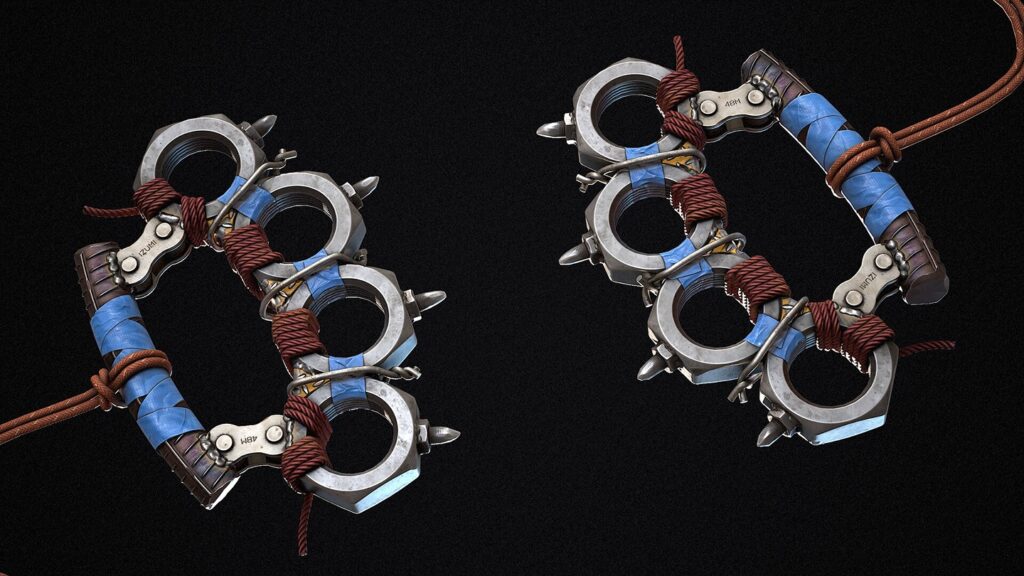
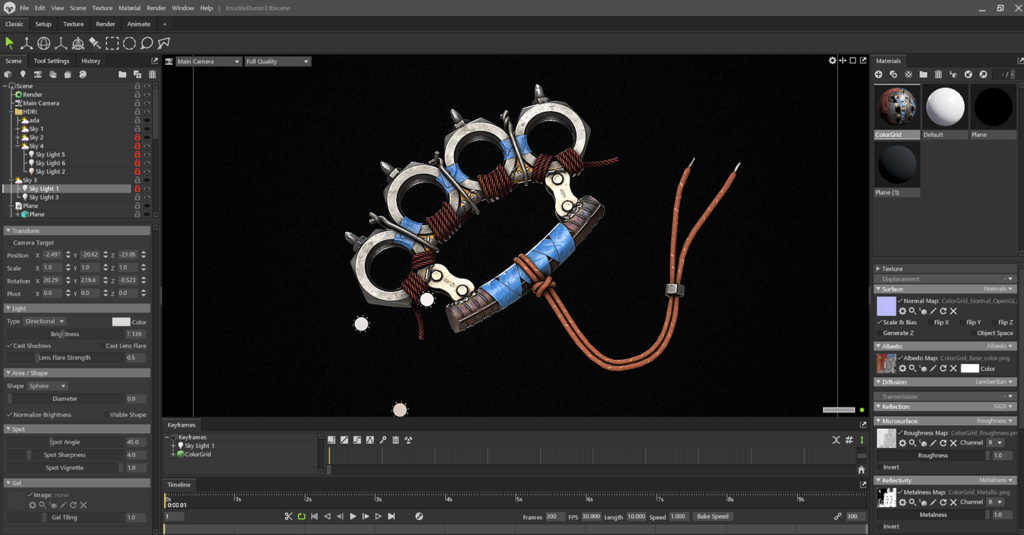
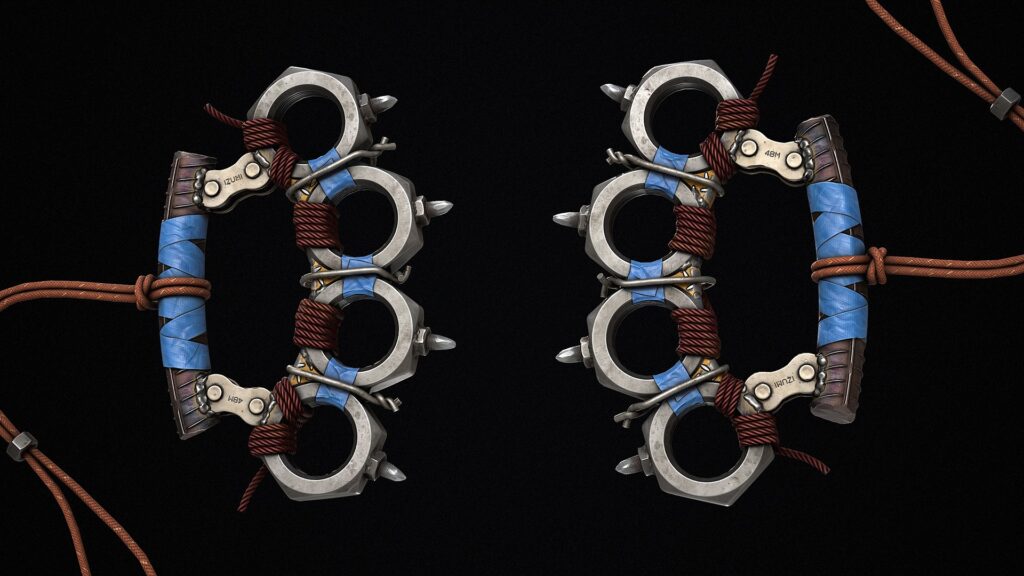
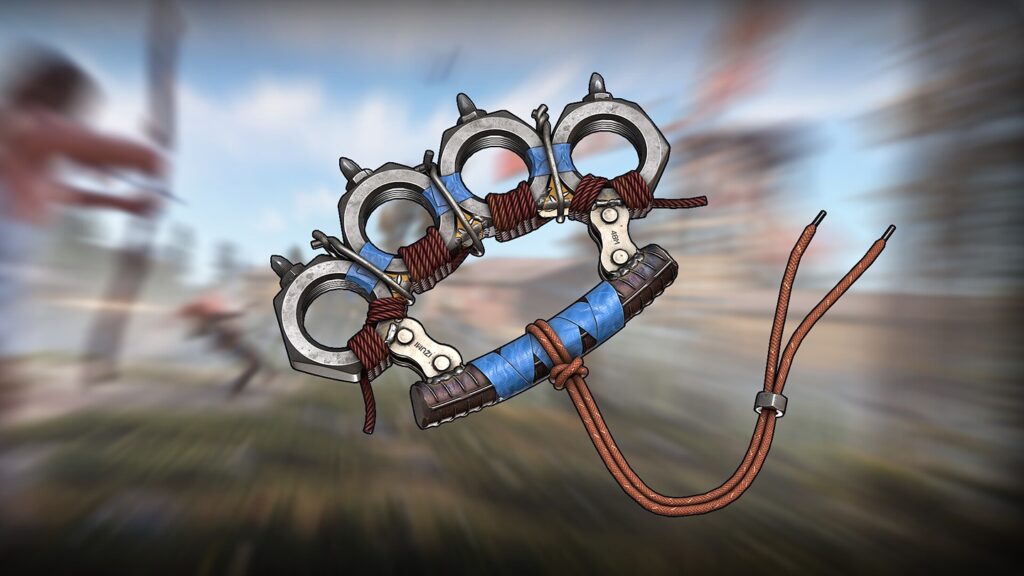
Rendering
While rendering, I focused on creating a pleasing ambient light. To make the model stand out, I chose a dark, slightly noisy background.
Additionally, I added a few extra lights to highlight certain parts of the model with subtle reflections and used careful lighting adjustments to enhance its overall depth and visual impact.
Conclusion
I hope you enjoyed the article if you’d like to see more of work, here is my Artstation.
Read more articles
You might also like these articles.