
Introduction
Hello everyone! My name is Milos Zec, and I am a self-taught Character Artist from Serbia. I started learning 3D art back in 2000, motivated by a deep passion for creativity and storytelling.
Over the past 15 years, I have been professionally engaged in character art, focusing primarily on the video game industry.
My expertise and interests include creating AAA-quality and cinematic characters, monsters, medieval clothing, fairy-tale-inspired designs, and unique fictional beings.
This work allows me to combine artistic expression with technical precision, always striving to push the boundaries of what can be achieved in character design.

Inspiration & Goal
In between professional projects, I enjoy dedicating time to personal works that allow me to relax and experiment. These projects give me creative freedom, unburdened by deadlines, constraints, or strict guidelines.
This particular project began as a passion project to explore a unique concept inspired by my hometown’s mythology.
It also served as an opportunity to refine my skills further, add an exciting piece to my portfolio, and showcase my artistic capabilities.
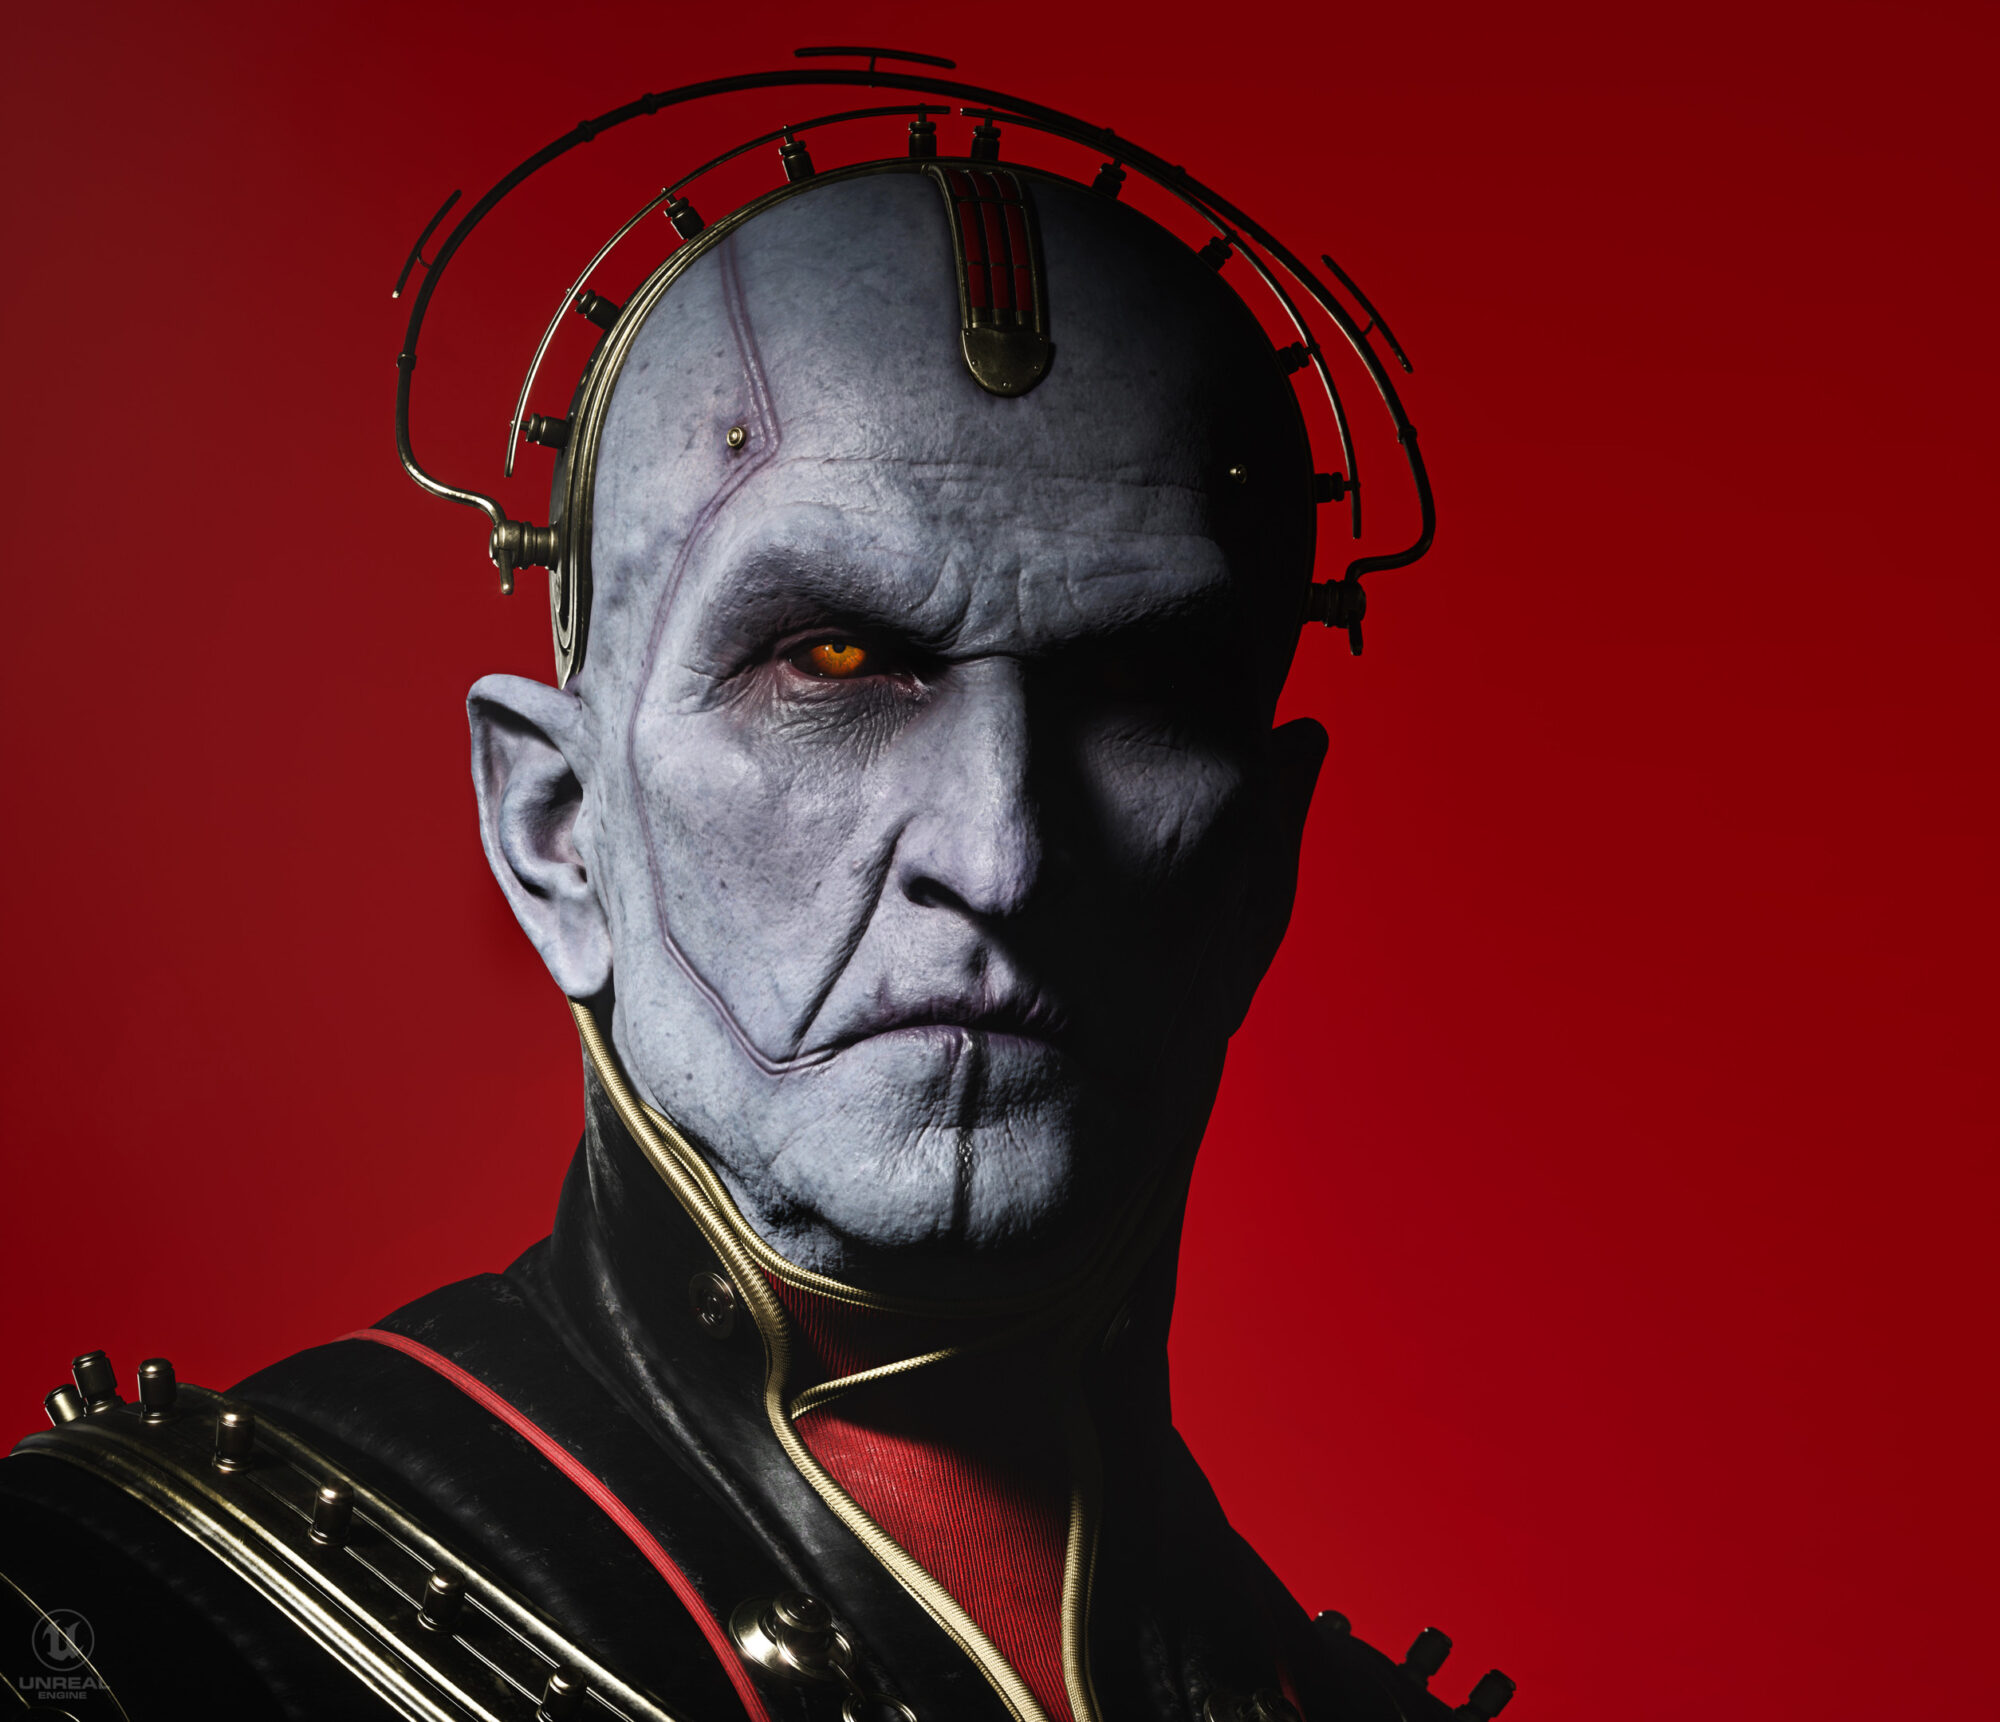
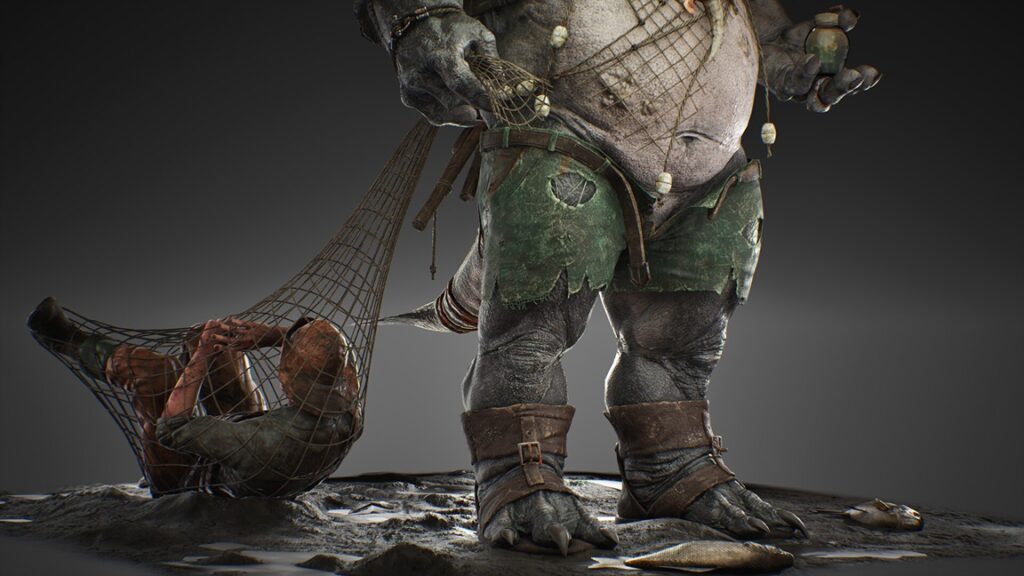
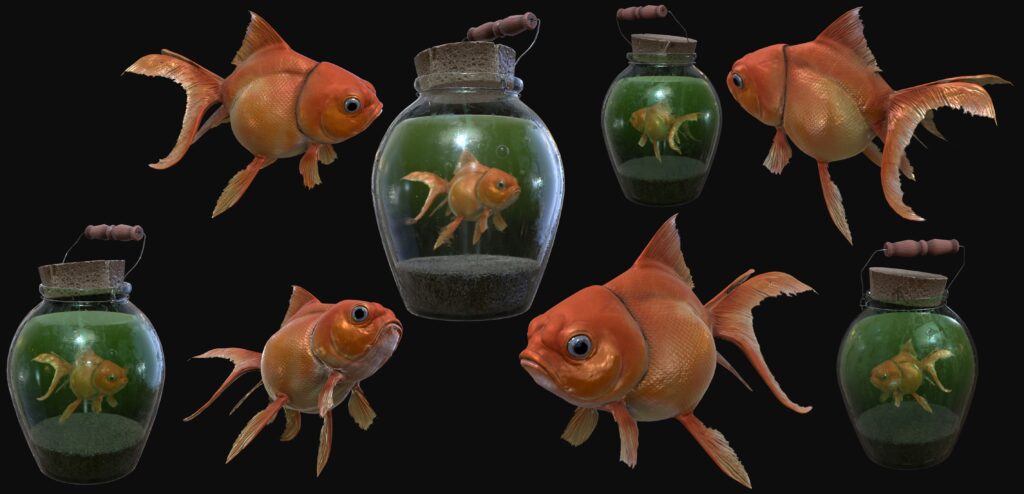
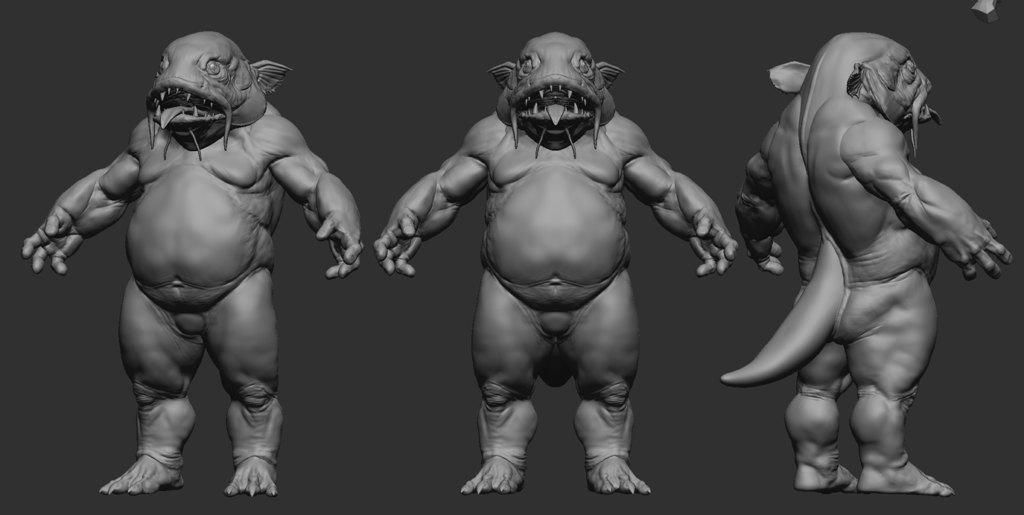
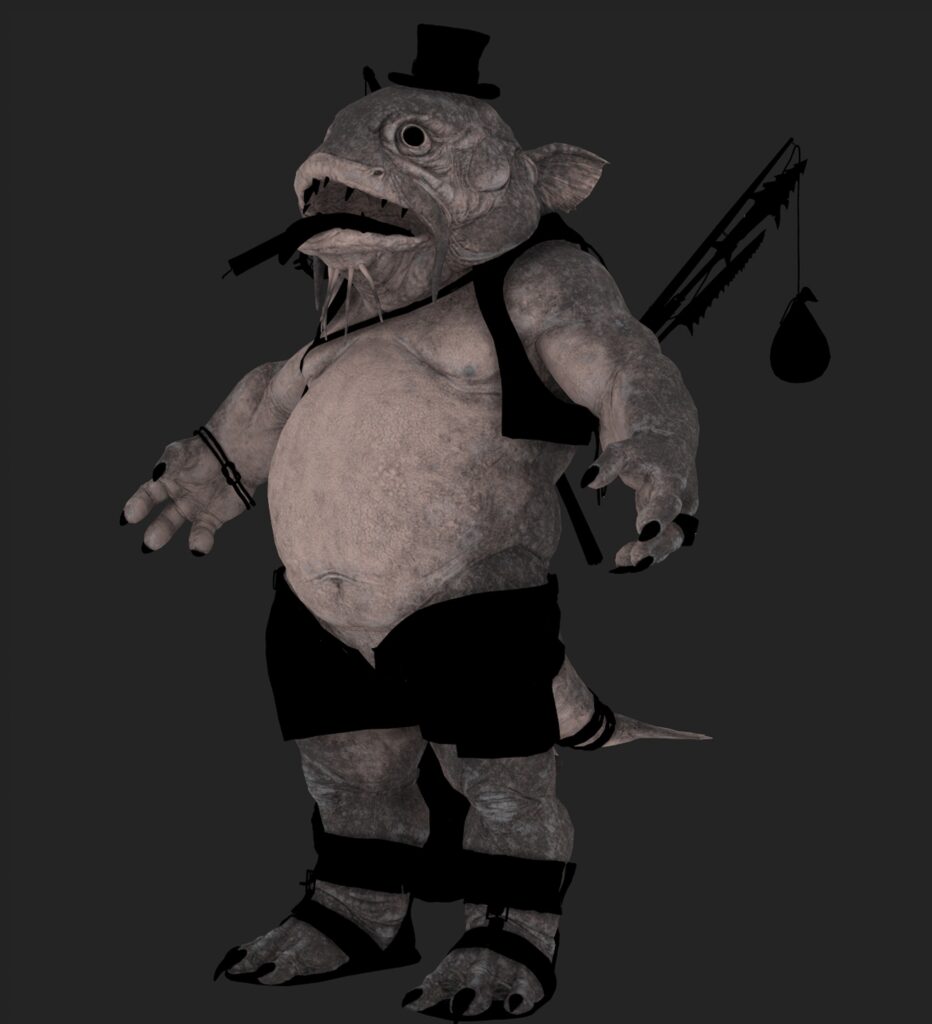
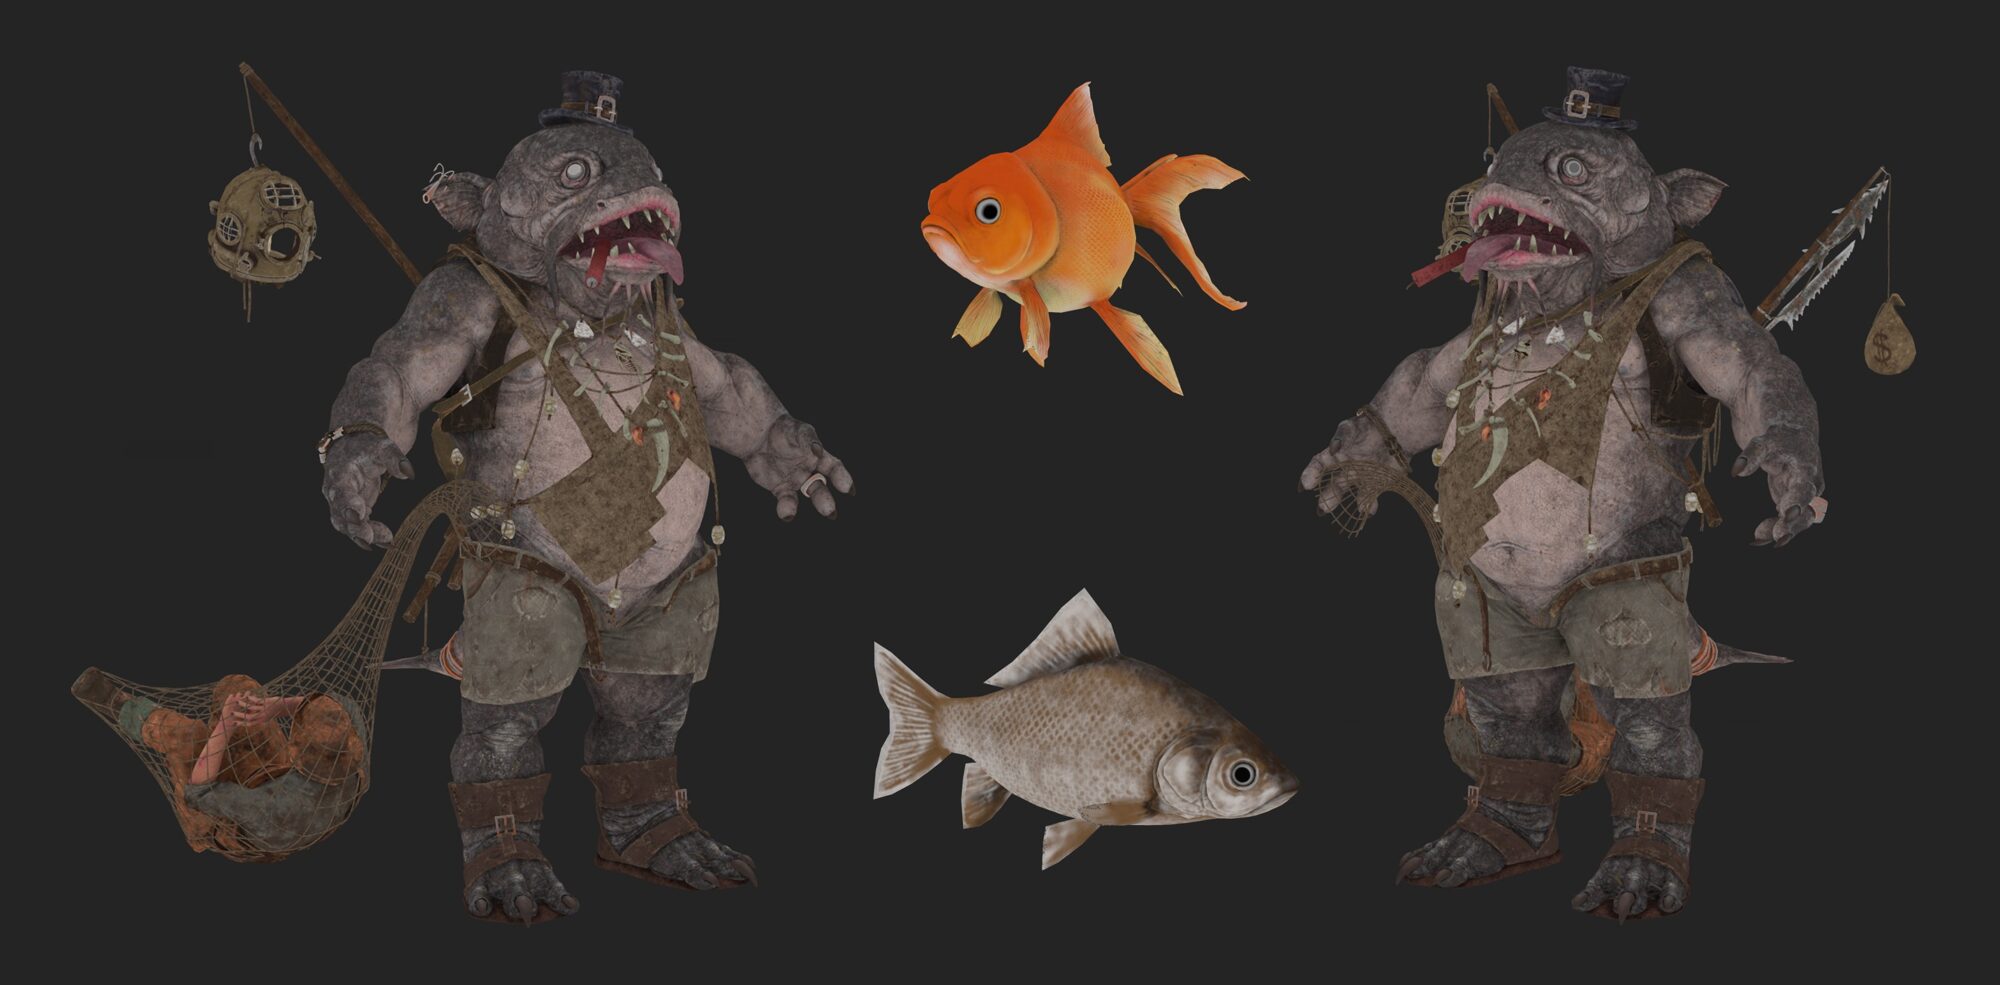
The concept of “Kemza” is rooted in an urban legend from my hometown, which speaks of a mythical creature believed to reside at the bottom of the Danube River.
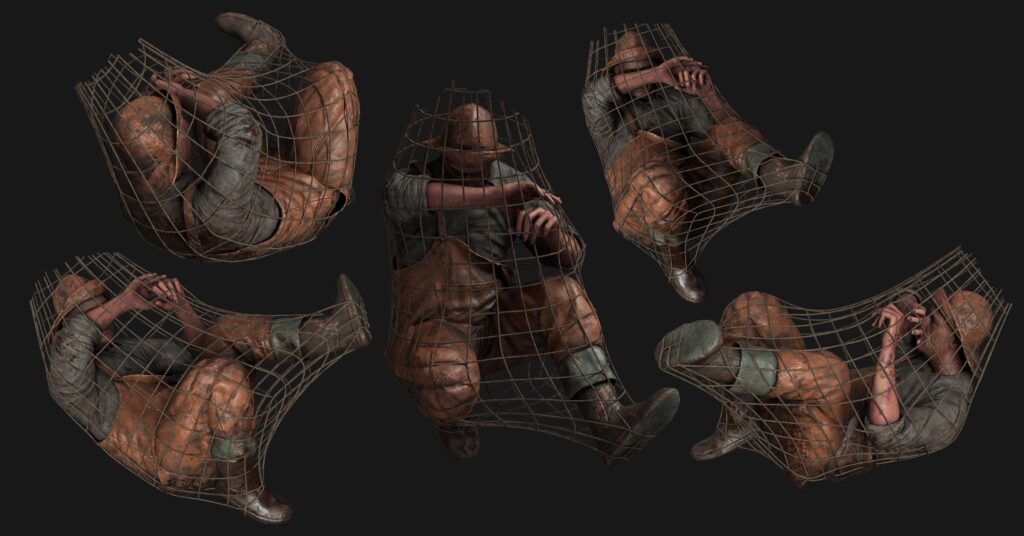
According to local legend, this creature attacks fishermen and overturns boats, embodying the darker side of Slavic mythology.
My role encompassed every stage of production, from initial concept to modeling, optimization, UV mapping, texturing and rendering.
Each phase was designed to ensure the character adhered to modern standards of design and performance, this character was made with creative support from my colleagues Vladislav Cvijović and Bojan Spirovski.


Software
To bring “Kemza” to life, I divided the process into distinct stages, using a range of software tools tailored for specific tasks:
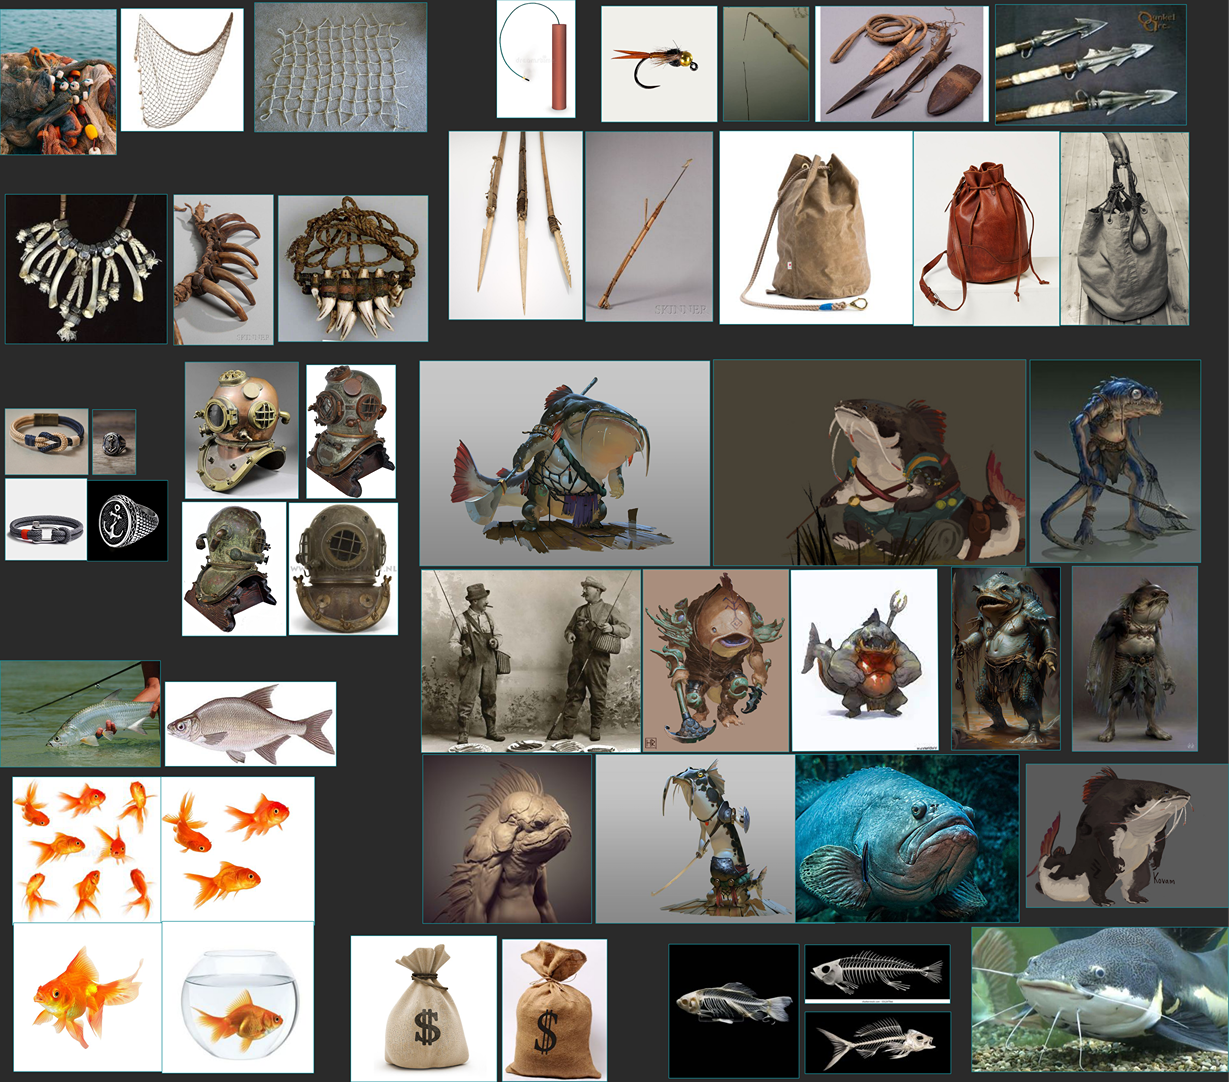
- PureRef for collecting and organizing references.
- ZBrush and 3ds Max for initial blocking and sculpting.
- RizomUV for precise UV mapping.
- Substance Painter for texturing, with Marmoset Toolbag used for additional map baking.
- Unreal Engine 5 for final rendering and presentation.
This combination of tools allowed me to work efficiently while maintaining the highest quality standards throughout the project.
References & Inspiration
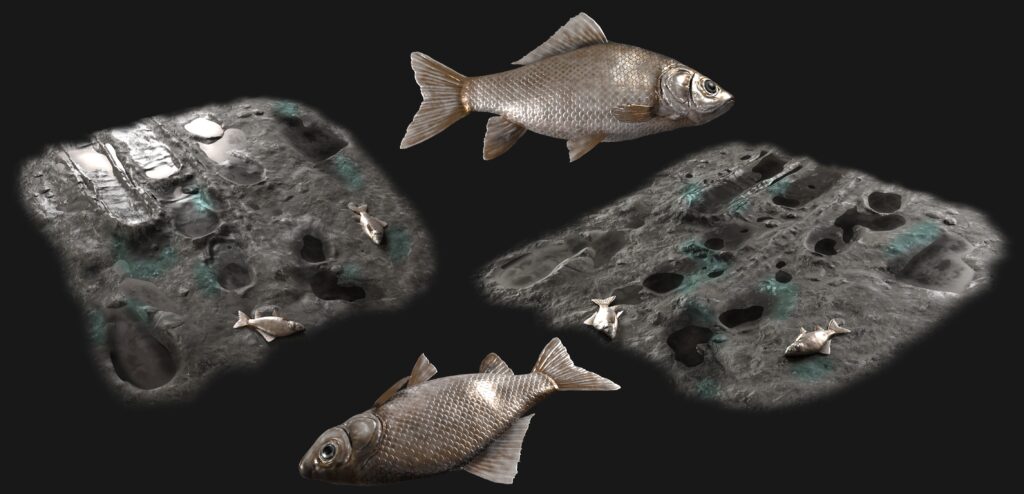
Given that the character was developed entirely from scratch, reference collection was a crucial first step.
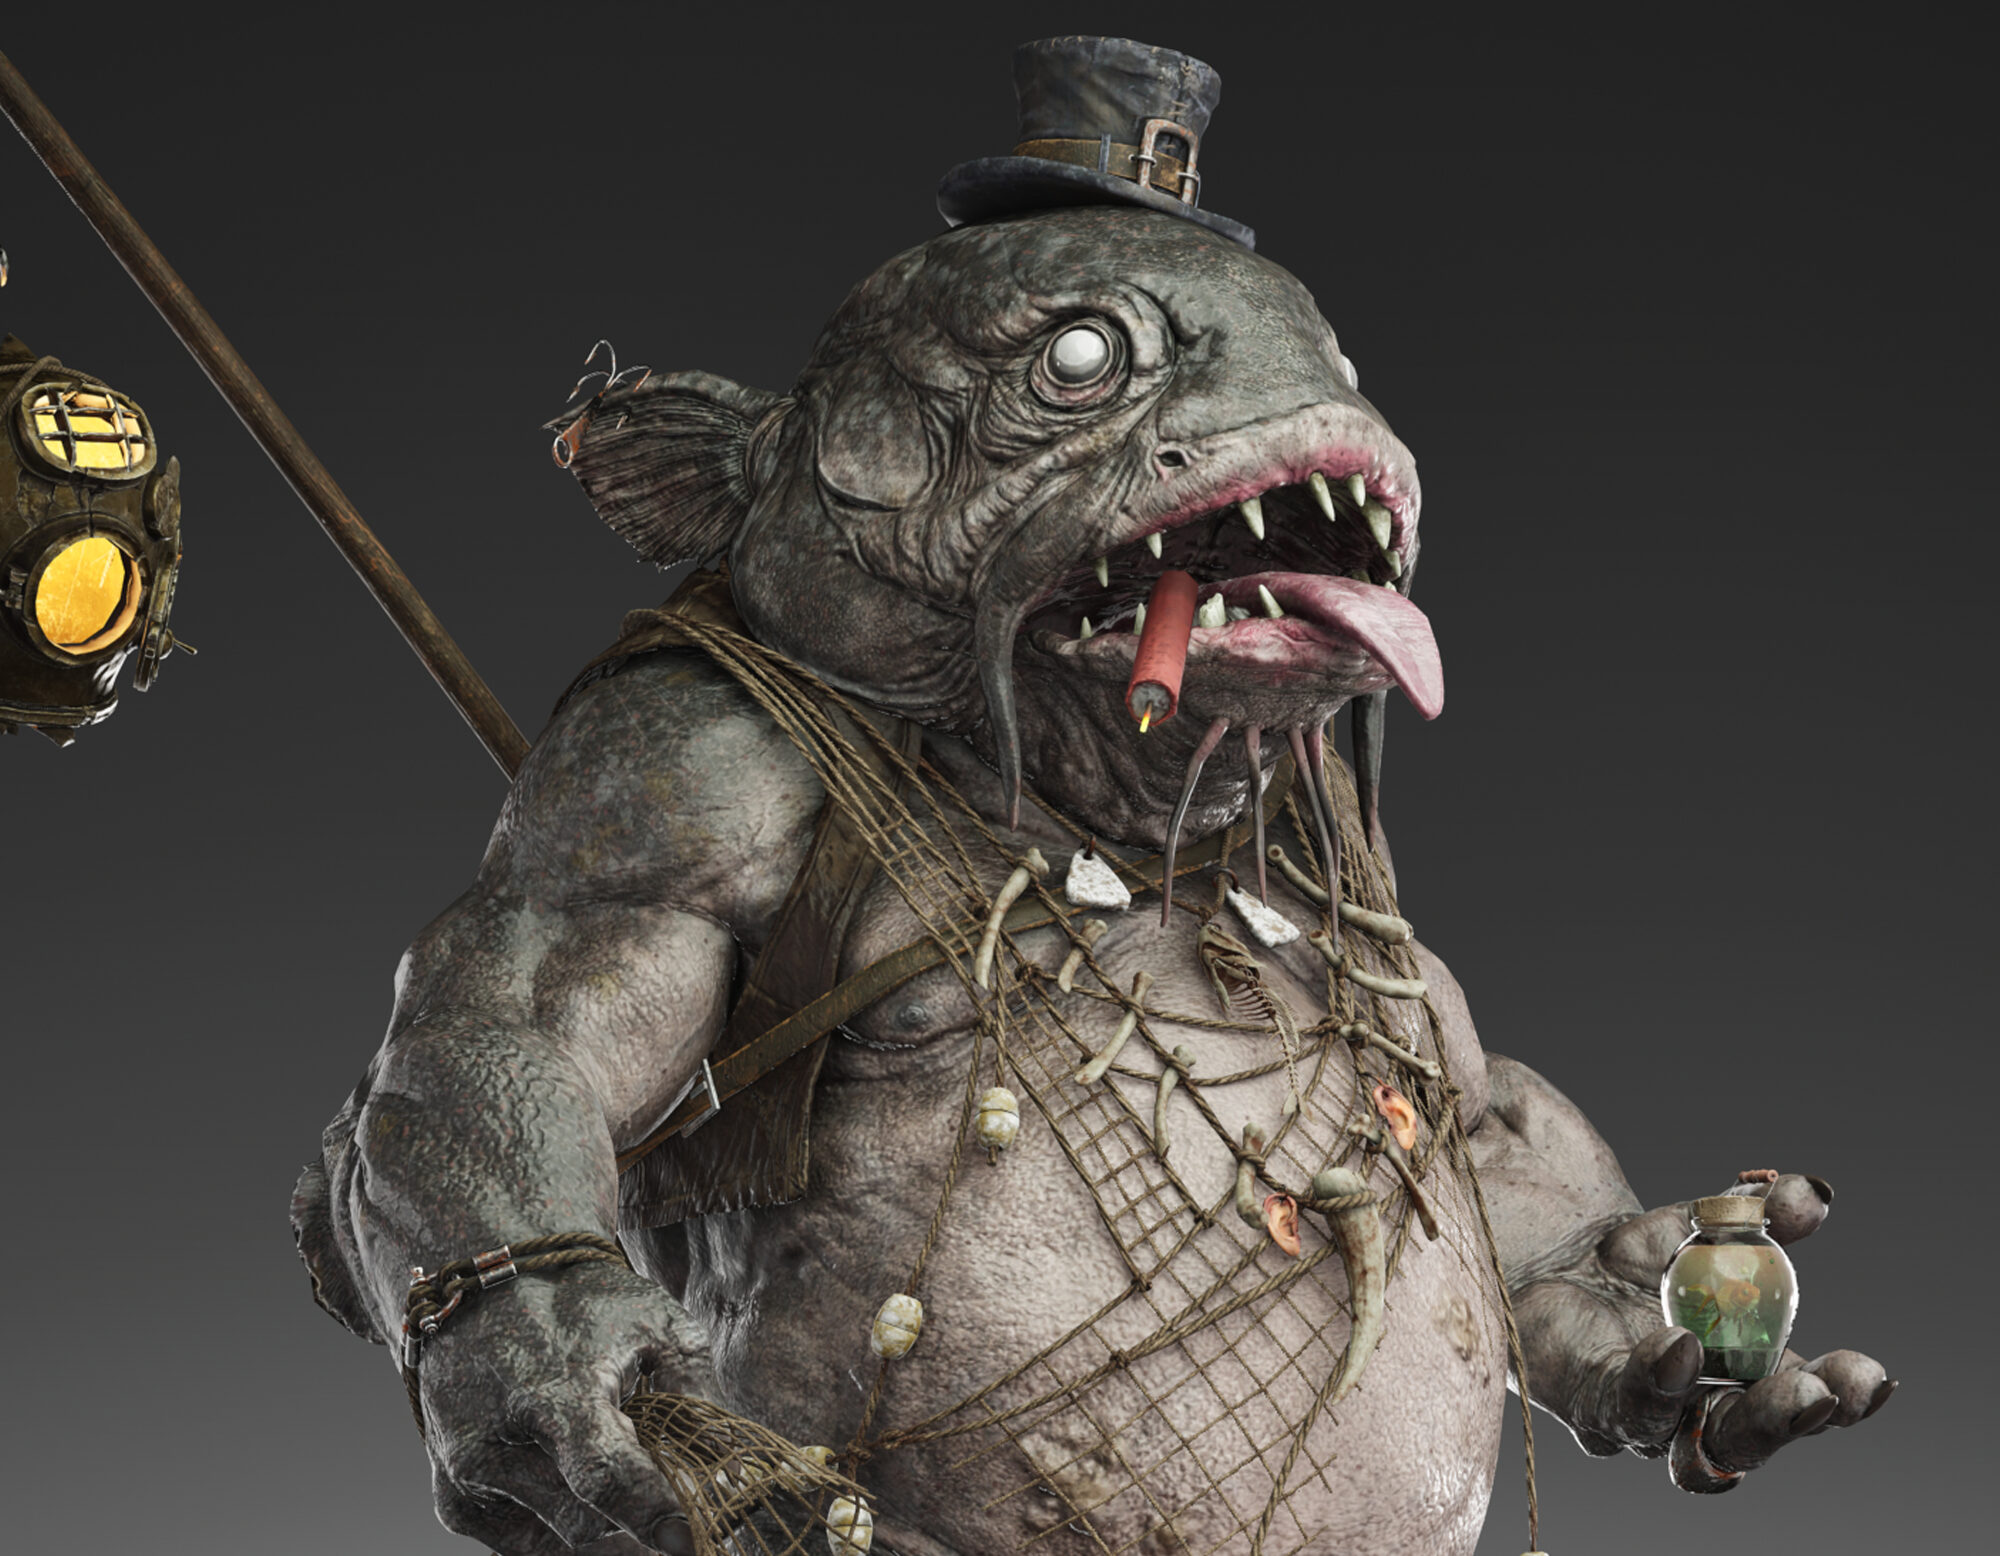
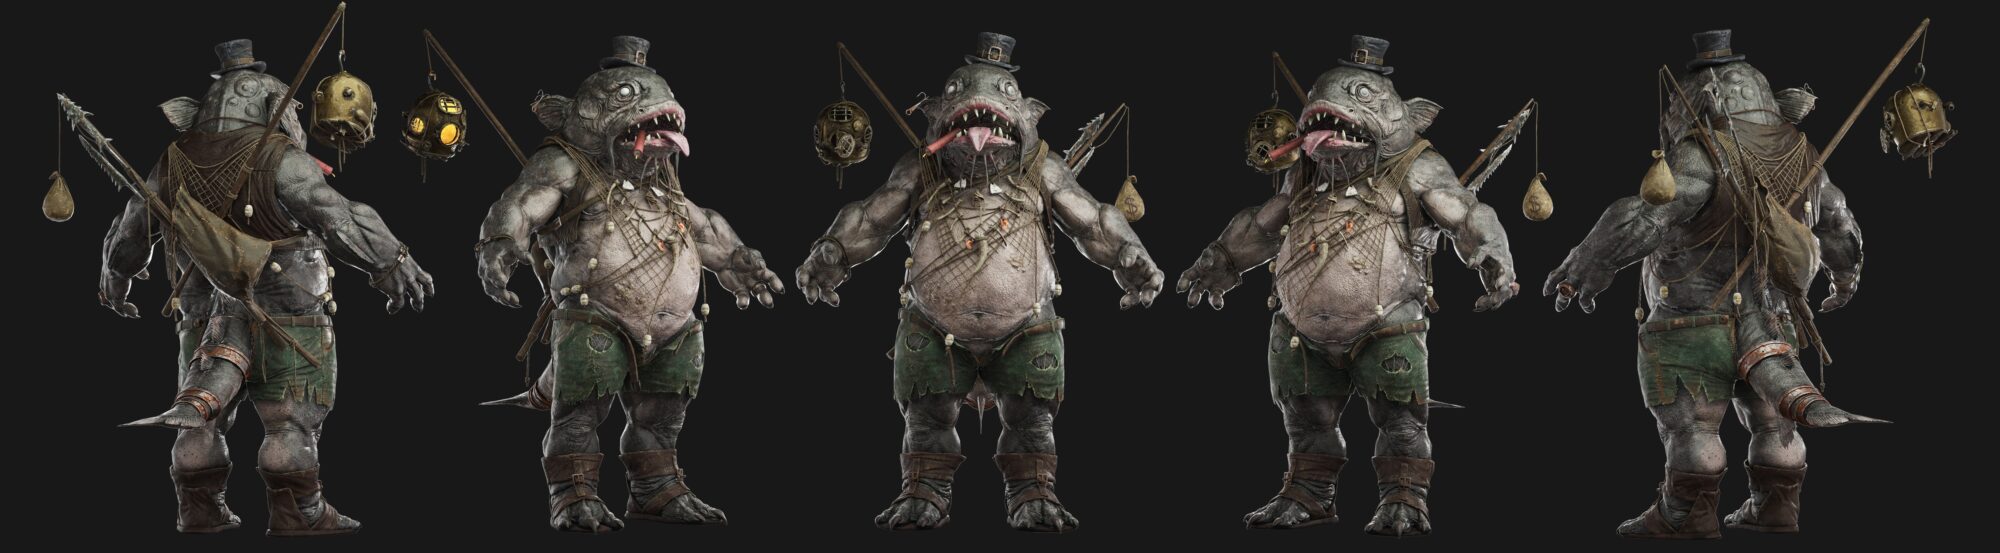
My goal was to design a creature that embodied greed, corruption, and brutality—someone who preys on humans, animals, and fish alike.
I gathered a wide range of visual references, focusing on elements that would convey these traits. This included depictions of grotesque anatomy, ragged clothing, and environmental elements that would complement the character’s backstory.
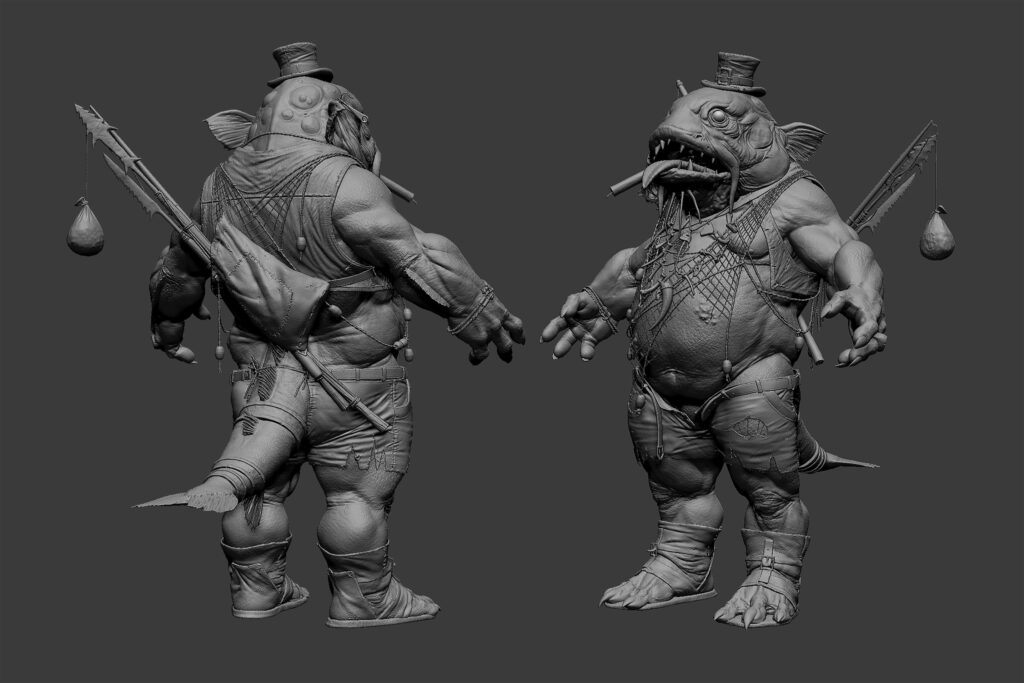
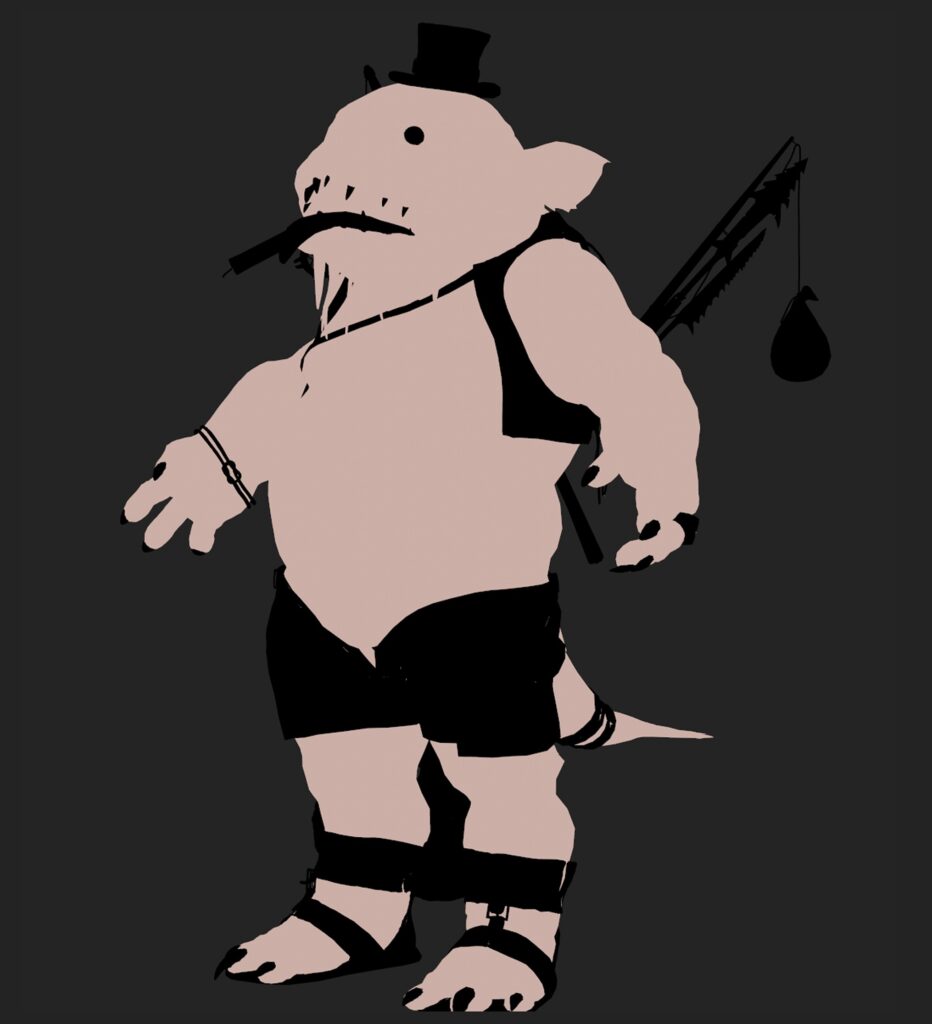
Blockout & Design
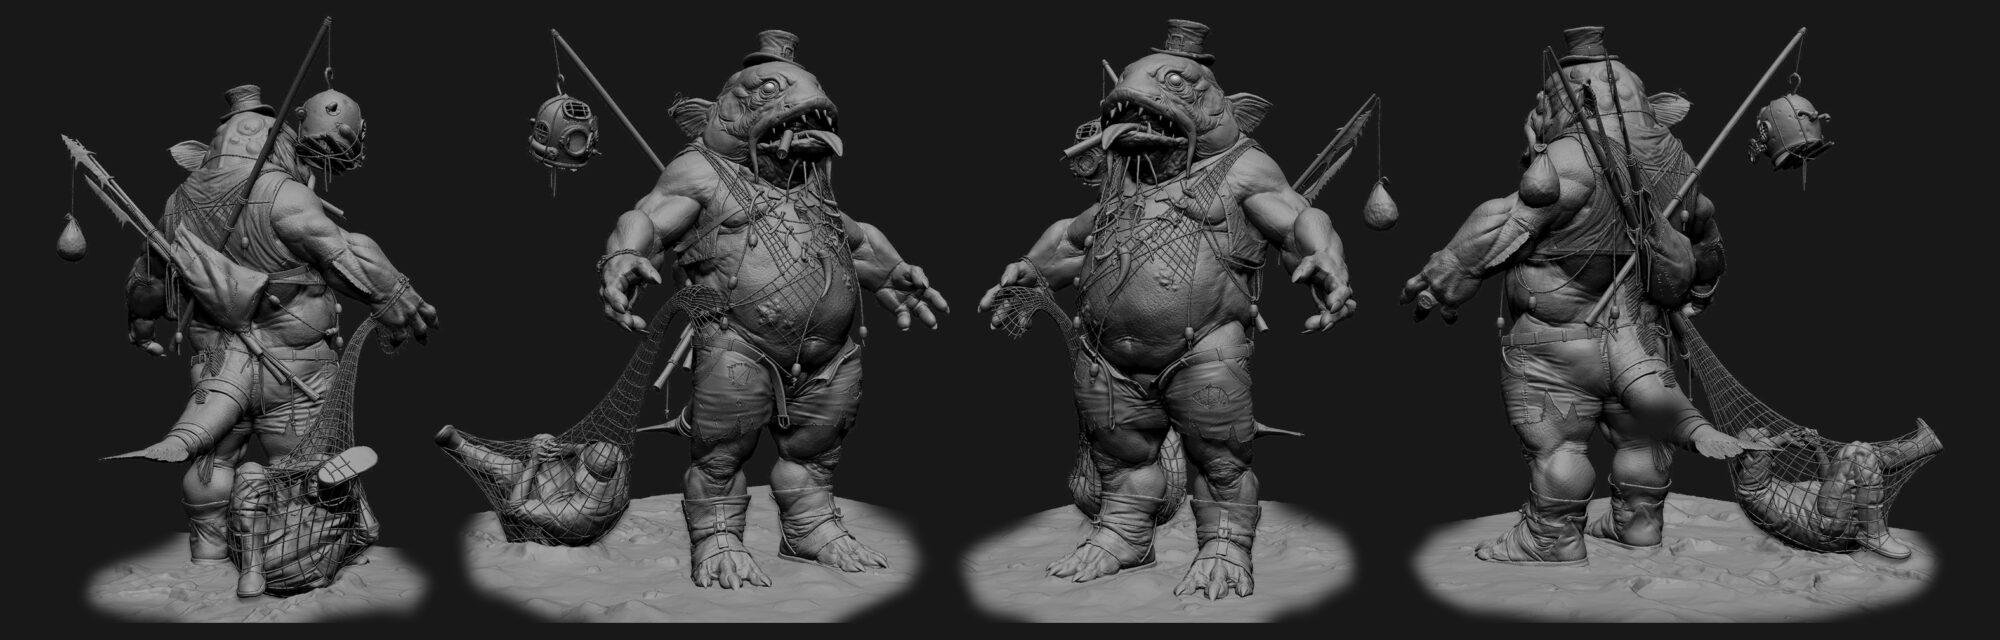
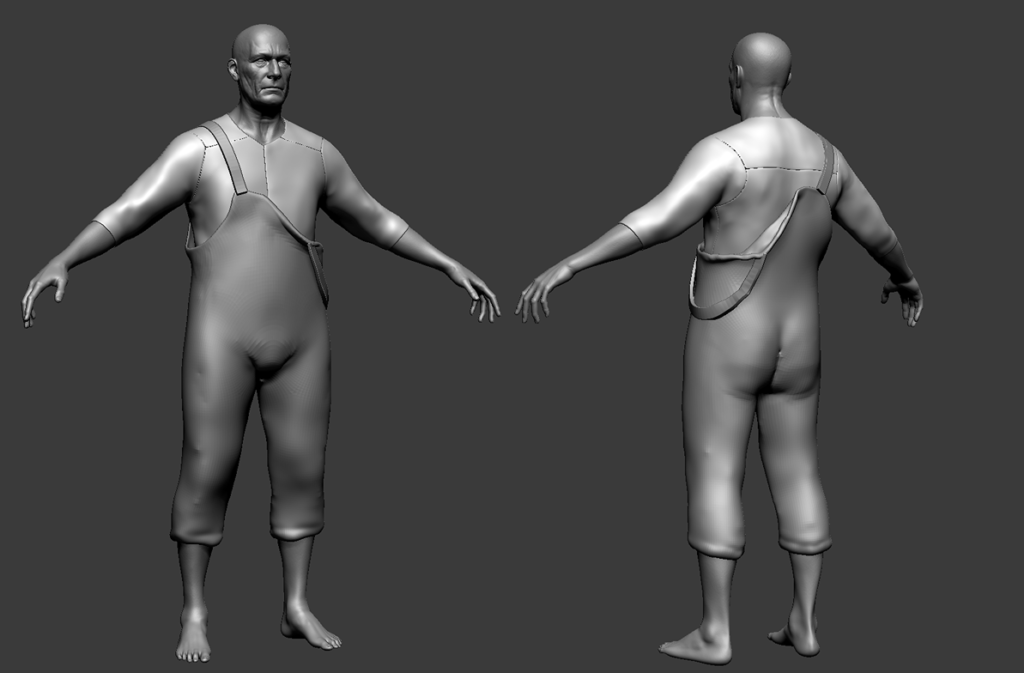
The blocking phase began in ZBrush, where I started with simple shapes like spheres to define the character’s silhouette.
Using brushes such as Move, Clay, Standard, DamStandard, Inflate, MaskPen, and MaskLasso, I gradually refined the proportions and key details.
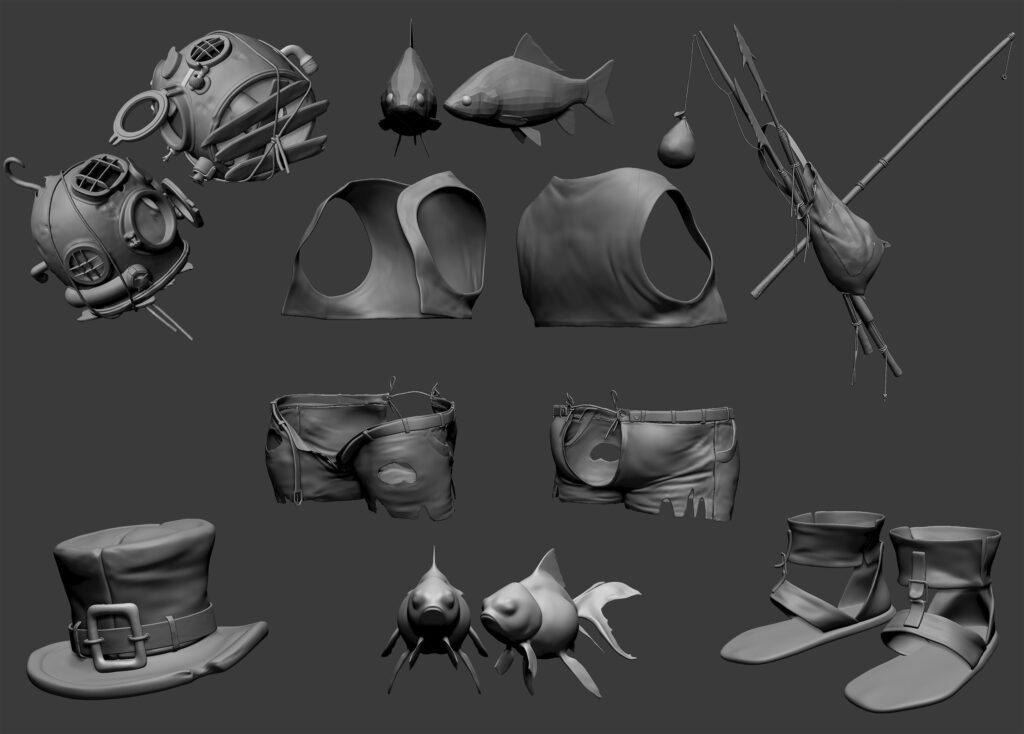
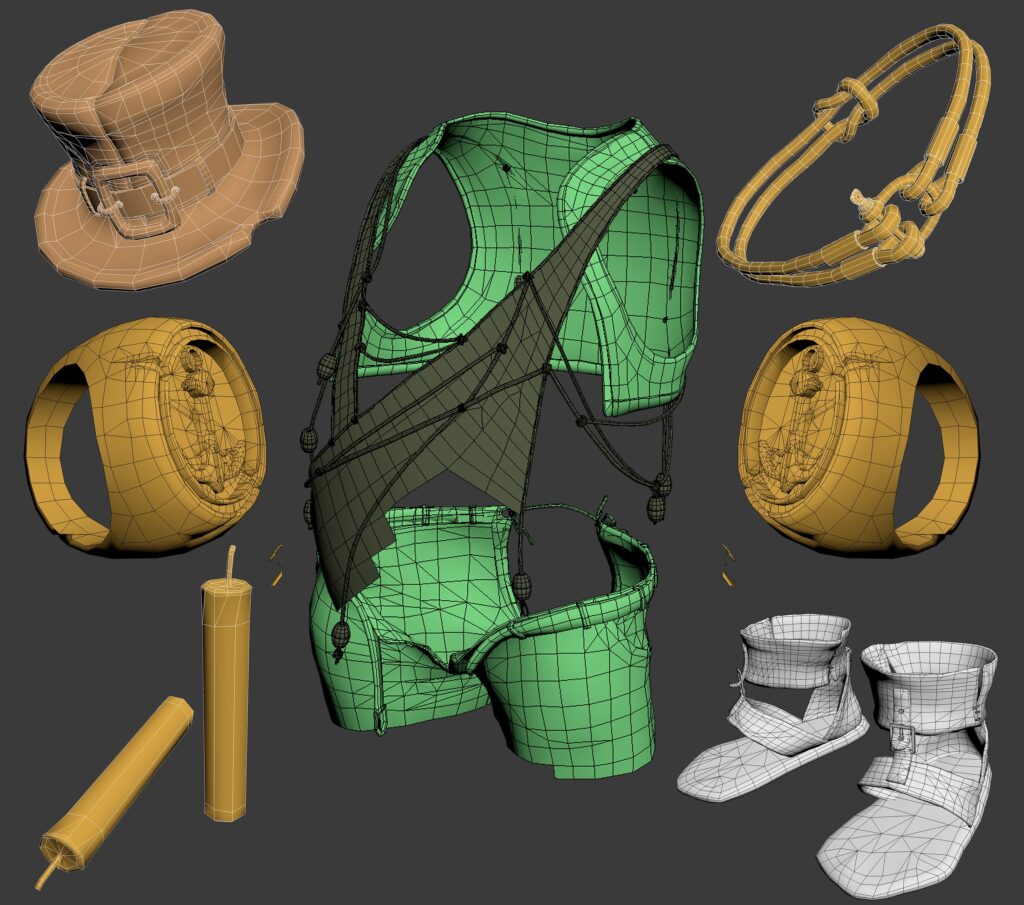
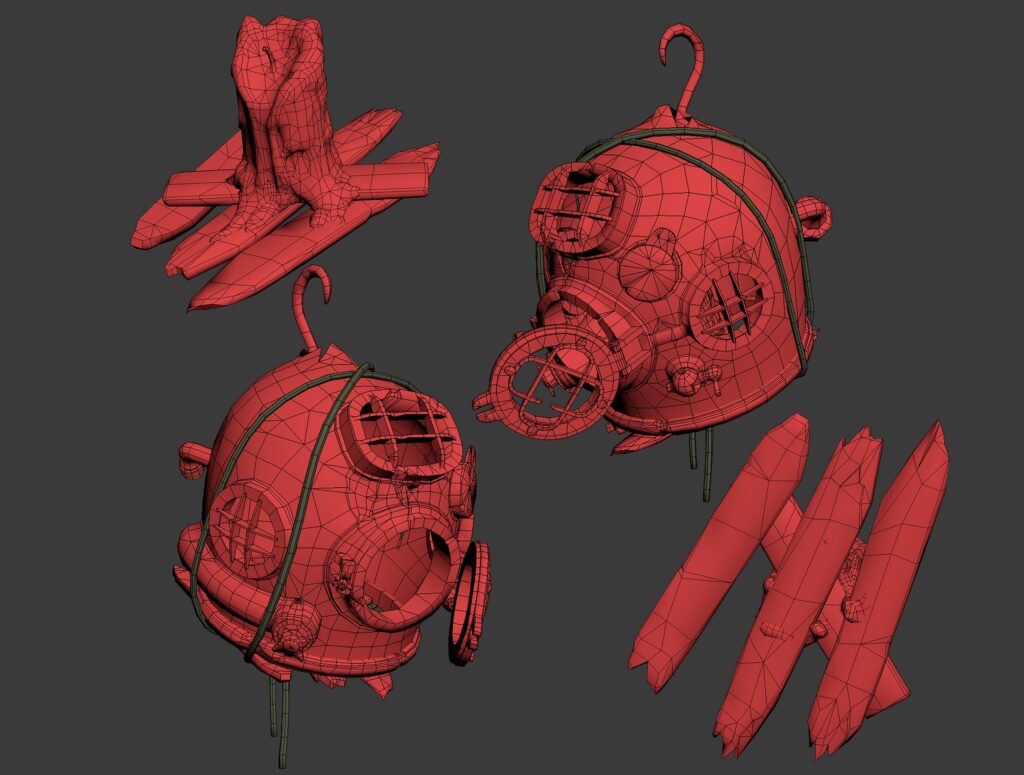
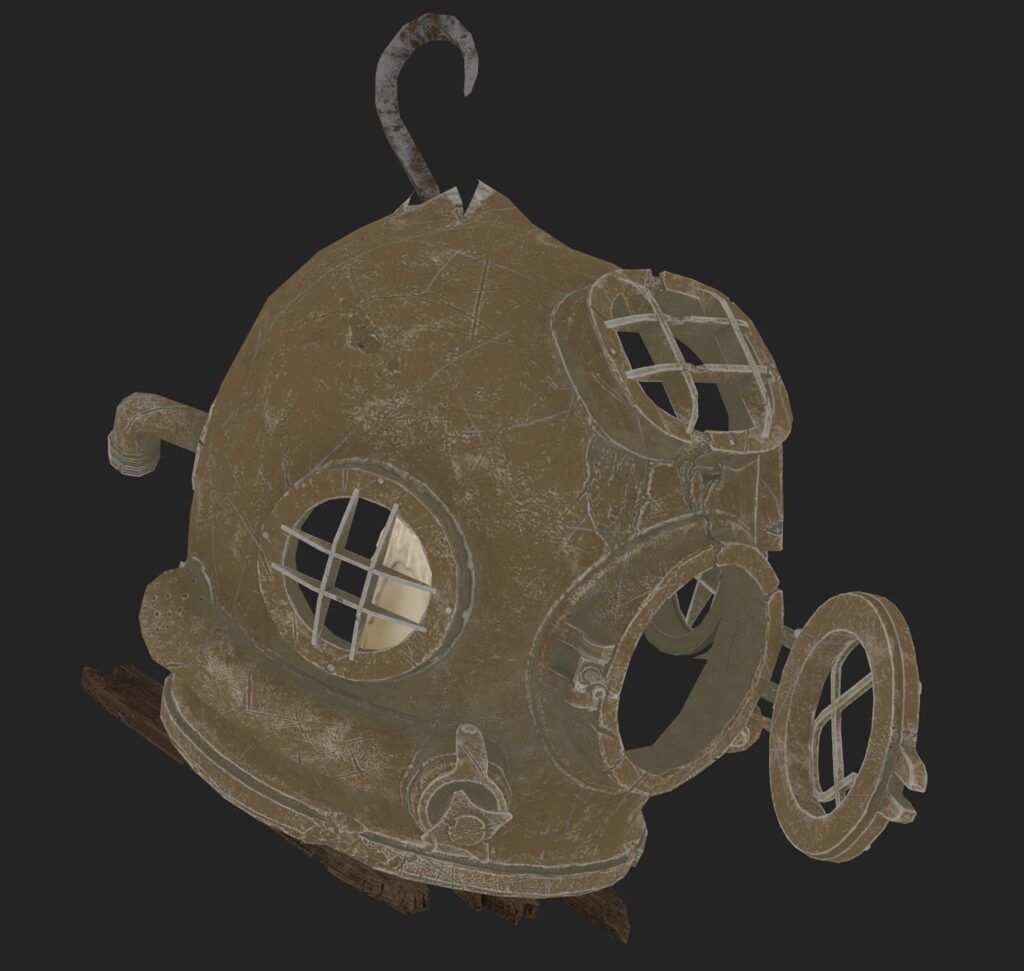
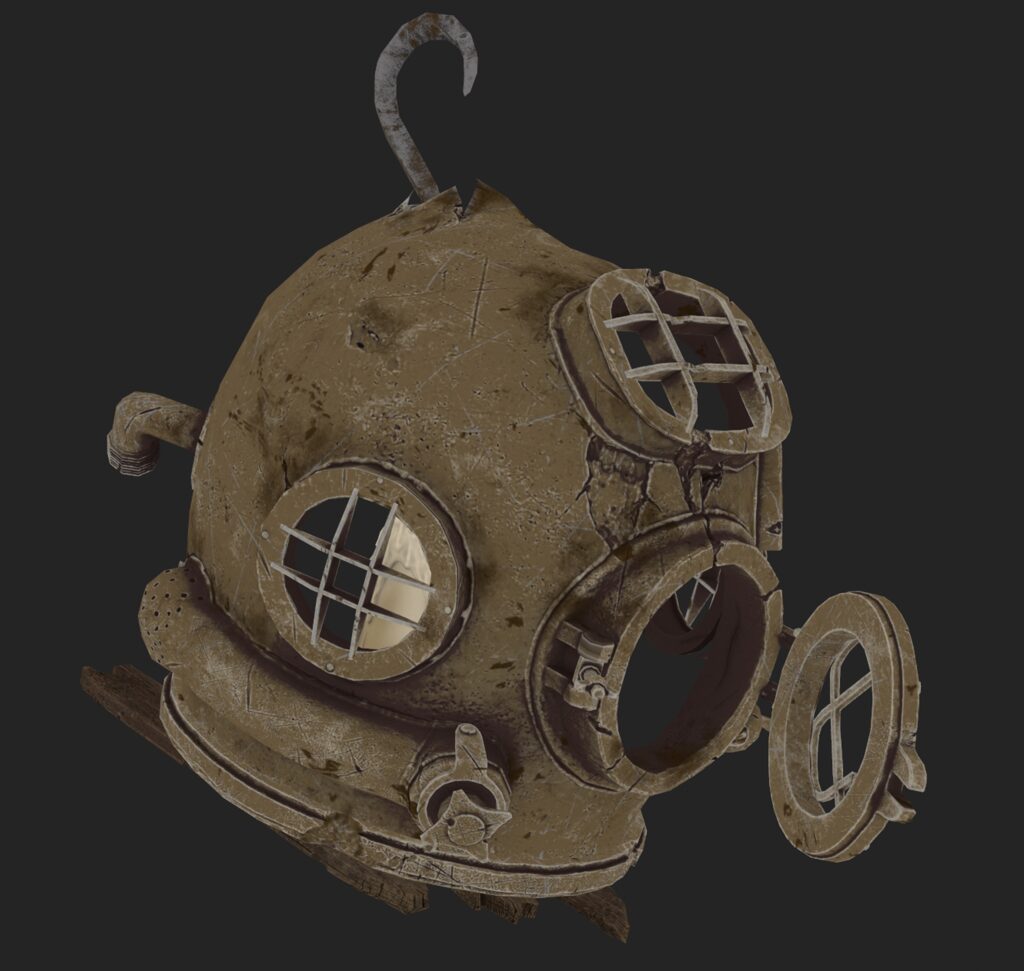
For props and accessories, I turned to 3ds Max, which allowed me to quickly create base meshes with clean topology.

This approach ensured that all assets would be easy to optimize during the lowpoly phase.
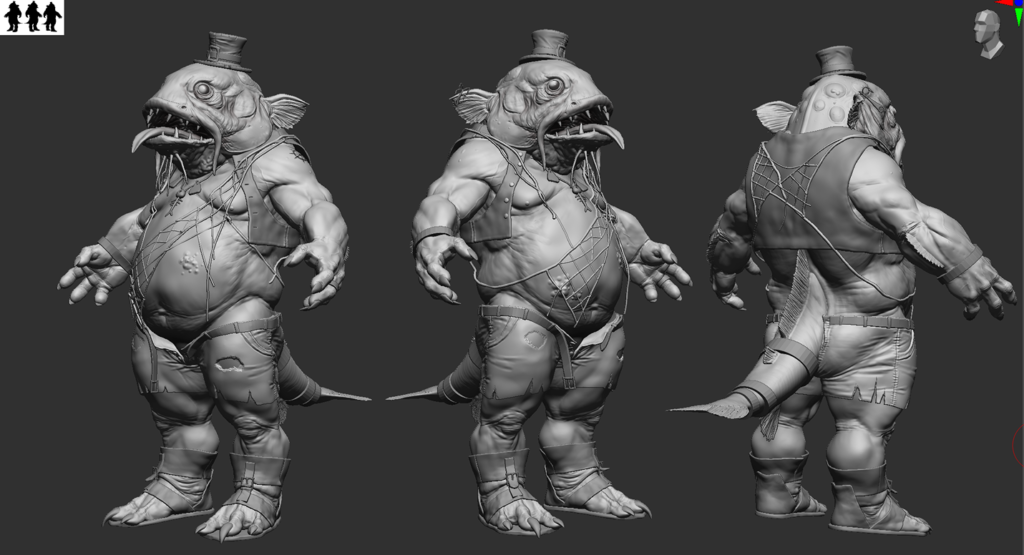

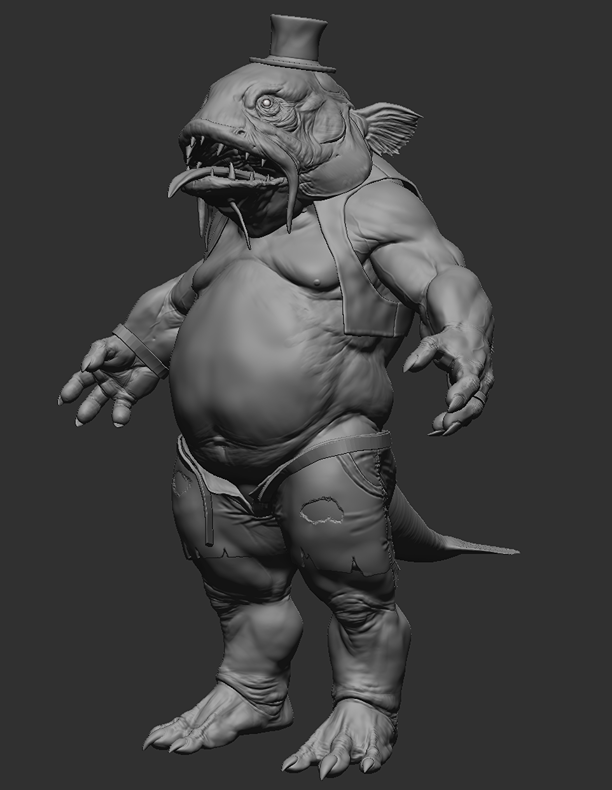
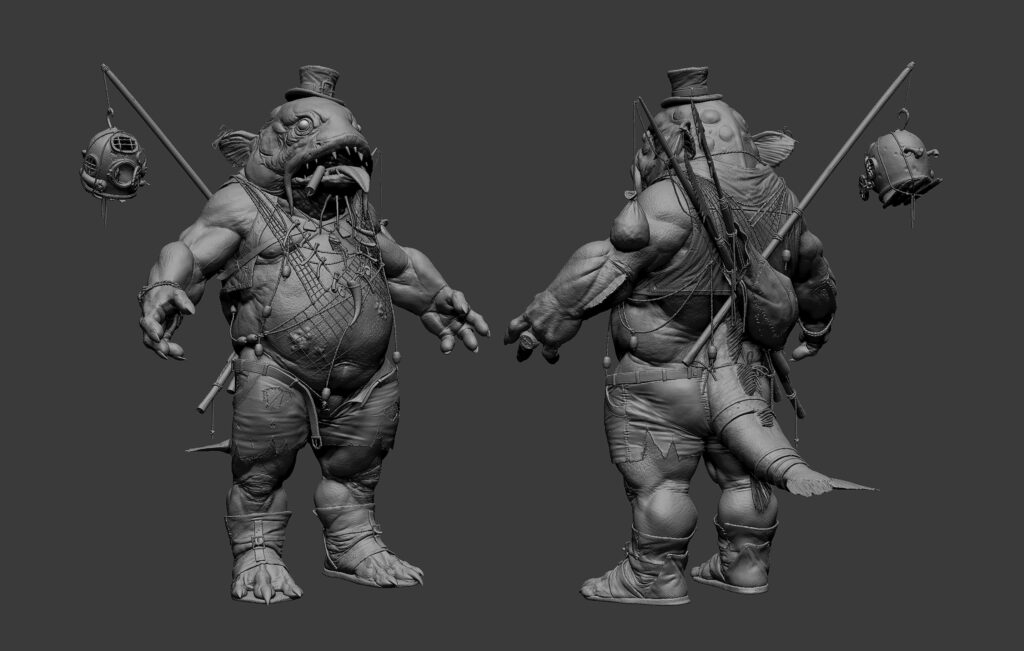
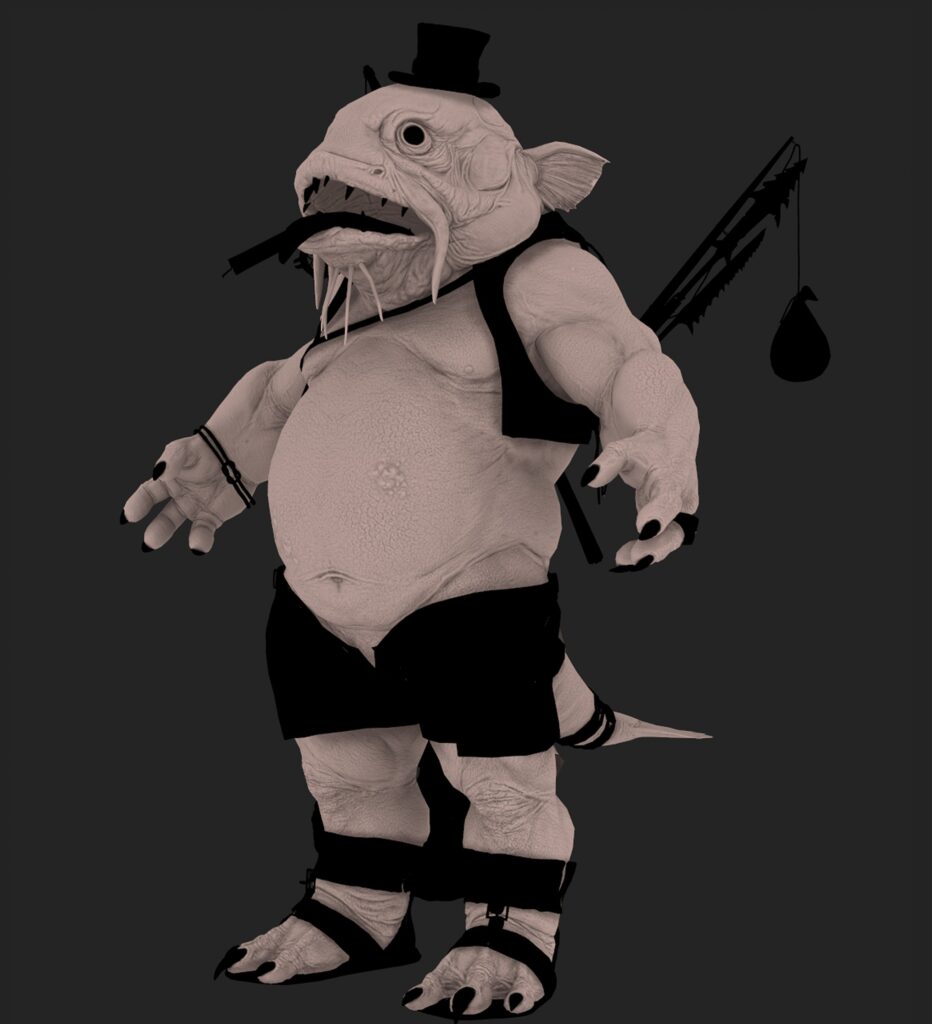
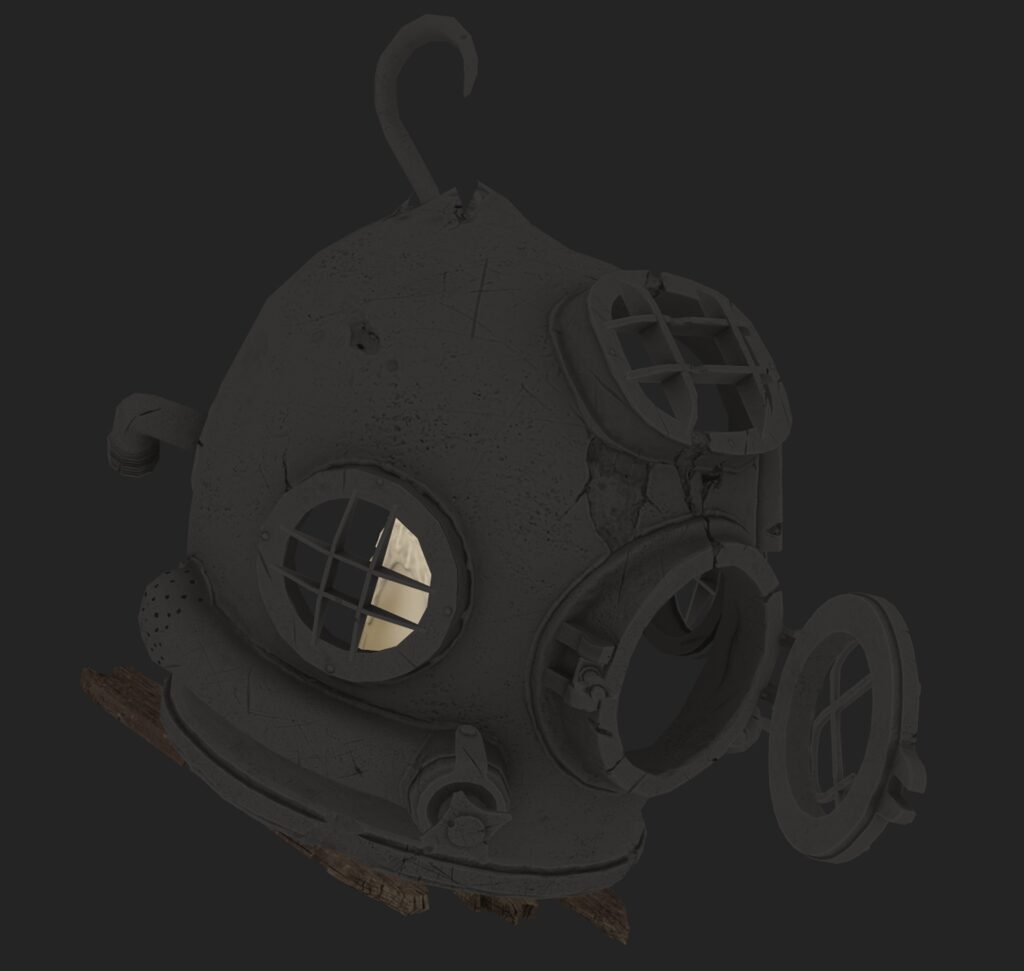
Highpoly
This is the most exciting and challenging part of creating a 3D character for me.
The challenge of achieving realistic detail, focusing on even the smallest aspects of the model, and finding solutions for bringing it all to life, represents an extraordinary charm for me.
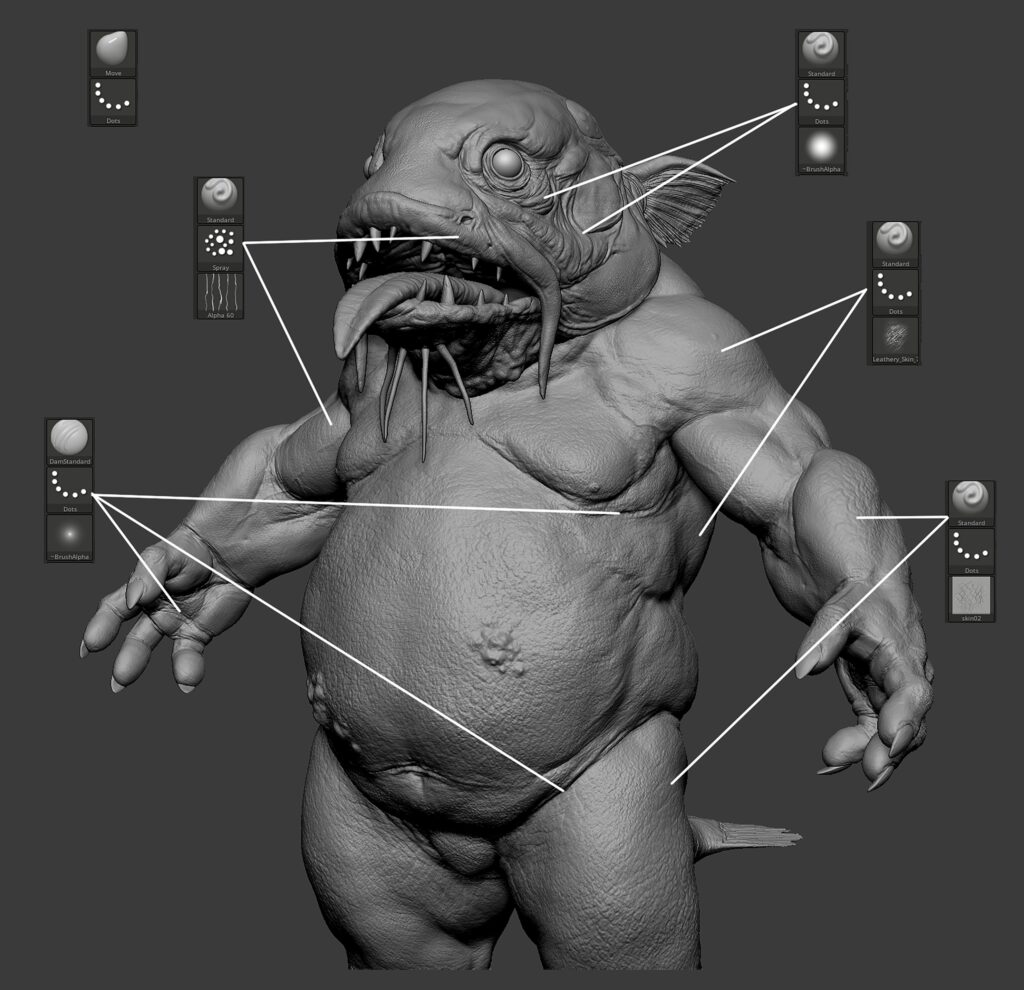
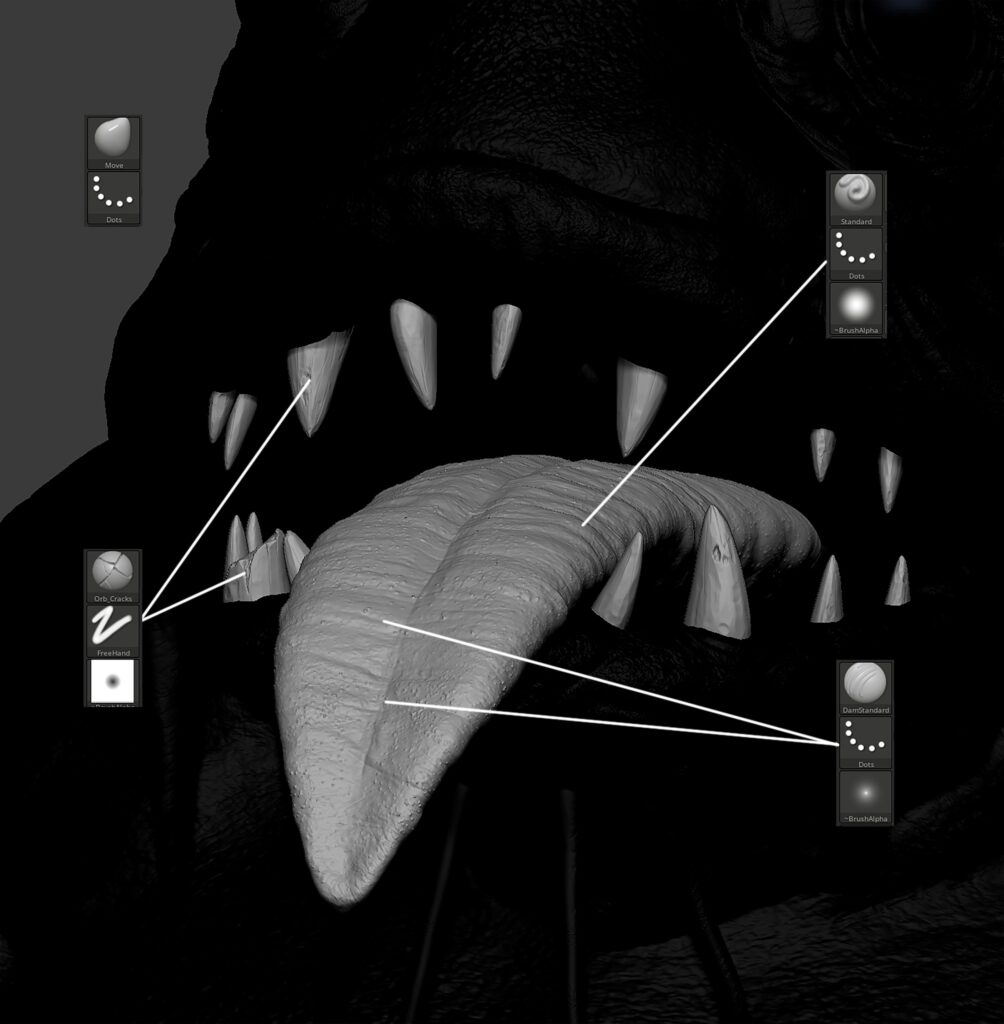
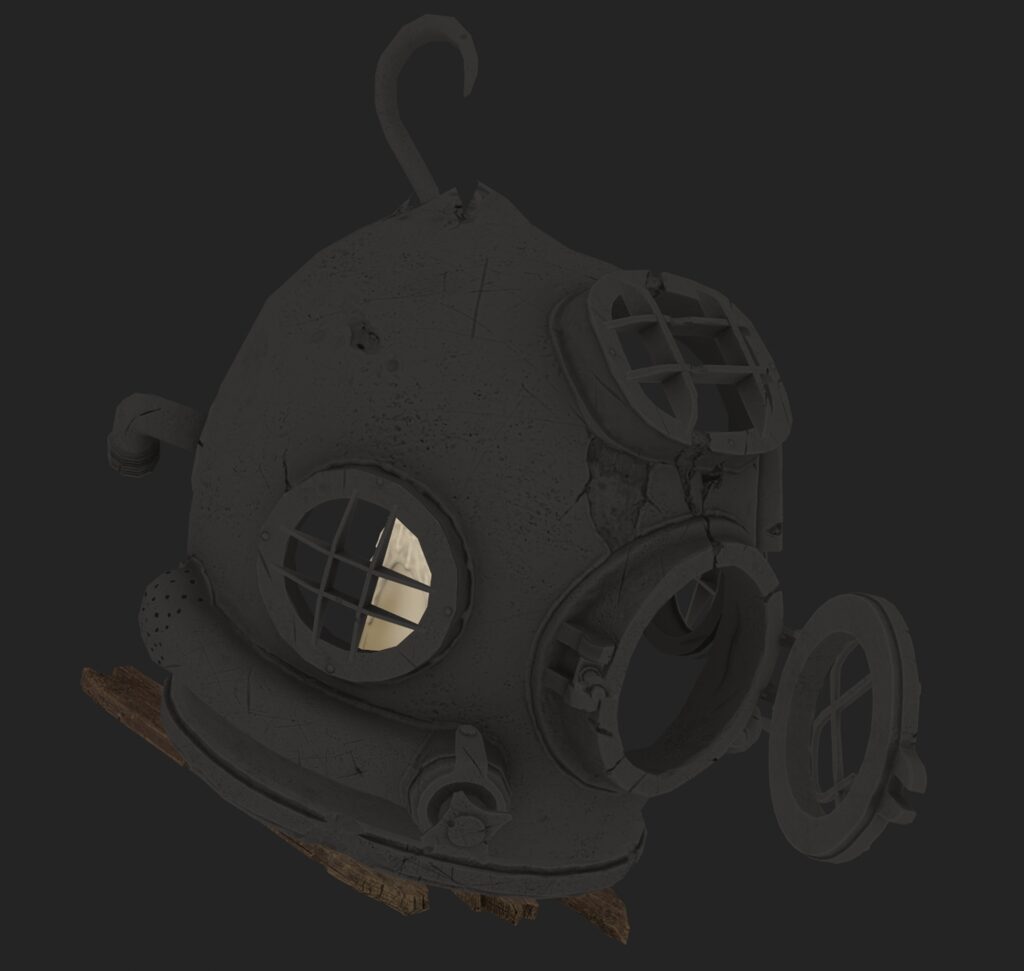
For this stage, I used ZBrush, relying on standard brushes combined with alphas for specific patterns. For skin detailing, I used the Standard brush with Spray, DragRect, and Dots strokes combined with specific alphas.
DamStandard was used for creases, folds, and scars, while the Move brush helped refine the model’s silhouette. Additional brushes like Inflate and Orb_Cracks were also used for other body details.
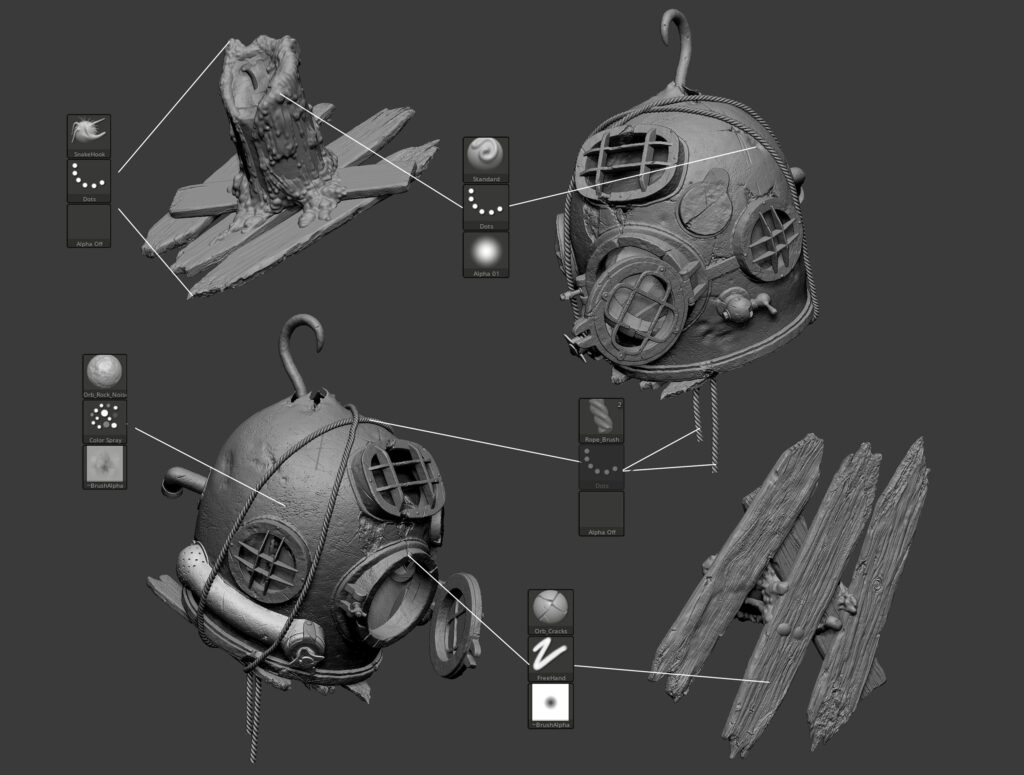
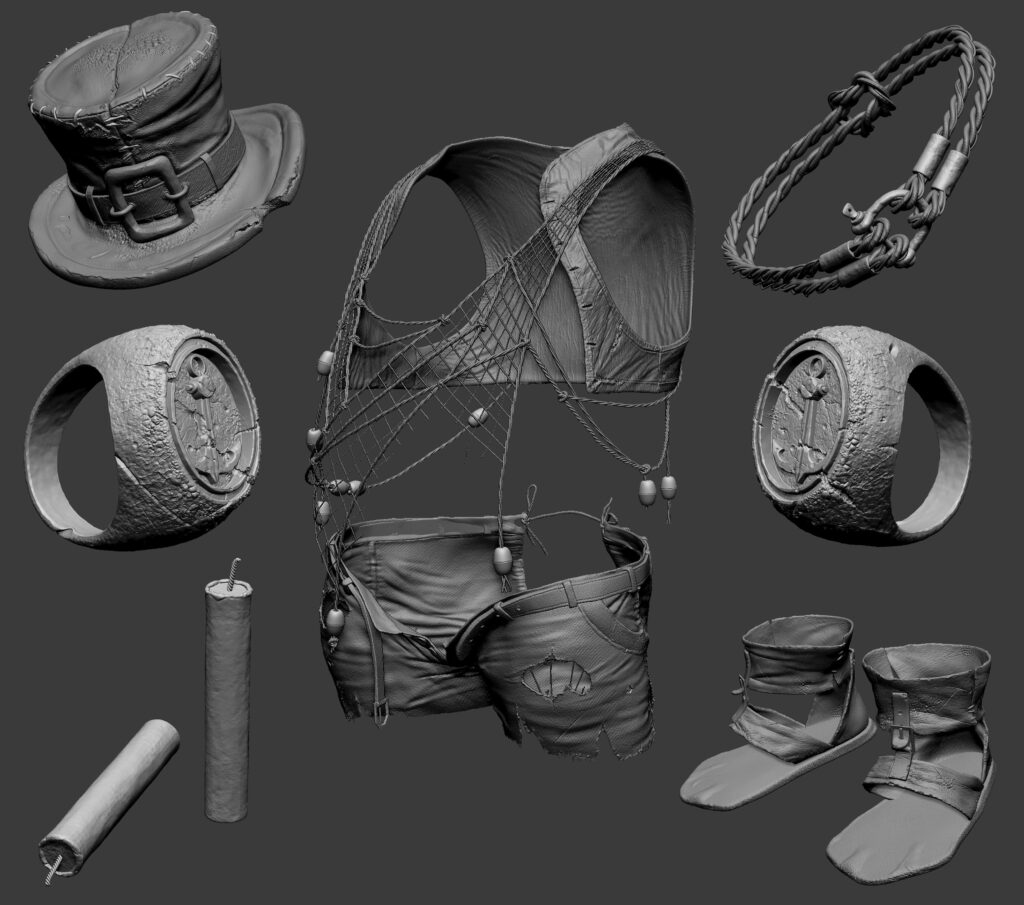
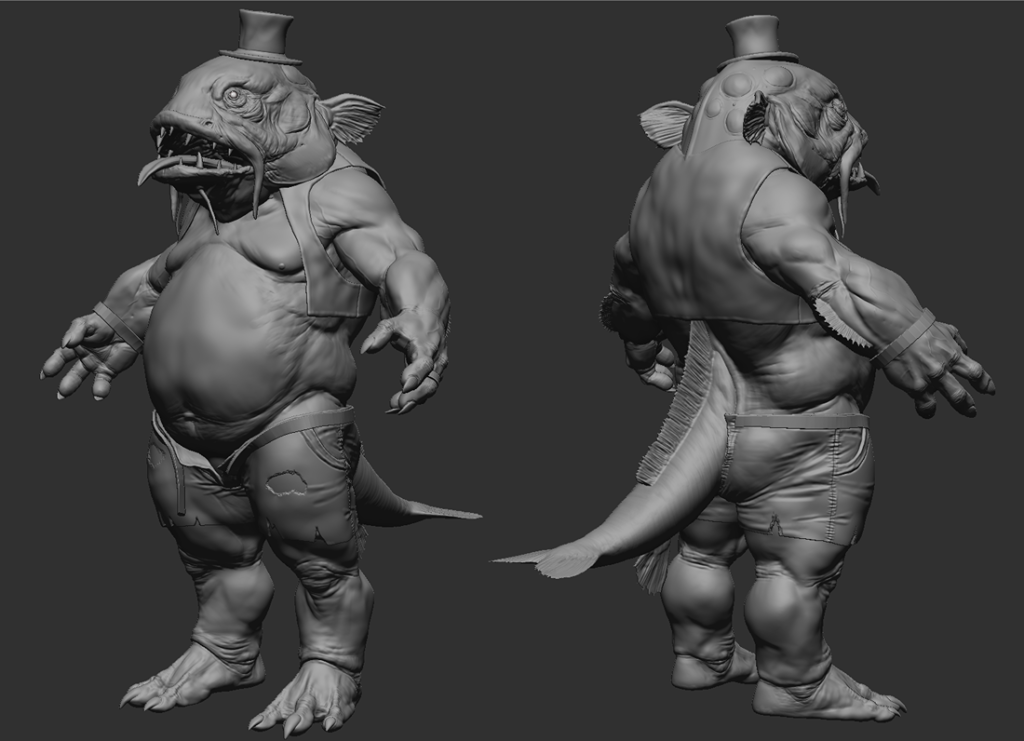
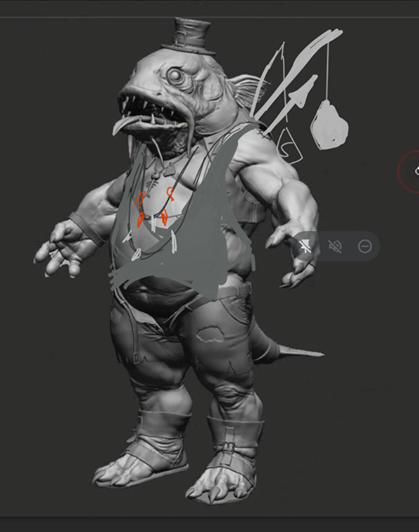
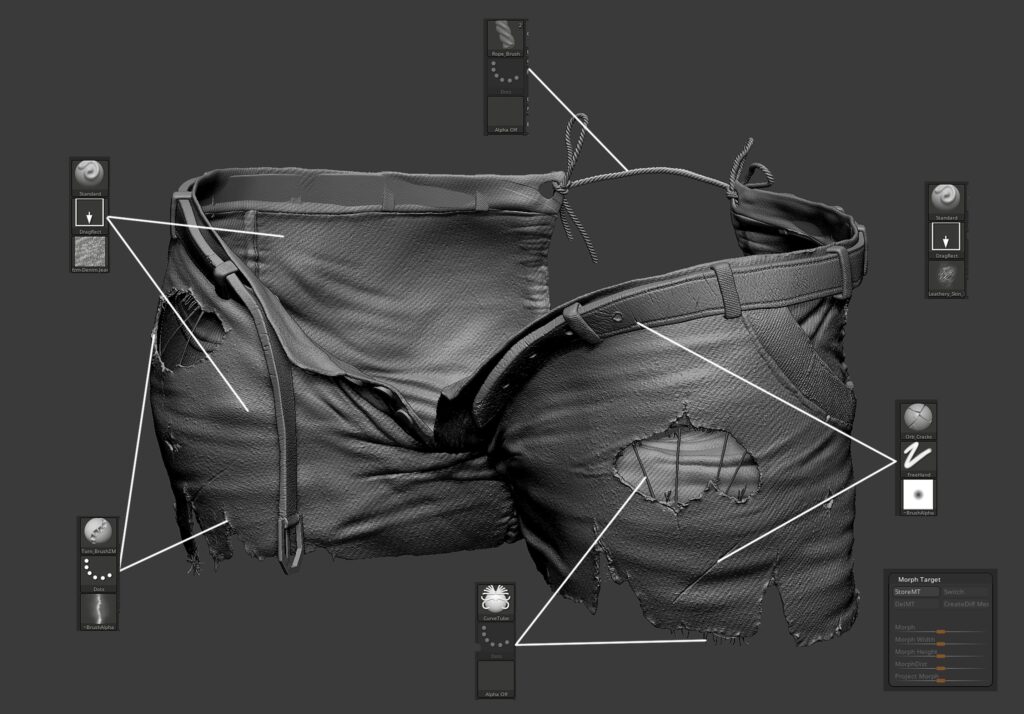
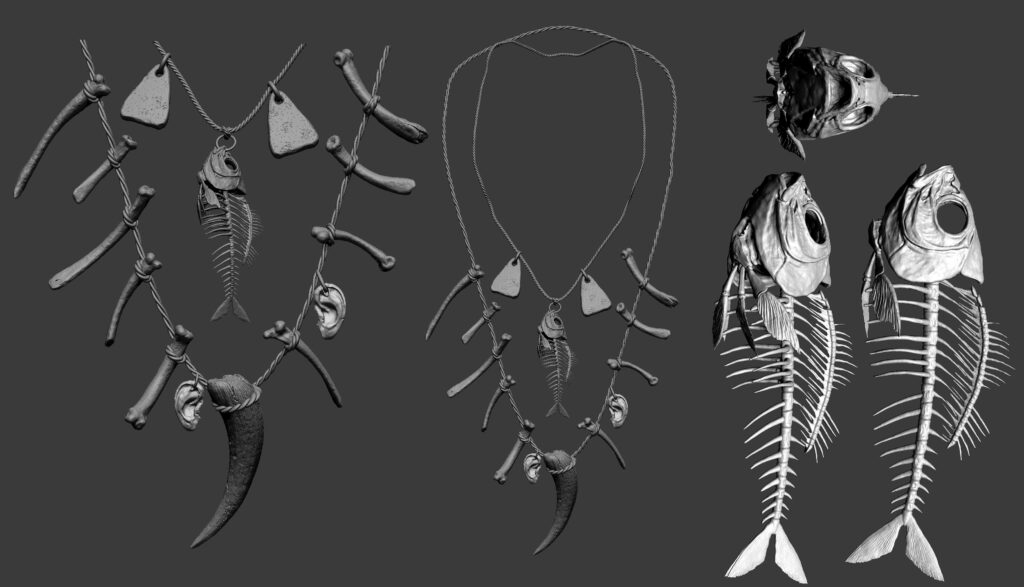
For clothing, I followed a similar approach but used specific alphas for fabric patterns and Morph Targets to control the arrangement of details.
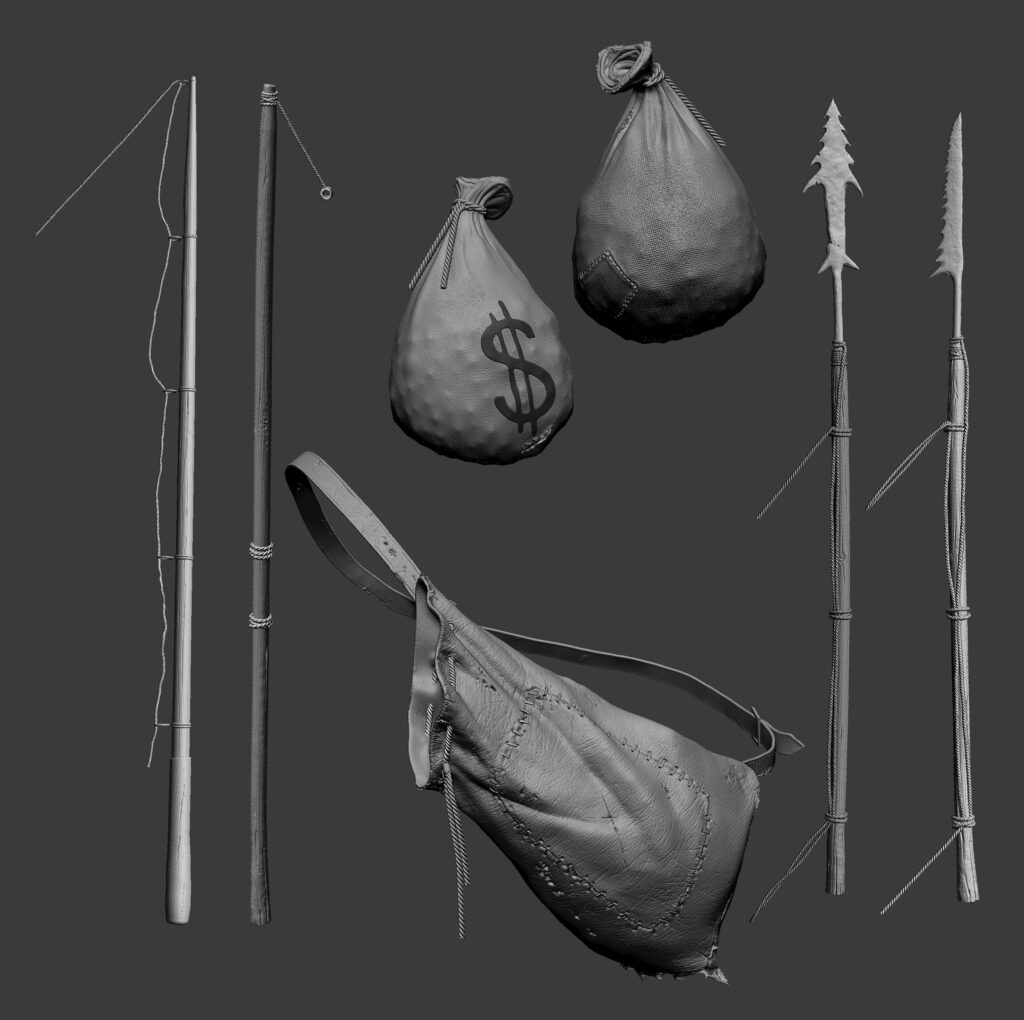
For tears and damages, I use a brush that I made especially for these details and it serves me as Torn_Brush.
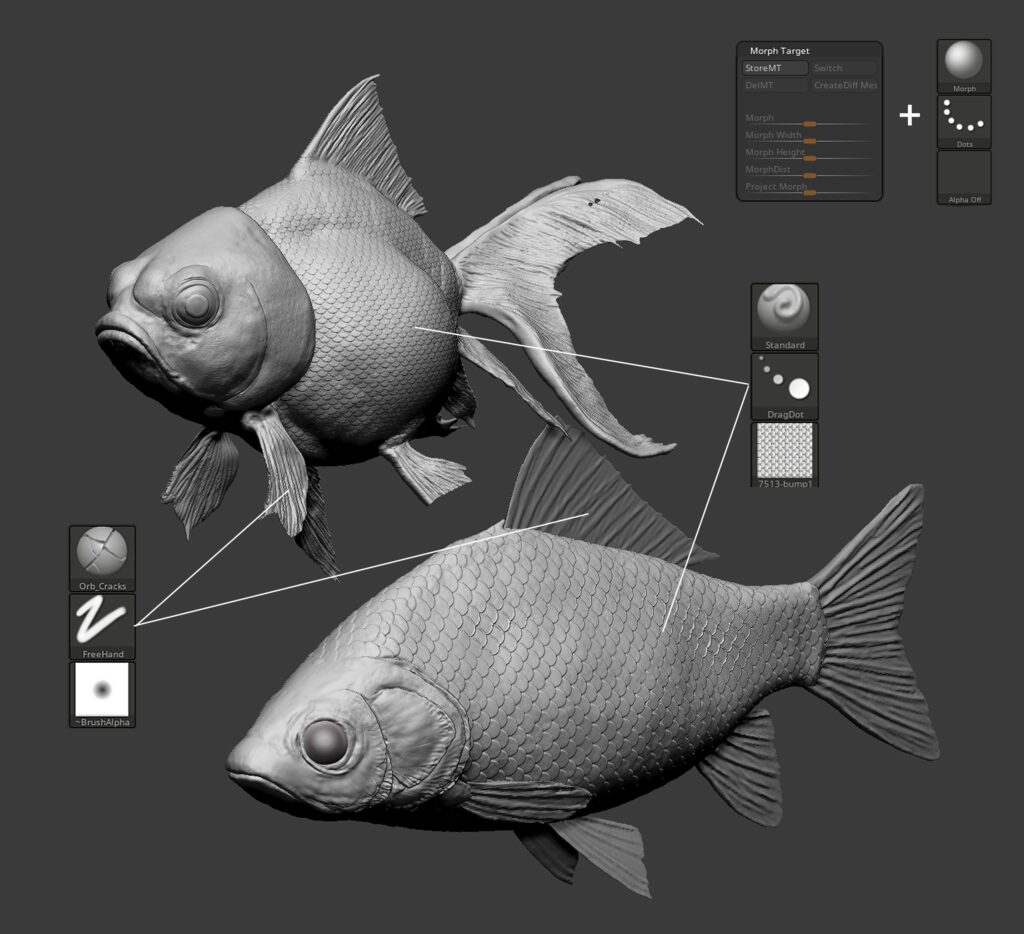
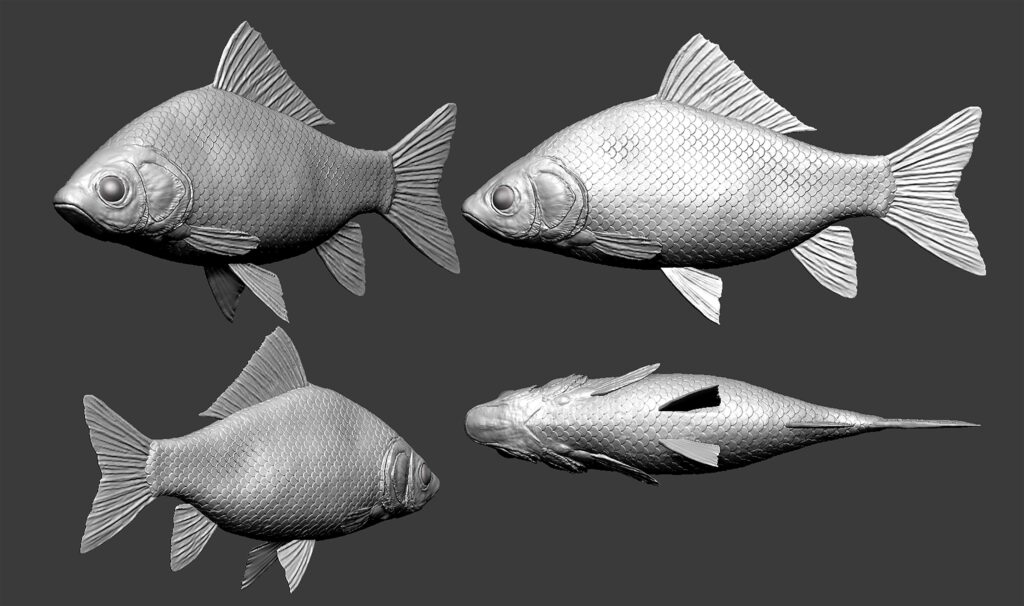
If it is necessary to show threads and similar damage at the ends, I use for that the Curve Tube brush. For fish scales, I used with scales alpha information applied with the Standard brush and DragDots stroke.
Morph Target and Morph brushes were also employed to remove patterns where unnecessary.
Lowpoly
For retopology and optimization, I used 3ds Max and its Freeform tab.
From the very beginning of my introduction to 3D, 3ds Max is the first software I started using, so the years of using this software have made me feel most comfortable in it when it comes to retopology, lowpoly modeling, and hard surface modeling.
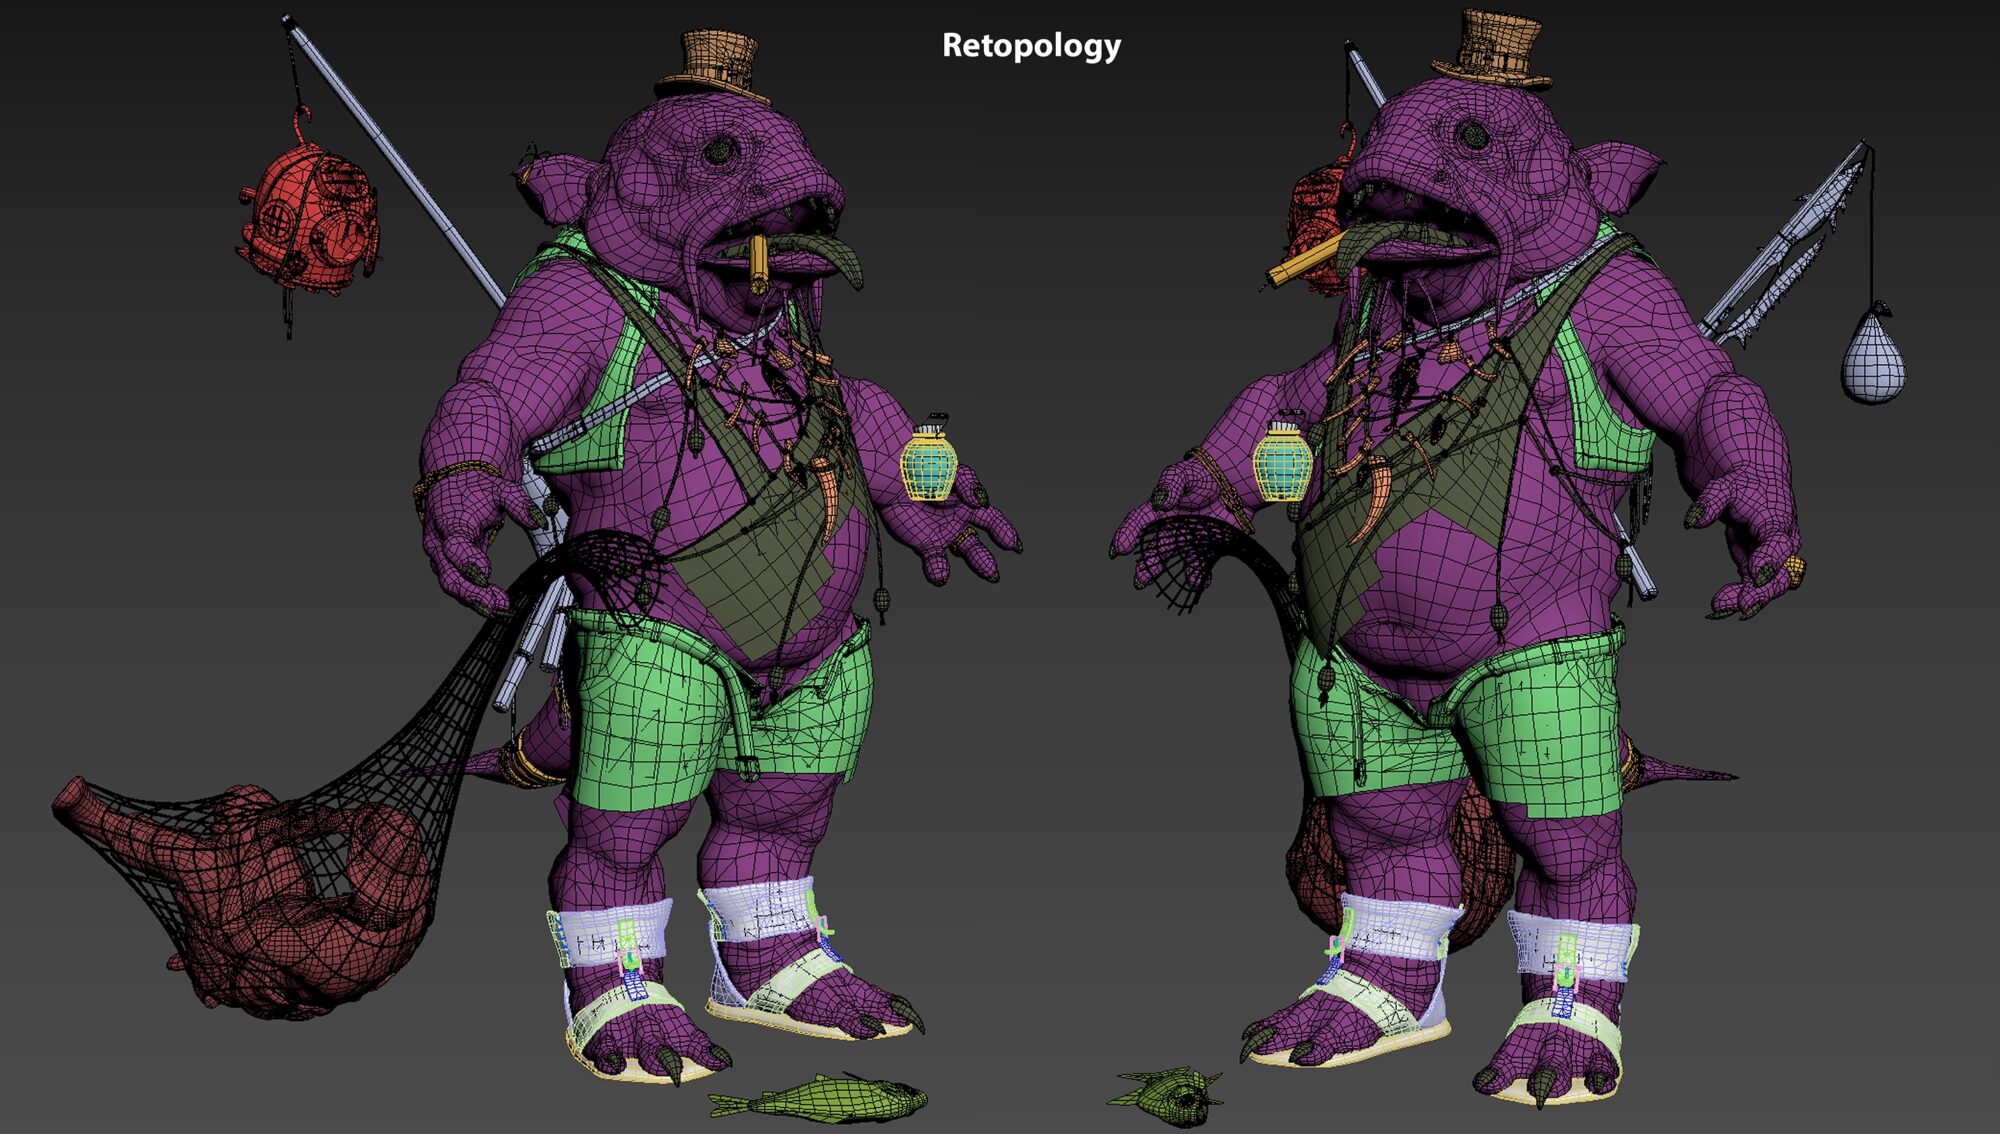
Decimated high-poly models were imported and manually retopologized using the Freeform tools, ensuring efficient edge flow and clean topology.
Each low-poly part was carefully named and matched with its high-poly counterpart to facilitate smooth baking during the texturing phase.
This step was essential for achieving a balance between visual fidelity and performance.

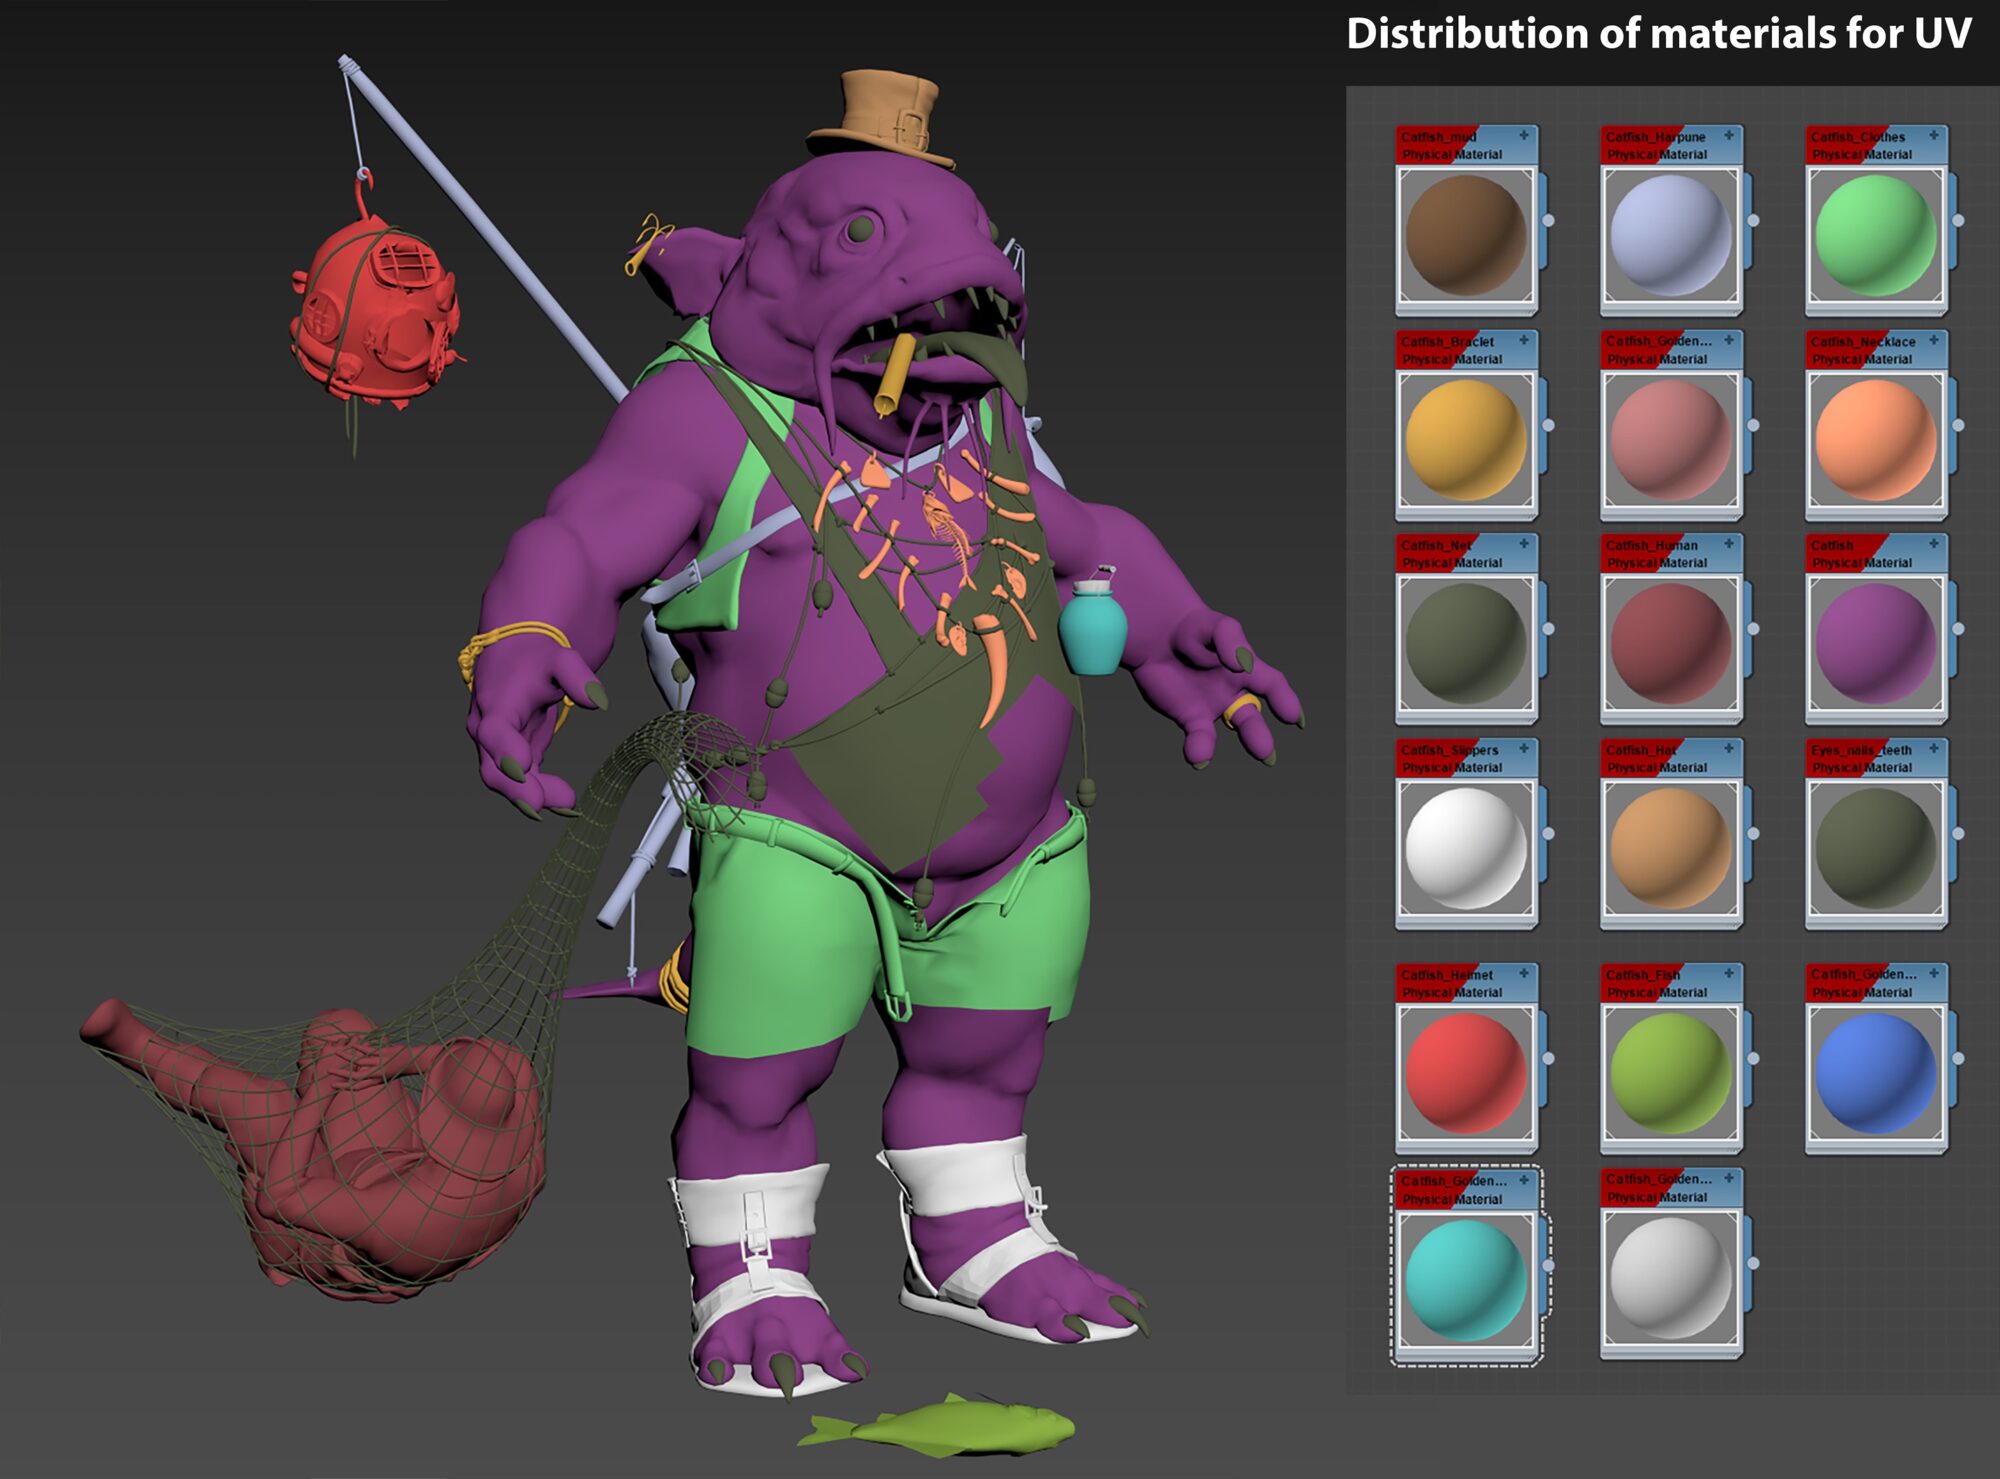
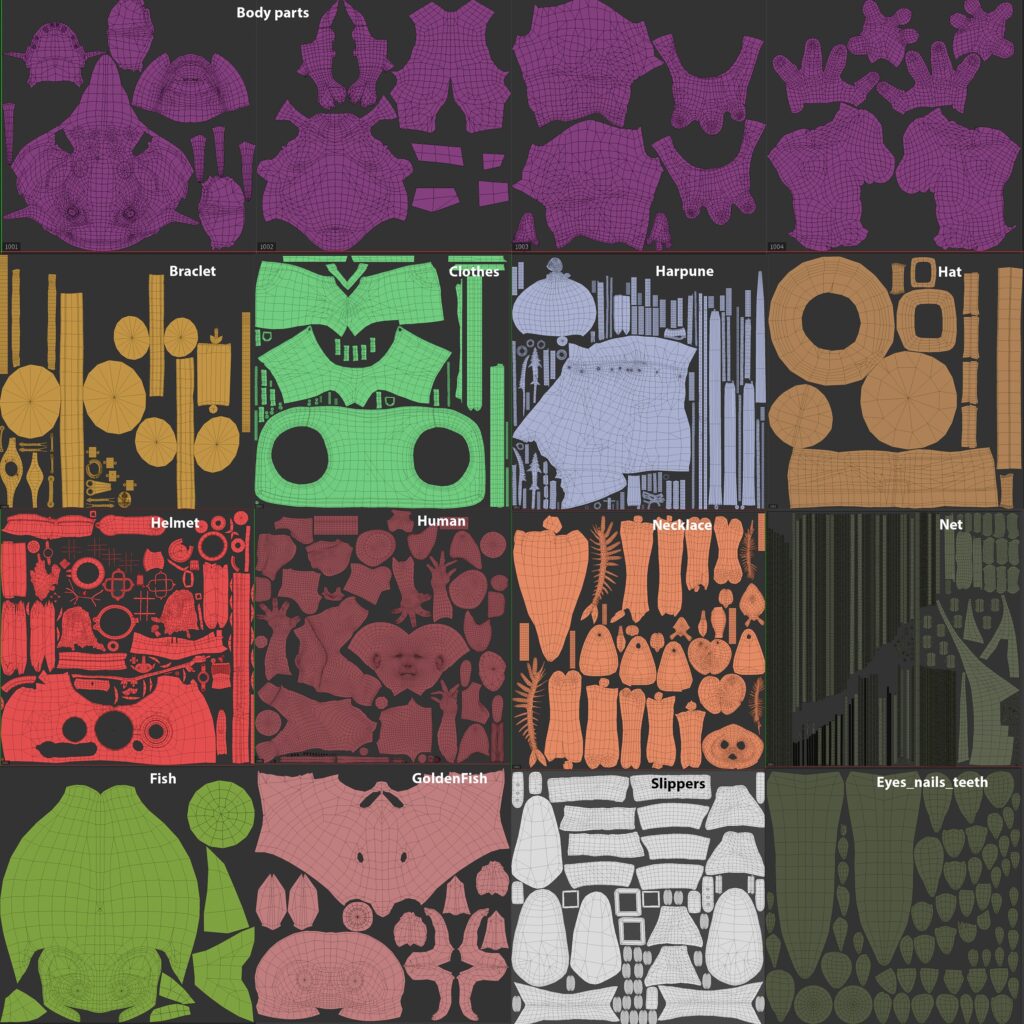
UV & Bake
In the lowpoly phase, it is essential to divide the model by materials to plan which parts will share the same UV shell and organize texture groups effectively. To ensure the highest quality in UV work, I use RizomUV as my primary tool.
This software provides excellent control over the UV layout, making it easy to cut and unwrap UV parts while optimizing space usage within the UV margins. If needed, manual packing of UV islands is straightforward and intuitive.
RizomUV’s user-friendly interface makes it accessible even for beginners, helping them quickly navigate and produce quality results.
Once the UV process is entirely finished, it’s critical to properly name each lowpoly part of the model to match its corresponding highpoly reference.
The naming convention involves appending _low to the lowpoly model’s name and _high to the highpoly counterpart.
This ensures the baking software correctly associates each lowpoly part with its highpoly equivalent, enabling precise detail transfer during the baking process.
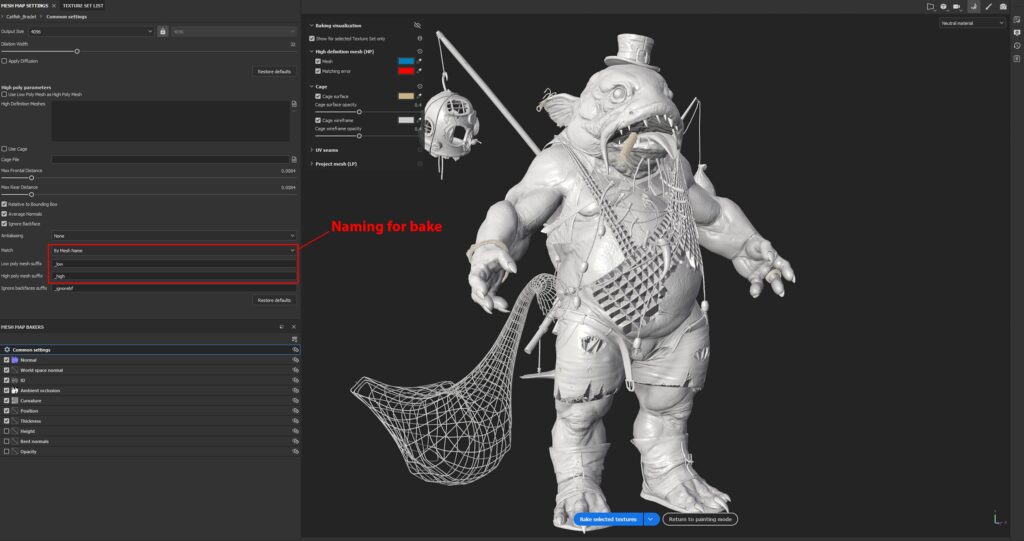
For baking and texturing, I primarily rely on Substance Painter. However, there are instances where I’m not entirely satisfied with the level of detail in certain baked maps, such as Curvature and Ambient Occlusion.
In such cases, I turn to Marmoset Toolbag for these specific maps. Marmoset often delivers a more detailed and information-rich output, which I can utilize later during the texturing process.
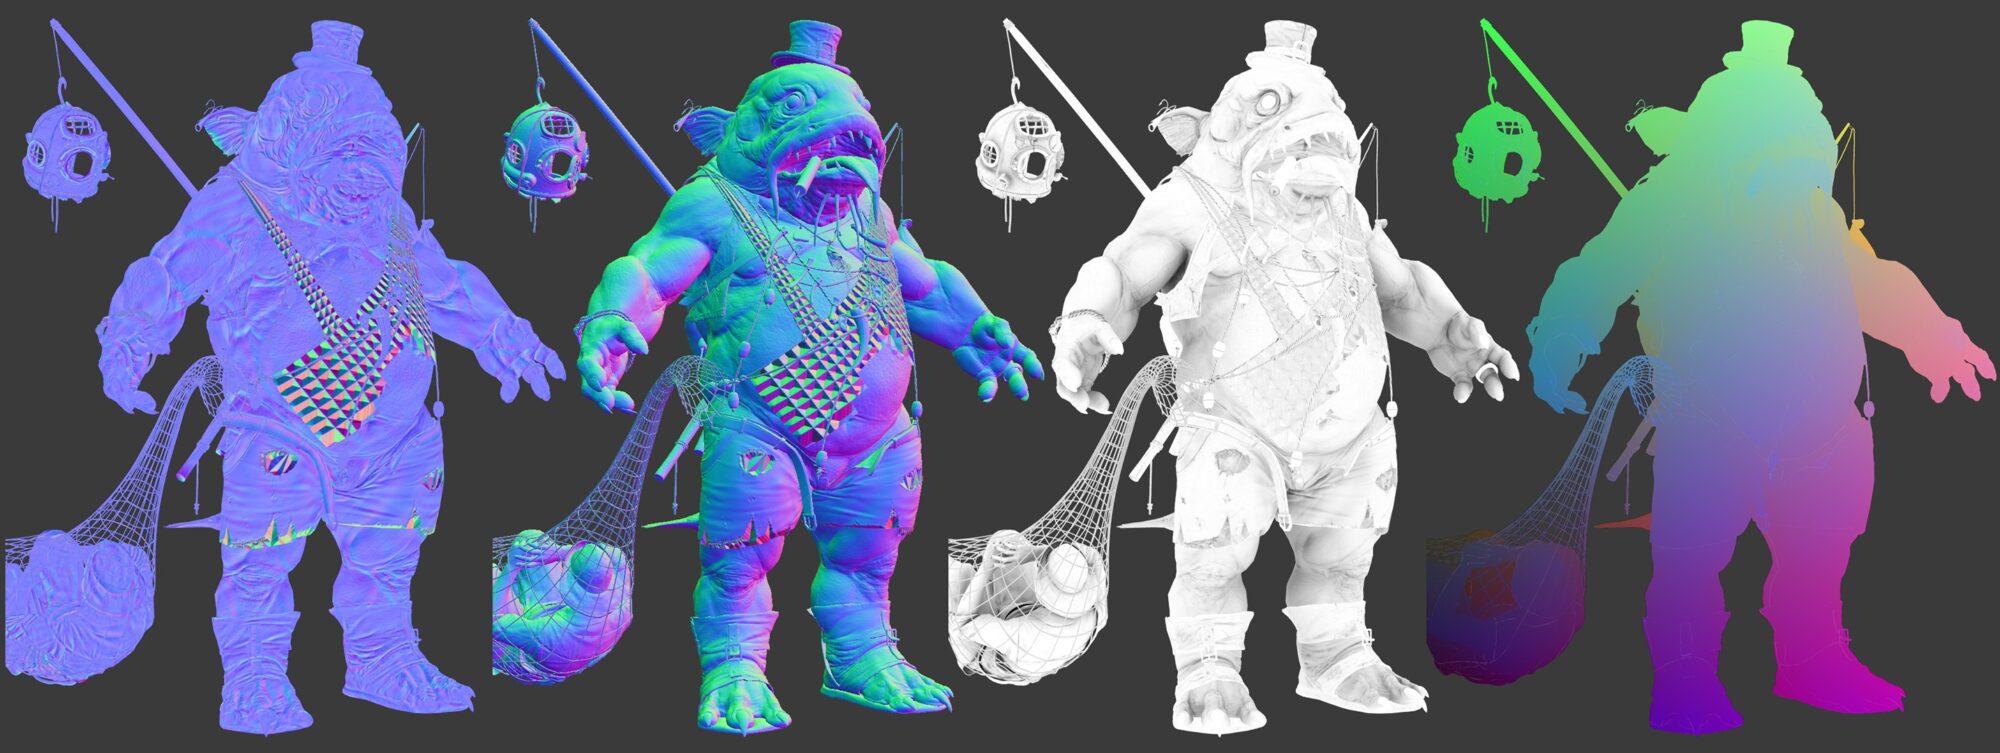
By baking maps such as Normal, World Space Normal, ID, Ambient Occlusion, Curvature, and Position, the model is fully prepared for texturing.
This thorough preparation ensures a solid foundation for the next stage, allowing for a seamless transition into the texturing workflow.
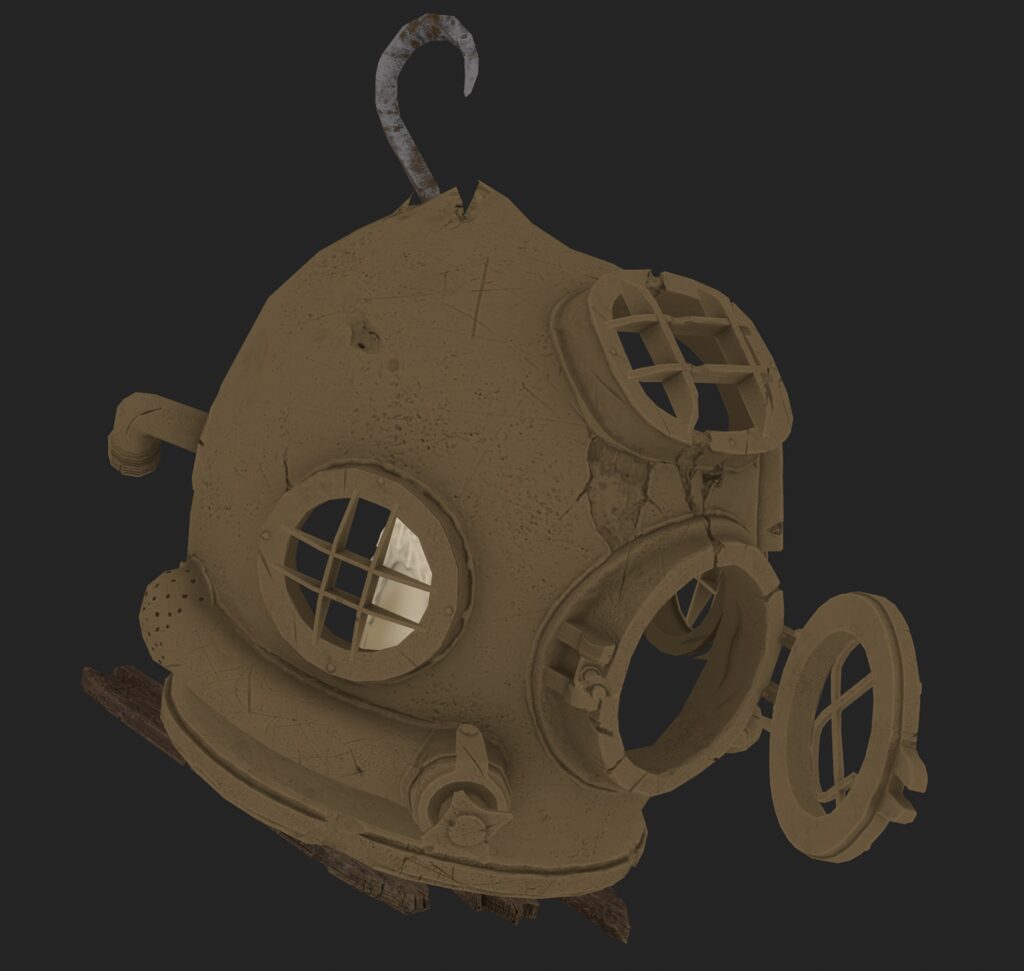
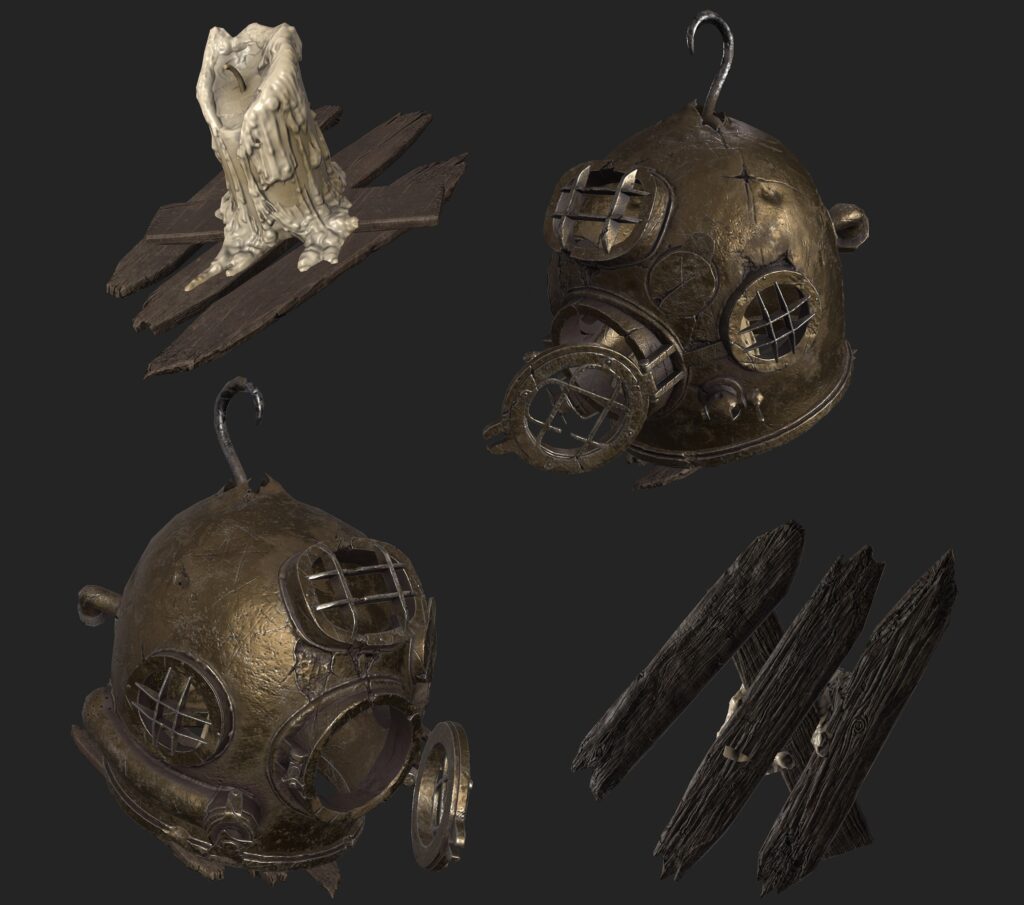
Texturing
Texturing was done entirely in Substance Painter. I started by assigning base materials to each part of the model, using masks to isolate specific elements.
Each texture set was organized into folders based on material type, ensuring efficient workflow and easy adjustments.
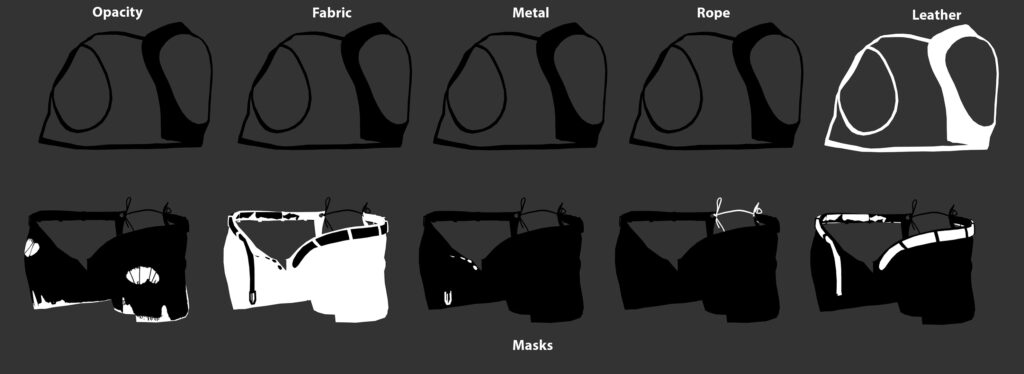
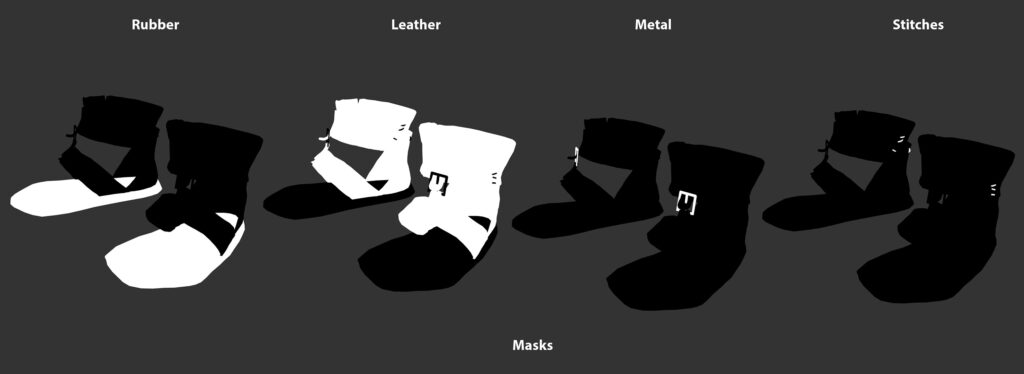
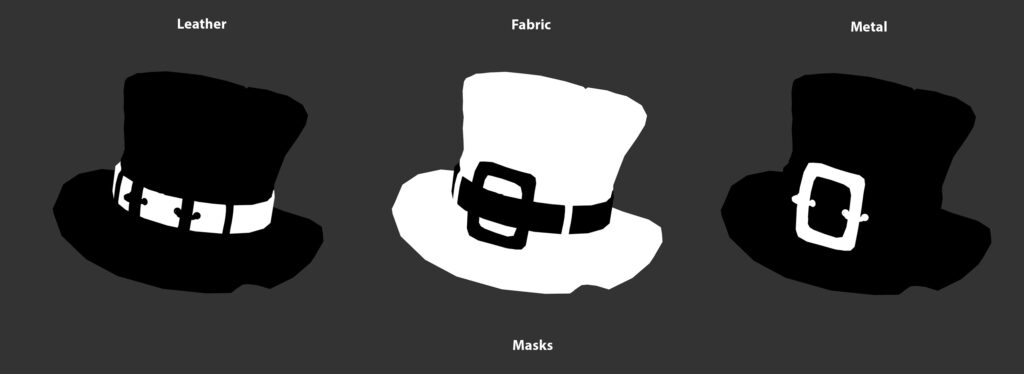
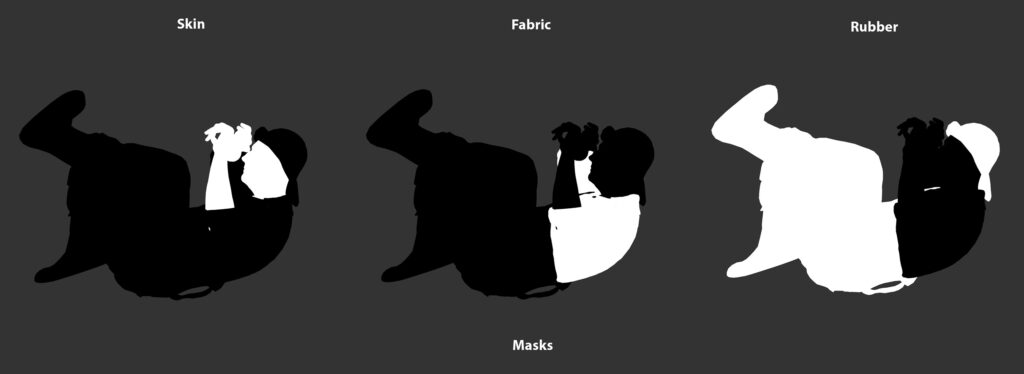
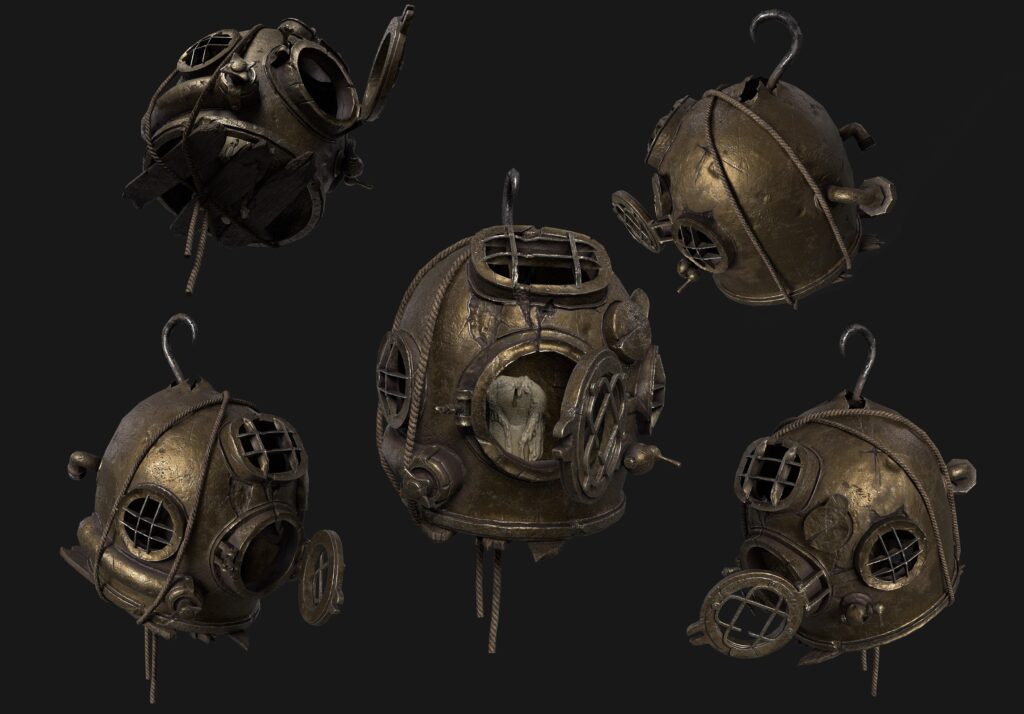
I paid close attention to small details, from scratches on metal to dirt and wear on fabric.
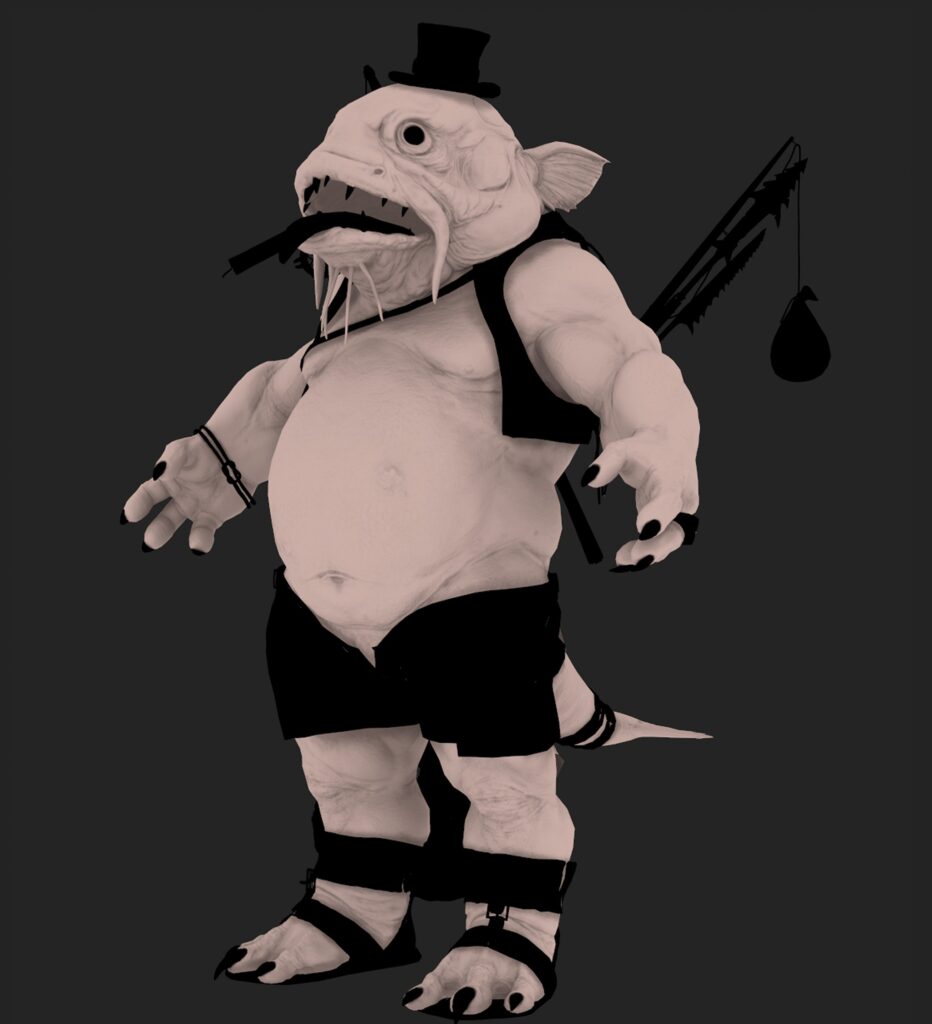


The goal was to create a rich, believable texture that complemented the character’s grotesque design.

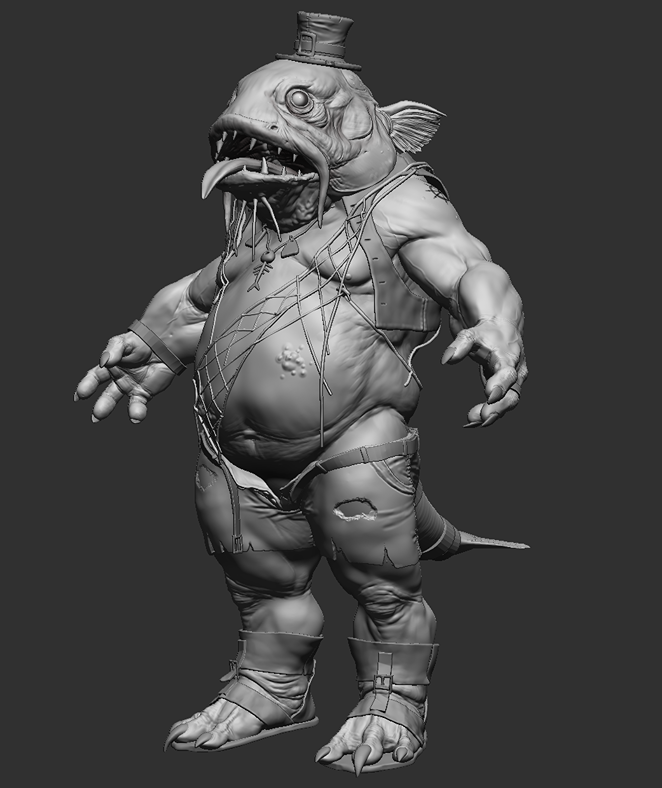
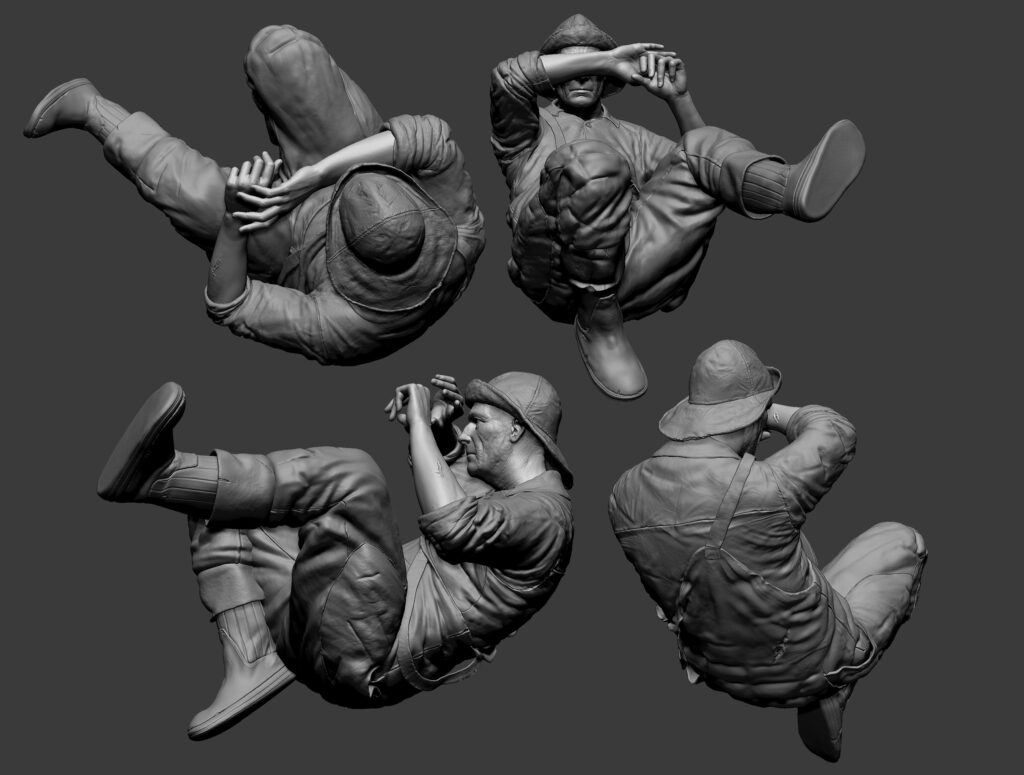
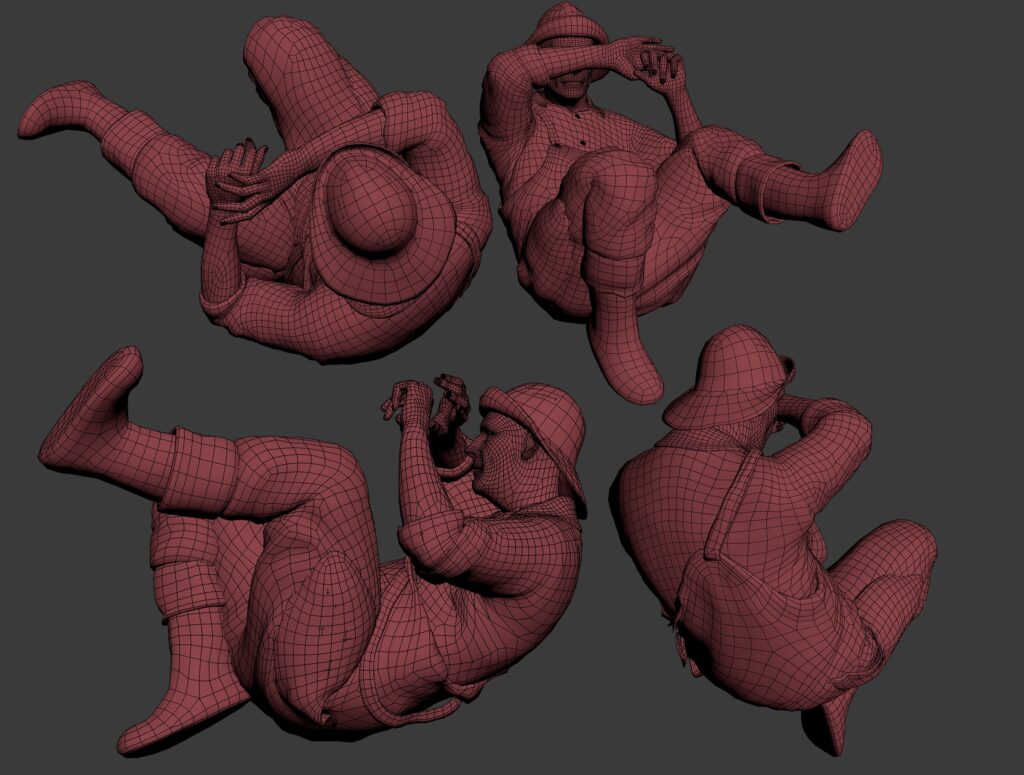
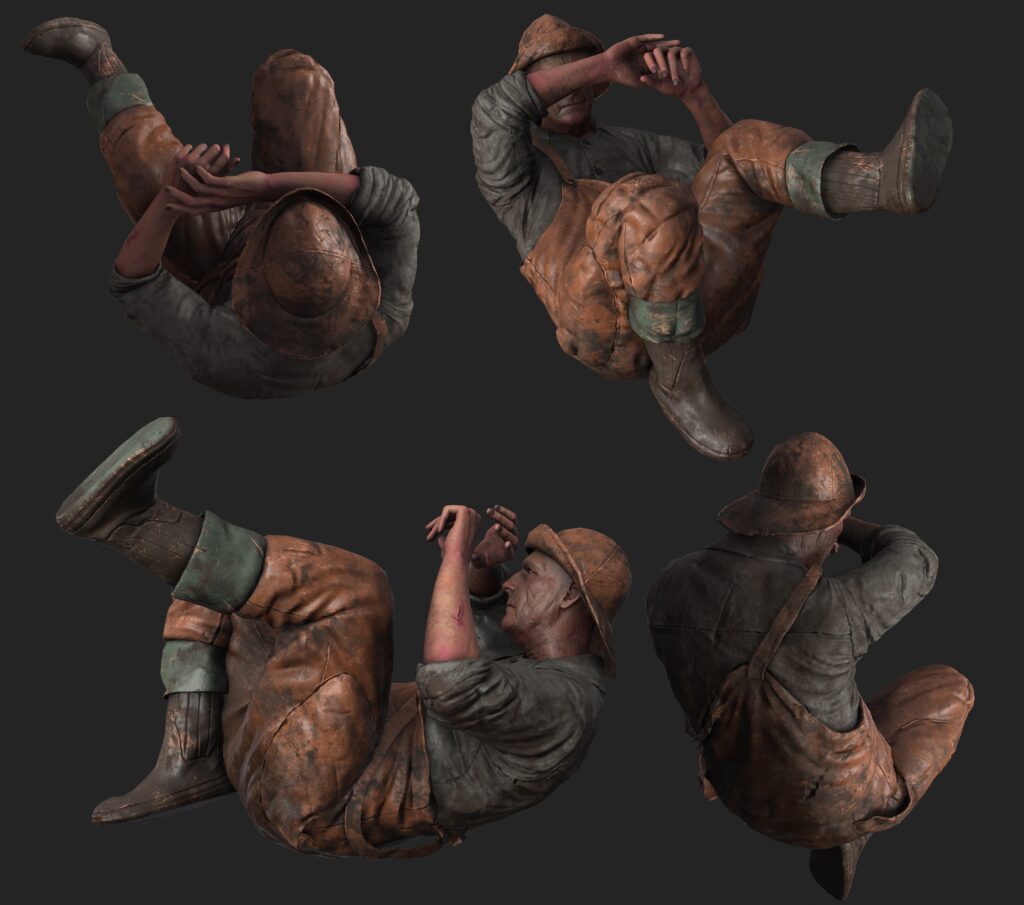
For posing the character, I used the ZSphere rigging system in ZBrush, which provided a quick and effective way to create dynamic poses.
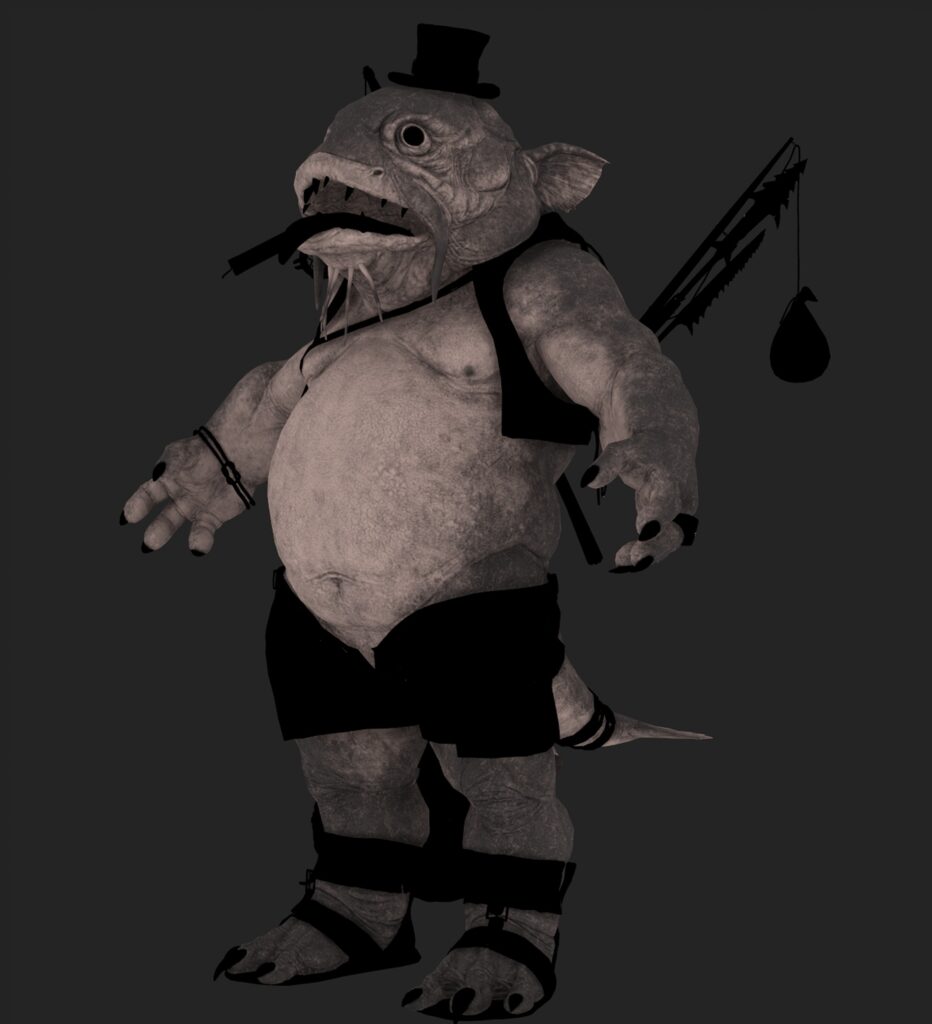
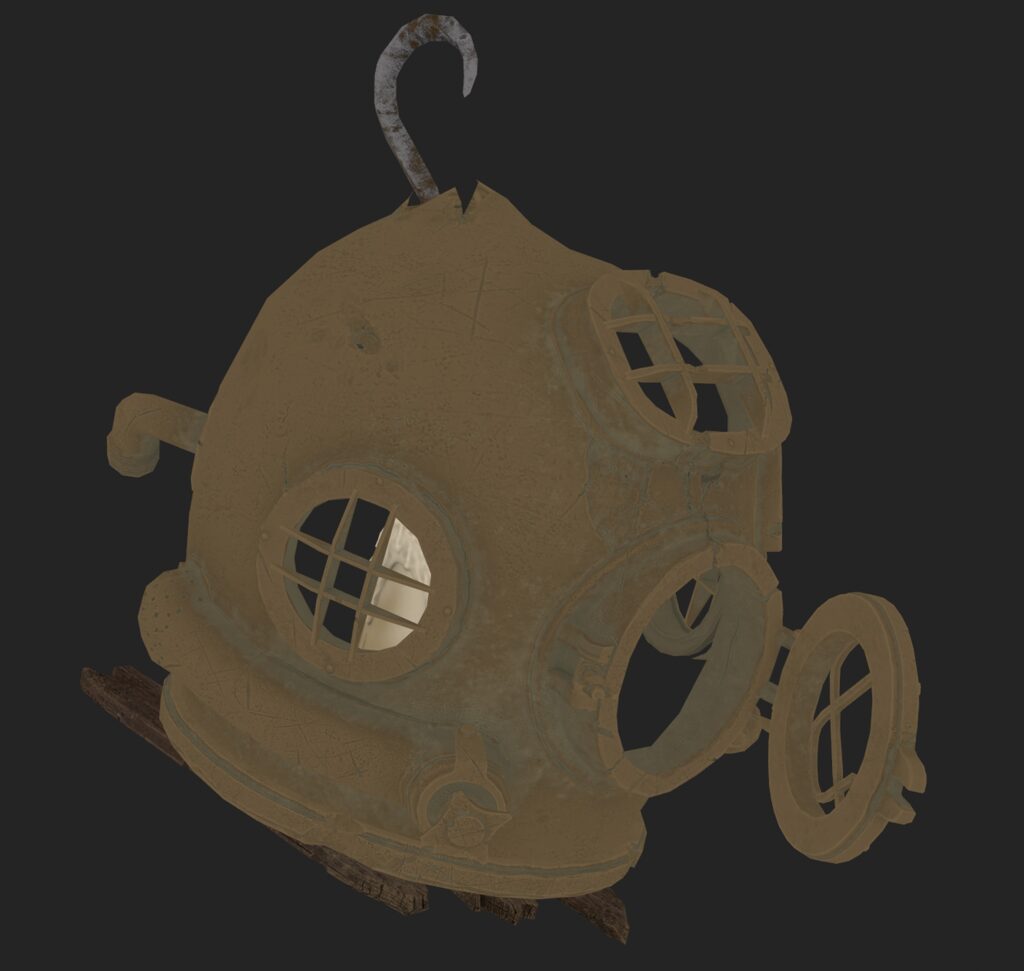
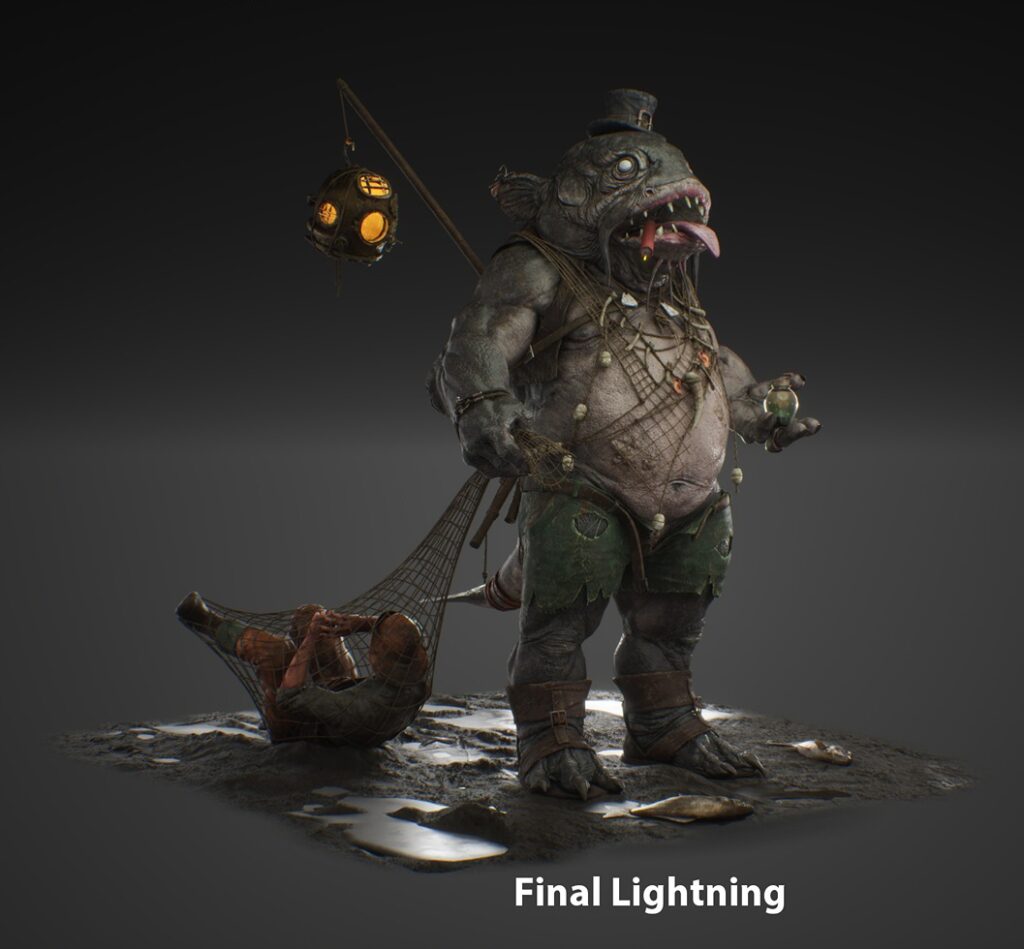
Materials & Rendering
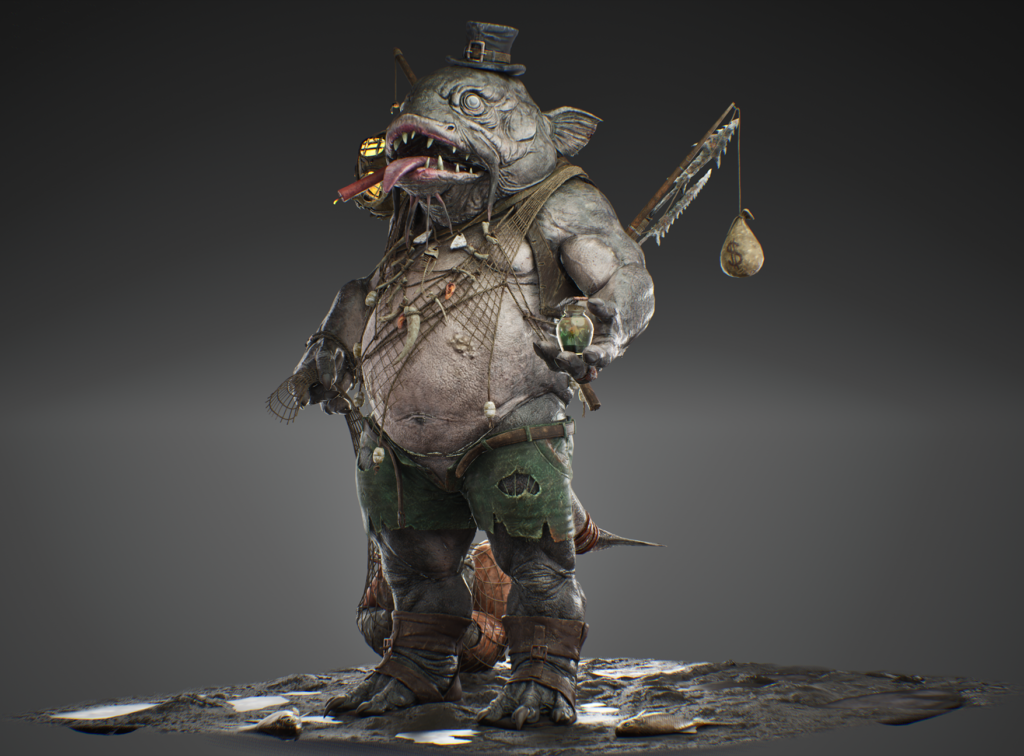
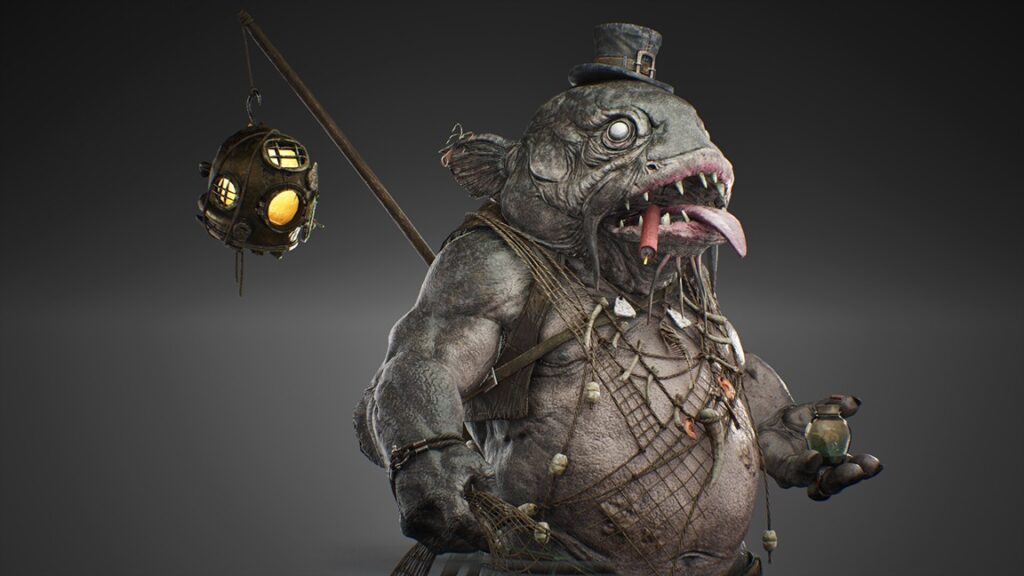
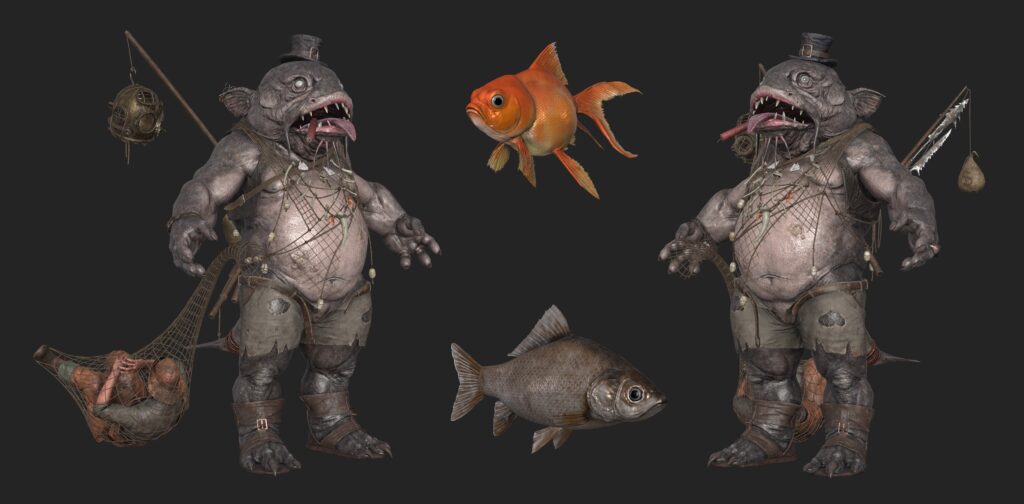
The final presentation of “Kemza” was done in Unreal Engine 5.
Using the engine’s advanced rendering capabilities, I applied certain materials to each element of the character, such as Surface Profile, Default Lit, Cloth & Thin Translucent.


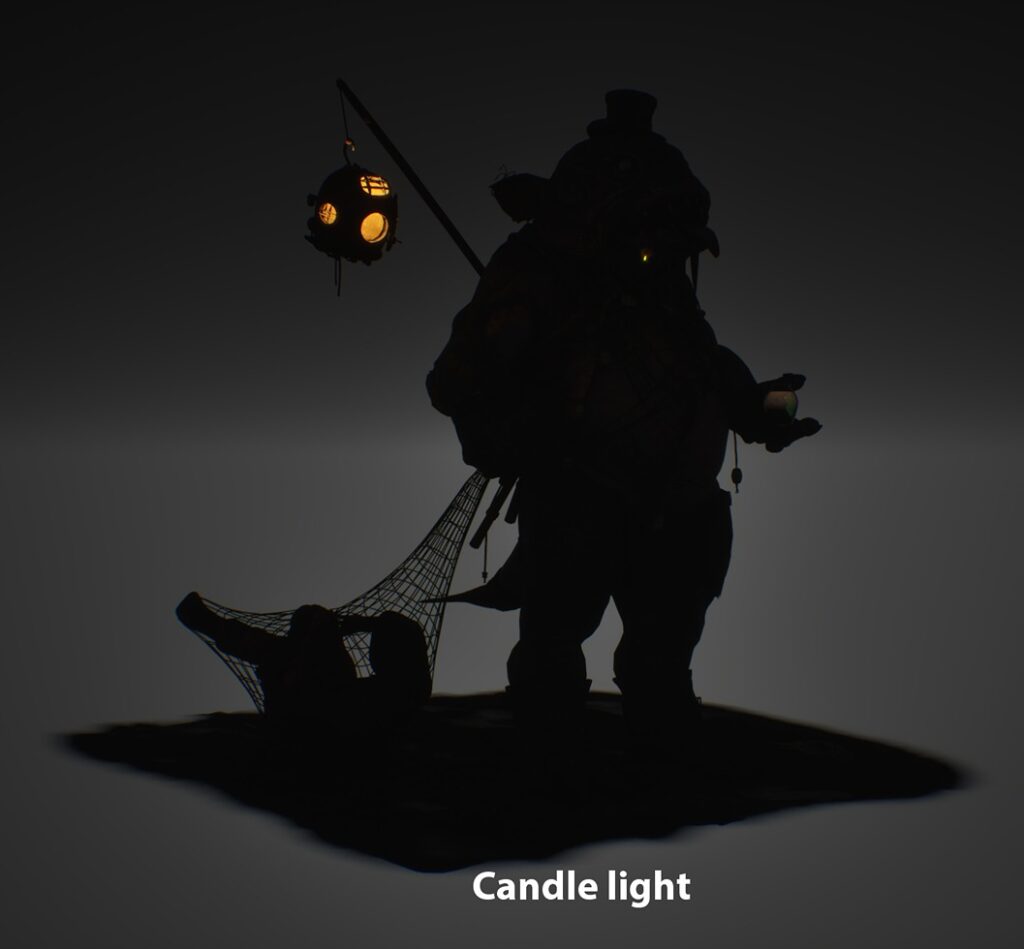
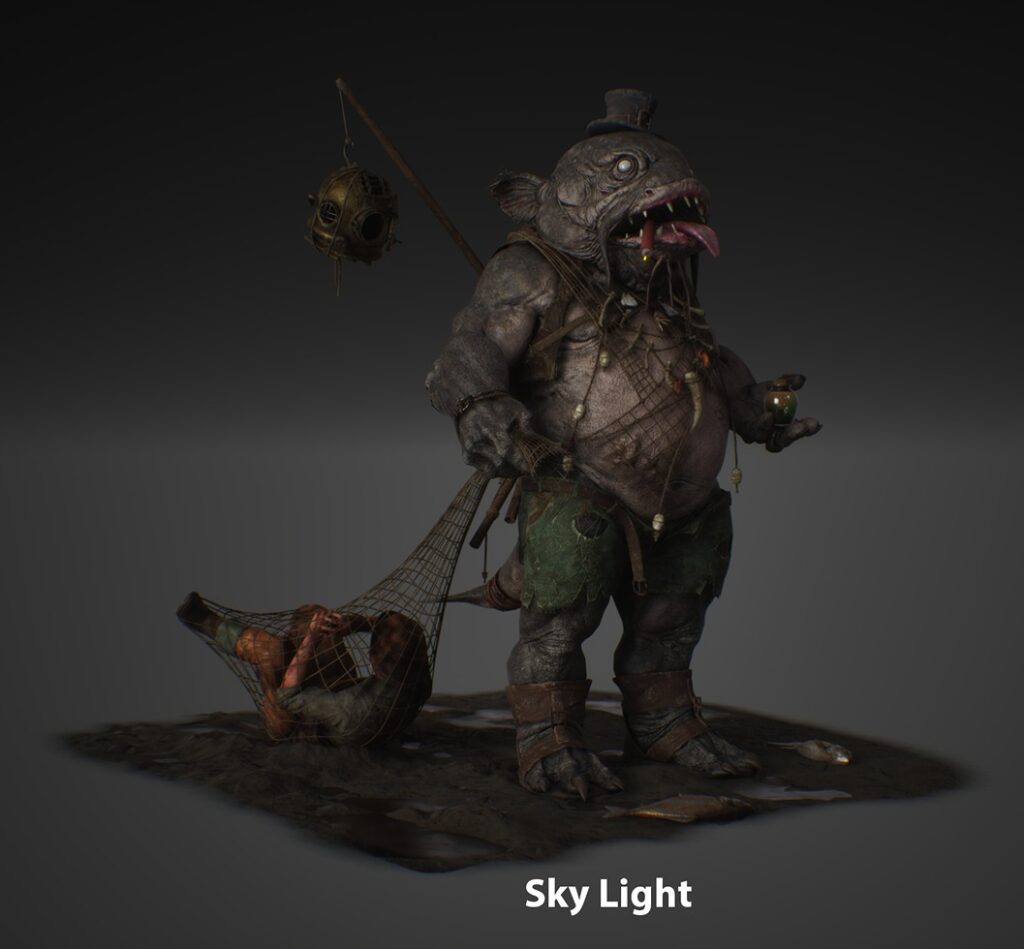
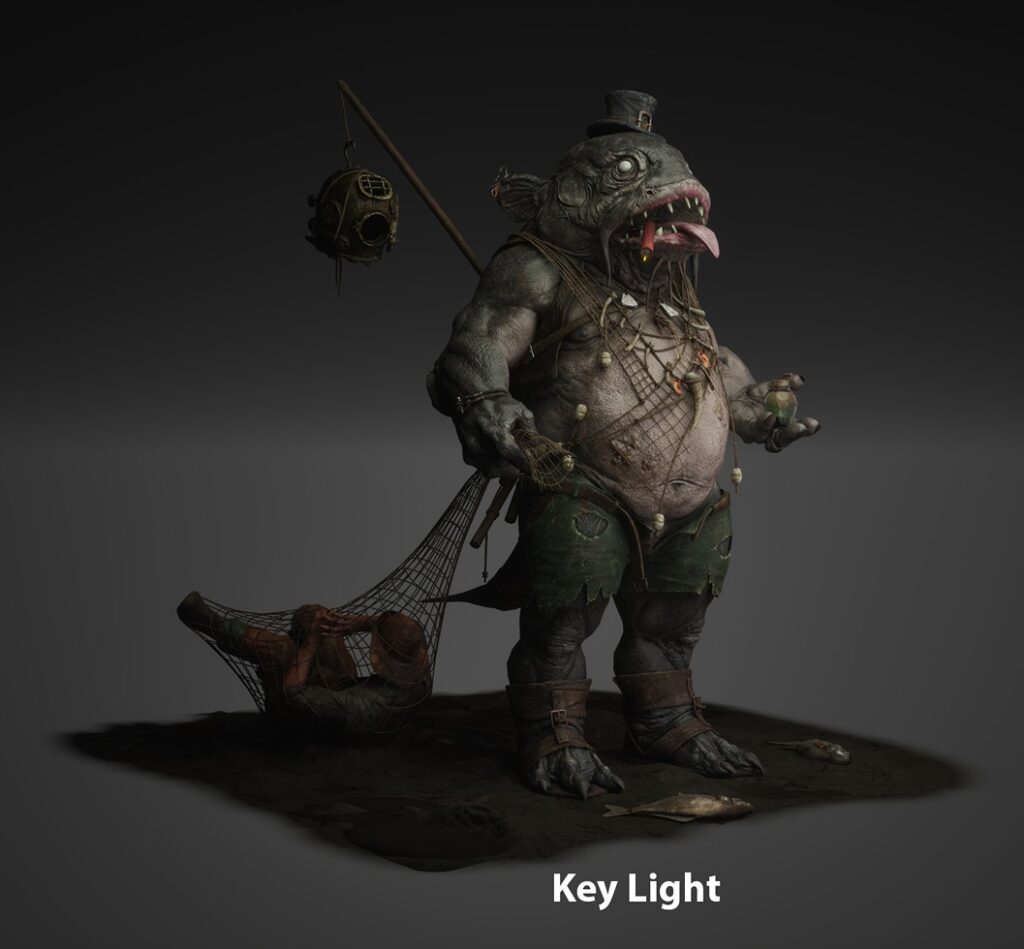
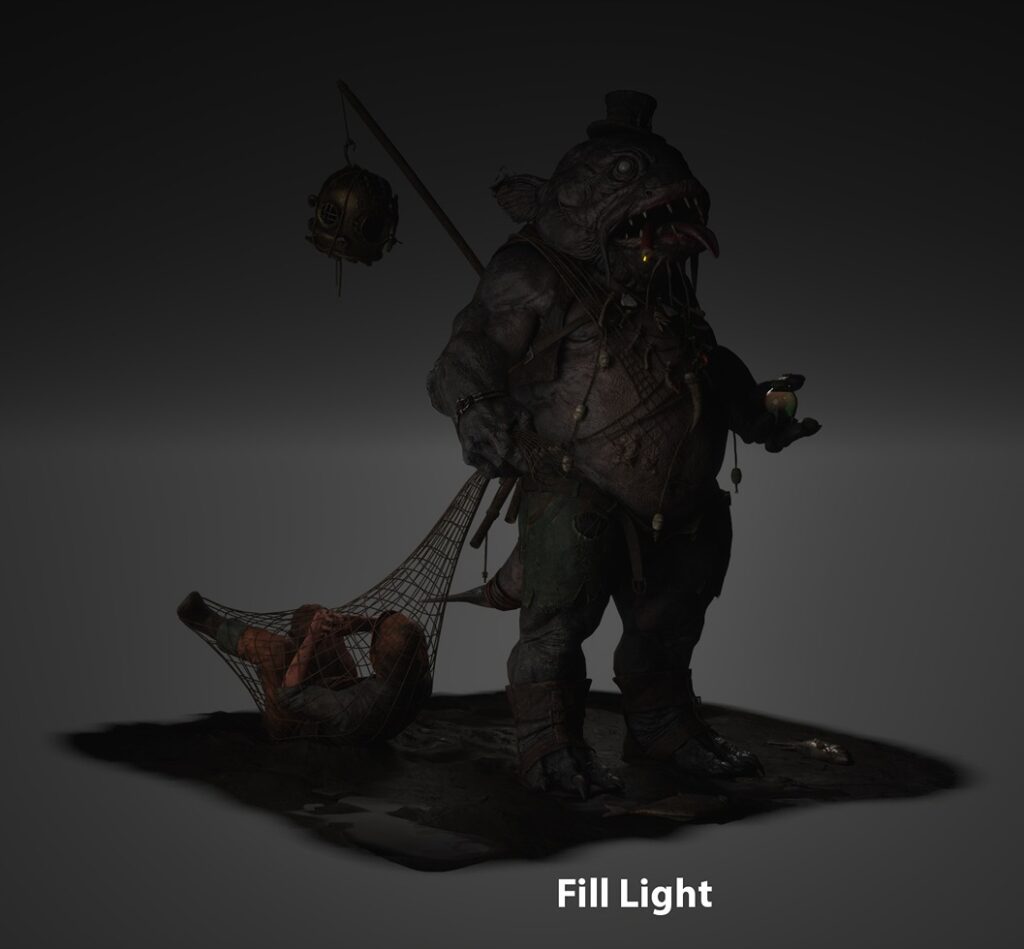
Lighting
Lighting played a crucial role in bringing the character to life. After setting up the main camera, I used a combination of Rim Light, Fill Light, Key Light, and Skylight to emphasize the character’s form and textures.
Careful positioning and intensity adjustments ensured that every detail was clearly visible in the final render

Conclusion
Working on “Kemza” was a deeply rewarding experience that pushed my skills to new heights. Starting from an idea and bringing it to life as a fully realized character required dedication, patience, and creativity.
I am especially grateful to my colleagues Vladislav Cvijović and Bojan Spirovski for their guidance and support throughout the project. Their input was invaluable in achieving the final result.
Personal projects like this are not only a way to showcase my abilities but also an opportunity to learn and grow as an artist. Despite the challenges, the effort always pays off when the character comes to life.
Read more articles
You might also like these articles.