Ithildin Door


Introduction
Hi! My name is Artem Ostapchuk, I currently work as an Environment Artist in VRFactory, Warsaw, Poland. In addition to the main job, I also do freelance and personal projects.
I wanted to create games since I was small - back then I drew platformers and sketches in notepads. To pursue my dream of working in game dev, I moved from Ukraine to Poland to study IT at Vistula University in Warsaw, and during my studies, I was engaged in self-learning programming and 3D graphics, which I liked more. Only thanks to constant learning and self-improvement did I get a few freelance opportunities and full-time work before I got an engineer's degree in computer science.
Start of the Project
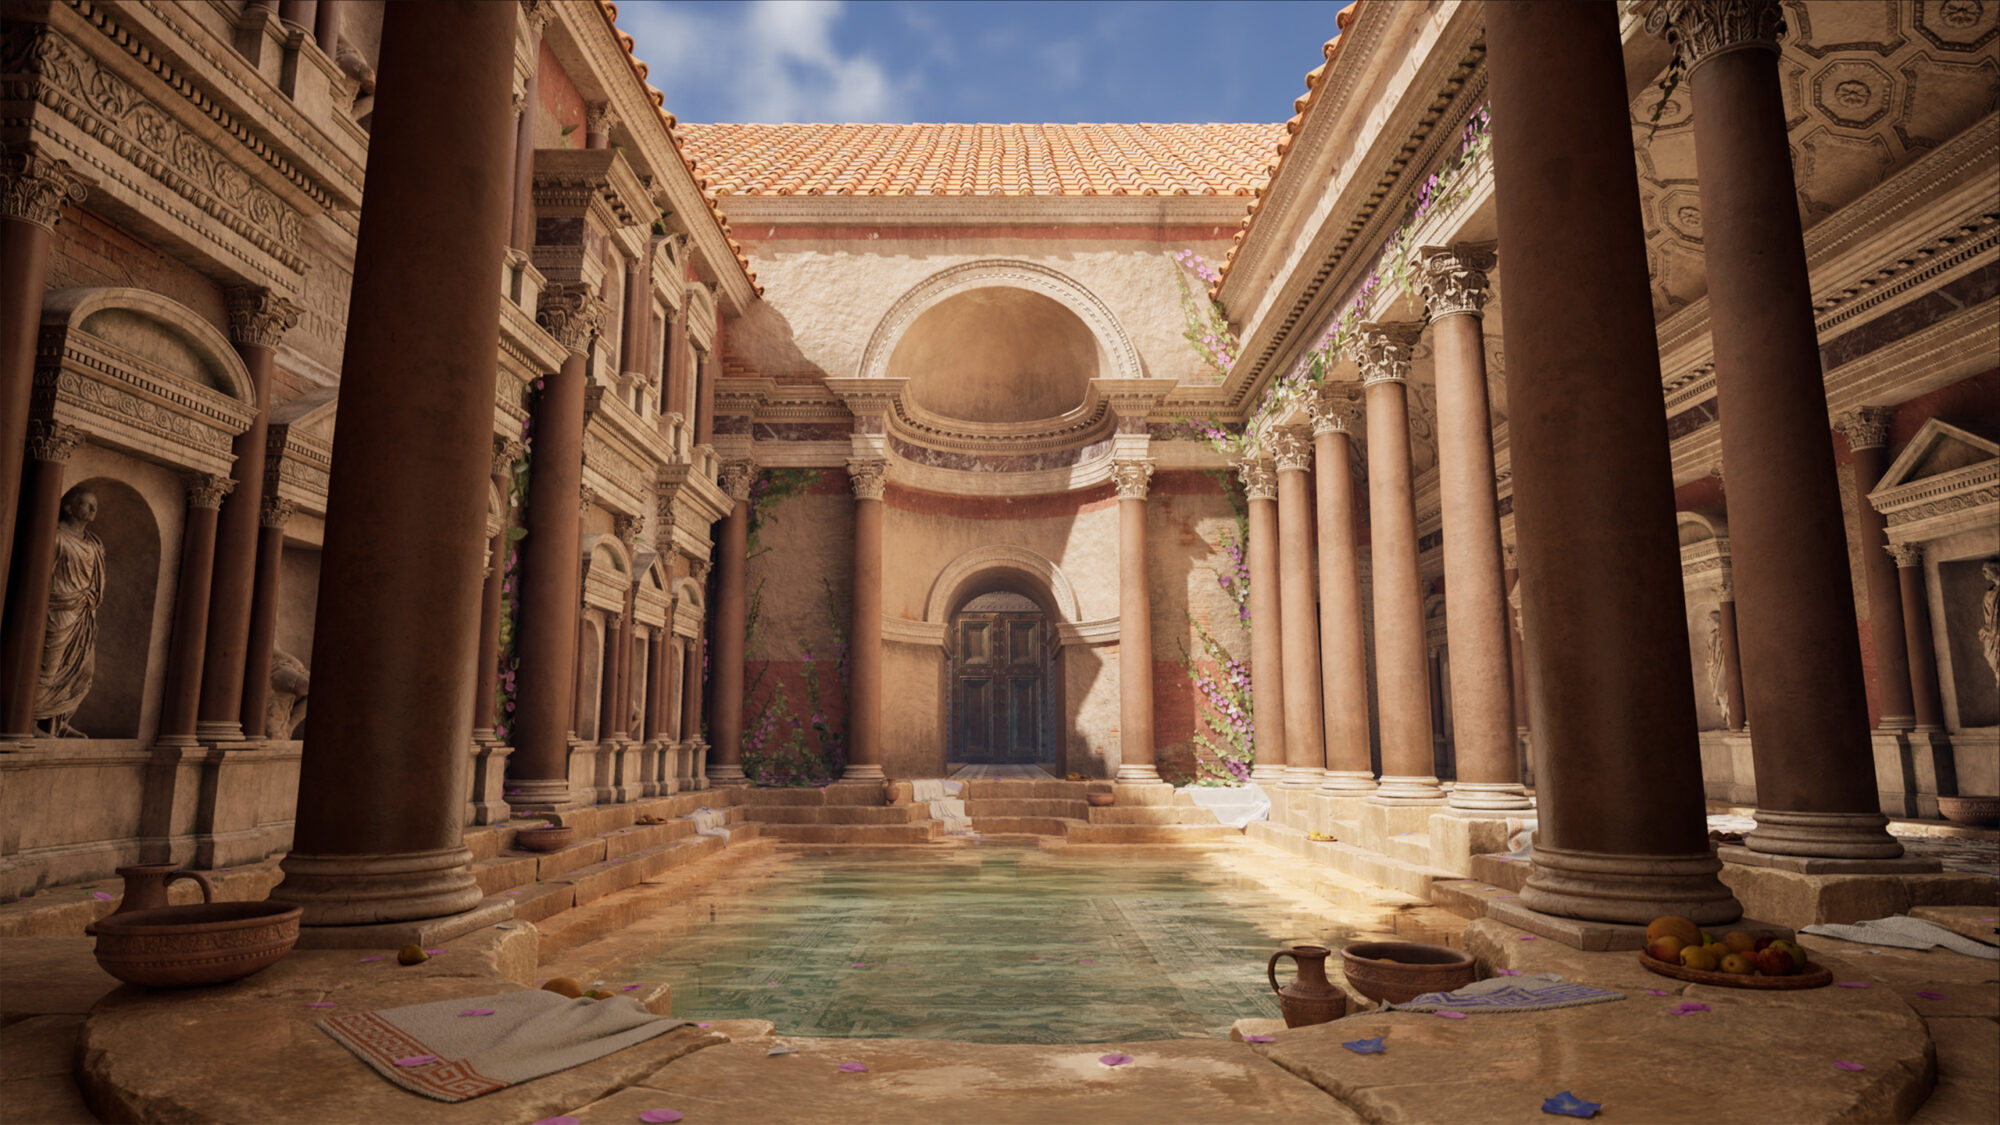
The project Ithildin Door appeared as a desire to improve my sculpting and lighting skills since my previous environments were mainly in sci-fi style. Also, this time I wanted to base my environment on good concept art, since my last environment, Alien Wars, changed a lot during creation because it was hard to catch mood and composition in a small room. That’s why I searched for good references and concepts in the fantasy genre. Then I remembered Tolkien`s fantasy world – that led me to recent games that take place in this world – Shadow of Mordor and Shadow of War. And then I saw this awesome concept for Shadow of War by George Rushing.

From the first time I saw this concept art, I knew that this is it – I want to recreate this in UE4.
References
The start of this project was a great opportunity for me to play Shadow of War and gather references from the game – luckily the game has photo mode which helped me a lot. I also re-watched all LOTR movies and read lore of middle-earth to understand this world and this environment in particular. The game version of this environment is very different from this concept, so I wanted to pay as much attention to the original concept as I can. For material references, I bought a gothic ruins reference pack and used some of the photos I have made during my previous vacations.

When it comes to recreating concepts, it is important to understand that you will not be able to recreate it in 3D with 100% accuracy. Environment concepts are made to give you a feeling of the scene, they don’t need to be perfectly accurate. Some parts may be kitbashed or copy/pasted. Some parts may be partially invisible because of small opacity or eraser tool. Your task as an environment artist – to fill these gaps and create something new. This scene is no exception – there are minor differences from the concept, but they are not crucial (also lighting is not so vibrant because I wanted to make it look closer to the LOTR movie trilogy).
I tried to match my scene to concept art by drawing lines on big objects in order to understand the proportions of objects on the scene. LUCKILY, there is the main character present on this concept – it helped to calculate the size of objects and distances between them.

(Yellow – guides to understand perspective and proportions, Green – imperfections in concept, Blue – size comparison)
Blockout
My pipeline for blocking out environments is simple – I make all of it in Blender, and then export all of it to UE4. I`m using the “Blender for Unreal Engine” plugin which helps me export things from blender to UE4 really fast. This plugin has a lot of useful tools, so I definitely recommend it. Also, on the early stages, I like to apply world tiled materials on blockout meshes (instead of grey or white materials), and make a quick automatic UV unwrap of the blockout meshes for lightmaps – it helps with lighting and mood a little bit (don`t forget to uncheck generate lightmap UVs).
I export big blockout meshes, but not the whole scene at once. Why? Because I want to do test bakes and if all scene is one blockout object – it will have terrible lightmaps. Yes, I could use movable lights, but since the lighting in this scene is crucial, and have a lot of indirect lighting, I wanted to start playing with static lighting as soon as possible.

So, the pipeline is very basic – blockout in Blender, then export a few merged blocks to UE4. After that, I create assets and trims and change those big blockout meshes to the ready models. When it comes to the position of each block – before export to UE4 I set the origin of each mesh to 0/0/0 of the scene, so in UE4 I have the same mesh position as in blender. It saves a lot of time during the blockout phase because this way you can quickly make a rough blockout in Blender and watch a preview in UE4 in a matter of seconds.

Materials pipeline
After finishing the blockout, I started planning trimsheets and unique meshes. I started by creating tileable materials since the majority of assets will use them. All materials were created in substance designer because I wanted them to look as close to concepts as they can.

I also created trimsheets in substance designer, but for some elements I used Zbrush. I sculpted the base in Zbrush and then added details in substance designer.

All small details on the normal map like cracks and imperfections were on the top of the main normal map (but some meshes were created using weighted normals pipeline and normal map overlay) and were world-aligned.
Also, in my master material, I used two types of material layer blending – by using vertex paint and by using masks. I mostly used vertex paint, but some meshes (like statues) were using masks. I used channels for the next masks: R for dirt, G for spots, B for moss, and A for the additional cavity.

After I created a few meshes and experimented with my master material, I was satisfied with my materials and used this pipeline for the majority of assets in this scene.

Sculpts and destructions
I knew from the beginning that the statue of the guardian will make the most of this project`s time to create. I`m not a character artist, but some time ago I spent a lot of time in Zbrush sculpting characters. I made this statue from 4 pieces: guardian with a sword mesh, shield, helm, and coat. I wasn’t creating guardian mesh from zero, I took one of my basemeshes and posed it in blender by using rigify plugin. After that I made a chest armor with a pretty simple pipeline – polygon stripes over the body with solidify, bevel and subsurf modifiers. Cloth meshes were sculpted in blender since I wanted to try new cloth sculpting in Blender.

Sculpting of the shield was pretty straightforward, time-consuming, and relaxing, still, it gave a nice result – I masked ornaments on basic mesh and then used inflate under the deformation tab. The majority of destructions were added later in substance and UE4. Helm was created the same way.


Partially destroyed statues were created with simple booleans and additional material for destroyed parts. No highpoly sculpts and bakes, just lowpoly stuff with material blending. The same was made for some partially destroyed pillars. I also tested simulations in Blender in order to make destroyed pieces of statues laying on the ground. First, I applied cell fracture addon to my lowpoly mesh and then made a simple fall simulation where each piece of mesh was an active rigidbody. Here is one of my first tests of this pipeline.

I then simulated this falling animation for only those parts of the mesh that I need and with simple wall collisions in order to have a little bit of control of how and where those blocks will fall. After that, I applied simulation and started to move and copy blocks in order to make it look better and to better match the concept. In the end, I also added small debris (with simulation). Everywhere else in the scene I added debris with the help of a foliage tool, but here I wanted it to be more accurate. I also used simulation for silver coins and few assets in this project.
All floor pieces are made of one tileable pack of stones that I sculpted in Zbrush. That’s not optimal, and I shouldn’t use this in production, but for my portfolio, I wanted to sculpt them (also added dither temporal to the material for a nice blending effect with the ground). With tiled ground and vertex paint water, it gave a nice result.

Lighting
Lighting was the hardest part of this project, I had to use every bit of information I have about lighting to make this scene look nice and close to the concept. I had to use combinations of static, stationary, and movable lights, tweak attenuation radius, shadow settings, lighting channels, indirect lighting, and so on. Some objects (like statues) were intentionally lighted with additional lights on another lighting channel to better show the profile and in order to draw attention to these meshes. I also enabled volumetric fog for this scene and added a few fog planes in order to add a little bit of mystery. Here is a detail lighting preview of my scene.

Ithildin door drawing is just an emissive decal projected on the wall. It was better for me to model the base of it in Blender and then add additional details to the mask in photoshop than do it entirely in photoshop.

Trimsheets and props
It is important to break forms a little bit – there is nothing perfect in our world (you can break forms even more if you`re doing a stylized scene).

And, as mentioned before, you should use vertex paint and decals – they will help you hide the modularity and tileable textures.

Candle material is based on my PBR material preset for small props of this scene, but I also added a simple vertex-based emissive. With fresnel, it gave a nice result, so I didn’t have to make a translucent material.

Spider web material was made in substance designer and photoshop (base in designer, details and variations in photoshop).

When the project was ready, I assembled all shots in photoshop (this time I didn’t use photoshop postprocess or UE4 LUTs, just prepared postprocess material in UE4). For video sequences I used sequencer cameras, and then assembled videos in DaVinci Resolve.
Conclusion
This was a very interesting and exciting project to work on. There always will be some things to change (and some errors on renders), but there is no limit for perfection so I ended up with the result you can see on my page. I tested a lot of new things and am very happy with how this worked out. The main challenge for me in this scene was lighting, and I put a lot of effort so it looks close to concept and LOTR world mood.
P.S. When working on my art, I always try to enjoy it as much as I can. That’s why I like to add some easter eggs and references for my friends and family. Working on personal projects sometimes can be not so inspiring as in the beginning, and such things as personal touches and easter eggs helps a lot with motivation. I always try to keep in mind that I am making it in the first place for myself, because I love it, and it helps me to continue. In the end, I will show you a meme that I have made just for fun for my friends some time ago (which references a smiling house from one of my previous works).

This environment is far from perfect, so if you have any suggestions or want to share with me some of your tips, feel free to contact me on artstation, I`ll be glad to hear from you.
Cheers!
Read more articles
You might also like these articles.