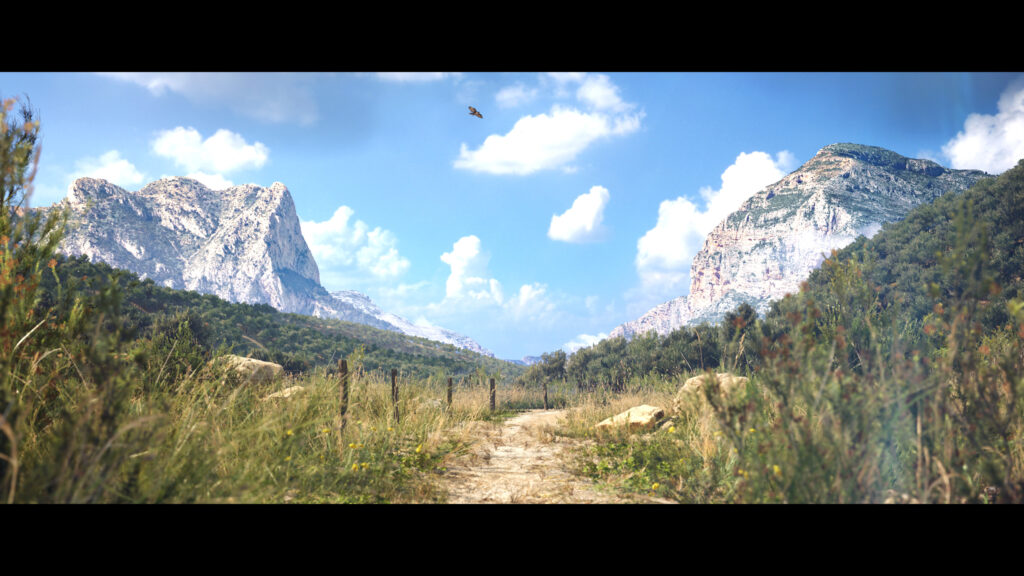
Forests of Valencia

Introduction
Hi, my name is Pontus Ryman, I am currently an Environment Artist at Embark Studios.


Inspiration and Reference gathering
My last project, Summer Archipelago, left me with a strong content base in terms of shaders and other technical solutions, so when I started planning this project I had an idea about using that content to create a follow-up video with the same framework and structure as my last video.
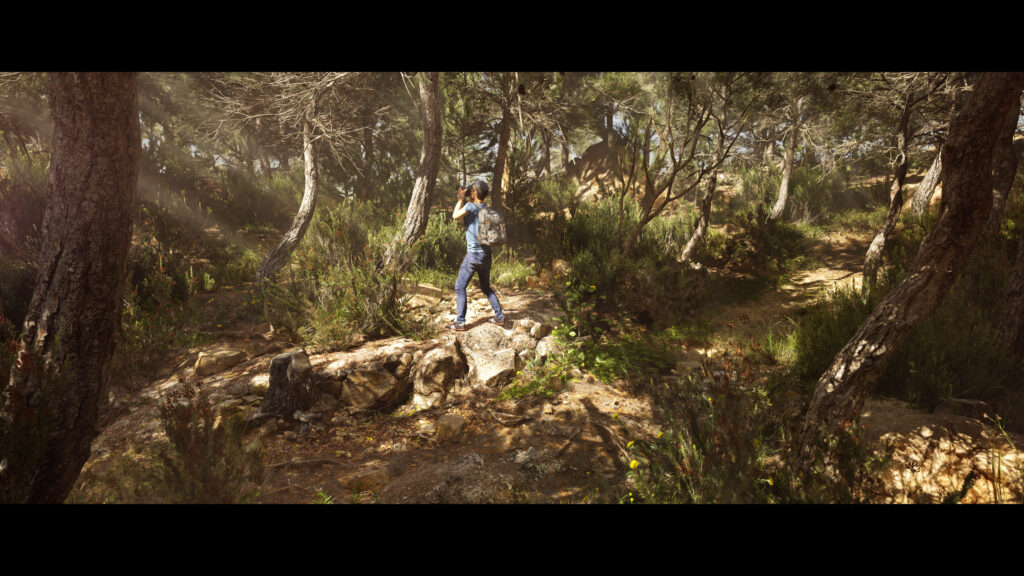
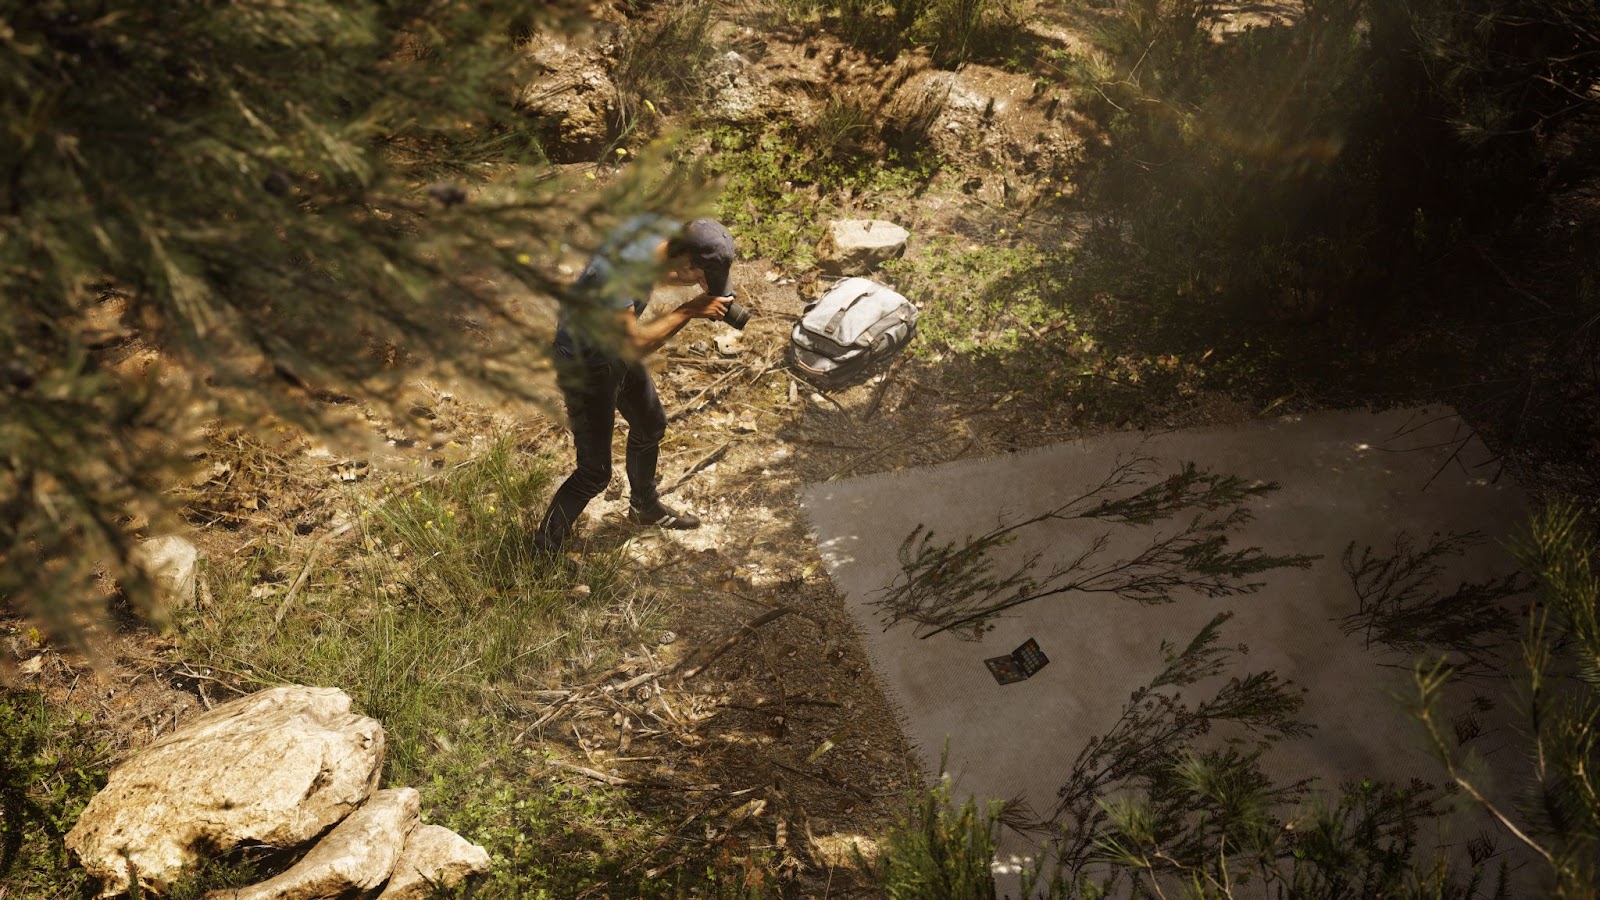
I was going with my family to Spain for a week and I thought it would be an excellent opportunity to create something vastly different in terms of location, but that could still live within the same theme as the last video. Going to a unique location also gave me a lot of opportunities to collect a large number of reference images and video content.

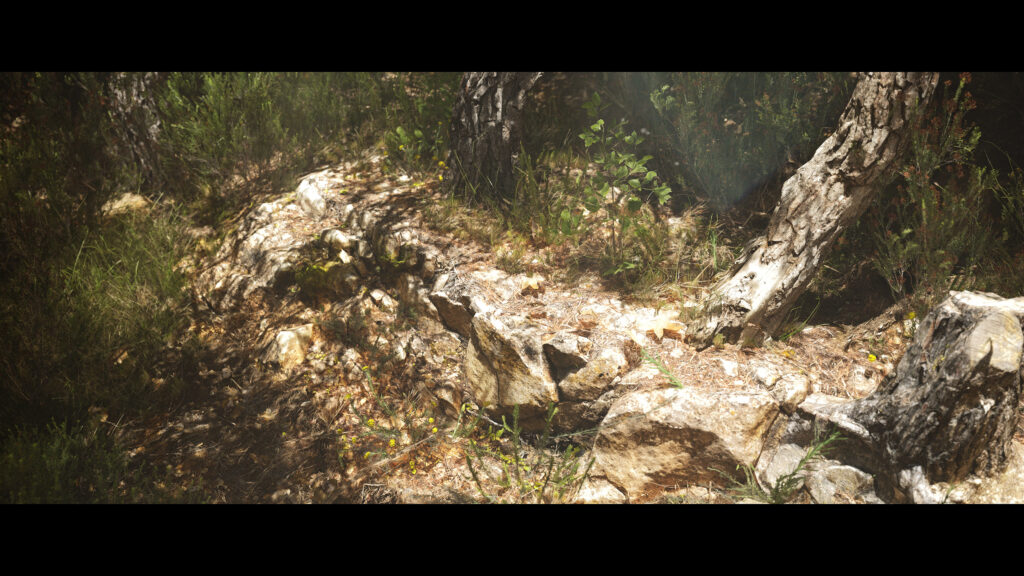
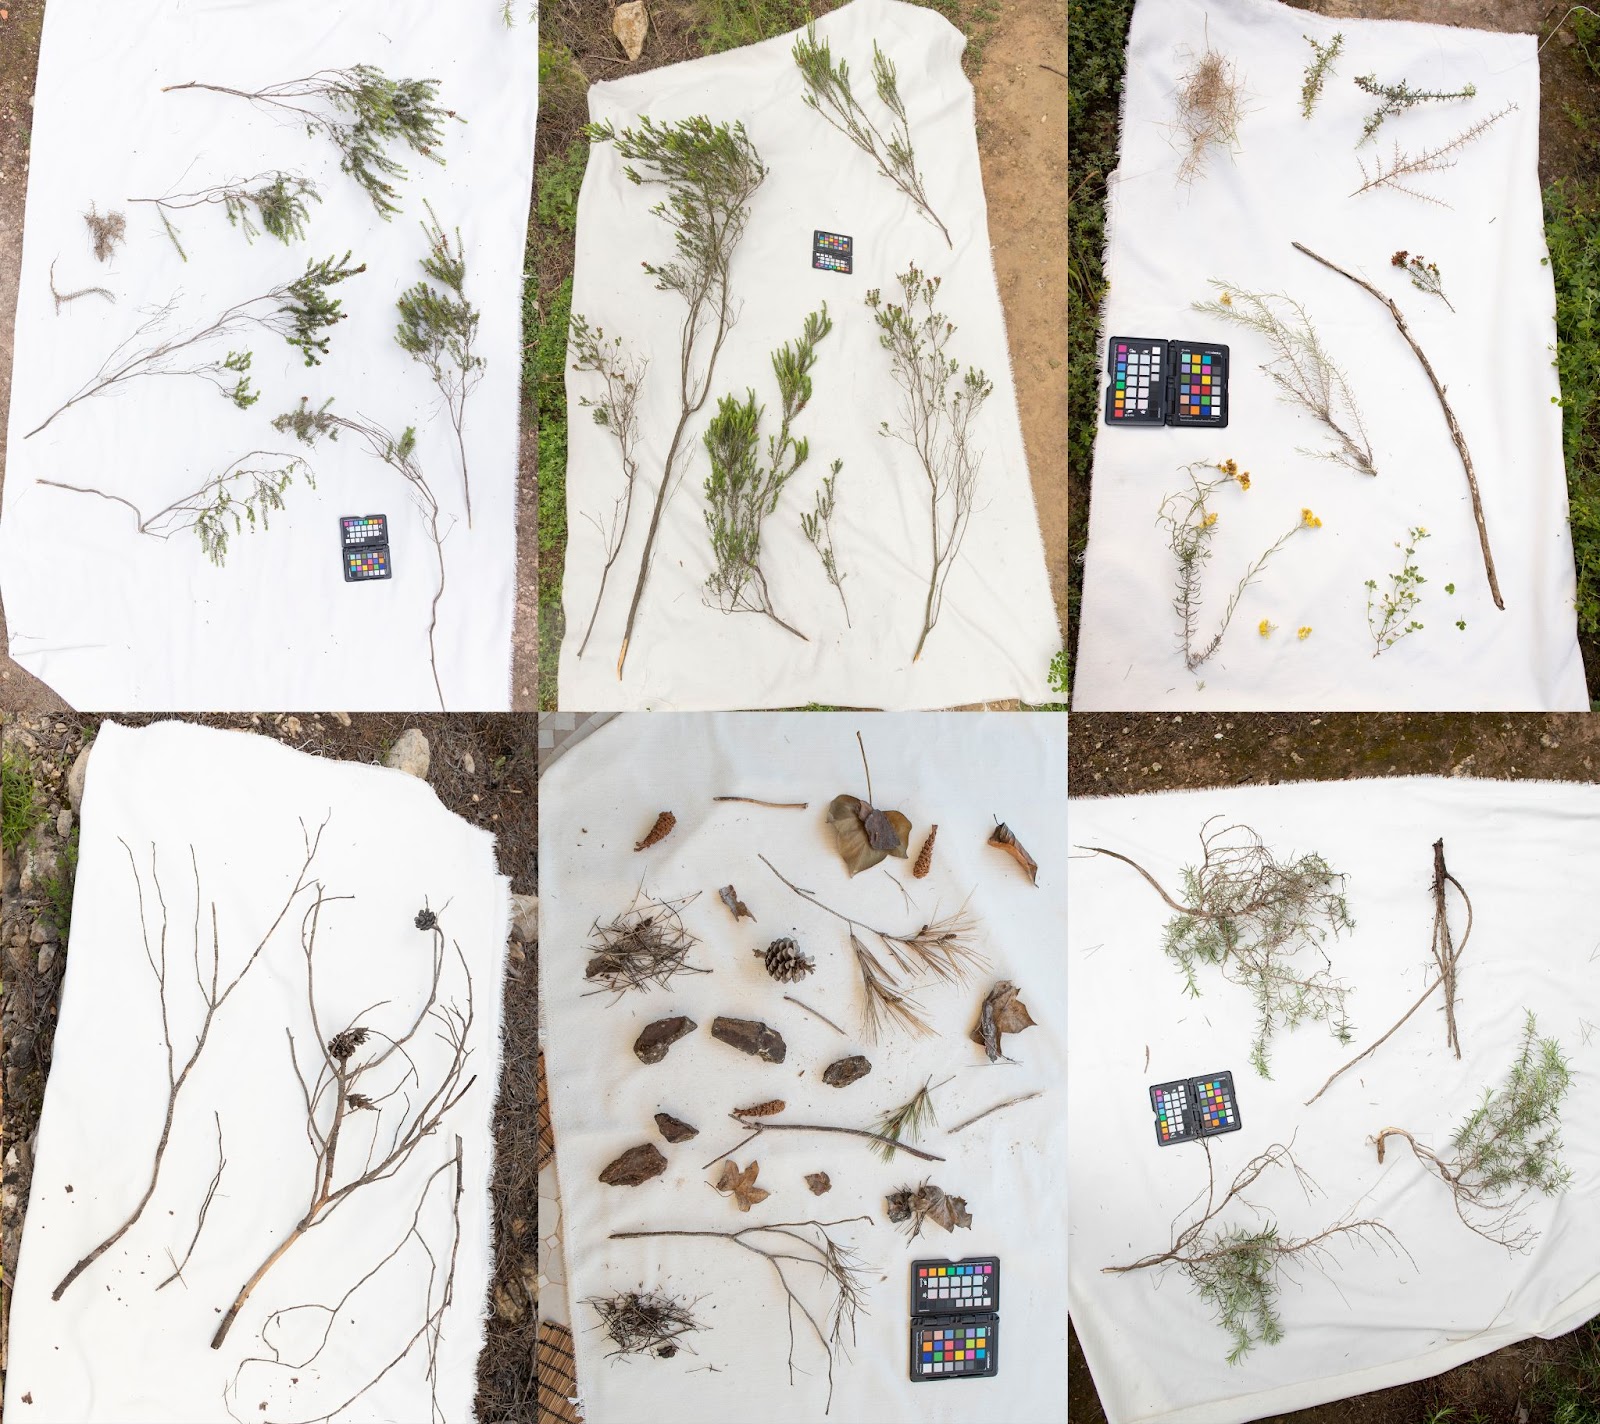
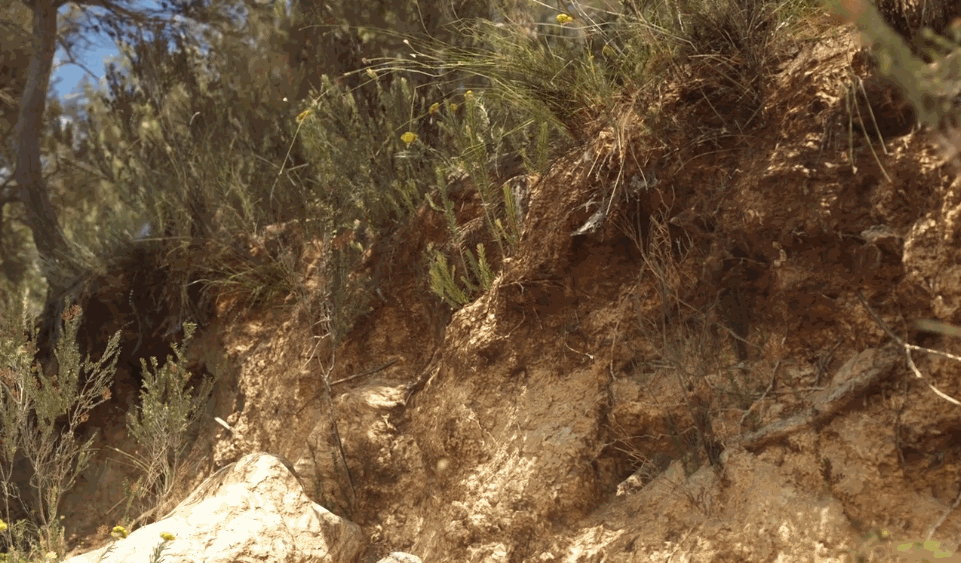
Some of the reference images gathered at the scanning location
I could both scan assets for the in-engine content, get references I could use for the content and for direct composition reference as well as gather video and audio material from the same location. This helped focus the style and look of the location from the onset of the project.
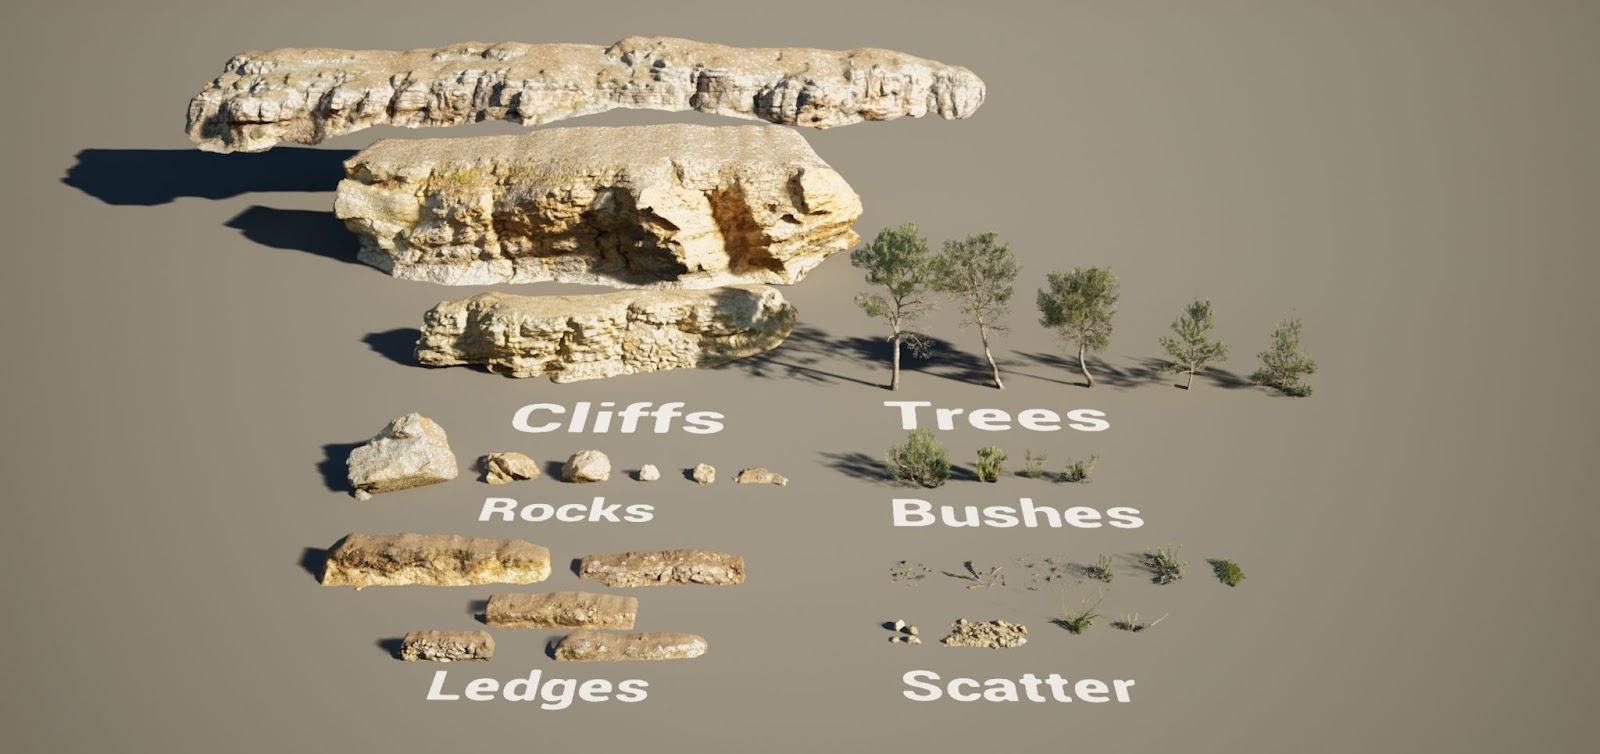
Photogrammetry content
The entire project is based on photogrammetry, and with a strong pipeline already established, I just had to get to work and create a new set of photogrammetry content tailored to the Spanish forest.
I had done some upgrades to the base shaders in between the projects but for the most part, the pipeline was the same.
In the field, I do my photogrammetry work with my Canon 6d MKII where I focus on collecting content that covers all the sizes and types of content there is to be found in the Biome.
I usually categorize the content into XS – S – M – L and XL sizes and by the rule of thumb I try to capture at least 3 of each size per category (if there is a size applicable for the content)
So, for example, there will be 3x XS rocks, 3x S Rocks, etc, while trees do not come in XS or XL sizes I capture the range of sizes that is available. Some assets might be considered “Cliff” instead of “Rockwall” and so on, either way, the important part here is to keep yourself structured, consistent and organize everything from the start.
Here is a sample of the content I gathered. The folder structure and naming convention do not need to be perfect for a personal project, but it’s very valuable to keep an organized workflow that at least gives a good overview of the content you have to work with.
I also have .blend files (in this case the Spain_Forest_Rocks.blend) where I have dumped every MID poly of every scanned asset of that type into one scene so I can see the 3d models together before I choose which ones to produce a low poly for and get into the engine.
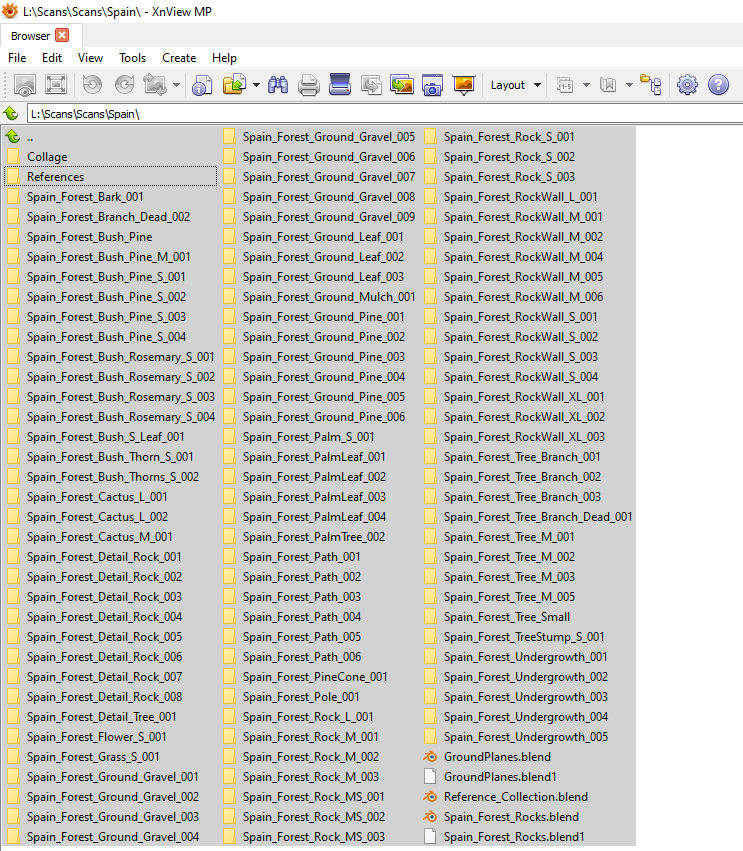
I use “XN View” for working with a lot of heavy images and folder structuring.
This is generally the “guideline” amount of content that I aim for, but sometimes due to time constraints, bad weather (bad as in, a bright sunny day which is not preferable for photogrammetry, the best case weather is always overcast) or the lack of the content in nature at the location can limit the amount of content acquired.
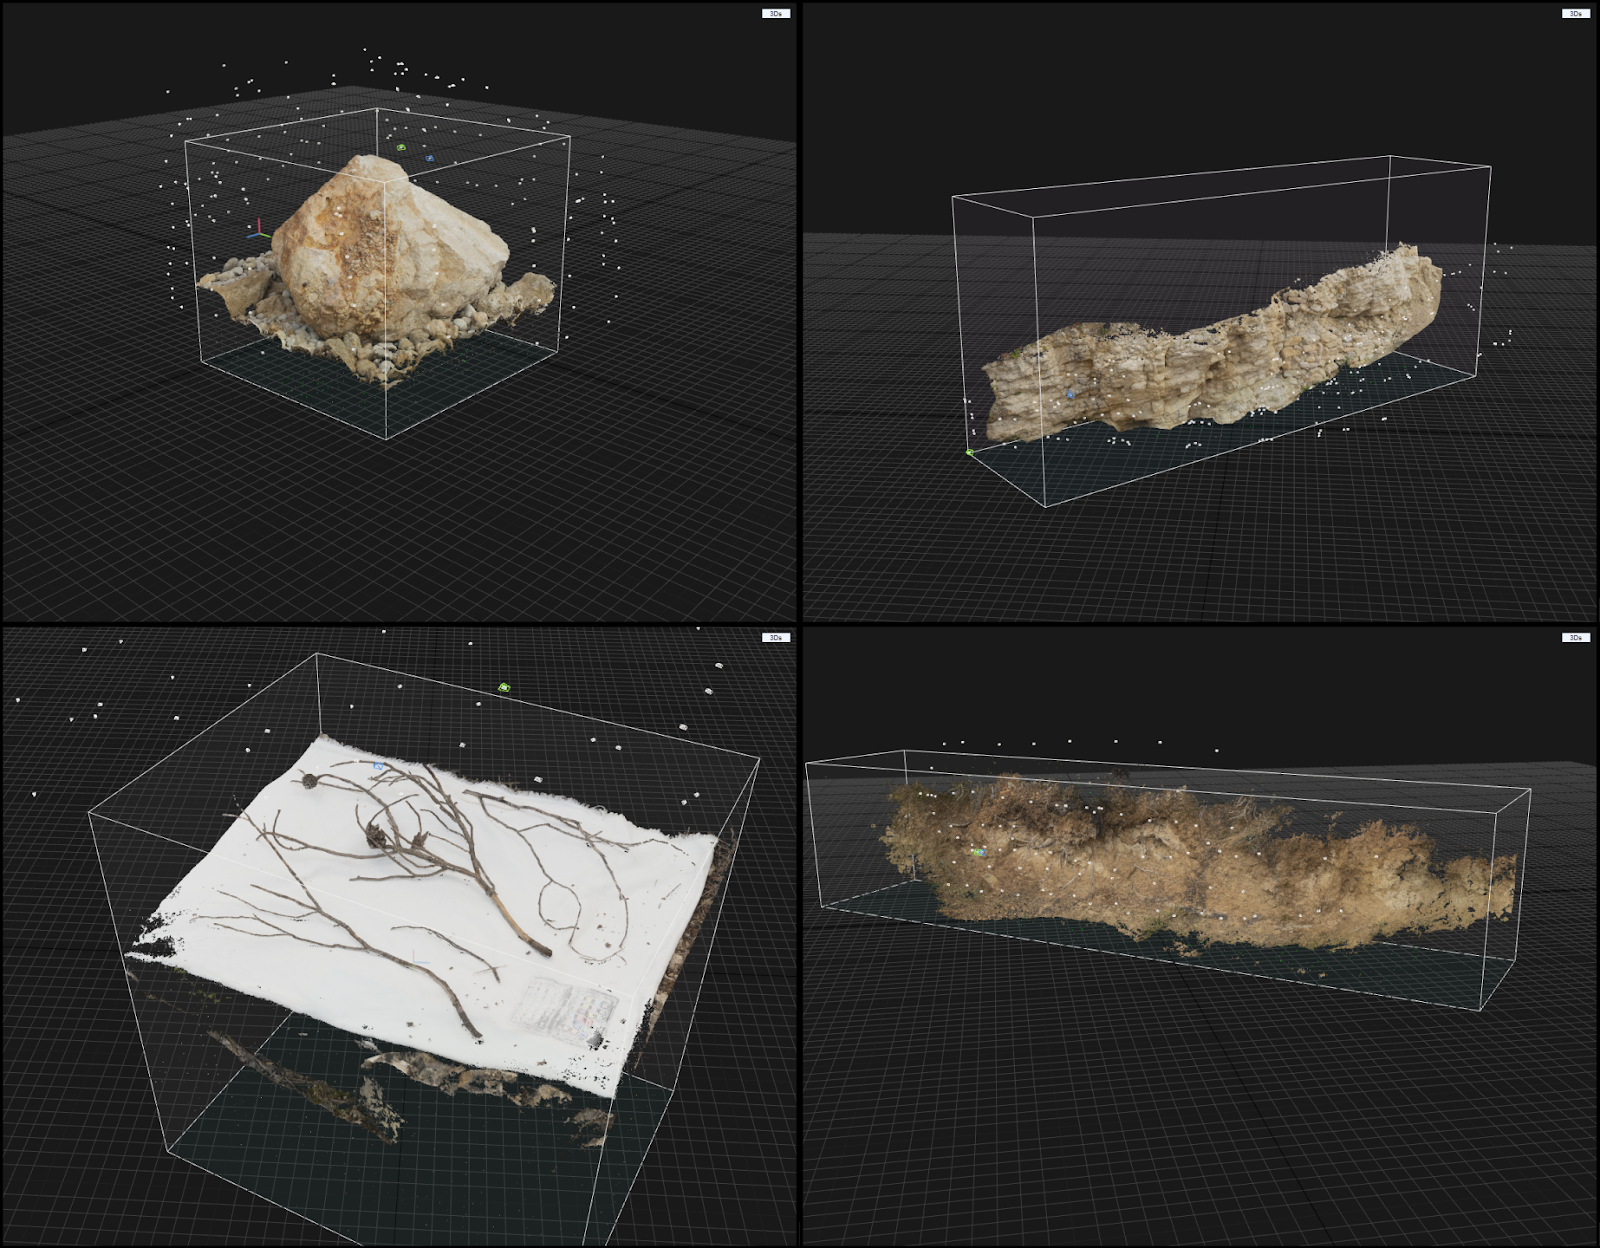
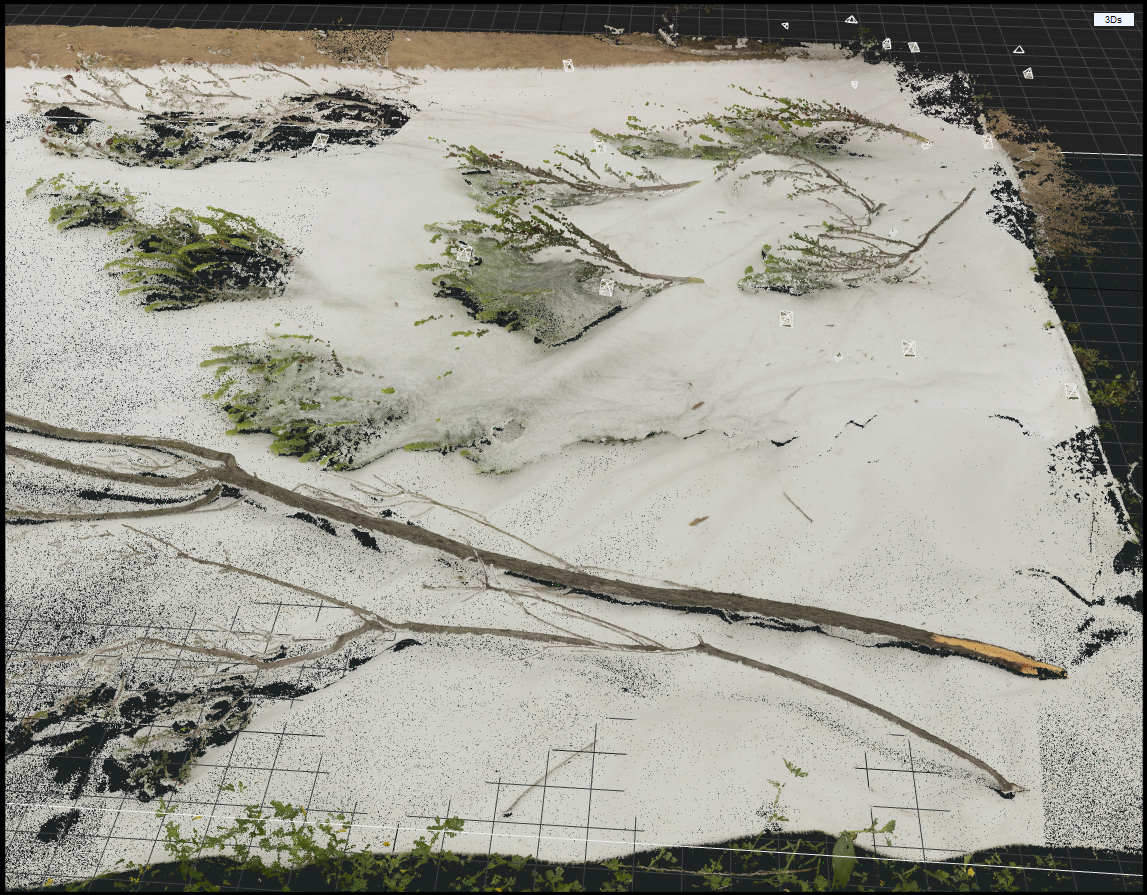
A small collage of some of the photogrammetry assets was collected for the project.
Usually, it’s not a problem as sometimes having to work within the limitations given is part of the process.
When capturing rocks, tree trunks and other more solid objects I go for the traditional approach of grabbing as many images as I can of an asset from as many angles as possible, keeping the images sharp and at a good midrange brightness by balancing F-stop, shutter speed and ISO.
However, when working with vegetation there is more planning to be made in terms of how to achieve a good-looking end result
Scanning thicker or larger leaves is easier as it is usually enough to work through the traditional approach, but when scanning thinner vegetation like thin grass, sticks, or pine-based vegetation on a white sheet, it is not always guaranteed that the many thin details will be properly captured or kept solid enough to be bakeable down to a texture sheet.
In this example, the sticks and ground scatter (bottom left and middle) worked out as scans while the others were too fine and had to be sorted and then highpoly modeled using a more traditional approach
I always try to do a scan of a vegetation branch but at the same time, I always take a top-down image on the white sheet in order to cover my bases. When I get home I can then see if the scan works or if it becomes broken. If it becomes broken I will be doing a manual highpoly based on the top-down image as a reference. A full-frame image of each full branch is therefore always important to have in the group of images taken for each set of branches.
Here is an example where the pine needles on the scan were too small and smooth (pine needles having a waxy surface that does not always lend itself well to photogrammetry) causing the bushy part of the branches to fail, however, the branch stem can still be baked down and used!
Foliage workflow
For the alpha cards for the vegetation, if I did not manage to bake directly from a scan, I make a collection of the best branches I can find from images taken of the vegetation on top of the white cloth.
I arrange them in the way I intend the final alpha card atlas to look in photoshop and I try to keep away from having multiple branches that are too similar in size and shape while sticking to fewer variants with a more unique look per branch.
Fewer similar branches on the sheet will give more resolution to the branches that are present and the variety will help when creating the 3d mesh. It’s always a balance here, how many do you include in the alpha sheet vs how much resolution do you want to give each branch?
It always depends, and you have to keep the end result in mind and the size of the smallest detail you want to show off or how much variation you want to have that becomes more apparent at a distance with multiple vegetation assets using the same atlas sheet.
When creating the High poly I break it down to the smallest component such as a small collection of Pine needles and their core branch.
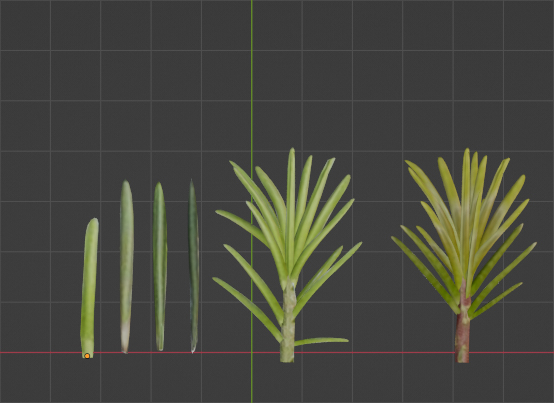
A small collection of the highpoly needles used for the creation of the high poly bushes.
By laying out the assembled alpha card sheet underneath I can trace the high poly model above it, this will ensure I model towards a realistic shape and help bridge the photogrammetry quality. I also try to use parts of the original sheet like the core branches. When the high poly is baked down I blend the two together to create a
realistic result. Sometimes the branches were good enough through the scan, so I get a partially photogrammetry-based alpha atlas sheet, this really helps bridge the quality.
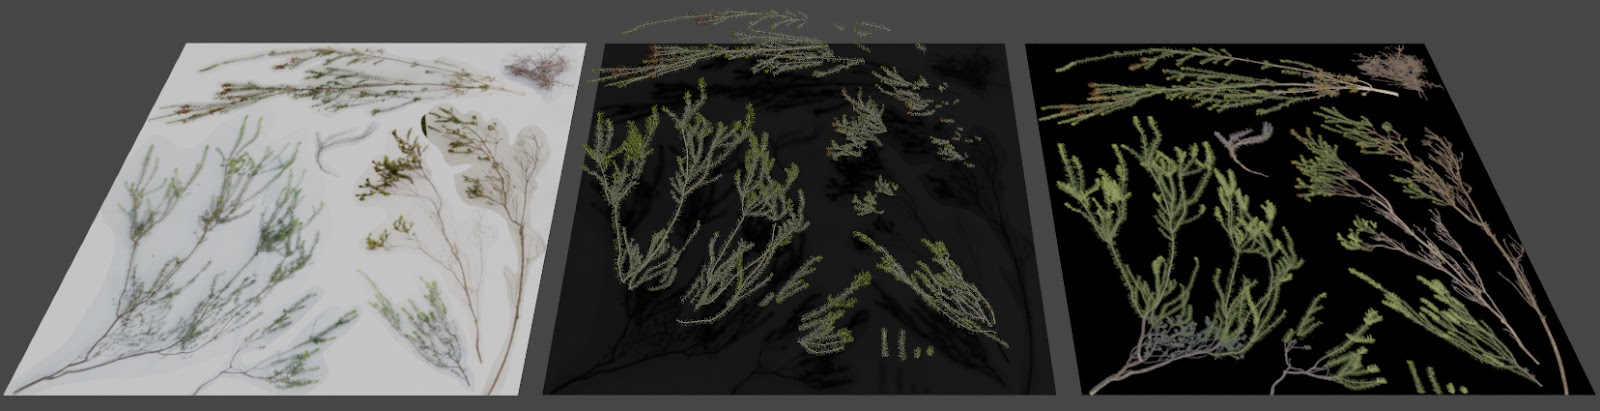
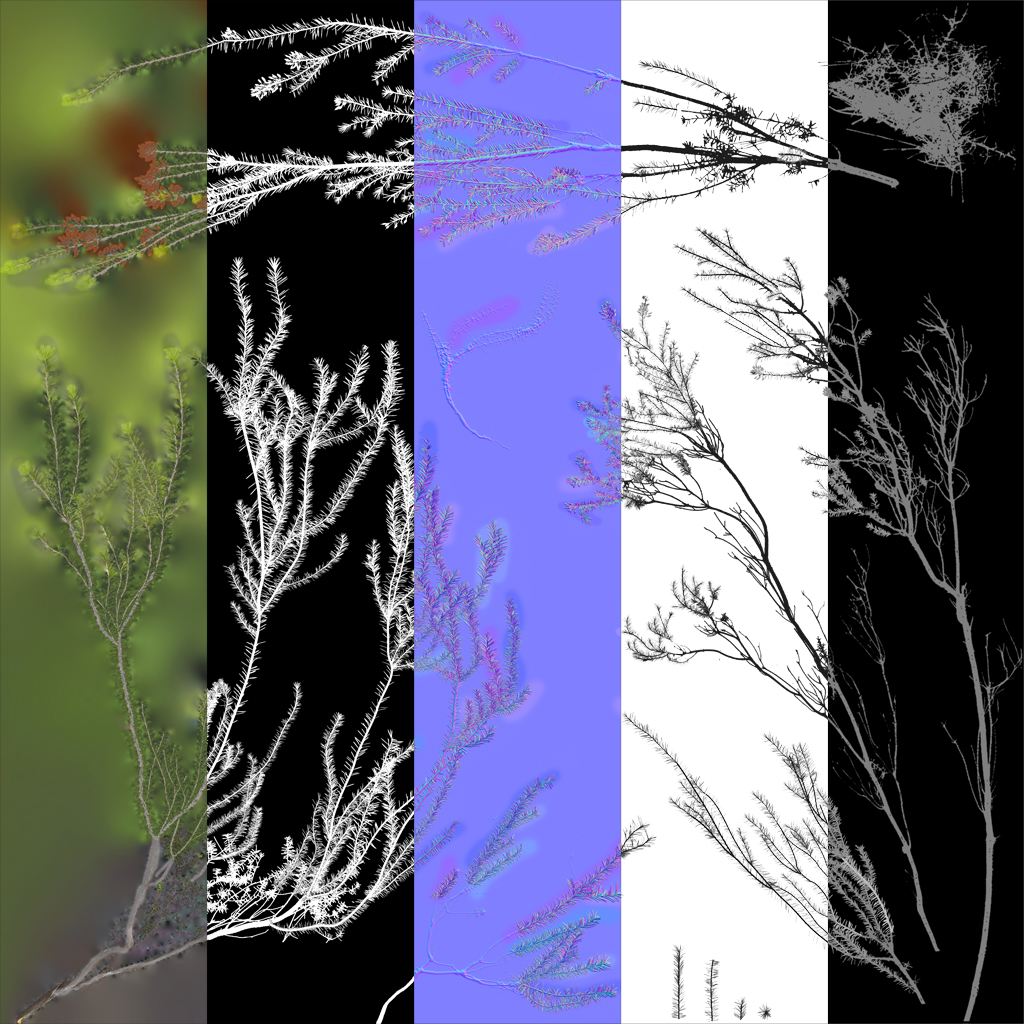
On the left is the flat atlas texture original where I have collected branches from the top-down images of branches taken on a white sheet, I’ve chosen the most fitting and varied pieces that I might need. in the middle image are the parts that I then highpoly modeled and baked down.
I then merge the modeled textures (Diffuse, alpha, normal, etc) with the assembled alpha texture base, mask in the high poly baked parts over the assembled texture since they hold the high quality in those regions while keeping the original parts for the stems. On the right is the final result with the two combined.
For this project, I created a geometry node procedural system in Blender to drag out splines that automatically populate the spline with a stem and needles, and with a few simple options I can rotate, angle, scale and add a tip of needed to each spline.
Variants of the same geometry nodes system would be used for different types of stems. This saved a lot of time in the creation process and I could easily go back if I needed to tweak the look of each branch’s highpoly.
This specific geometry node was set up to cater to one style of pine bush I was going to create but was flexible enough that the content (textures and models for the placed pines) that the geometry nodes asset was referencing could be switched out in order to create something different.
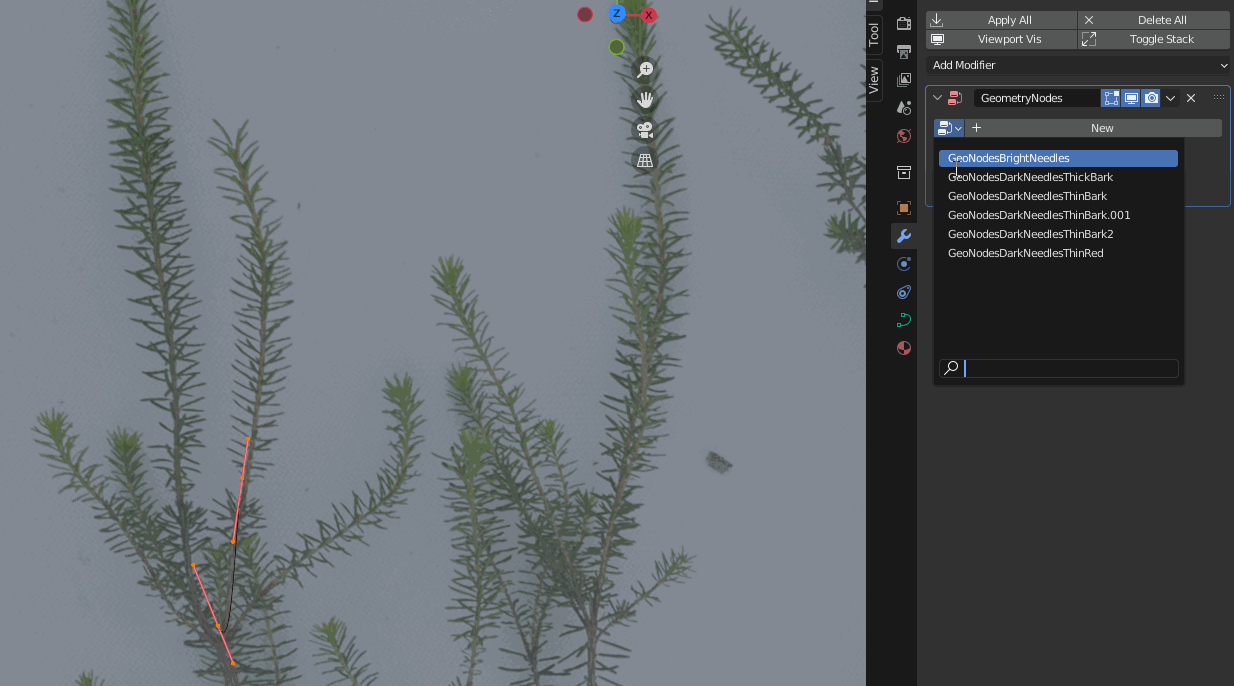
Here is a quick example of how the geometry nodes setup works in action, it’s quite rudimentary but speeds up the creation process significantly, and it keeps everything procedural so that its easy to tweak and adjust without working destructively
Once the splines that were using the geometry nodes setup were traced on top of the alpha atlas sheet from a top-down angle I just needed to bake down the high poly to a texture sheet.
I would also bake out a version where the highpoly was using an RGB texture that assigned colors to the pines, stems and seed pods. This gave me some color calibration flexibility in photoshop after, which I later used to balance and tweak the colors.
To create accurate SSS for the needles I set the needles to half transparency and the stems to zero transparency and baked a top-down shadow to a white sheet to light give passthrough and overlap shadowing. This created an accurate light passthrough map that gave the end result a realistic look even if it was just a flat plane being displayed.
It doesn’t have to be perfect since the overall combination of everything will bring it all together.
The final textures are then packed together into a “Color – Alpha” and “RG Normal, Blue SSS and A – H” packing setup. I also give the normals some extra directional weight by color picking from a normal map sphere and overlying it on different branches. It gives a little bit of extra depth and breaks up any flat-looking shading.
Once proper alpha sheets are made i use them in the creation of the trees and bushes in SpeedTree, while I always test out the cutting and branch layouts in Blender before going into speed tree in order to get an idea if the sheets are the correct sizes and work in a group, the actual in engine content is assembled in speed tree.
I work through standard speedtree workflows using the alpha cutout tool and use the nodes in the speed tree to structure the tree. Since I build at least 2-3 trees per size, I spend a lot of time on the first tree to get the right shape and size of the alignment of the branches and alpha cards. Once the first tree (or in this case, bush) is a prime example of what I want a tree to look like, the next few variants become significantly easier to create since the template has already been established, and I usually do not have to do much tweaking per variant after that.
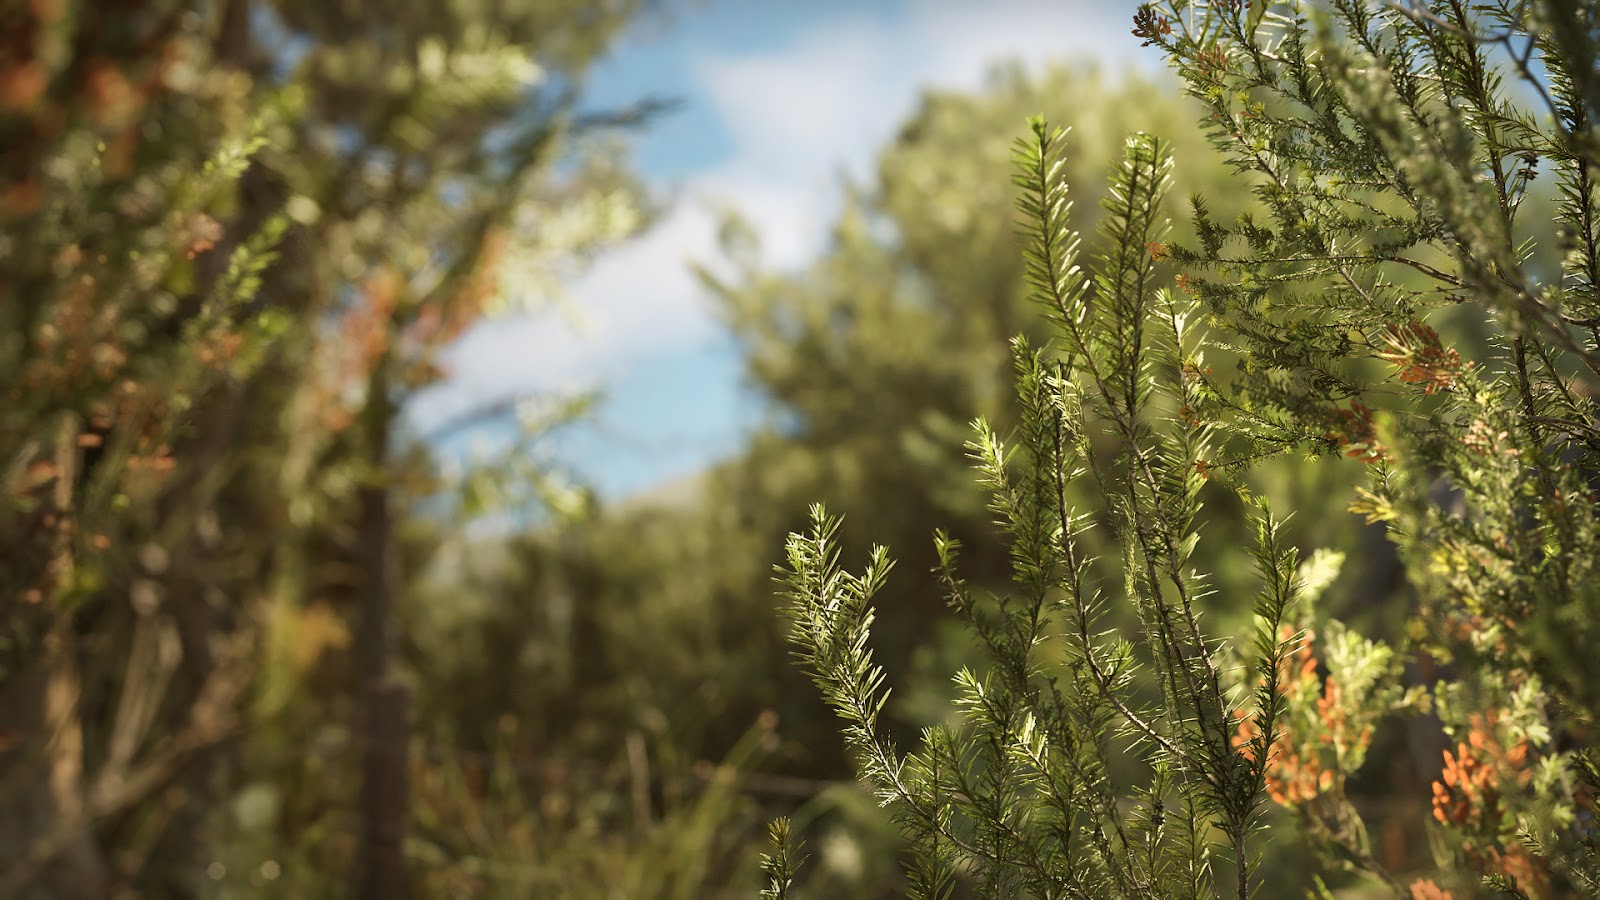
In engine result of the highpoly branch combined with the atlas scan branch base.
Terrain Layers
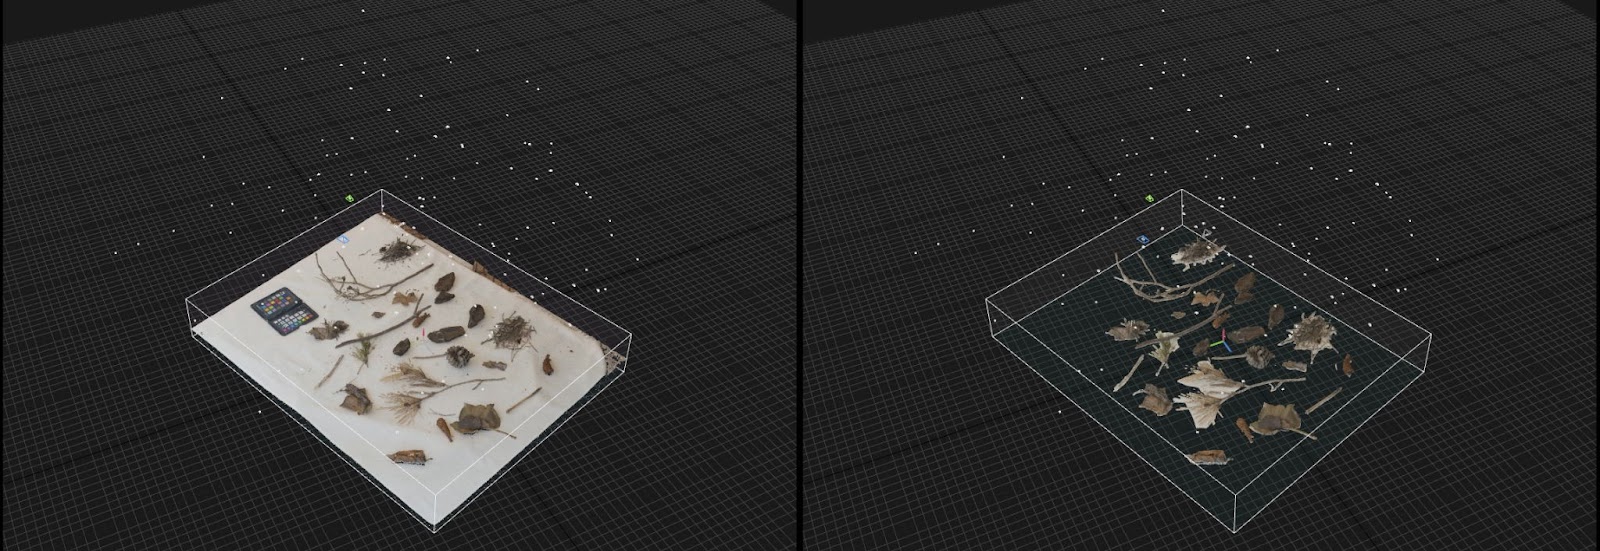
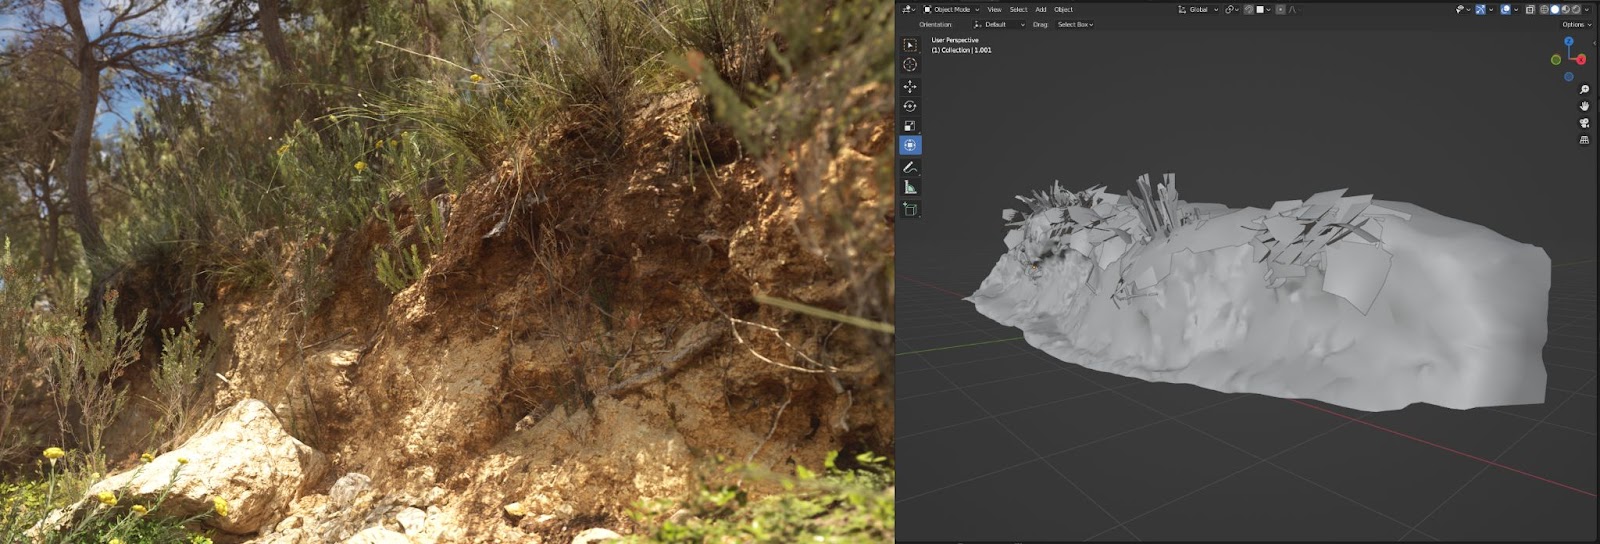
When creating terrain and terrain materials I simply bake down a piece of scanned ground which I usually scan at 2-3 meter square sizes. Preferably I want to have a ruler included in the scan to secure an actual size that I can use to set the tiling size in the engine.
I rely on contact shadows a lot for the terrain since Unreal Engine 5 does not have terrain displacement available, this means baking and balancing out a good height map. When making the contact shadow heightmap I always lightly overlay a desaturated version of the diffuse that I have done some light balancing on, it will help pop some of the extra details in the contact shadows. Even though this is not always technically “perfect” the visual quality difference is impactful enough to be worth breaking the technically perfect rule.
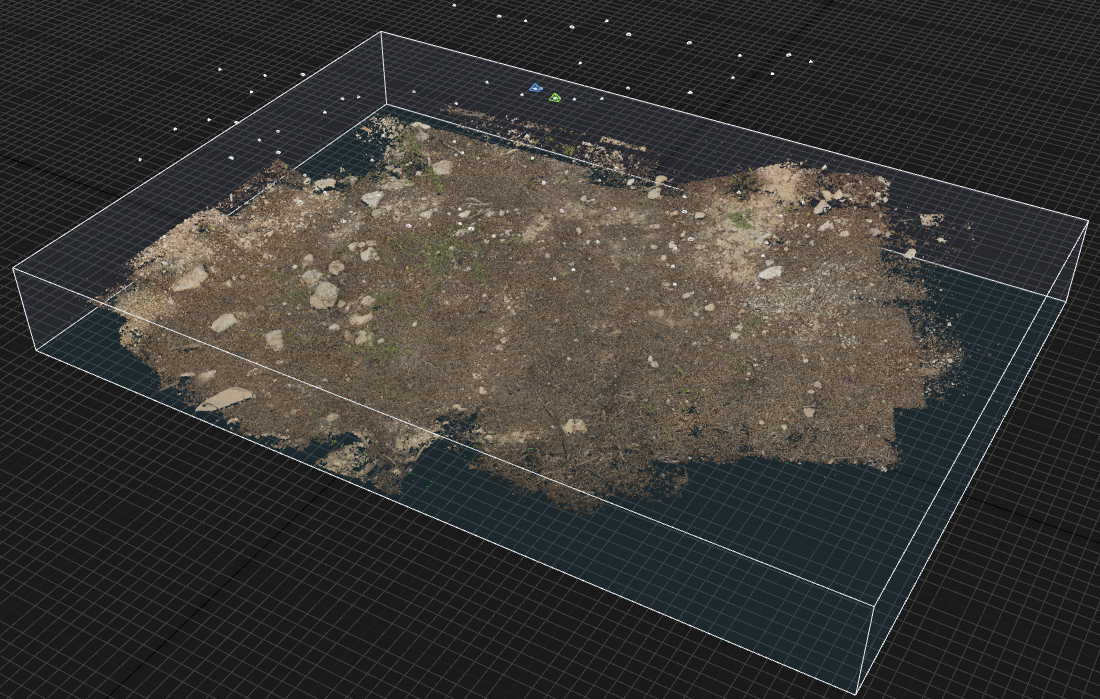
An example of what a terrain patch scan can look like, is this scan is baked towards a flat plane (or a subdivided plane that is projected or shrink-wrapped towards the terrain if the terrain is bending a lot).
When creating a whole biome it’s important to gather a variety of different surface types, just like with rocks or trees there needs to be a range in “size” from smaller pebble ground to coarse gravel as well as different types of forest floor materials. One of each type in the end result is enough but it’s always good to grab multiple variants of the same type while scanning.
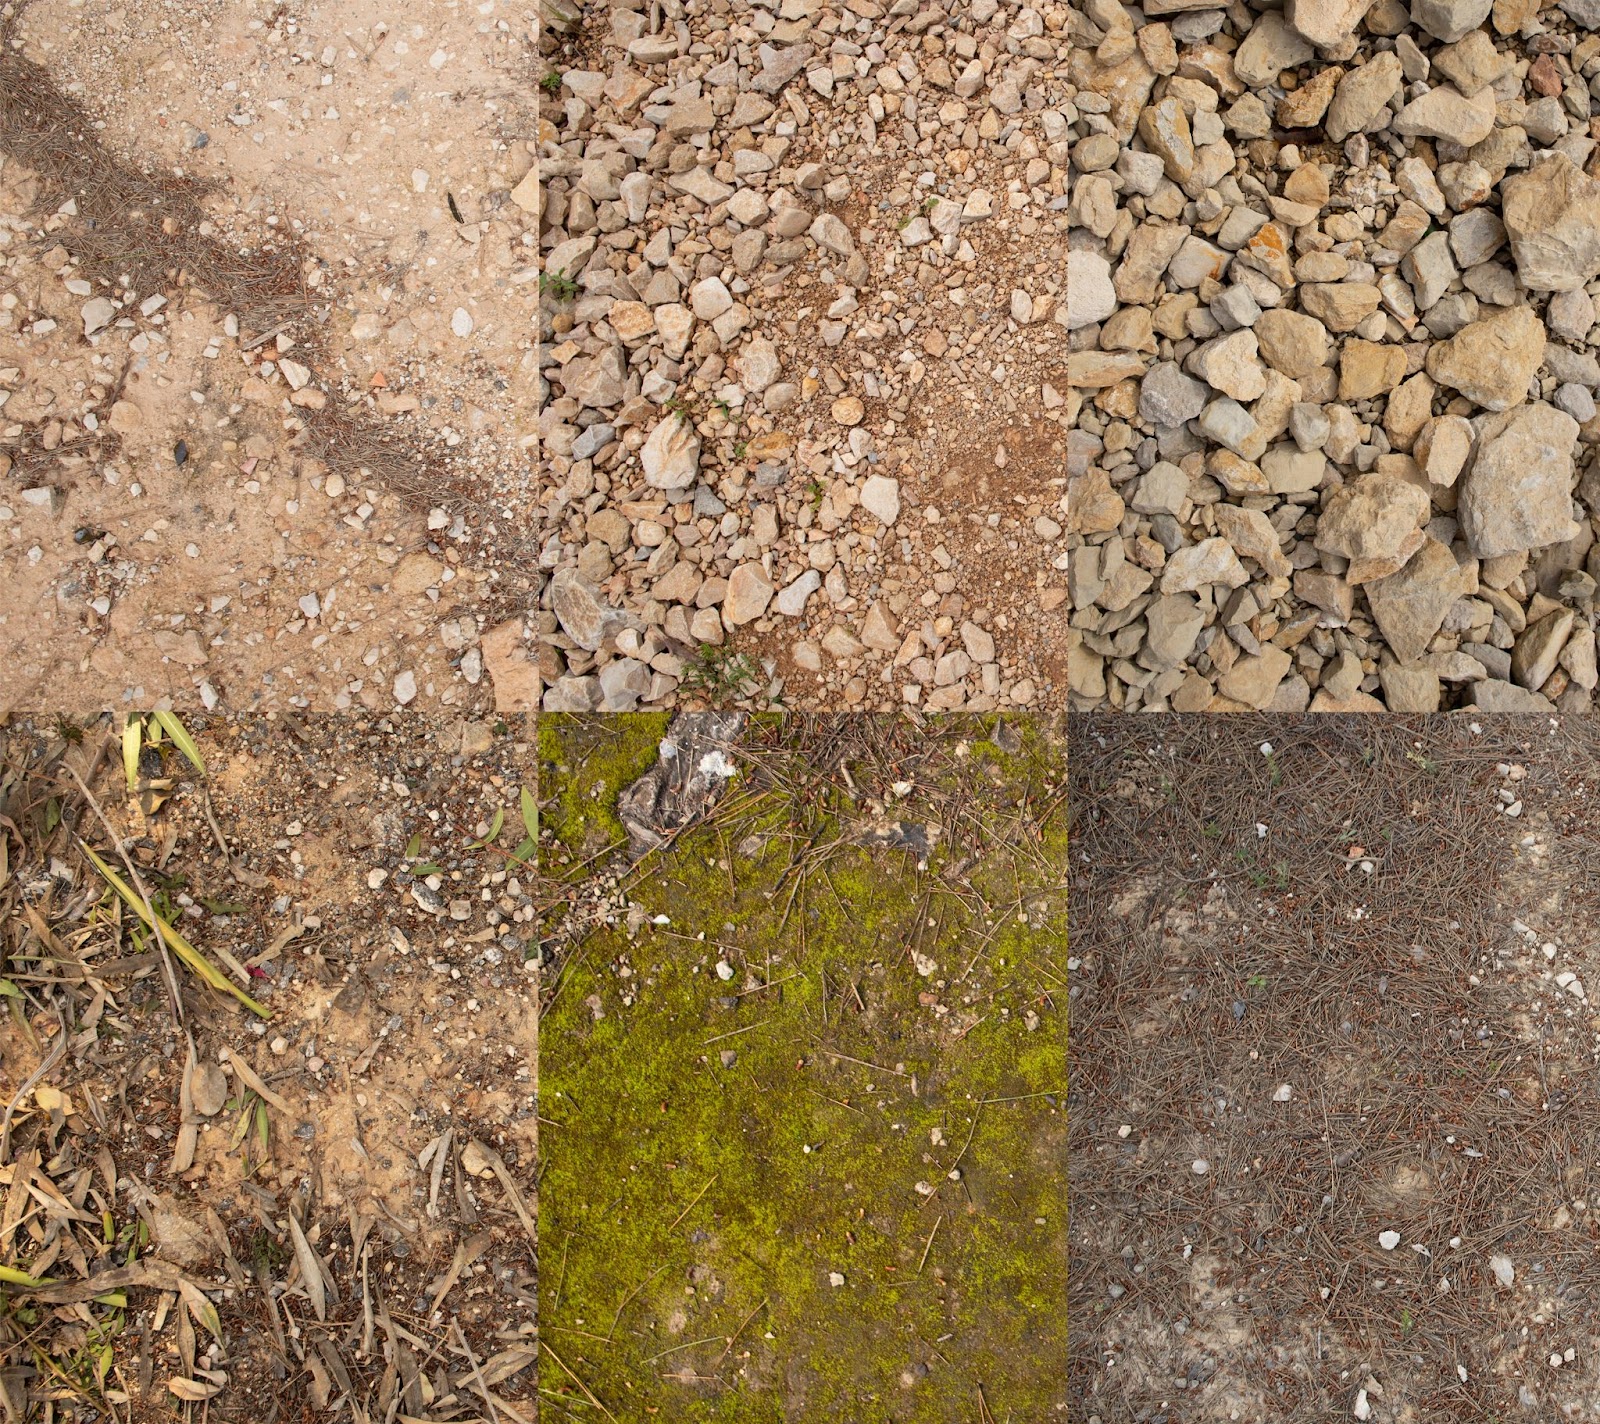
Some examples of the types of terrain materials collected for the project.
Together with the terrain material I always use scattered assets with each terrain material, this includes grass, stones, pine needles and whatever else a specific terrain layer might need to look realistic.
It’s important to not think of a terrain surface as a “texture” but as a whole layer.
A terrain layer should be the whole visual experience of what that entails, meaning everything from the texture at the bottom with a layer of filler scatter that’s similar to what’s in the texture, up to small plants and dead branches on top.
It really brings more value to the terrain layer and if you have a small collection of well-curated terrain layers, you can paint an empty surface with just those terrain materials and it can be enough to create a realistic impression.
A group of scanned assets that I used for a terrain layer was scanned on a white sheet and cleaned out ready for baking to planes. Once baked I clean up the textures and prep them for in-engine use.
Every aspect of the content that goes into the terrain and the scatter on top is sourced from photogrammetry and from the same location.
When creating the layers, it’s important that the assets are taken from the same spots as well.
If you are making a pine needle forest floor, make sure to grab pines from the same spot, the bushes, grass, twigs, etc that sit on top of the same terrain texture that is used as a base. The goal is to recreate the same layer that you see in real life, in a digital format in Unreal Engine.
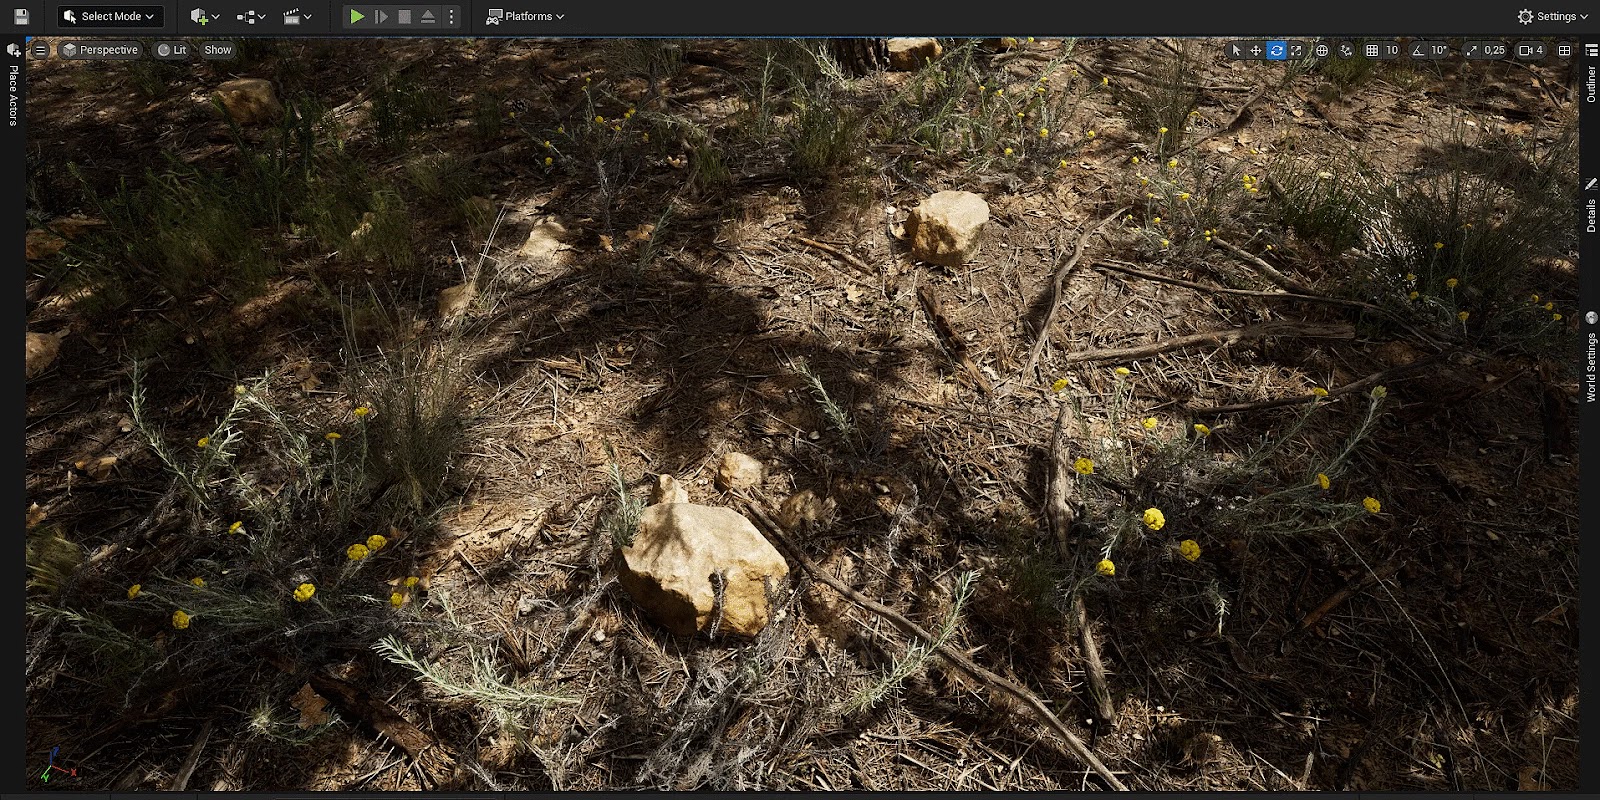
Early In engine results of the pine ground terrain layer, with the texture at the base and a combination of needles, sticks, bushes and smaller rocks, the result becomes more than the sum of its parts. Then it just paints out the layer on the landscape and you get everything scattered in one go.
This workflow of making a layer with a texture and scatter on top is in no way a revolutionary workflow, it’s probably the most common way to populate the base terrain with textures and content. However, it is still incredibly valuable to curate this aspect with thoroughness and care, as it populates a base quality across your entire project.
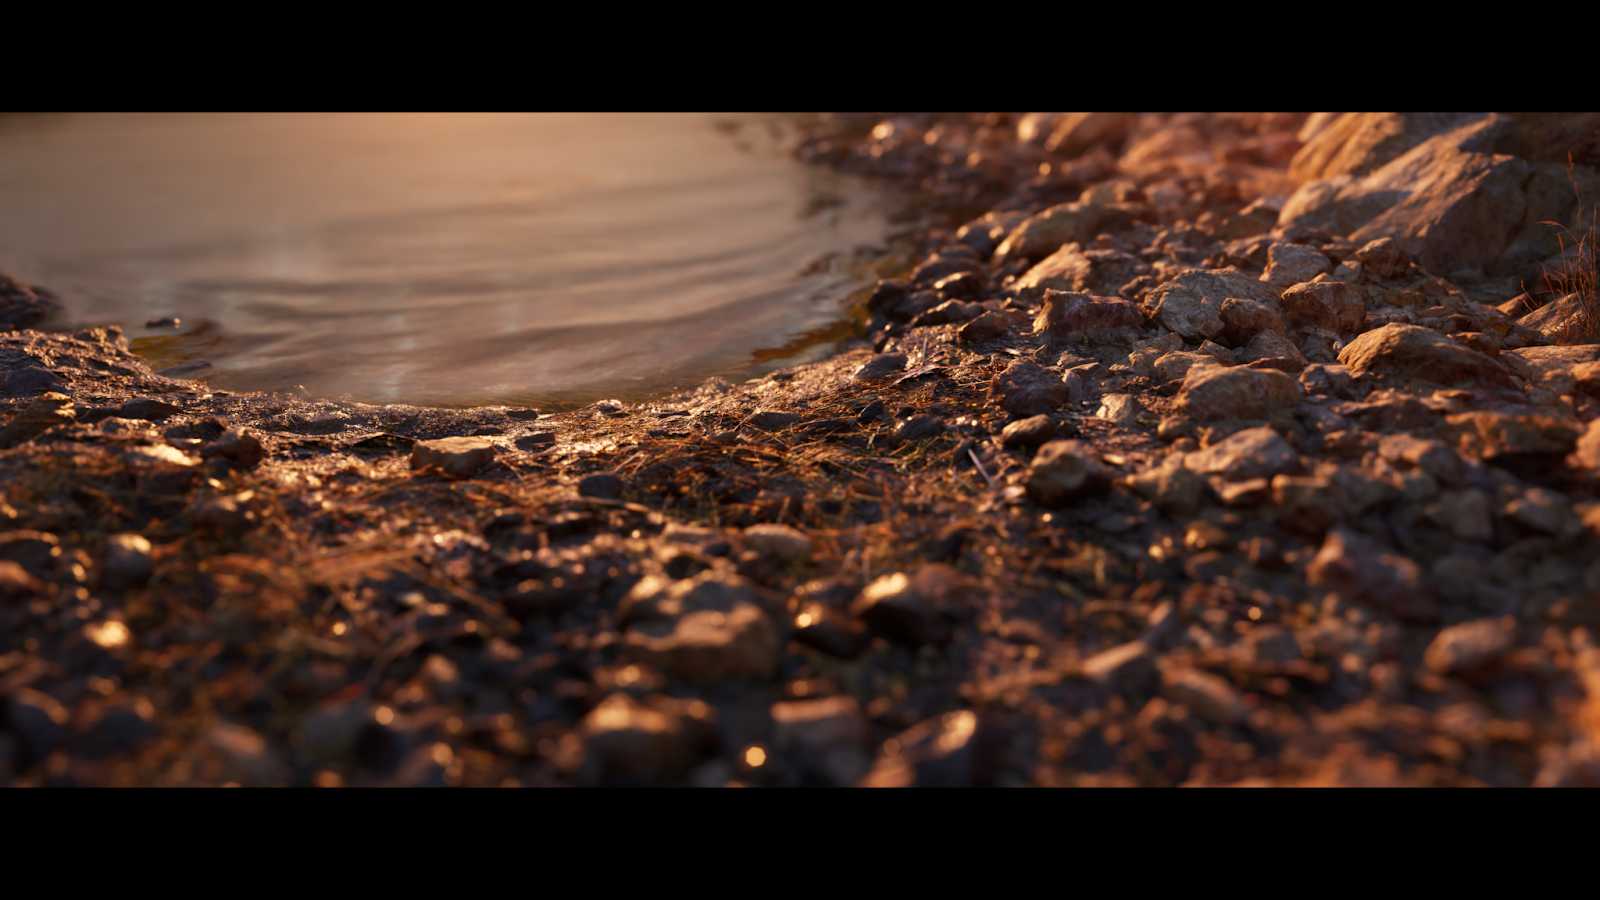
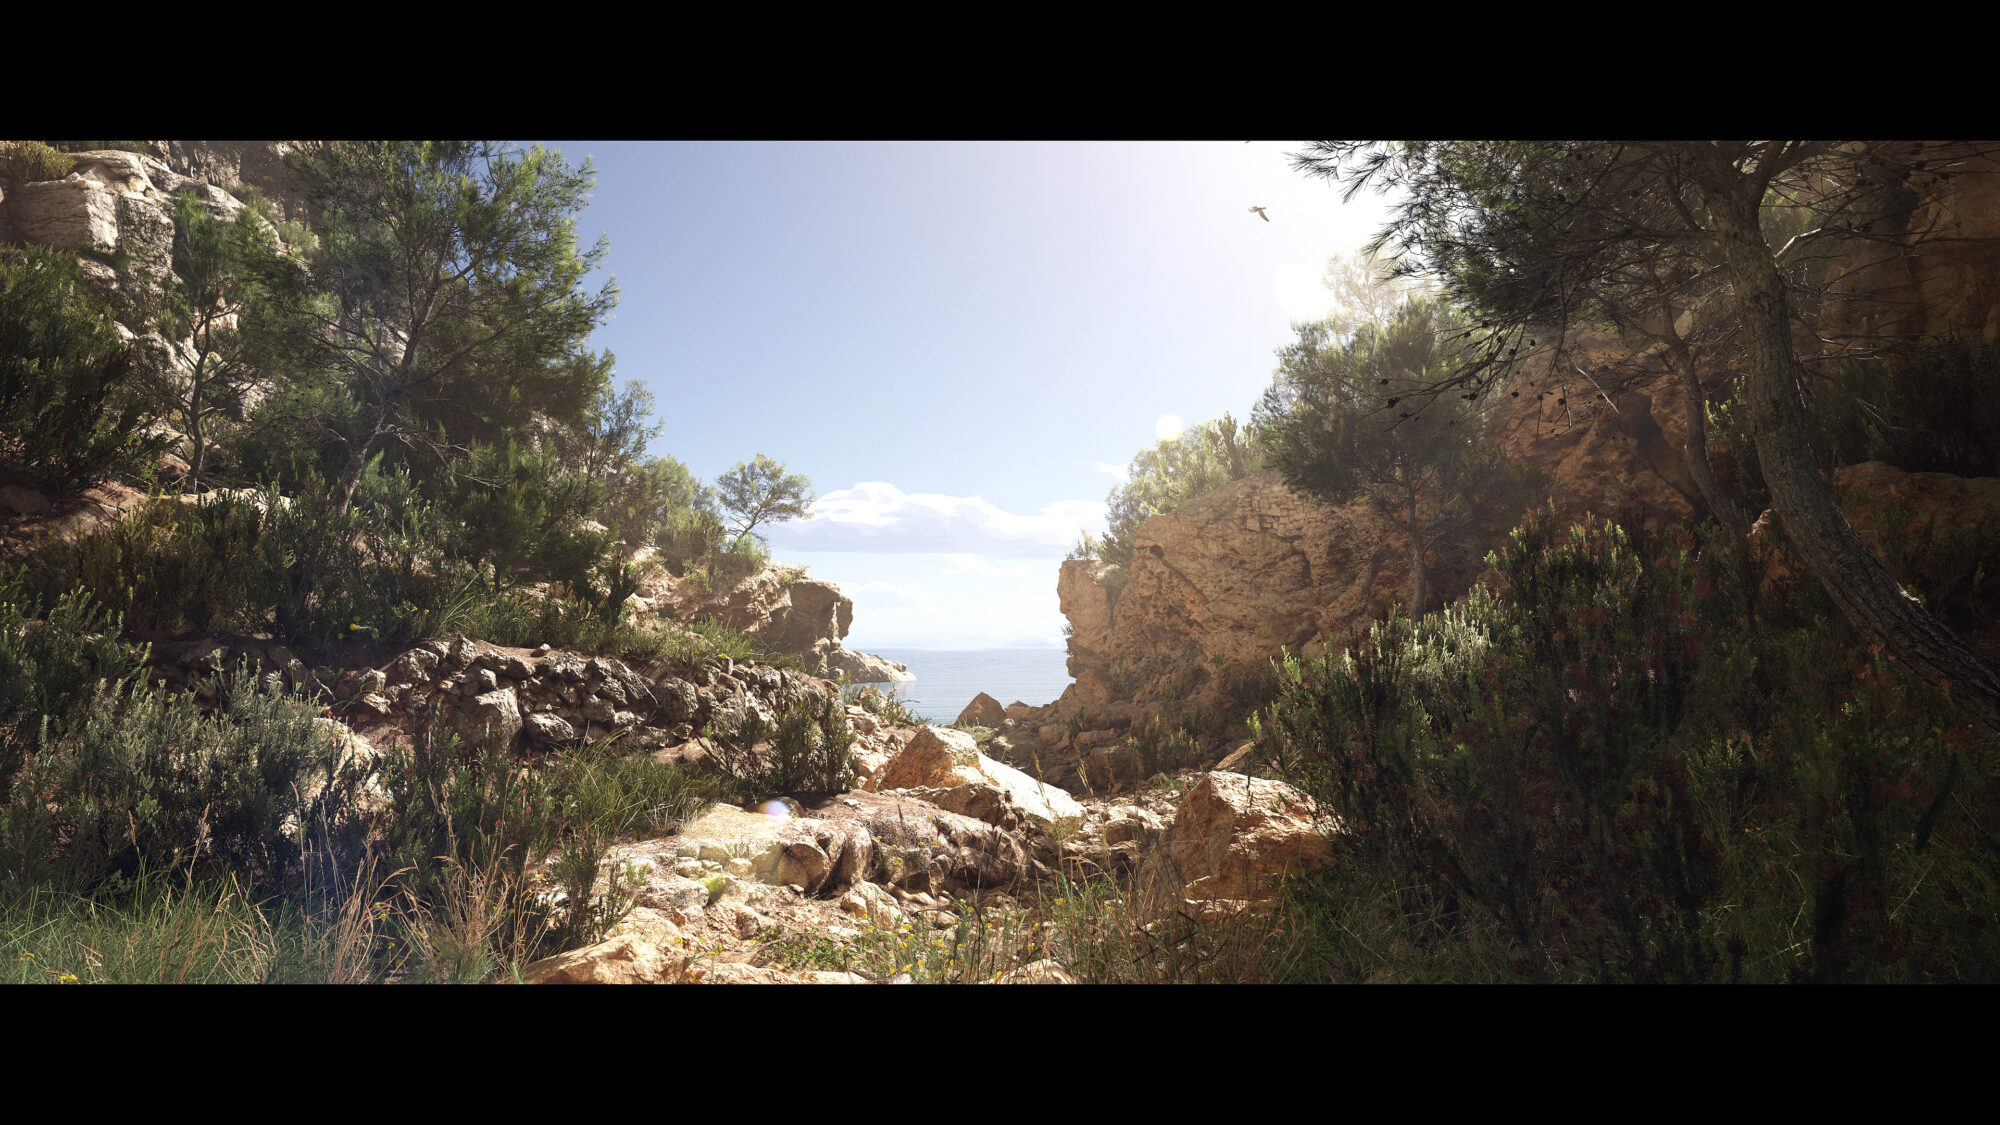
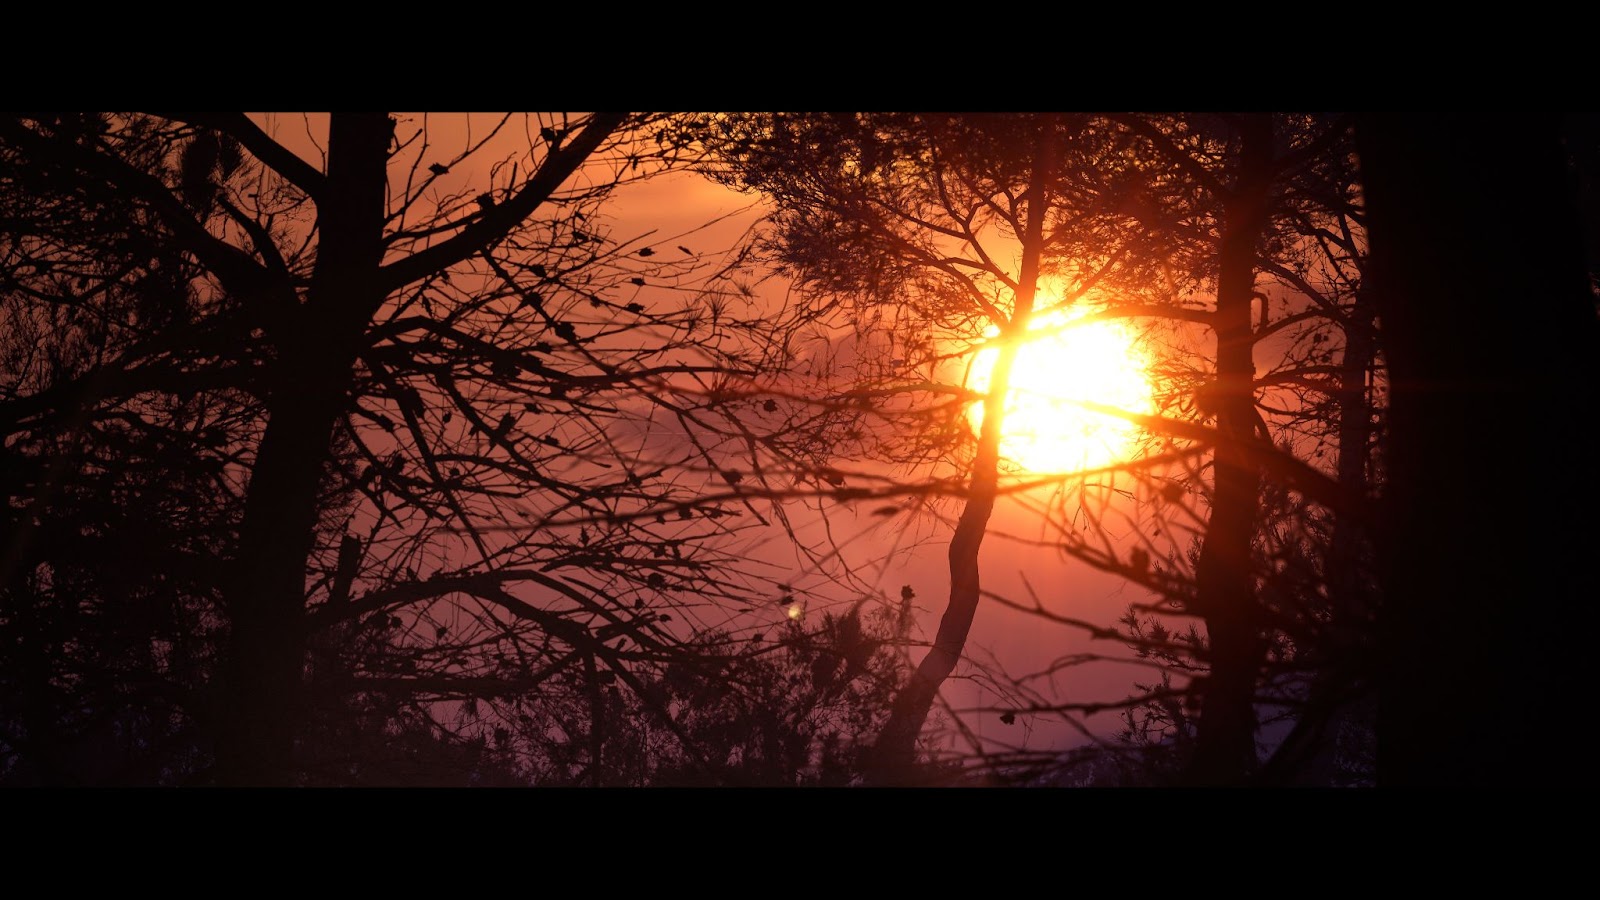
Ending sunset, water, and lighting
When I created the final area of the video with the water, the sunset and the boats, I reused the water from my last project as a base with some modifications.
The water specifically uses a few basic setups where there is a different tiling of the water surface normal based on the distances, it also has large spanning surface specularity breakups through masks and closes up a thin water edge shallow wave normal map that triggers with the distance field when the water gets close to the terrain. The functionalities are simple in principle but combined they create a believable combination.
The water also gets brighter when it becomes shallower and a caustic texture is projected onto the sea floor.
The sunset lighting is an HDRI that I found to my liking, aligned to give the best compositional punch and a directional light with a color set to match the sunset color. It’s a tried and true approach, and while I did use the volumetric clouds in some other shots, I wanted something vivid and impactful that I could not achieve with the in-engine tools, so an HDRI with just the right experience is what I went for.
Since the HDRI is imported from an HDR format that has 32 bits, there is a lot of brightness and color depth to play with, I could hook it up to the emissive slot with a multiplier to find the right brightness value for the skybox.
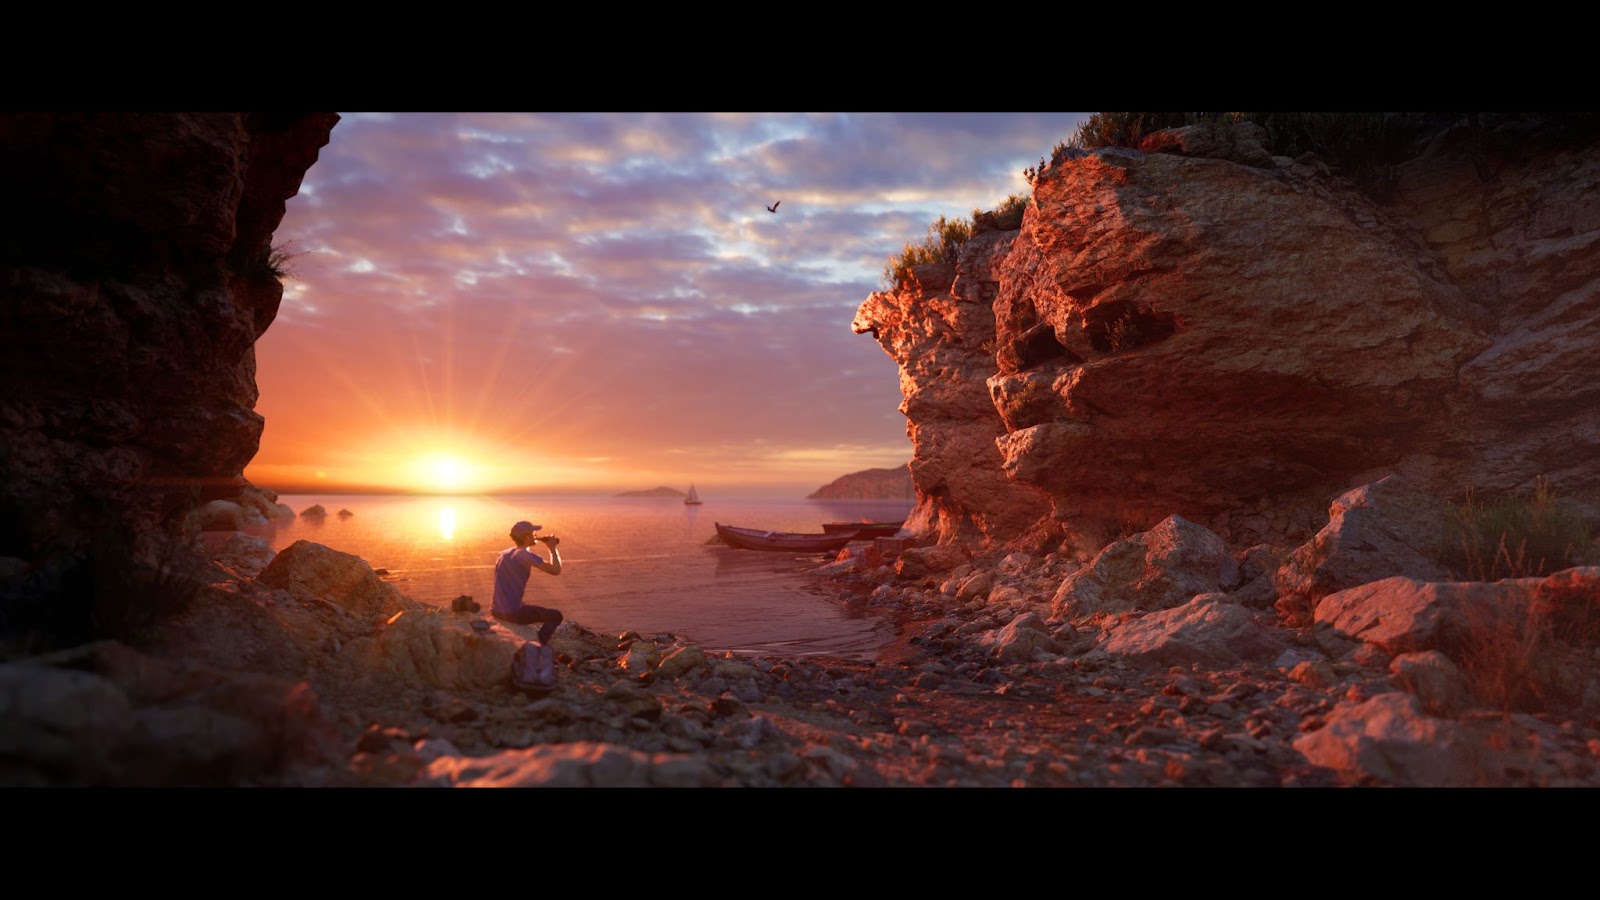
The rest of the composition such as the boats and background are just basic assets to tie the distance together. The boats are from my own photogrammetry scans and are then animated in the in-engine sequences. The distant backdrop is just backdrop planes taken from images that I took with my 200mm lens when I was in Spain, the sky in the image is then masked away and the mountain shape works great as a silhouette for the backdrop.
Shaders and technical base
For most of the shader work in terms of the nature assets (and most of the man-made props as well), I relied on a base shader that I set up that holds the core functionalities of every prop that I might need.
Any vegetation alpha surface also has its own base shader as there are some fundamentally different aspects in the shader such as opacity and translucency.
The base shaders hold things like the very rudimentary wind waving system that I built for my content. It’s a cheap solution that works for most cases and holds up fairly well unless pushed too hard. It’s not as elegant visually as pivot painter for example but is more performant.
The vegetation base shader also has an alpha angle fade out to reduce the flat plane look when an alpha card is facing the camera from the side, its also set up to let the sticks/branches of the alpha card be present longer as the camera moves towards the side of an alpha card. This helps reduce the obvious fadeout that can happen when fading out based on the fresnel.
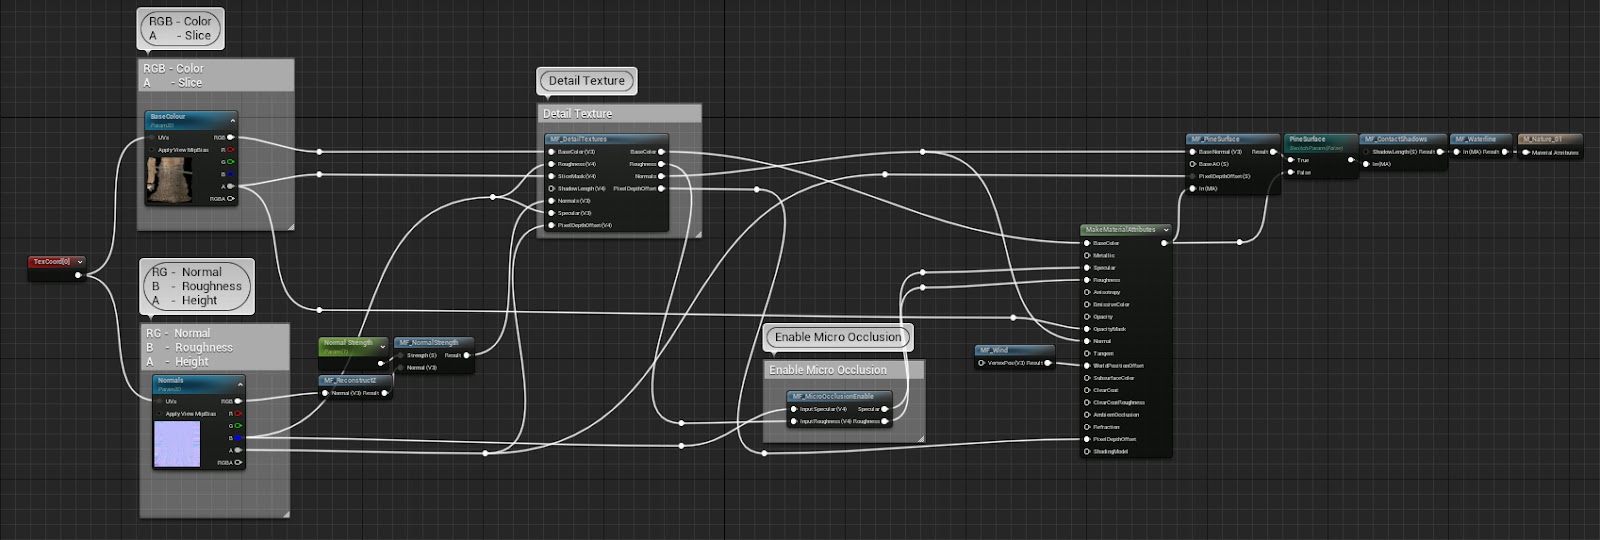
The base shaders also hold material functions and other technical solutions like reconstructing the Z (blue channel) from the packed normal map. Contact shadow and detail texture material function that holds the technical setup for detail texture overlay and blending are also held there and a few parameters that the content might need on a case-by-case basis. I try to keep any case-by-case parameters to a minimum if possible but sometimes it’s unavoidable.
All in all, I’ve tried to keep the instruction count low and rely on the content quality through the actual scans and the detailed textures that work in conjunction with base textures.
When importing a new asset I can then just make a material instance of the base shader and apply any unique exposed parameter specifics that I might need per asset such as the unique textures, detail texture tiling and its overlay strength and any SSS tweaking needed to be done and set up the wind per asset as its slightly different depending on size and type of asset (grass, for example, use a stripped down version of the wind setup compared to a full tree that uses the whole functionality)
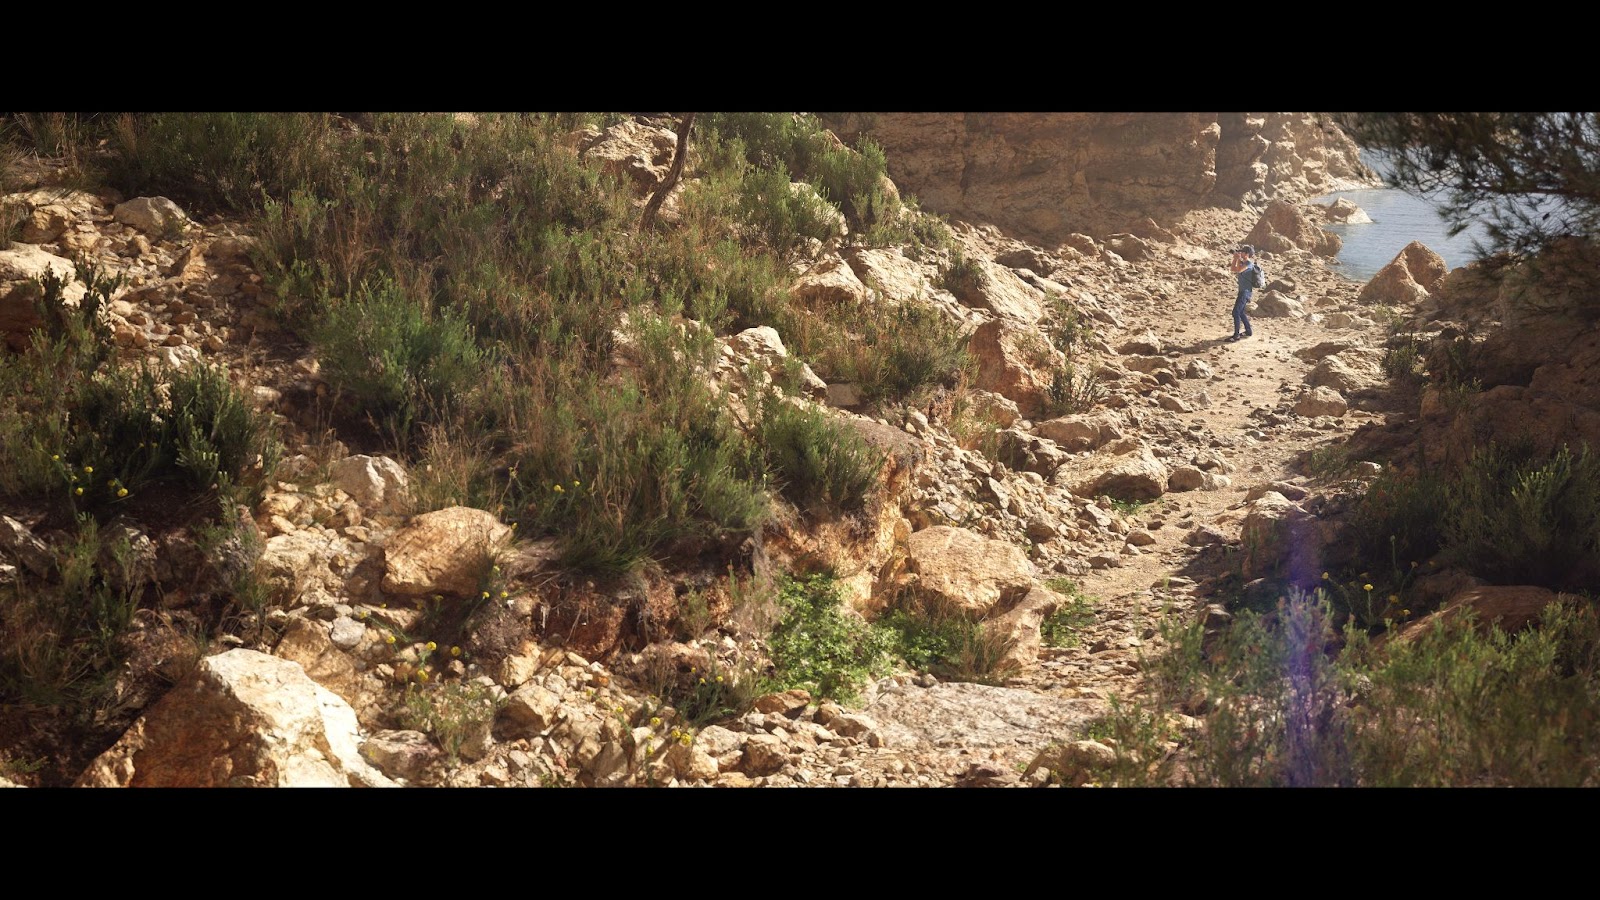
I always try to bring in terrain from a real-world location, even if I do not end up using it.
Since this project was based in Spain, and specifically I scanned it in the Valencia region (Moraira to be precise) I found LiDAR terrain height data and world color data that matched that location. All my reference images were from this area and having the real-world terrain to work with when placing my content and setting up shots really helped create a believable location.
I could use the world color from the terrain to see where rock walls were in the real world and align assets roughly around those rocky spots; this served as my base for content placement in order to get believable results. Then I would just fill in with terrain materials and other content around it.
Final polish
When I was working towards my shots and looking at the end result I did not do that much unique polish work in terms of the content, I tried making every single asset that I brought into the engine as qualitative as possible and focused overall on quality over quantity.
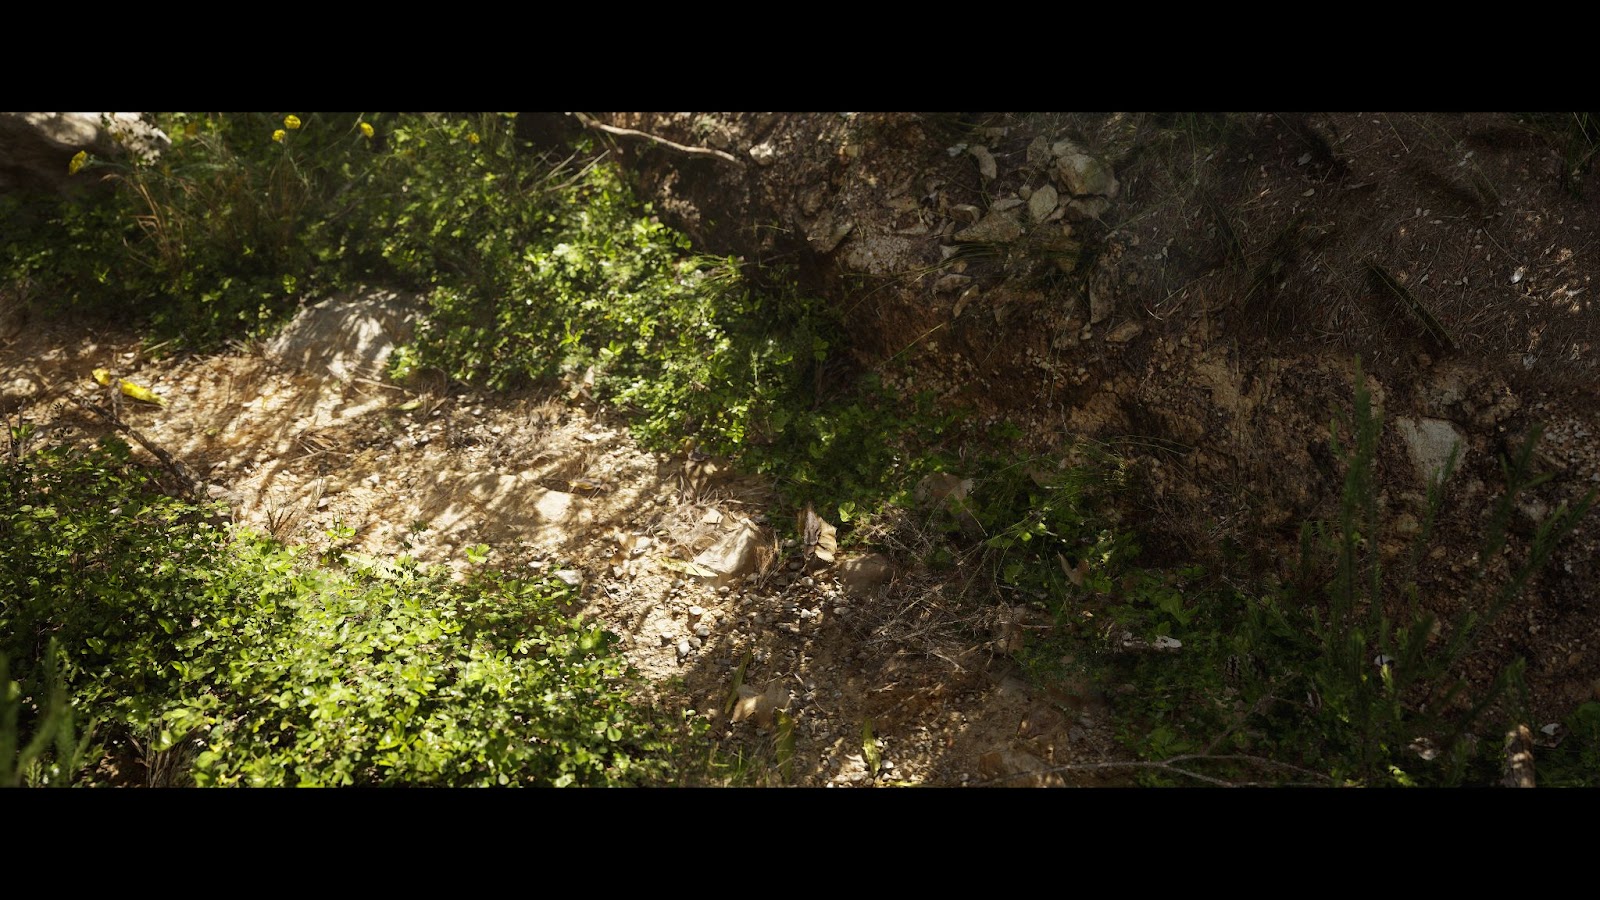
This did take an effort in terms of the time per asset where I would for example take the dirt ledge and place pieces of bushes and grass into the asset, carefully curating the vegetation to fit the ledge and contextualize them.
But with this done I could then place that dirt ledge over and over and get qualitative results everywhere and did not need to do any placement of assets per shot and do a lot of polish work to bring it together.
Since each asset has a high-quality heightmap, the pixel depth offset creates a believable blending and eliminates any sharp edges between assets. It’s effective and I was already paying for it since I rely on contact shadows so much.
While a virtual texture blending solution could help with longer and more accurate blending, there was so much vegetation going on that I thought it was a technical overhead. I did not need to add to the project and instead save on the performance and memory cost as well as setup time and skip it for this project.
VFX such as small buzzing flies and falling leaves was very valuable for the polish phase and was something that I added to most shots, it brings some life and believability to the short film and helps tie the movement of the world together. The flies in particular are a derived variant of the ants I did for my summer archipelago.
The Niagara particle system VFX is using small one triangle polygons that have an emissive white material on them, they are then spawned within a sphere where they are sent flying around with wind and turbulence combined with a jitter movement node. This adds to the erratic movement effect you often see from small swarms of flies.
While this VFX is not the most elegant solution, it does the trick and produces the result I was after.
Lighting
Across the entire project, I relied on Lumen for the lighting
The Unreal Engine really took a big leap when it came to the introduction of Lumen, and using it in the project made lighting the different shots a lot smoother and easier to keep a consistent look. The volumetric fog was also very easy to work with together. There are a few specific technical challenges however when it comes to Lumen and forests.
As the world position offset wind moves the trees around, lumen tries to update the lighting in real-time. This causes light bounce flickering at times, most noticeably when there are a lot of trees clustered close together.
The easiest way to get away from this is to select every other tree and turn off the “affect distance field” checkbox, this excludes them from the lumen lighting and reduces or removes the flickering light bounce spots. This does however also remove it from any darkening or light bounce feature that does come with lumen so the challenge is to balance turning on or off different trees.
This can be more problematic when using procedurally placed vegetation as there is no access to specific trees, the workaround here is to use fewer trees in the procedural placement and if needed place a few extra by hand.
The lighting always consisted of a skylight with real-time capture and a directional light. I stuck to this lighting for every shot as the atmospheric light checkbox helps find the right lighting for every condition I need.
The simplicity of this setup in Unreal Engine 5 made it very easy to work with, the only challenge was finding a nice skybox where I would want a nice cloud structure. In most cases, it was an HDRI as mentioned but I did also use the volumetric clouds at times since they tie into the lighting very well.
Rendering
When setting up shots I placed a cinematic camera in the world, created a sequence for the shot and worked my way through the settings such as focus distance, f-stop and exposure.
Any animation was also set up to trigger the sequencer and each shot had a camera shake of different types to give a bit more life to each shot.
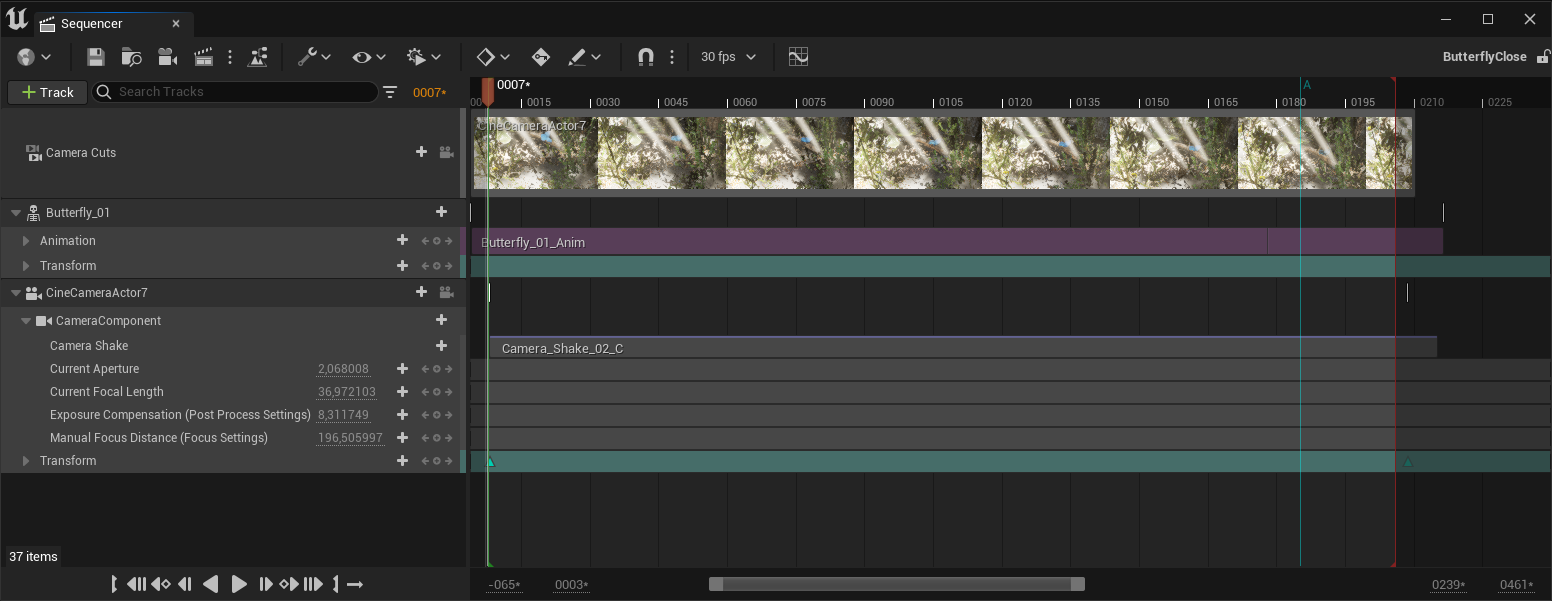
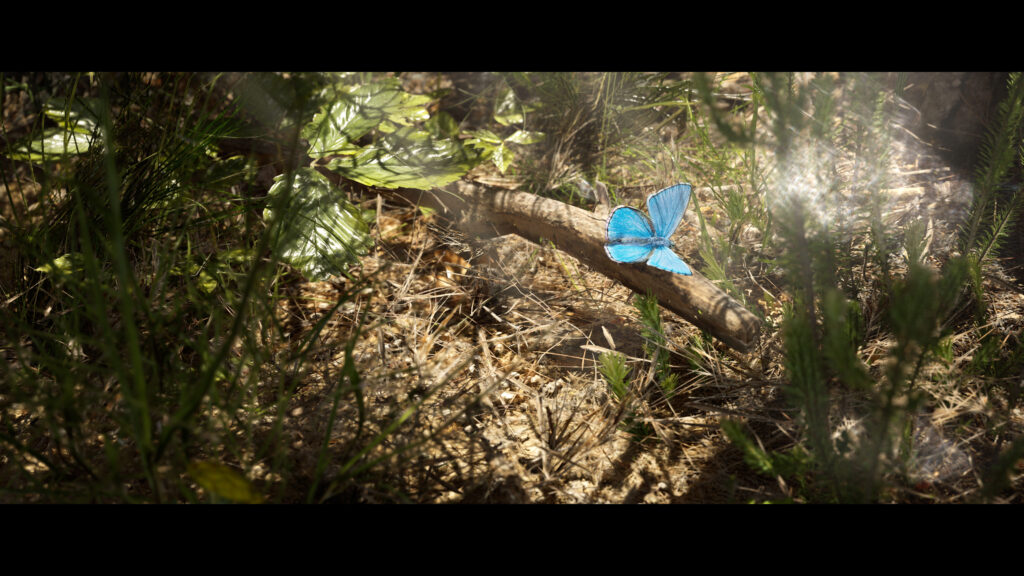
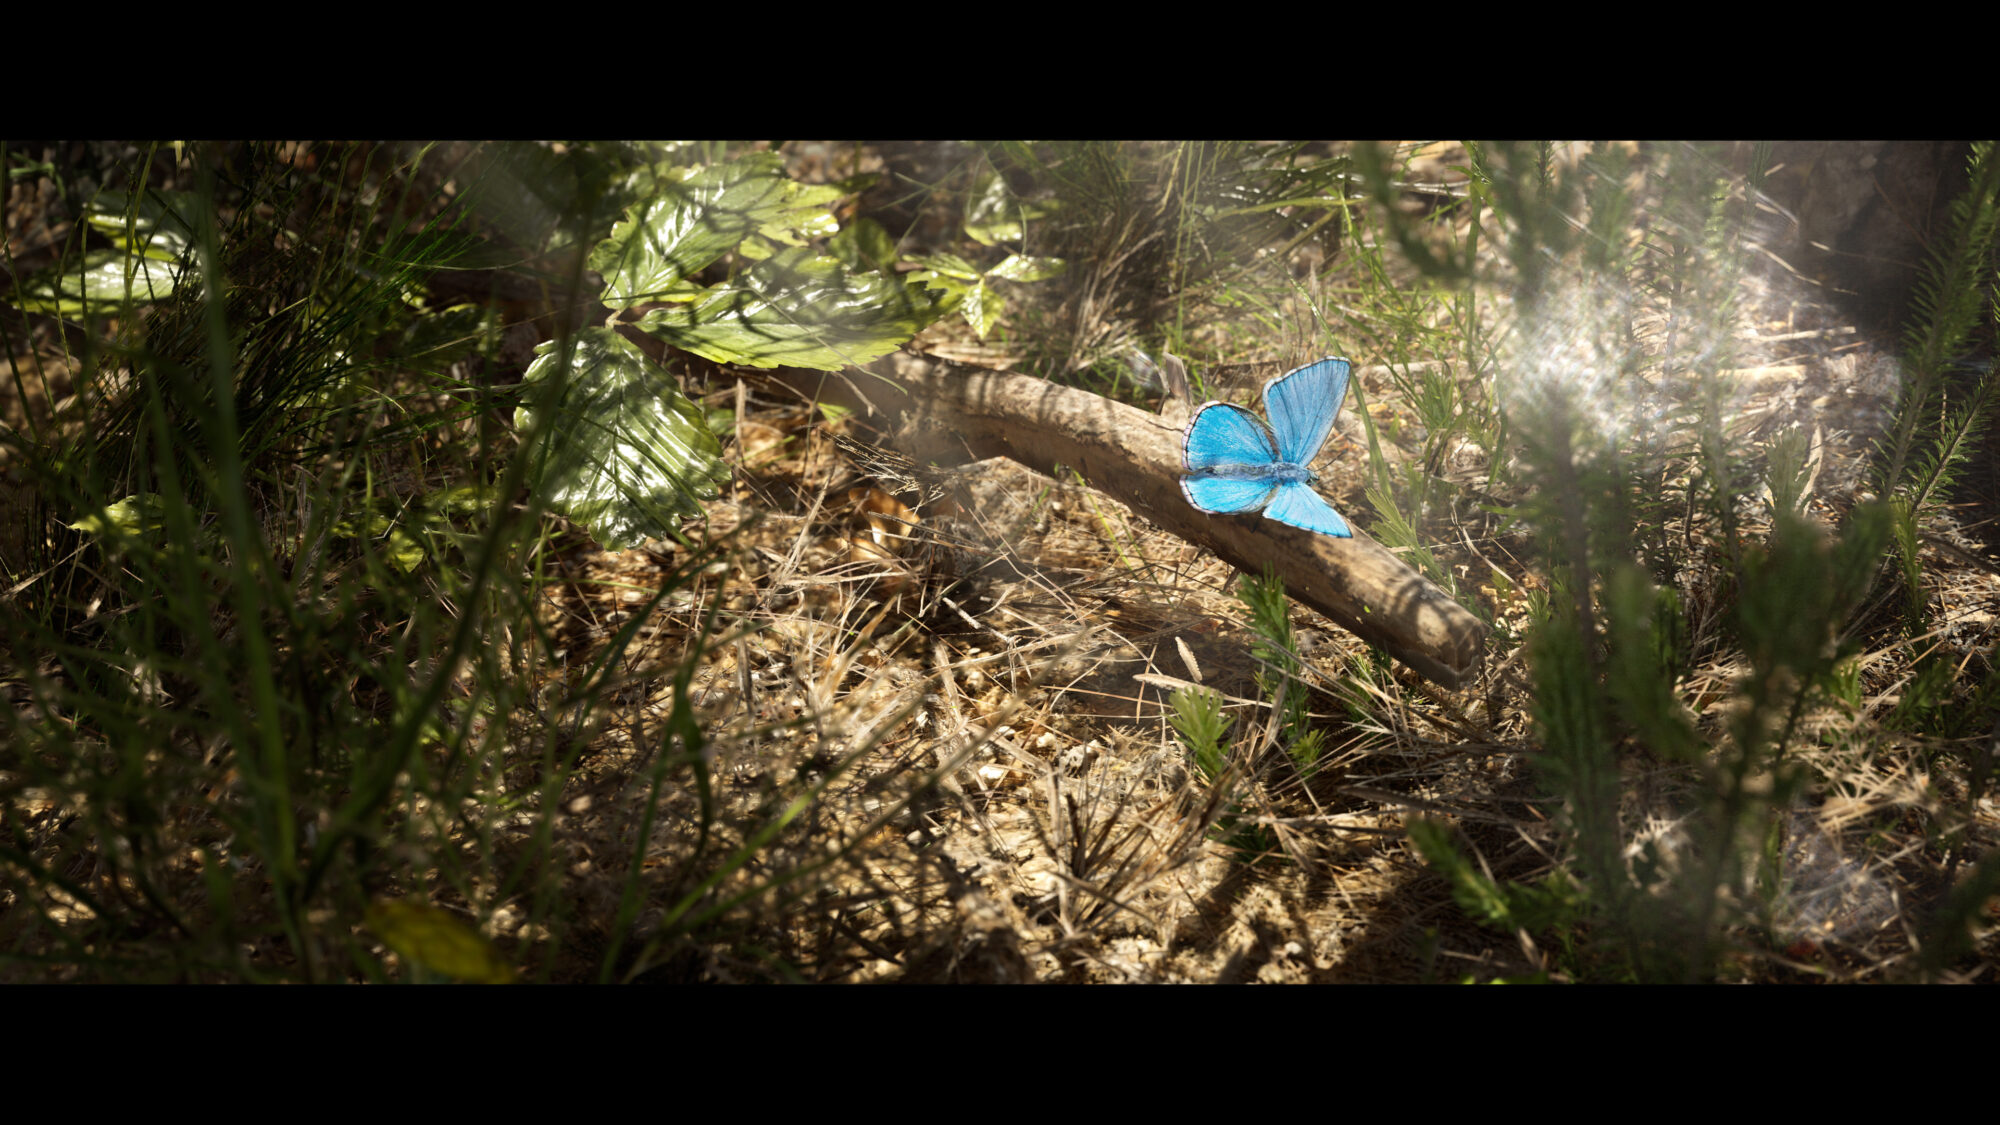
Each sequencer setup was quite simple and looked for the most part like this; a camera with movement settings and keyframes, and something with an animation attached to it, in this case the butterfly which I animated in blender and brought into unreal engine.
When a shot would be done and it was time to take out the clip from Unreal Engine I used the movie render queue plugin. It’s an effective and manageable way to get the video clips out in the format you want with different console commands run specifically when the video is being rendered.
For this movie, I did not run any console commands. I was not already running when in the editor. I took out each clip as a png image sequence that was then dumped into after effects for cutting and editing. I did only a minimum of work on after effects.
In terms of the shots, the focus was always on sound effects, editing everything together contextually and doing only slight color calibrations if a shot would be too off the mark in context to the clip before and after it.
Conclusion
This project was a challenge and a lot of fun to make, but since I had a strong foundation to work from, I could hit the ground running and produce content straight away and improve upon workflows and techniques from the last project instead of building everything from scratch.
The biggest takeaway I had from this project was that you can do even more with less.
While this has been a core fundamental principle for all the AAA games that I have worked on that used photogrammetry, this project took that aspect to the edge for me as I had a very limited window of time to collect the content that I needed and time to build and curate that content once I got back home.
For this project, I focused on improving the parts of my workflow that was the biggest time sink and quality challenge from the last project, which was the highpoly manual work of recreating vegetation alpha cards that I could not scan. By building a geometry nodes tool that I could use to procedurally trace image references I cut down on my production time a lot while also getting a chance to learn and apply Blender’s geometry nodes.
For anyone building photogrammetry content, my biggest suggestion and takeaway is that it’s incredibly valuable to look over your production pipeline when you are going to make something that involves more than just one photogrammetry asset, and even more so if its a biome or a set of assets that are supposed to sit together as a set.
It will save a lot of time, produce more consistent content and let you focus on the bigger picture and any technical challenges that might occur in other aspects of the project.
Having a good folder structure for your photogrammetry content, setting up naming conventions and base materials that serve as your basis for each newly imported photogrammetry asset, each standardized step helps you smooth out your production and keeps things nice and clean.
I would like to thank Games Artists for giving me the opportunity to do this article, it’s been a privilege to share a glimpse of the effort I put into this project and I hope the information I have shared has been of value.
Pontus Ryman.
Read more articles
You might also like these articles.