

Introduction
Hello! My name is Sol Saito. I am an Environment Artist with a special passion for Material Art and Substance Designer.


Goal
My initial motivation for this project was to practice making a stone material. I started by looking at some flagstone floors and decided to make a more natural interpretation of them.
I wanted to make larger stones that look like they have been naturally cracked and shifted over time.
Tools
- Substance 3D Designer
- Unreal Engine 5
- PureRef
References
My first step is always gathering reference. I usually like to have only a few reference images starting out and only add more as I need.
For this project I had a few references for the stone patterns, the cuts and cracks in them, and their surface under harsh light. These are all images of flagstone floors that I decided to pick and choose aspects of.


Base Stones
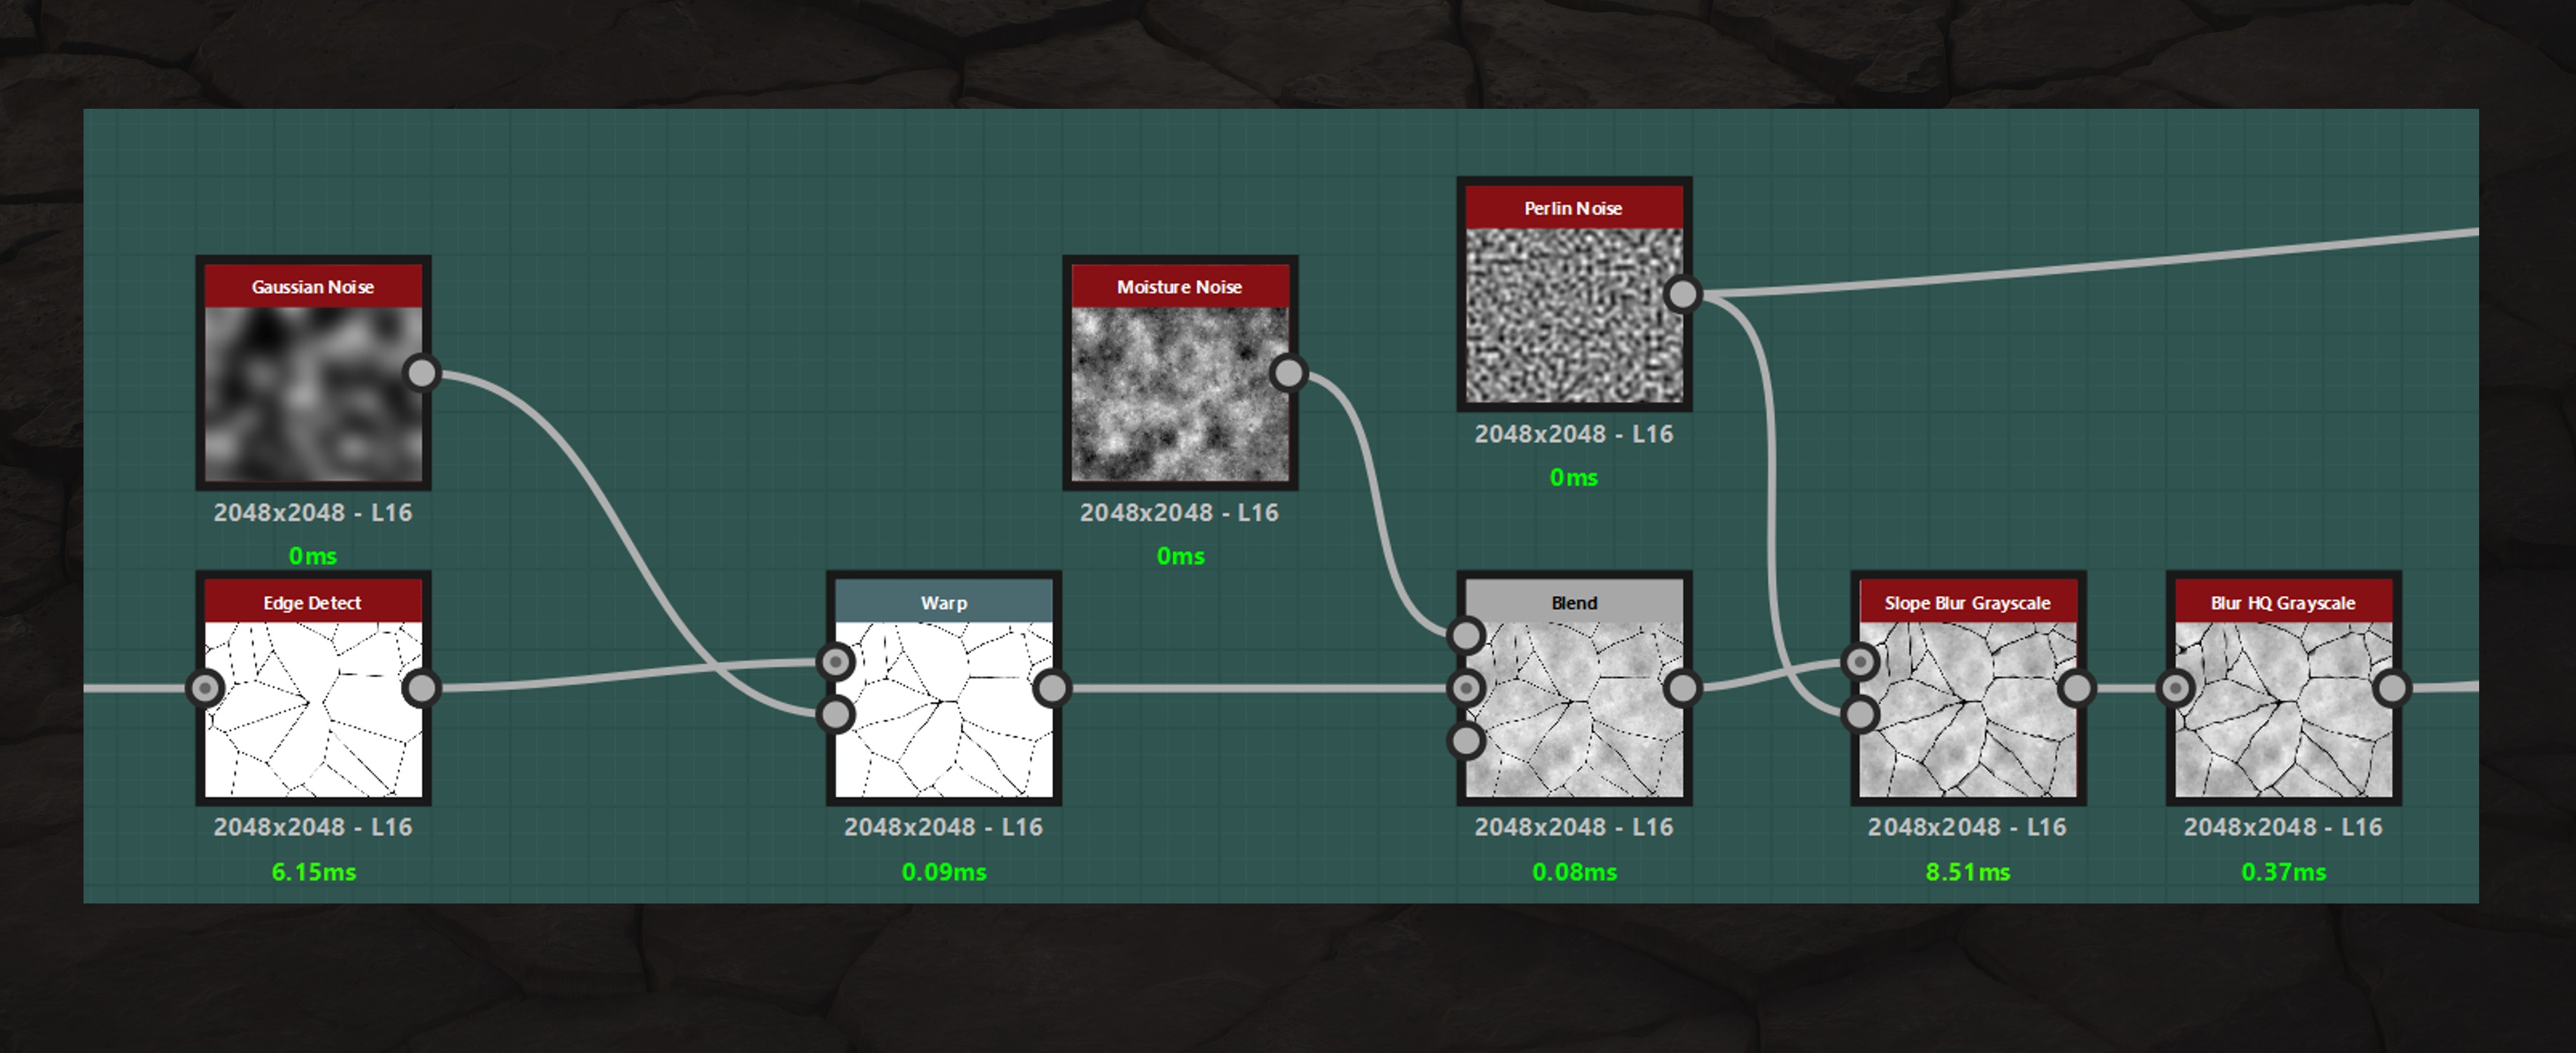
The base stone shapes are very simple. I first used a Tile Generator node with a few points with random position and luminance, then set size mode to “pixel” to avoid artifacts.
I plugged the tile generator into both inputs of a Distance node and Edge Detected it to get a variety of stone shapes. I prefer this method over a Voronoi or Cells node because it gives me more variation in the size of the stones.

I warped the stones, multiplied in a Moisture Noise to get some basic variation, and ran it all through a Slope Blur node.
The Slope Blur adds some edge variation and simplifies the moisture noise.
Cracks & Damage
For the surface of the stones I wanted a smoother surface with large indents and small cracks. The smaller cracks were made with the same method as the larger indents. I added noise and variation to a Crystal 1 node and used a Histogram Scan to get a clear mask.
The only difference for the small cracks is that I ran them through an Edge Detect node before blending them into the stones.

I experimented a bit more when making the large indents, warping them and using different noises and blending modes.

Each mask is put through a Directional Warp node before being blended into the height, I do this to separate details between different stones.
I plug the mask into the input and a Flood Fill to Random Grayscale into the intensity input, then I turn the intensity to a high number.
Since each stone has a different intensity value due to the Flood Fill, they will warp different amounts preventing details from spreading across stones.

Once the Stones had some damage, I added some height variation and started on the other maps.

Height Variation
I wanted the stones to be very uneven, to protrude at different heights and angles. To that effect, I simply multiplied a Flood Fill to Random Grayscale and a Flood Fill to Gradient into the height.

I ran it through an Auto Levels node to bring back the values lost.

Base Colour
My primary colour and roughness reference was these old British flagstone floors.
They look almost monotone at a glance so I needed a lot of subtle details to get them looking right.
I started my base colour with a high frequency noise as a base and used flood fills to colour each stone differently. I used a Curvature node to darken the gaps between stones and an Ambient Occlusion node to add dirt to crevasses.
Then I begin layering on colours, masking them out with a variety of noises and aspects of the height map like scuffs at the stones’ peaks or small holes throughout.

A lot of the details I add are hard to see, but you can feel them.
Those details do make a difference though, and taking the time to look at your reference and build up those colours gets a great result. Especially when you need to get subtle details and colour variation.
Roughness
I started my roughness map by blending an inverted Highpass Grayscale and Ambient Occlusion node taken from my height map. This gives a good base with more roughness in the cracks and damaged areas and smoother exposed areas.

Once I had a good base, I reused masks from my base colour and added them into the roughness.
These masks were for small holes in the stones, spots where the rocks have been scuffed, and places with dirt and dust.

Conclusion
I’m happy with how this practice went and I learned a few good things from doing it. I think giving yourself small projects as a way to practice a software or study a material is a great way to improve quickly. A short time frame to build something new and move on.
Substance Designer in particular has a decent amount of resources for learning. I was lucky enough to be taught by Johnny Malcolm while first using Designer and he has a lot of great tutorials and resources on his YouTube channel.
Beyond Extent has some incredible talks about materials.
And of course Games Artist is filled with great articles and breakdowns, here is one I find really helpful: Old Stone Paver by Kai Li.
I hope this breakdown was useful for anyone reading and thanks to Games Artist for the opportunity to share it.
Thanks for reading.
Read more articles
You might also like these articles.


