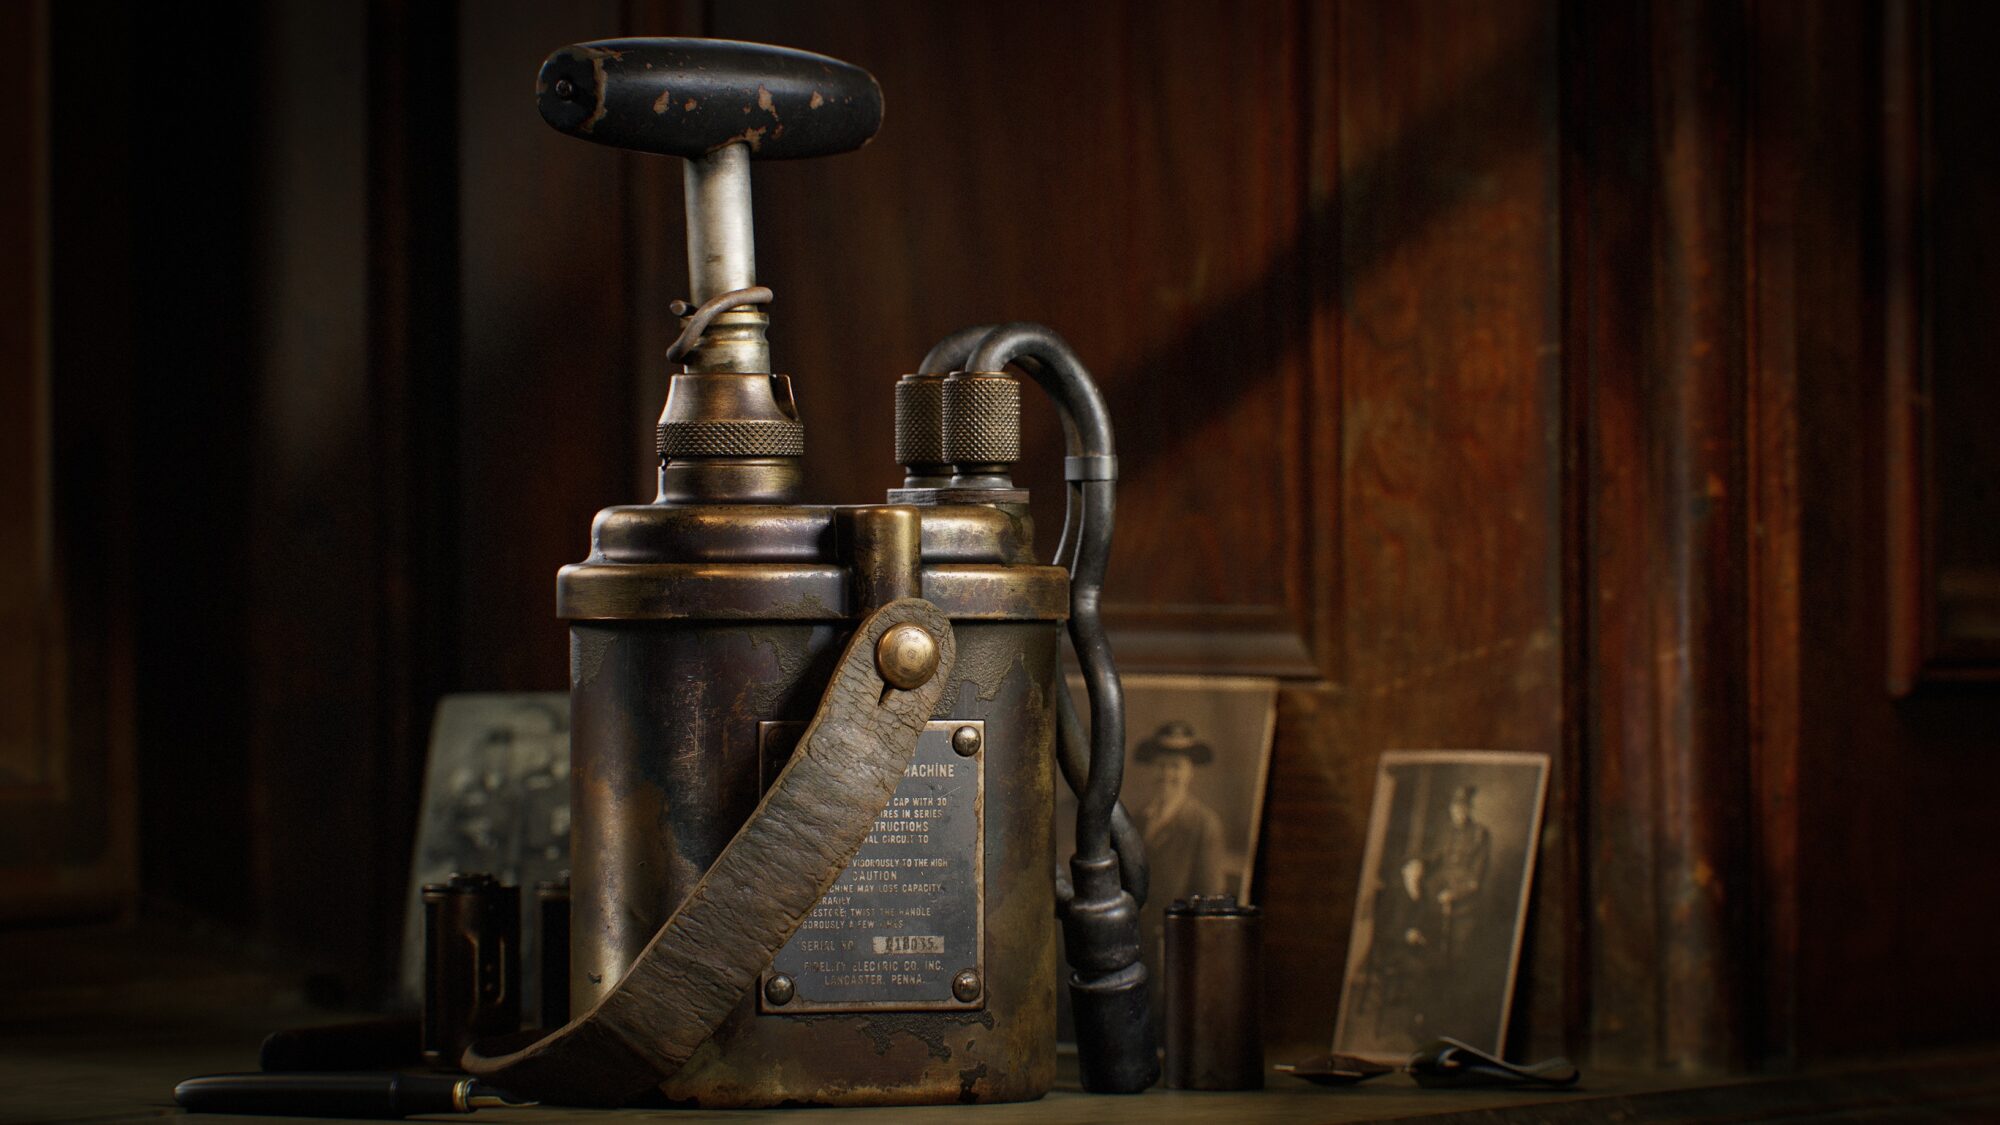
WWII Detonator
Introduction
Hello, my name is Doru Bogdan. I currently hold the position of Lead Environment Artist at Sierra Division.
I am a self-taught artist and started my professional journey about six years ago.


Tools
- 3ds Max (Blockout, Lowpoly)
- ZBrush (Highpoly)
- RizomUV (UVs)
- Marmoset Toolbag (Texture Baking and Presentation)
- Substance Painter (Texturing)
- Substance Designer (Custom Filters/Alphas)
References & Inspiration
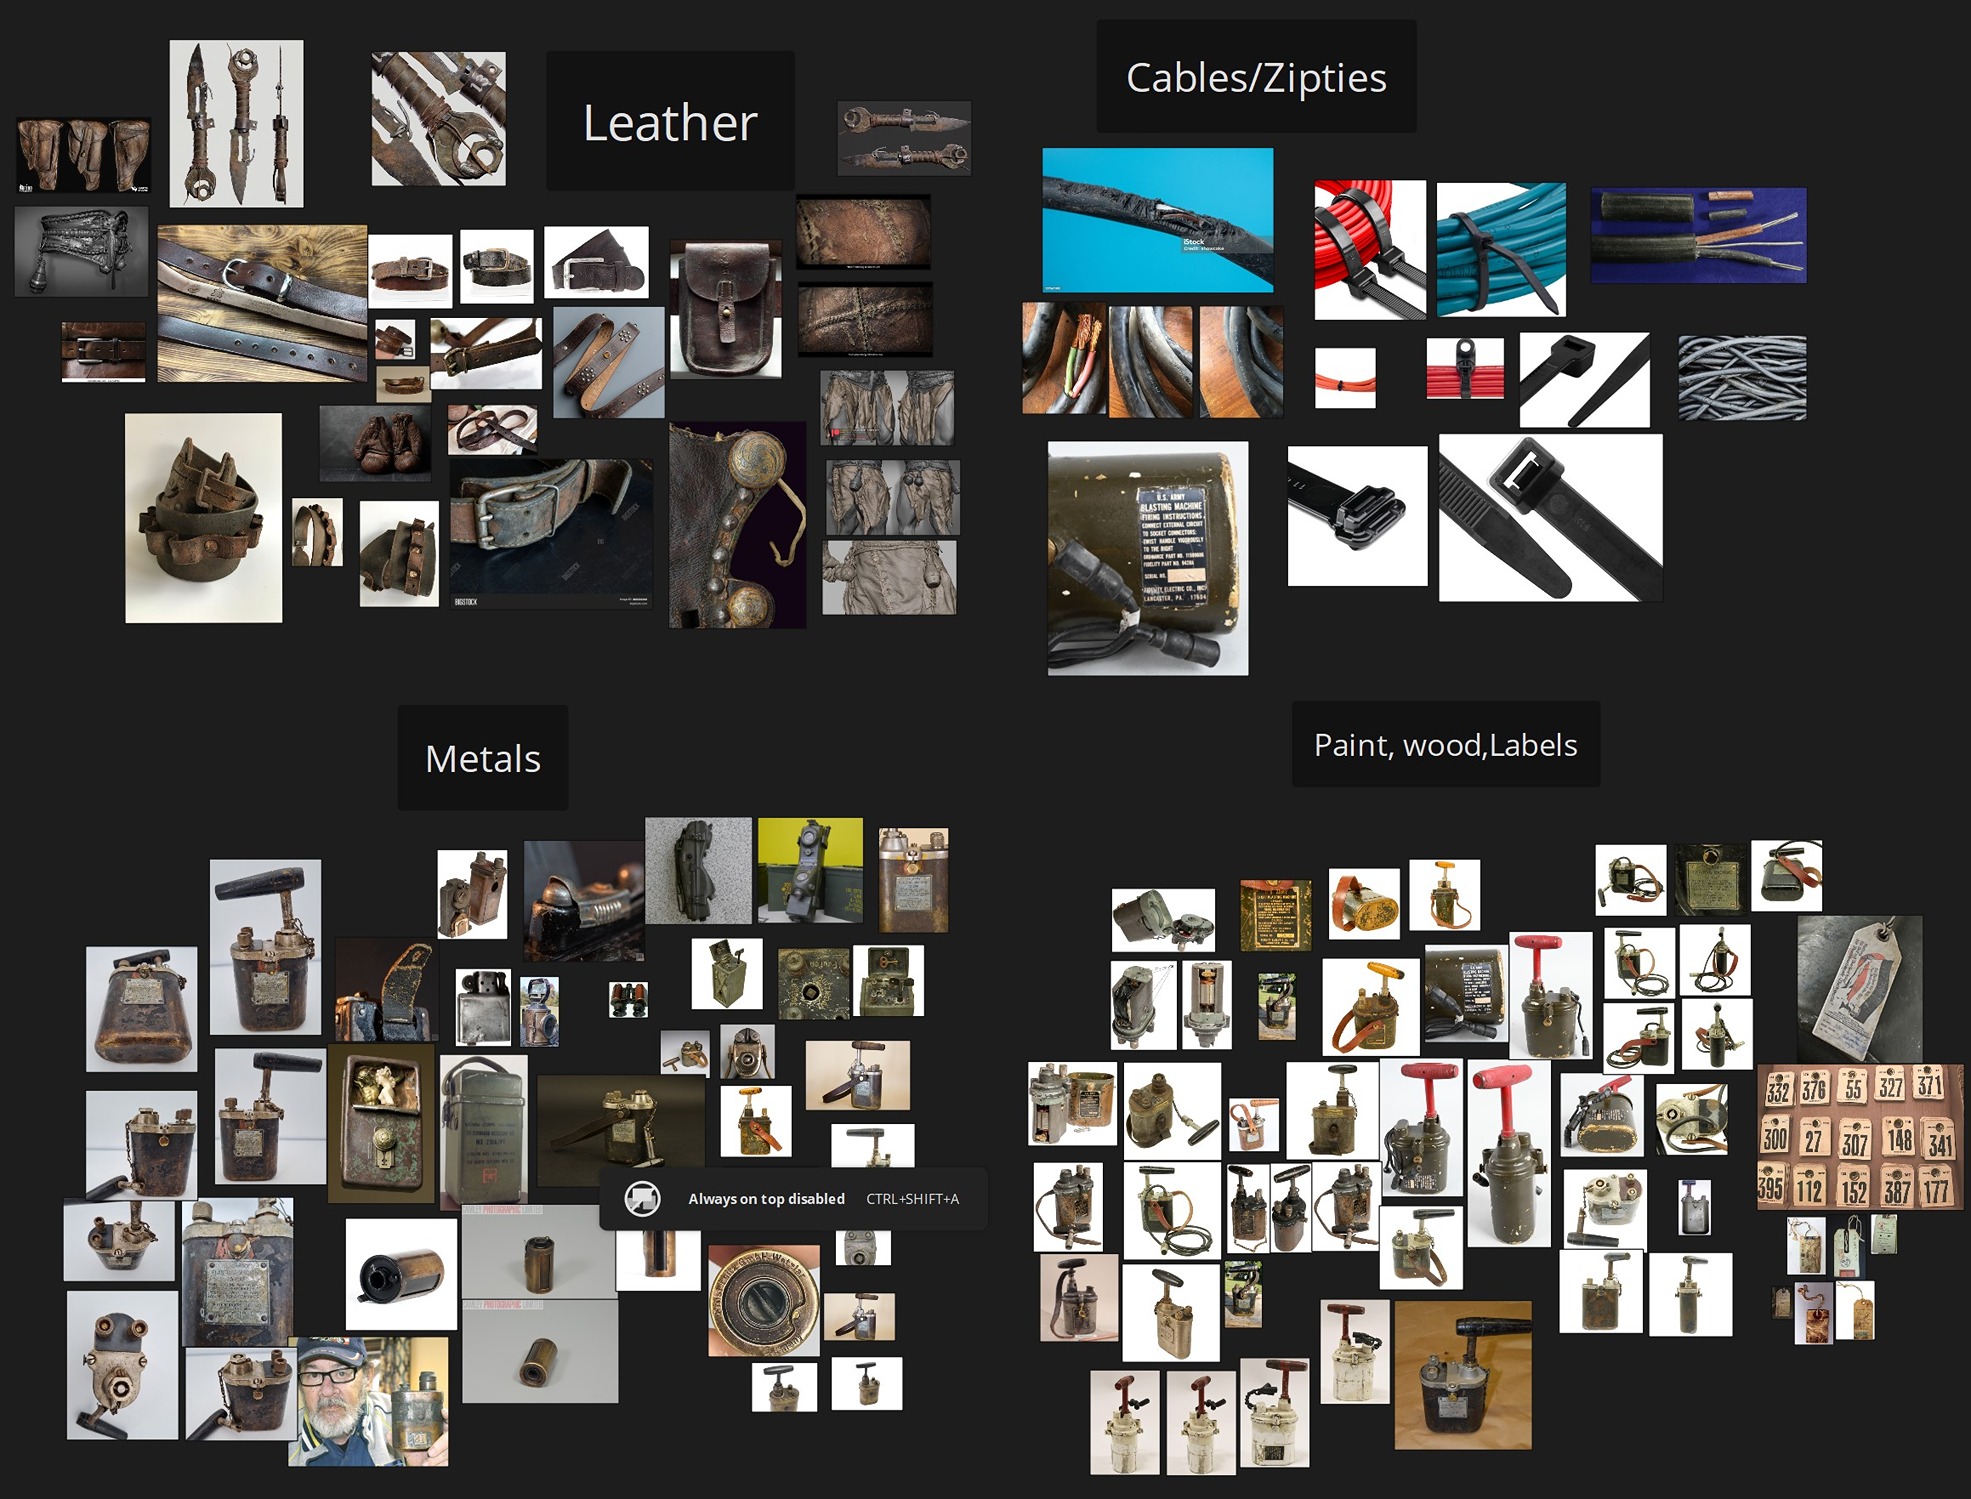
Gathering references is crucial for me and greatly impacts the final result. Before I even start the blockout, I spend several hours researching and finding high-quality references, continuing this throughout the project.
Personally, I blend elements from multiple references, adding my unique touch. I seek inspiration from various props, not just those related to my current project.
By combining multiple references, I aim to enhance my work, keeping in mind detail distribution, contrast, and rest areas. I often find valuable sources on auction websites and marketplaces such as eBay.
Blockout
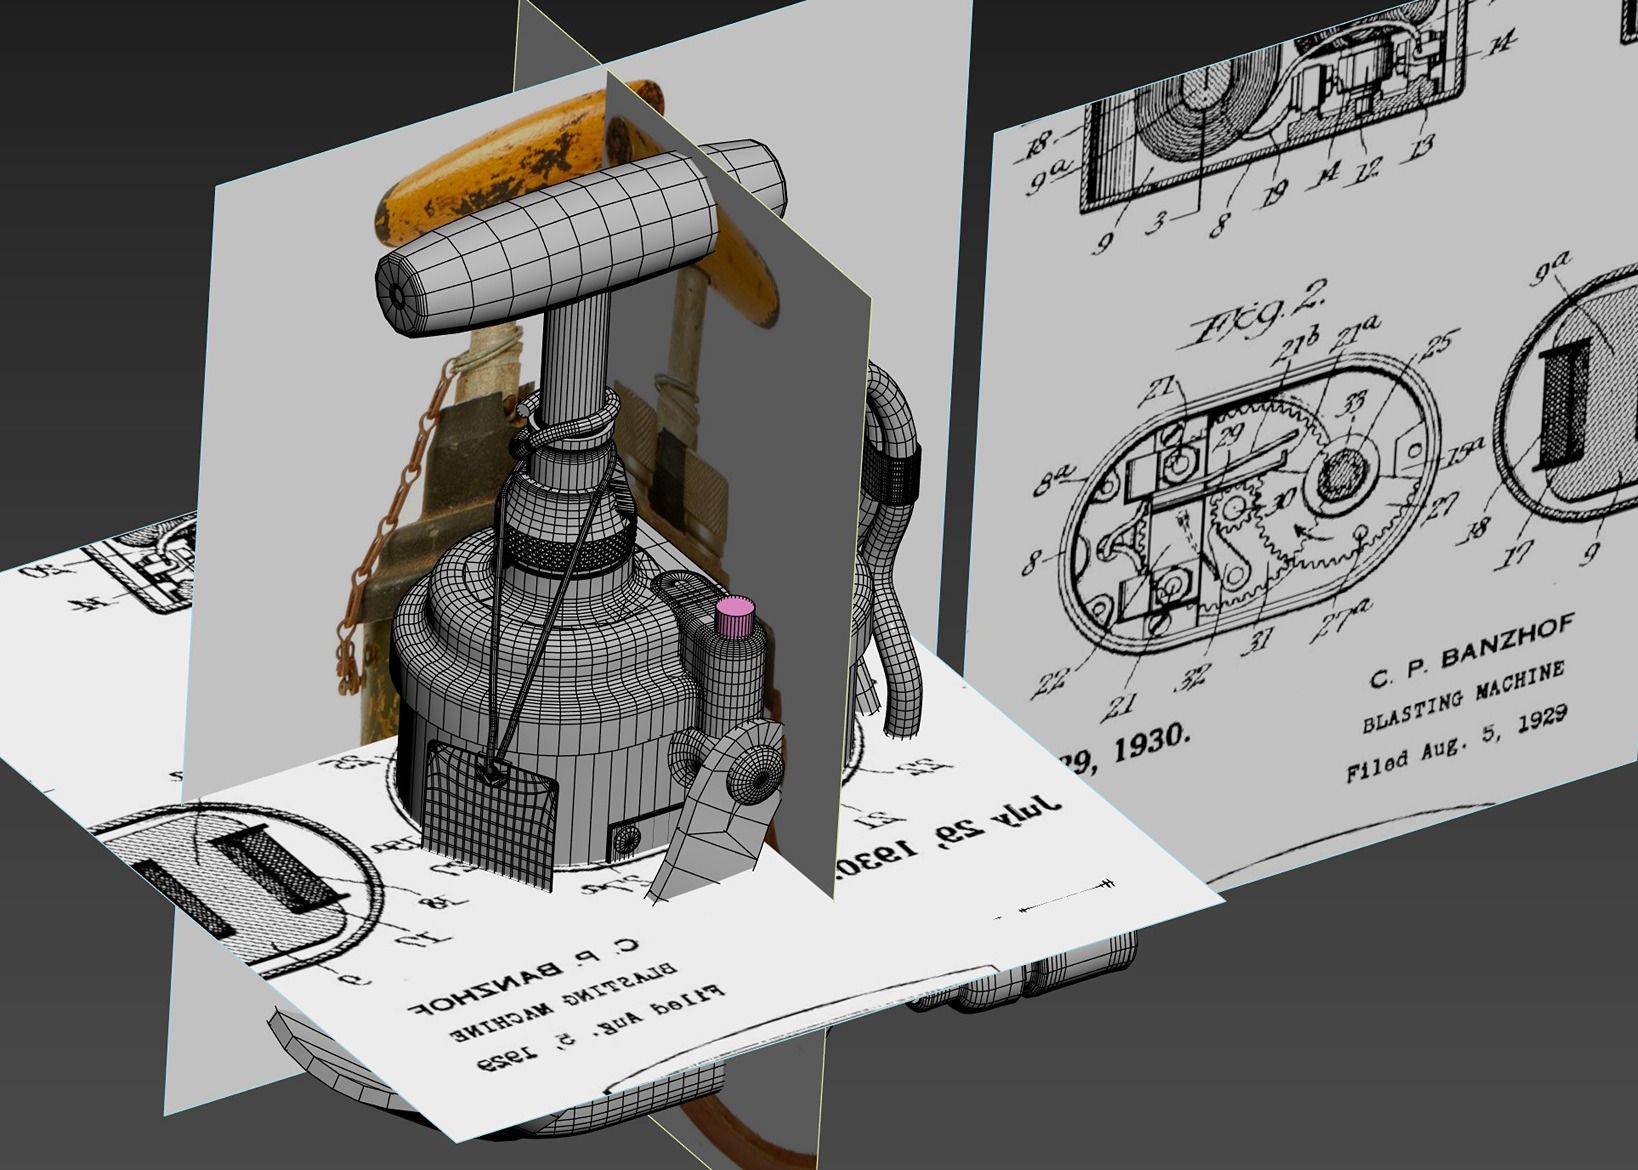
For the blockout, I was fortunate to find some schematics online and references close to orthographic view, which helped me get accurate proportions.
I take great care here to ensure that scale is correct and matches real life, avoiding future issues.
Modelling
The modeling approach utilized polygon modeling and simple boolean operations, with a primary focus on speed.
This involved achieving quick high-poly results and preparing the geometry for future low-poly meshes by easily removing edge loops.

The principle of working non-destructively whenever possible is highly beneficial.
In 3ds Max, I leverage the modifier stack, enabling me to preserve modifications and make adjustments at any stage.
Highpoly
The high-poly stage is straightforward and employs widely used techniques.
I apply all booleans, import the model into ZBrush, and use Dynamesh on each part. If needed, I polish some edges to make them smoother.
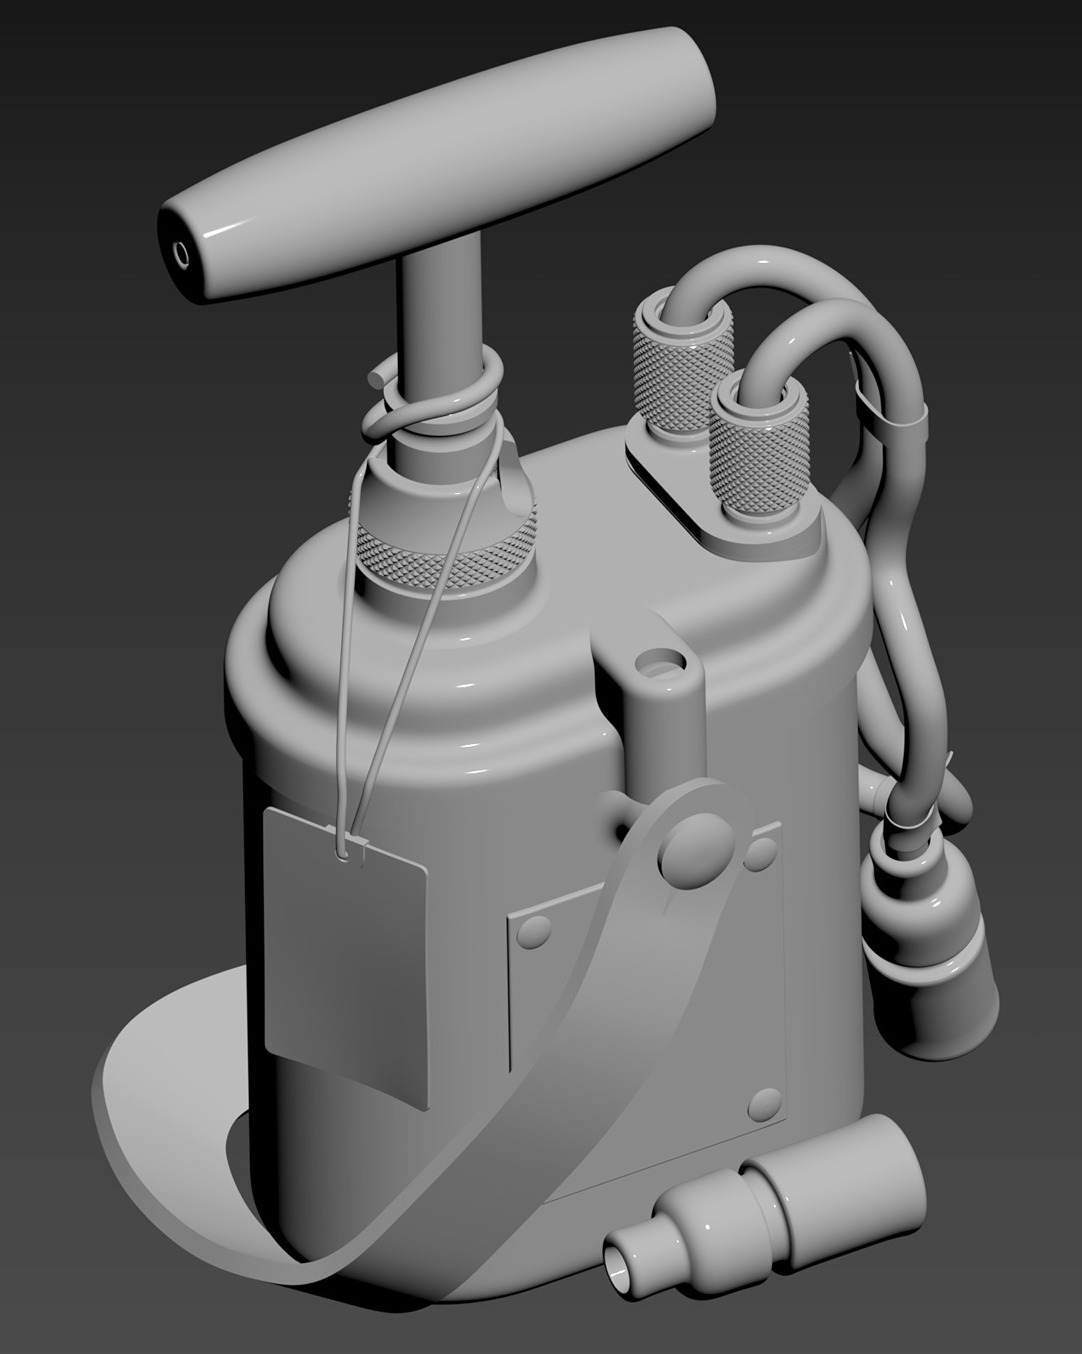
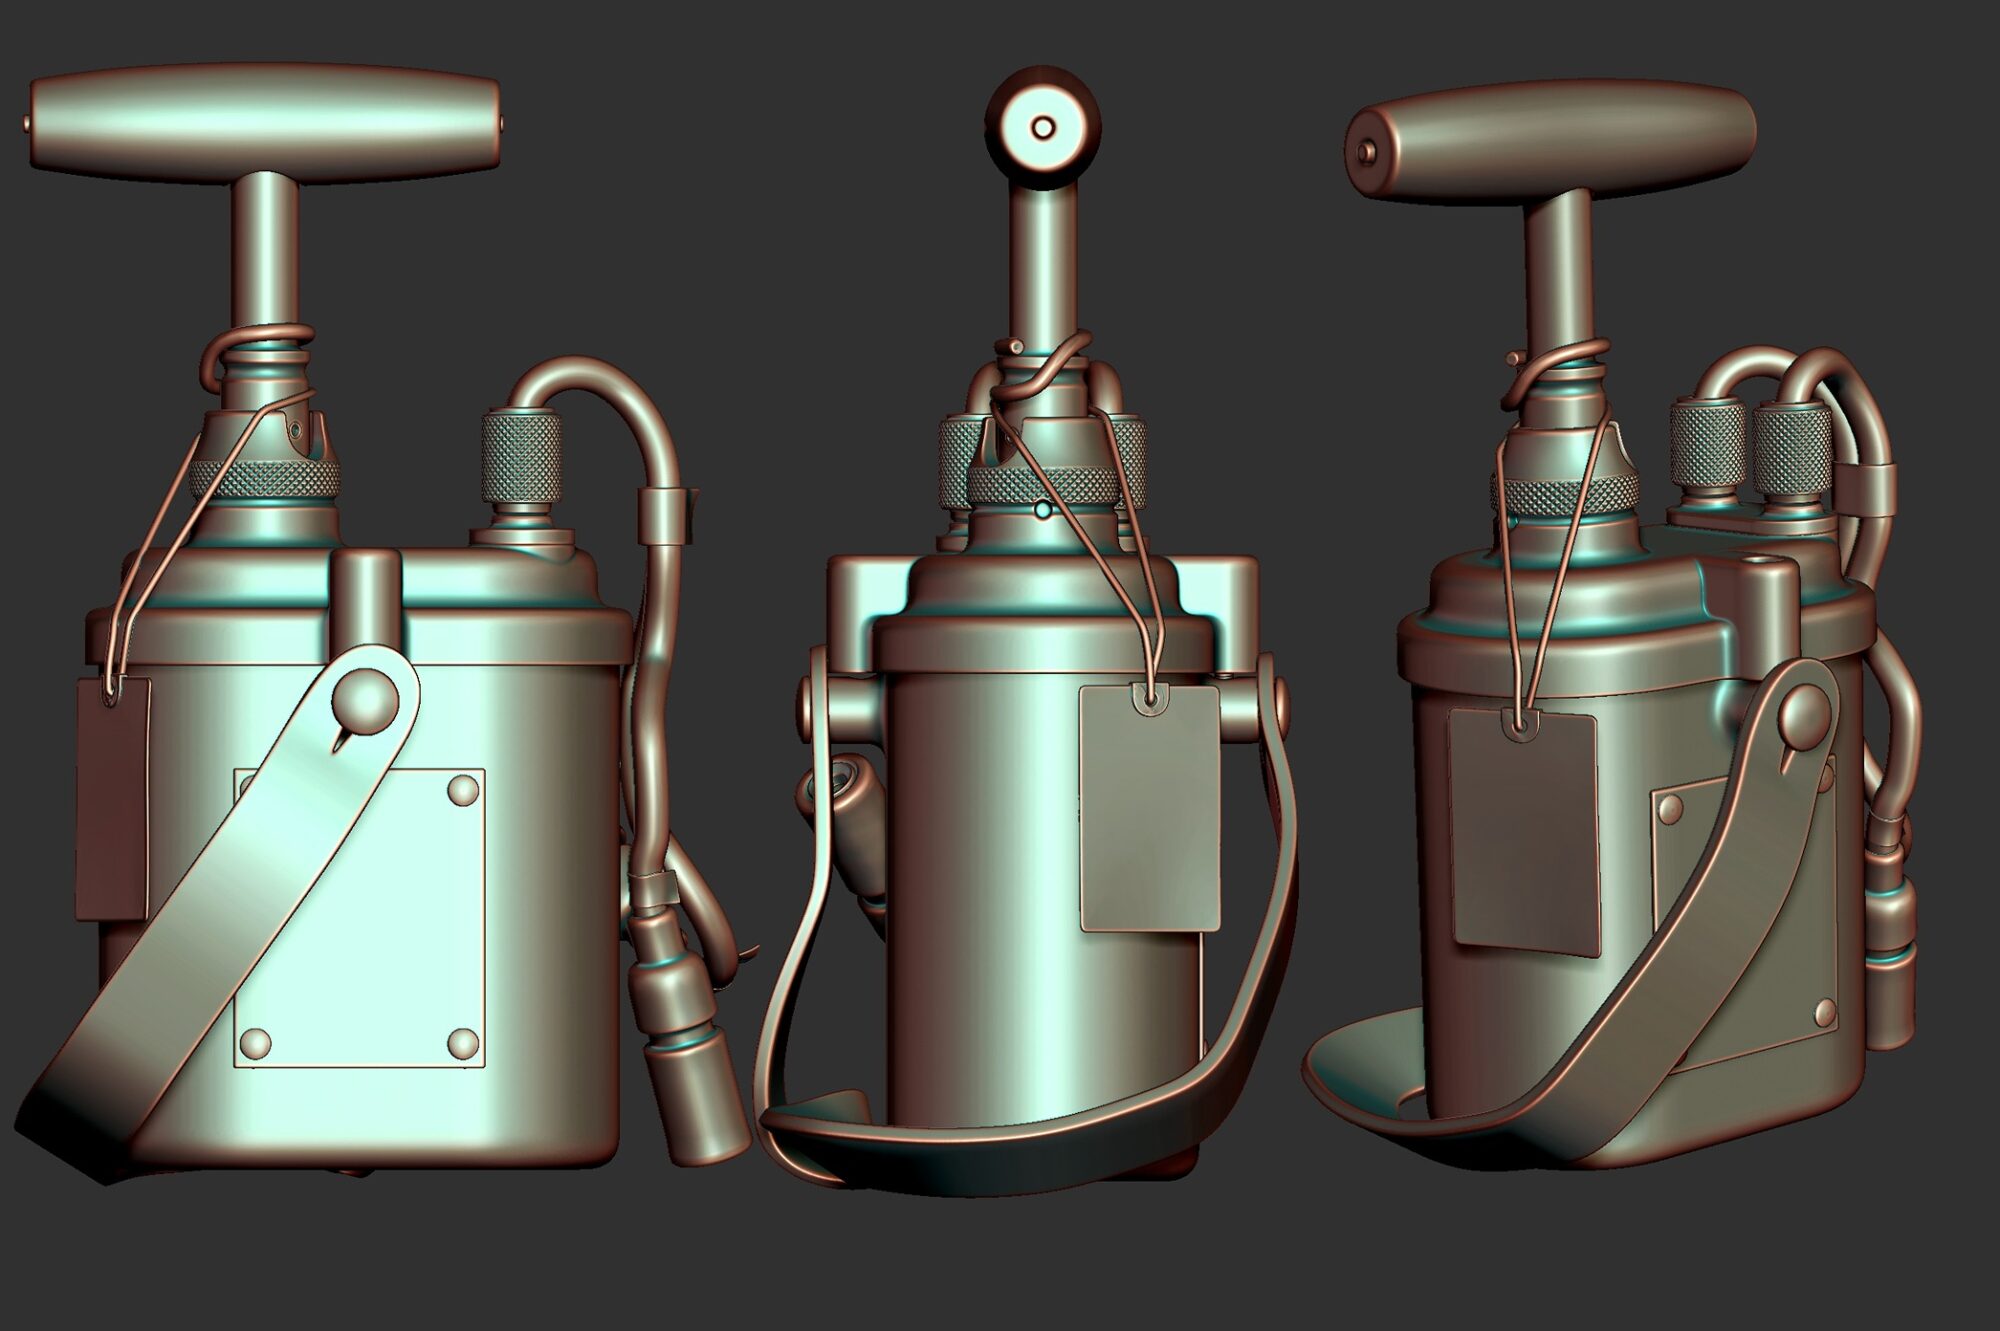
At this stage, I’m also preparing the highpoly for some light sculpting.
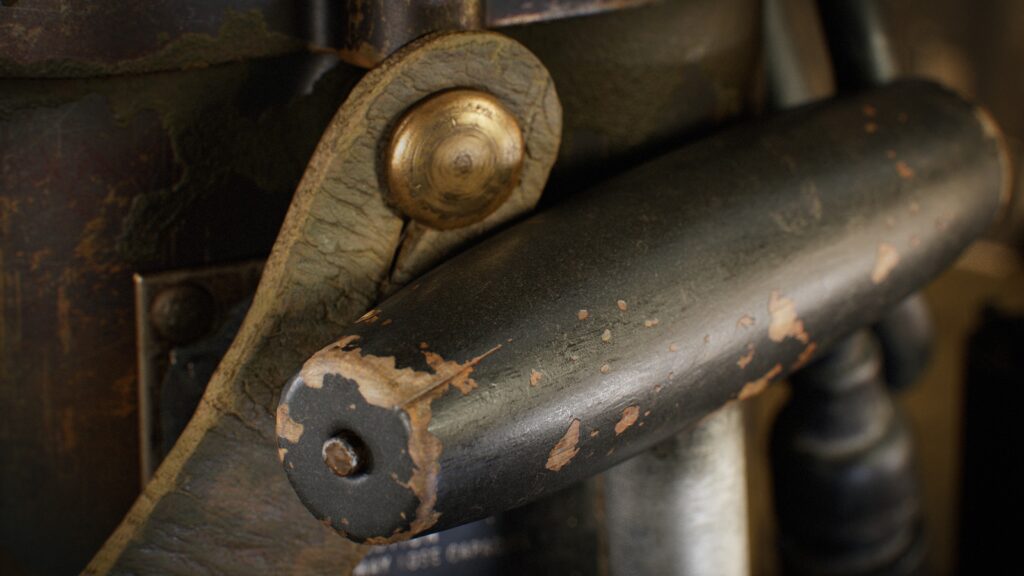
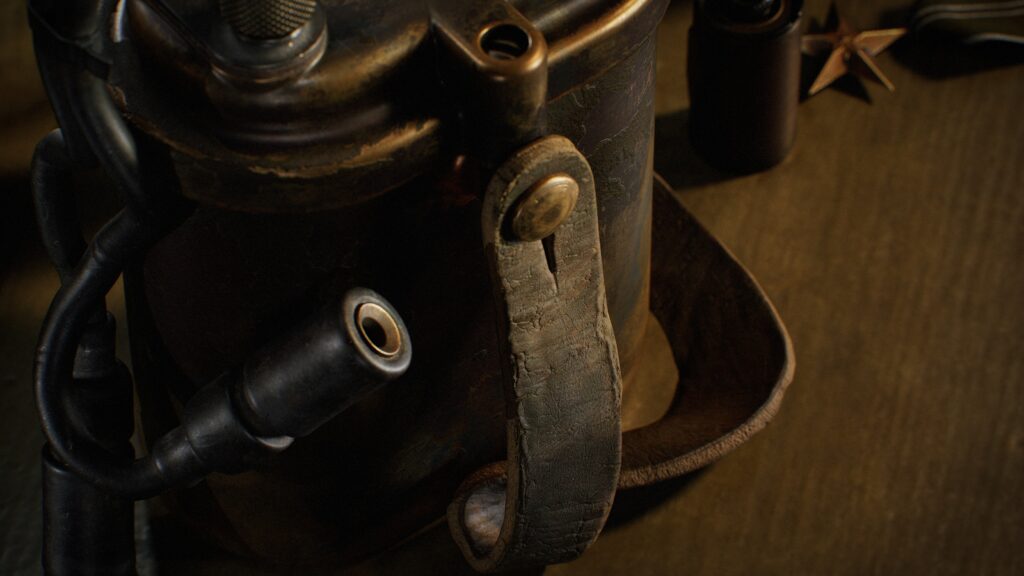
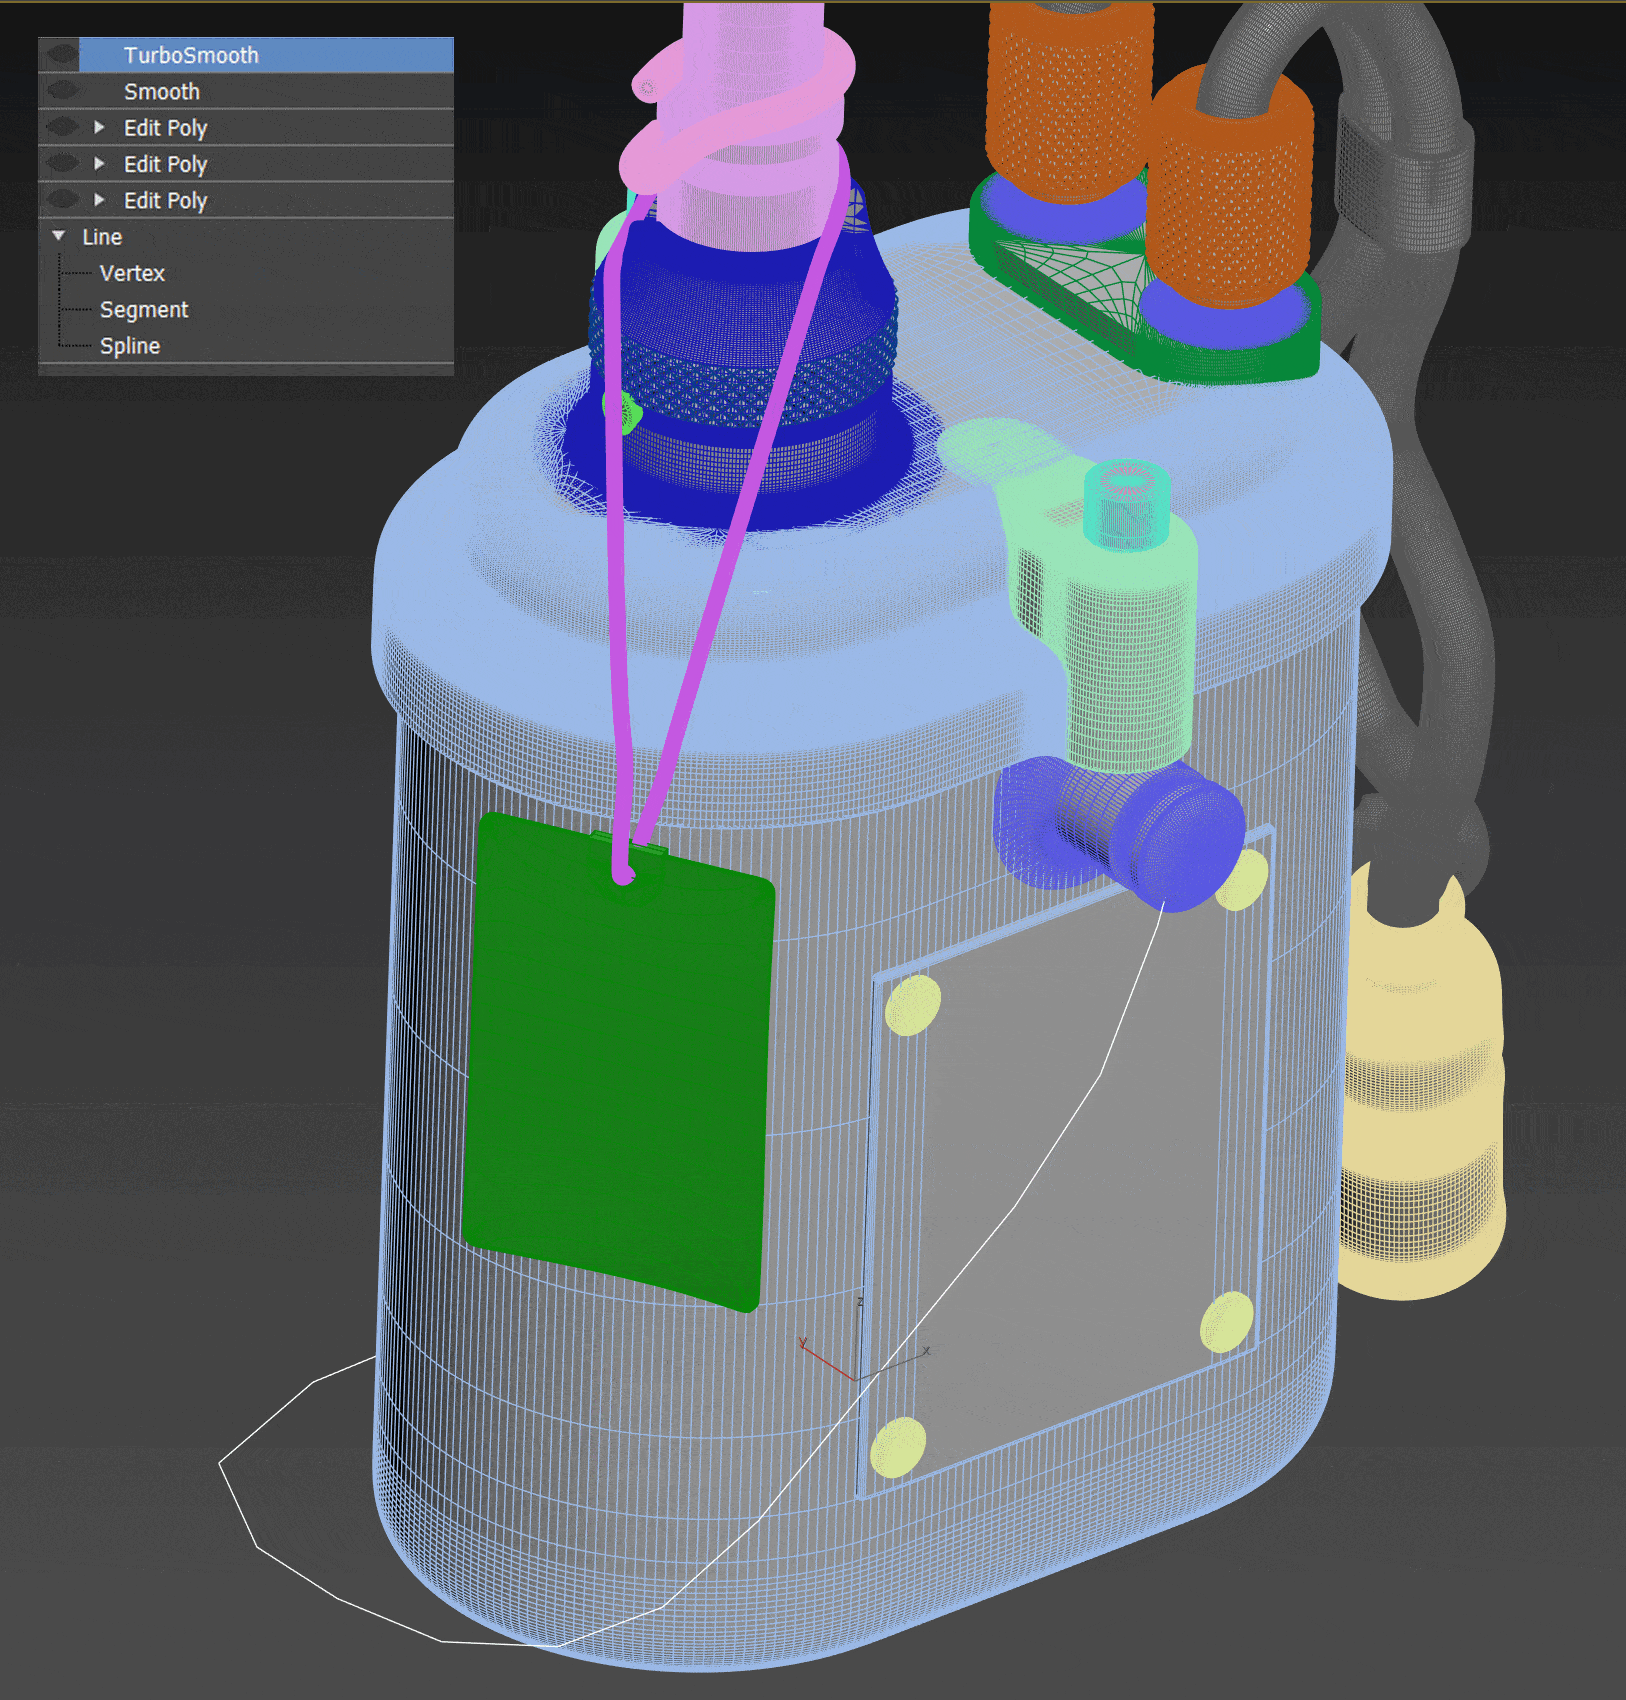
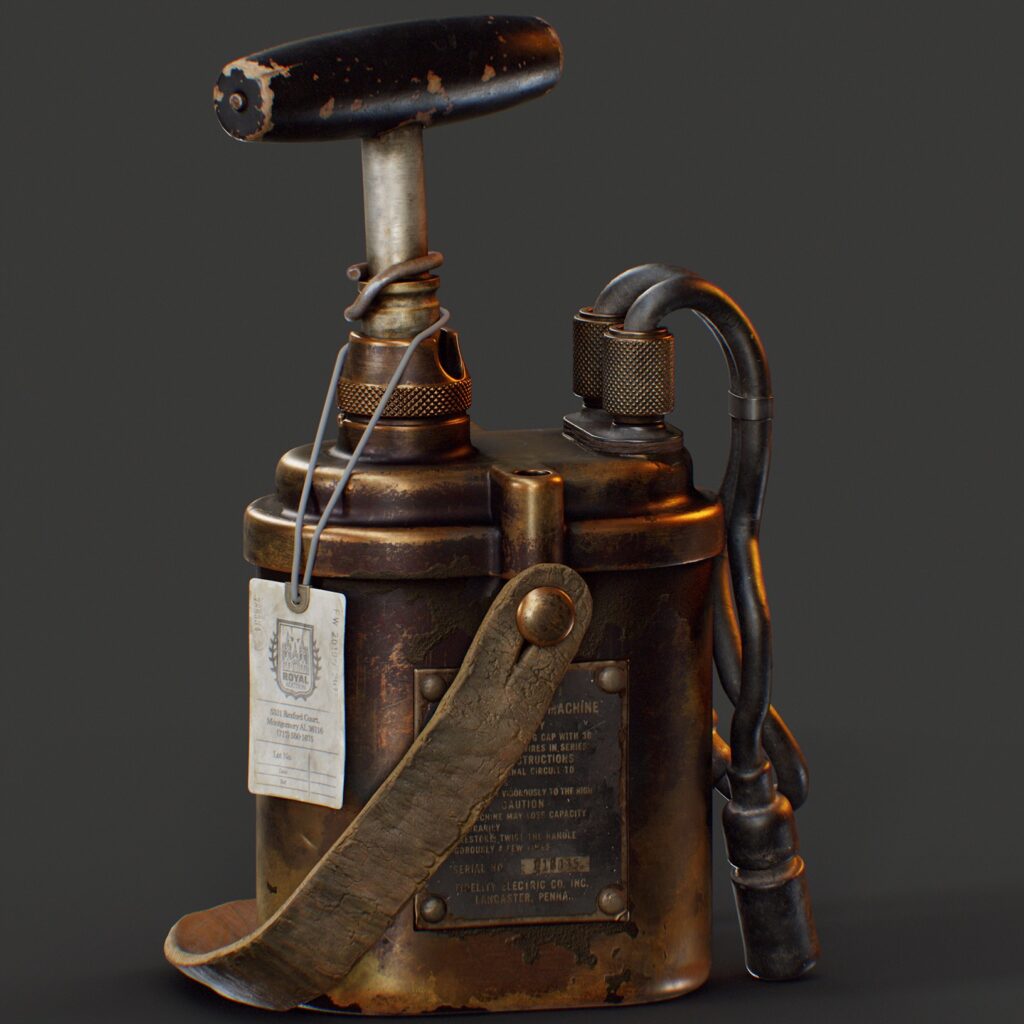
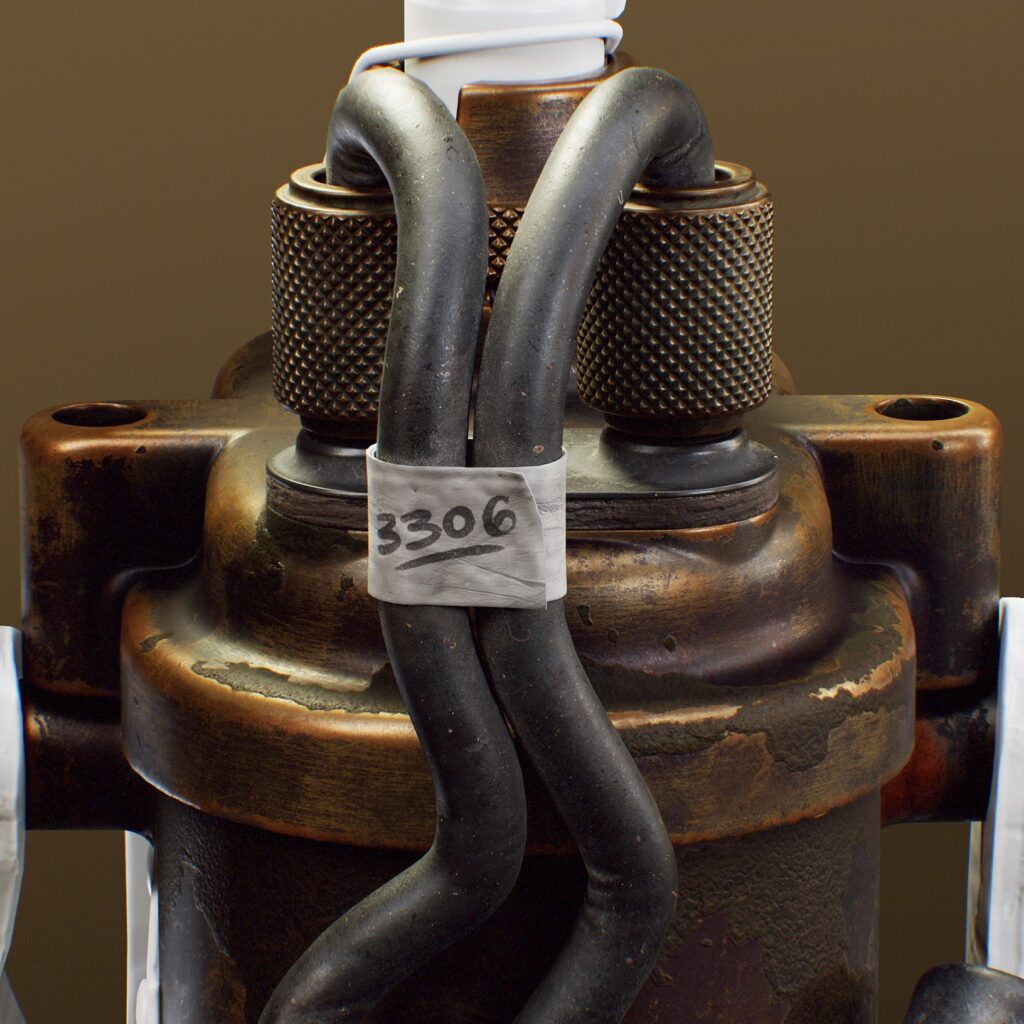
In these screenshots, you might notice some elements that differ from the final piece in my portfolio, such as the paper tag and the tape on the wires.
These were initial ideas that I felt didn’t work well in the final composition, so I changed them. I’ll discuss this in more detail later.
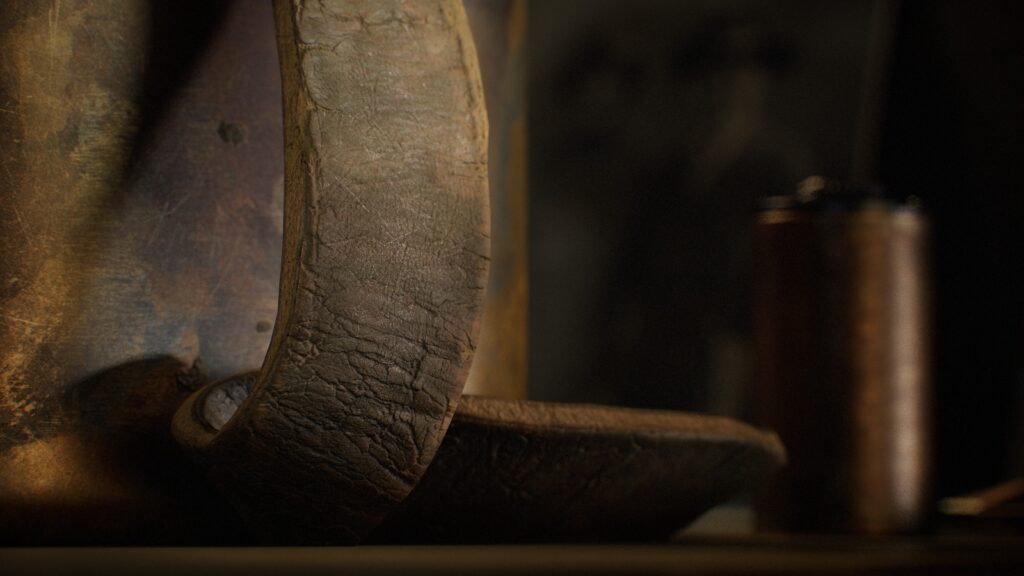
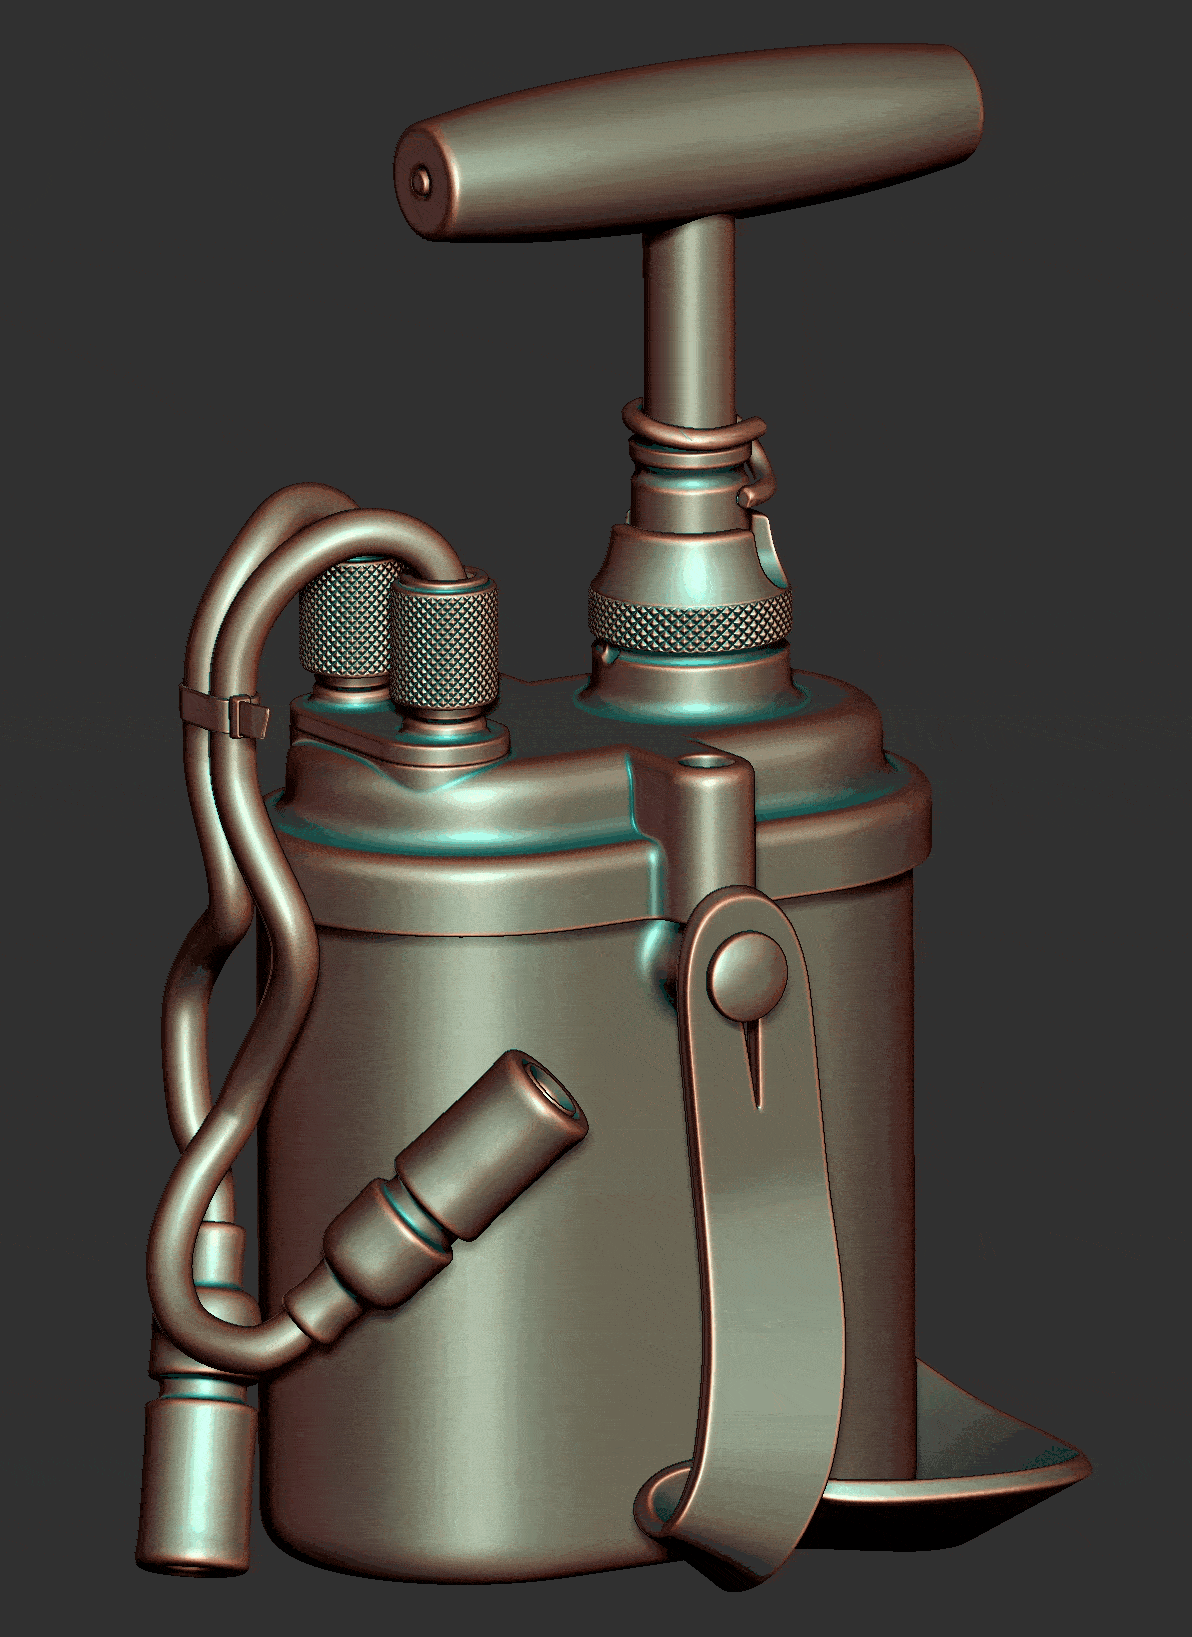
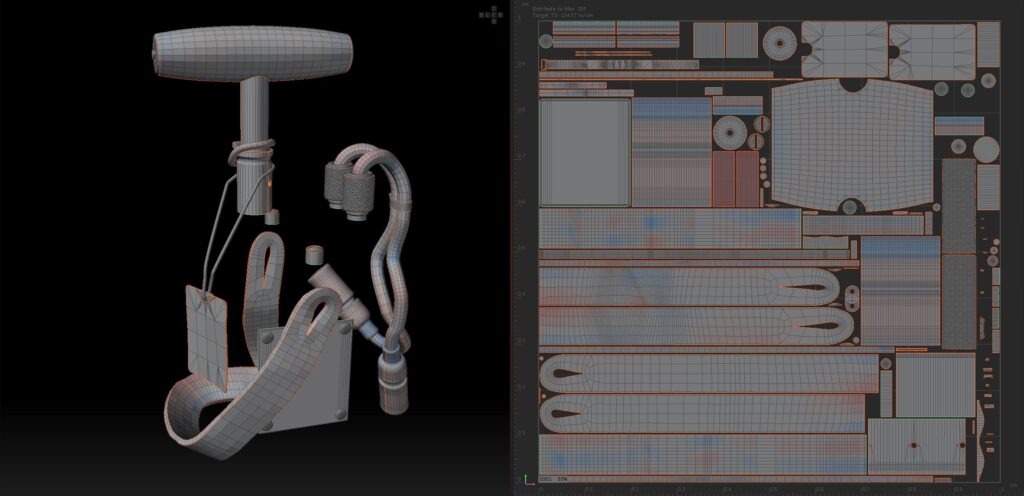
Sculpting Pass
I aimed to do most of the detailing in Painter, but some small details were better represented as baked details. I minimized sculpting and initially kept the belt’s details in ZBrush to a minimum.
However, this didn’t yield great results during the texturing phase, so I went back and added more details. I wanted to demonstrate that the path from concept to final product isn’t always straightforward.
Mistakes or changes in ideas can occur, and I’m willing to spend extra time to ensure everything looks as good as possible. In these next two images, you can see the initial approach and the revised highpoly along with a few other small changes.
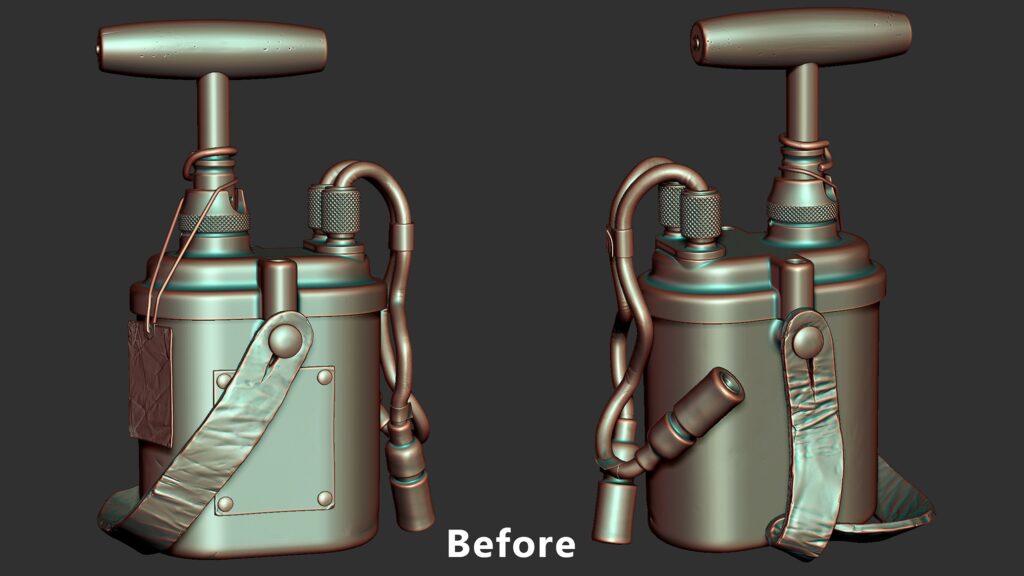

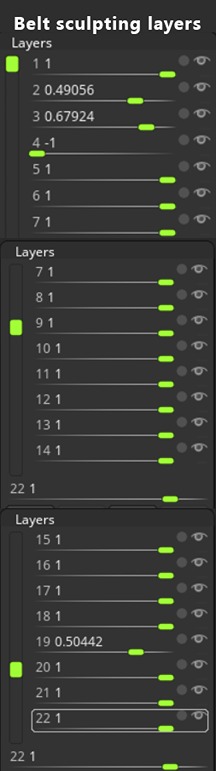
Because I used many layers on each subtool while sculpting, I can easily modify or remove details, adjust their intensity, or iterate further.
For the leather sculpting, I used some of the techniques from Brendon Bengtons, which he illustrates in this short YouTube video:
A helpful tip is to use the Morph brush after storing a morph target. This allows you to selectively add or remove details in specific areas.
For instance, you can store a morph target, apply polish crisp edges to your entire model, and then use the Morph brush to restore sharpness to certain edges as needed.

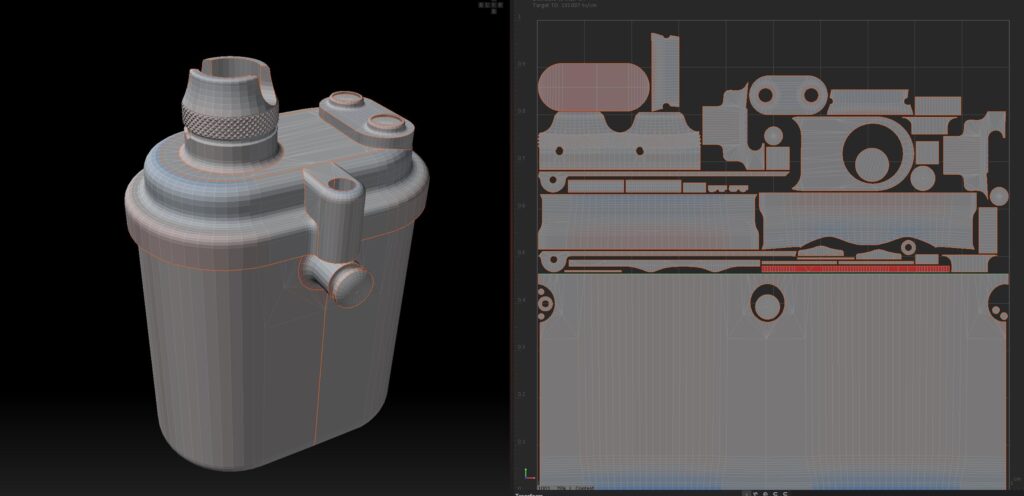
UVing
Since my goal was texture fidelity rather than game optimization, I split the asset into two UV sets, targeting around 135 texels/cm at 4k. Using RizomUV made this process easy.
The constraints controls allowed me to straighten the UVs, which improved baking quality and packing efficiency. However, because the belt is very long, I had to place a UV seam in the middle to optimize packing.
This can result in visible seams in the texture, but it’s an issue that can be fixed later in Painter.
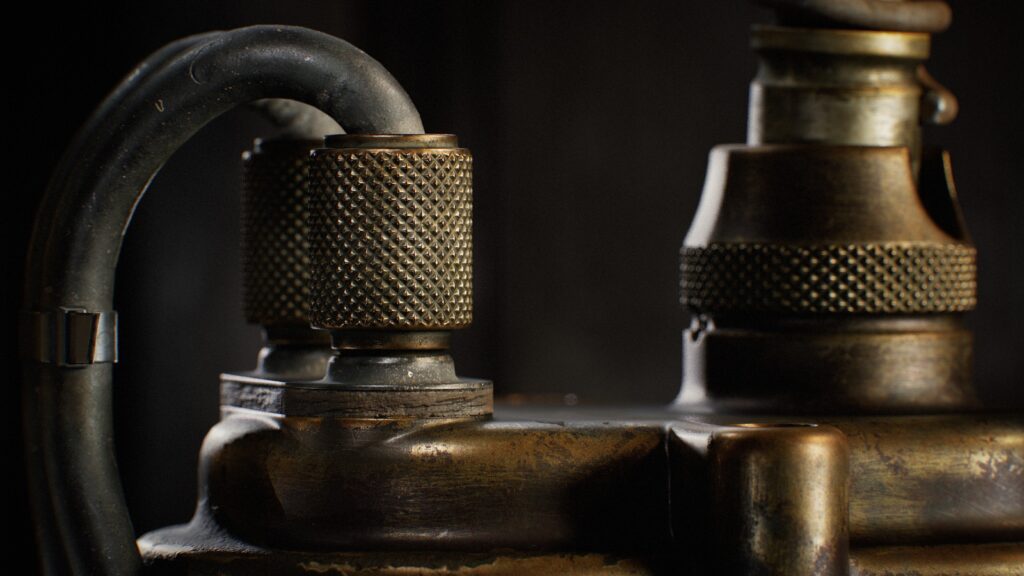
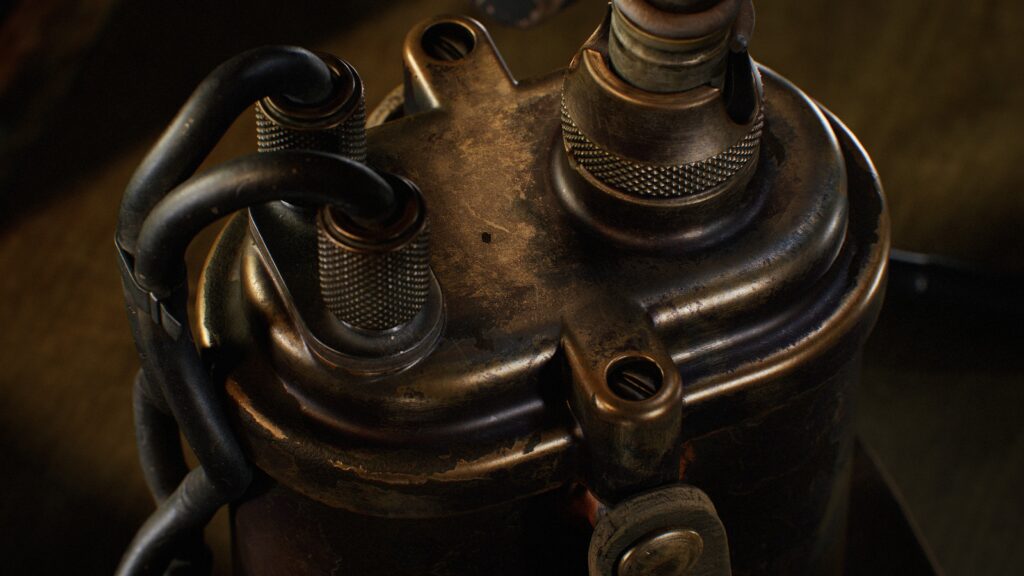
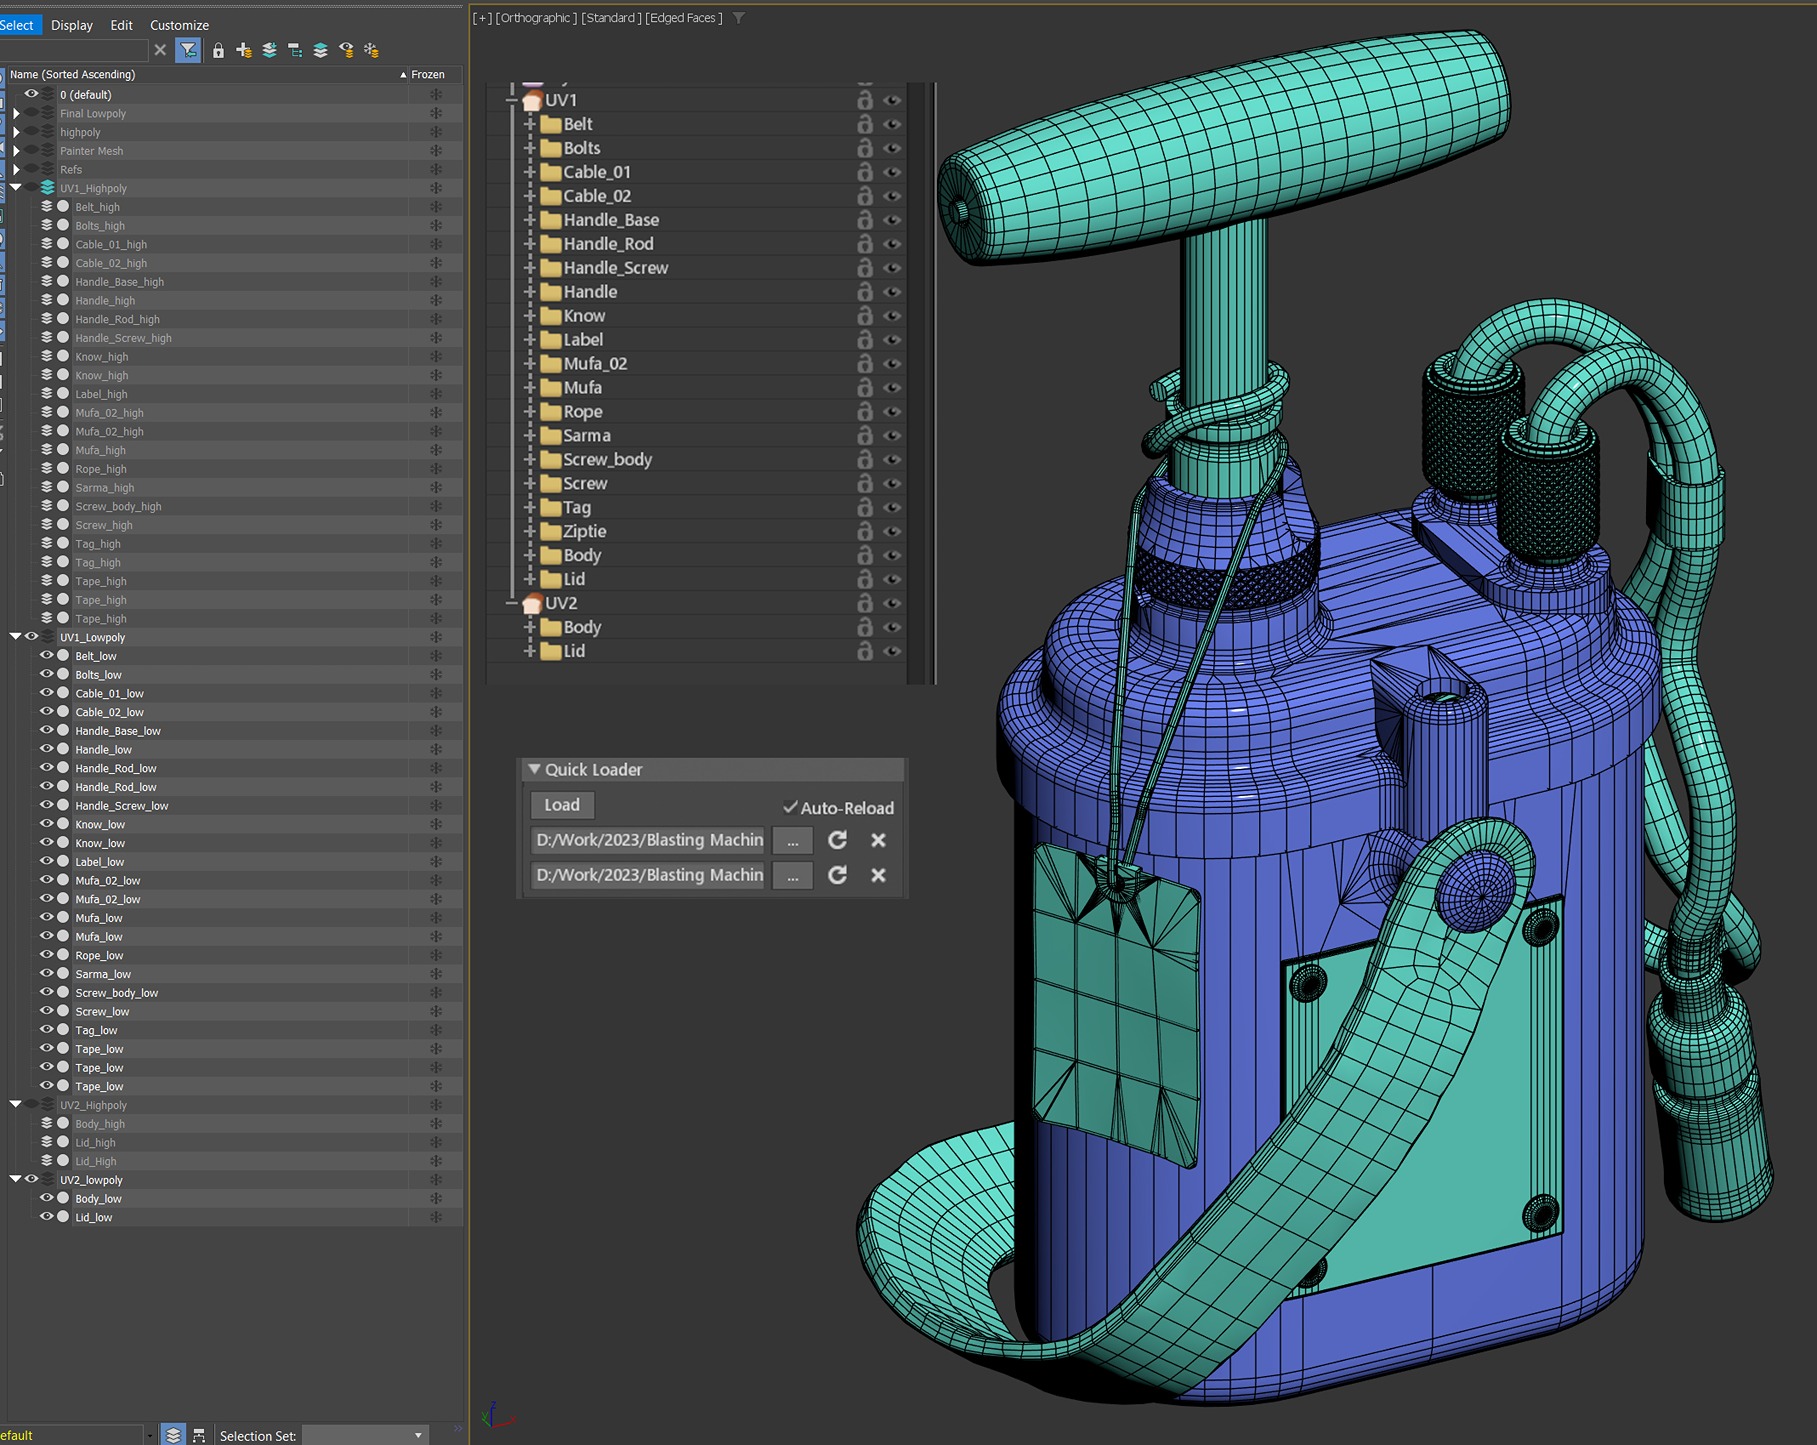
Baking
I always use Marmoset Toolbag for baking. Its speed and control options are, in my opinion, the best in the industry. A crucial step for me is naming everything in the DCC with _low and _high suffixes before exporting.
This makes importing and setting up in Marmoset extremely fast, and any future changes for rebakes will be automatically updated using the quick loader function.
As shown here with the naming in 3ds Max, Marmoset automatically sets up the grouping. Staying organized is a valuable skill to develop. It not only makes it easier for future teammates to work with and modify your files, but you’ll also appreciate it if you need to revisit the files after a long time.
Texturing
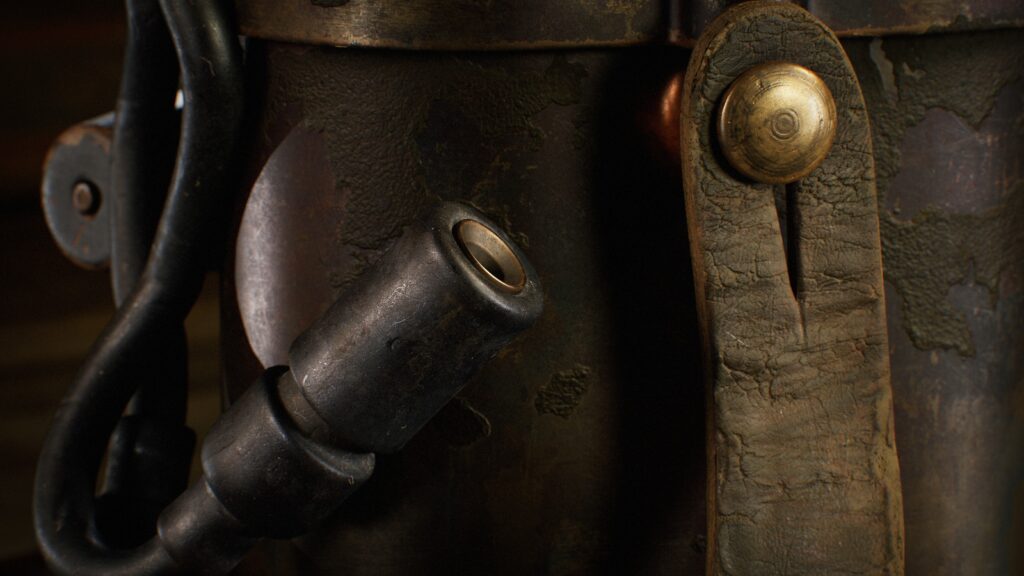
This was by far the most time-consuming stage and one where I really wanted to push the envelope. When adding color and roughness variation, be mindful not to introduce too much noise or repetition.
When adding details, it’s important to avoid introducing random color and roughness without purpose. Instead, observe references closely and replicate details as accurately as possible.
Use alpha stamps from images to enhance realism and tell a story through your details. Consider how materials wear down, suffer damage from sunlight or impacts, and show signs of aging.
Colors tend to fade over time and with sun exposure. Damage and details are often more pronounced in areas that are frequently handled or come into contact with other objects.
Think about these factors and convey them through your textures.
Layer Buildup
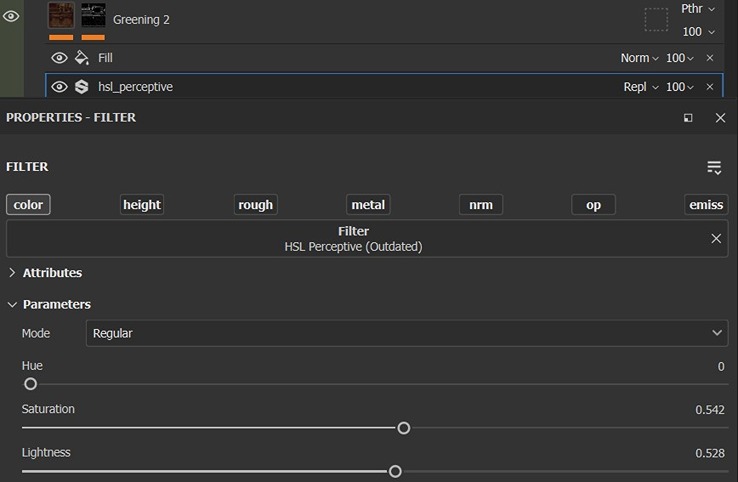
I create my materials by starting with a simple base layer, then gradually adding roughness and color variations.
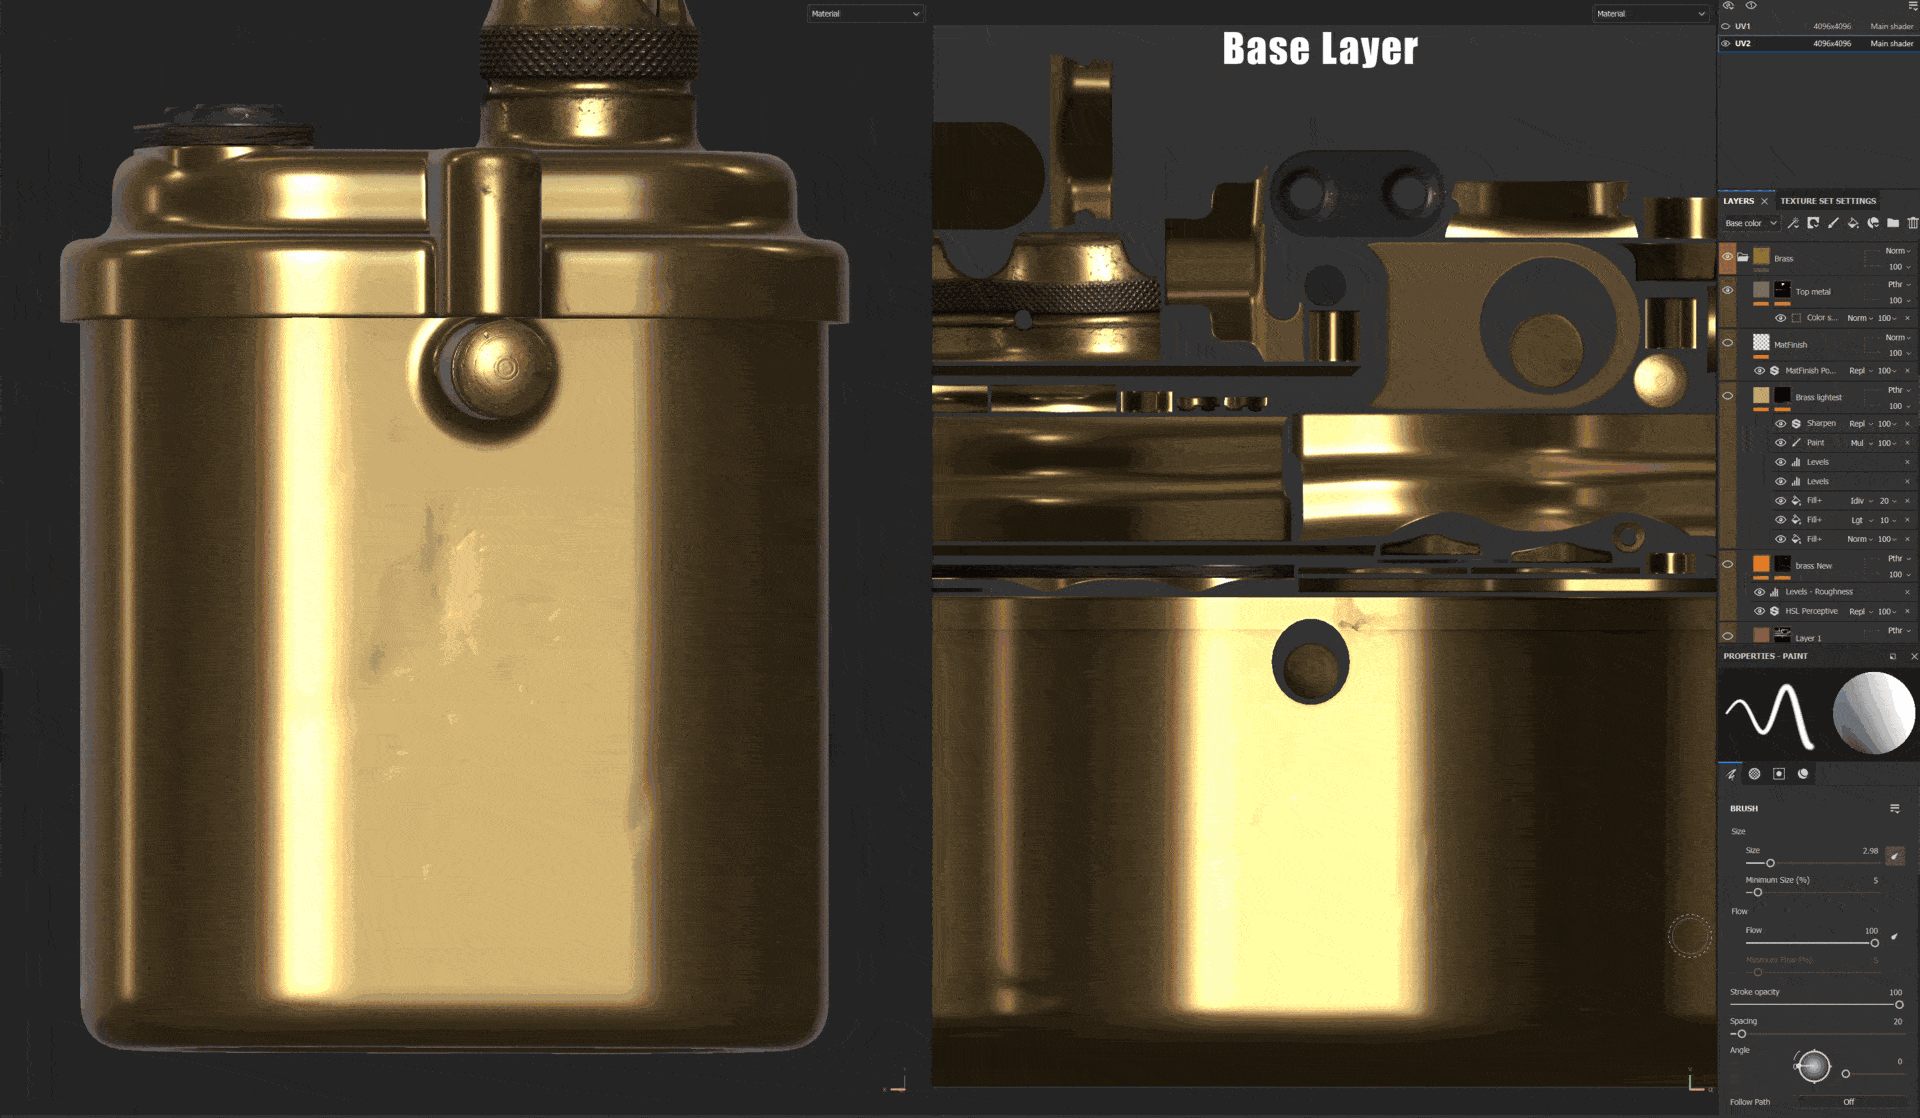
I create color variation by using a layer set to passthrough mode with an HSL filter. This method adds subtle color variations based on the underlying layers.
This way, any tweaks to the base layer or intermediate layers will still blend seamlessly with the color variation.
Alphas
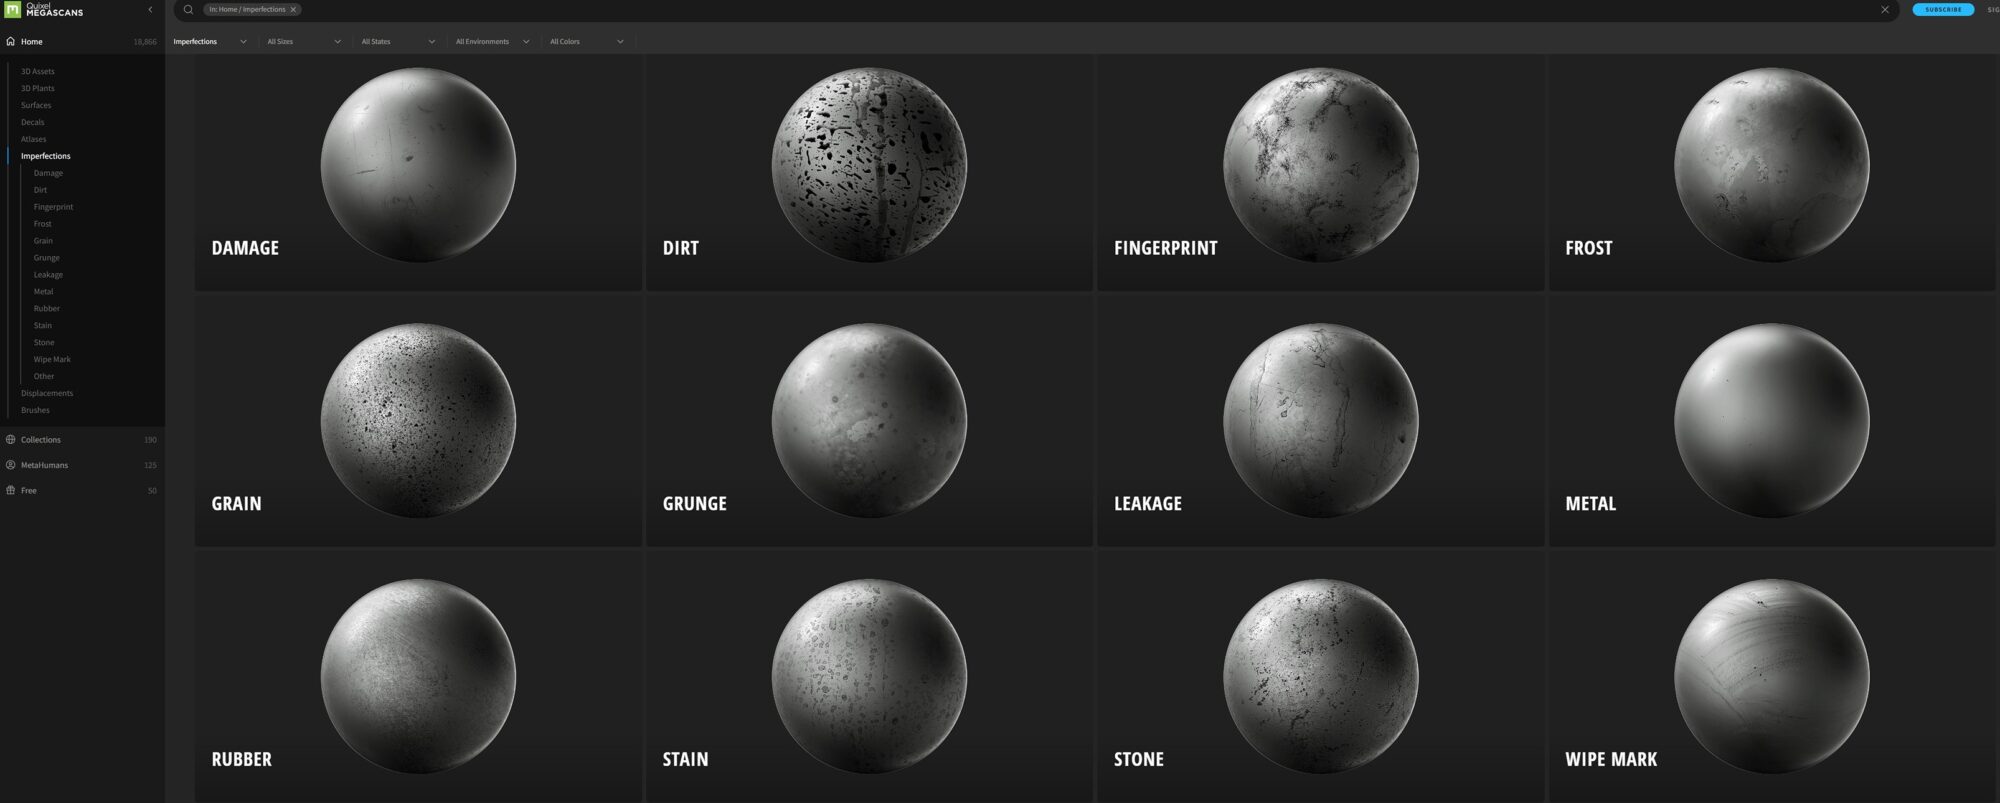
The quality of your masks is crucial. High-quality alphas and stamps greatly impact the final asset. For my personal projects, I use Megascans imperfection alphas and my own custom library.
Megascans provide excellent textures, but their high resolution can be demanding on your PC.
Building the Masks
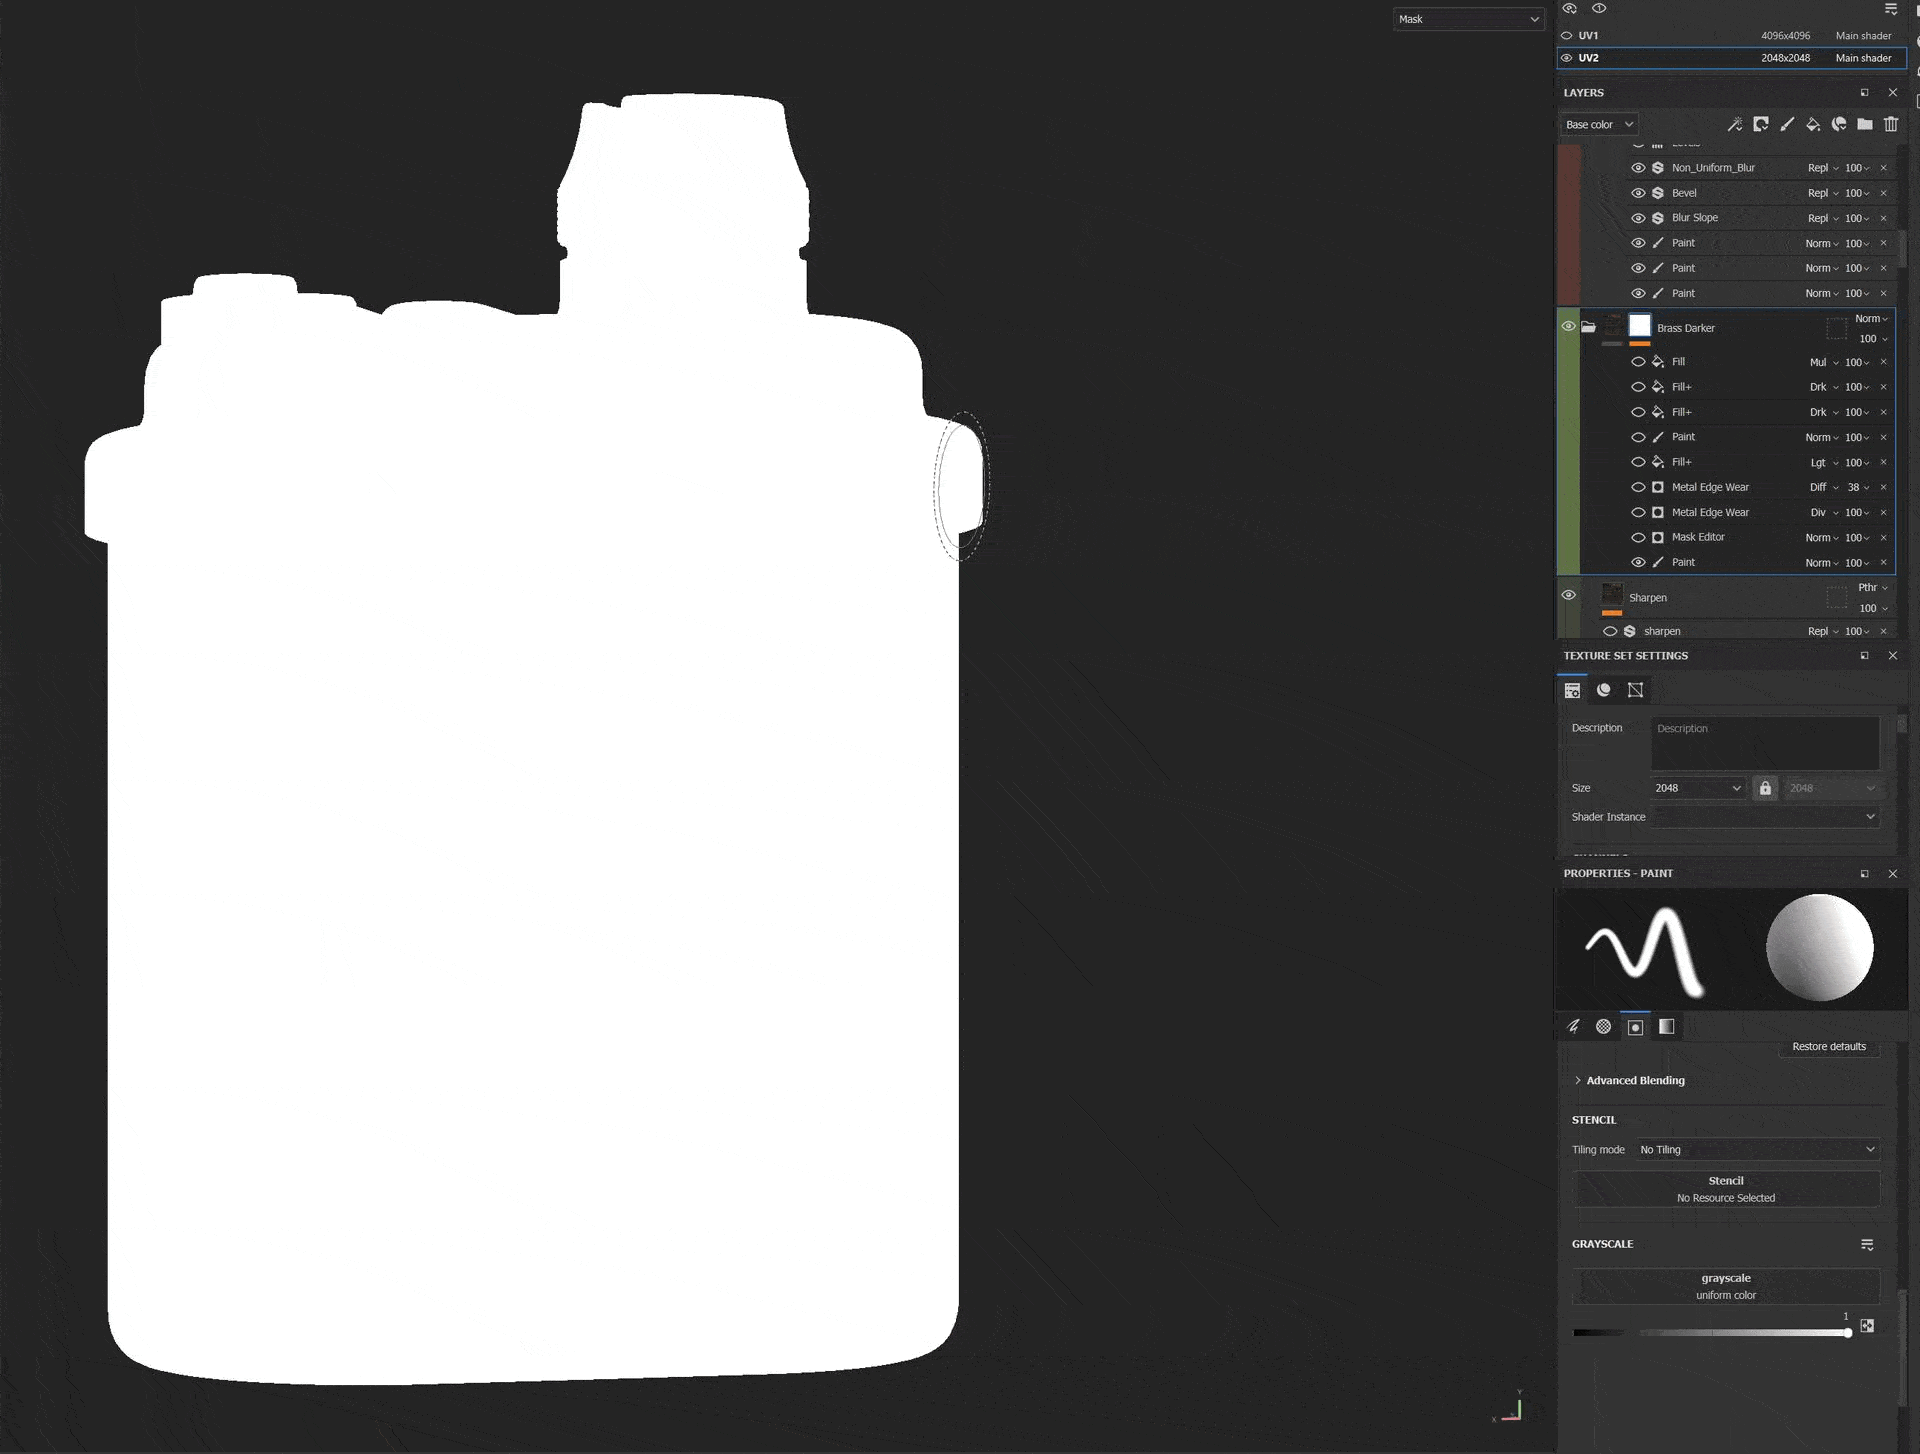
I primarily control my layers through masks, which has evolved my workflow and given me the most control. Over the years, I’ve developed some custom filters that are extremely useful.
I will share some of these resources for free at the end of the article. One essential filter I created is Fill+. This filter adds mask controls such as levels, blur, value clamping, and sharpening directly within the fill itself.
This allows you to adjust the current alpha plugged in, rather than affecting the entire stack underneath as a normal levels filter would.
Interestingly, this filter can also be used to control the levels of an alpha when plugged into Painter’s projection tool.
To my knowledge, this is the only way to adjust the alpha on the fly as you paint, which I found incredibly useful.
Additionally, you can plug anchor points into it, giving you greater control over them.
Another great filter is Non-Uniform-Blur.
This is a basic node from inside Substance Designer which I brought over to Painter and it is extremely versatile in creating interesting gradients, reducing the noise in some alphas, or simply getting a ton of variation from a single alpha.
Here we can see the Non-Uniform Blur used in the actual project:
You can find these filters for free on my ArtStation page.
Make sure to follow me on ArtStation because I plan to share more resources like these and any new custom filters I create in the future will also be available for free.
https://www.artstation.com/a/305754
https://www.artstation.com/a/39459458
Procedural vs Alpha vs Handpainted
I likely use procedural mask building more than you might expect, with high-resolution alphas as my go-to for creating a solid texture base.
However, the most crucial step for achieving believable and realistic textures is hand-painting and manually placing texture details.
This is where I art directly and make deliberate decisions, such as adding interest to dull areas, creating pleasing gradients, and establishing rest areas in the texture.
Anchor Points
Anchor points are one of the most powerful and important features of Substance Painter. They allow us to semi-procedurally drive detail by linking other layers to what we paint in an anchor point layer at the bottom.
Any adjustments to the mask using procedural filters—such as slope blur, non-uniform blur, levels, and more—will automatically update whenever the anchor point mask is modified.
I highly recommend experimenting with this feature to see how it can enhance your textures. Here are a couple of examples from my project where I use anchor points.
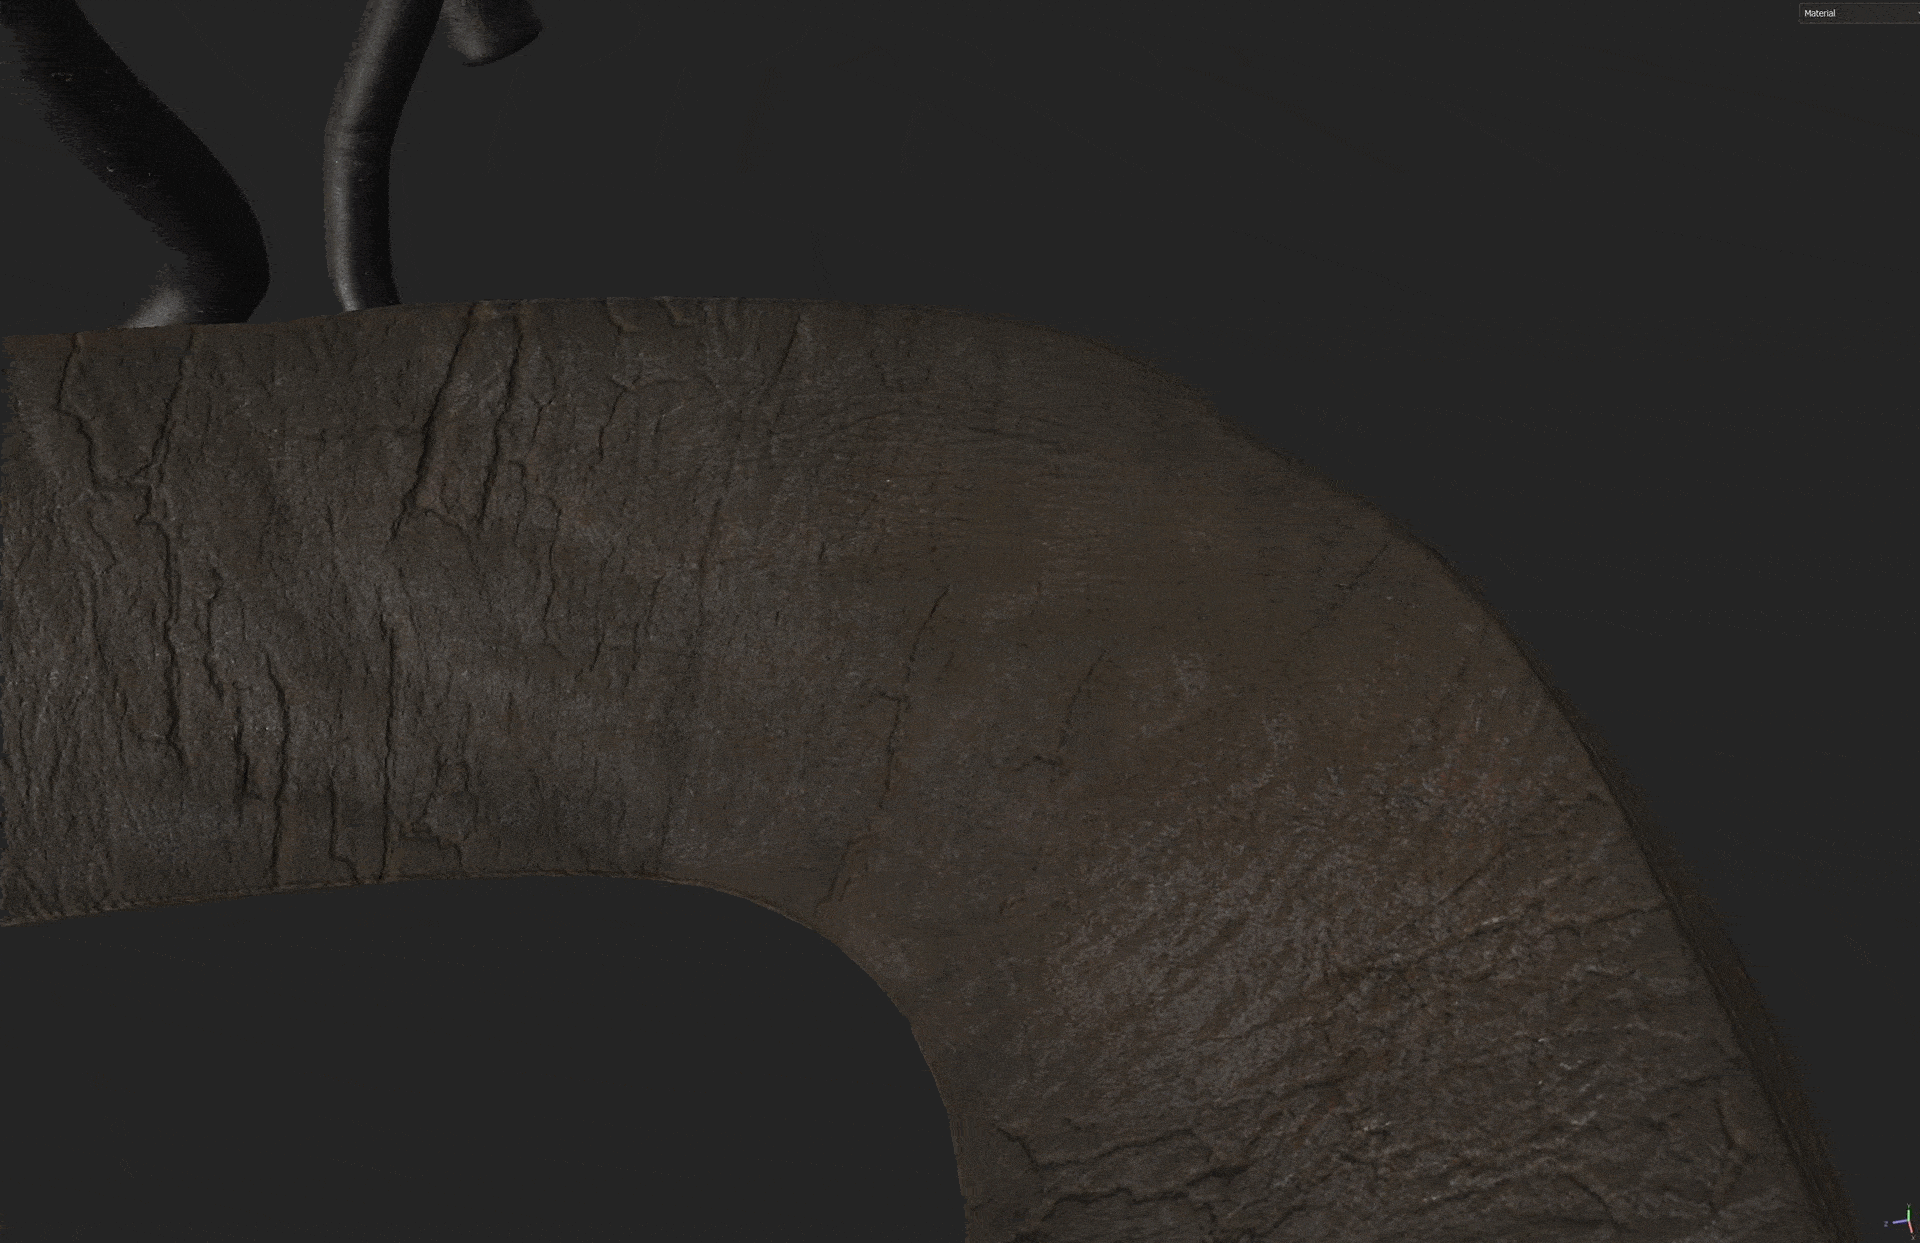
By painting leather cracks on the anchor point layer, I can then add effects to enhance the basic hand-painted details. This includes accentuating the edges of the cracks, darkening the insides, and using slope blur to make the crack lines more irregular and natural.
Seams Fix
Inevitably, seams can appear in our models, especially when using UV-projected textures or alphas. To fix these seams, I use a layer with all channels set to pass through, and then employ the clone stamp tool to hide the seams.
This technique was particularly useful in my project for the leather belt, which required a UV cut down the middle due to its length.
Mistakes & Outtakes
A project rarely goes exactly as planned. Often, there isn’t even a very clear plan at the start, just a broad idea of what I want to create. I rely on intuition and adjust as I go until I achieve something I’m proud of.
Exploration and a willingness to revisit earlier stages, even going back to the high-poly phase if necessary, are crucial for pushing myself to improve.
Getting feedback is especially important, and I rely on many great artist friends for fair and honest criticism. This project was heavily discussed in my personal Discord, where we shared our own approaches and ideas.
I also received valuable feedback from my teammates at Sierra Division, who provided very constructive criticism. One early struggle was with the leather material.
Initially, I did limited sculpting, focusing only on primary and secondary details.
I planned to create most of the small details in Painter, but the results were less than stellar, as shown in these pictures.
I want to highlight that there are always struggles behind the scenes, and not everything works out. I often try different approaches and go through several iterations until I find something that works.
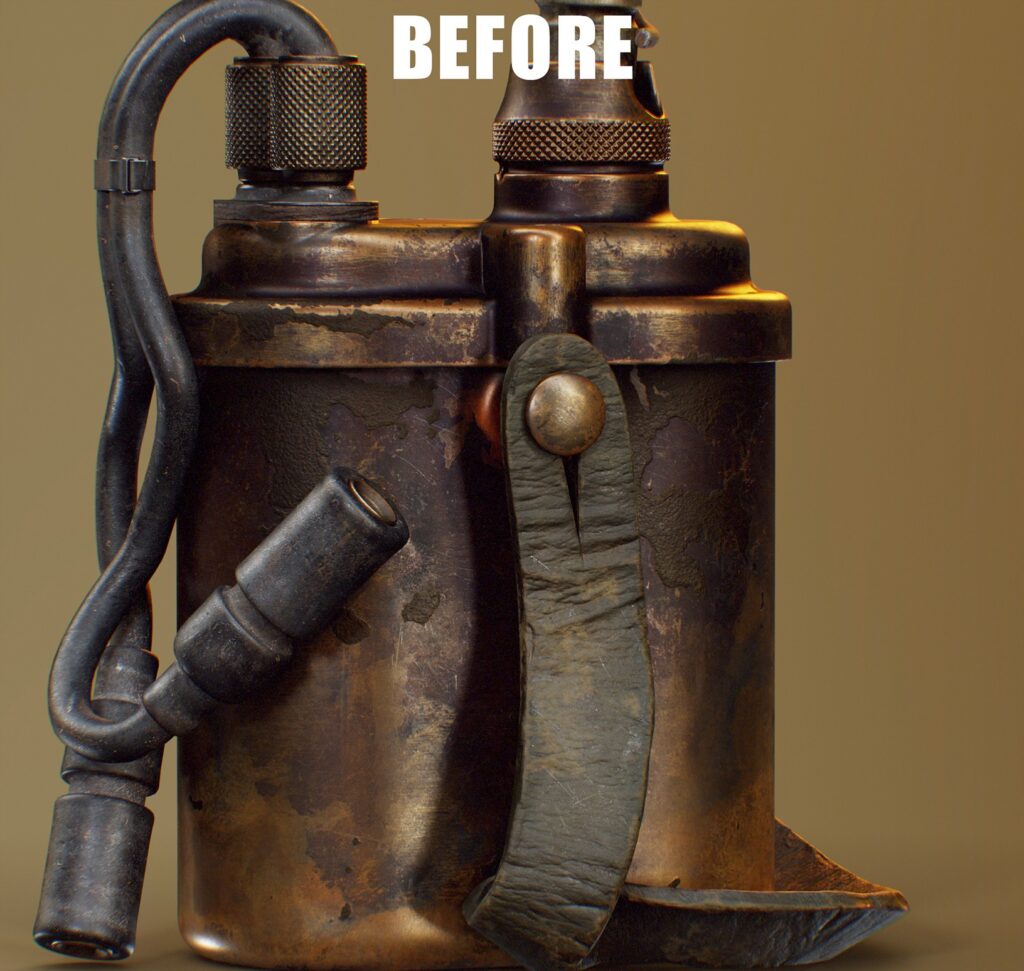
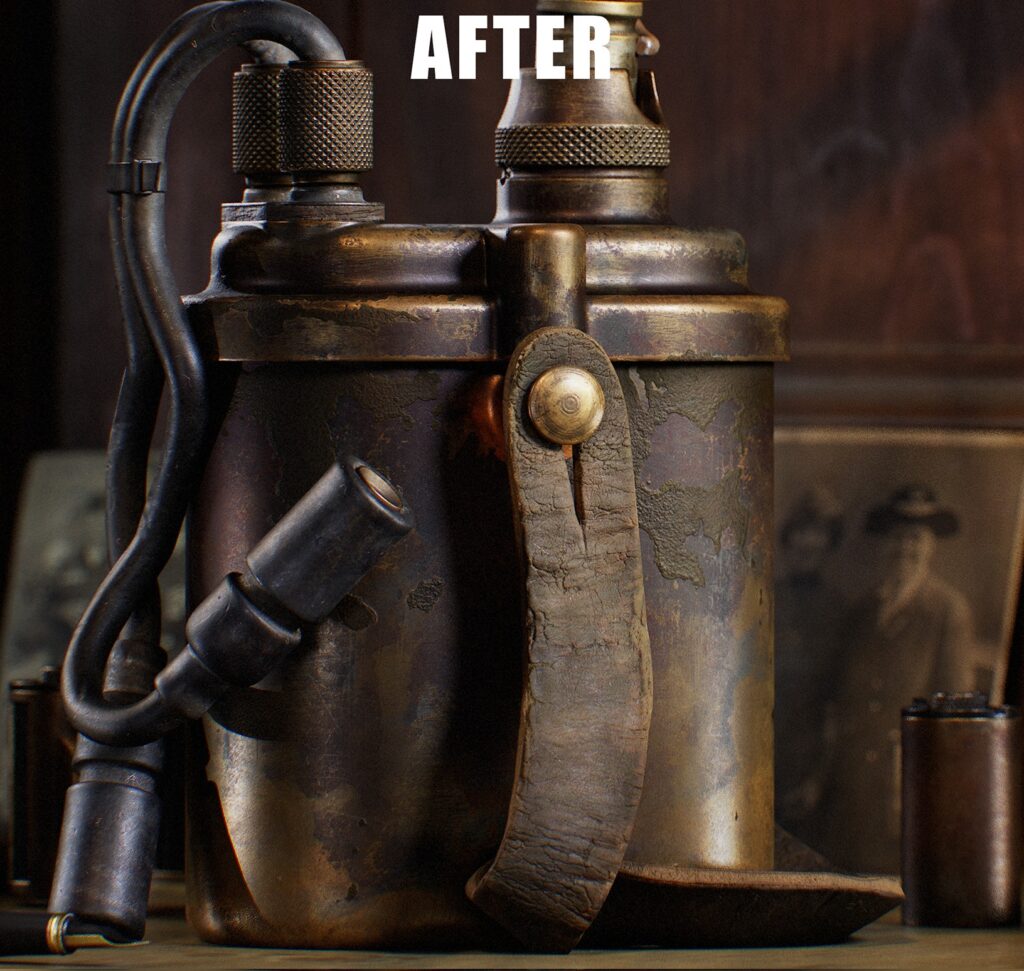
Another example is my initial idea of adding tape and an auction tag. Ultimately, I felt these elements didn’t work well—the tag was distracting and pulled attention away from the main focus area.
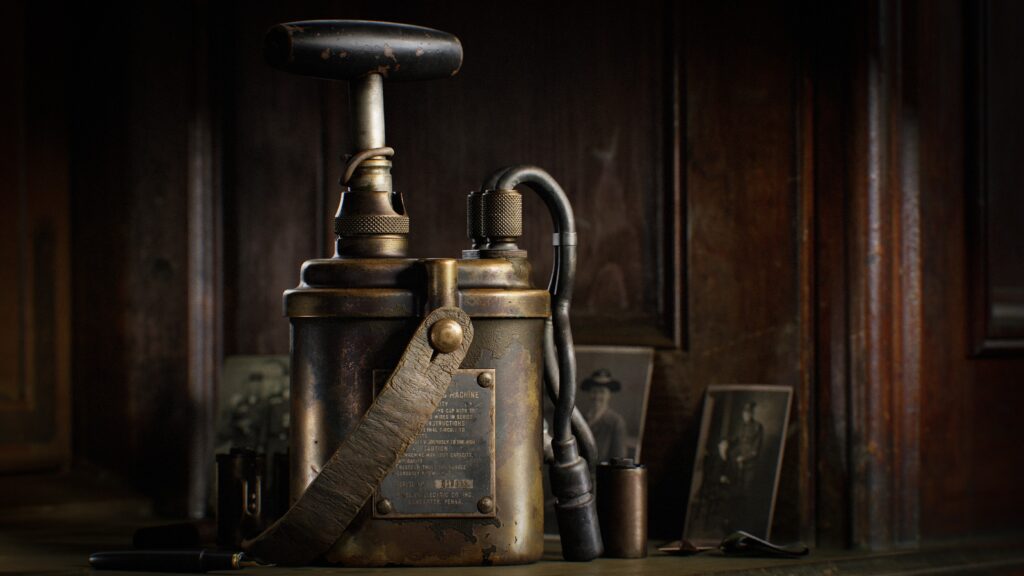
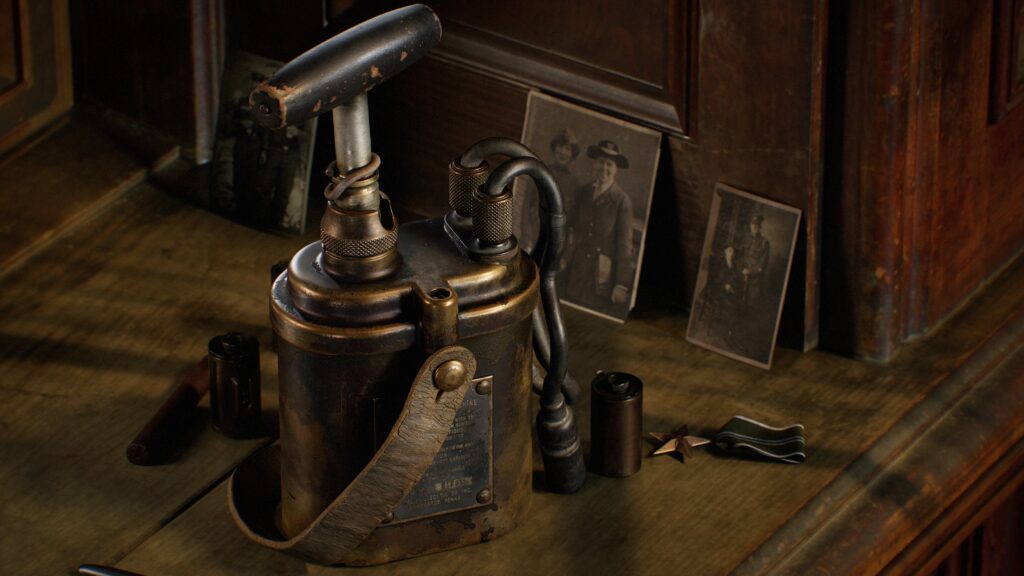
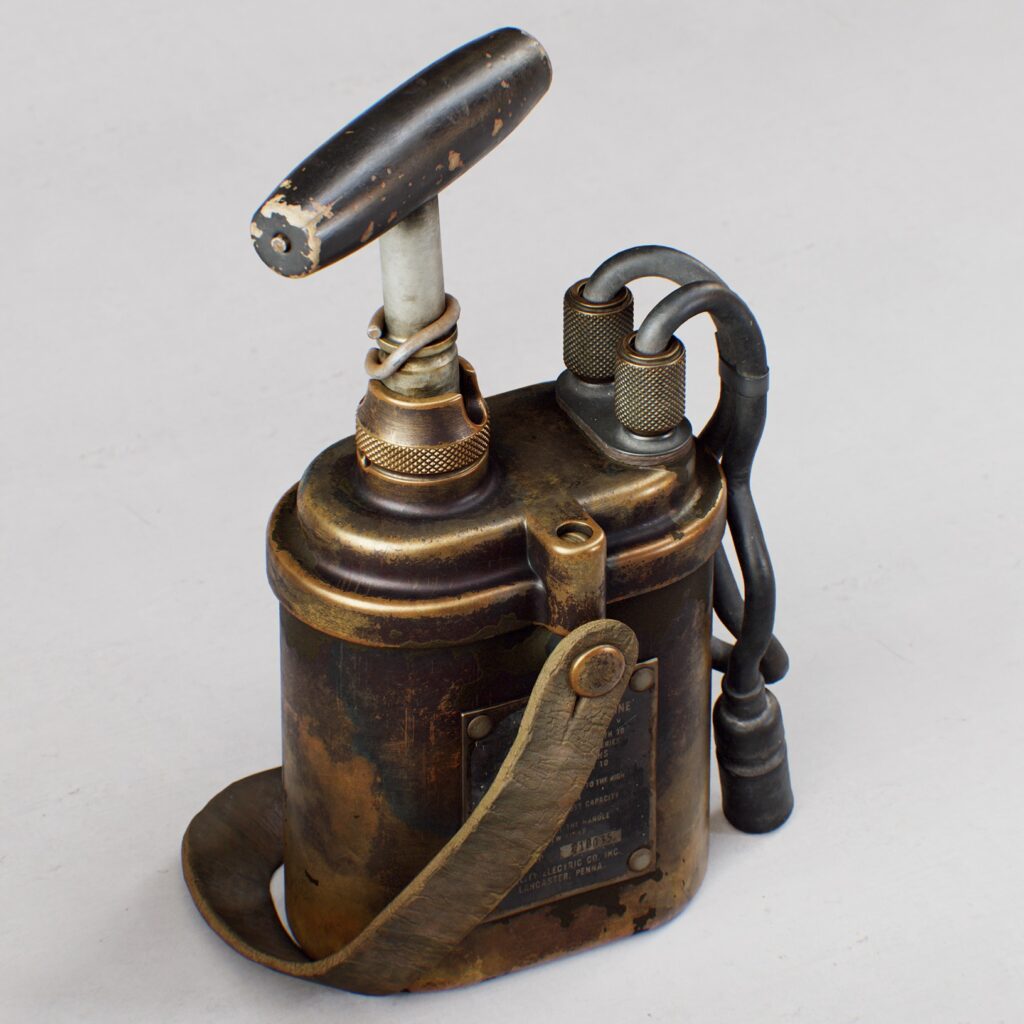
Presentation
Presentation is crucial to the final outcome of a project—it can make or break it, so it must be handled with care and patience.
Creating something truly unique or original is challenging these days, but you don’t need to reinvent the wheel to make your work interesting and visually appealing.
I went through an exploration phase early on and continued testing ideas throughout the project to see what looked best for this prop.
Ultimately, I decided to create a theme that ties this project with my previous one, “Memories of War,” as both items are from the same time period and setting.
Choosing the best idea can be subjective, but I believe I made the right decision in the end. Here are some of the other test images I came up with during this process.
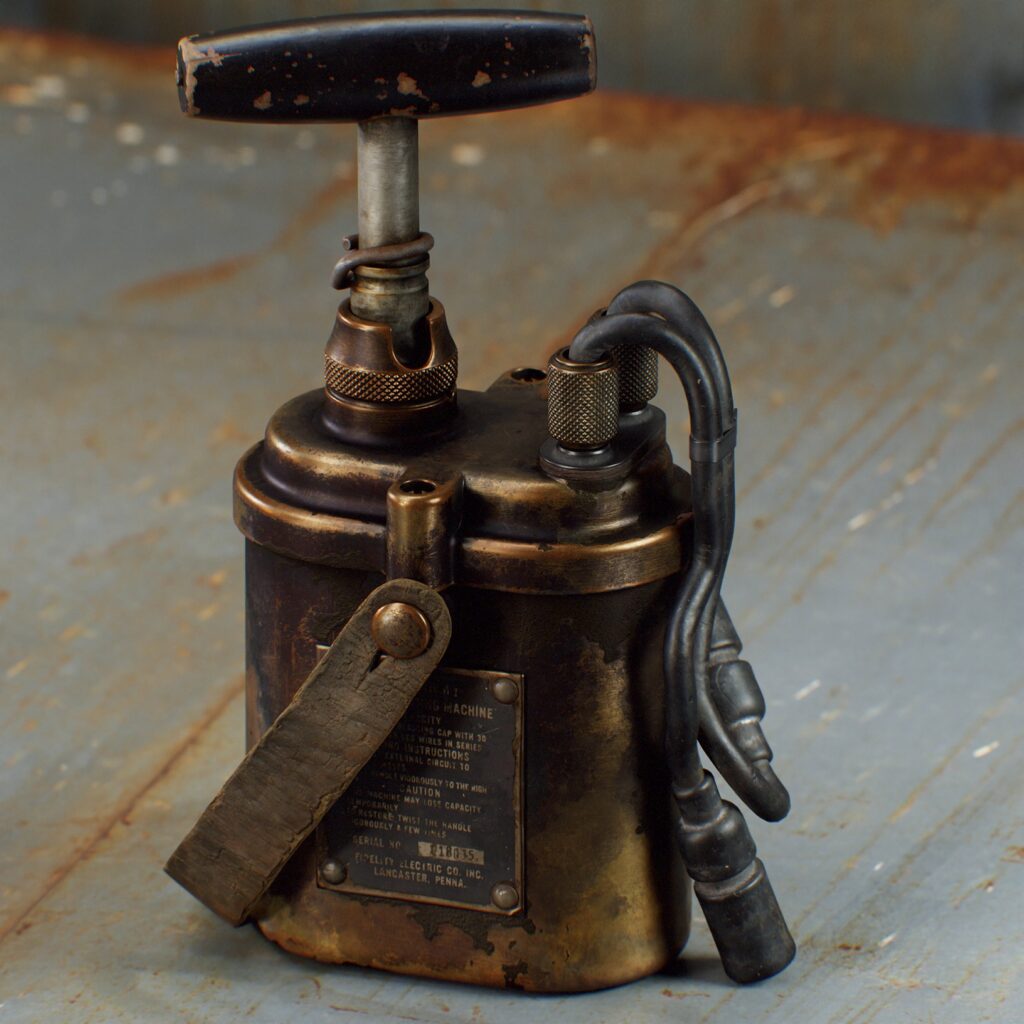


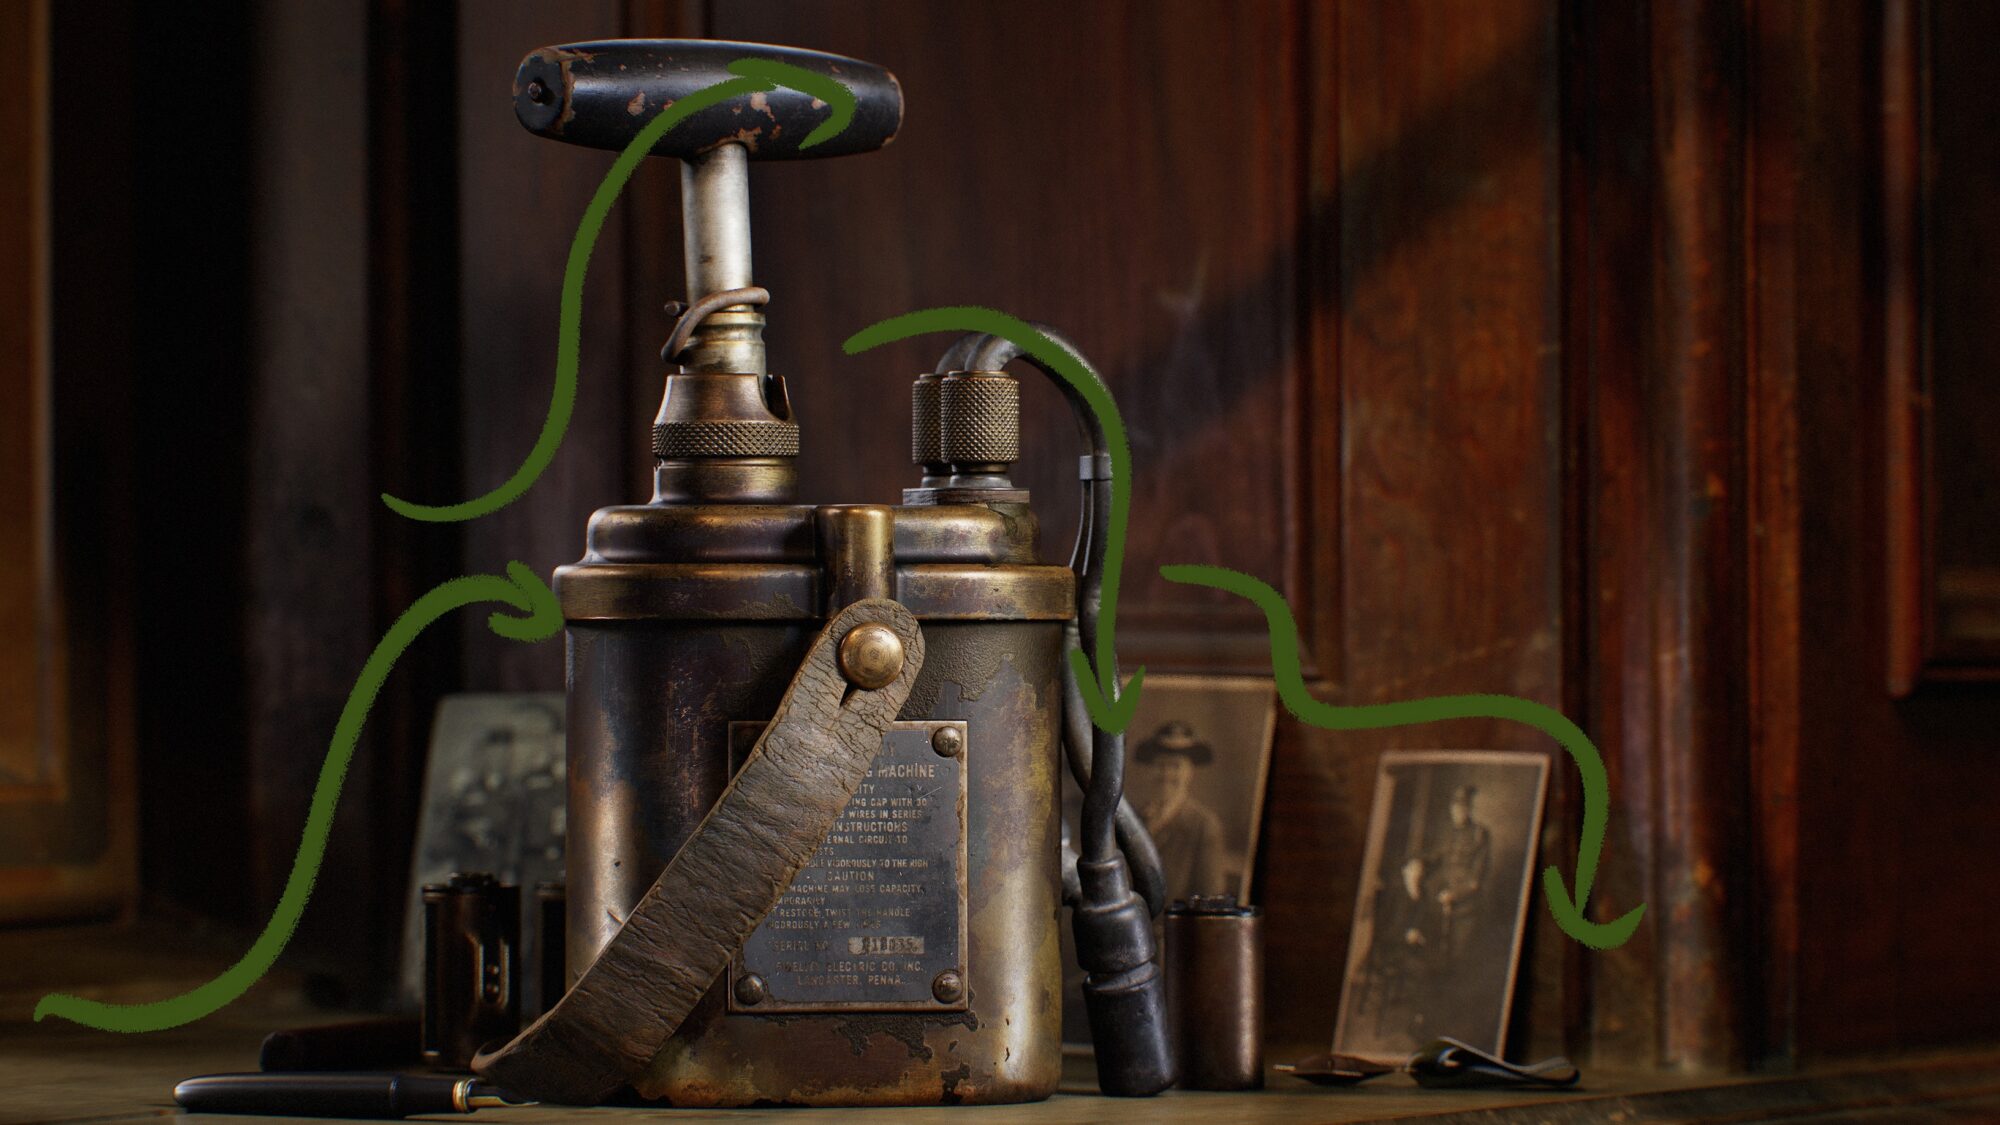
For my presentations, at least the main shot, I make conscious decisions about how the viewer will experience the image. I intentionally add leading lines to guide the viewer’s eye towards the main focus area.
It is more pleasing when our eyes can take in the image in large, sweeping motions from one area to the next, without too many distractions or abrupt changes in direction.
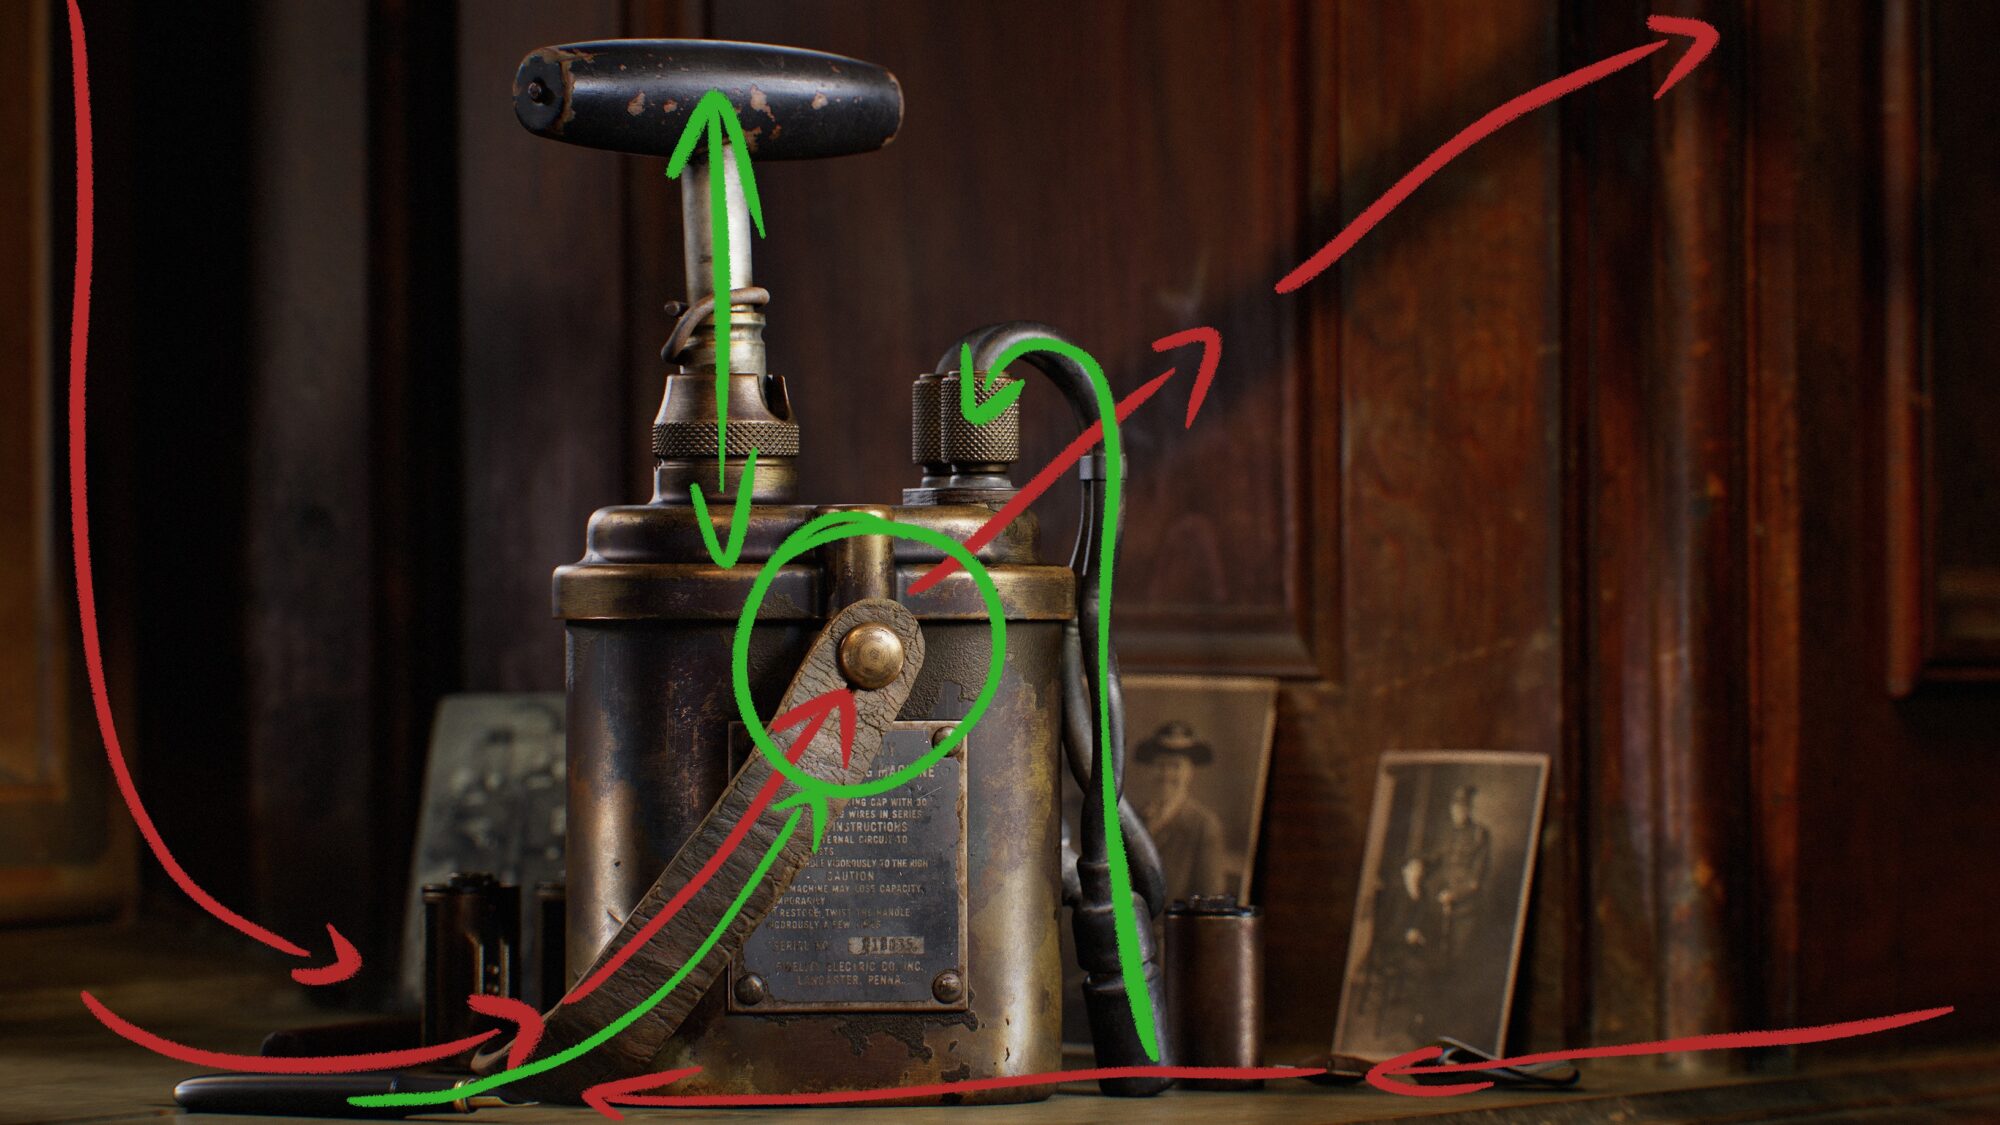
The background items were arranged to create a gradient in the silhouette, helping to guide the eye towards the center.
Lighting
My lighting setup is quite straightforward. Although I use many lights, the main ones are the most important.
- Main light / Flood light: Illuminates the subject from the front.
- Key lights on the sides: Brighten up the sides, making the subject pop and highlighting roughness details.
- Rim lights: Separate the subject from the background.
- Background light: Illuminates the background.
- Gel light: Adds light with artificial shadow casting, like a tree or window frame shadow, making the lighting more believable and interesting.
- Additional fill lights: Lighten areas that are too dark.
- Catch lights: Small, hand-placed lights that highlight specific details, enhance roughness, or add interesting specular highlights where desired. For me, lighting is like painting with light. I strategically place my lights to capture the beauty of my subject in the best possible way.
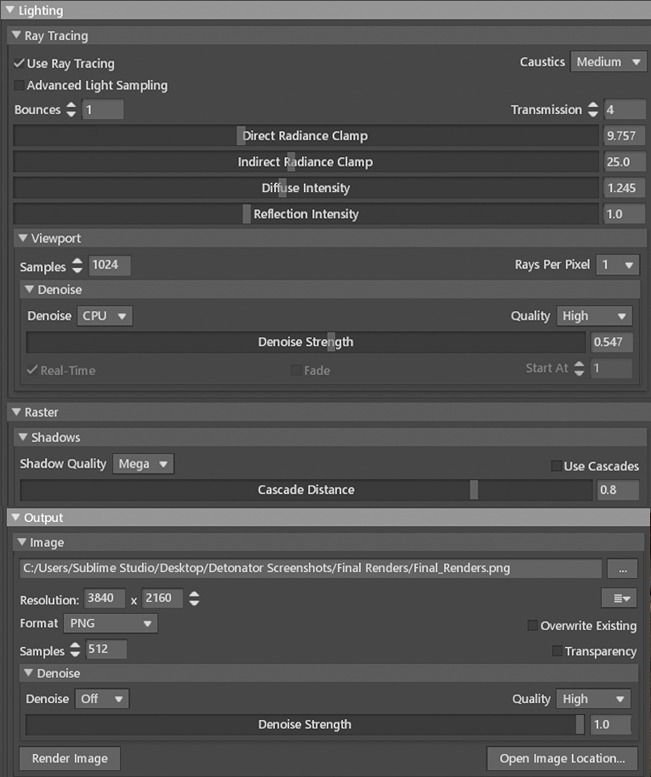
Rendering
Presentation, lighting, and rendering are my favorite stages of a project—I have the most fun here at the end. This is where I get to play, experiment, and explore ways to showcase my prop in the best possible light.
Rendering is a lot like photography: I aim to find the best composition, interesting angles, or just the perfect shot that catches the eye.
I almost always prefer longer focal lengths, around 150-200mm, and some depth of field always adds a touch of realism.

Conclusion
In closing, I’d like to say that this was a very enjoyable project, and I learned a lot throughout the process. I want to thank all my friends on the Art Refuge Discord and extend a special thanks to my colleagues at Sierra Division for their support.
Additionally, I appreciate GamesArtist.co.uk for the opportunity to showcase my work and process.
Read more articles
You might also like these articles.