Introduction
Hi my name is Sébastien Evrard, I live in Canada and I'm a very interested and passionate Character Artist who loves to learn new things.
Goals
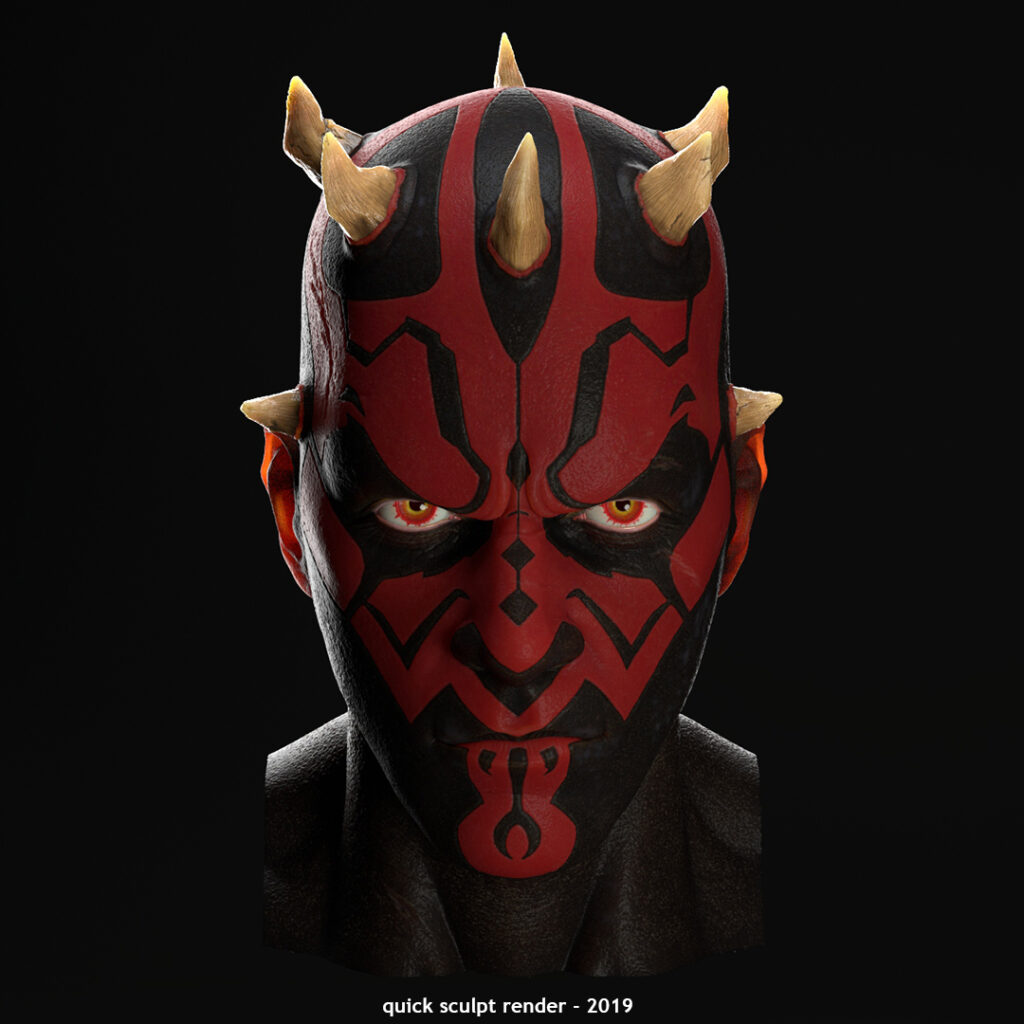
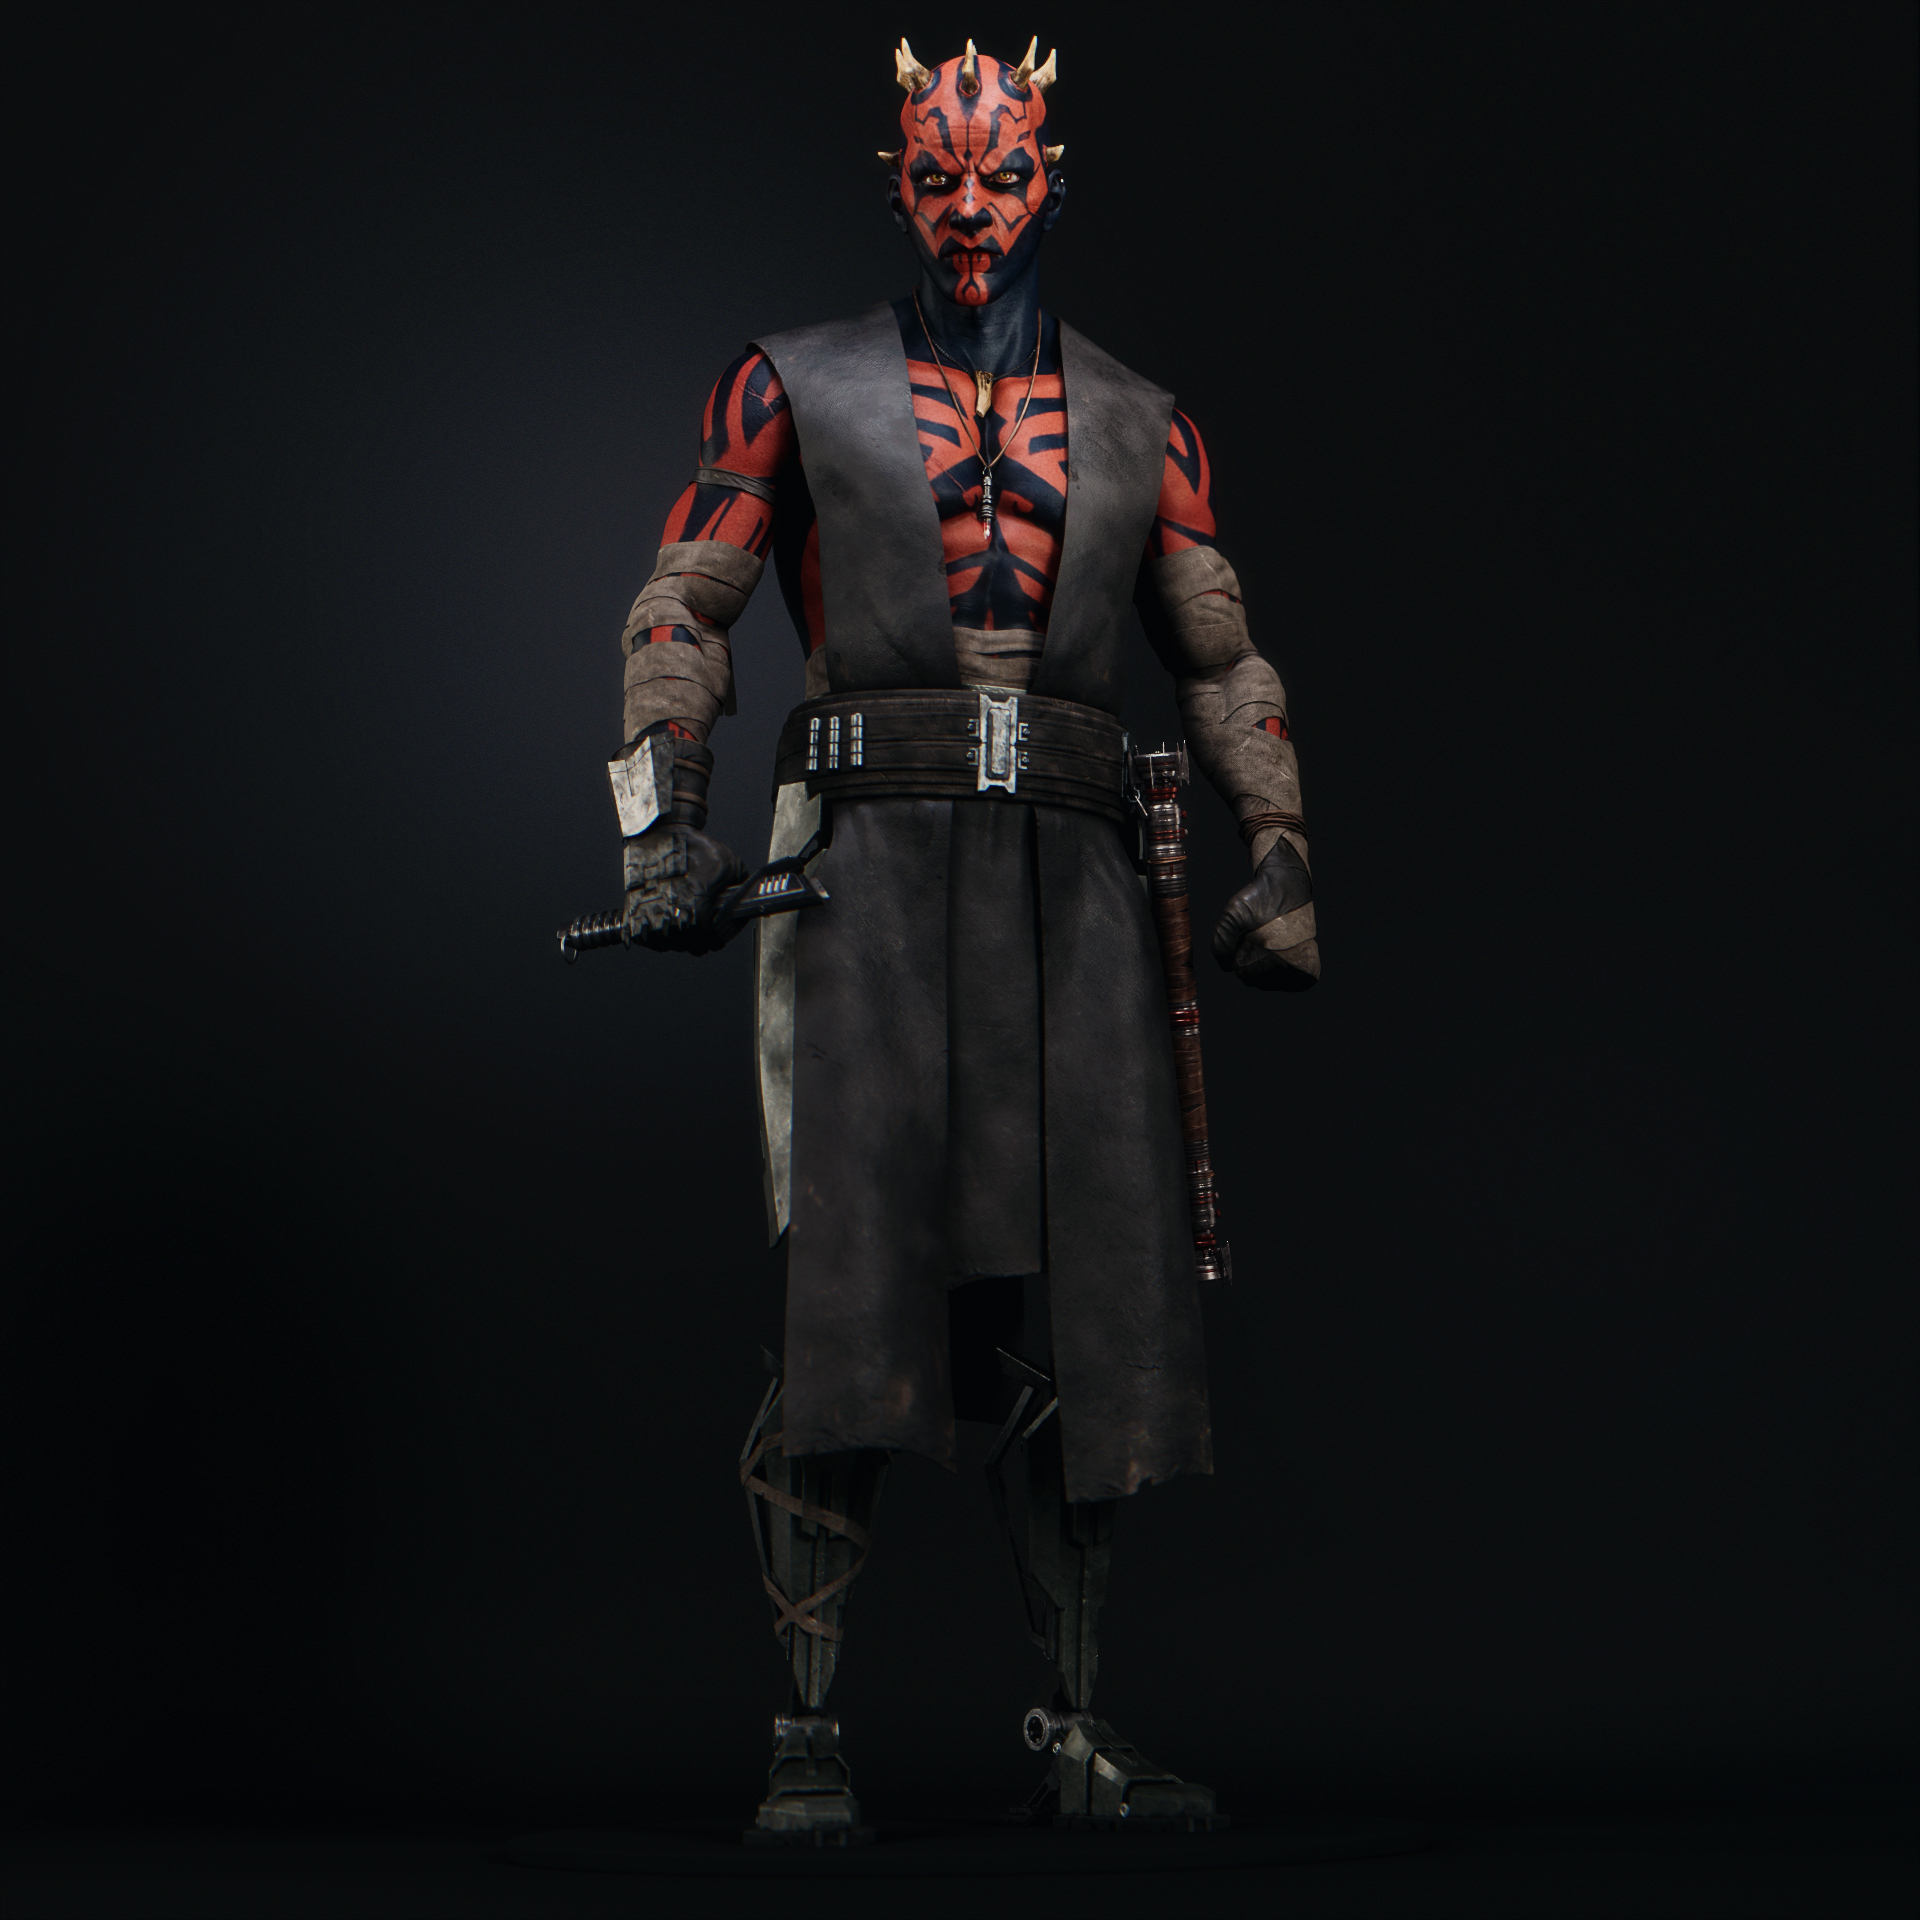
This project started as a lunchtime/after-work quick sculpt, at this time, I wanted to work and progress on face anatomy. Then I did a very quick texturing and rendering, and it grew on me a lot. I saw the potential and immediately knew what I wanted to do with it.
I’ve never worked in VFX professionally, so I don’t have the production workflow and tricks to achieve a realistic character. My goal here was to learn new skills by myself, playing in Maya, which I try to do with my personal projects.
References & Inspiration
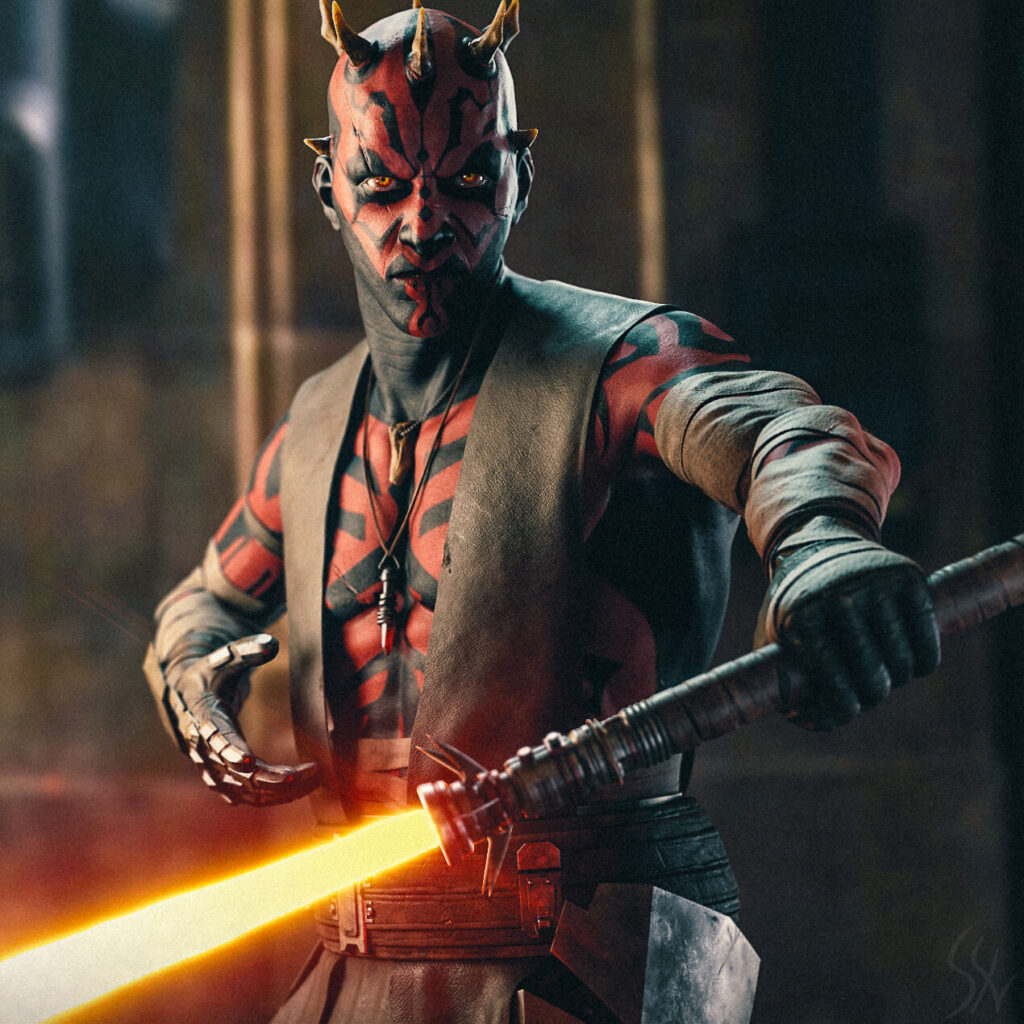
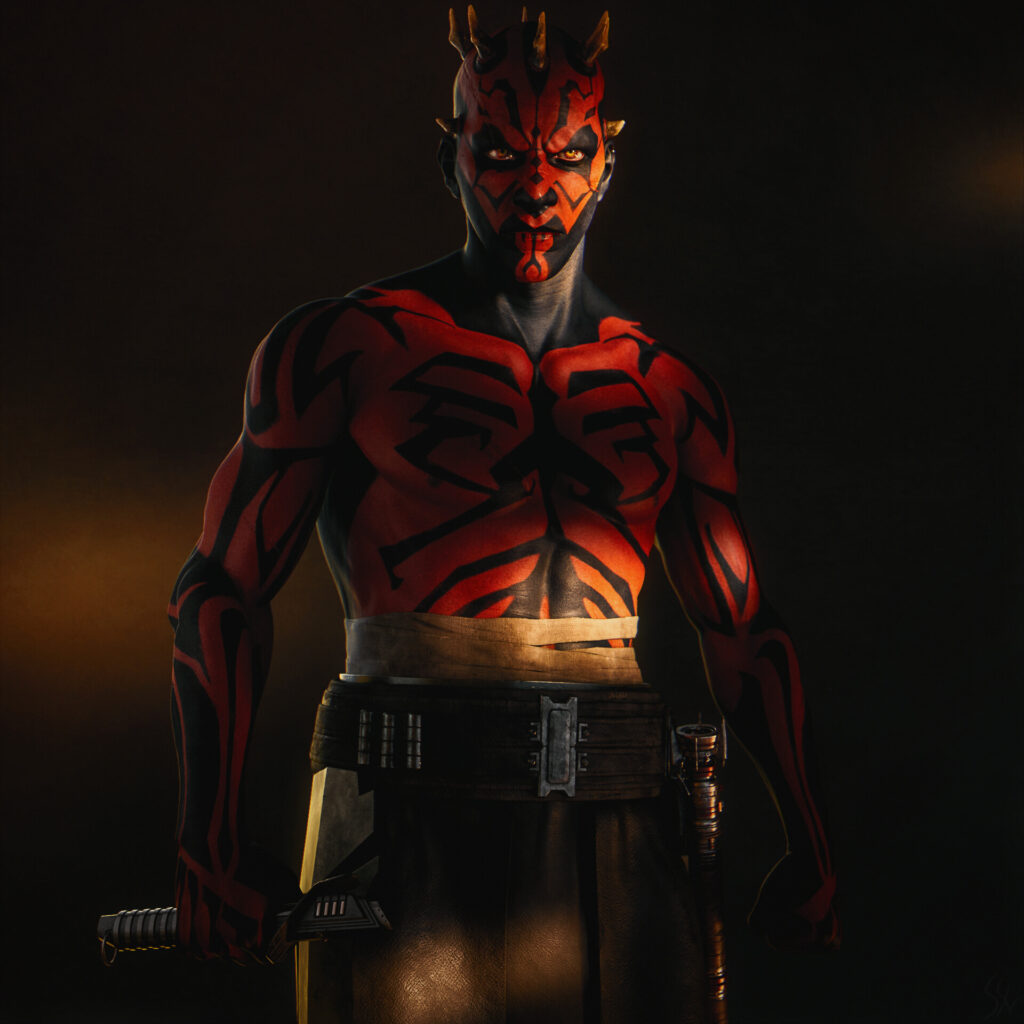
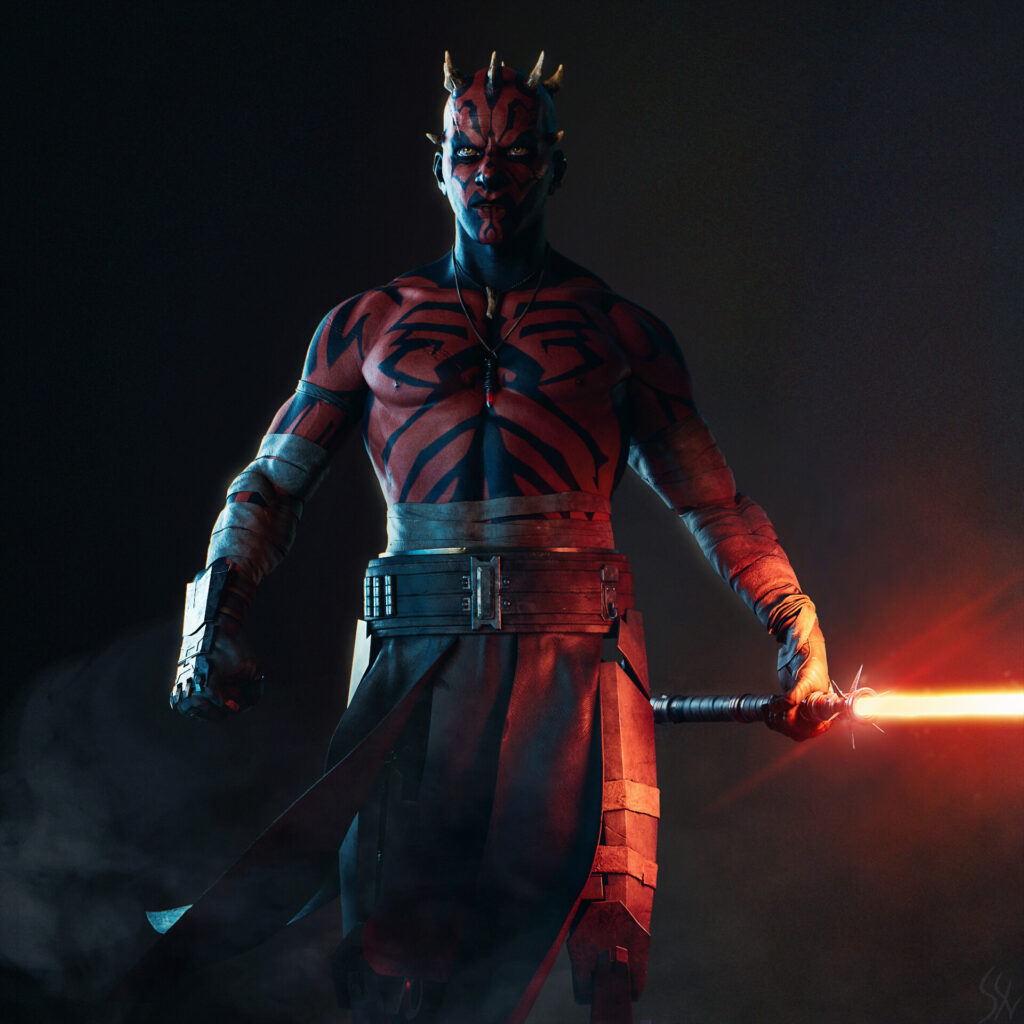
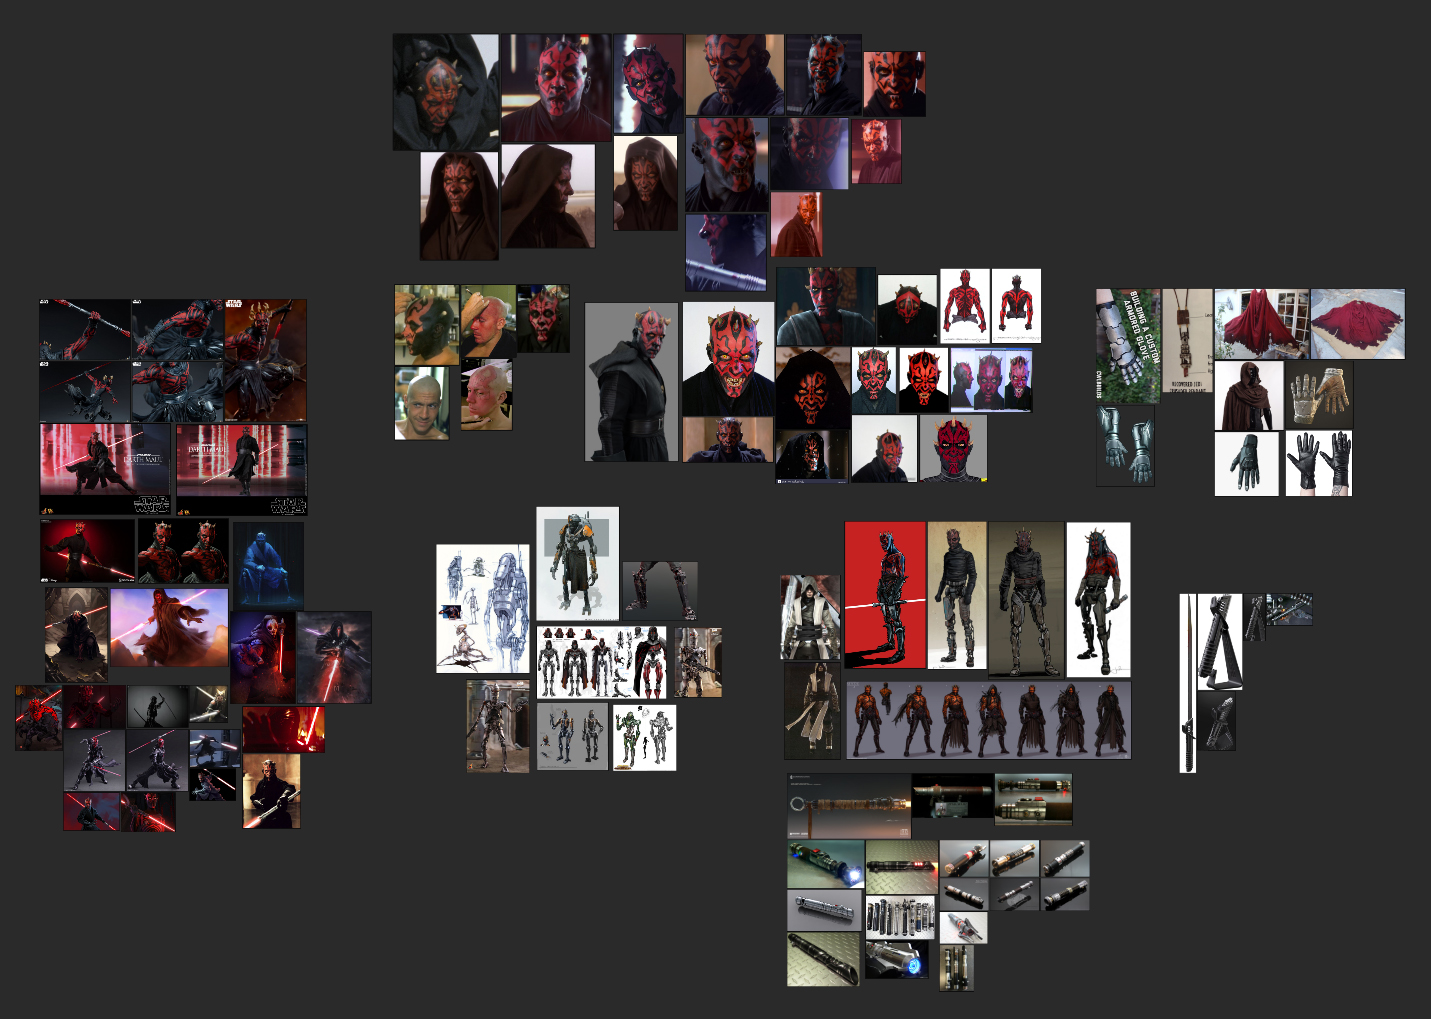
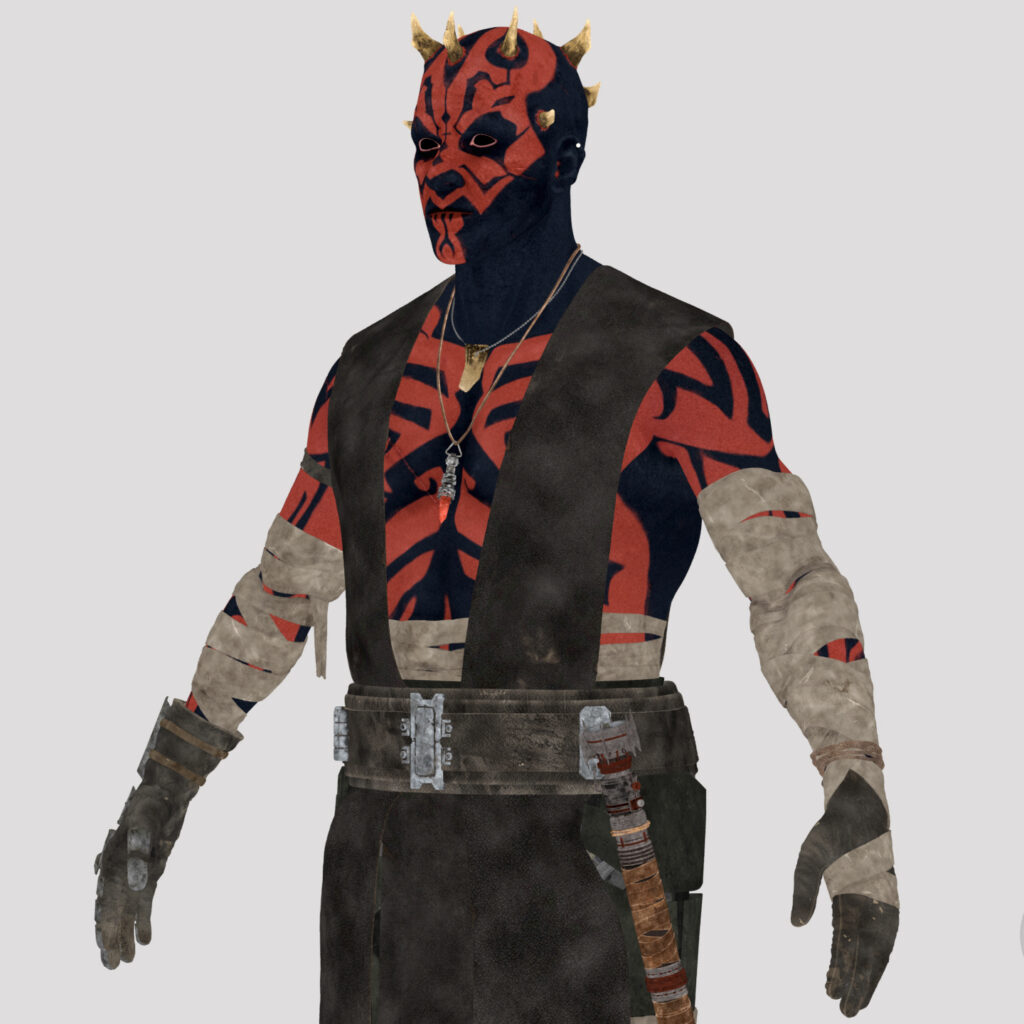
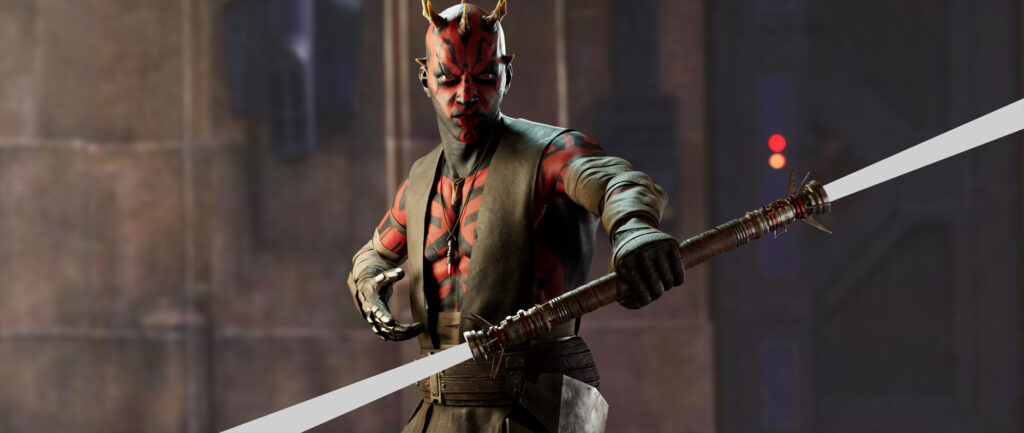
I used a lot of different references, but the main ones were from The Phantom Menace and The Clone Wars.
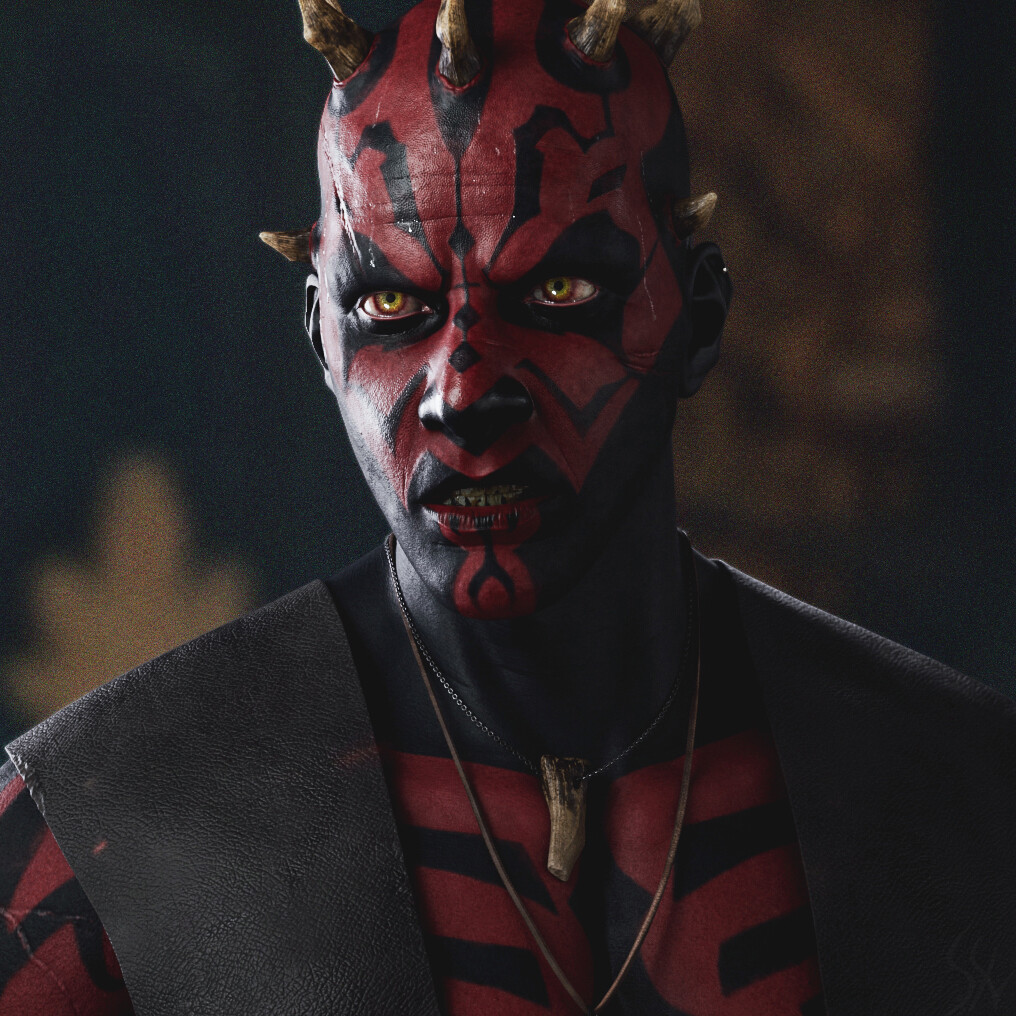
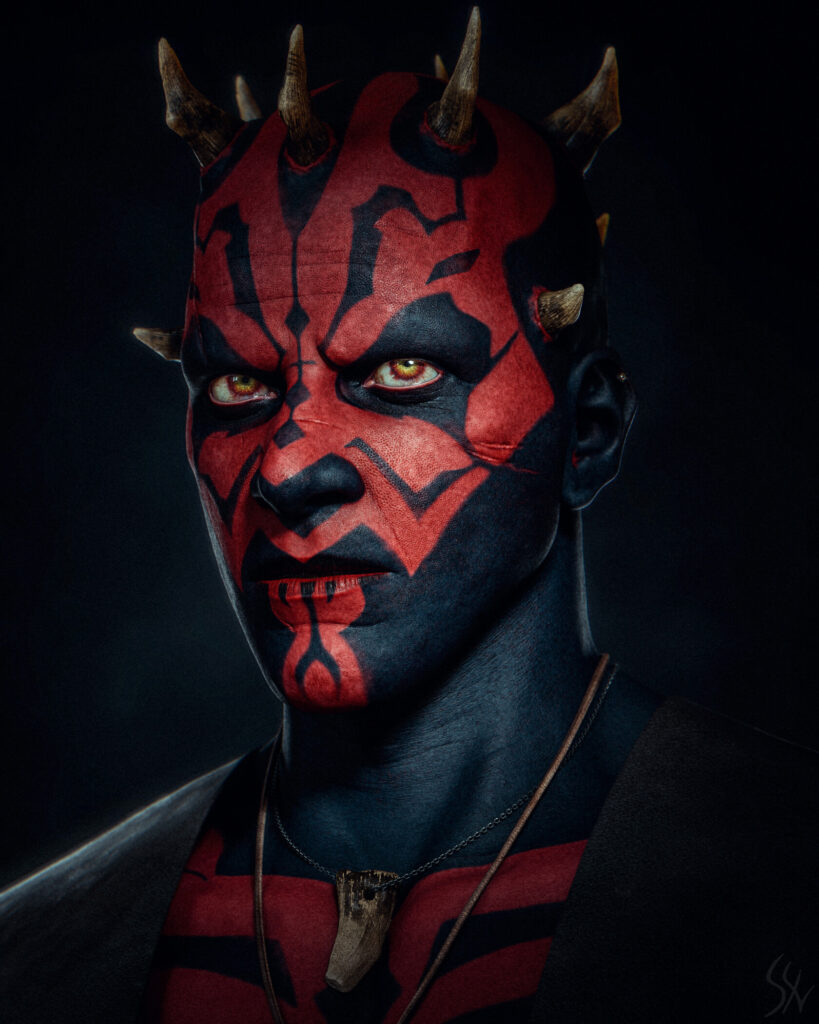
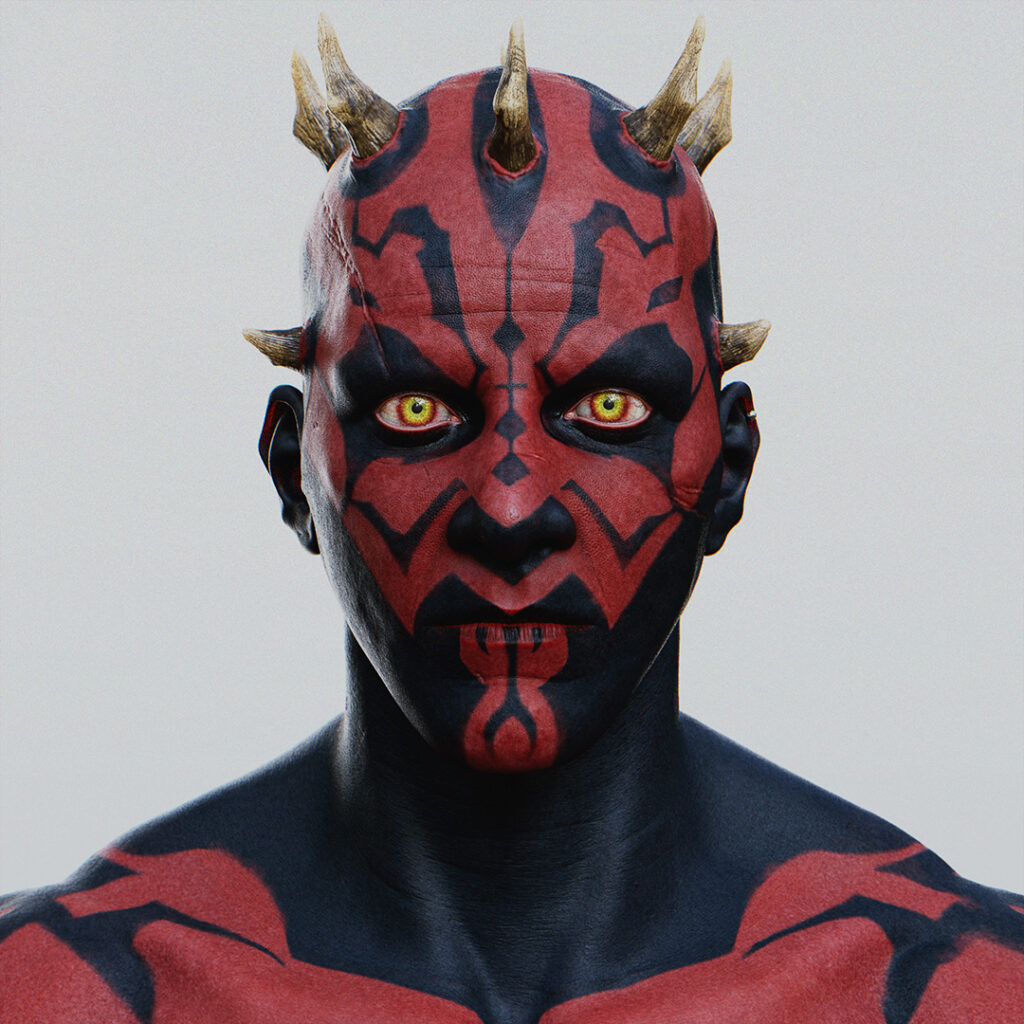
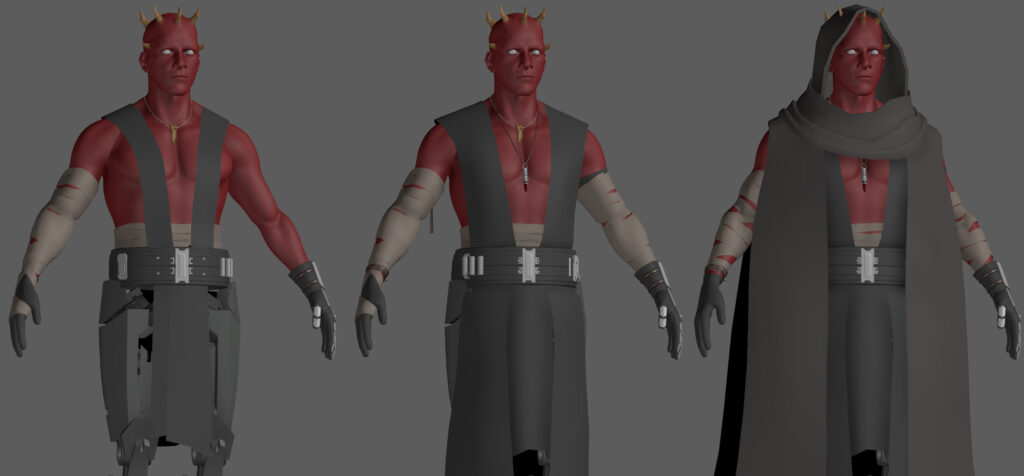
I really wanted to capture his attitude and evilness and keep as much as possible the likeness of the original actor, Ray Park.
For the rest, I knew I wanted to do something different that got inspired by the concept arts of Maul for the movie Solo, something ‘used’, ‘dirty’ and ‘damaged’.
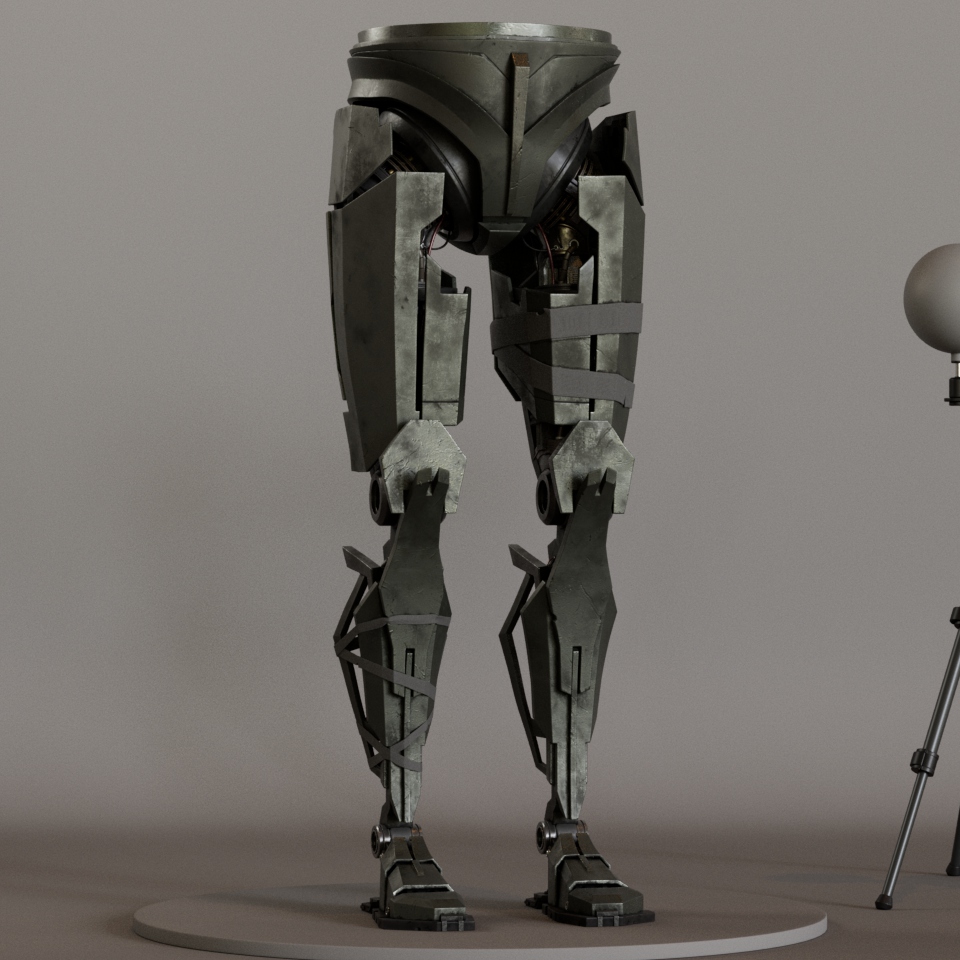
The legs got mainly inspired by the droid designs of the original trilogy, but also some cool fan art. Of course, I also got a whole board of references for the anatomy of the body, etc.
Software
I’ve started it in Zbrush using mainly Claybuildup, DamStandart, and other basic brushes to sculpt.
Then, I used Maya for the topology and the modeling of the clothing/legs/accessories. The texture maps were done in Zbrush and Photoshop, and the render/compositing in Arnold and Photoshop.
Sculpting and Modeling
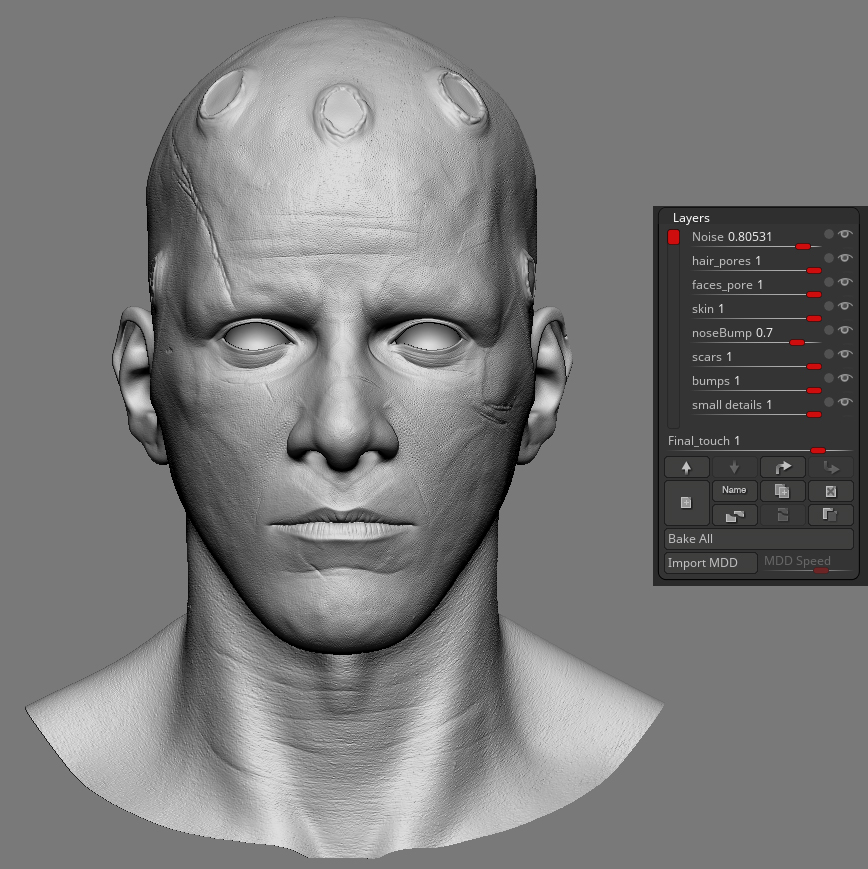
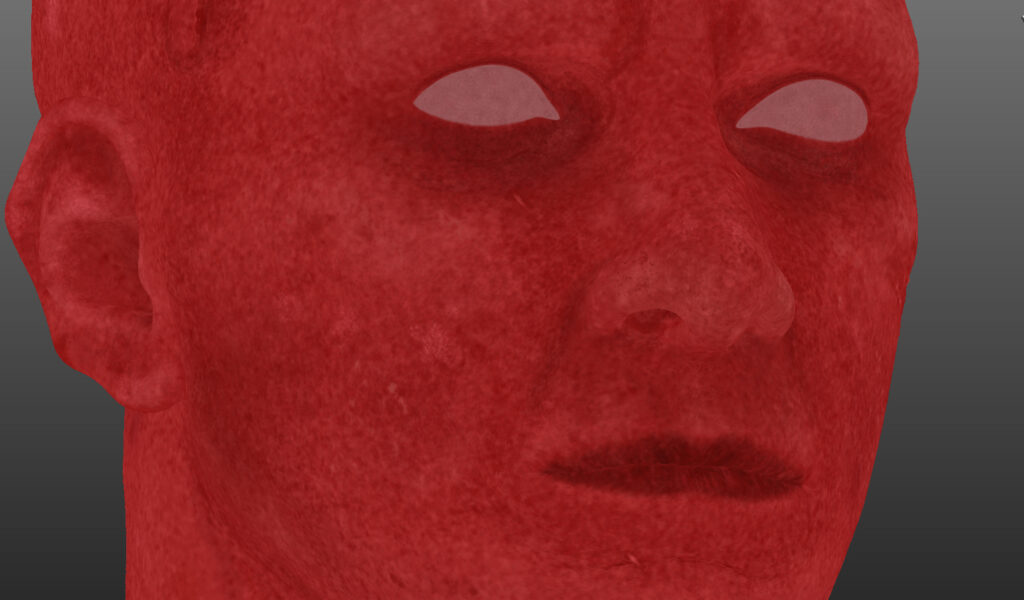
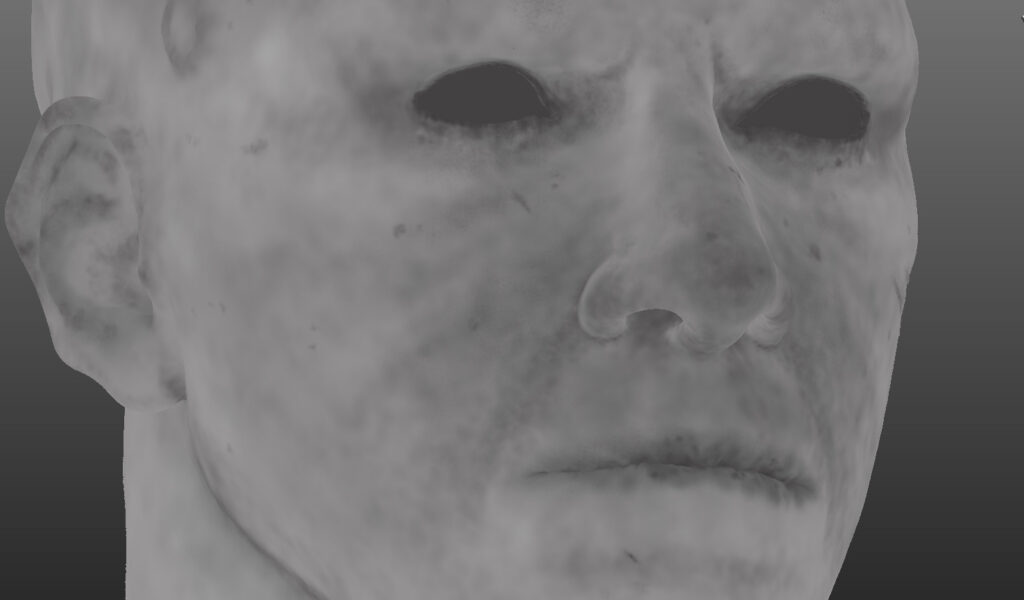
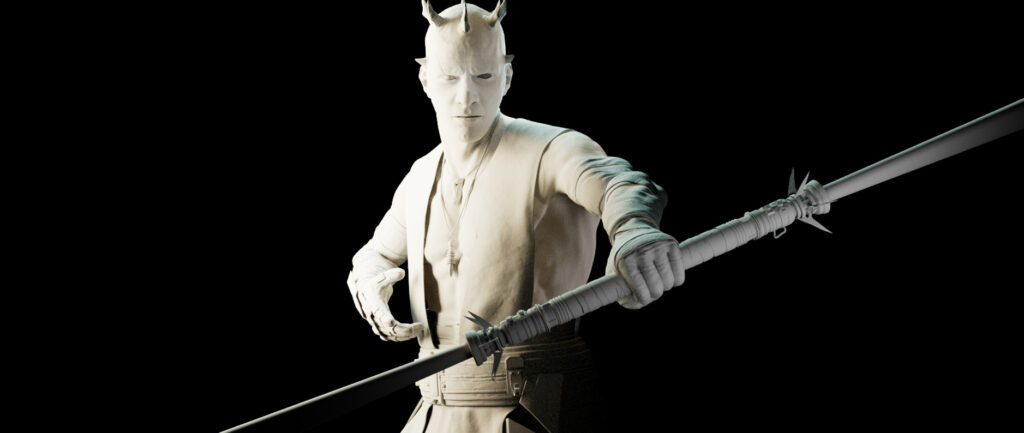
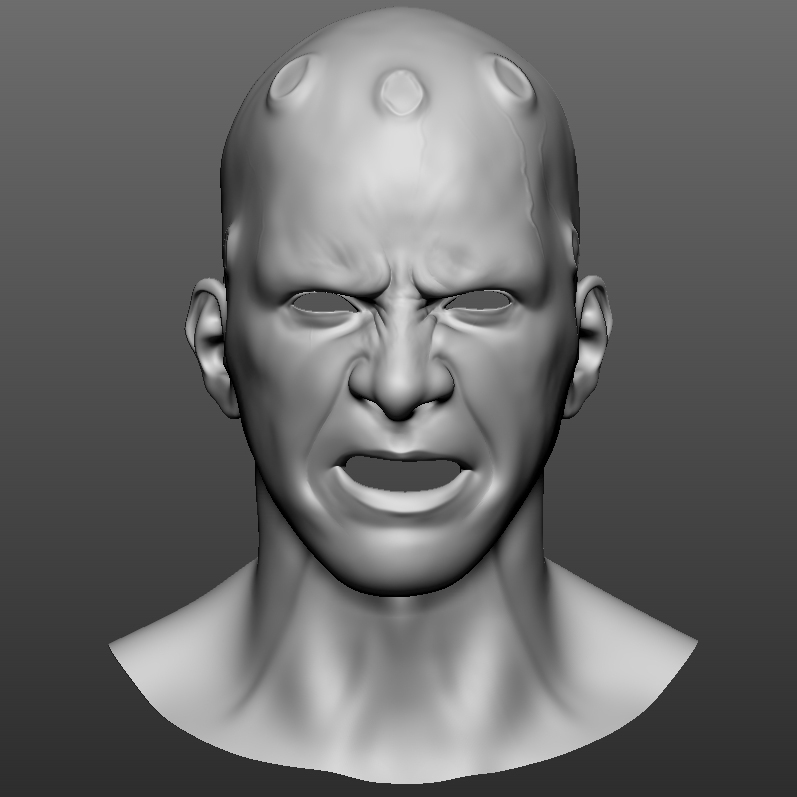
I always start with a sphere in Zbrush, which I sculpt/move and use dynamesh. I worked on the face anatomy at first, getting the proportions and pushing it to be as realistic as I could.
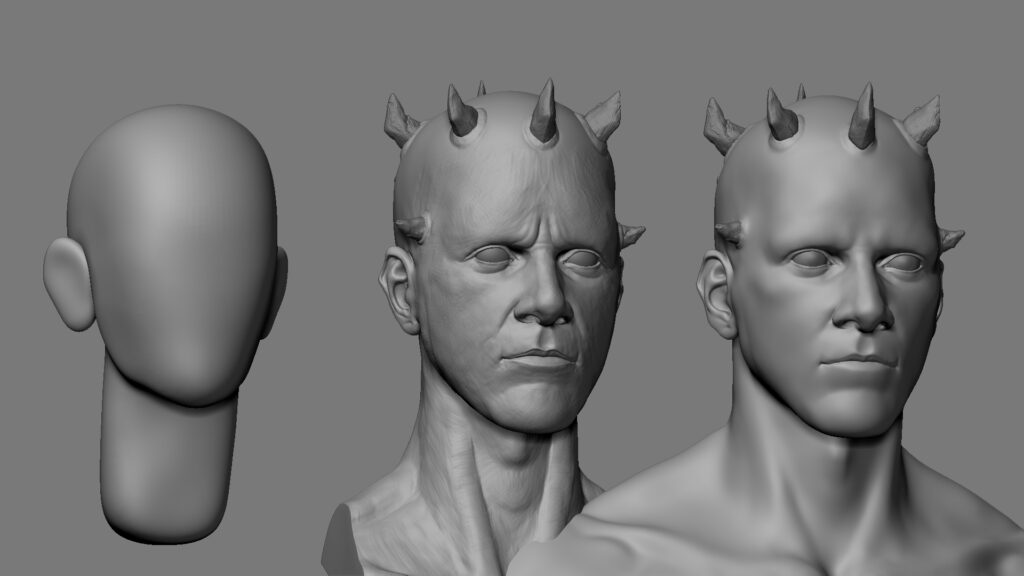
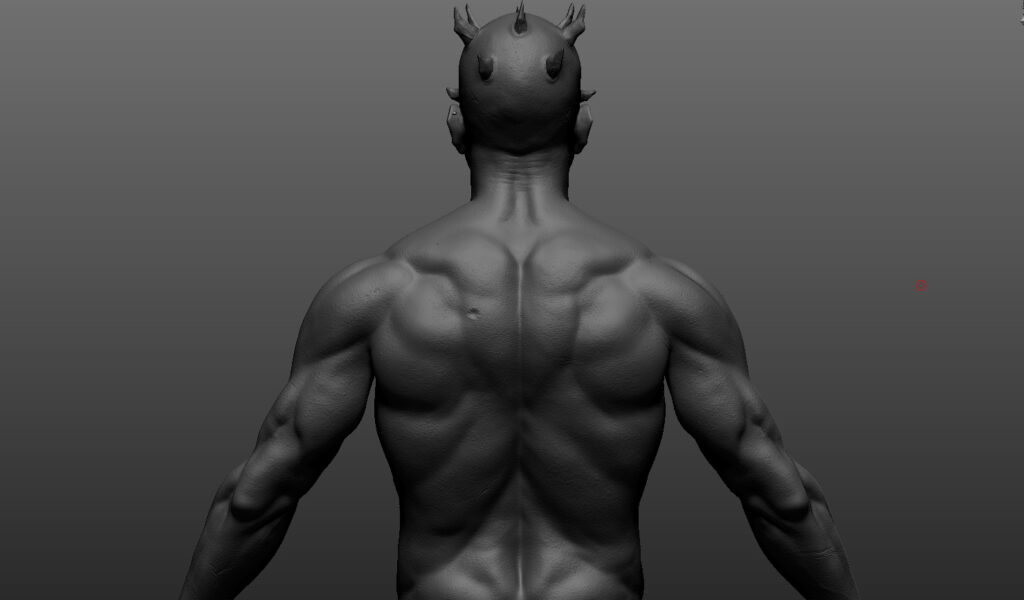
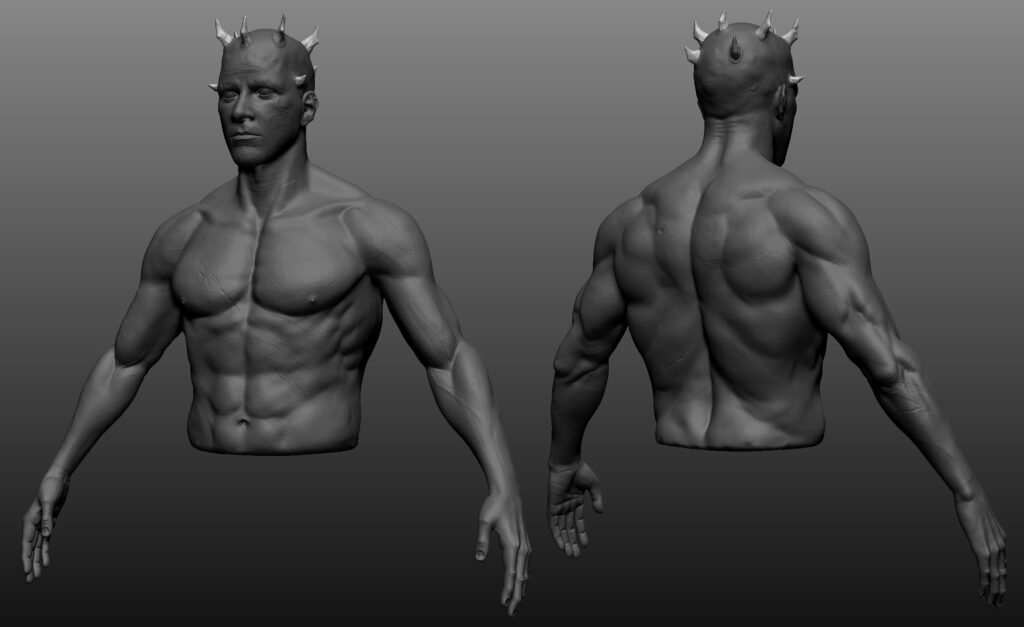
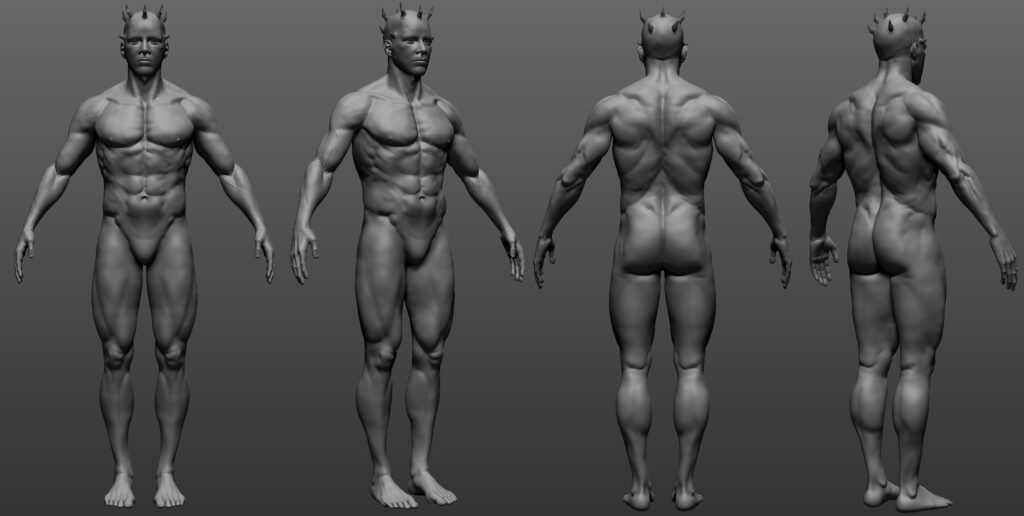
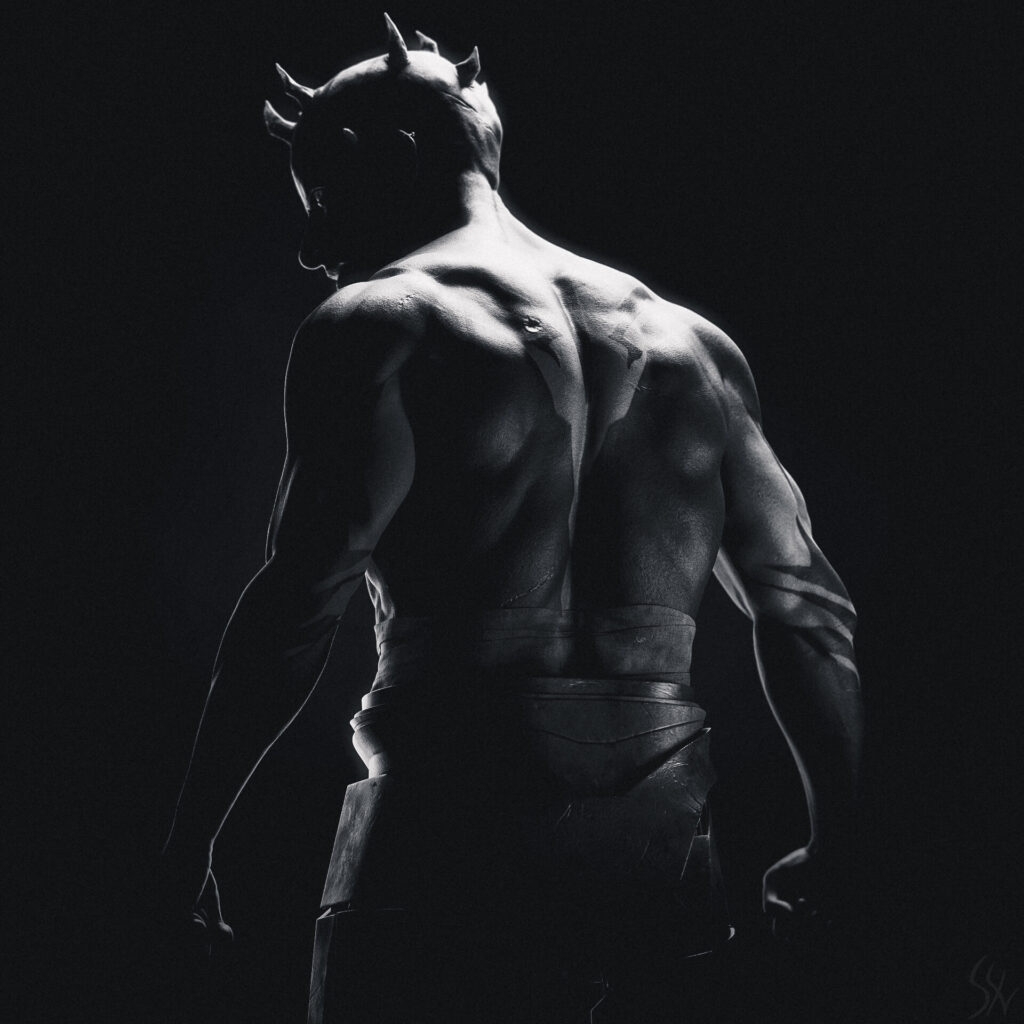
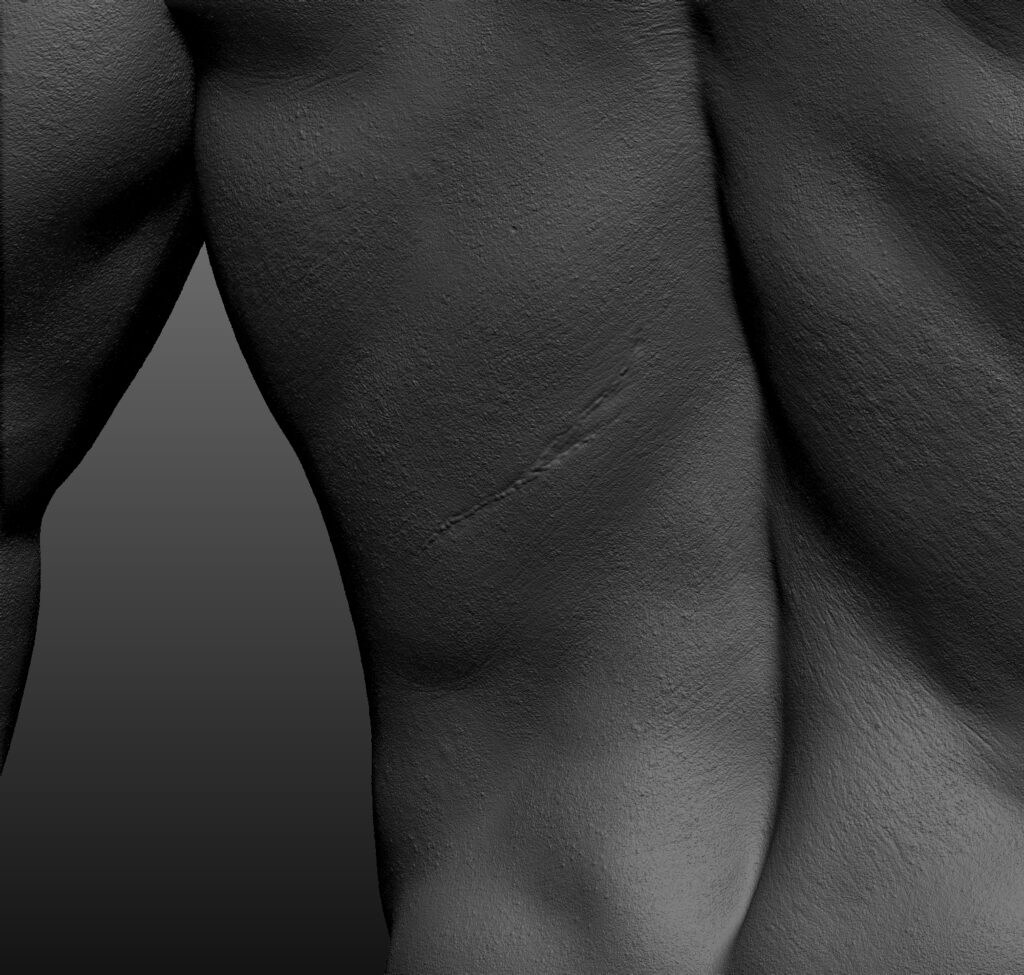
Since I did the head first, I had to adapt the body proportions according to the head, and it was a back-and-forth job after that. Once I have the shapes and anatomy right, I then add the main details. Finally, I break the symmetry at the very end, adding all the secondary and tertiary details.
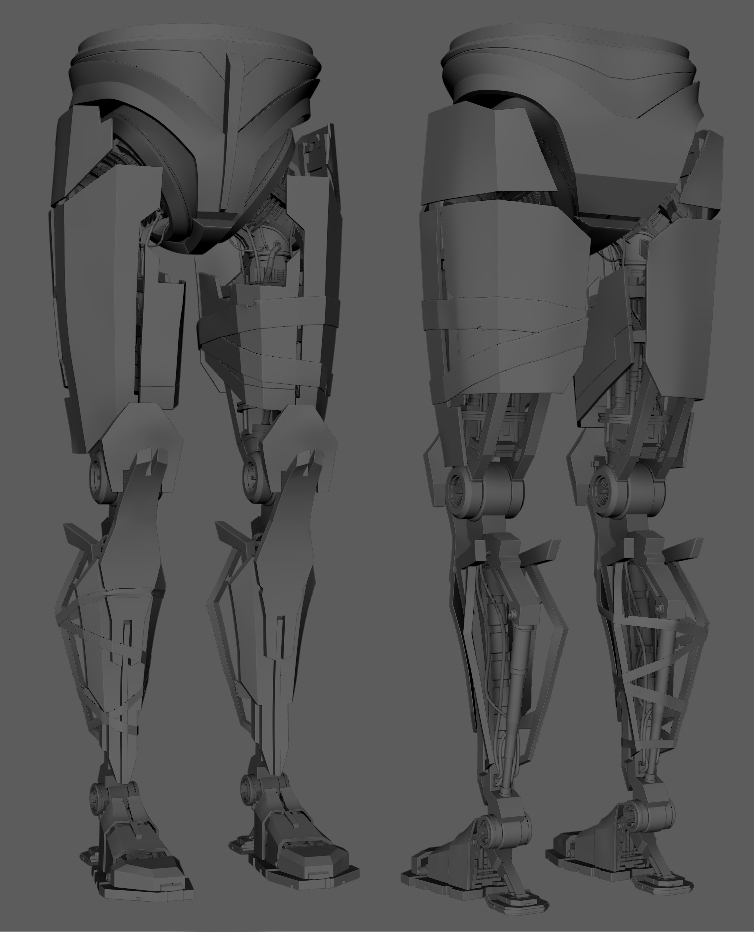
I knew already that the body would be cut in half, but I did the legs anyway, to work on my full body anatomy, but also because they could be used as a base for proportions of the robotics legs afterward.
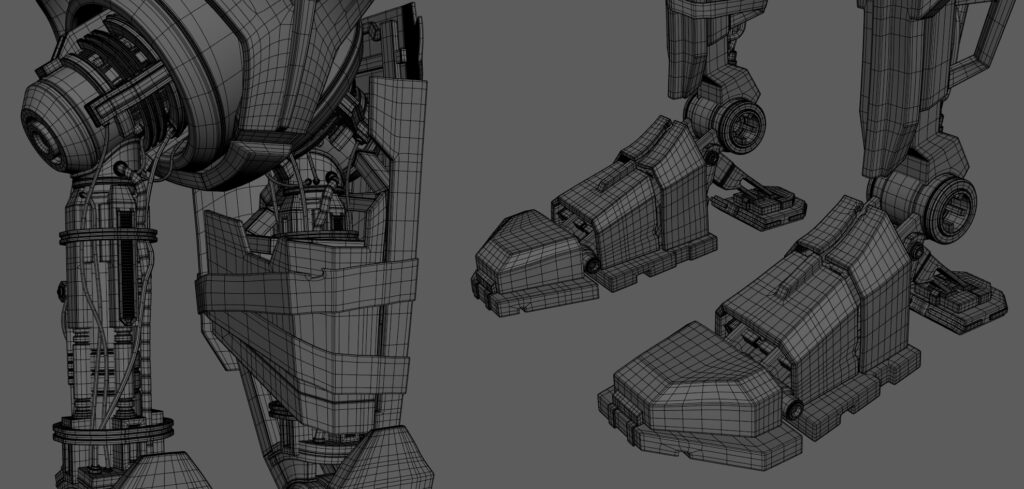
After the organic part was done in Zbrush, I decimate the mesh and do a retopology in Maya using Quadraws, so my model would be usable in production in terms of topology flow and could be animated if needed.
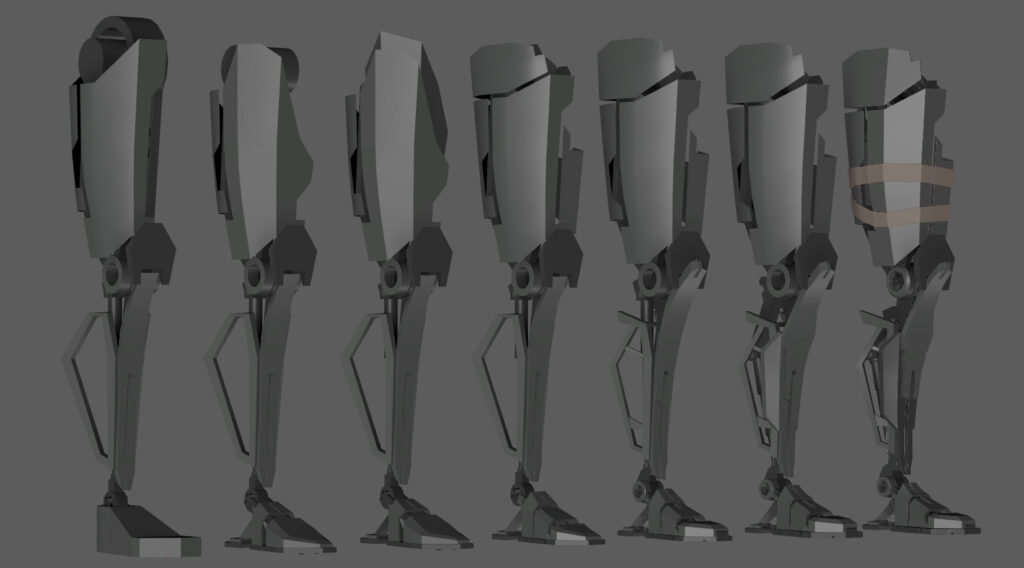
For the legs, I did a quick blockout in Maya, finding my style and the direction I wanted.
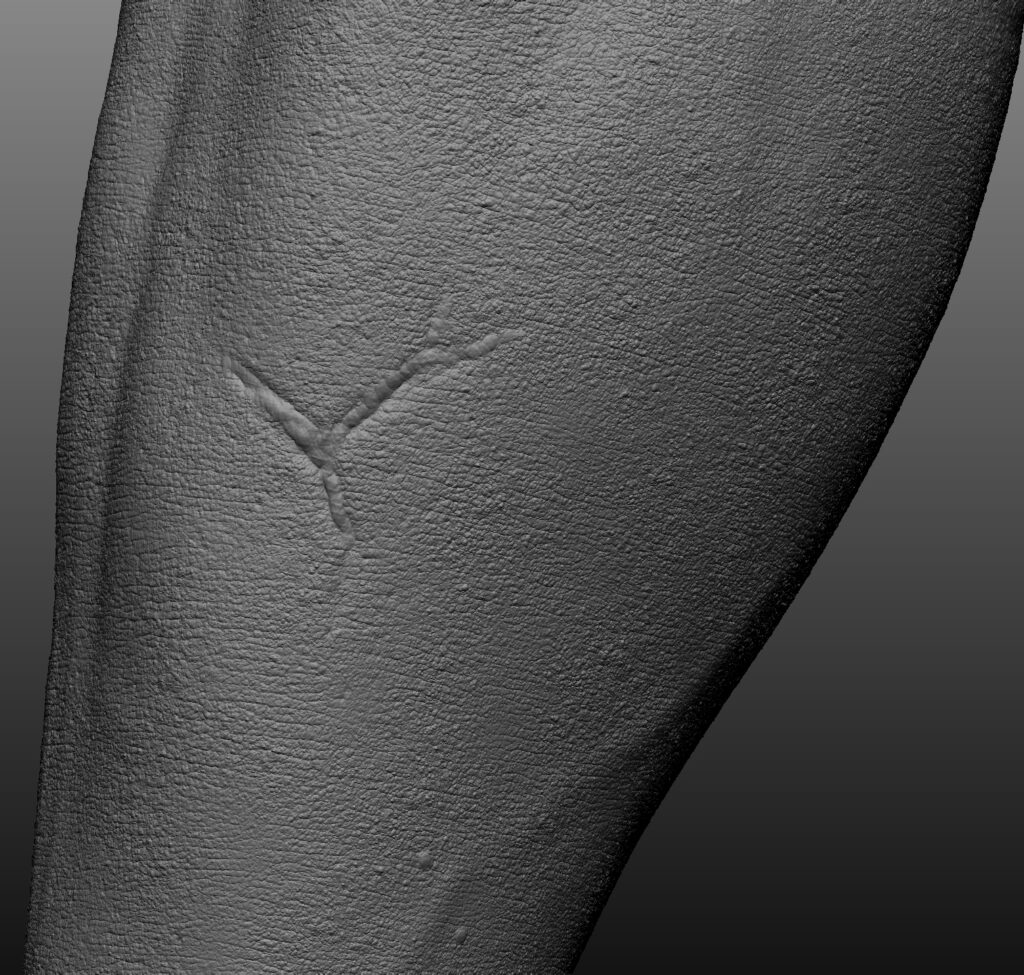
Once I was happy with the blockout, I refined the modeling and broke the symmetry here too as I wanted each leg to look worn out in its own way.
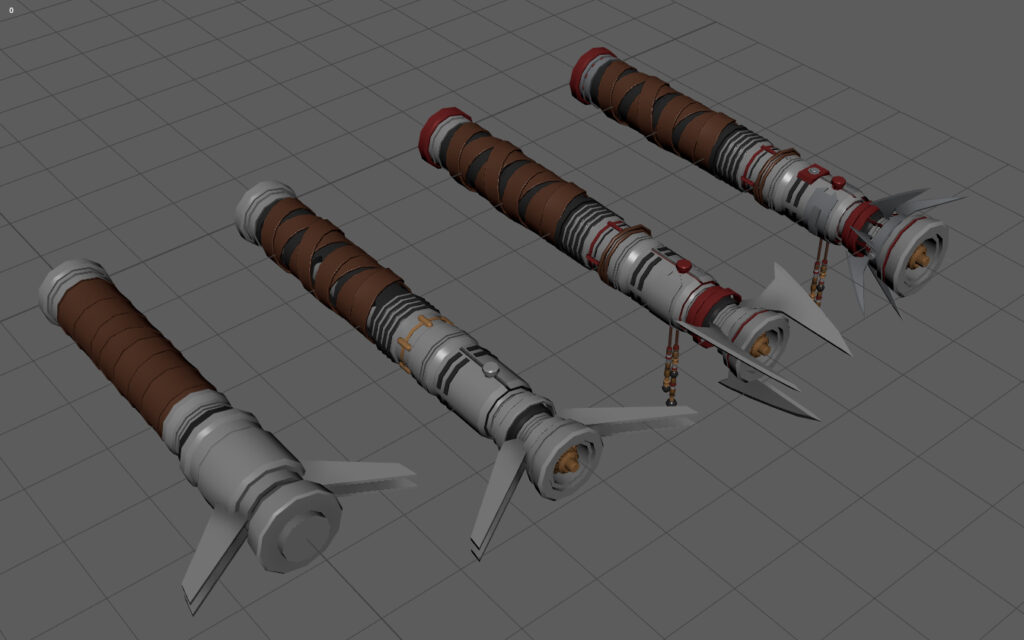
I did the exact same workflow for the clothes and the lightsaber.
Skins details & custom brushes/alphas
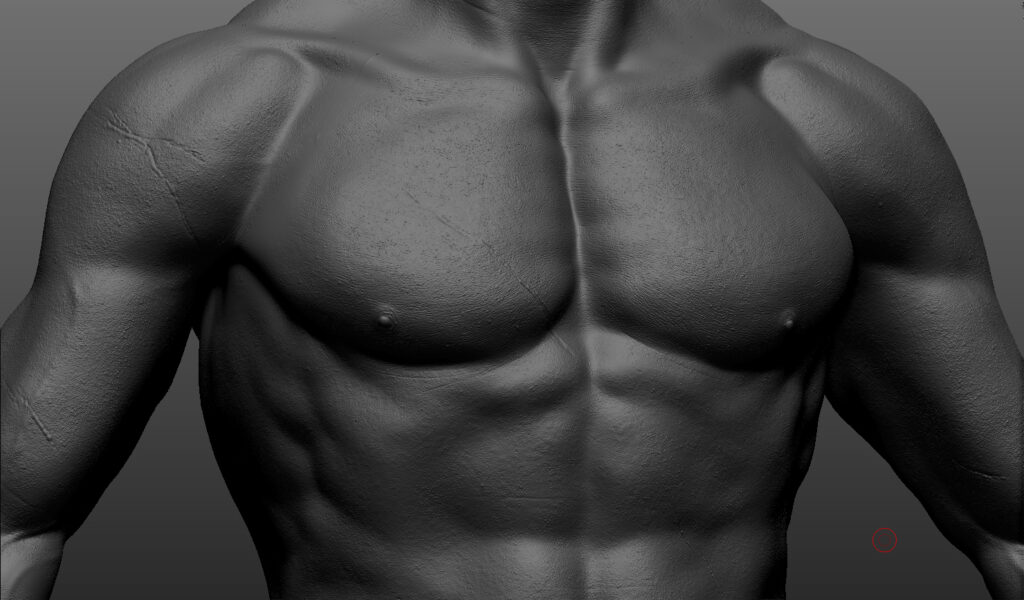
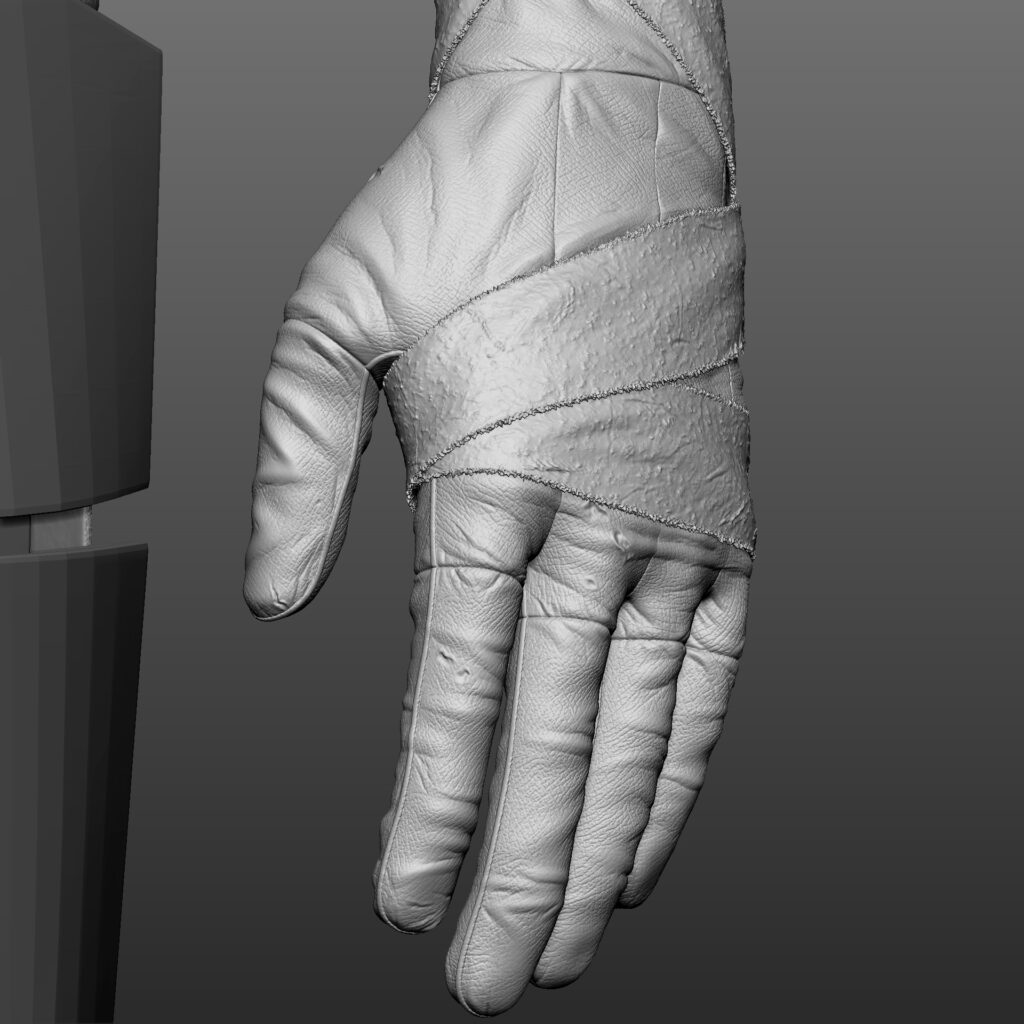
For the skin details, I used my custom alphas and brushes, then I applied them step by step, using layers in Zbrush to have full control over everything.
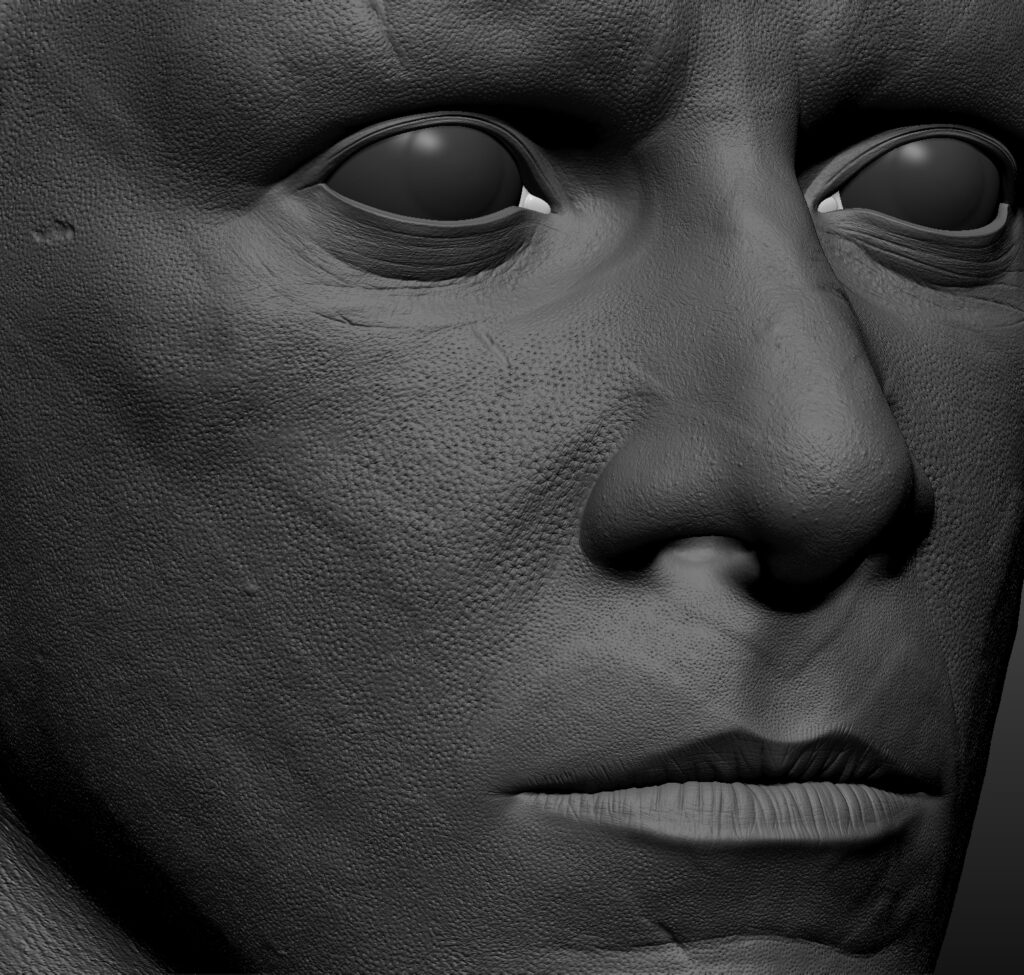
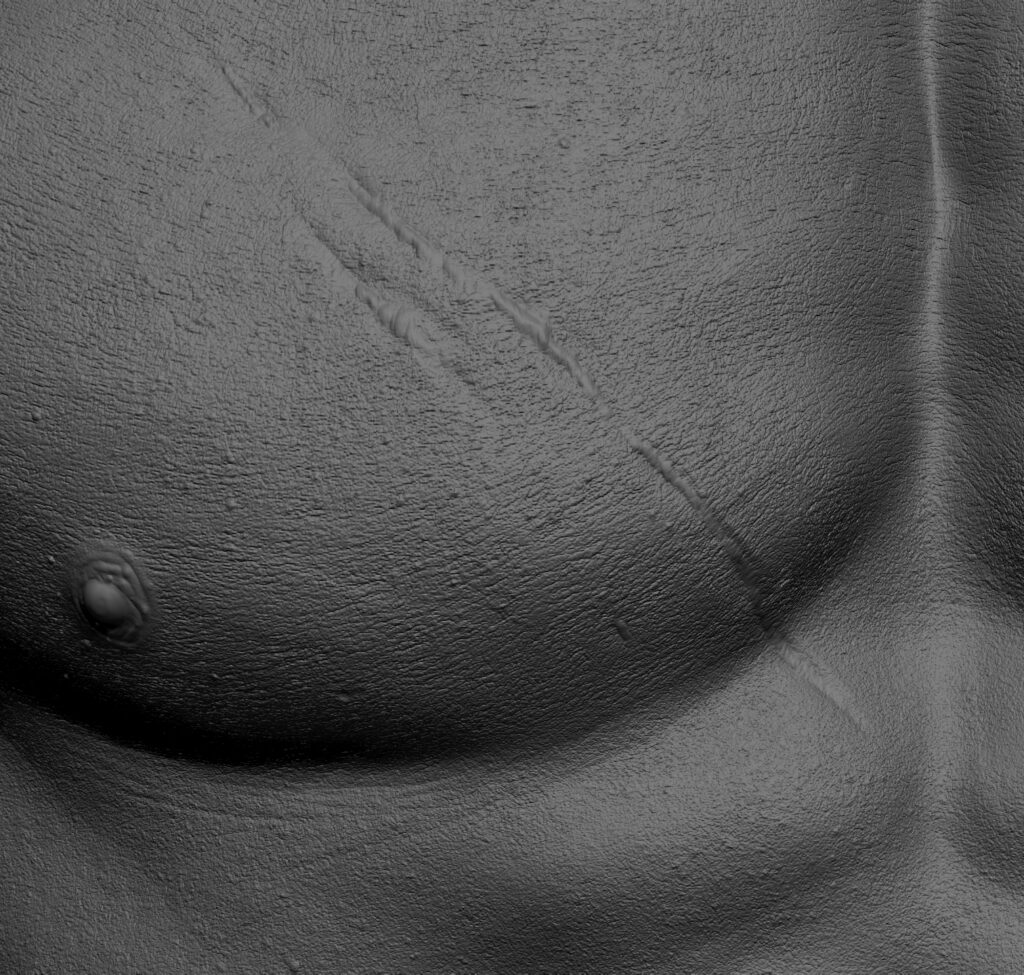
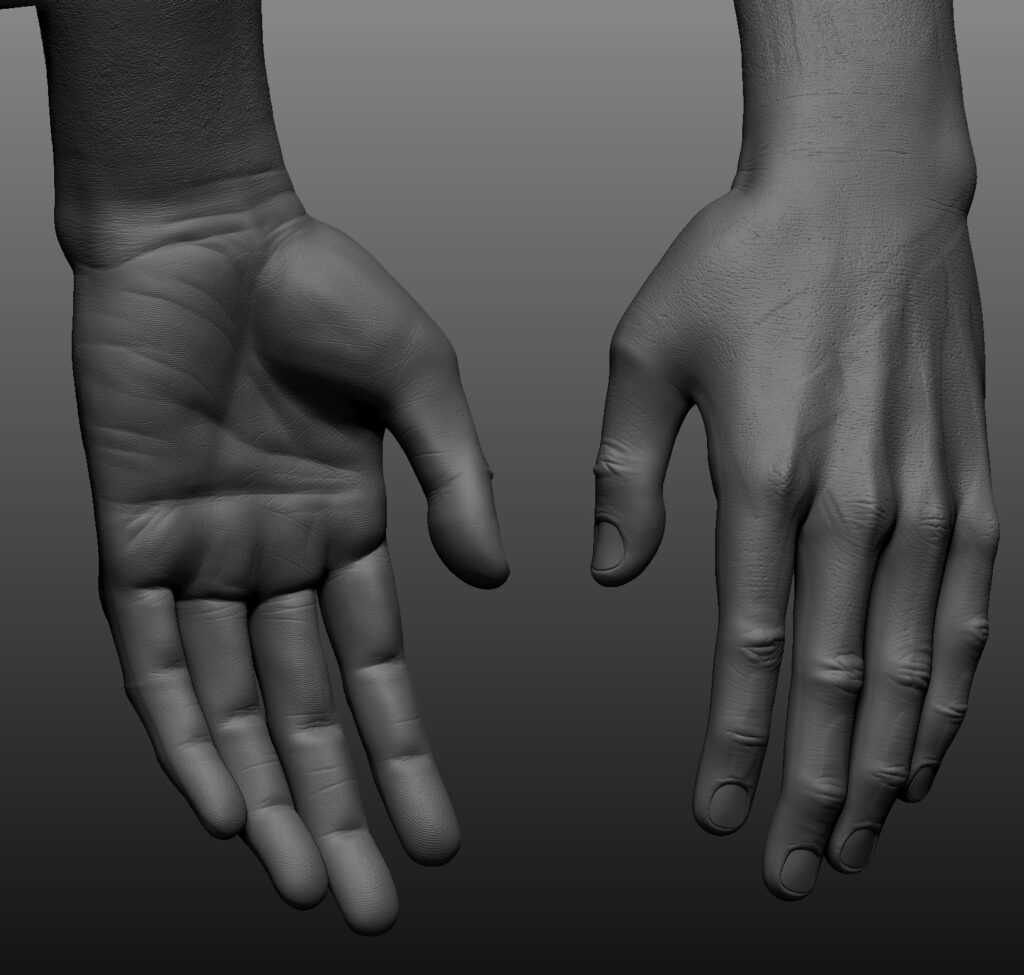
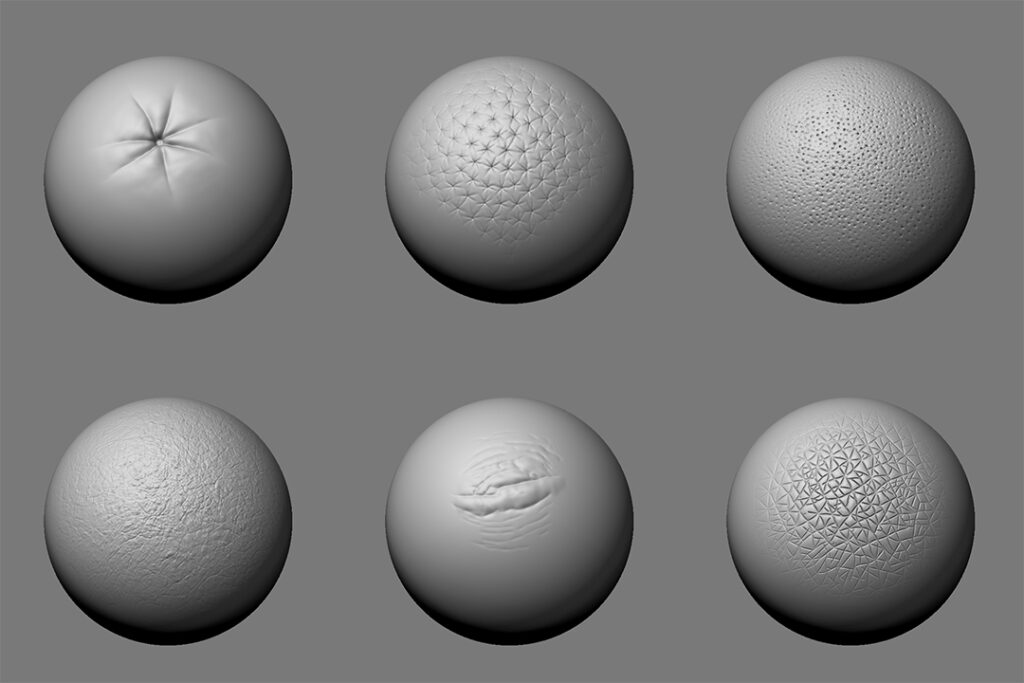
I made several single pore alphas, some alphas with multiple pores, some skin patterns and also some knuckle alphas for the fingers.
To get all those fine details, you need a good density on your mesh. In order to achieve that, I use another common technique: The bridge.
To do so, I cut my model in different subtools. Then, I create a mesh that will be on top of the seam of two subtools. I will sculpt them individually, then I project both of them on my bridge. I then sculpt a connection between them making it seamless, and when it’s done, I reproject my bridge on both subtools.
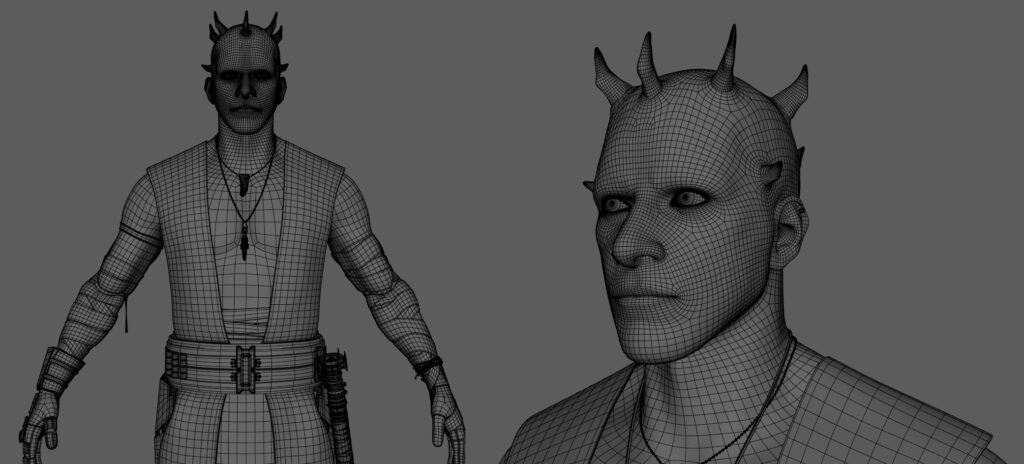
Clothing & Accessories
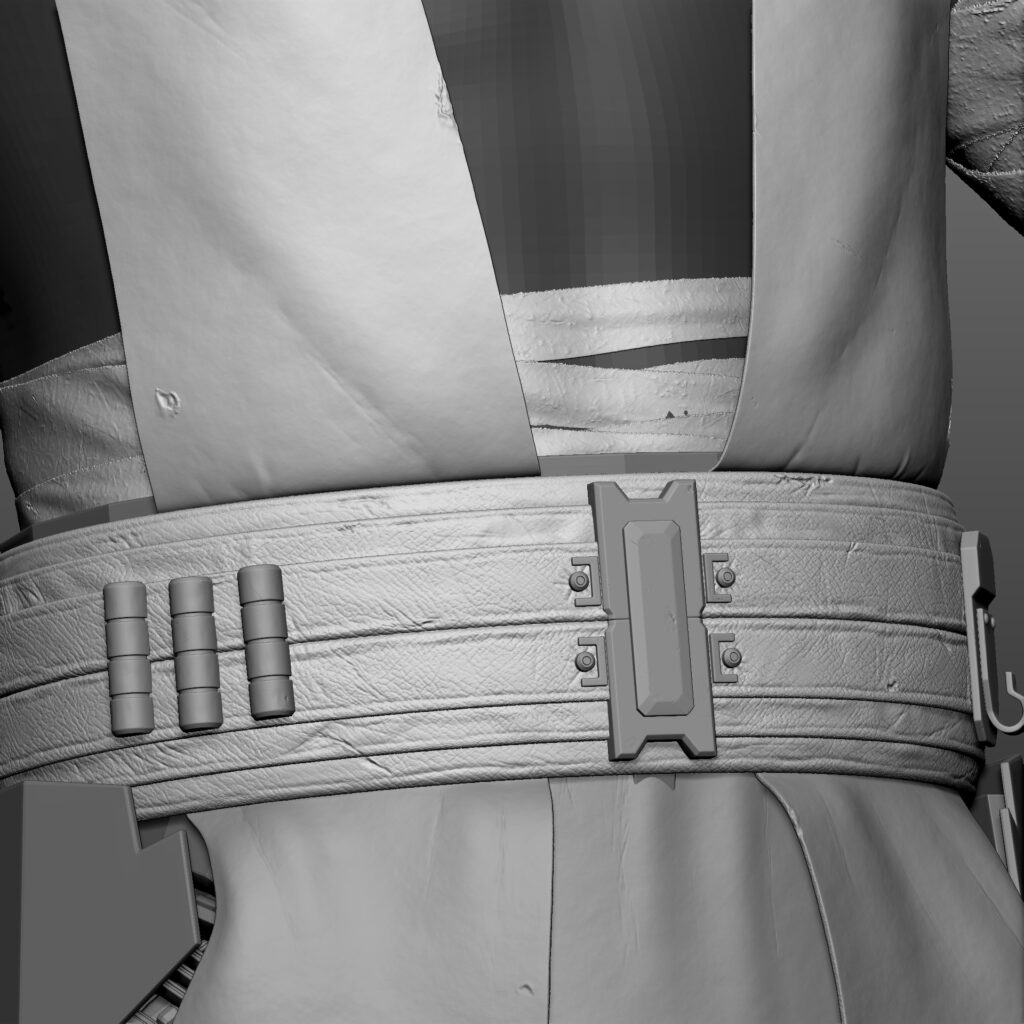
For the clothes, I kept them simple but reflected Maul and the Siths in general.
Same for the lightsaber hilt, it has leather wraps, spikes and red-colored metal, that will recall Maul’s global aspect and clothing and be a callback to his lightsaber from The Phantom Menace.
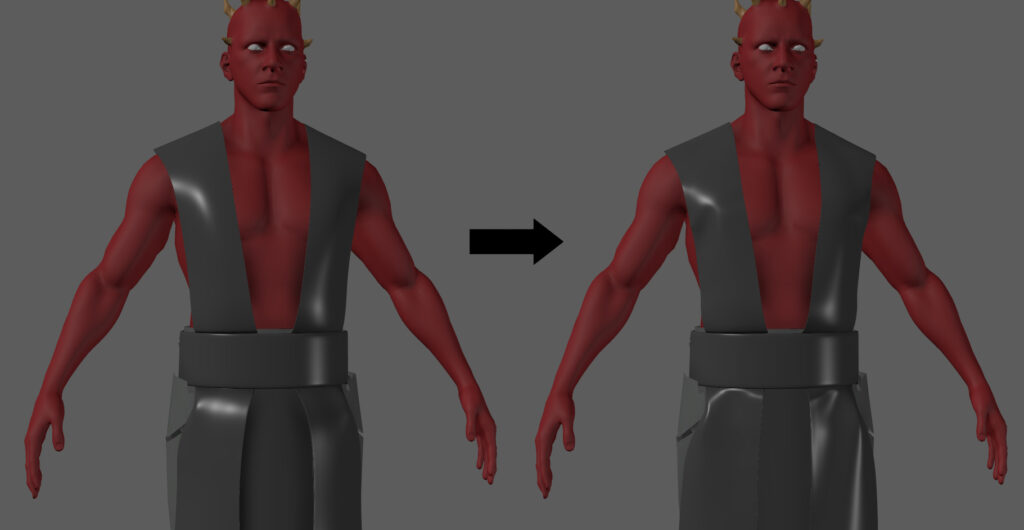
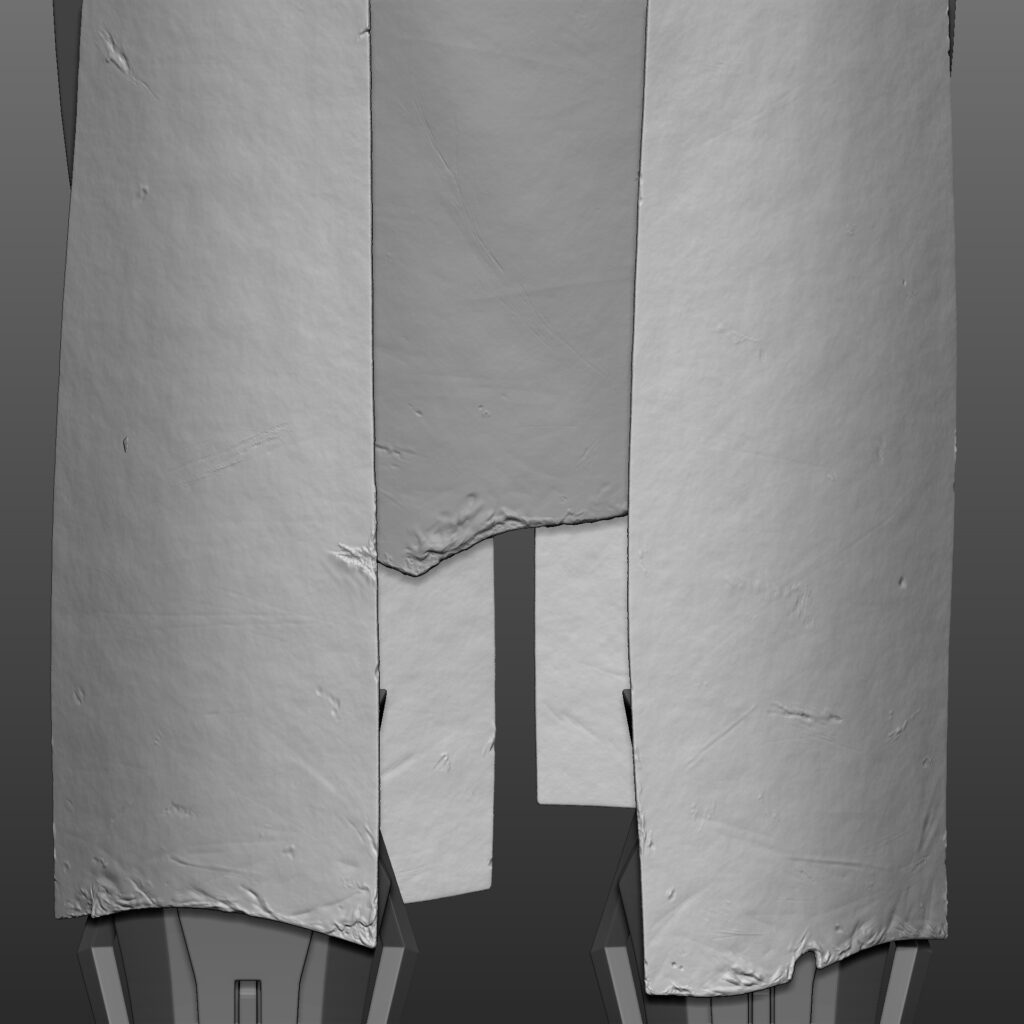

For a more realistic aspect, I do a simulation using Ncloths in Maya to give them a more natural look, getting folds and deformations. After that, I add small details and small wrinkles in Zbrush.
The leather was made using tileable alphas I sculpted in Zbrush. I then combine them with a density mask in order to remove them where the cloth is worn or on the edges.
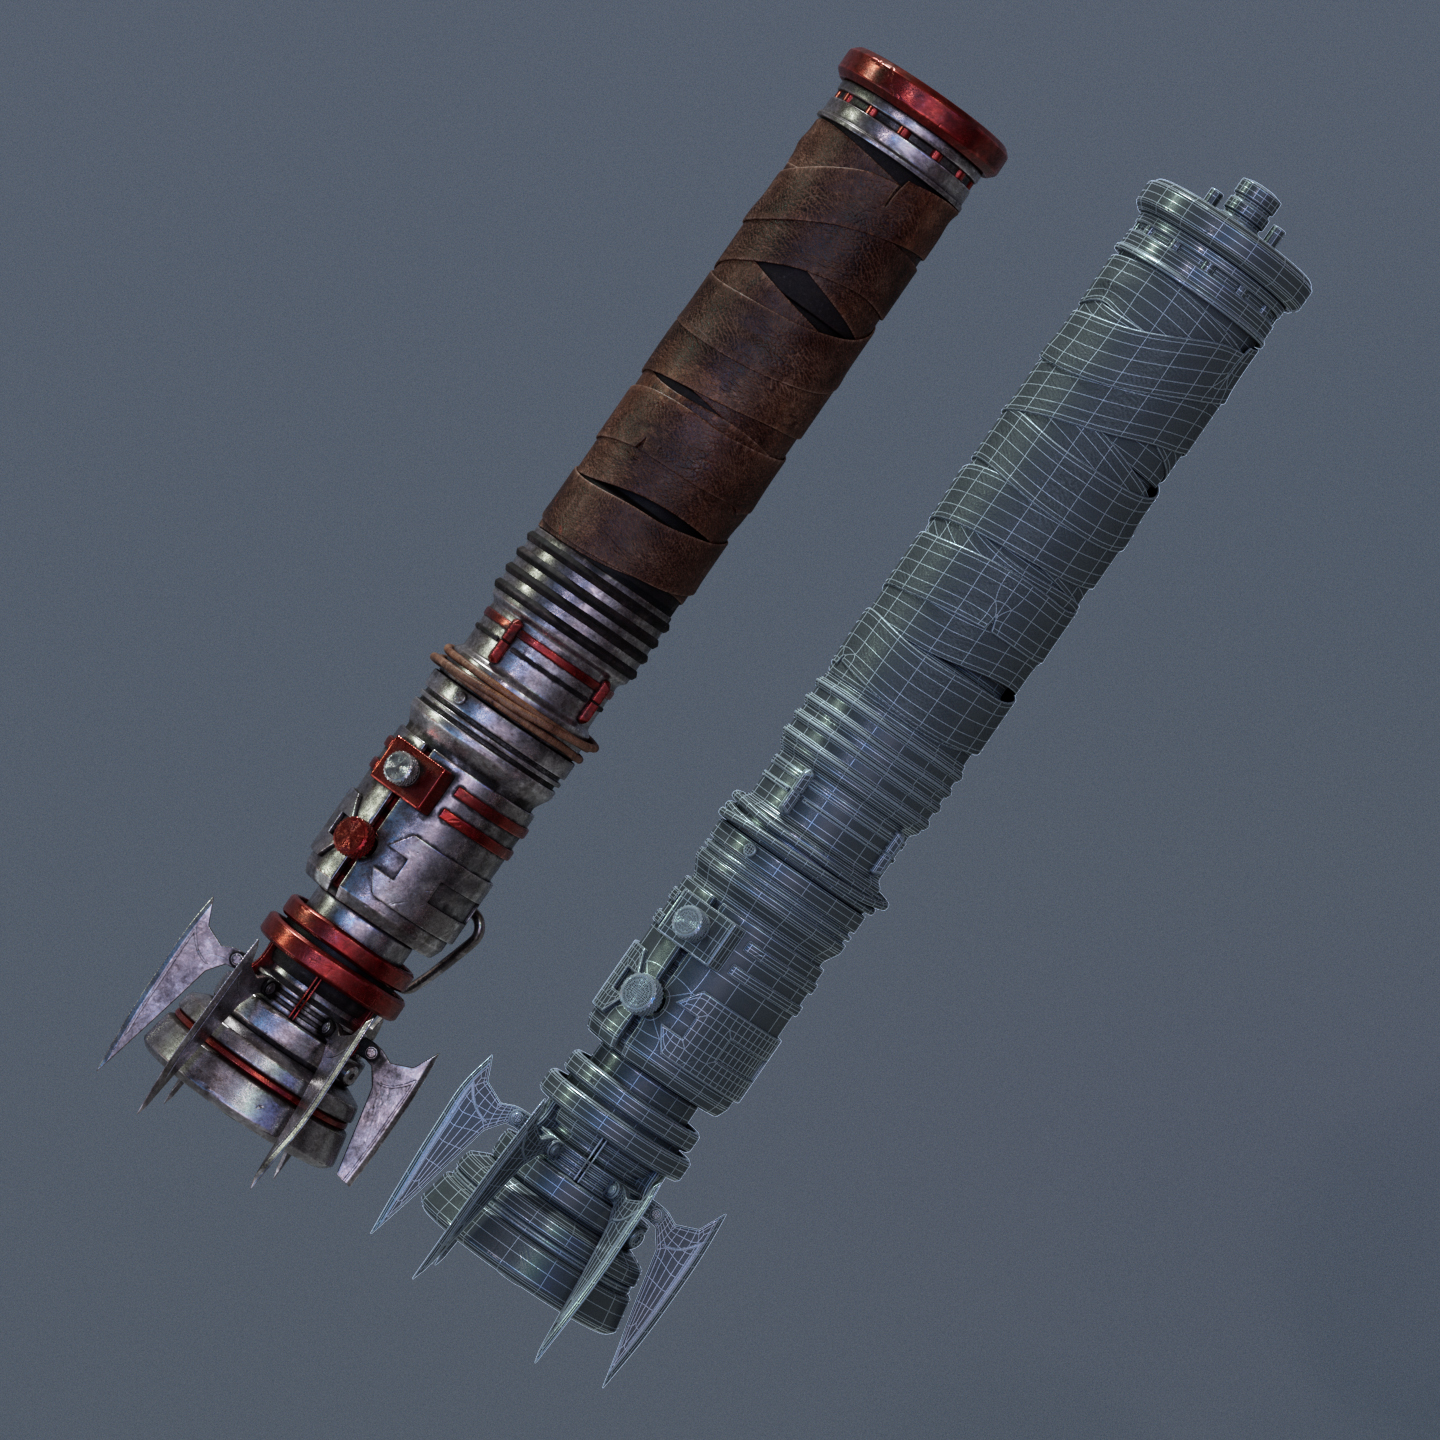
For the wraps around the body and lightsaber hilt, I usually work on a low poly cylinder. On top, I create the stripe that follows the topology flow of the cylinder, extruding and making sure nothing is intersecting.
Then I subdivide it, add the support edges, and then wrap it on a blendshape that will take the form of the object I want it on.
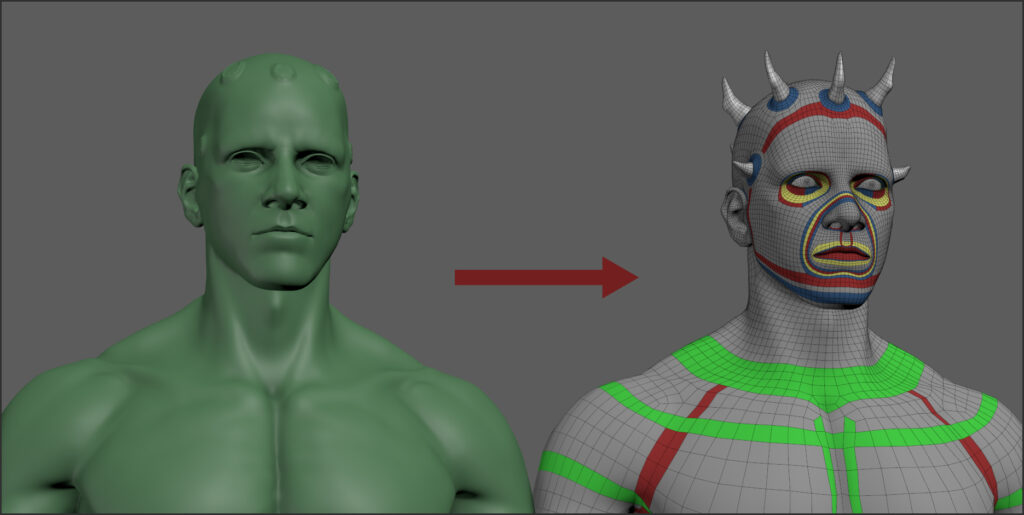
UVing
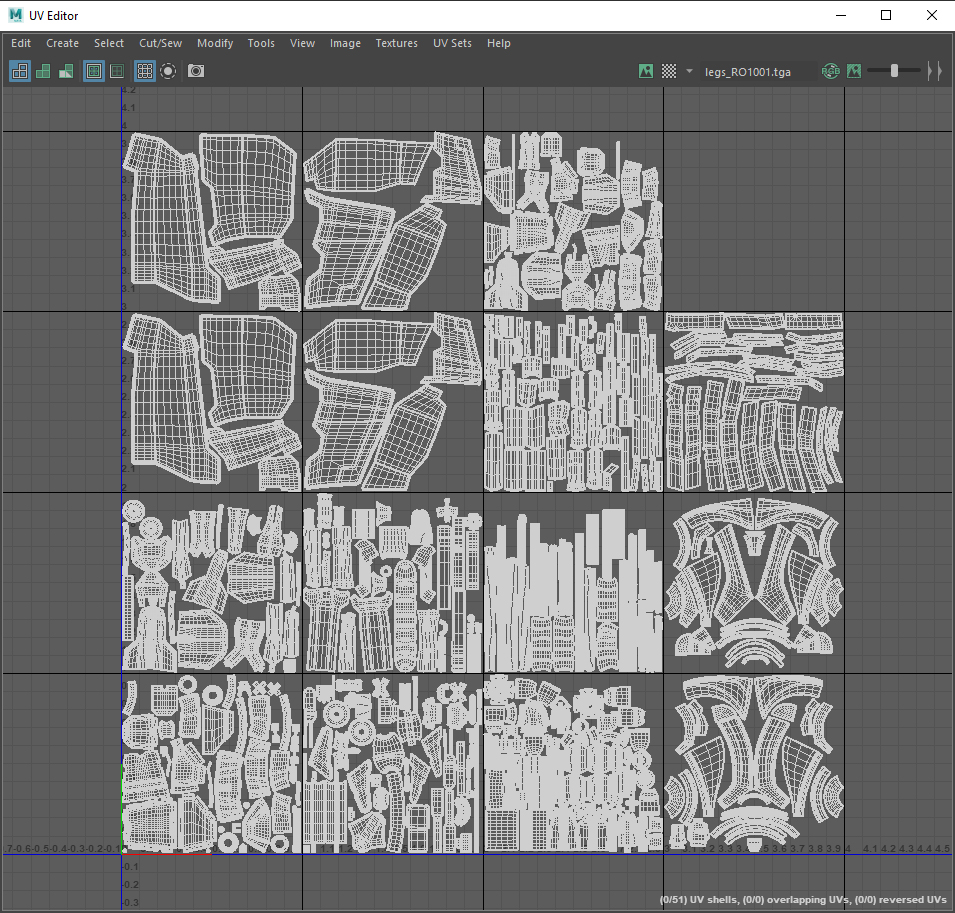
UVs were pretty straightforward, I unwrapped them in Maya and made Udims that I regrouped by objects, allowing me to keep a good texture resolution.
Textures & Shading
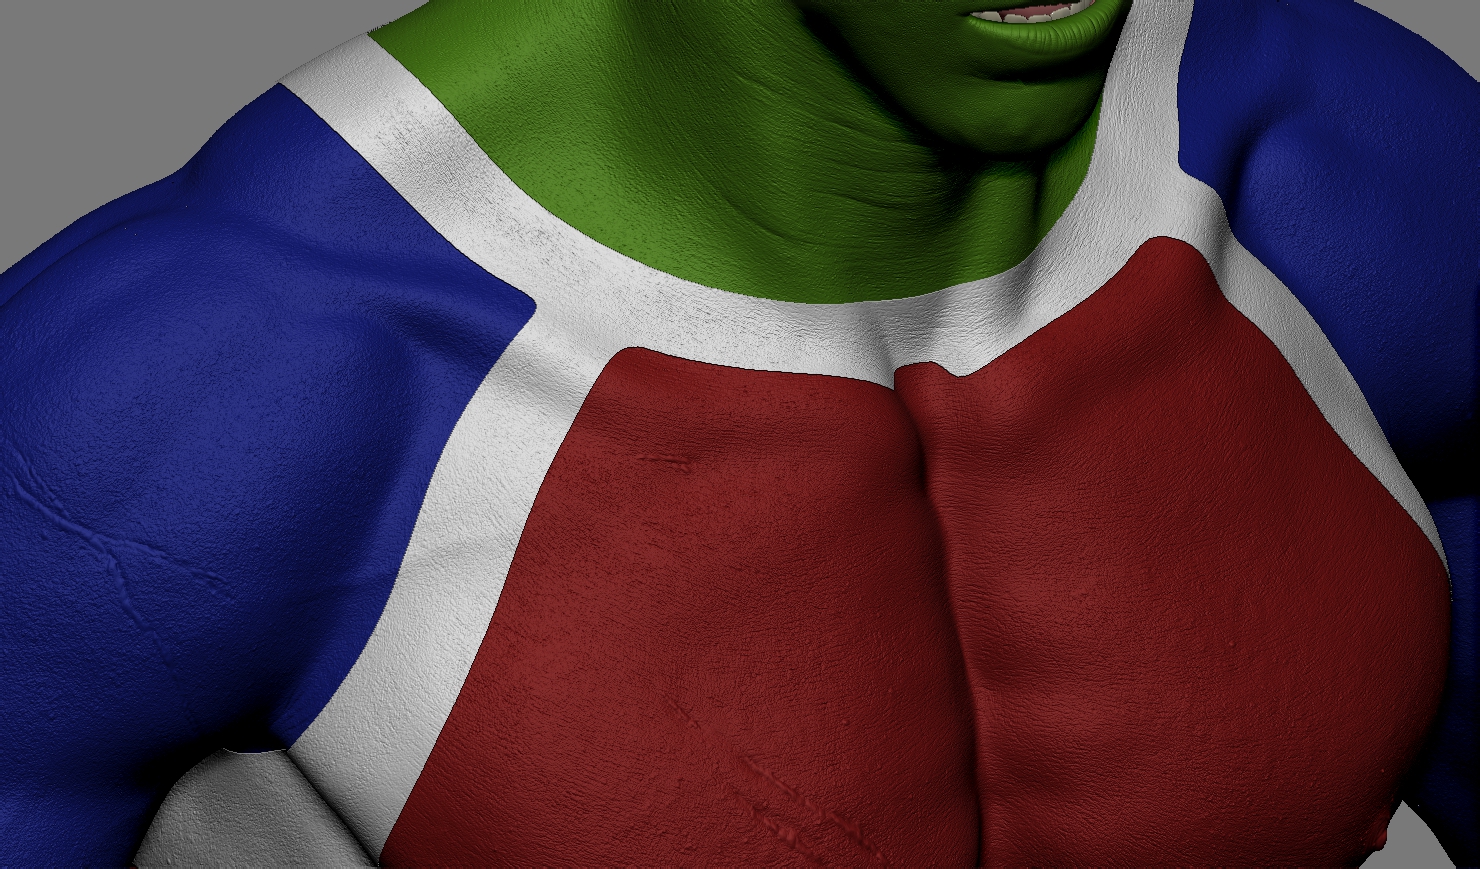
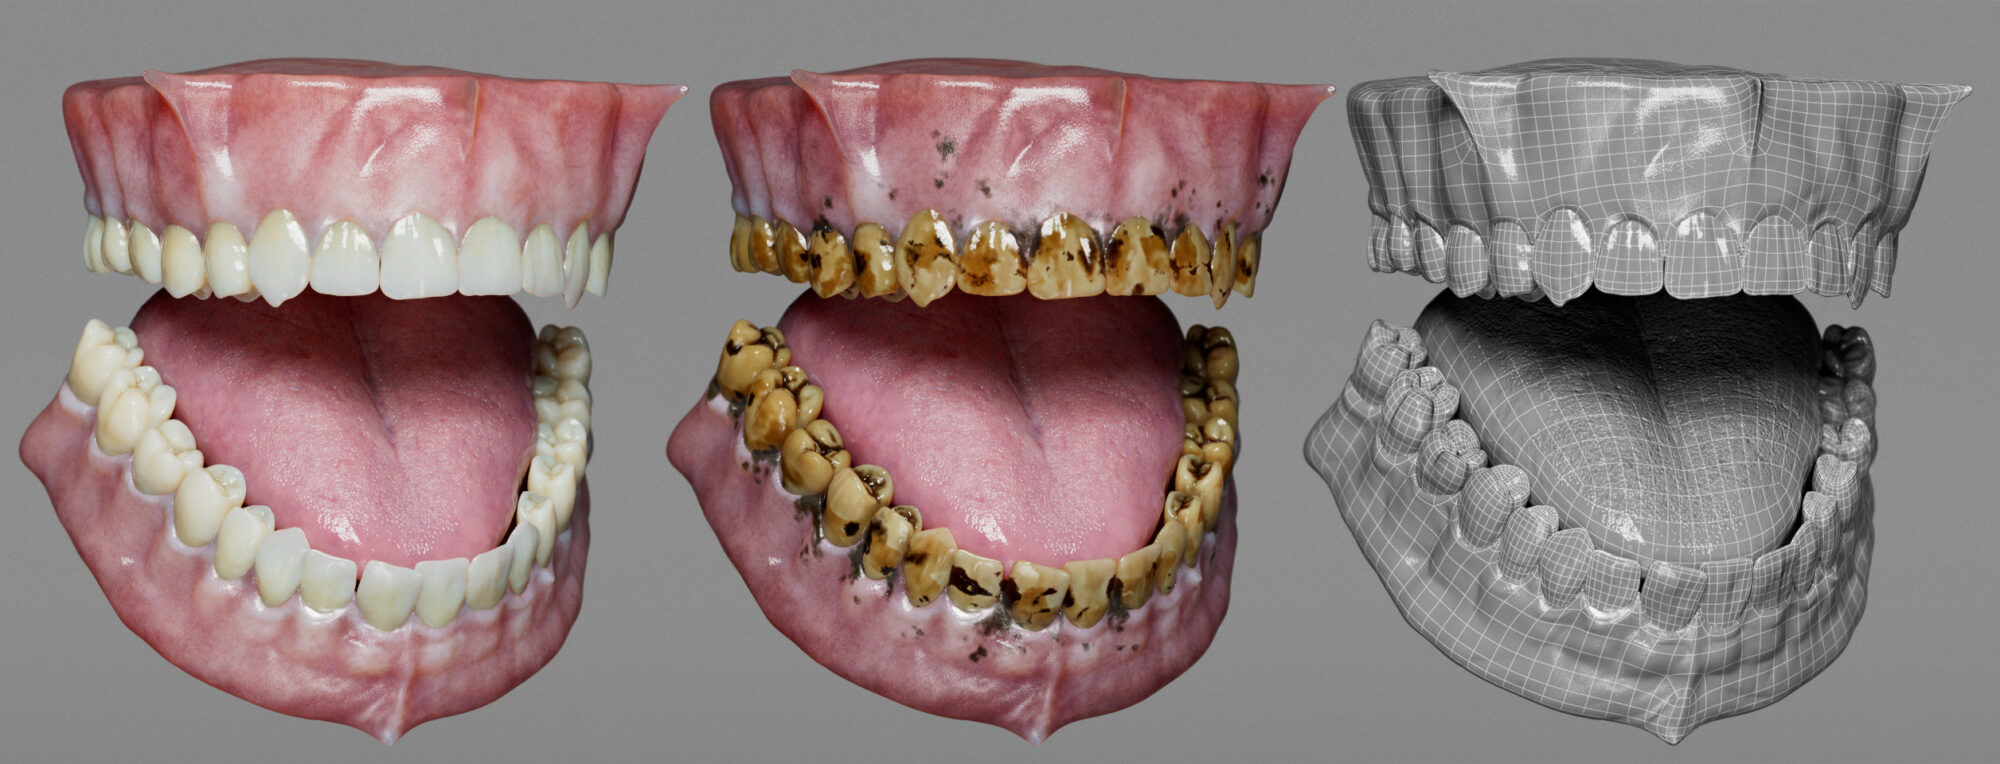
The textures are poly painted in Zbrush. The tattoos are made on a different layers and are mixed in Photoshop with the skin Diffuse, Roughness and Specularity.
Regarding my texture workflow, let’s take the roughness maps as an example.
I will start in Maya with an AiStandartSurface and play with the roughness slider, this value will be my base color in Zbrush.
I will paint details using brushes and alphas on top. I also use the Noise system to get more minor details.
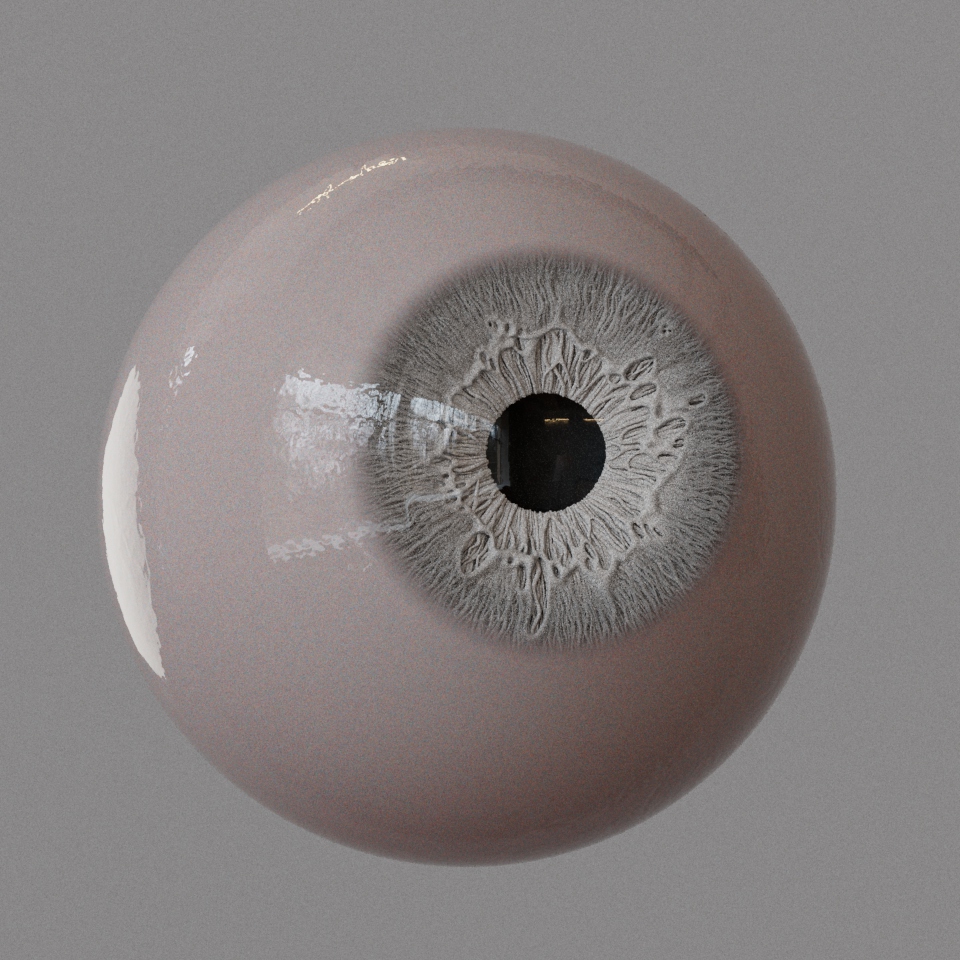
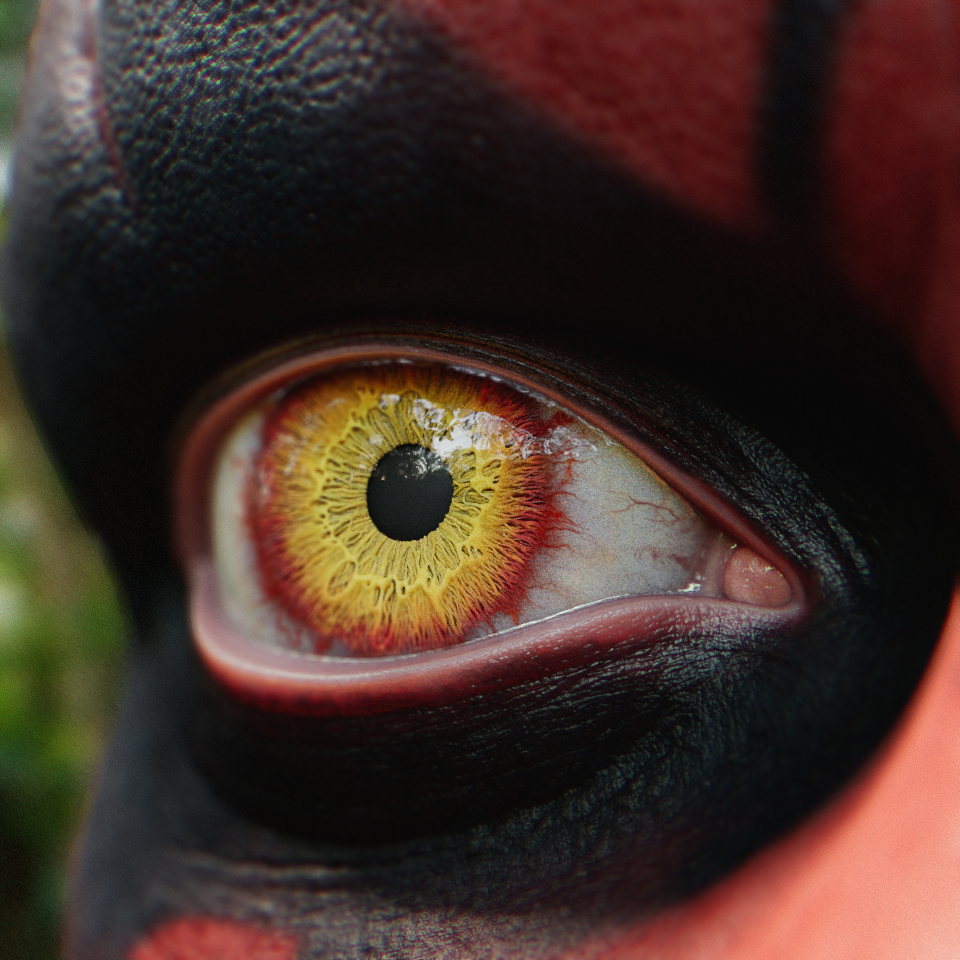
The eyes have always been my favorite part to work on. I developed a particular kind of iris for this project, as I wanted it to be almost entirely modeled.
The cornea and sclera are the same geometry, a ramp node is used to create the transparency for the iris to appear, which is different geo.
I also needed to create a mouth interior.
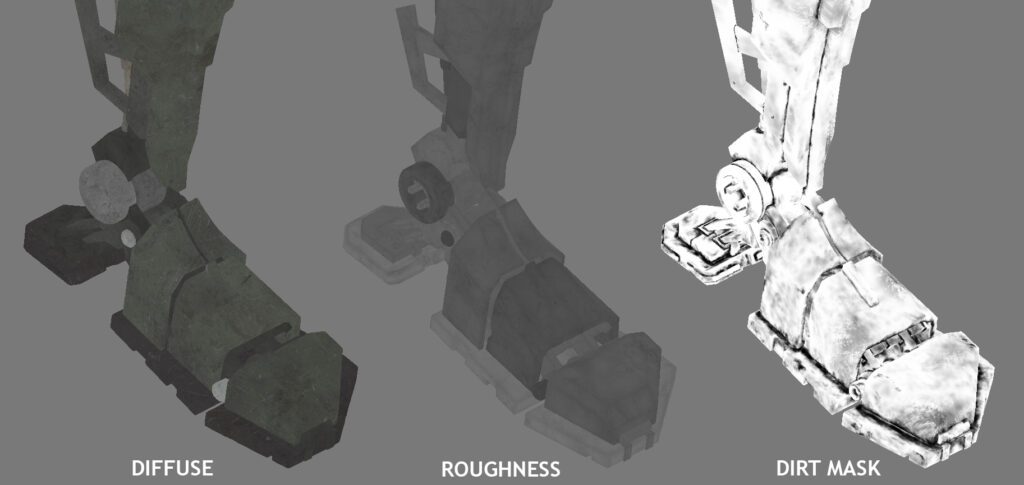
For the textures of the Hard-Surface models, the workflow is almost the same as the skin. I put a base color, add all details and paint the scratches to match the sculpt if necessary. Then, on a different layer, I paint the dirtiness using black and white which will be used later as a mask.
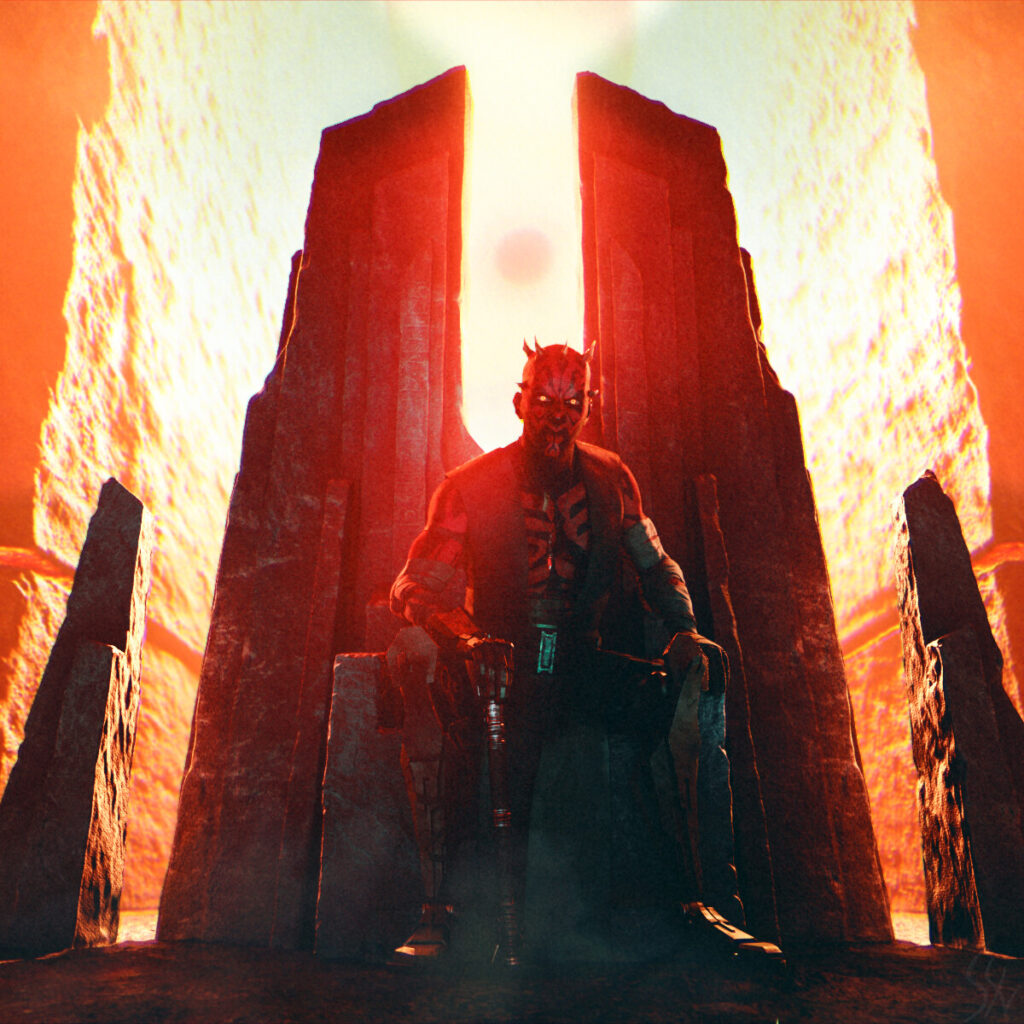
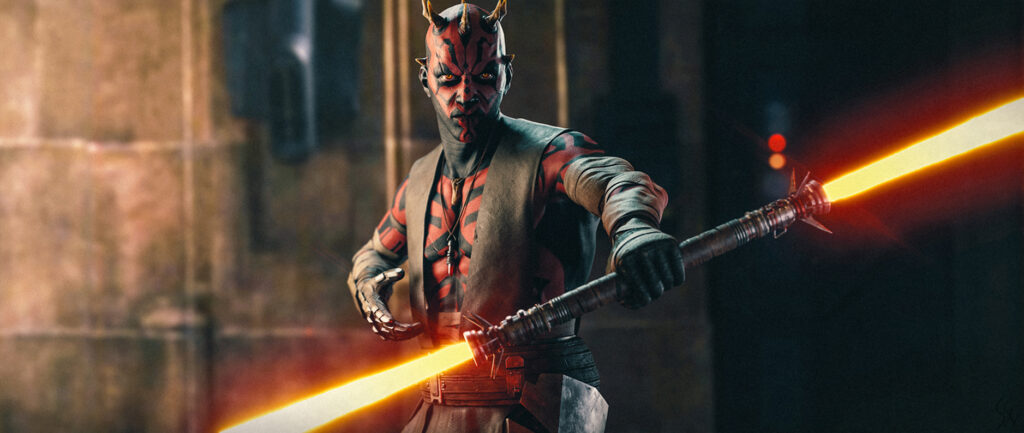
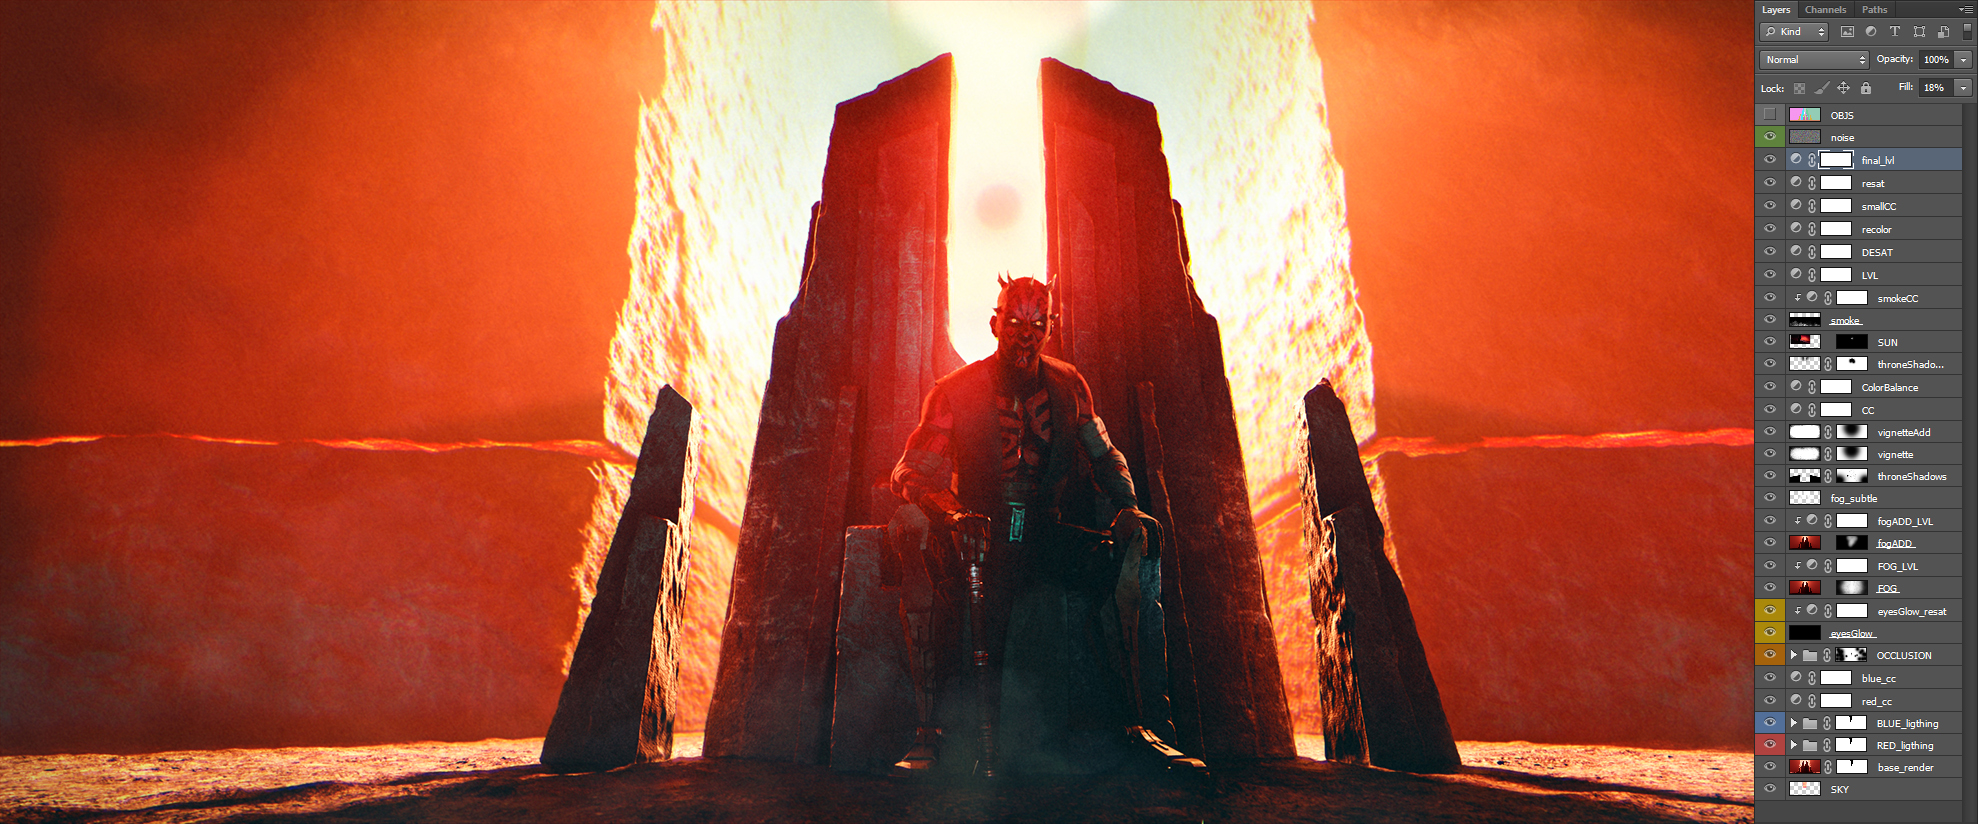
Lighting
For the lighting, I wanted something realistic and cinematic looking. For that, I used Arnold with the ACES workflow, using HDRIs and Aera lights mostly.
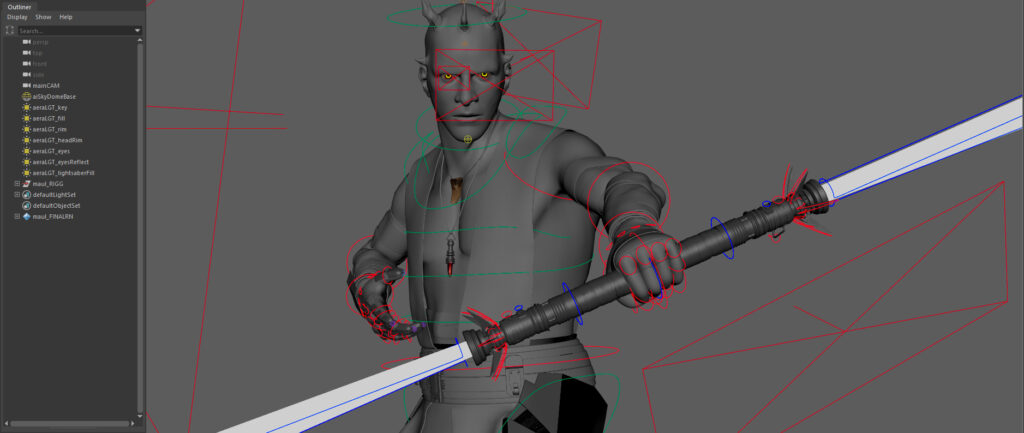
Rigging/Posing
I made a simple rig system. After I posed my character, all the deformations caused by the skin were fixed by sculpting and blend shaping them back into the model.
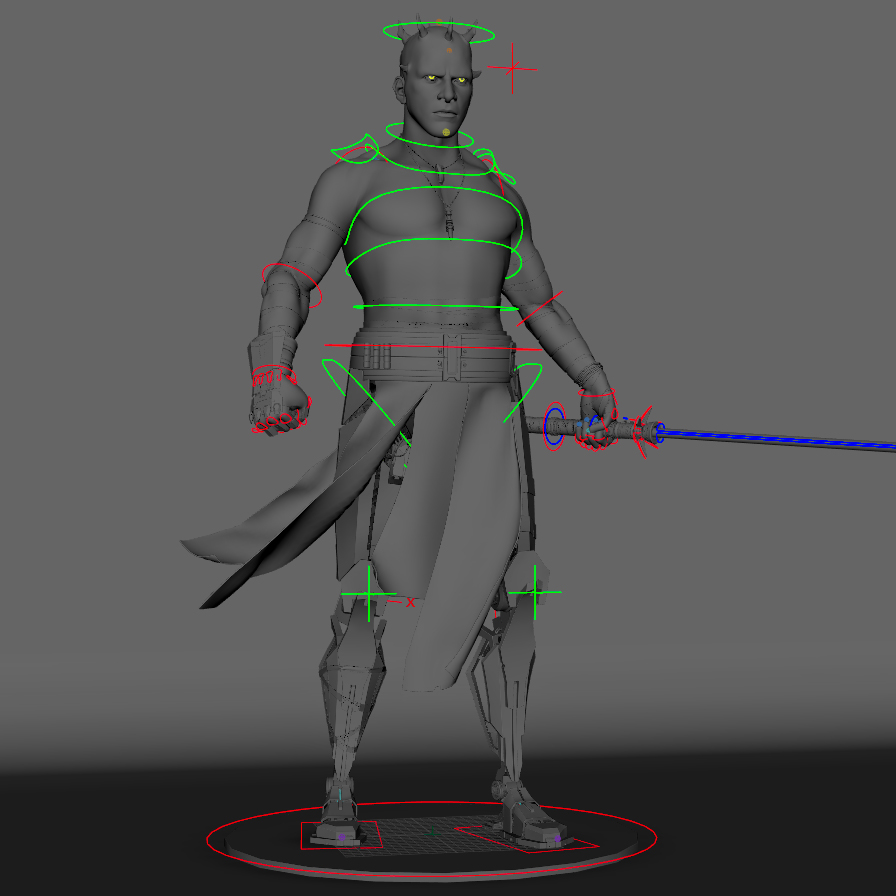
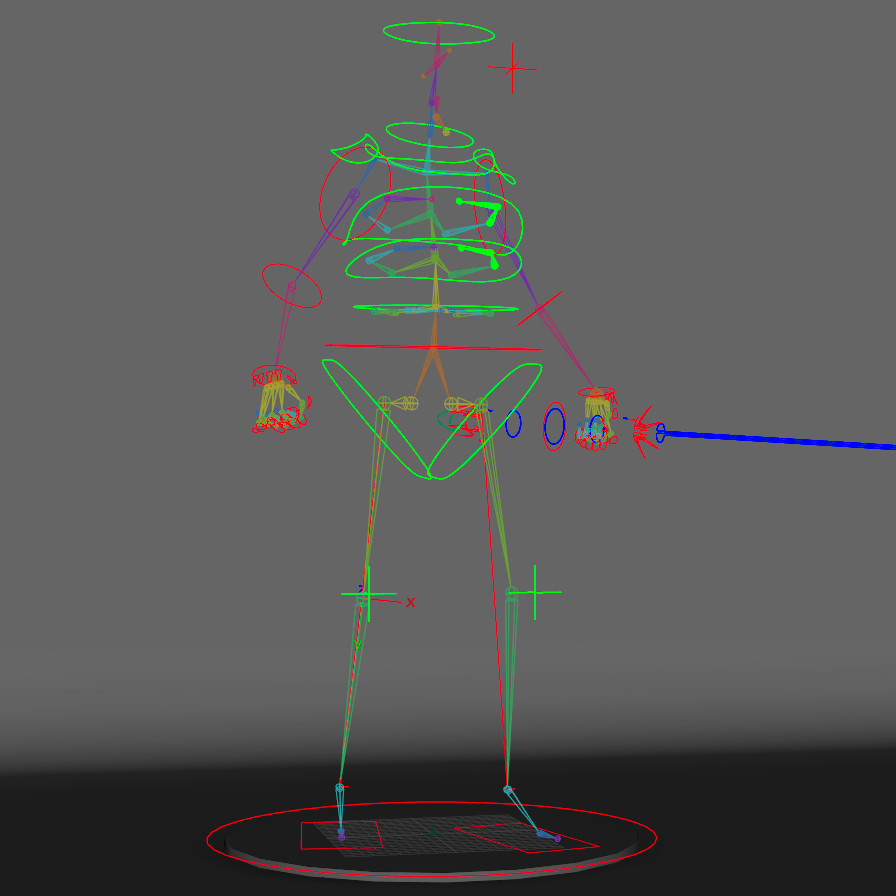
The face is a mix of 4 blendshapes that could be combined to adjust his expression.
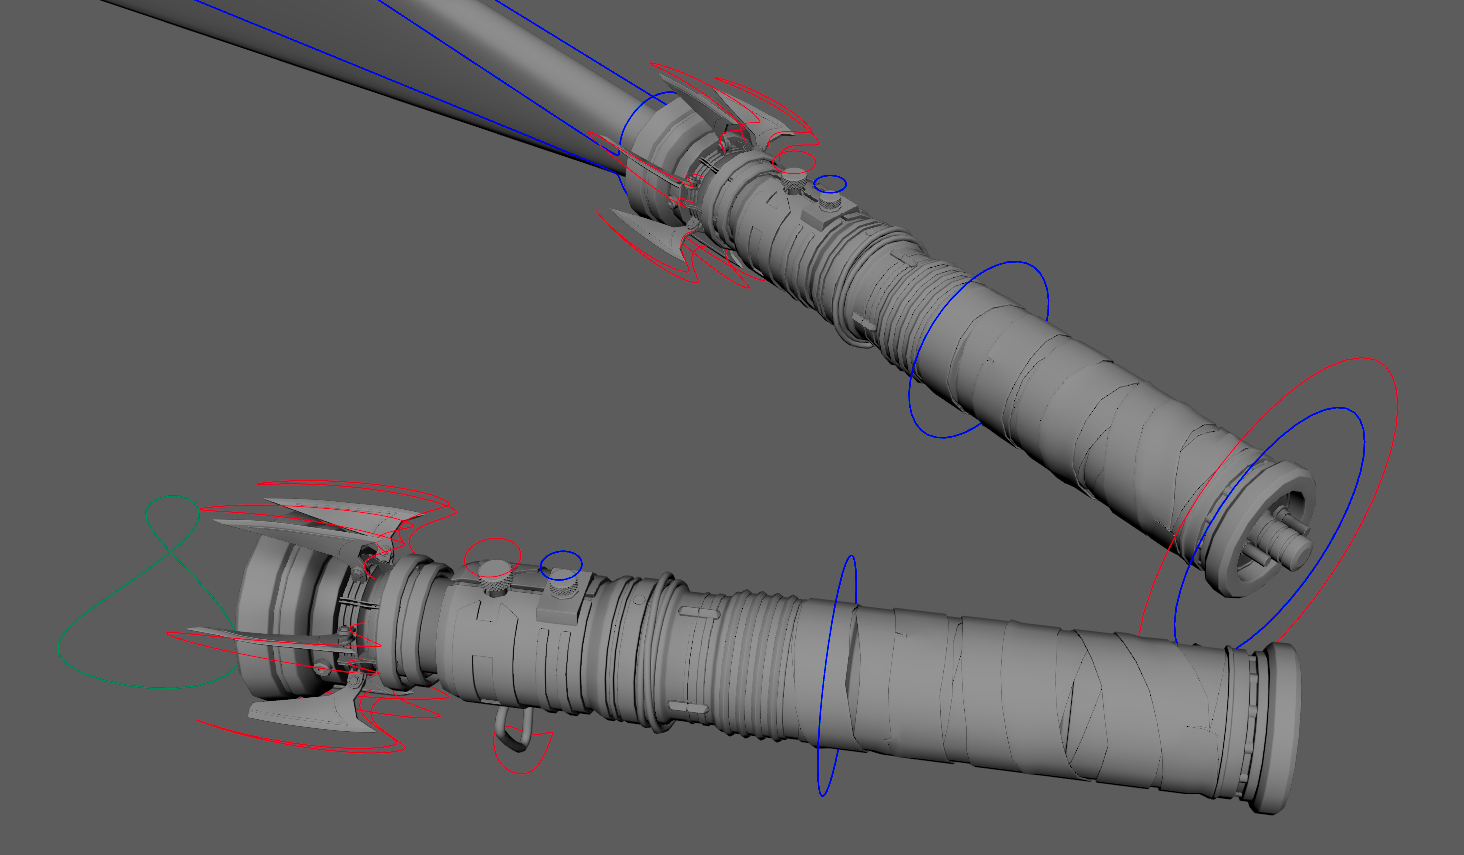
The lightsaber also got its own rig, it’s possible to separate it into two different lightsabers, and the blade can extend or retract. Controllers and blendshapes also drive a ‘swoosh’ effect.
And finally, the iris was rigged using the Set Driven essential function, blendshapes and a custom attribute attached to the controller.
I posed them with the Sculpt Tool in Maya for the facial expressions and added the extra wrinkles in ZBrush that I will mix with my base displacement map.
Rendering
For rendering, I use the Arnold Render View. I keep it very simple: I render each light independently with no background, a Z-depth pass, an Object pass and an Occlusion pass.
All of that is then composited in Photoshop, and sometimes, I do some back and forth to remove/add some minor stuff like reflection or shadows.
Conclusion
This project is the first one that I’m happy with. I achieved a lot of new stuff and learned many new things. But it was also the most challenging and difficult one, because it was a very, very long project, but also because I wanted it to be technically usable in production, with clean topology, high details and realistic shading.
I’m hoping this will give little help to some, but also give the inspiration to continue and finish projects.
Read more articles
You might also like these articles.