Control Device

Introduction
Hello!
My name is Shangyu Wang, I'm a 3D artist from China.
Currently, I'm a student in college and I have been learning CG for about 4 years now.


Project
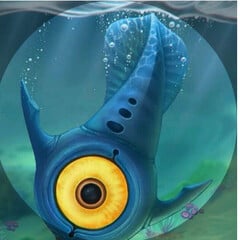
Over the last few weeks, I went to collect some reference materials from abandoned factories.
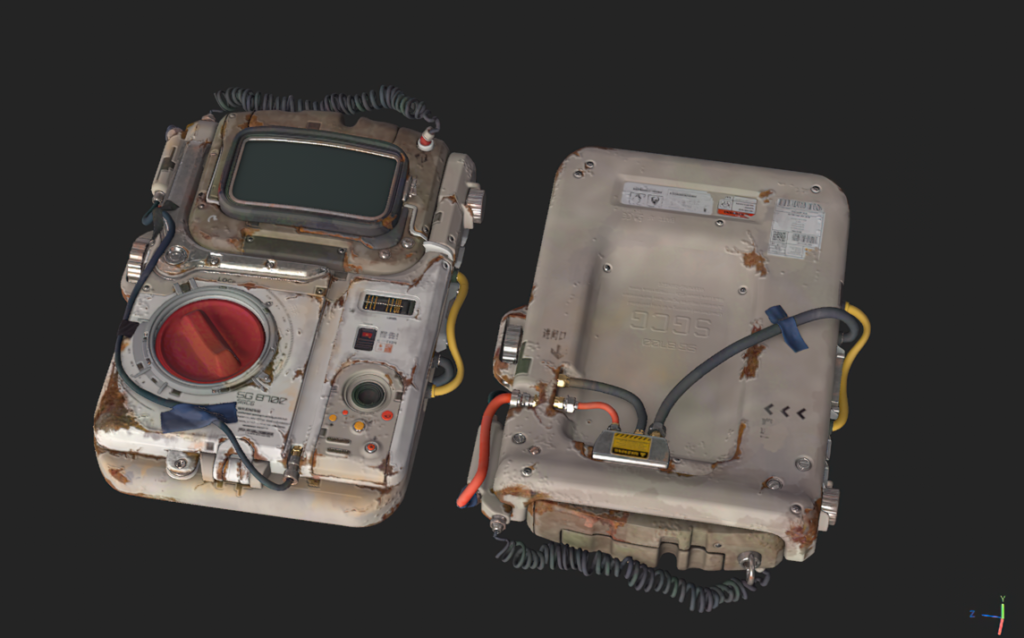
Some of the equipment inside really caught my eye. That’s why I decided to create a control device inspired by those pieces. At the same time, I wanted to practice my material creation skills.

Modelling
Before starting the modeling process, I didn’t create any sketches or drawings. Instead, I prefer to design the model as I go along. Most of my design ideas originate from my imagination and develop as I model the object.
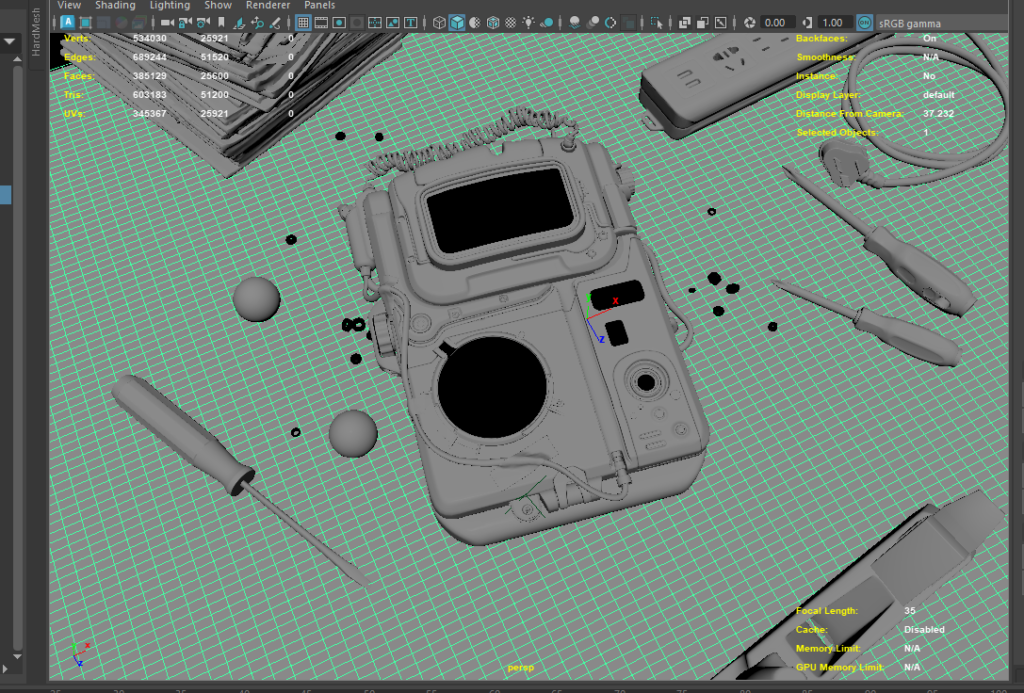
For this particular project, my primary objective was to practice creating a realistic rusty material since I had not attempted to create rust before. As for the modeling aspect, I didn’t pay too much attention to the topology of the model because my main focus was on practicing the material. Therefore, I opted to use Hardmesh to quickly perform some boolean operations to achieve the desired shape.
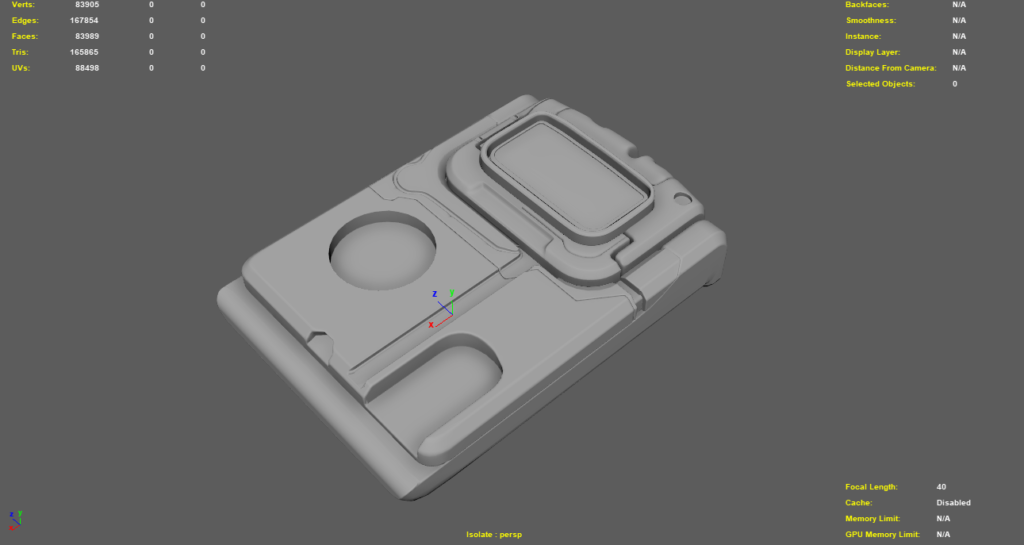
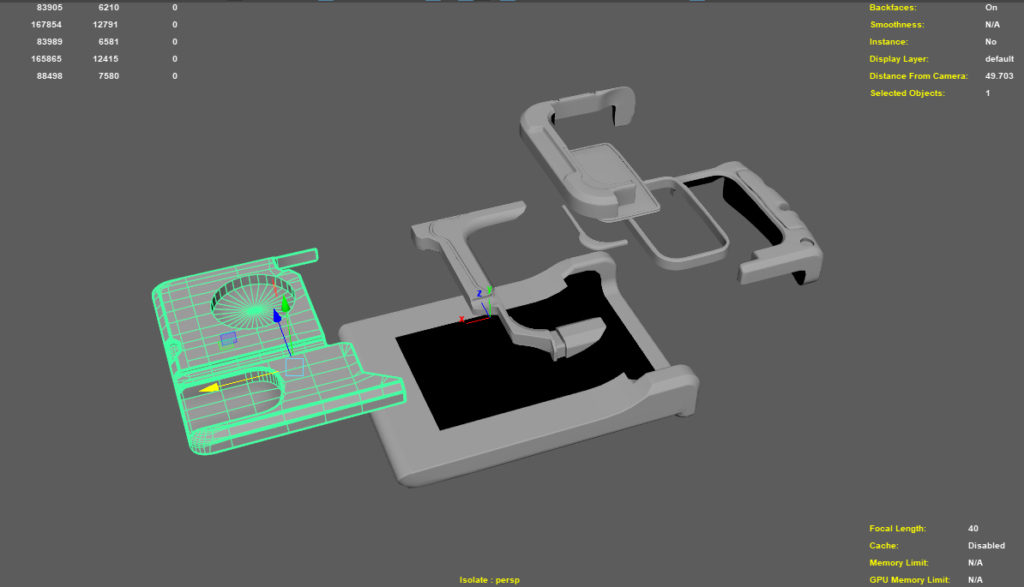
In addition, I incorporated some wires to enhance its complexity, and I extended certain sections to provide a greater sense of depth and dimension to the design. As a result, the screws, buttons, wires, and other details all contributed to producing a more intricate and realistic control device.
To be truthful, the process of modeling this device was not excessively challenging. In my opinion, the key factor in creating this model was patience, rather than any particular technical skill.

I would like to share an interesting process I used to add tape to the control device.
First, I exported the mesh I wanted to place the tape on and converted it to a VDB in Houdini.
Next, I converted it back to a polygon.

Then, I exported it back to Maya.

I used the paint select tool to choose the specific shape or area where I wanted to apply the tape.

And then, I used the transform tool to straighten out the four sides of the tape.

Reduce the polycount using a tool, then extrude the model slightly and smooth it out.
This will result in a nice sticky tape texture on the surface.
Alternatively, you could use the snapping tool to create the tape, but I found that this method produced a more detailed texture.

After careful observation, I have come to the conclusion that nothing in this world is perfectly straight, especially when it comes to older objects.
To give my model a more realistic appearance, I intentionally avoided making it completely straight by using the move tools to slightly align the surface.
This technique adds a level of authenticity and realism to the model.

UVs & Texturing
For the UV mapping process, I utilized RizomUV and divided the model into four UDIM textures.

Baking
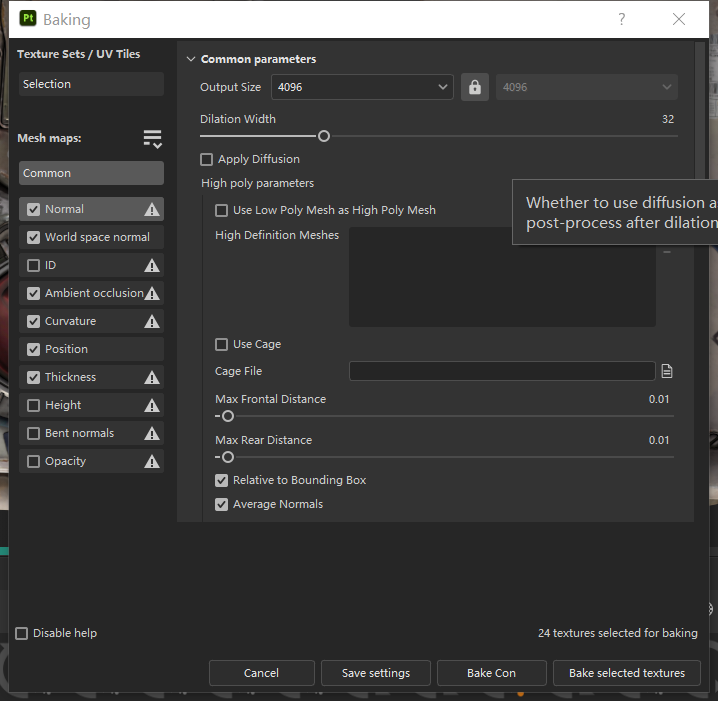
I sent the model to Substance 3D Painter. Since I didn’t create the high-poly mesh, I just baked the texture using the default settings.
Furthermore, I duplicate the model, one for the front and one for the back.
The reason for this is that Substance 3D Painter does not allow for free rotation of the model, and having two separate models would allow me to observe and paint more efficiently.

Every time before I paint the texture, I think about what materials are used in this prop and in what order the material layers should be applied.


After that, I created a base metal layer first, and then I created a few different masks to apply different materials to specific areas.

My next step would be to create several layers of different colors to differentiate the major areas of the model.

To create the base color, I suggest using the ‘Mortar Wall’ default material in Substance Painter.
This material enables you to have slight variations within a single color, rather than a plain and uniform appearance.

In the next step, we need to add a rust layer. Once we have added it, we should mask it and paint the masks.
It is essential to find reference images of rust scratches as they can help us create a more realistic effect.
Typically, paint tends to peel off first from the edges and corners of surfaces that are prone to scratches. To make the rust layer more defined, I used a level layer.
I also added an anchor point that we can use to create a peeling height effect later on.

Additionally, I added another layer of rust and made it deeper. To achieve this, I used the fill tool to apply the previously painted mask information and filled a noise mask up to the base rust mask.
This process results in more detailed rust damage.

Next, create the details for the rust edges. Start by creating a layer with only the height information, and then create a black mask.
This will allow you to add further details to the rust edges with greater precision.

First, use the “Fill” node to retrieve the mask that was painted earlier.
Then, apply a “Bevel” node to expand the mask outward. Next, use the “Fill” node again to obtain the original mask and change the stacking mode to “Multiply”.
By doing this, we can subtract the expanded mask from the original mask, resulting in a strip at the edge of the rust.
Finally, apply a noise layer in “Multiply” blend mode to the beveled mask to add more randomness to the rusted edge.
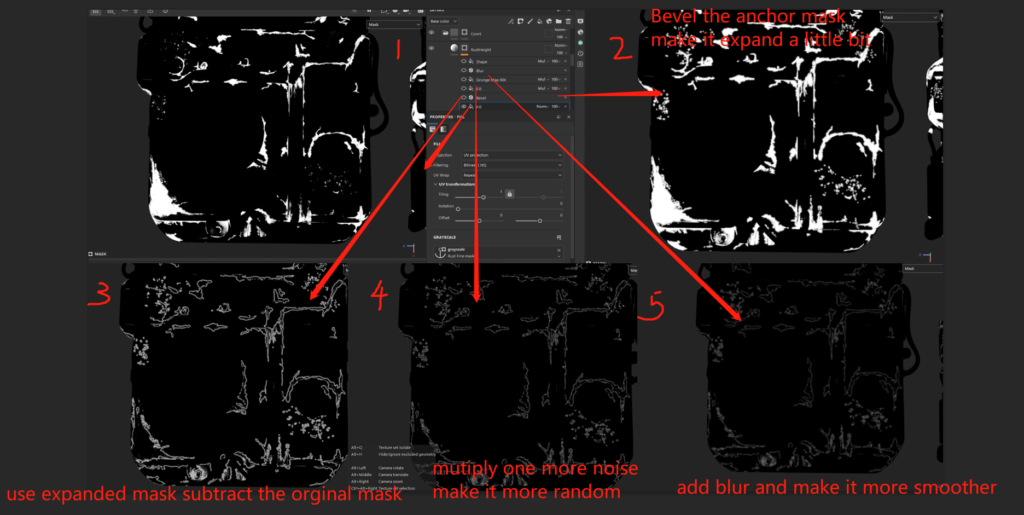


After completing the details for the rust edges, the modifications to the rust mask will also affect the edges accordingly.
Moving on to the next steps, they are much simpler. We will proceed to color the wires, tapes, and buttons.

Here I use the alpha channel to paint logos and text information.

I typically apply a layer of colorful texture over the base color to enhance the overall look.
In this instance, I used the world space normal baked texture directly to add colors and then adjusted the opacity to approximately 1-2%.
This technique enhances the realism and naturalness of the colors.

Lastly, in the final step, I usually add dust. Normally, the dust on the base color layer has low saturation and is not very noticeable.
To make it more visible, I use a dirt generator to add a light layer of gray dust. The opacity of the dirt base color is usually set around 20-30%.

Finally, I managed to finish creating all the textures and proceeded to export them for rendering in Arnold within Maya.
Rendering
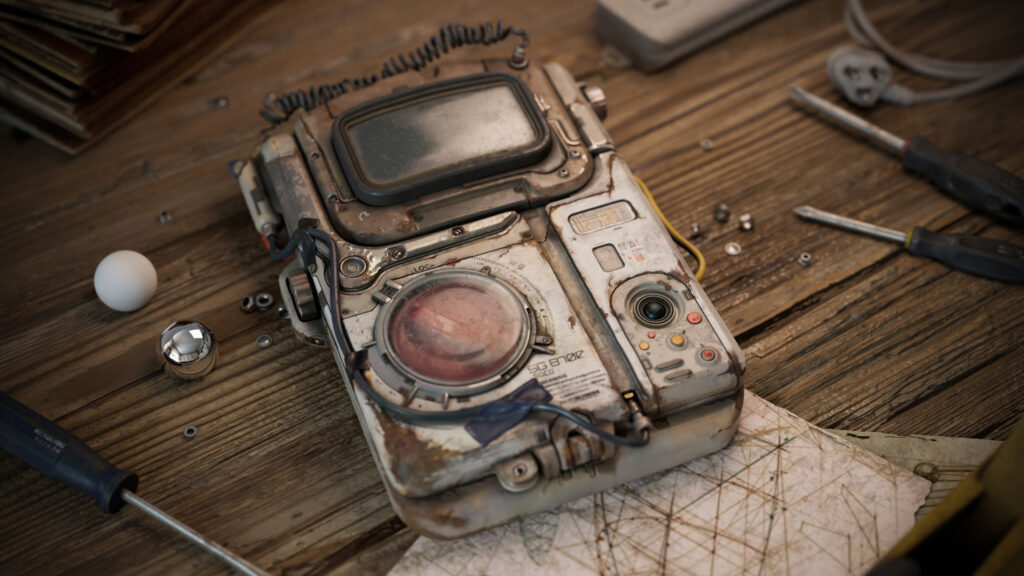
To enhance the presentation of my work, I quickly and easily put together a small scene using my previous assets that complement this device.

Lighting
In terms of lighting, I didn’t use too many lights, just an HDR and a plane light to mimic the ambiance of a desk lamp.
Conclusion
In conclusion, it took me approximately two weeks to finish this project. I am delighted to share my creative process here, and I hope it can be beneficial to others.
Through this experience, I realized the significance of meticulous planning and attention to detail, as well as the value of soliciting feedback and continuously improving my work.
I am grateful for the opportunity to share my work with the community and look forward to future projects that will allow me to evolve as an artist.
Read more articles
You might also like these articles.


