
Introduction
Hello, my name is Kataiishi.
Actually, I'm not a professional Material Artist, I'm a video editor. However, I've always been extremely passionate about 3D art, so I started learning material creation about 10 months ago.
Finally, I would like to express my sincere gratitude to GamesArtist for giving me this opportunity to share some of my thoughts and techniques when creating this texture.
Project & References
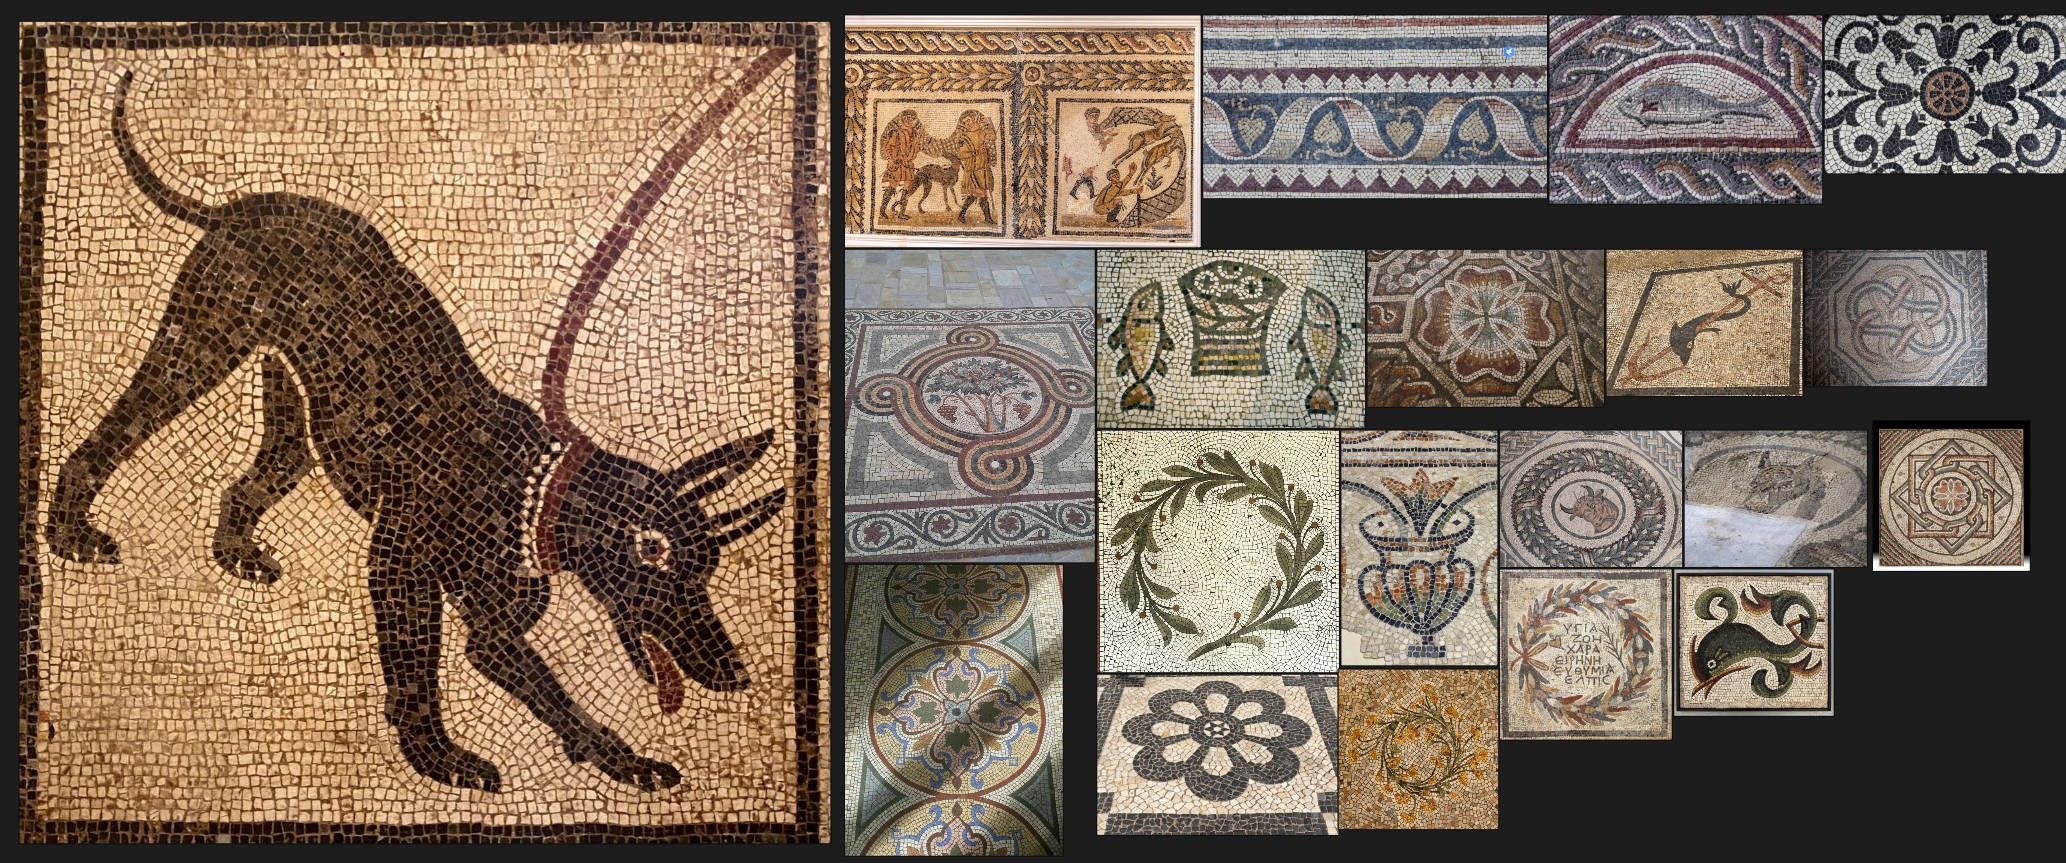
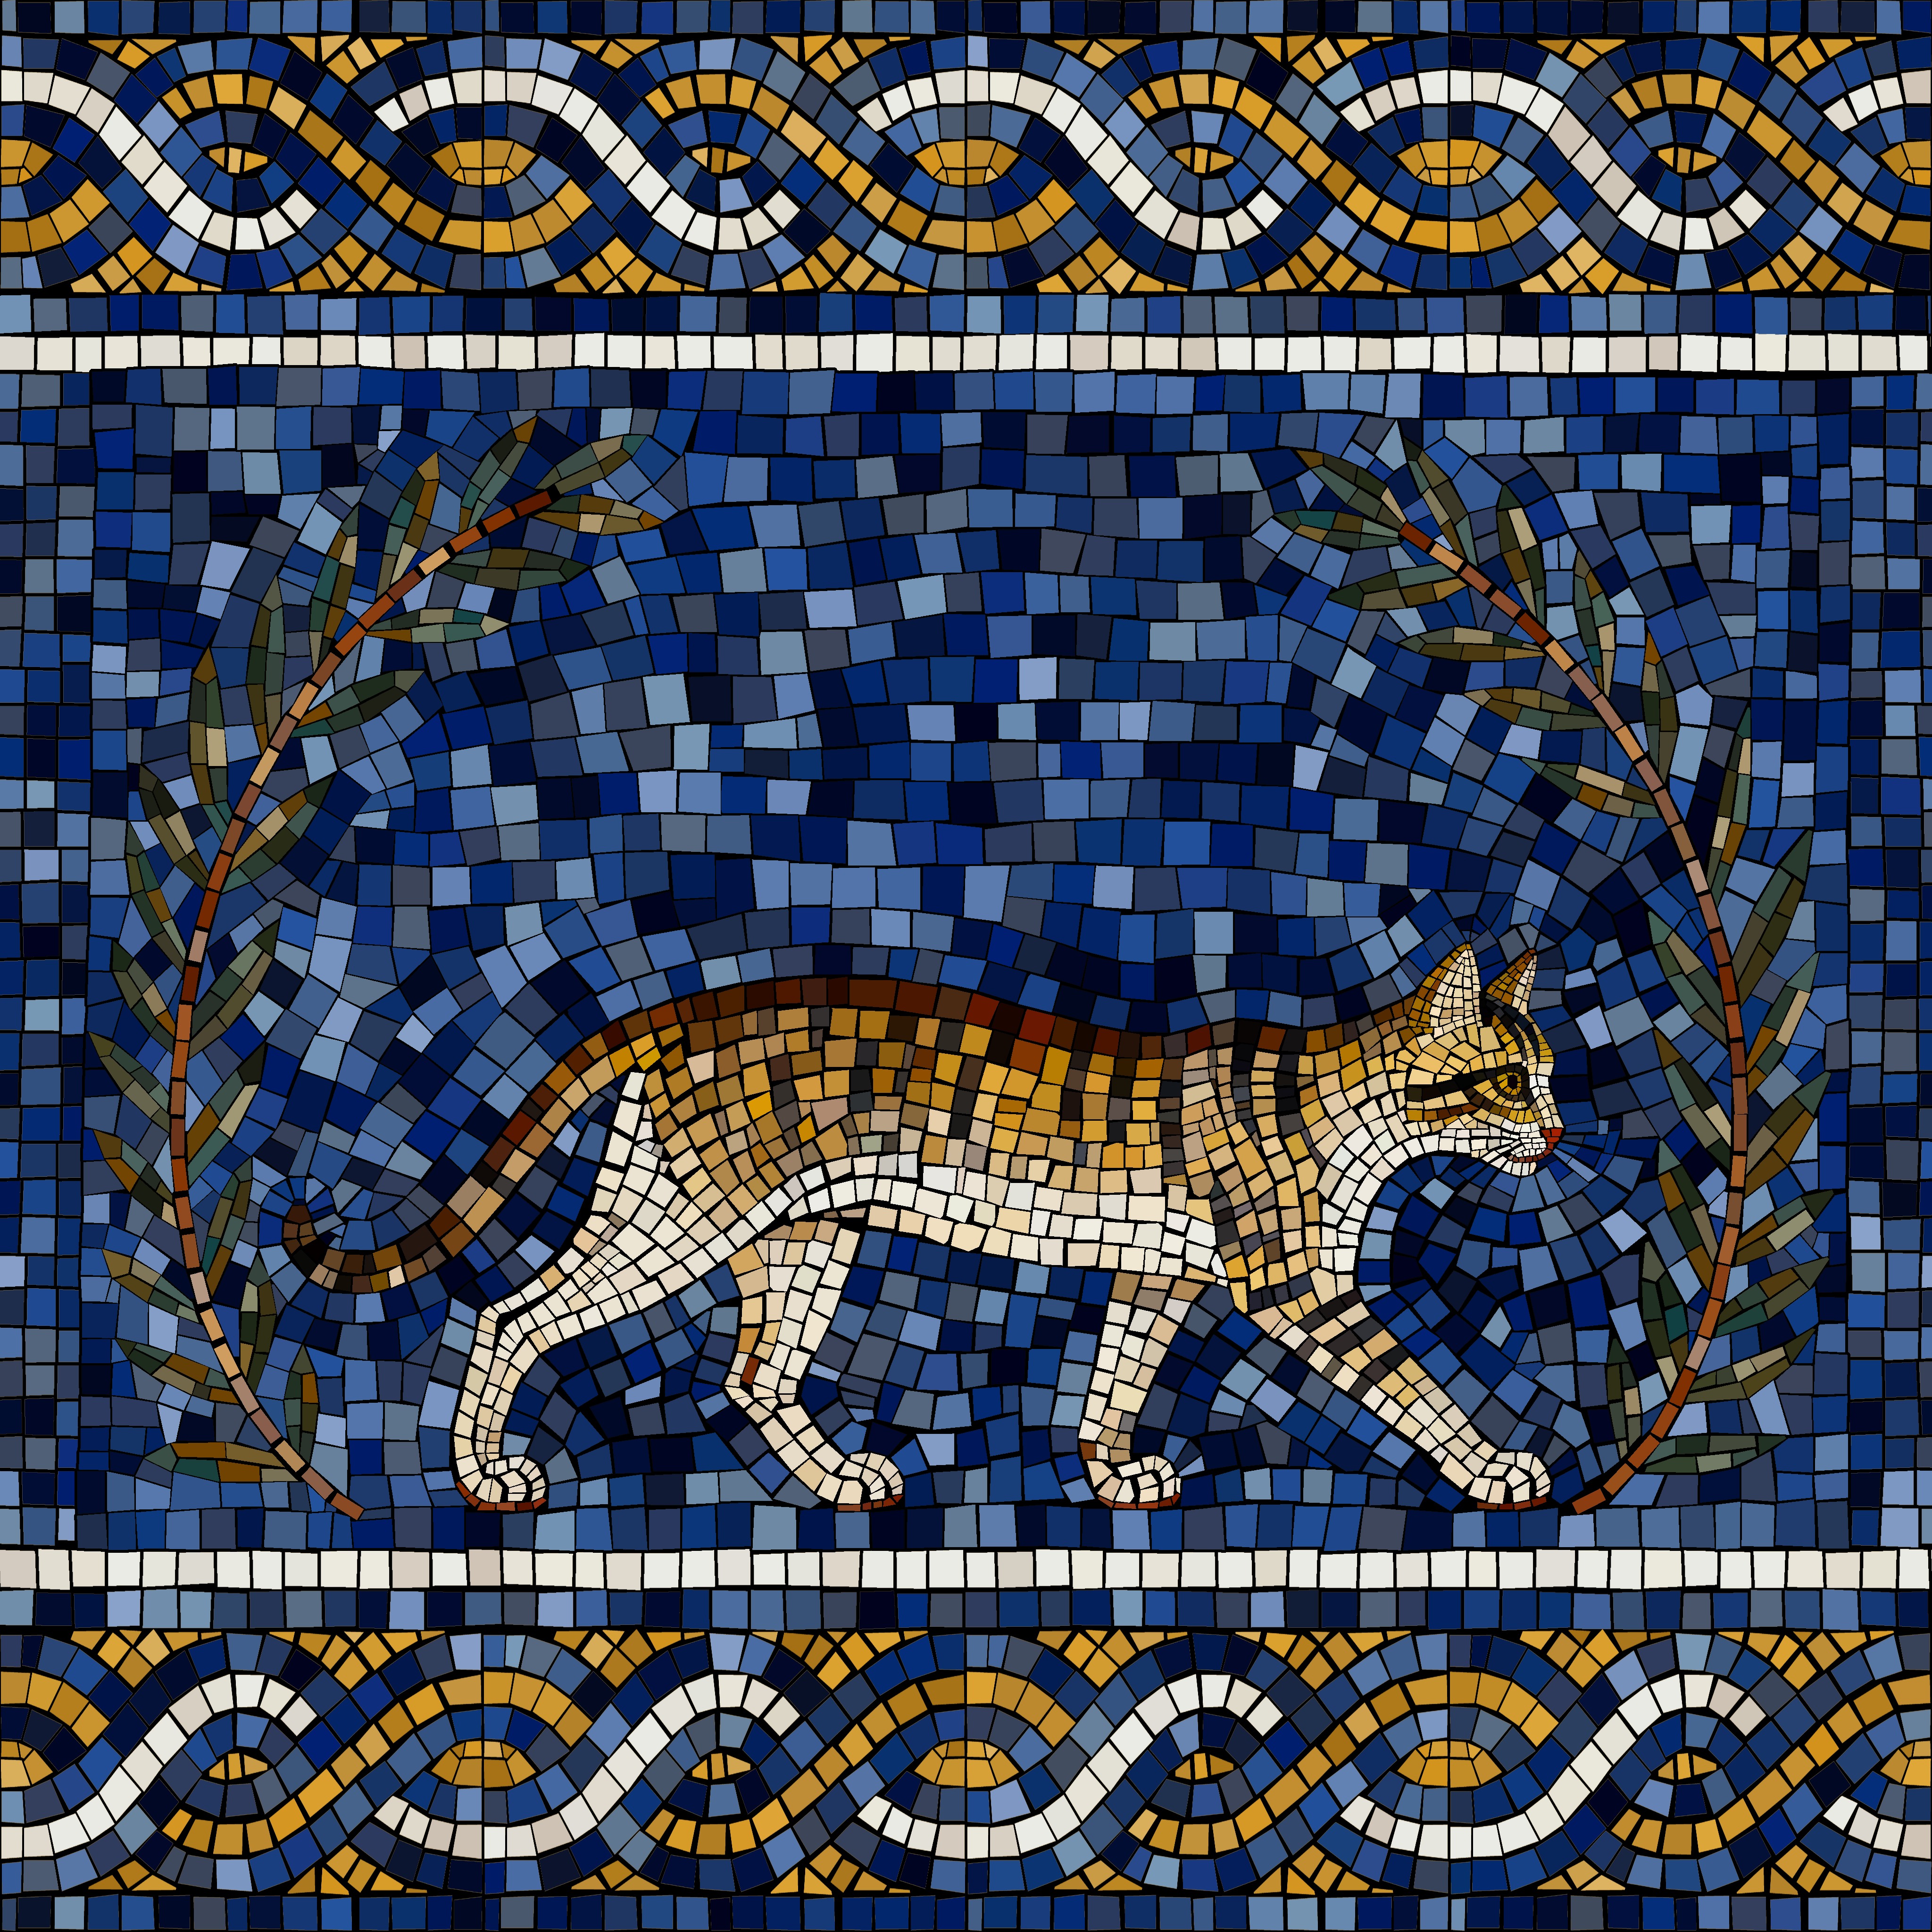
The inspiration for this project came from a picture I stumbled upon while searching for references on Pinterest.
Since I had never created this type of material before, I wanted to take on the challenge.
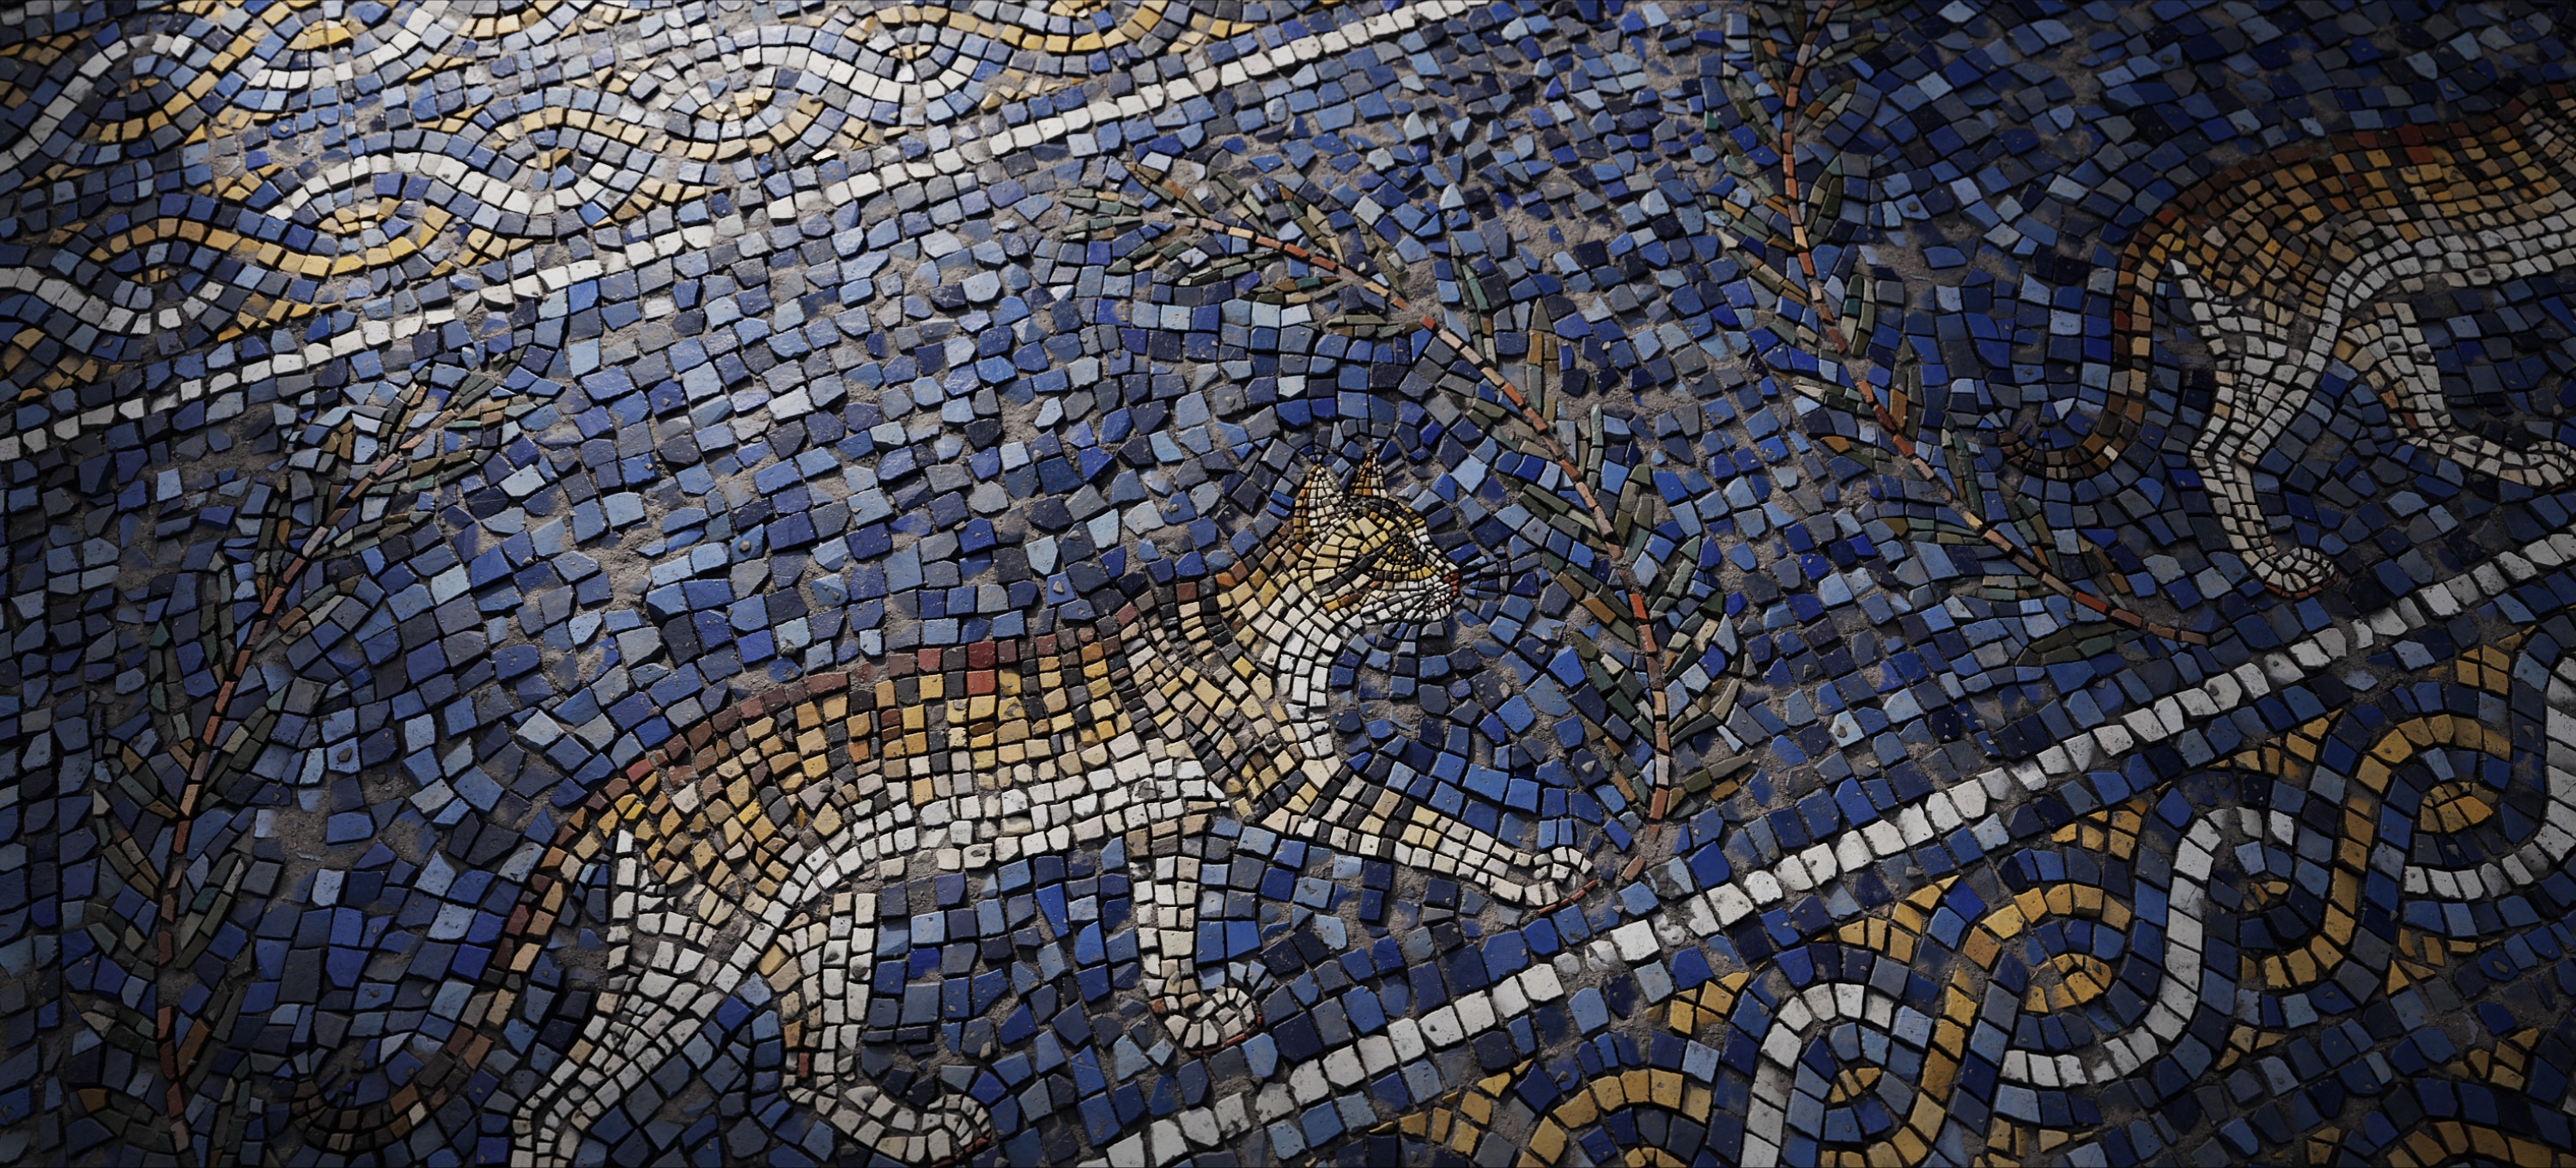
Afterwards, I looked for more references related to mosaic floor tiles and noticed that many of them included elements like animals and olive branches.
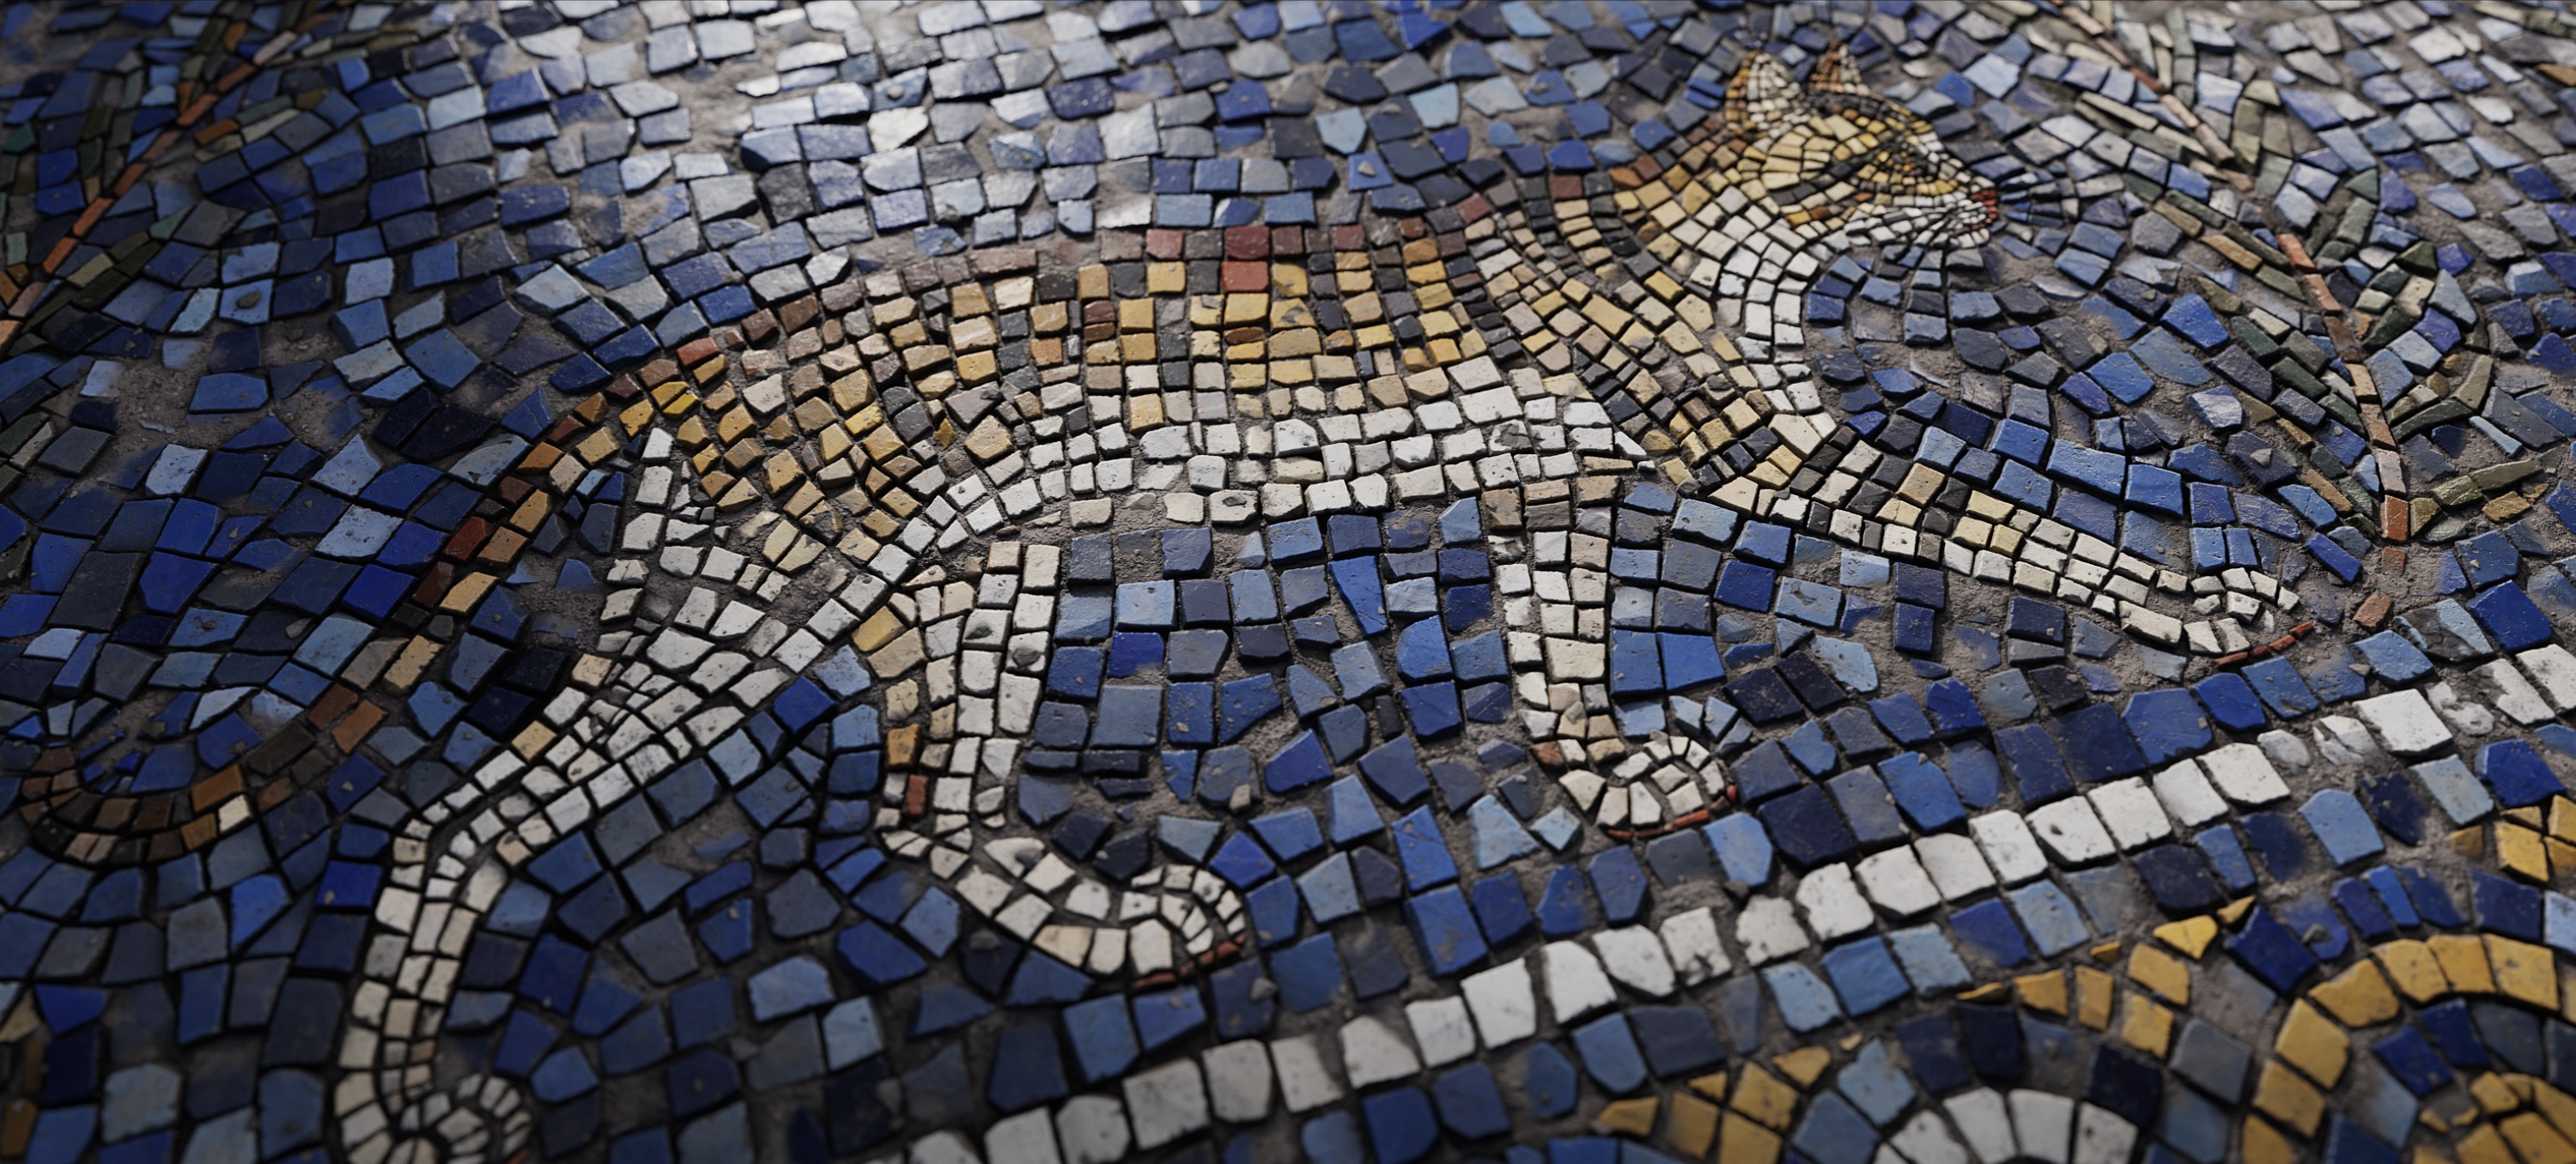
As I’m particularly fond of cats, I chose a cat as the main pattern and used olive branches as decorative accents.
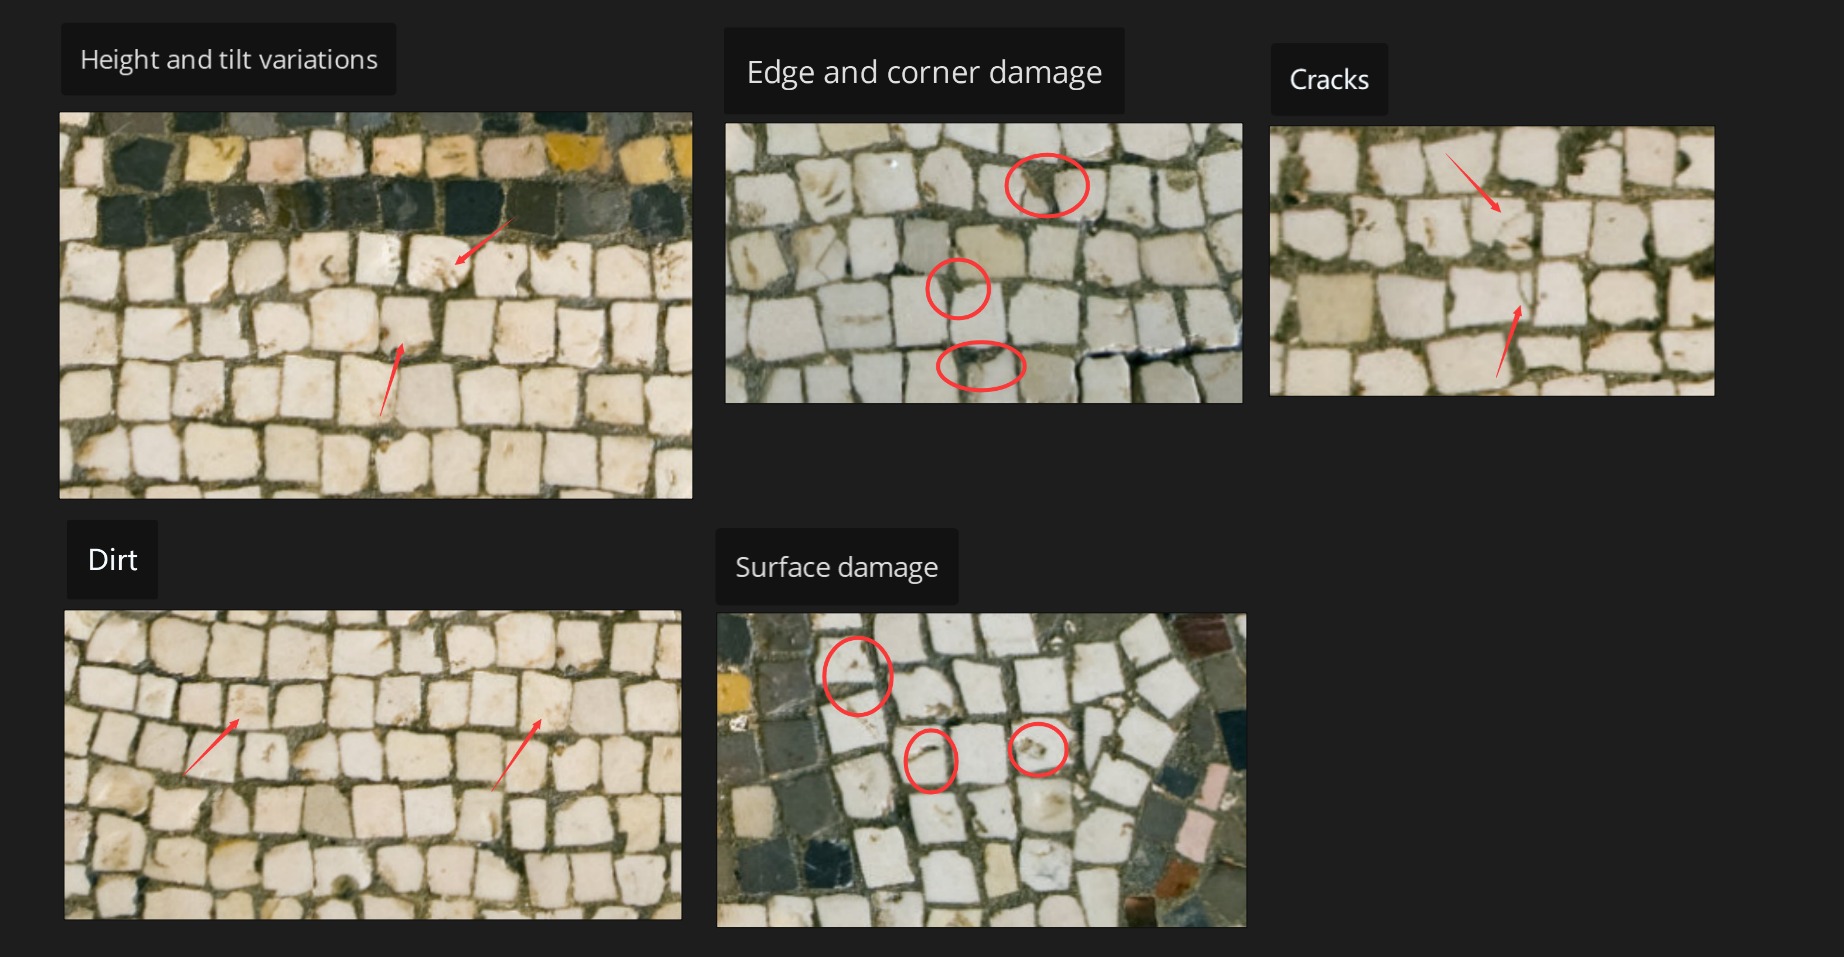
Breakdown Reference
Once I figured out what I wanted to create, the next step was to break down the reference images to determine which details to add—this way, the process would be much smoother.
Creating Patterns
I used SVG nodes to draw the base shapes. This step is very simple — you just need to keep drawing squares, but it’s extremely time-consuming.
For the central main part, I used two SVG nodes. During the drawing process, I distinguished them using three colors (red, green, and blue) based on the color scheme.
As for the cat pattern, since it’s relatively special, I had to apply the colors directly while drawing.

For the decorative patterns on the top and bottom, I also first created a base pattern using SVG nodes, then used the Tile Sampler Color to tile it.

Then I can conveniently extract individual channels using the RGBA Split node to get masks, and then use Flood Fill + Flood Fill to Random Grayscale + Gradient Map for coloring respectively.

Then, by combining all the separately colored parts together, we get the base colors and base shapes.
Base Height
I extracted the Alpha channel from the base pattern to get the base shape.
First, I created a mask for the corners using Flood Fill + Flood Fill to Gradient + Histogram Scan, then added some large damage variations to the base shape.
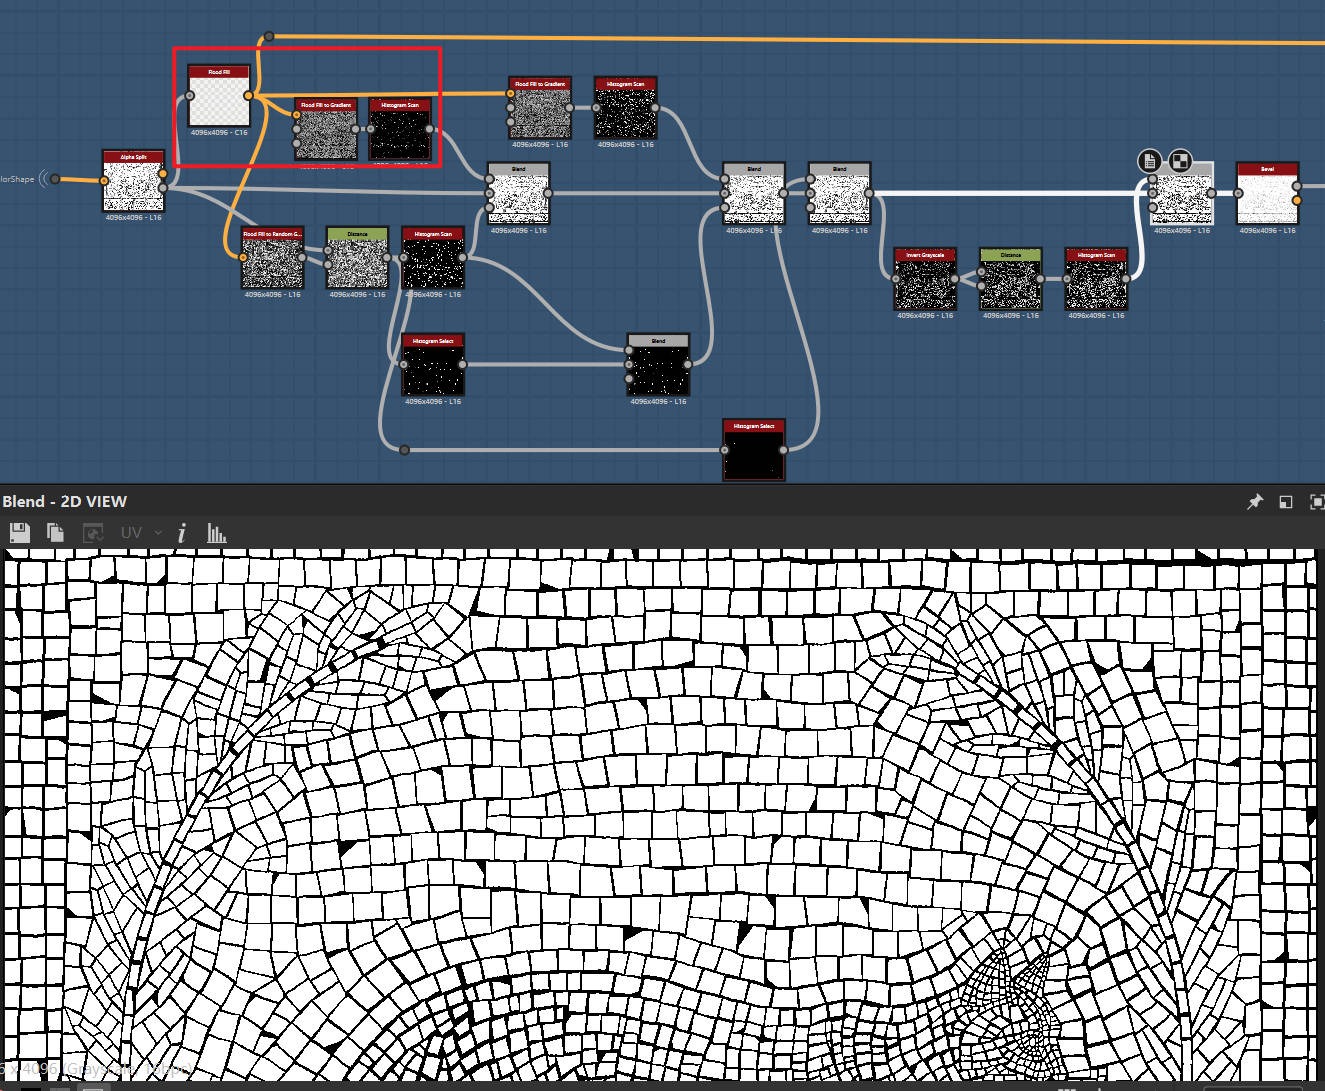
Next, I added a Bevel node to sculpt the bricks, then introduced random variations in grayscale height and tilt.
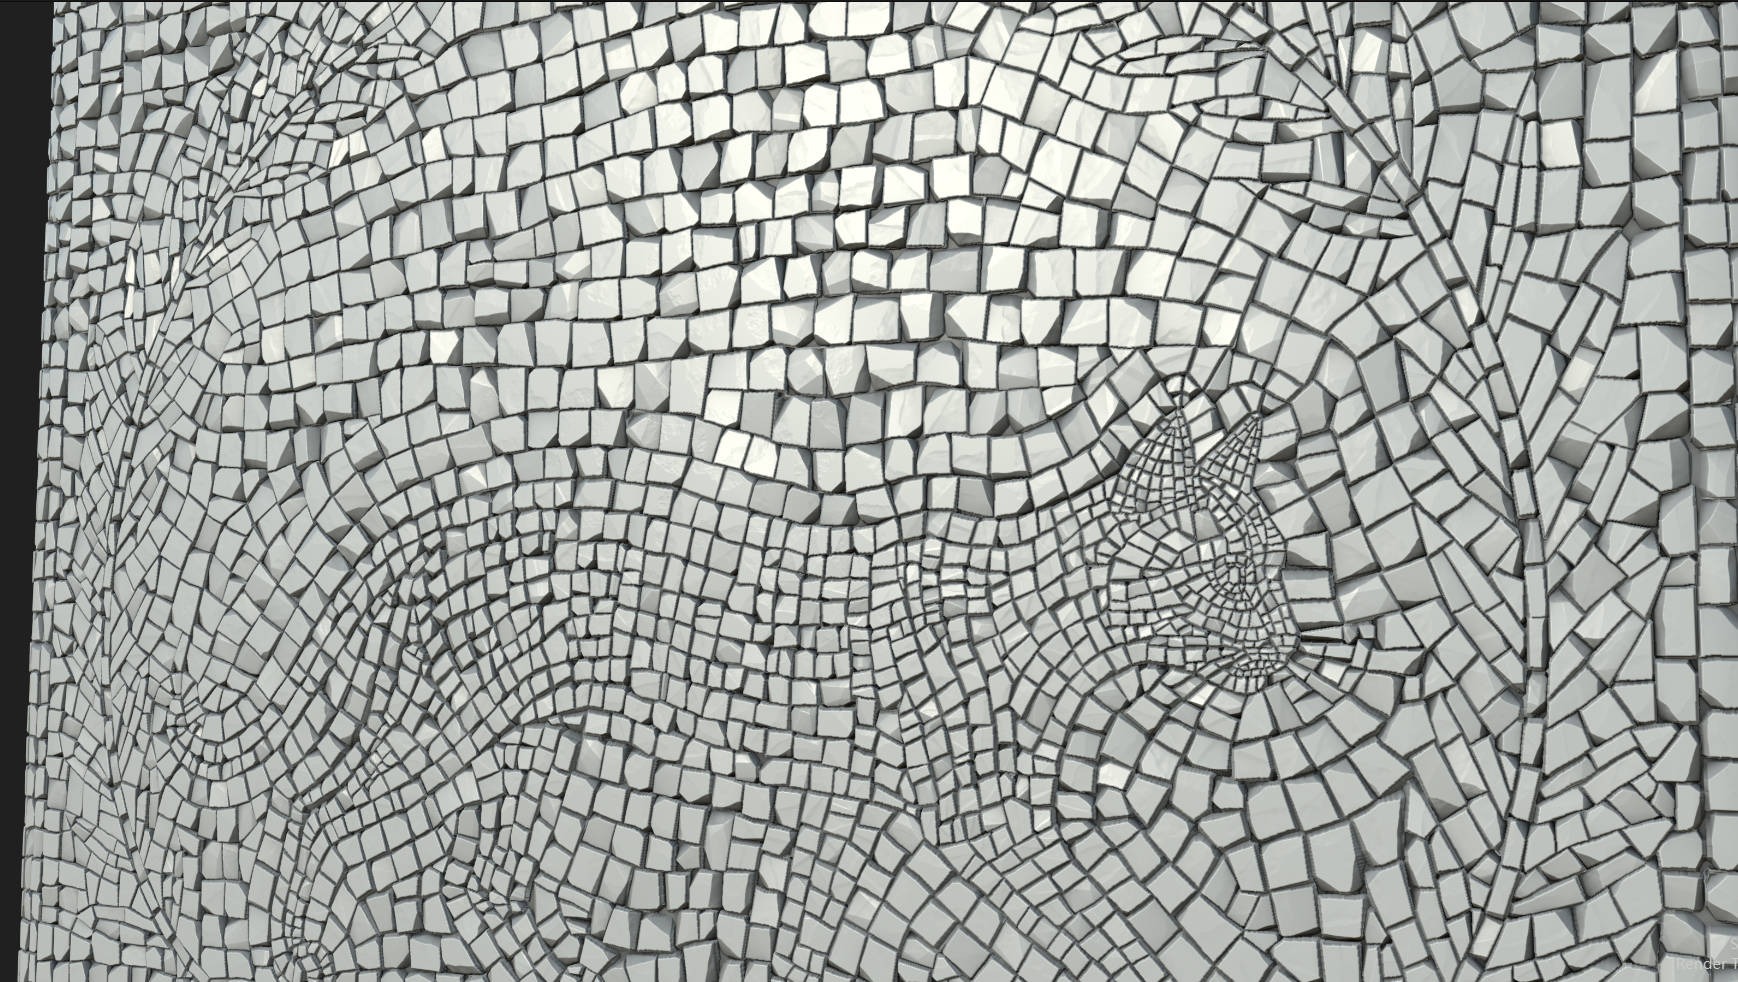
Here, I used the same method as before: you can create a random gradient with Flood Fill + Flood Fill to Gradient, overlay it with a Clouds 2 node, and then adjust the grayscale contrast using a Levels node.
This can be used to sculpt the brick shapes and create more morphological variations.

Here is the final base height.
Surface Detail
There aren’t too many difficulties when it comes to the surface details of this project—and this is where the benefit of analyzing references before starting production becomes evident.
You just need to follow the earlier analysis and proceed step by step.

Notably, regarding the crack details: to make the cracks more controllable, I created three separate cracks first.

Then, I used the Flood Fill Mapper to scatter them across each brick.
After that, I utilized Flood Fill to Random Grayscale + Histogram Select to extract masks for some of the bricks, ensuring the cracks only appear on a portion of the tiles.

Soil Creation
The base height of the soil is created by remapping noise to green tint using a Gradient Map, then converting it to grayscale with Normal to Height.
I learned this method from a tutorial—it gives a more three-dimensional feel than using Clouds 2 or Moisture Noise directly.

Then use the Height Blend node to blend the soil and the bricks.

Base Color
Before coloring, I like to mix several Noise or Grunge Maps, then multiply and blend the AO of the final height, and overlay the curvature as the base grayscale for coloring.
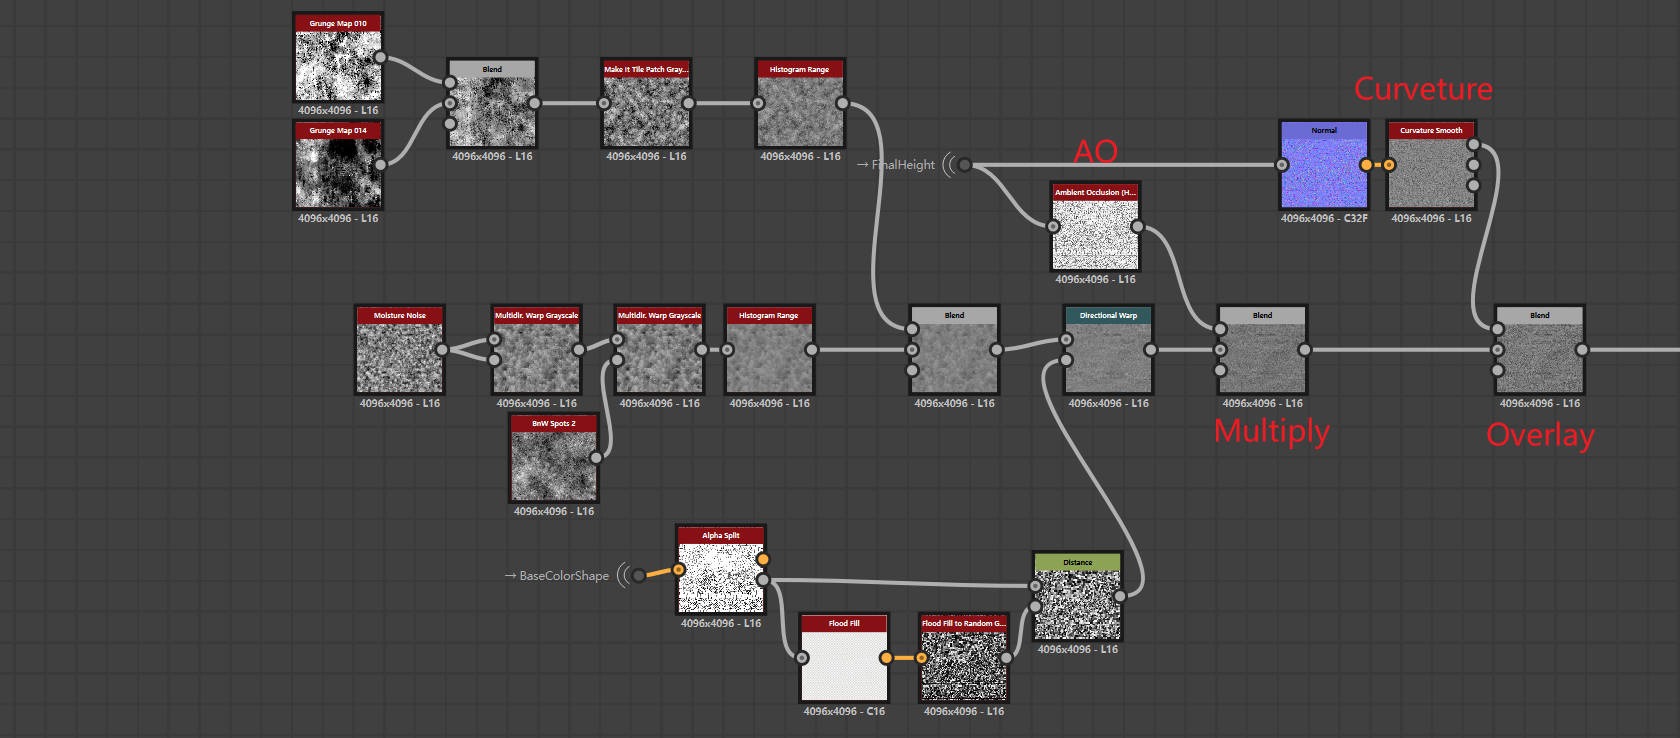

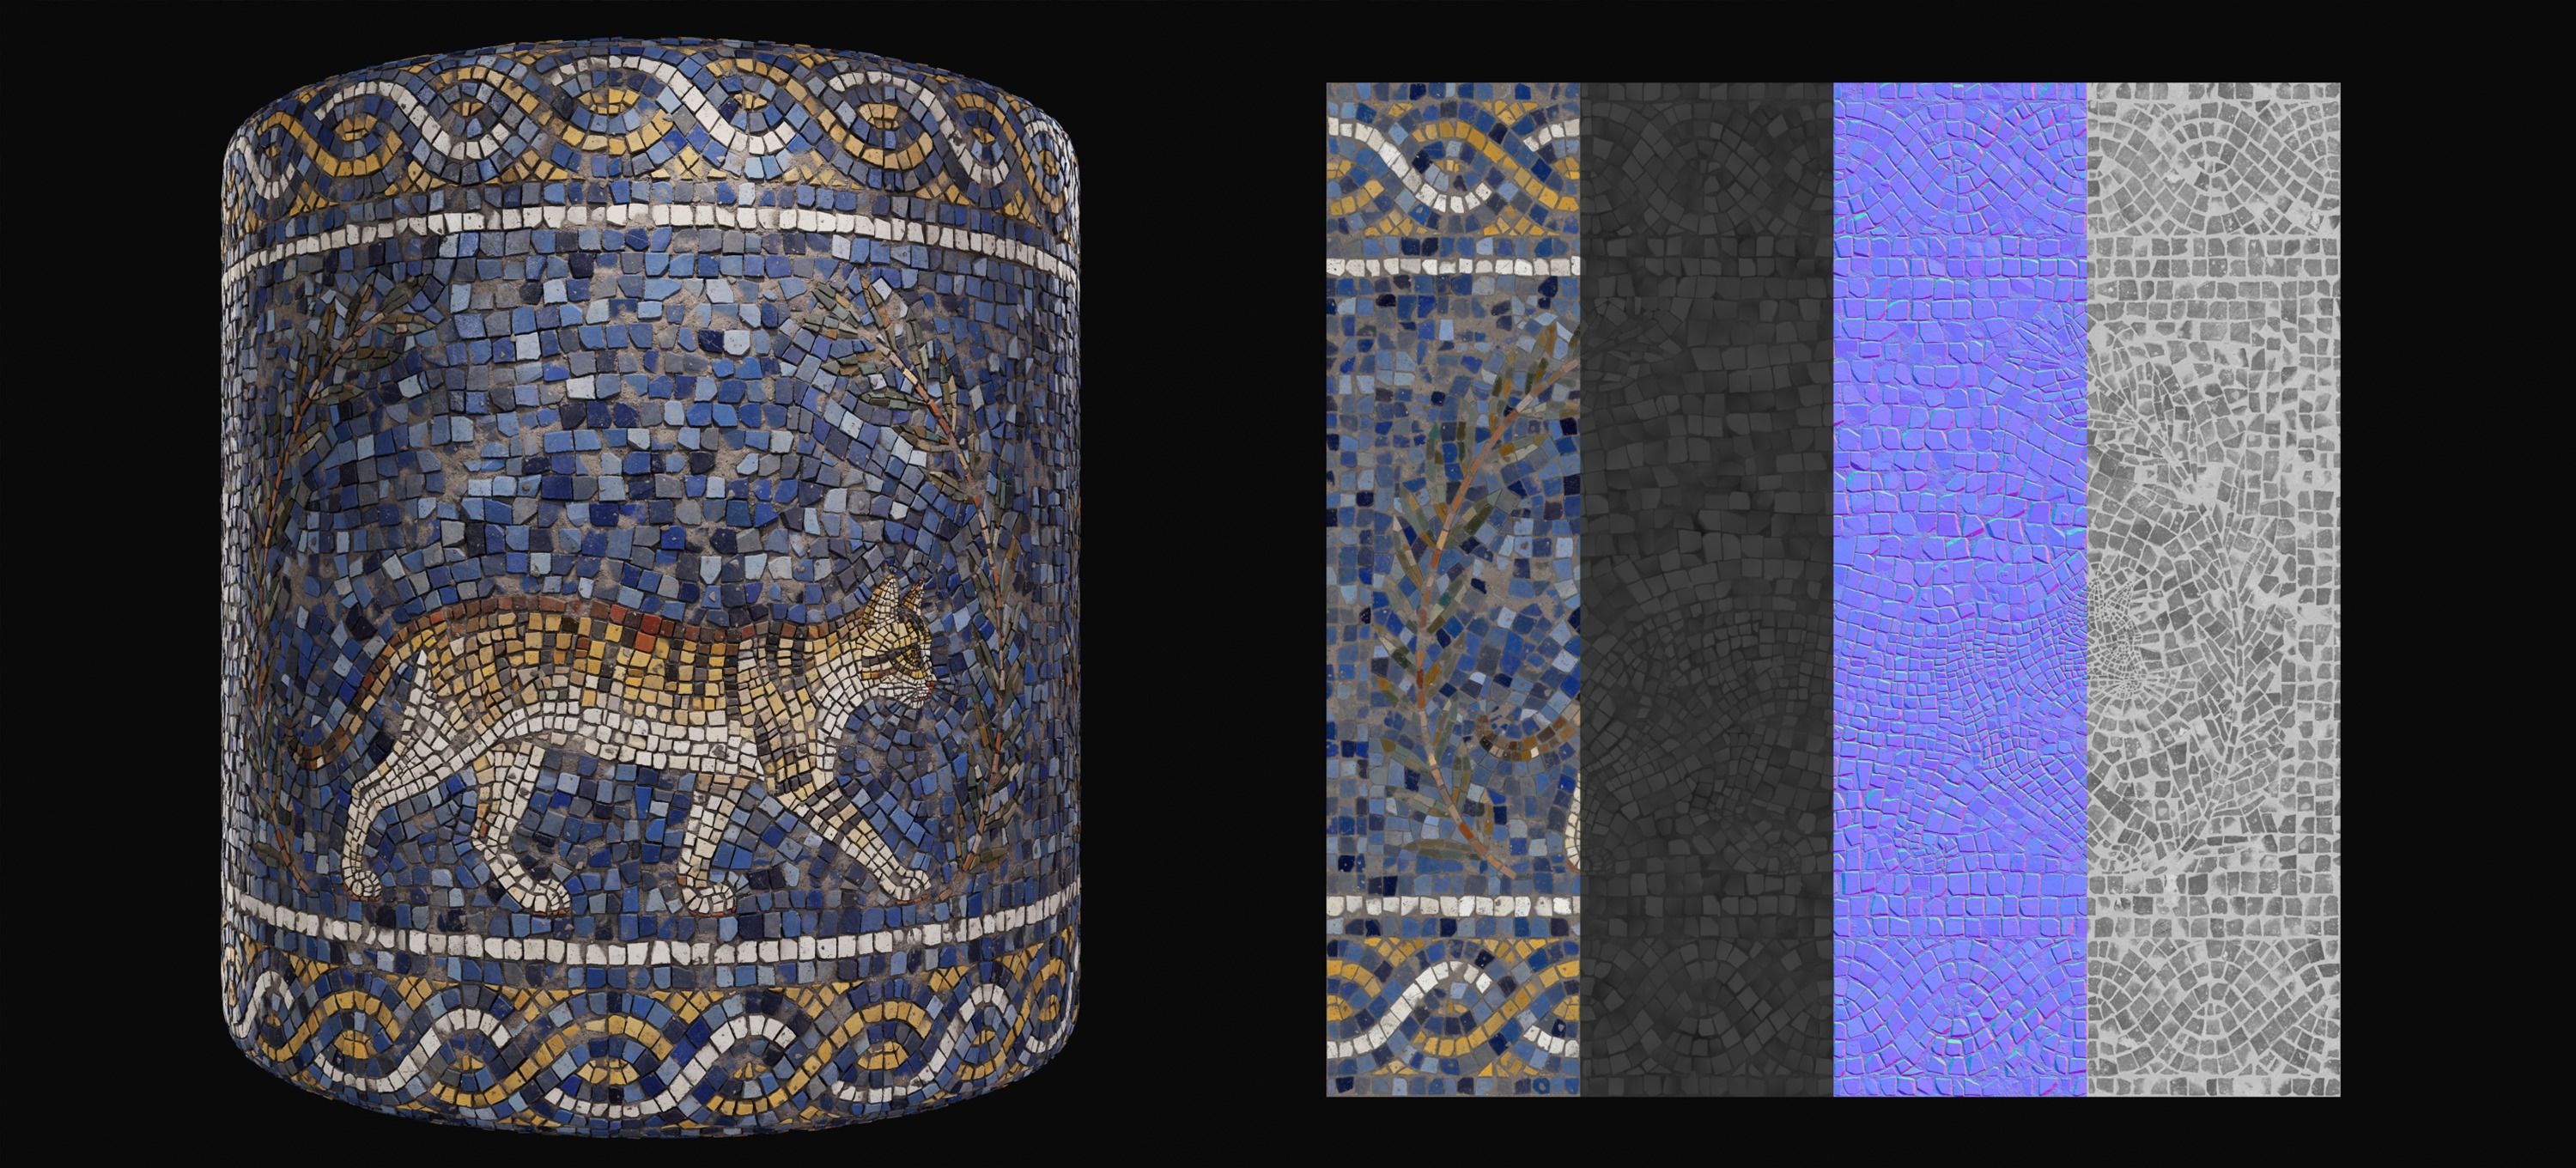
Then, use the Gradient Map to sample colors from the reference image for coloring, and then overlay the pattern colors we created earlier. Here is the final base color.

Lighting & Rendering
I usually use Marmoset Toolbag to render my materials—it’s really convenient and efficient.
Typically, I only use one HDRI environment light and one fill light; too many lights would actually make the result less realistic.
Conclusion
Thank you so much for taking the time to read this article, I hope it proves helpful to you.
Finally, I’d like to express my sincere gratitude to GamesArtist once again!
Read more articles
You might also like these articles.