
Introduction
Hi everyone, my name is Laurent Pozzuoli. I'm a 3D Character Artist based in Paris, France.
I specialize in creating characters for video games or cinematics. Currently working in the video game industry, I like to create fan art of characters that I love during my free time.
Goals
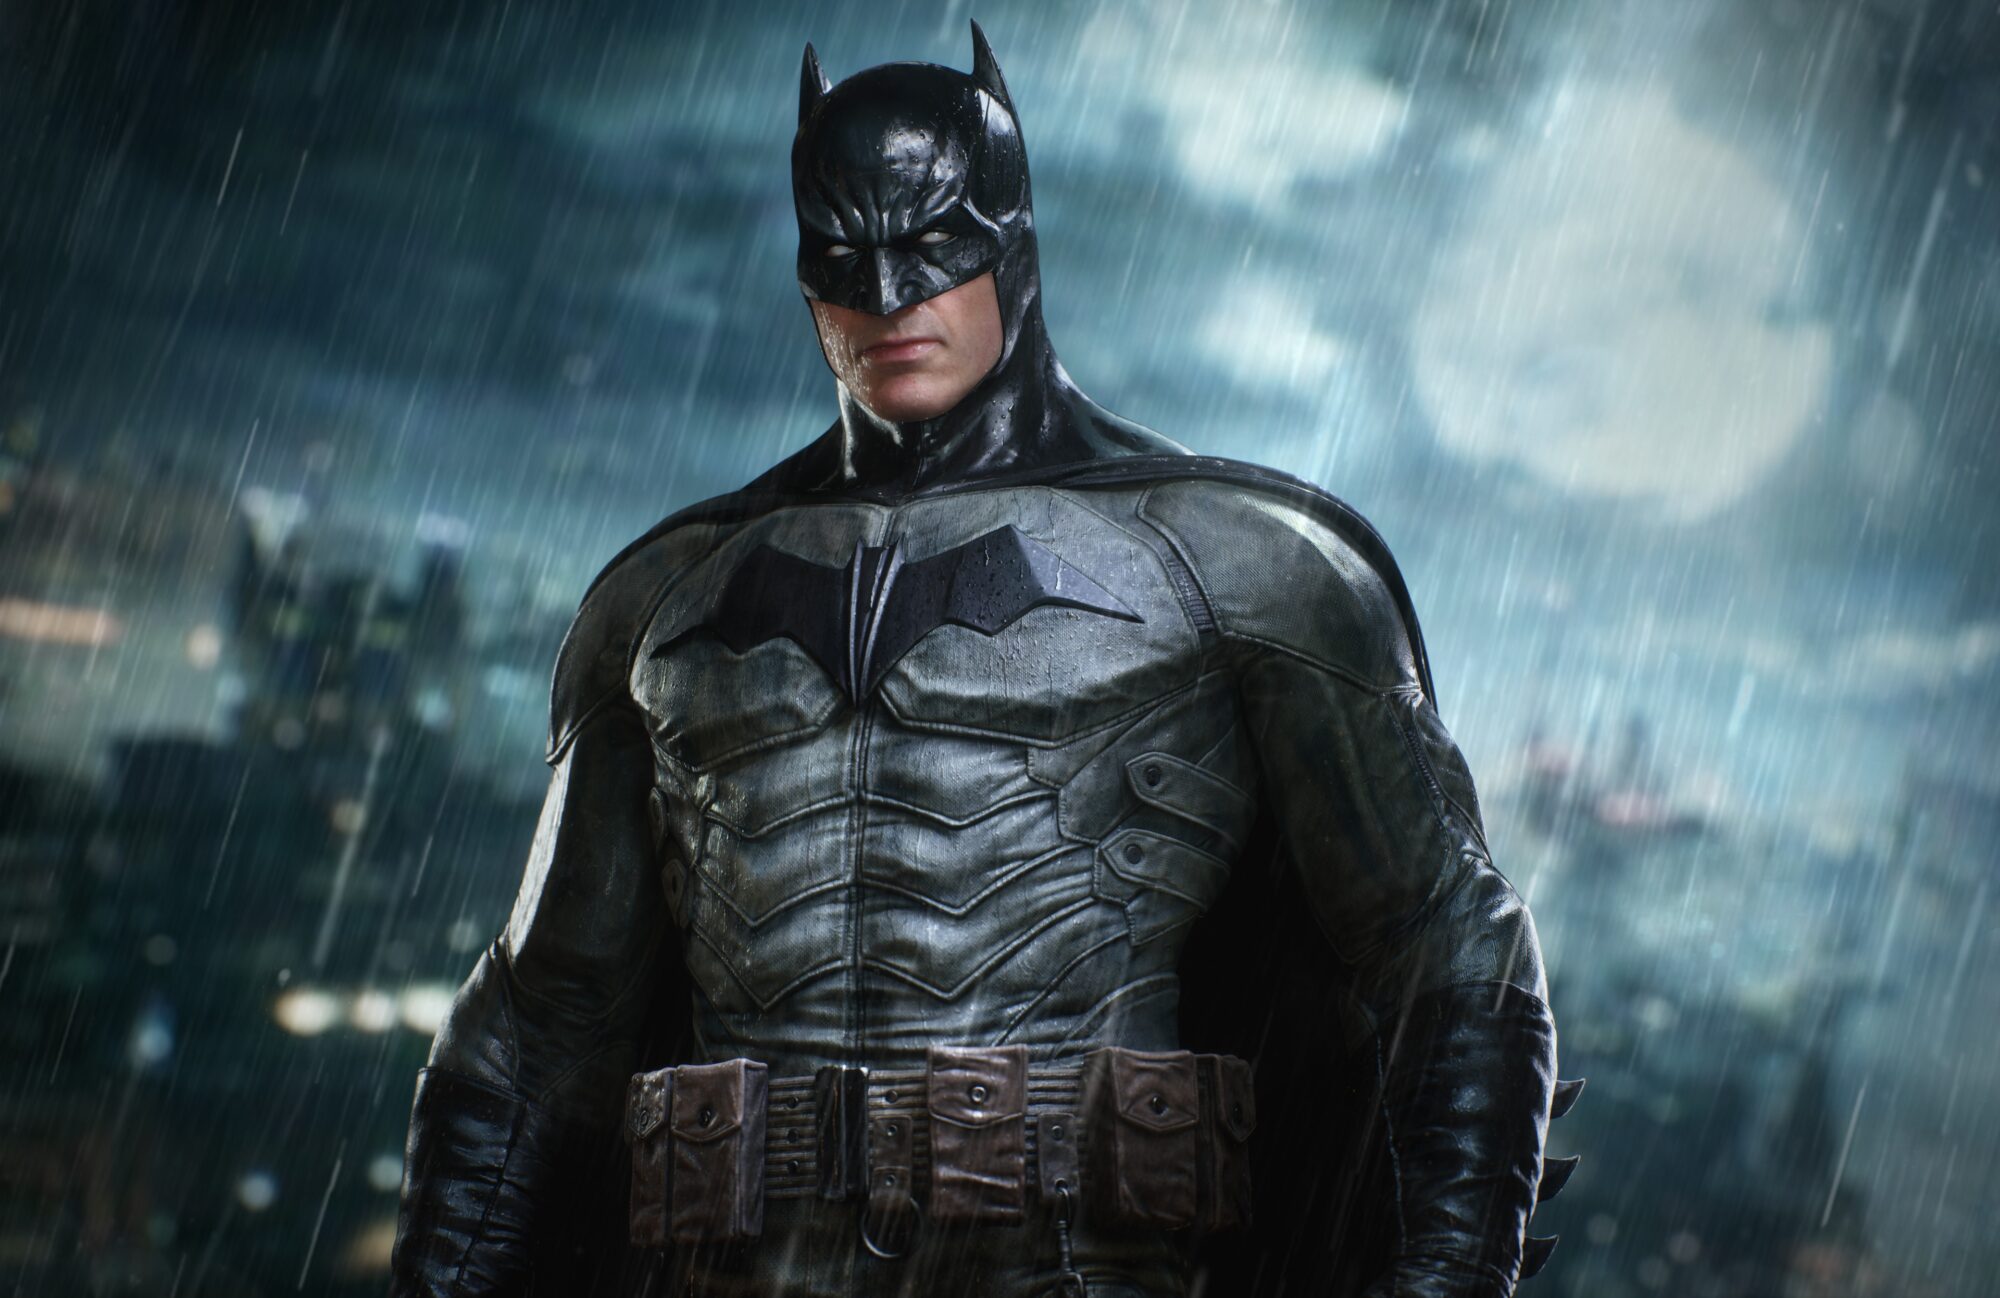
This project was quite different from most of my latest characters since most were made and optimized for video games. But for this Batman, I wanted to see what my favorite look for the character would look like in a cinematic trailer.
So I knew I wanted a more cinematic model, with more polys and texture resolution.
I wanted a model that could still look its best if I zoom in on its cowl and the fabric of its suit, and that could handle small texture details like the raindrops all over it.
Software
-
3ds Max for modeling, retopo, UV, and posing/animation.
-
ZBrush for sculpting.
-
Photoshop for texturing and compositing.
-
Substance Painter for baking and texturing.
-
Marvelous Designer for the cape.
-
Accurig for a quick rig/skinning.
-
Unreal Engine 5 for Metahuman and rendering.
References
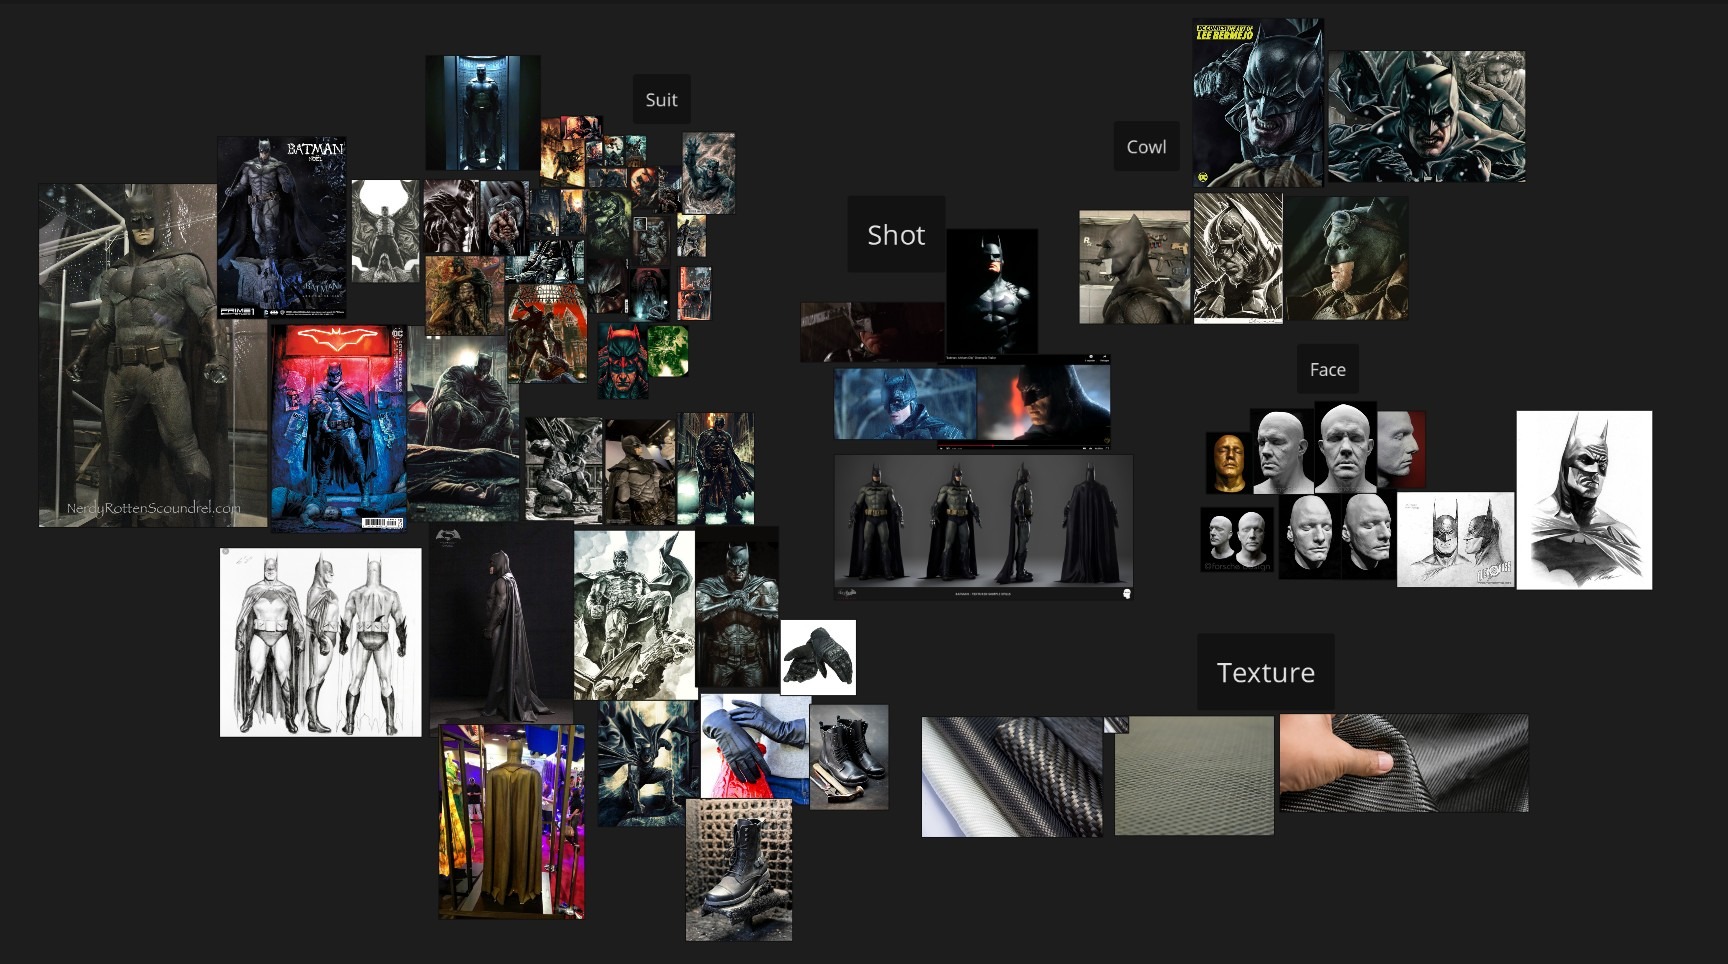
The main inspiration for my desire to create this Batman model was the “Batman: Arkham City” cinematic trailer. Though the trailer is quite old now, I remember it making an impression on me back in 2011.
Seeing the Arkham Batman, with his cowl that reminded me of Alex Ross’s art, rendered with such cinematic quality, I wanted to see my favorite Batman look get the same treatment.
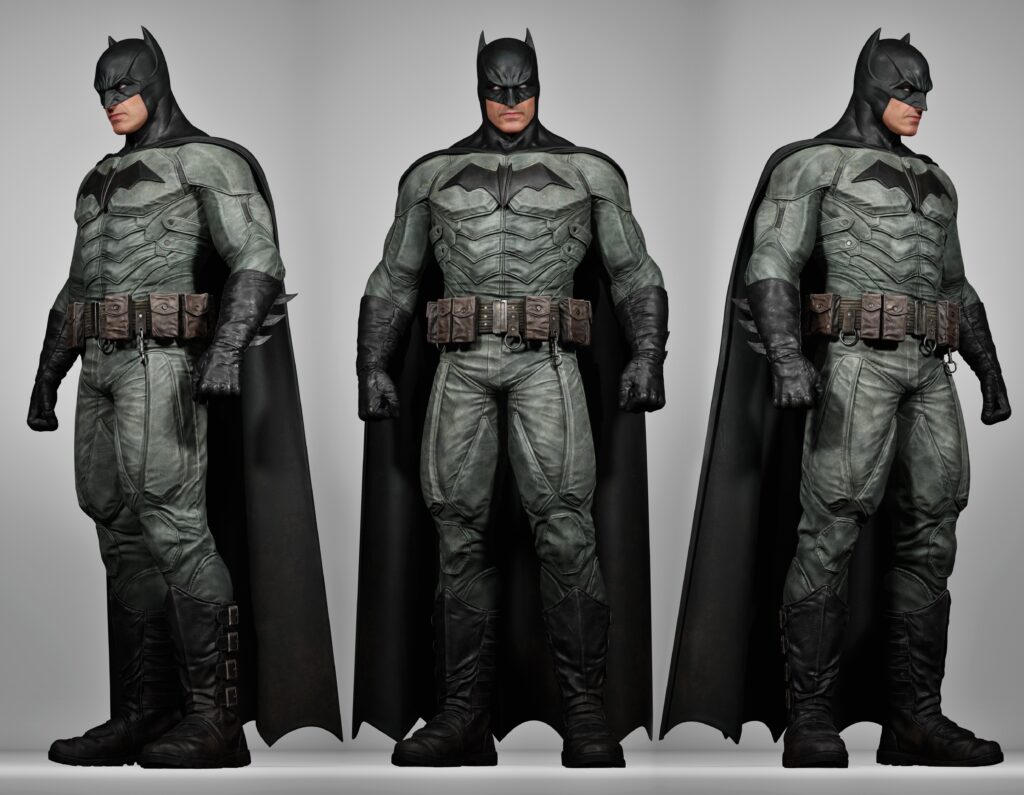
For my version of Batman, I borrowed a lot from Lee Bermejo’s art, especially for the suit.
All these details and straps he brings on the grey area make up for the loss of details when bringing the character into a realistic 3D world, with all the muscles clearly visible through the classic comic suit being lost in the process.
Furthermore, I like that it does not go heavily into the “armored” look. I think it strikes a good balance between the armored versions and the classic spandex suit by appearing as a believable reinforced fabric suit.
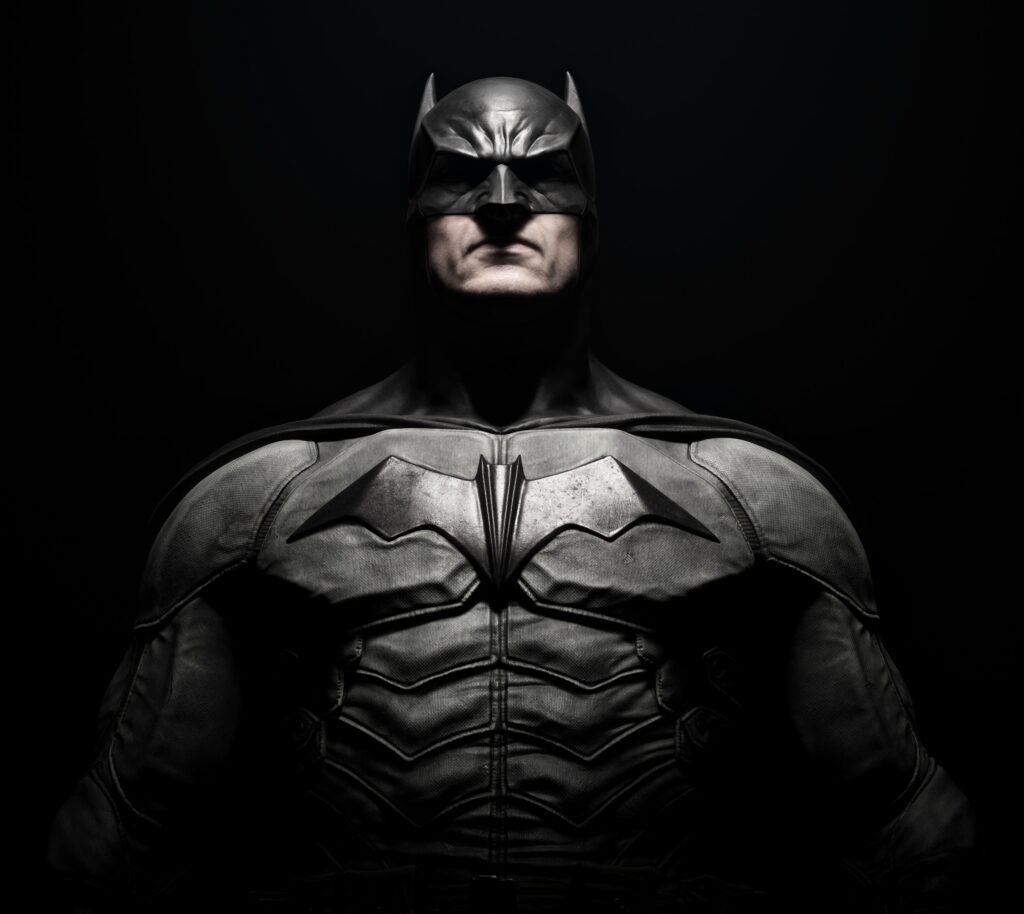
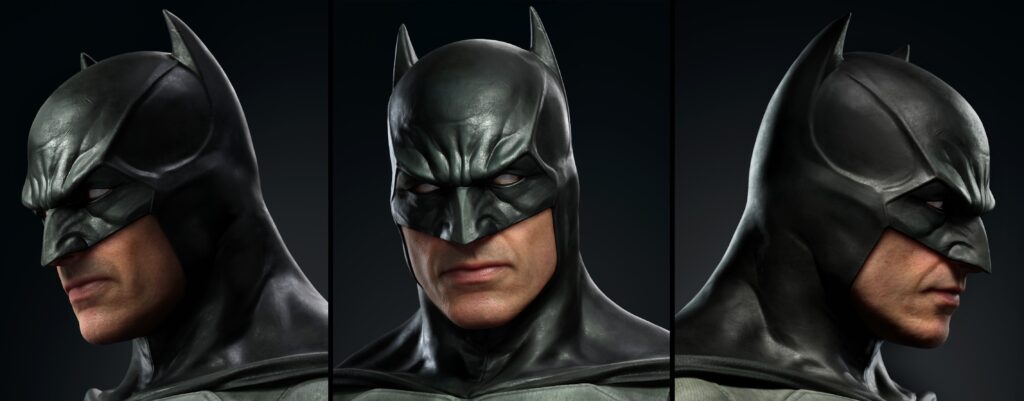
For the cowl, I borrowed more from Ben Affleck’s Batman. I wanted my Dark Knight to have his powerful neck and avoid the angular look of the opening around the eyes from Bermejo’s cowl.
Blockout, Sculpting & Modelling
For such a well-known character, the blockout phase was rather quick. Having good references and a clear idea of the final look I wanted, I didn’t have to go back and forth between a lot of design choices to find the right basic silhouette.
I started from a base mesh and extracted the cowl and other organic parts directly from masks in ZBrush.
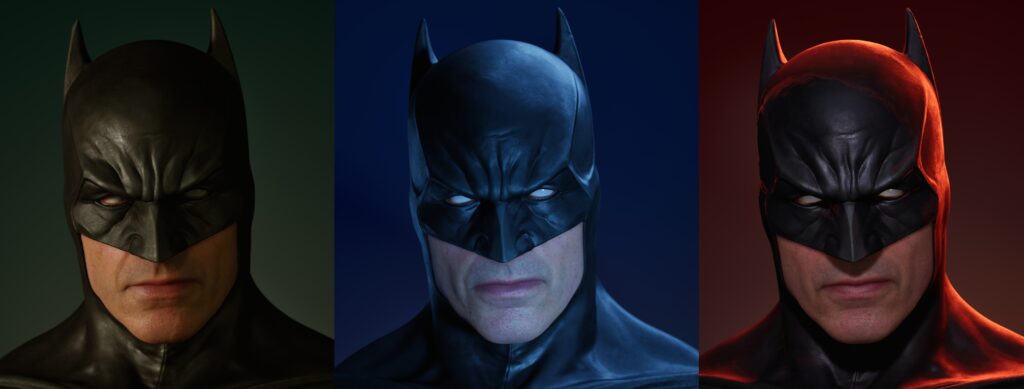
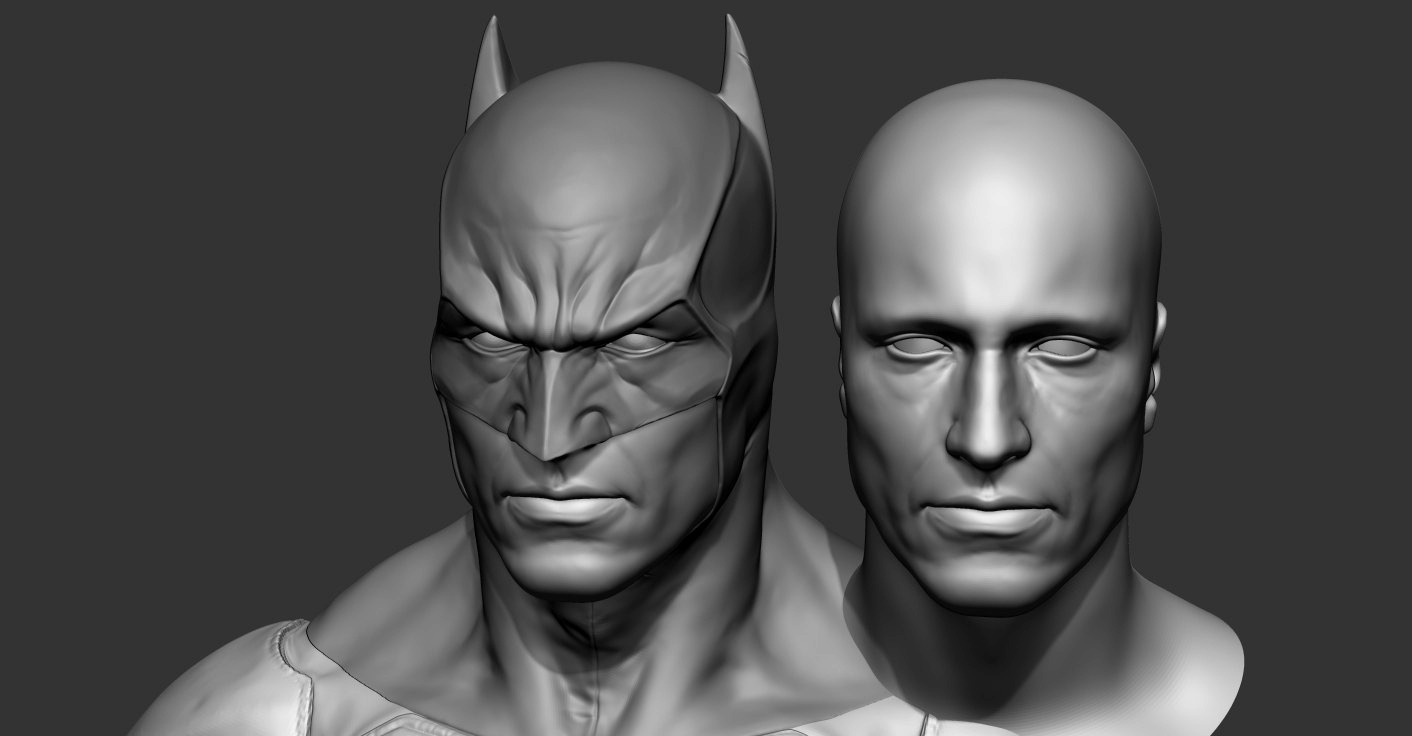
The first part I really focused on once I had my base was the cowl. I always focus on going almost all the way to the final result for the face before working on any other part of a character.
With it being the center of attention on a character, I feel better building the overall look and outfit around a face that already works. In this case, I decided to treat the cowl as if it were the face for this character.
It was essential to quickly place the white eyes, which I knew I wanted. As I sculpted the expression of the mask, I needed to feel that the always frowning/menacing look of the mask went well with the eyes—that it felt menacing but not weird or too exaggerated.
Knowing that only a small part of the face would be visible, I wanted to keep the usual strong square jaw. I still wanted it to feel real, though, so I gathered different actors’ face castings for reference.
Having worked with some scans in the past, I always find that the scanning results bring out some surprising irregularities and shapes in faces that are a lot more difficult to spot in real life.
So these face castings seemed like good references to give some believable shapes to replicate for my Bruce Wayne.
Usually, I would project pores and other details on the face from a scan or alphas, depending on the style of the project, after I am done with the base.
But the focus of the face being really on the cowl for this character, I thought it was a good occasion to try to work a bit with Metahuman without depending too much on it.
Suit
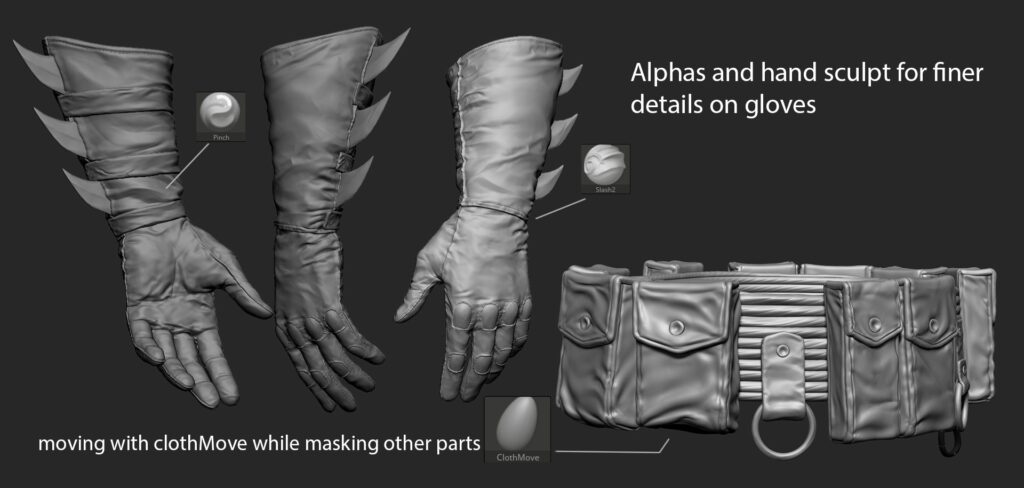
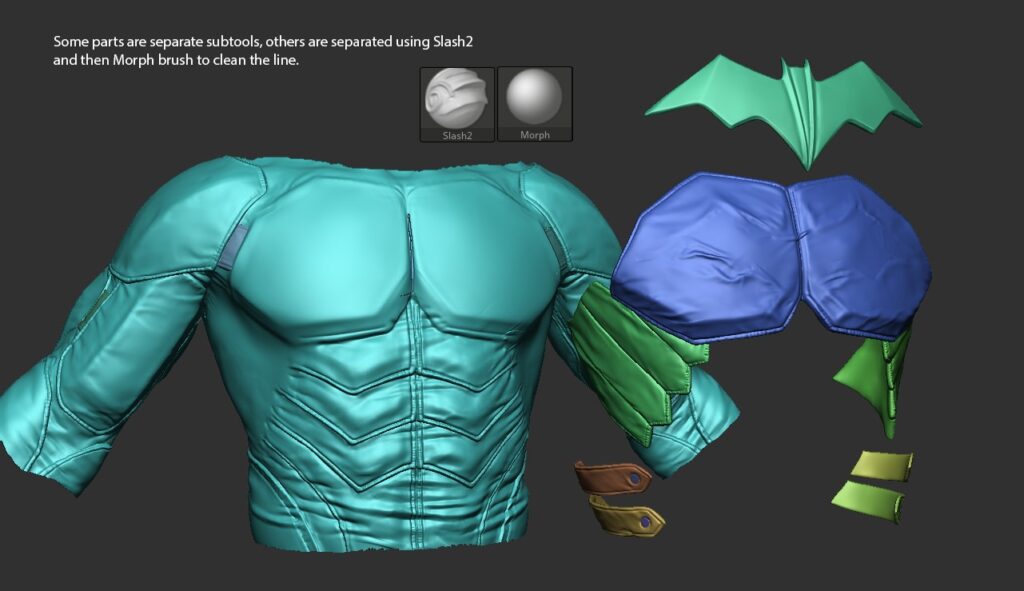
I built the grey parts of the suit on multiple subtools, with the more heavily armored patches built on top. For some that felt less bulky, I stayed on the same mesh and worked with the “SLASH2 Brush” to create the illusion of layered fabric.
I always work with an active morph target so I can go back and forth with the morph brush to clean the shapes I sculpt. The wrinkles were a mix of hand sculpting, alphas, and cloth brushes.
As an example, for the pouches, I sculpted one model that I duplicated for the rest. Then I went through each of them with the move cloth brush, masking various parts and moving the rest around, forming most of the biggest folds. I accentuated and added some by hand after that.
For the cape, I wanted the part resting on the shoulders to keep an interesting form and accentuate the stiffness of the cape material. I wanted it to feel like some leather, with big folds that don’t drop softly on the front of the body.
A lot like Affleck’s cape, I wanted it to be able to flow and move around, but still keep its form where it matters. So I made a quick base in Marvelous, mostly focusing on the lower half of the cape, not the base.
I then exported it and sculpted and cloth-brushed the top half to my liking in ZBrush.
Retopology
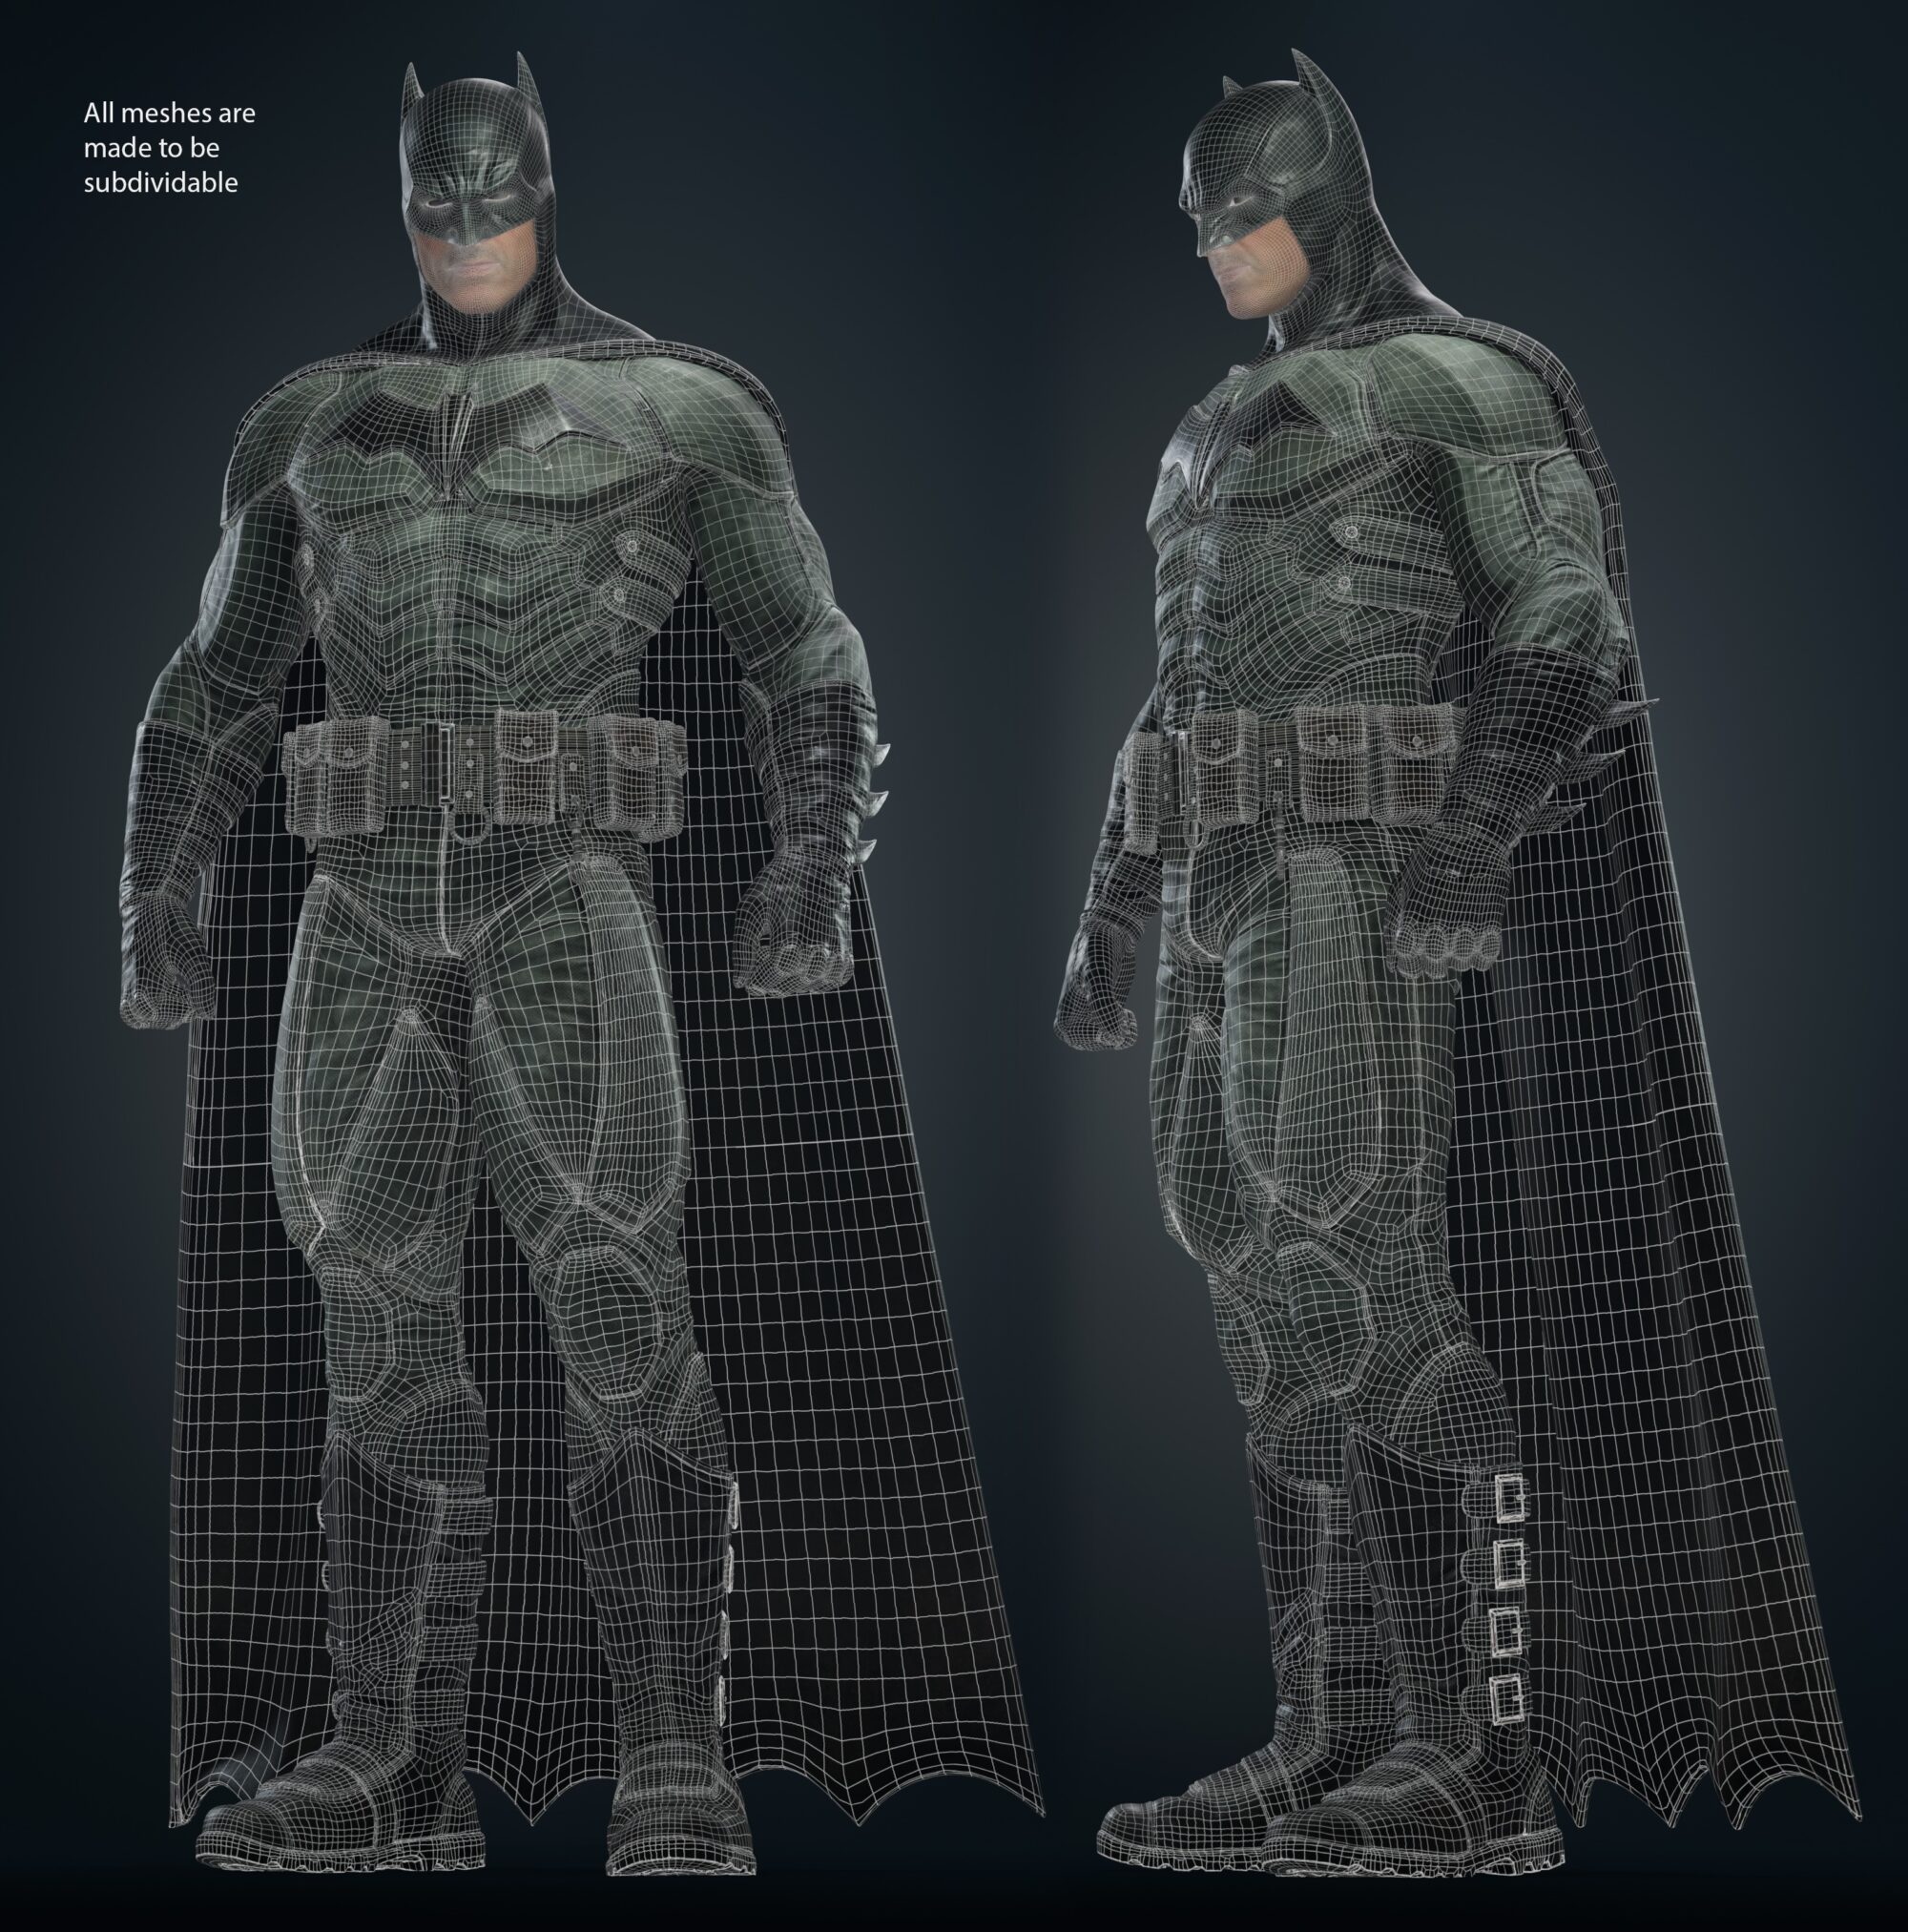
Most of the poly modeling then was the retopology. Though I wanted a high-res model, I still wanted control over the shapes and edge flow, so I avoided automated retopology.
The main task was to make the mesh completely subdividable without losing its sharper shapes or stretching textures.
I also ensured all the fabric suit and the armored patches were part of the same mesh and same topology continuity to avoid any problem when the character would start moving.
UVing & Baking
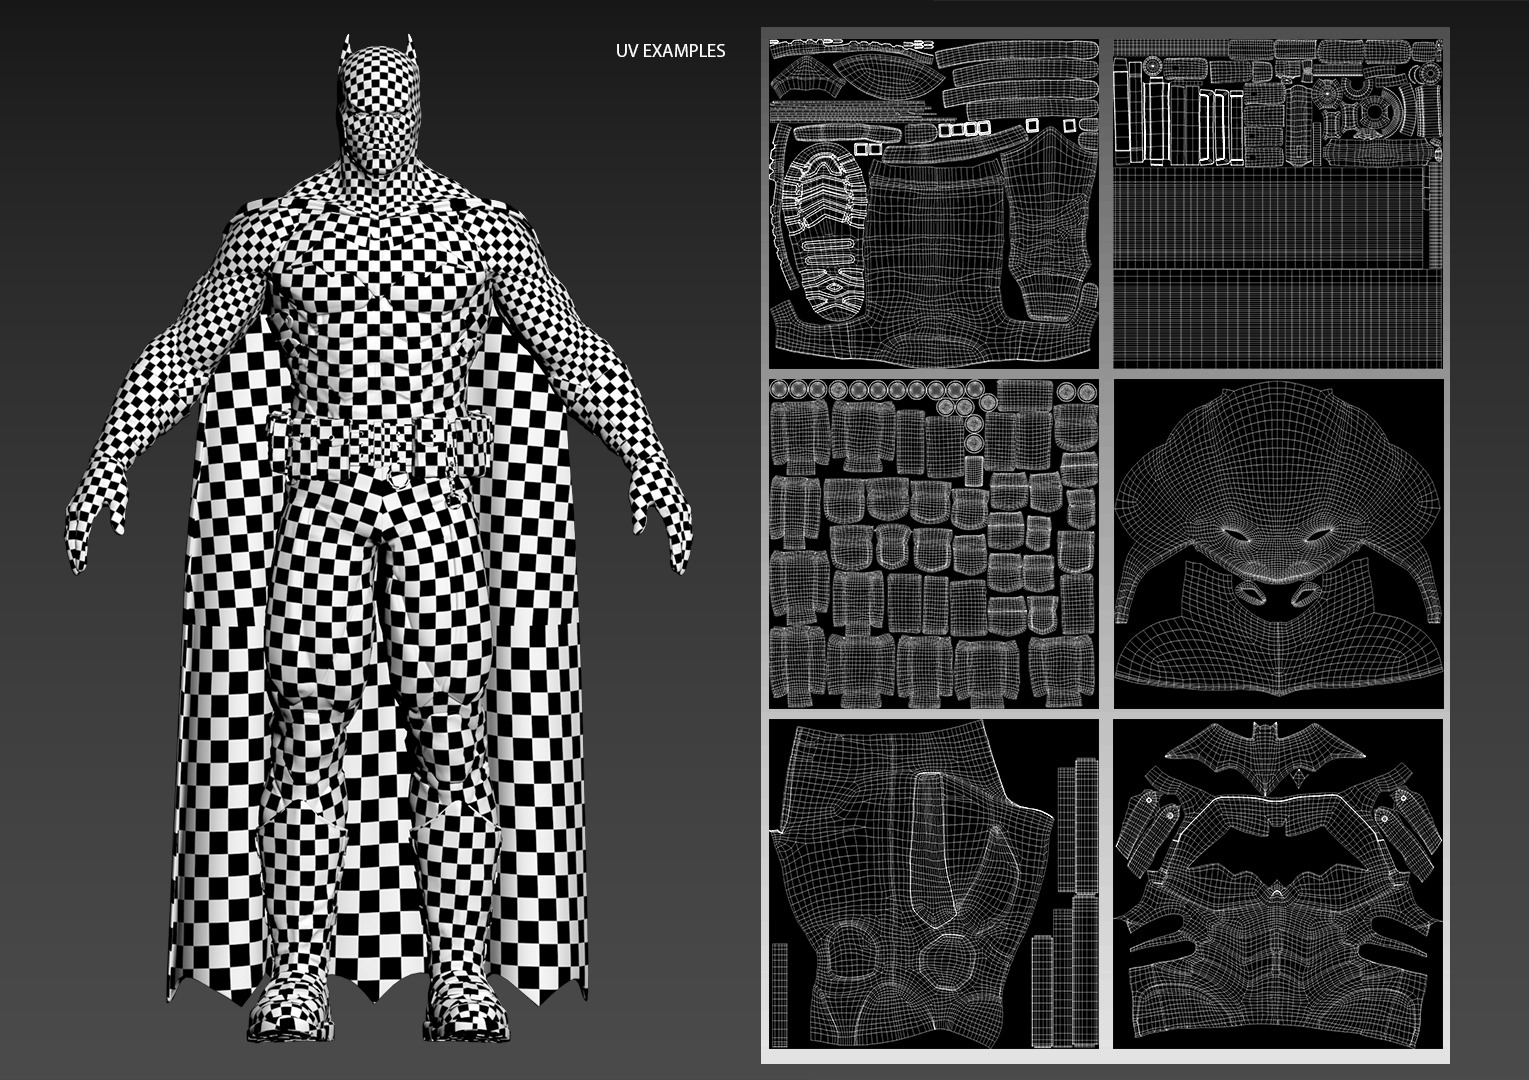
The UVs for the character were quite simple to make, with this topology having loops everywhere I needed. Considering I was making a cinematic model, I didn’t limit myself to a small number of UDIMs like I would with a game model.
The main focus was on splitting the UVs by logical parts (mask, cape, gloves, chest, arms, etc.) and keeping a consistent resolution for the whole character.
For a clean baking result between the various meshes that interact with each other in the Batsuit, I used the bake “by mesh name” in Substance Painter.
It allows me to choose which mesh should be baked alone. By naming the low and high poly meshes accordingly for all the parts, I made sure the baking of the pouches wouldn’t bleed on the belt, same with the straps and the gloves, etc.
Materials & Texturing
For a high-resolution model like this one, I always split my Substance projects. They can get quite heavy and laggy with time, and splitting them by the various parts of the character helps keep it smooth for work and future retakes.
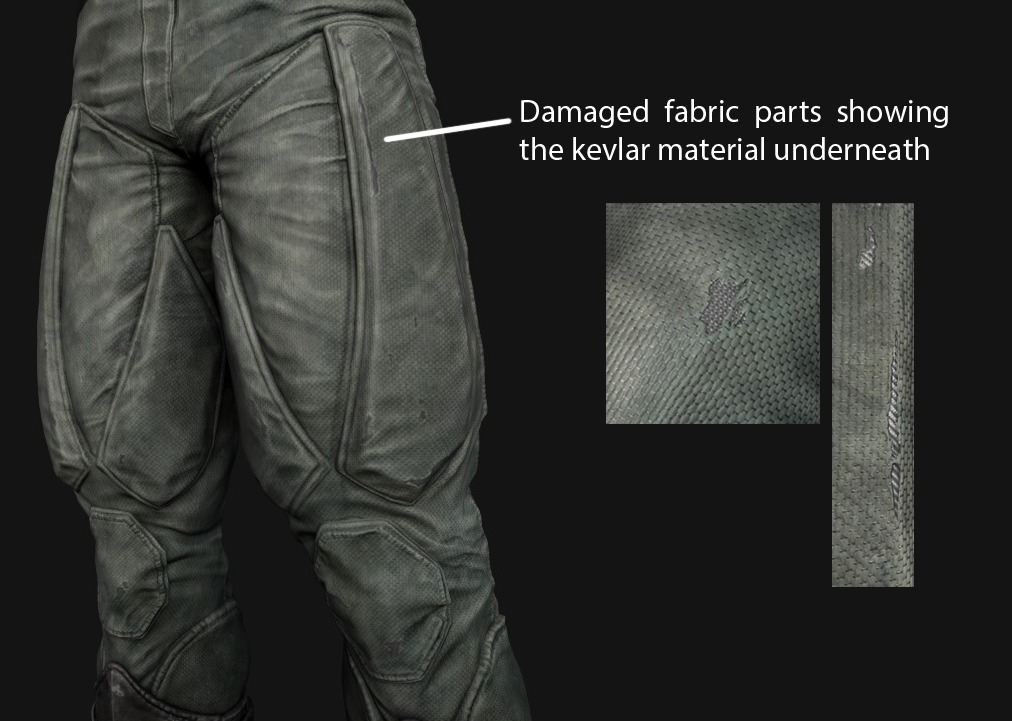
Overall, for the texture, I wanted the fabric parts to appear a bit dirty—not full of mud or blood, but with lots of color variations inside the fabric, built up by lots of nights out in Gotham.
After my base work was done, I used various maps of abstract color variations that I projected on some parts to break the “too clean” look of the texture. I always like to project real references on my textures, for it creates details that I wouldn’t think of otherwise.
I can then selectively build the rest of my texture work around these new details, enhancing or lowering them here and there. Depending on the materials, I also like to add a little fake lighting information in the base color.
For this project, I used it a bit on the darkest part to help the highlights come out a little more once the materials were lit.
Though working with a 2k resolution in the viewport is quicker and smoother, I always check and adjust my bumps for the 4k resolution when I know I’m working on a project that might use it.
The difference can be quite big for the bump channels, so I always work with the end resolution in mind.
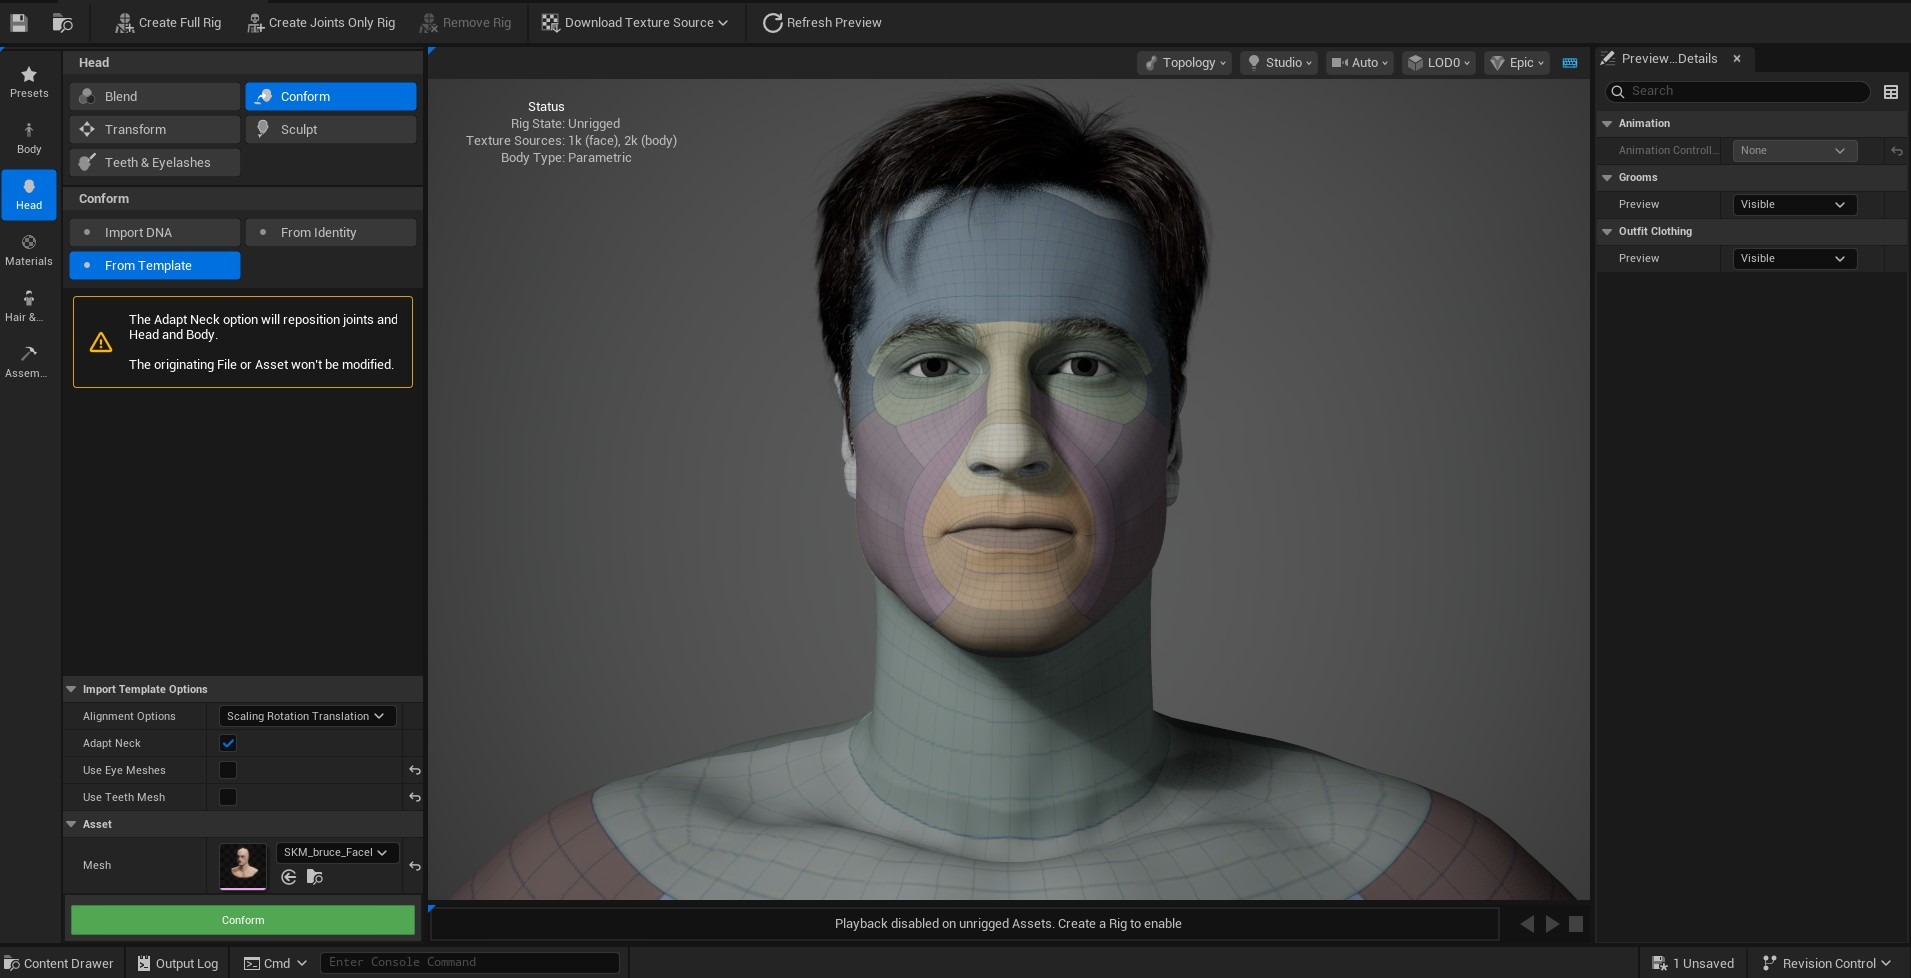
For the face, I created a Metahuman identity through Unreal. Once I had a Metahuman wrapped to my face sculpt, I took its textures and worked on them.
Firstly, to project the shapes of my sculpt on its normal map, but also to change the rest of the face texture to my liking.
Polish & Final Pass
Before making retakes on my texture work, I like to put the model in UE5 in different lighting scenarios, without touching anything more than needed inside the materials. This way, I make sure that what needs to be reworked isn’t just a result of a particular lighting or material setup.
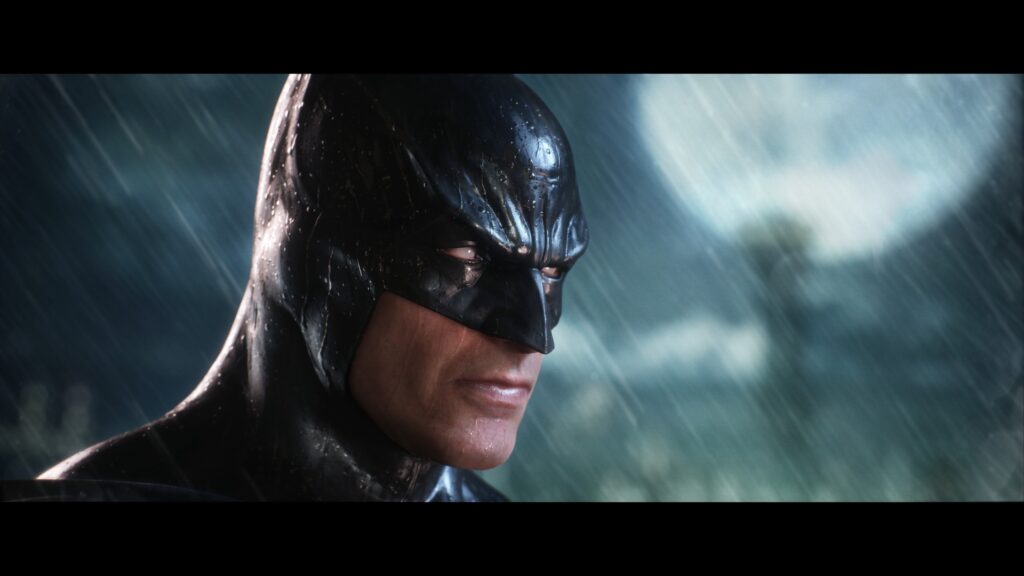
But most of the final work was about the rain. Though I wasn’t sure at first about giving it a try, after the first cinematic render, it appeared obvious that all the little glossy details that would come out with a wet version of the materials would complement the cowl and enhance the shot.
So I built the wet versions by layers in Substance Painter, on top of the original final texture. For most cases, only the roughness and height channels were needed, though for the fabric, I added a darkening effect to the base color where the wetness was.
For the drops, I made sure to use a replace blending mode in the height and normal channels, to make sure the bump details of the cowl would stay under the drops and not be pushed with it to the surface.
With some drops and a condensation map, as well as a handmade wet base with no height at all, I had the global part of the rain covered. I then went back and forth between Substance and my UE cameras to choose where I would add and selectively project the raindrops for more aesthetic choices.

Rigging & Posing
For this project, I just wanted to be able to pose the character and make a simple idle animation to go with the cloth sim of the cape.
For the rigging of my character, I used Accurig. It’s free to install and quite easy to use. It gives a really good result for skinning this quick, especially for the fingers.
I used it quickly on the character at various stages to ensure the movement was correct. The animation bank that comes with it helps see how the skinning would hold up to various animations.
I did the cloth sim directly in 3ds Max. I wanted to make sure I would have enough control over it to modify the mesh afterward if needed, and to make sure the animation looped with the idle pose.
To make it loop, you can see the process in detail by following this tutorial.
Having the Metahuman mesh for the face, I went a bit further than I initially planned to and took the face’s blendshapes out of Unreal. 3DS Max doesn’t have a simple bridge to support the export from UE right now like Maya does.
You can follow this tutorial if you’re interested in exporting Metahuman Blendshapes to Max.
That’s how I was able to animate and pose the face with the Metahuman blendshapes directly in 3DS, though such quality was not necessarily needed for this project.
Rendering & Lighting
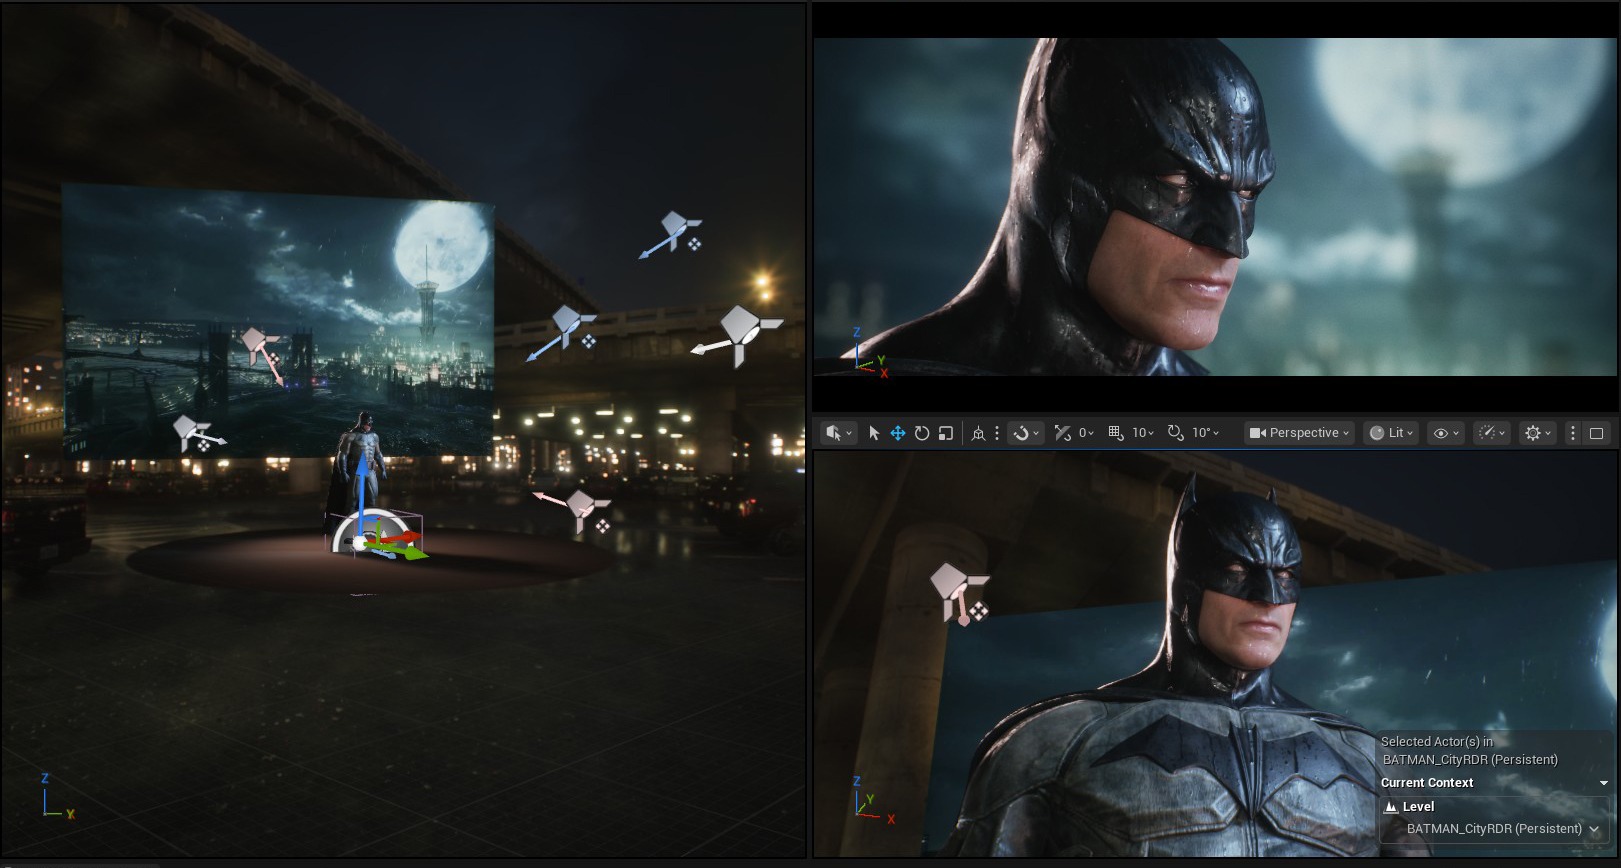
For me, the easiest way to iterate for my different lighting setups in UE5 is to pilot the lights directly in one view. Moving it like a camera while seeing the result in my main view helps save a lot of time when going through different tests.
I usually start with a completely dark scene, painting various parts of the character on purpose with my lights, making sure I bring out the shapes I want, the way I want them.
I always add a really soft HDRI in the process to ensure there is no complete darkness and for the reflections, unless it is appropriate for the shot.
For my renders, I had various goals in mind. I wanted some to be treated as “cinematic” shots.
Those would be the main renders showcasing the model with lighting adapted to a particular environment, where I would have fun with the camera settings to replicate the feeling of a real shot.
Then I would create environments for more global renders, the ones that show the entire model. Of course, for the close-up cinematic shot, I went back to the Arkham City trailer and took inspiration from it.
In Unreal, the shots were rendered with Movie Render Queue. For the rainy shots, the rain was composited in Photoshop.
Conclusion
I am quite happy with how this one turned out, and that working on a cinematic model made me go further than I intended to with the final renders.
I learned a lot during the whole process, and a lot more could be done with Unreal and its Metahumans. Working with it gave me lots of ideas for things to try on my next projects.

