APC Wolfenstein


Introduction
Hi everyone, my name is Aitor Baños and I’m a Hard-Surface Artist Student.


Inspiration
The first day I started with 3D, I always liked the hard surface style used in Wolfenstein and as my final degree work, I wanted to replicate one of his vehicles, reinterpreting it in my own way. The reference vehicle I chose is made by Matthias Develtere, making one of his models was a challenge for me.
First of all, I started looking for references, most of the models that I wanted to replicate, but I also wanted to look for other APCs, to have other inspirations.
I personally recommend using Pureref to make a compilation of all the references you are going to use, as it allows you to sort all that information in an easy and fast way.

Blockout/Low Poly
In my case I start with 3ds max. First of all, I like to make a box with the dimensions of the vehicle, this way we work with a good scale. One thing I learned in the creation of a vehicle, is to start by blocking the exterior and then the interior, so we have a good organization from the beginning.

Once we have done a blocking, we start to make all the pieces with all the details, giving a sense and a composition to the whole model, with which everything agrees with logic in all the mechanisms to be able to animate in the future. A very important thing that I have in mind when I finish the low poly model is the assignment of the smoothing groups, which are applied in editable poly or edit poly, with the polygon or element mode, we make this assignment thinking about the UVs, that later I will show you why to take it into account.


UVing
Next comes the UV process, where I follow these three rules:
-Good orientation
-Good order
-A good optimization
Once we have applied the smoothing groups, we open the unwrap UVW modifier and inside the editor we reset all the cuts, then there is an option called Flatten by Smoothing groups, which allows you to make cuts in the UV
from the smoothing groups, created previously and then we do a relax, to make sure that they are well opened and deployed.

We preview the texture pattern, so we can ensure that all parts follow the same direction. In the optimization part, we reduce the texel density of the parts that are not very visible, giving more space for the parts with more prominence, also the parts that are the same (like the wheels) can be given the same space in the set. Finally, we arrange everything inside the set and make the most of the space possible.

High Poly
I did the high poly in Zbrush with the polygroups technique that I will show you next:
Once the model is imported, we preview the polygroups, we open the folder called Polygroups and once inside, we click on Auto Group With UV, which separates the model into different polygroups according to the different islands of the UVs. We have to think that each polygroup is a subdivision group, which means, where there is an edge, we have to put a different polygroup. Then you can change the polygroups with the Zmodeler brush, doing the combination Alt+ LMB.

Then we go to the geometry section and in the crease folder we follow this order:
We change the crease lvl to 3, we give Crease PG, so we apply the support loops where we want hard edges.
(The crease lvl serves to indicate the number of subdivisions that you are going to realize before the zones between PG begin to be smoothed, this way we give a slight beveled in the edges).

Finally, we hit Ctrl + D to give it subdivisions. Now that we have more geometry, we can do any detail, we just need to set the high poly to reduce the back time.


Bake
For the bake, I used Marmoset Toolbag, because you get very good bake quality and you can manipulate the cage freely. We have to create different bake groups within the baker, we do this so that pieces that together do not interlock the cages of the same bake group, otherwise you can have problems with the bake or get weird stains.
Also in each bake group, in the low section, there is the option to manipulate the cage of each bake group independently from the other groups.


Then I use this configuration to get the bake out, I recommend doing bake tests so you can check with less time if there is no problem and then when you are sure you get the bake out to the maximum.
Normal Map: This map is used to pass the information from high to low. In my case, I change the “Y” channel because I’m going to implement this model in Unreal Engine.
Ambient Occlusion: This map is used to generate shadows on the model. It is also used by Substance Painter generators.
Thickness: This map is necessary when texturing in Substance Painter, it is used by many of the generators.
Curvature: This map is very useful when we are going to make textures to mask the edges of our models.
World Space Normal & Position: These two maps are used internally in Substance Painter when using generators or smart masks.

Texturing
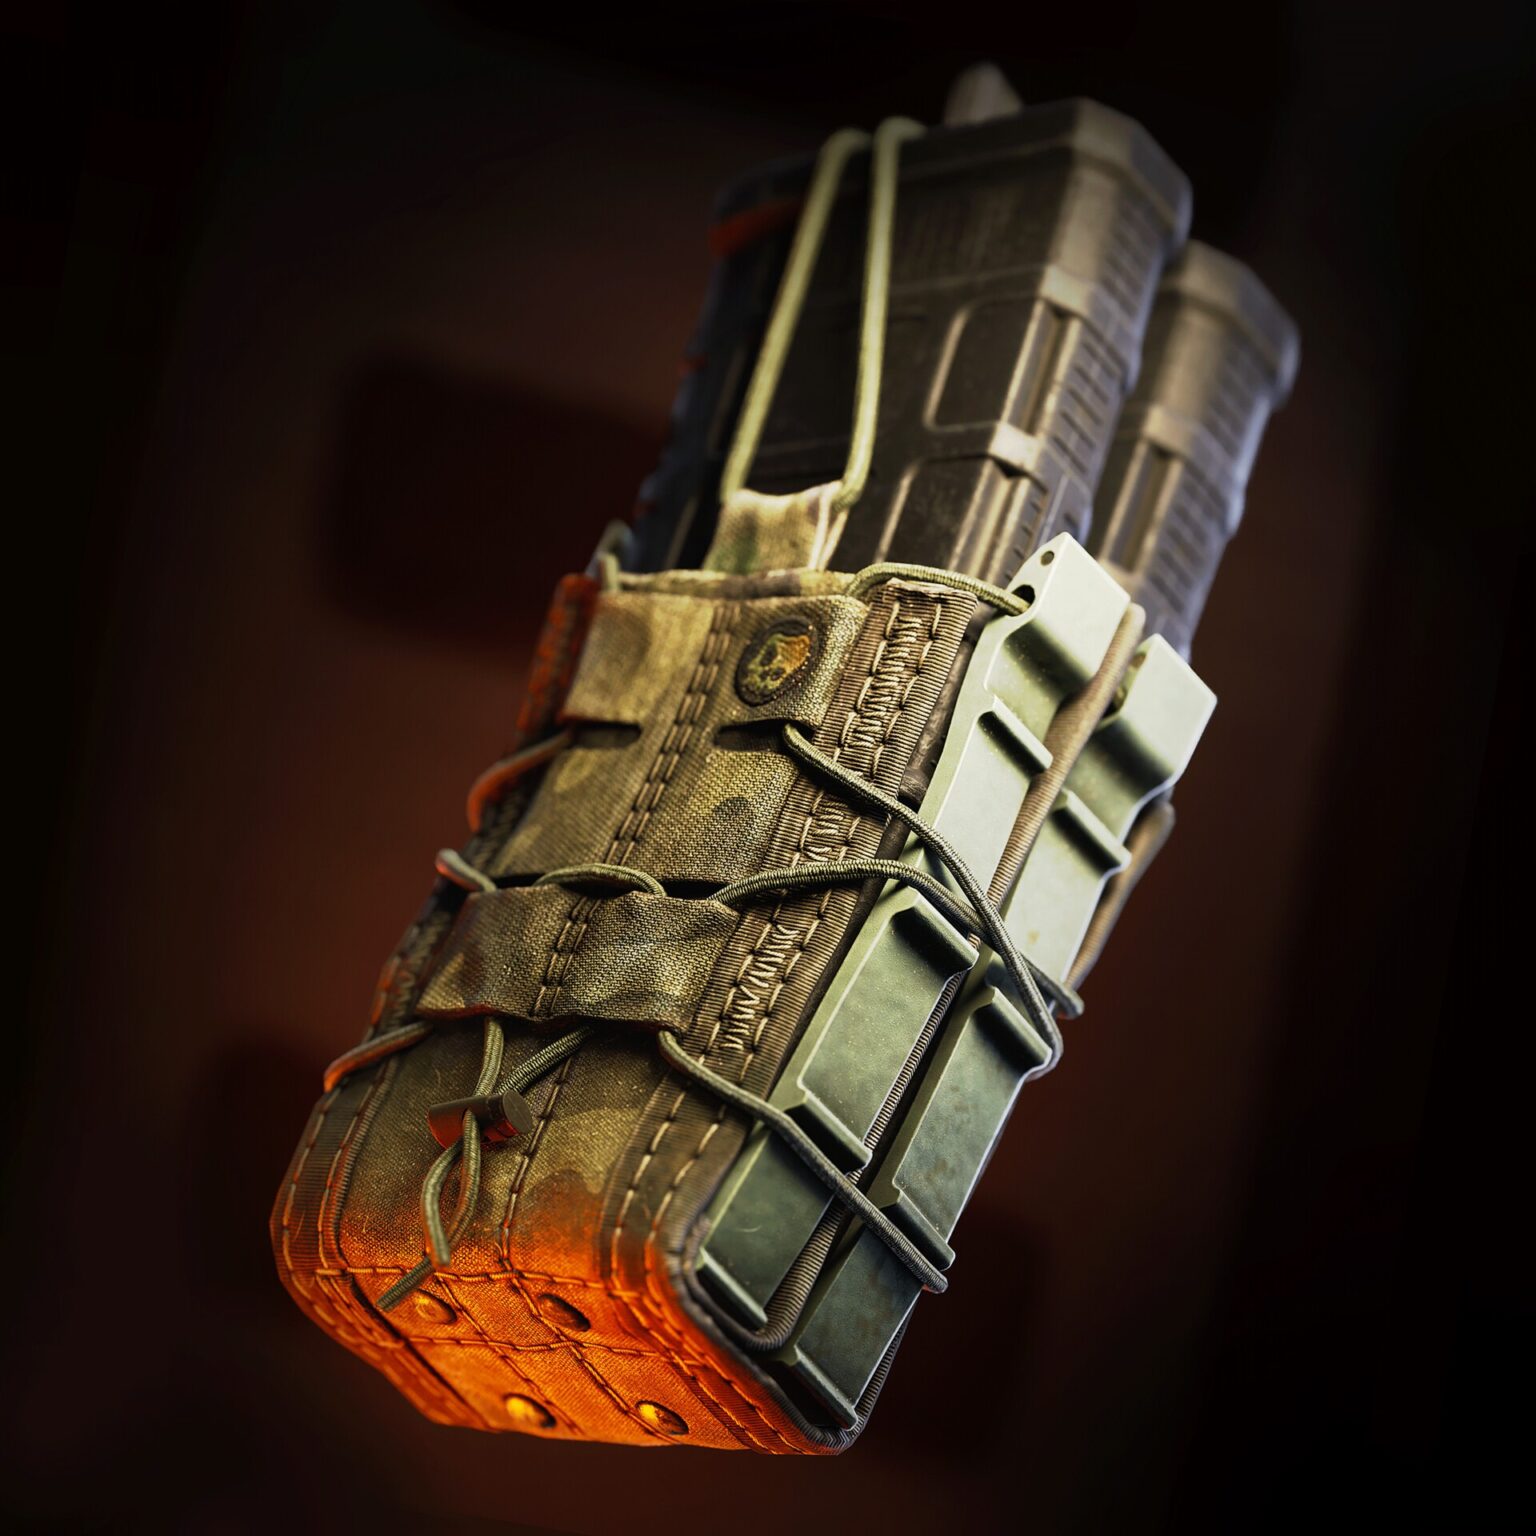
Once we have all the maps we start the texturing phase, for this vehicle we already have an idea and a reference of what colours we want to use for this model, depending on the material of the vehicle we will work in one way or another. Most of the parts are made of metal, so I use this method to give the most realistic result possible.
First of all, the first layer is metallic, with two variations of colour and roughness. A lighter one with less roughtness, and a darker one with more roughness, give the metallic touch that can be seen on the edges, since being a military vehicle, it is logical that it has a lot of wear and tear.
Then I always use a layer of varnish on top to protect the metal, where we leave the metal edge wear modifier so that the metal is only visible on the edges. We also add some areas with rust, to add more wear to the vehicle, which can be seen in the areas where the paint has gone.
The next step is to start applying the paint to the model, trying to trace as much as possible the references, in my case I have given variations of colour and roughness with different grunge to have a lot of variation, but that all the layers can be seen, giving a touch that because of the rain the layers of paint of the vehicle are fading.
Then we visualize all the other sets to start giving the wear on the hardest edges, we also make some colour changes in areas where there are glued parts with wear and varnish layers, lower metal, areas with dirt and a little noise in the height map. Finally, we apply all these steps to the rest of the objects to get the best possible result.
It is very important to test in the render engine we are going to use because depending on the engine we use, it will have one result or another, so we can see what the final result can be.

Render and Lighting
I used Unreal Engine, a very powerful engine, which I wanted to learn more about. First I looked for an environment that fit with my model to give it a good final composition.
From the models I found in the Epic Store bazaar, I decided to build an underground environment, with an illumination of the upper lights of the scene.

The next step was to start incorporating the model, tweaking the general lighting so that it had a strong light at the front and rear, from the overhead lights. On the sides, being darker areas, the best result was the use of a Rect light (Area Light) which gave me the option to illuminate the sides of the vehicle and create that contrast.

Now we just need to take the final renders, retouch the post-processing and adjust the camera to get the best result.

Closing Thoughts
Special thanks to the Games Artist team for contacting me for this breakdown, it has been a real pleasure for me to be able to contribute to this fantastic project. Thanks for reading! If you haven’t already, take a look at my artwork:
Read more articles
You might also like these articles.