Anti-Tank Mine PTKM
Introduction
Hello everyone! My name is Leonid Kozhushko, I'm a 3D artist with 3 years of experience working on mostly photorealistic AAA projects as part of a large outsourcing team 1518 studios. Now I am improving my skills and looking for studios for partnerships.
Goals
The main goal of this artwork was to update the portfolio and test my skills outside production limits. The focus was on exact match to references in all details, sizes and textures.
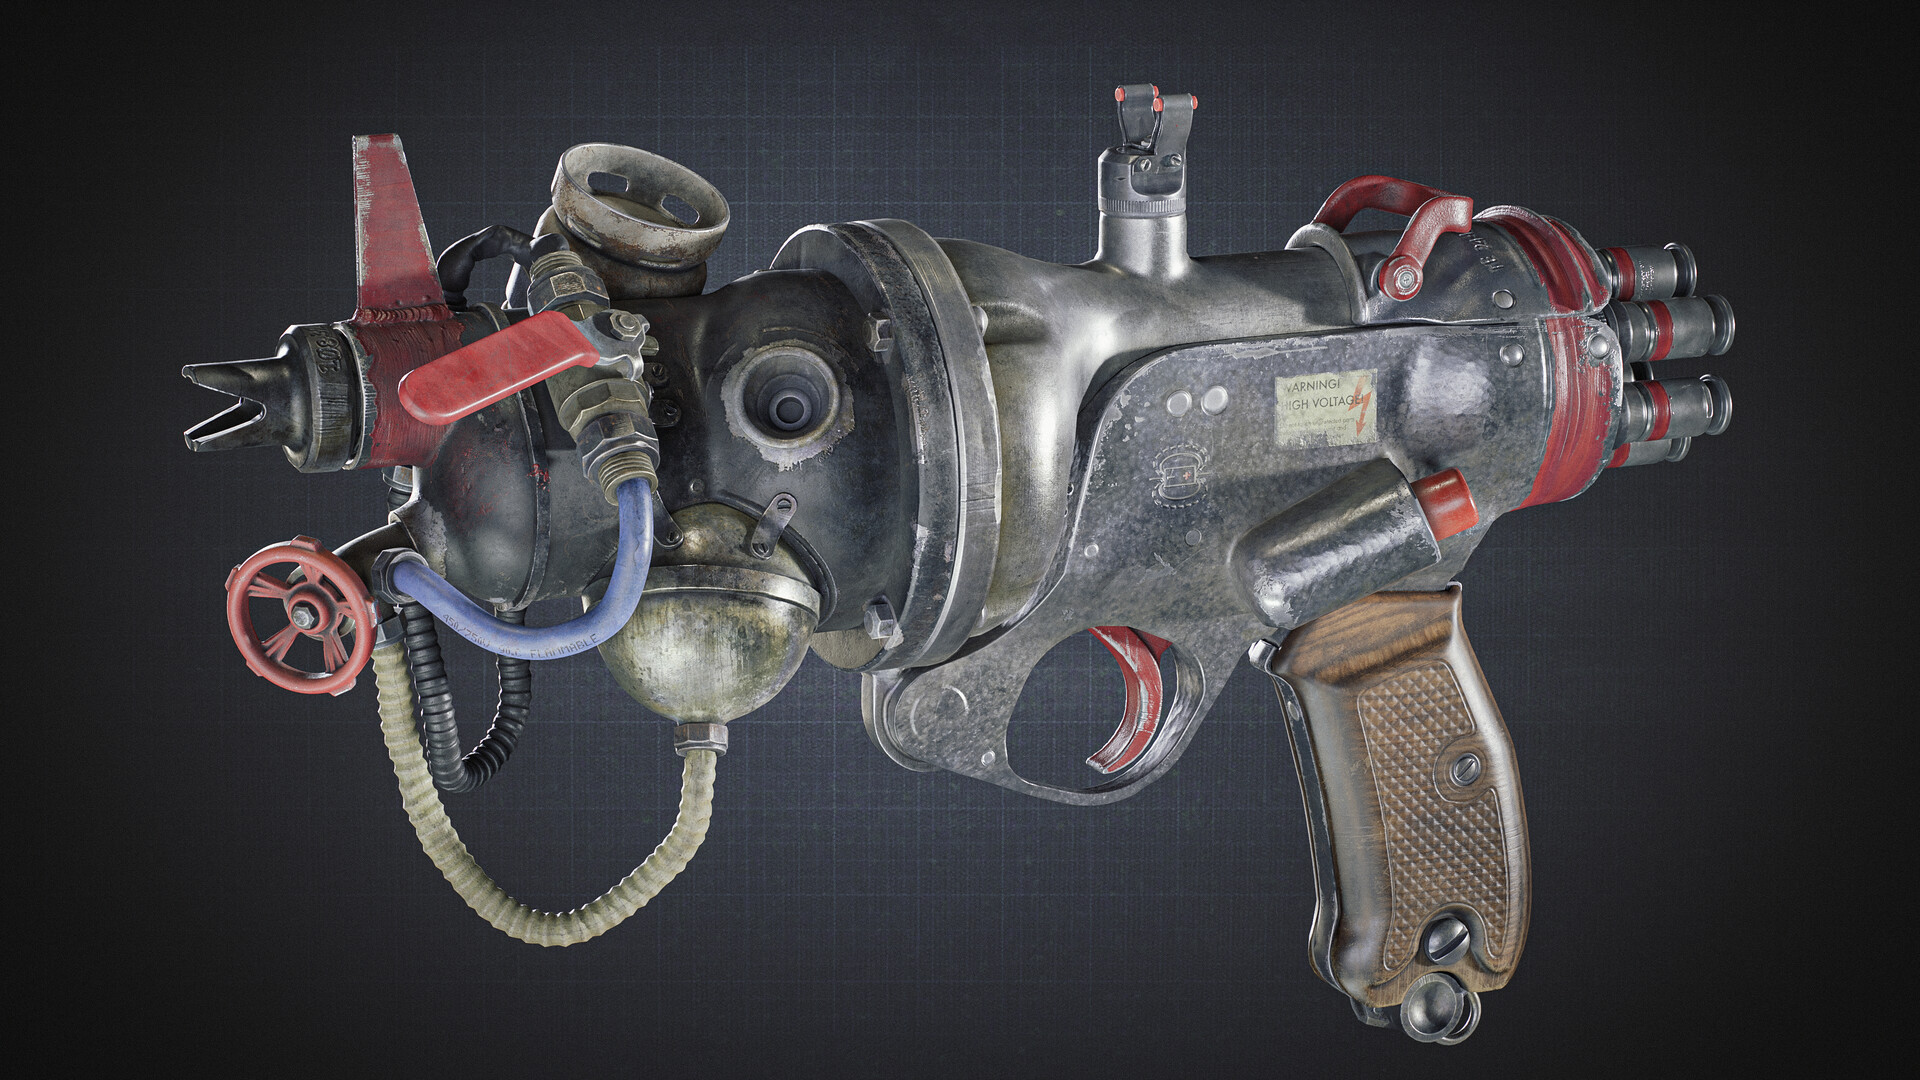
I wanted to do something hard-surface, but from the real world. Weapons are best suited for this, but all types of guns were made many times in 3D, so I wanted to do something that is not yet published on Artstation. The choice fell on PTKM-1R.
References
Preparation for any asset begins with collecting refs. I suggest spending a whole one day searching and structuring refs, if you have enough time to. This will prevent returning to this step later. You can search both by pictures and any available videos, disassembled into screenshots. In addition to collecting and planning references in PureRef, I advise you to straighten the perspective distortions on some references in Photoshop. Later, they will be very useful as a plain image helper during modeling.
To do this, draw help guidelines, then use the Crop Perspective Tool to set the area you want to align. With Alt button pressed you can expand the crop area without changing the alignment. Press Enter to apply.
Modeling
Usually, artists like to split the modeling process into several stages: blockout, lowpoly, highpoly. We wouldn’t separate them, because they are very connected and flow from one to another. Generally, in my personal pipeline, a blockout is an almost ready low-poly which can easily and quickly turn into high-poly.
Instead of showing a complete typical model creation process, I will show an example of one complex part.
First, go to the Maya settings and set the Global Sub-d Method to “OpenSubdiv Catmull-Clark Adaptive”.
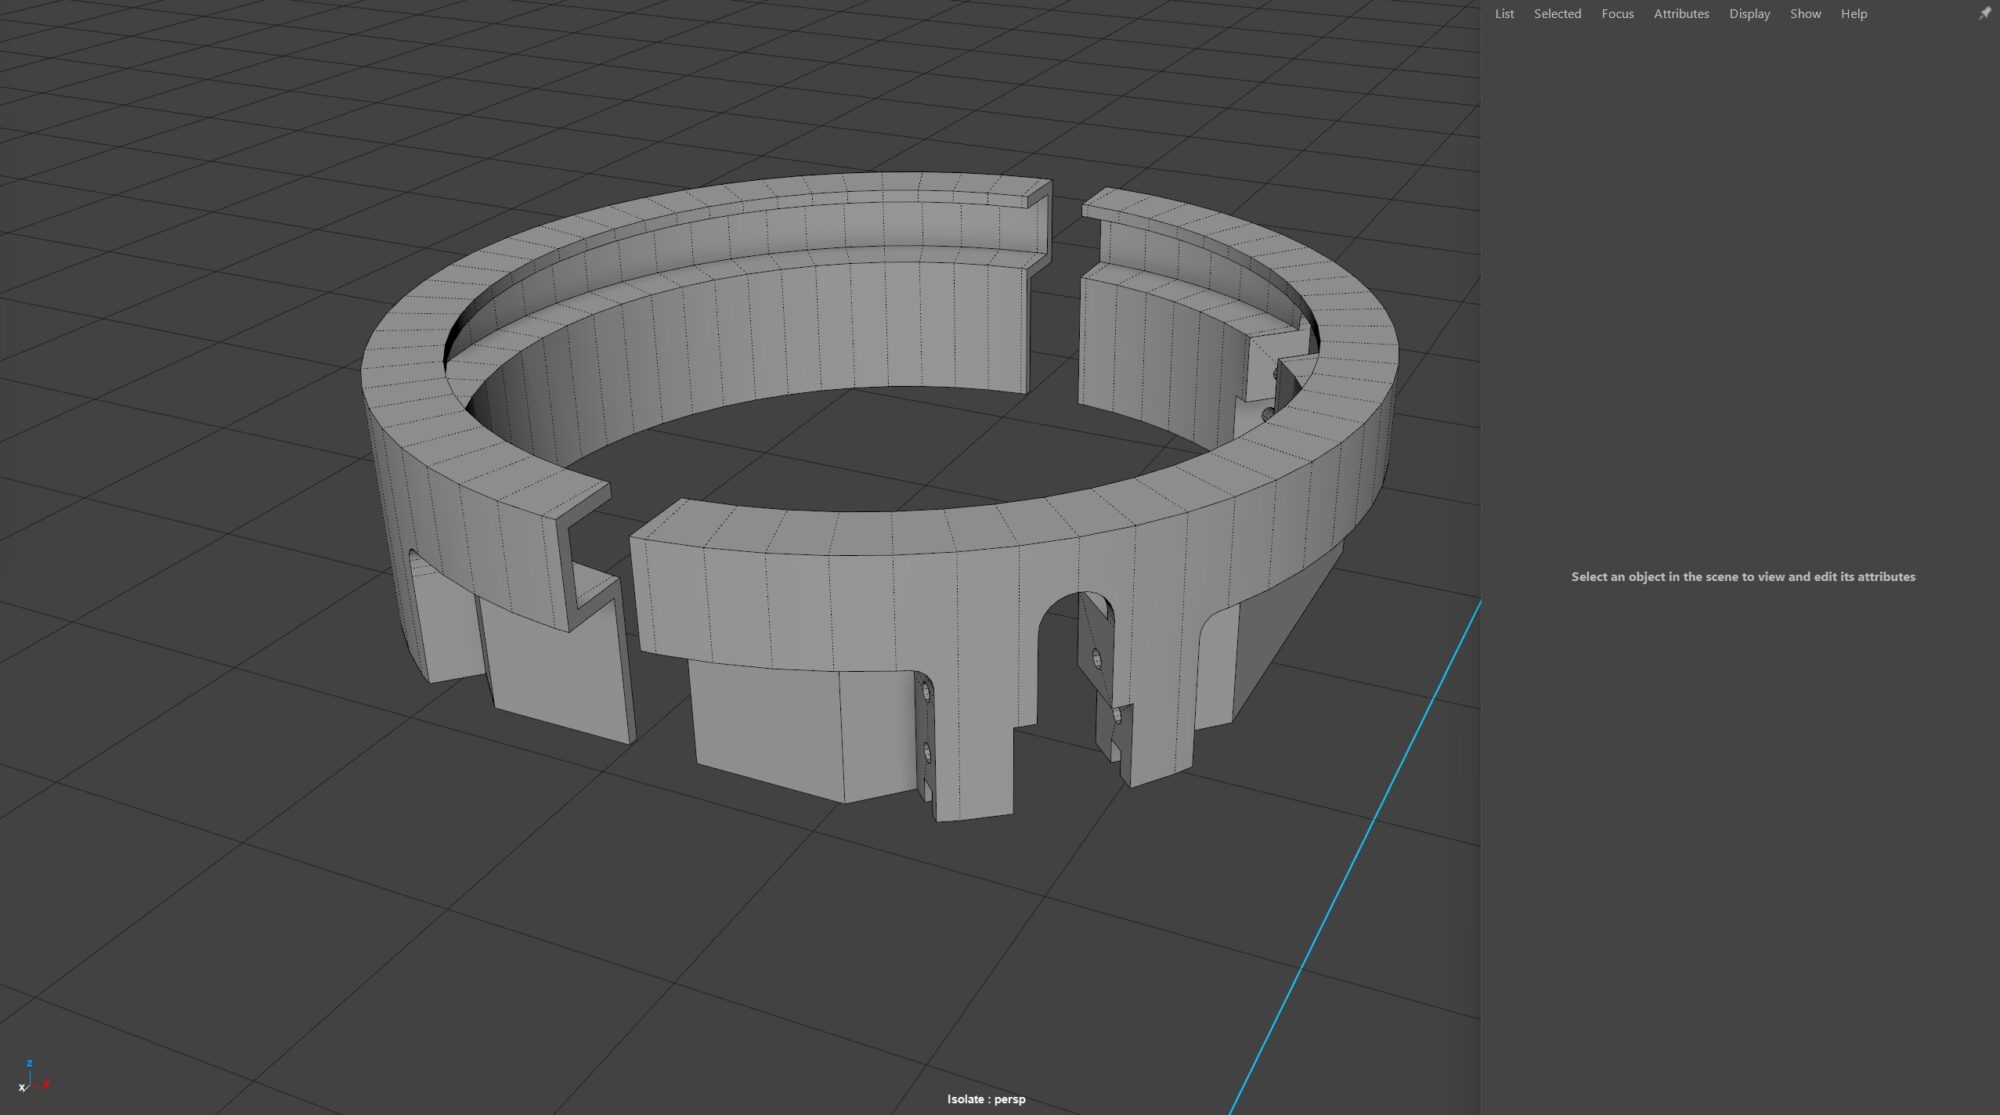
After the blockout is completed, we break the model into parts. In this case, I will show an example using this detail.
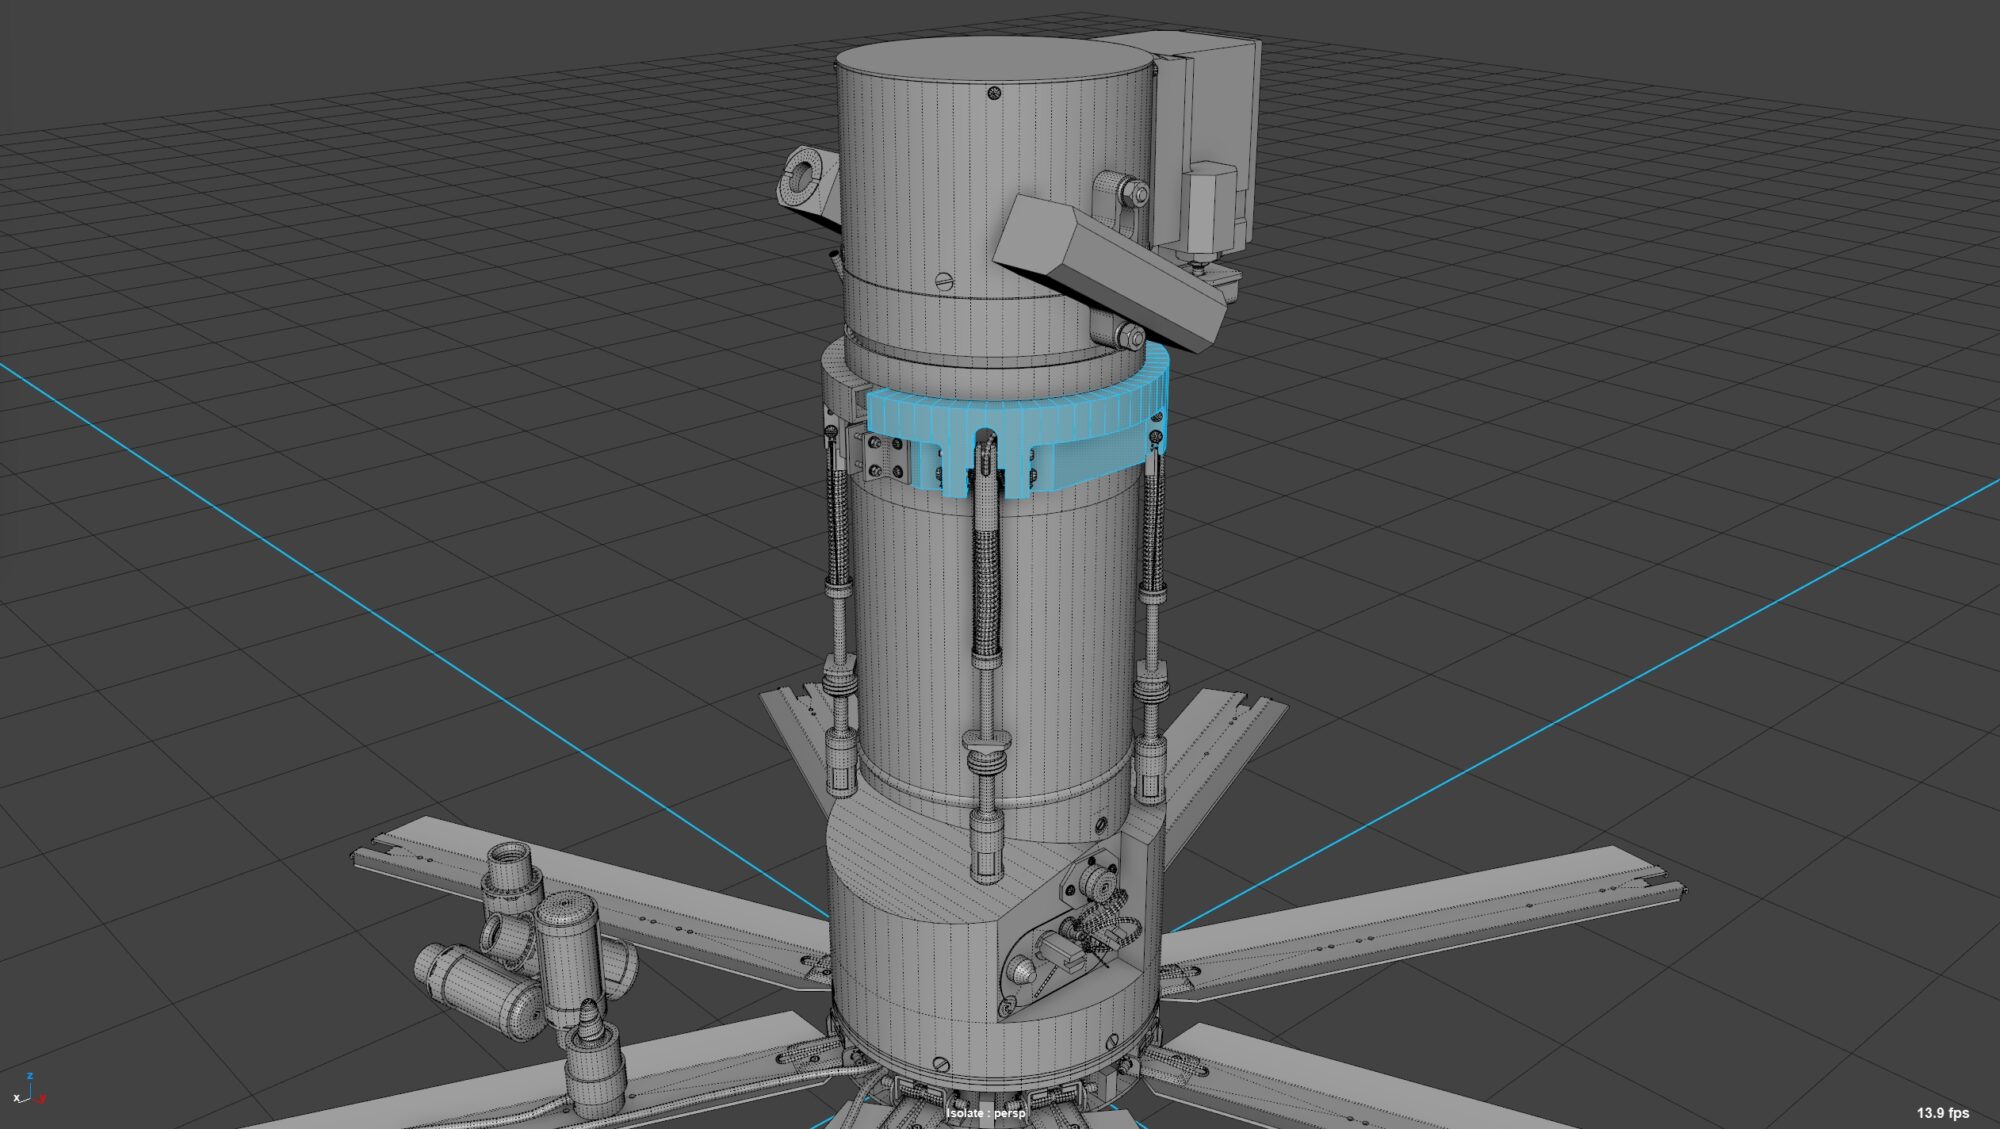
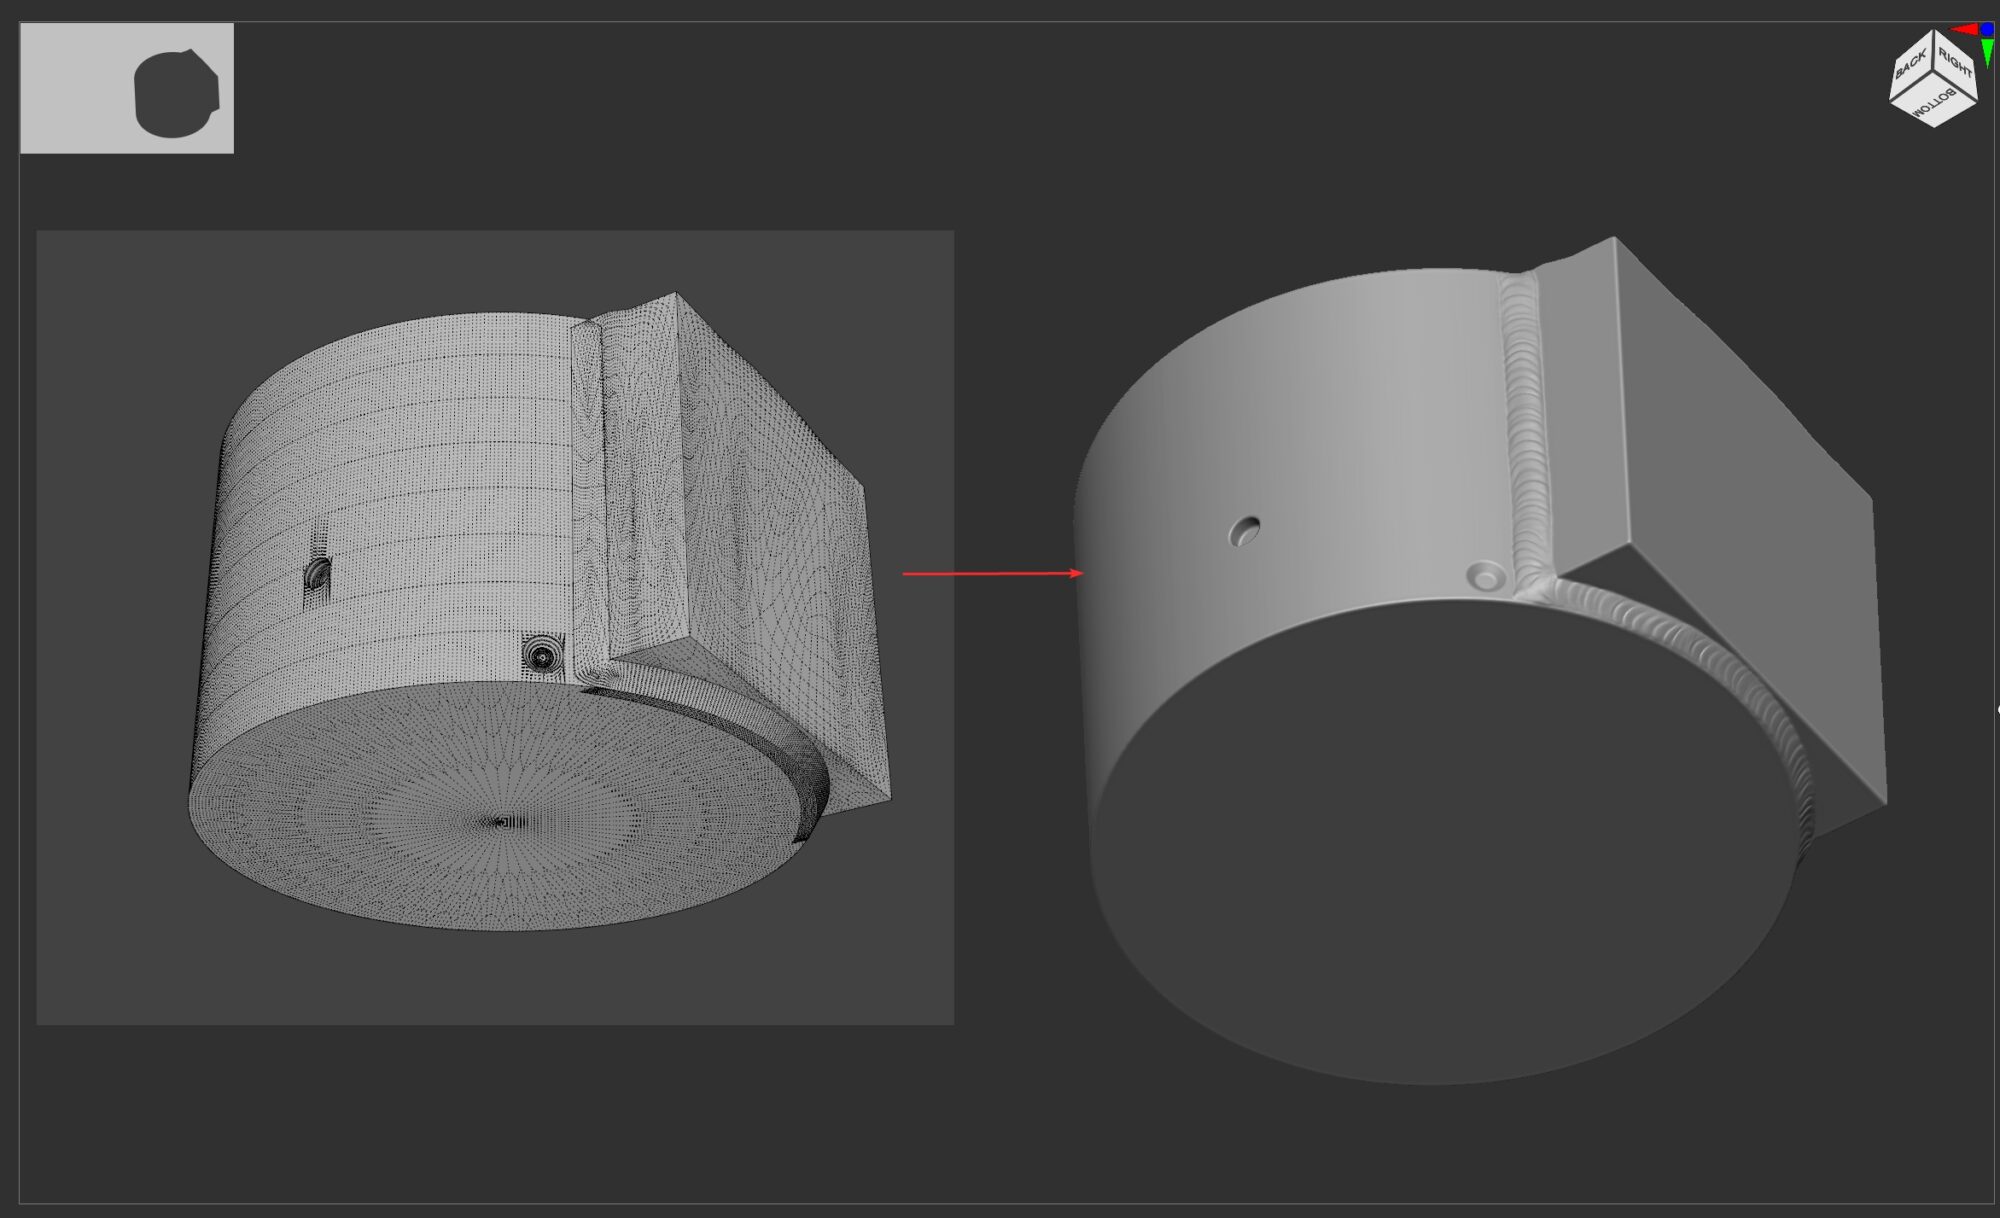
For correct highpoly shading on similar complex parts, I use the midpoly technique with polishing in Zbrush. First, you need to reassemble the mesh with Boolean operands.
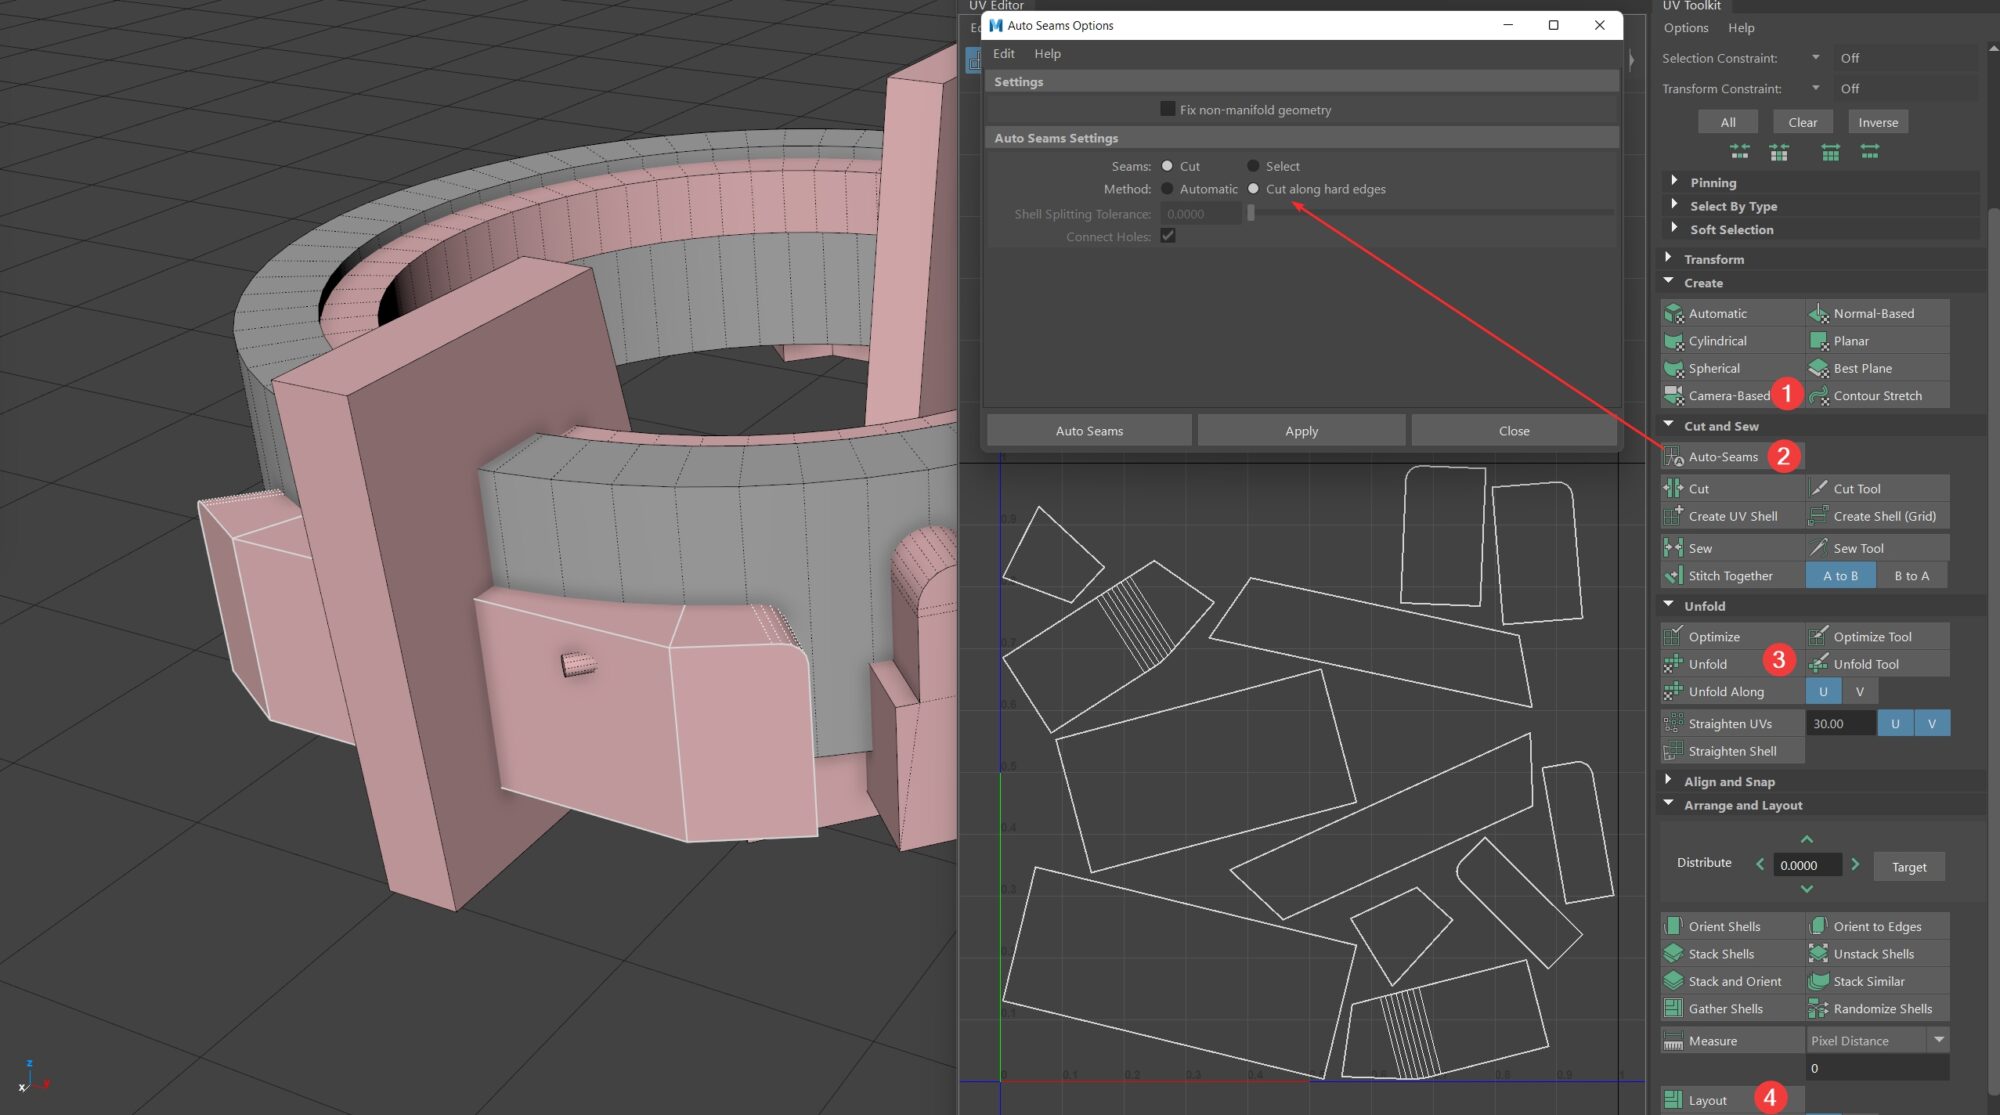
Next, map UV islands with cuts on hard-edges. Just click Camera Based -> Auto-Seams -> Unfold -> Layout buttons. We need this for further steps in ZBrush.
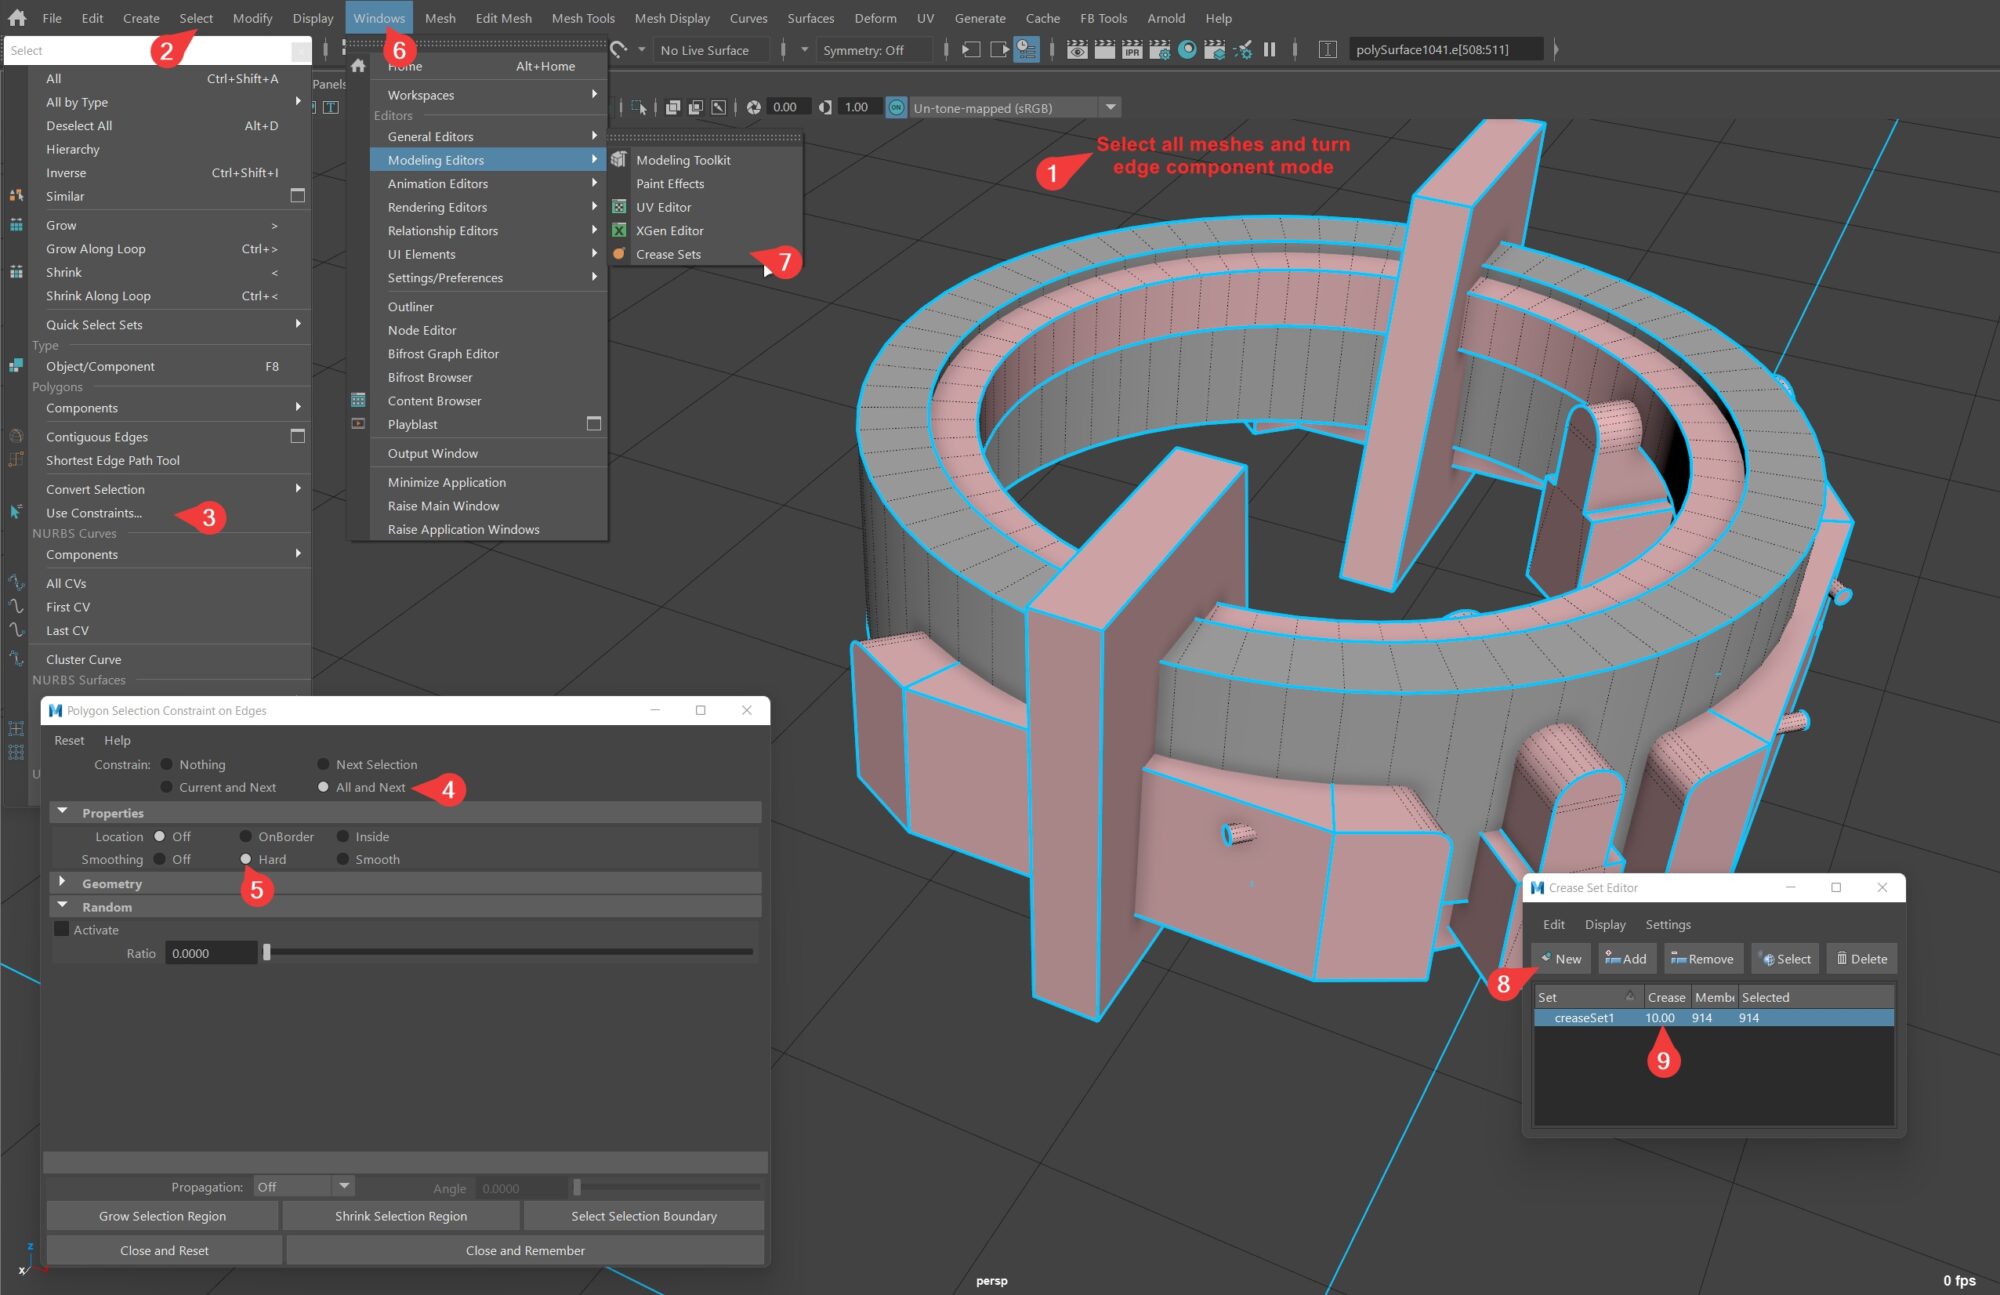
Then we add creases to all parts on hards. For comfort selecting and assigning creases, you can use third-party plugins, or tools built in Maya as shown in the screenshot. The main logic is: Select all the meshes, go to edge component mode, and use the tool “Use constraints…” to select all hard edges and add them to a new set of creases. Set the crease value to 10.
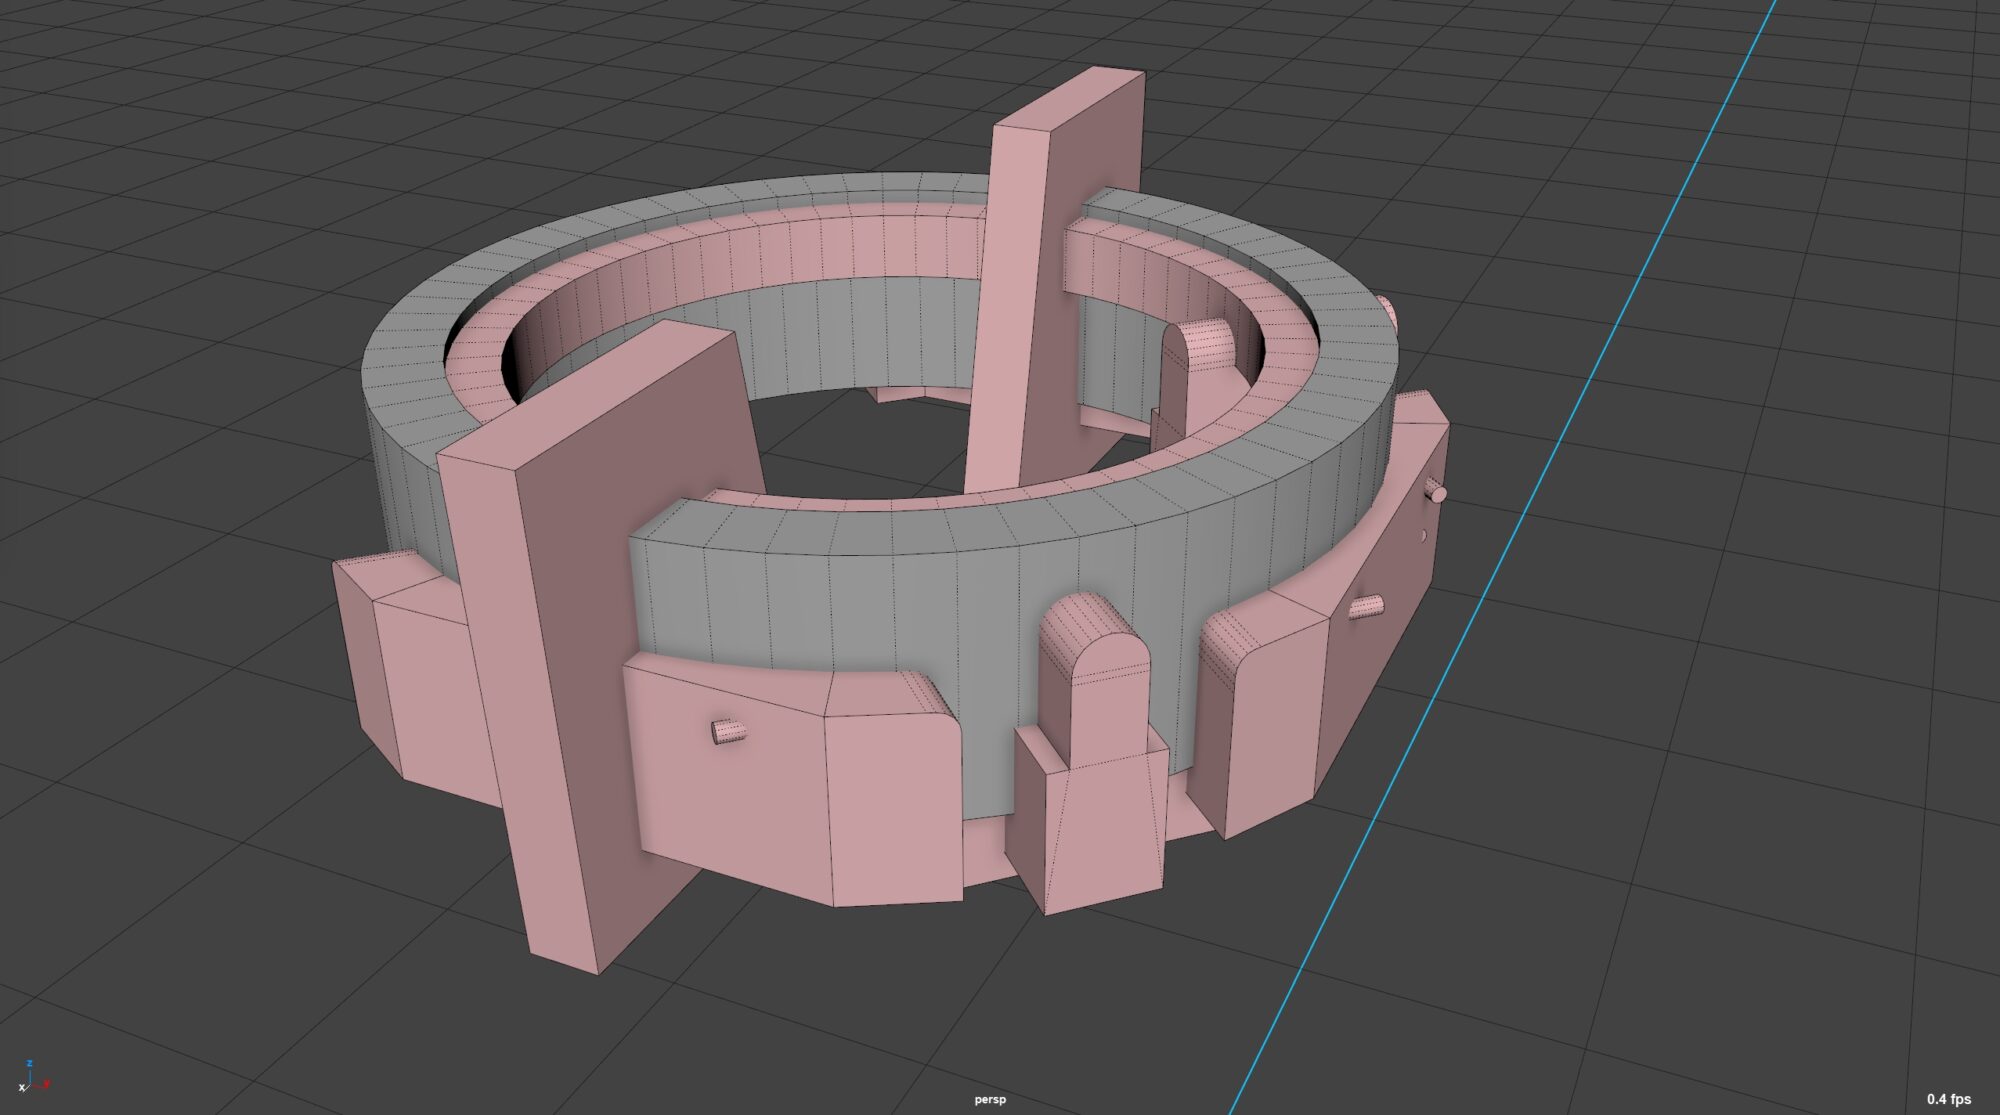
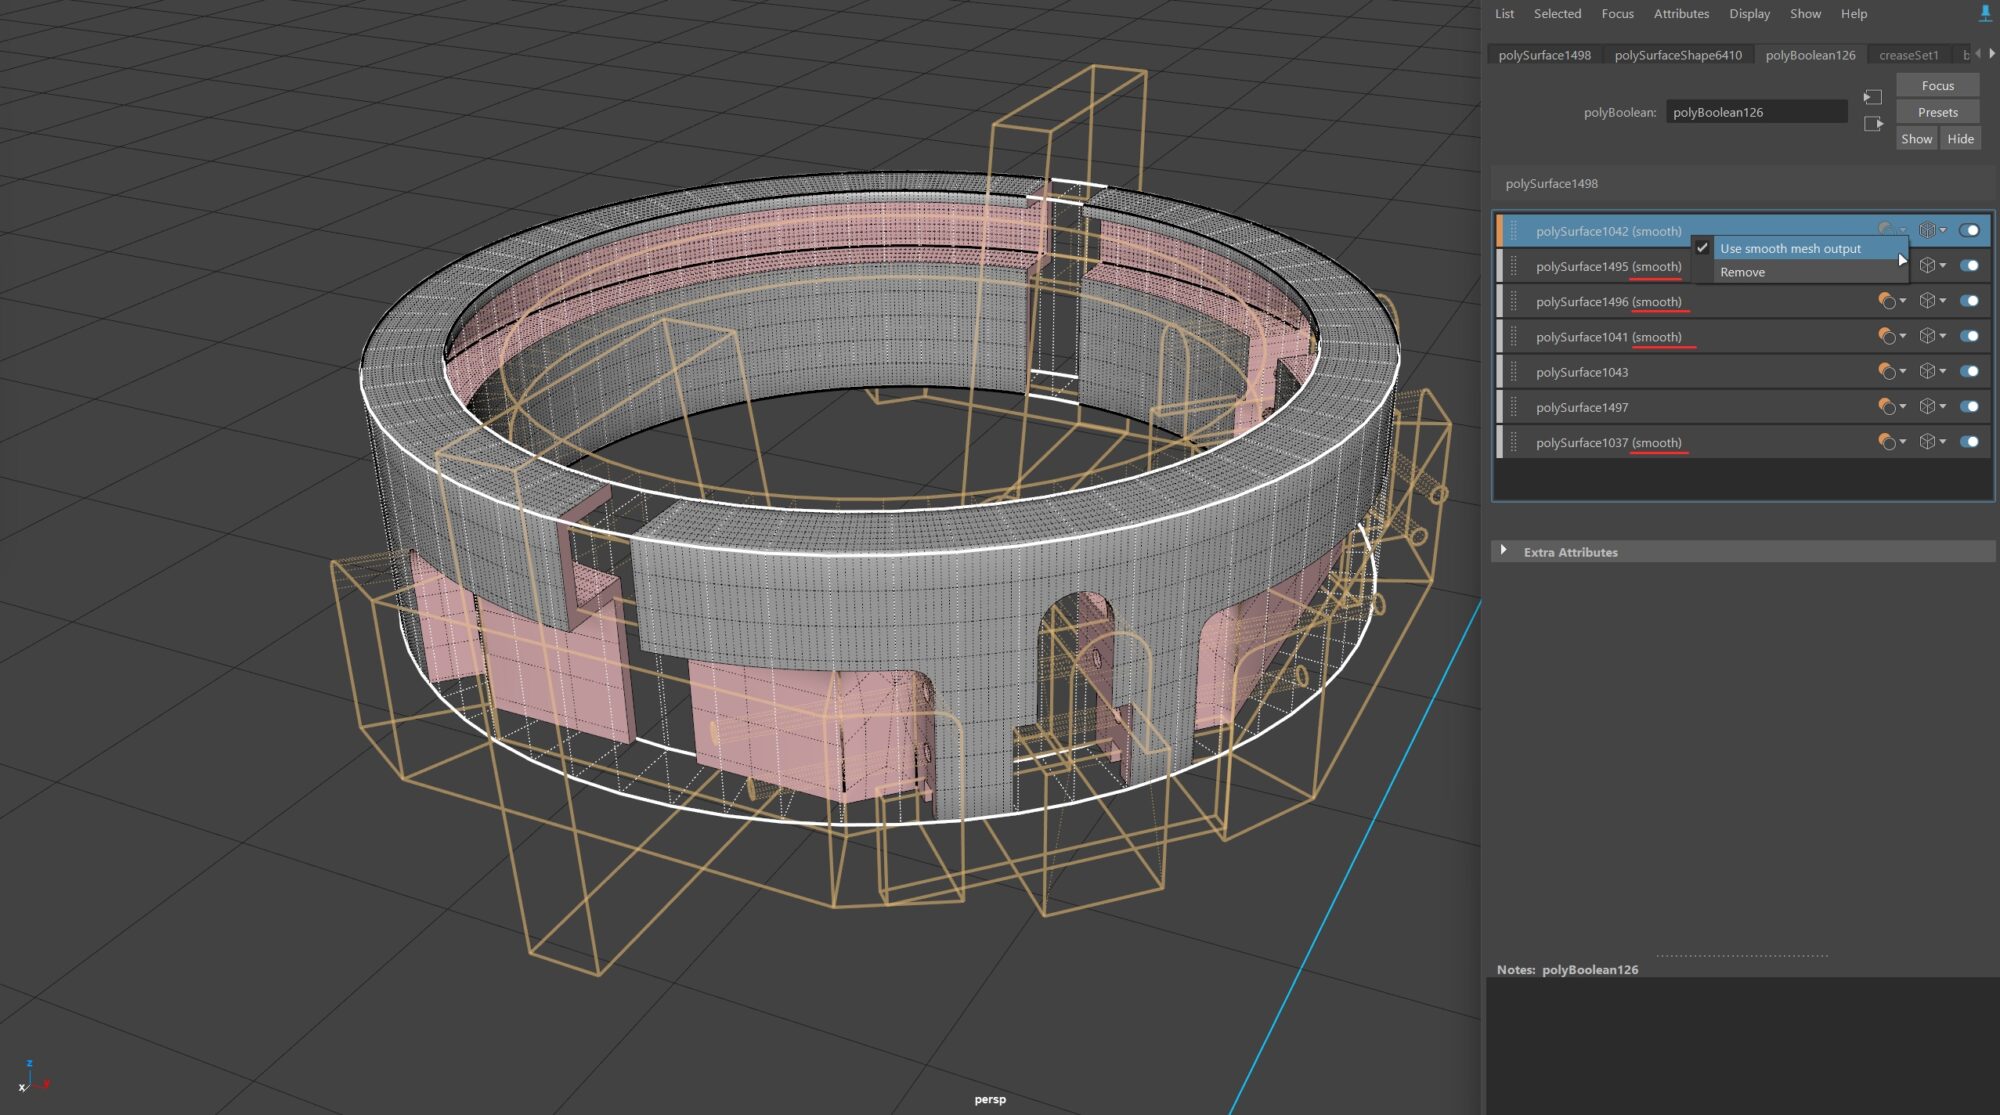
Using the new Boolean operand stack in Maya 2023 (use similar free third-party plugins if you have old versions of Maya), we get something like this:

Copy the final mesh (You wouldn’t lose the Boolean node. It does not spread over the copy). This will be our lowpoly.
Now, go back to the boolean stack and turn on the smooth mesh (RMB on operands). In this case, there is no need to smooth simple cubes, skip them.
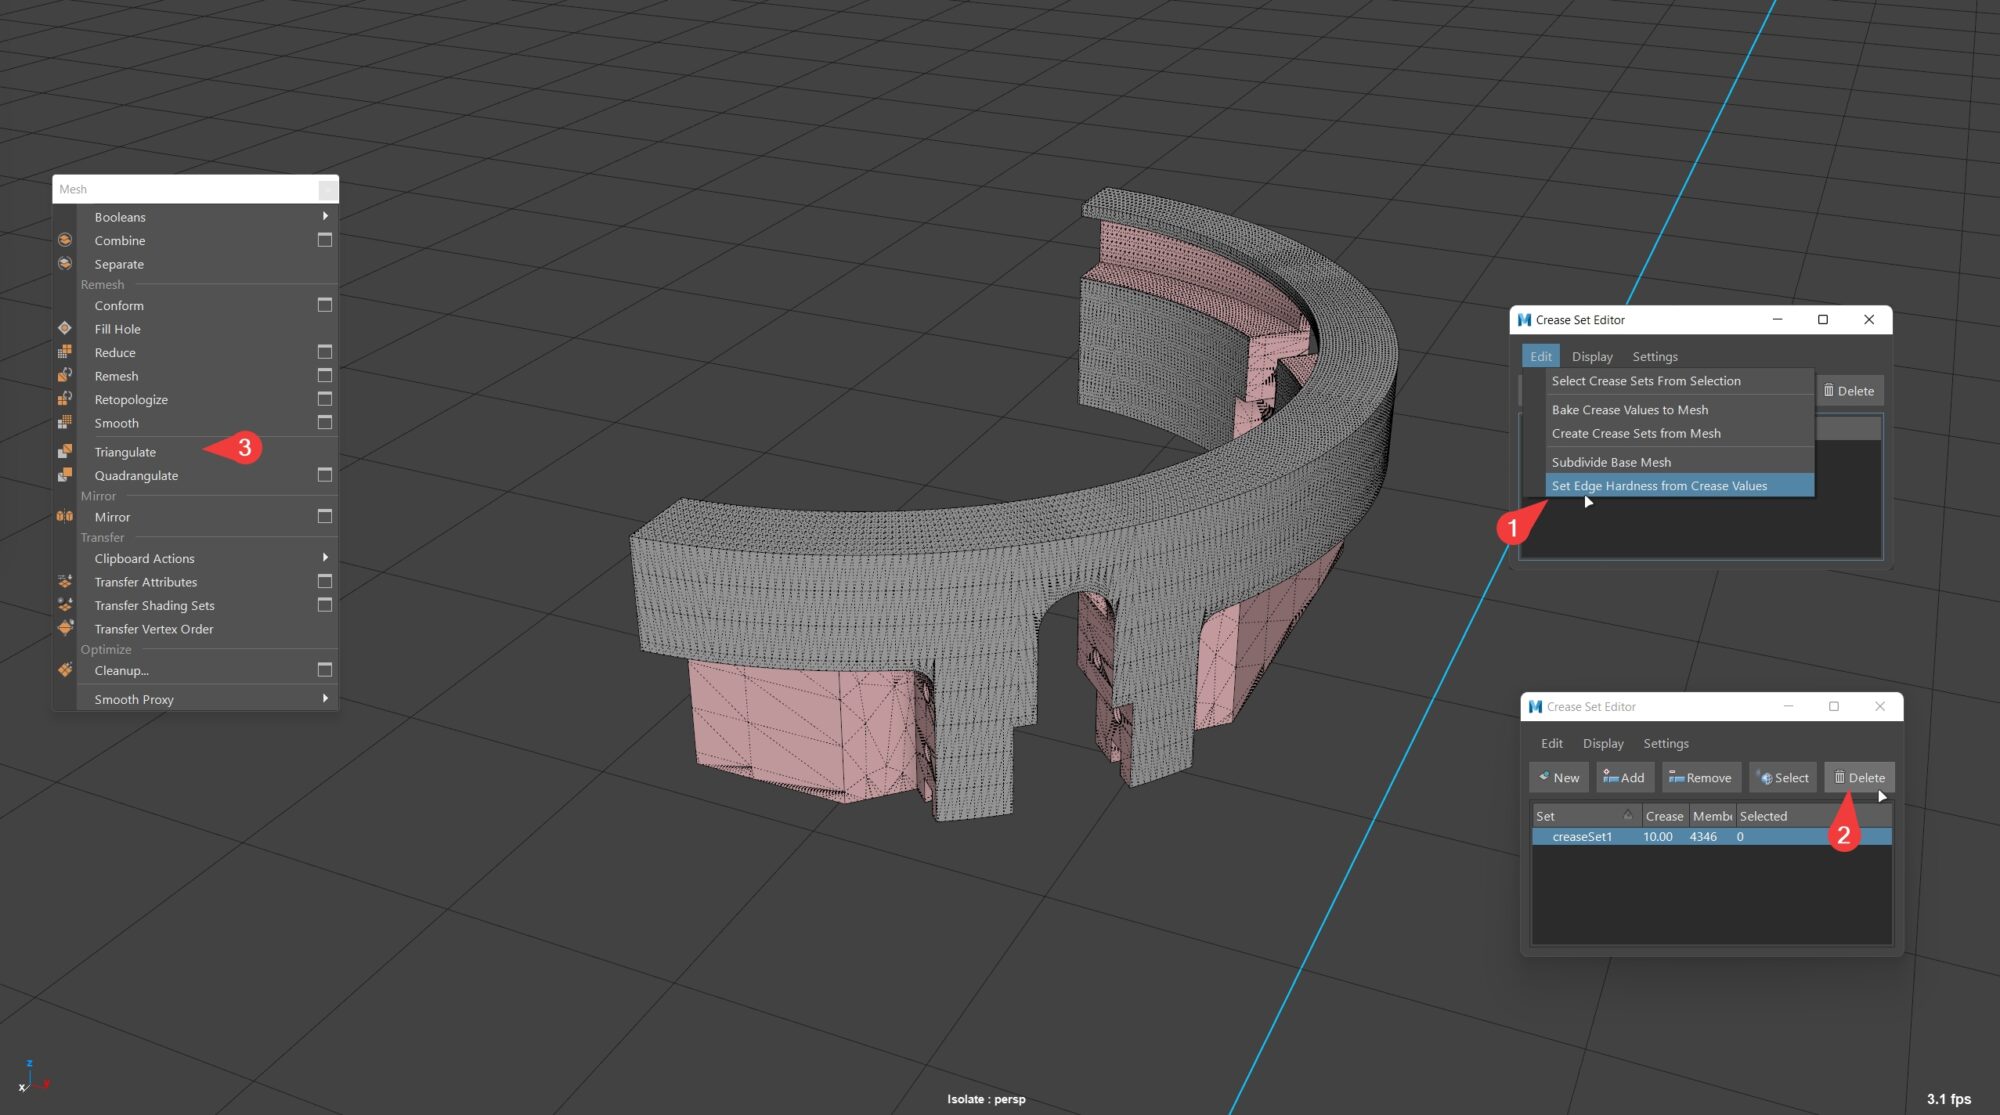
Copy the result (or clear the history if you are sure that the boolean stack will not be needed later). Before exporting mesh to ZBrush, you should clear it from creases and remove Ngons (it’s easier to just triangulate). If you left the Boolean stack – don’t delete the crease set. Also, in my case, I only need one half, because the other would be mirrored.
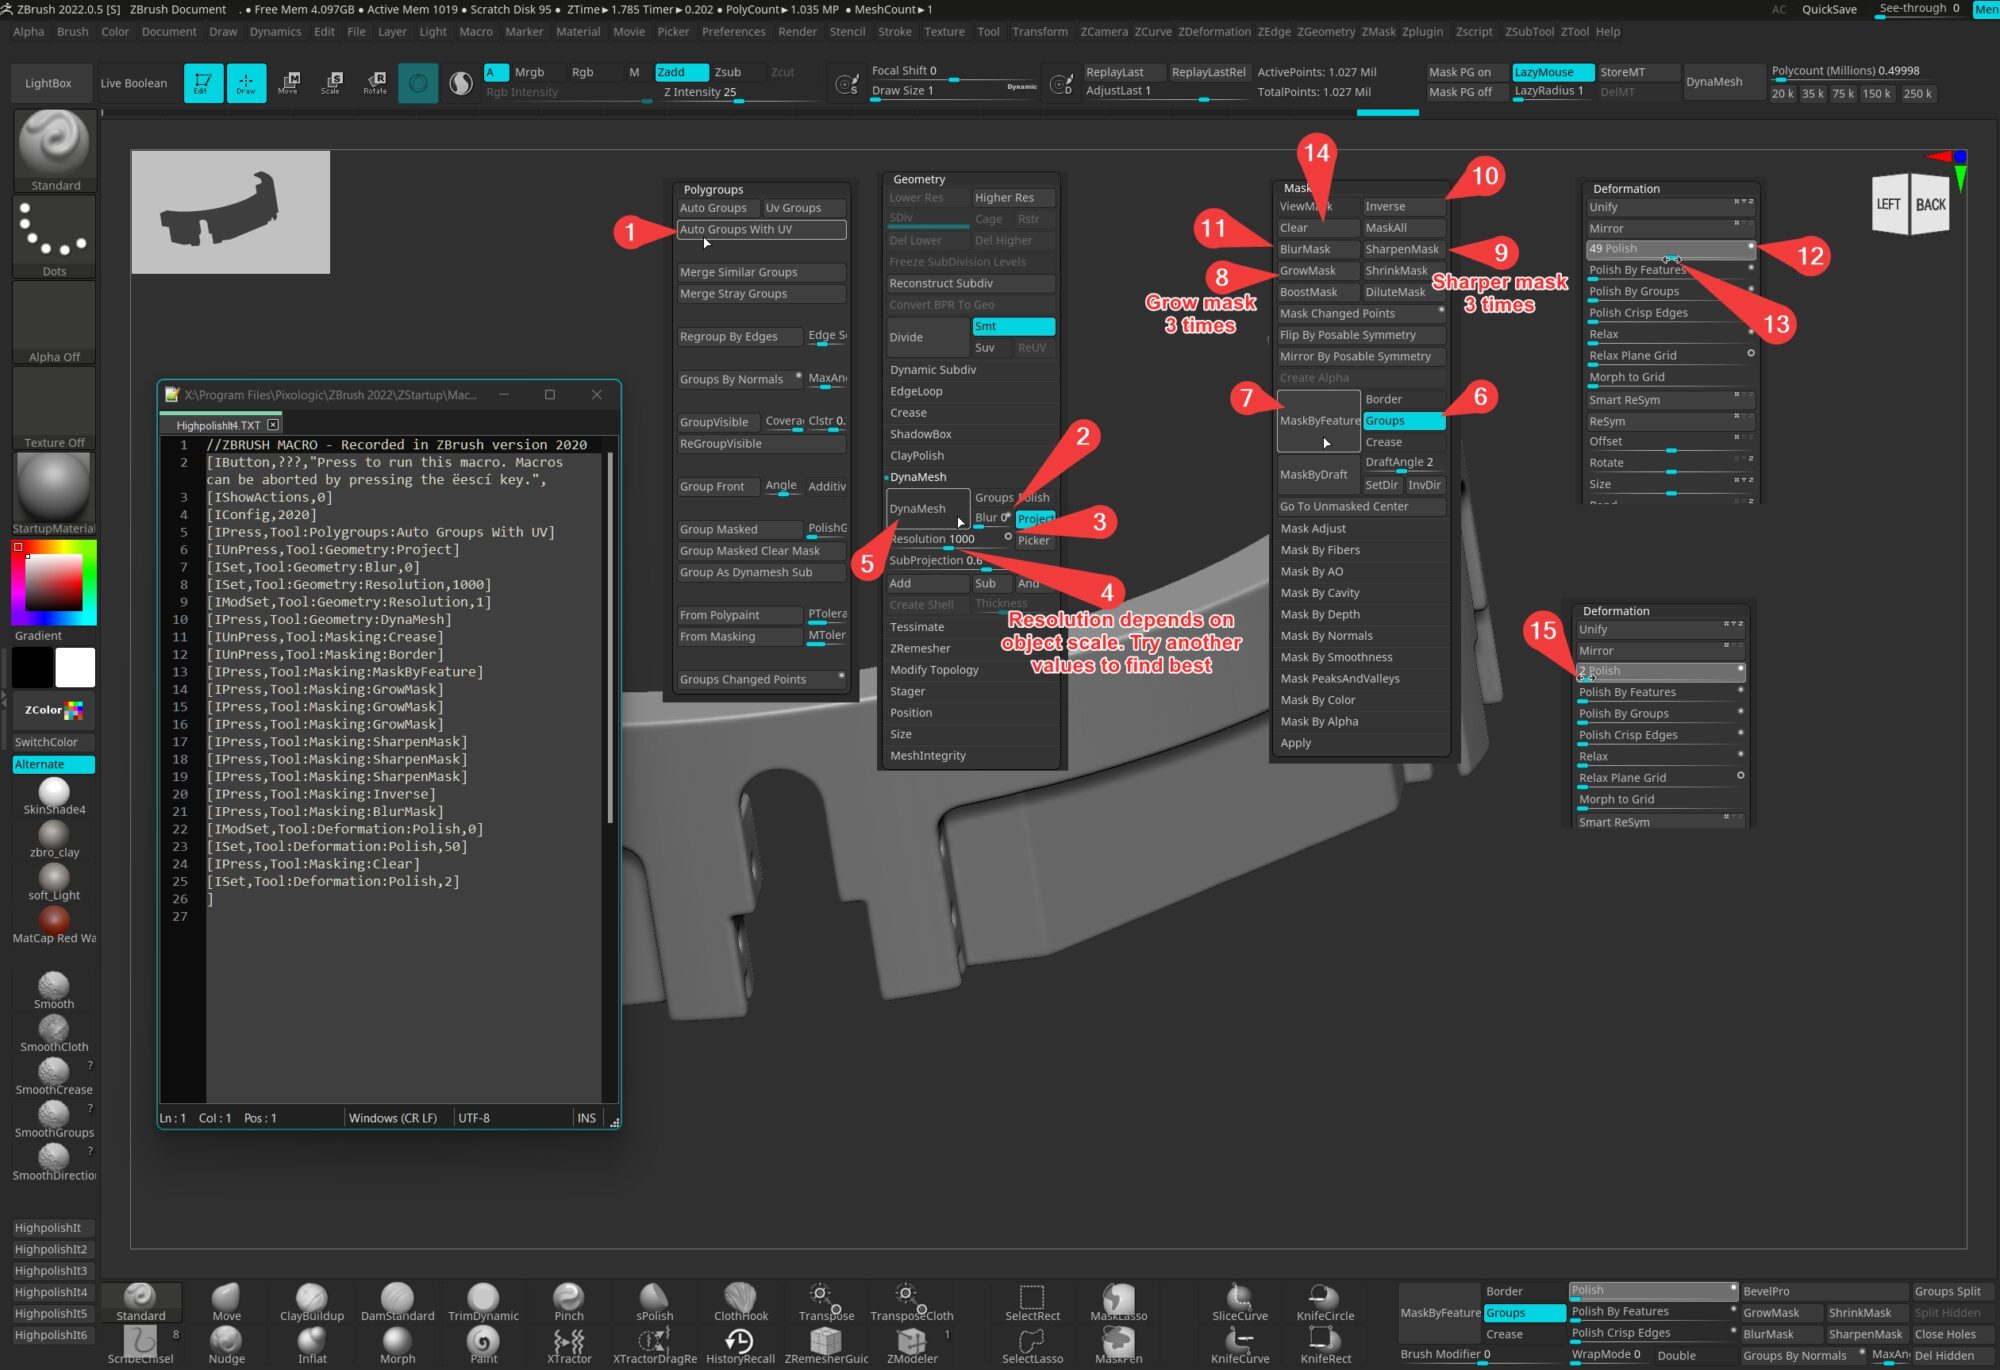
Export the resulting piece to ZBrush. For the next operation, I recorded several macros with different resolutions of Dynamesh. One-button magic can be seen in the video below:
Let’s see what it does.
- Auto Groups With UV. That’s why we cut UVs by the hard-edges.
- Dynamesh our subtool with disabled Blur and adaptive scale. The values can vary, for each mesh they can be different. I have 6 macros recorded, the difference between them is only in remesh resolution from 100 to 4000. Usually, I iterate over macros for the most acceptable result.
- MaskByFeature by Groups borders, Grow it 3 times, Sharpen 3 times, Inverse, Blur.
- In Polish pick the circle and use a value of about 50.
- Clear the mask and Polish again with a value of something like 2.
This way goes through all the meshes polishing the edges.
We will not look at sculpting separately, things like weld are done quite simply, just add three meshes at once, and after the Dynamesh they would be combined, then use a brush with weld alpha.
Before exporting from ZBrush, don’t forget to decimate. Usually values from 2 to 10% are enough for dense meshes with >1kk points.
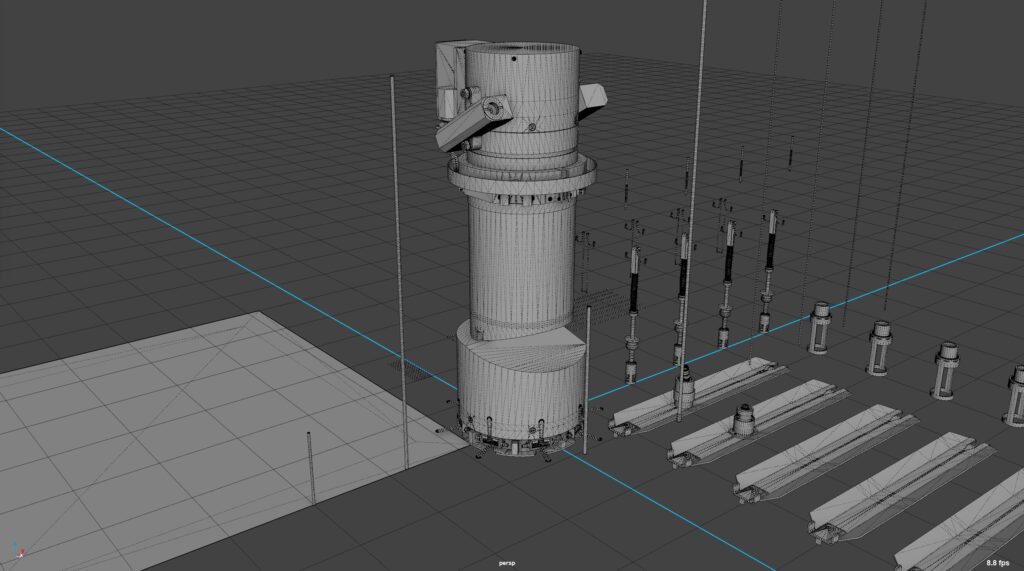
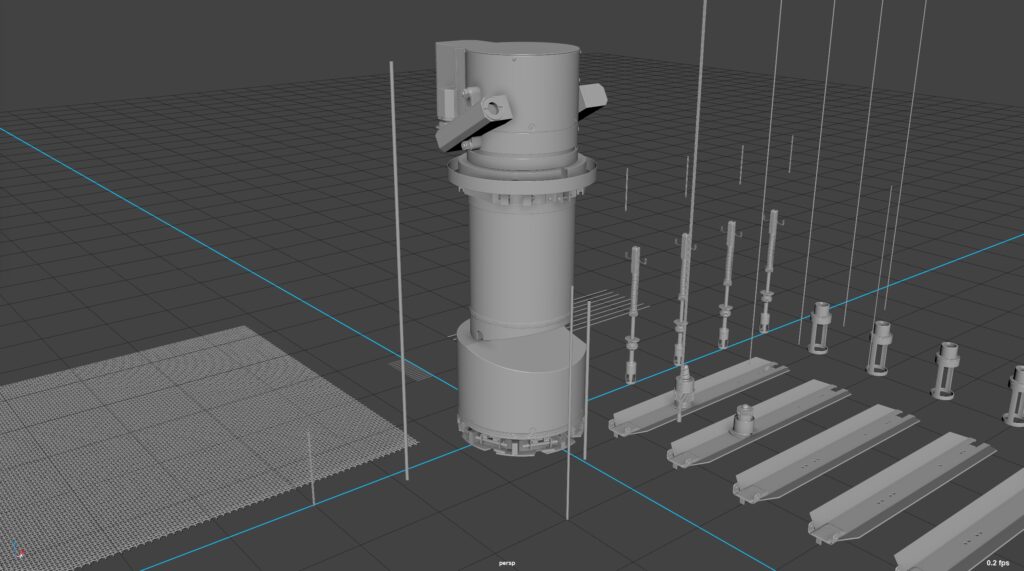
Lowpoly and Highpoly end results:
UV’s and bake
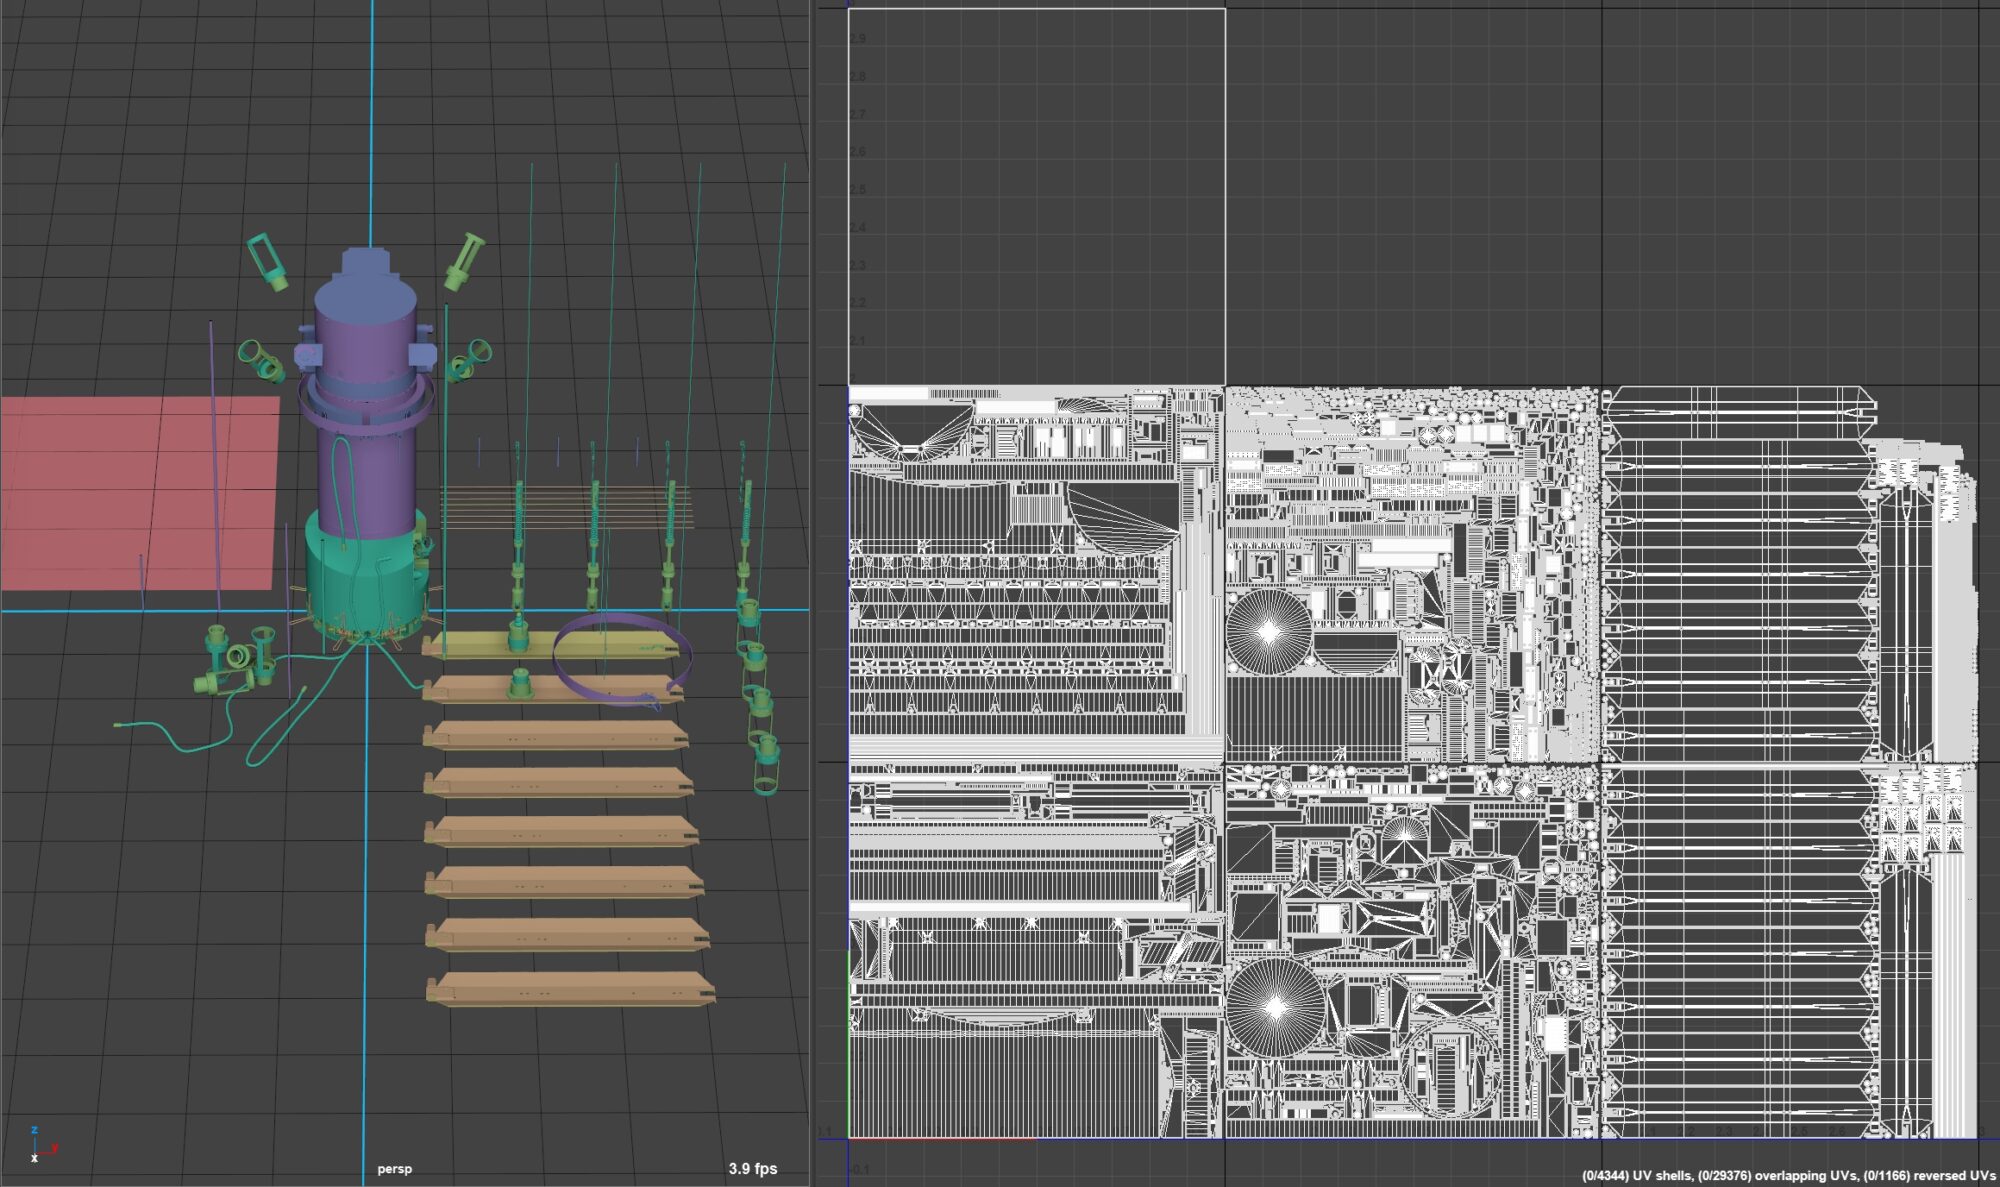
In this artwork, I decided to try the UDIM workflow. I managed to break it into 6 sets for the main mesh + 1 set for the translucent grid. Mapping was made in Maya and packed in RizomUV with target texel 40px by 1cm. Since I didn’t have any technical limitations, I mapped everything uniquely, except for the grid and some invisible parts. Rizom is great for quickly packing an object to UDIMs.
The bake is made in Marmoset; it doesn’t really differ from a regular bake, except that for UDIM you need to assign a unique material to each set and check Multiple Texture Sets checkbox in the baker’s settings. Don’t forget to transfer all UDIMs to 1001 tiles, and move overlaps to any nearby square before baking.
Texturing
Since my object is a disposable item, it makes sense that its state should not be very damaged or rusty. That’s why I pay attention to damage and chipping during transporting and installation while maintaining the overall look of brand-new.
The latest versions of the Substance Painter allow you to texture projects with UDIMs comfortably and quickly.
When you start texturing, a good starting point is to apply the base materials your asset is made from. Imagining in mind, try to break down the material composition of each element into layers. For example, painted metal consists of a metal base, primer, paint, dirt, and leaks. And rubber only consists of rubber and dirt. If you plan to use Smart Materials for textures, I advise you to turn off the dirt effects for each of these materials and use a single, physically correct, and a reasonable stack of dirt layers on top of the entire model. This always gives realism to the model and avoids excessive contamination.
The overall process of texturing is quite typical, but just take a look at the creation of the spray paint effect.
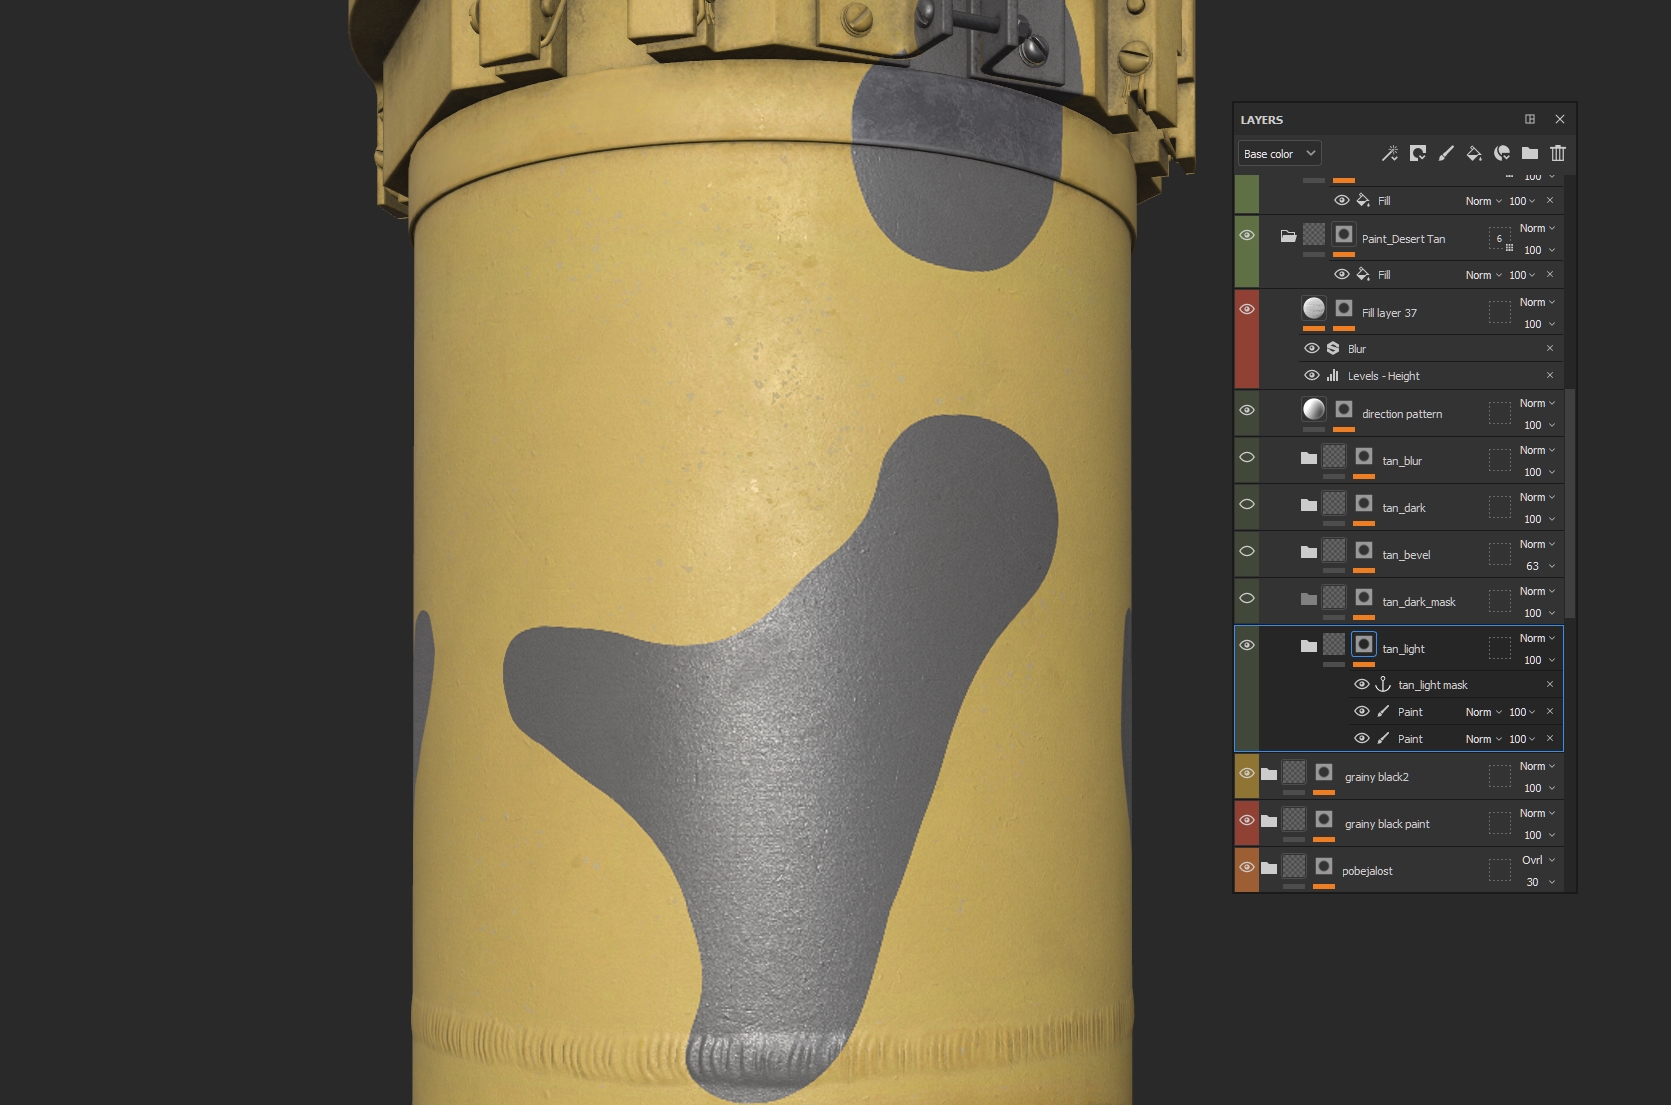
Start with basic paint, and use mixed procedural maps and grunges to achieve interesting material imperfections.

Draw a mask with camo spots. I’ve used references, but you can use generators similar to camo. Let’s leave the first anchor point here.
Using this anchor, we will make a separate mask – an assistant for camo spots, for example, apply bevel and levels, in order to smooth out sharp edges.
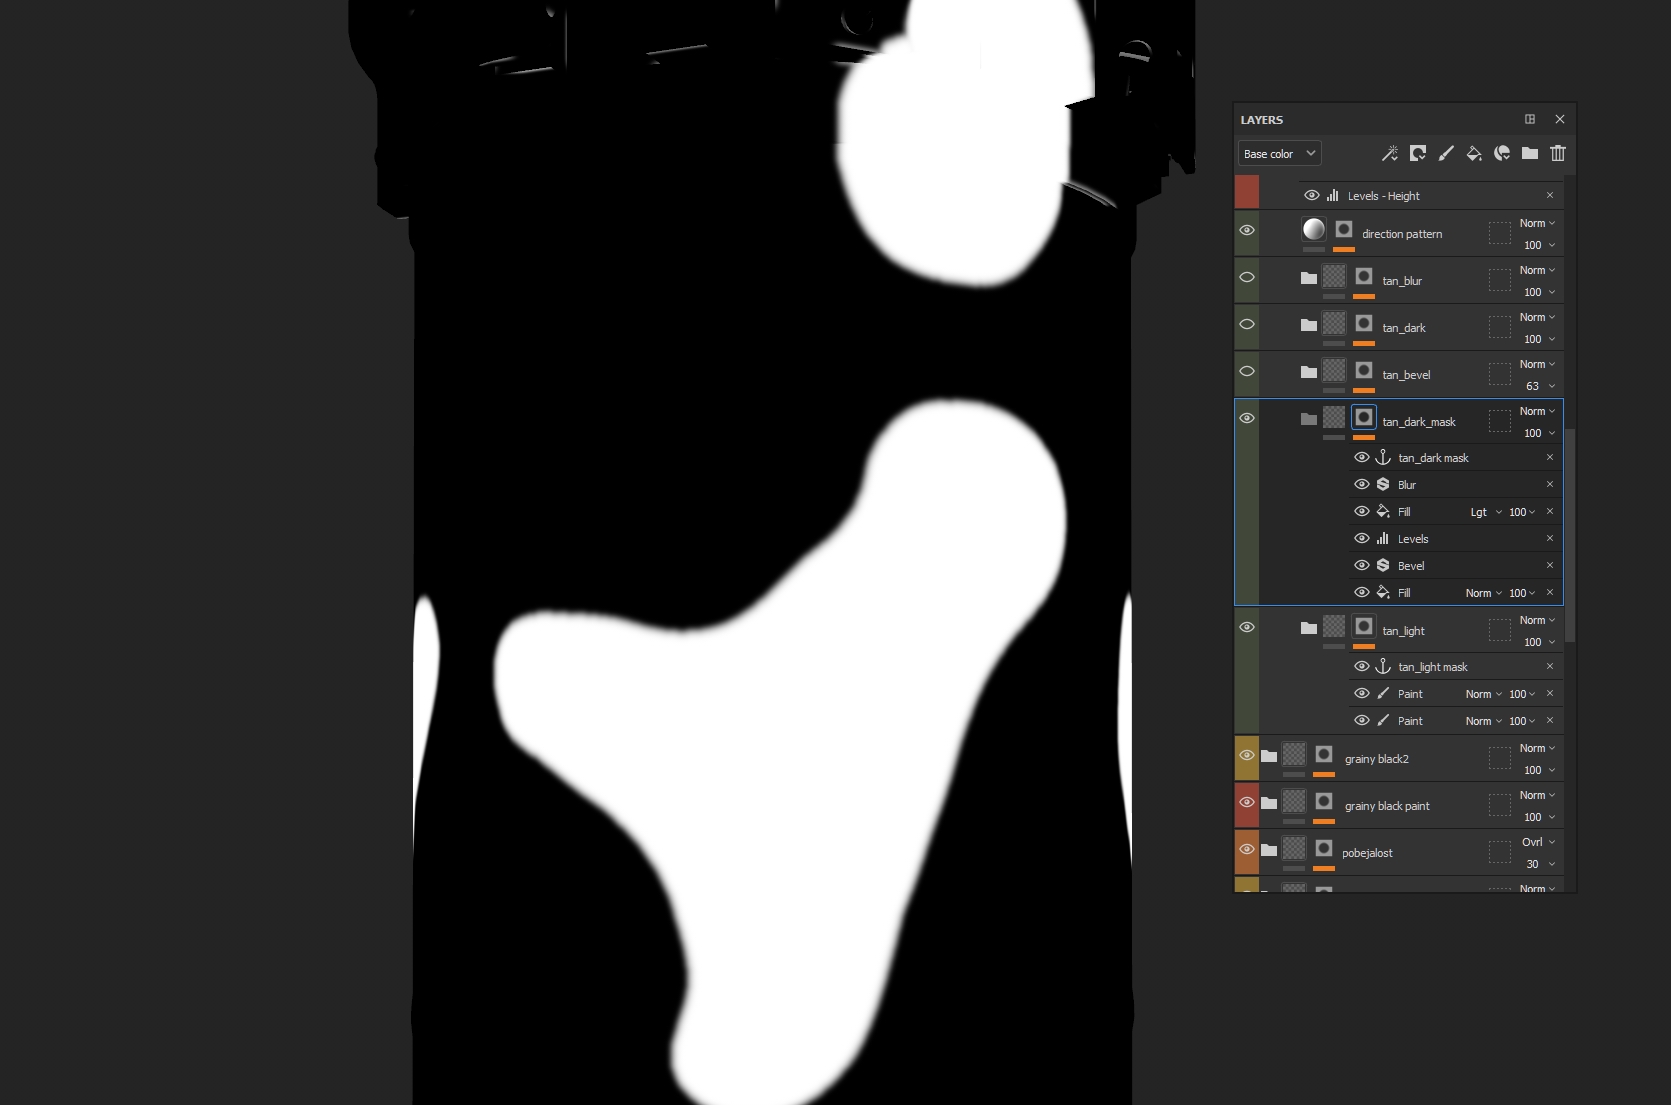
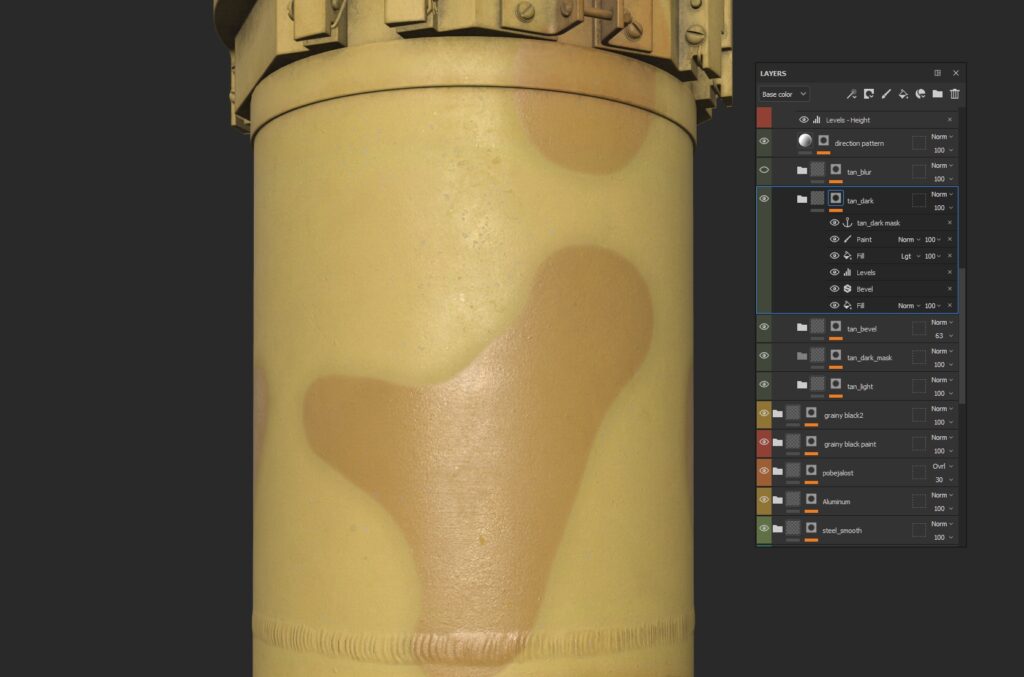
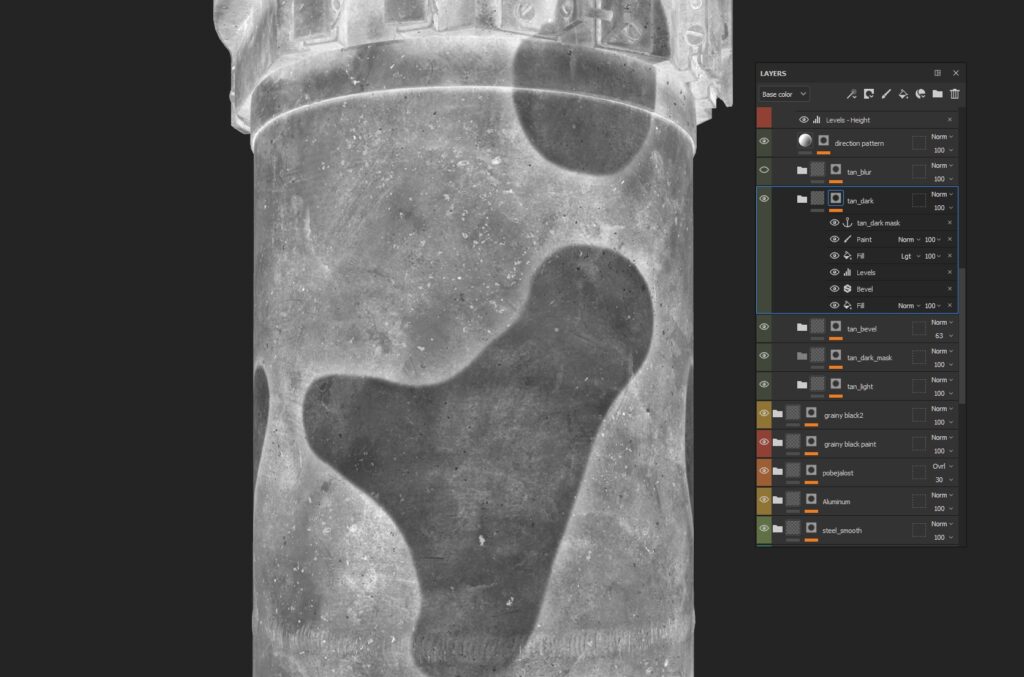
Now let’s make a cool dark transition. We add a mask to the folder with a fill layer that will darken our albedo and roughness. Turn dark spots’ anchor into a frame using Mask outline, levels, blur and subtraction of this anchor. Do not forget that at any time you can fix the mask with a paint layer.
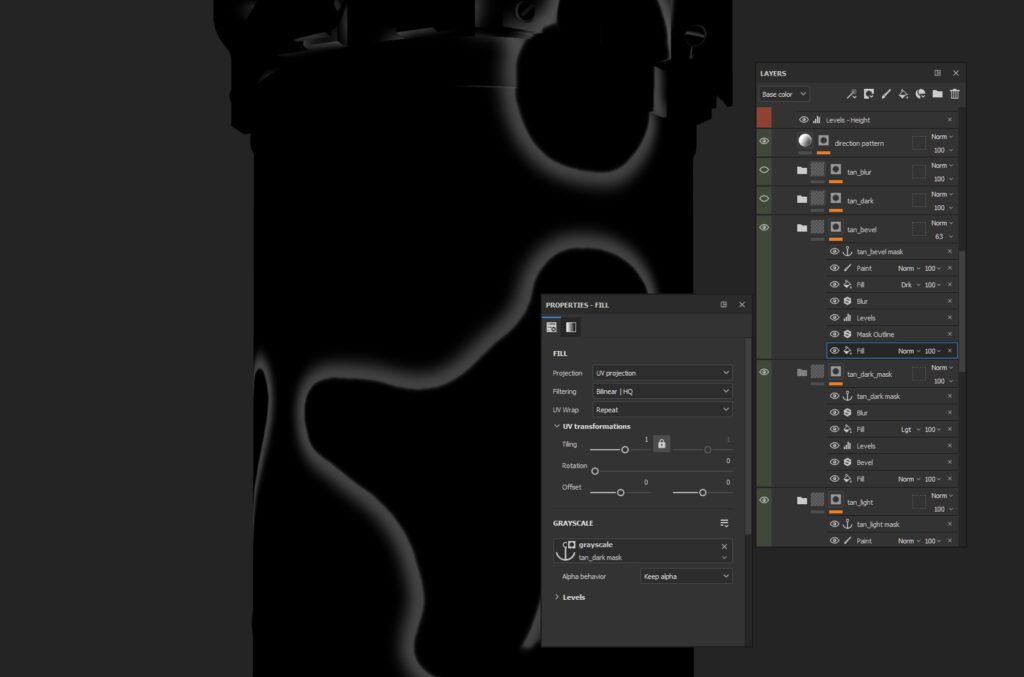
Now dark spots! Just copy the original material folder and randomize values in generators to change patterns. Color can be changed through an HSL perspective filter, and roughness can be inverted by levels.
Copy the folder with dark spots. This time we wouldn’t touch generators, but just make a mask of a very blurred edge, again through levels, blur and Mask outline.
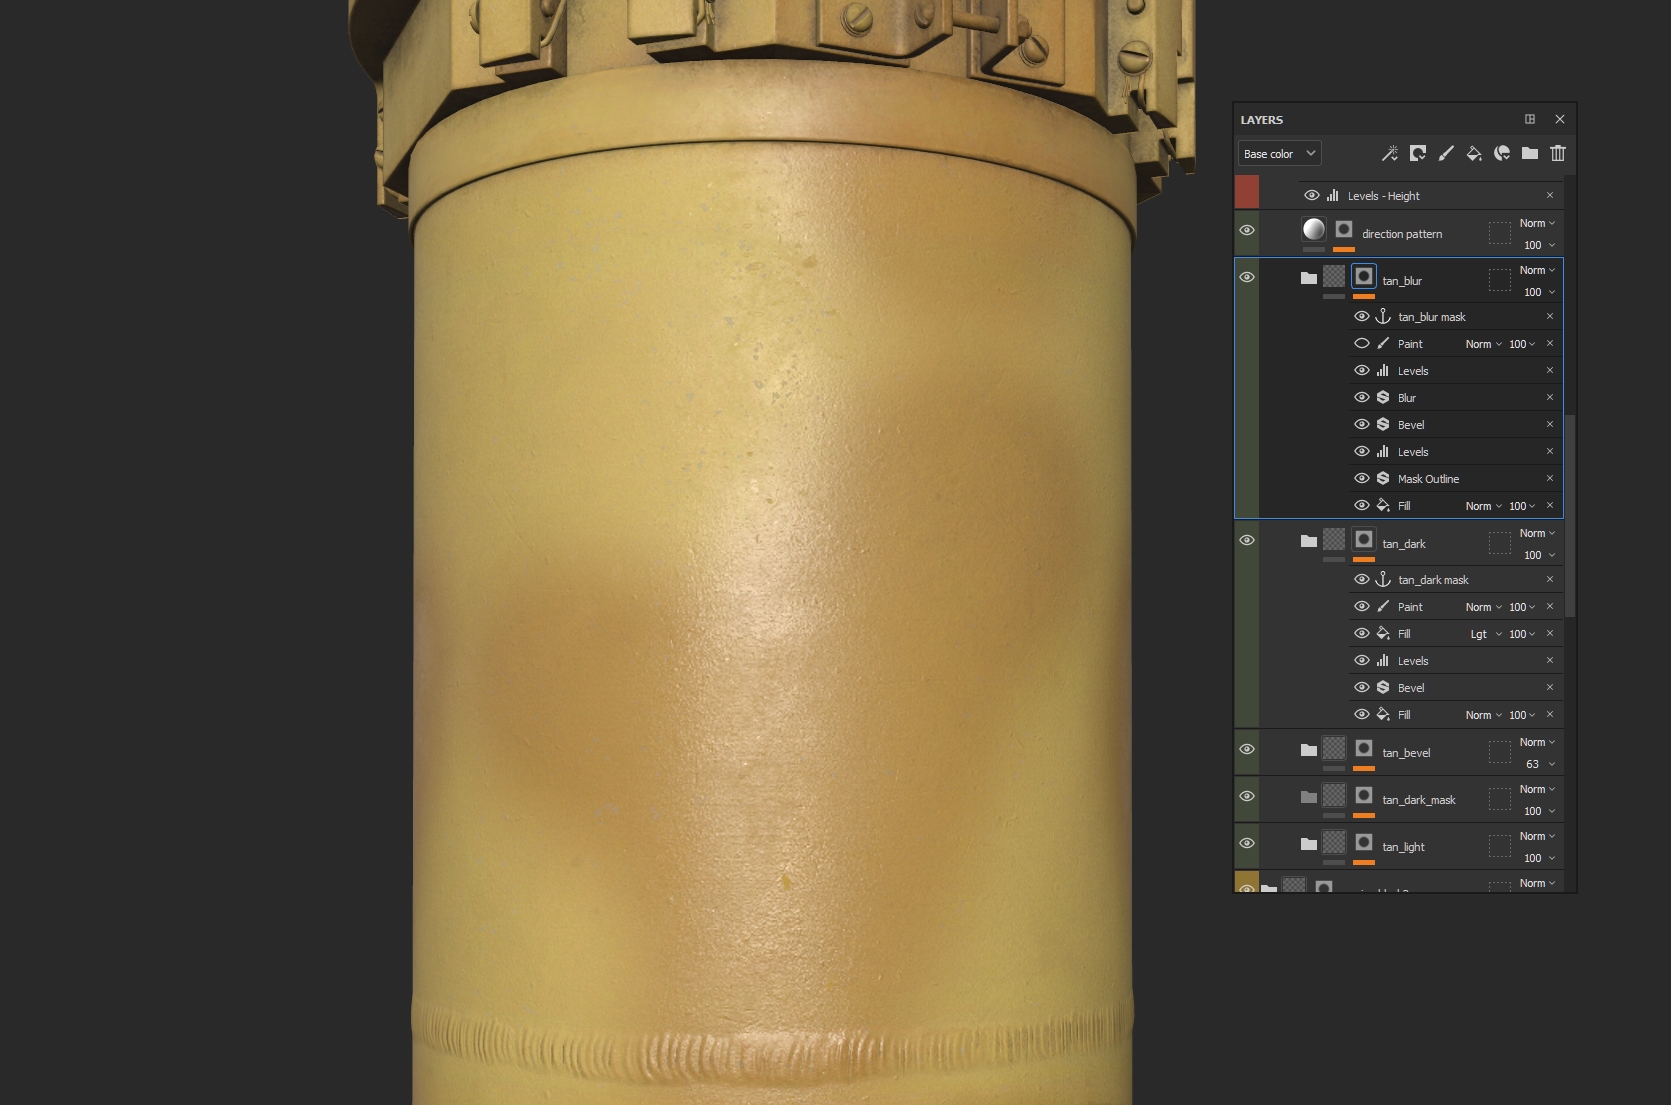
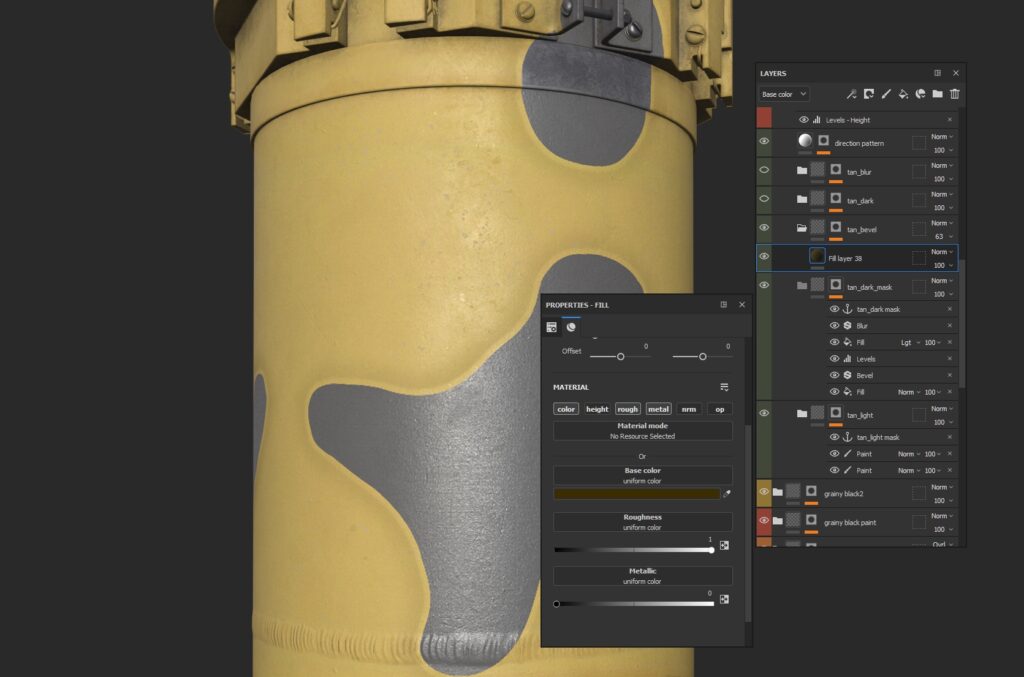
Drawing places where you want to keep the effect of smeared paint is quite simple. Create a paint layer, fill the entire mesh with black, and use Eraser to show places where needed.
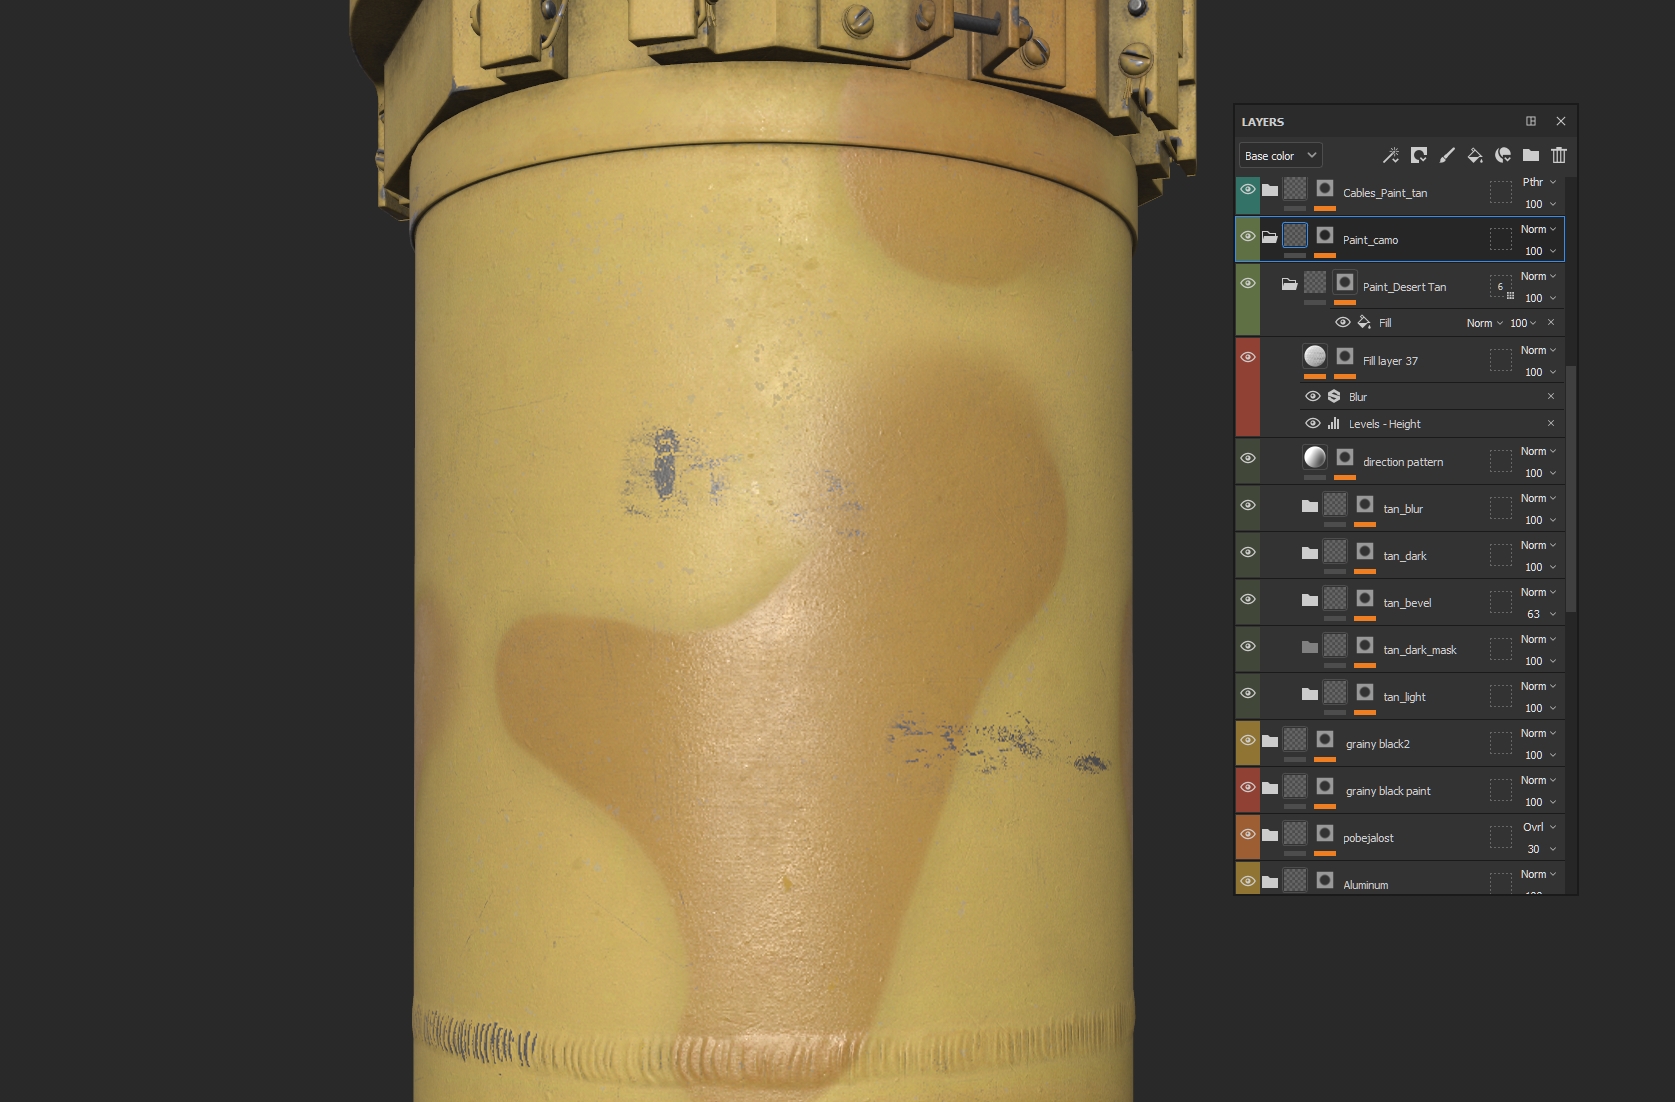
Spray paint is ready! Finally, we need to put it all in a folder and create a mask for the scratches and damage, so that the lower metal layers would appear.
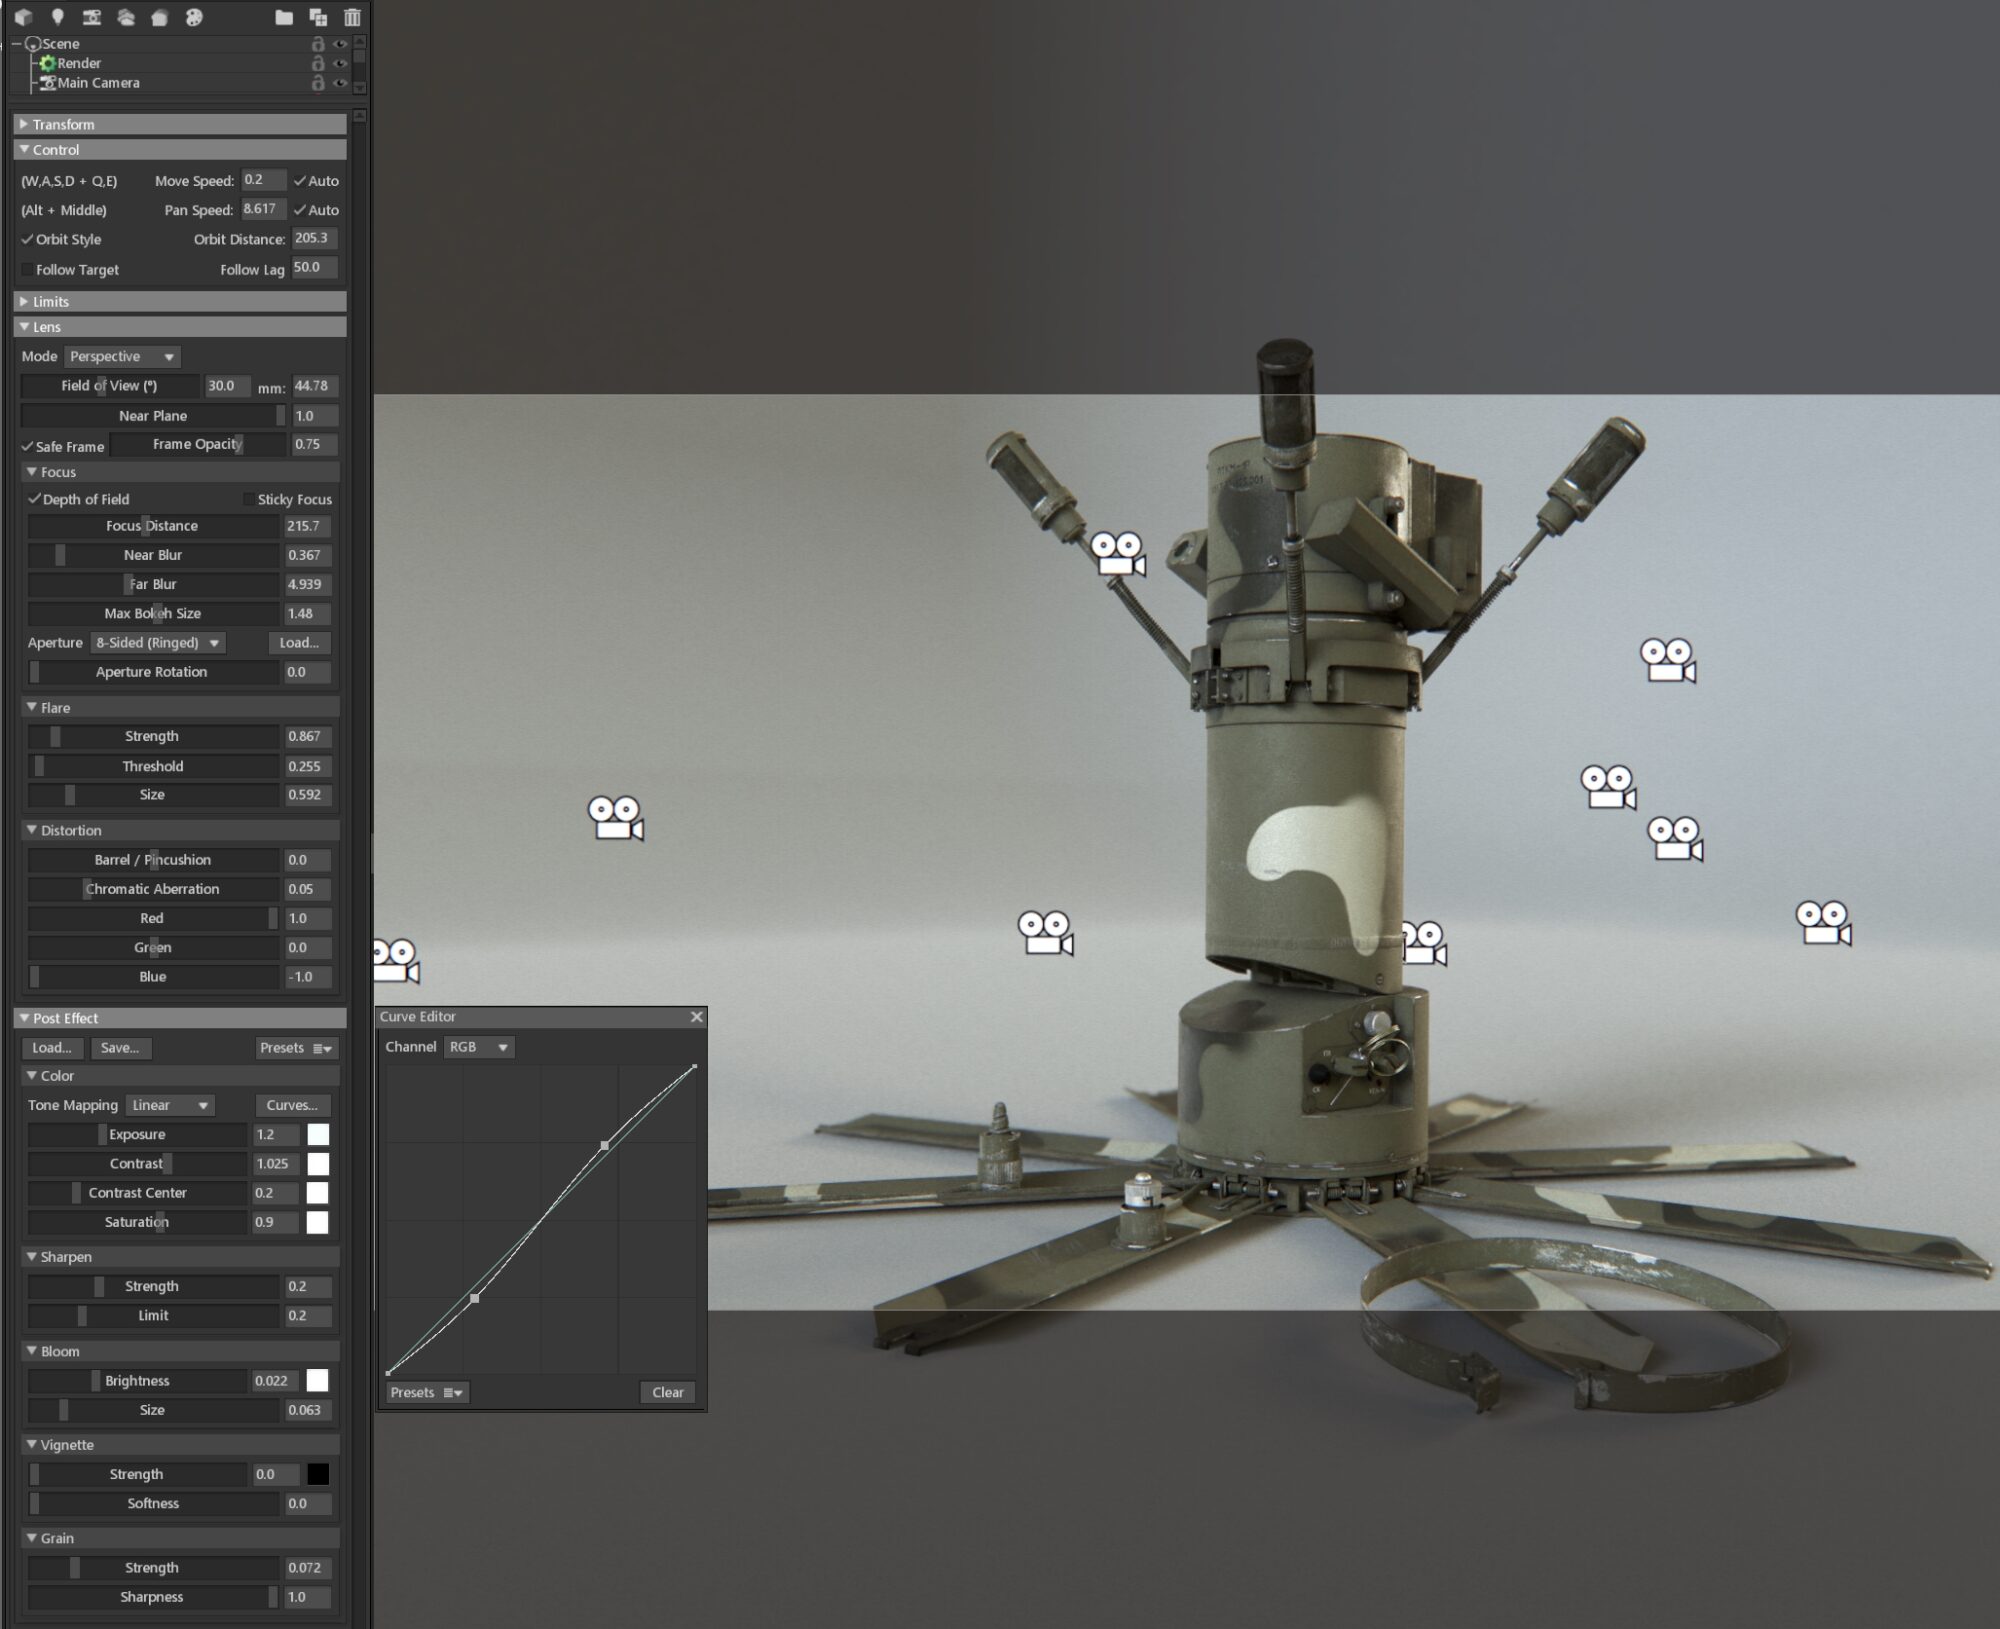
Render and presentation
I used Marmoset Toolbag 4 with ray-tracing for rendering all my shots. Vegetation and terrain for the forest shot were taken from the Megascans library.
I haven’t any specific advice on setting up the scene, lights, or camera. But you can get pretty good results just by using a good HDRI, and a pair of lights for highlights. Just try not to overdo it with sharpening, chromatic aberration, and bloom.
After creating enough shots, I recommend correcting them in Lightroom, simply using YouTube tutorials about processing real photos!
Conclusion
In conclusion, I would like to advise you not to limit the number of polygons and textures when creating personal artworks. Just create amazing works, and leave the limitations of production to production.
Huge thanks to my friends for their feedback, and support, as well as the Games Artist team for the opportunity to share this breakdown.
See you at Artstation and gamesartist.co.uk!
Read more articles
You might also like these articles.