
Introduction
Rakan Khamash is a self-taught 3D artist with over 12 years of VFX experience. Rakan’s artistic and technical expertise have propelled him to succeed in creating high-quality 3D models for games, cinematics, and more.
I had the opportunity to work on fun projects, including Overwatch, Diablo, and World of Warcraft. Currently, I am enjoying my role as Lead Character Artist at Player First Games/WB Games.
Goals
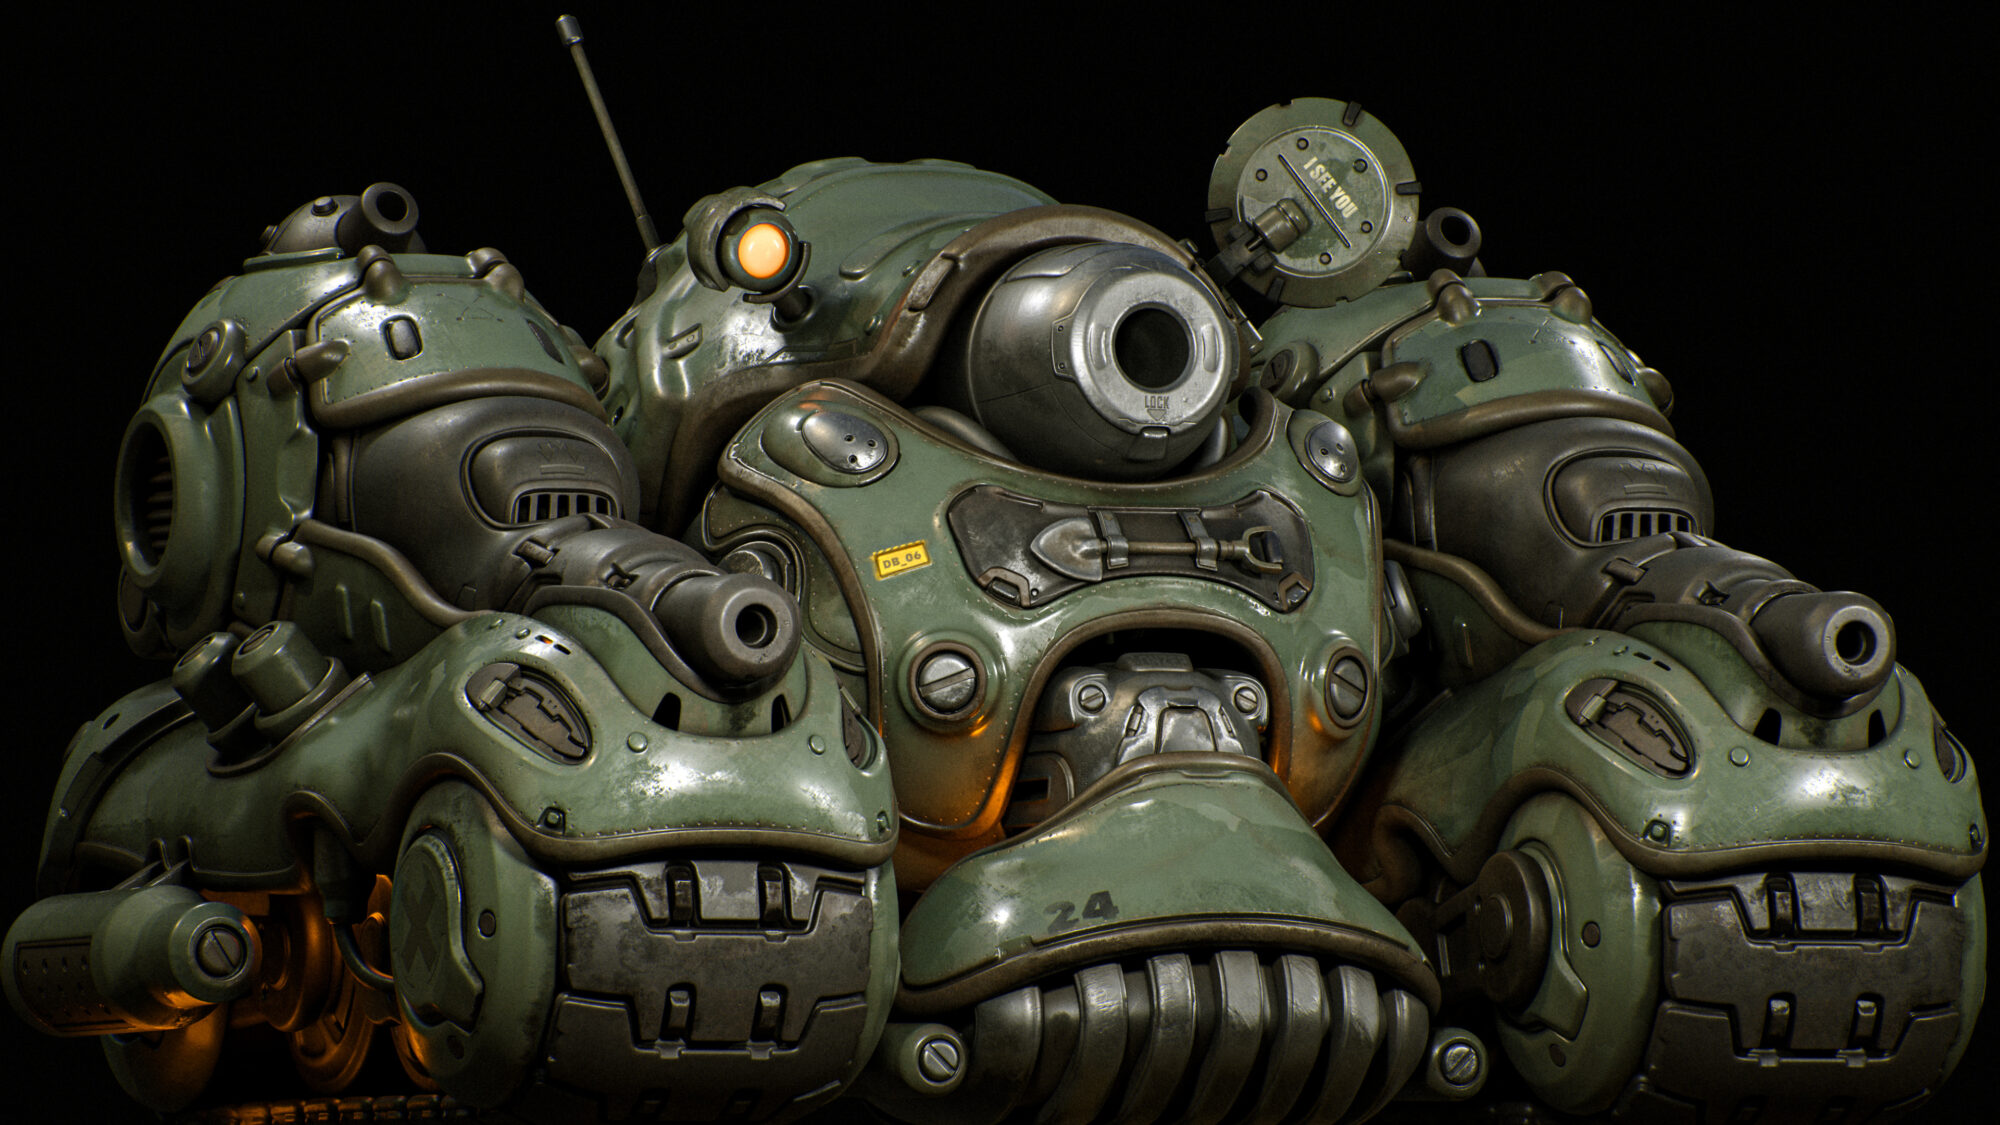
This tank was a great test for me to learn ZModeler and create a full Sub-D model with clean topology using only ZBrush.
After watching a lot of videos and streams of artists using ZModeler, I thought it was about time to dig in and see if it was something I wanted to add to my modeling tools.

Tools
ZBrush, Maya, Substance Painter, RizomUV, Photoshop & After Effects.
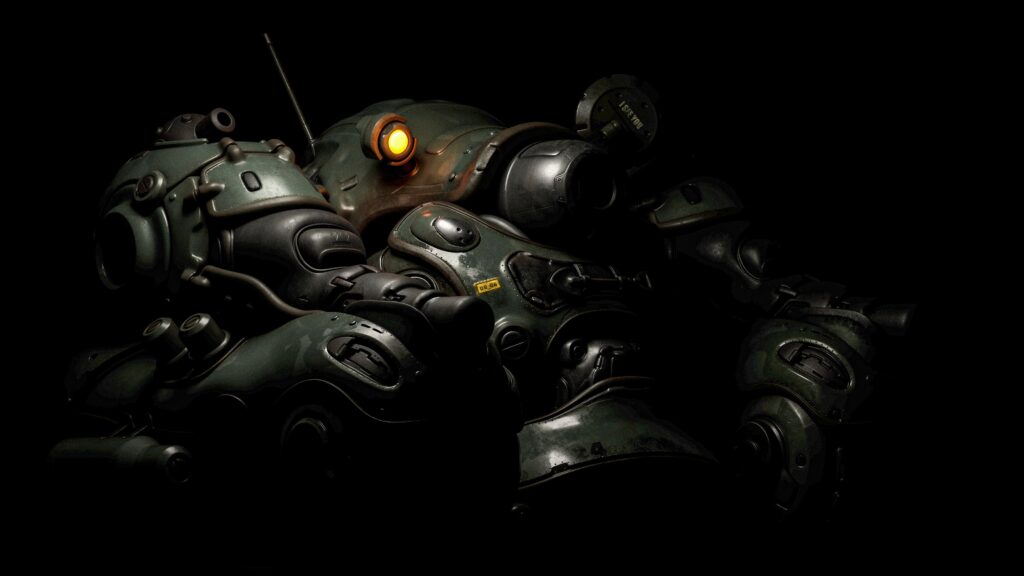
References & Inspiration
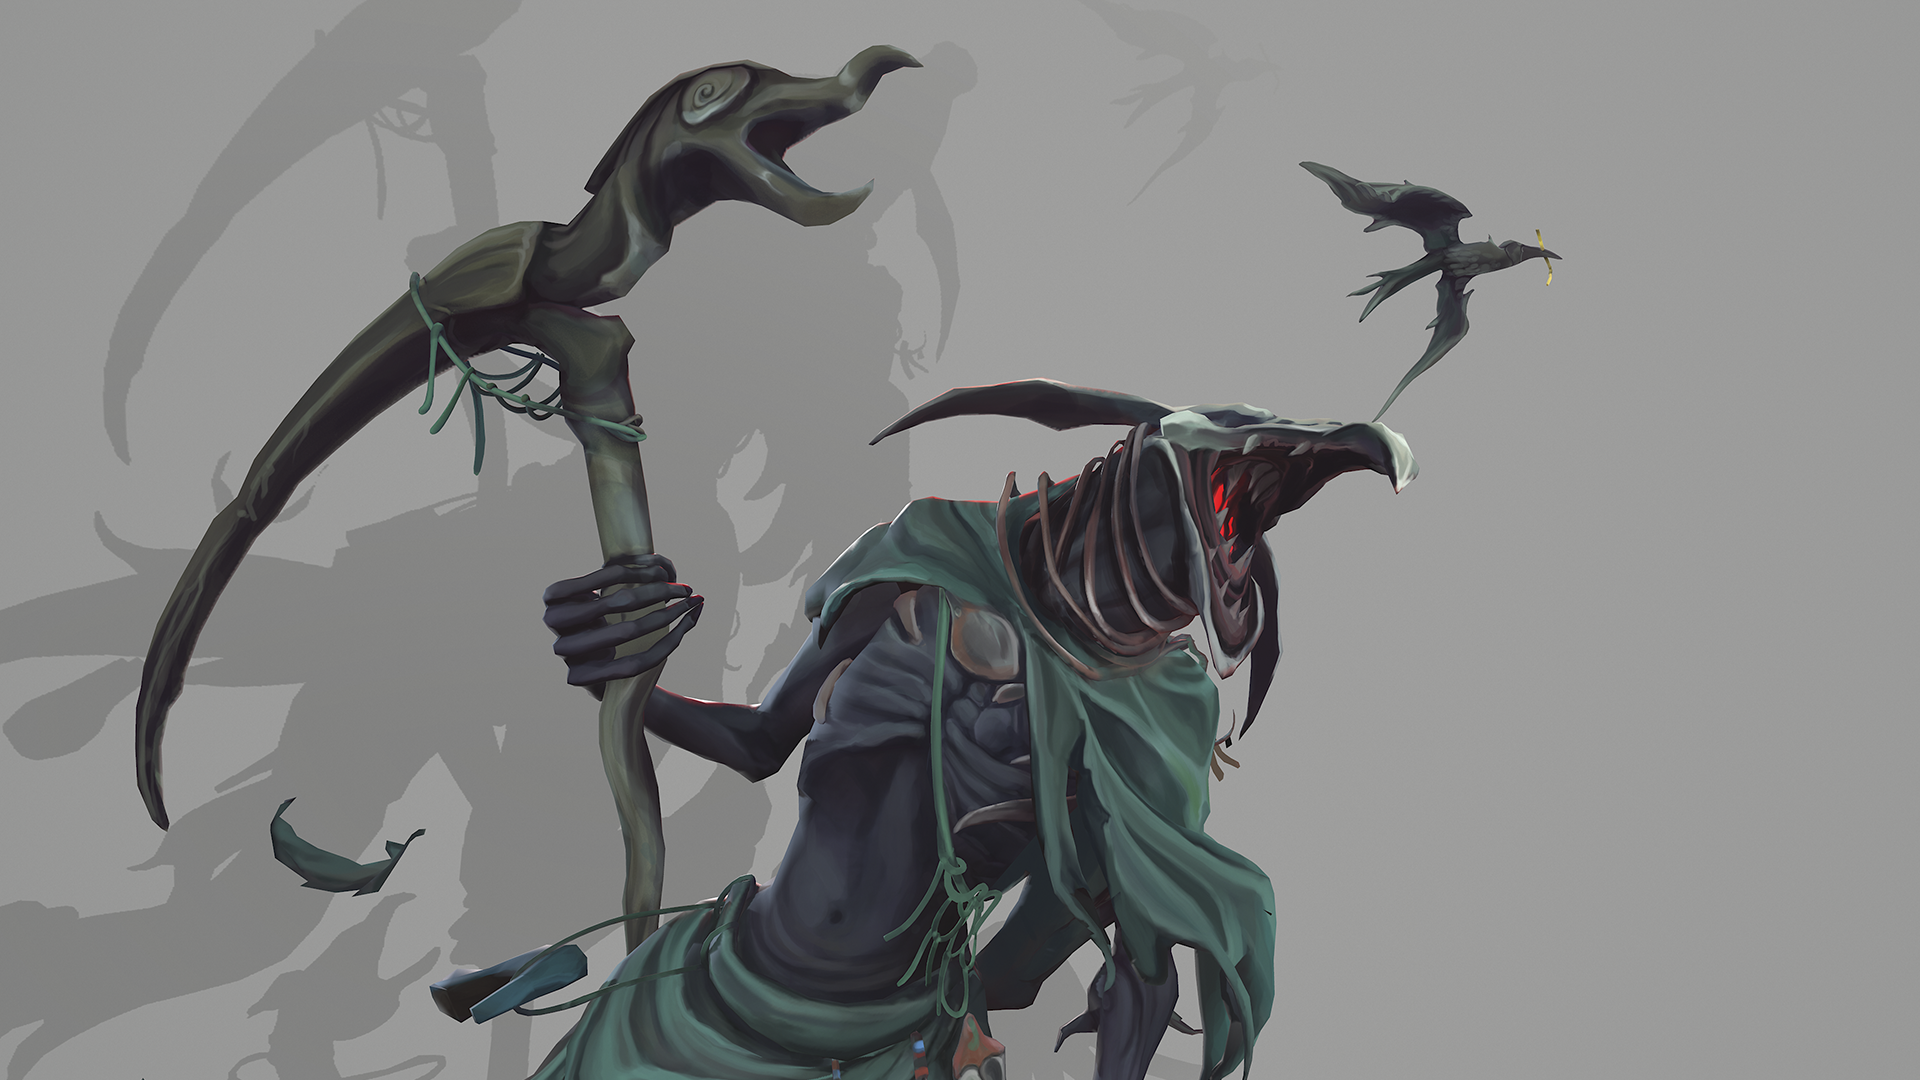
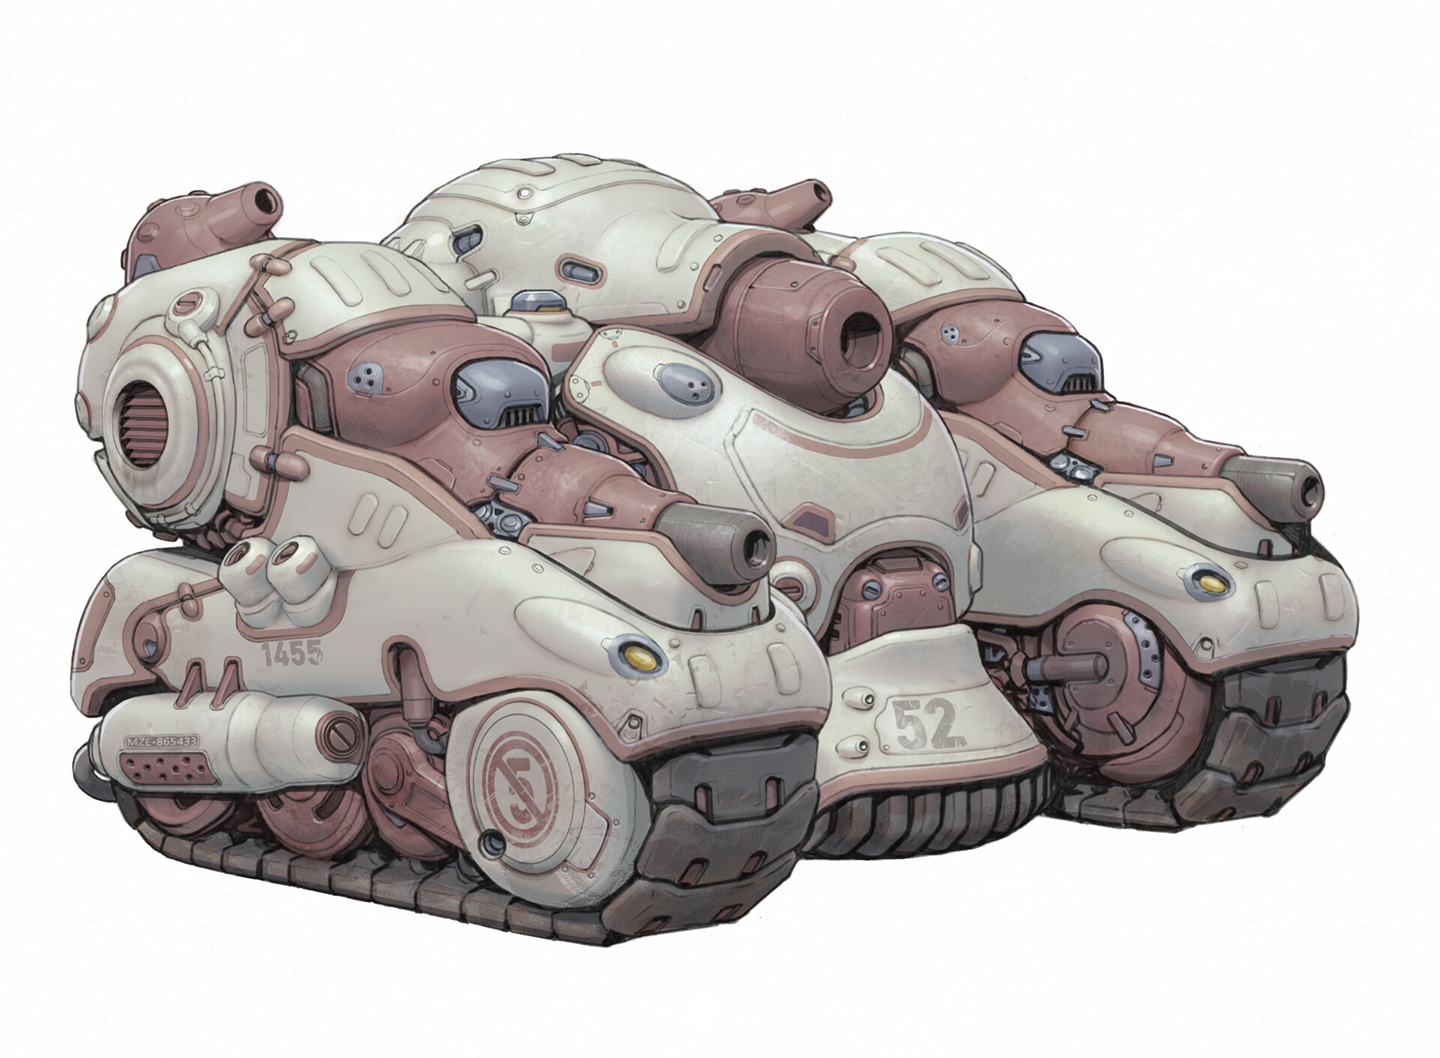
The amazing 2D concept by Manuel (Du) Pong immediately caught my eye. I thought it would be a great concept to push me to test out new tools.
I also wanted to add some elements and fully design the backside, making it a nice mini-challenge.
My approach
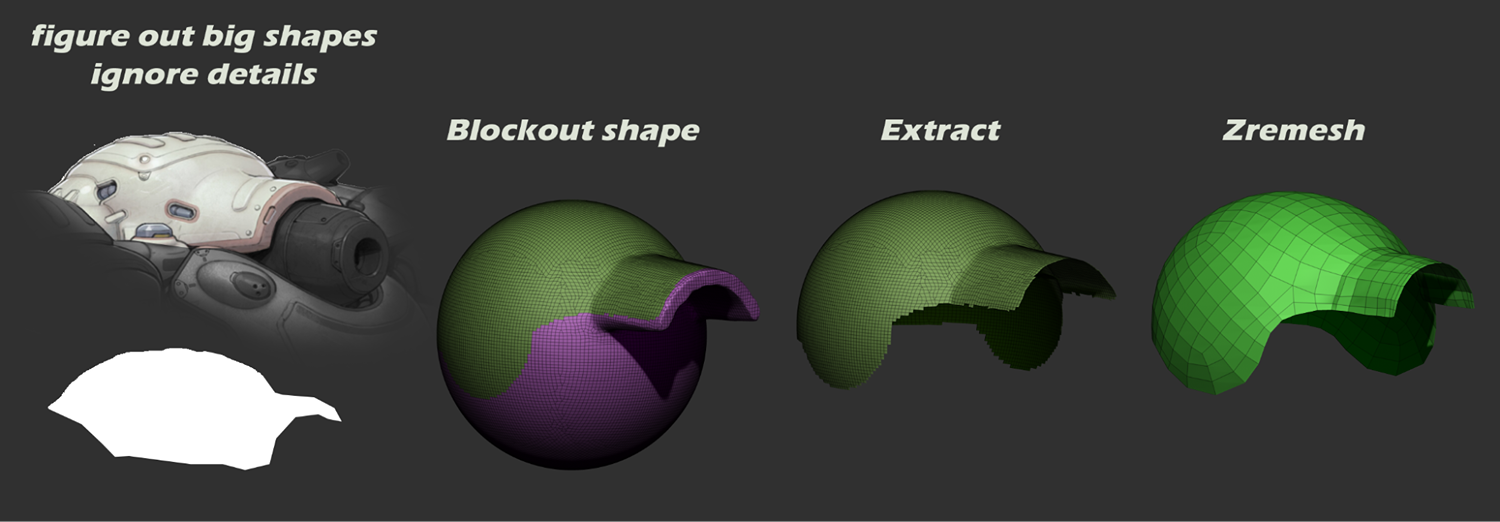
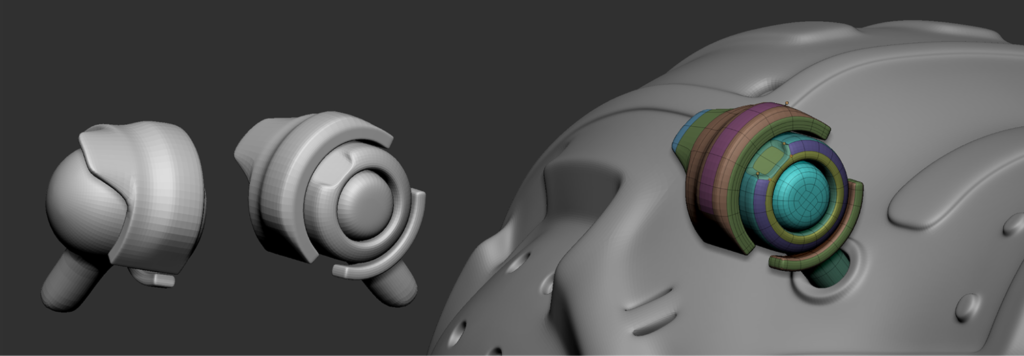
My approach was to keep things simple and quick. I started with primitive shapes and then used Dynamesh with a low value. The Move brush was used to block out shapes, masking out areas I wanted to keep and giving them new polygroups. After that, I ZRemeshed with a low value to get the base shape in a good spot for modeling extra parts or details.
I isolated and simplified parts as I worked. While everything initially looked complicated, tackling it as smaller tasks made it easier to approach.
Starting from a sphere, I aimed to extract and ZRemesh shapes quickly, creating a strong starting point. That’s the power of ZBrush.
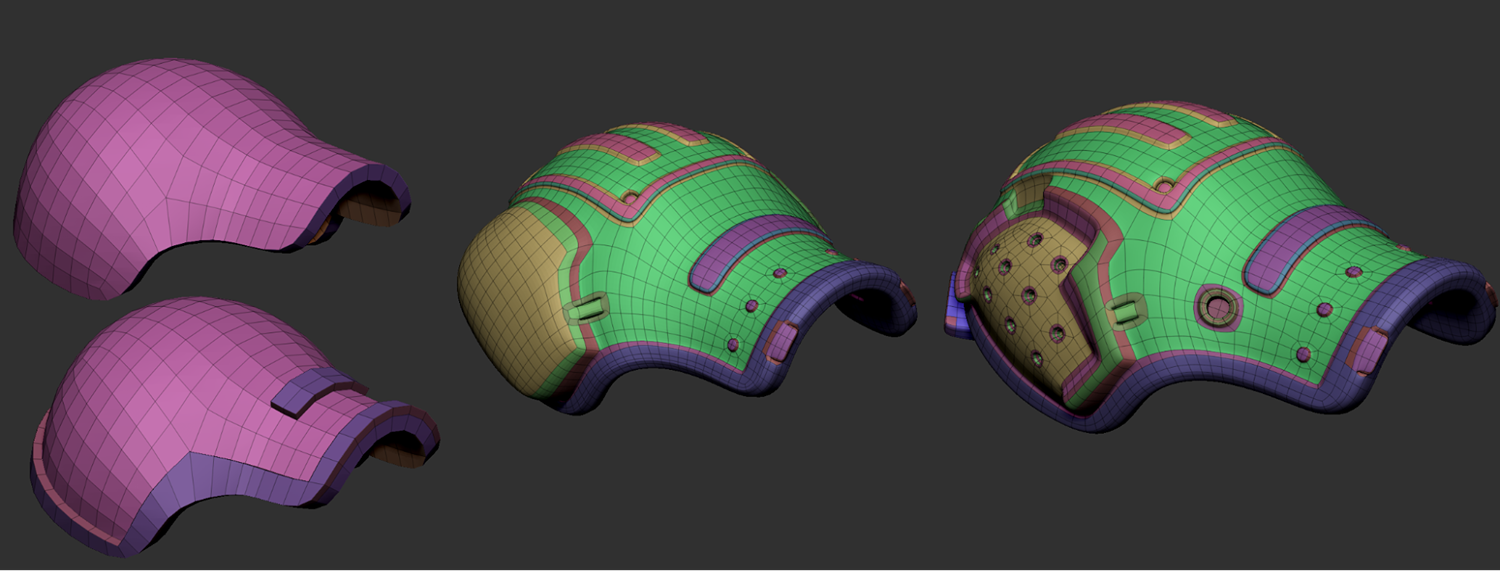
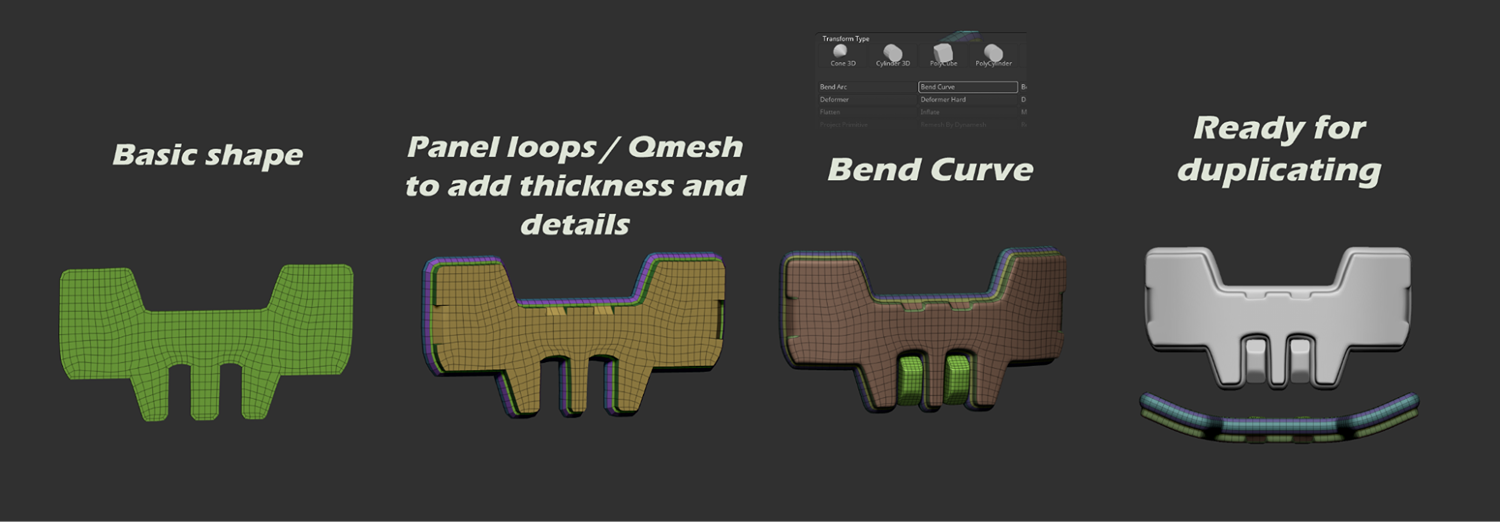
After modeling a few parts, I found this workflow to be the most enjoyable and effective:
- Panel Loop for thickness (0 loops, 0 polish) to get a clean shell.
- QMesh with different targets (island/polygroup border/inner/single face) to add detail.
- Inset to add support loops and provide depth to flat faces.
Optimizing workflows
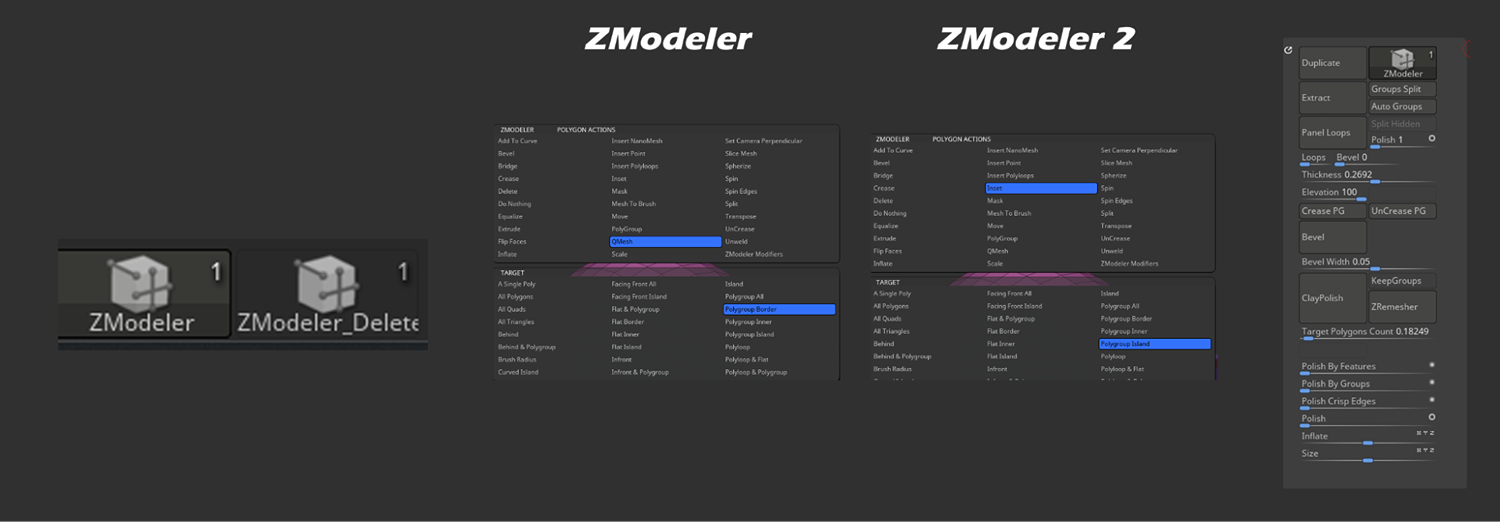
After a few days, I noticed I was using repetitive tools. Unfortunately, ZModeler tools can’t be hotkeyed directly. My workaround was duplicating ZModeler brushes and saving selections for each. For example:
- ZModeler Brush 1: Face = QMesh, Edge = Insert, Vertex = Split.
- ZModeler Brush 2: Face = Inset, Edge = Delete, Vertex = Slide.
You can create as many brushes as needed, save them, and assign hotkeys (mine were ALT 1-2). This made my modeling speed 10x faster. Another quick tip: make your own custom palette.
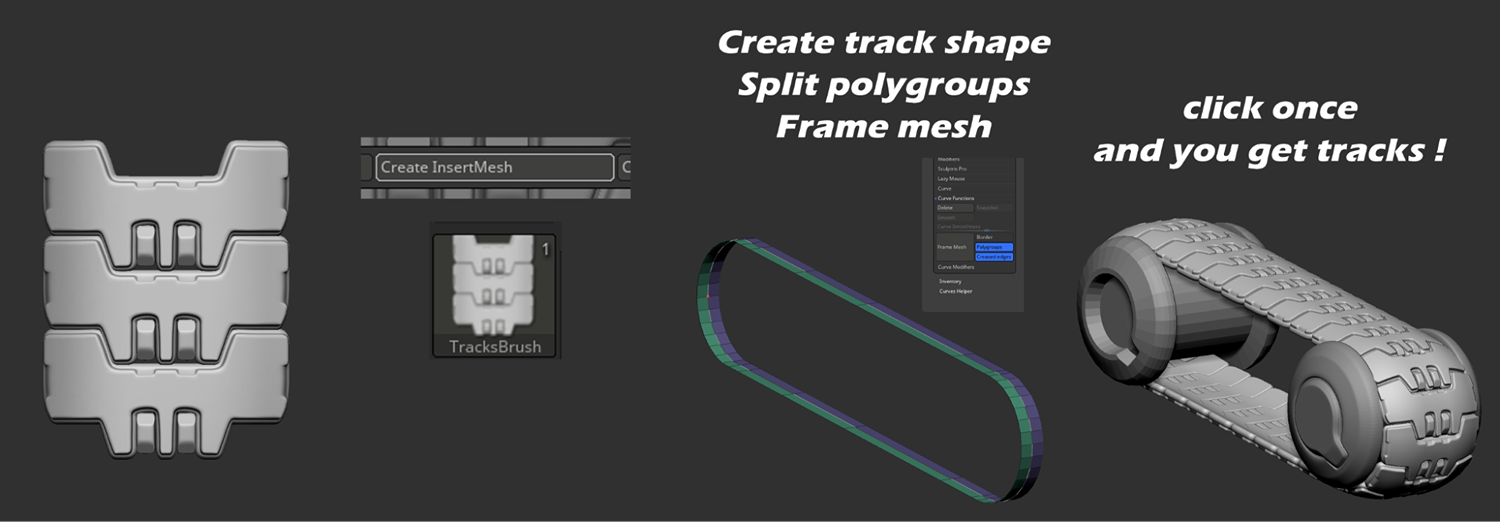
Working on the tracks
For the tracks, I used the Frame Mesh trick. Essentially, I created an insert brush with the track shape. Using Panel Loops, I added thickness. Then, with QMesh from ZModeler, I started pulling Polypaint islands to see what looked good.
Adding small bevels and details here and there, I was ready to duplicate.
To align the tracks precisely, I created simple geometry by bridging between two cylinders. Adding a cut in the middle split the polygroups into two sections.
This intersection framed the mesh selection, allowing me to add tracks with the insert brush. When framing the mesh, ensure the Border option is off.
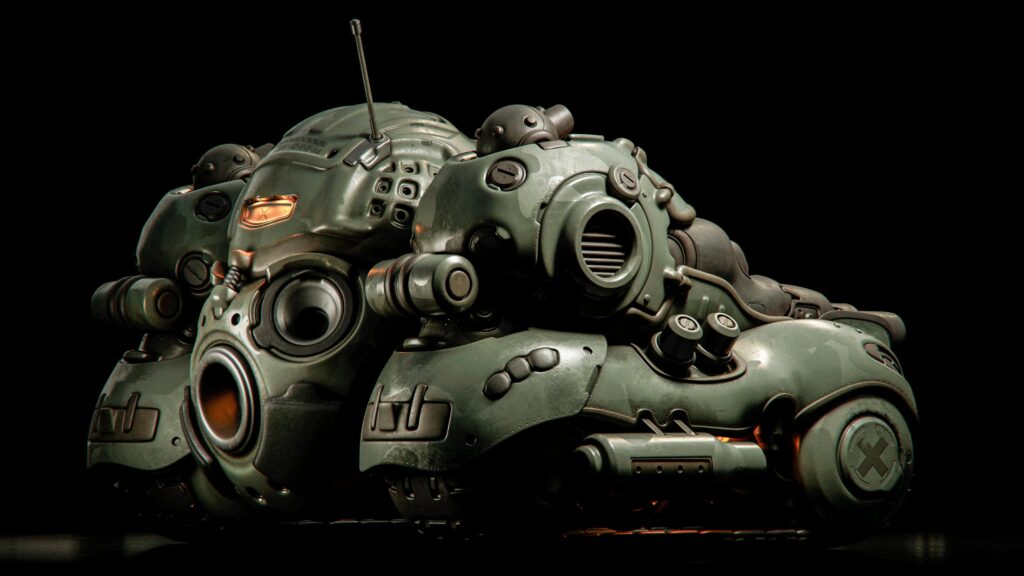
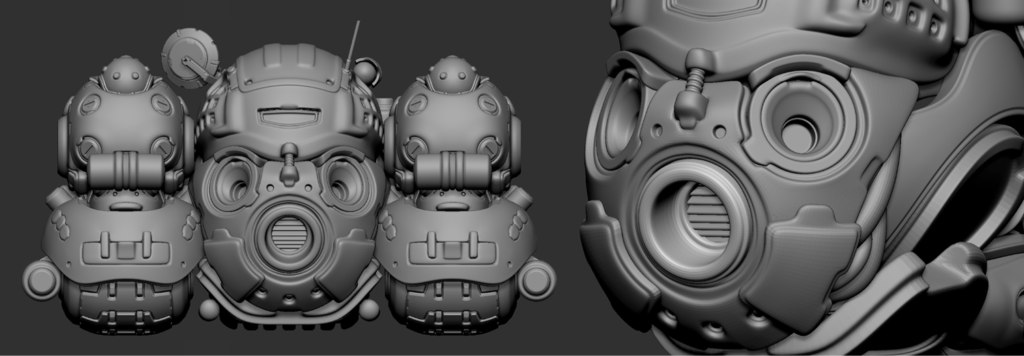
Designing the back of the tank
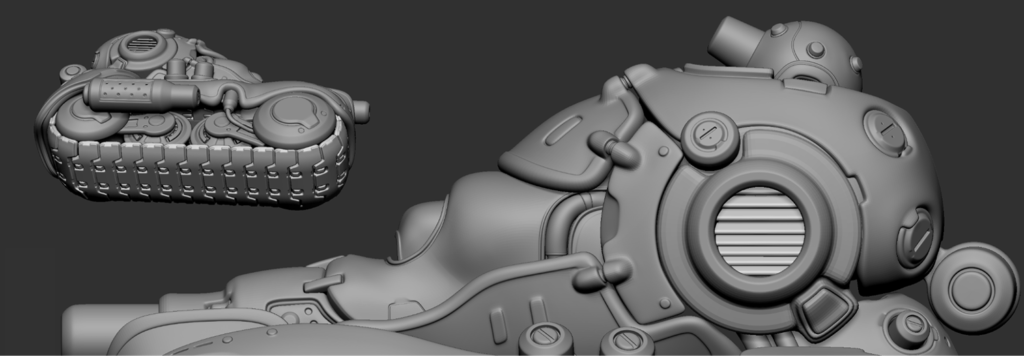
The back of the tank was a fun challenge because the reference only showed the front. The style and language of the shapes needed to match the rest of the tank.
I also wanted to see how far I could push it without making it feel too noisy or busy.
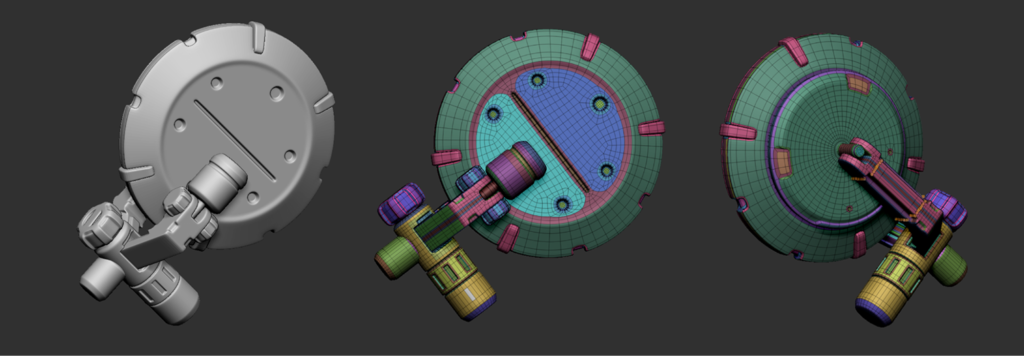
Splitting texture groups and adding details
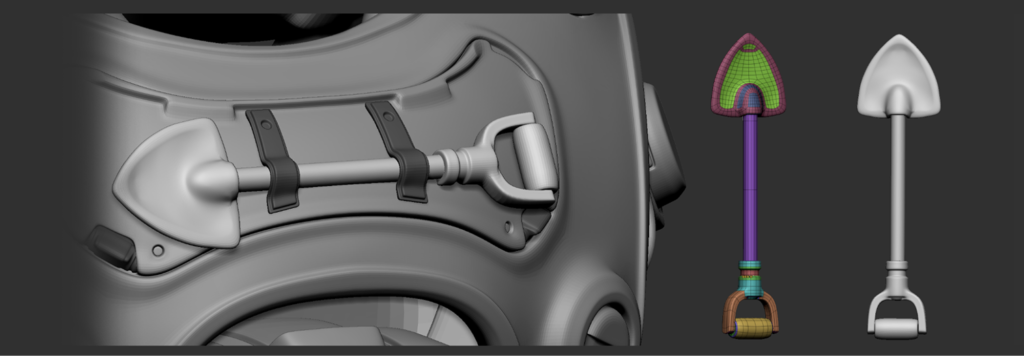
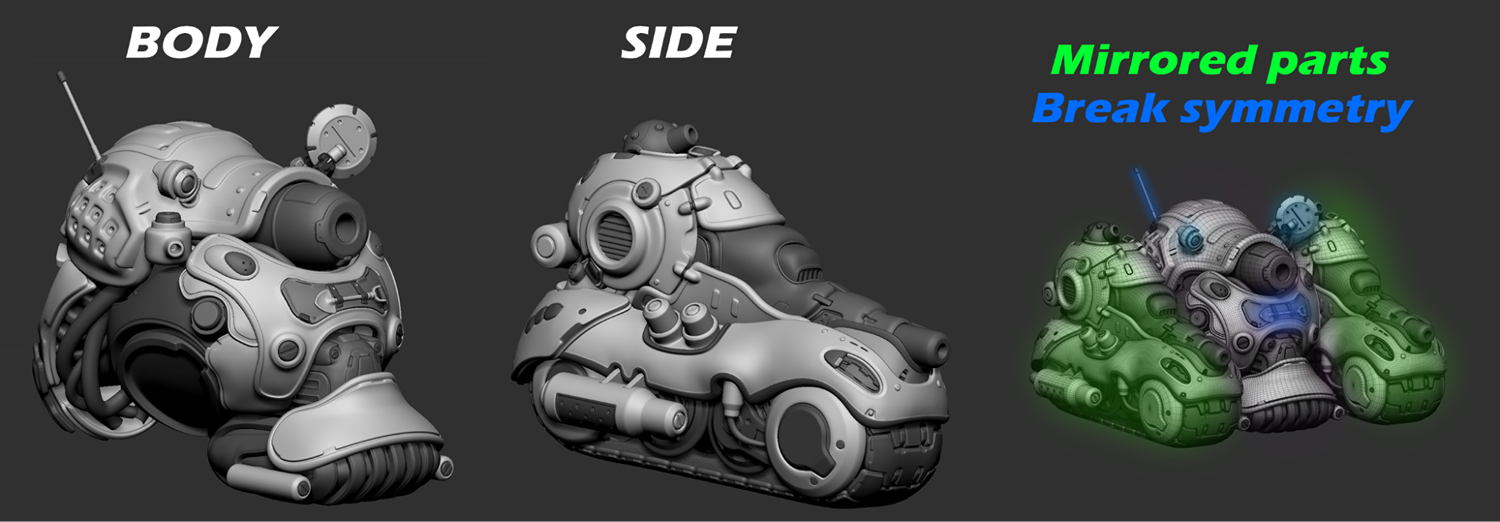
To split the texture groups and details, I decided the middle part would use one texture set while the sides used another. I also aimed to break the visual symmetry by adding random parts, like a radar, antenna, and shovel, to create a tactical military feel.
The key when adding extra parts is to ensure they follow the design style and language, so they don’t break the flow.
Finalizing the project
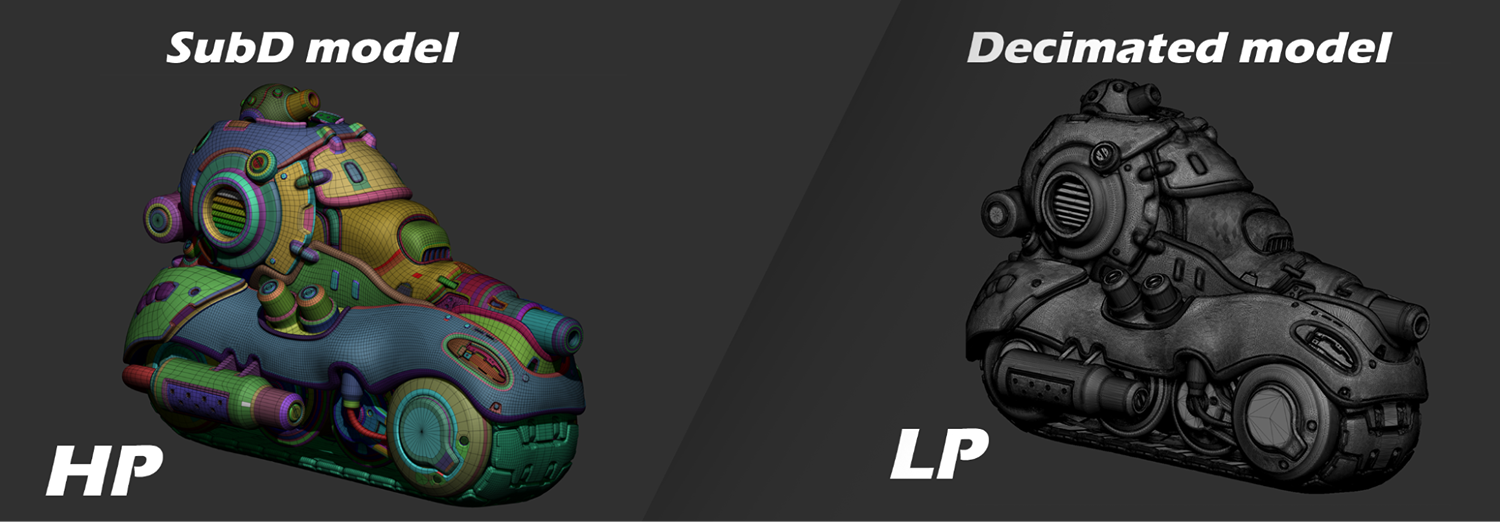
The main goal of this project was to practice and learn ZModeler. Exporting a clean mesh wasn’t necessary. I simply wanted something quick to bake high poly (HP) details and apply textures. For this, I followed Marco Plouffe’s workflow from Keos Masons, as shared in his streams:
- Decimate the low poly (LP) to hold details and shapes.
- Assign polygroups/material IDs in the HP mesh.
- Use automatic UV tools (I used RizomUV).
- The models are ready for baking and texturing!
This workflow saved me from spending hours on tedious tasks, allowing me to focus on fun exploration and learning.
Baking & UVs
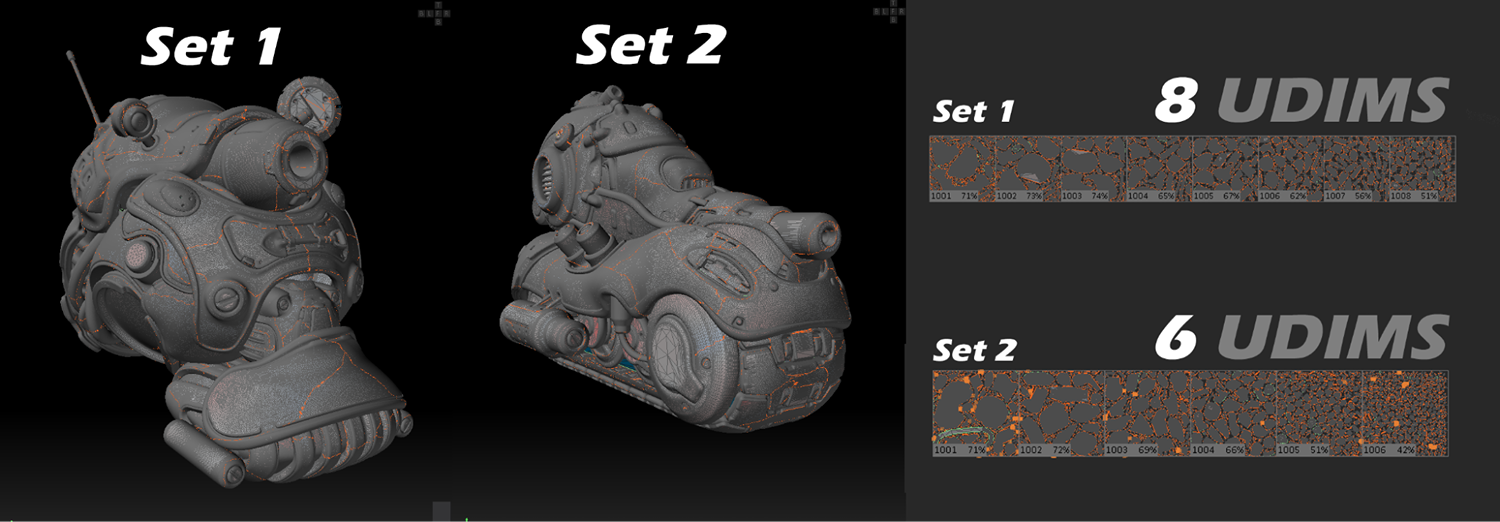
Then I exported the Decimated mesh to Rizom for automatic UVs and UDIMS, for the final presentation I wanted to make some closeups and have high-res textures so I ended up with 8 for the middle section and 6 for the sides.
The number of how many UDIMS is set by the texture resolution, to test it out simply export the obj and add a grid texture and see if that holds up or if you need more or less.
Now I have a UV’d Lowpoly Mesh, I export HP from Zbrush as FBX with the polypaint so I can use them as ID in substance.
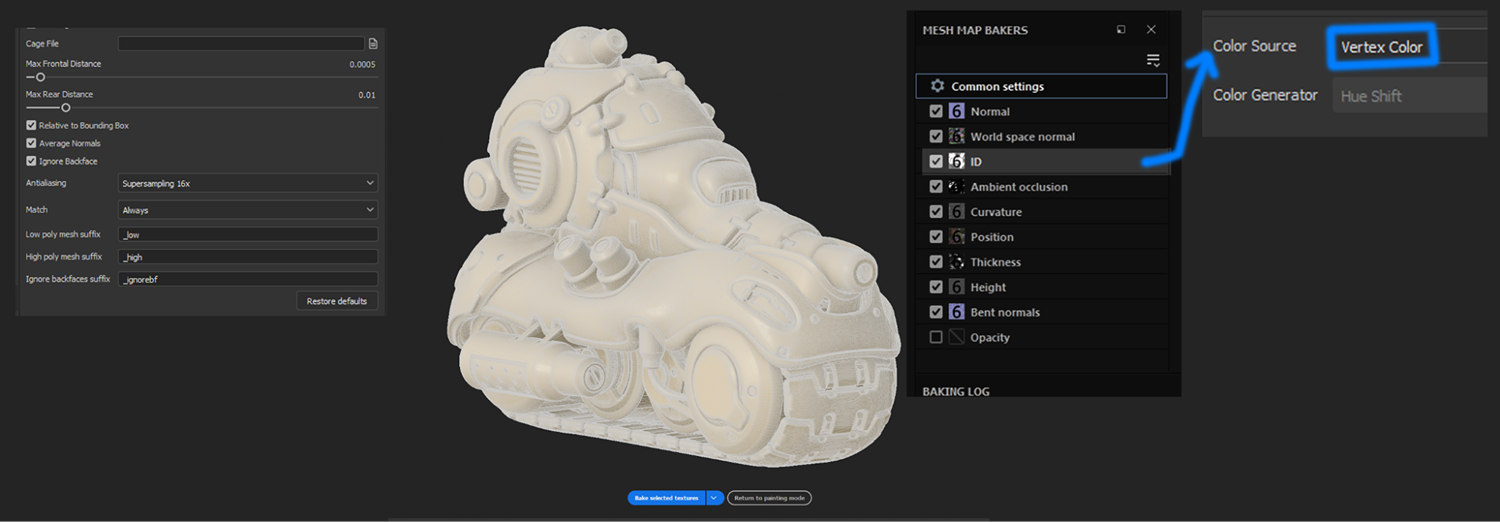
I imported it into Substance Painter and set up my baking settings.
Nothing too crazy here, just basic load LP and check UDIMS, import the HP and adjust the settings for Antialiasing and cage range, for the ID map make sure to VERTEX COLOR so the baked polypaint can be used to easily mask out materials.
I made 2 substance files for each part so it’s easier to handle and it won’t get super slow if you add lots of layers.
Texturing
We are ready for texturing!
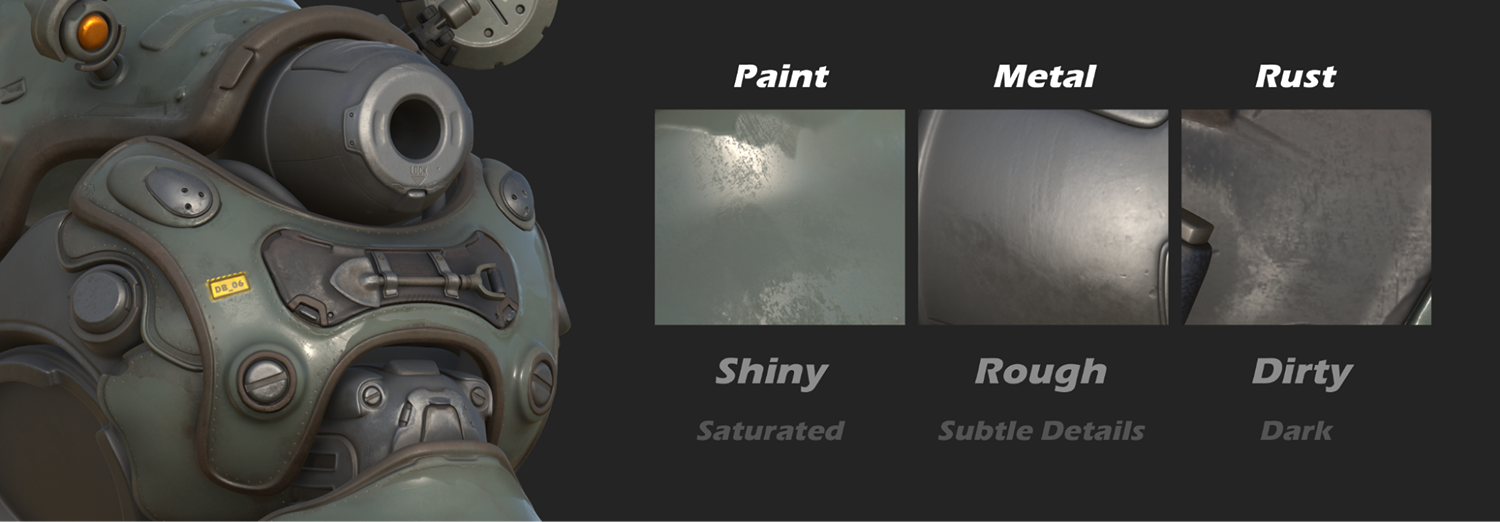
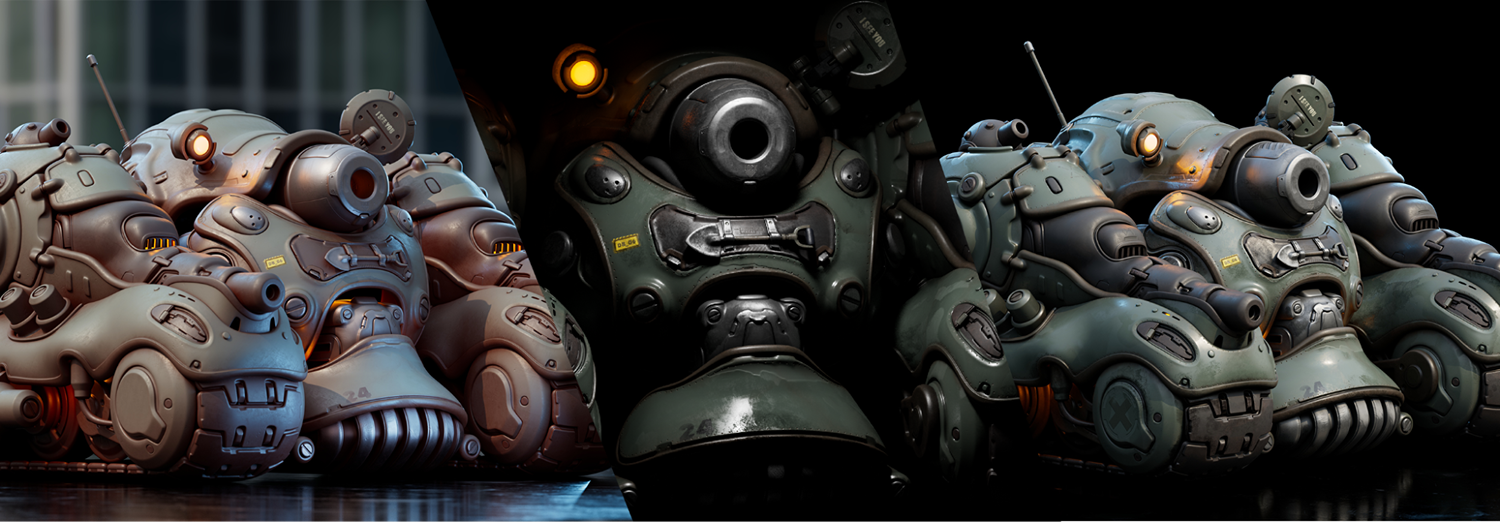
I broke the textures into 3 master materials and then edited them for some parts.
Paint is 70% of the Tank, Metal is 20% and Rust is 10%.
Each material setting is set to create contrast and depth in the textures, avoiding flat and low contrast textures, with different roughness values and subtle breakups combined with bump maps and decals for texts/logos. This creates a nice and detailed layer of elements to help your final presentation shine!
My rule here is (If the model is detailed, keep the texture clean, if the model is simple, Textures can be detailed).
Details are nice but if they are everywhere it will create noise, you always want some areas for the viewer’s eyes to rest.
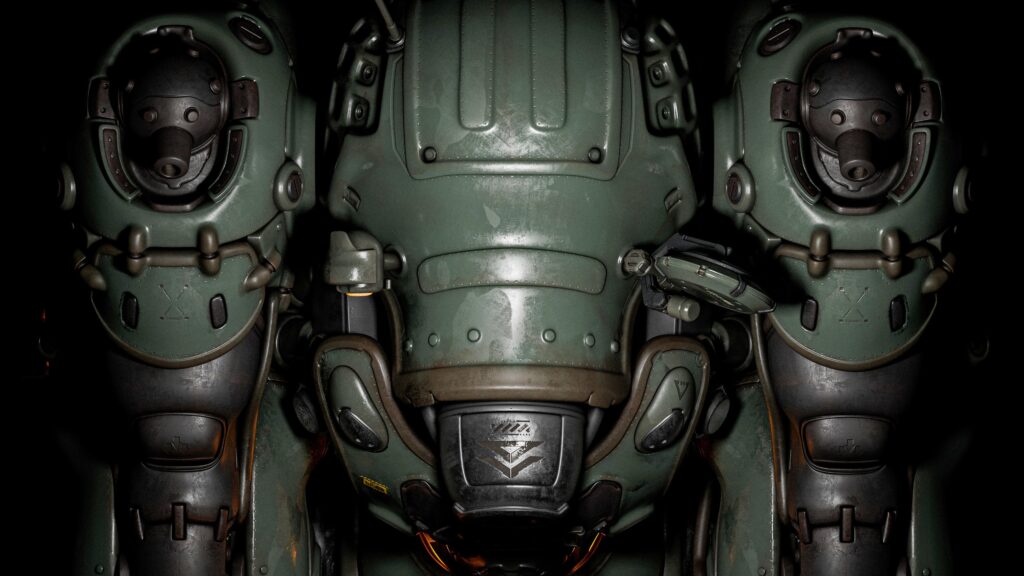
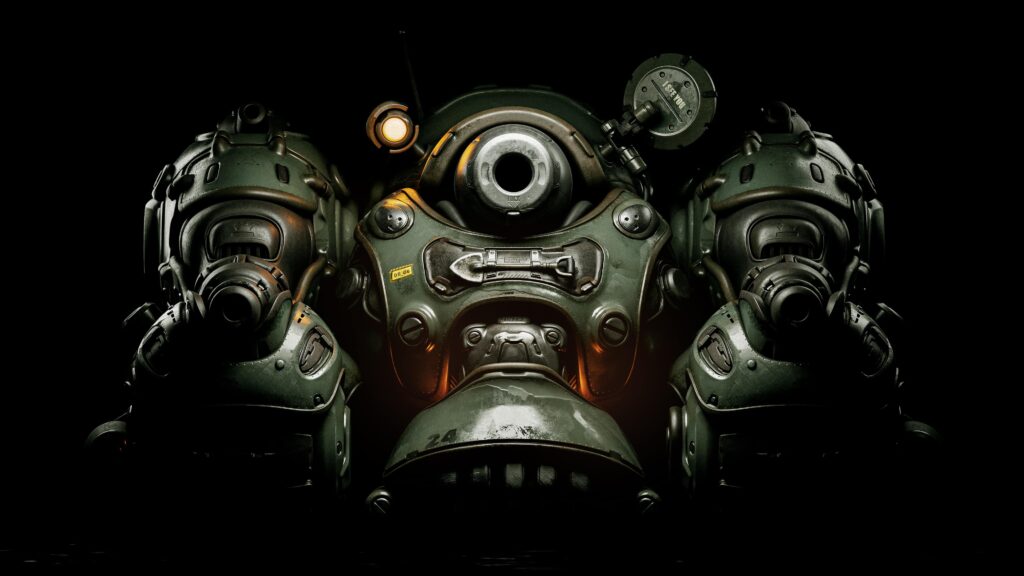
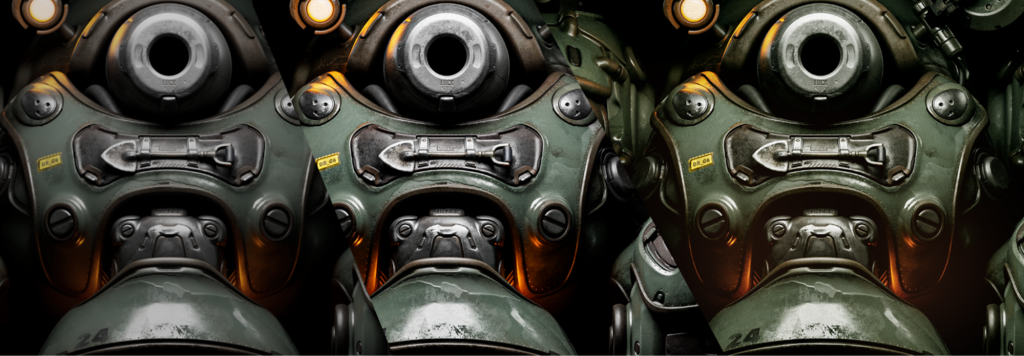
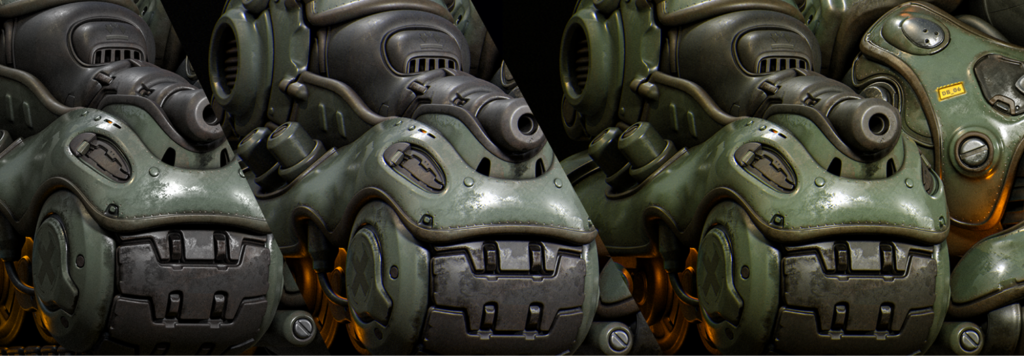
Rendering & Presentation
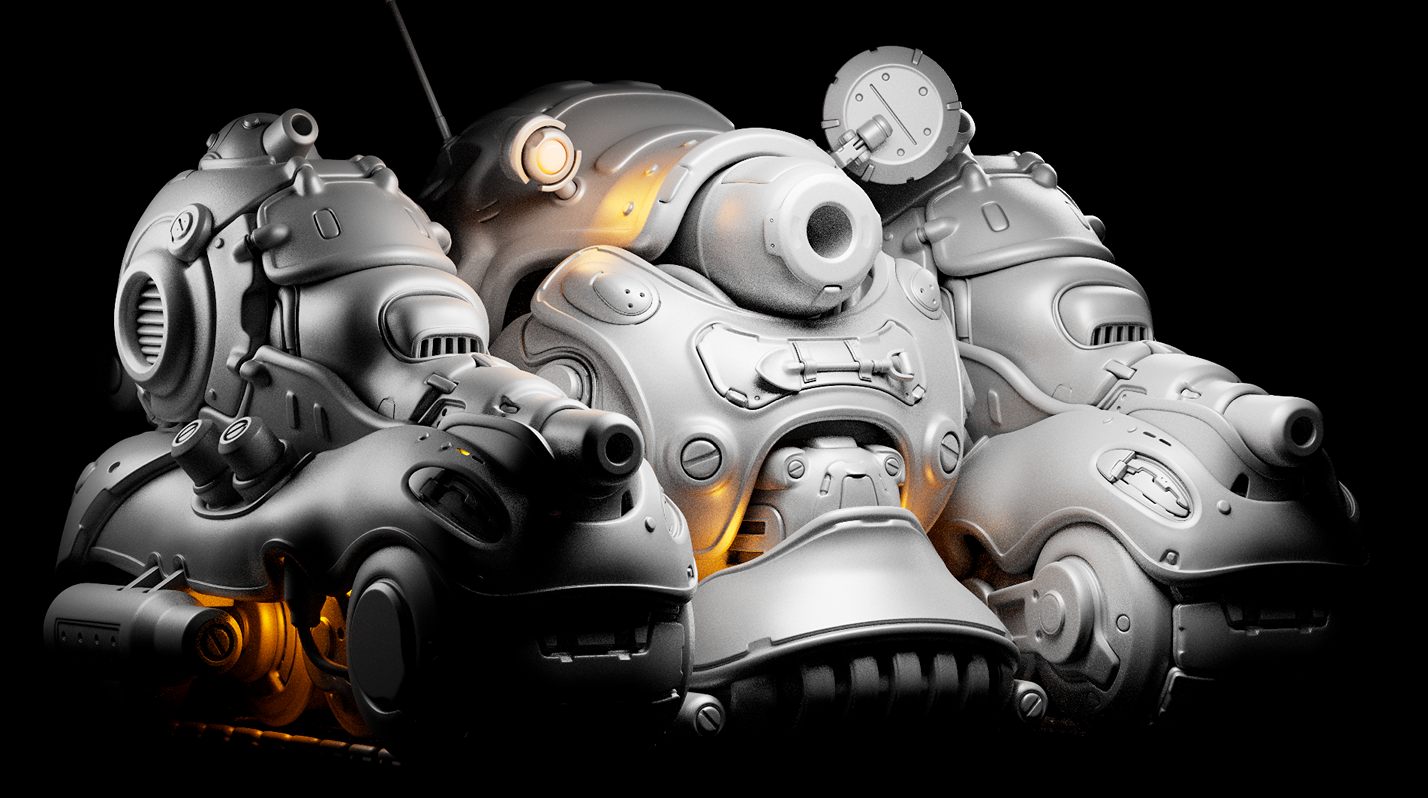
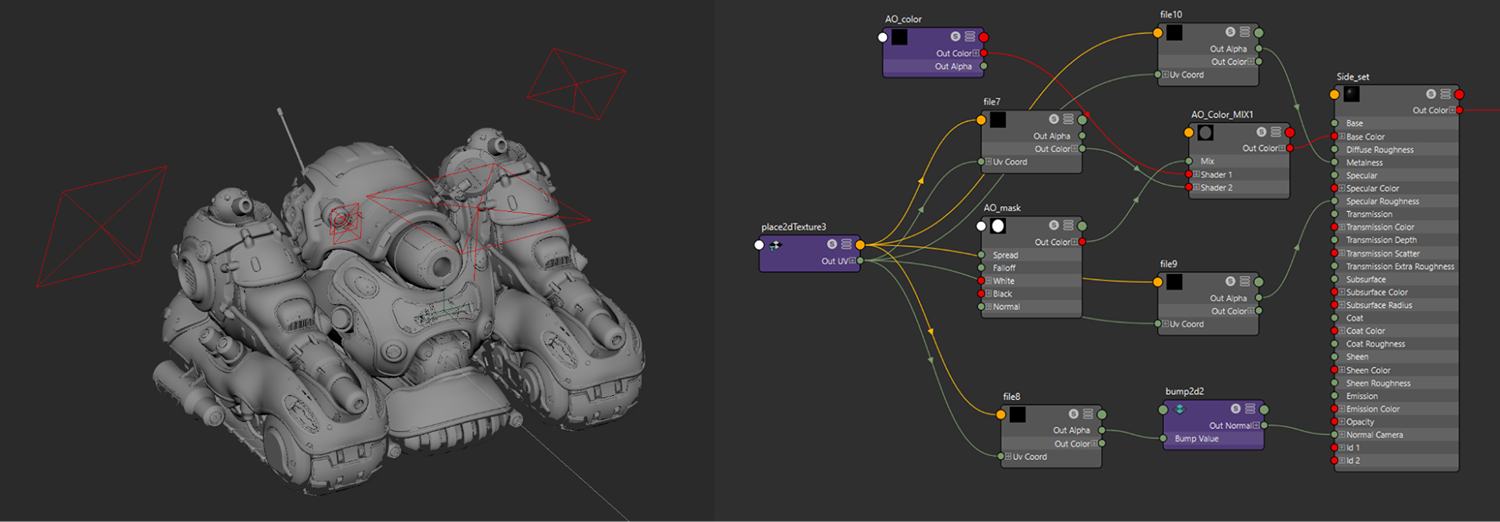
Once I finished texturing, I exported the maps using the Arnold preset (metal/roughness) and set up the shaders in Maya. The only extra thing I did was add the AO with a tint to help push the depth of the textures a bit more.
For lighting it was a basic fill light that acted like a spotlight for the part I wanted to highlight and some Rims in the back to show silhouettes in some renders, I also added some small orange lights to show some interior parts and give the tank some scale, I tried rendering with an HDRI, it looked cool but it took some of the high contrast I ended up going with for the final renders so I removed it.
Rendered the images in 4k and exported them to Photoshop for some compositing and Color correction/post work (the cherry on top stage).
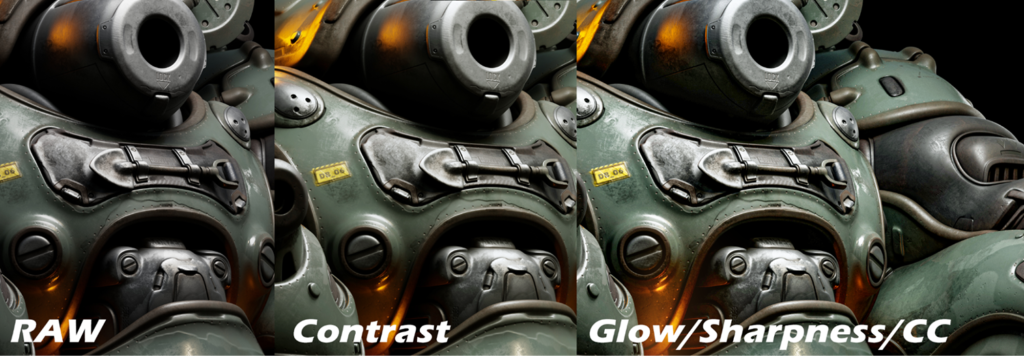
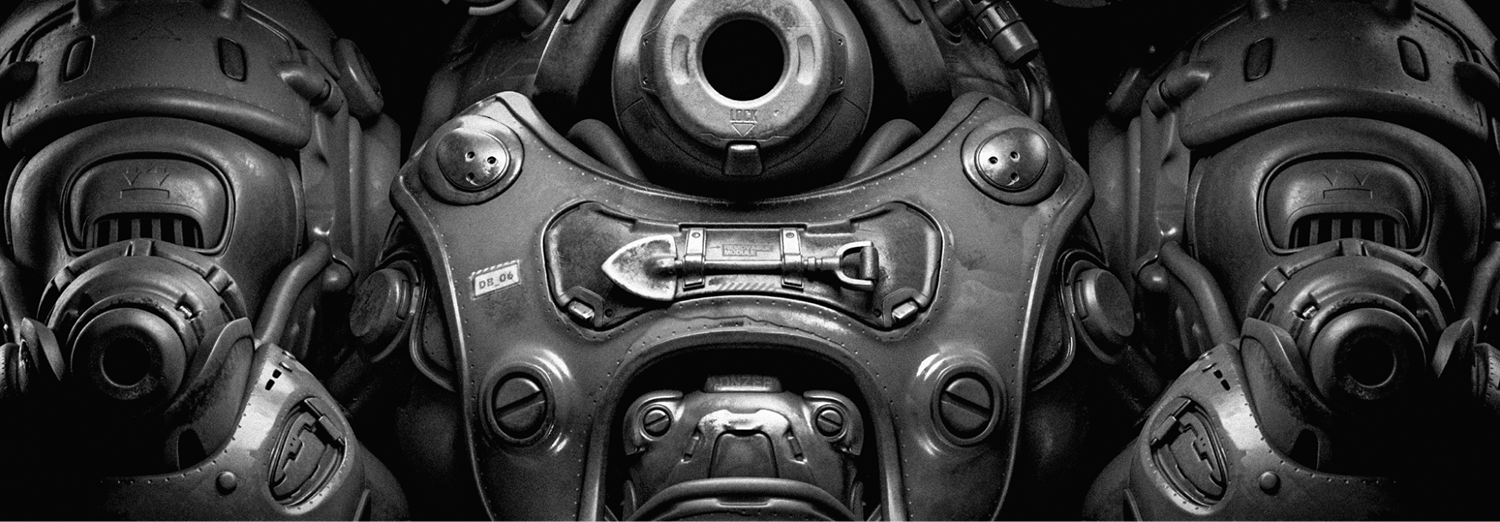
Tip: I always test out my images’ contrast by applying a BW filter. If you don’t get a lot of contrast when it’s BW something needs to be edited.
Conclusion
Working on this Tank was a very fun learning experience for me, especially using Zmodeler and getting out of my comfort zone modeling in Maya as my main tool of choice.
Also testing out the Fast decimation/UVs in Rizom with UDIMS workflow for personal projects was like a wake-up call for me, not EVERY project you do needs to have perfect Topology/UVS.
This way you are not worried about the tedious tasks and only have fun exploring new tools and learning new workflows knowing you can get high-quality renders at the end to show your art.
To end this presentation I would like to shout out to Games Artist for sharing this article, Manuel for the awesome Concept and Marco for sharing his techniques.
Peace out!
Read more articles
You might also like these articles.