
Introduction
Hello! I’m Vincent, currently a junior character artist at Dambuster Studios.
I began my journey as a game artist back in 2020 when I started at a higher vocational school in Malmö, Sweden called The Game Assembly, but I’ve been drawing since much earlier.
I love creating characters, from sculpting to setting them up in an engine, and feel extremely lucky to be able to do it as a job as well.
Project
This was a very spontaneous project that led me into several unknown territories.
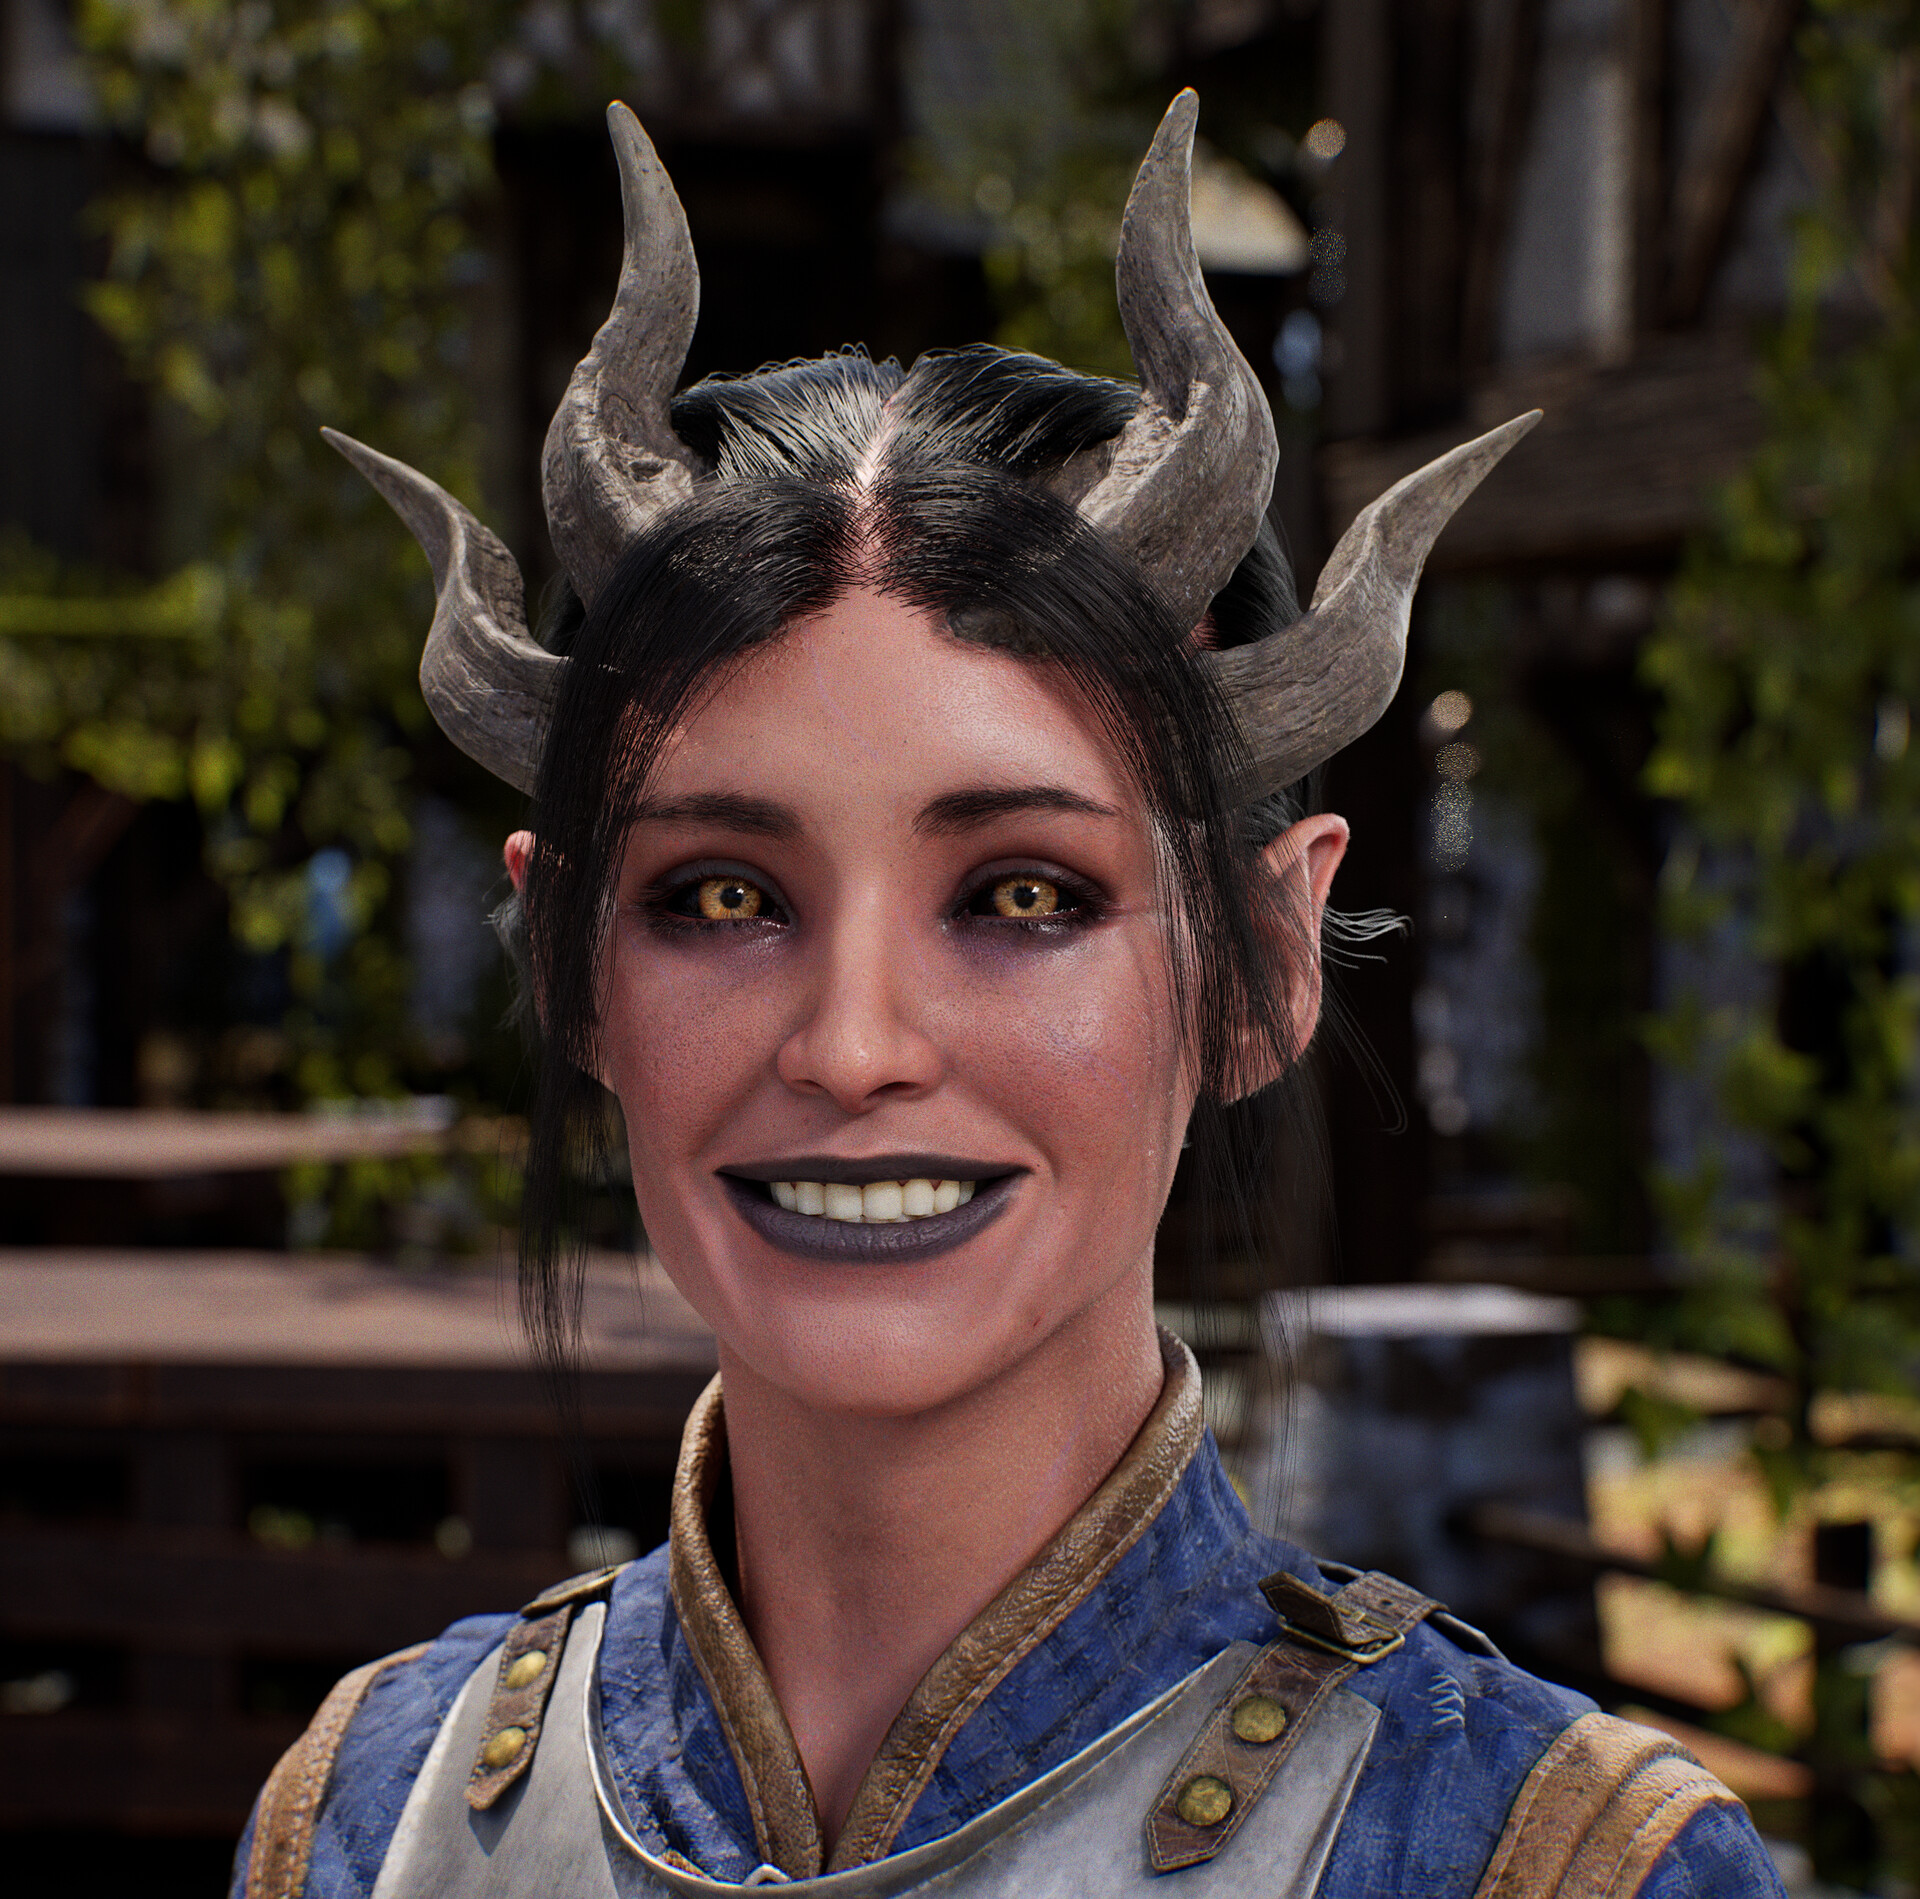
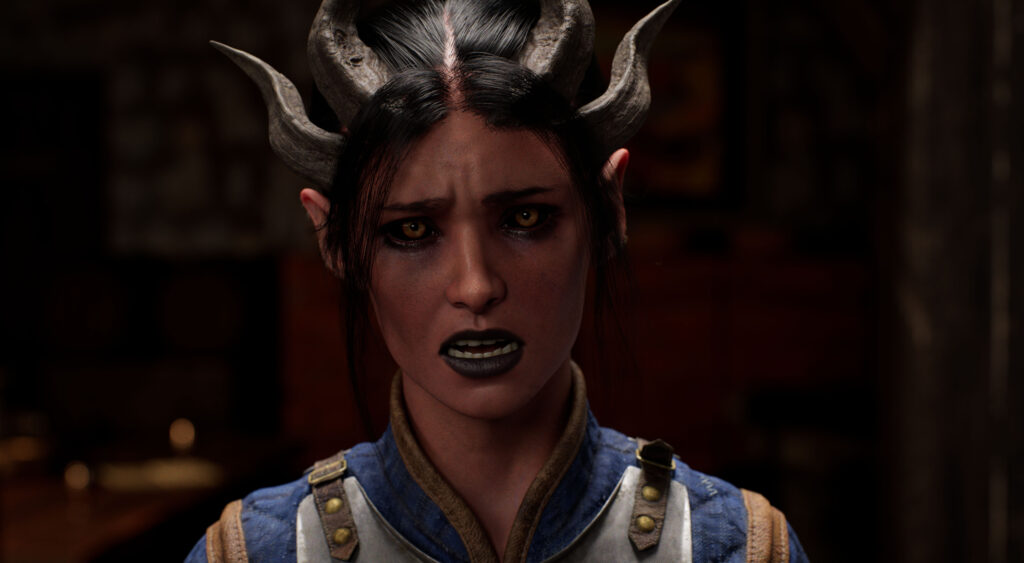
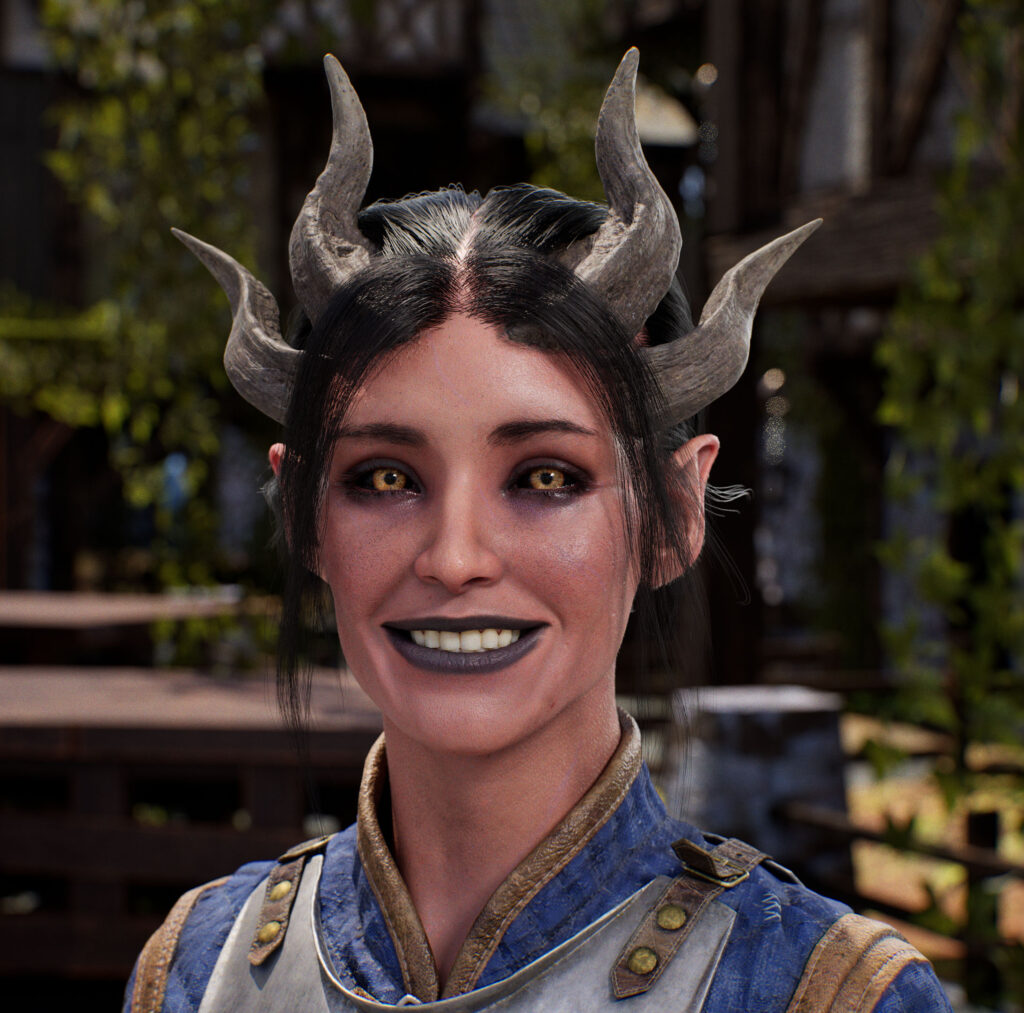
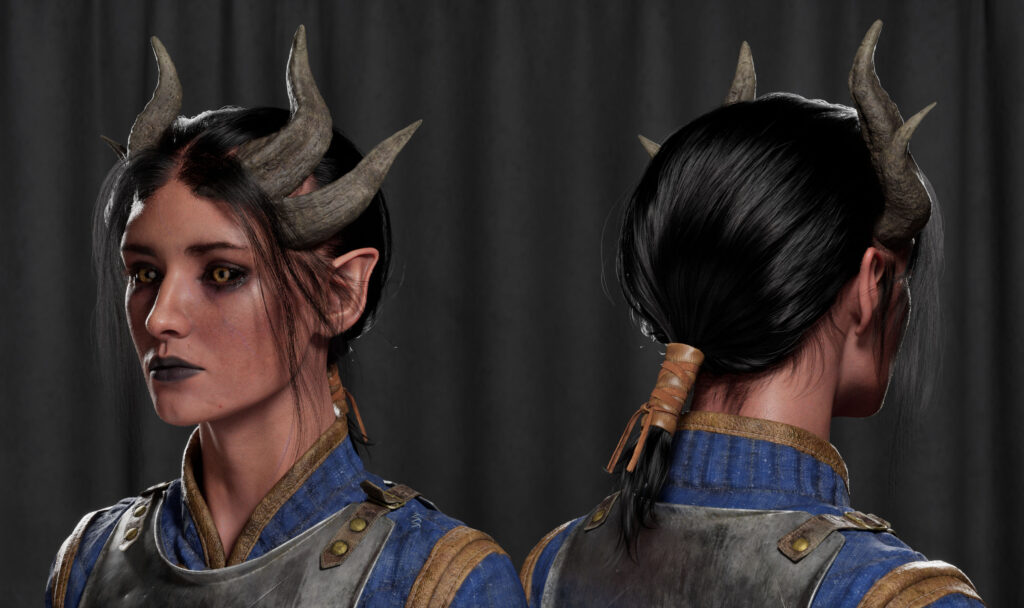
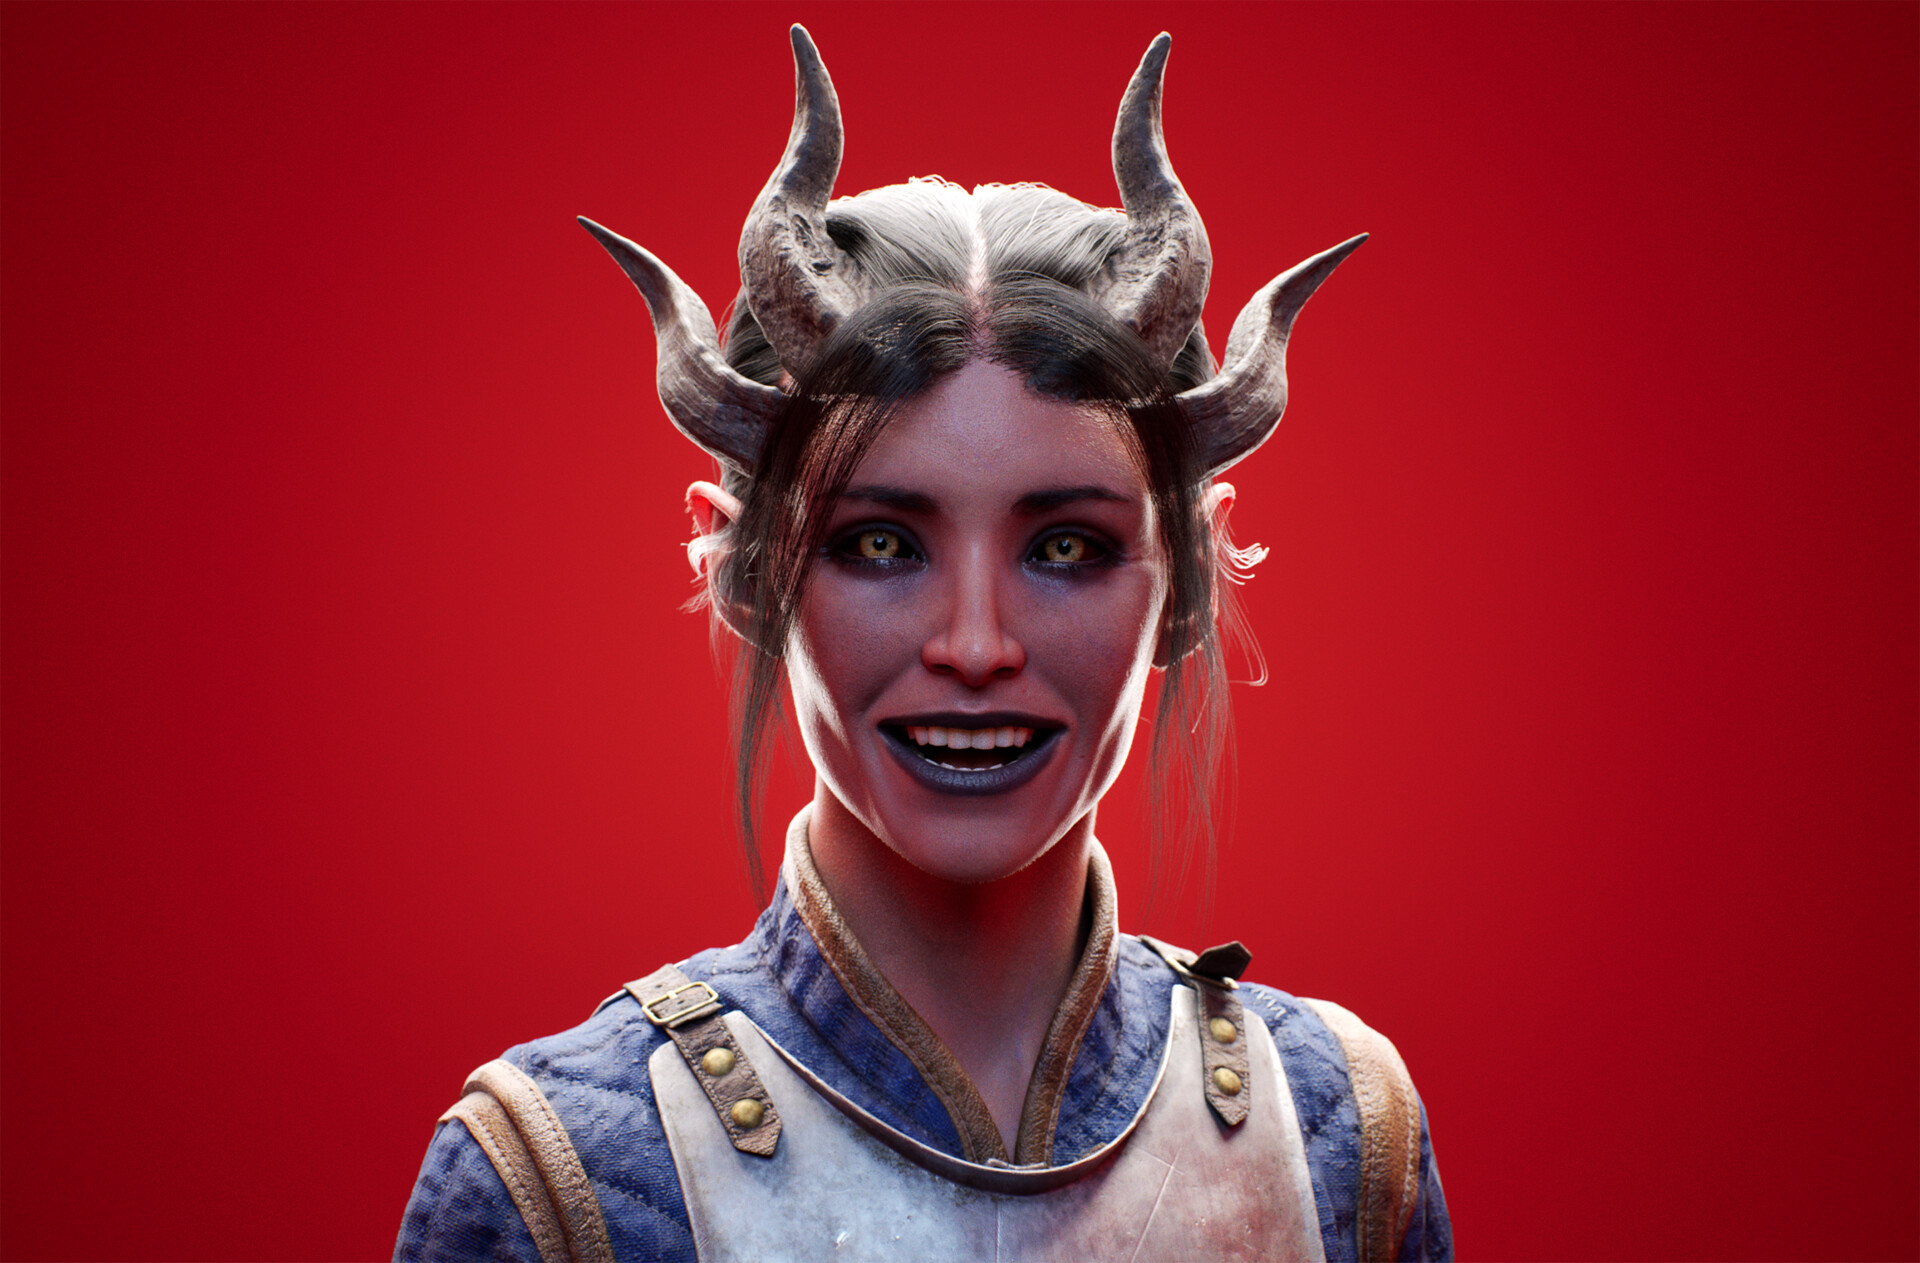
But the end result is what you’ll read about in the rest of this article: a 3D portrait of a Tiefling, complete with a FACS-based face rig!
Goals
I’ve always wondered how games like The Last of Us and God of War create all these amazing facial animations that look so natural and make the characters seem like living people.
I wanted to have a go at it myself, if only just to know the process. Well, not the animations themselves but a rig that is capable of creating them! This naturally led to a system of dividing the movements a face is capable of producing, called Facial Action Coding System (FACS).
So, the goal of this project was to create a facial rig based on FACS, that could produce natural-looking animations for cinematics. I wasn’t too concerned with following an art style and just created what I wanted to make.
I mostly saw this project as practice as well. I intentionally did things that I wasn’t comfortable with but wanted to learn.
I wasn’t very strict with myself about much; if things took time, I allowed myself to properly learn from it and not rush.
Software & Tools
I used very standard tools for this project:
- ZBrush – Majority of modeling
- Maya – Blockouts of meshes and blendshapes, rig, and animation
- XGen – Hair
- Marmoset Toolbag 4 – Baking
- Substance Painter – Texturing
- Unreal Engine 5 – Rendering and presentation
References & Inspiration
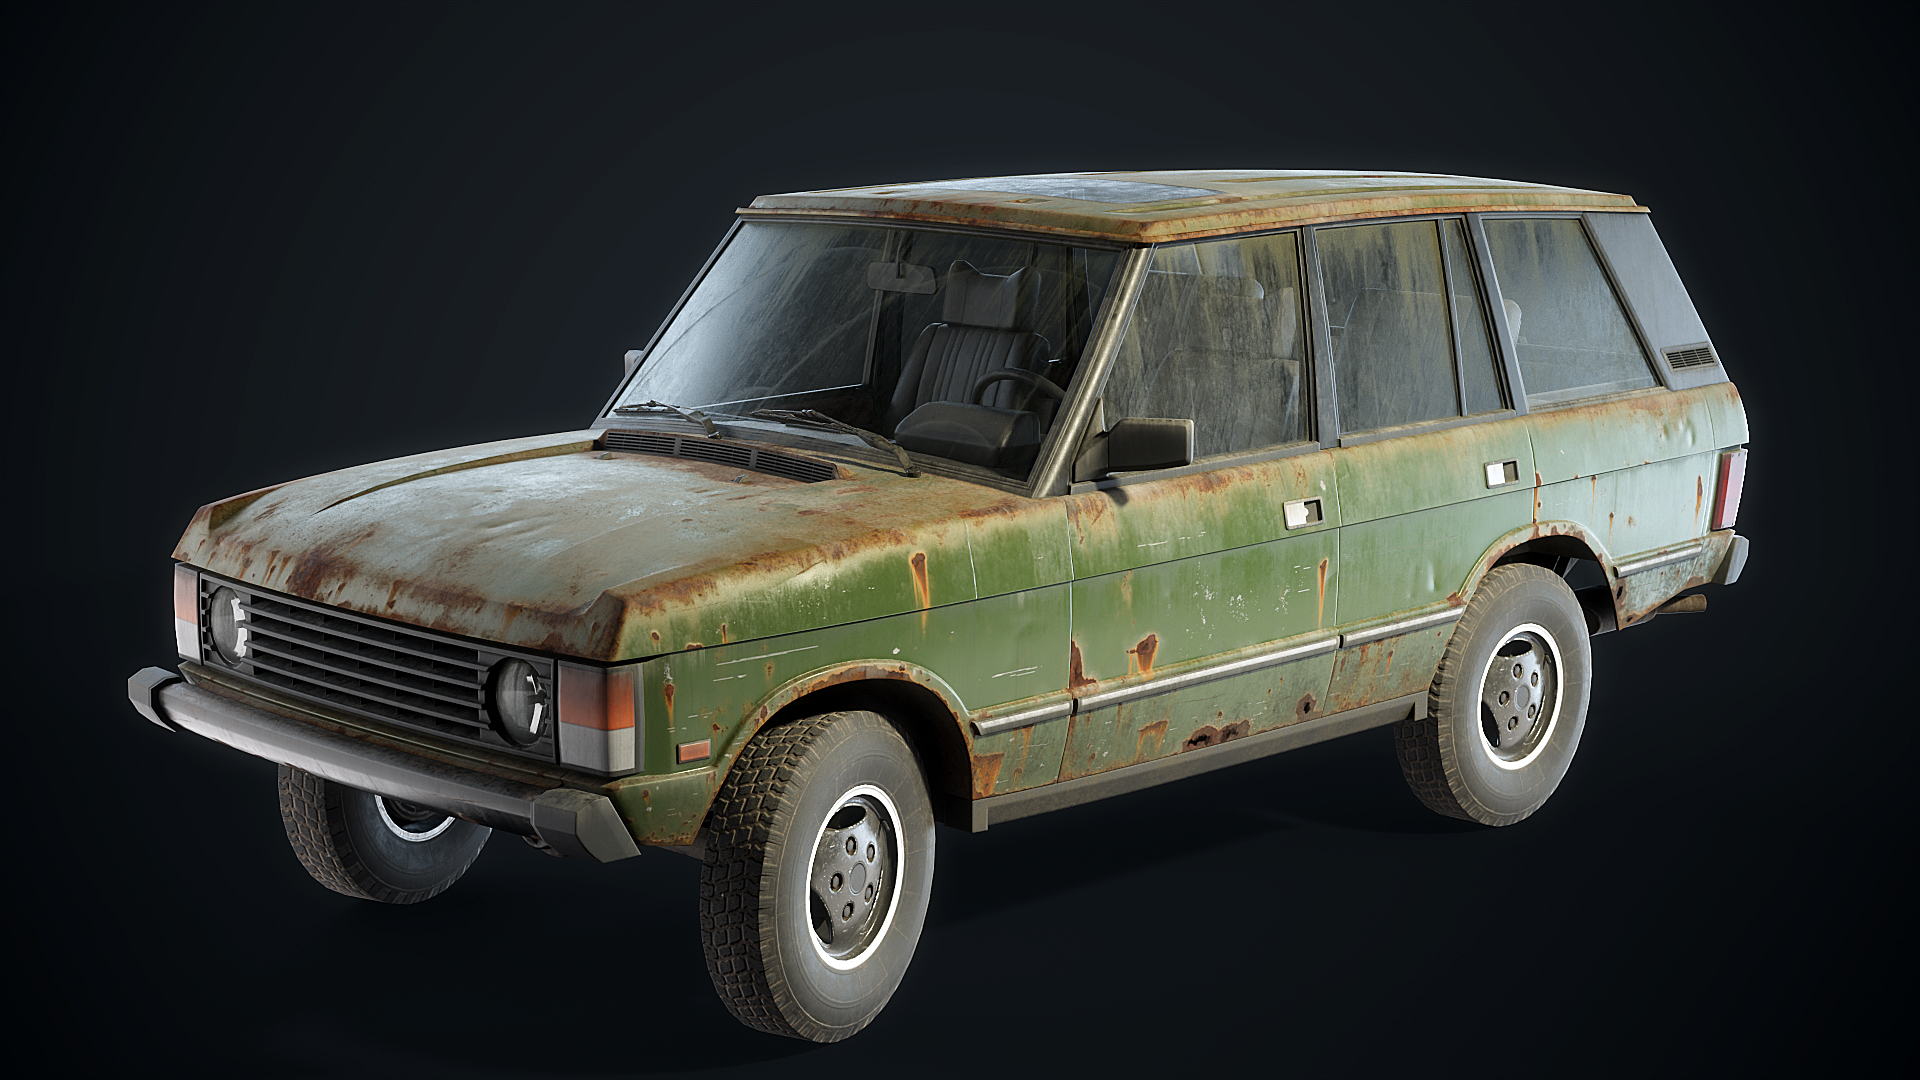
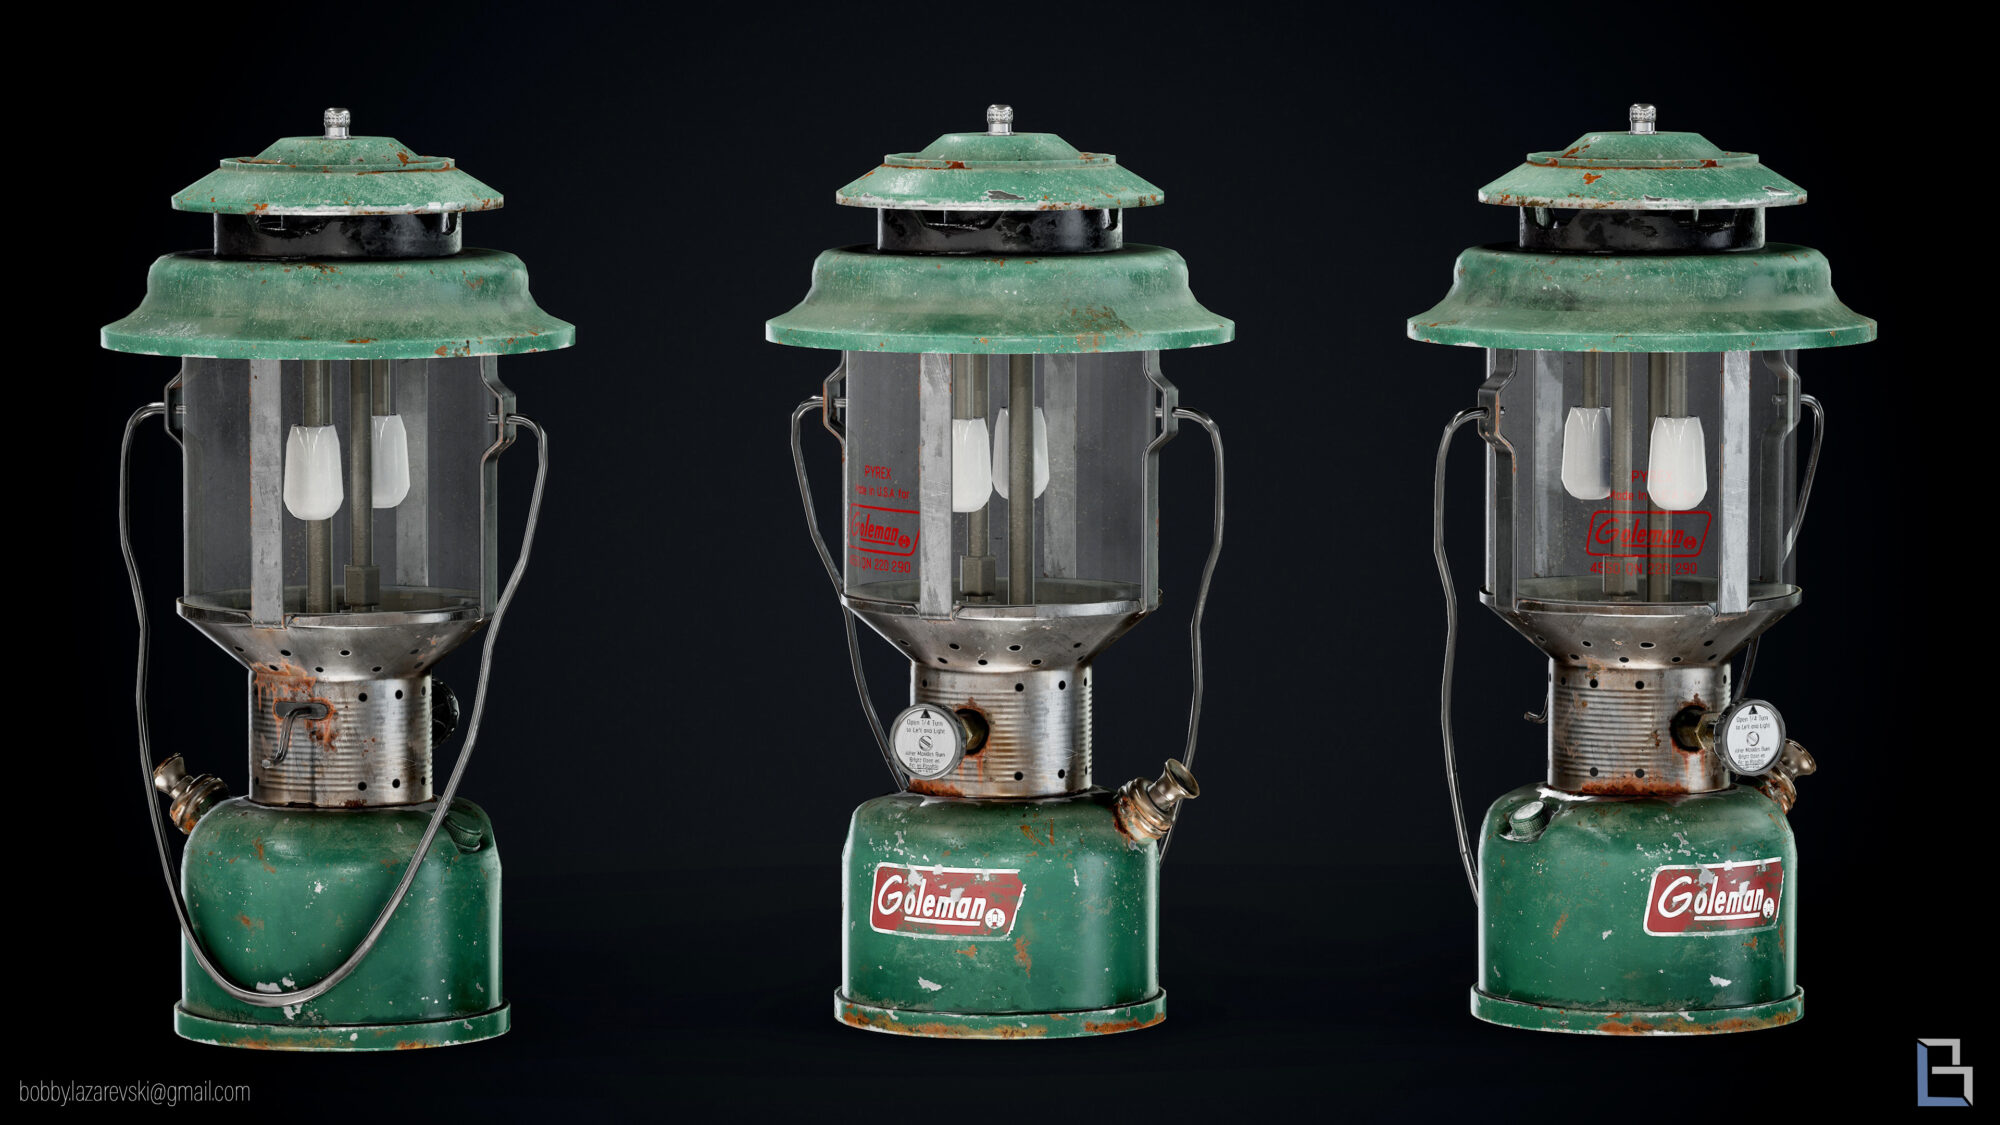
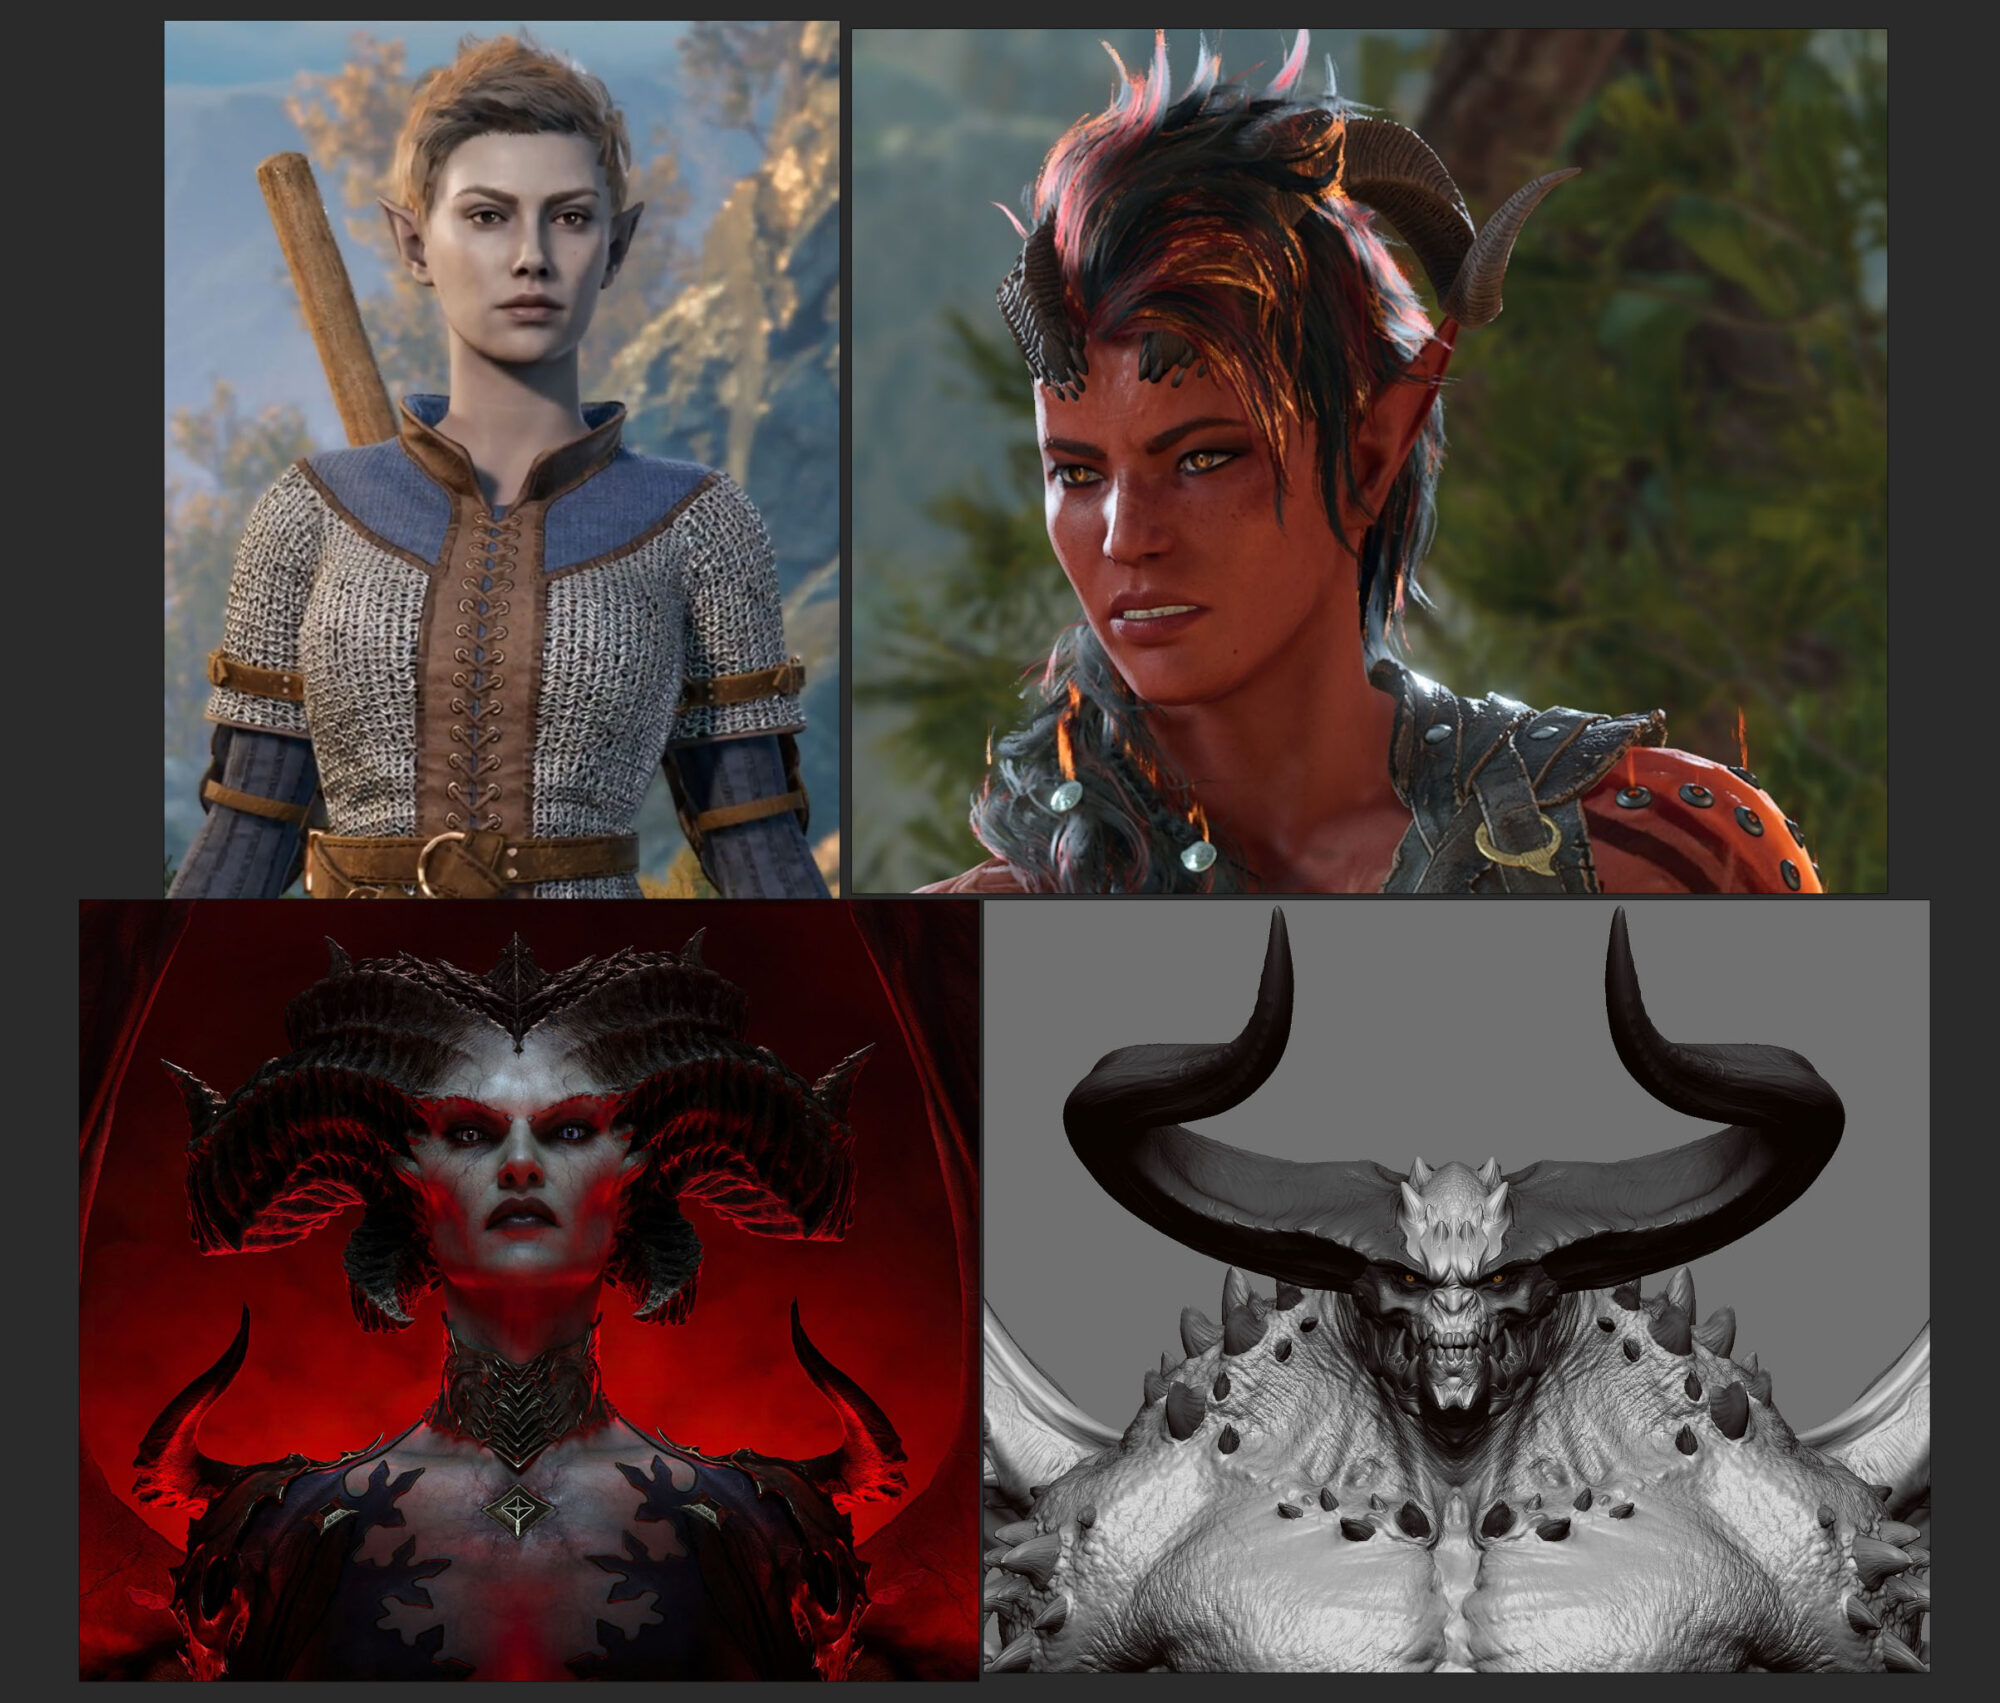
Baldur’s Gate 3 was a big inspiration; it was the latest game that left an impression on me. I wanted my character to feel like a low-level DnD adventurer and the outfit and hair were made with that in mind.
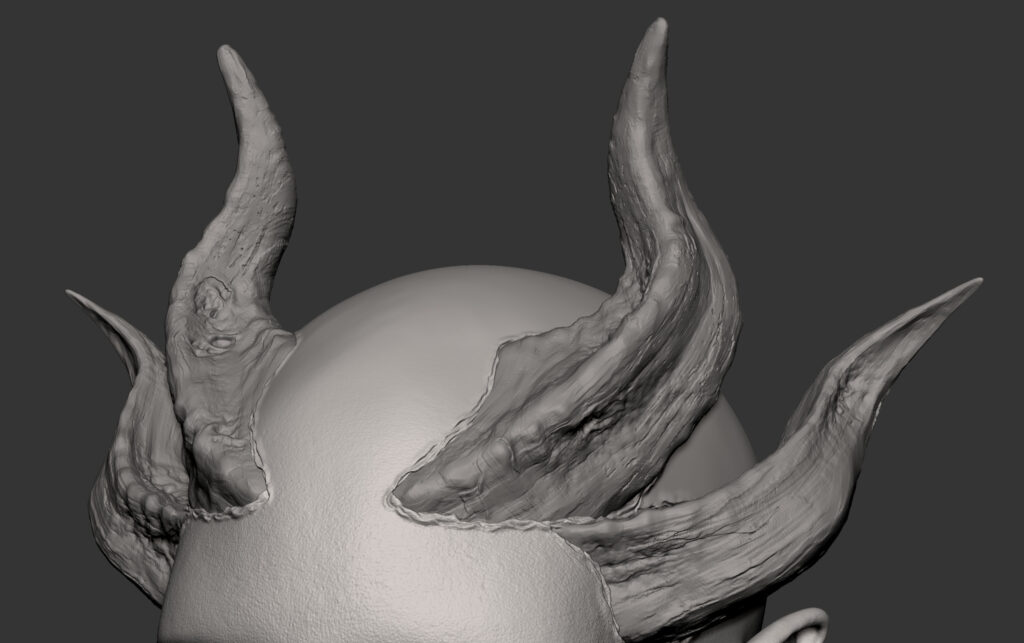
As for the horns, I’m absolutely in love with Diablo 4’s treatment of them. Blizzard’s talk at the 2023 ZBrush Summit is where I got a lot of tips on how to make them.
Below are the four pictures I would consider my main inspiration:
Sculpting the Head
I started sculpting the head from a sphere. I’m gonna be honest, it’s always a struggle in the beginning, and I lose confidence in myself as a character artist every time I do it.
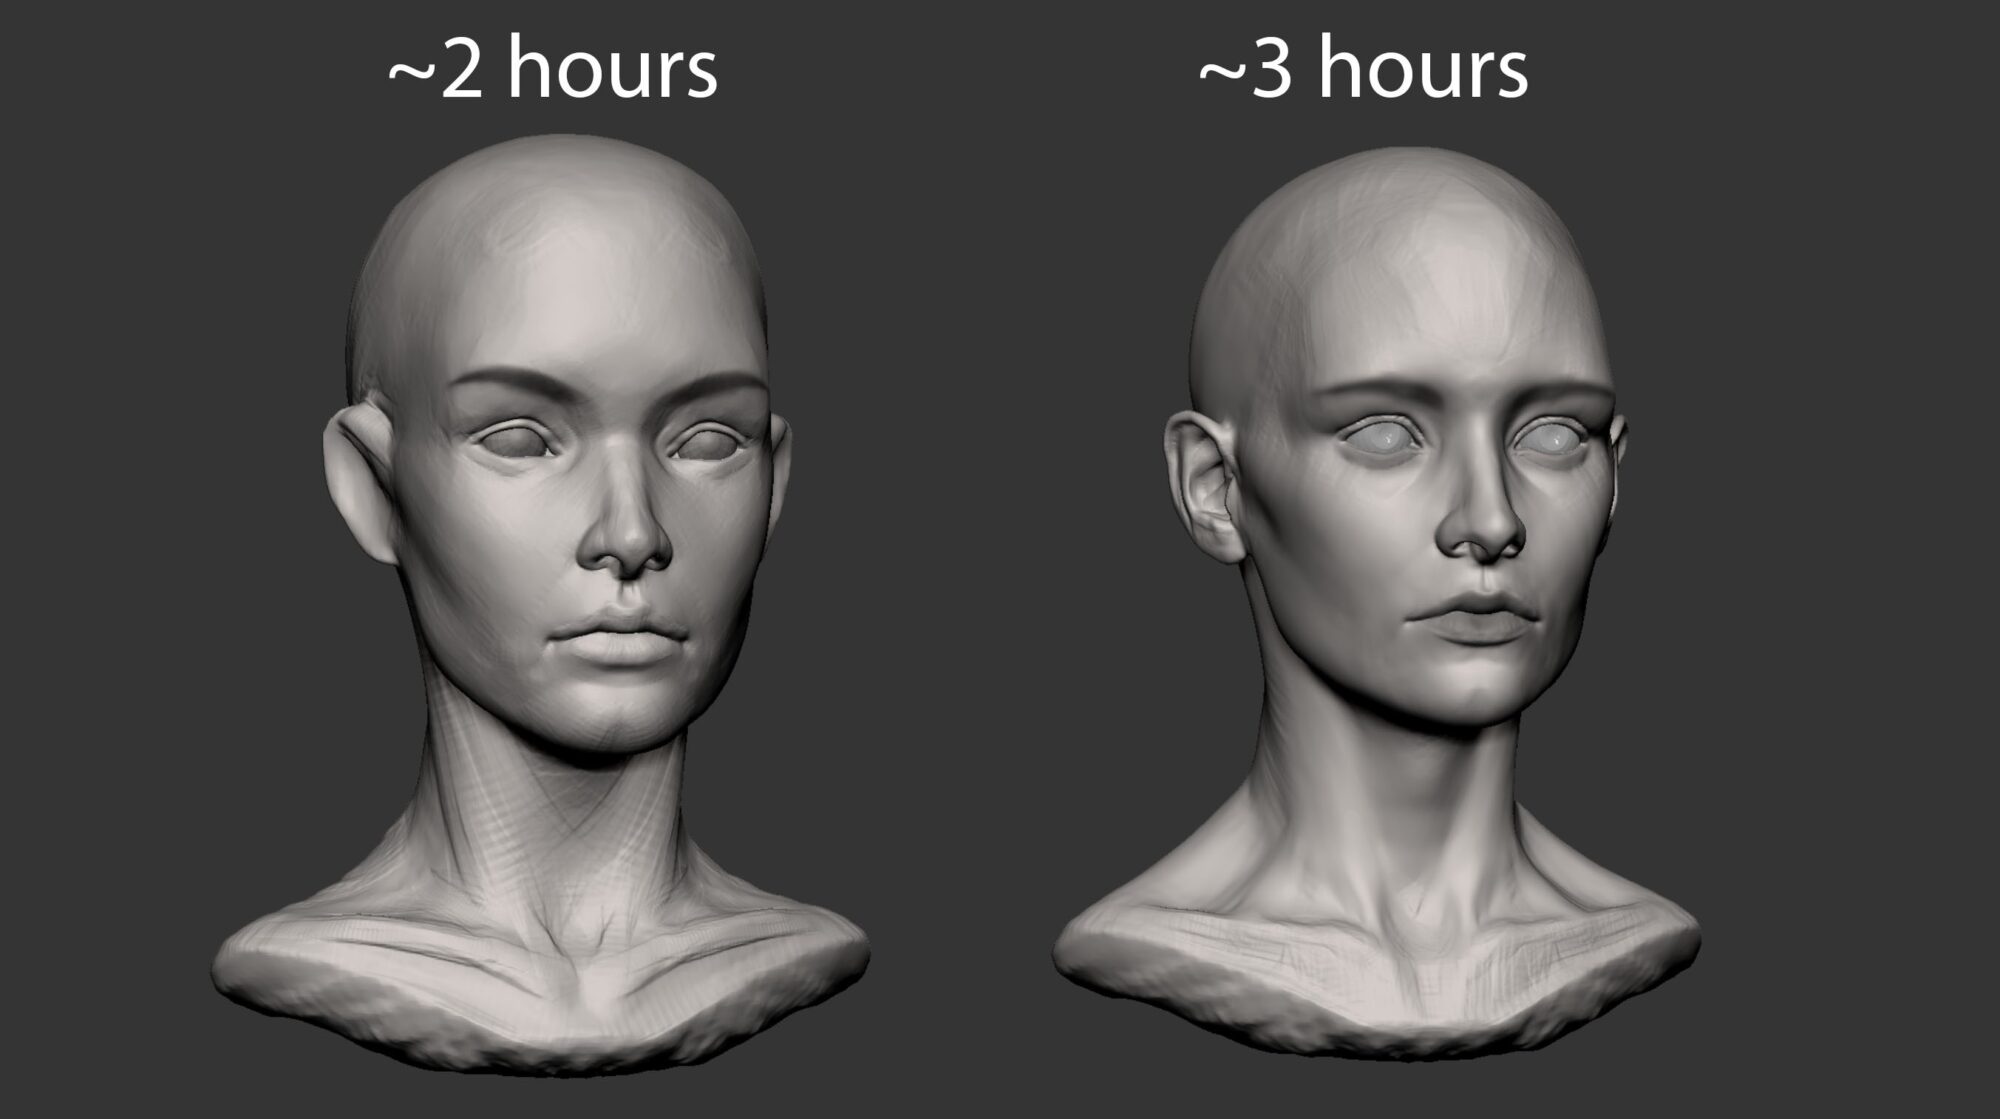
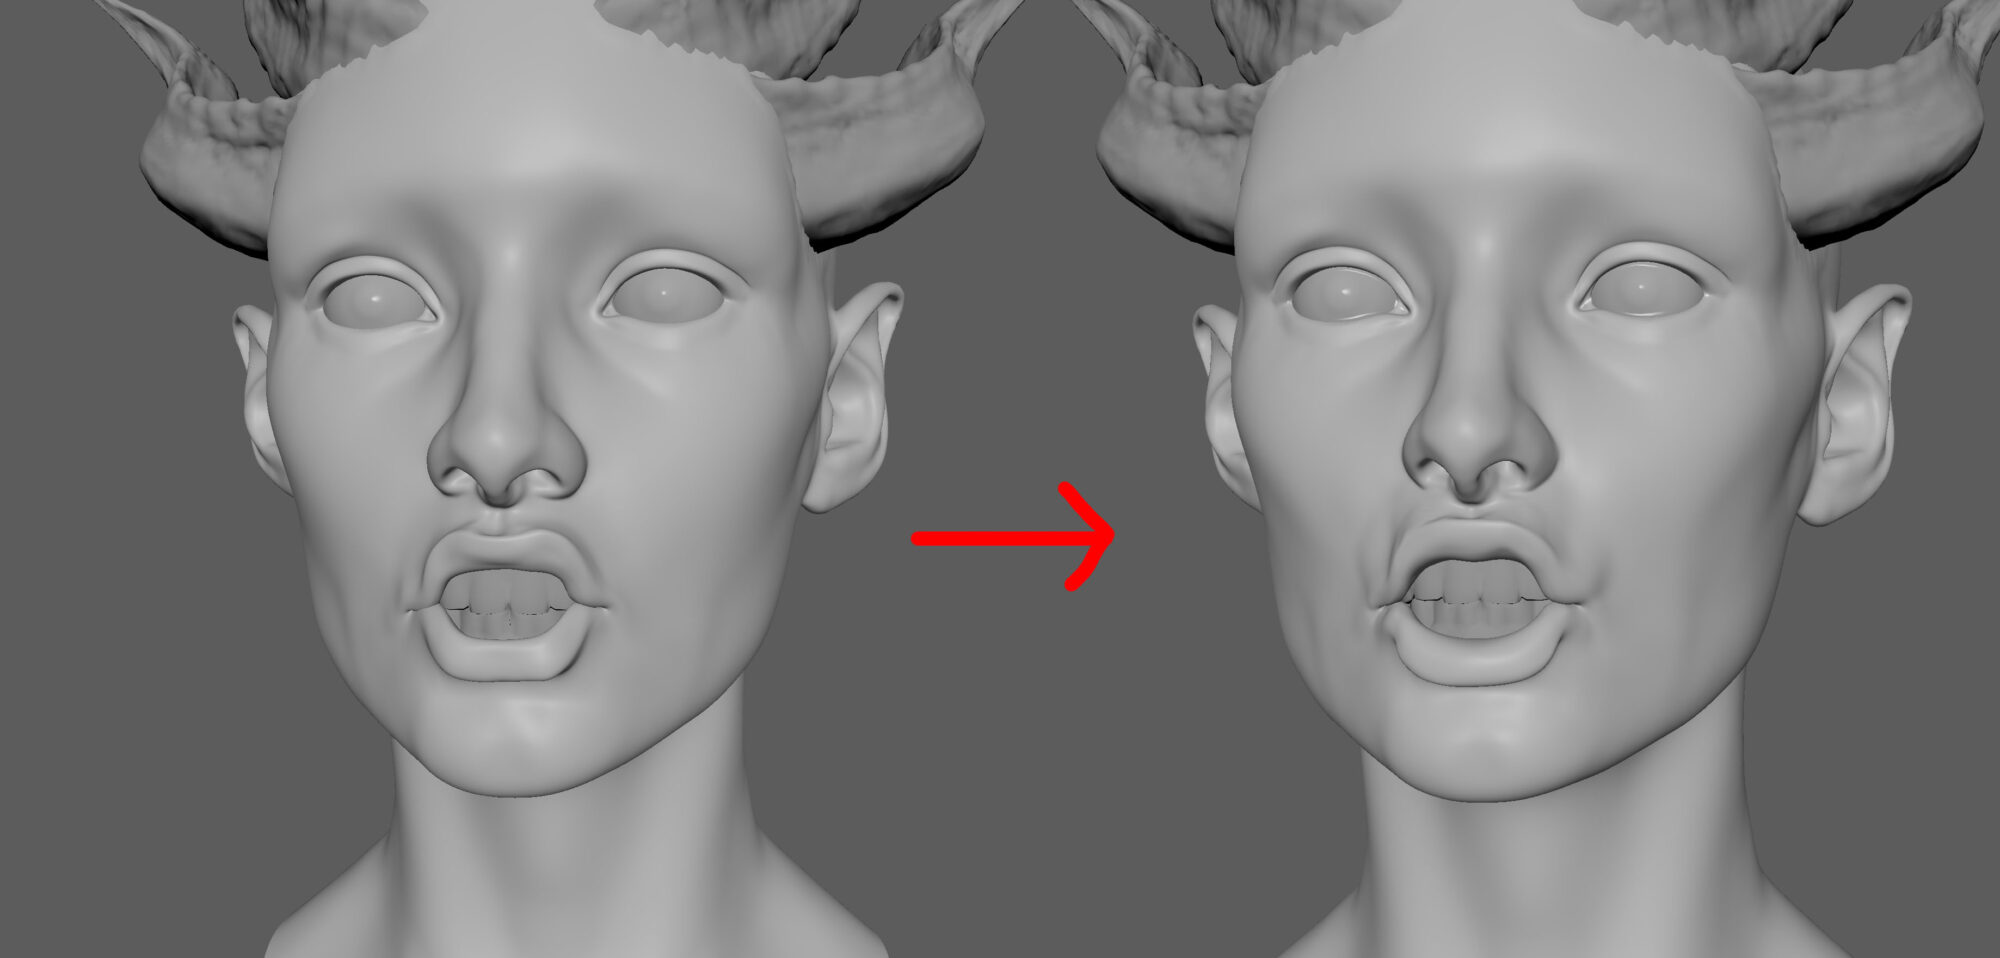
Let me show you an example of what I mean. Below you’ll find the head I sculpted in my first sitting, roughly 2 hours. I really didn’t like the result and went to bed feeling completely destroyed.
Like, I make better-looking stuff in the toilet. But it just required a few tweaks the next day, and I got a much better result. After an additional hour, the head on the left turned into the one on the right.
In my opinion, the important things to include early on are the barrel of the mouth, the plane changes from eyebrows to eye, cheekbones, some polypaint for the eyebrows, ears, as well as a neck down to around the collarbone.
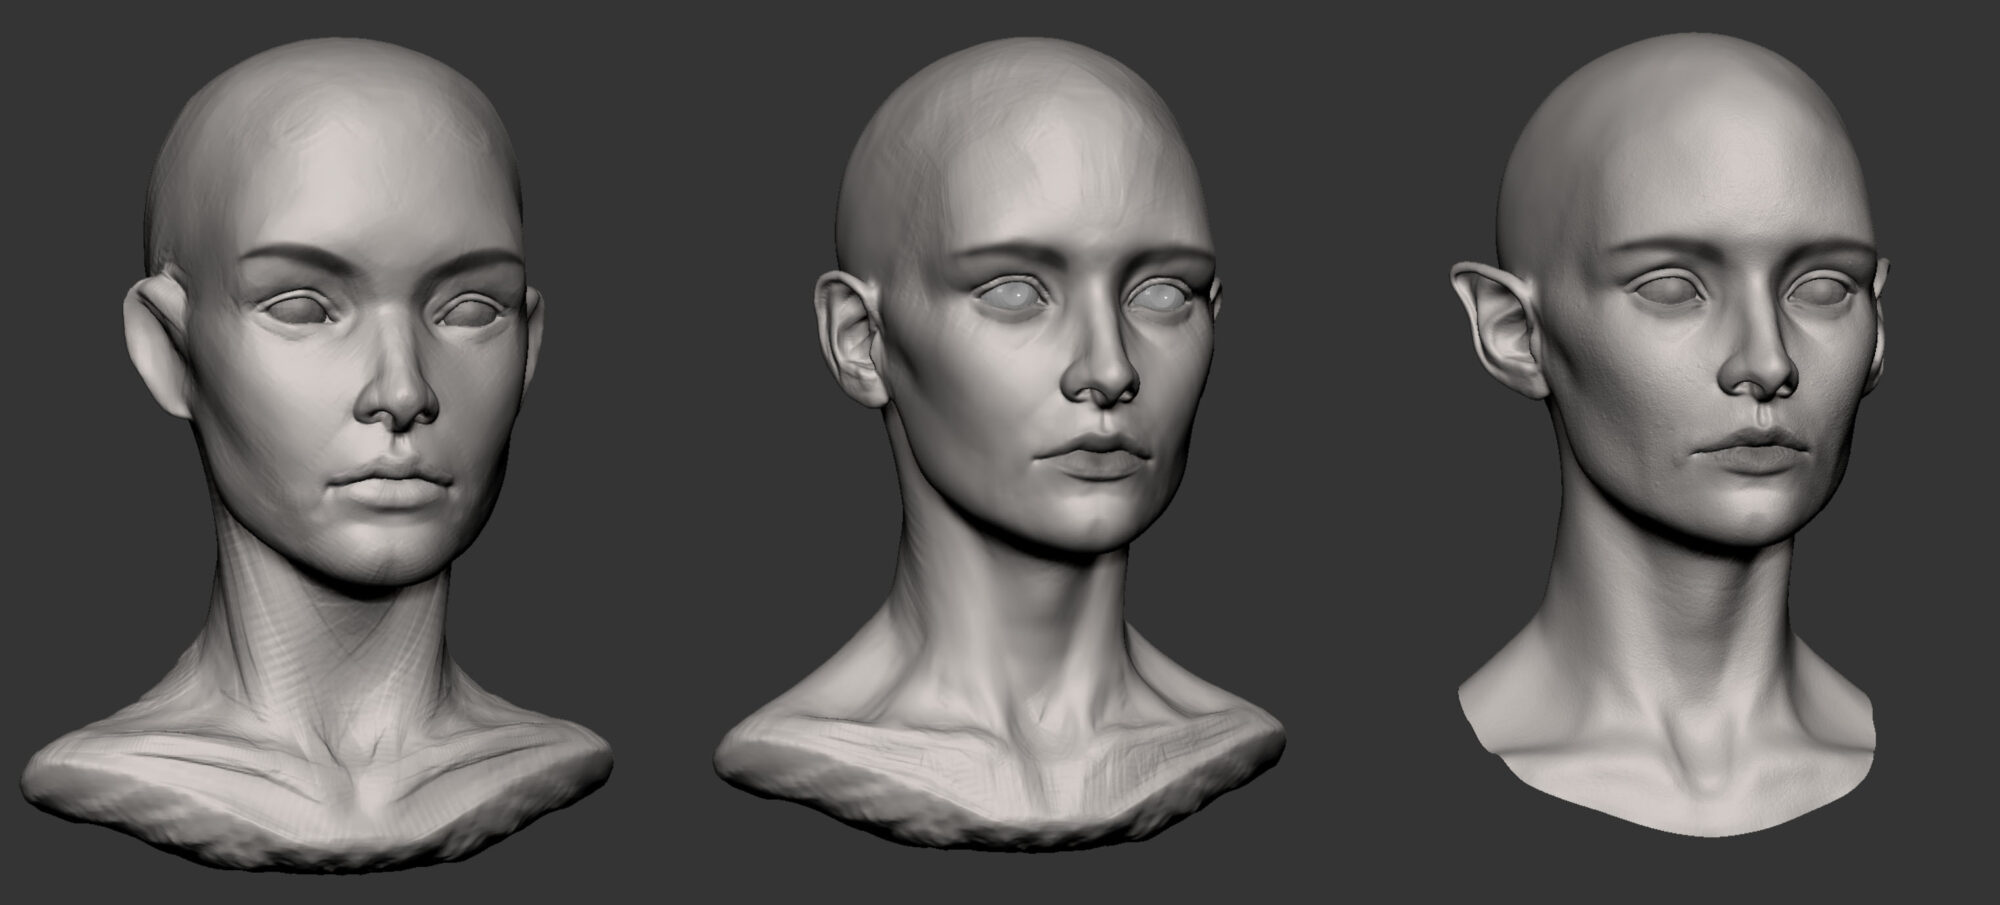
With this, I usually get some subconscious recognition of a human face. Add in some eyelids, nose, lips, and better transitions between the planes, and you get something like the left head.
What I did to get to the head on the right was apply some real-world measurements from anthropometry, which is basically measurements of different parts of the human body, e.g., on average, how wide should the widest part of the head be, how far apart are the pupils, how long is the average female nose, etc.
With this, I get more realistic proportions by moving different parts further apart or closer together based on real data. After that, it didn’t change a lot, just some general polish and smoothing of features.
I wrapped a VFace from Texturing.XYZ to get skin detail and used that as my topology.
As for the horns, getting the basic shape isn’t very hard. It was just Move Brush, Dynamesh, Move Brush, Dynamesh until I liked it.
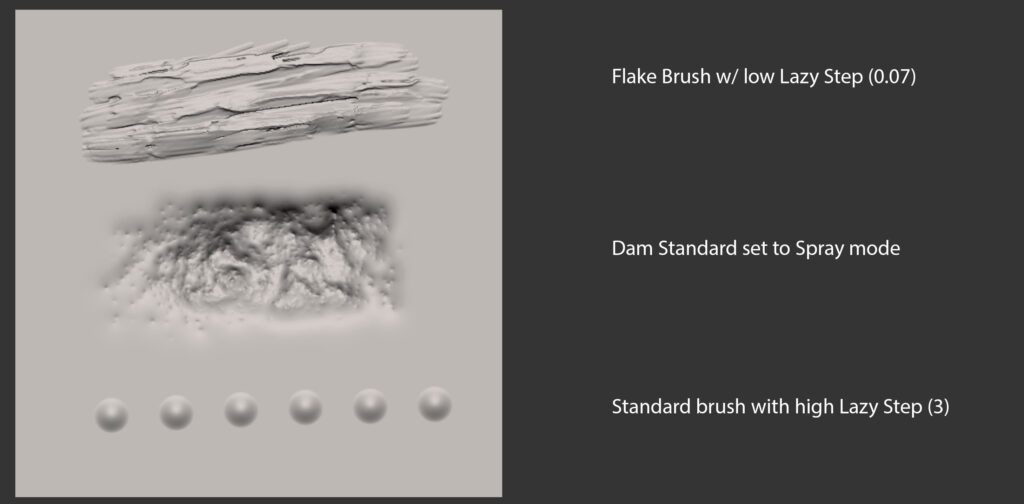
These three brushes did most of the heavy lifting to create interesting textures:
Sculpting the Outfit
The creation of my clothing and armor began with different basic geometries that were sculpted and dynameshed until they looked decent.
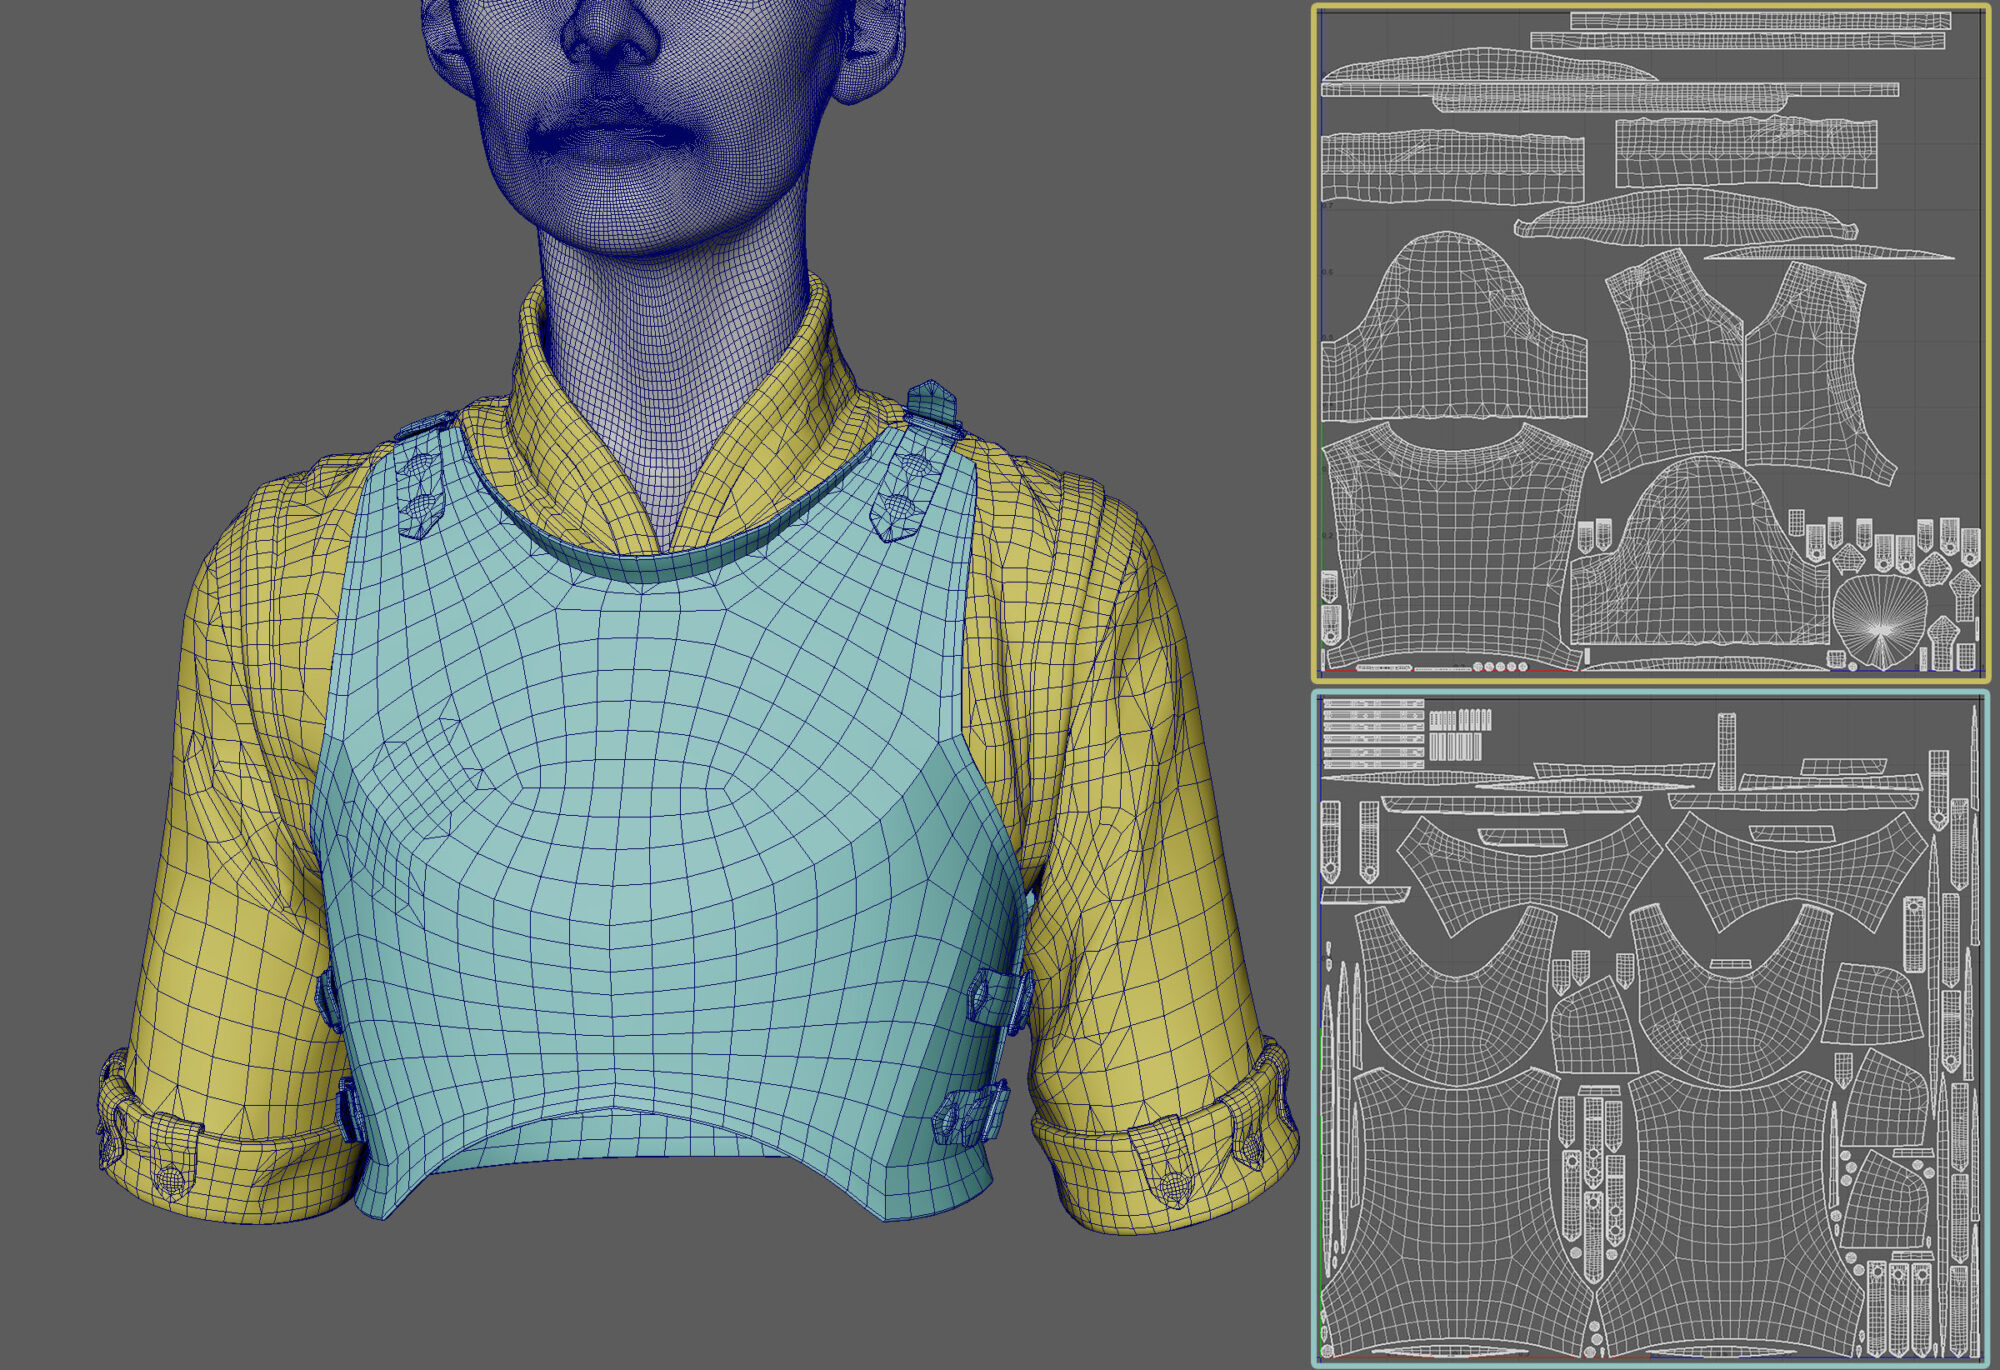
Once it was getting somewhere, I created polygroups based on how I thought the fabric would be cut in real life as a pattern (normally I just think about how I would build it in Marvelous Designer), ZRemeshed them while keeping polygroups to very low topology, subdivided and reprojected to get back the forms from the dynamesh version.
When ZRemeshing, I try my best to not have poles or stars in the topology since sculpting on those can show pinching.
And with that, I got a mesh with several subdivisions and polygroups based on the panels of cloth, which made it easy to add crisp seams!
This also meant I could easily UV map it, which was important since I made a displacement map for the quilt pattern in Painter.
A lot of things I knew I could add in the texturing stage, such as tertiary details, puckering around seams, etc., so the sculpt didn’t include that.
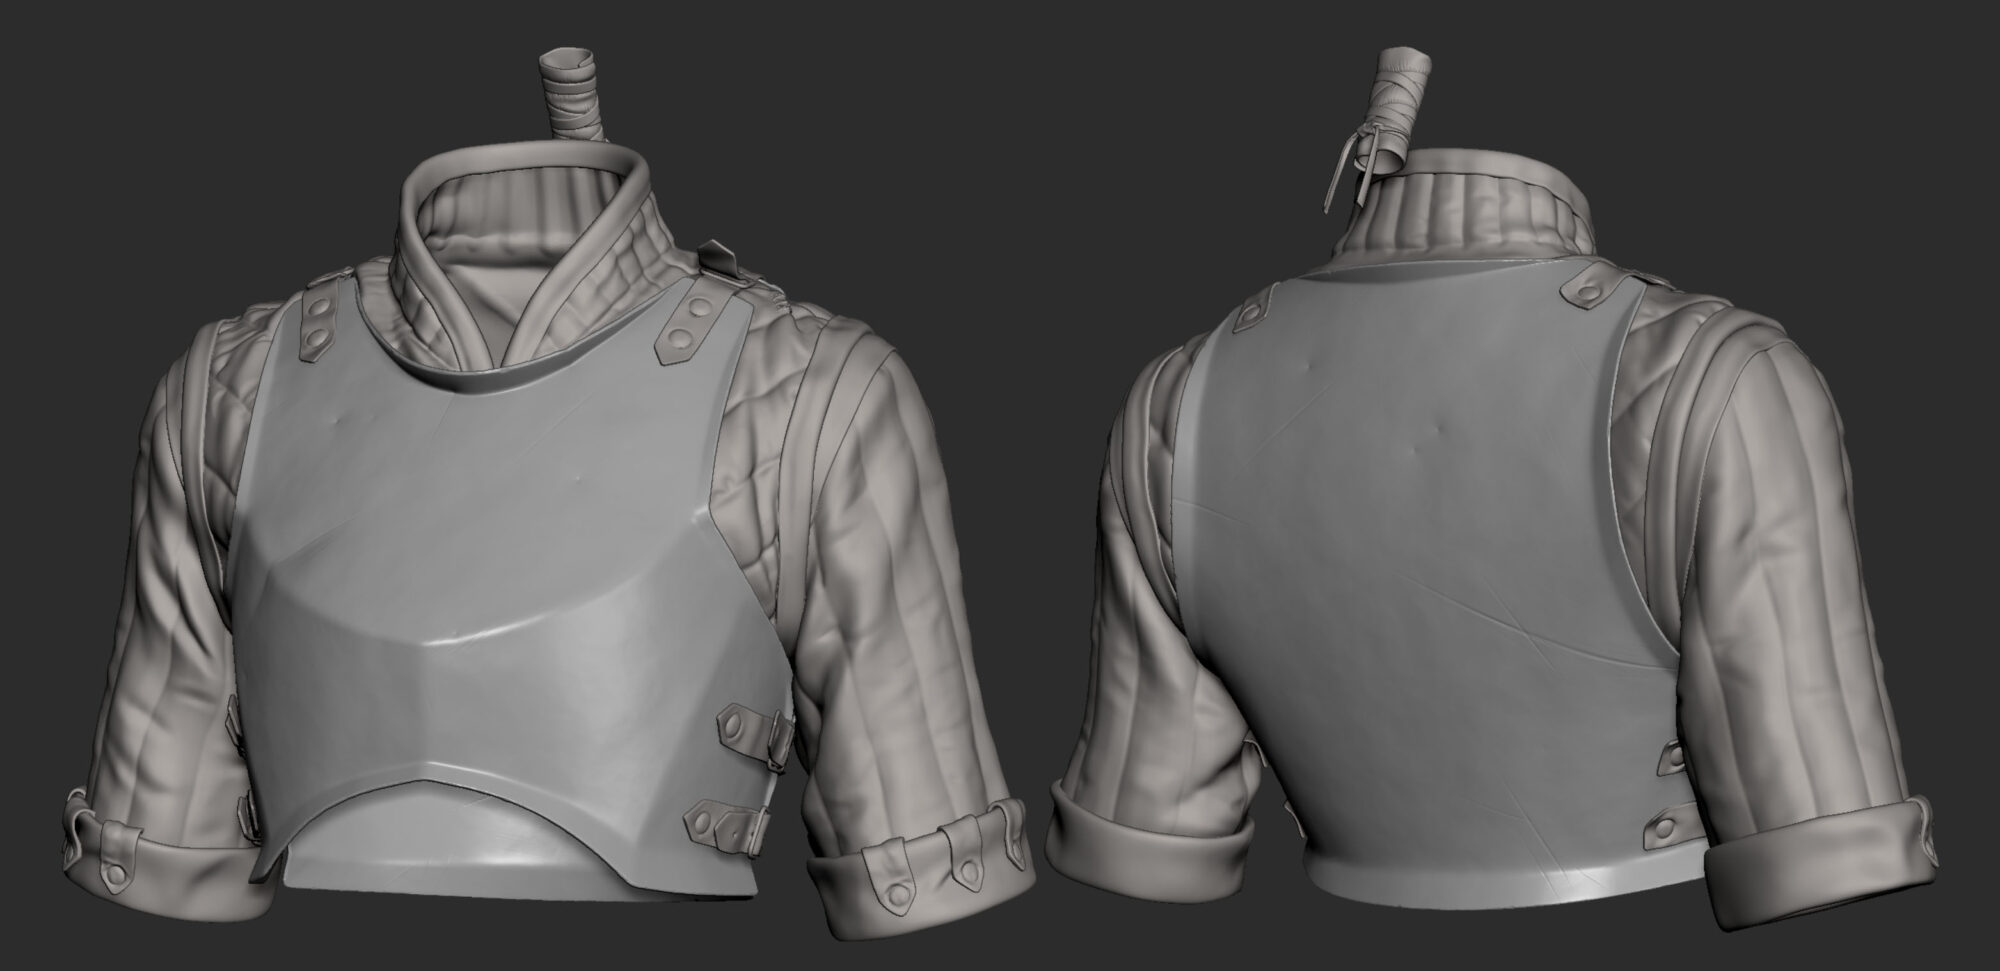
As for hard surface objects like the armor, instead of polygrouping based on panels of cloth, I based it on sharp angles and where I wanted to put creases.
And I didn’t reproject after getting a nice ZRemeshed base since I wanted clean meshes.
Instead, I creased edges that I wanted to keep sharp (if I did it properly before, that would be based on polygroups) and used Dynamic Subdivision to see how it would look on higher subdivisions and adjusted the crease level based on that without actually needing to commit to anything.
Once I was happy, I applied the Dynamic Subdivision and sculpted some imperfections into the metal, like bulky surfaces, worn edges, scratches, etc. I did this by going in circles with the Standard Brush with a high Lazy Step and DamStandard in various modes.
All of this was kept in layers so I could easily modify their strengths.
UV Mapping & Baking
When creating UVs for clothes, I based it on how I thought the real-life pattern would look (or how I would create it in Marvelous). So a seam in the clothing = a seam in the UVs.
Then I made sure to straighten it where it would make sense (again, based on the pattern). Texturing really begins with the UVs, and if clothes aren’t done like this, applying tiling patterns or graphics later would be an absolute nightmare.
Then I scaled down some UV islands that wouldn’t be visible (such as mesh caps) if they occupied a lot of space and lastly let Maya do its automatic layout.
It’s not very optimized though, but that wasn’t a focus for this project.
With this, I moved on to baking, which was very straightforward in Marmoset Toolbag 4.
Texturing – I ❤️ Painter
Before texturing, I always go on a little reference hunt. I did it in the beginning already, but that was mostly for the form. This time I was searching for interesting materials.
When searching for medieval stuff, LARP and cosplayers are great, since lots of them have blogs/albums with zoomed-in and high-res pictures of their creations.
Museums and (if you’re lucky) auction sites are also fantastic.
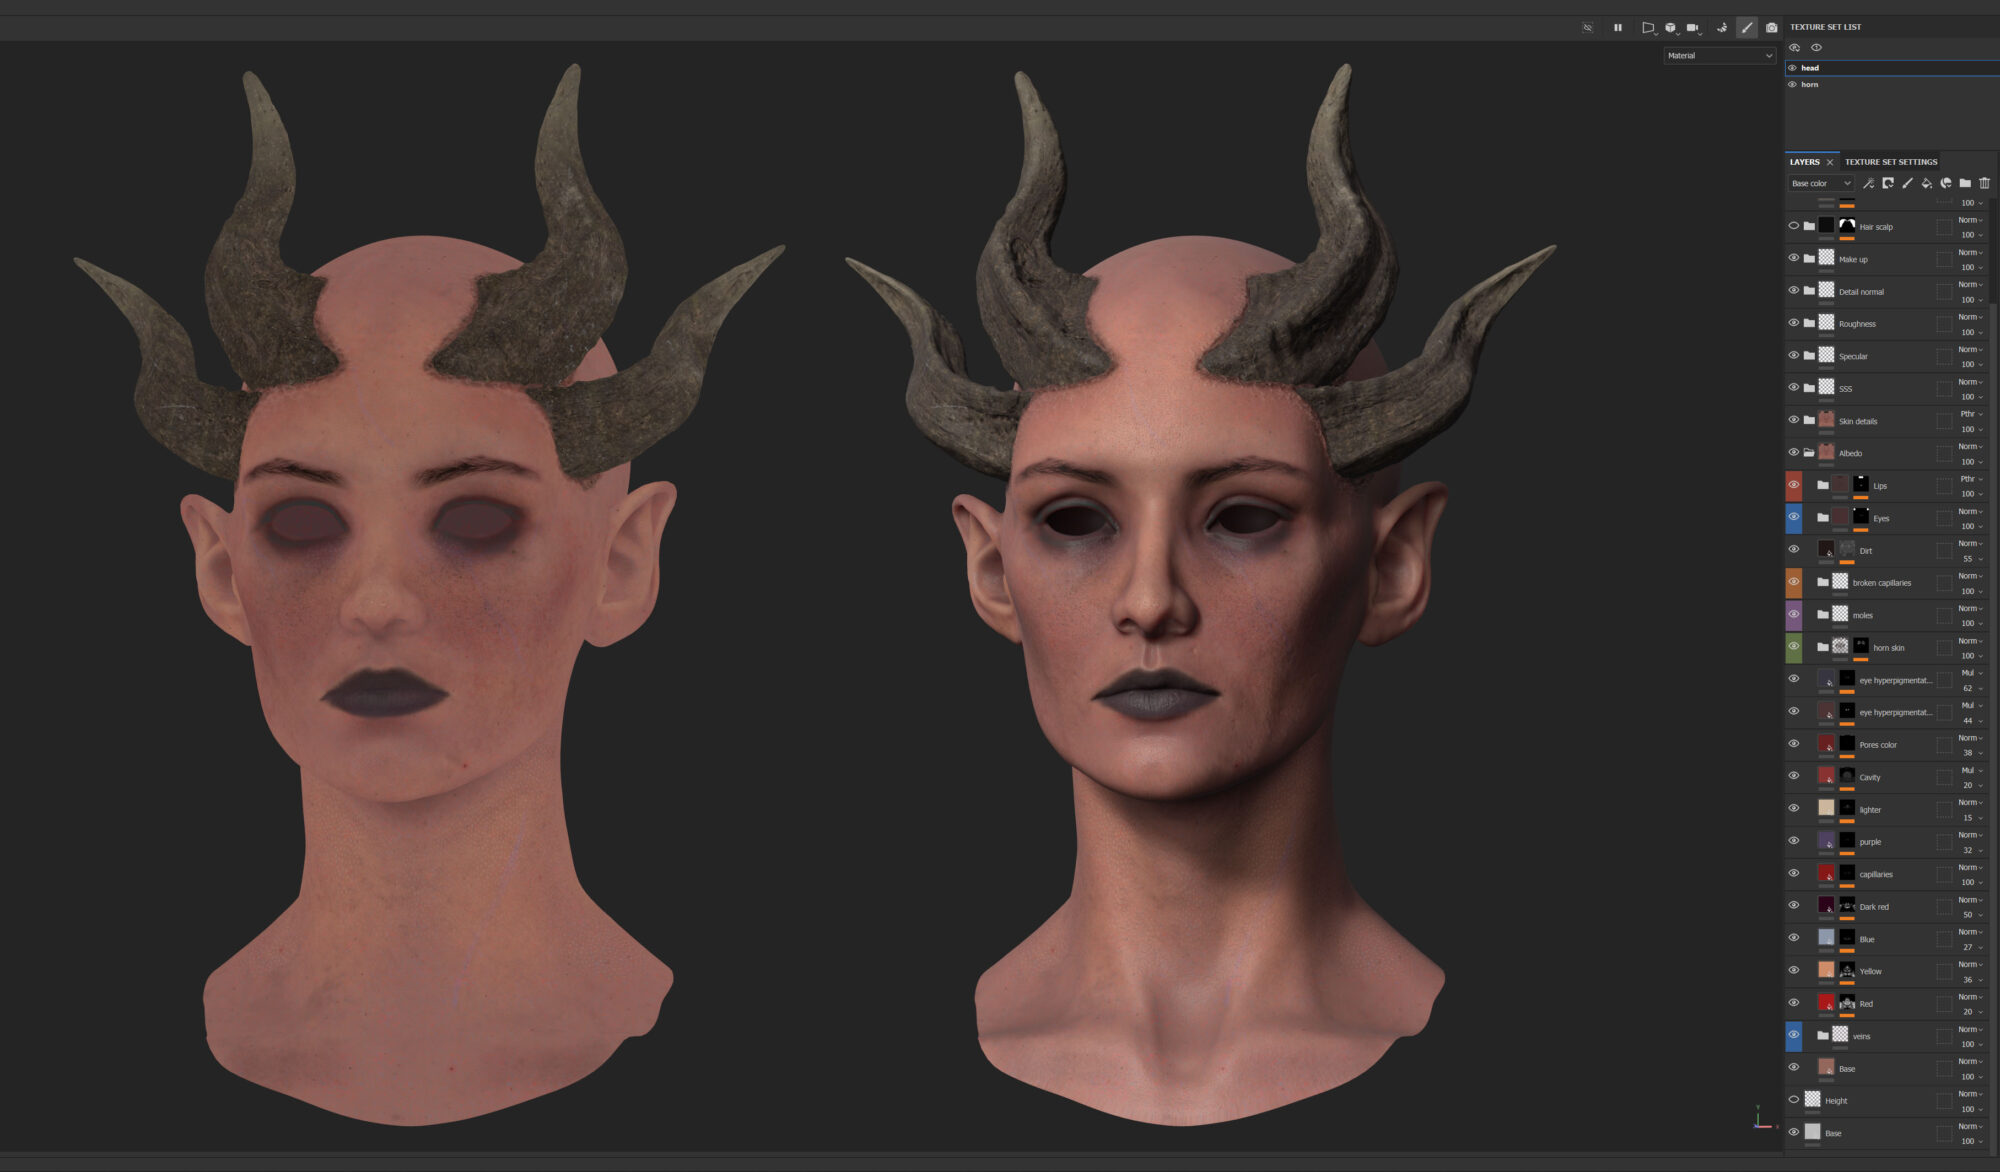
When texturing a head, I usually just hand paint everything since I find it enjoyable and rewarding.
An issue in the beginning was that I couldn’t find a lot of references for red people (big surprise), so I started as if it was Caucasian skin, and once it looked alright, I changed the colors to fit a red skin tone.
What I usually do is focus solely on the base color and get that to look good before worrying about anything else. My favorite brush for this is the Cotton Brush in Painter.
I used it with low opacity and flow and just gently dabbed my Wacom to gradually paint the masks for the Fill Layers. The result is a bunch of colors stacked on top of each other based on what I saw in references and what I thought worked.
And then as a final step, I add some grunge maps as a break-up of the color.
For the clothing, I used Outgang’s Textile Generator to get a base fabric and it was just a matter of general texturing, nothing fancy.

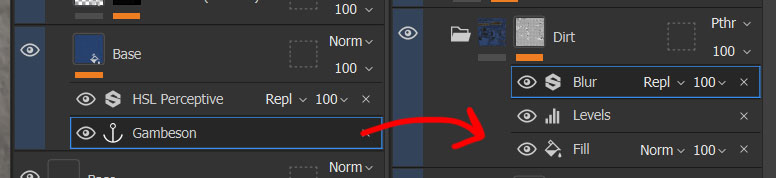
If there is any special tip I can give out though, it would be to use the height information from the base fabric to apply dirt.
You do that by using an Anchor Point in the base fabric and calling upon height (or whichever channel works the best) as a mask for the dirt.
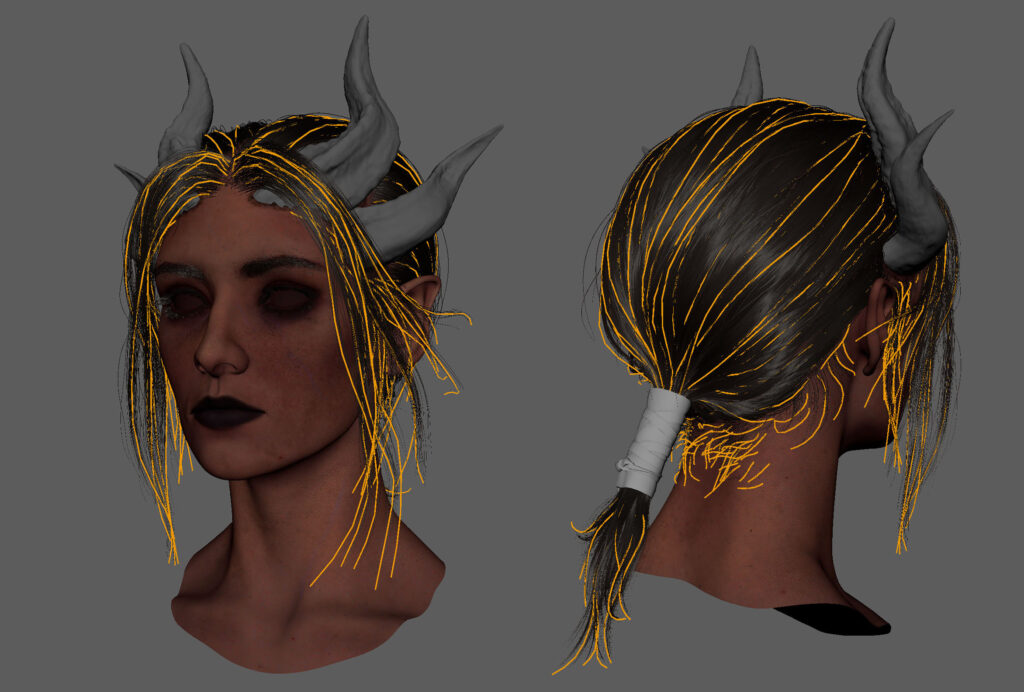
Hair Creation
For the hair, I experimented with several different styles before ending up with the current result. The horns’ position made it a bit awkward; it easily looked like she had a receding hairline or was straight-up bald, hence the bangs to help cover it up.
And the ponytail was to emphasize the adventurer vibe. I wanted to use Unreal’s new-ish groom system since I had never used it before and it looks awesome. (And because placing hair cards isn’t fun).
For this workflow, I used XGen, which I had dabbled in a bit before but never fully grasped. I learned a lot from this project.
FACS Setup & Rigging
I created the FACS one by one by first blocking them out in Maya and then refining them in ZBrush.
I saw people online doing full expressions and then extracting parts of it as one blendshape (e.g., make an angry face and then mask out eyebrows for a brow lowered, mask out the nose for nose wrinkler, etc.).
I didn’t get great results from that workflow, so I opted for this more modular approach.
Blocking out in Maya mainly involved using clusters.
They act the same as joints when rigging but are deformers instead. So, I place a cluster at a part of the face, move/rotate/scale it, and then mask out its influence.
I use a few of them per blendshape. Here you can see an example of when I blocked out the Lip Funneler blendshape (the + icons are the clusters, please ignore the Cs):
This gets the big movement and is much easier and non-destructive than doing it entirely in ZBrush.
But while the movement feels nice, there is some volume loss that needs to be fixed. So it requires a sculpting pass.
A big thing in making it feel natural is getting some skin sliding, which is when the skin slides along the surface but the underlying form doesn’t change because there’s fat and muscle underneath.
It’s most noticeable with textures on, so I highly recommend sculpting the FACS with at least a base color, but preferably also a normal map on.
The way I handled it was using Morph Targets in ZBrush.
If you first store a Morph Target, and then in a new layer move some skin around, you can then mask the part that you moved and project the mesh back to the previous form.
This keeps the same form but with moved quads, and you get the effect of topology sliding along the surface as you scrub activate the layer.
(For a better explanation, you can head to Joaquin Cossio’s Artstation page.)
This was used a lot across the different blendshapes. Here’s an example; notice the skin on the cheek sliding across it as the mouth moves:
Some movements required two blendshapes to look natural, e.g., lip suck:
And sometimes blendshapes would look good in isolation, but when combined with another shape, they wouldn’t work and look bad.
In that case, a corrective blendshape would be needed.
You do that by having a blendshape of the bad result and a blendshape of the result you want, a good result.
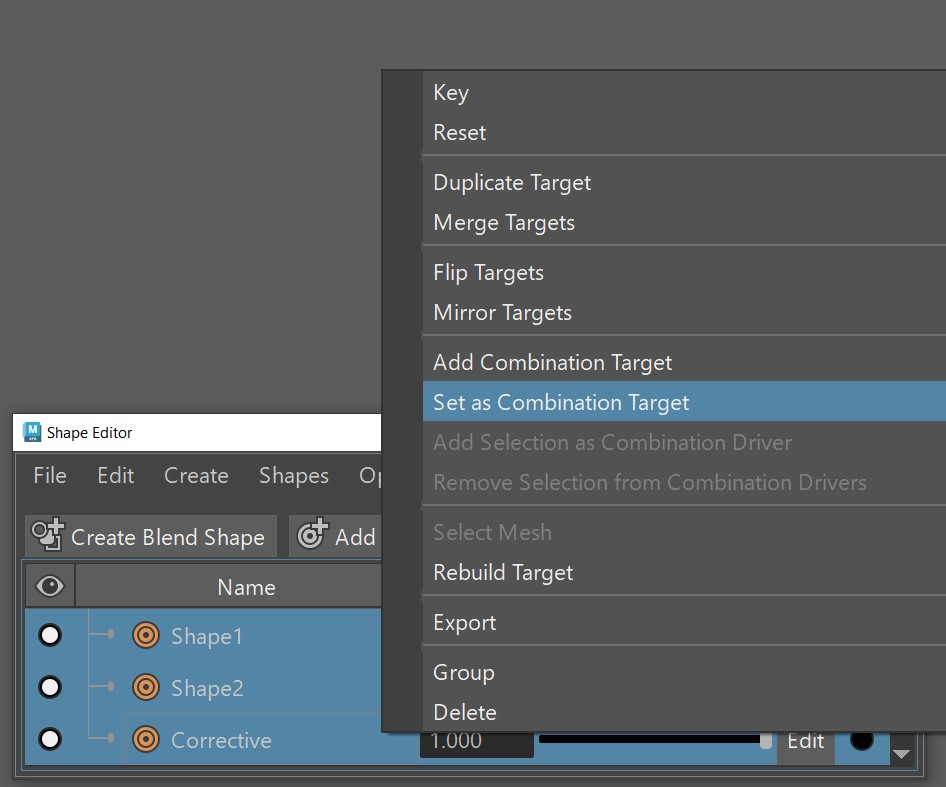
And then in the Shape Editor, setting the bad result’s weight to -1 and the good to 1 would give you a weird-looking mesh that’s now the corrective shape.
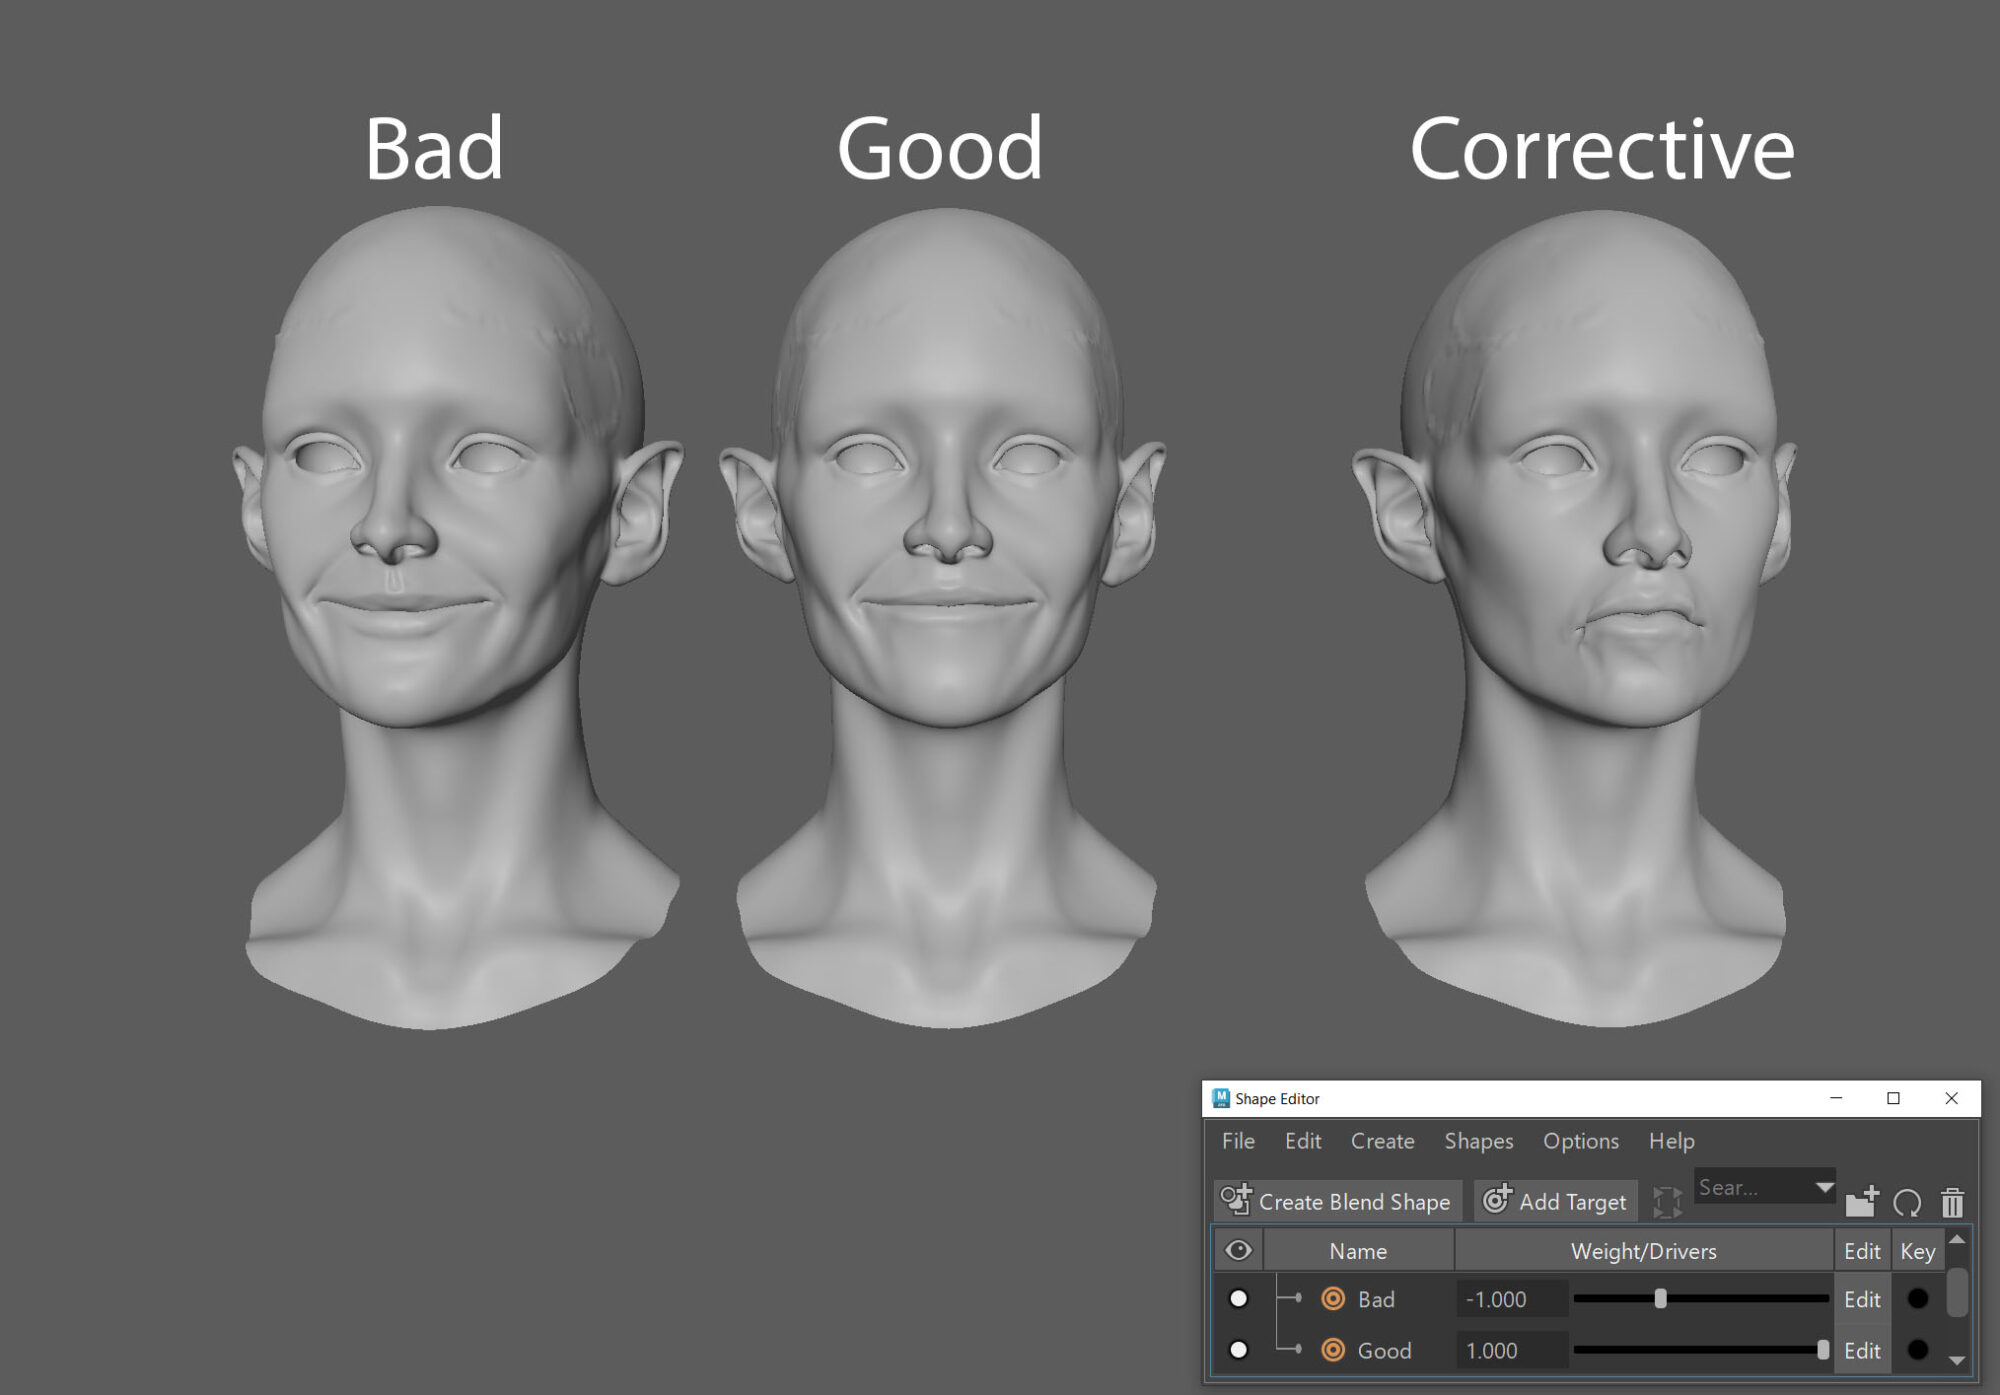
In the Shape Editor, select the two blendshapes that don’t work together and lastly, the corrective shape, right-click > Set as Combination Target.
This will then activate the corrective whenever both shapes are active at the same time and it won’t look bad anymore!
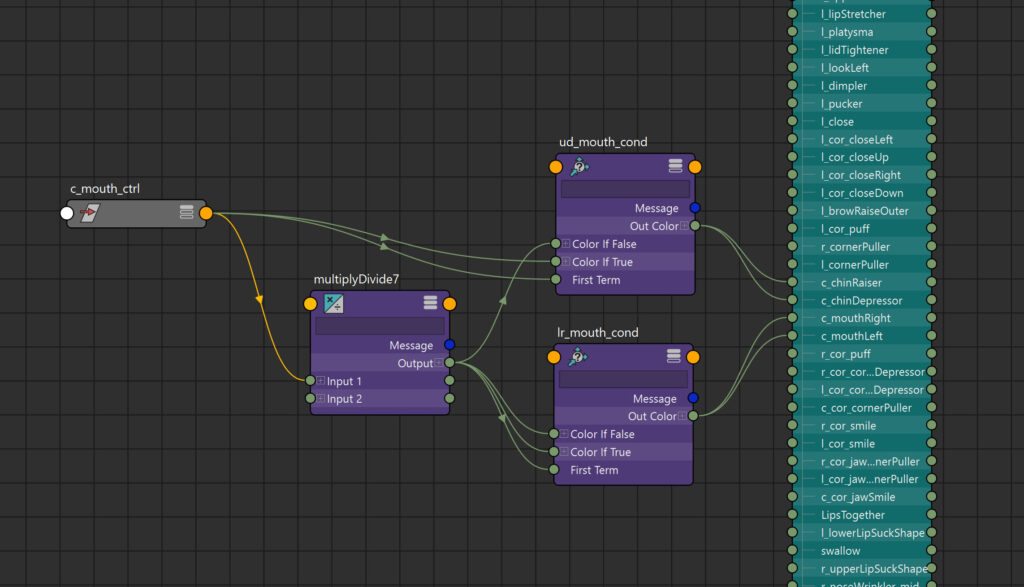
Once all this was done, I could hook everything up to NURB controls to create the rig!
This was very simple and involved constraining the controls’ transformation and connecting them to the blendshape weights in the Node Editor.
Some multiply and condition nodes were used to ensure the values being fed into the blendshapes were within 0-1.
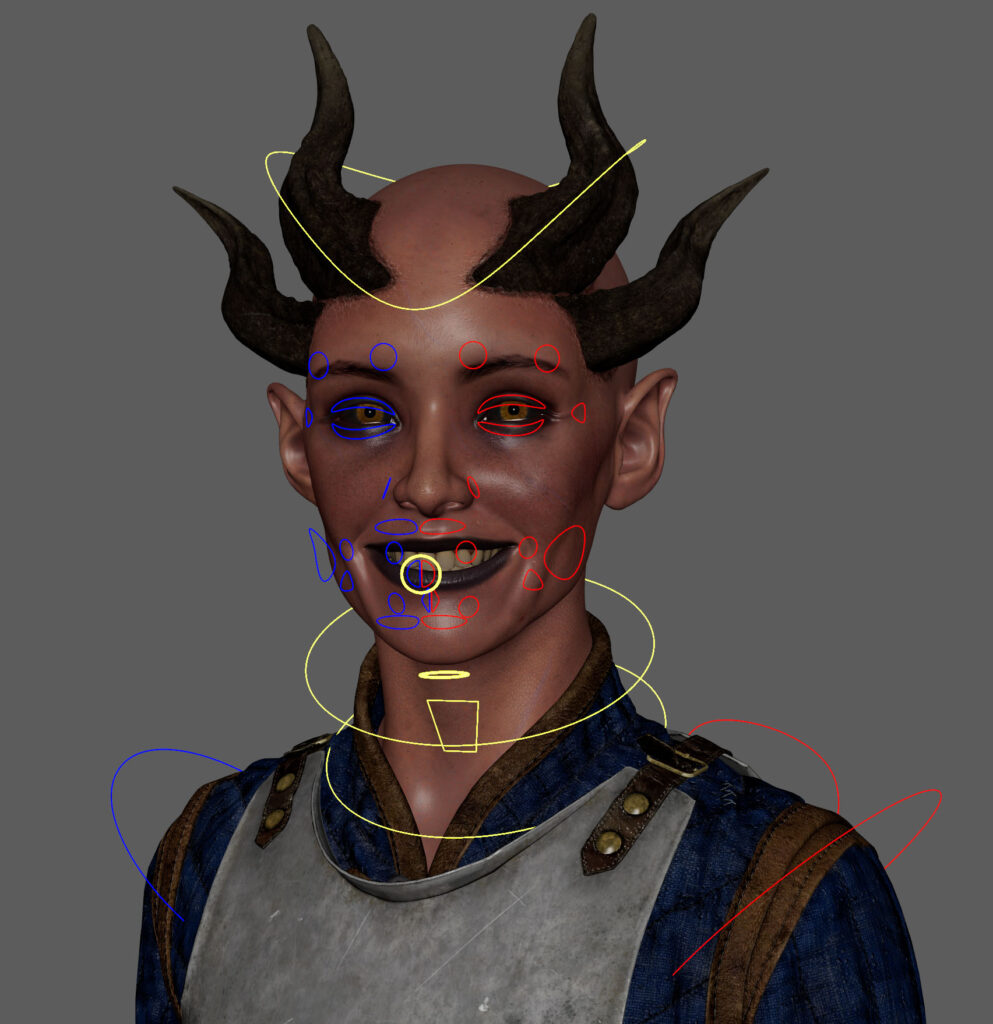
Rendering
The last step is the presentation of course! A simple three-light setup was used and an environment from the Unreal marketplace to get some pretty pictures.
I wanted to test out Path Tracing so my still images all use that. The videos I exported use Lumen though because I don’t want to grow old and die before I get my videos rendered.
Here’s a turnaround of the final result:
Conclusion
I learned a lot during this project, but my biggest takeaways would be how to set up a face rig and how Unreal’s groom system works.
I worked on it very on-and-off, so it took several months to create, but I’m happy with the result and can move on with my life now.
Obviously, there are lots of things I didn’t write as well, but this is the general gist of it.
Thanks for reading!
I’ll leave you with these links; some are stuff that I mentioned above while others are stuff that helped a lot during the making of this project.
https://thegnomonworkshop.com/tutorials/introduction-to-creating-facial-blendshapes-inmaya
(I honestly can’t take credit for a lot of what I wrote regarding blendshapes, since I learned it from this course by Derrick Sesson. He goes over it much more thoroughly than I did!).
https://melindaozel.com/facs-cheat-sheet/
(GIFs of FACS by Melinda Ozel).
https://outgang.studio/downloads/textile-generator-pro/
(Outgang’s textile generator).
https://www.artstation.com/artwork/zPnkxq
(Skin sliding by Joaquin Cossio).
https://www.youtube.com/@AG_Groom
(Lots of useful info here about Unreal’s groom system from Andrew Giovannini).
Read more articles
You might also like these articles.