
Introduction
Hello everyone! I'm Ayrton Diaz, a 3D Character Artist from Huacho, Lima–Peru, specialized in characters for cinematics and videogames.
I originally studied Graphic Design, a field where I worked as Art Director for eight years before transitioning into the world of 3D. My journey began fully self taught learning from small tutorials on YouTube and later I strengthened my foundation through specialized mentorships.
The Project
This project is the result of the most challenging and demanding mentorship I’ve taken so far, taught by Ankit Garg at Zombie Art School. The mentorship focuses on creating high-quality AAA characters, with a strong and consistent emphasis on outfit construction.
The program lasted six months and was divided into two parts:
- Core Character: A month and a half dedicated to deeply understanding the fundamentals of clothing creation.
- Advanced Character: The second and most intense phase, lasting three and a half months, where we developed a full AAA character of our choice.
In this article, I’ll walk you through the entire process of creating this character, sharing not only the technical decisions but also the artistic thinking that guided me through each stage.


Concept Art
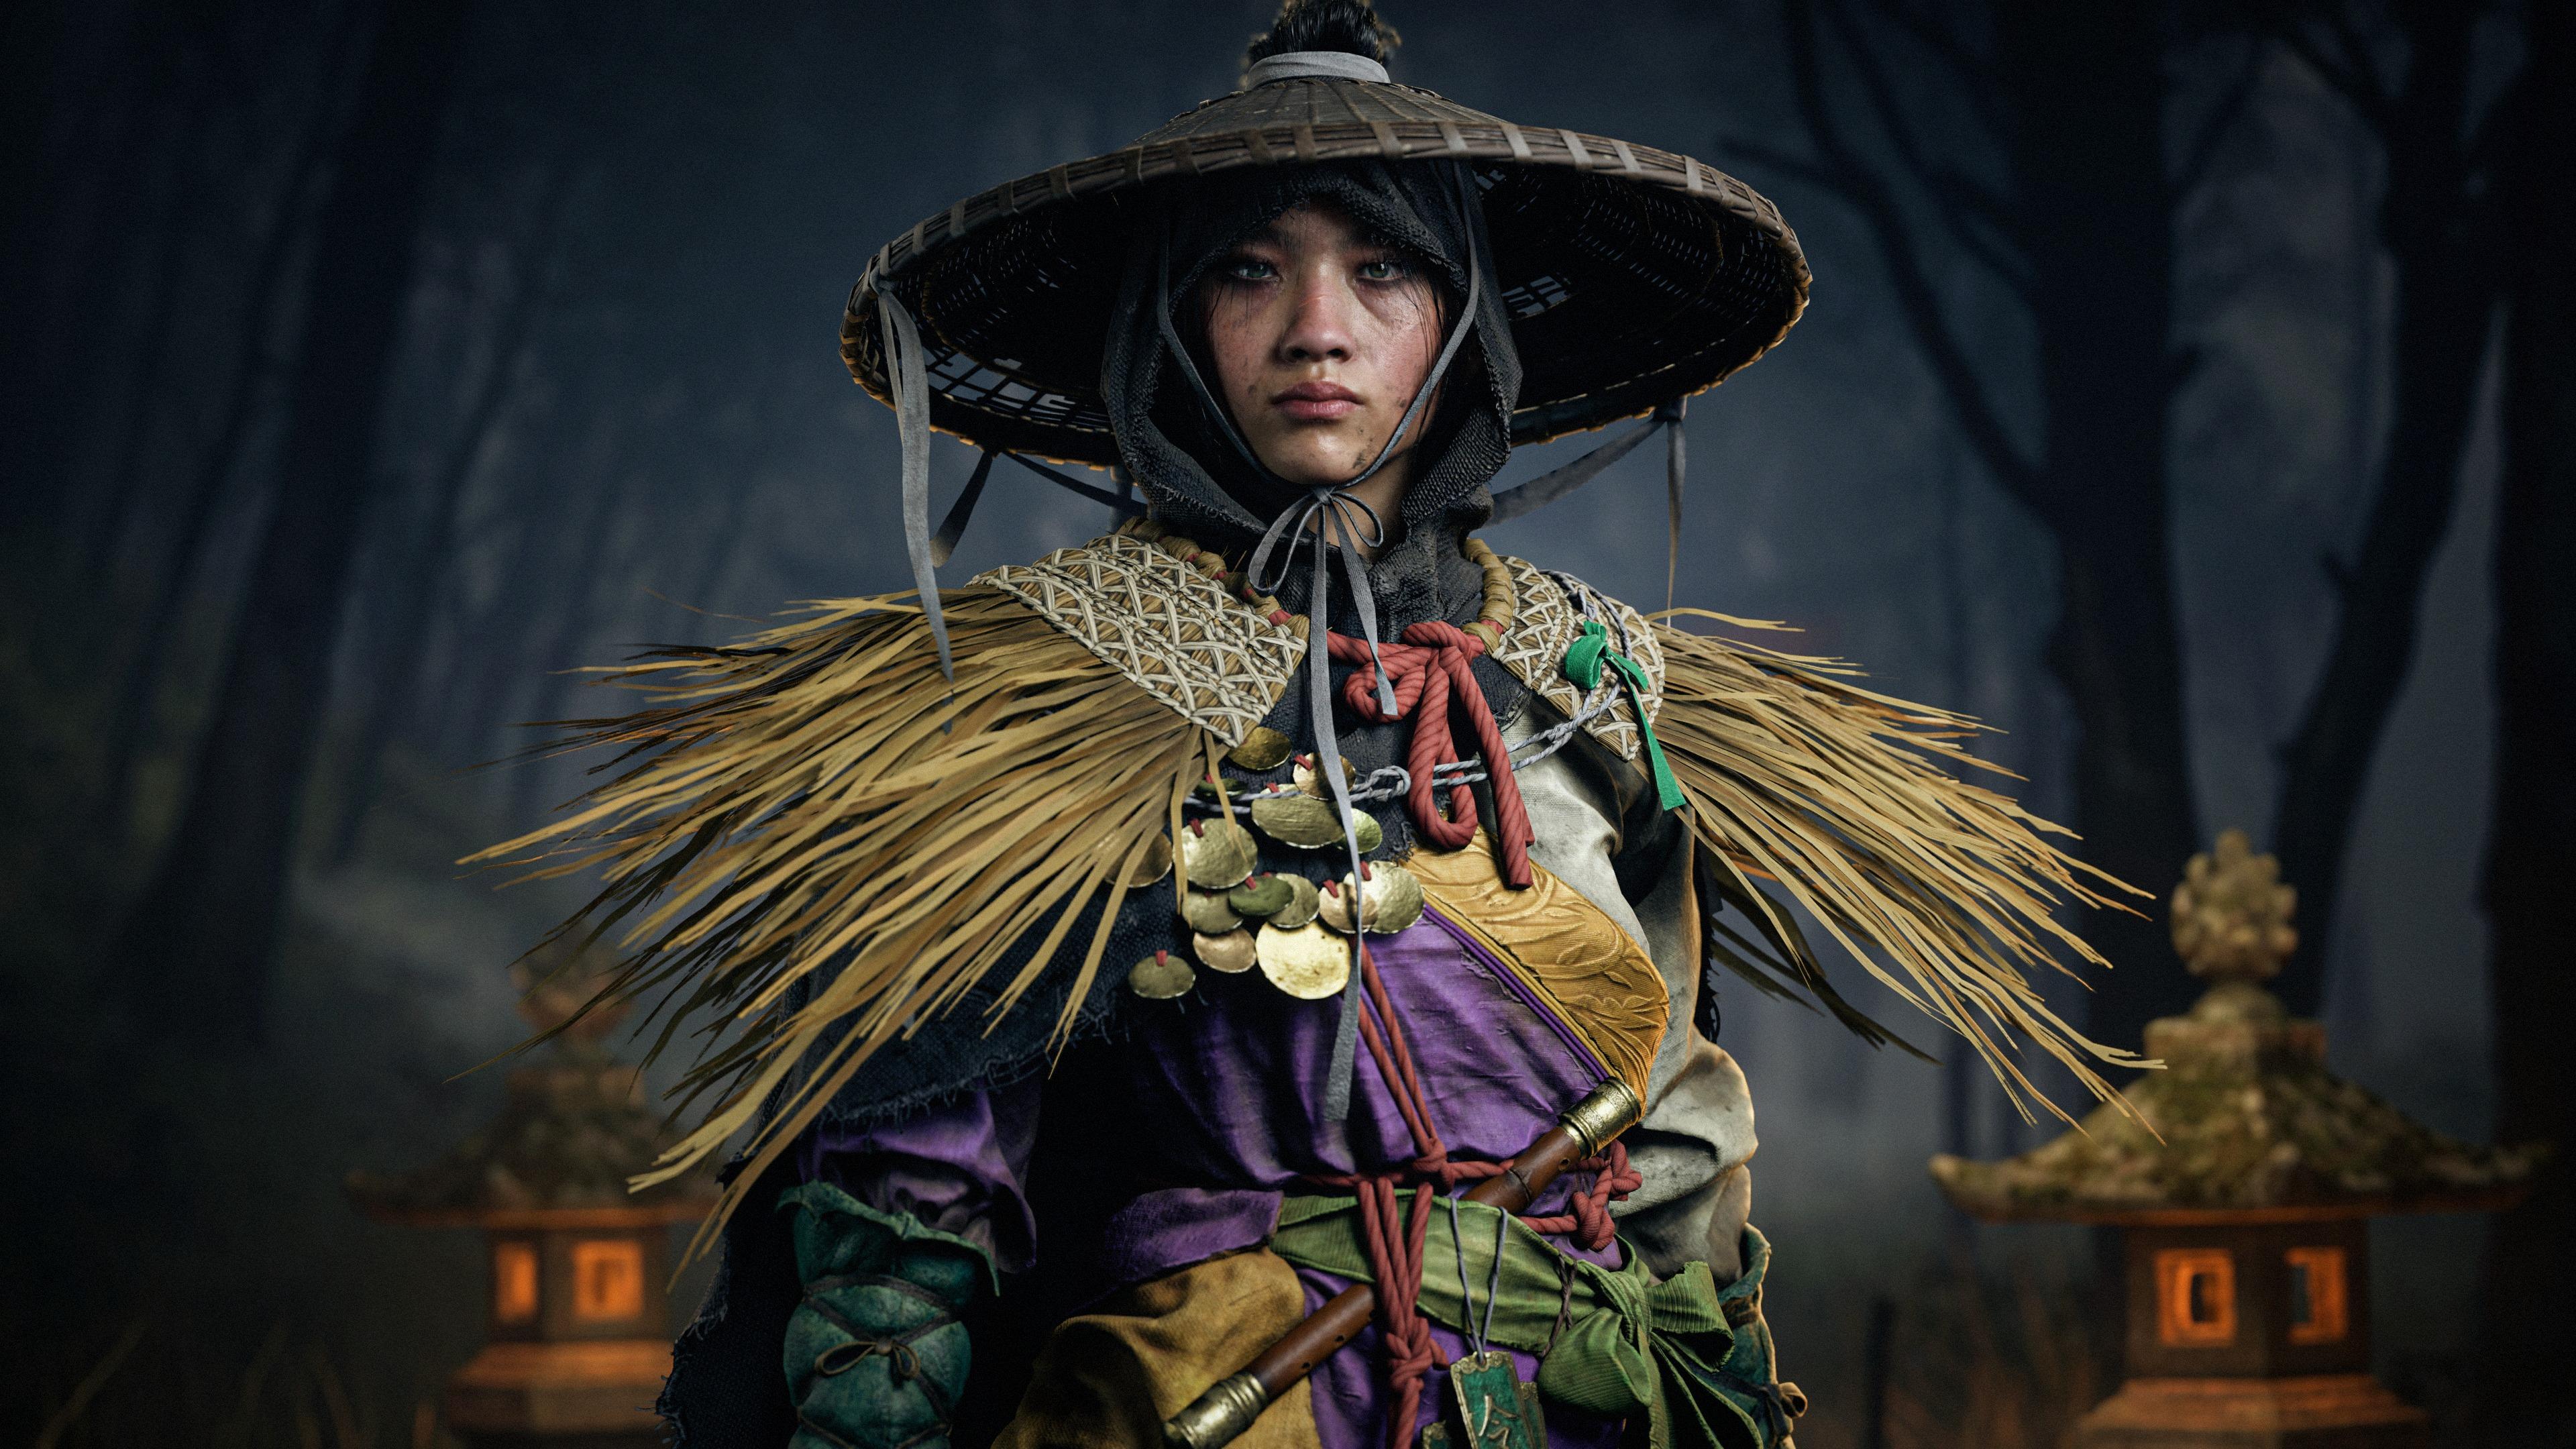
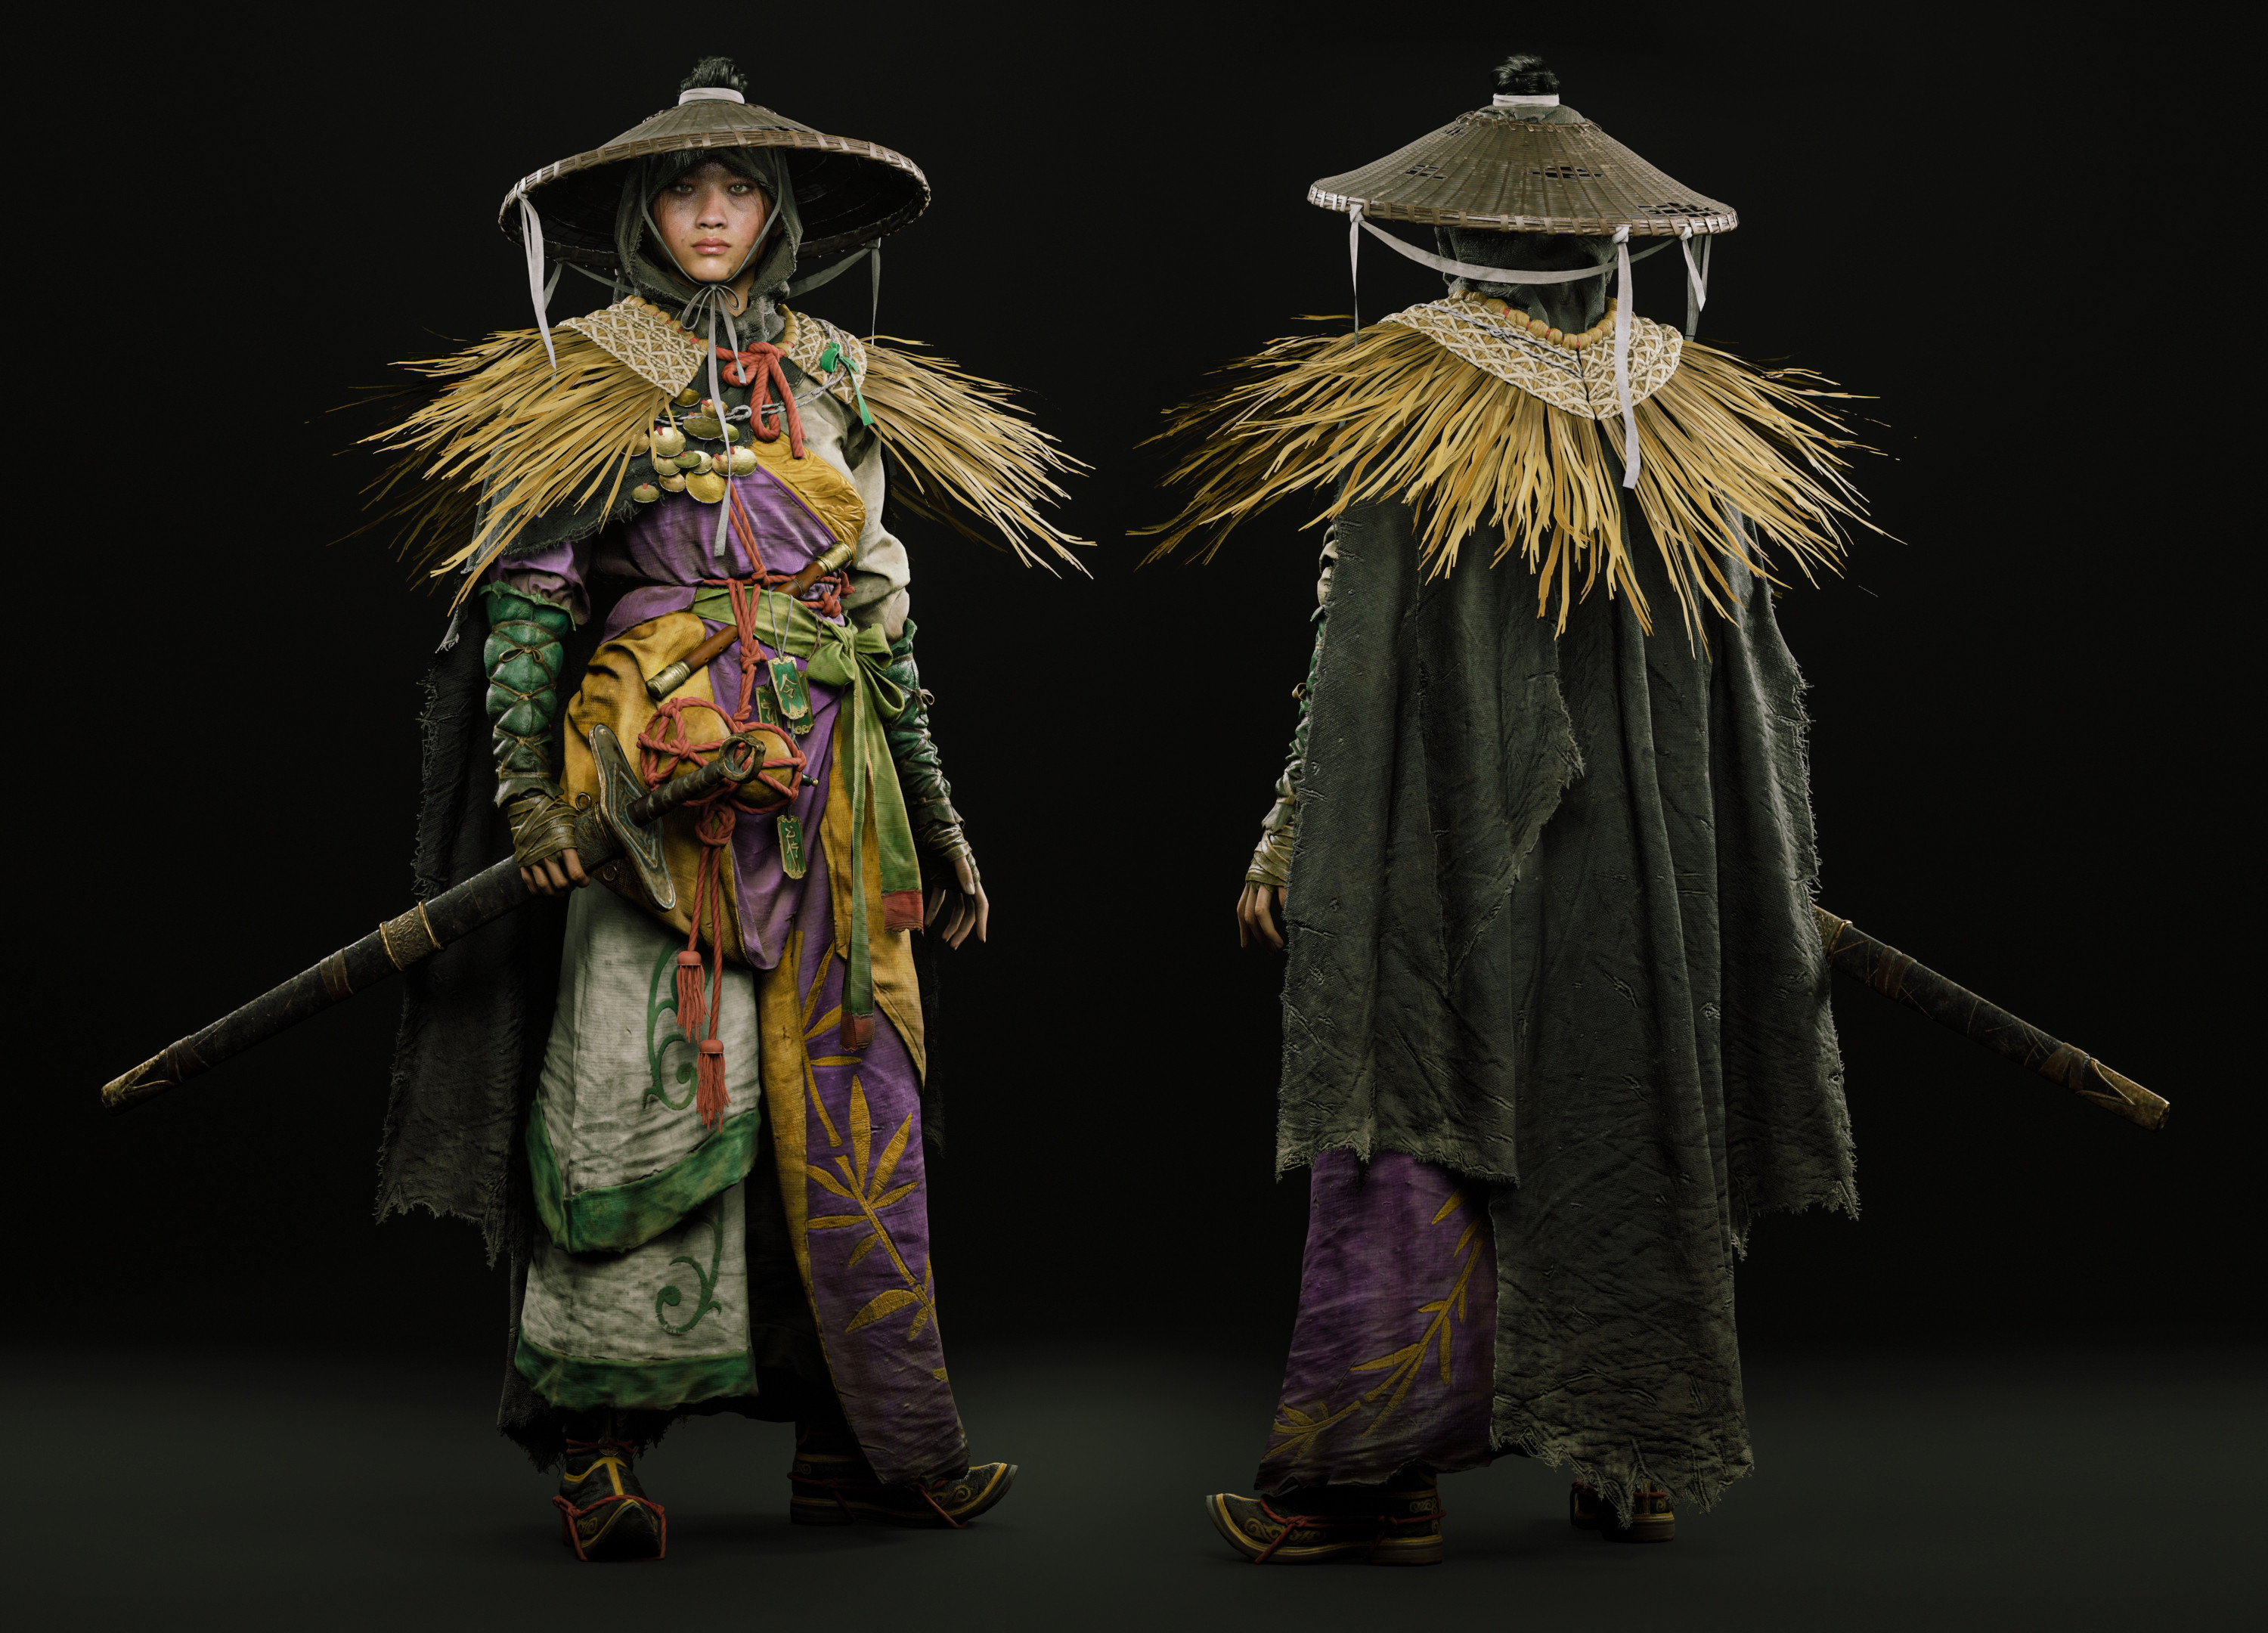
For this mentorship, I chose a concept created by the amazing artist 顾德雄. I was immediately drawn to its complexity, its unique color palette, and the strong storytelling potential it offered when translated into 3D.
All of these elements felt essential, as one of my main goals with this project was to create a character that truly stood out.

Goals
Before starting, I set several clear goals for myself:
- Build a character that could coexist in the world of Ghost of Tsushima, which I used as my main quality benchmark.
- Learn and fully integrate every part of the project into Unreal Engine, one of the most in-demand tools used in studios today.
- Create a character where every element interacts correctly—ropes, pressure, clothing tension, and all the subtle details needed to feel believable.
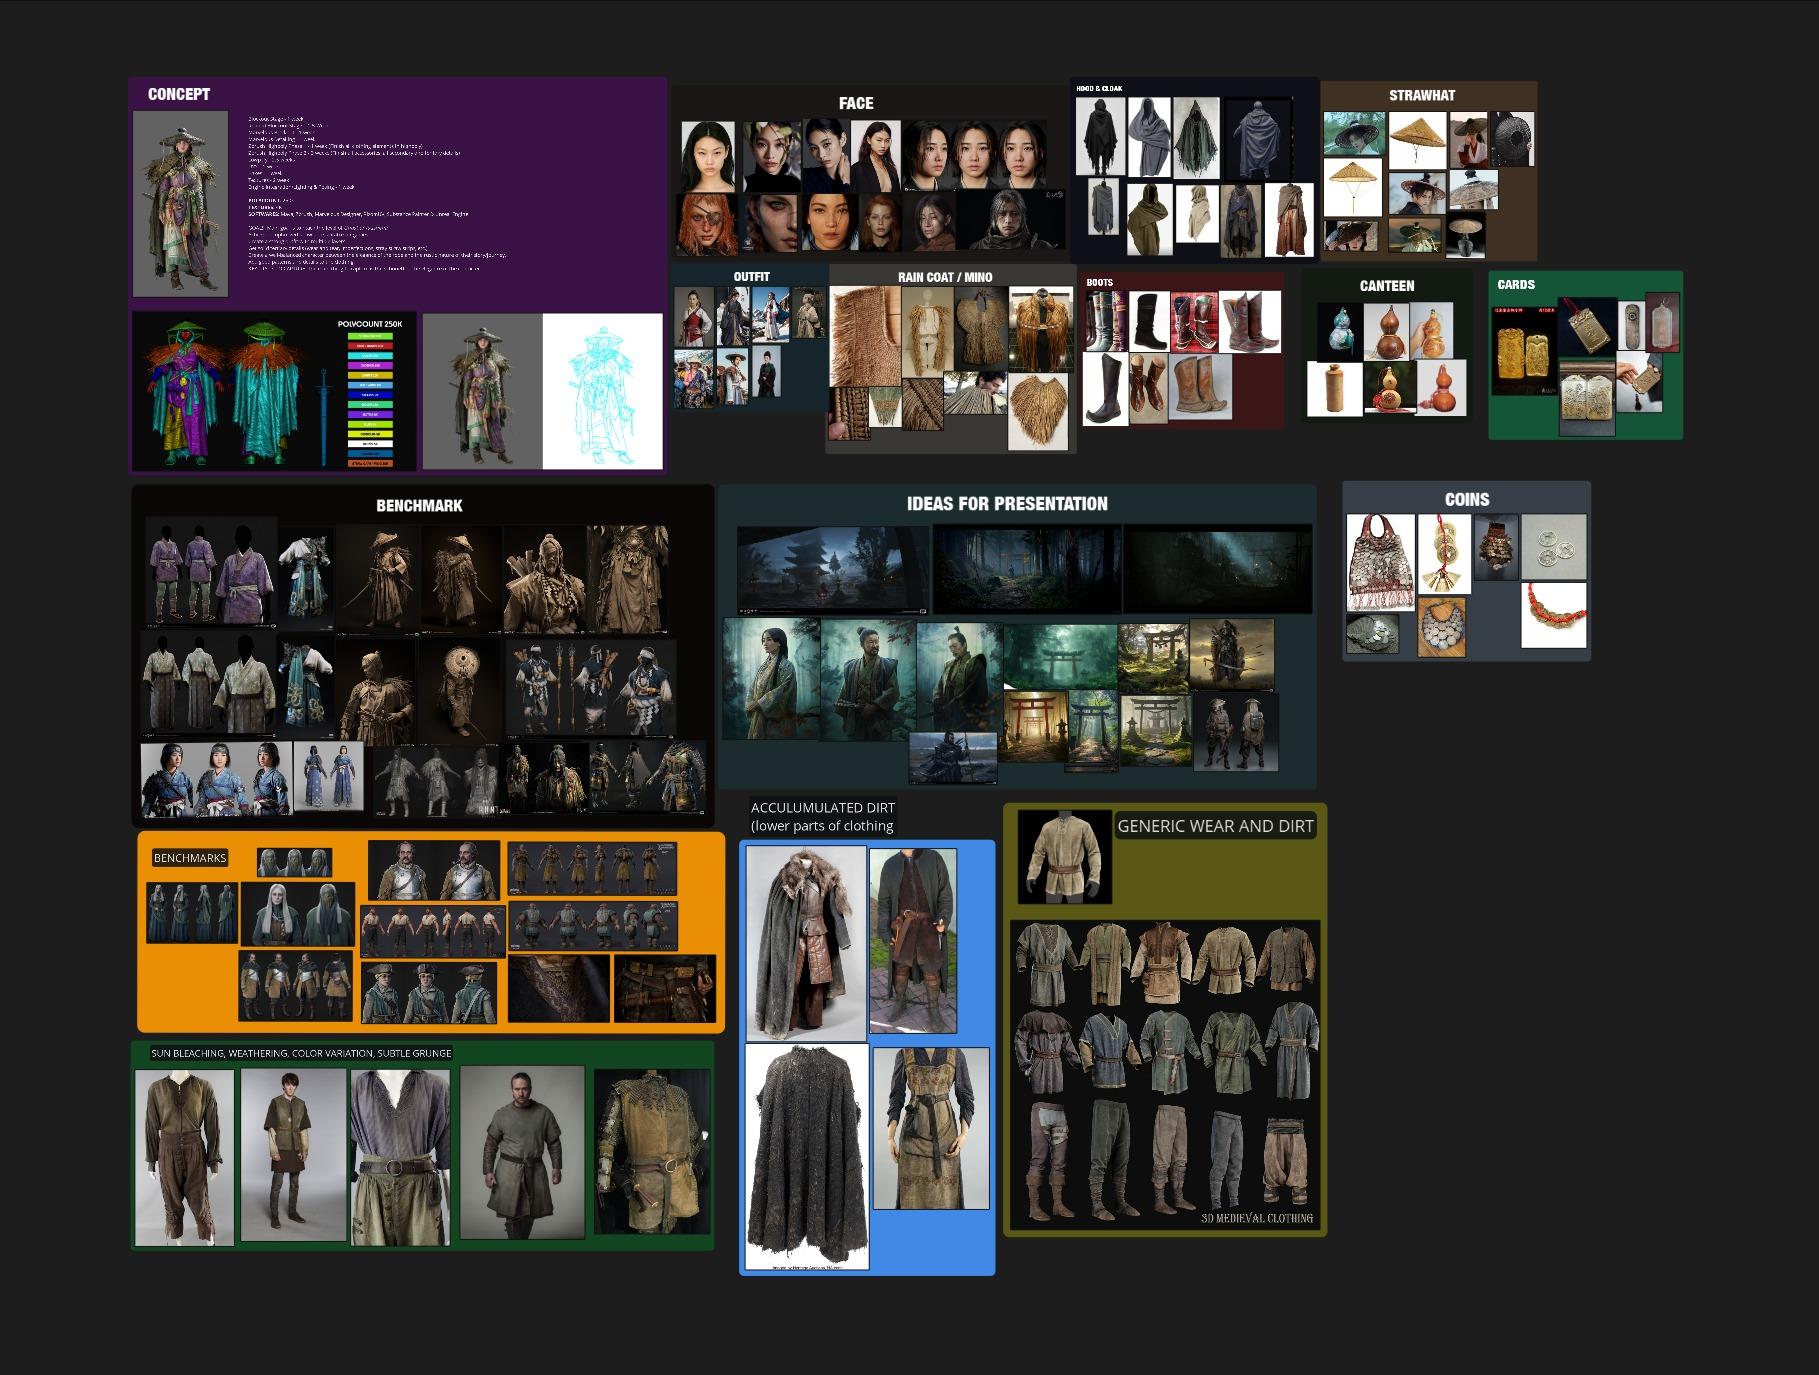
References
Like any character project, nothing can begin without strong references. I gathered real-world references in PureRef for each element of the concept, since grounding everything in reality always helps.
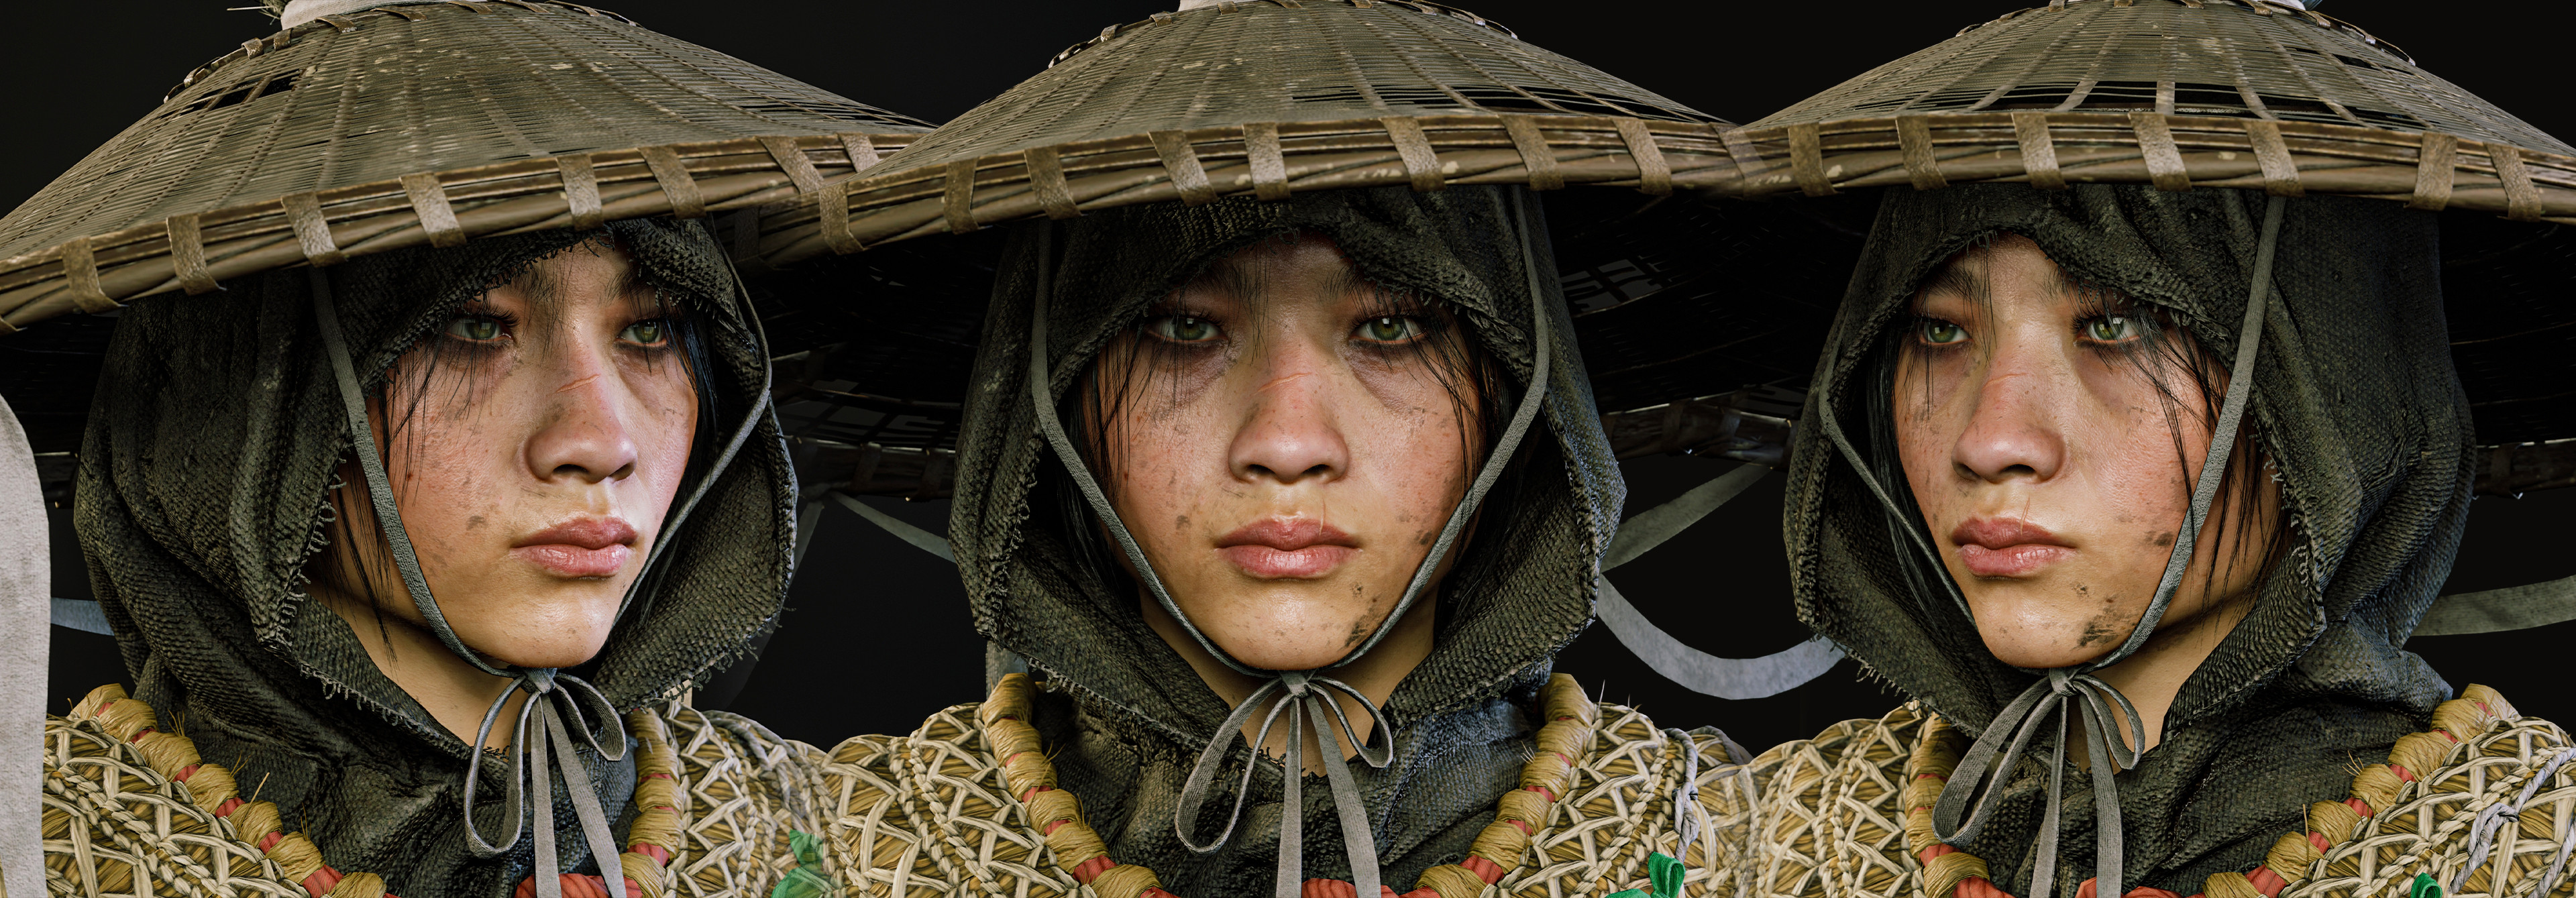
For the face, I based the likeness on South Korean actress Jung Ho-yeon, whose features carried the exact attitude and boldness I wanted to portray.
I also added a Benchmark section with images from Ghost of Tsushima, Black Myth: Wukong, and other works that matched the level of quality I wanted to achieve. These were divided between final renders and high-poly/clay shots, as I love analyzing clay renders to understand how other artists approach form and detail.
Finally, I included cinematic imagery to study lighting, color, and composition. This helped me visualize the mood and feeling I wanted for the final renders.
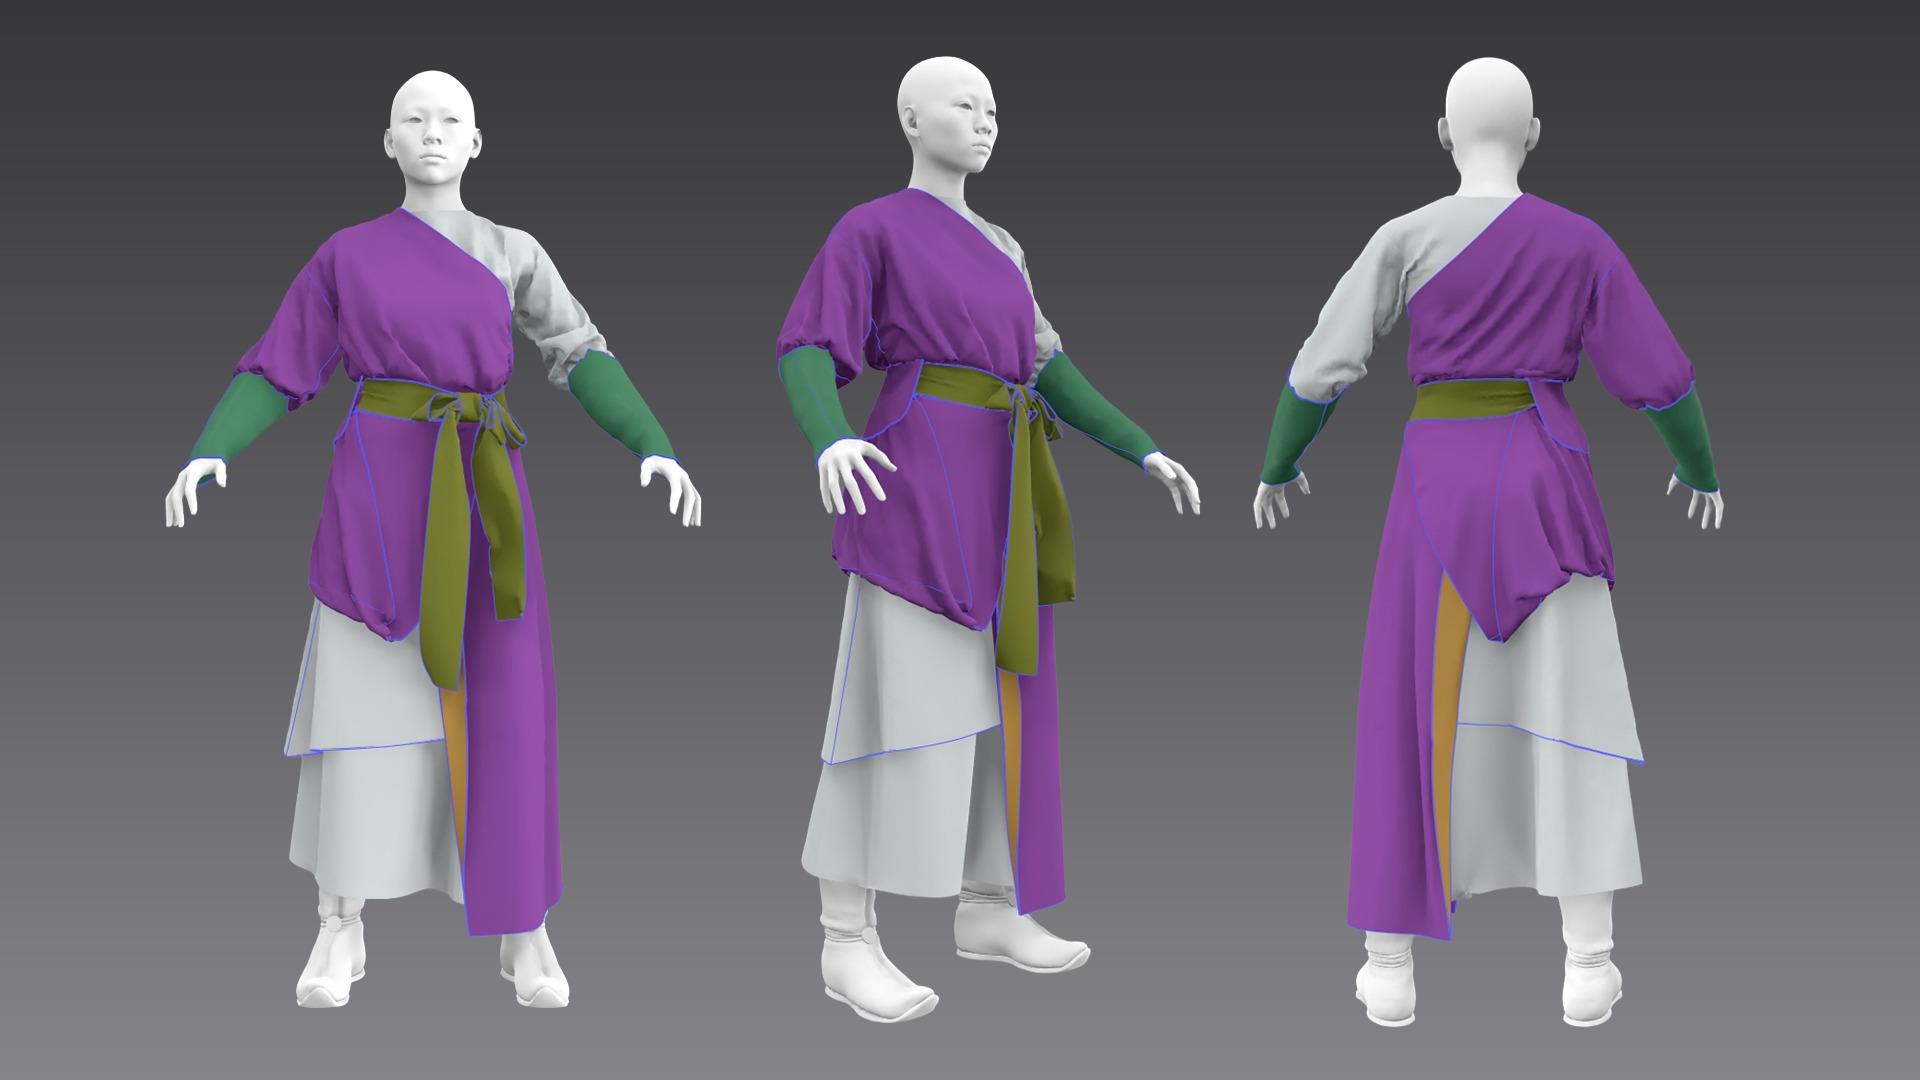
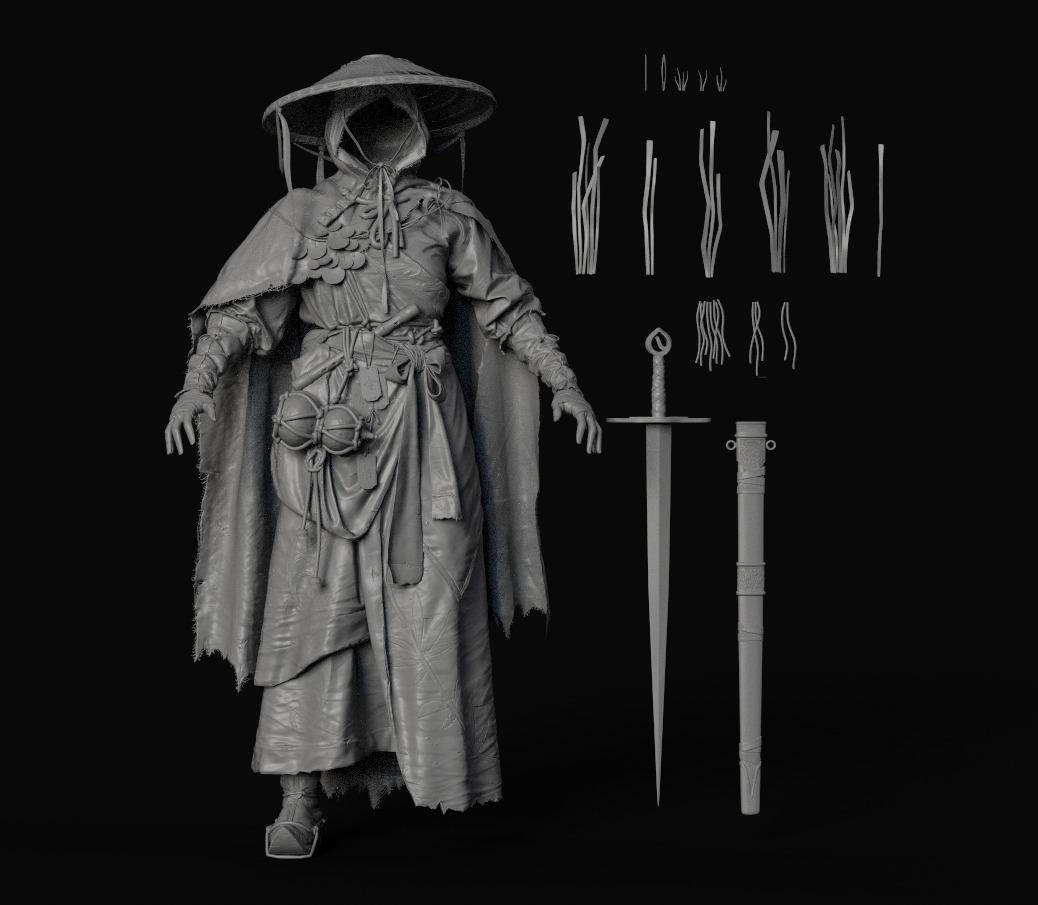
Blockout
This stage is crucial, as it allows me to visualize the character’s overall proportions and silhouette clearly. I began by blocking out the outfit pieces I would later build in Marvelous Designer, placing each component in its correct position.
A key focus during blockout was identifying interactions and pressure points between objects—something I knew would be essential for achieving a cohesive and believable outfit.
I also blocked out all the knots at this stage. While it added complexity early on, it paid off later when everything started coming together visually.

Cloth Simulation
Once the blockout was complete, I moved into Marvelous Designer to build each garment. I created a quick retopology using ZRemesher, exported clean meshes into Marvelous, and used them as bases for my patterns.
My workflow followed three clear steps:
- Establishing a solid fit (primary forms).
- Refining the patterns to achieve appealing secondary shapes.
- Increasing particle distance to work on tertiary details.
For the cape, I created a separate Marvelous file using all previous geometry as a base, which made the simulation process much more comfortable and efficient.

High Poly
After finishing the simulations, I brought the garments into ZBrush, following a clean retopology pass in Maya. Preserving Marvelous UVs is something I always do, since these meshes often serve as the base for the final low-poly and, in some cases, their UVs can be reused.

For general detailing, I relied on simple brushes such as Standard, DamStandard, and Move, constantly adjusting the mesh to maintain the silhouette planned from the very beginning.

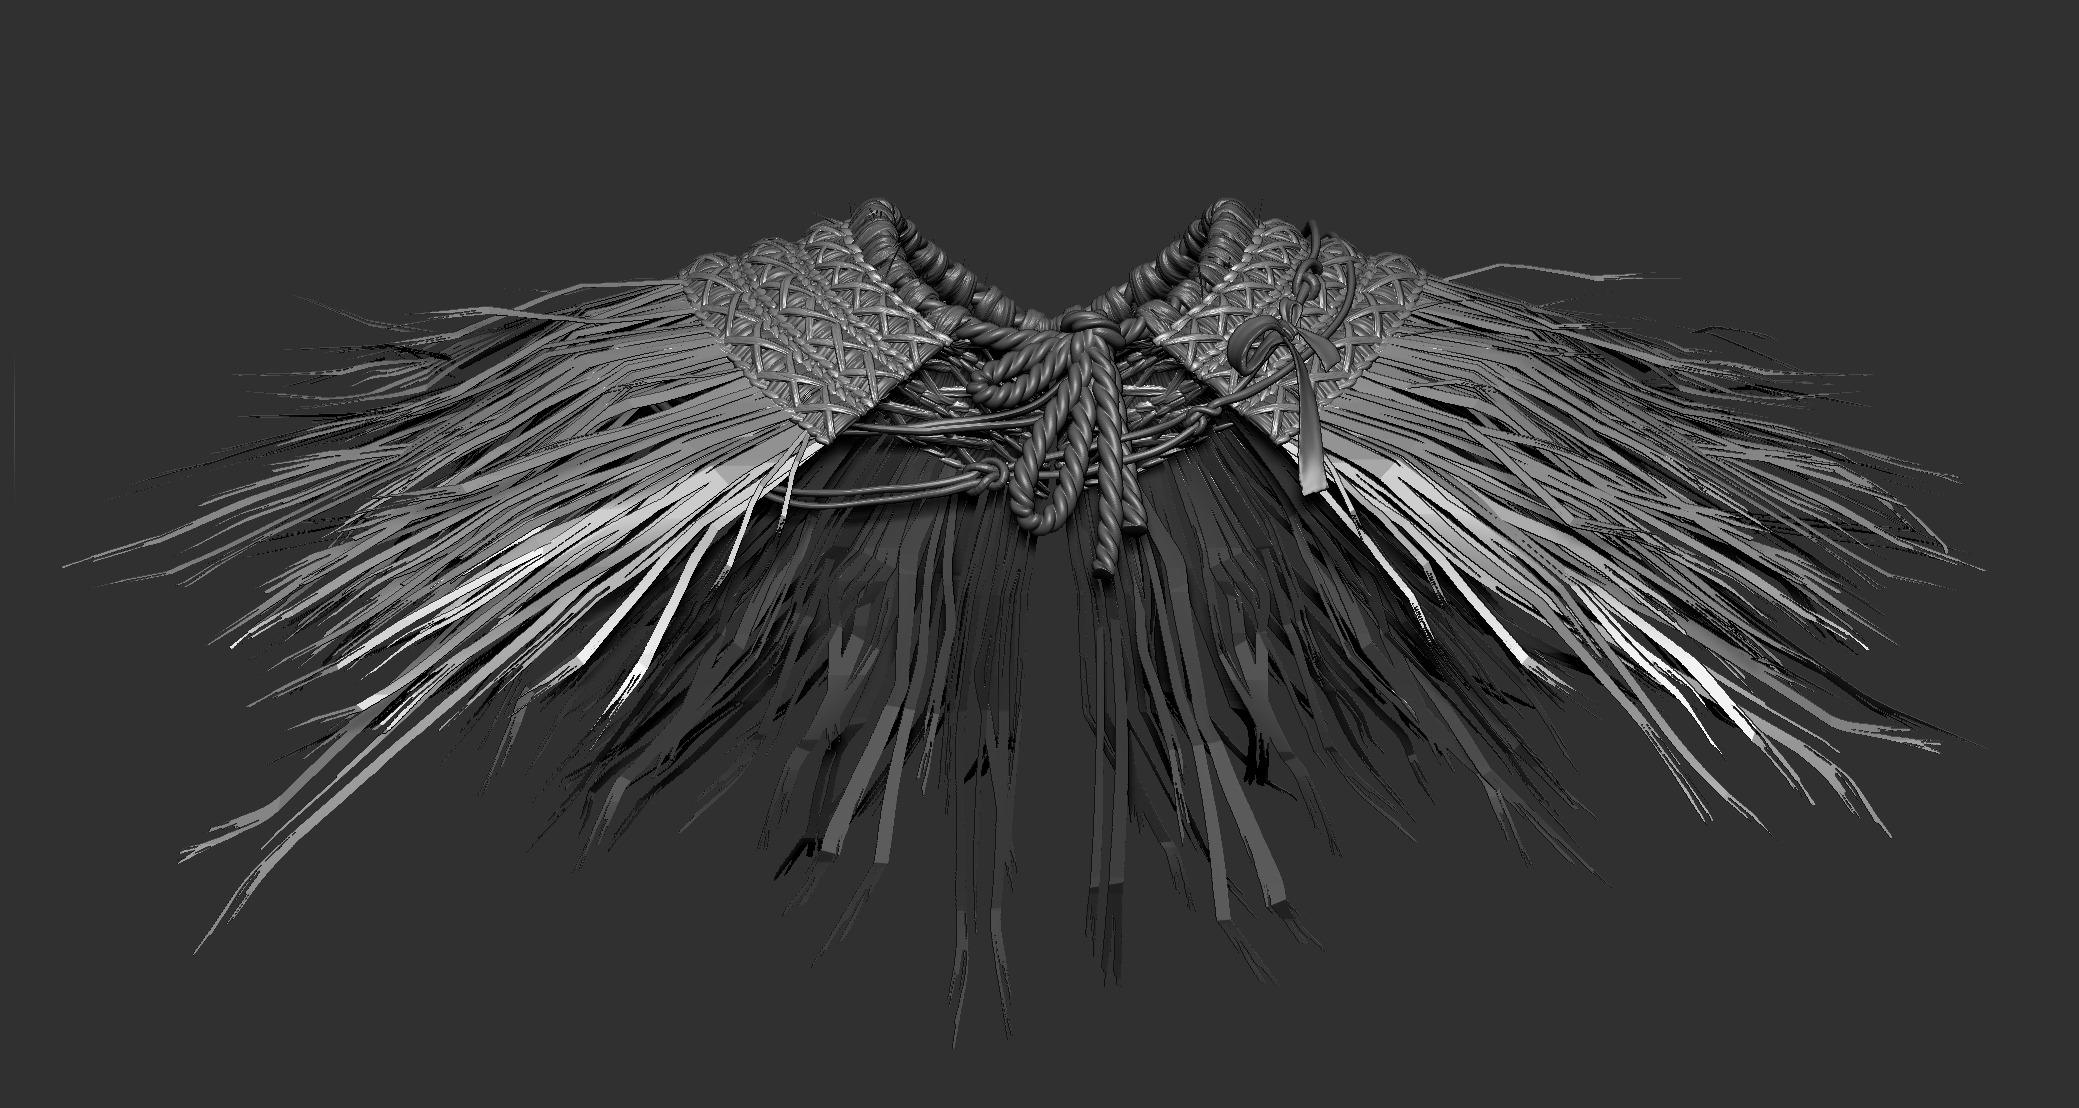
Raincoat Workflow
For the raincoat—especially the straw shoulder pads—the most practical approach was to treat them like hair cards. I created several variations, including loose straw pieces, to add silhouette variety and visual interest.
To preview these in ZBrush, I exported the textures as PNGs with a black background, which ZBrush recognizes as alphas.
For the main body of the raincoat, I built a modular system: one clean base model and four high-poly variations duplicated along the surface to avoid noticeable repetition.
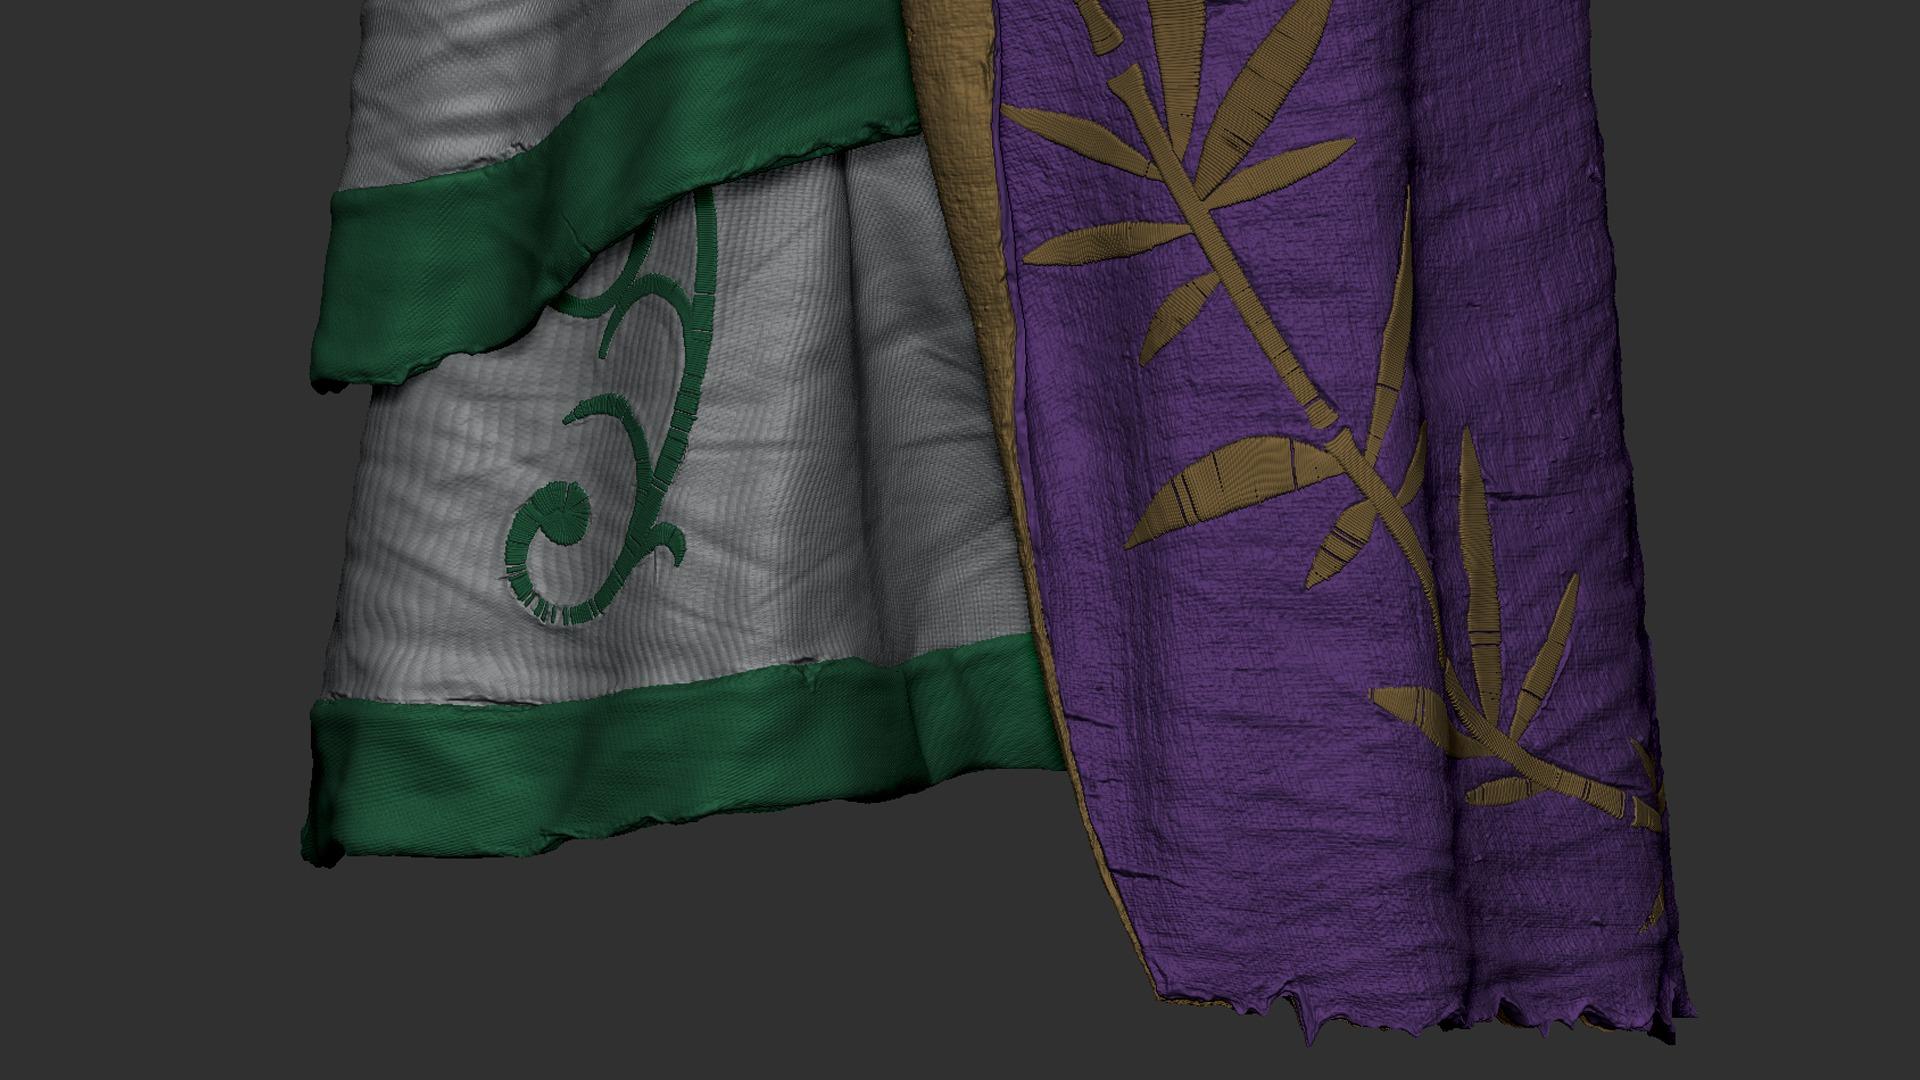
Embroidery Workflow
My goal for the embroidery was to create everything fully by hand, ensuring unique and organic details. The process was as follows:
- Since the garments retained their Marvelous UVs, I created a polypaint sketch of each embroidery design and exported it as a texture.
- I brought the flattened Marvelous mesh into ZBrush and used the texture as a guide to draw paths with the CurveFlatSnap brush.
- In Maya, I projected this flat version onto the 3D mesh using Transfer Attributes, a method often used for retopologizing clothes.
- With the paths ready, I applied a simple embroidery IMM brush along the guides.
- Finally, I refined the shapes, removed some threads, and added subtle imperfections to keep everything feeling natural.


Straw Hat
I initially built the hat in Maya, starting from a flat circle. I made precise cuts and evenly distributed edges to maintain clean, organized topology that could easily be duplicated around the circumference.
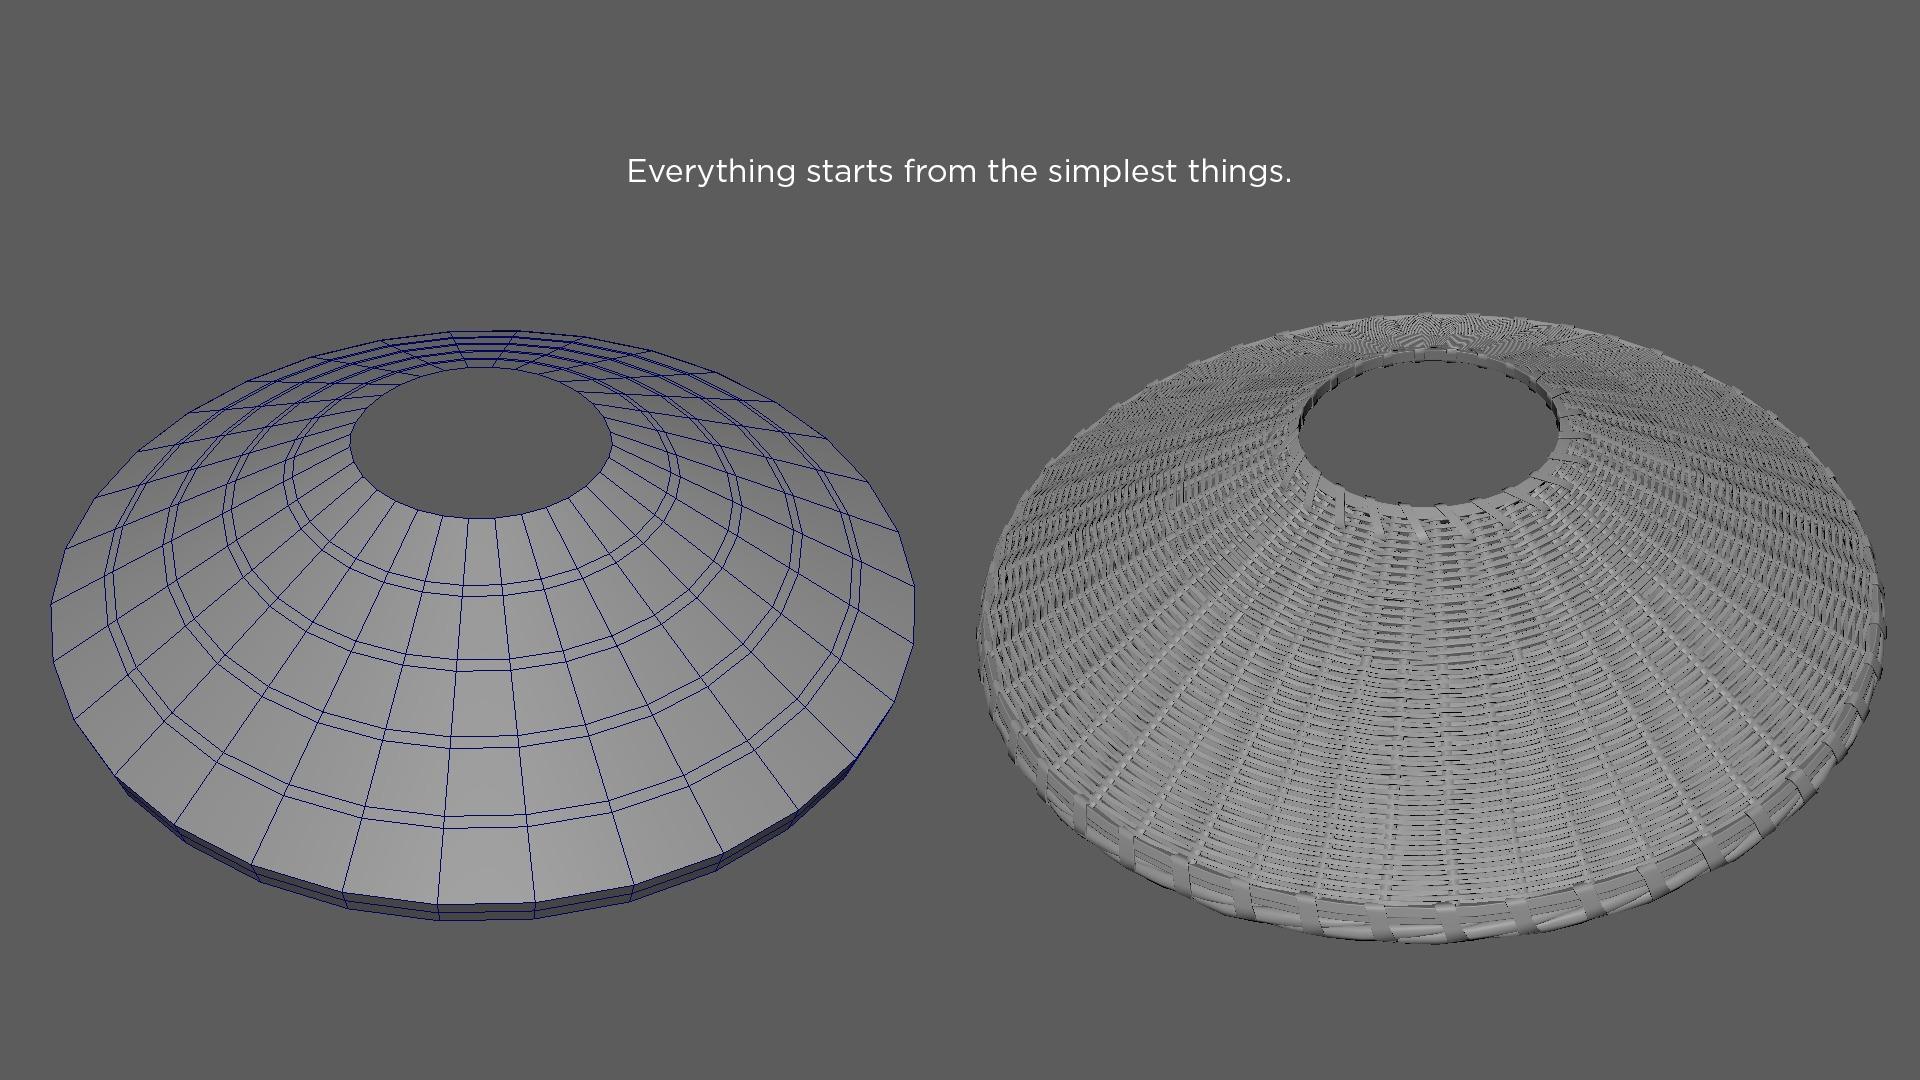
After that, I brought it into ZBrush, broke the symmetry using the Move brush, and removed polygons in specific areas to make the woven strips feel more natural and visually interesting.

Low Poly
Retopology was done in Maya using QuickDraw. For the garments, I started from the clean base mesh used for the high-poly and refined it with Multi-Cut to preserve the silhouette.
The most important consideration here was maintaining clean vertex flow, which is essential for proper animation—especially when multiple pieces require matching edge loops.

UVs & Layout
Although many artists find this stage tedious, I genuinely enjoy it. It feels like a mental puzzle and a break from the heavier artistic workload.
I used RizomUV for all assets, preserving Marvelous UVs wherever possible and maximizing texel density across the layouts.

Baking
I baked all maps in Marmoset Toolbag, which consistently delivers excellent results. I customized the cage to resolve as many issues as possible and polished any remaining artifacts in Photoshop.
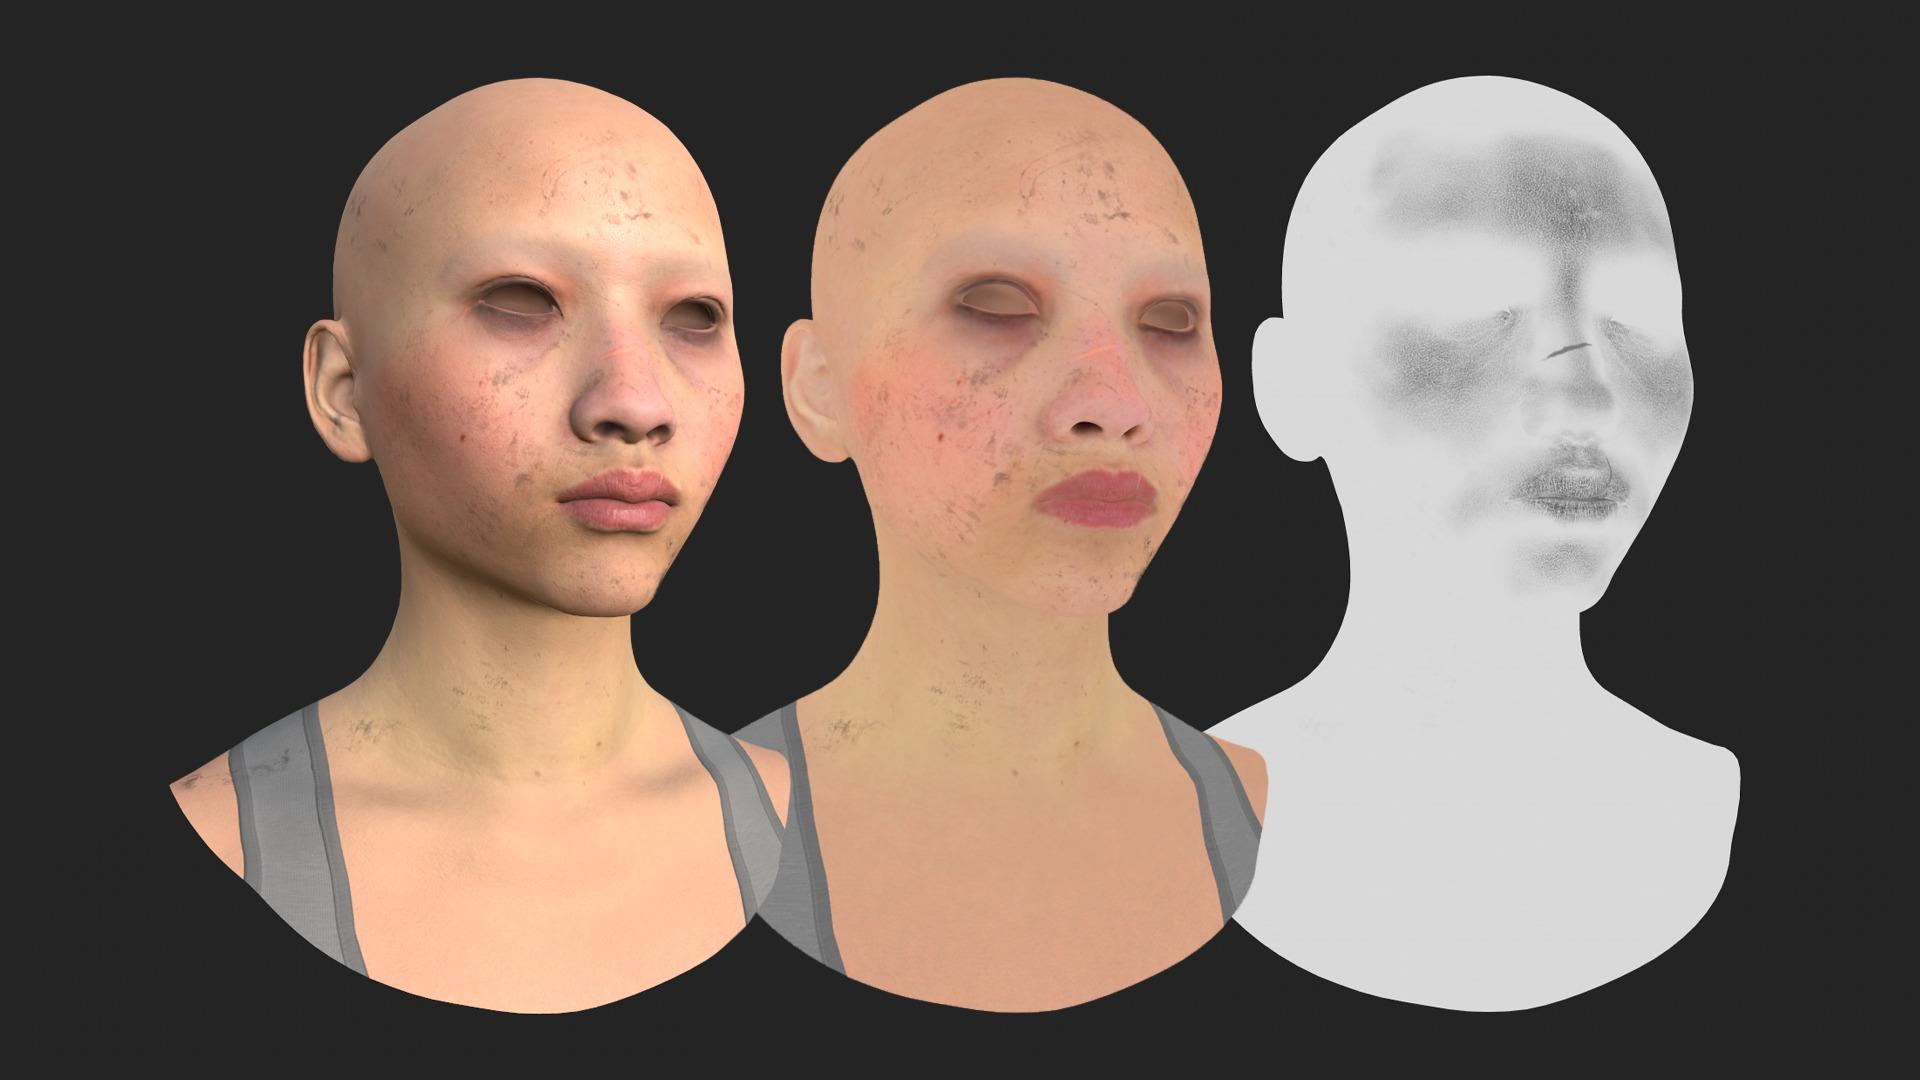
Face – Texturing
This was my first time working with MetaHuman. I sculpted the face on a base mesh and wrapped it to the MetaHuman topology using ZWrap.
Inside MetaHuman, I completed the first texturing pass. To further customize the look, I extracted the maps and refined them in Substance Painter, adjusting base color, roughness, and normal details.
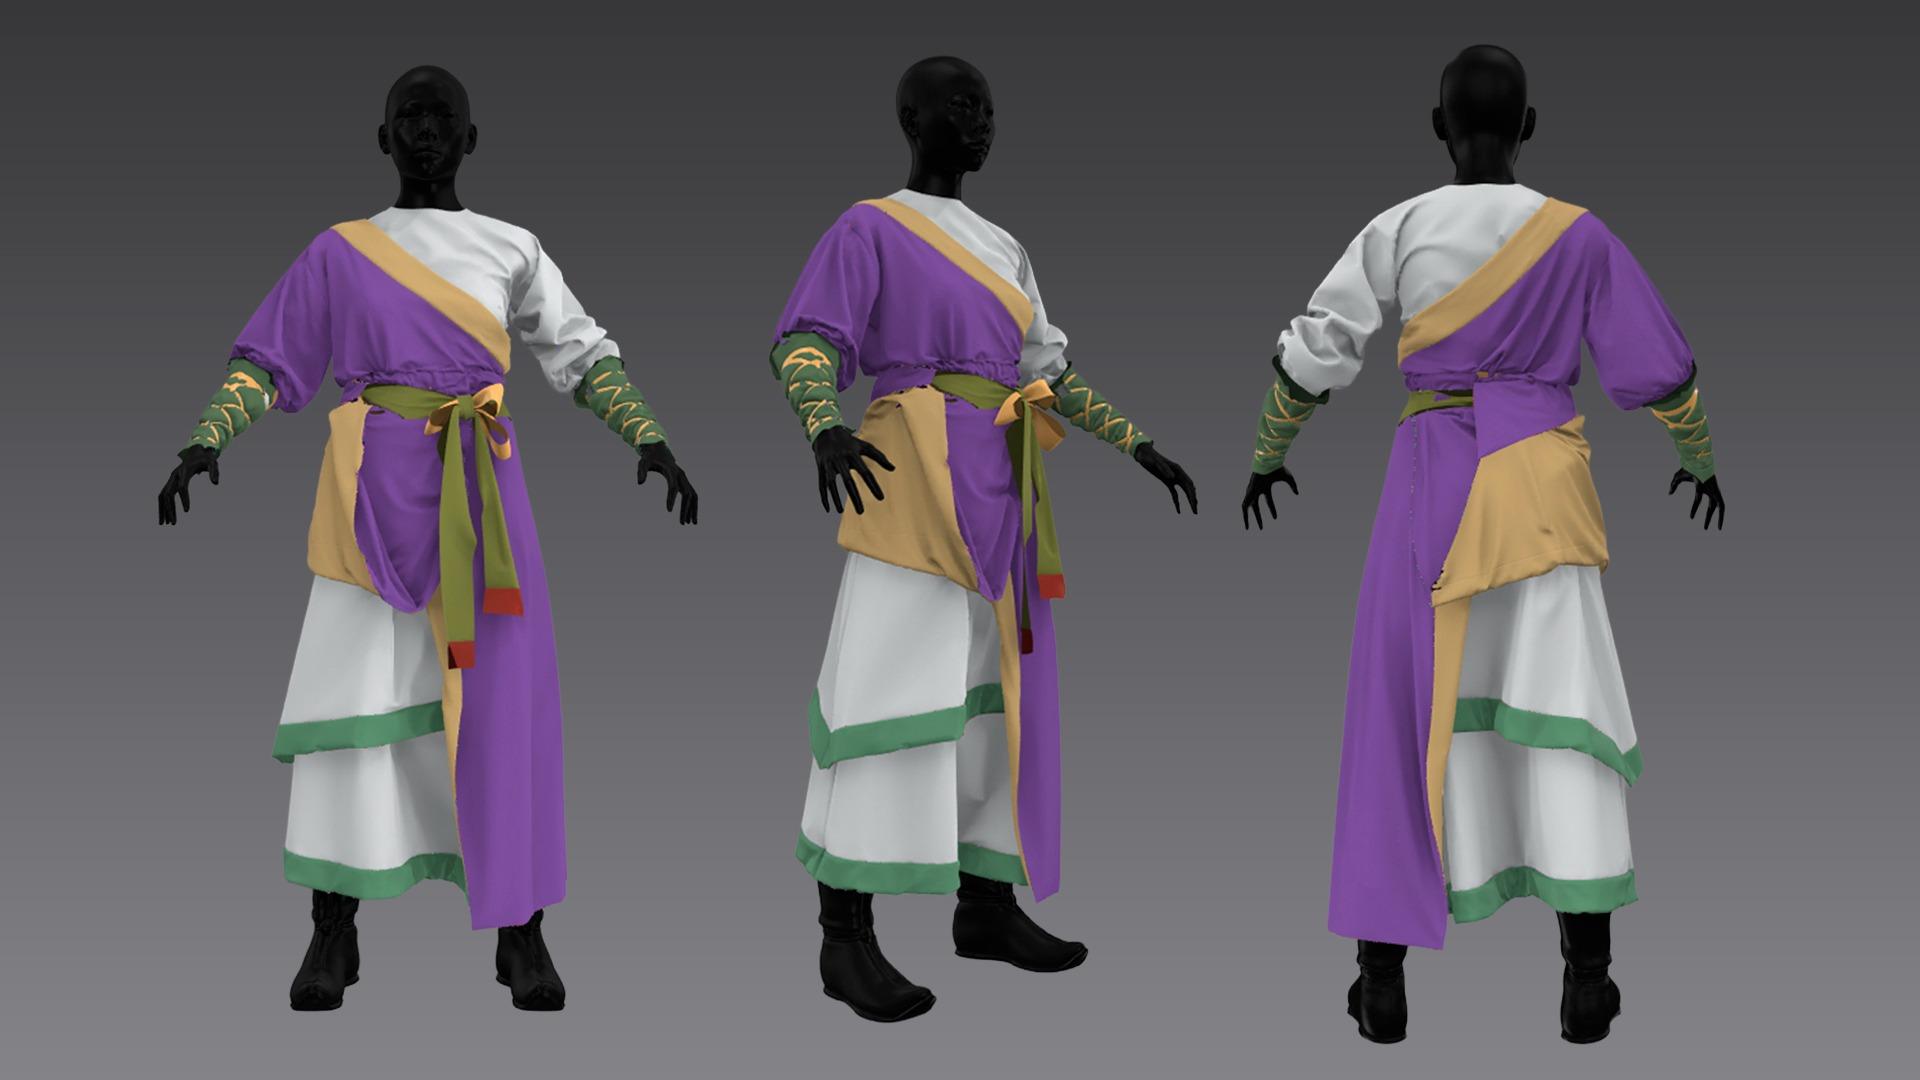
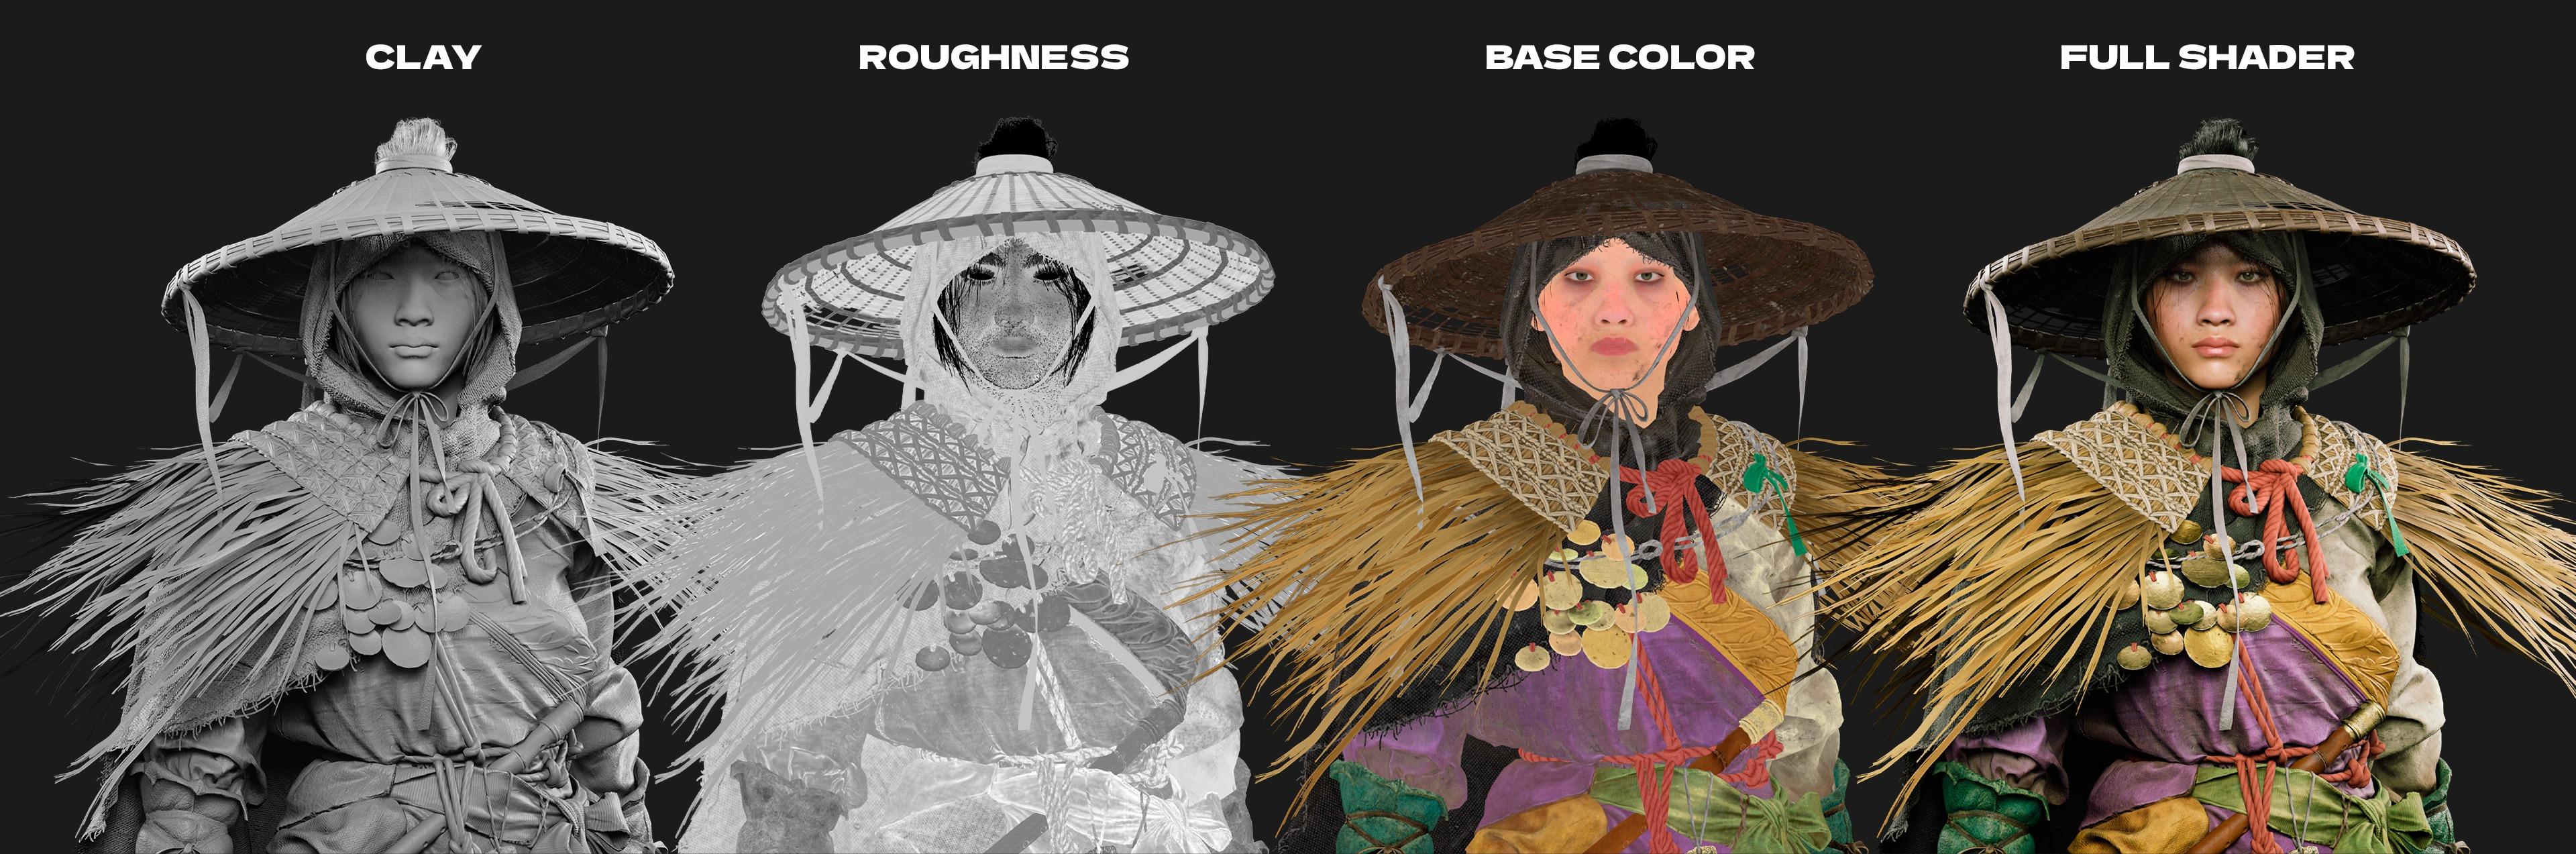
Outfit – Texturing
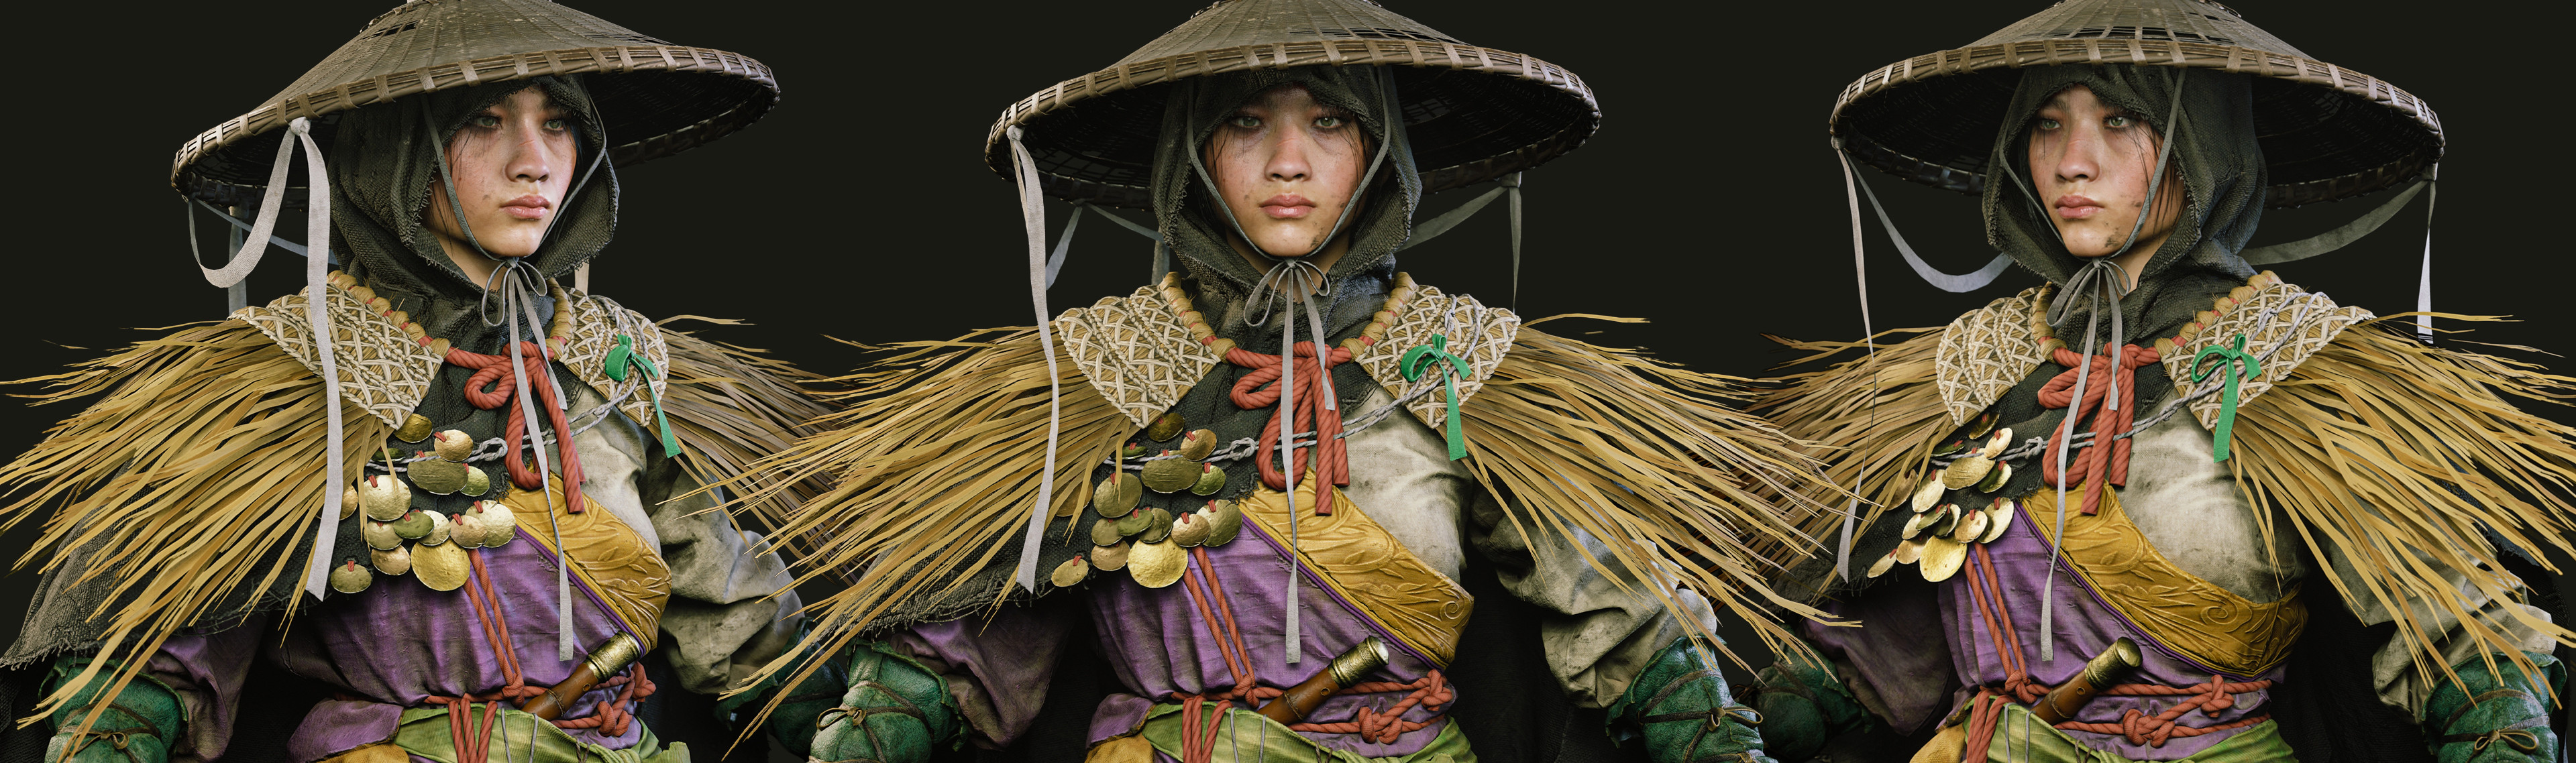
Texturing the outfit was one of the most challenging stages. The concept features a very specific color palette, and finding the right balance so all elements harmonized was crucial.
Once the primary colors and materials were locked in, I added layers of dirt, subtle sun bleaching, and hand-painted stains to create contrast and visual interest. Roughness variation played a major role in achieving a grounded and believable result.
Hair
Originally, I didn’t plan to add hair beyond the main bun, but after reviewing references, I decided to include small facial strands to add personality and a sense of history.
These were created in Maya using XGen, and they contributed greatly to the character’s storytelling.

Look Development
Since the character uses the MetaHuman mesh, I relied on the MetaHuman Skin Shader, making a few adjustments to achieve the desired look.
For the rest of the assets, the school provided an excellent tutorial by Patrick Van Rooijen on building Master Materials from scratch—an incredibly valuable skill, as these materials are reusable for future projects.
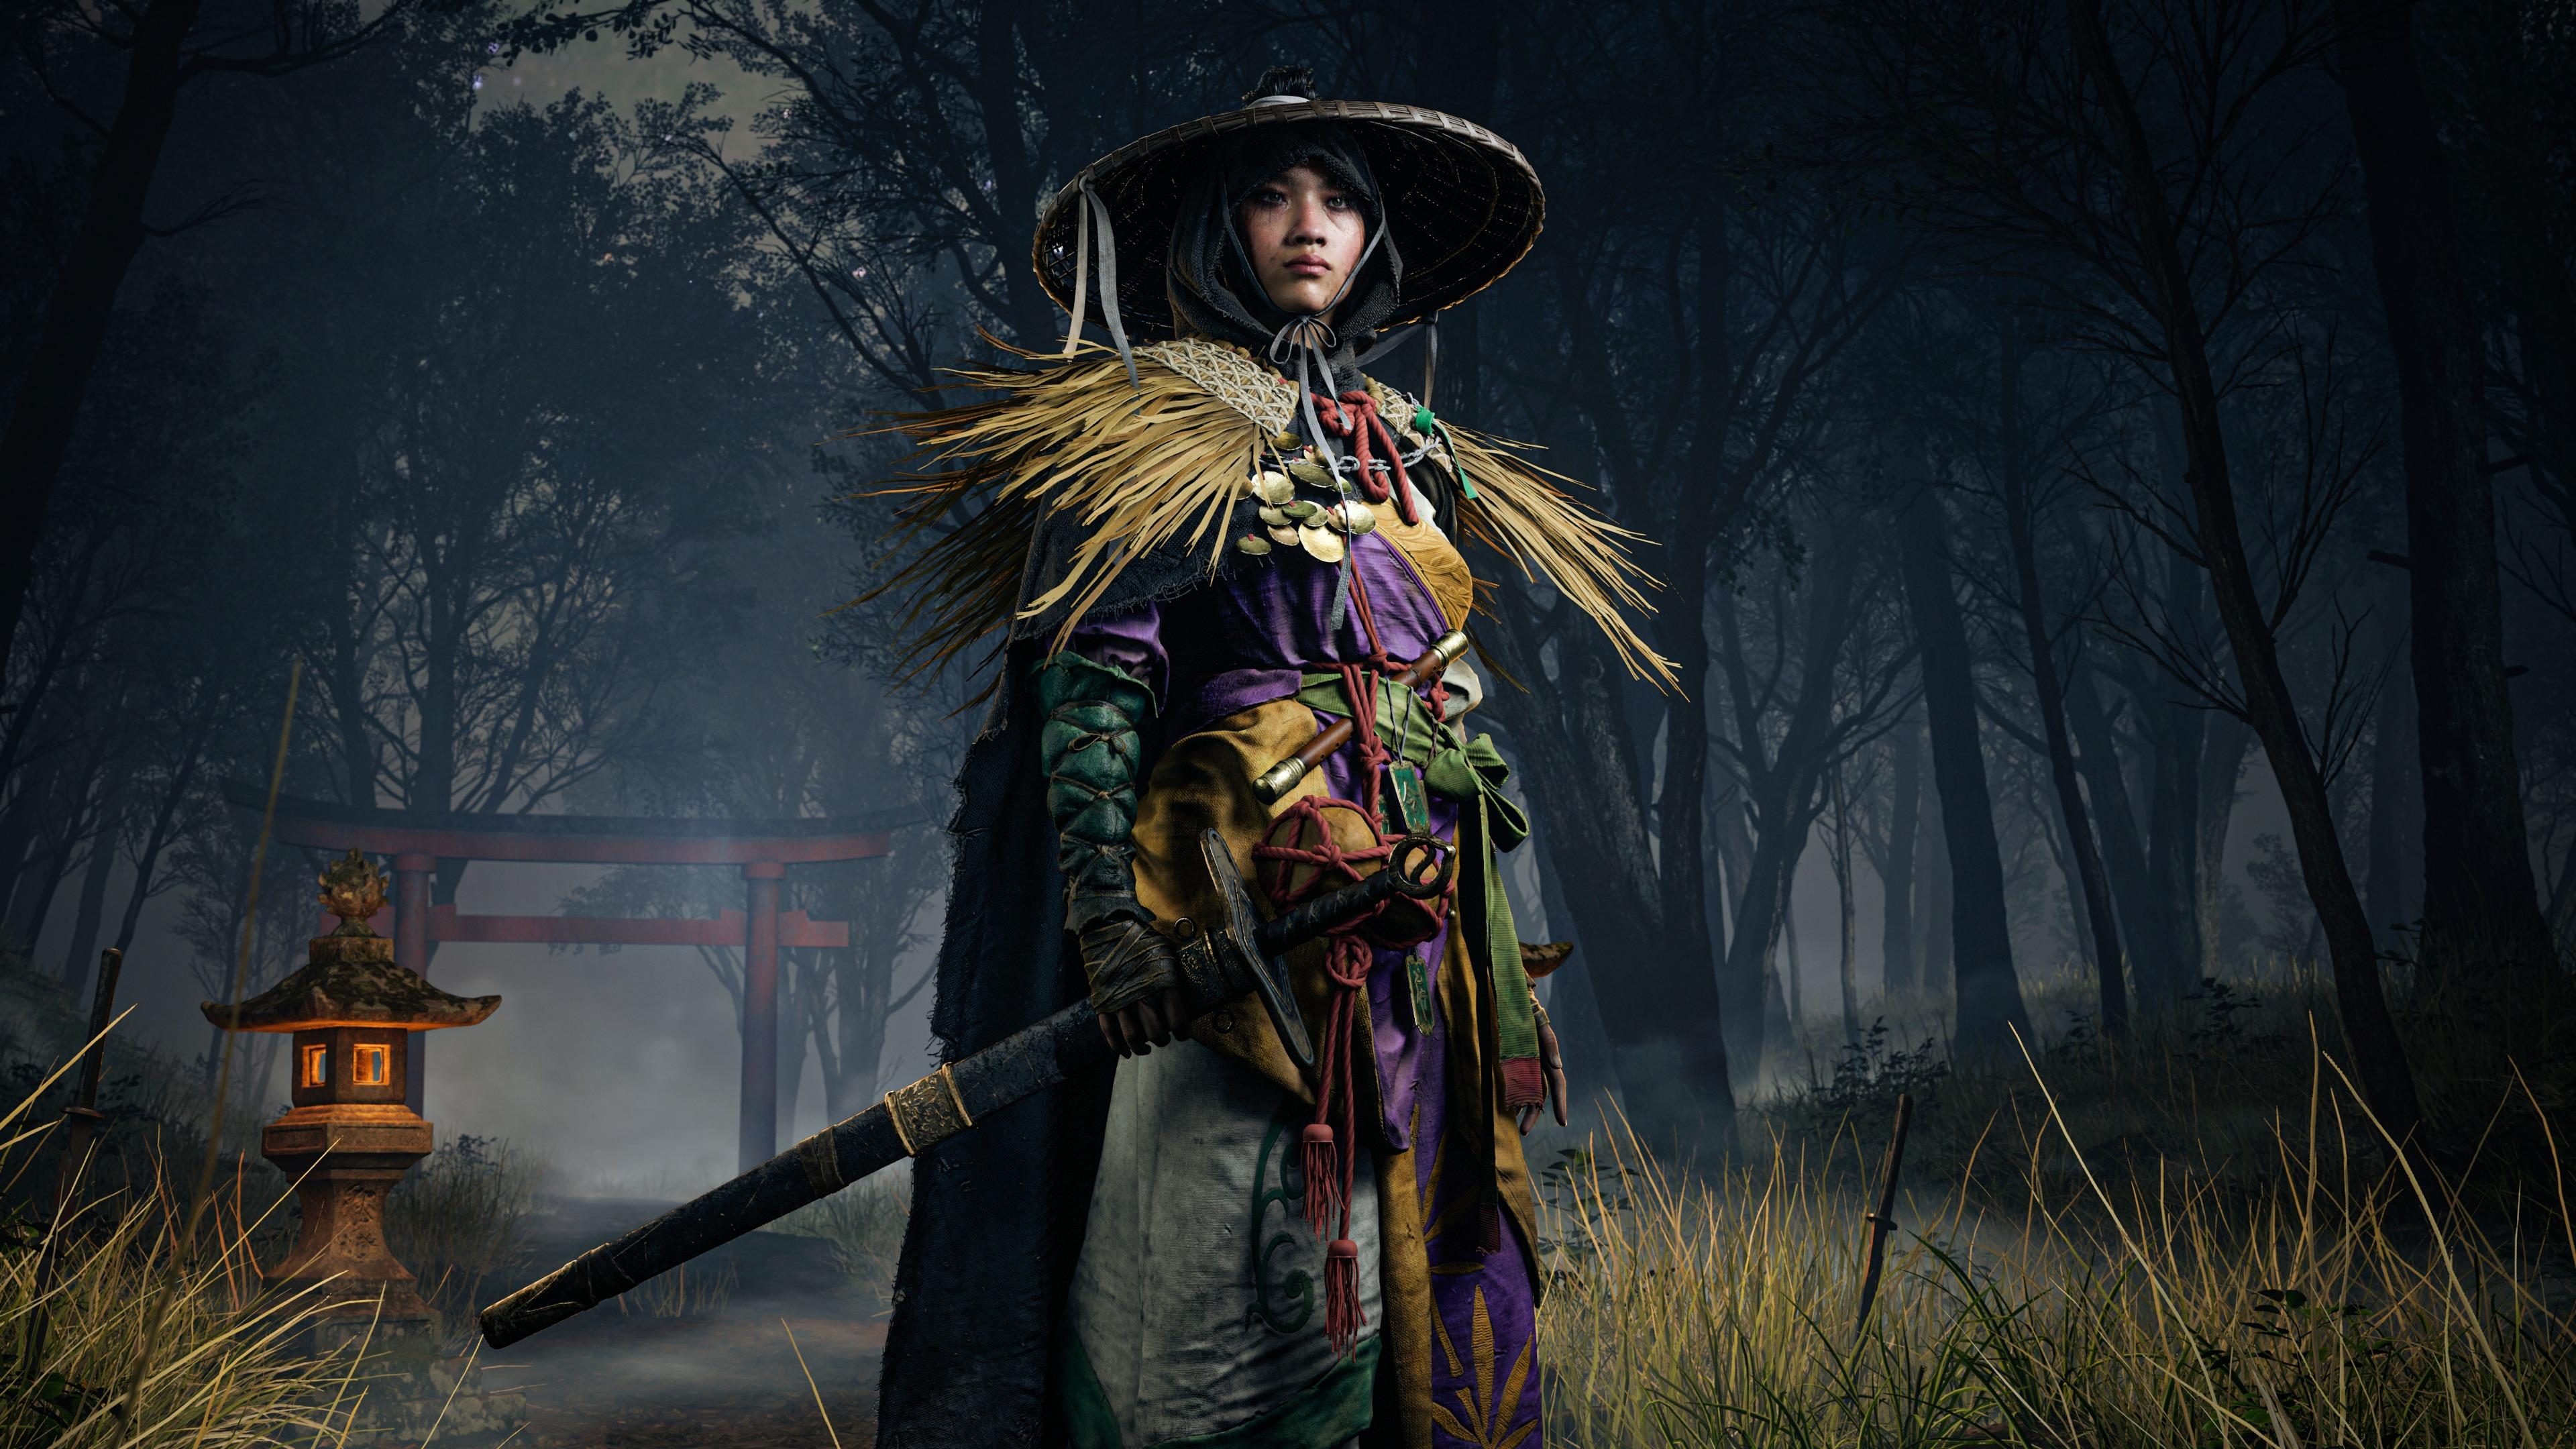
Lighting & Environment
I built two separate Unreal Engine levels: one with studio lighting and an infinite backdrop, and another with a full environment.
For the studio setup, my goal was clarity. I used three main lights—two side lights with different color temperatures and one frontal light—along with subtle fill lights to reveal darker areas.
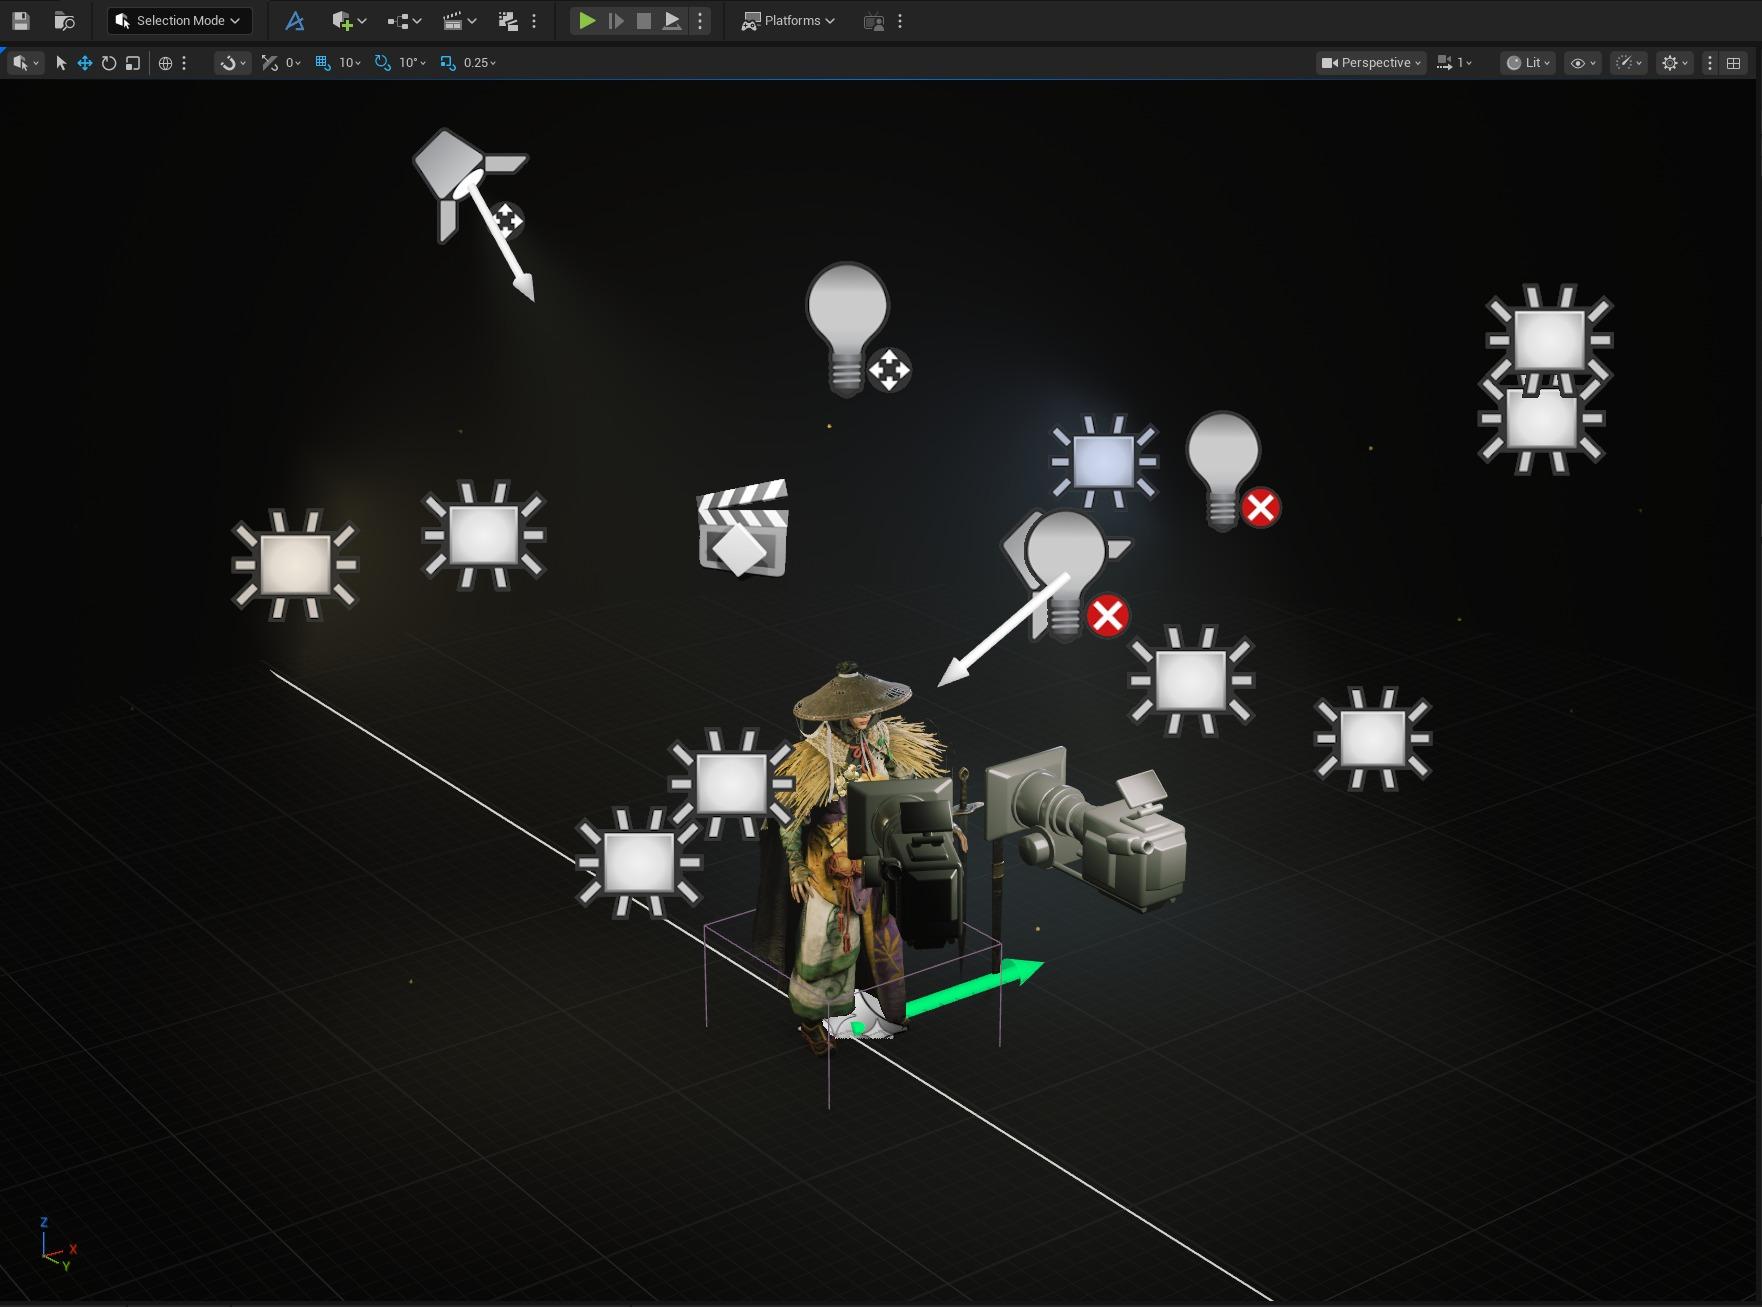
For the environment level, I built the scene using the DASH plugin, a powerful and intuitive tool for rapid environment creation.
Lighting the environment was more complex. Beyond properly lighting the character, I aimed for a strong cinematic atmosphere.
I combined cool lights with increasing fog density in the distance and added warm light sources inside stone lanterns to create contrast. Blue and orange lighting combinations never fail.

Conclusion
This project helped me grow in every direction as an artist—artistically, technically, and mentally. I hope you enjoyed reading about my process, and thank you for taking the time to follow the journey.
A huge thanks to Ankit Garg and Zombie Art School for their invaluable guidance throughout the mentorship. It has truly been one of the most enriching experiences of my career.
Thank you as well to the GamesArtist team for giving me the opportunity to share this article.
If you have any questions, feel free to reach out to me on any social platform—I’ll be more than happy to chat.
Thank you,
Ayrton
Read more articles
You might also like these articles.