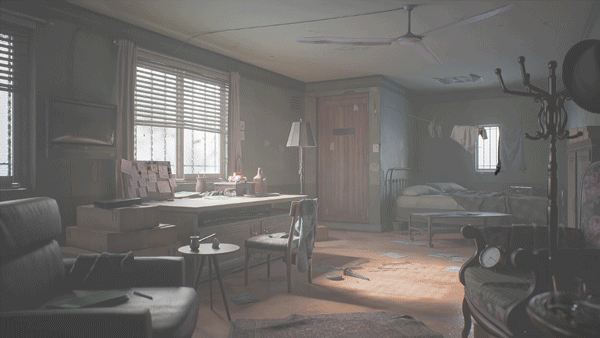
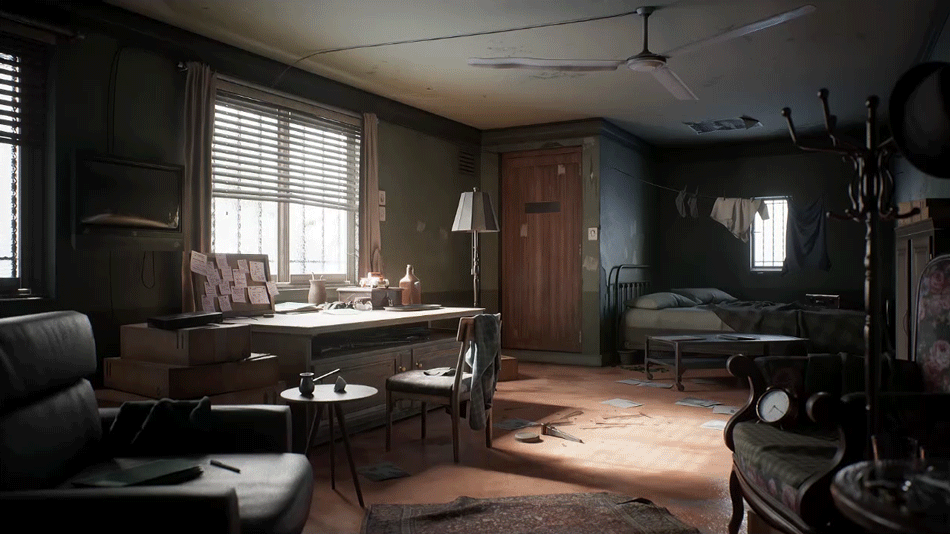
The Room


Introduction
Hello there, my name is Mostafa Sobhi from Egypt, I am 19-years old & I’m a 3D Environment Artist. I’m self-taught, and my learning resources are from Google and YouTube as well as Artstation learning. Playing video games has always been my passion and I evolved my passion into making games and specifically making 3D environment scenes from scratch and making scenes that have more details in that have a story to tell.
I have always strived to learn more and improve my skills whilst learning new things.
As I started learning Unreal Engine 4 a few weeks ago, I’m trying to keep up with standards. This project was fun and I enjoyed creating it, it was a great educational experience as it was my first project in Unreal Engine 4 and I would like to share what I have learned.


Concept

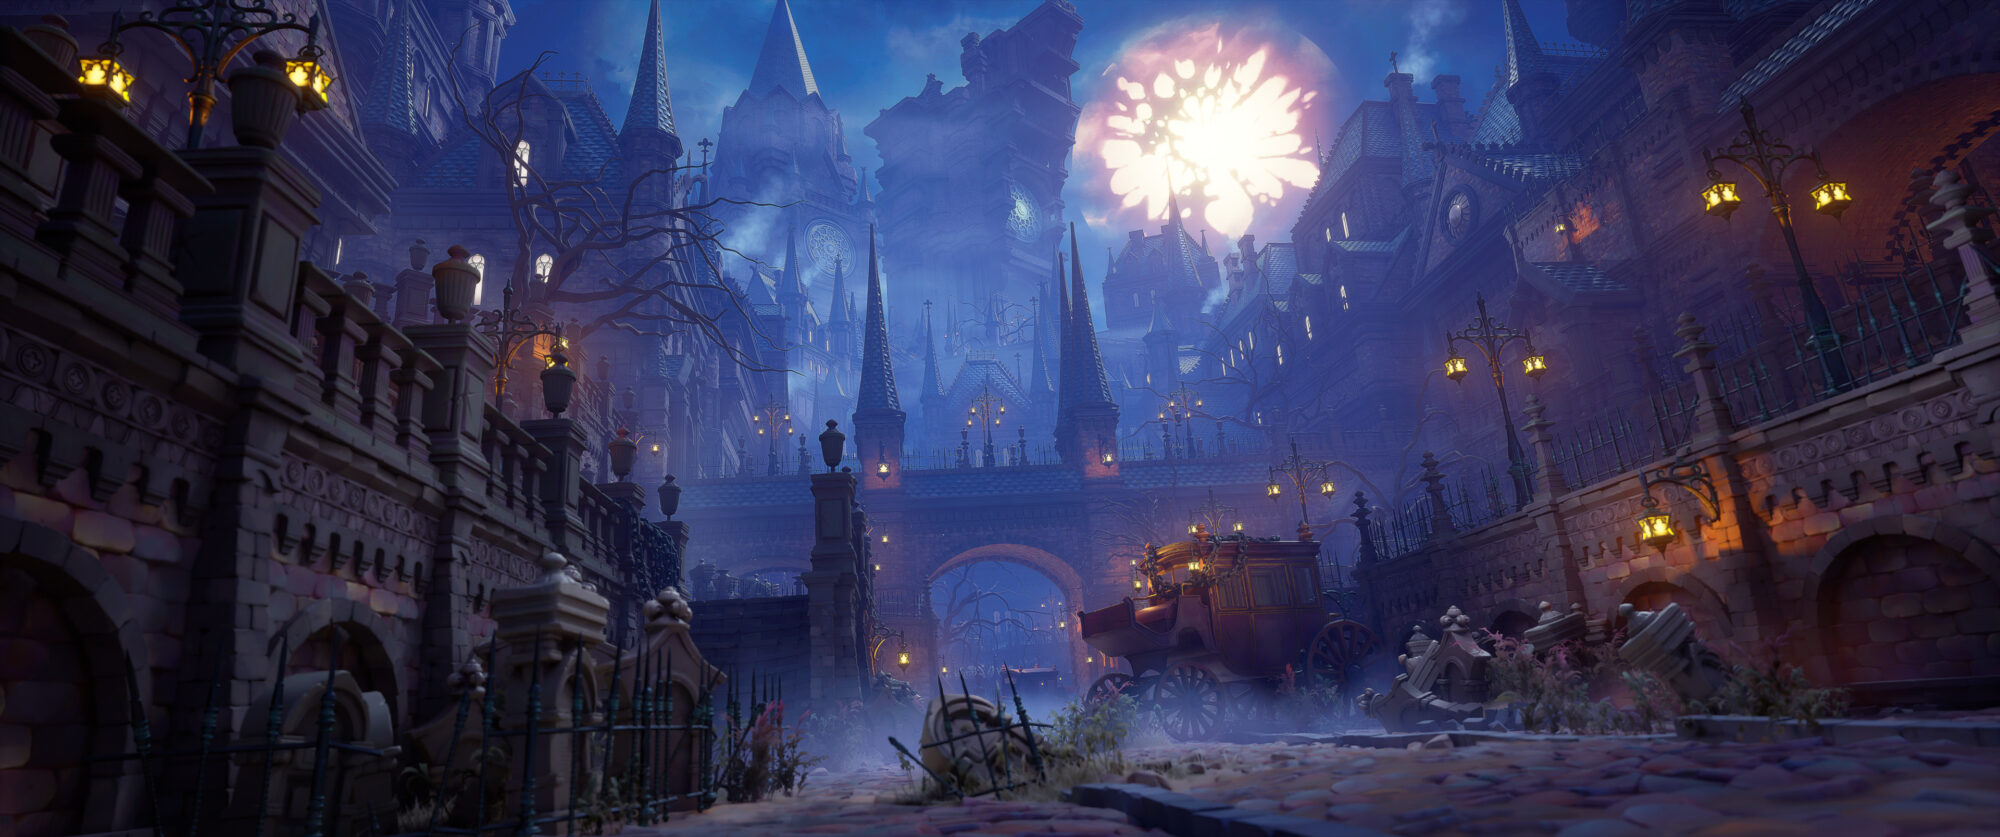
I was planning to create a full 3D scene, so I started looking around on Artstation for inspirational concept art to create a new environment scene for my new adventure of learning and practicing, after a while of looking for something special. I stumbled across this incredible concept by Jonas De Ro. After looking a little deeper, I took notes on all the different models that I will be creating, I found that it would be a challenge and it be would really great to try it, so I decided to start the journey and take it as the main concept.
Blockout
I started the scene with a simple Blockout, HDRI & direction light in Cinema 4D to match the concept and to make it easier for me to composite the scene. Figuring out the camera position and the settings first is very important and it takes a little bit of time to deal with, to get the same angles as the concept, after I’m done with that I started to add simple blockouts, like the desk and the chair, etc, which takes up most of the scene.
References

For the references I used, I didn’t stick with the same assets within the concept exactly as some of the stuff in there I didn’t recognise and as it was a long personal project, I wanted to change a little bit and fill it with even more assets from my imagination. After, I recognized what the models were, I began to take references from Google and sometimes even “eBay”. It’s really a great source for gathering high-quality references.
Modelling

For modeling the assets:
I use Cinema 4D for modeling, so I started with the larger models such as the armchair as you can see the parts to make it easier. And as you can see with the chair’s arm I started with a cylinder > selected two faces & extruded, I kept doing that until I got half of the shape I wanted then mirrored and rotated then connected it on the first half and adjusted it a little bit, I kept adding edges and extruding the faces to get the look I wanted.

Also for the couch, I just used really simple cubes and with some adjustments in the vertices, I made this low poly mesh to SubD, after I’ll export it to ZBrush to sculpt more details such as the wrinkles, so I didn’t need to add a lot of details in Cinema 4D for now.

For the coat stand, I added a tube and added more edges to extrude to add more interesting details, for the small extra holder which looks like a seahorse in the shape, I created the shape with the spline tool and I added the spline in a sweep then I added a circle to sweep it across the spline, so after I got the shape I wanted I adjusted it a little bit and then I added the two objects that I want to clone in a group and then into a cloner, after that I set the clone mode to radial to put them all in a circle, changed the count to 6 as I wanted them changed along the plane to “XZ” axes and enabled the align.

Also for the ceiling fan, I did the same but with the blades, I just adjusted the blade (1) to look more damaged like it had been hit by something, and I left (2&3) as they were. For the table, I created one of the legs and mirrored it on the left, and mirrored both on the other side.

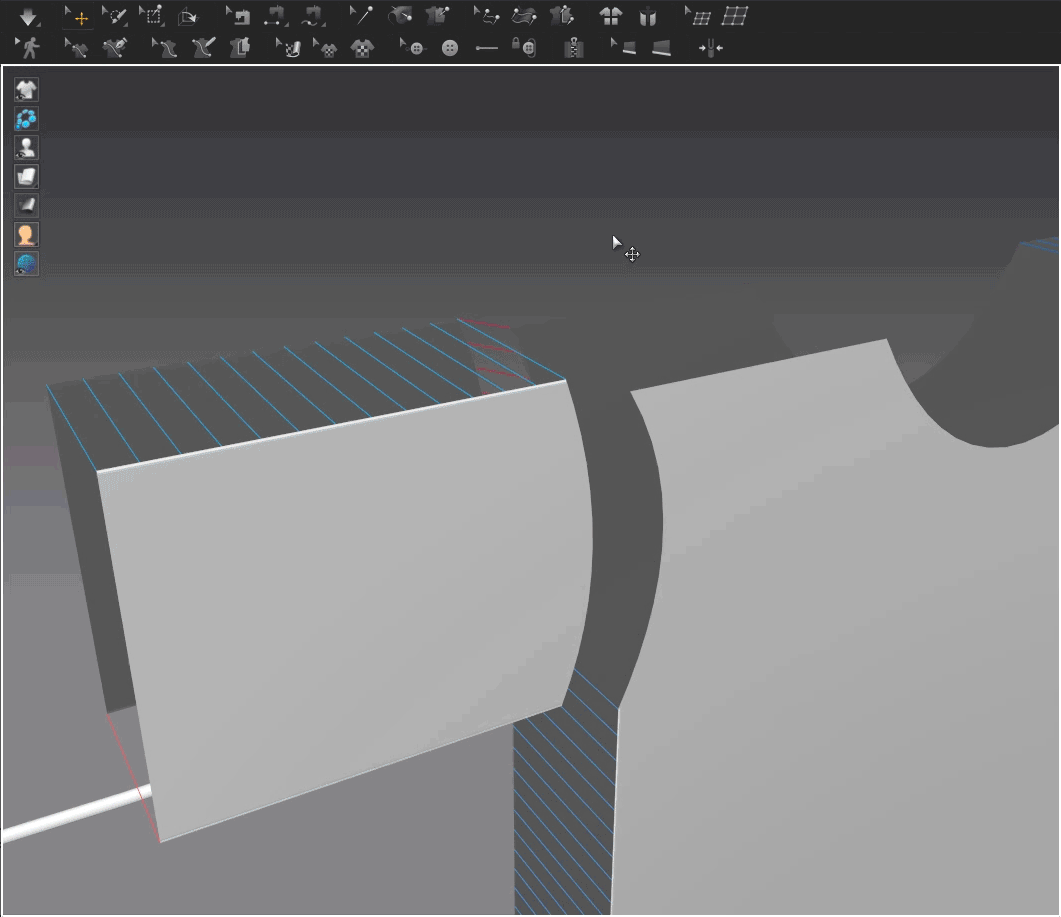
For the windows, books, truck toy, and even most of the models, I used symmetry after I unwrapped the UVs, It’s always a time saver and UV map space so it’s based on copying and mirroring the most parts as you can see for the window’s wooden parts I modeled on the left then started to copy them to get the final low poly model.

And for this box which is an old-money box, I used some references I got from eBay, It’s very simple for the box modeling, and for the lock, I show this in the image, for making the high poly models I didn’t care about the mesh that much as I wanted clean edges for baking later on. As for the hat, a simple cylinder, and I kept working on it.
Glass Simulation

For the broken glass of the souvenir on the ground, I added a capsule then took half of it which is dome-shaped then added it into “Voronoi Fracture” from “MoGraph” menu, and in “source” I edited the Point Generator – Distribution until I got the look of broken glass and the Impact point which has the smaller broken pieces and I controlled the number of broken pieces by changing the value of the Point Amount after that I made some walls with the ground to let the glass fall on it and after I turned the Voronoi Fracture to an editable object I selected all the objects and added “Rigid Body” in the “Simulation Tag” and “Collider Body” for the ground and the walls and then pressed play and watched it break.
Cloth Simulation

After I made the bed’s parts and made the low poly along with the UVs, I duplicated the parts to get the final look of the bed.

For the pillows, blanket, sheet, I used Marvelous Designer which is a great software for cloth simulation.
I made this object as the bed’s mattress to simulate the cloth on it instead of importing the whole bed and then I added a rectangle and hit simulate, letting it find its way on the mattress, I started pulling it over to get the look of a wrinkled blanket. Also for the pillows, I made them based on this tutorial.


I’m not a fashion designer who makes garment patterns but what I made just works very well.
I sewed all the segments together, I faced a problem with the reversed sewing lines, I select the reversed lines and hit Ctrl+B, more info.


To affix a part of the garment to the Avatar or the imported object such as the clothesline, I select “Tack on Avatar” then click on a part of the garment, now you will see that the garment will turn translucent and the avatar will become visible to tack on it, and then hit simulate.
Also, I used the same garment and simulated it on the chair.
Sculpting The Details

For sculpting the details, I’m using ZBrush. As for the couch and armchair details, like the wrinkles, I used alpha maps by Max Derksen, it’s basically a cloth alpha map but I found it really useful for what I wanted.

For the damaged area on the wall I wanted something that looked like the walls had been peeled off and lost a layer, so after I DynaMeshed the wall I made a mask for the damaged bits and used an alpha metal map by Fredo Gutierrez, after adding some sharp details I started to flatten it out just a little by using the flatten brush.

I used the same alpha cloth maps I had and for the wooden part of the bolt rifle, I used an alpha wood map by Fredo Gutierrez.

As for the obelisk, I made a simple shape, like the one on the left then I exported it in Zbrush and then DynaMeshed it to get more polygons to start sculpting on it, after that I searched on Google for some hieroglyphic words, after I got an image, I adjusted it a little bit in Photoshop and then in Zbrush I Masked By Alpha on the obelisk and then to get the depth, in “Deformation” I raised the “offset by 1” and then I started to sculpt it more and add more damage.

For the low poly model of the obelisk aswell as for some other models I used “Decimation Master” after processing, I changed the decimation to a low value to get a low poly count, it’s still even a little bit high in the image and needs to go a little lower as for the place of the obelisk in the scene, the obelisk model was a model I made a year ago but I used it in the scene as is.

More often I use this method to make the low poly models, I use the same model before I SubD it and then I go up by SubD it by 1 just to take the closest silhouette as the high poly one and then select all the unnecessary edges by “Loop Selection” which is way faster then sometimes removing them, often I have to retopologise if it’s gonna be faster in some other models.
Composition

Now after I’m done with all the modeling I composed the scene based on the concept art and the lighting. For example, add a directional light to view the shadows in the scene, this helps you find the areas your eyes go to, now based on what I did and what is in the concept art I realized that my eyes went directly to the bright areas more than the others, now I know where I should fill the scene with details and of course nothing too crazy but to add some kind of interesting assets that tells you what are you looking at or narrates some little stories.

I use Marmoset for baking and also to showcase the 3D models, it also has great rendering and shows more graphical fidelity. Before I import my models into Marmoset I separate the model’s parts to bake them in a group to avoid normal map’s issues so I have the low parts & the high parts and then I added a “Bake Project” then I loaded them in and adjusted the Max offset to fill the high & the low model together. To understand more about the normal map here’s a great article by Carlos Lemos.

Now after I got all the baked maps, I imported my model and the baked maps into substance painter and set the maps as “Textures” and added them in the mesh maps and then I started to paint every model and after I’m done, in the Export dialogue I choose “Unreal Engine 4 Packed”.
Unreal Engine
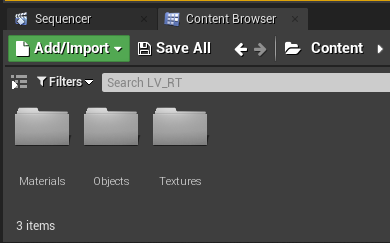
Now inside Unreal Engine 4, In this project, I used 4.27.2 Version, and one of the most important things that I do is organize the workflow and the folders, so I separated and rearranged all the folders to the Objects, textures and materials.

After importing the textures I uncheck “sRGB” in the channel packing which contains the metallic, roughness and AO.

After I made the first material and put all the texture in the right inputs, I made a Material instance by right-clicking on the material I made and choosing “Create Material Instance” so the material instance inherits all of its attributes from “The Parent Material” so I don’t have to open the material graph and do it again and again so now it’s more simple.
Path Tracer

As for this project, I rendered the final images by using “Path Tracer” it’s more costly but more accurate and realistic! So first I have to enable the Raytracing in: “Project Settings” from “Edit” menu > “Windows” In Plateformes and change default RHI to “DirectX 12”. And then in Engine > “Rendering” > check “Ray Tracing” to turn it on. Now I can change the Lit mode to Path Tracing. More Info. Also, I recommend seeing the PATH TRACER Explained tutorial by William Faucher.

I’m still an absolute beginner in Unreal engine, so as long as I’m using Path Tracer, I didn’t need to fake too much lighting in the scene so I used the basic lighting which is (Directional Light – Sky Light – Sky Atmosphere) and then I added “Post Process Volume” into the scene.

Also, I faked a little bit of the lighting like the additional flare on the TV by adding SpotLight and for the alarm clock to I added a Point Light behind the arm of the chair and changed the intensity to lower value, I just wanted to get a little bit of brightness instead of looking too dark and changed the lights to not cast any shadows

I set up the camera setting and the Post Process Volume, I changed the exposure to manual and added a little chromatic aberration and Bloom too, added lens flare with low intensity and vignette also added Film effect with low slope intensity.

Now with the setup done, I’m ready to render the shots, so I added a Level sequence and added my shots and then I edited the config and deleted the default setting and added the PNG format for the exporting and Path tracer for rendering and added Anti-aliasing, more about it I recommend this tutorial by William Faucher.

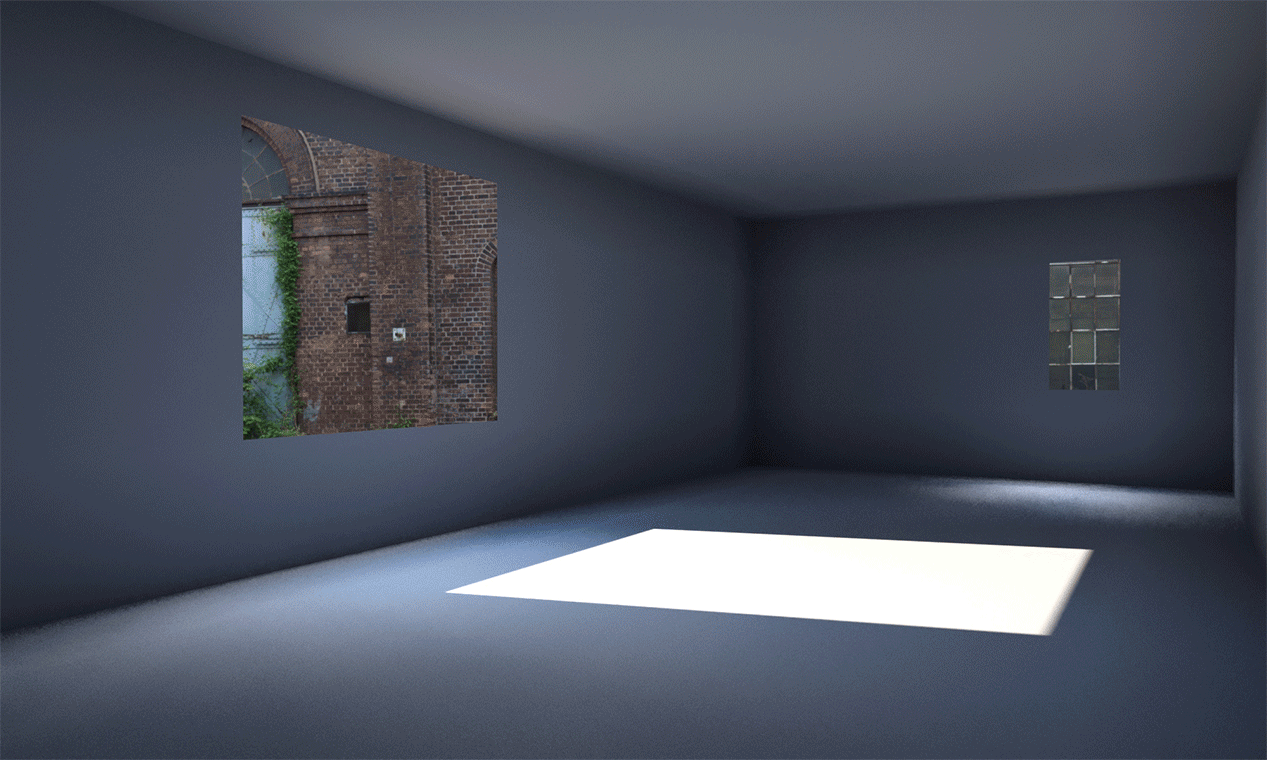
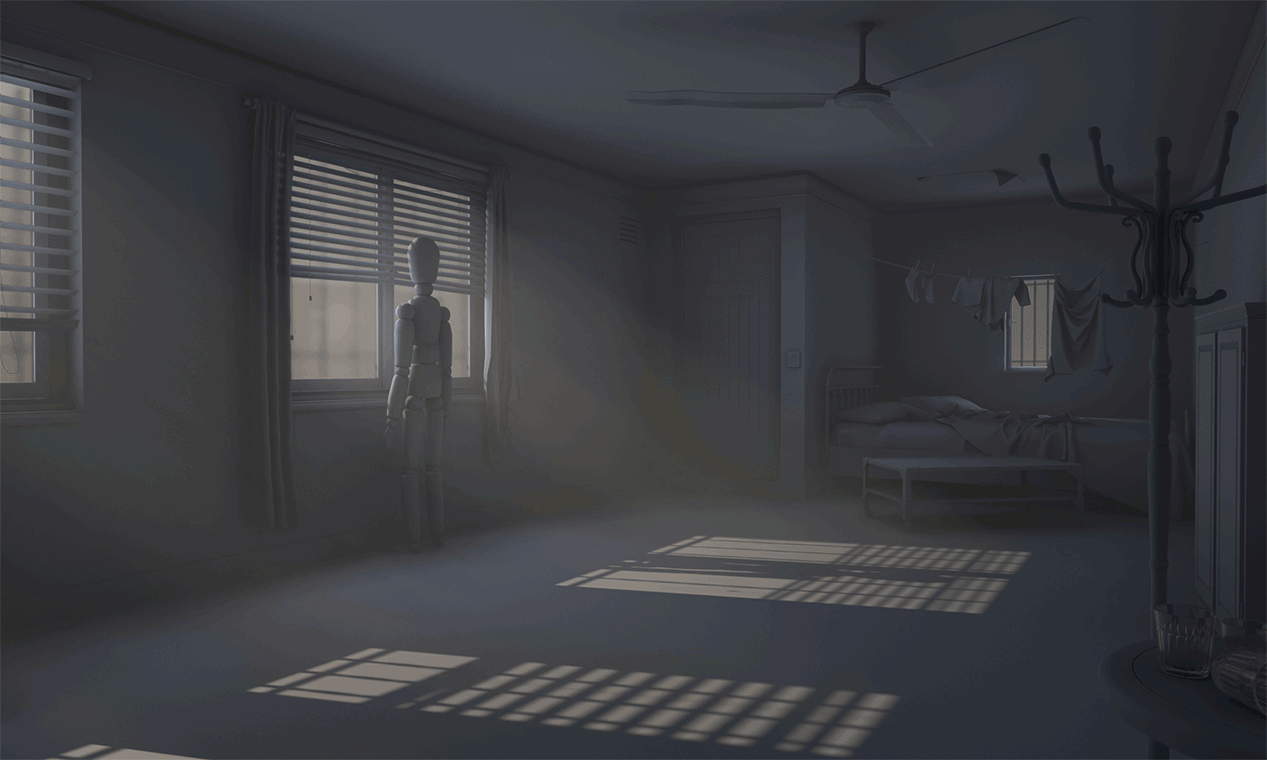
I also wanted to have the depth pass of the scene to add a little fog in Photoshop as the volumetric fog is an unsupported feature with the path tracer, so I took a high-res screenshot of it.
Post-Processing in Photoshop
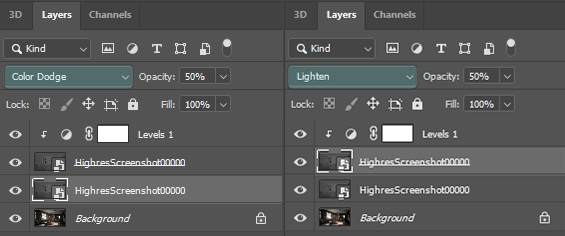
Now after I have the final rendered image I wanted to edit it a little bit by using the depth pass on the dark areas so I changed the depth pass mode to “lighten” and changed the intensity by adding “Level” and changing the value and decrease the opacity to 50% and I wanted to make the bright areas brighter just a little bit by using the same depth pass and set the mode to “Color Dodge” and changed the opacity to 50%.
Final Shots

The Assets


With little knowledge of Unreal Engine and with some tutorials, this project turned into a very interesting one and I enjoyed it, of course, because of the complicity of the scene I was at risk of getting burnt out or finding it boring during the middle of the project, but in my case, I decided to stick at it and to model and texture everything in the scene. Modeling like 1 to 3 models per day, next day baking them and painting, just to diversify and do something different every day to keep your curiosity until the end.
I’m really excited to learn more of Unreal Engine and I even made some side notes for the next project whilst doing this one. I hope you have found something useful in my article and I hope I didn’t bore you that much, if you want to ask me anything feel free to message me on ArtStation or Discord Mostafa.S#9999 or Email me ([email protected]).
Time for the next adventure.
Peace!
Read more articles
You might also like these articles.