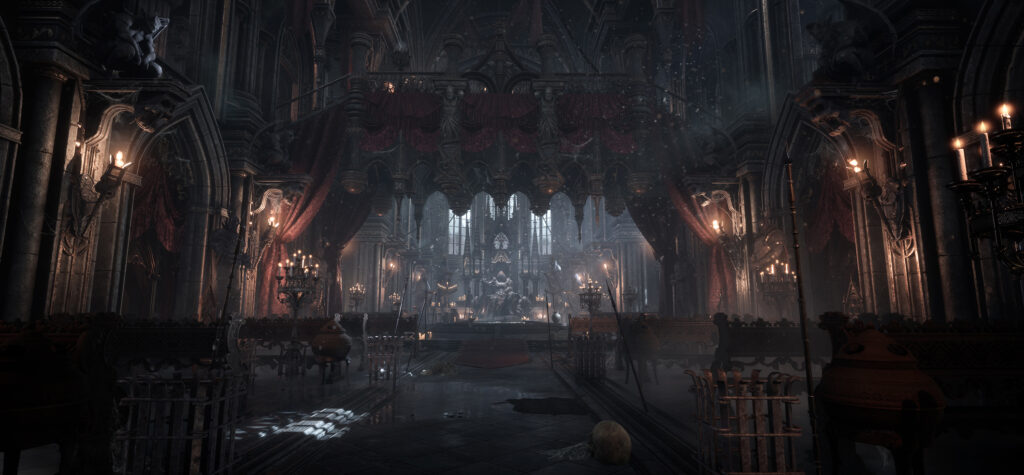
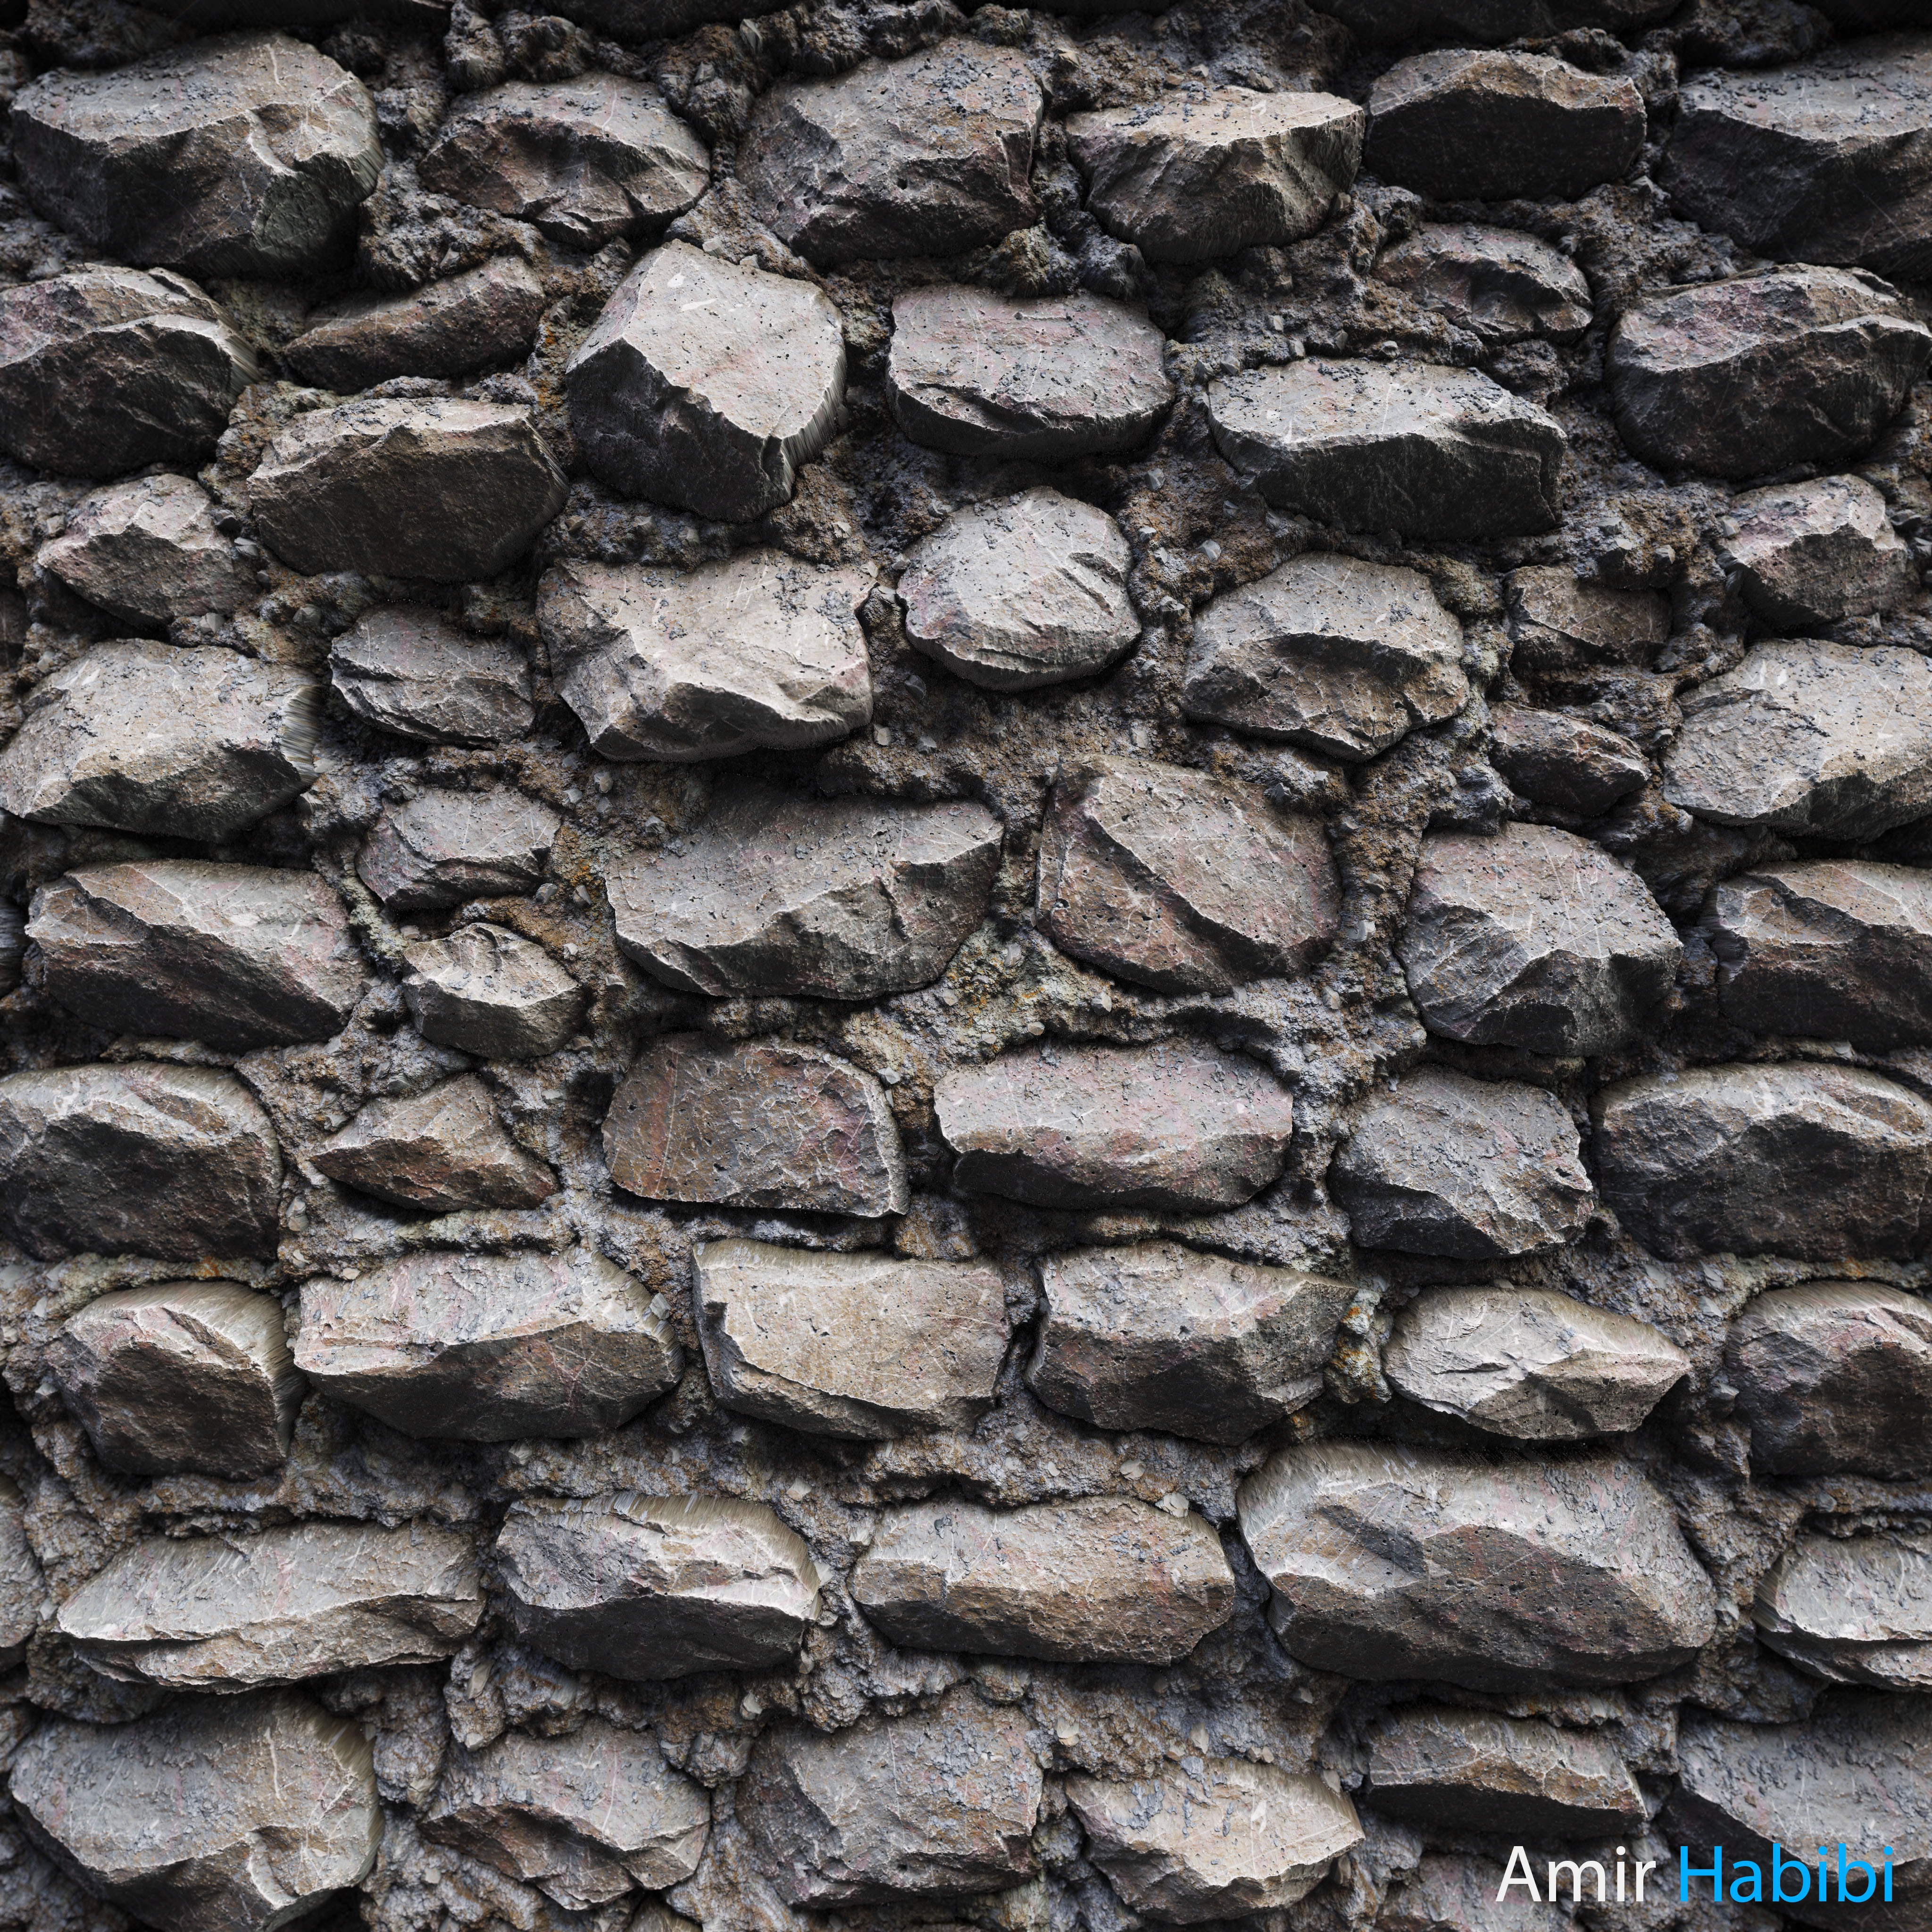
Stone Pebble Wall

Introduction
Hello, I am Amir Habibi, an Iranian Material Artist with over five years of experience in material creation.
My journey began in 2019 when I was accepted into the 3D Graphics program at Futuregames in Stockholm, Sweden.
During my studies, I became interested in creating materials for games and decided to focus on this area.
Since graduating, I have continued developing my skills in material creation through both personal and professional projects.
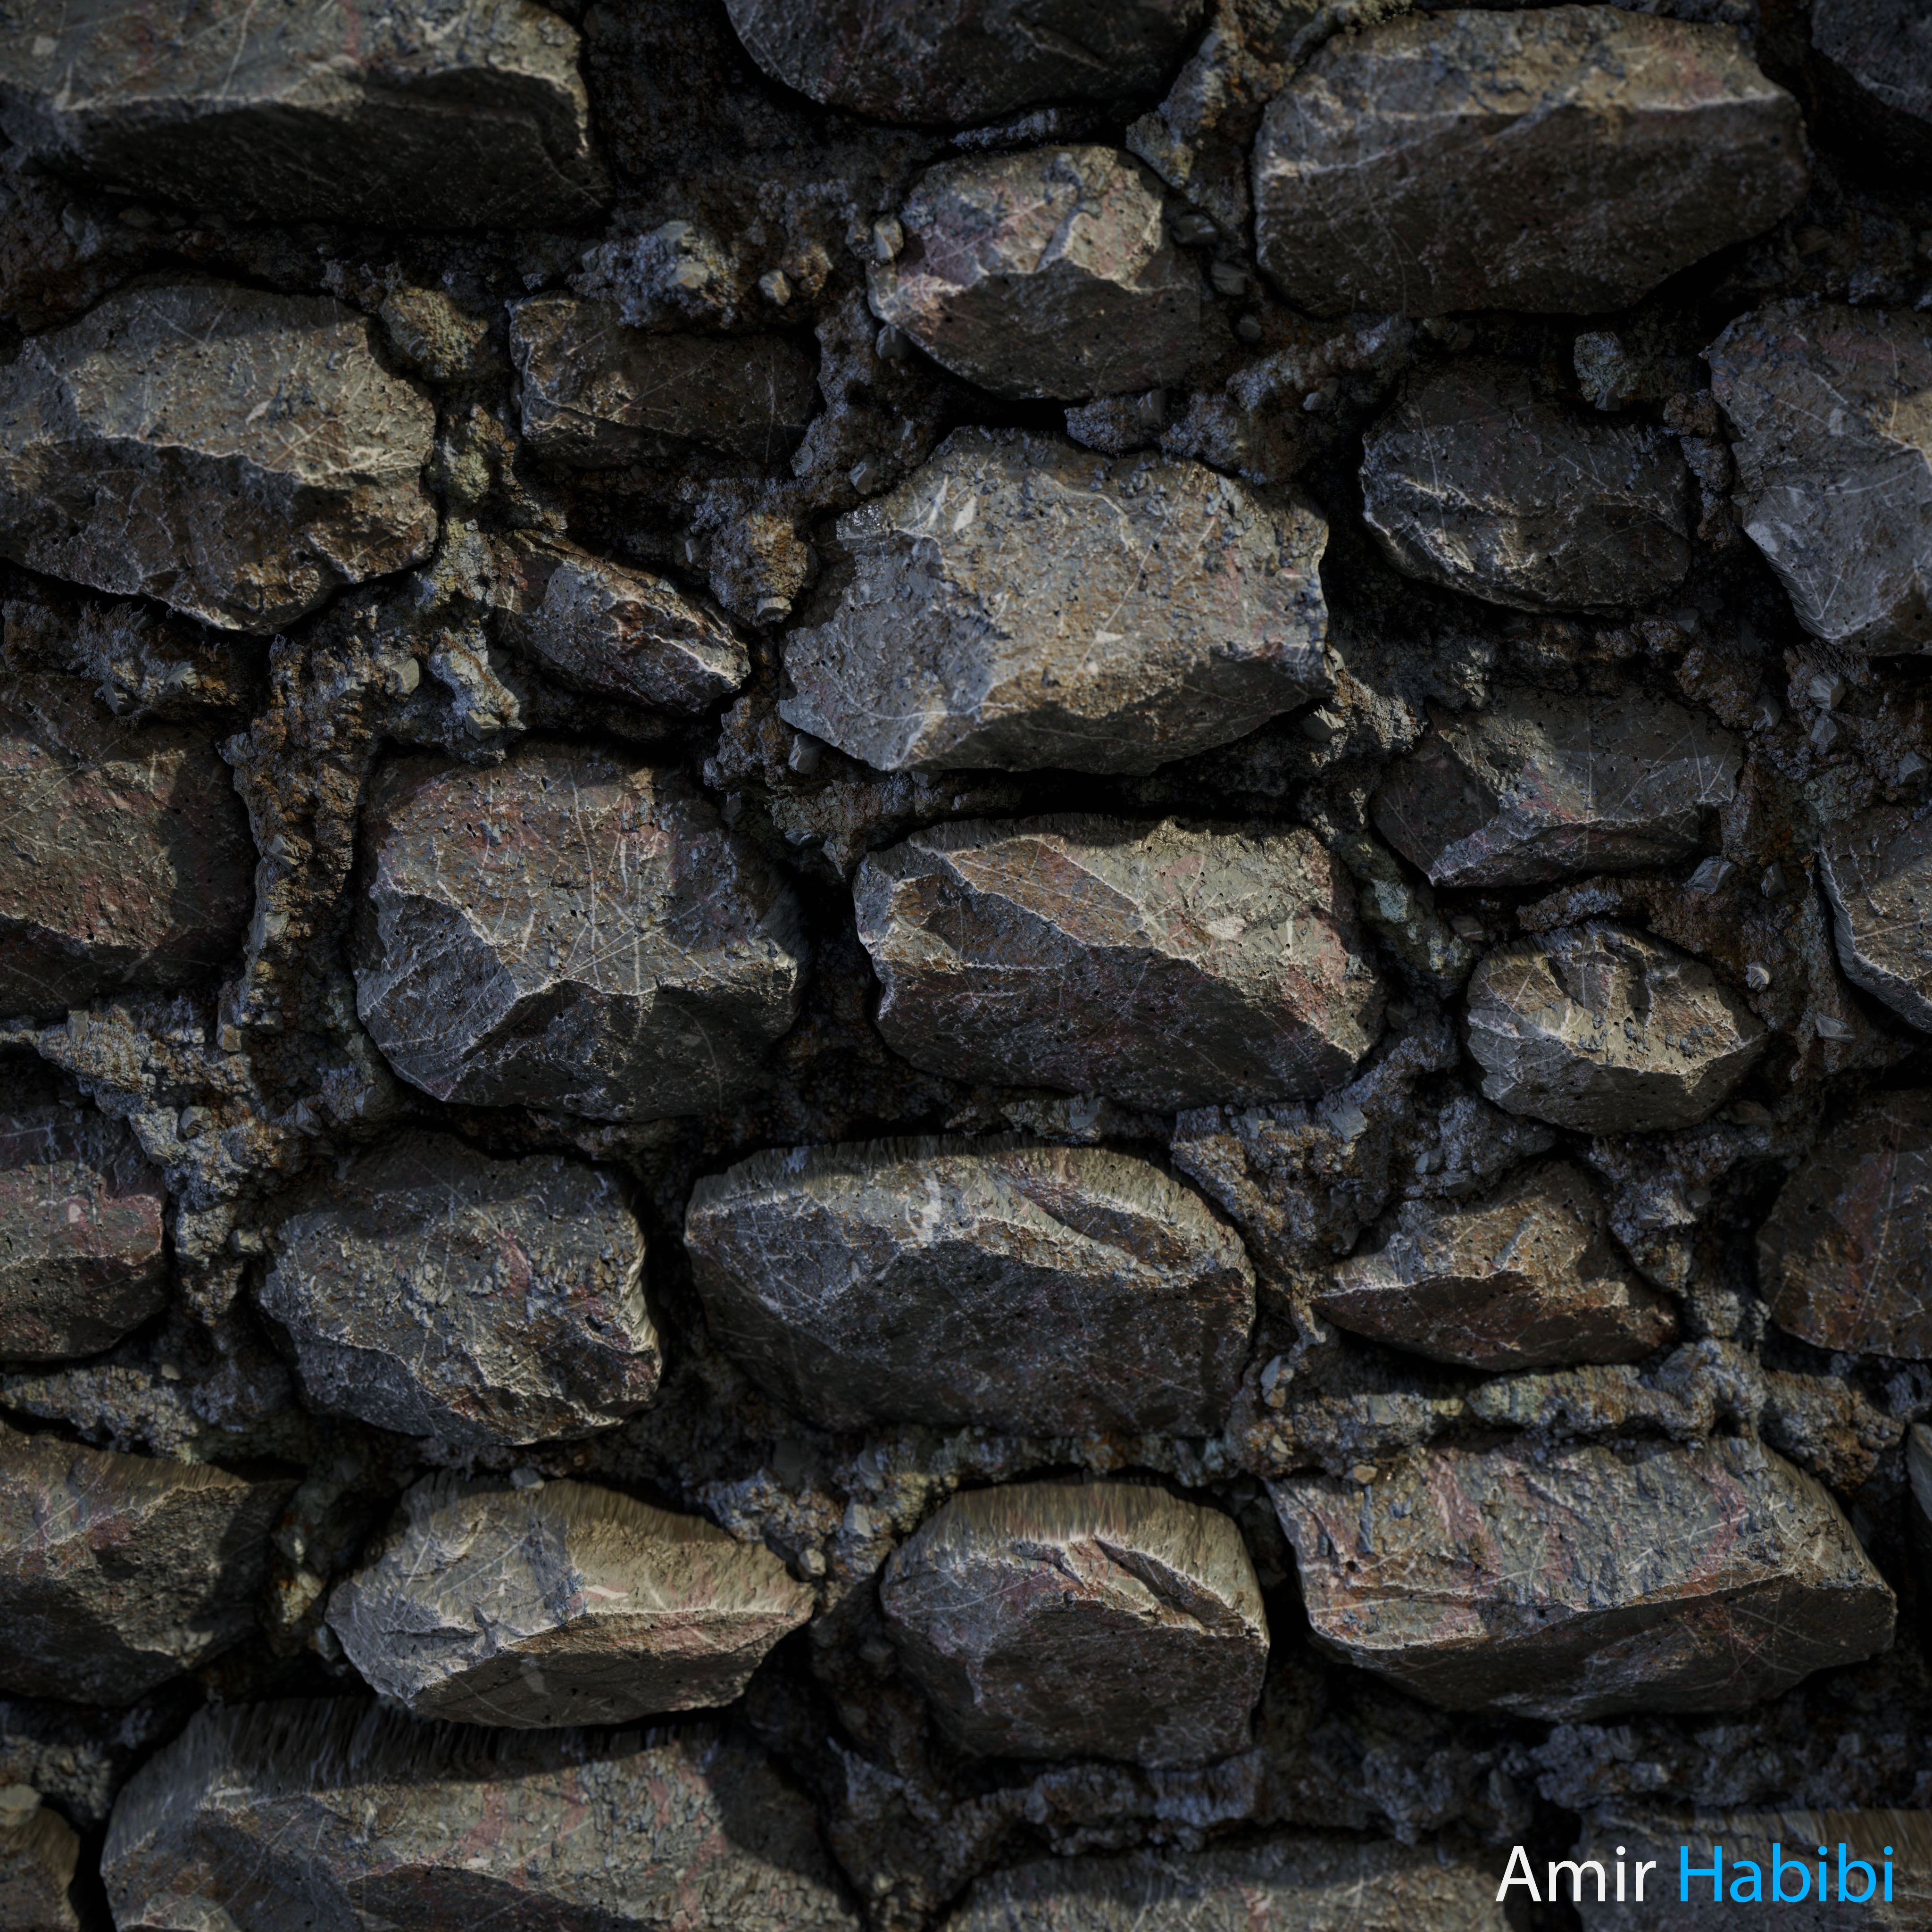
Project
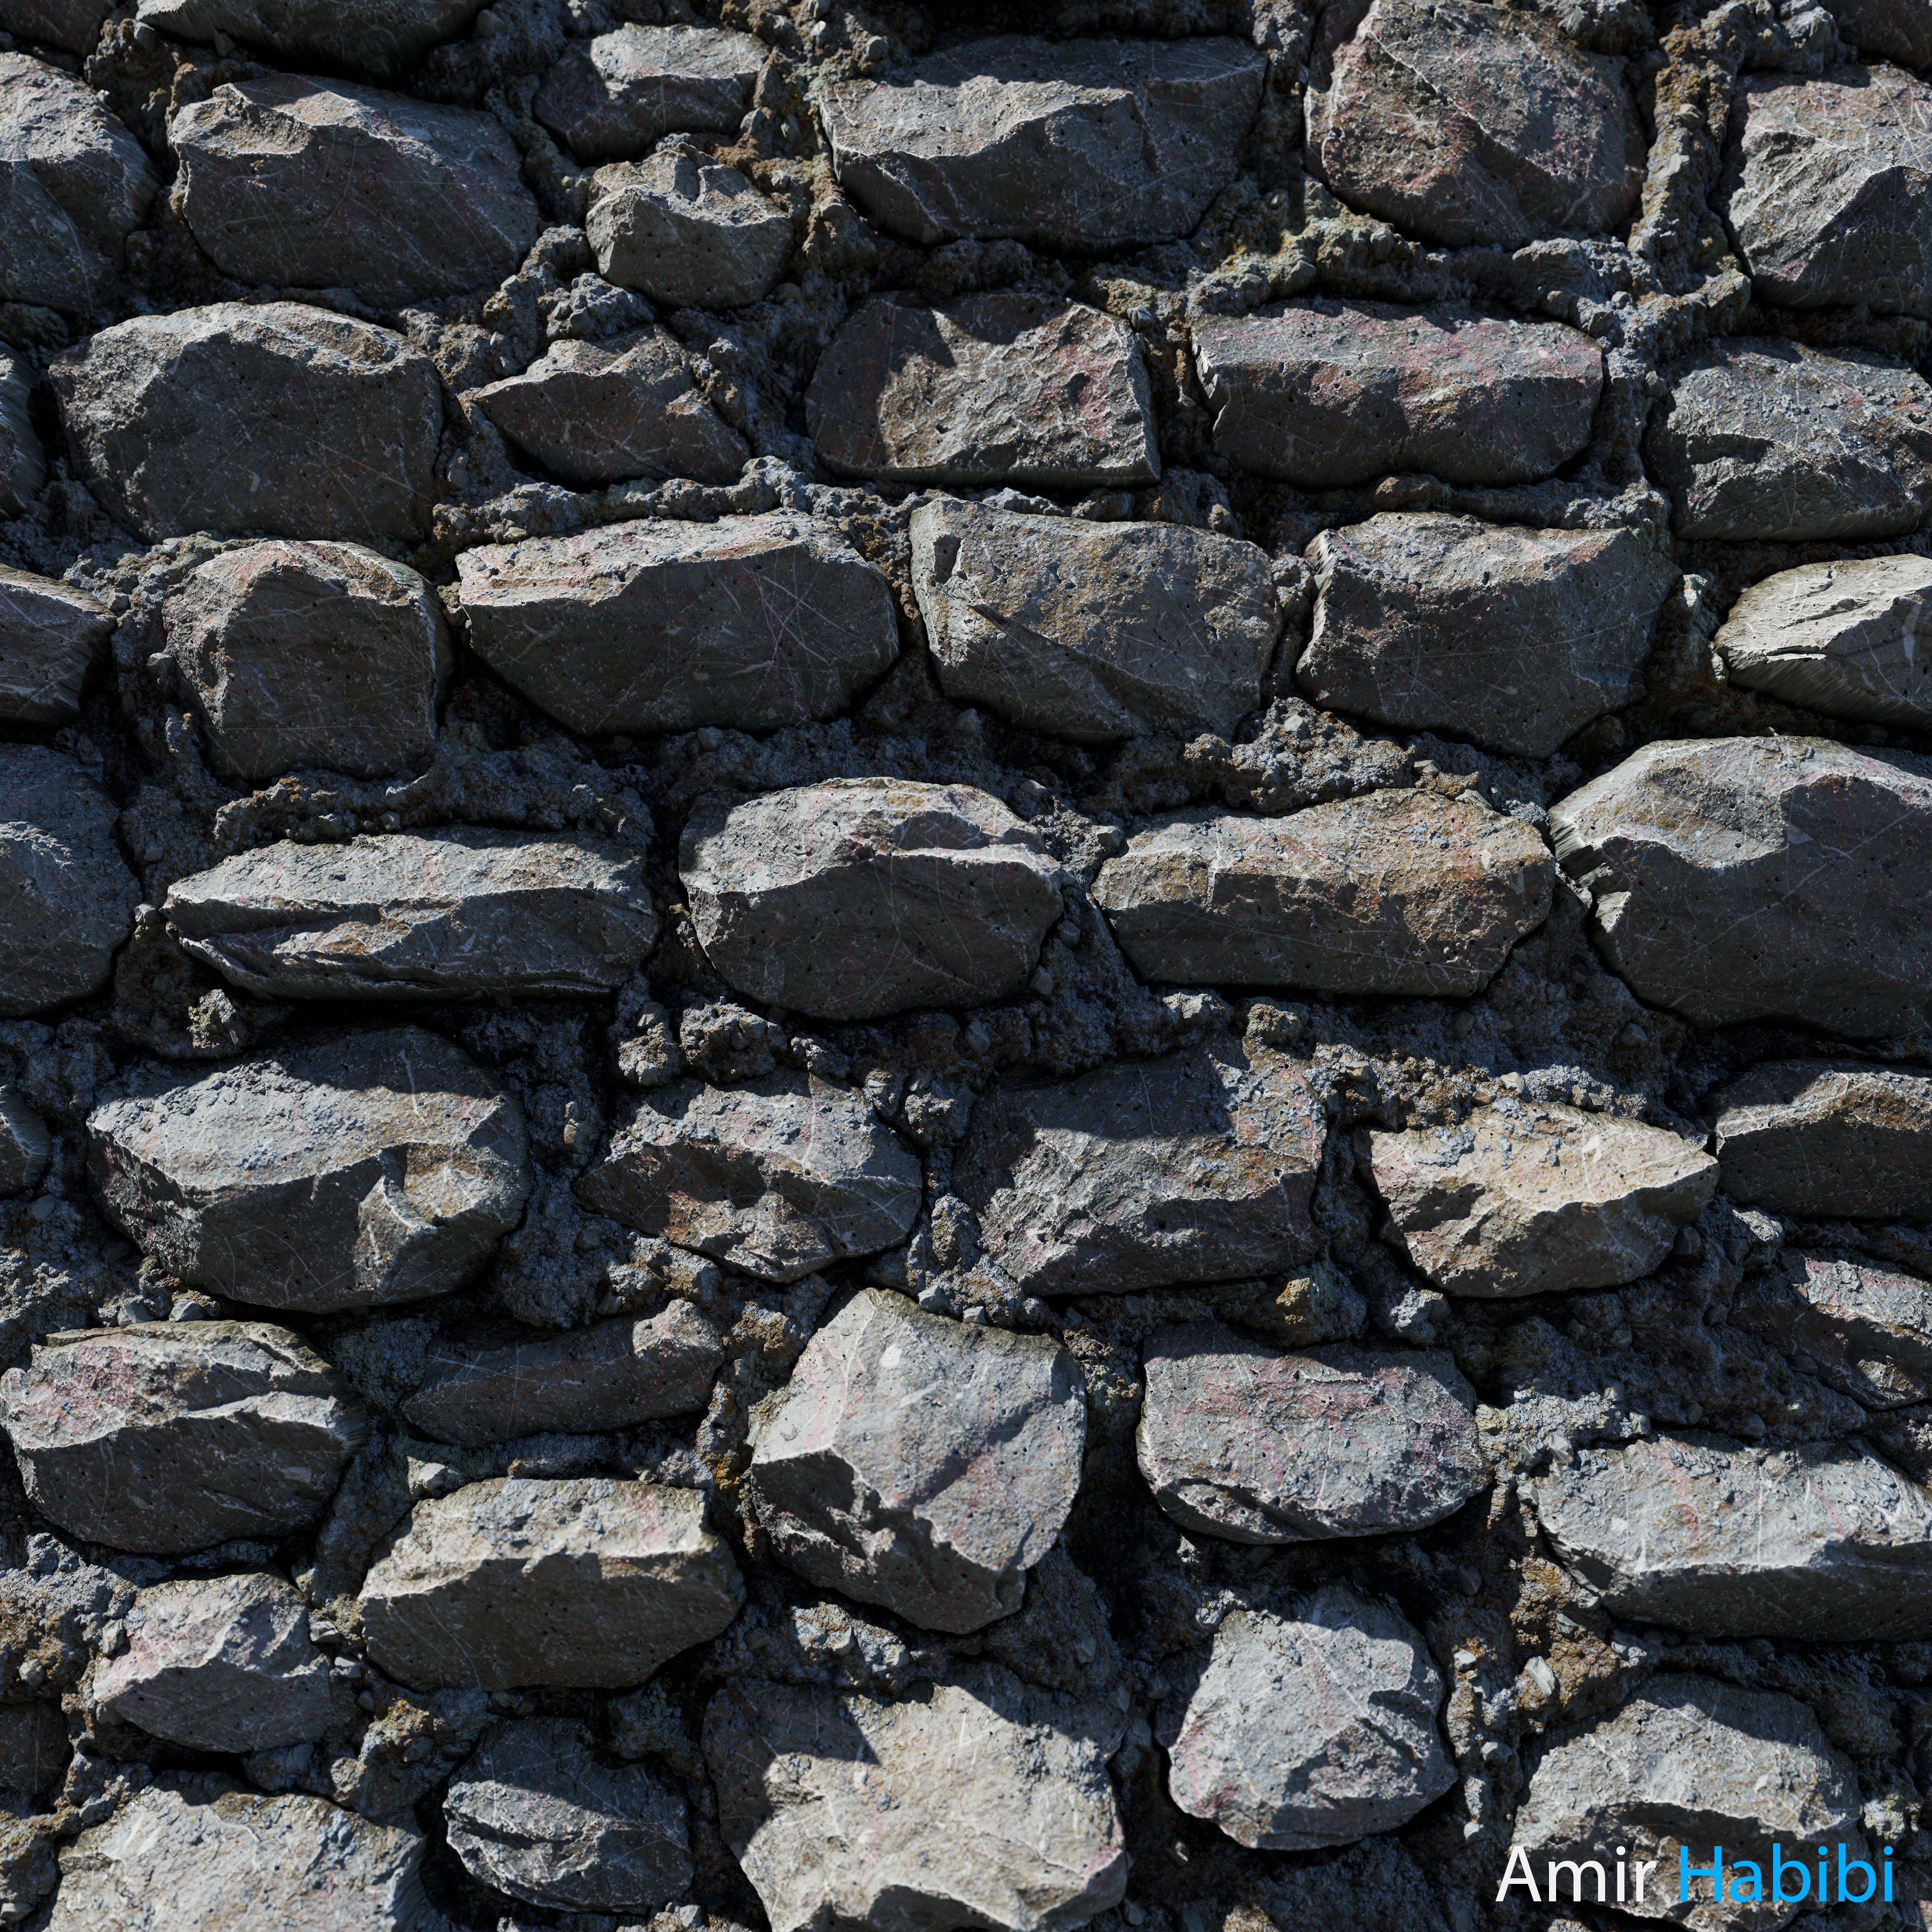
In this article, I will break down the workflow behind my Stone Wall material, from reference gathering and sculpting to texturing and final presentation.
References
Before starting the material, I spent some time gathering reference images.
At this stage, I mainly focused on the shapes, weathering effects, color variations, and roughness details.
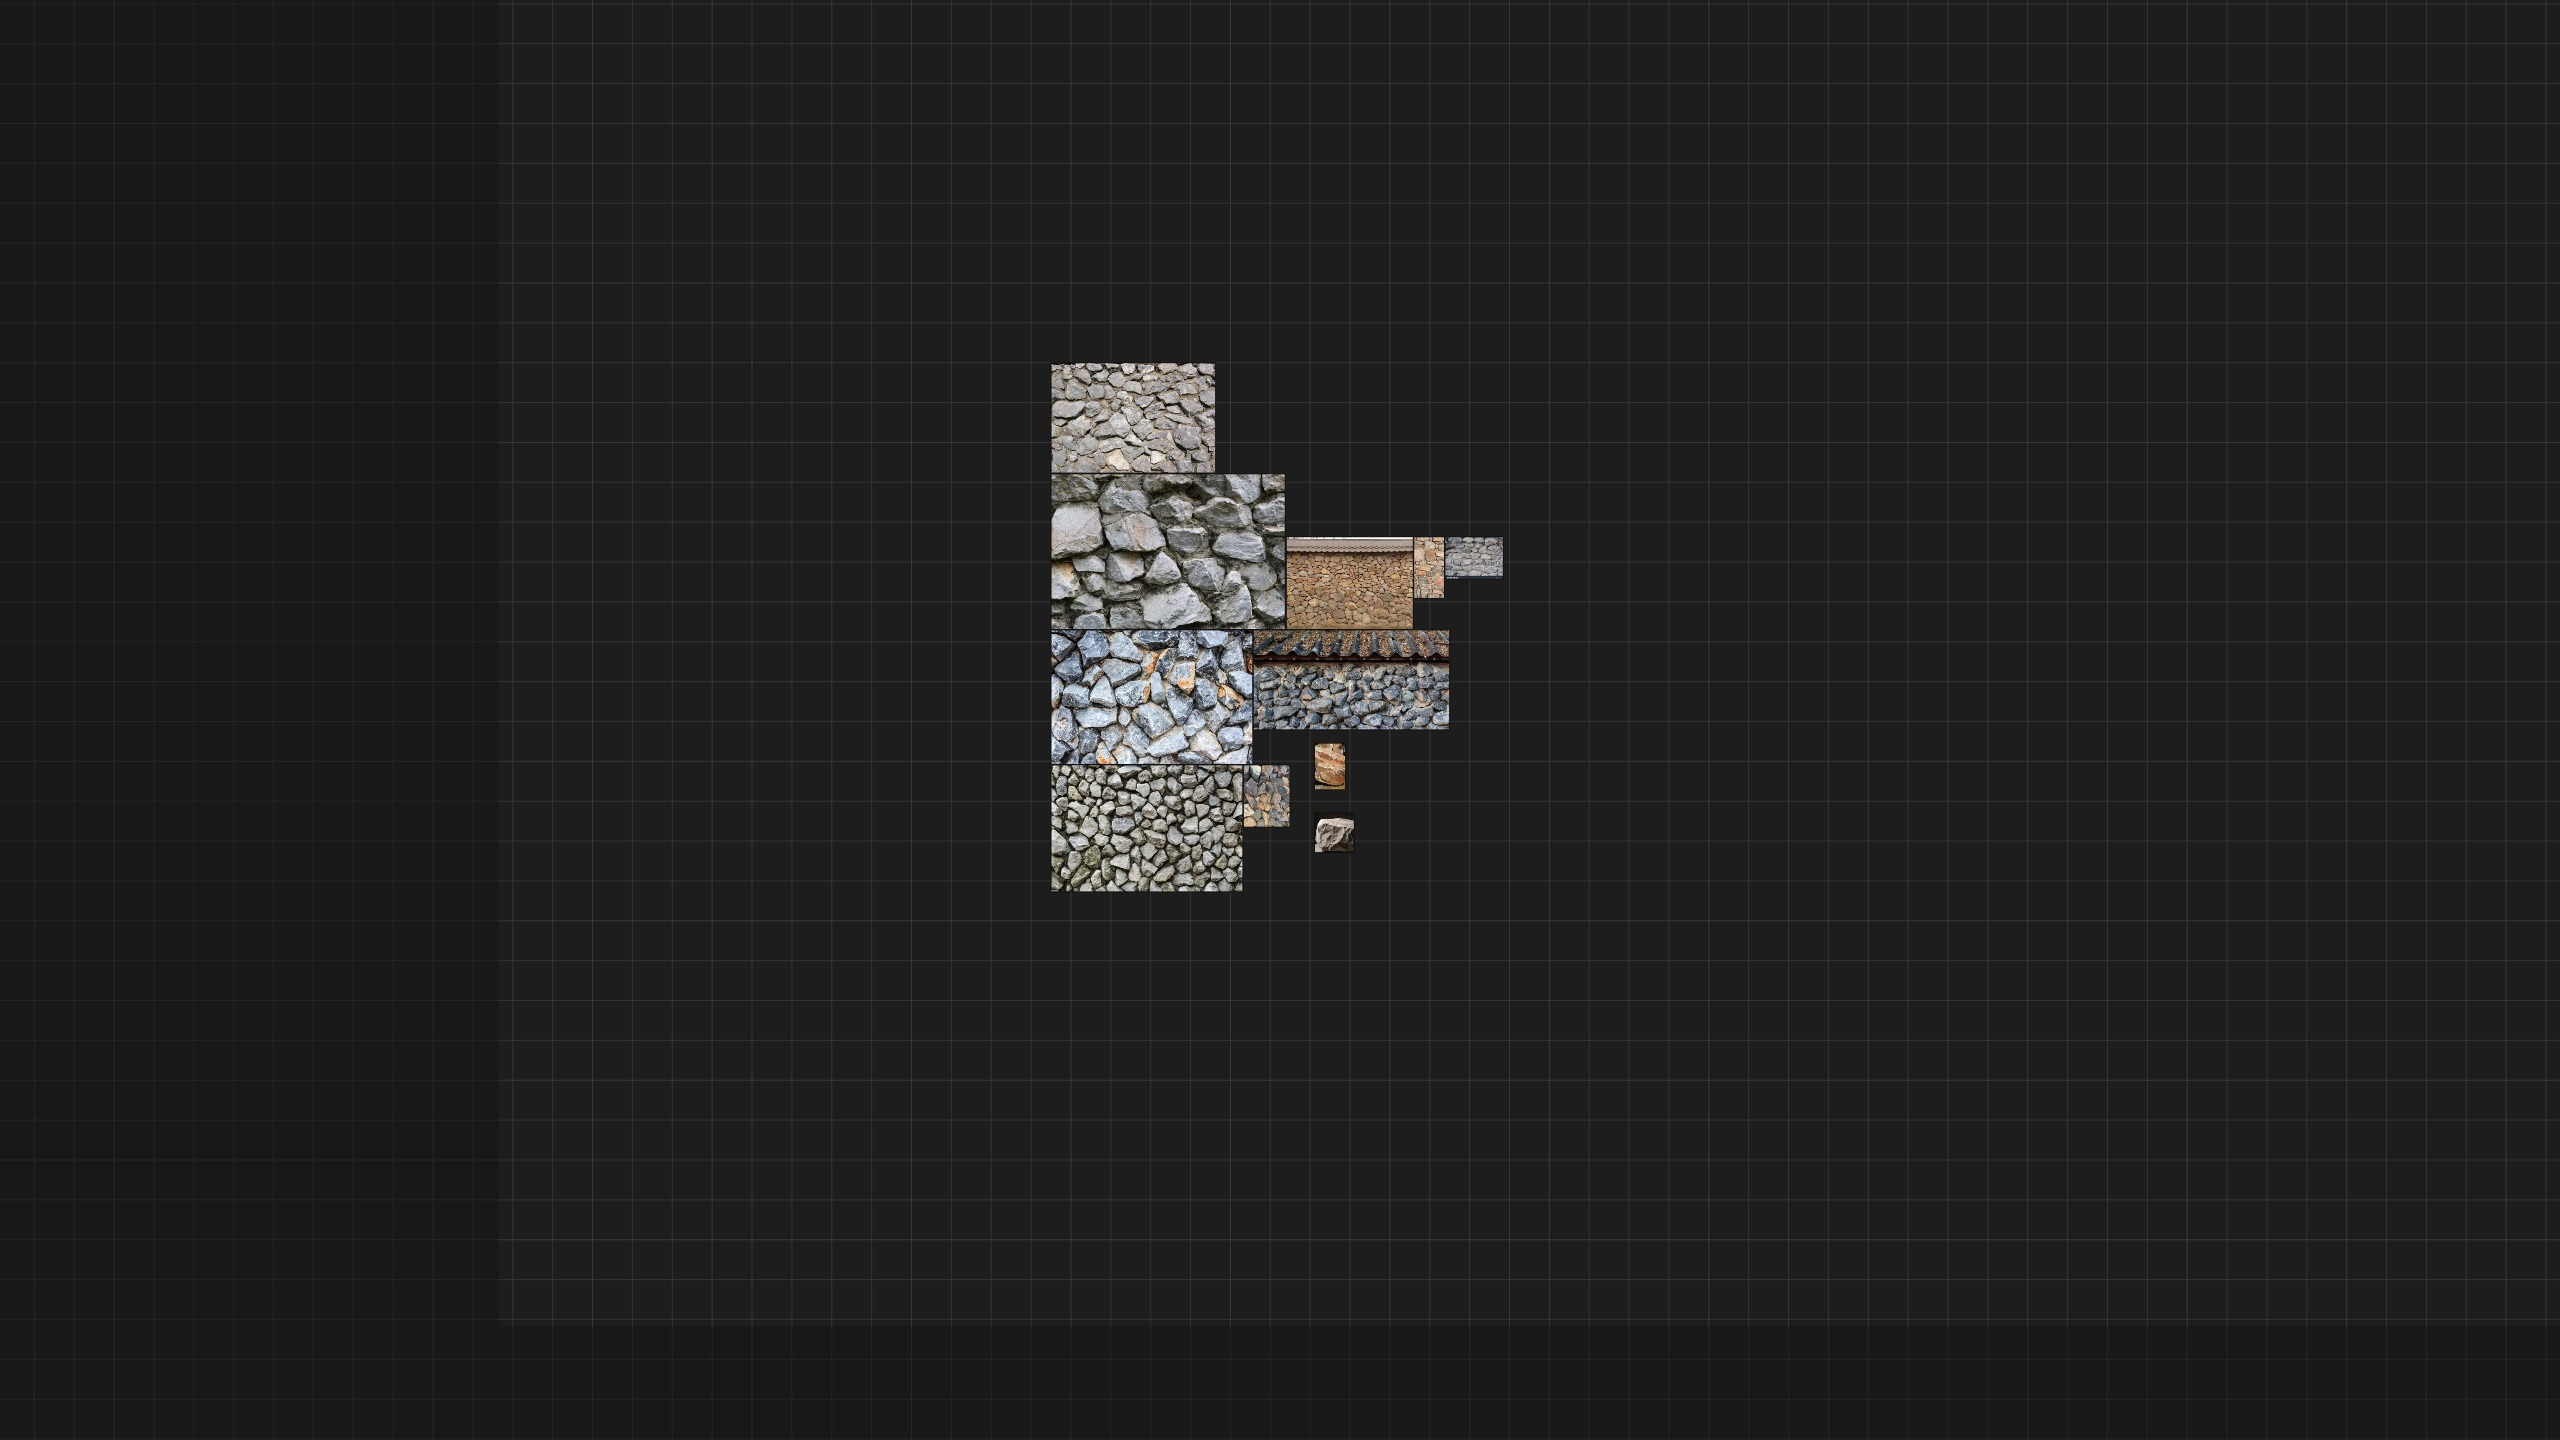
After studying the references, I realized that creating the entire stone wall in Substance Designer would not give me the level of detail I was looking for.
This encouraged me to step outside my comfort zone and include Maya and ZBrush in my workflow.
My plan was to first create the base stone shapes in Substance Designer, convert the height maps into 3D meshes in Maya, and then export them to ZBrush for sculpting.
Once the sculpting was finished, I baked the stones back into Substance Designer and continued refining the material by adding the final details.
Stone Creation
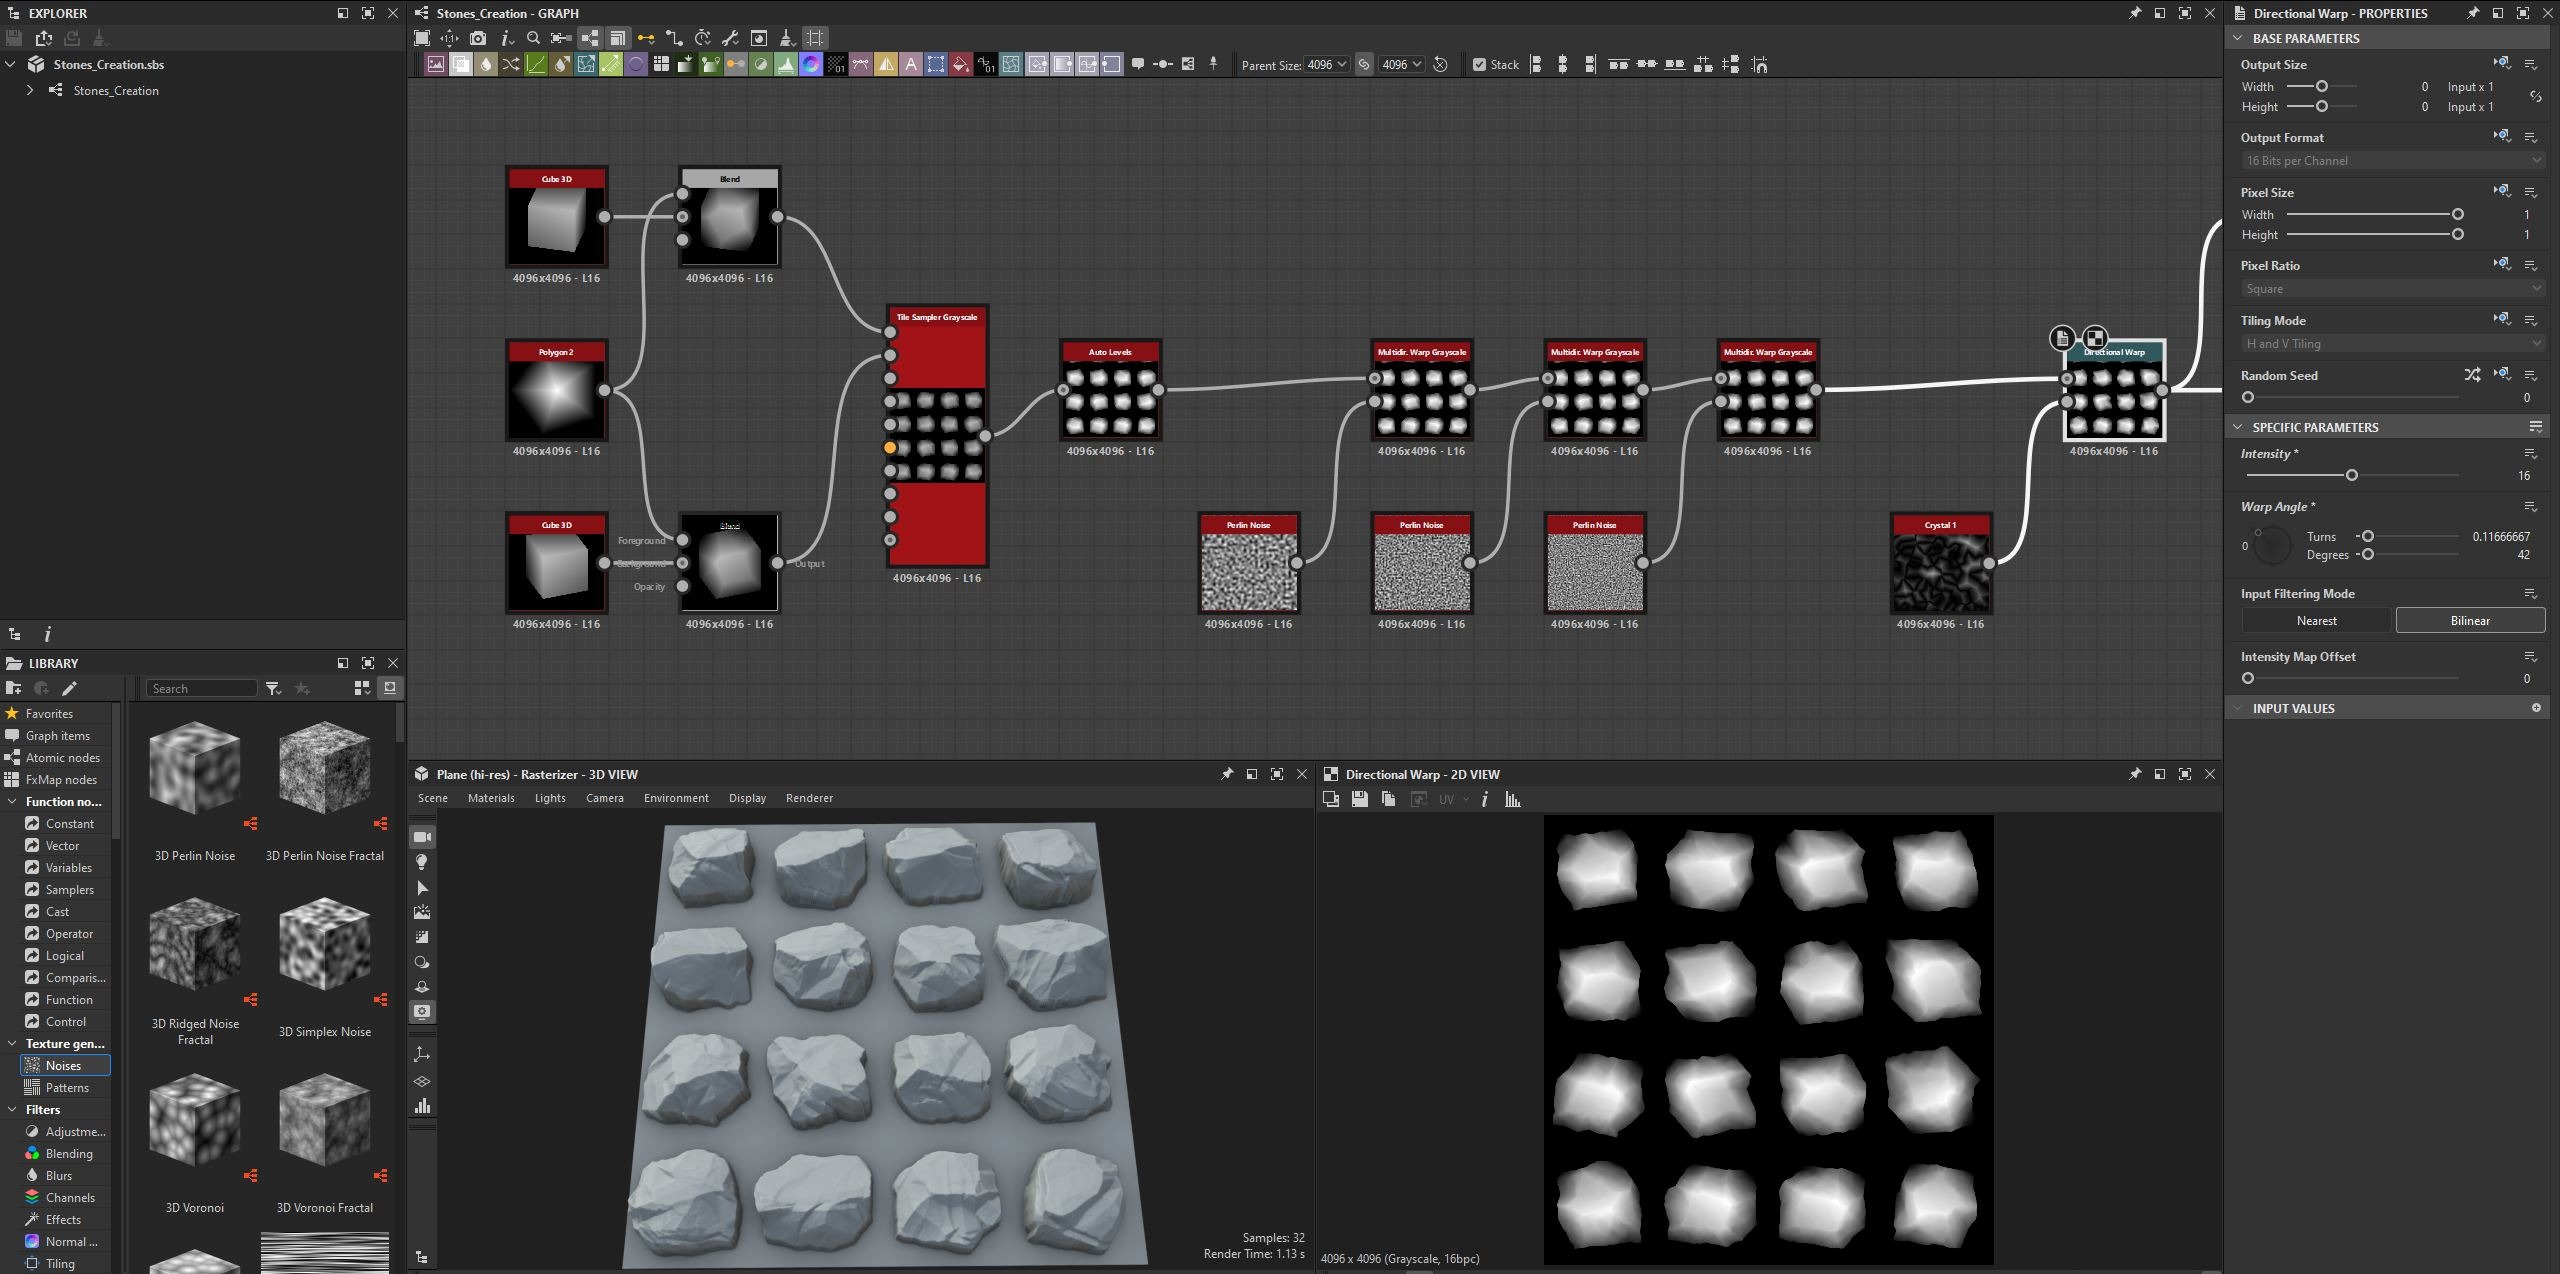
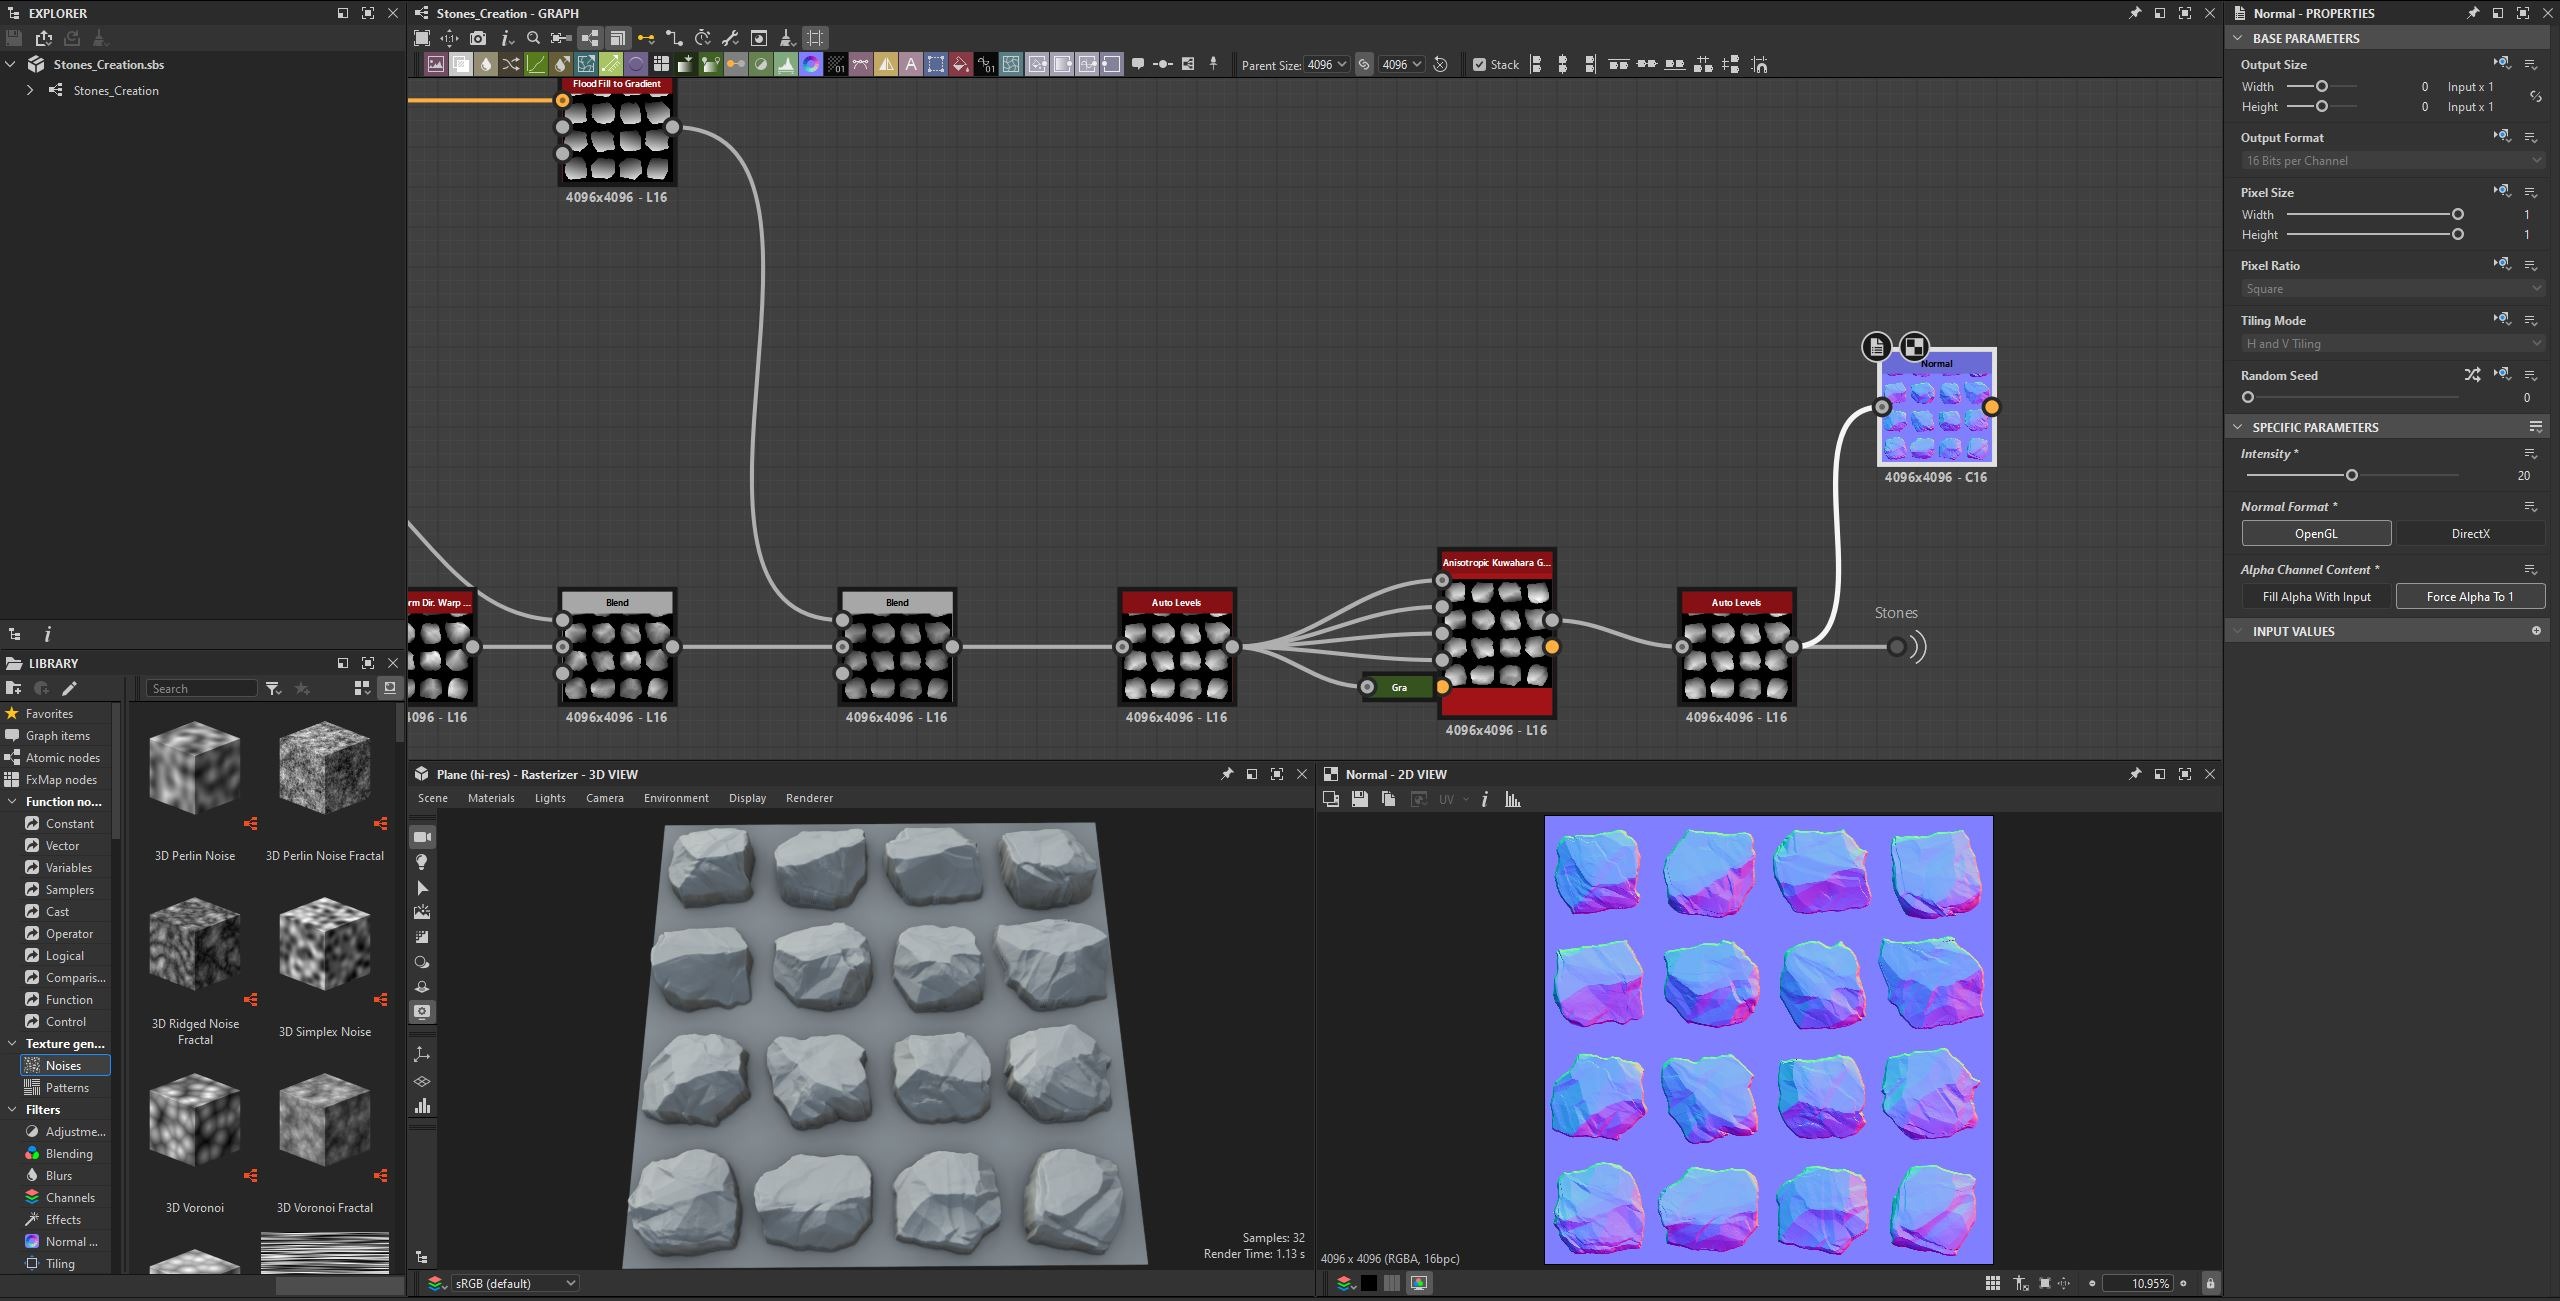
In this stage, I first created 16 stones in Substance Designer and then exported them to Maya to prepare them for ZBrush. I did not spend much time making them look exactly like the references, since I only needed some basic stone shapes as a starting point.
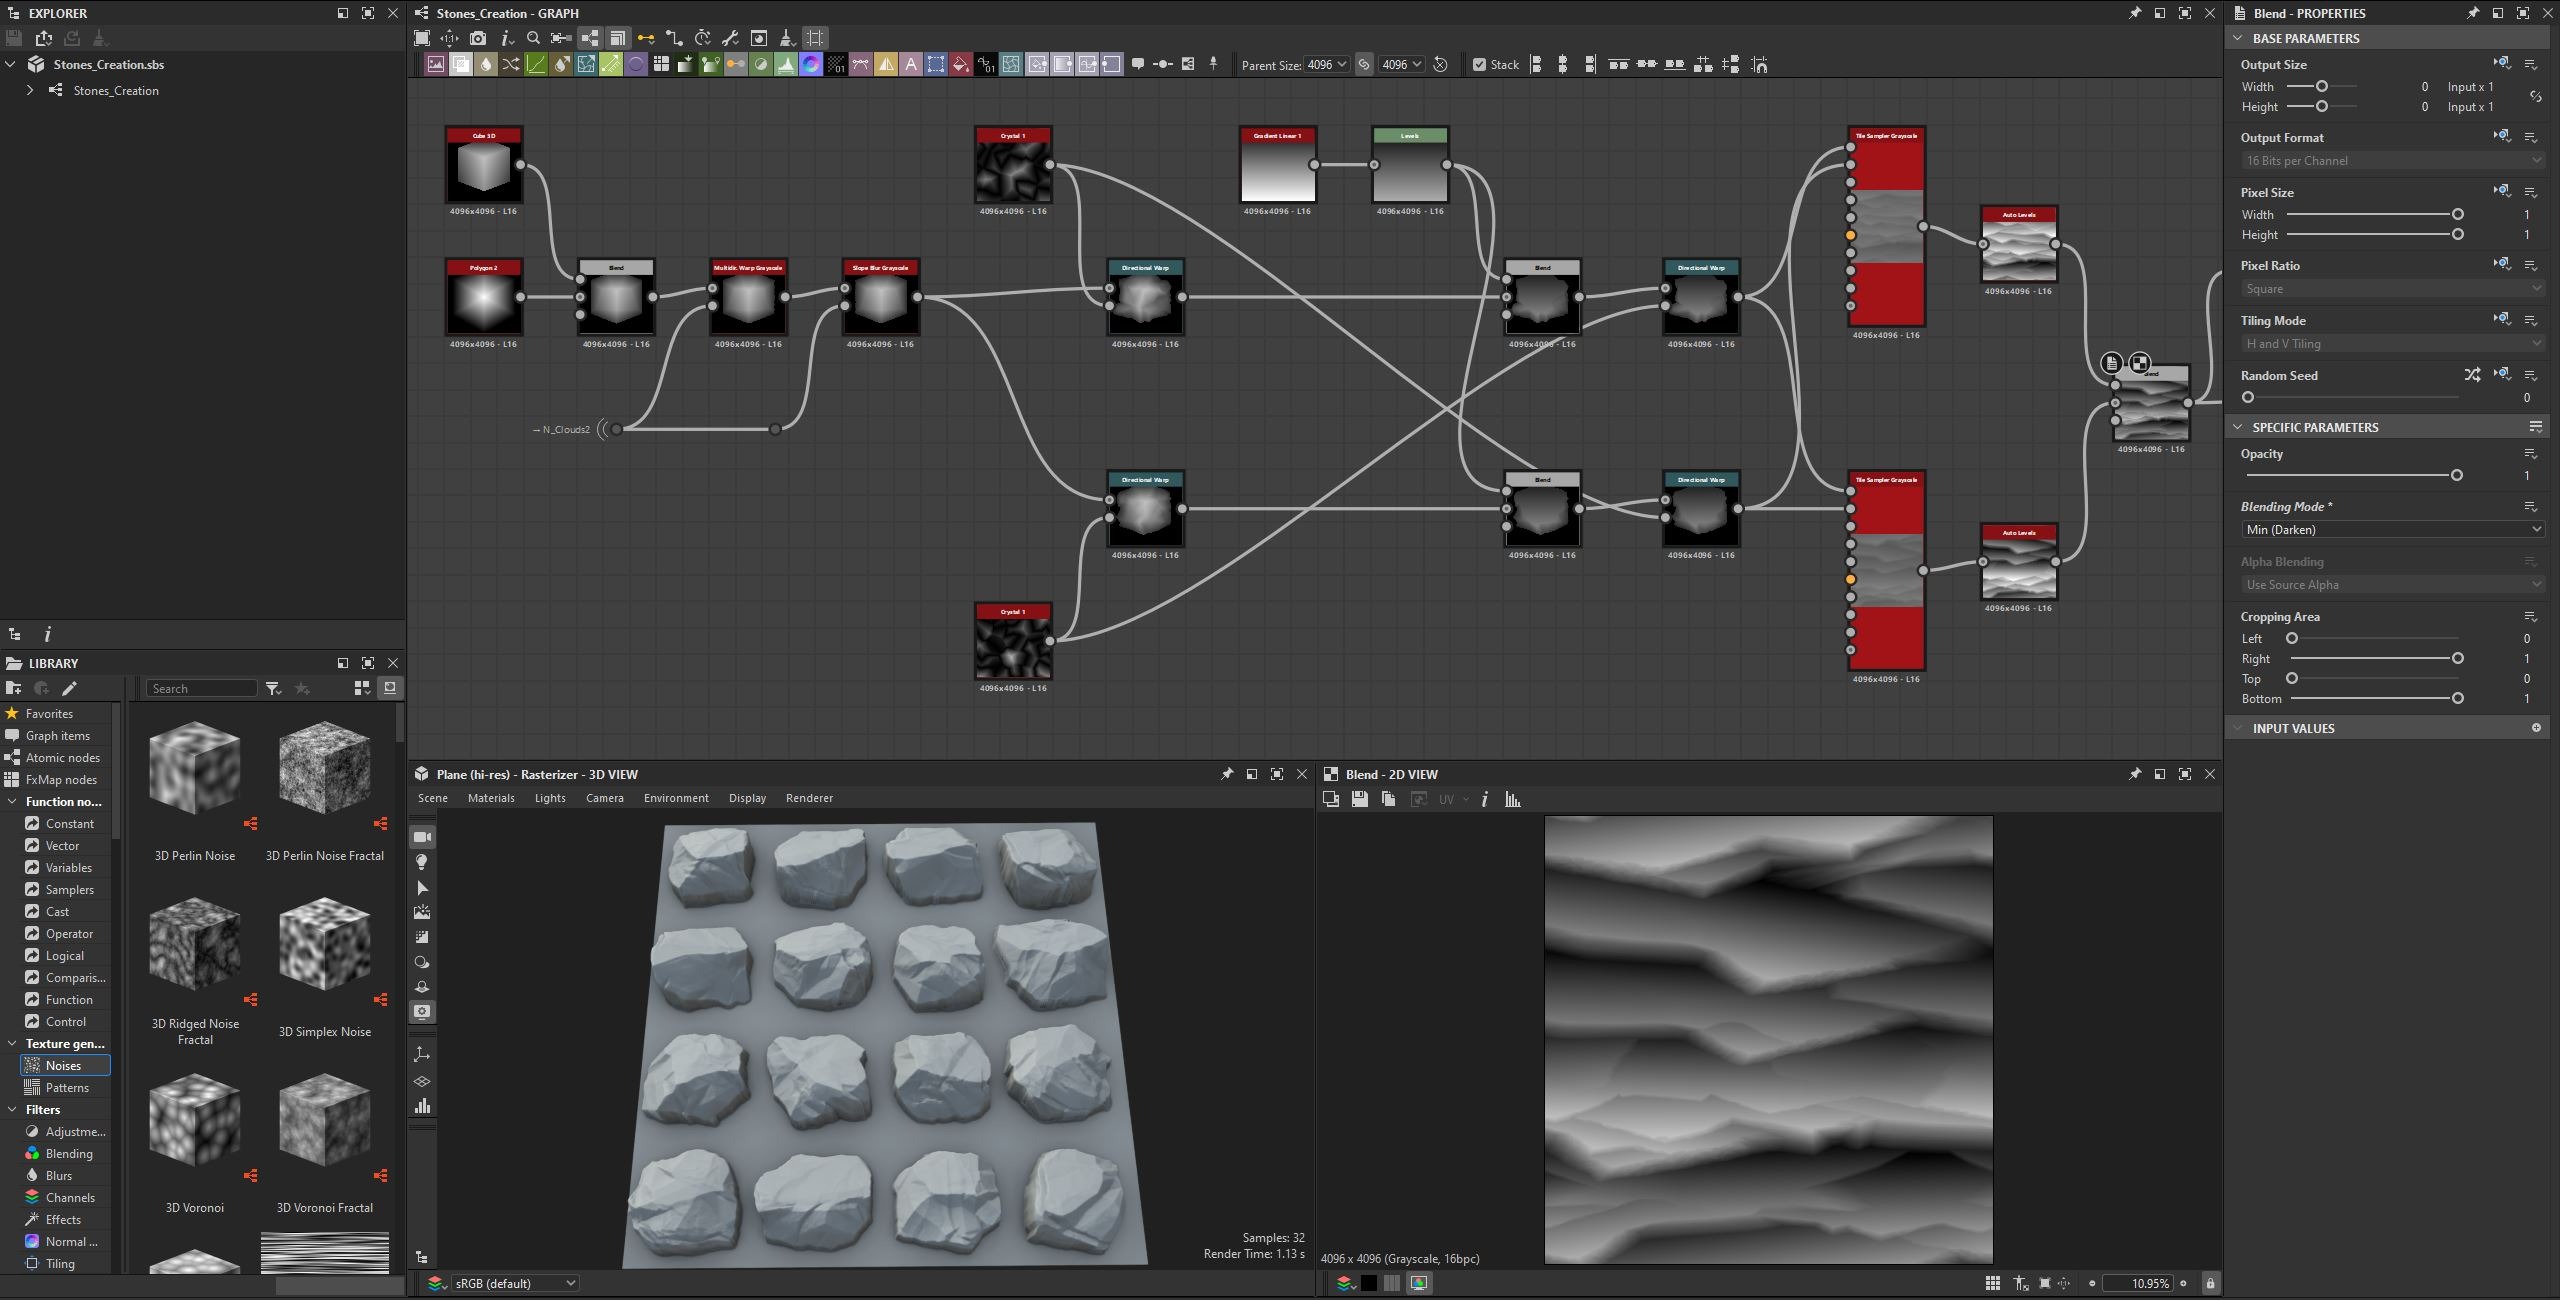
In Substance Designer, I generally work from macro to micro shapes. I started by using a Cube 3D node and blending it with a Polygon 2 node to create the base stone shapes. After that, I warped the stones several times to break up their forms and make them look less uniform.
Once I was happy with the overall shapes, I used a Directional Warp node to create some carved details on the stones.
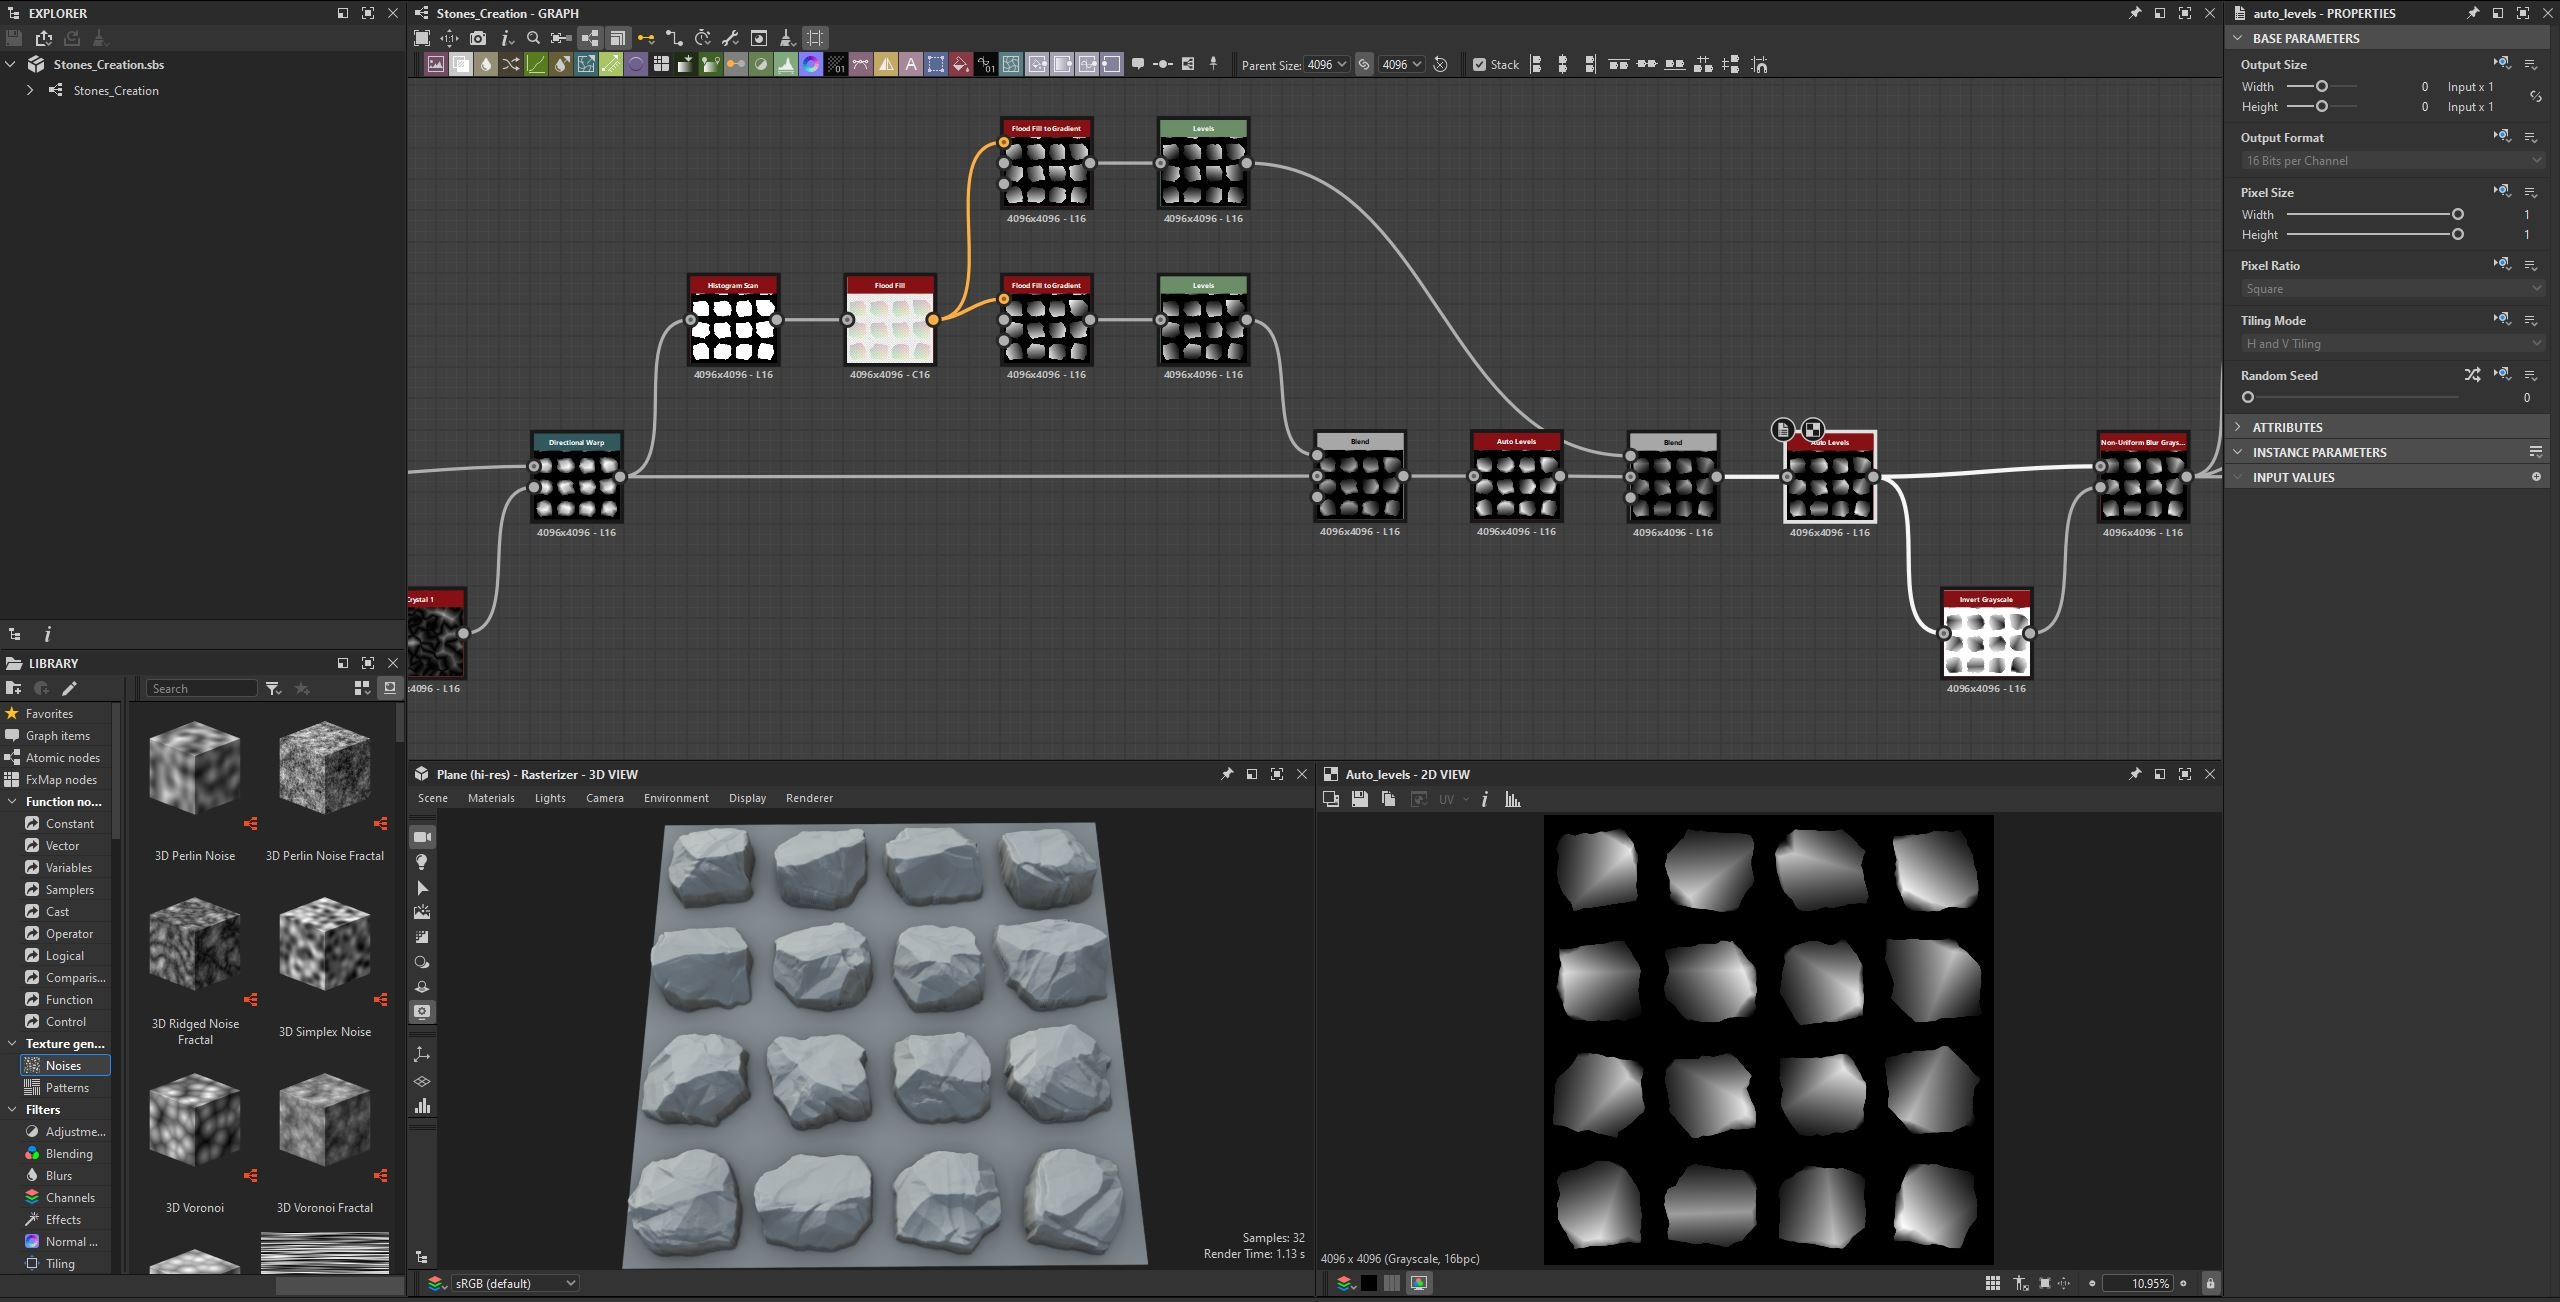
After warping the stones, I used a Flood Fill node to cut them in two different directions.
This technique helped me not only create more interesting stone shapes, but also generate new forms based on the previous modifications I had made.
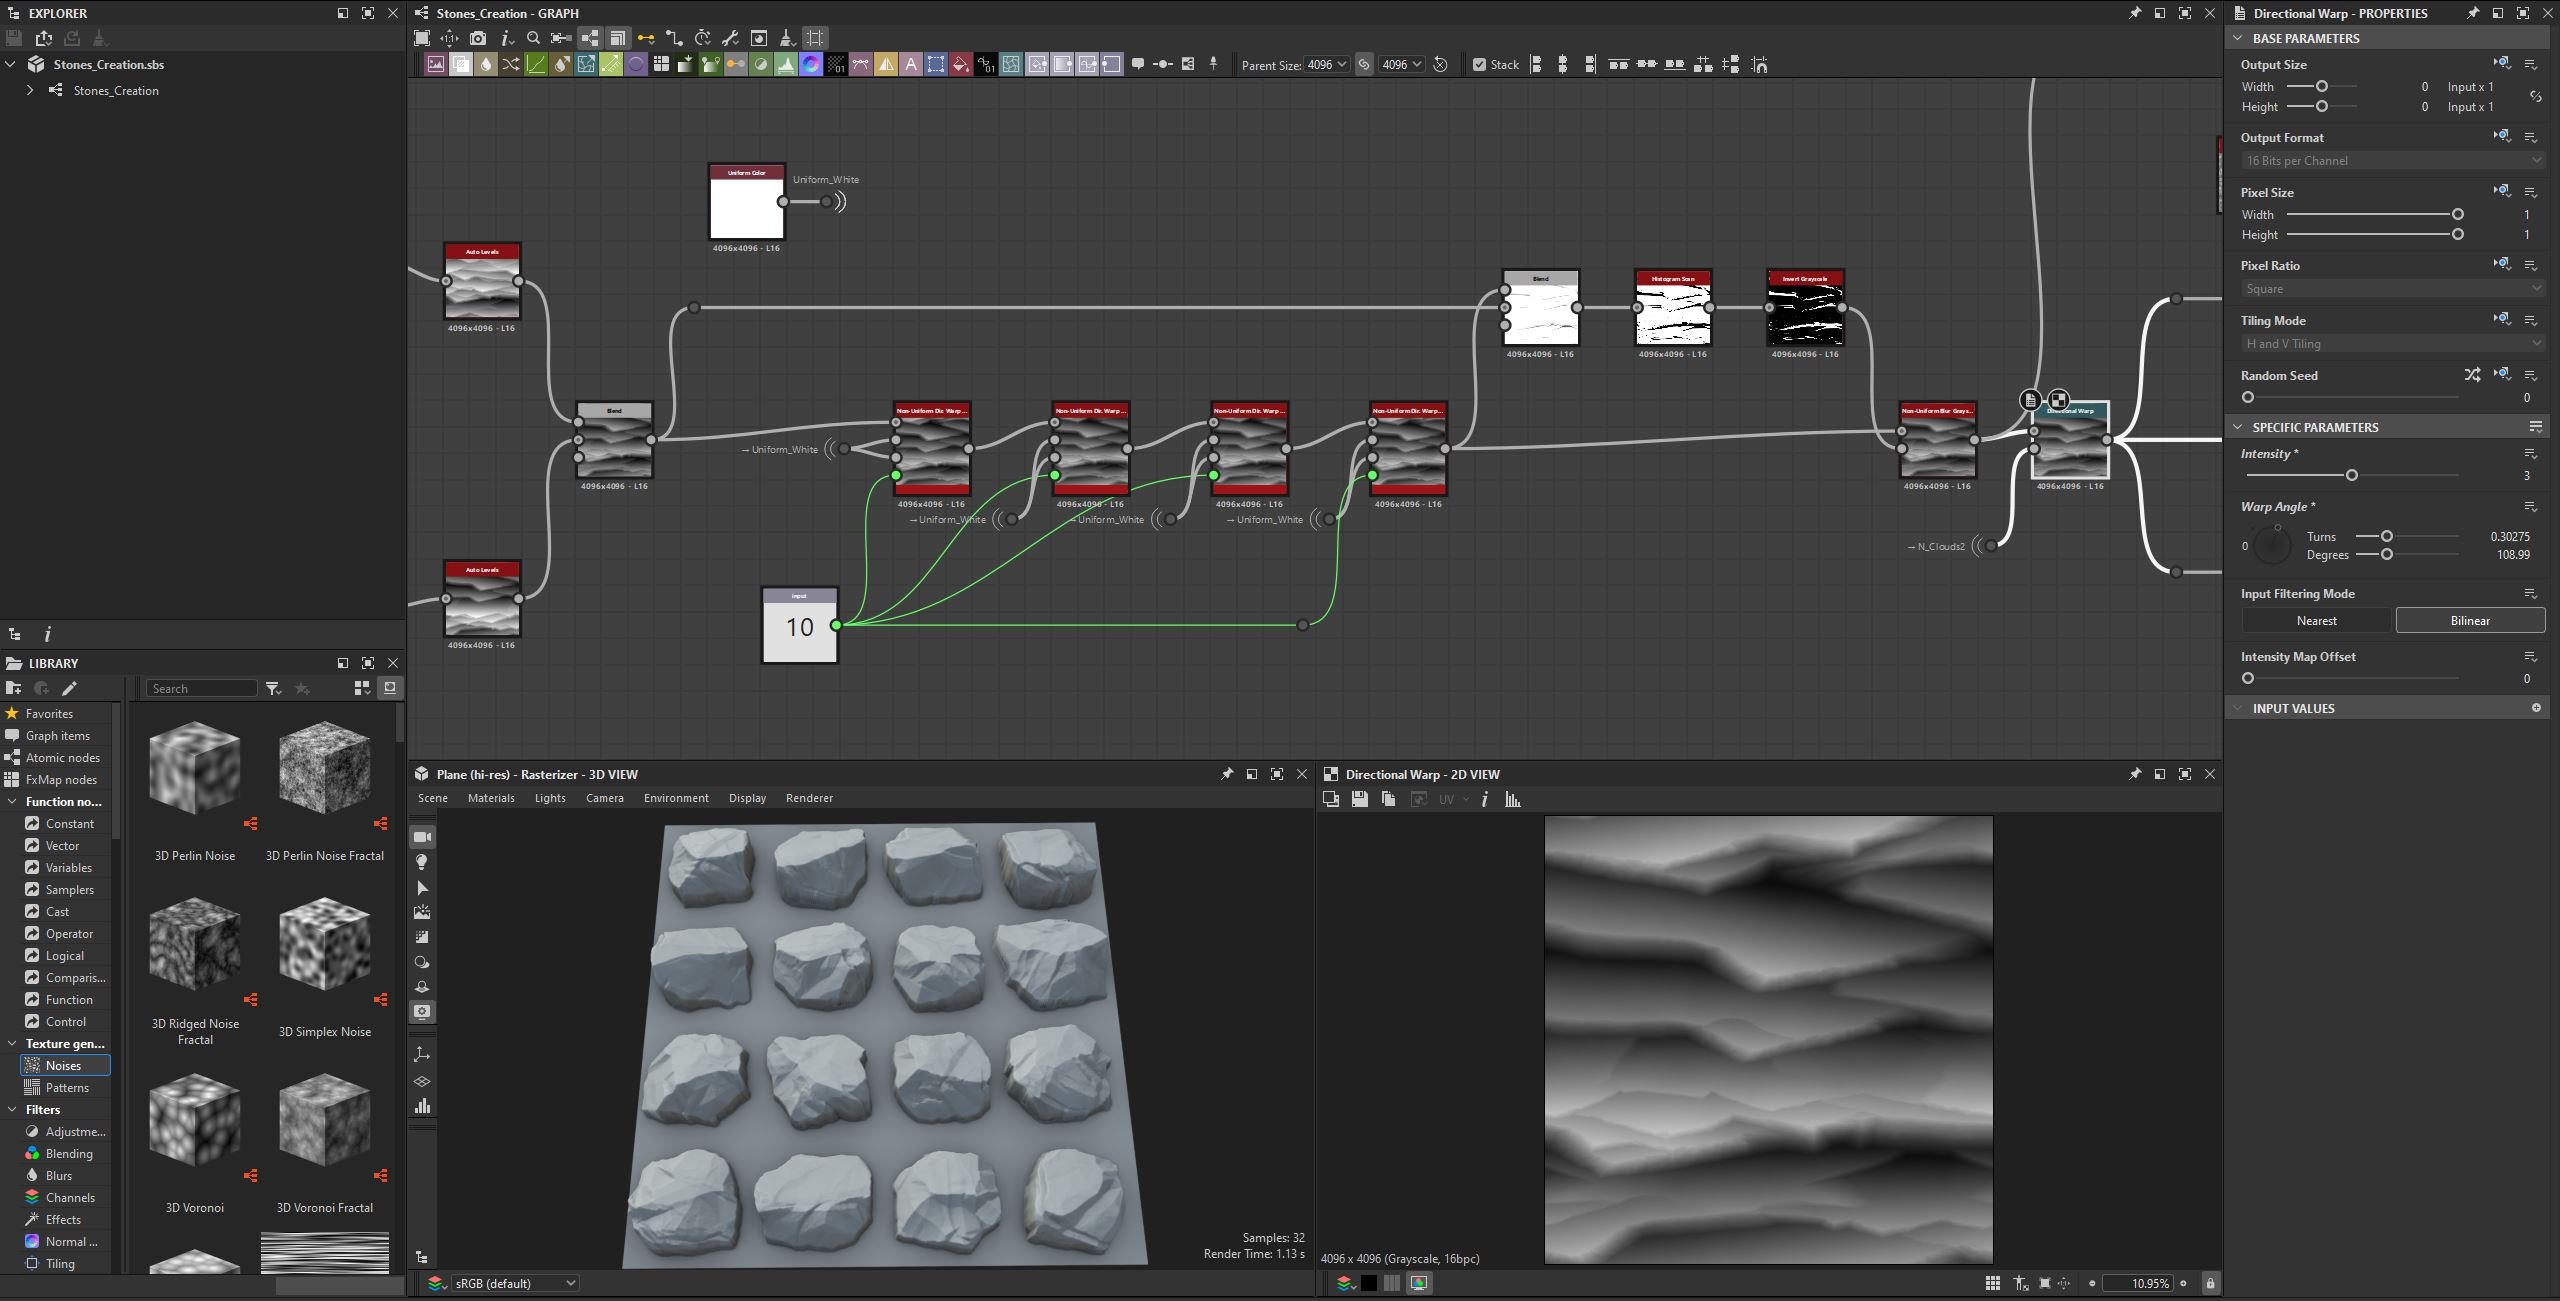
After cutting the stones, I wanted to add more variation to their shapes by pushing and distorting each stone individually.
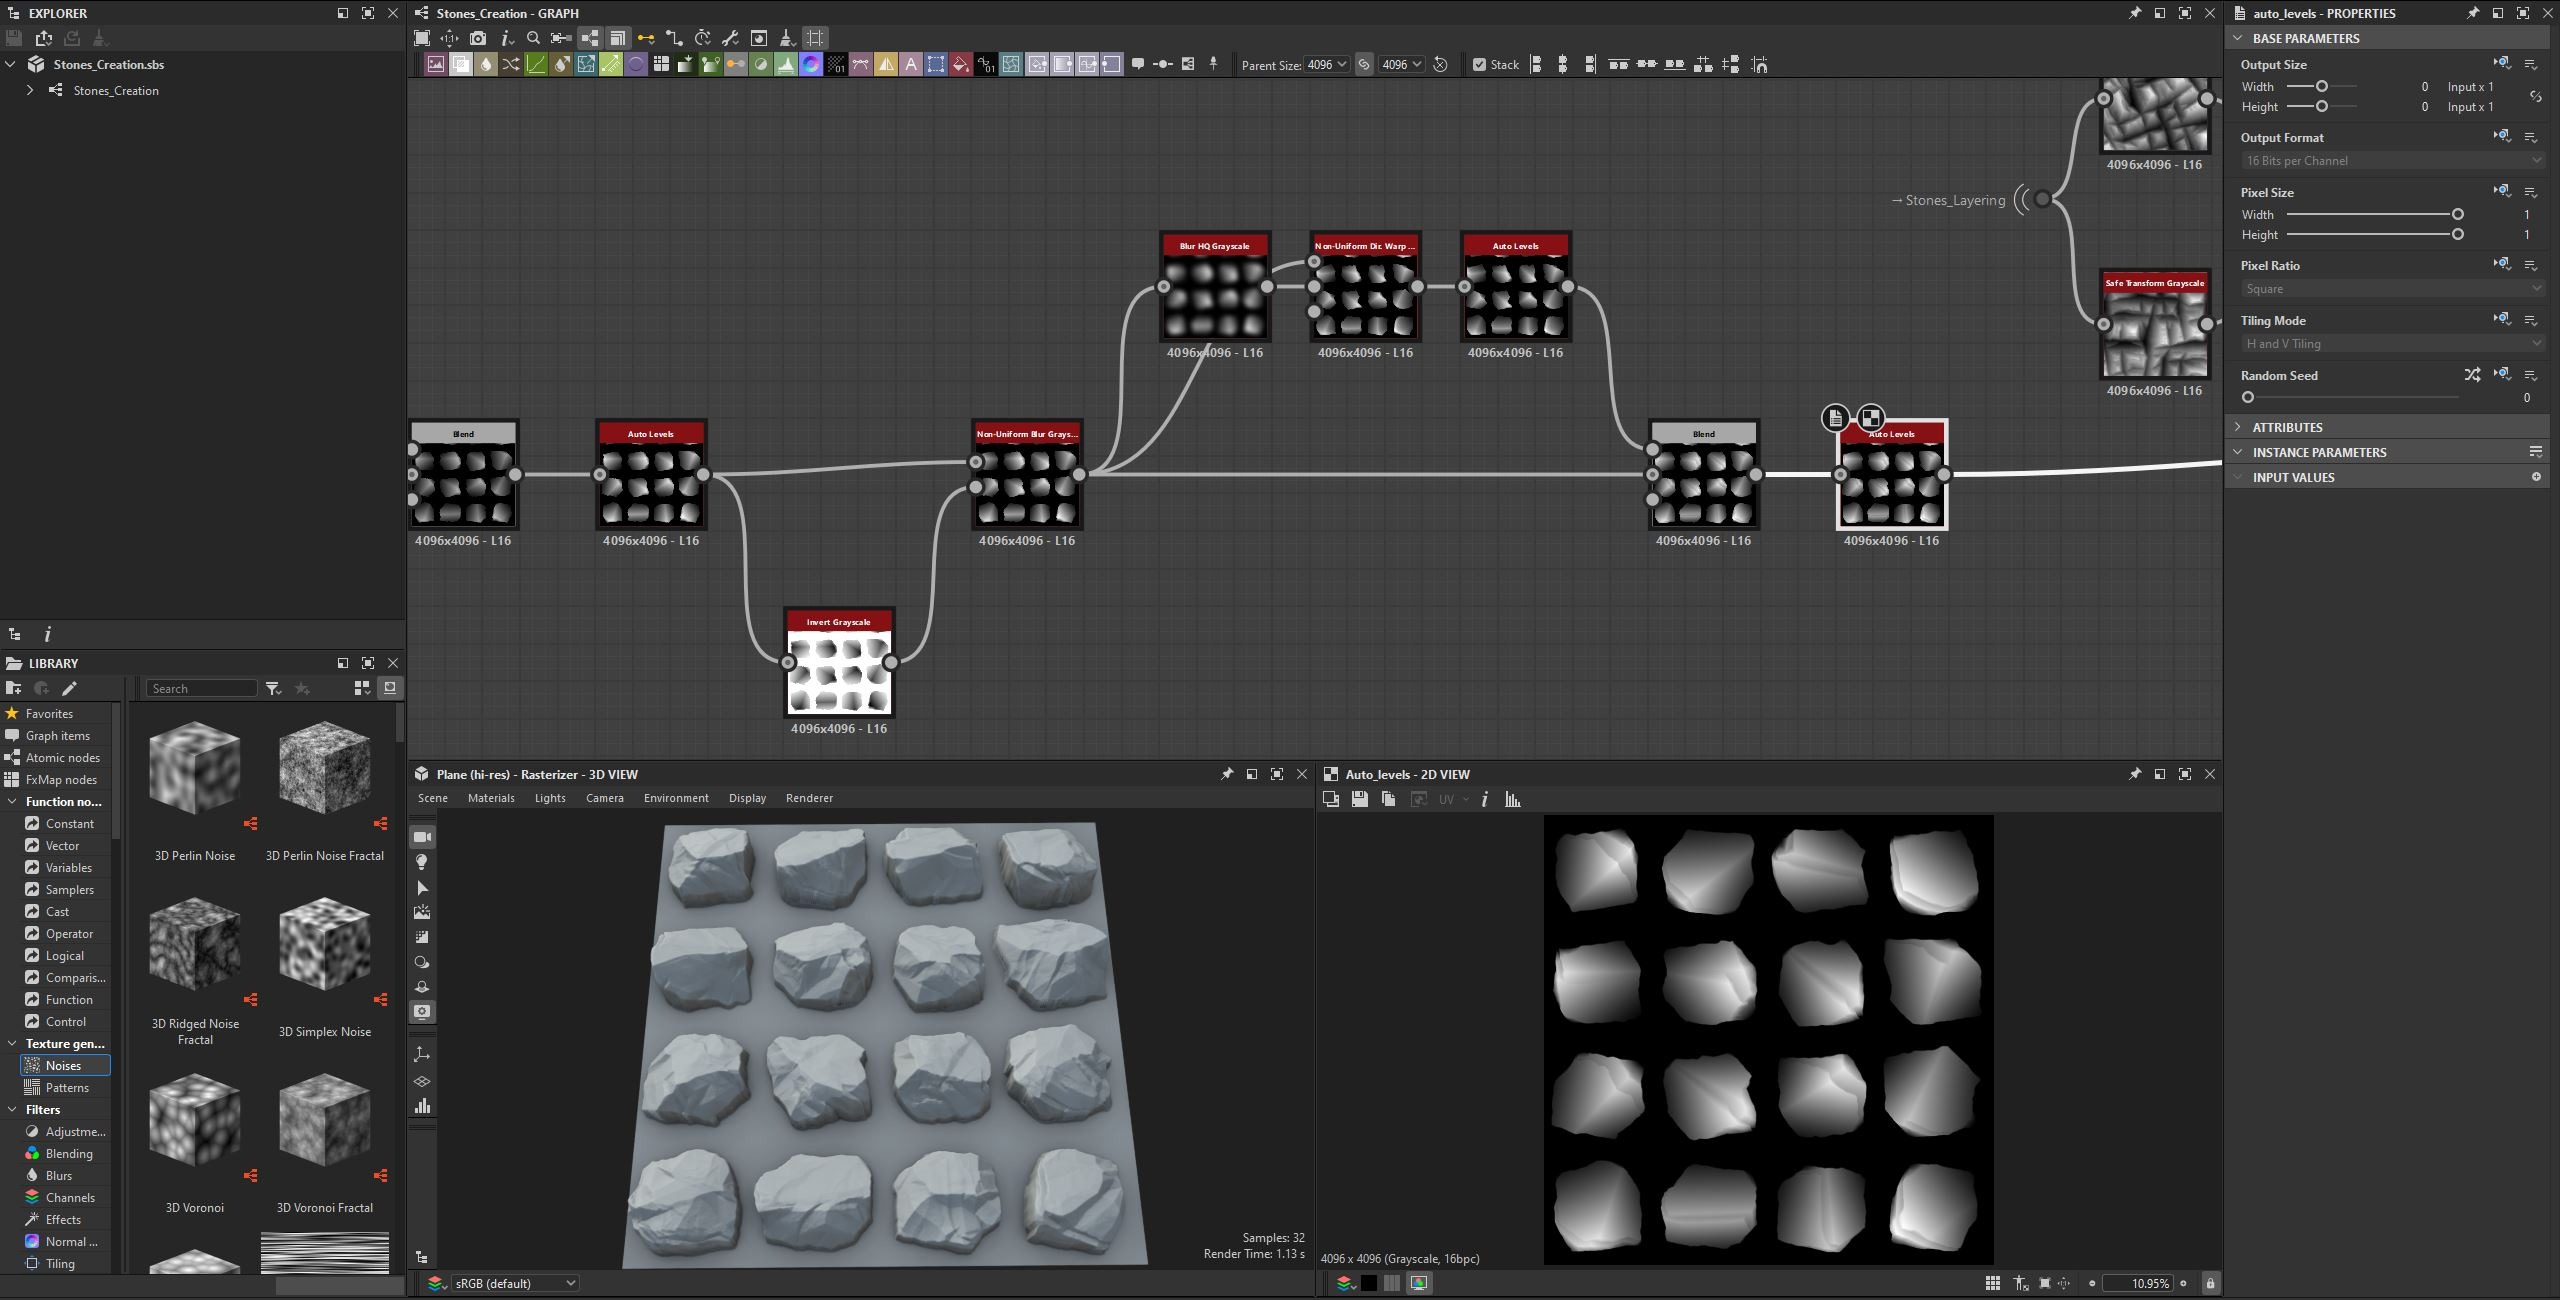
After that, I blended the stone layering setup, which I will explain later, into the main chain.
While working on the material, I learned that it was better to warp the stones based on the stone layering before blending them together, as it created more interesting shapes.
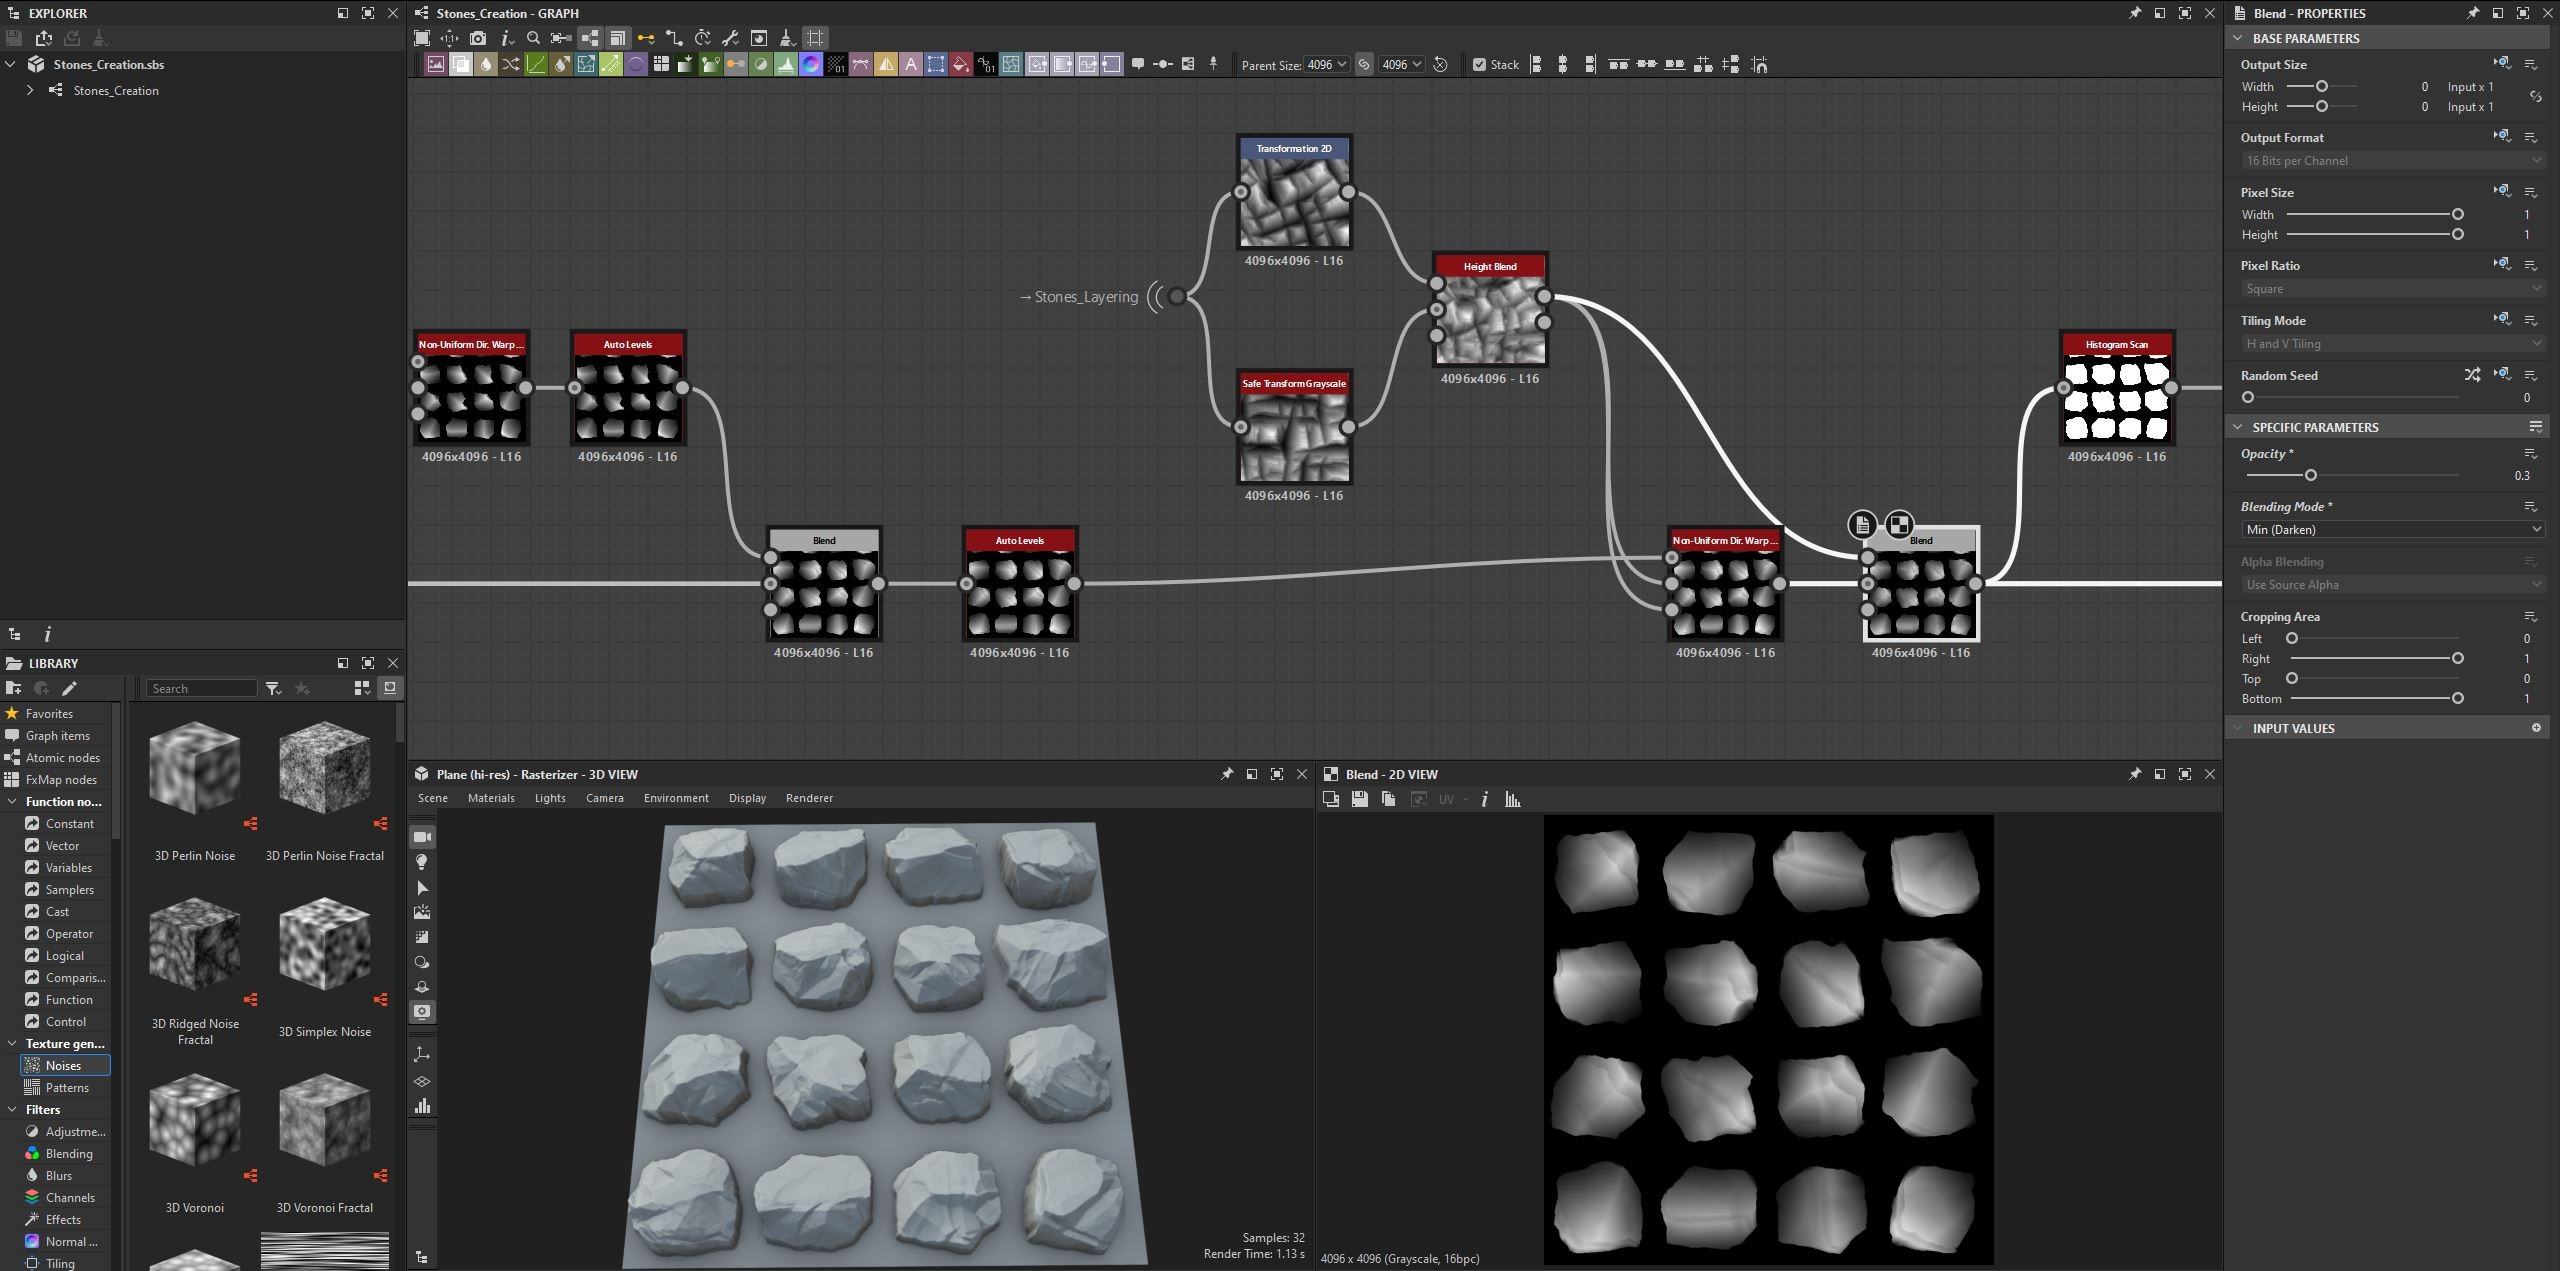
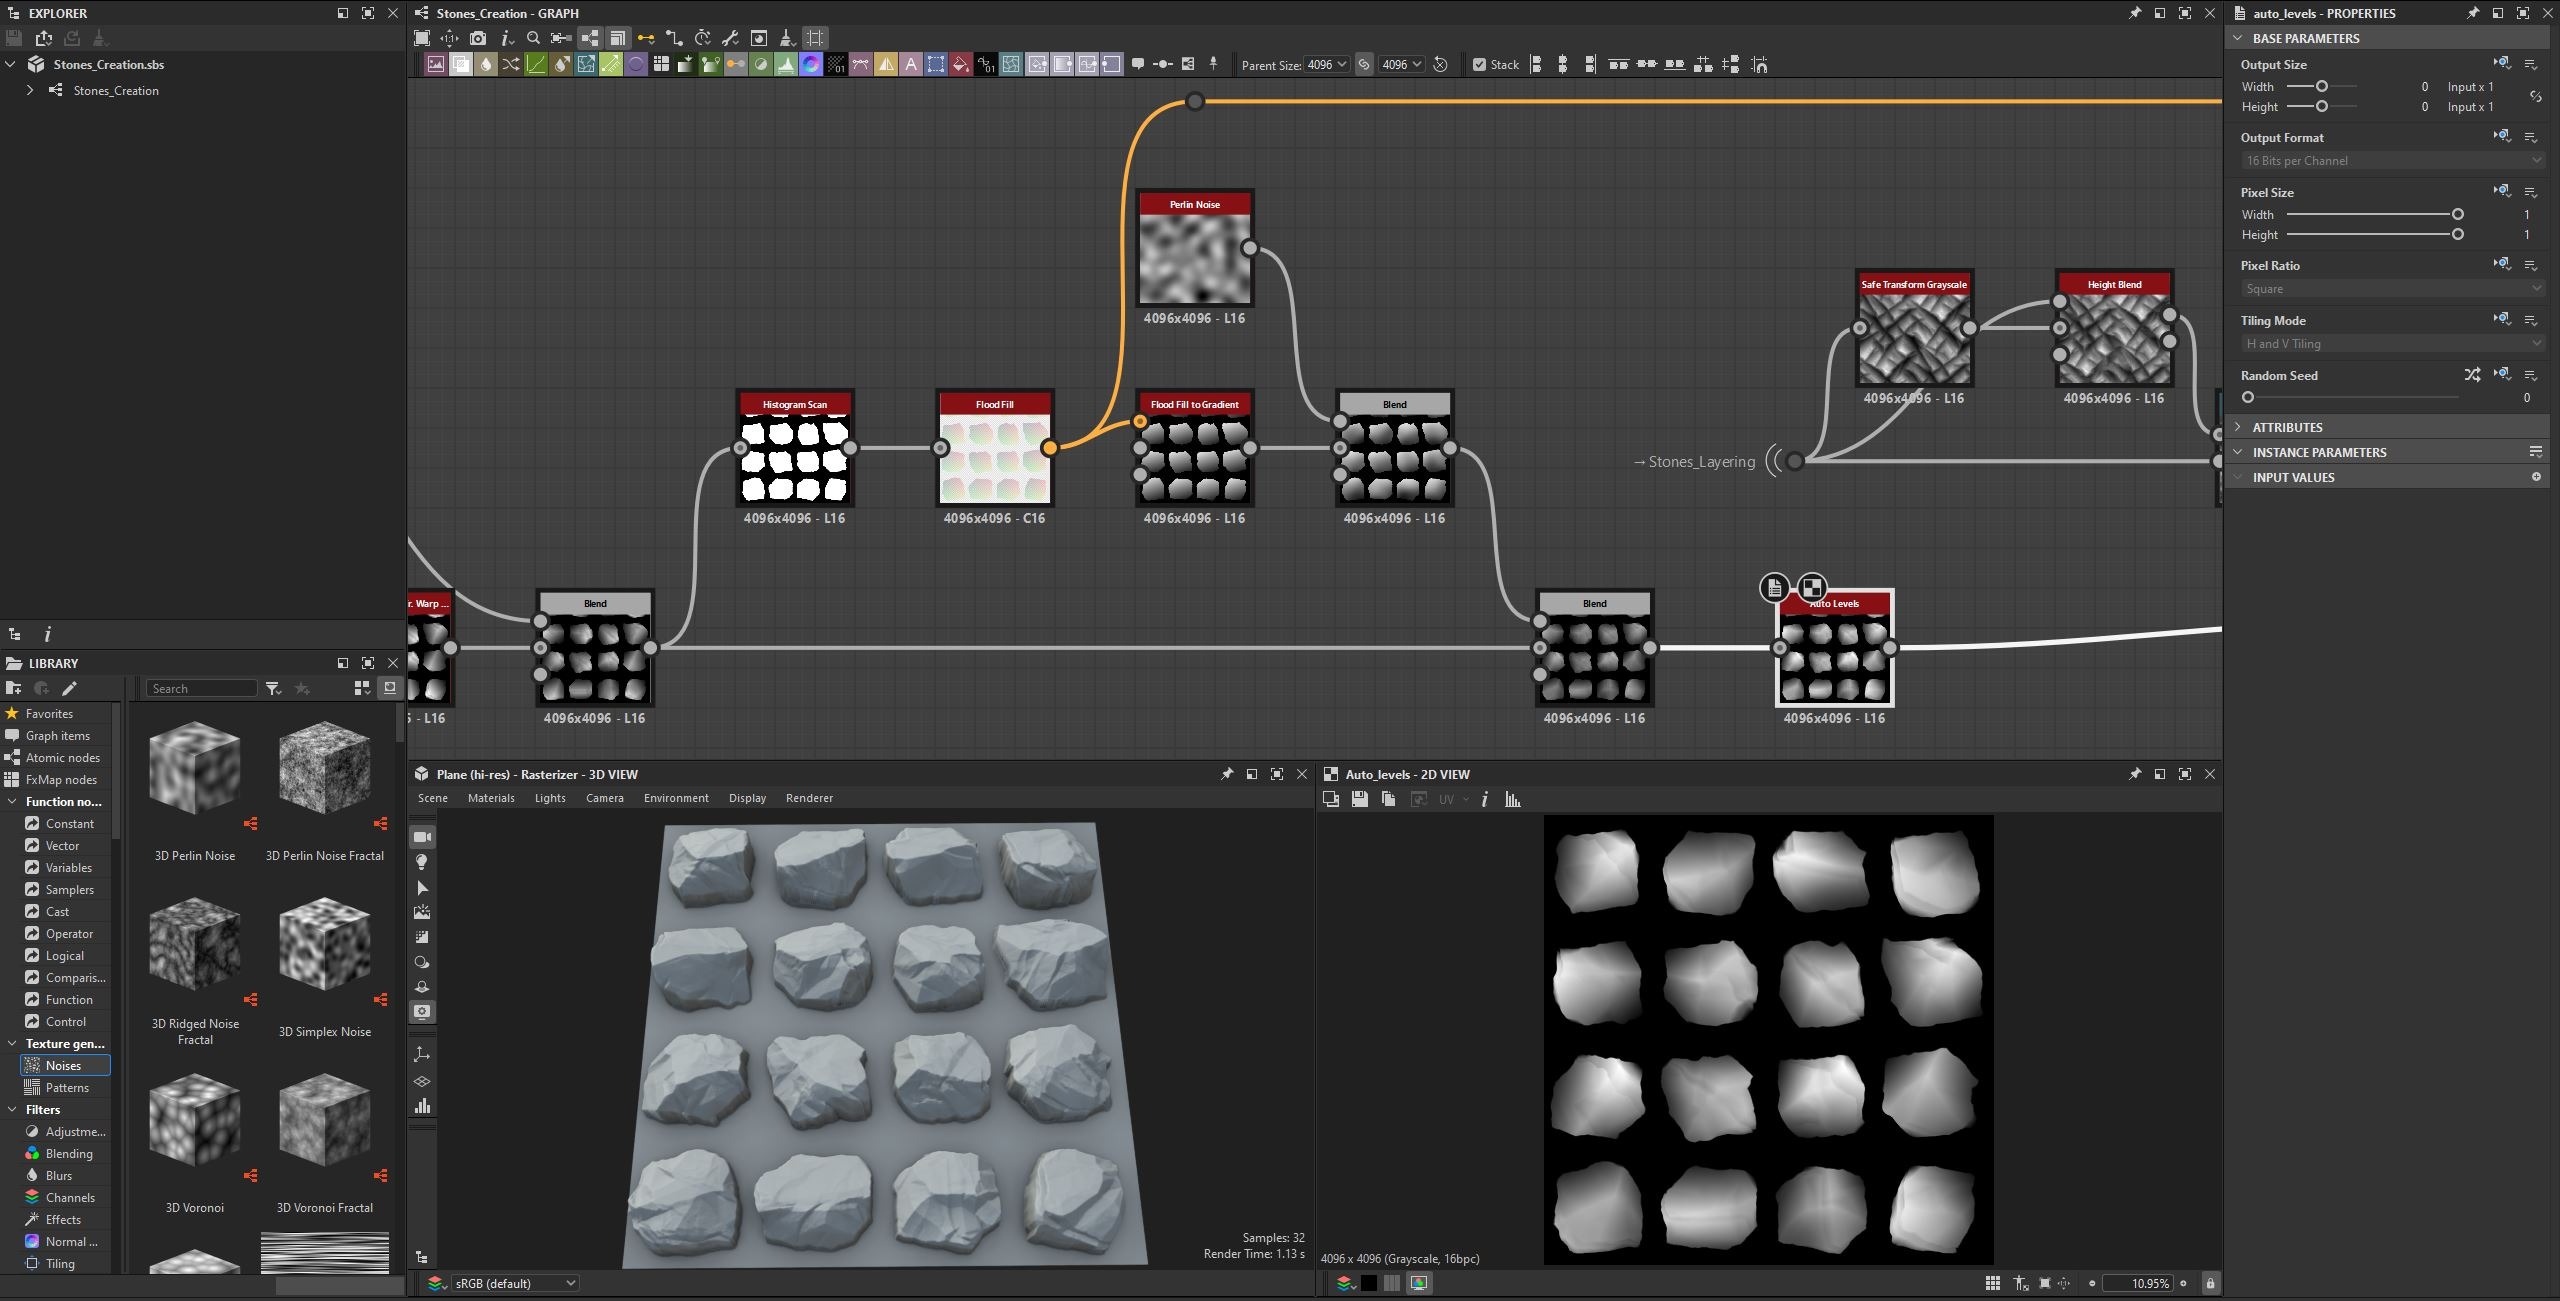
Once I was happy with the stones, I cut them again using another Flood Fill node. This time, I blended the gradient with a Perlin Noise to create some large scoop-like shapes on the stones.
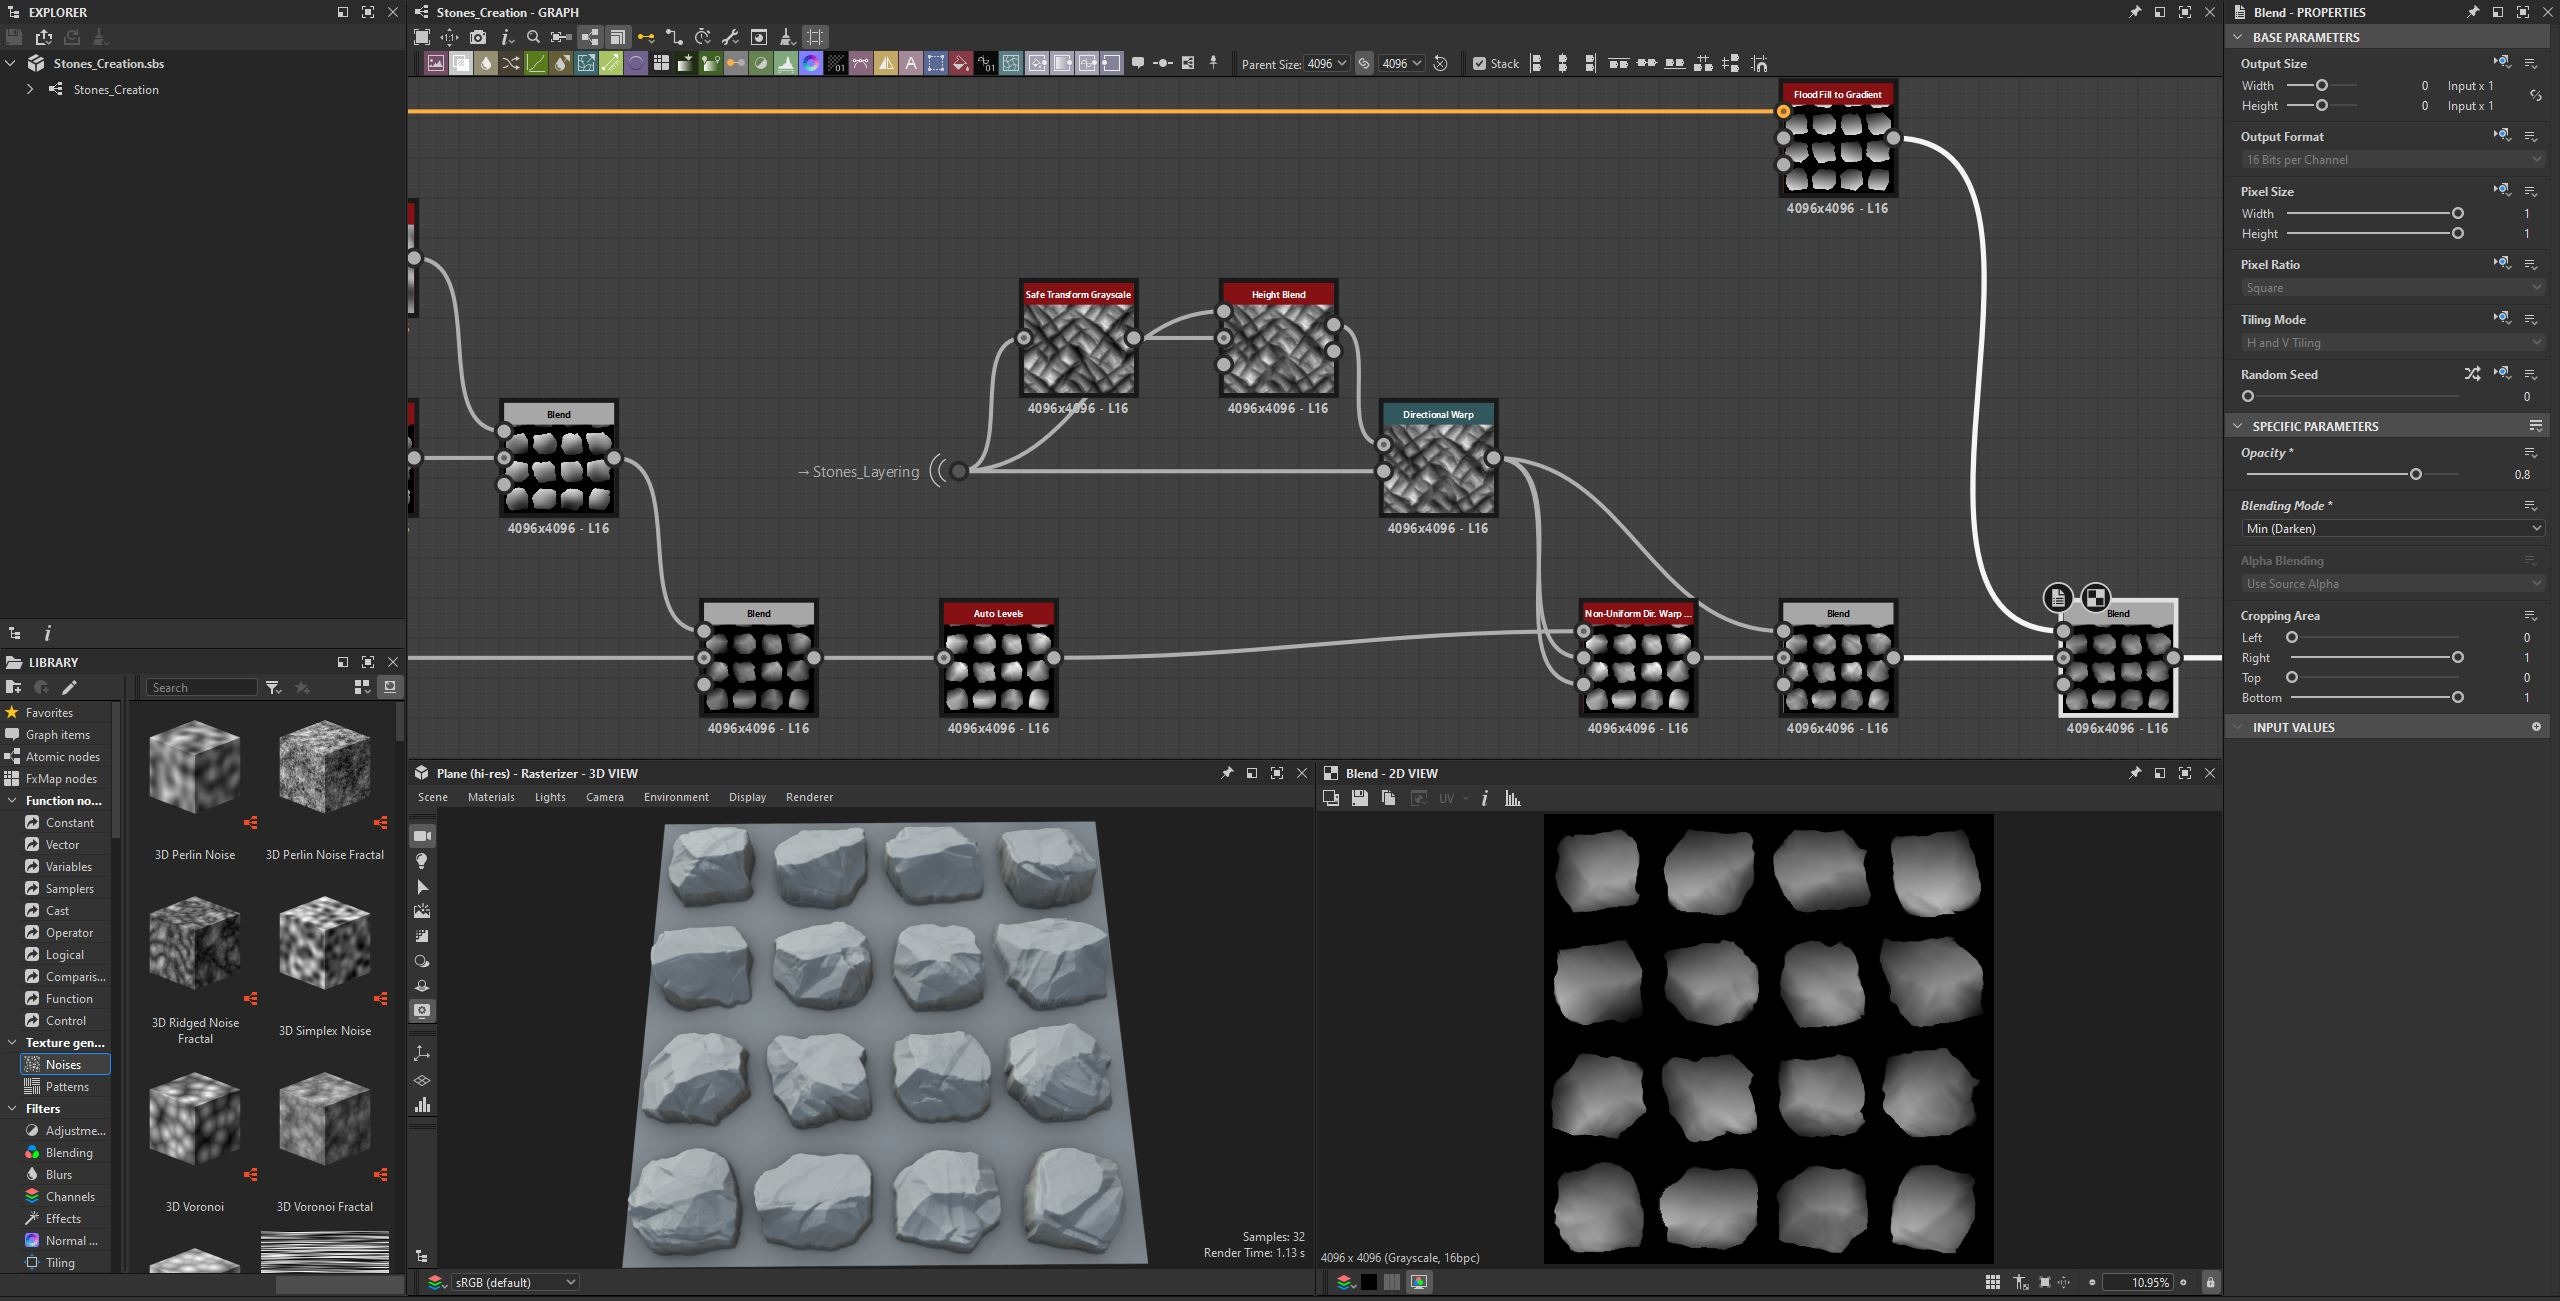
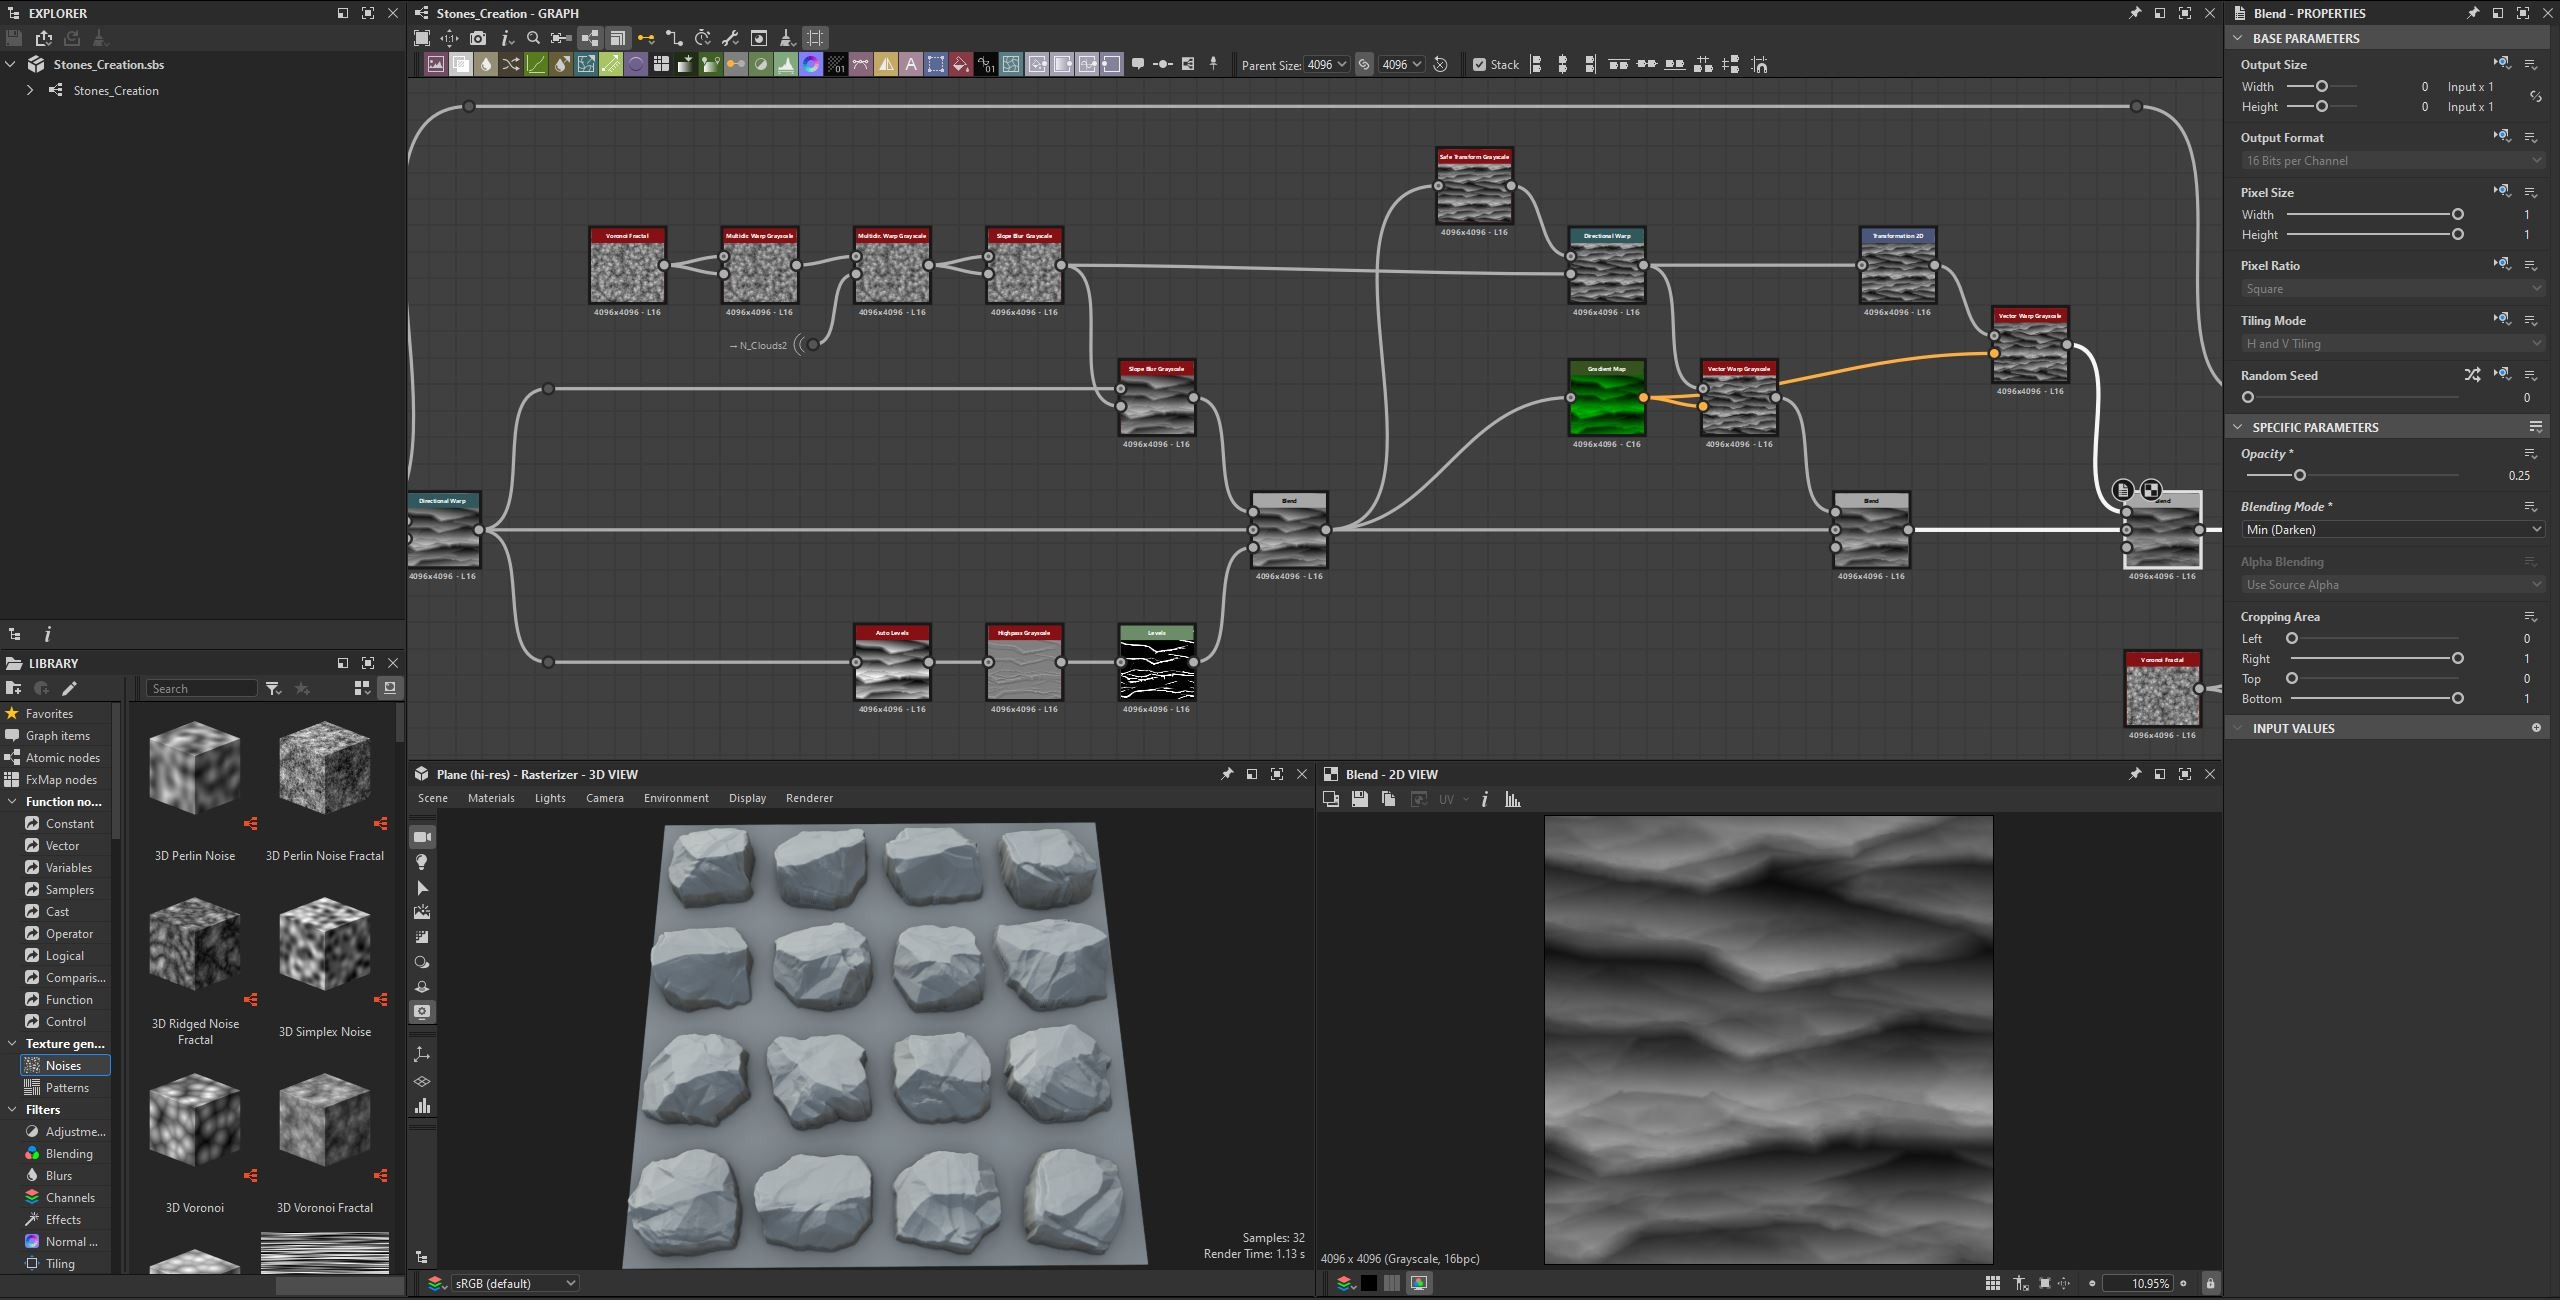
After that, I used the Stone Layering detail again to add more organic carving shapes. Once all these details were in place, I cut the stones from top to bottom to give them a more realistic appearance.
At the end, I used the Anisotropic Kuwahara node to slightly blur the hard edges and soften some of the transitions.
Stone Layering
For the Stone Layering setup, I started in a similar way to how I created the base stone shapes. After connecting the two base shapes to two Tile Sampler nodes, I blended them together using Min (Darken).
After that, I started adding more modifications to the layering shapes, such as extruding, warping, duplicating the layers, and blending them back into the main shape using Min (Darken).
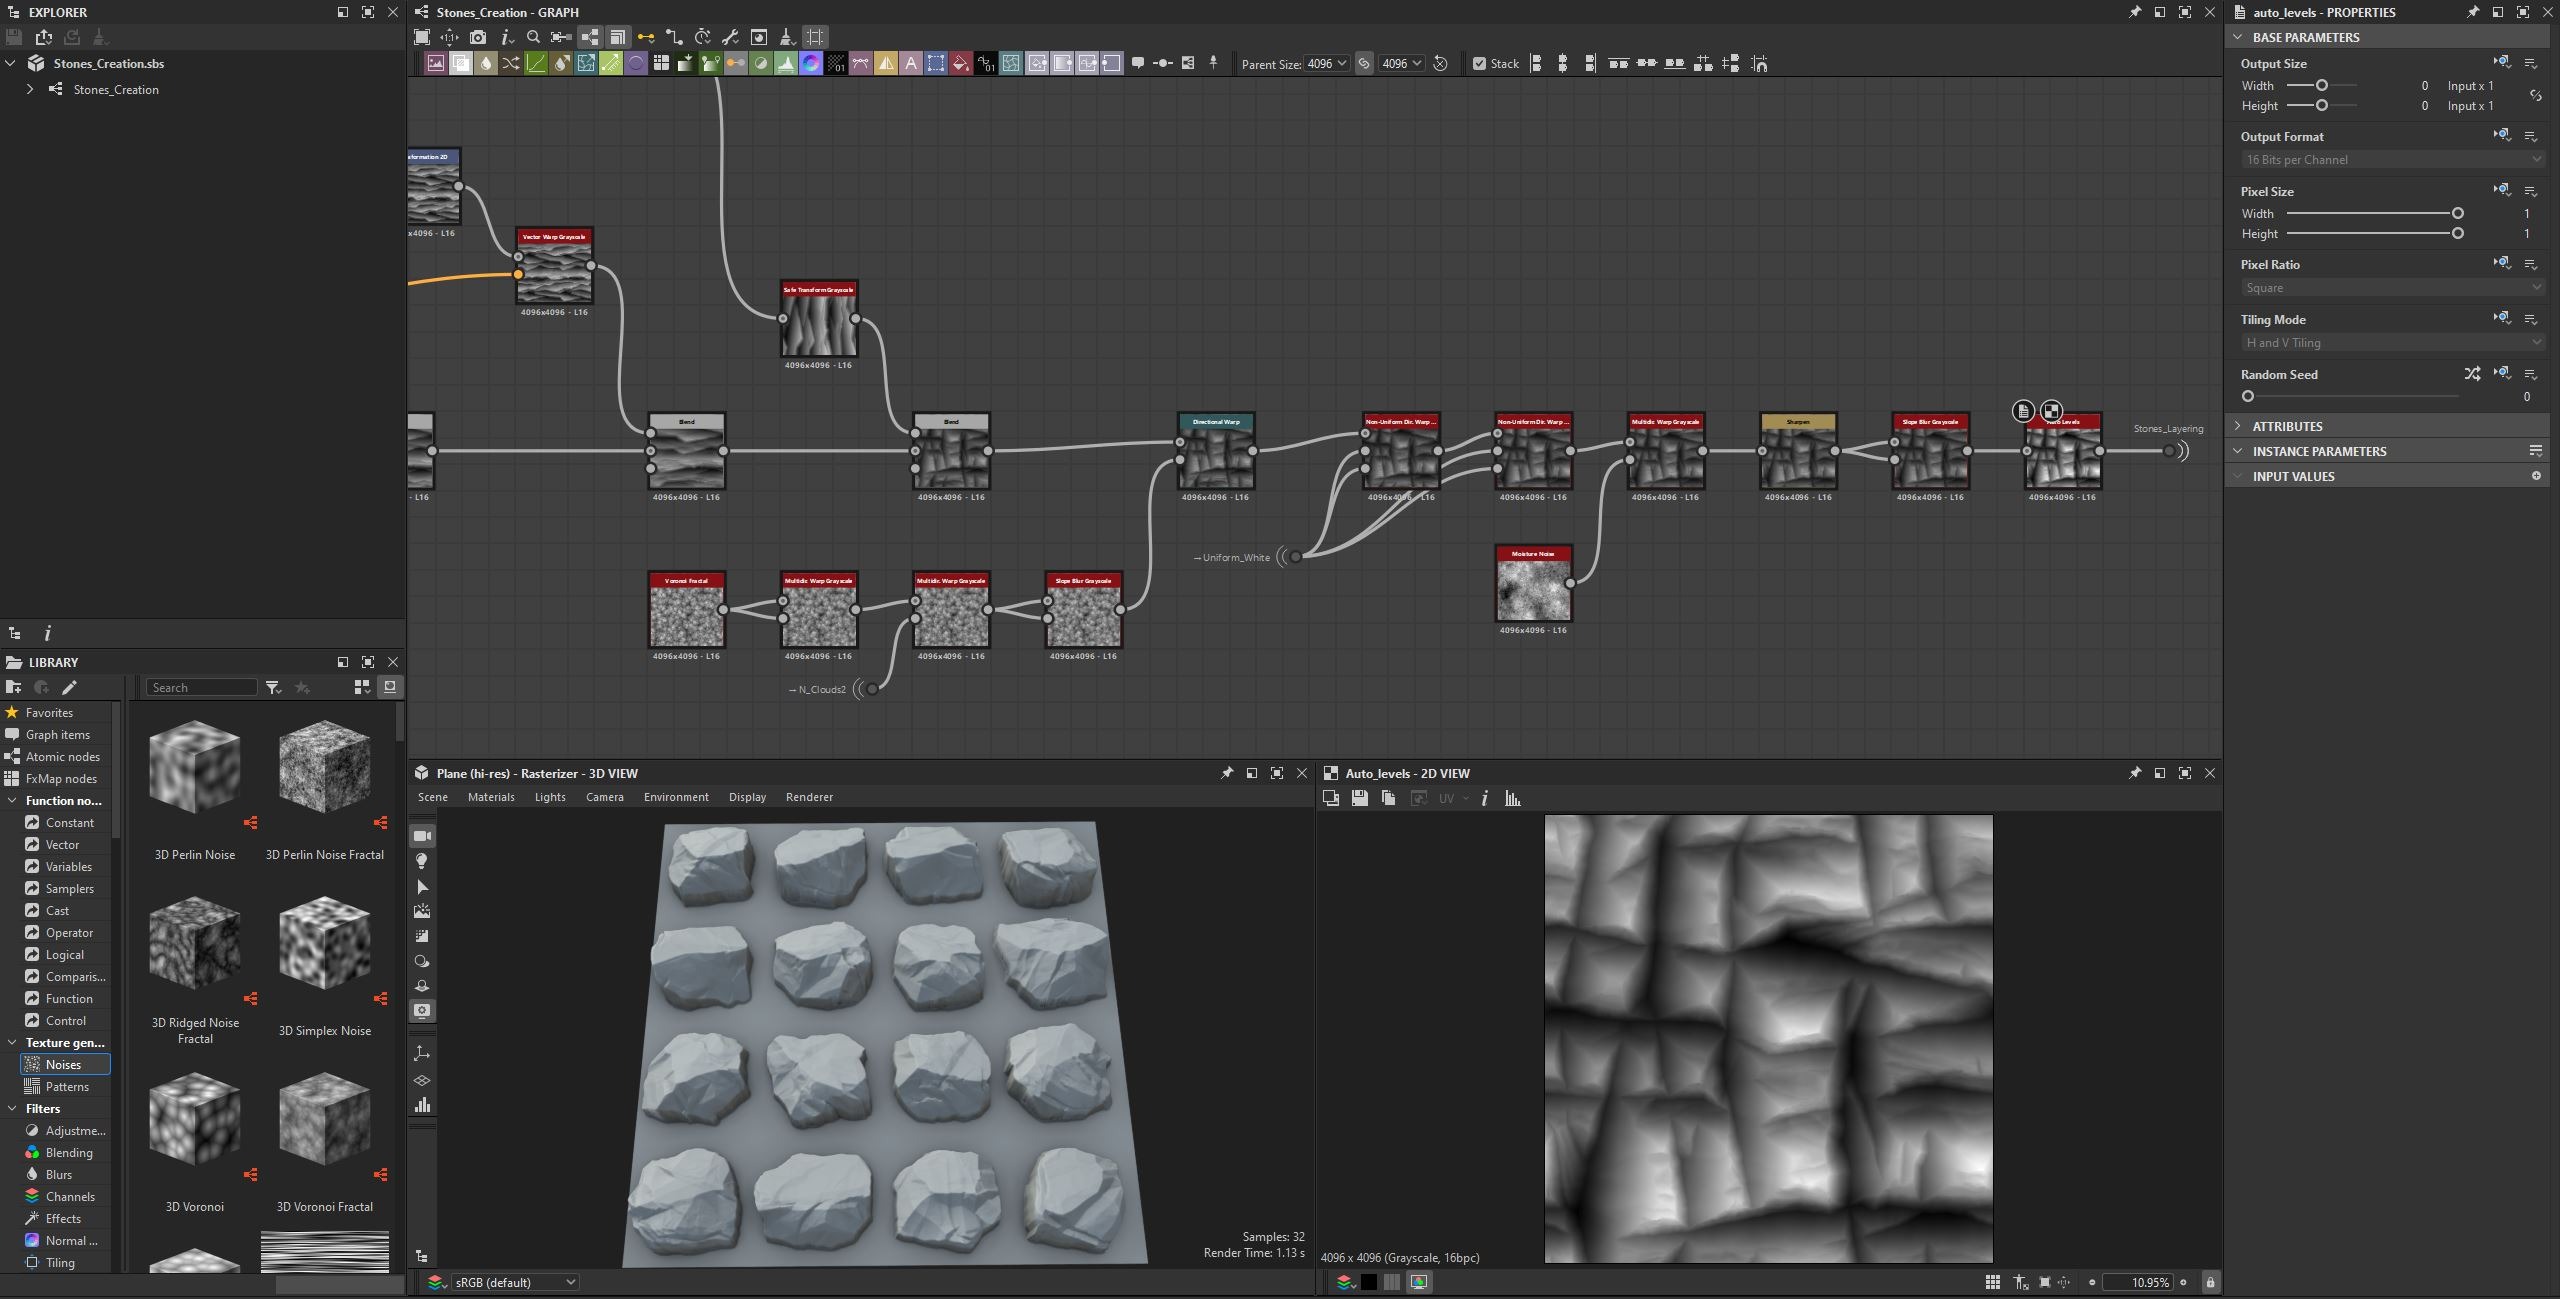
Once I was done with the height maps, it was time to export them to Maya. It is important to export the stones individually and not as a single height map. Otherwise, you may end up with artifacts when tessellating them in Maya.
For this, I used a Transform 2D node together with an Auto Crop Grayscale node to select and export the stones one by one.
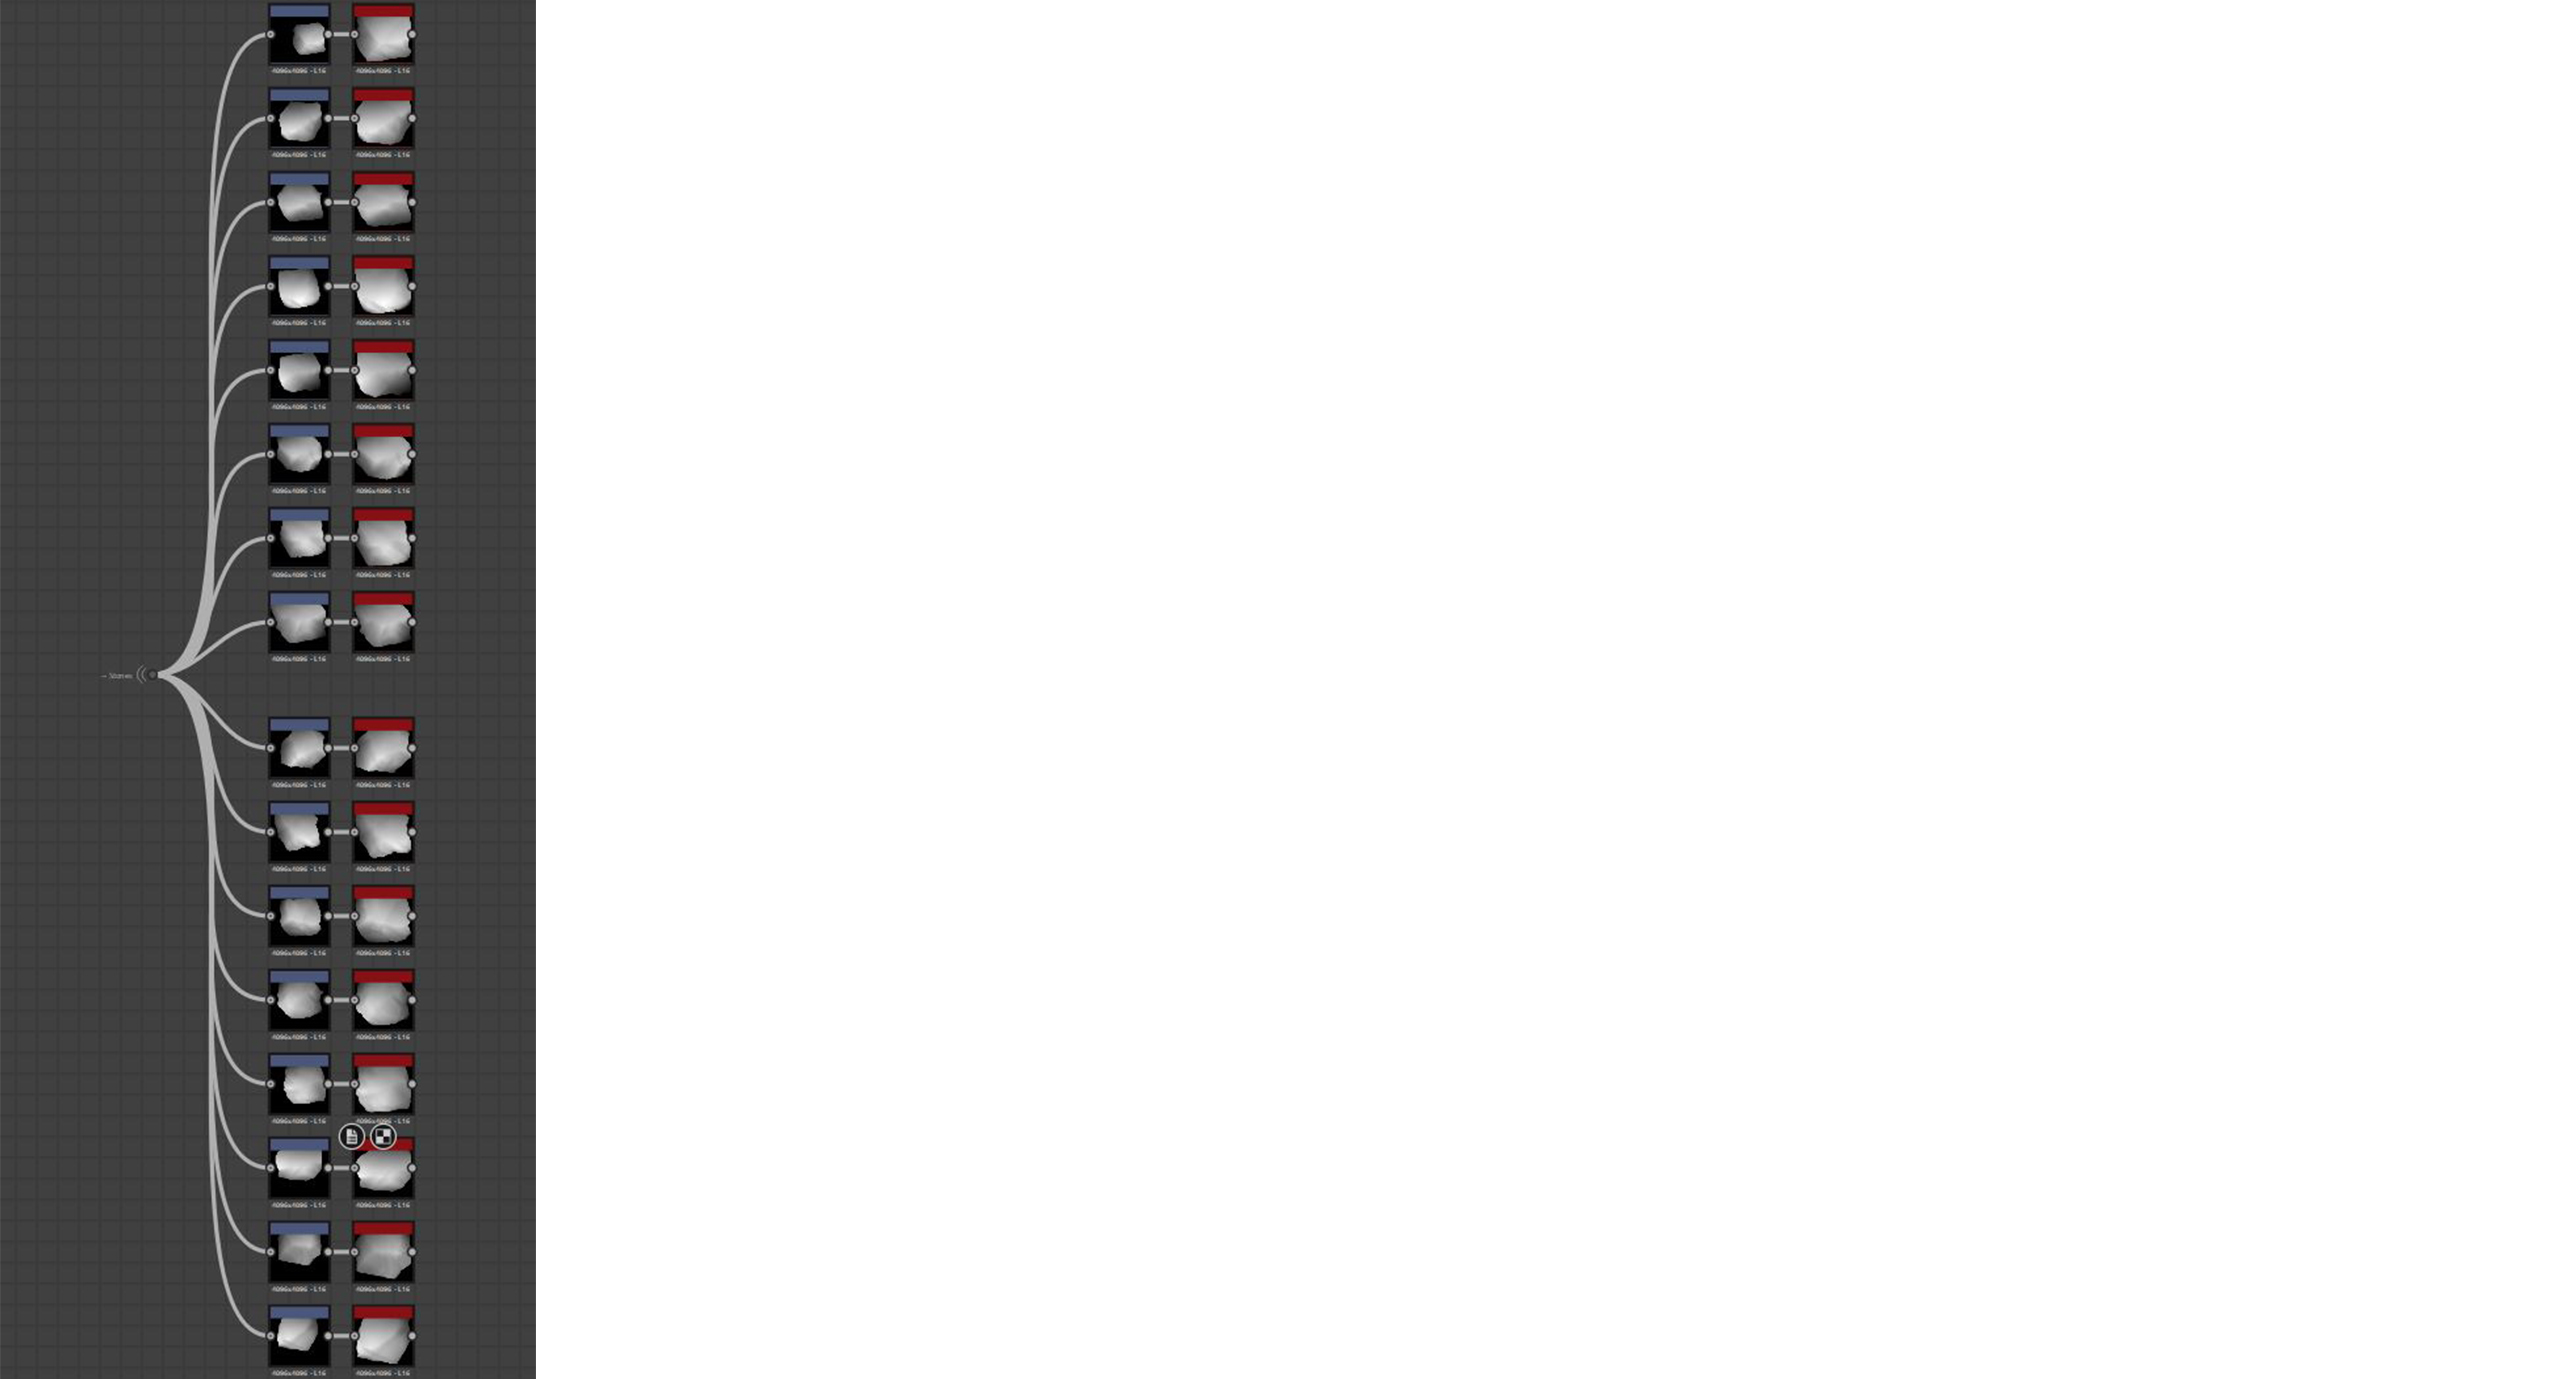
Pointing
I also created this noise pattern to use later in ZBrush, where I dragged it across the stones using a custom brush.
Maya
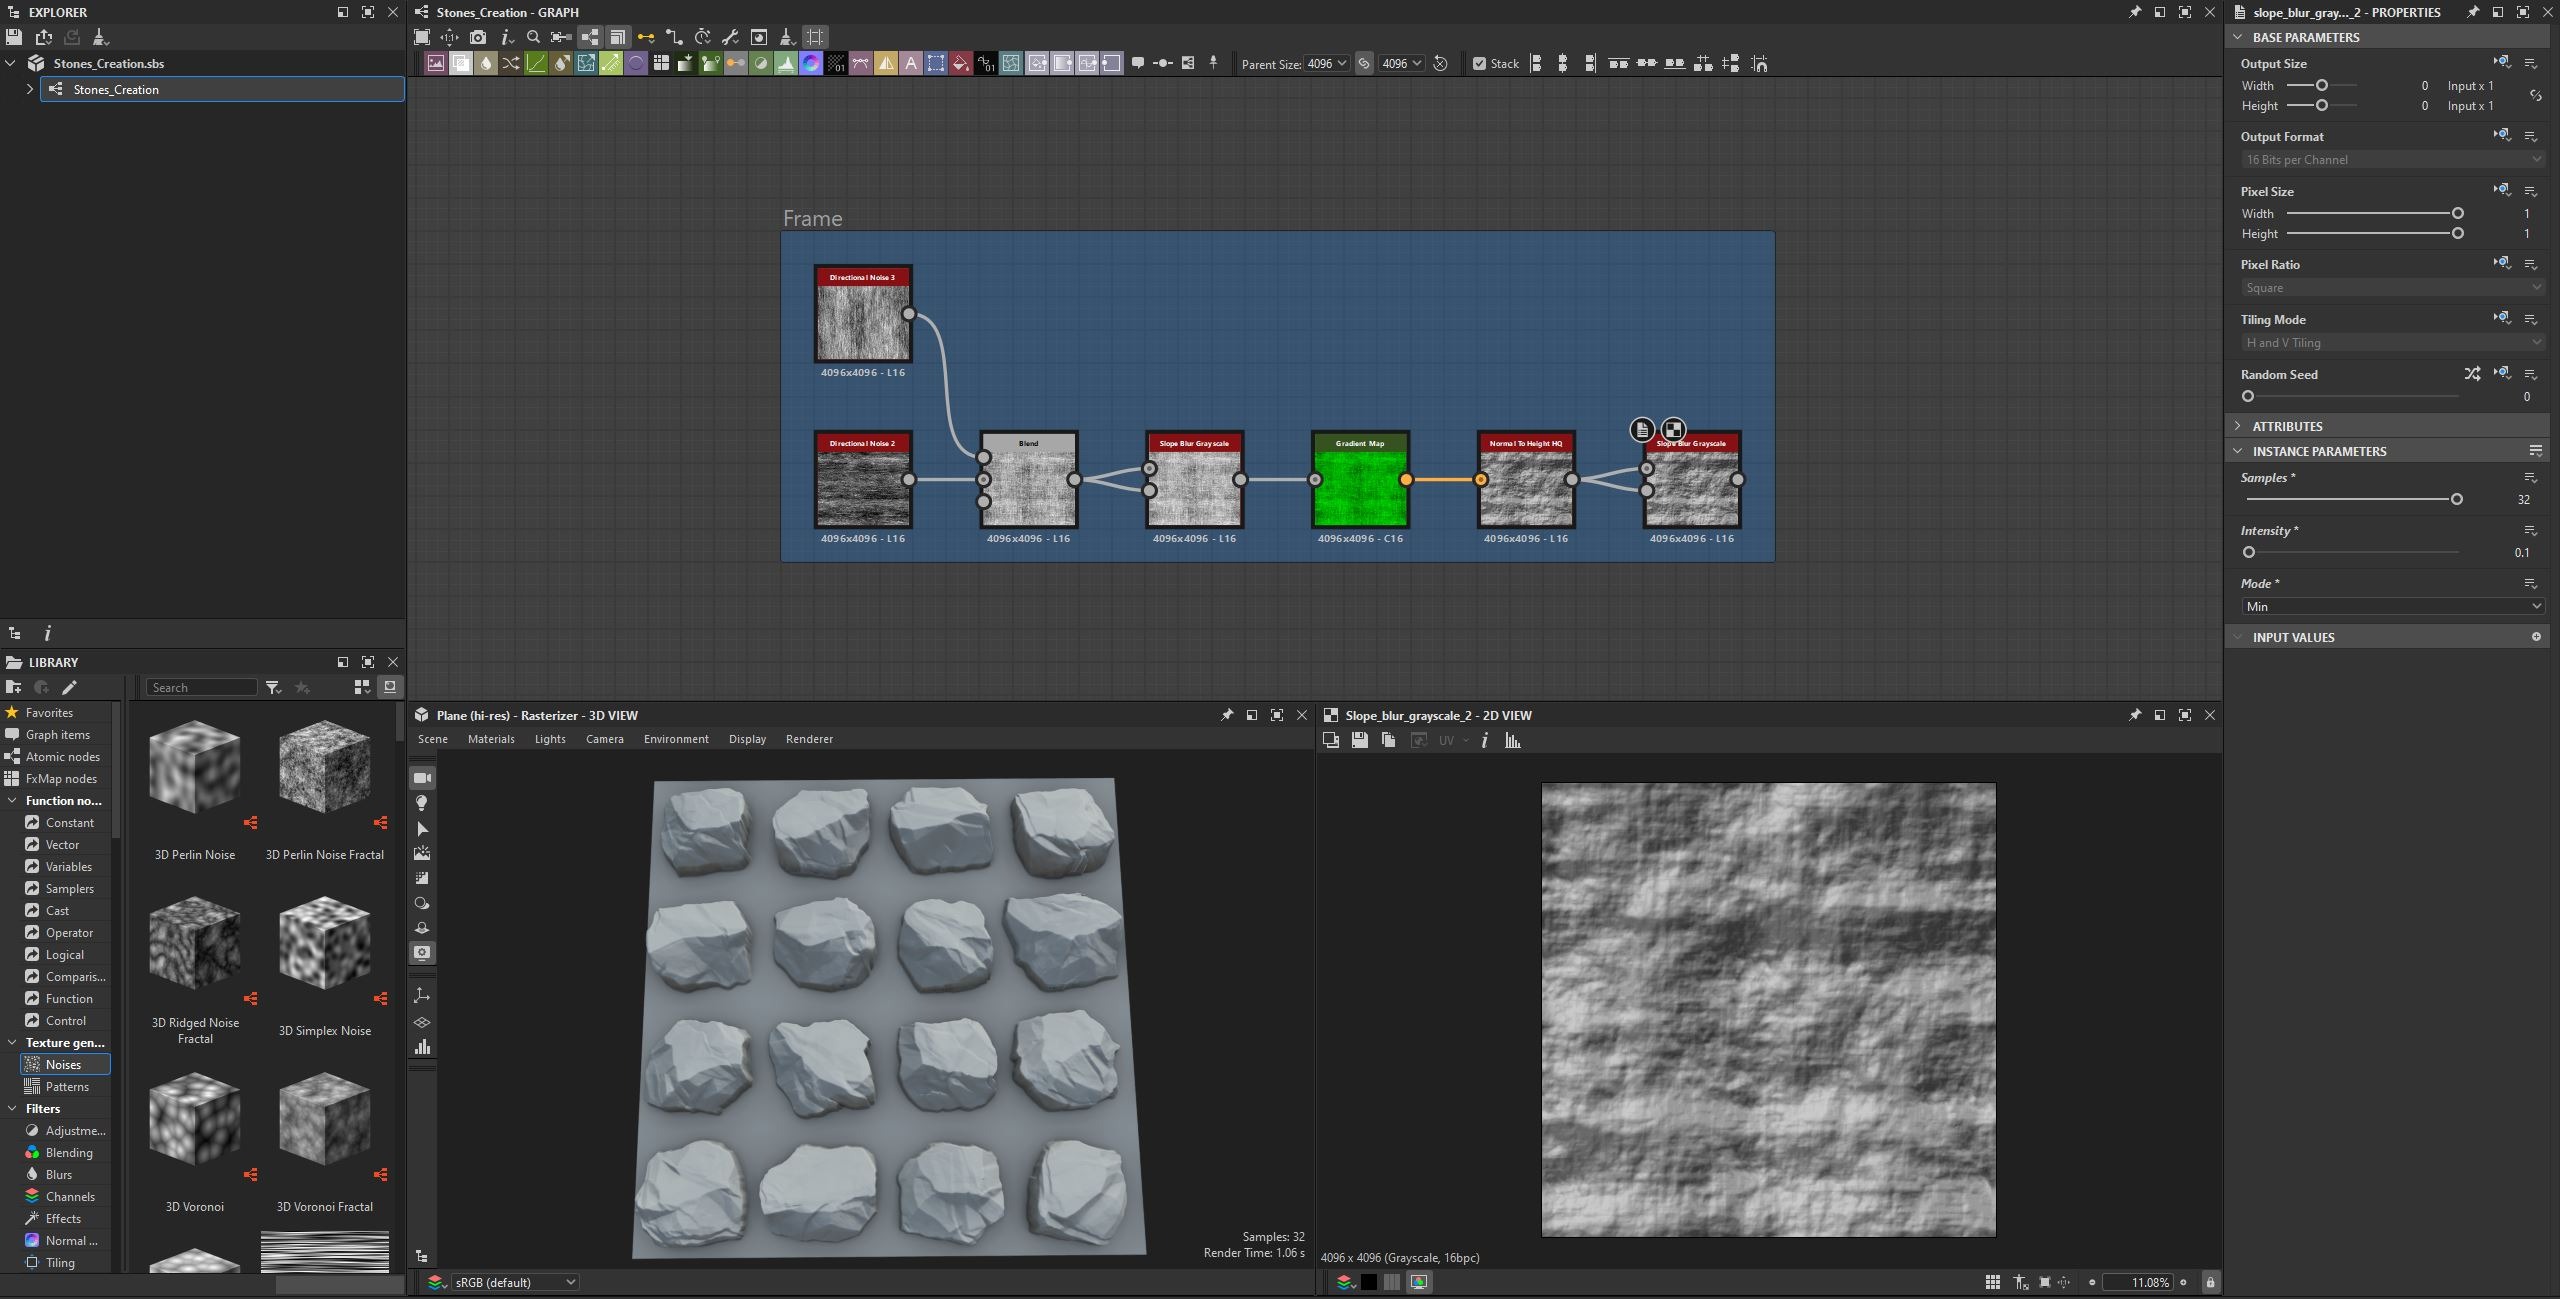
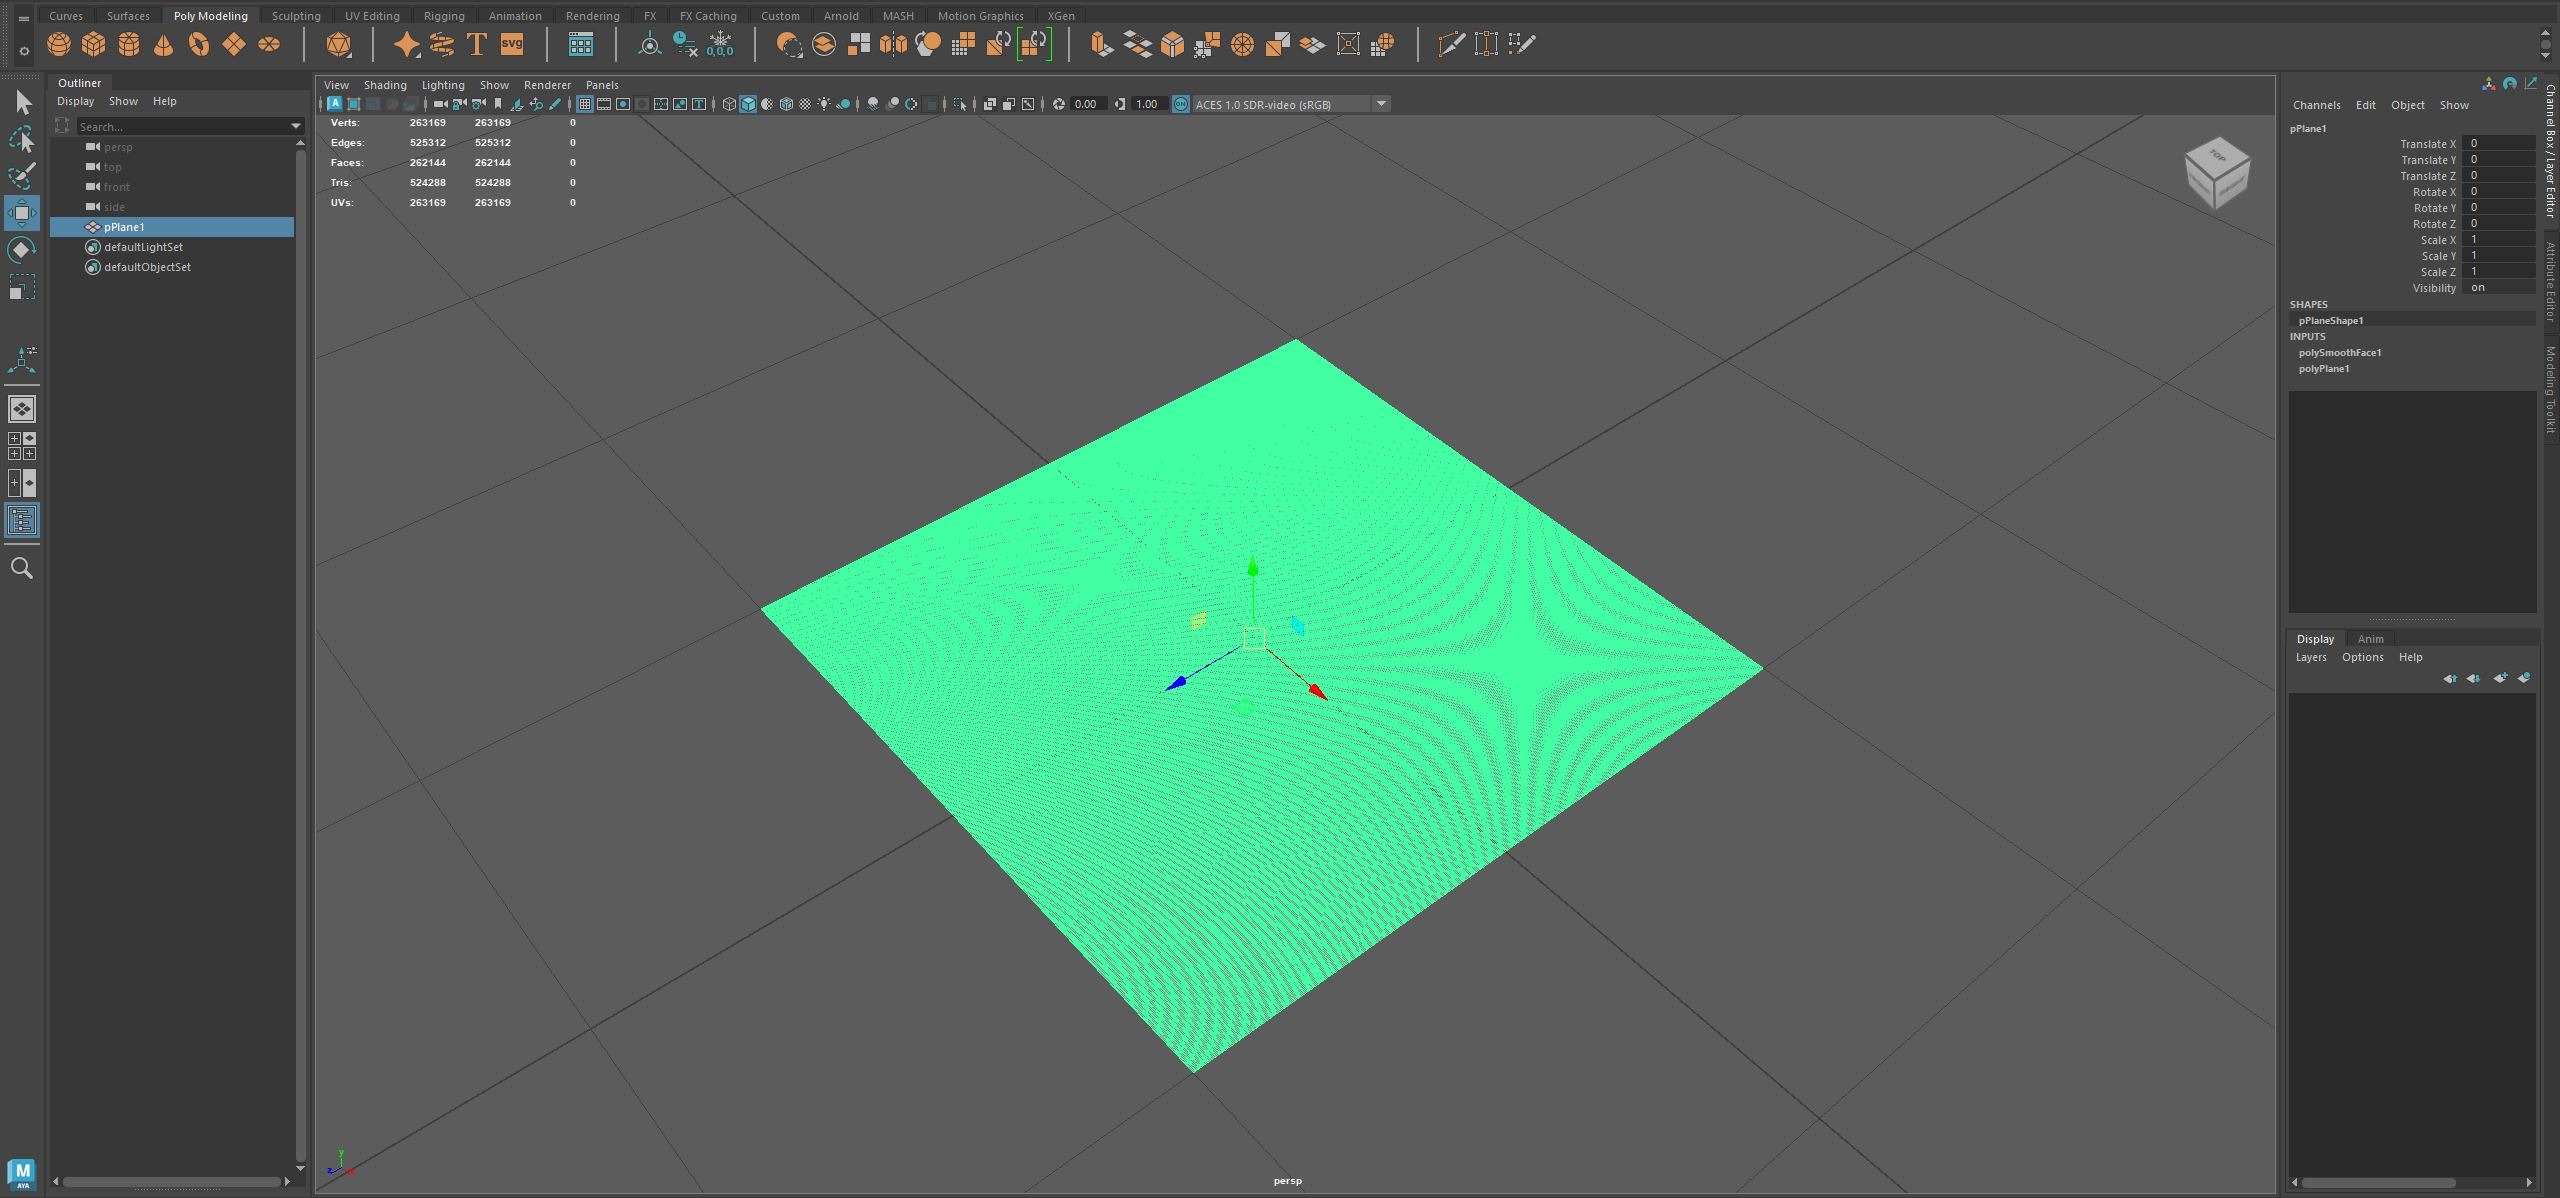
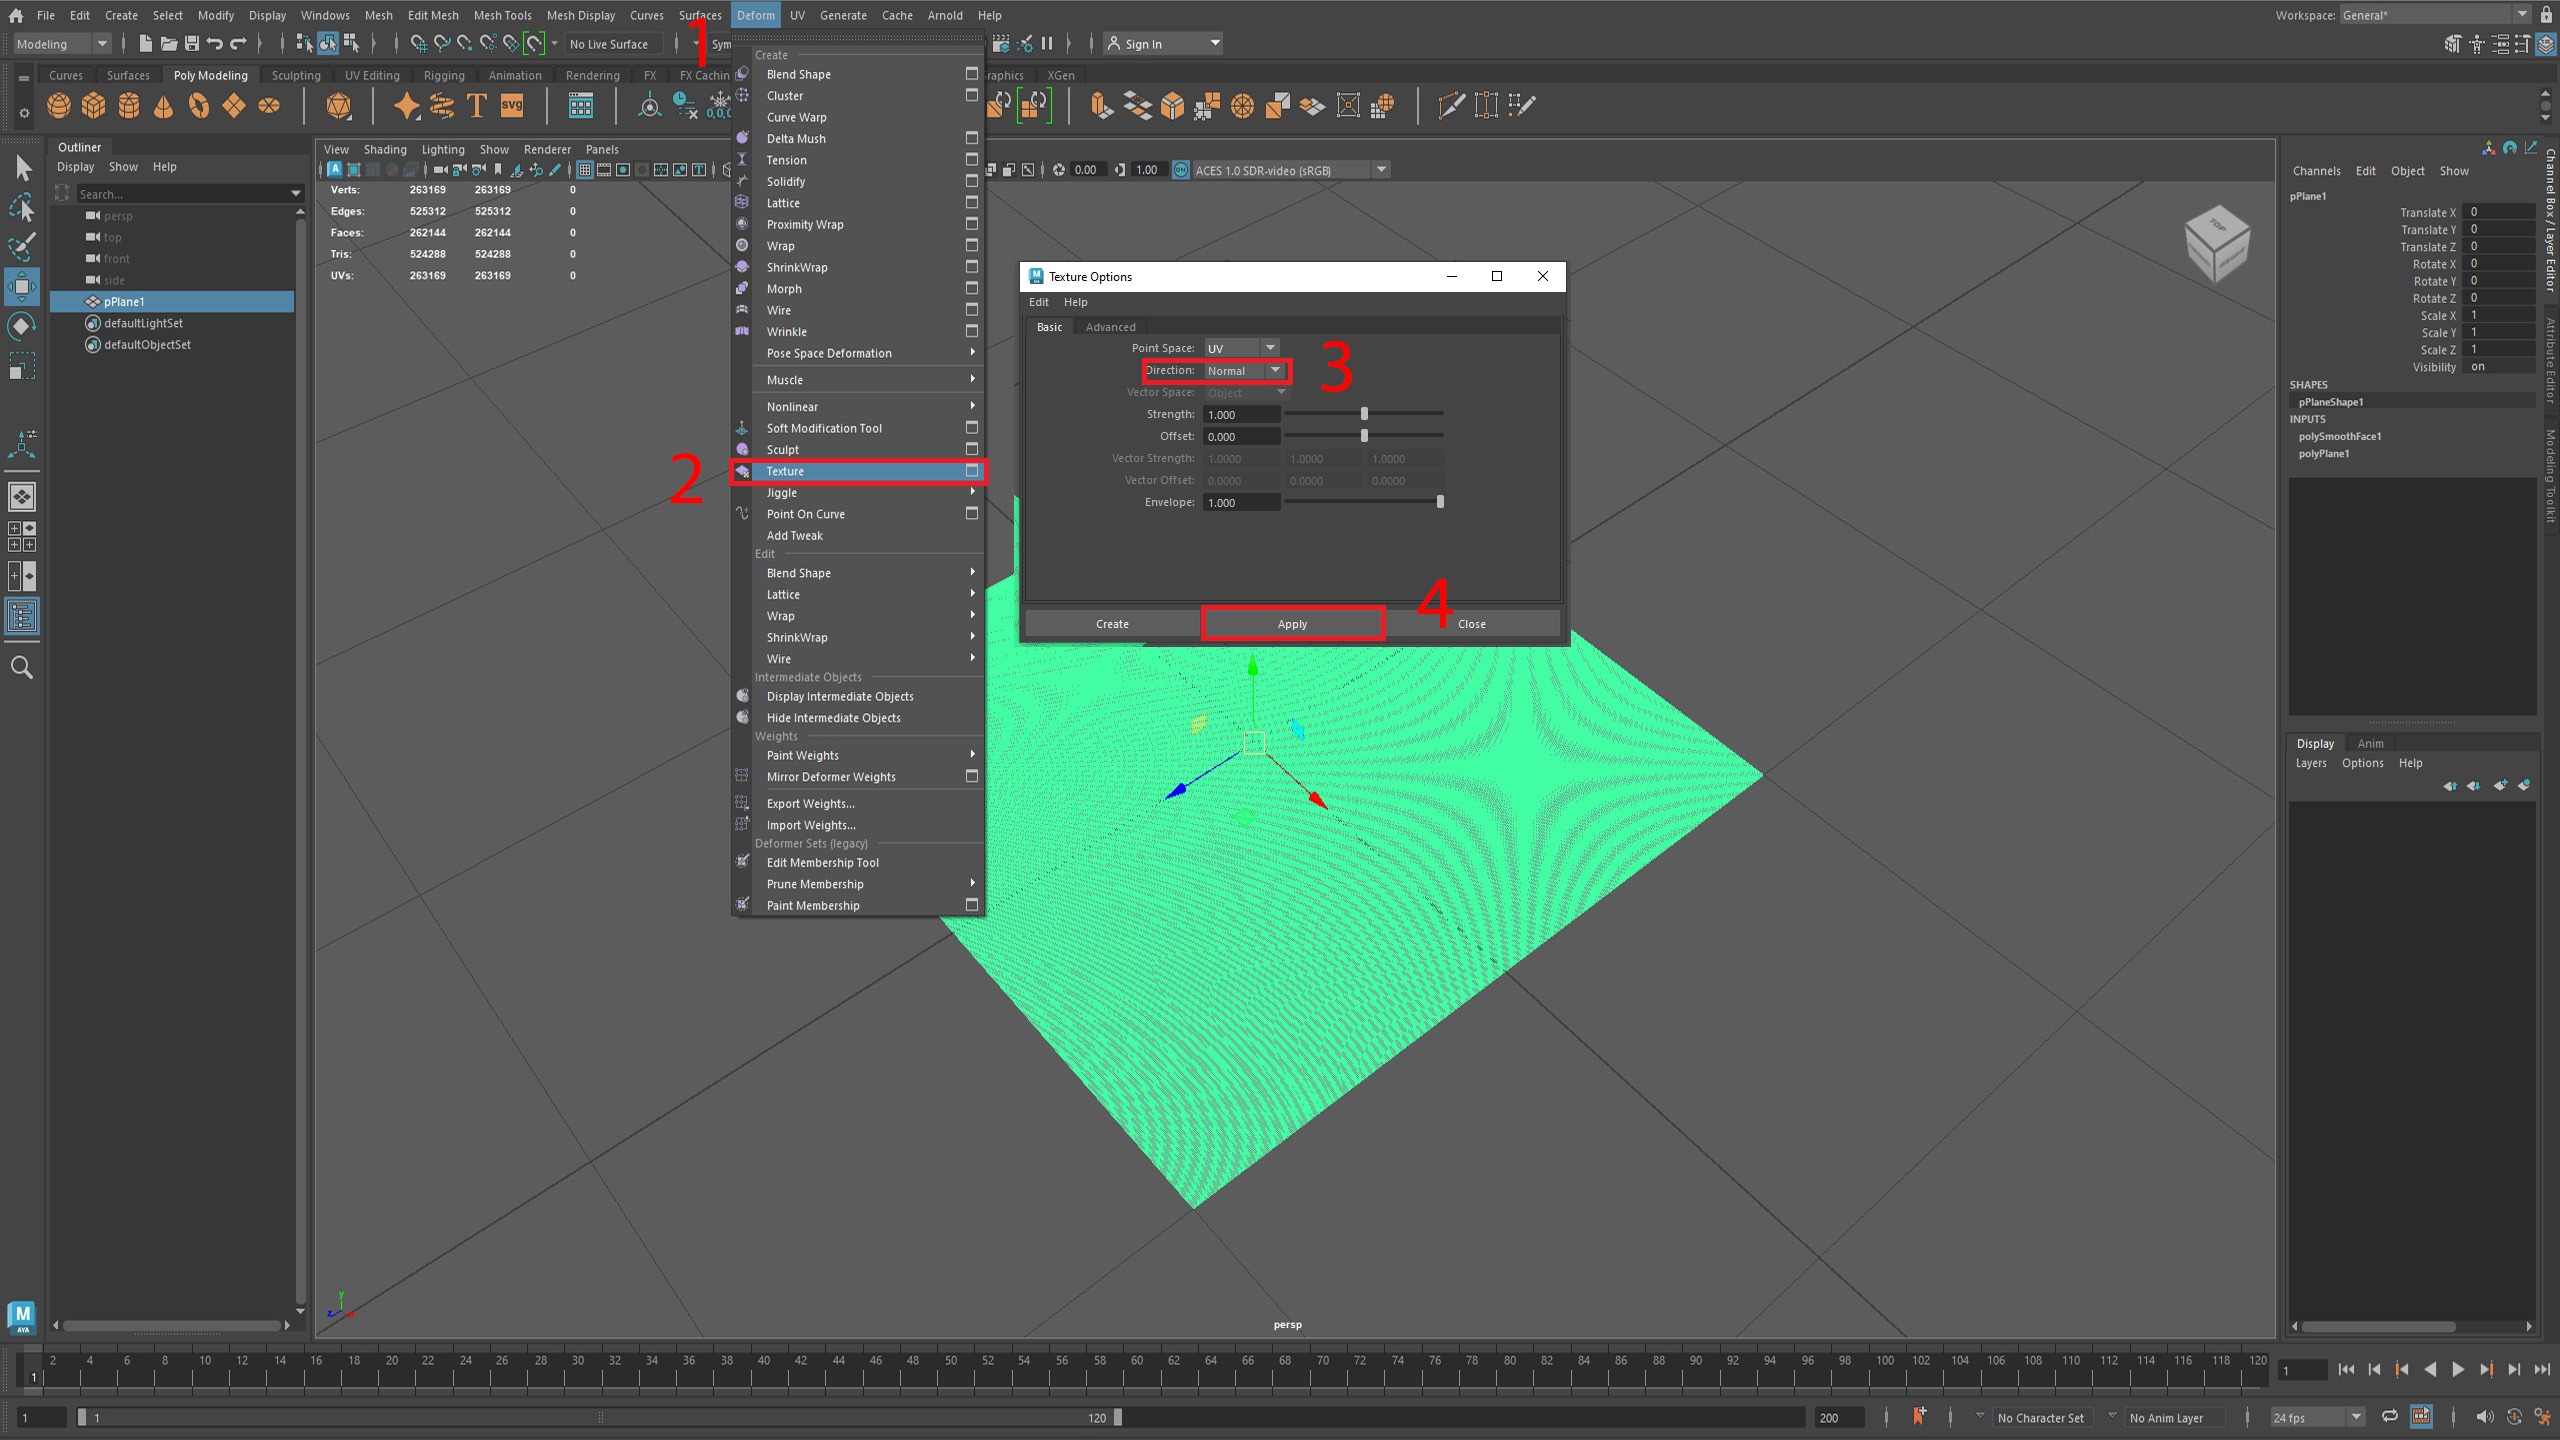
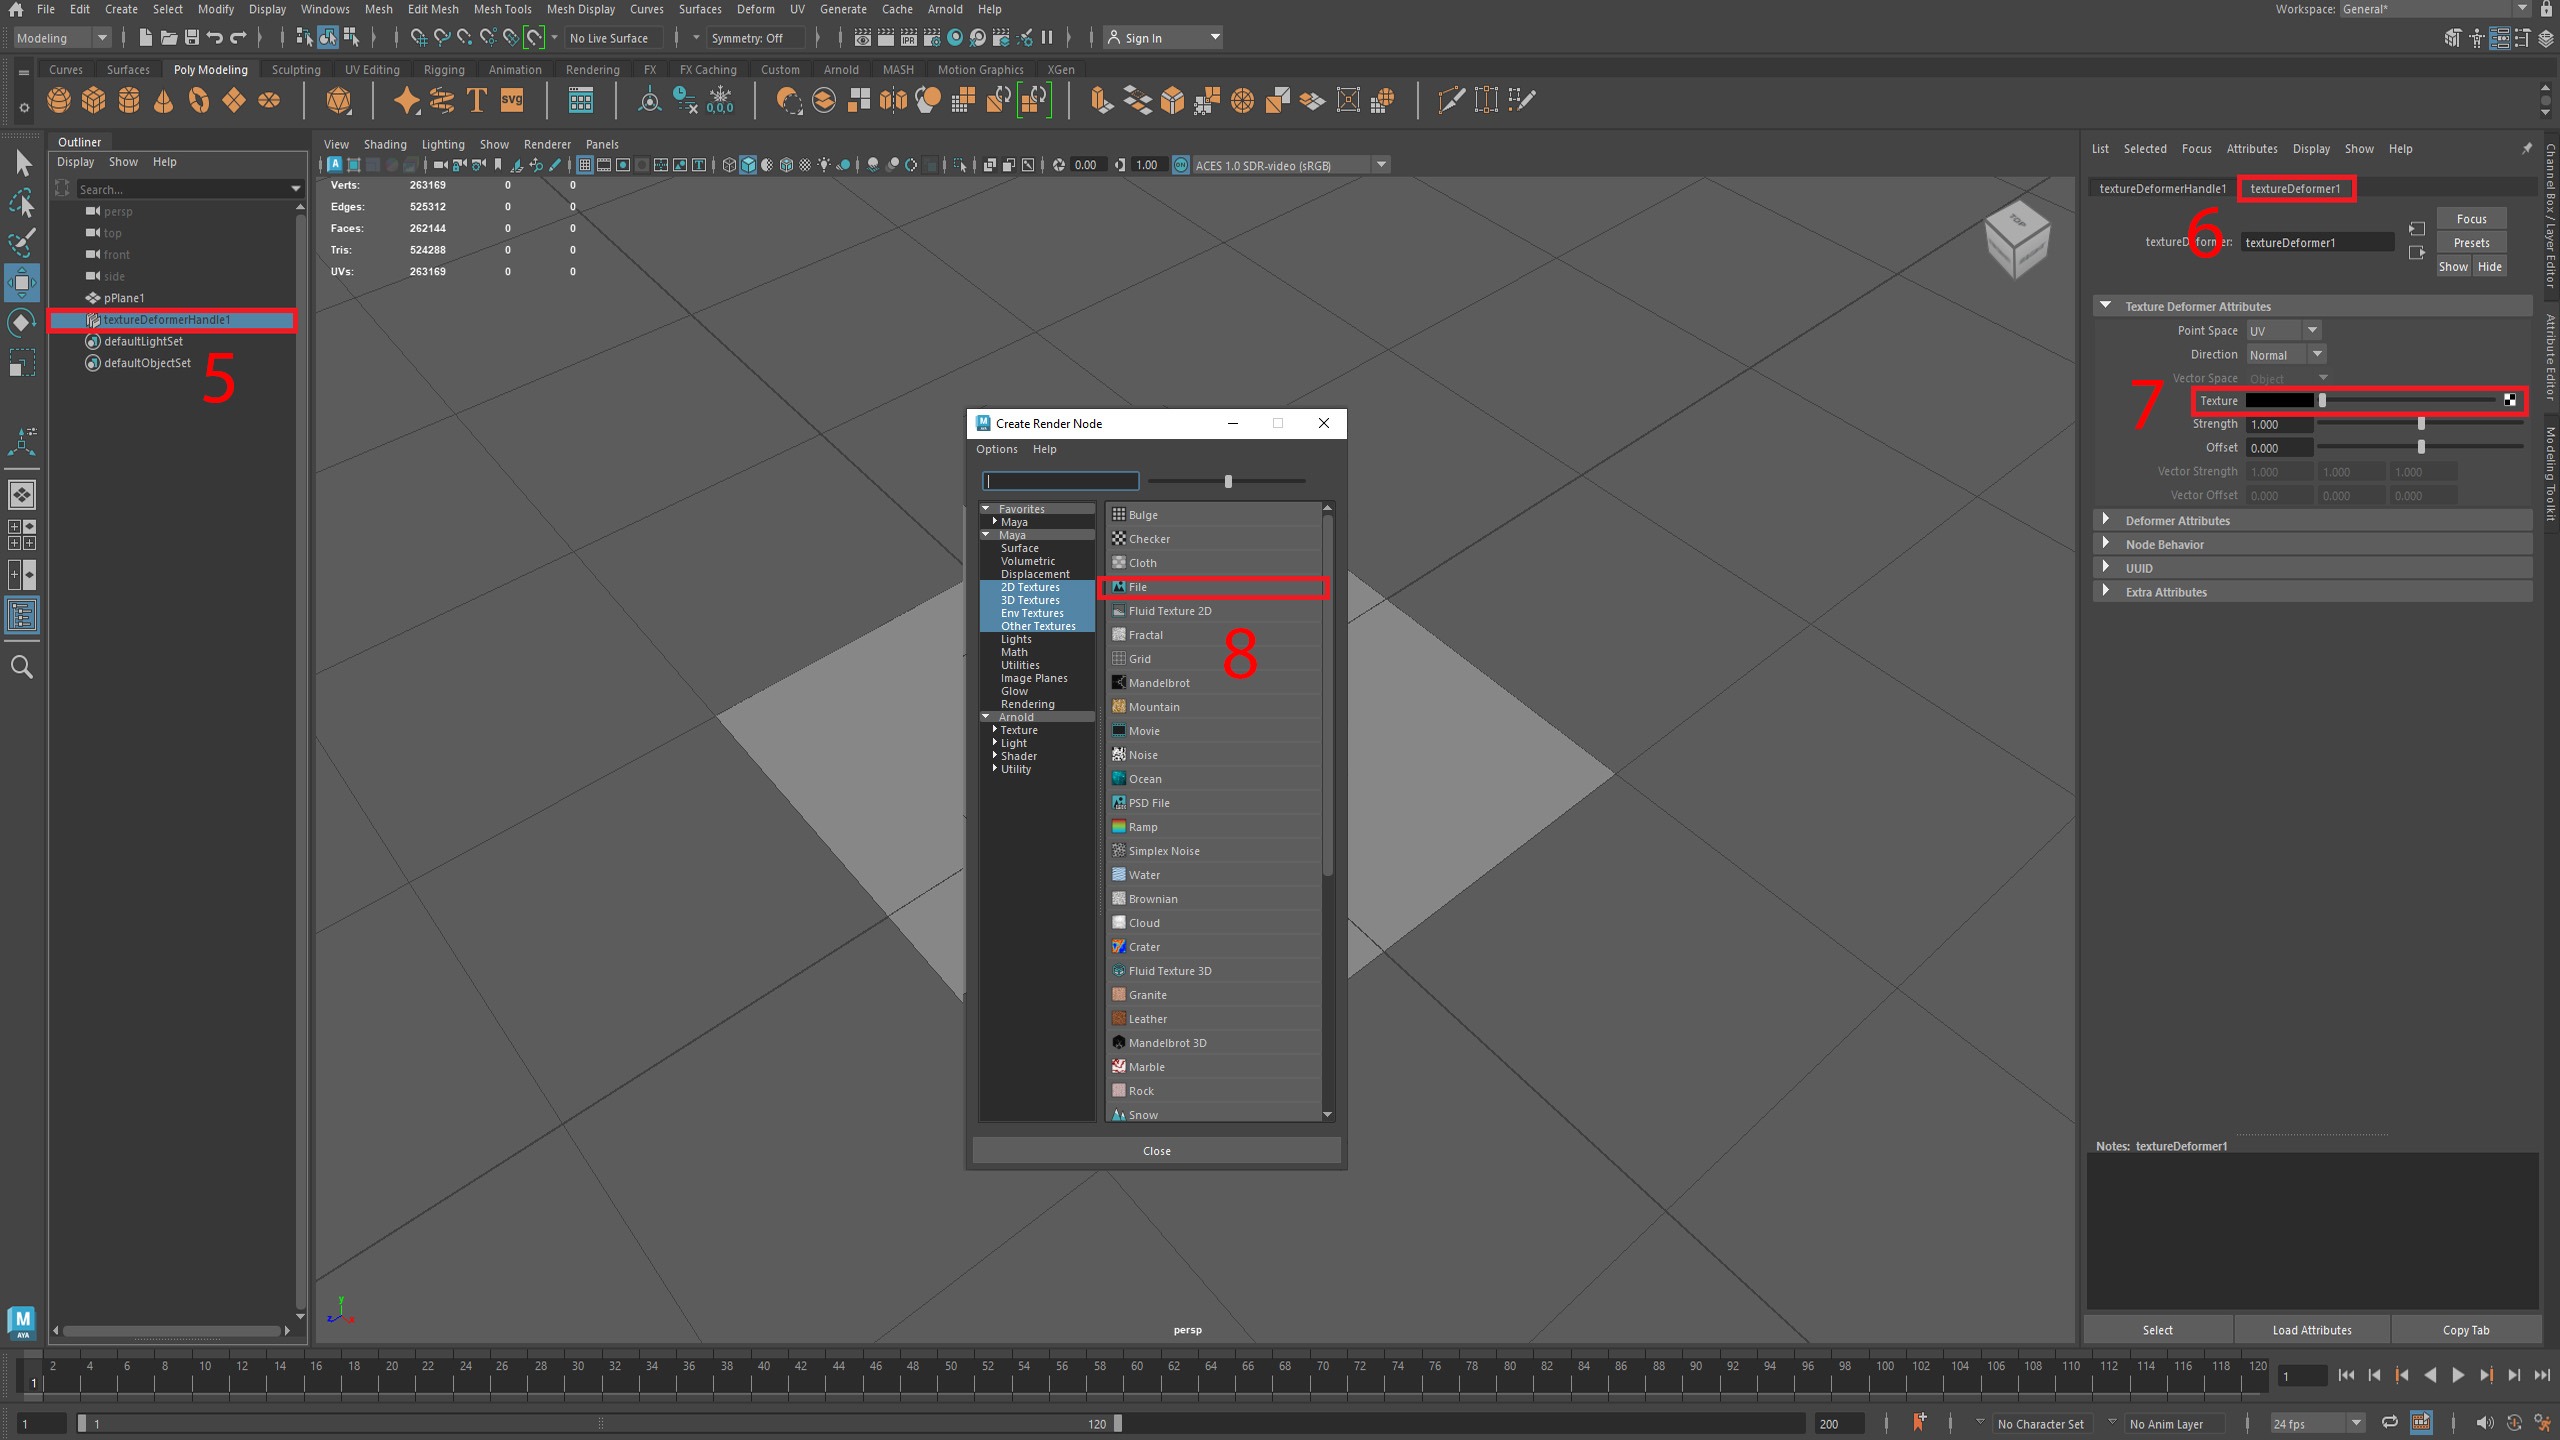
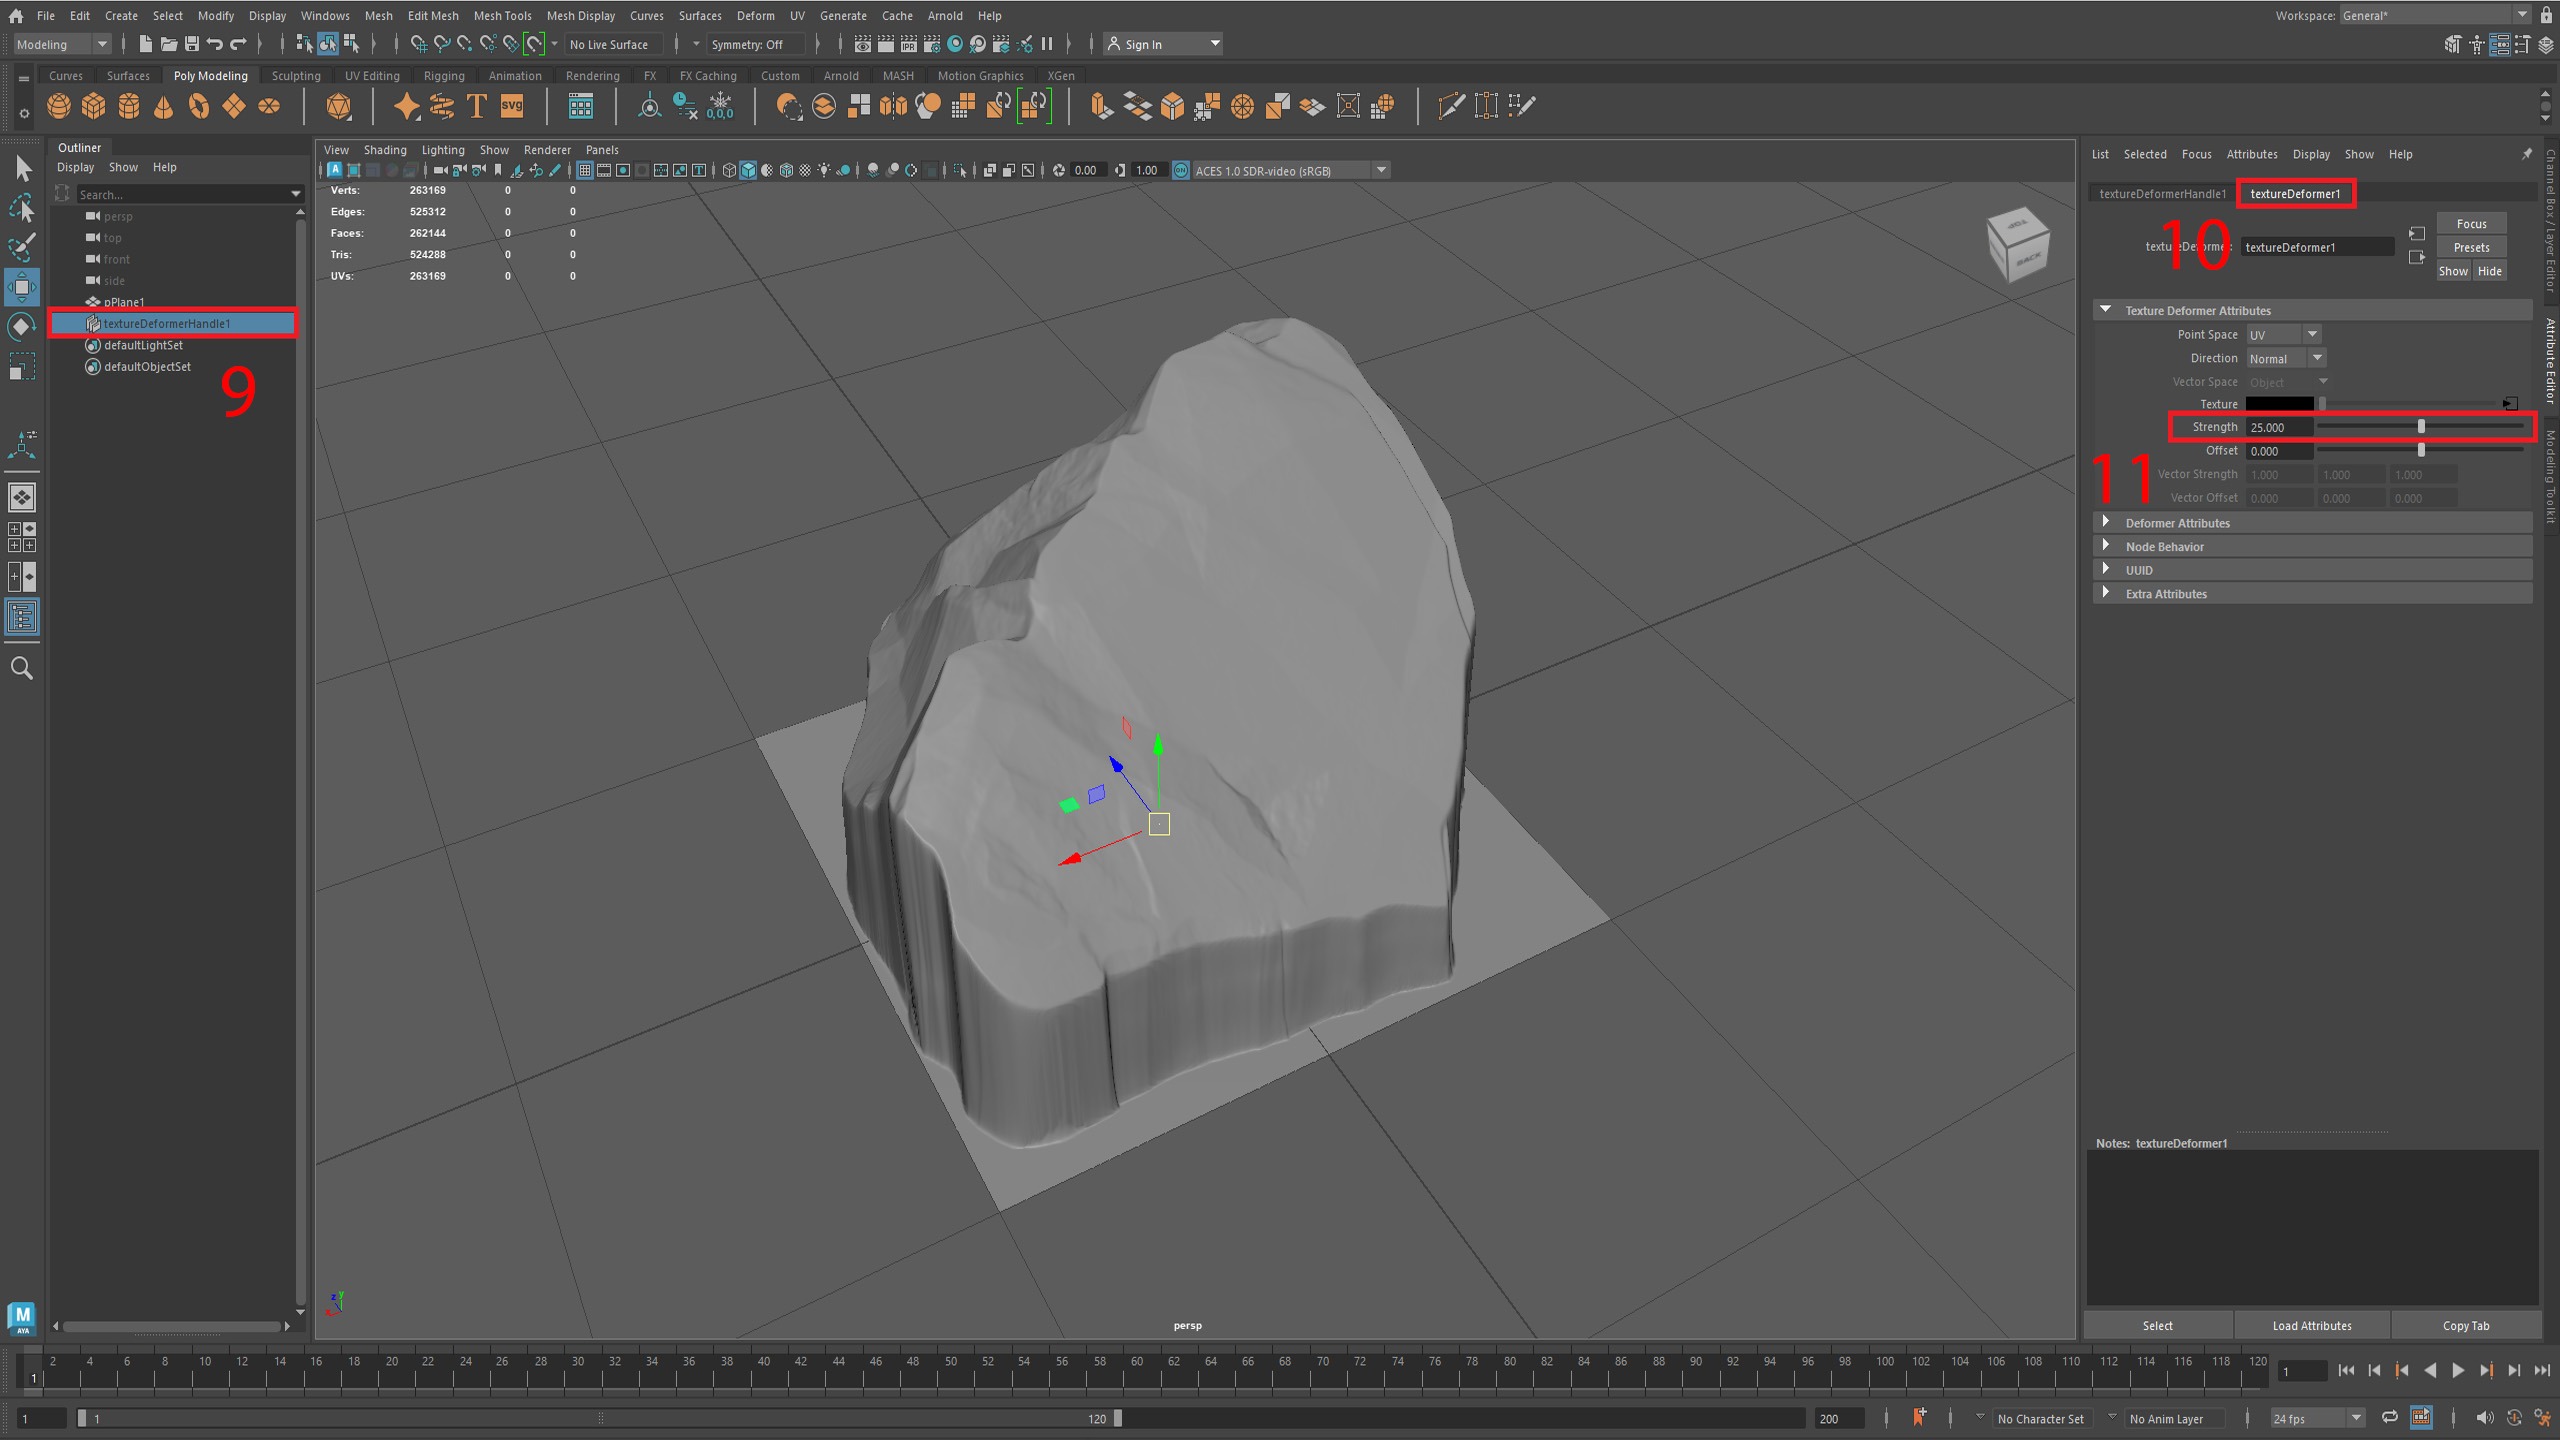
In Maya, I converted each height map into a 3D model. To do this, I started with a simple plane and applied Mesh Smooth with 9 subdivisions to create enough geometry for tessellation. Next, I went to Deform > Texture and selected the corresponding height map. After assigning the texture, I opened the Attribute Editor and increased the Strength value from 0 to 25.
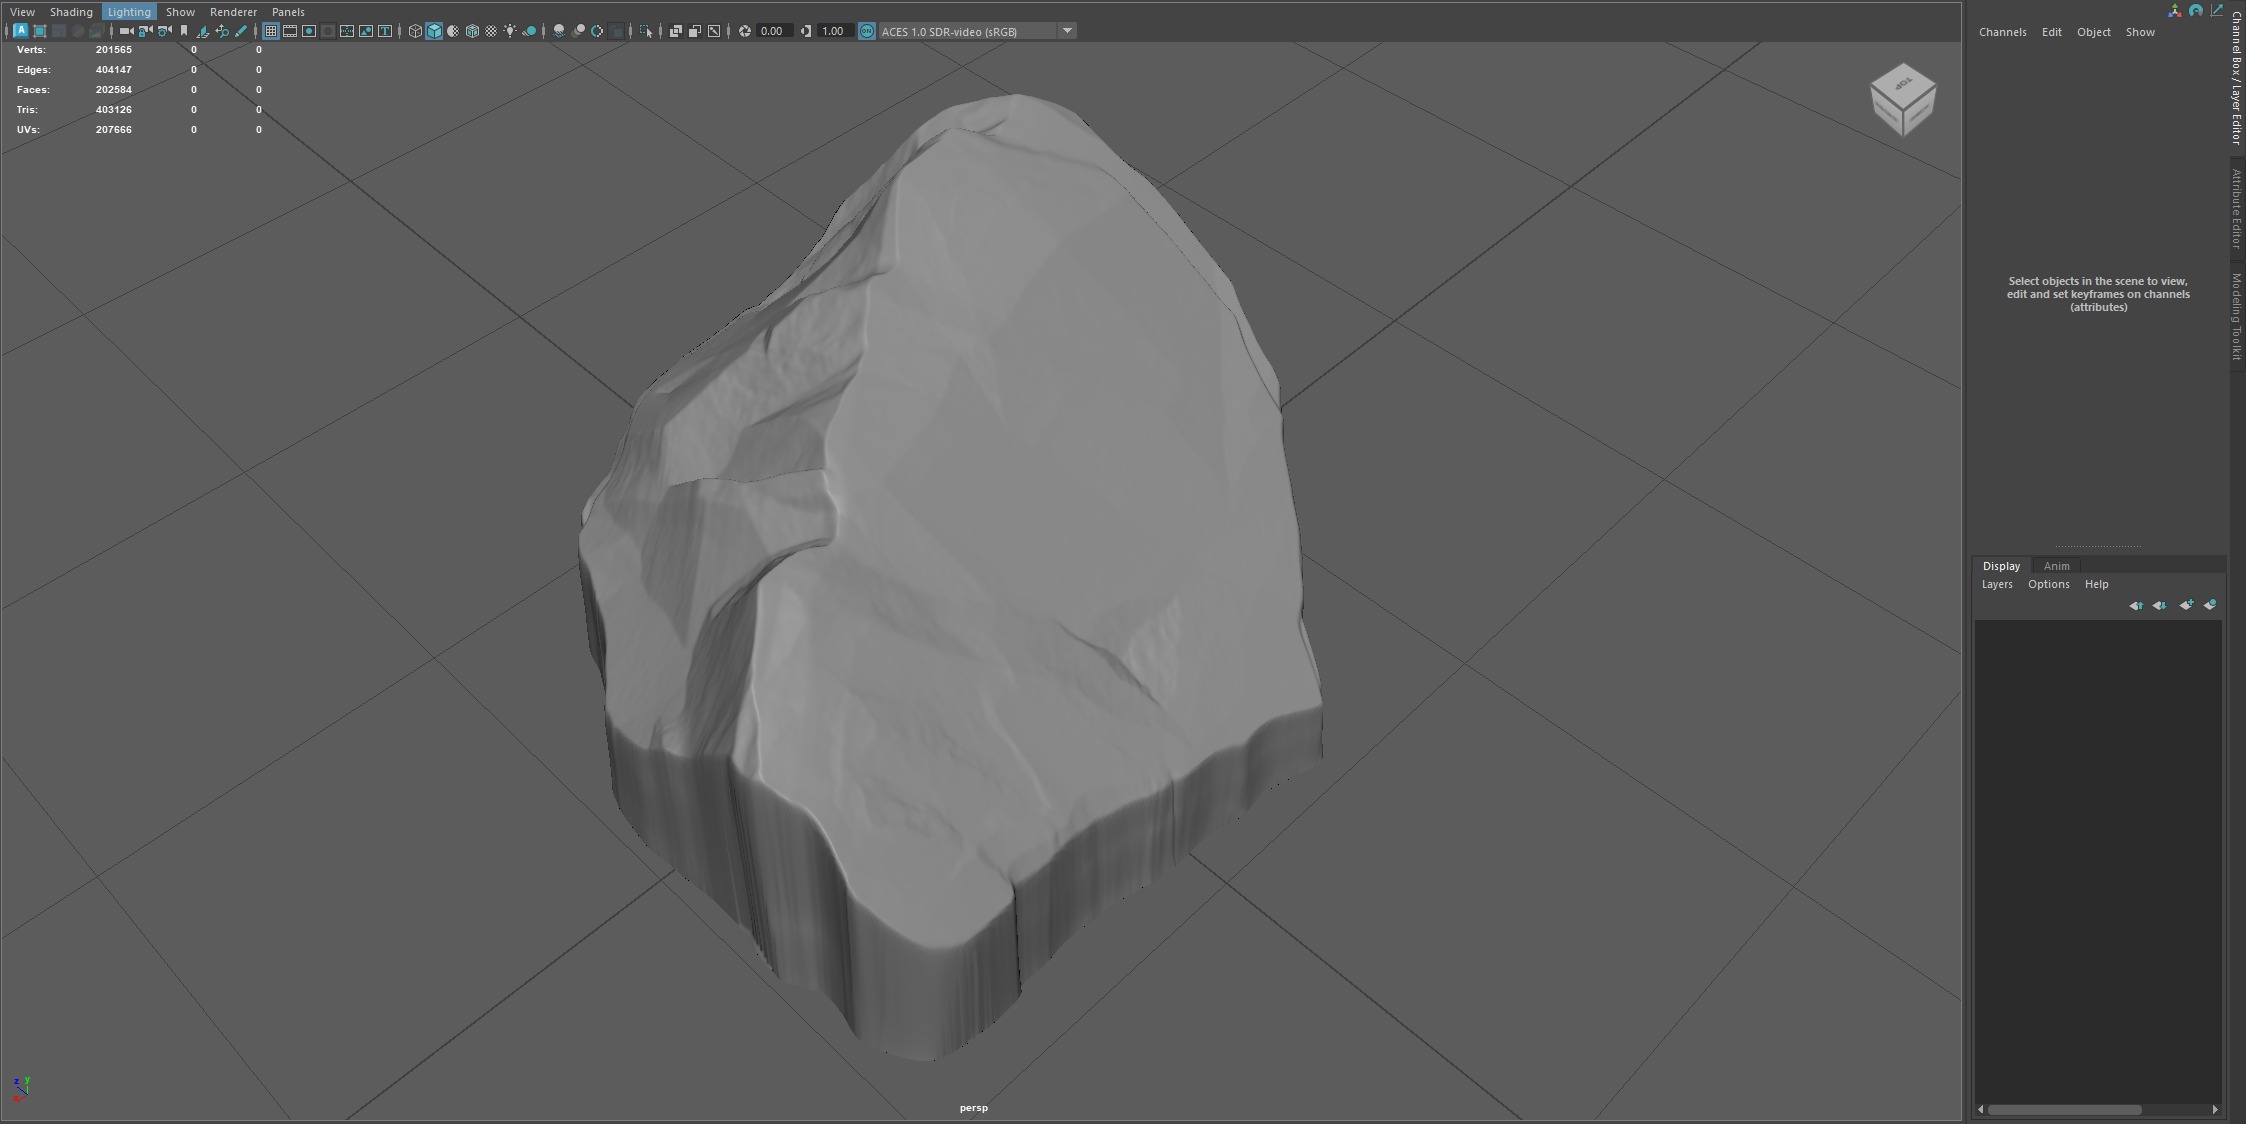
This is one of the methods for tessellating a height map in Maya, and I’d like to mention that I learned this workflow from Daniel Swing. Once the displacement was applied, I made a few final adjustments to remove unnecessary faces and clean up the mesh.
I repeated this process for all 16 stones. The entire conversion and export process, including saving each stone as an OBJ file, took around 20 minutes in total, which was much faster than I had initially expected.
ZBrush
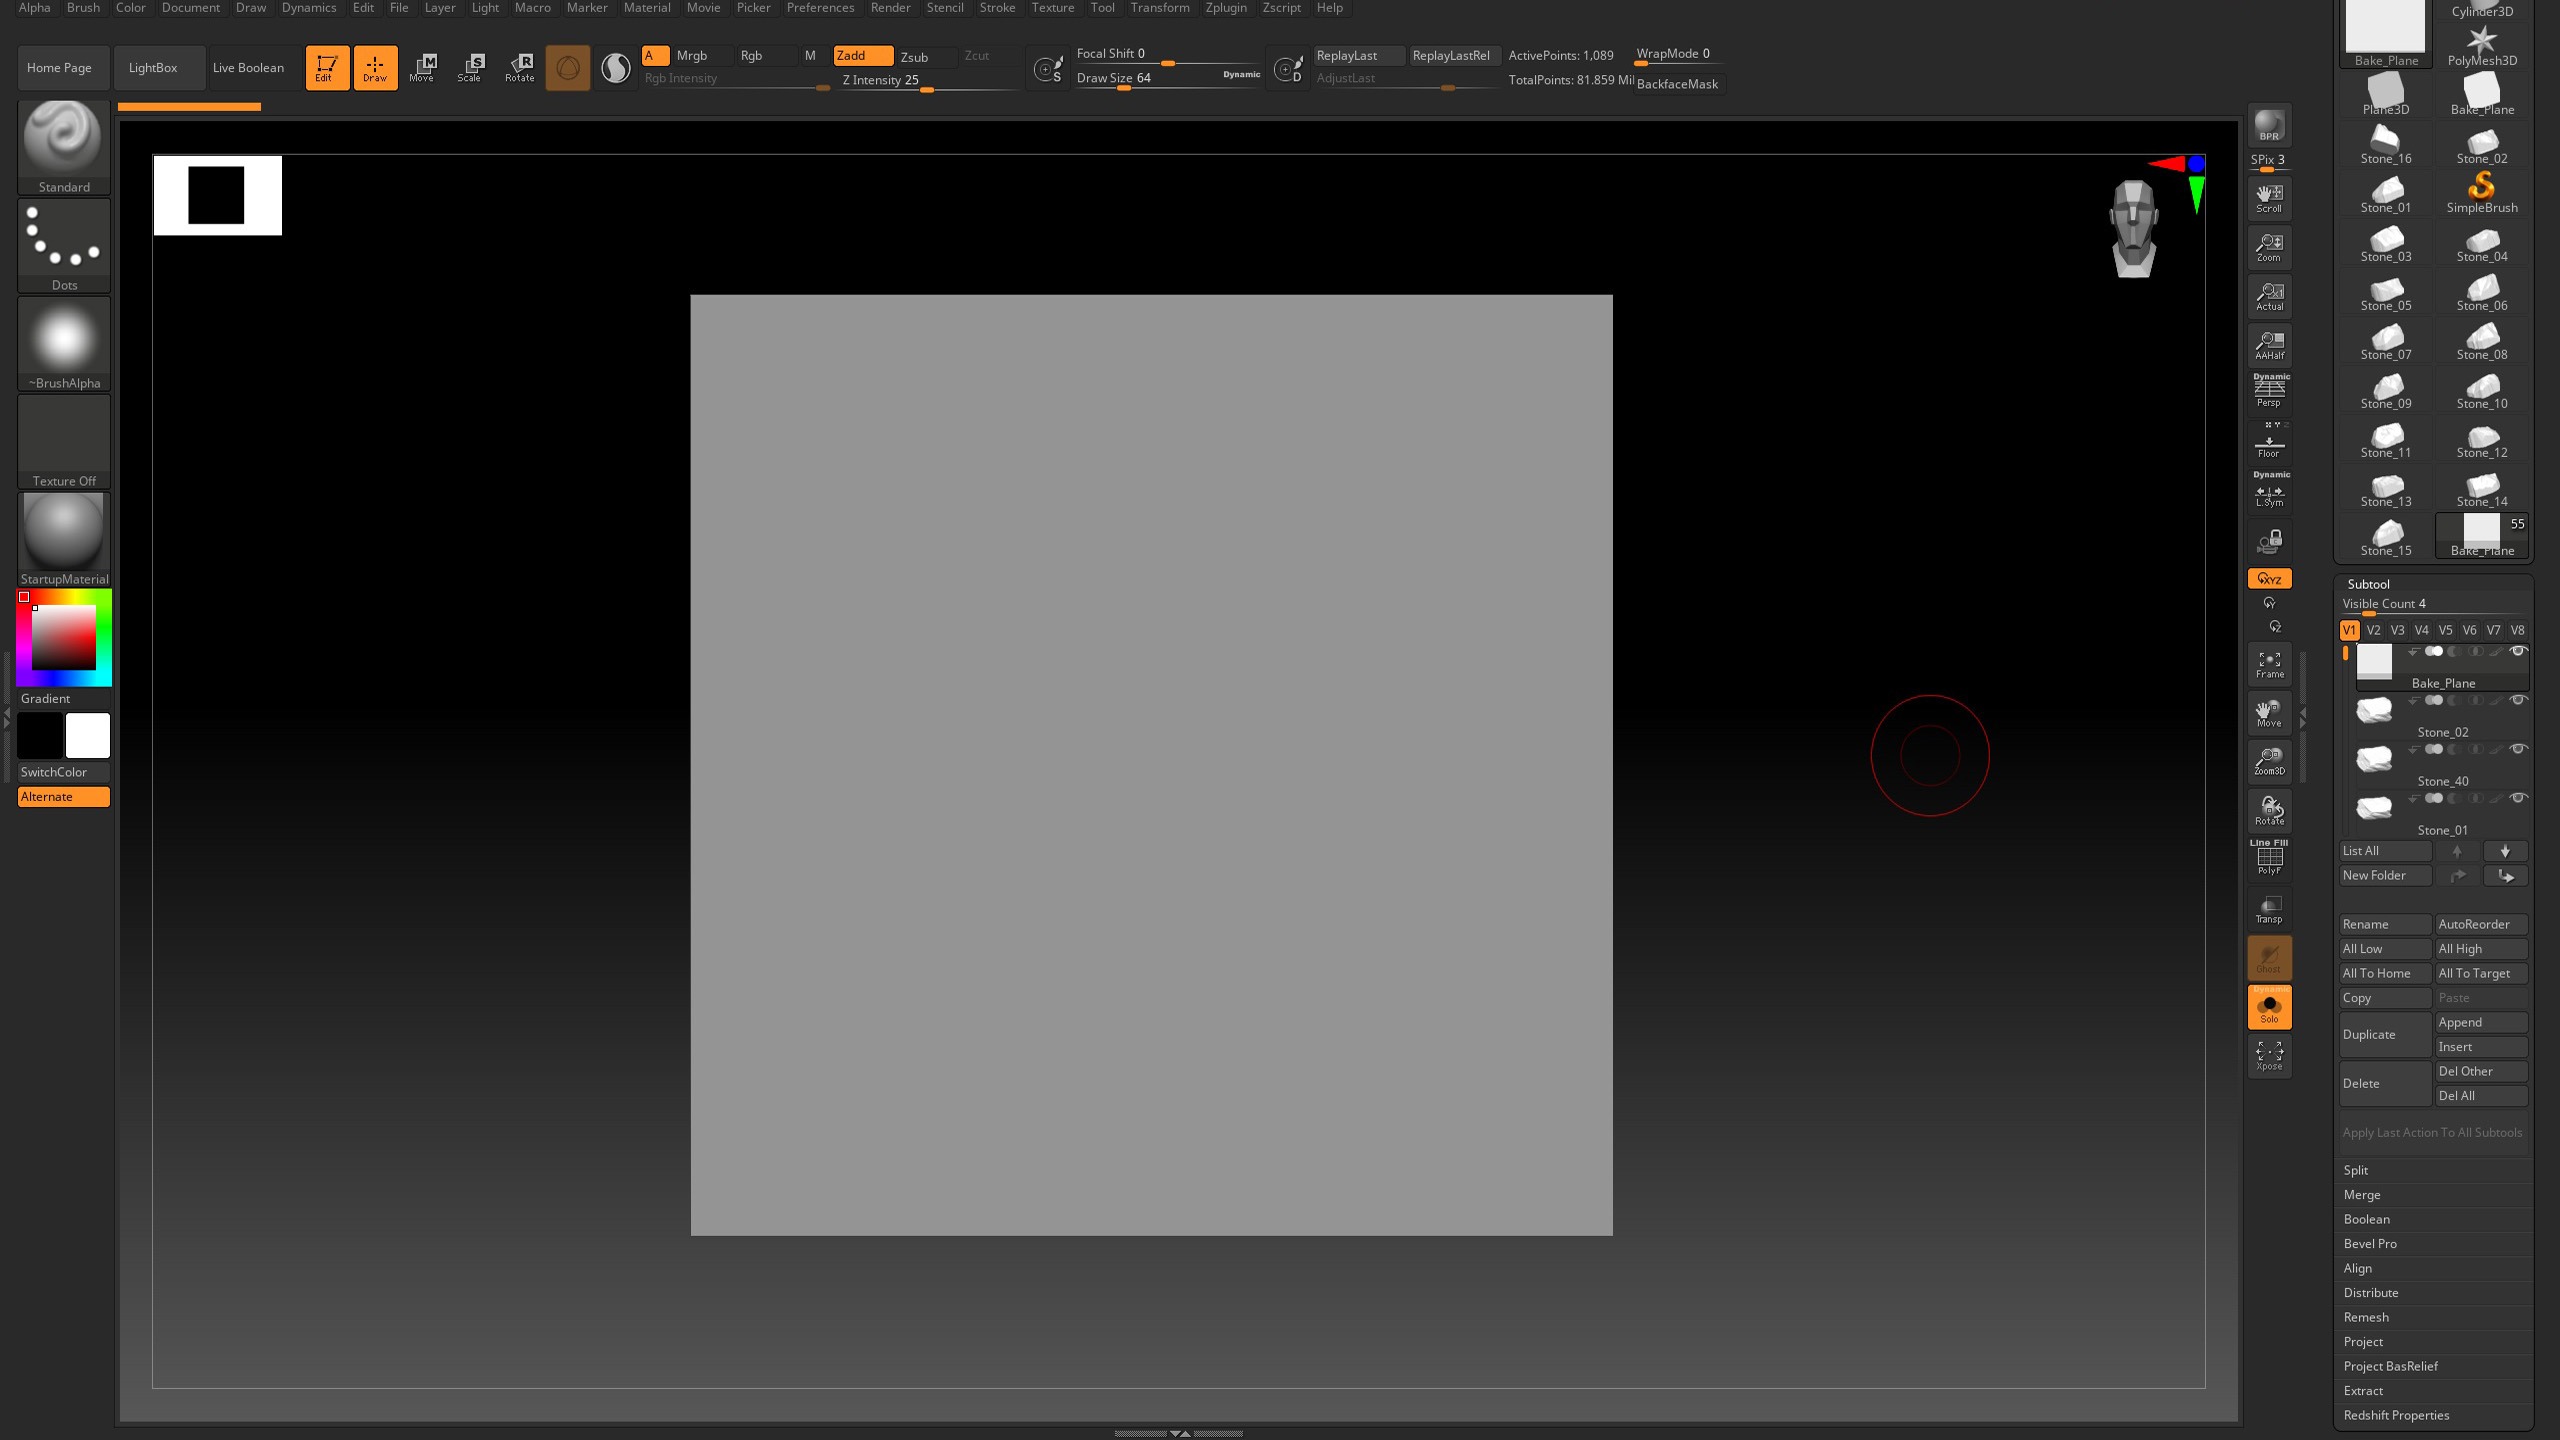
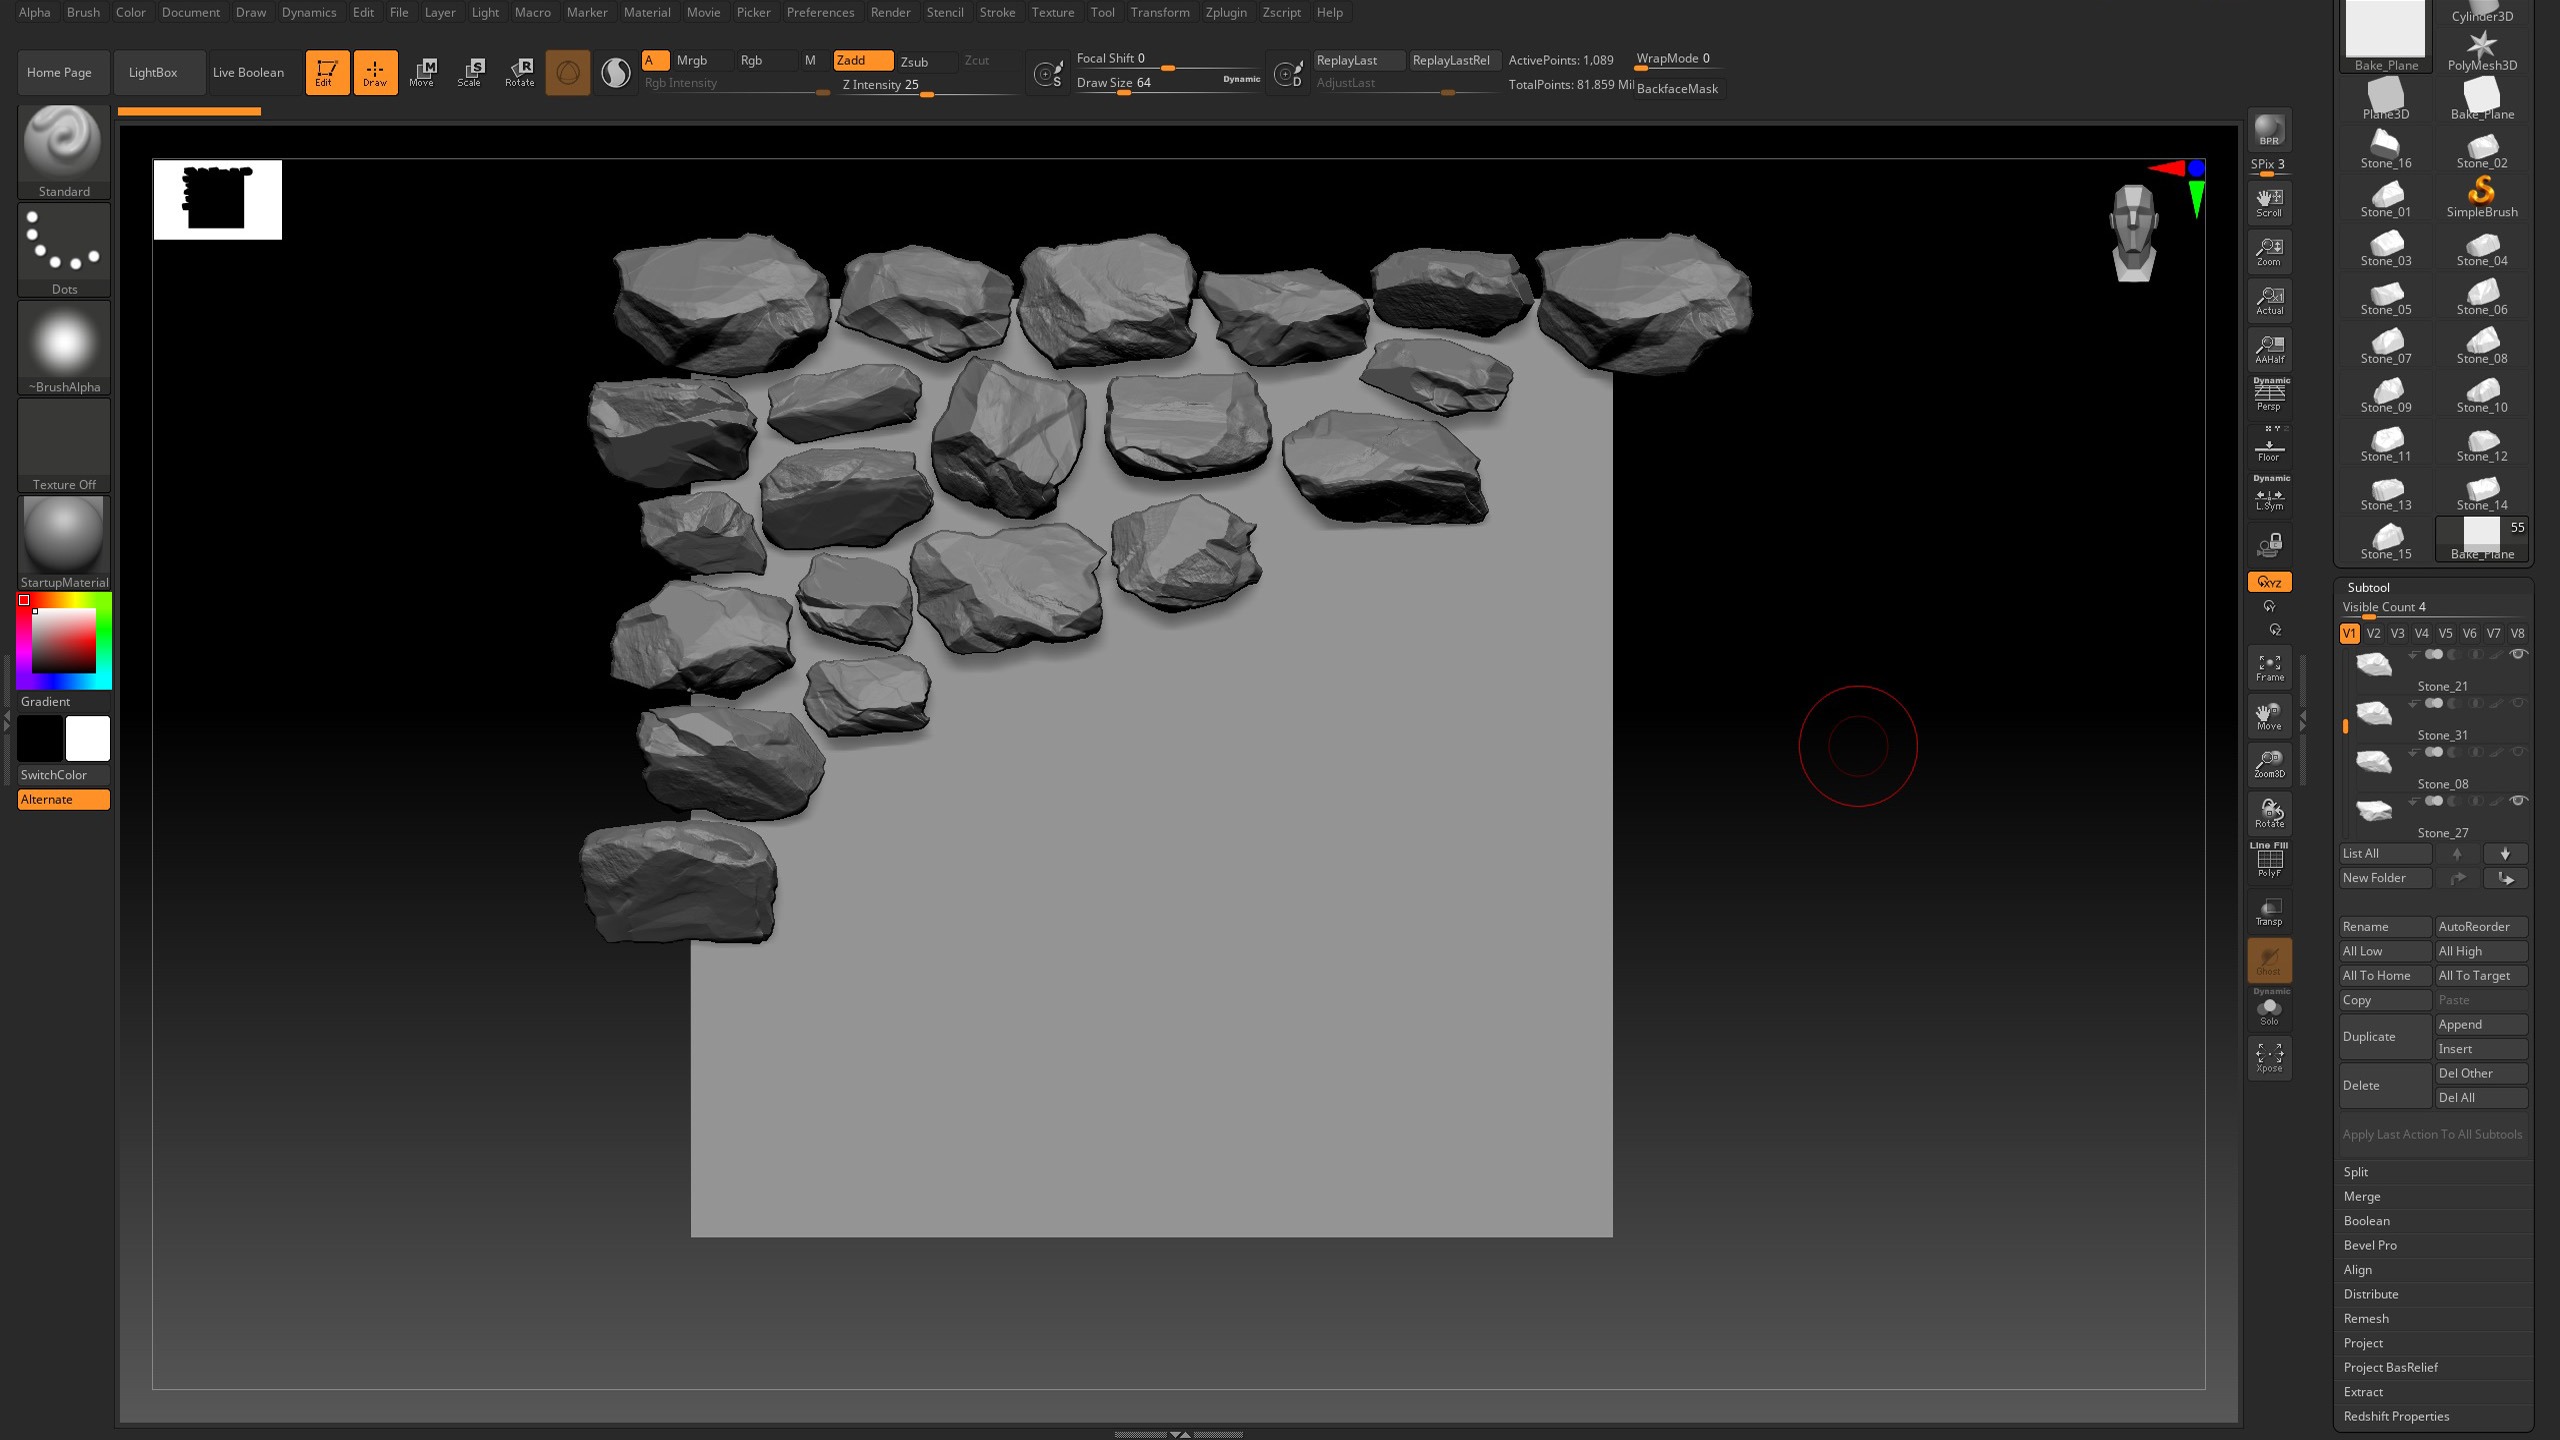
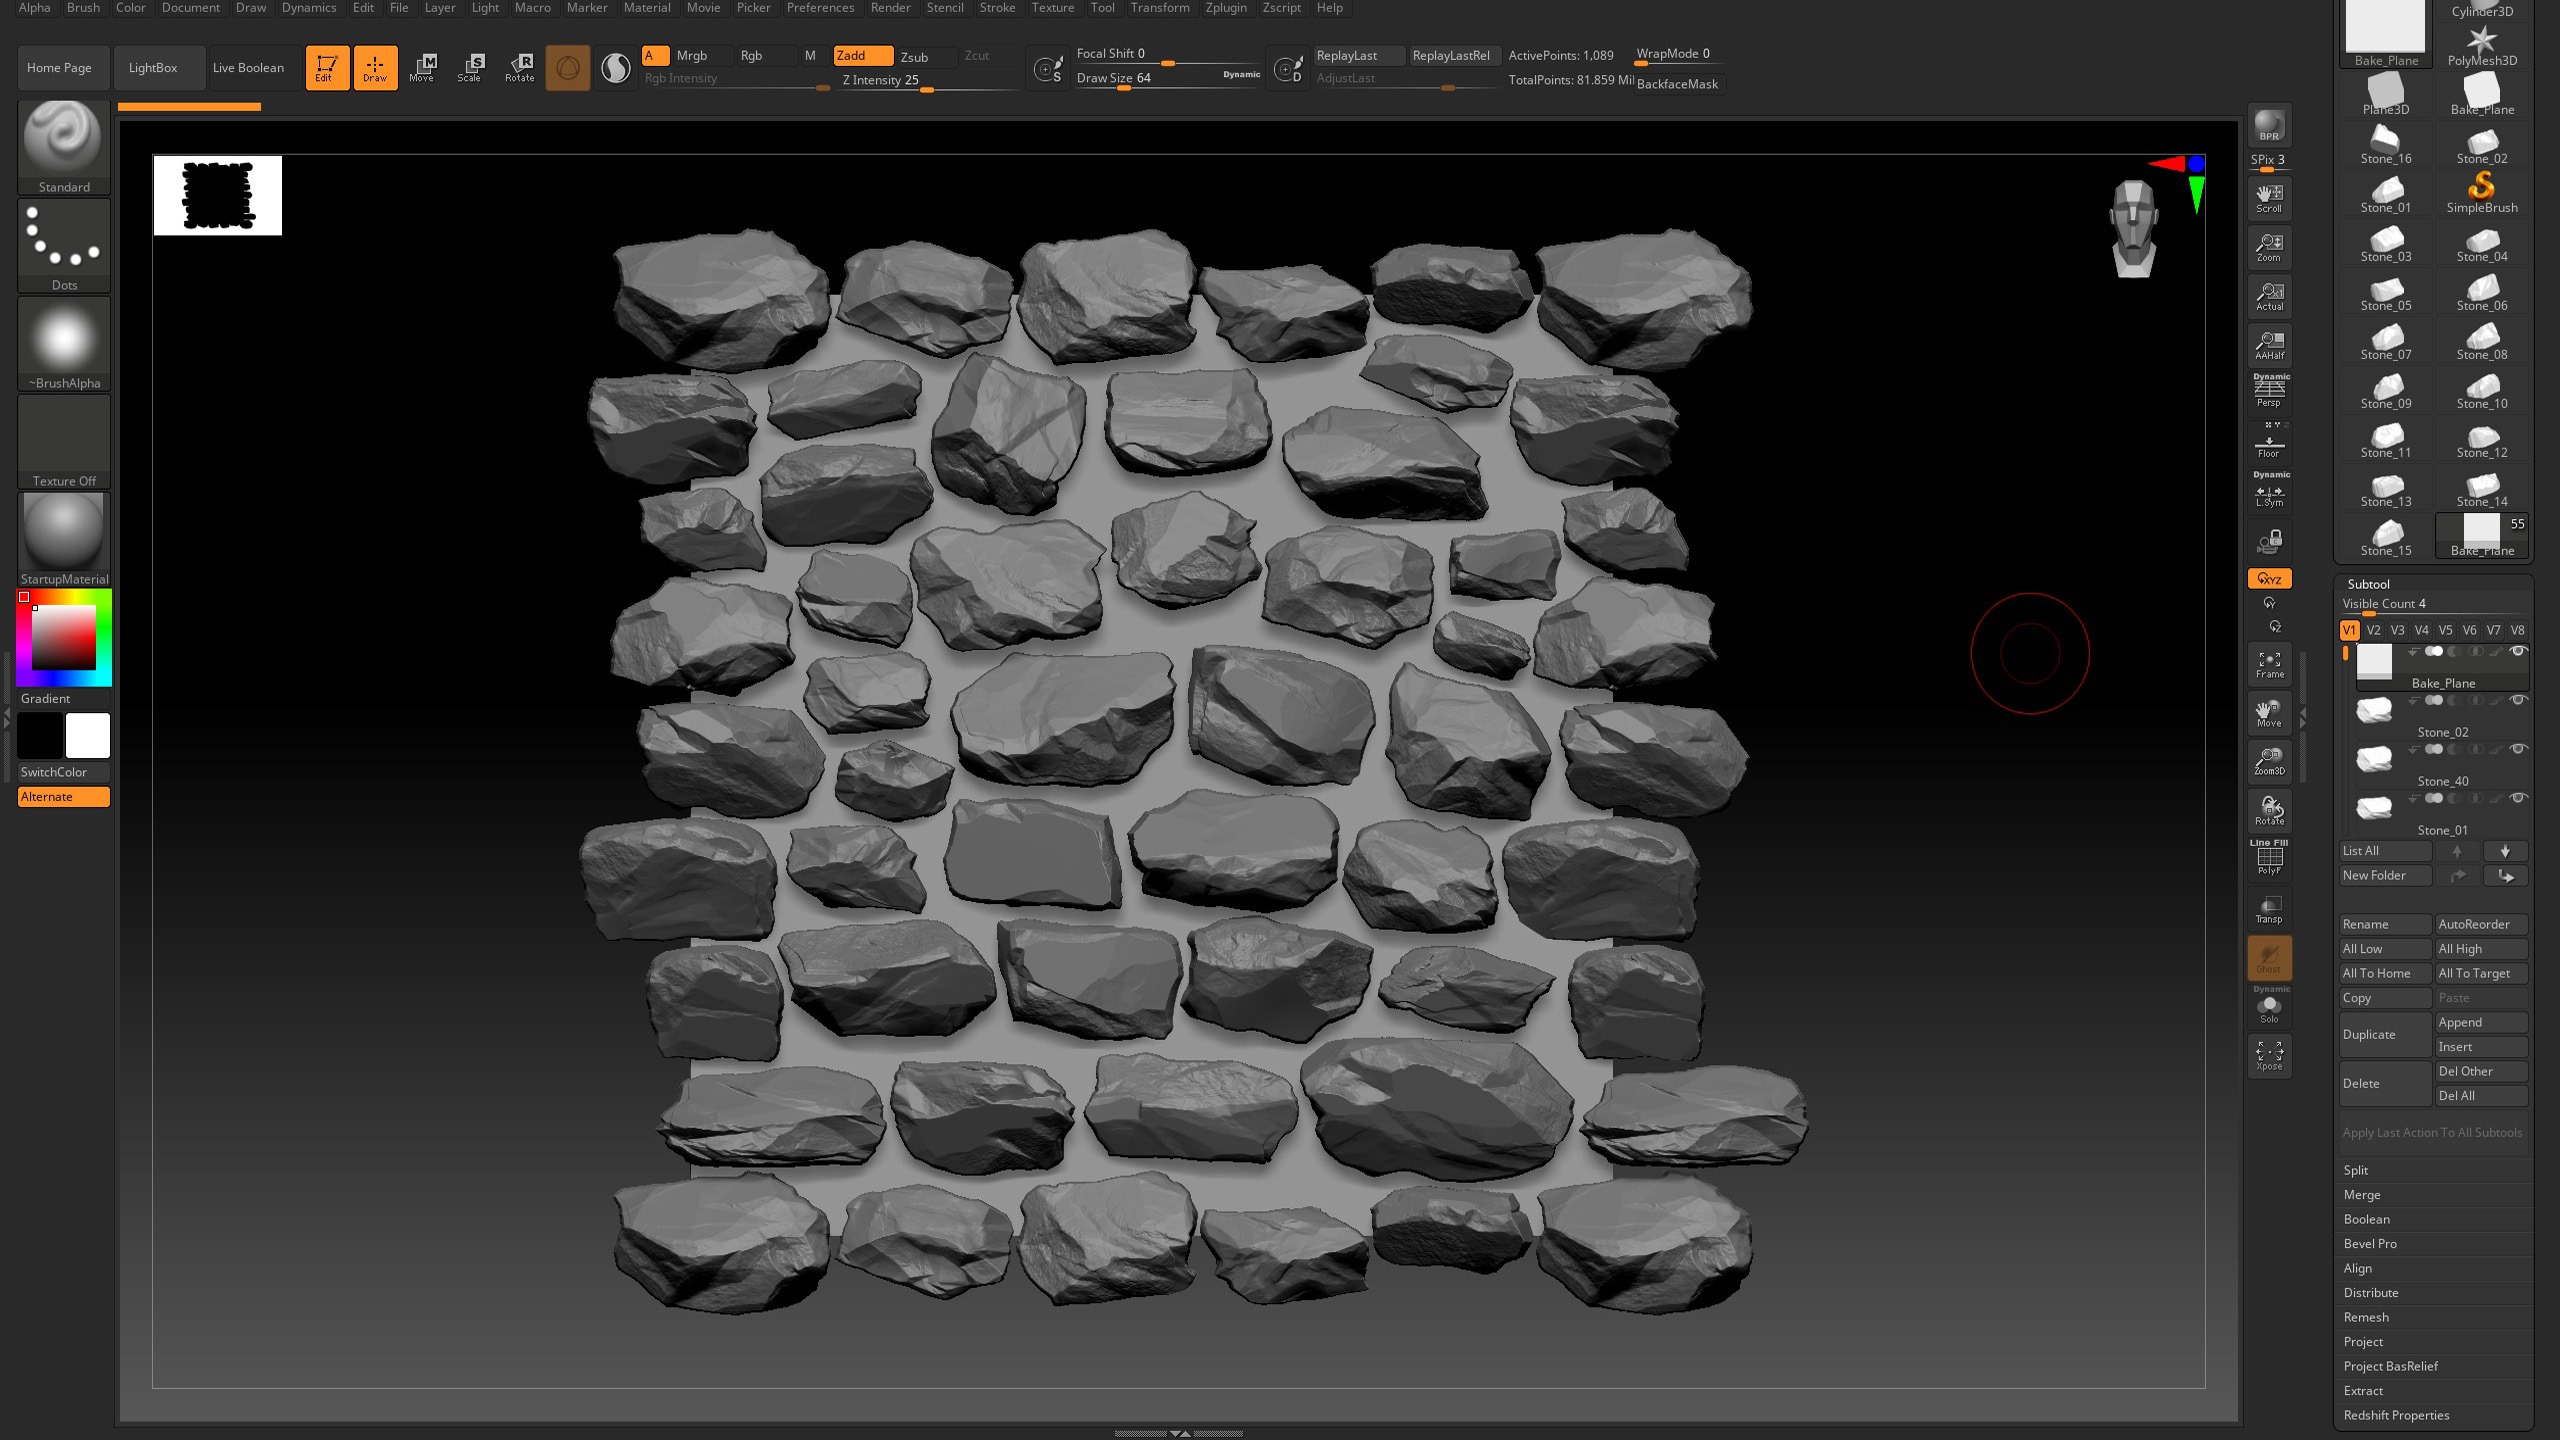
In ZBrush, I started with a default plane, which I named Bake-Plane. After that, I imported all 16 stones and began scattering them across the surface. To achieve full coverage, I duplicated, rotated, and scaled the stones, filling any empty areas on the plane.
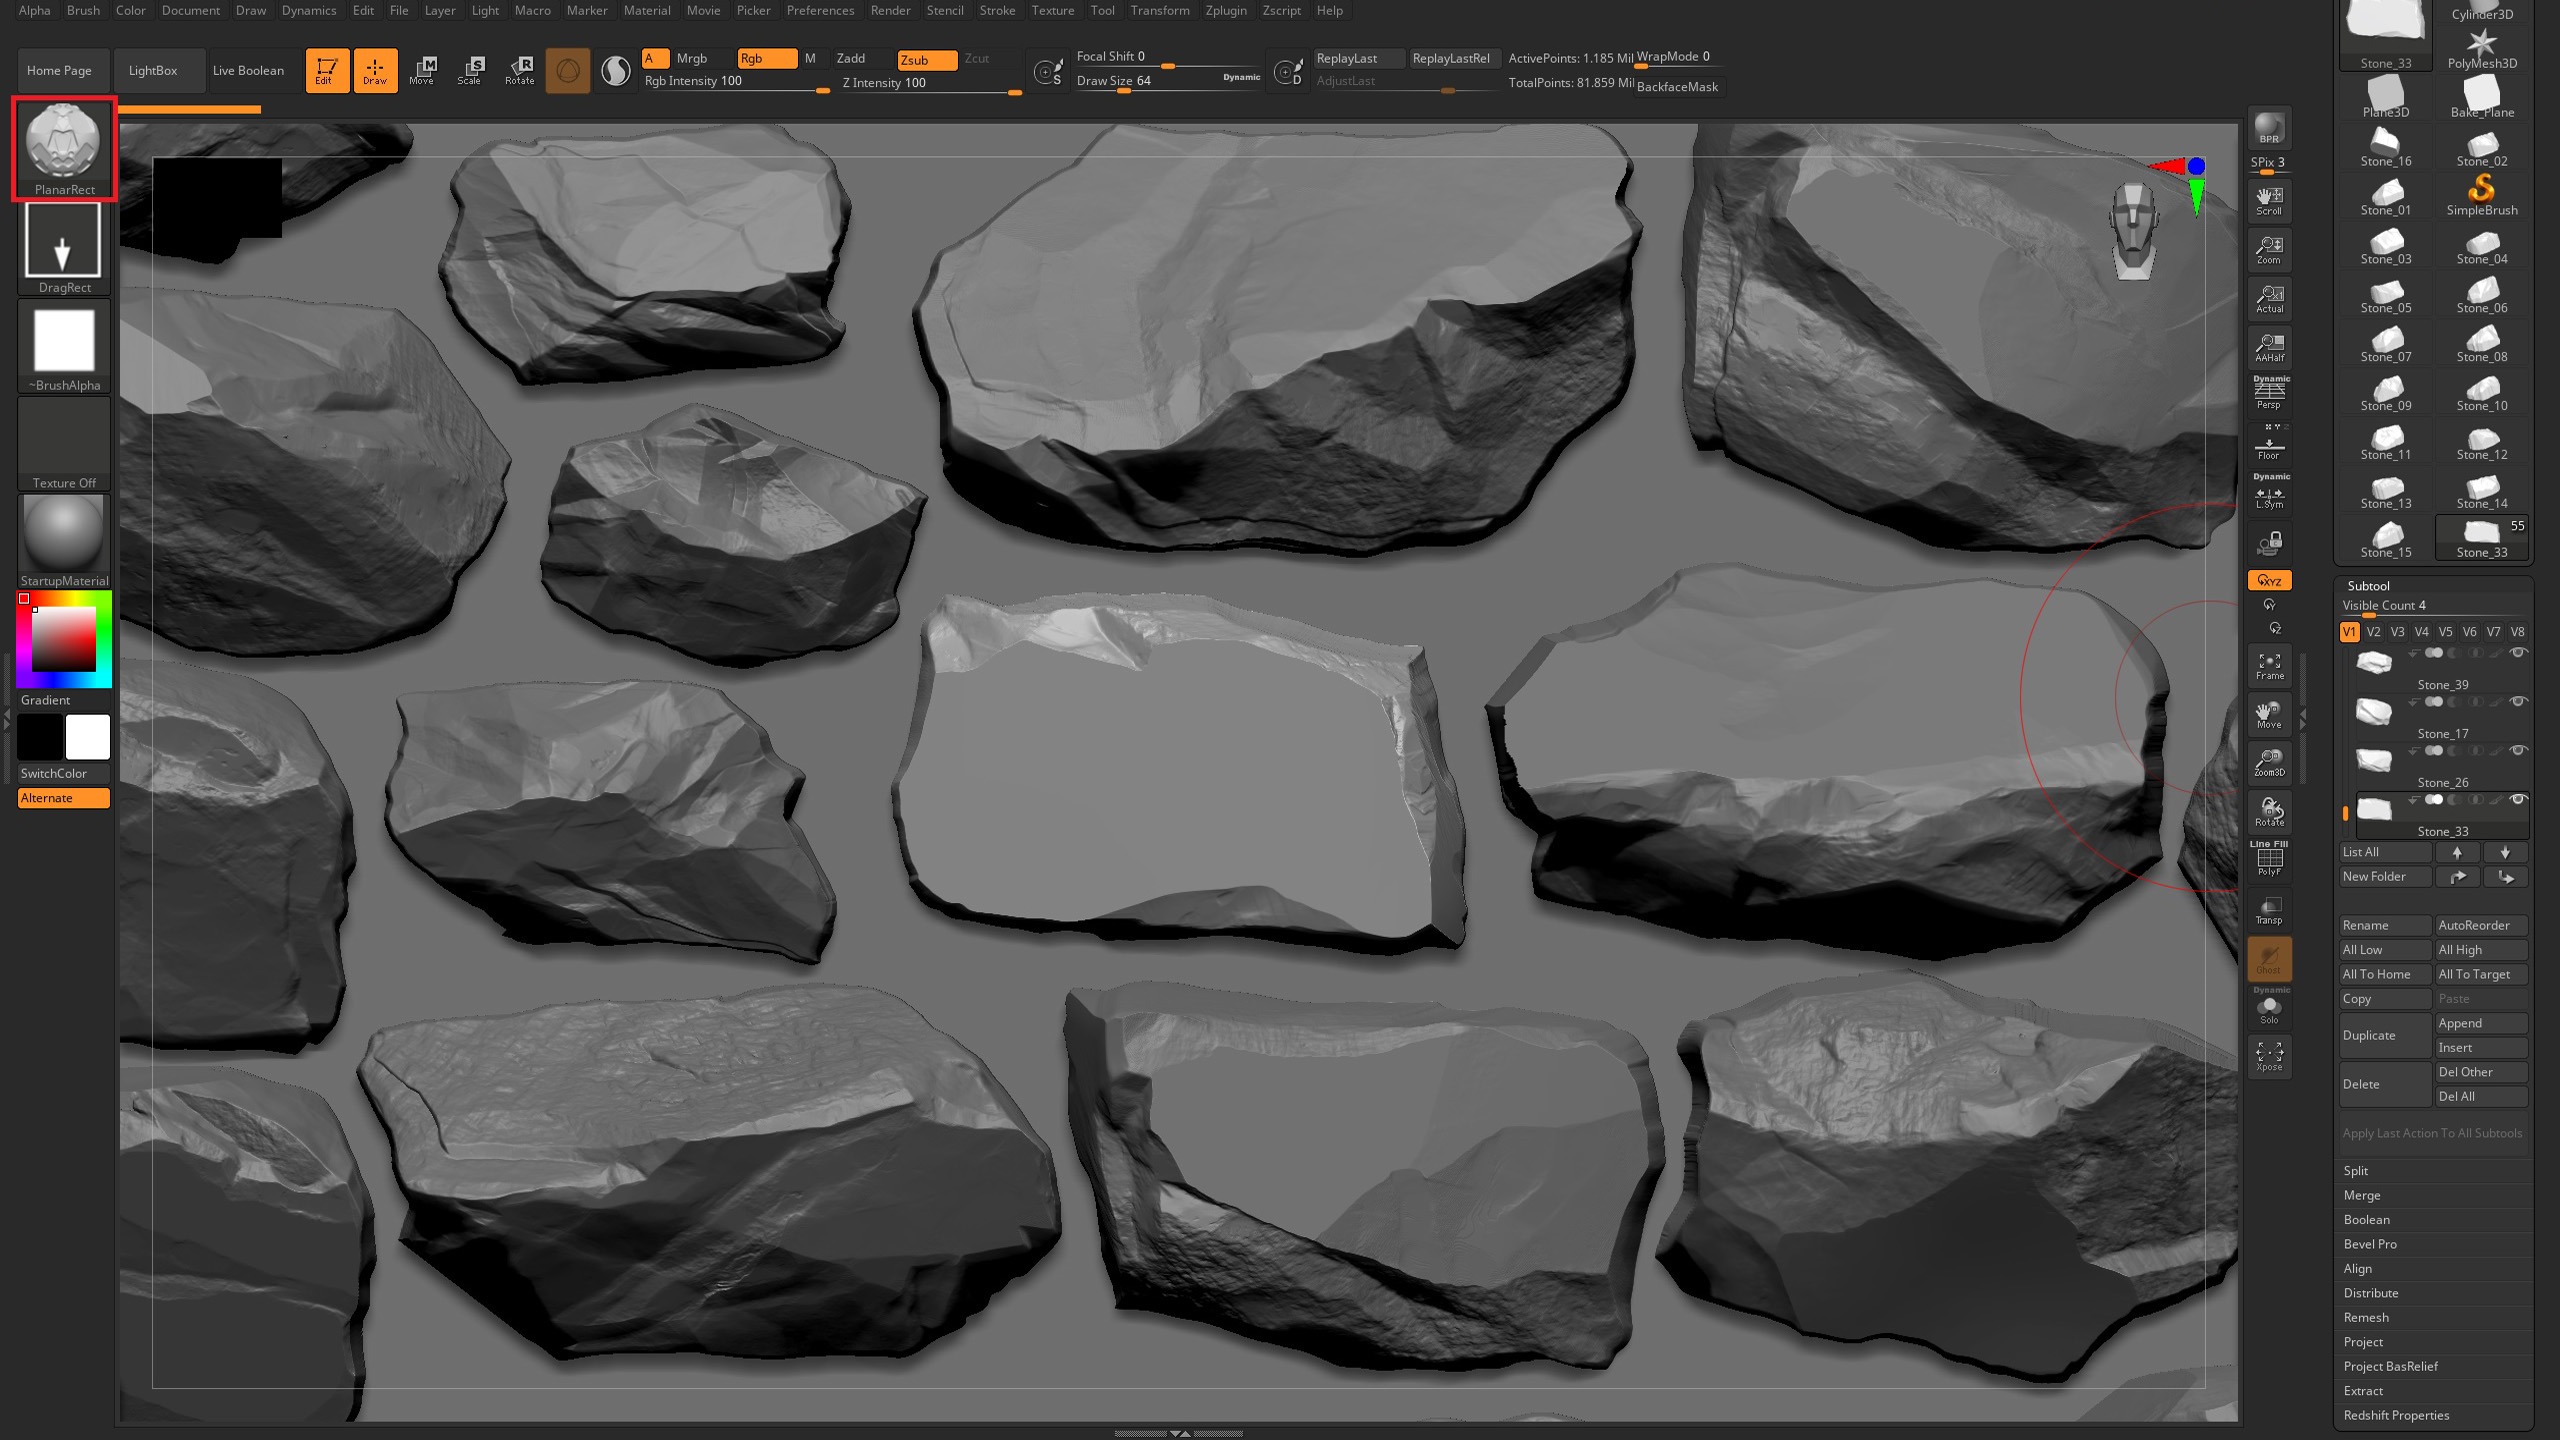
During the sculpting process, I primarily used the Trim Smooth Border, Planar Rect, Move, and ClayBuildup brushes. For example, after using the Trim Smooth Border brush to create chipped edges and stone damage, I switched to the Planar Rect brush to clean the surfaces and sharpen the edges.
Once the sculpting phase was complete, I noticed that some stones still contained straight lines and unnatural shapes. Rather than correcting them in ZBrush, I decided to address those issues later in Substance Designer.
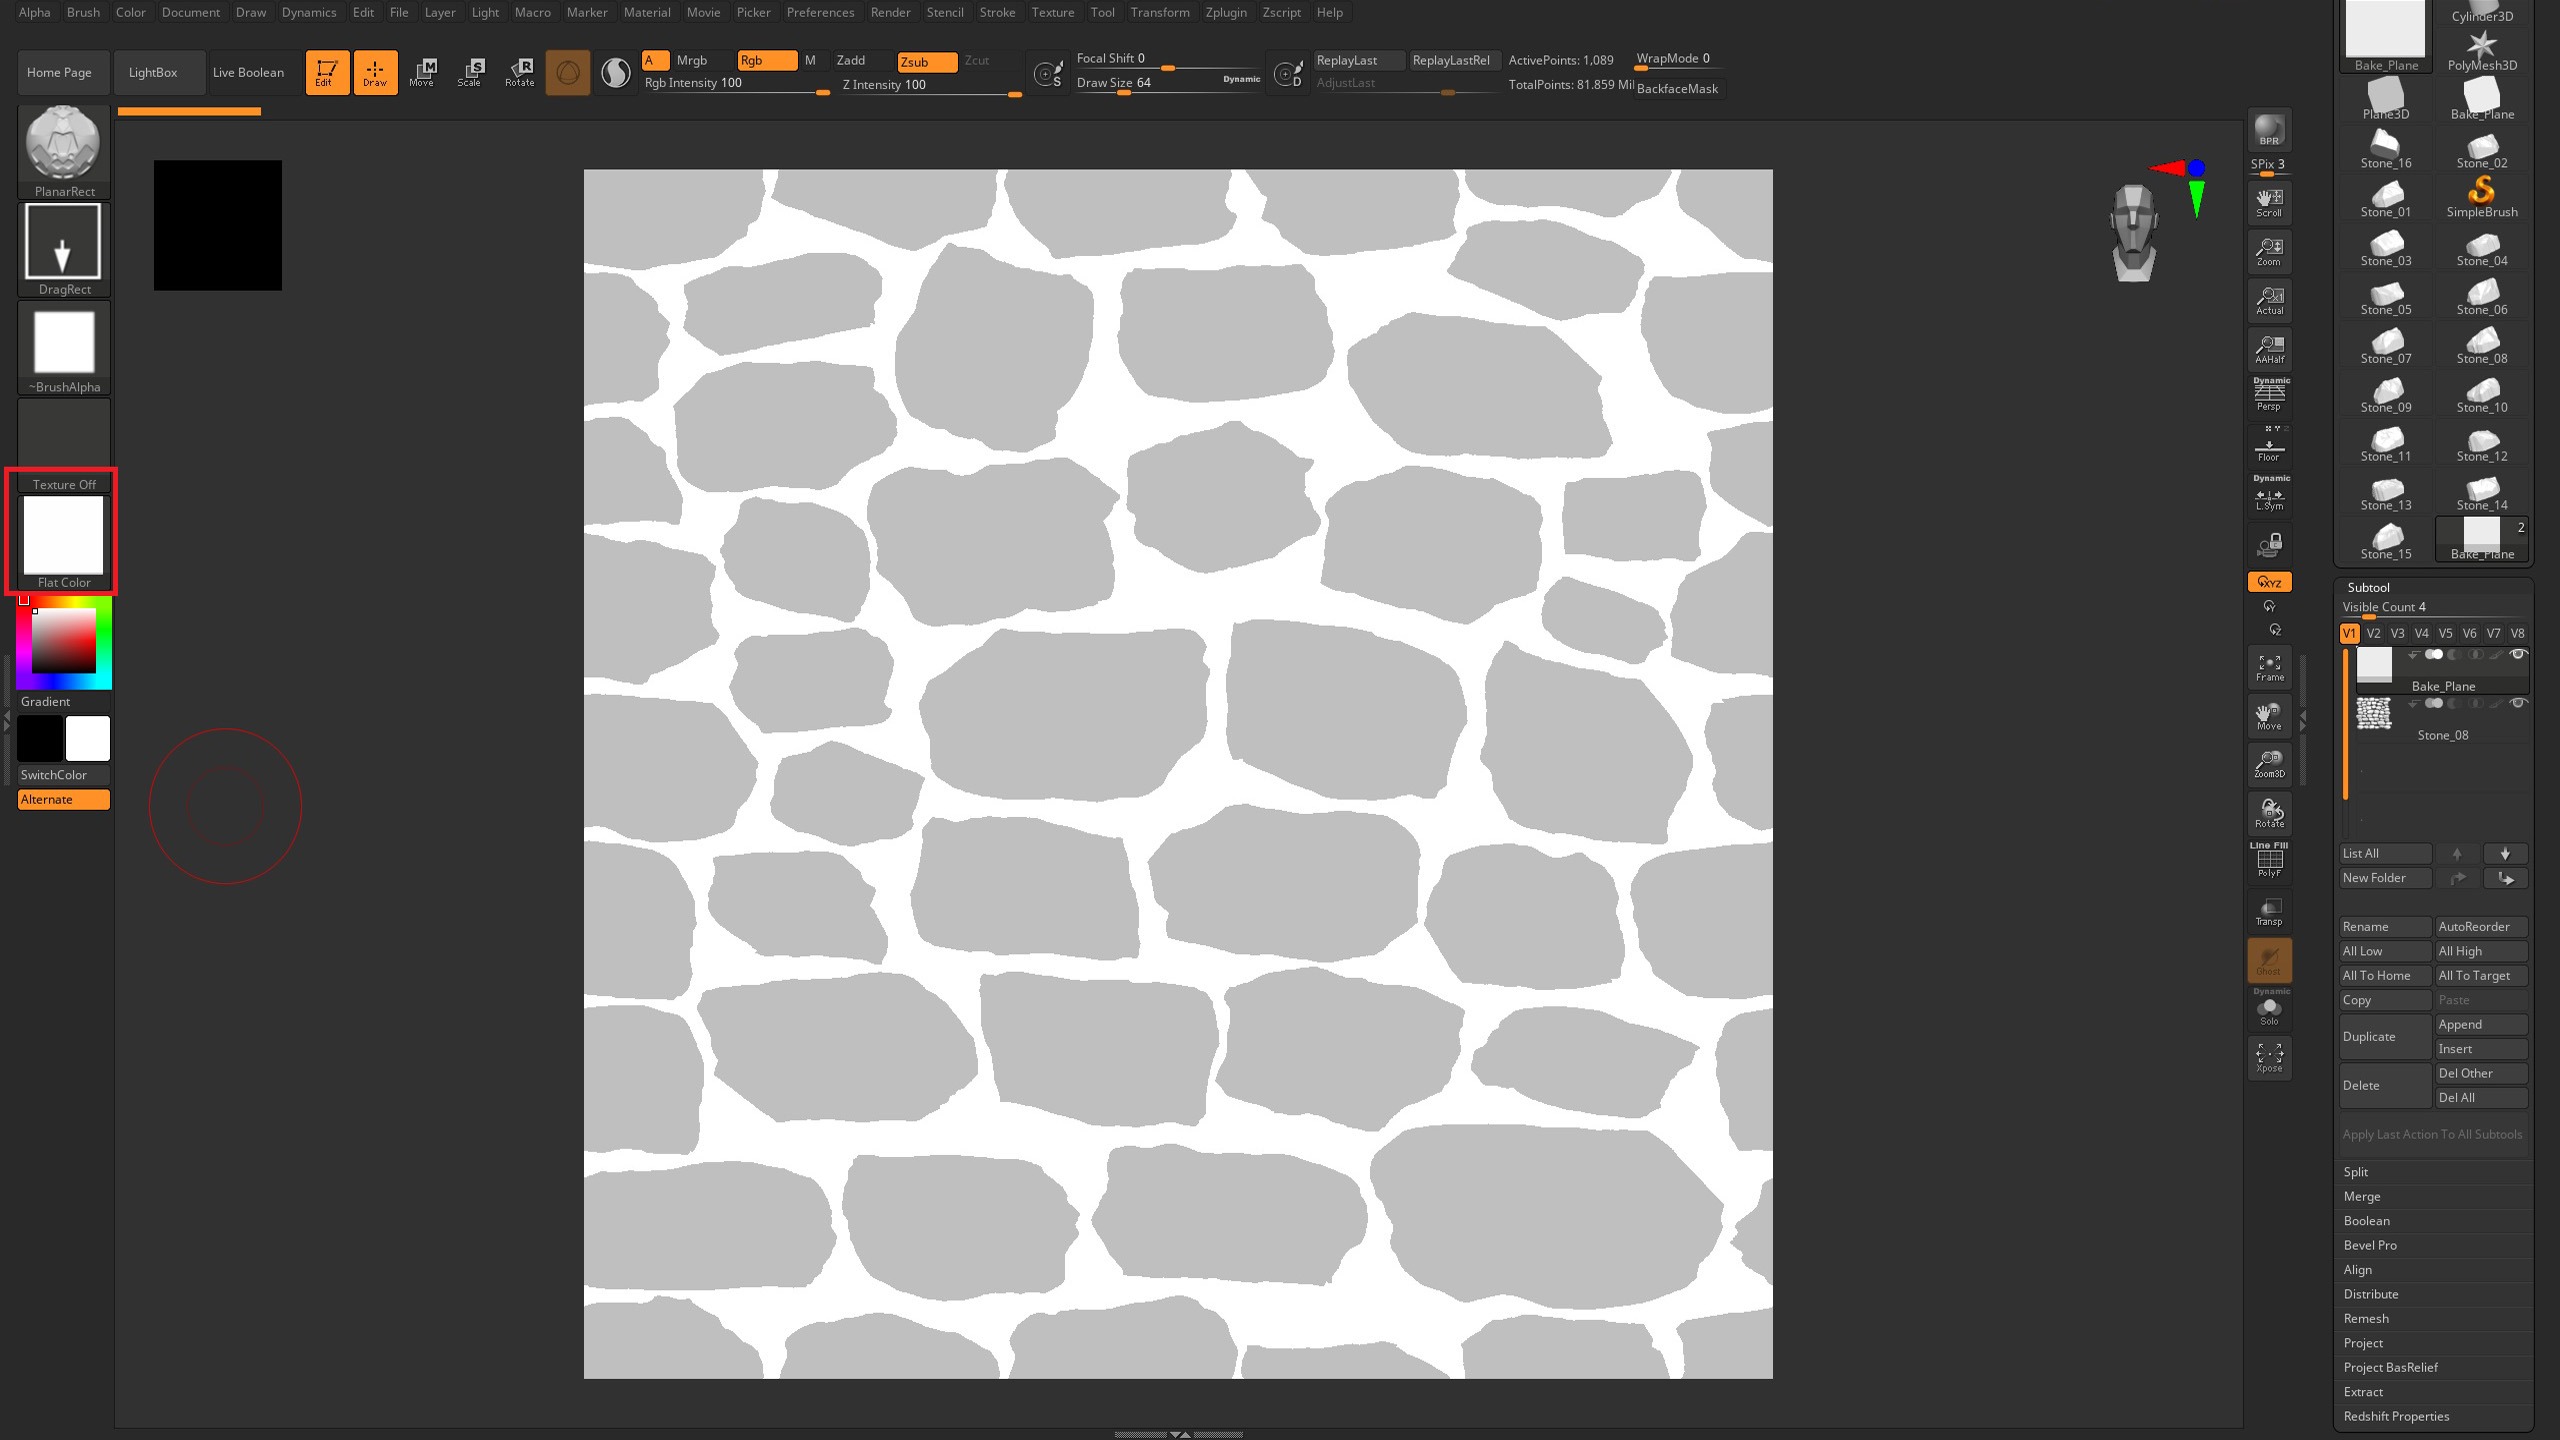
After finalizing the sculpt, I merged all the stones into a single mesh and decimated it to approximately 30 million polygons. I found that using a higher polygon count could cause Substance Designer to crash during the baking process. Finally, I created a mask that I would later use in Substance Designer.
Baking
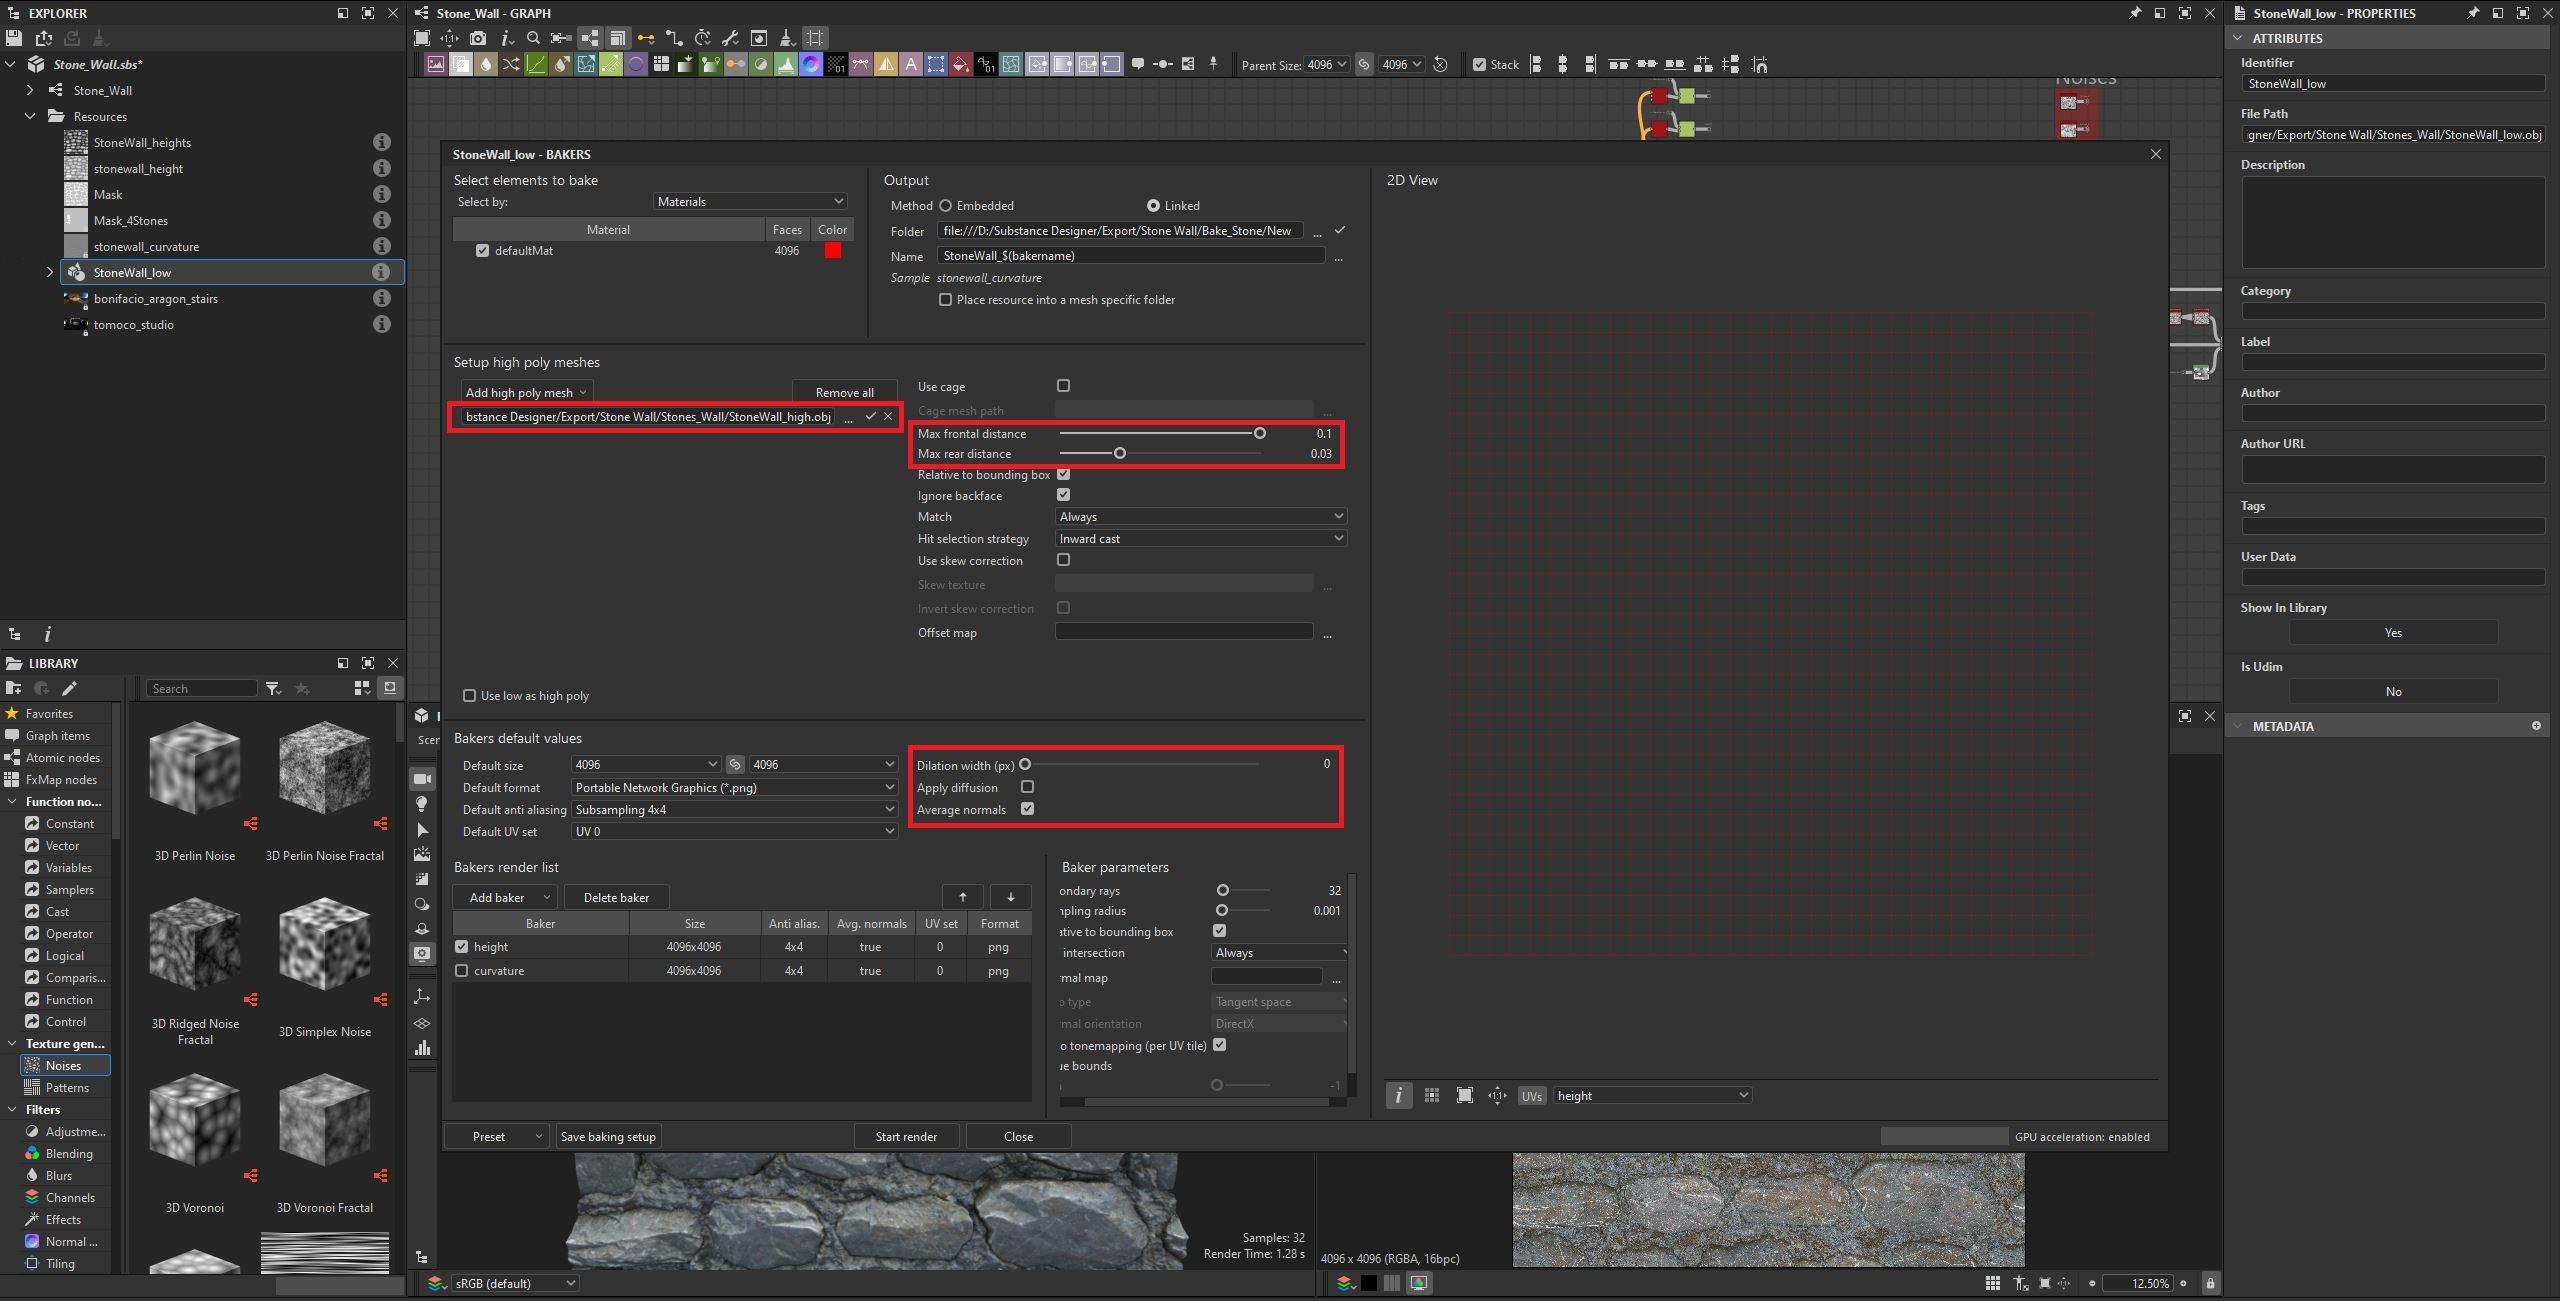
In Substance Designer, I first imported the bake plane and then right-clicked on it to select Bake Mesh Information. After that, I adjusted several settings in the Bakers window and prepared the mesh for baking.
For this project, I only baked the height map, as I prefer to generate the normal and ambient occlusion (AO) maps directly from the height information later in the graph.
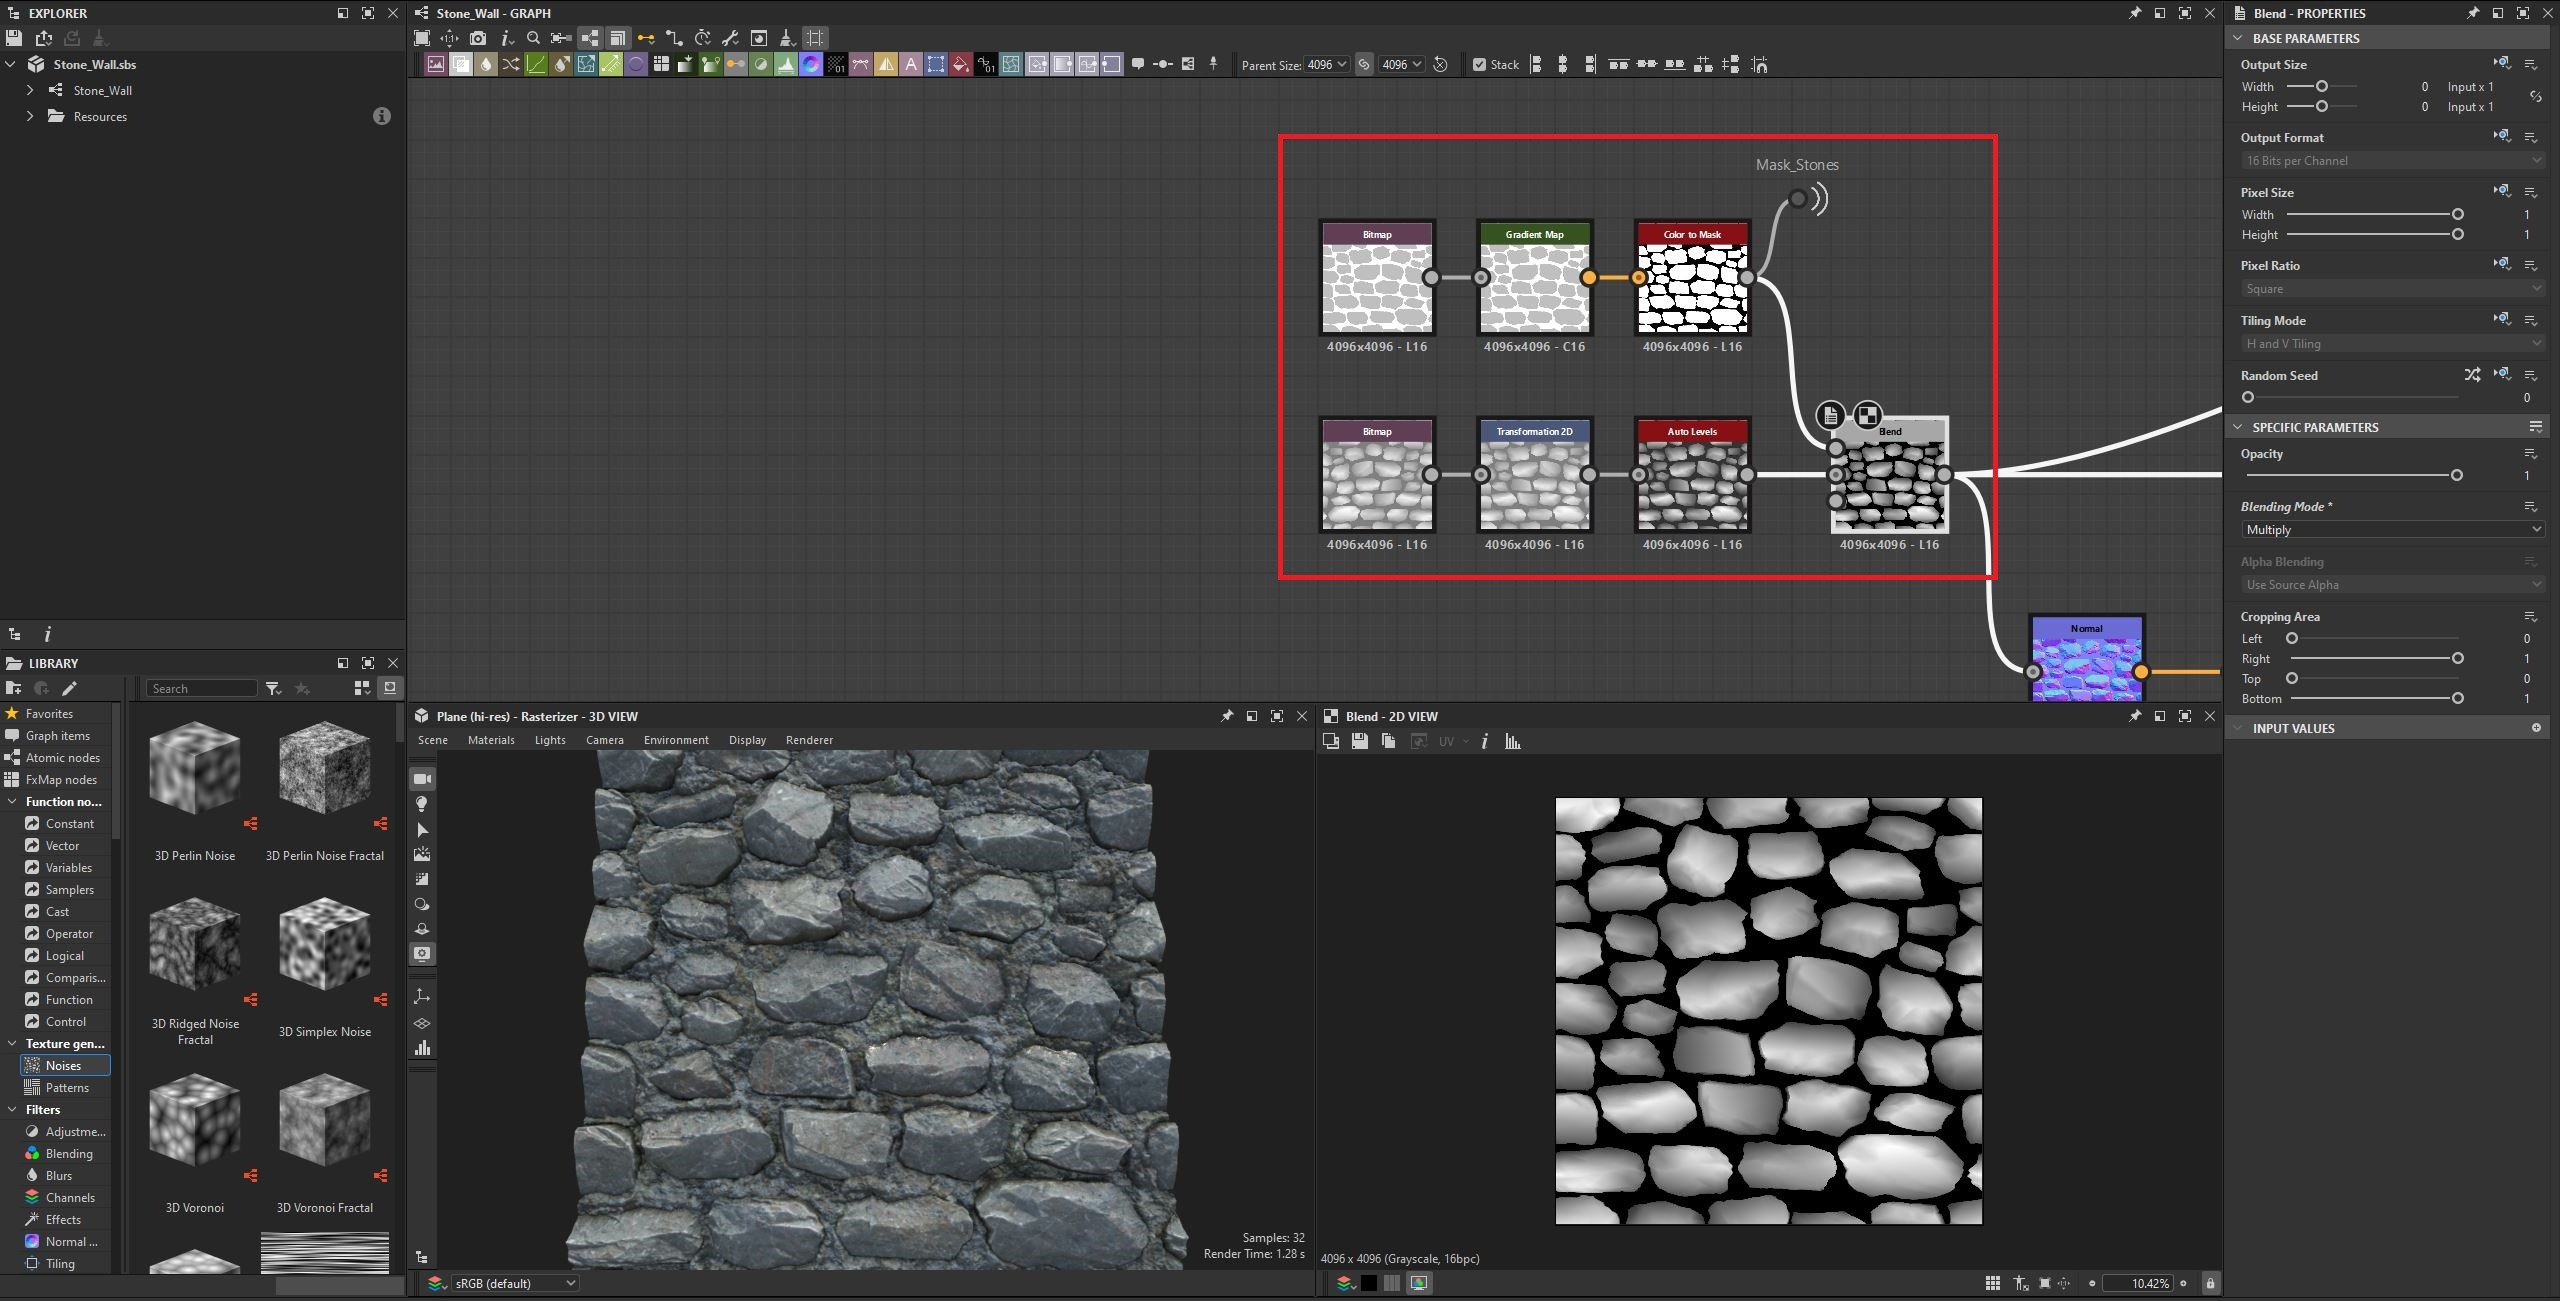
After baking, I noticed some unwanted mortar appearing between the stones due to ray projection artifacts. To resolve this, I multiplied the baked height map by the stone mask. This effectively removed the artificial mortar while maintaining the original stone shapes and silhouettes.
Graph
After correcting the baked height map, I configured the output using real-world dimensions. I set the Surface Size to 200 cm and the Height Depth to 18 cm, which helped establish the final scale of the material.
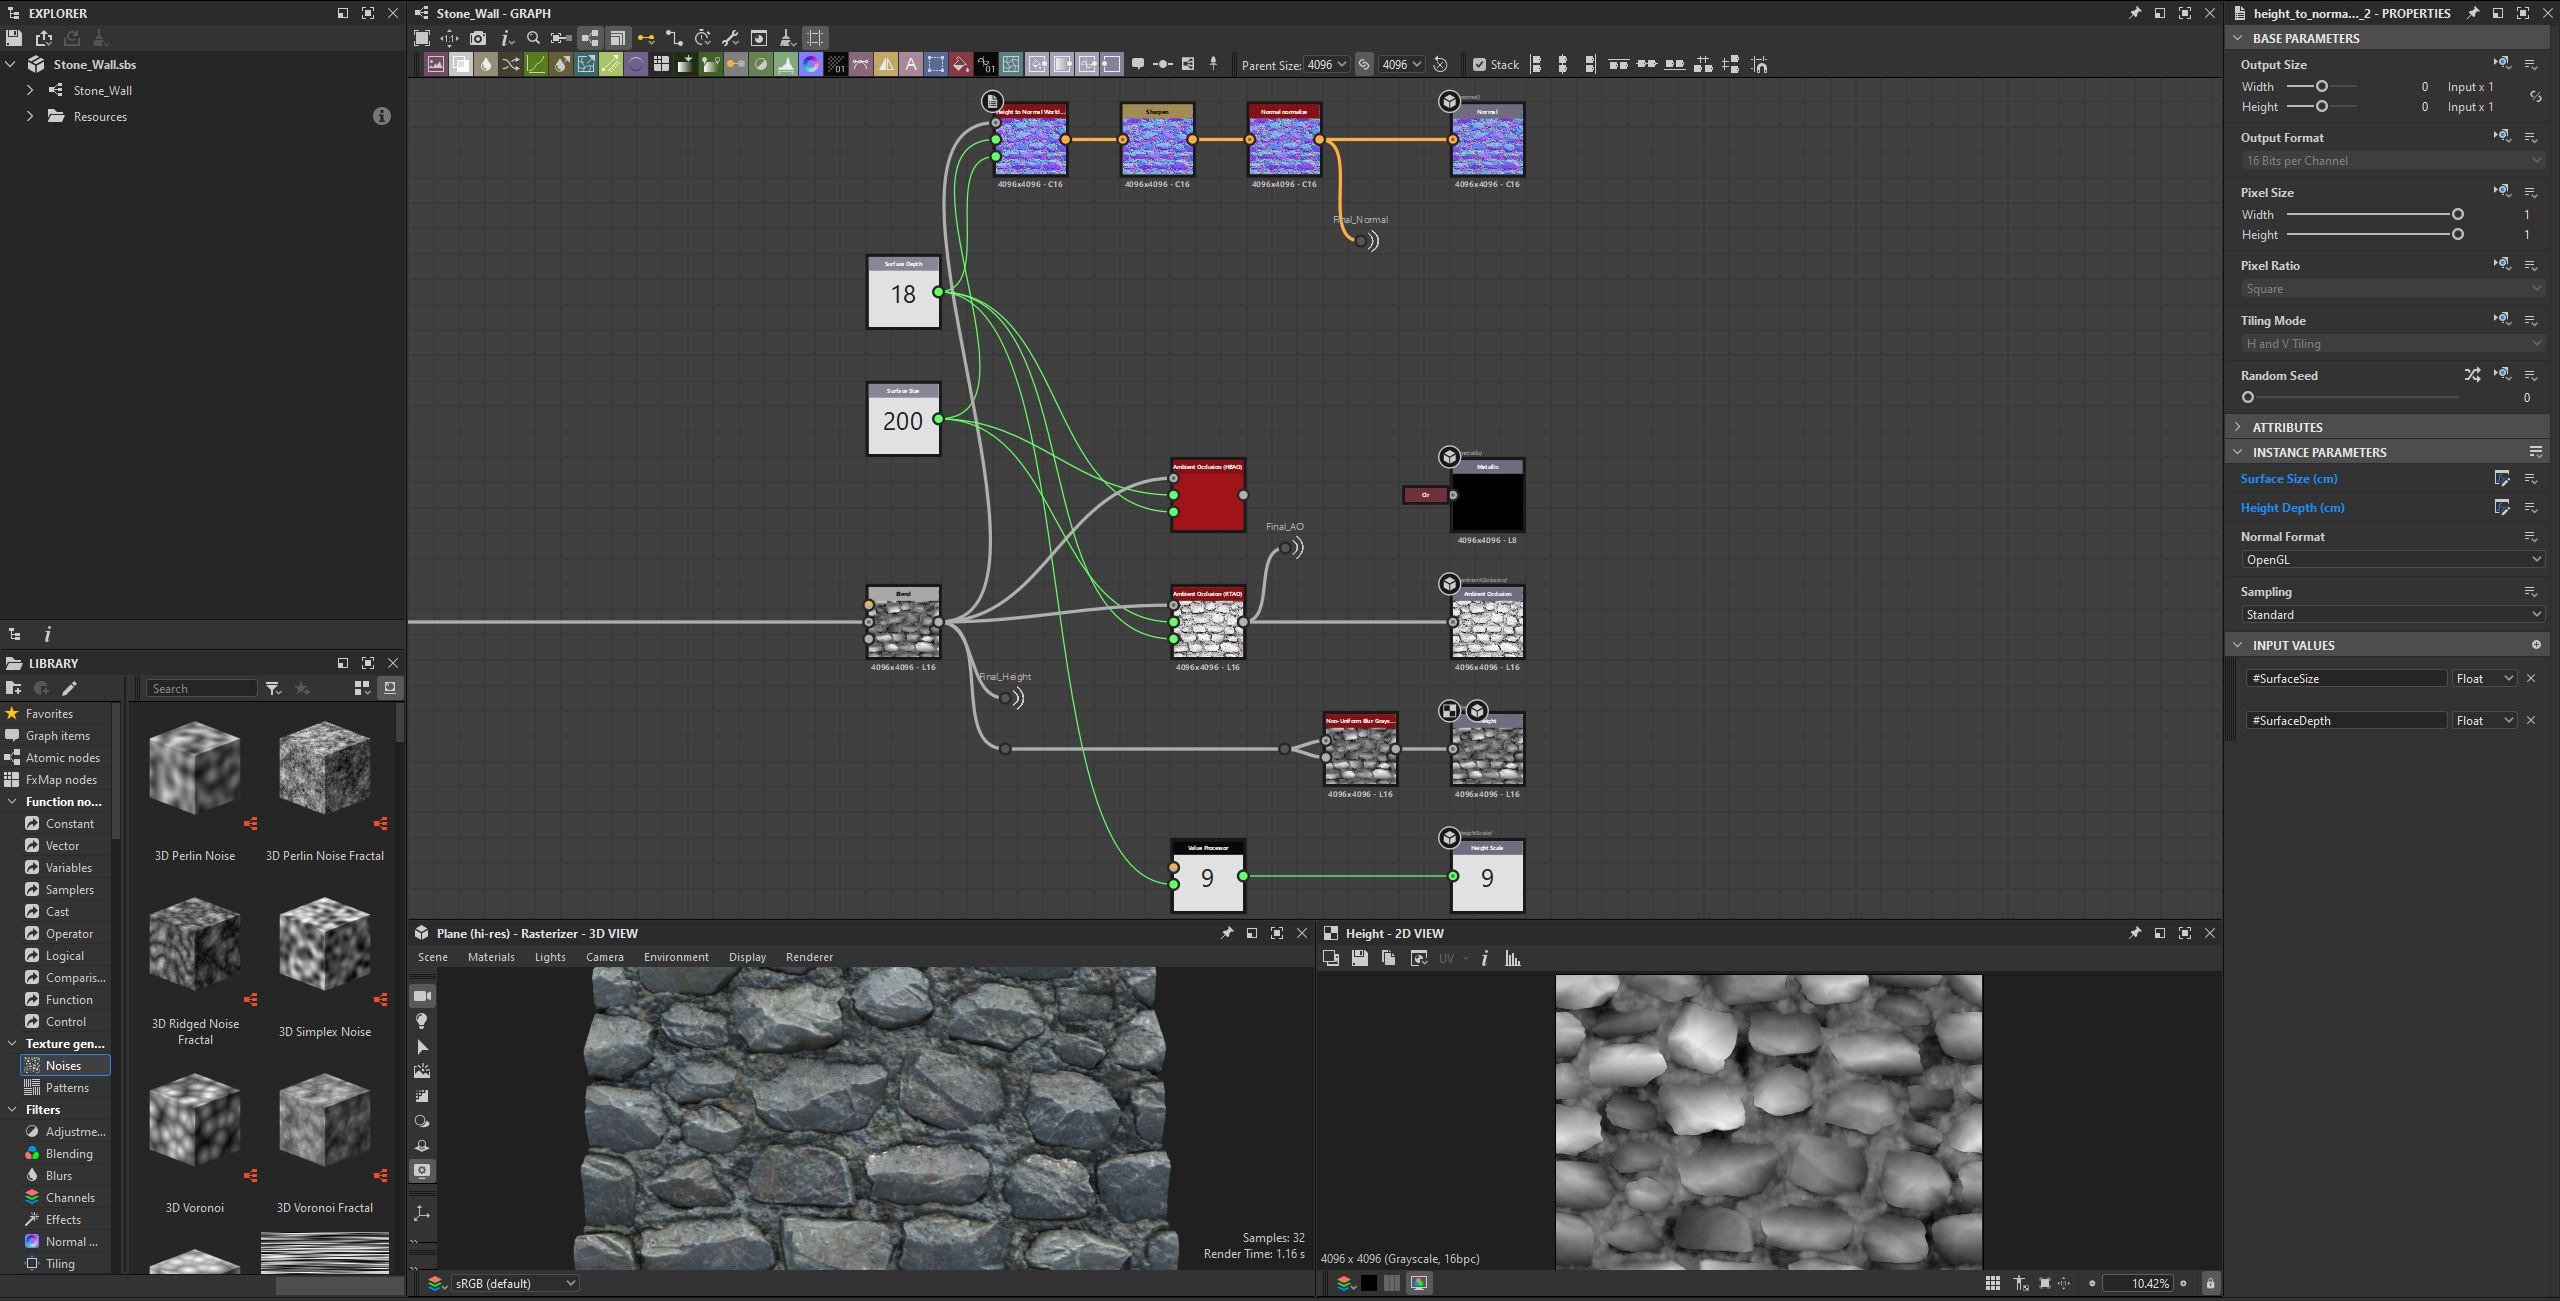
Once I was happy with the output setup, I returned to the baked height map and began refining it. The first step was to sharpen the stones, as some of the details appeared slightly blurry after baking. Next, I fixed the torn edges using a Non-Uniform Blur Grayscale node.
To address the straight lines that were still visible on some stones, I used a Non-Uniform Directional Warp node. After that, I applied several additional adjustments and noise passes to enrich the stone surface. At each stage, I tried to introduce unique shapes and patterns to make the stones feel more natural and varied.
Note: MVG, which you can see in the sliders, stands for Multi Value Grayscale and is driven by a Flood Fill node.
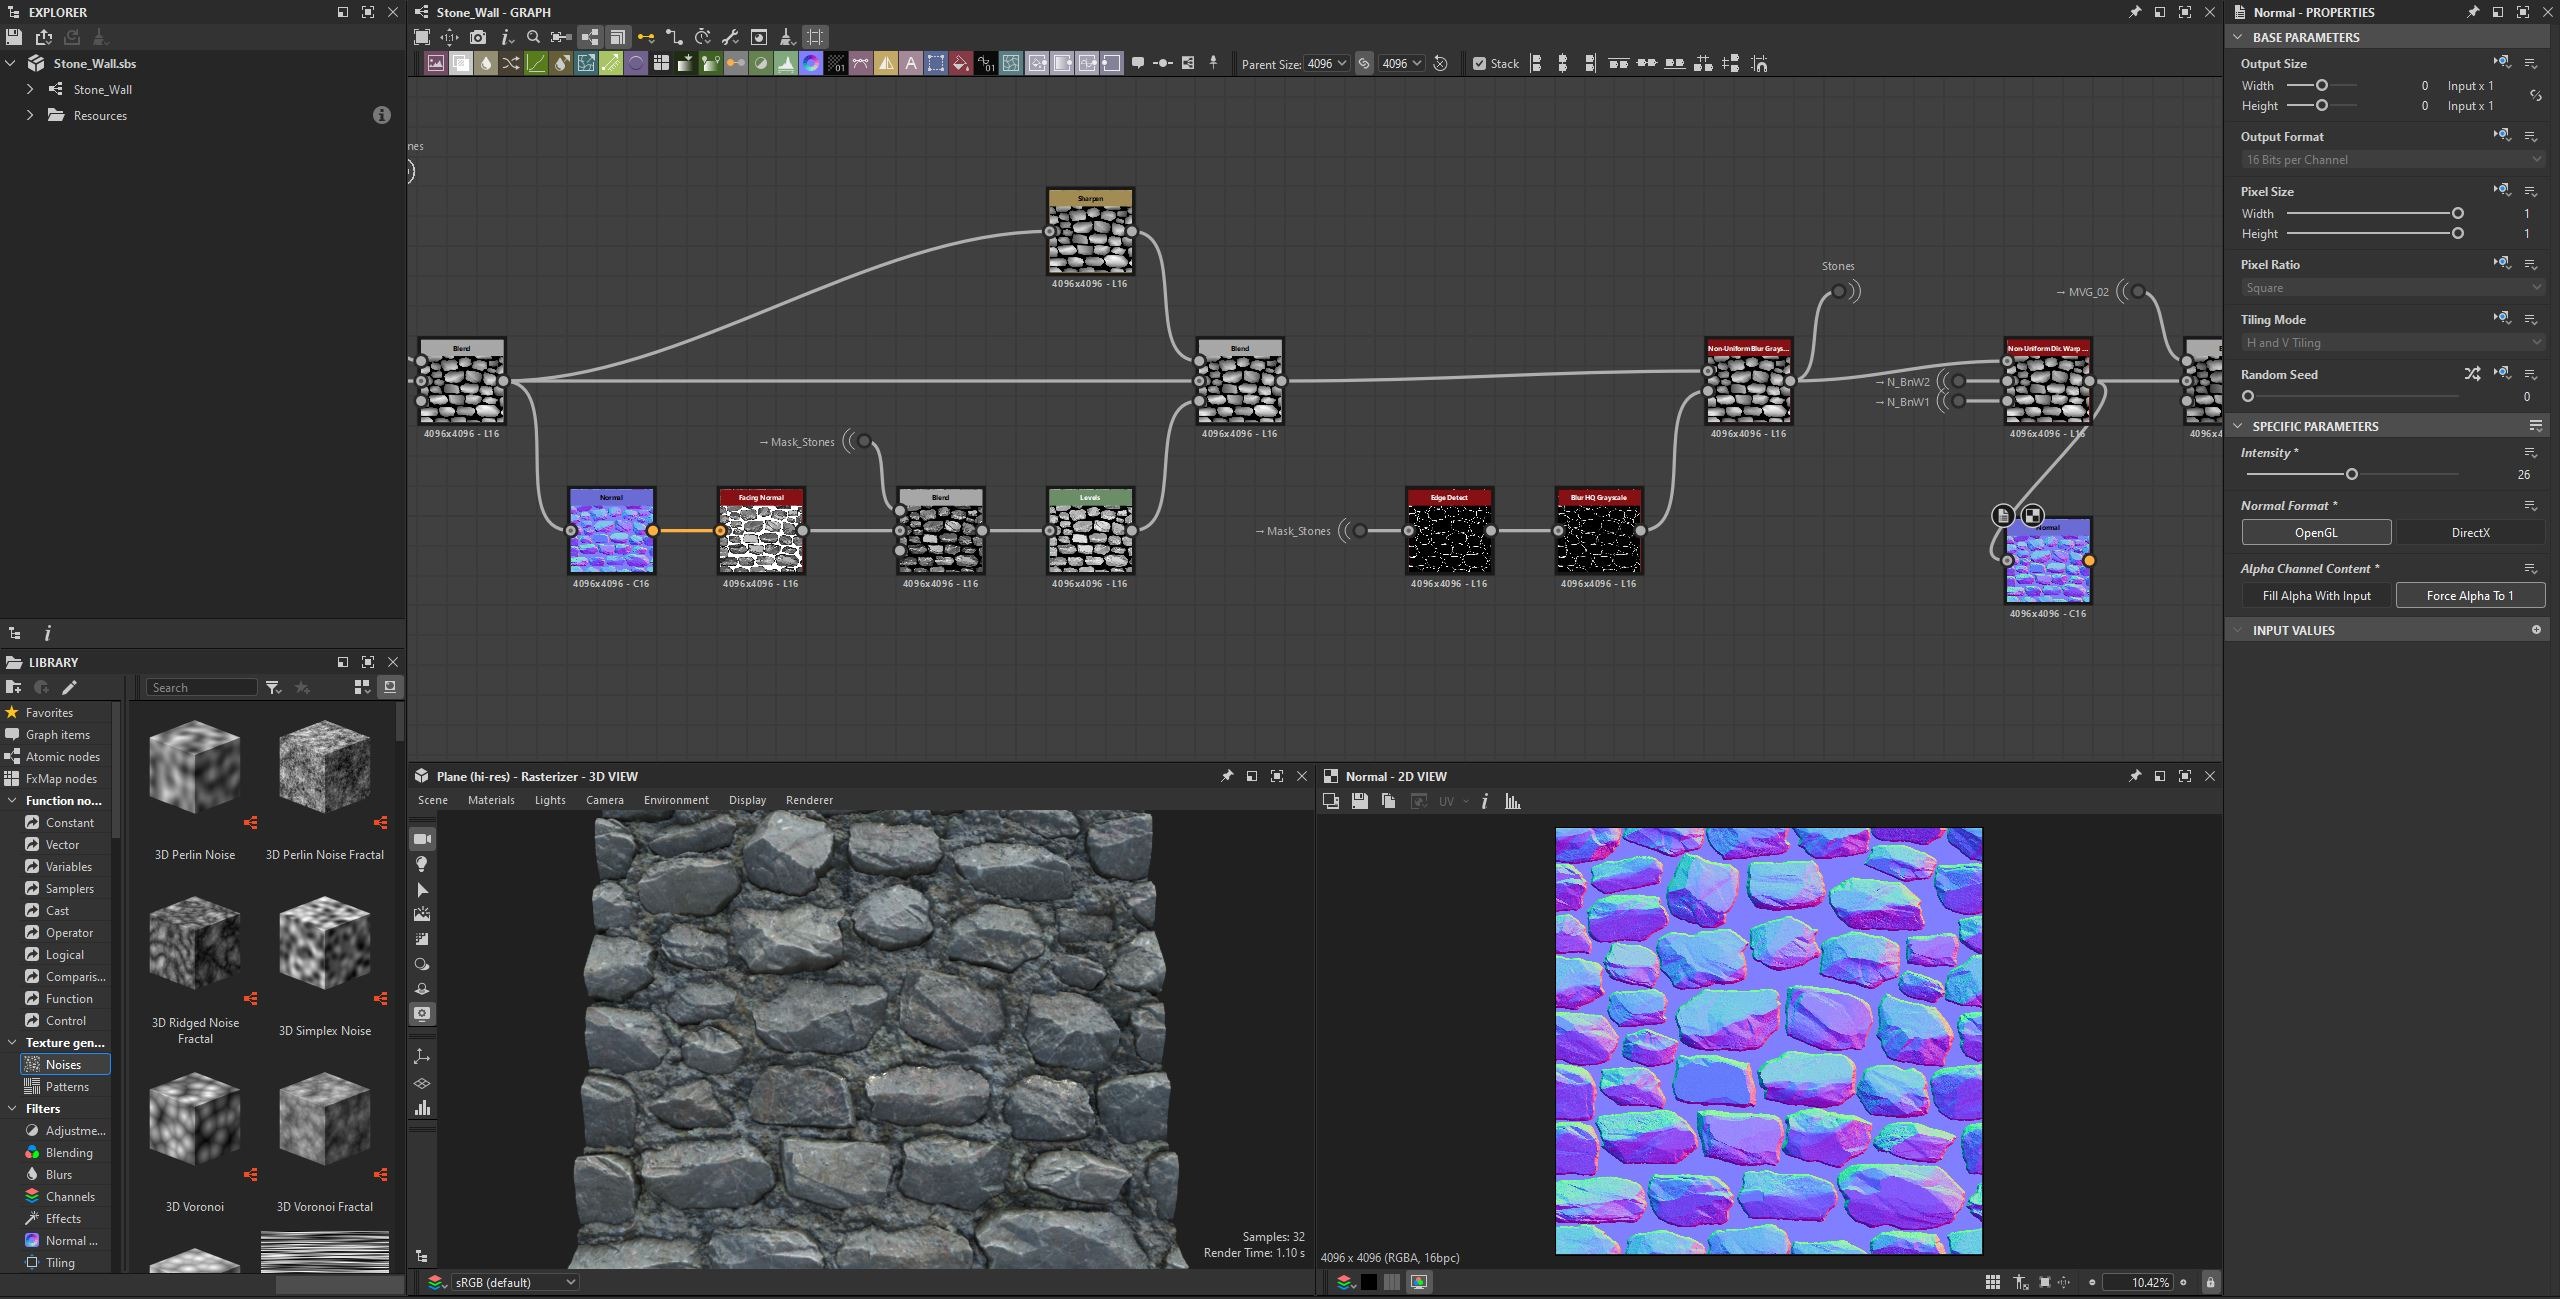
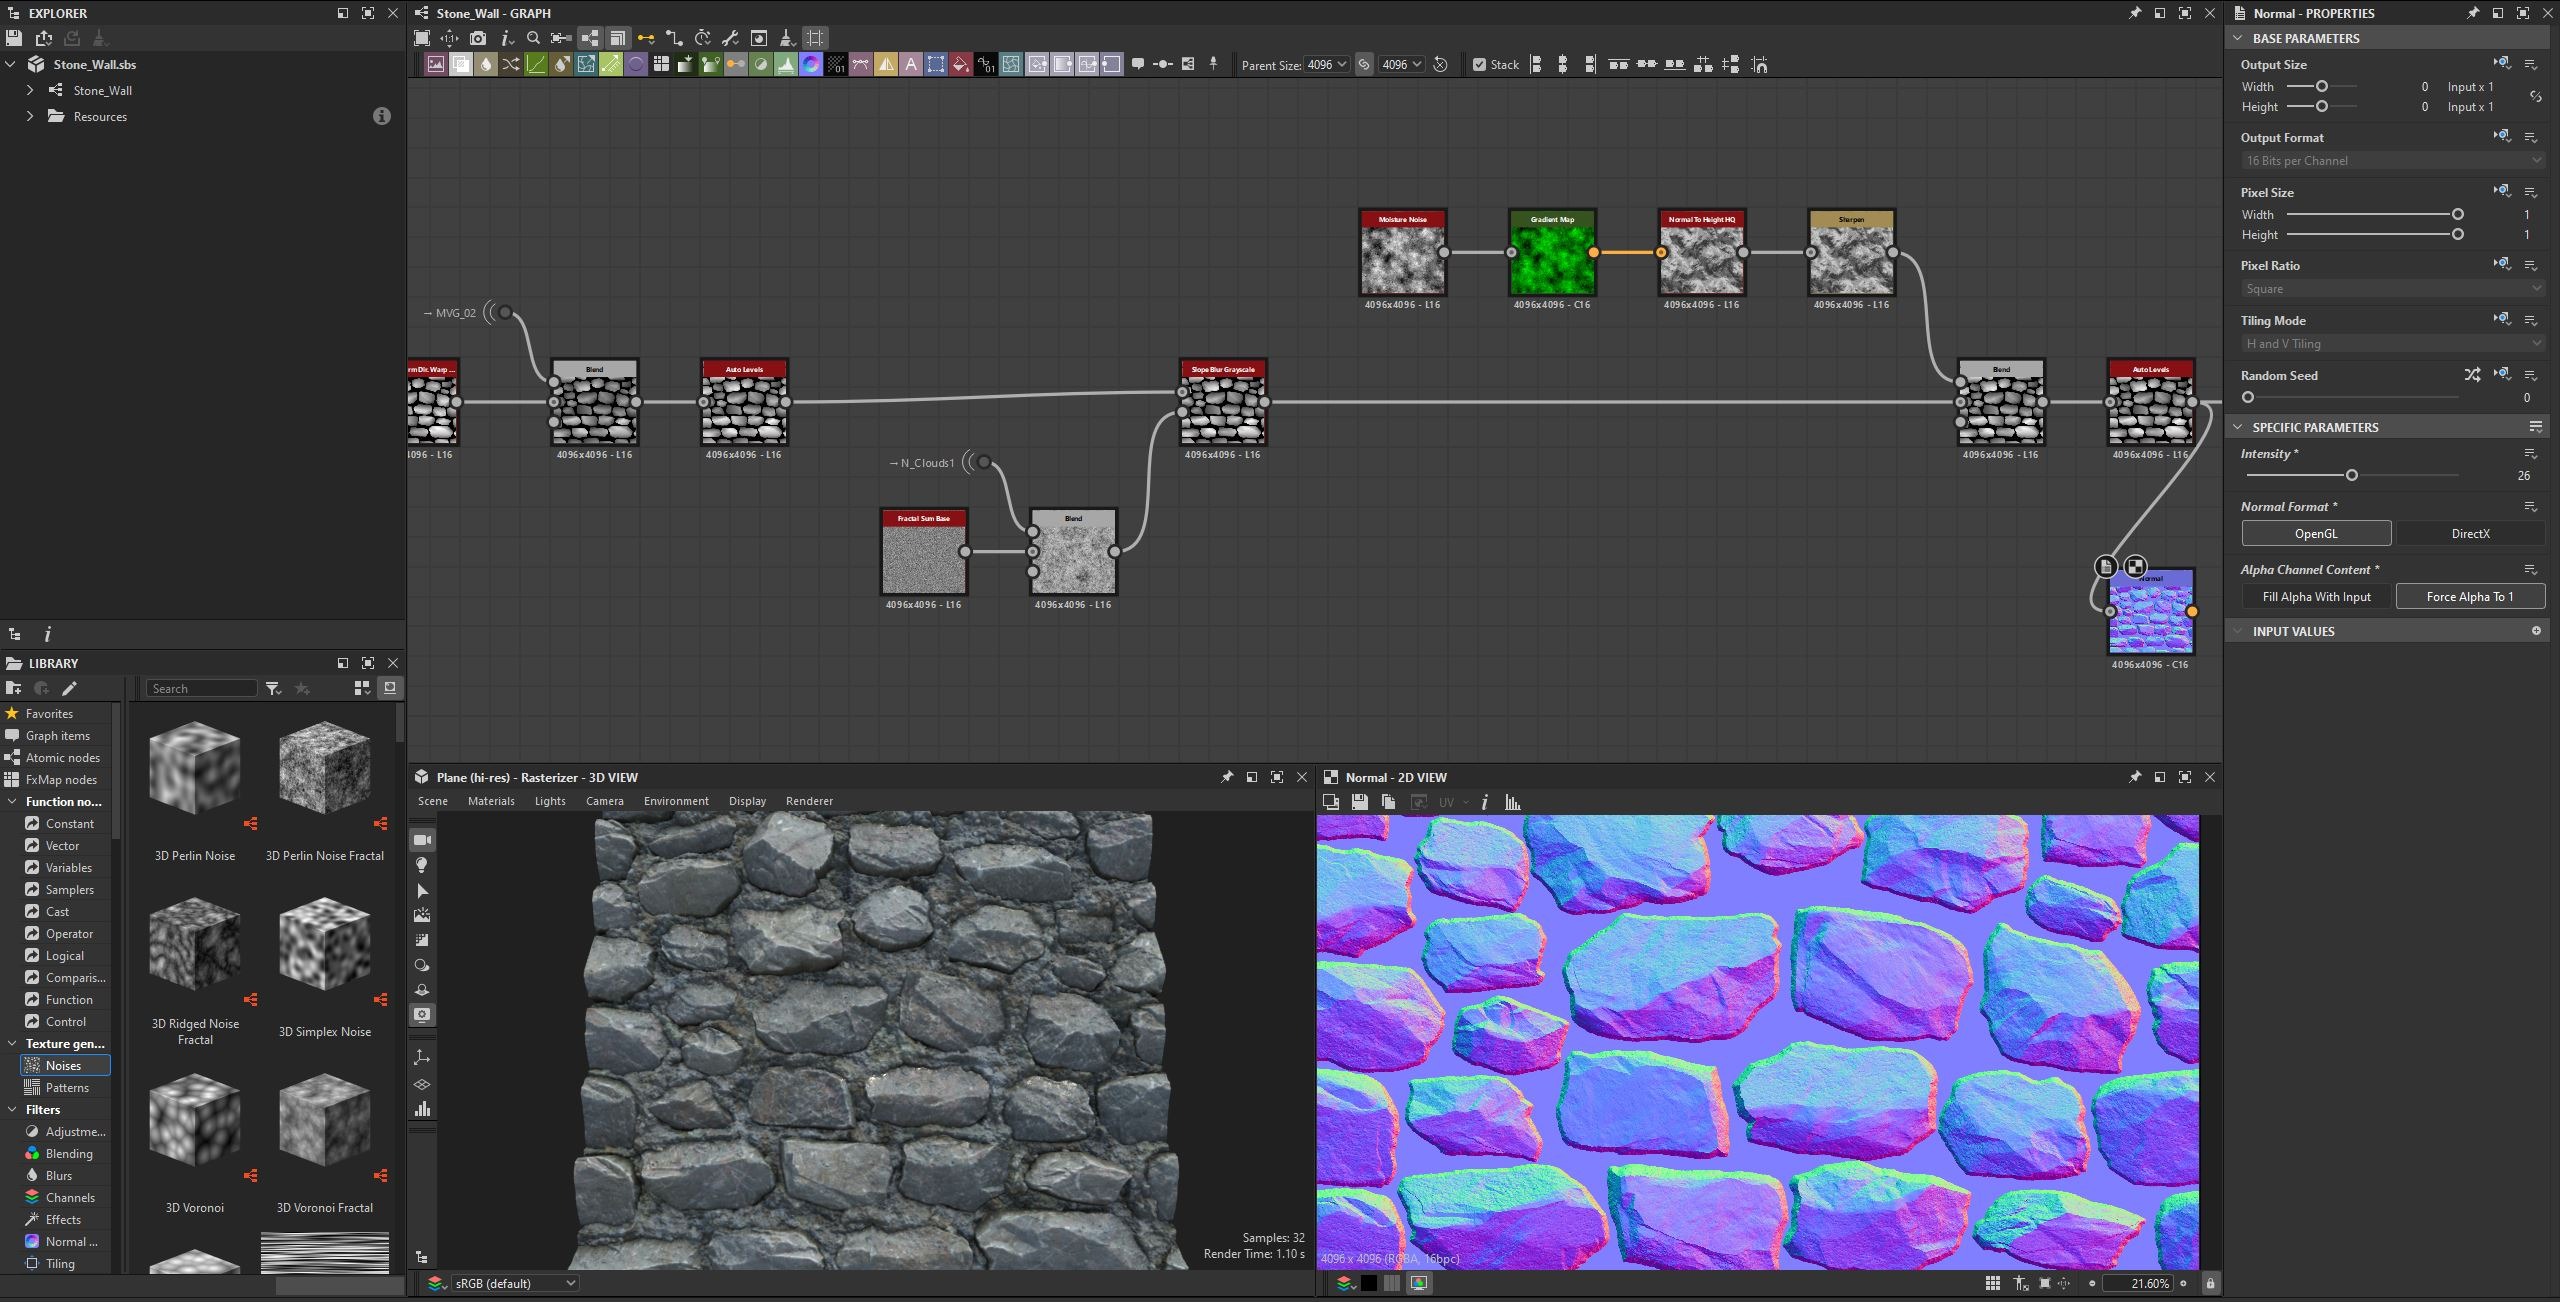
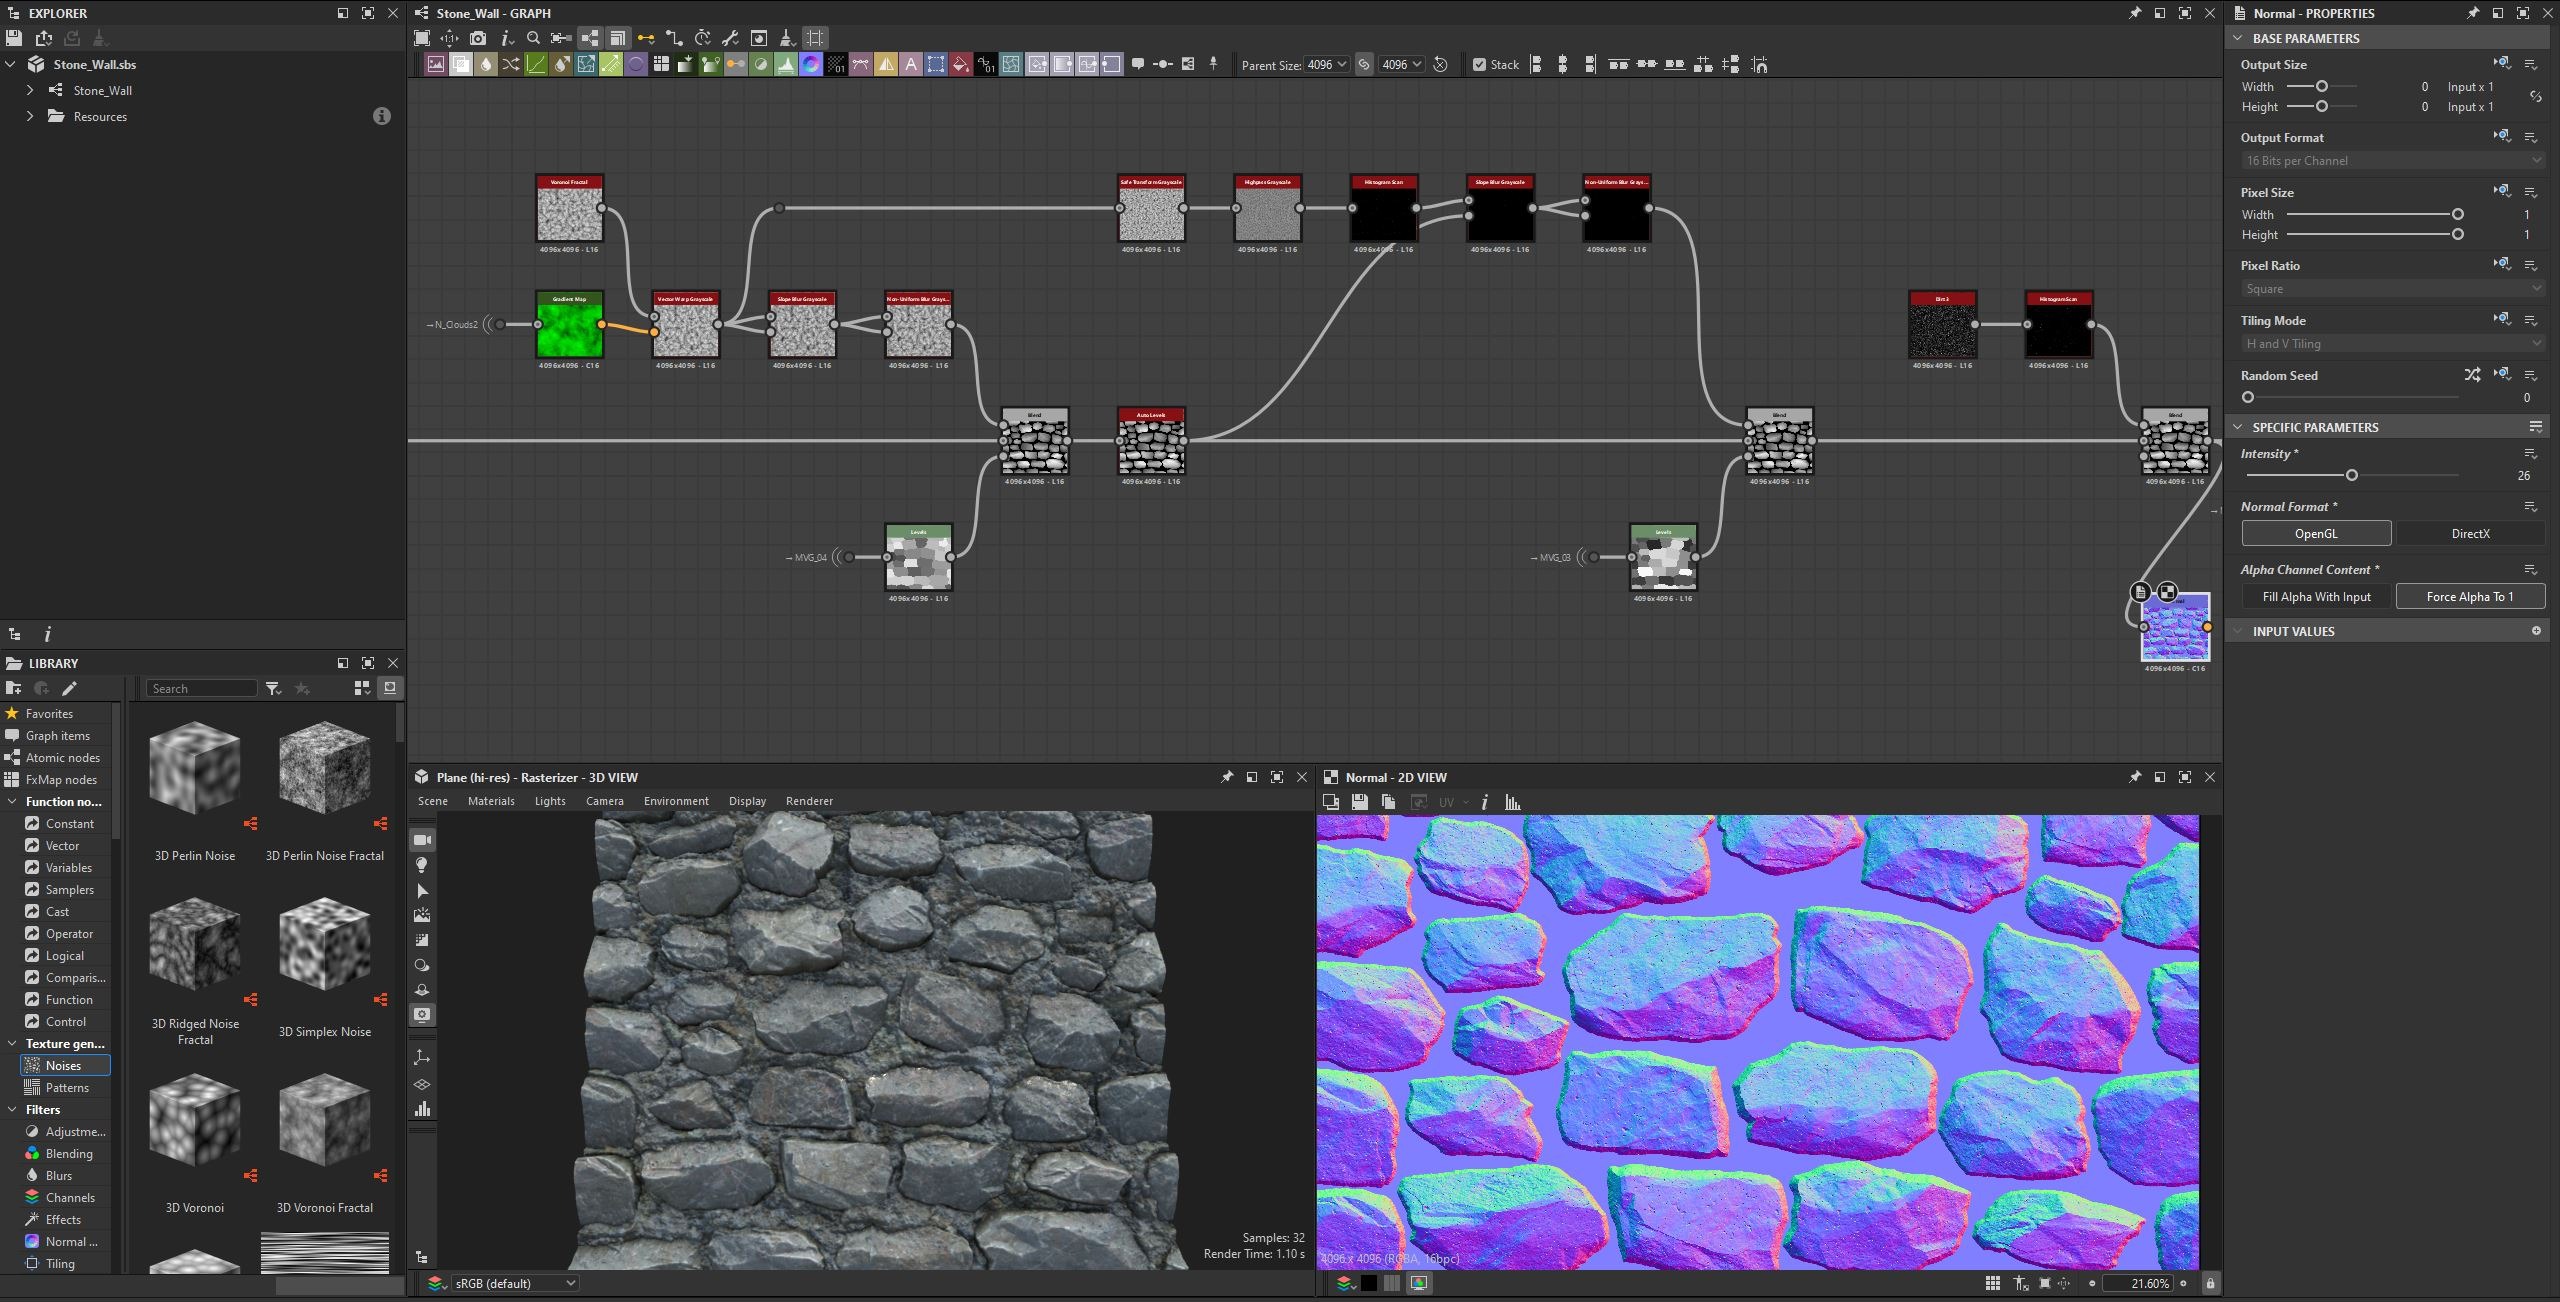
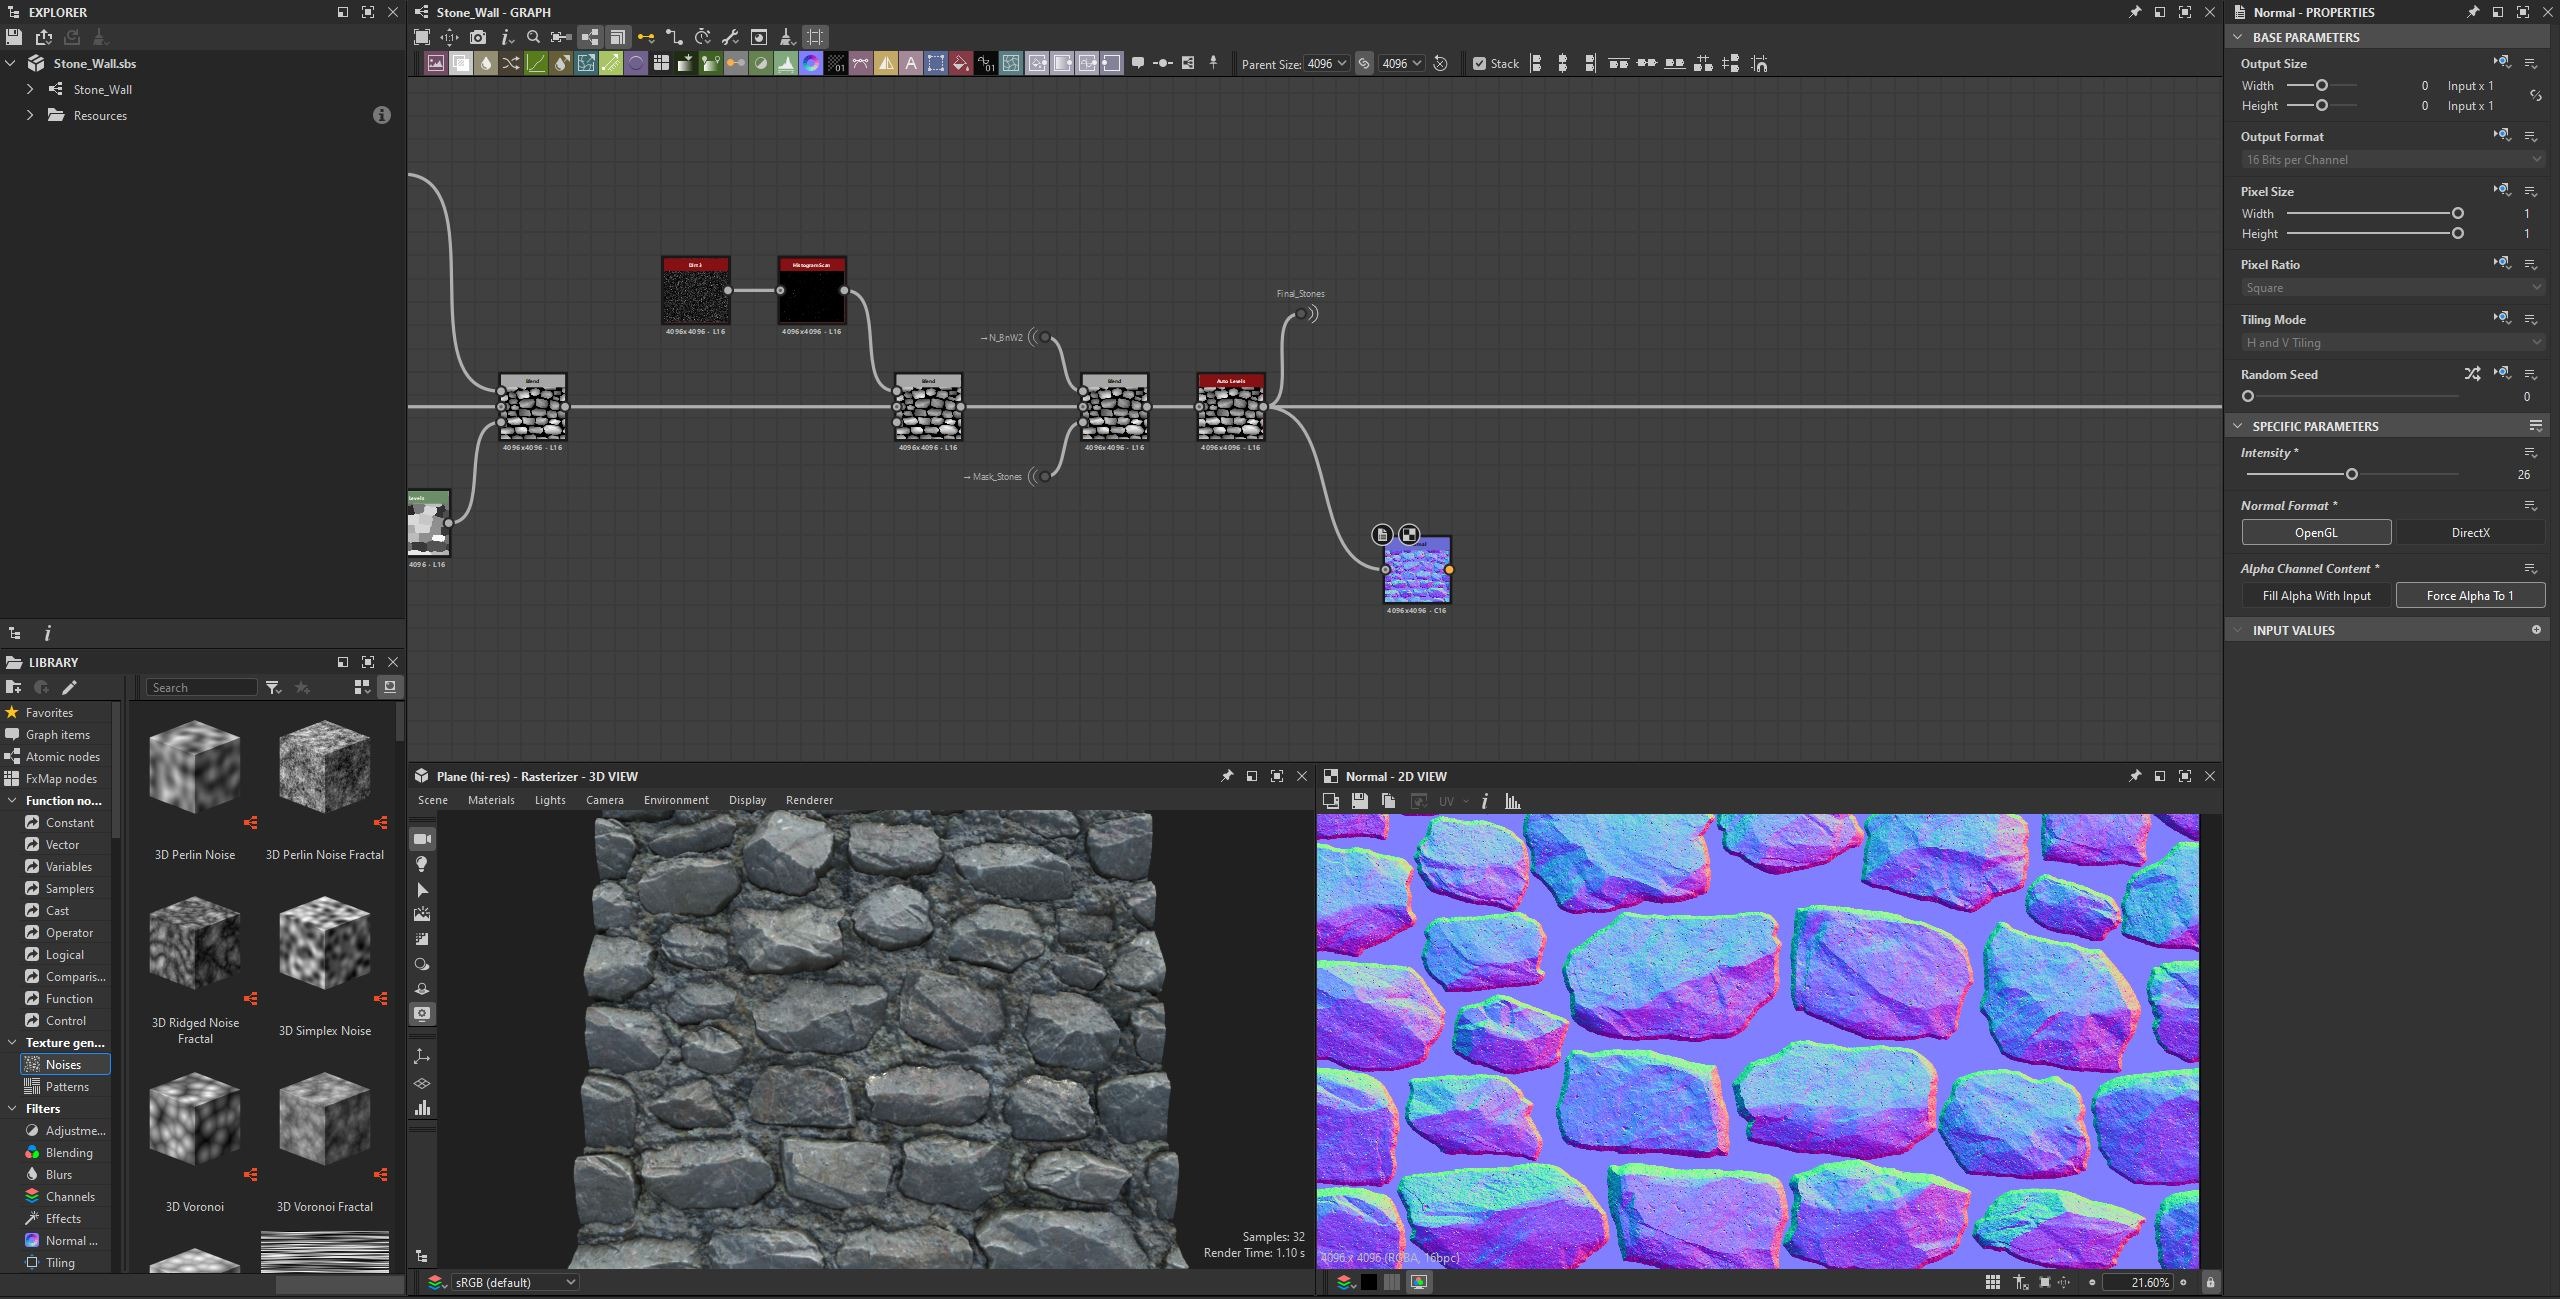
After completing the stones, it was time to create the mortar. First, I inverted the stone mask and then made it slightly larger using an Edge Detect node. Here, I wanted to add a sense of gravity to the mortar, so I used a Non-Uniform Blur to achieve that effect. After that, I blended the result with Moisture Noise to add more variation.
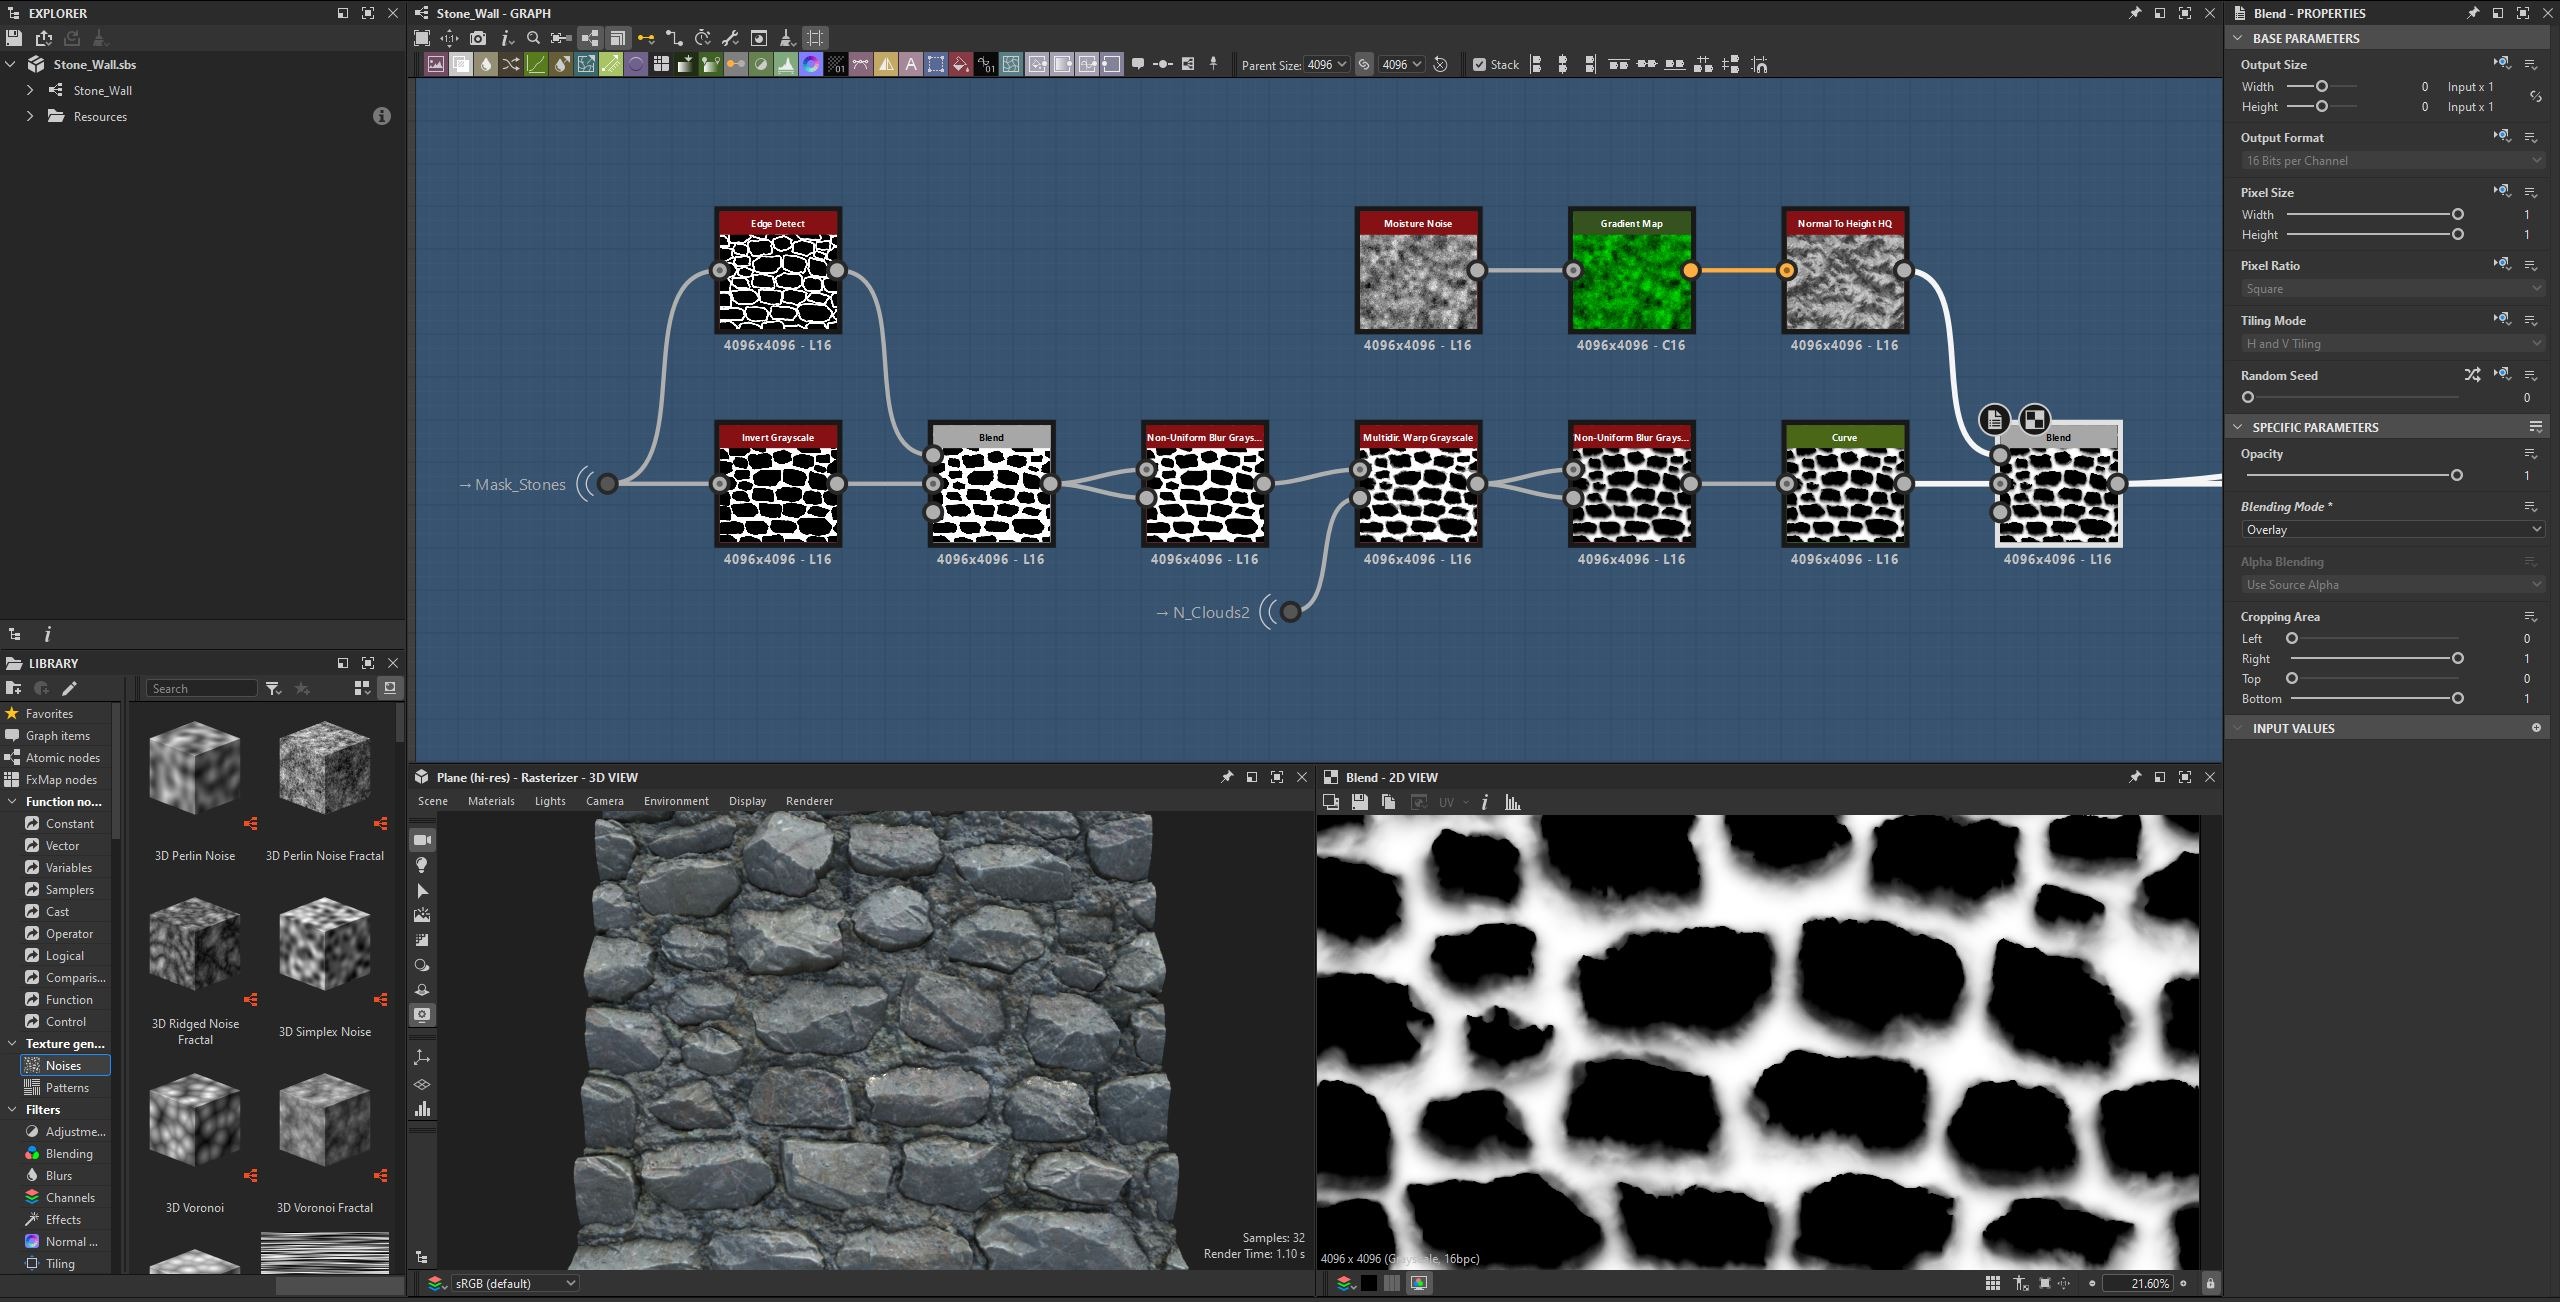
After this stage, I wanted to add more variation to the mortar.
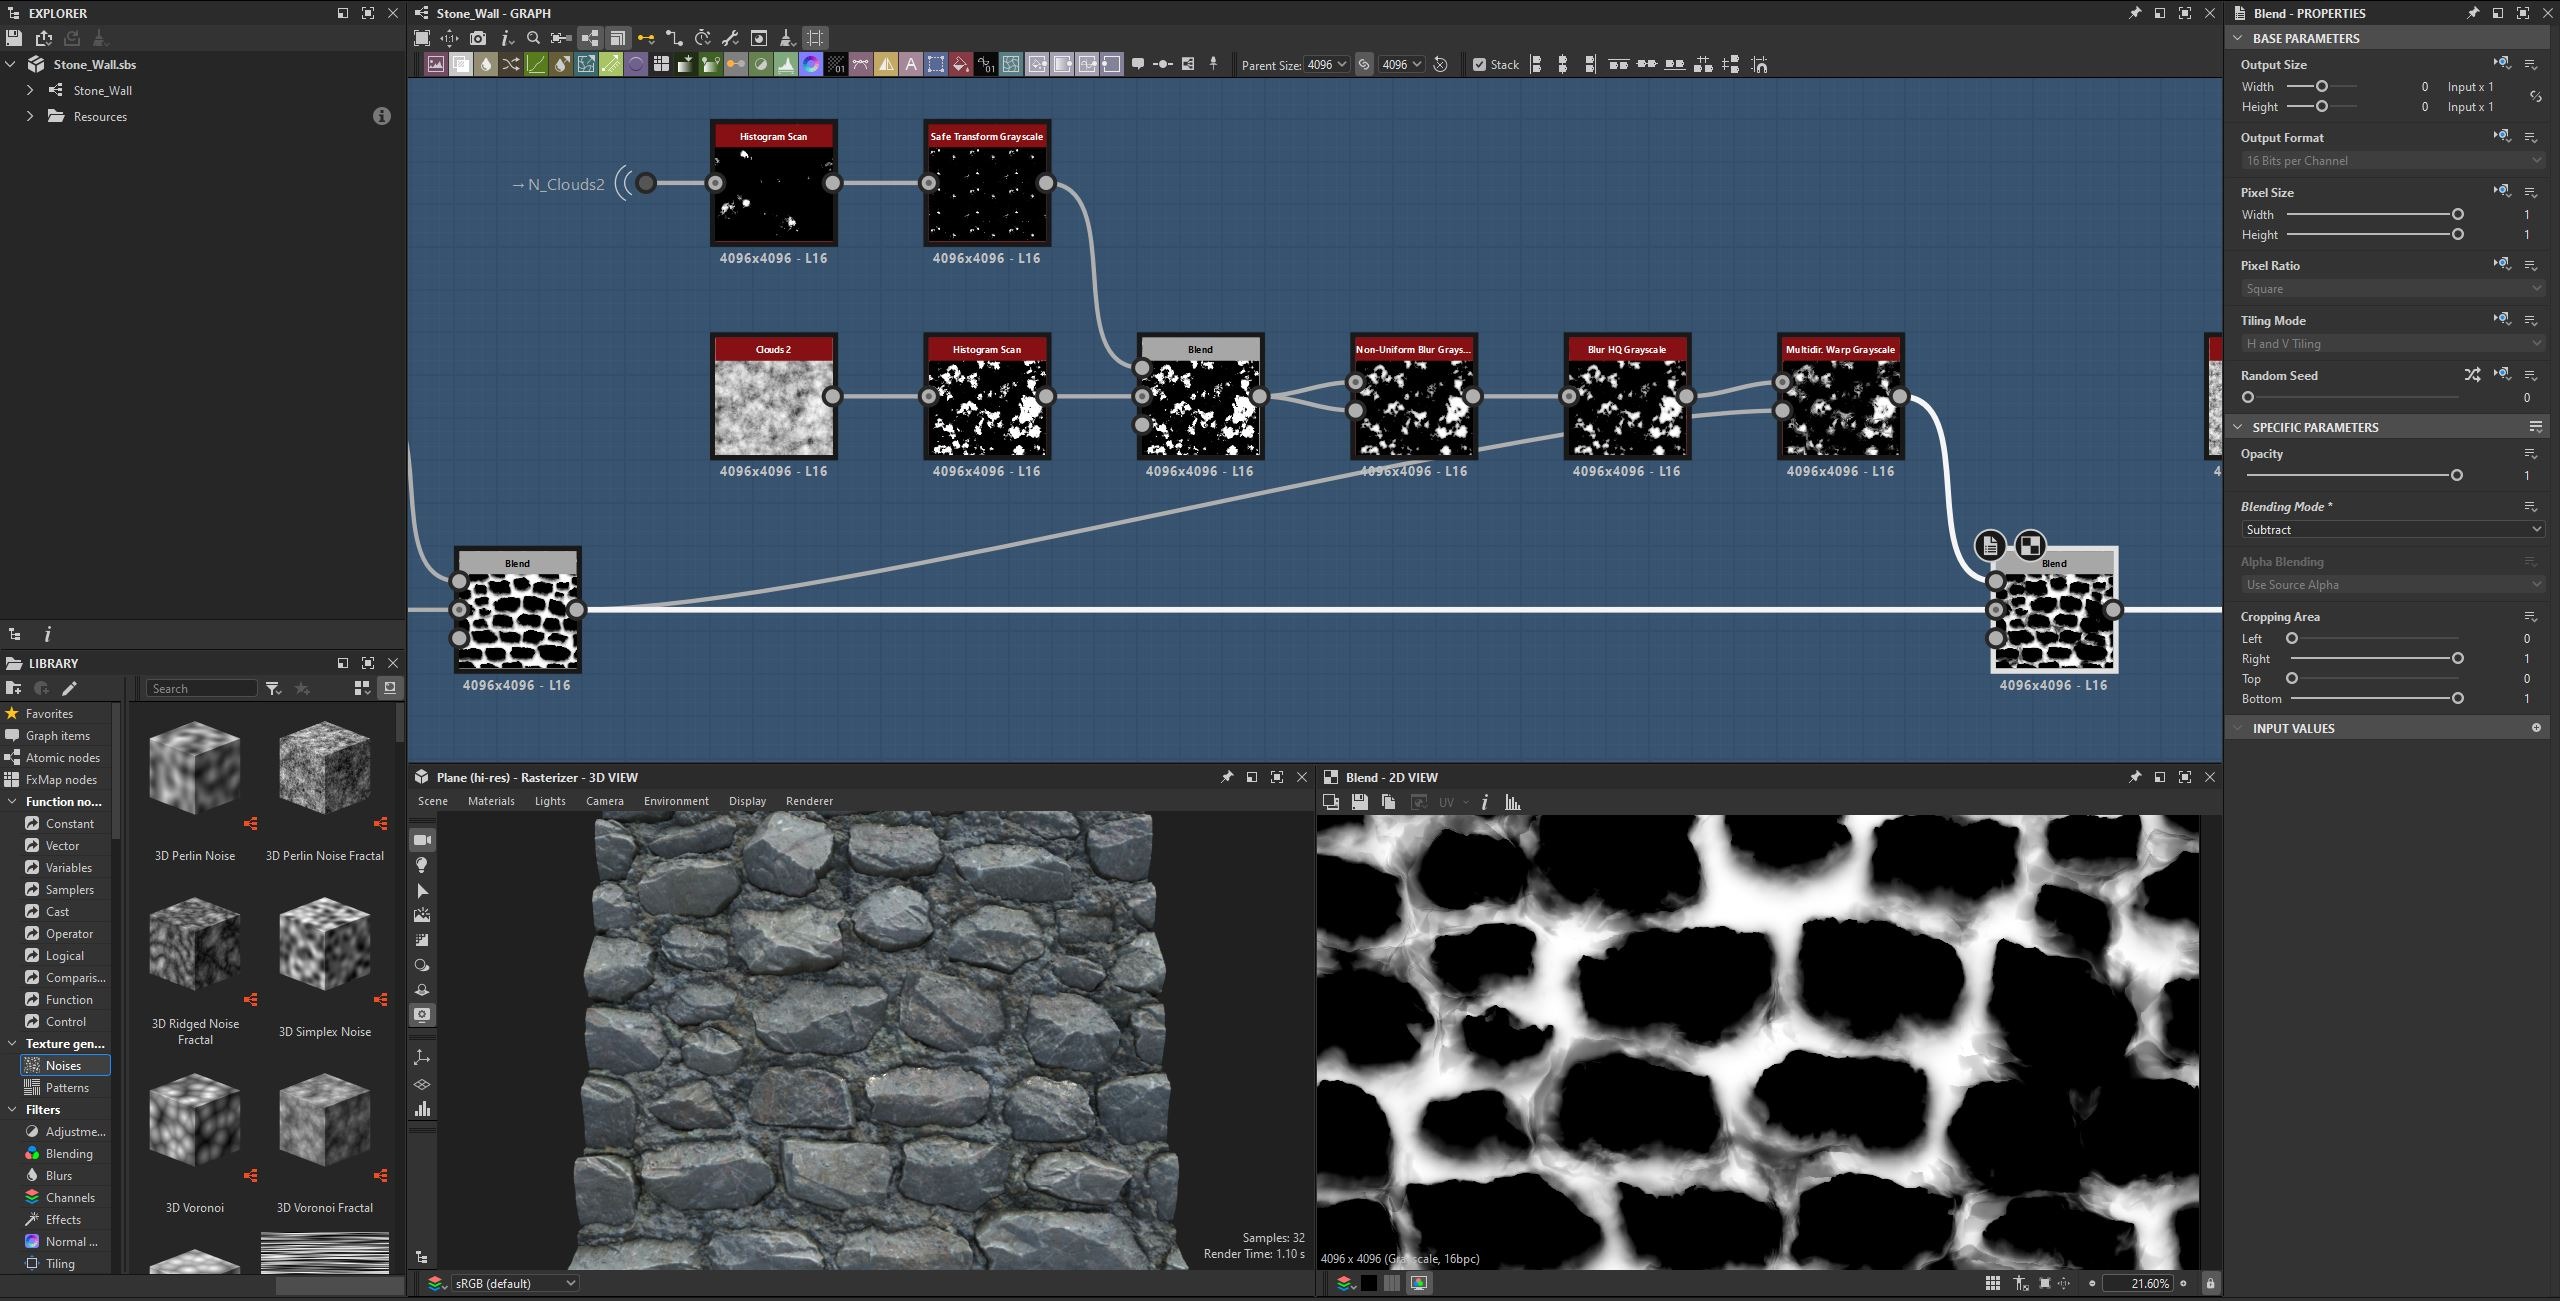
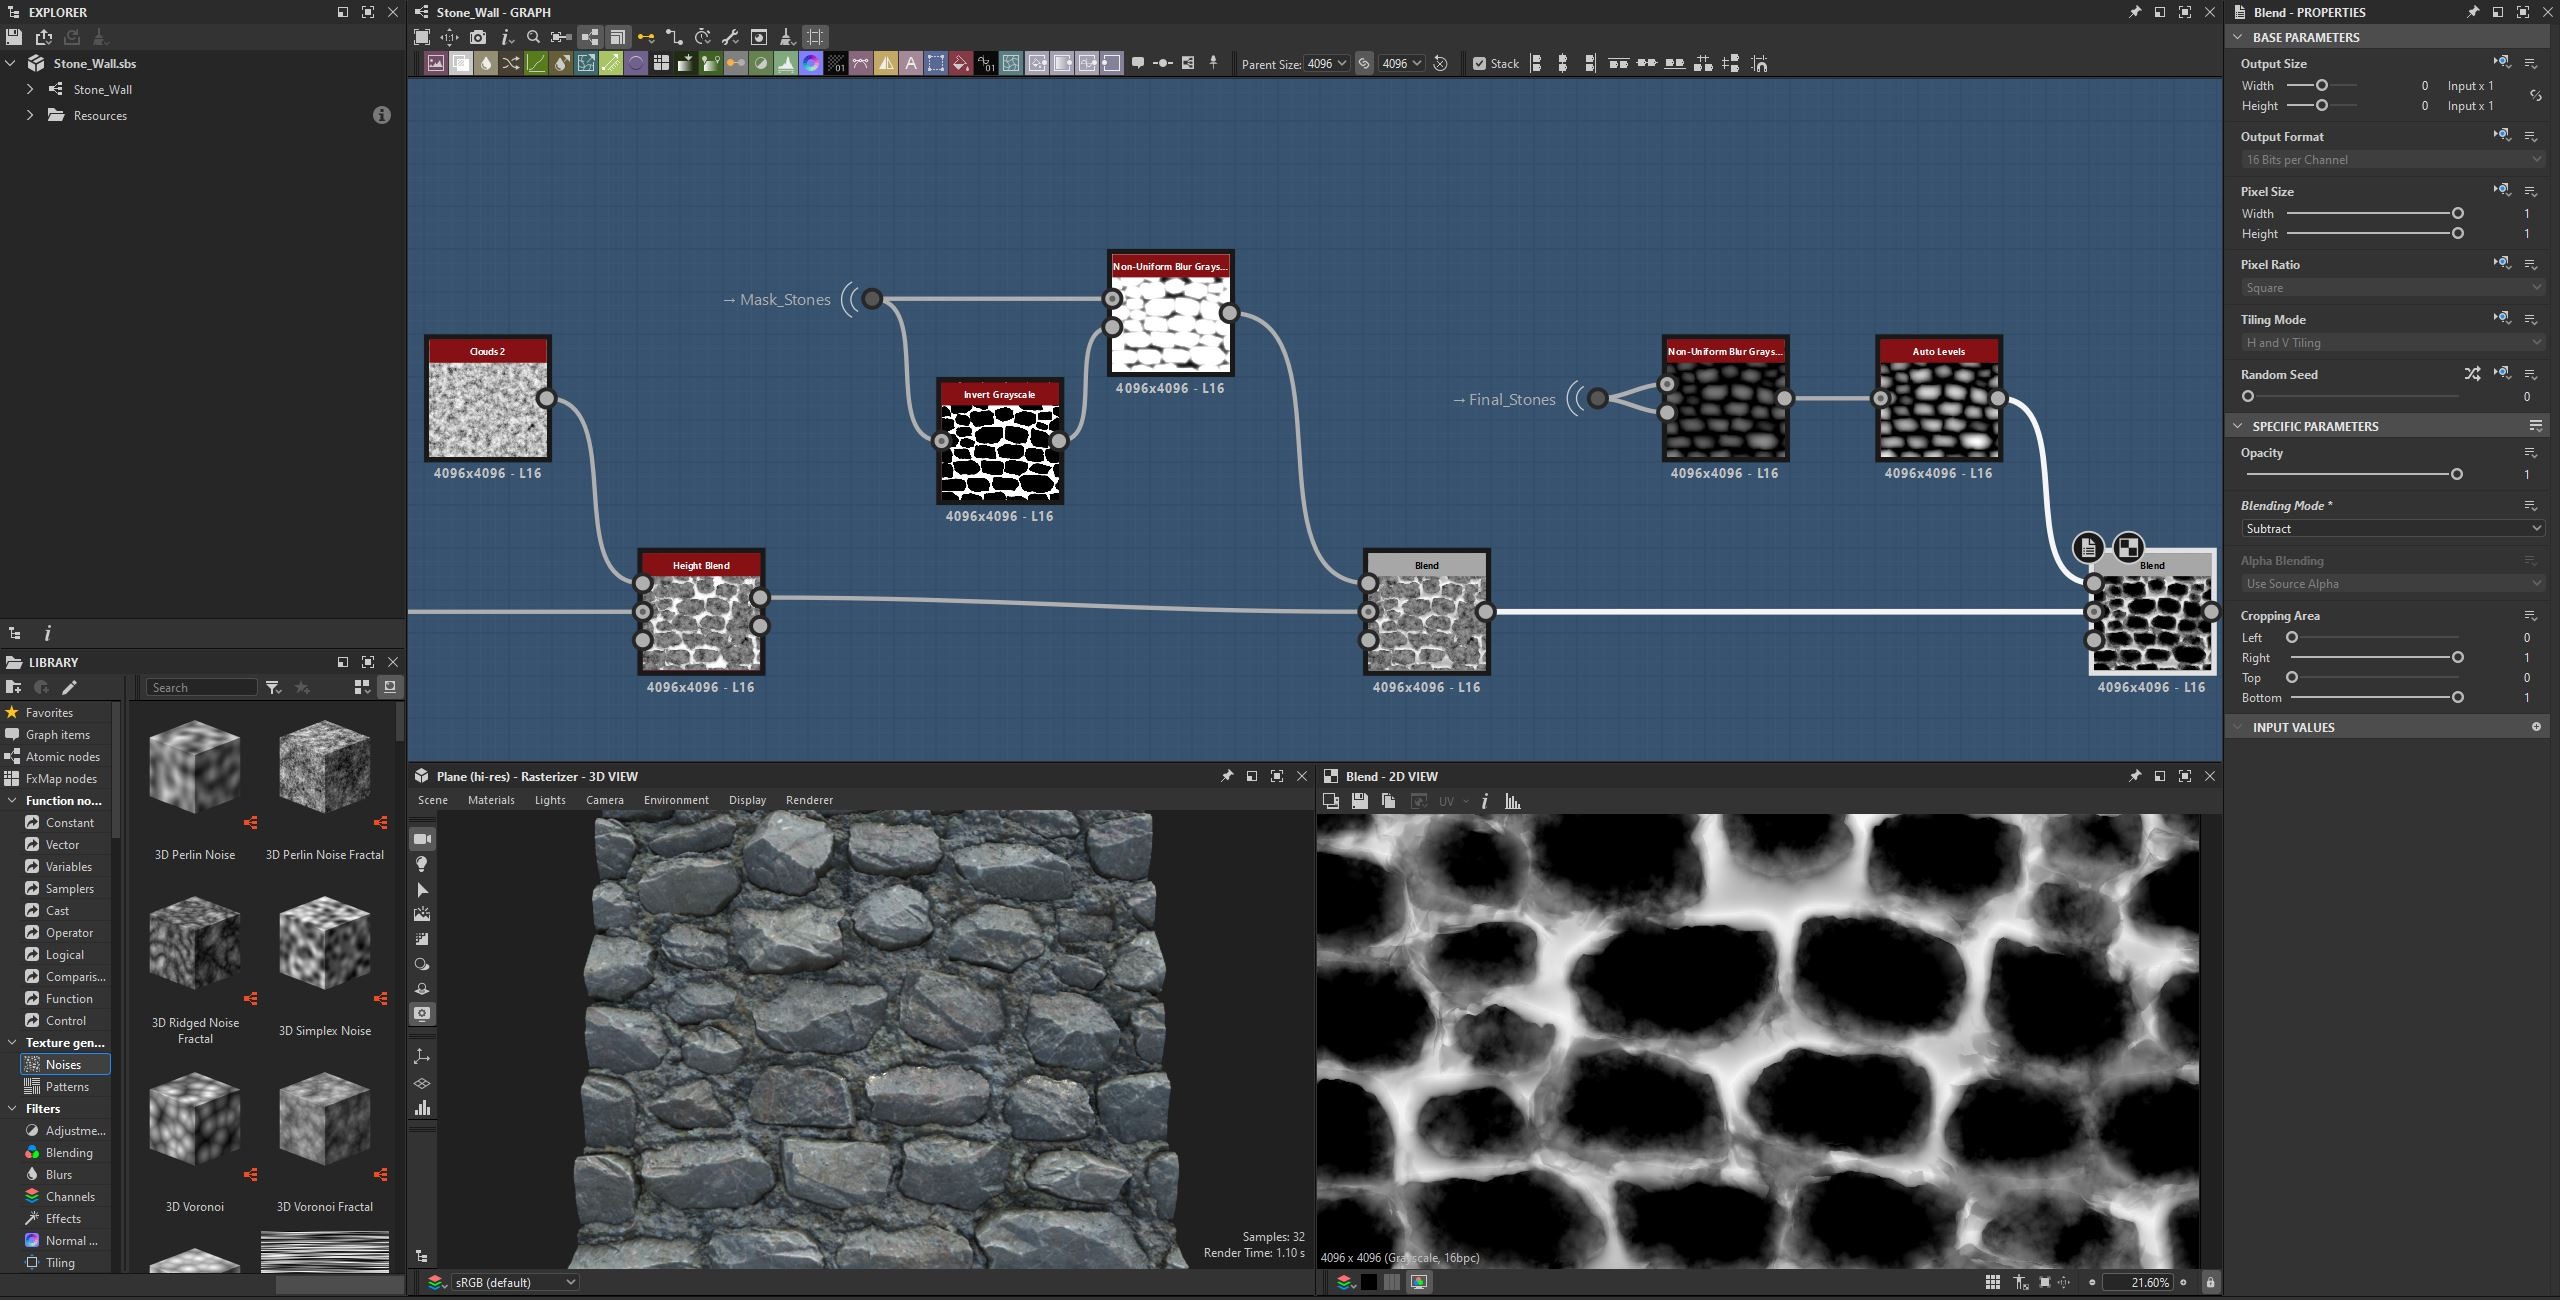
In the next part, I continued working on the mortar and focused on adding more details. I introduced different types of noise, added gravity buildup under each stone, and scattered tiny pebbles throughout the mortar.
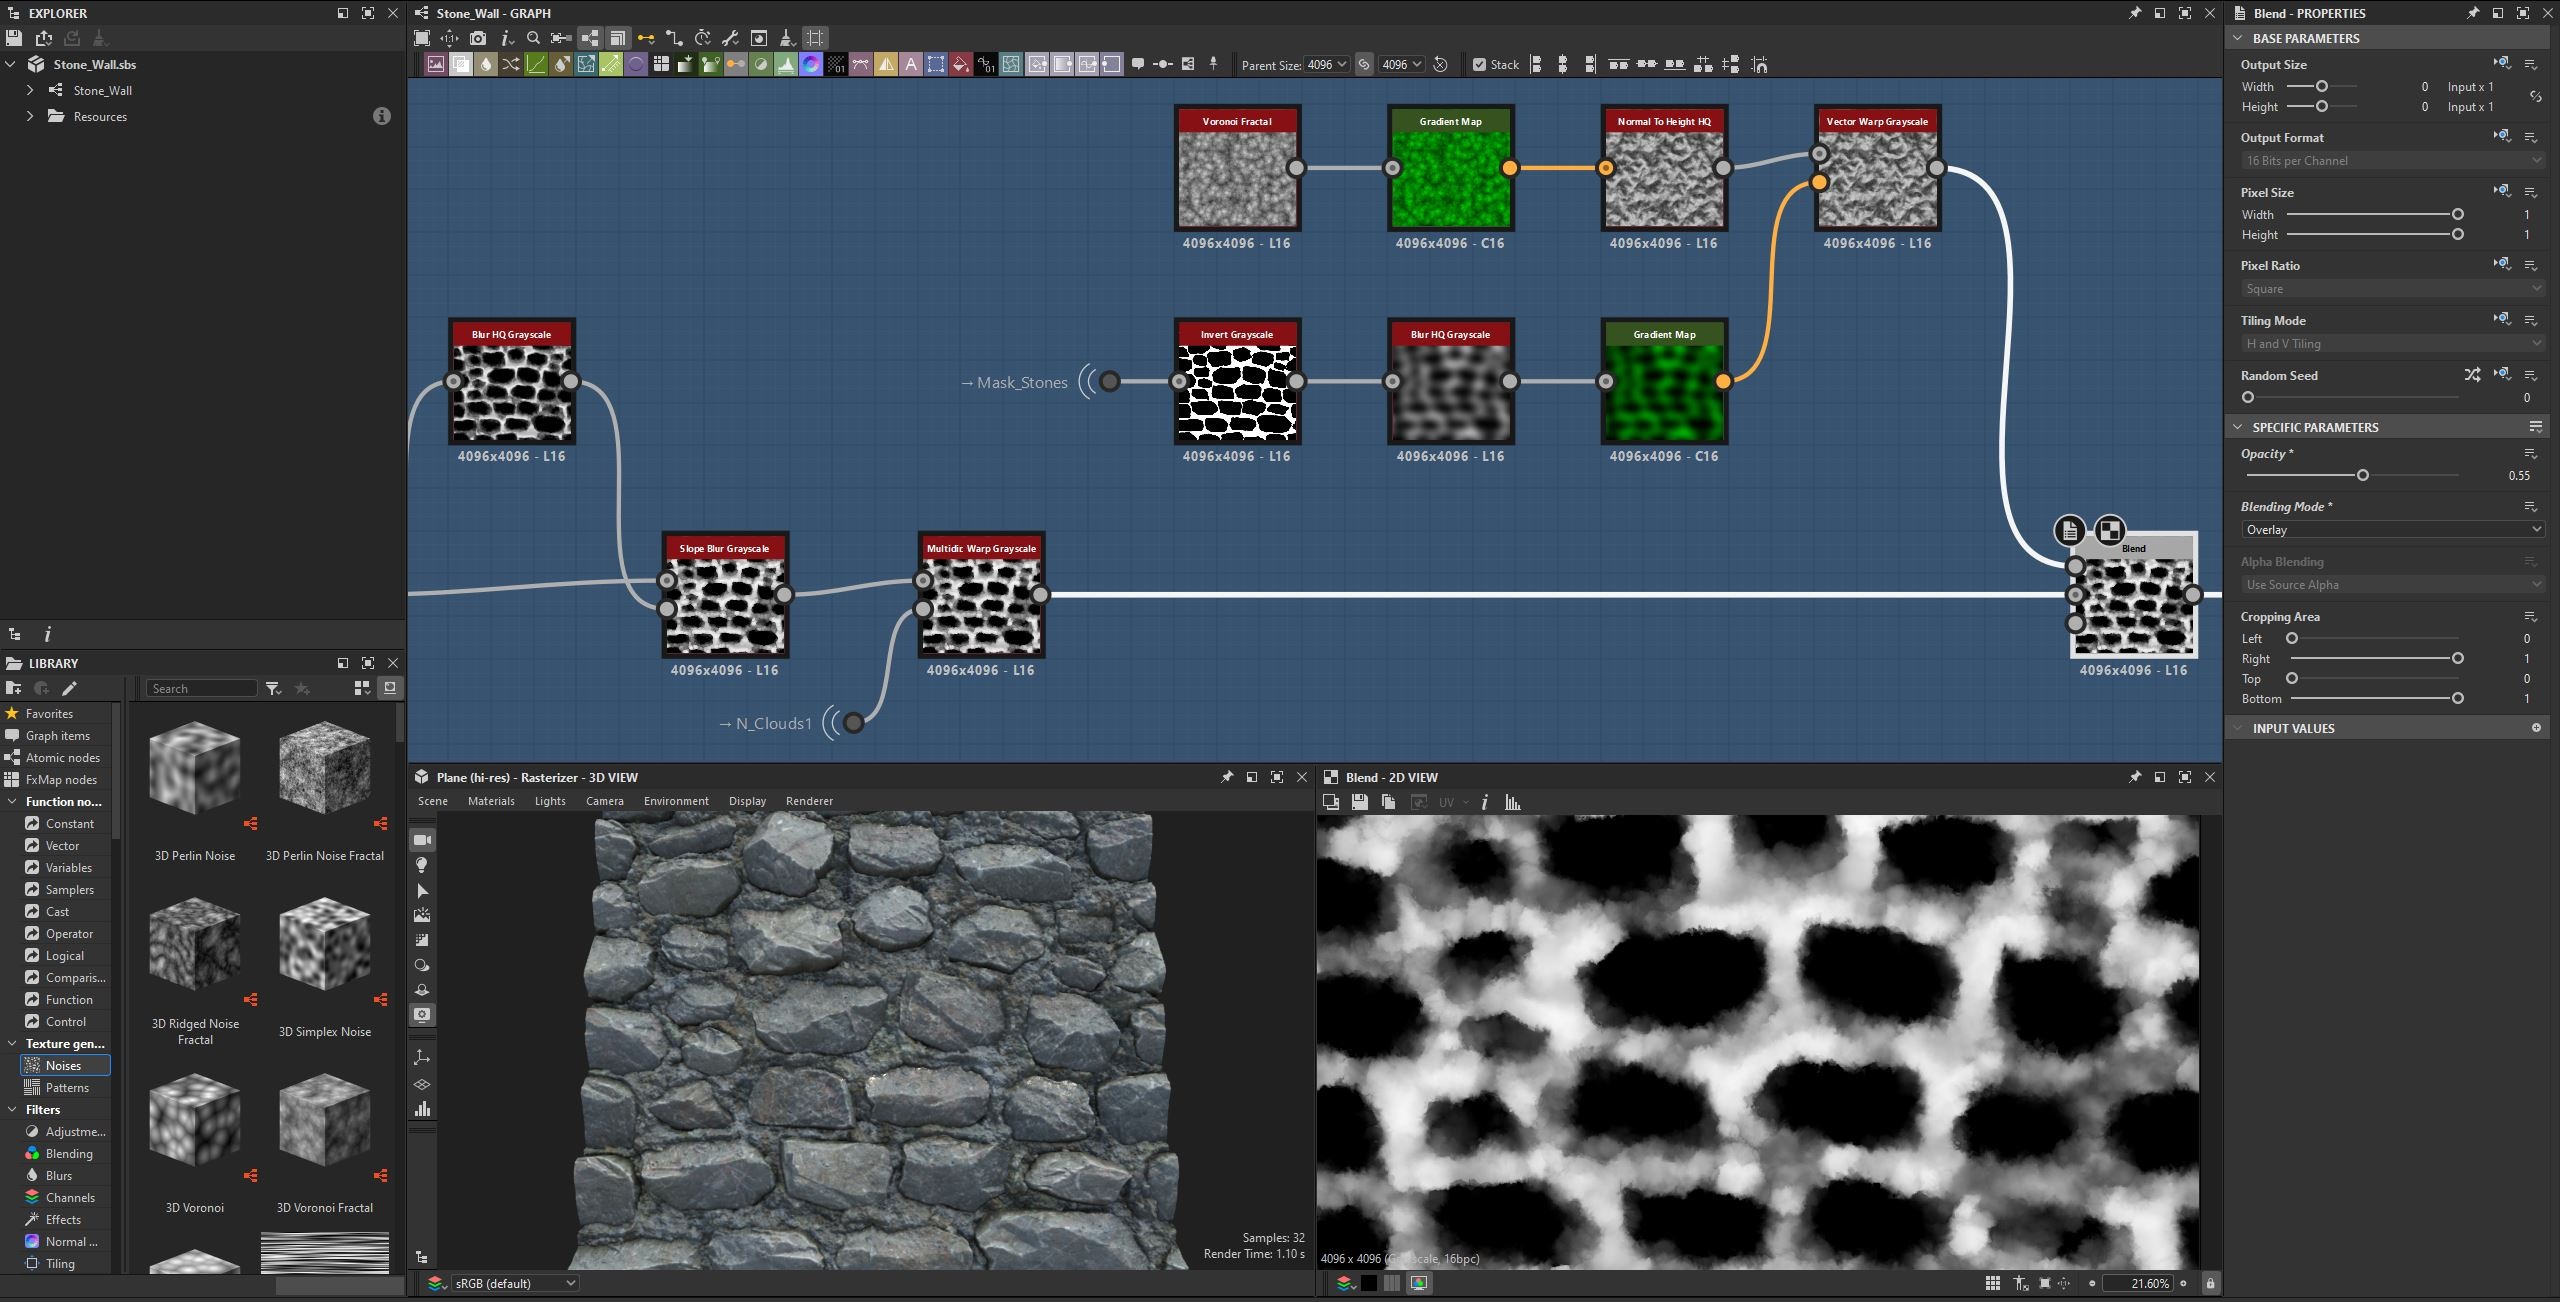
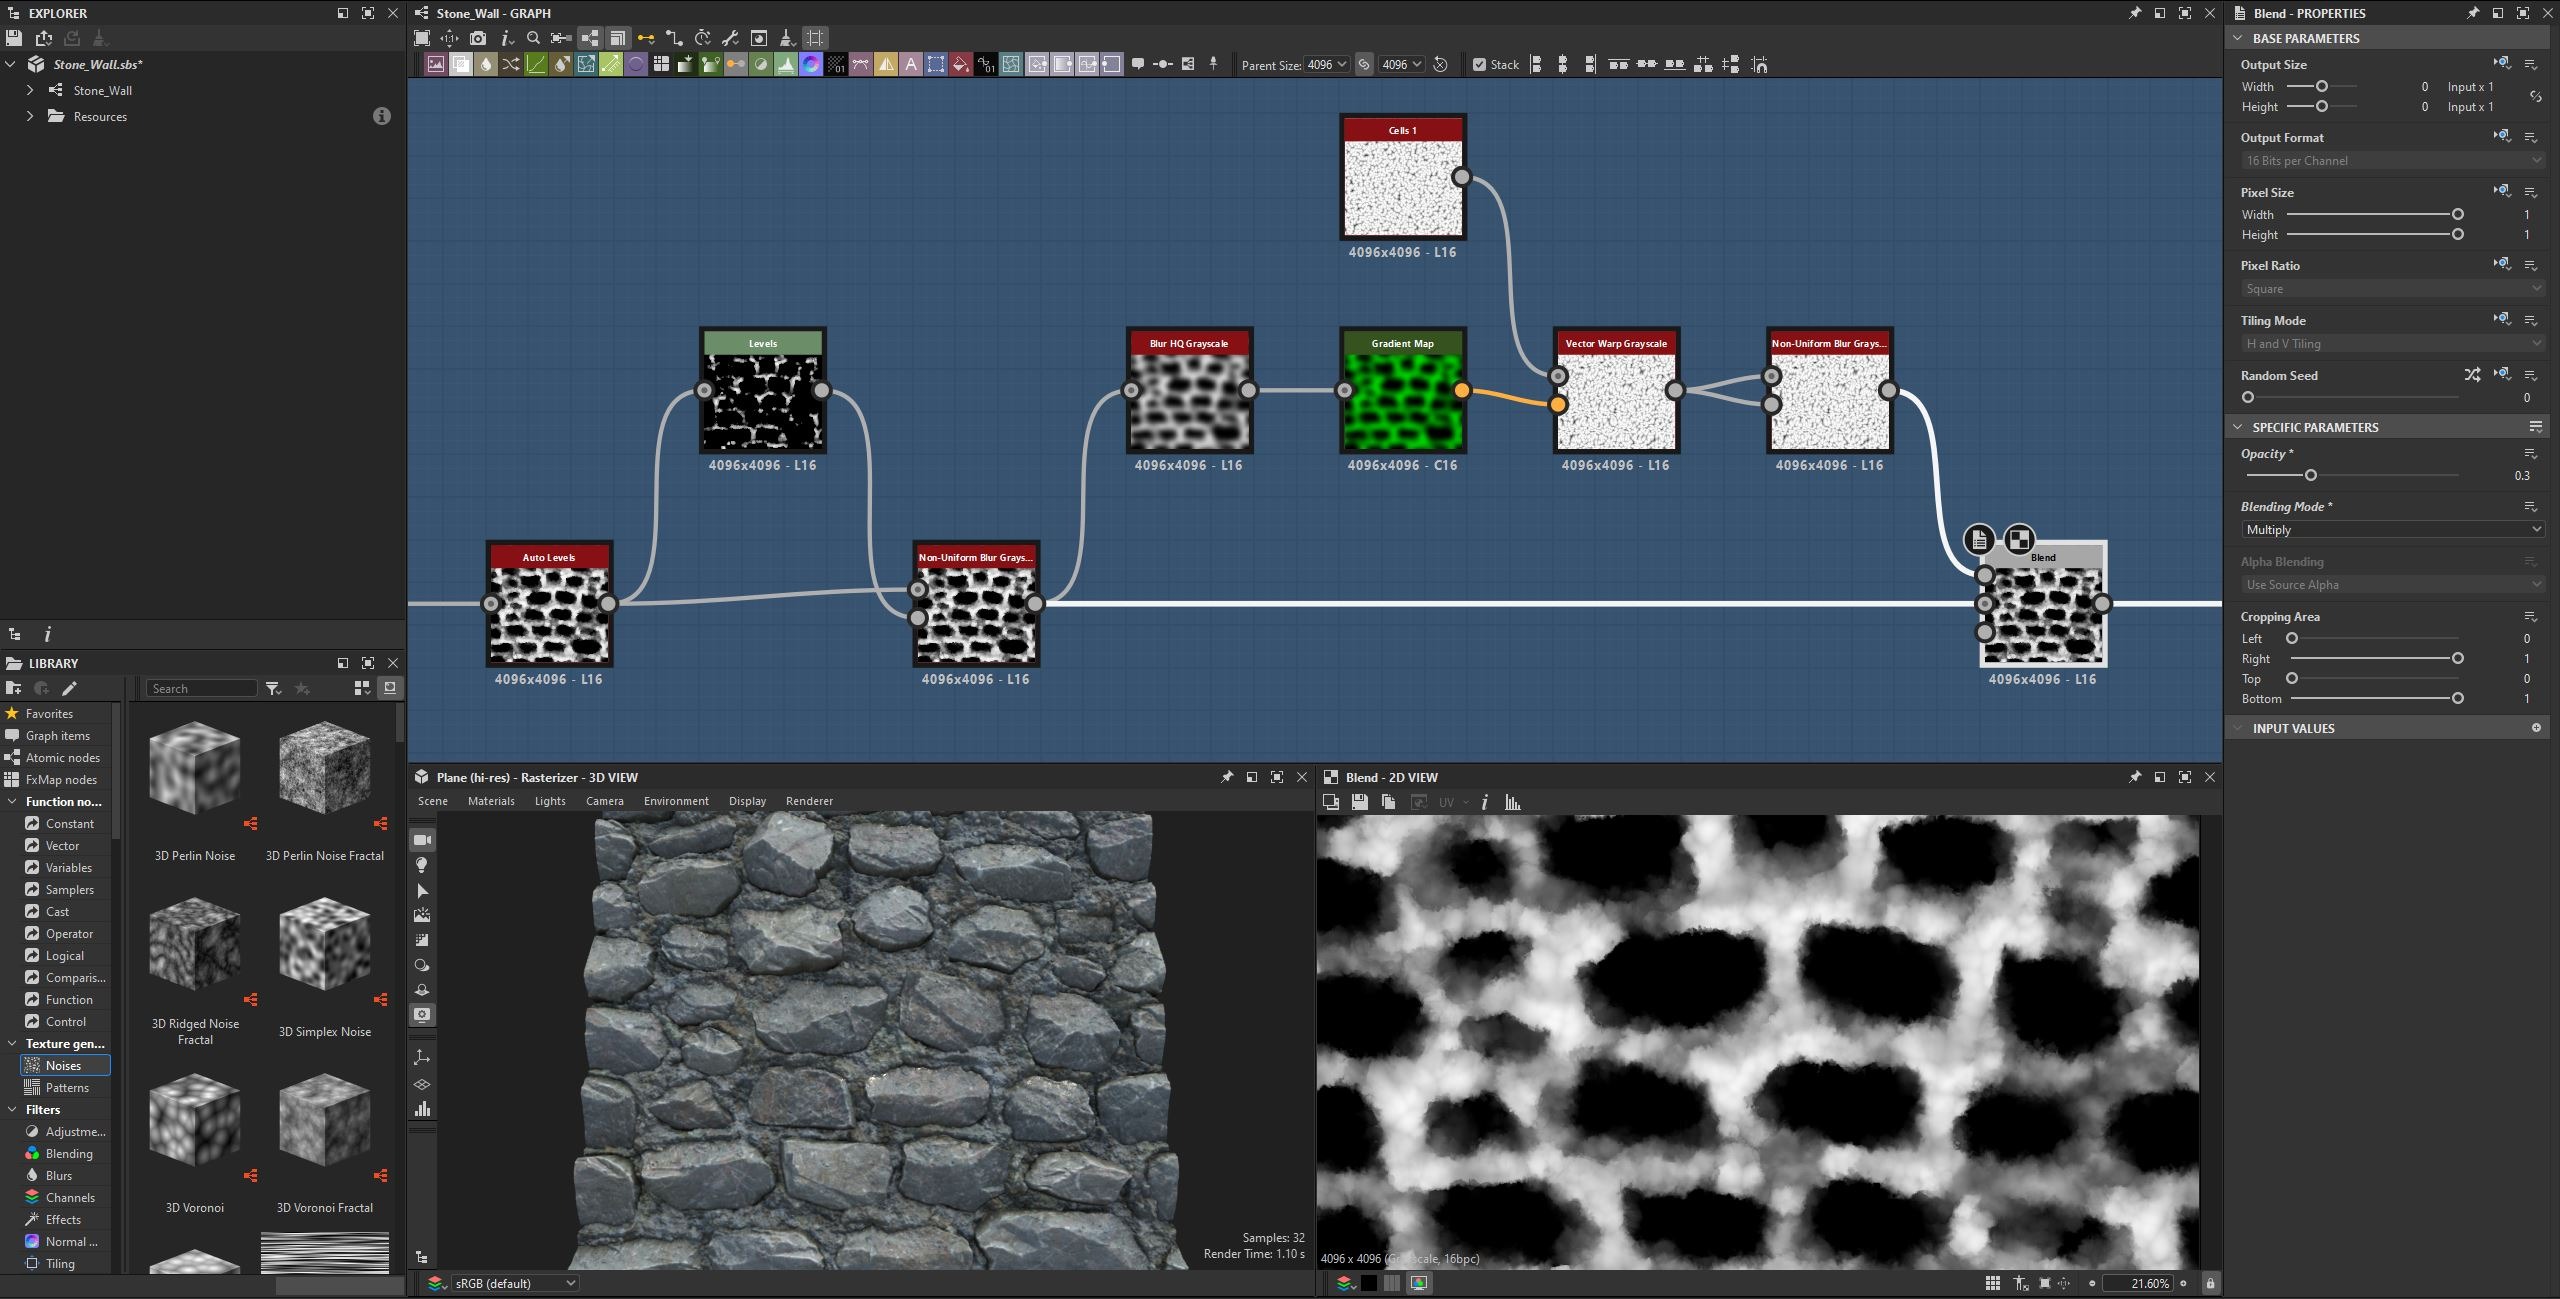
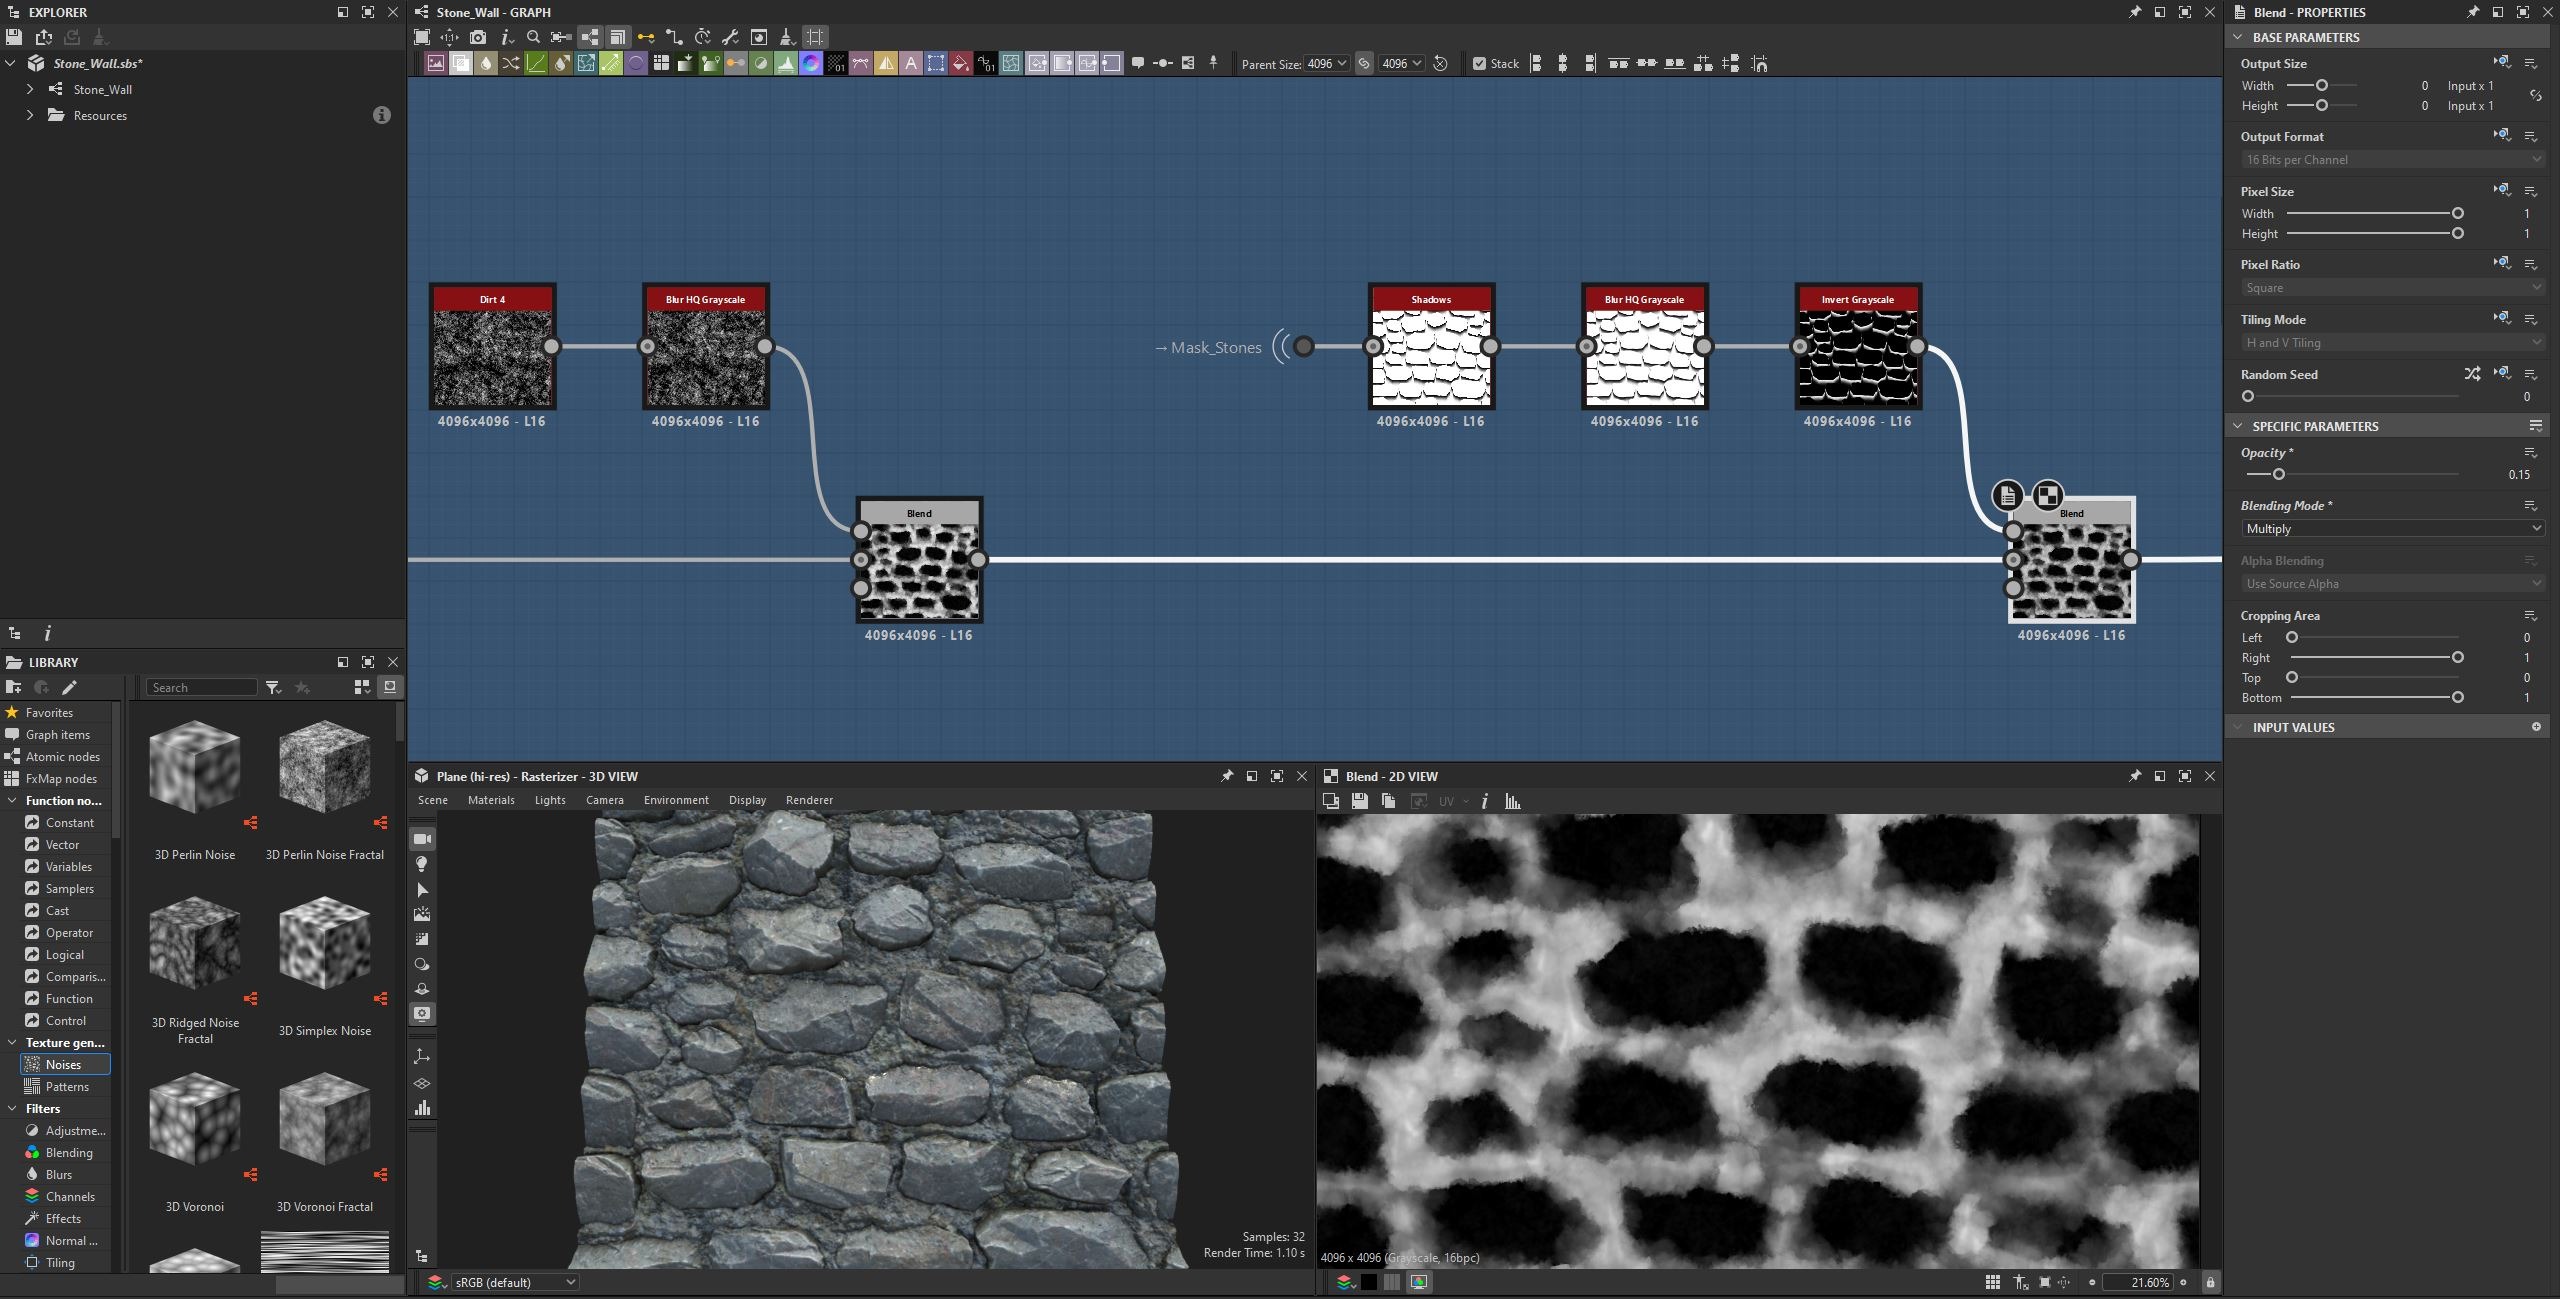
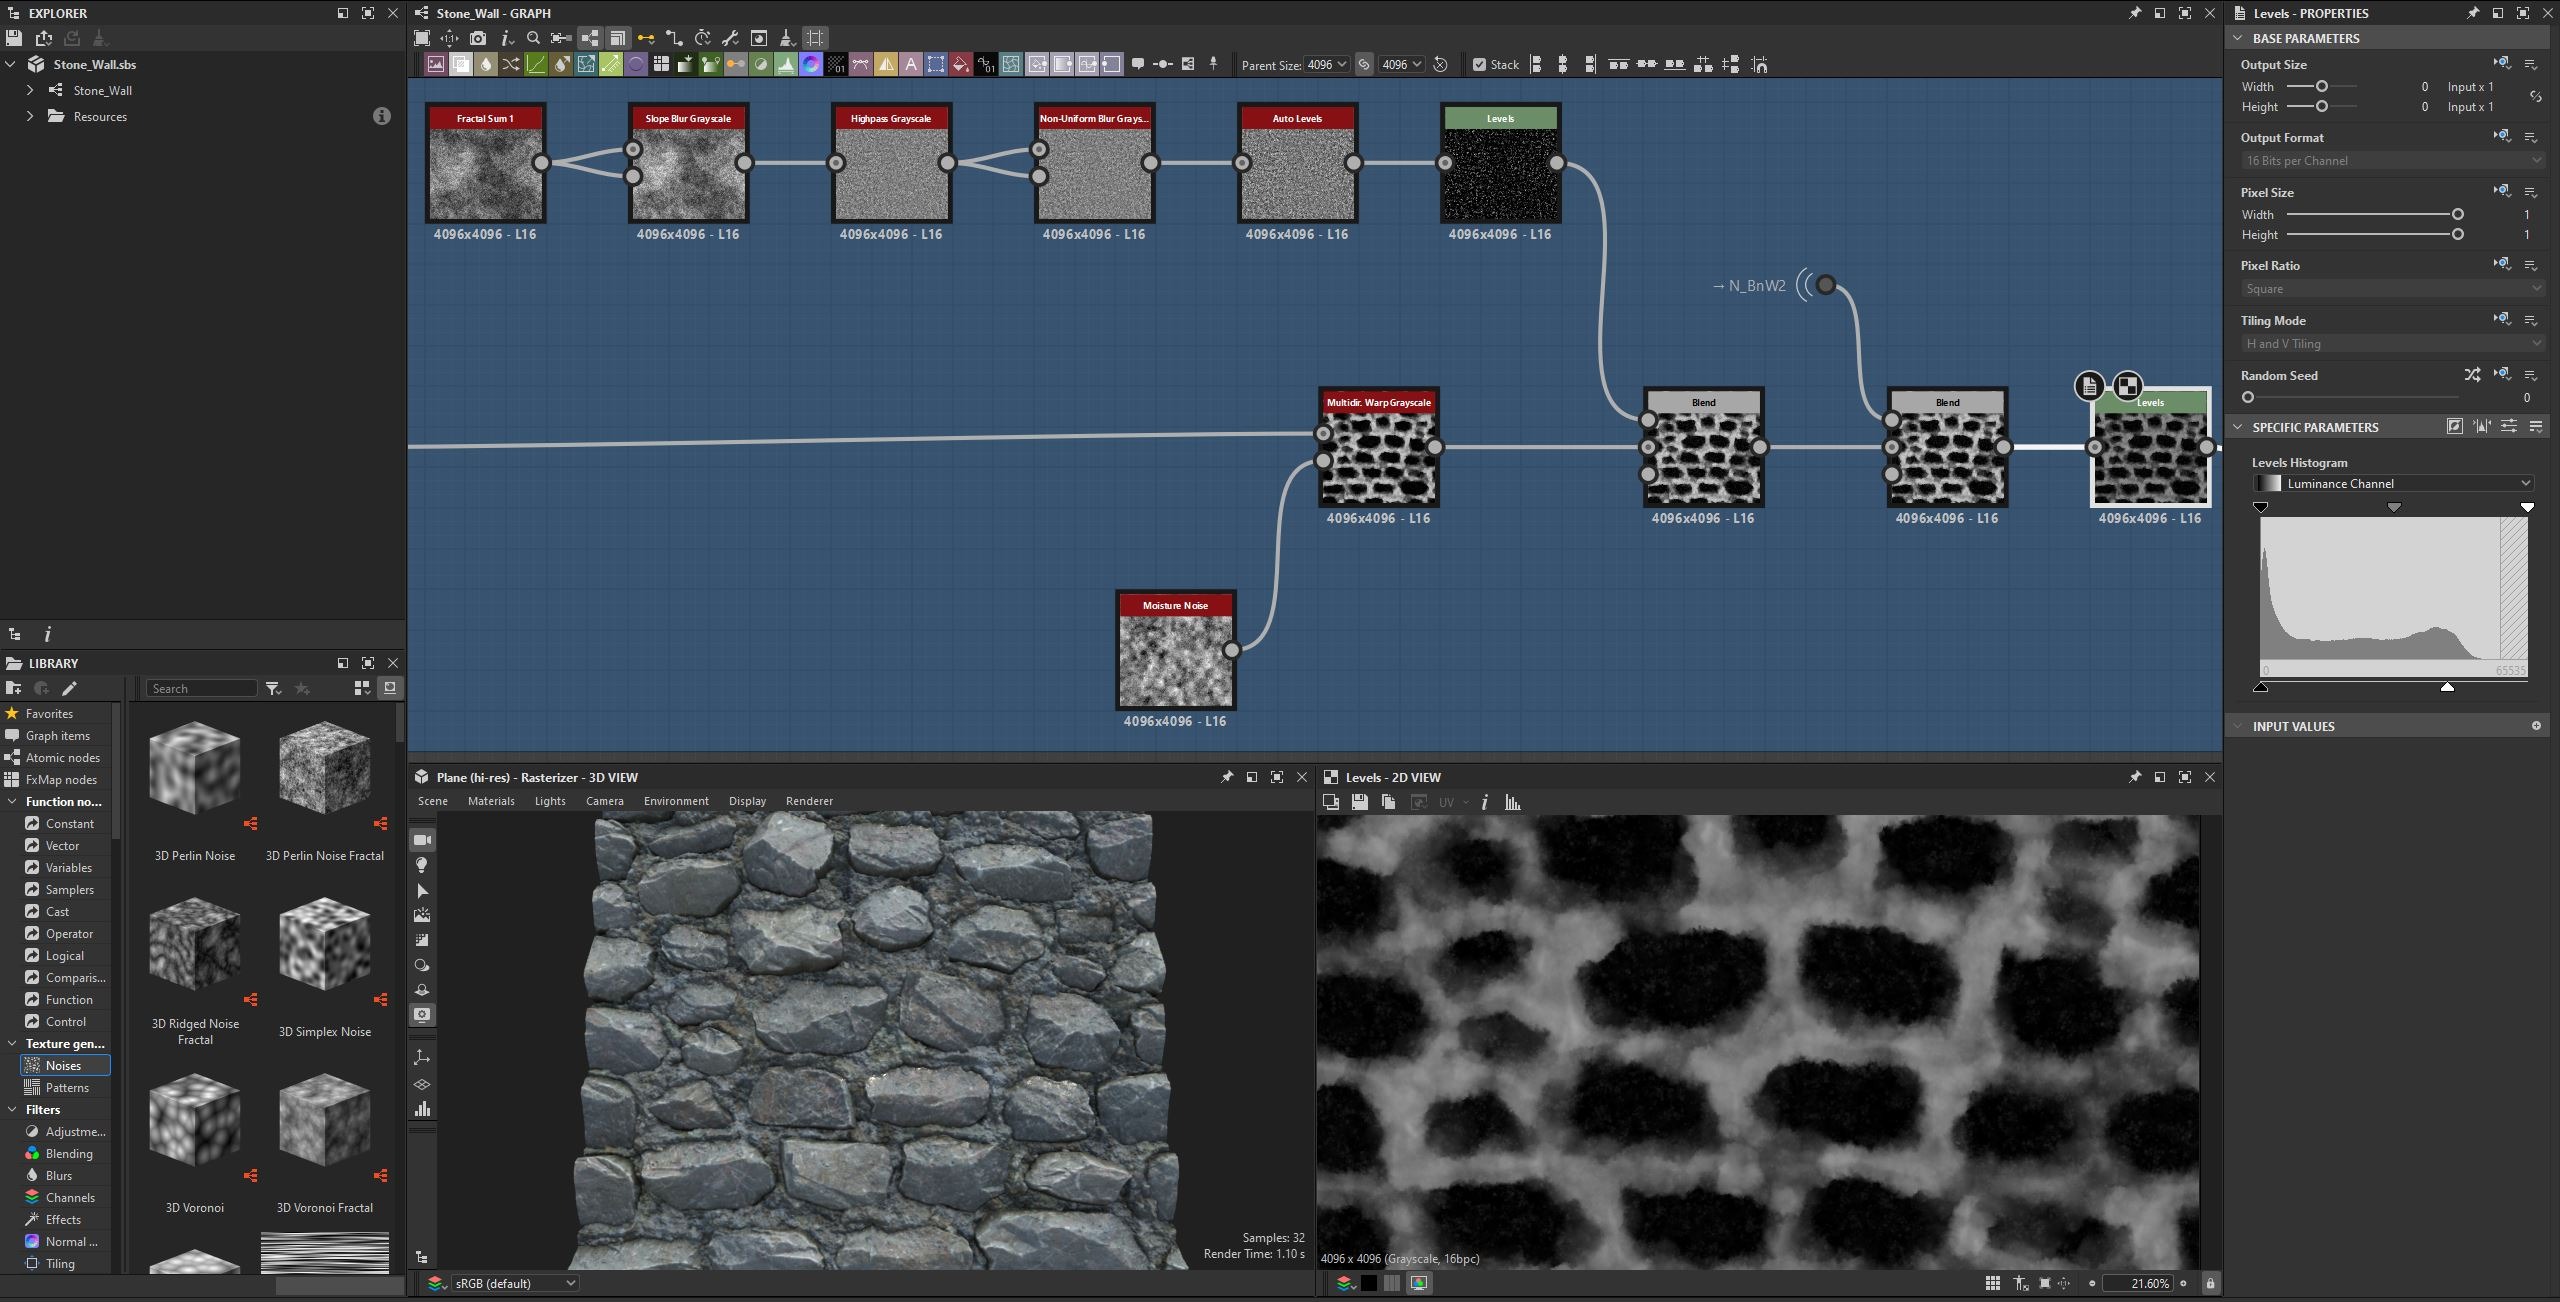
Once the mortar was done, I blended it back with the stone wall using a Height Blend node.
After that, I worked on two more sections, Top Mortar and Pebbles. For the Top Mortar, I used the green channel from the normal map generated from the stone wall as a mask because I only needed the top part of each stone. After that, I used Dirt 4 noise, adjusted it several times, and blended it into the main chain.
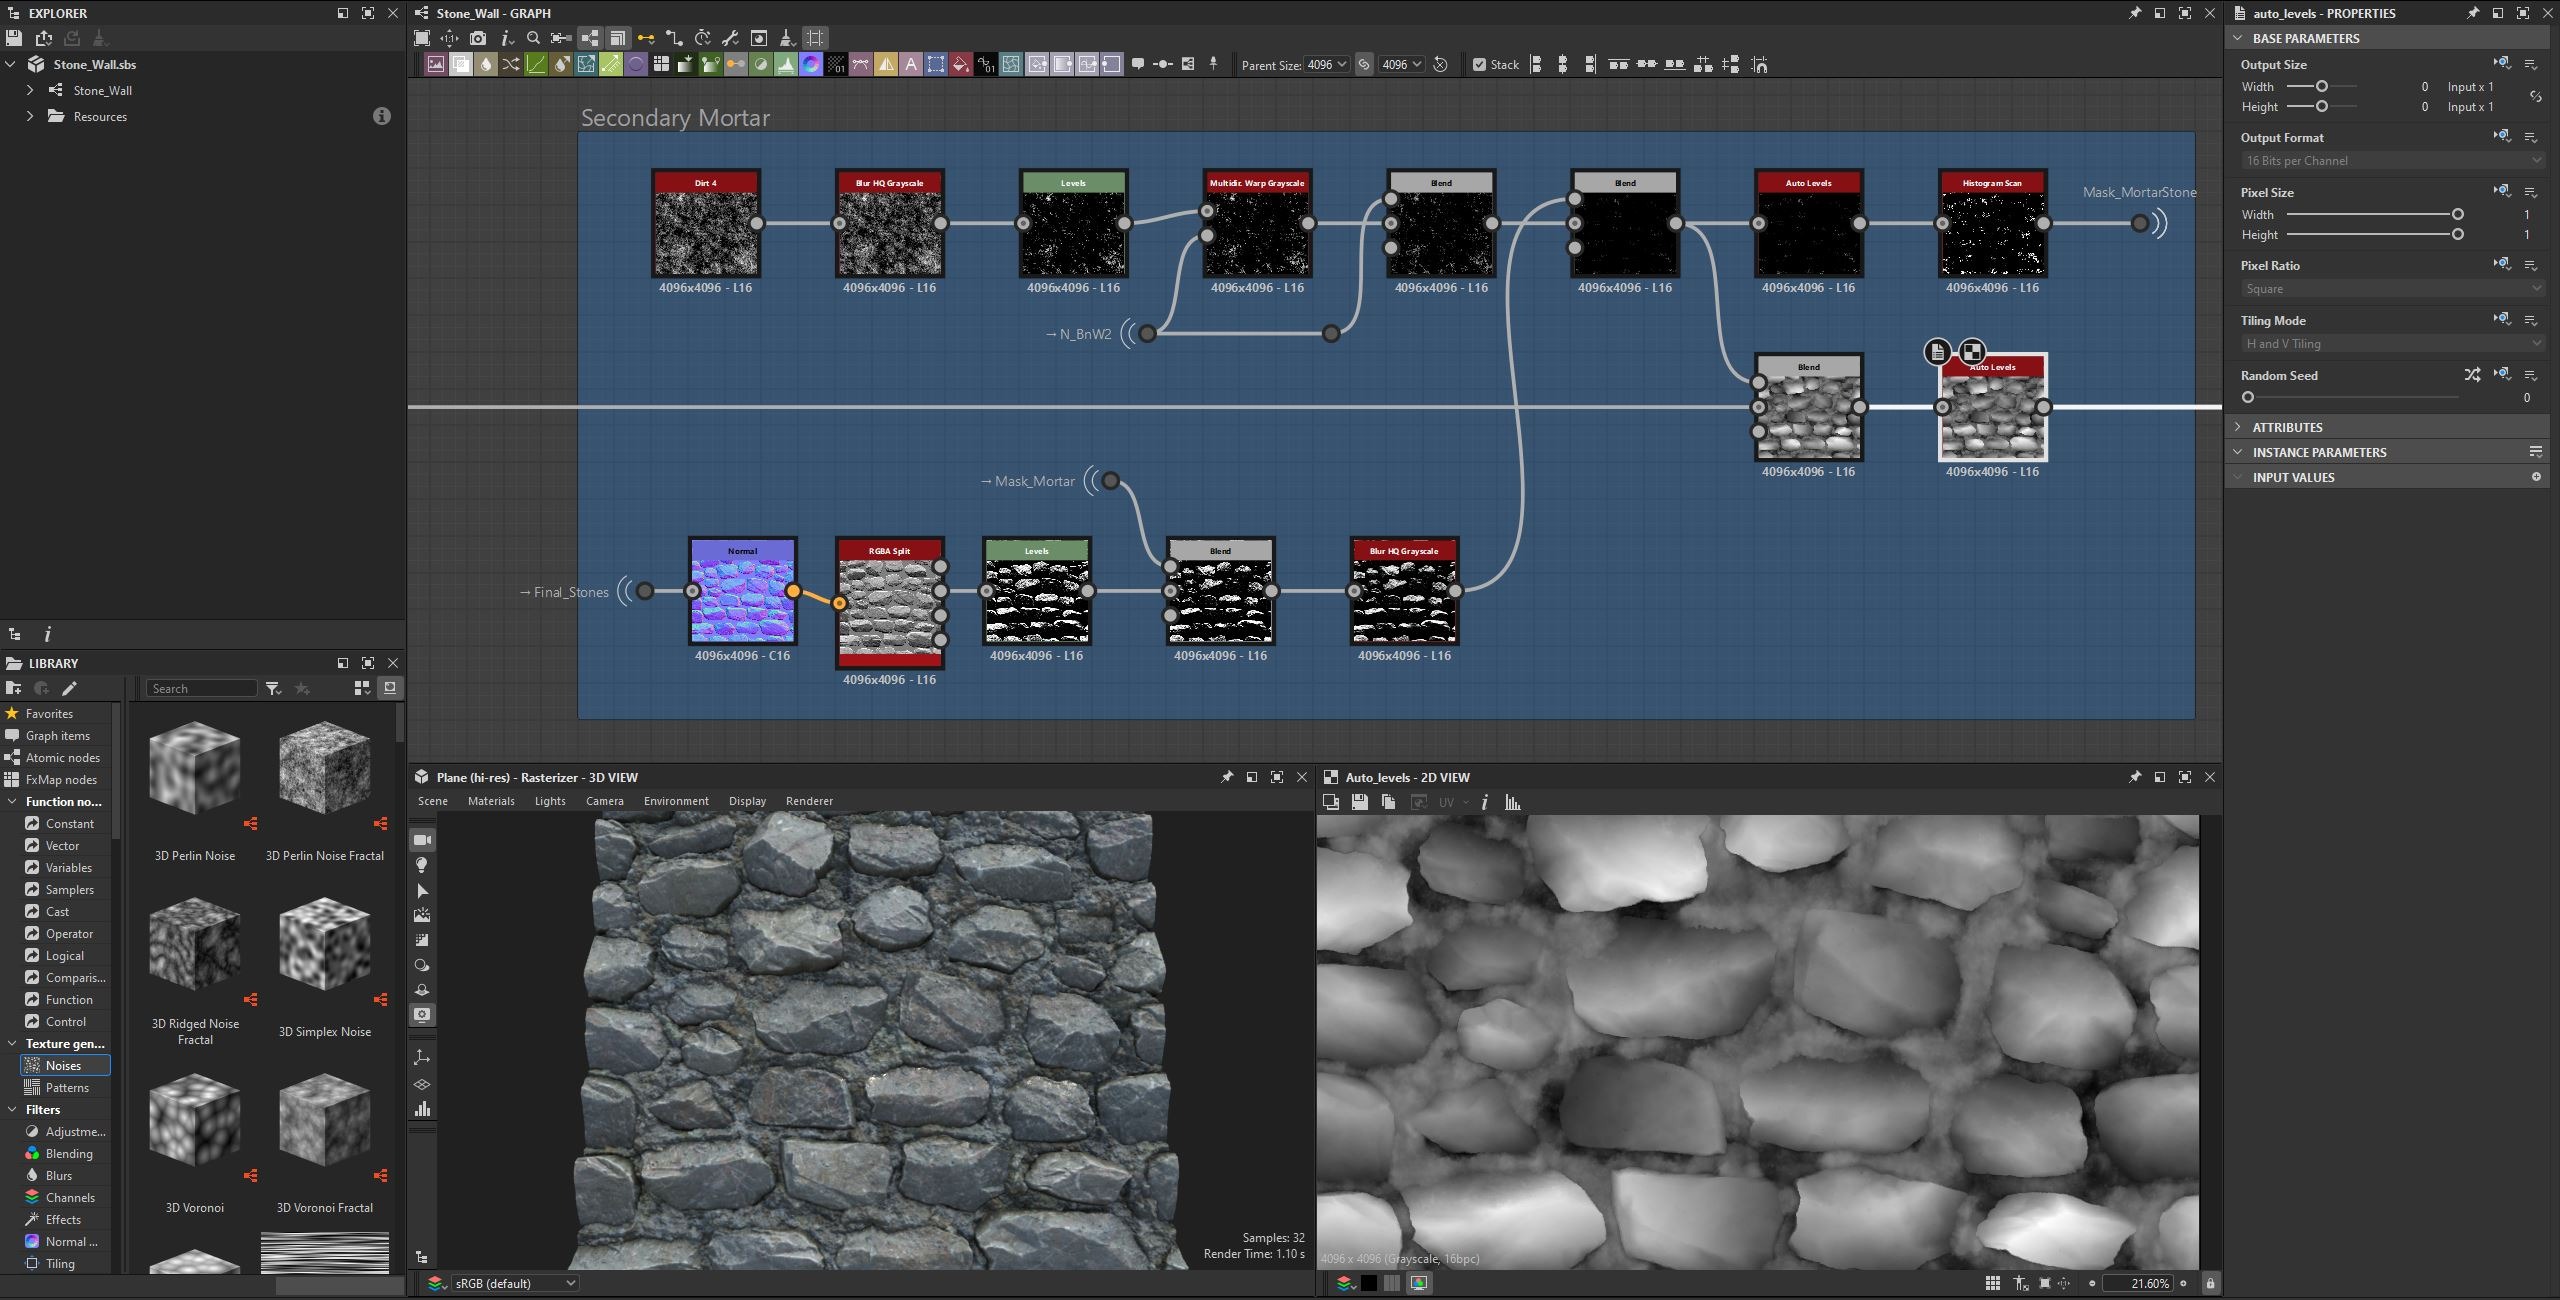
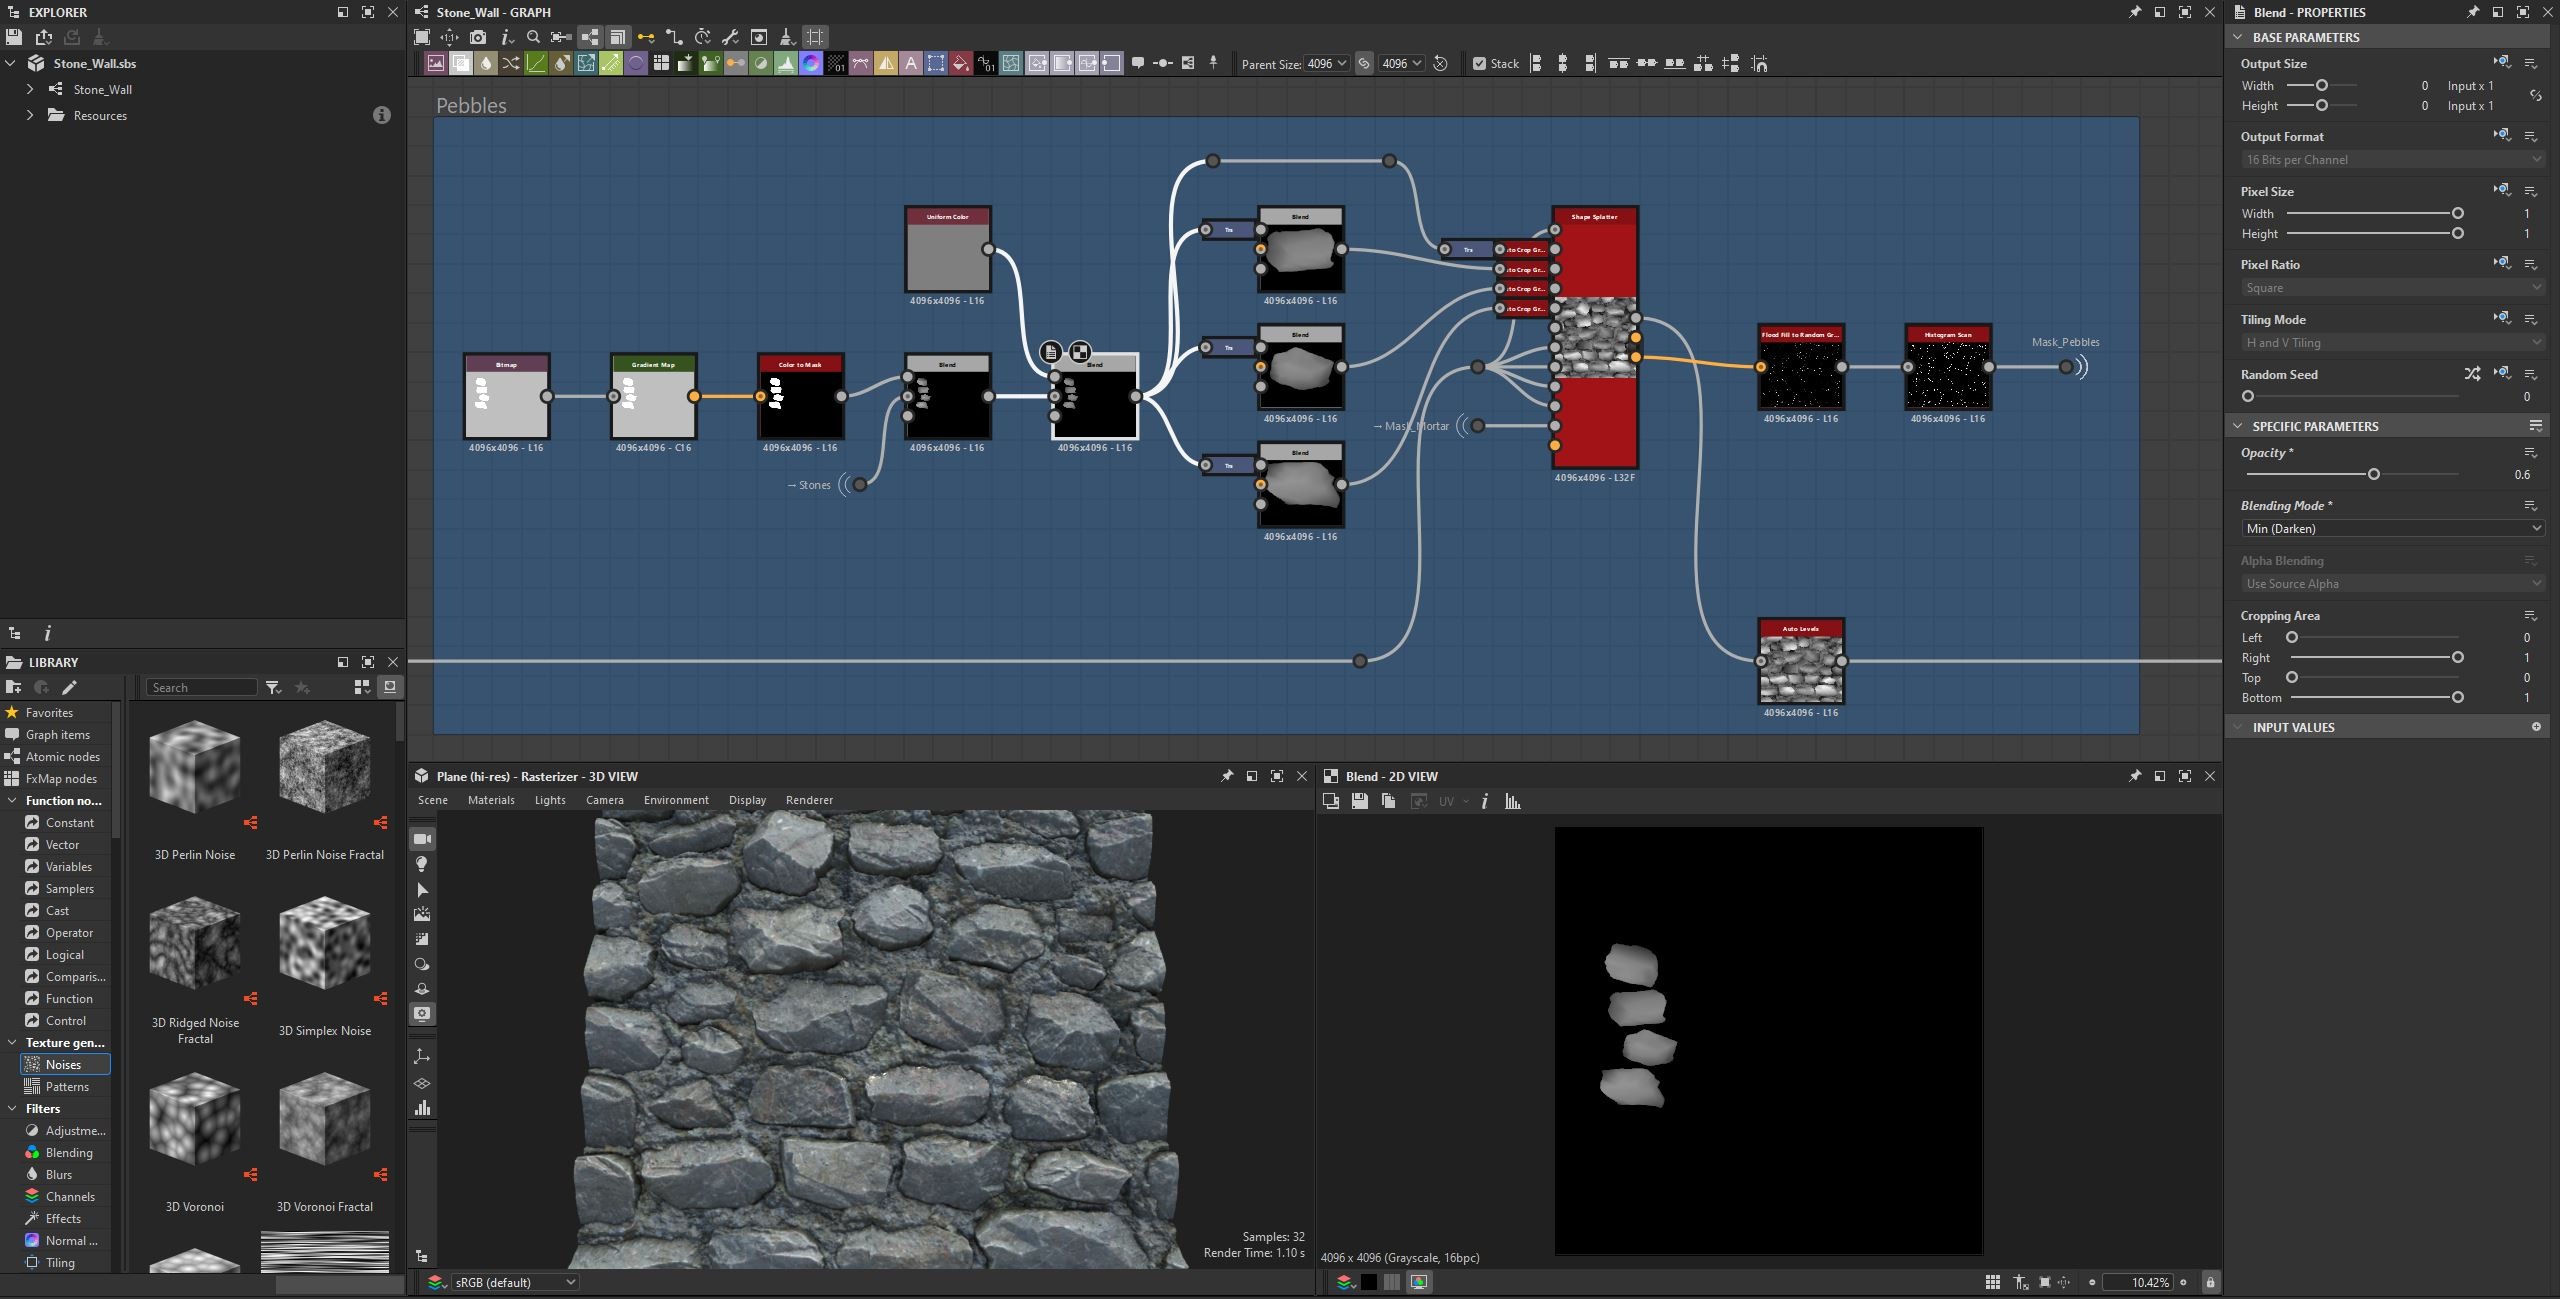
At the end, I wanted to add some pebbles inside the mortar, so I created another mask in ZBrush to isolate those areas. After that, I used a Shape Splatter node to scatter the pebbles.
Base Color
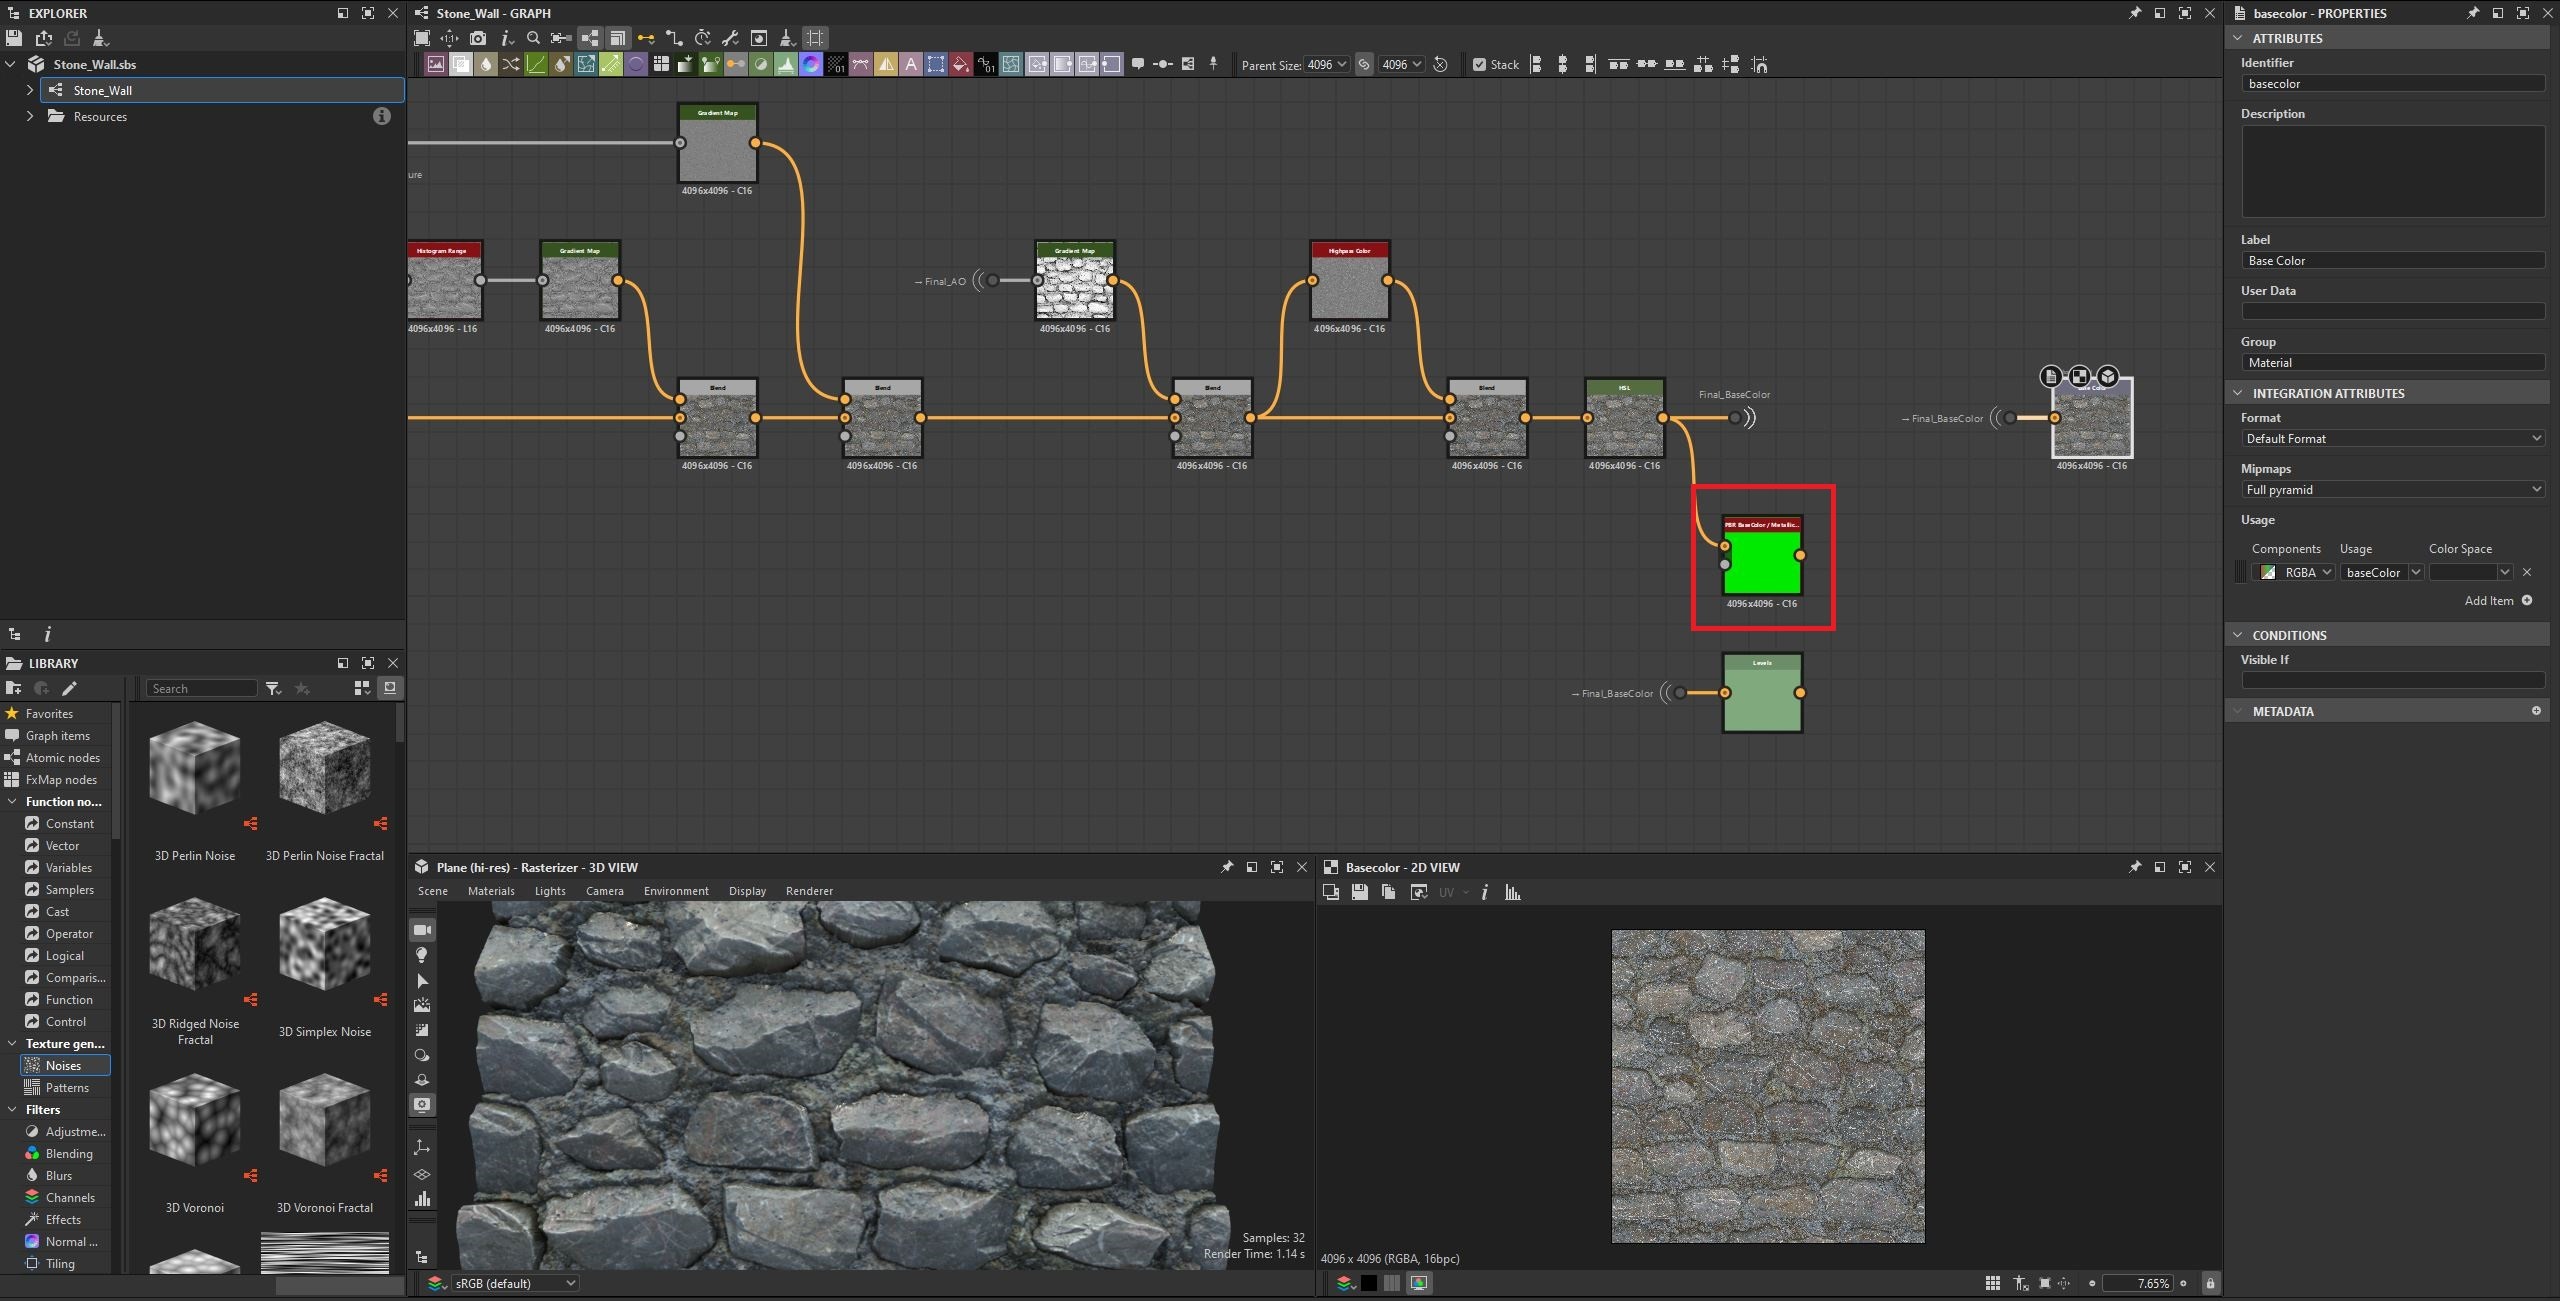
Once the height map was done, it was time to create the Base Color and Roughness.
For the Base Color, I started with Grunge Map 001 because it had enough shape variation.
I also wanted to blend the final Height and Normal information with the grunge map to create an initial pattern for sampling colors from my reference images.
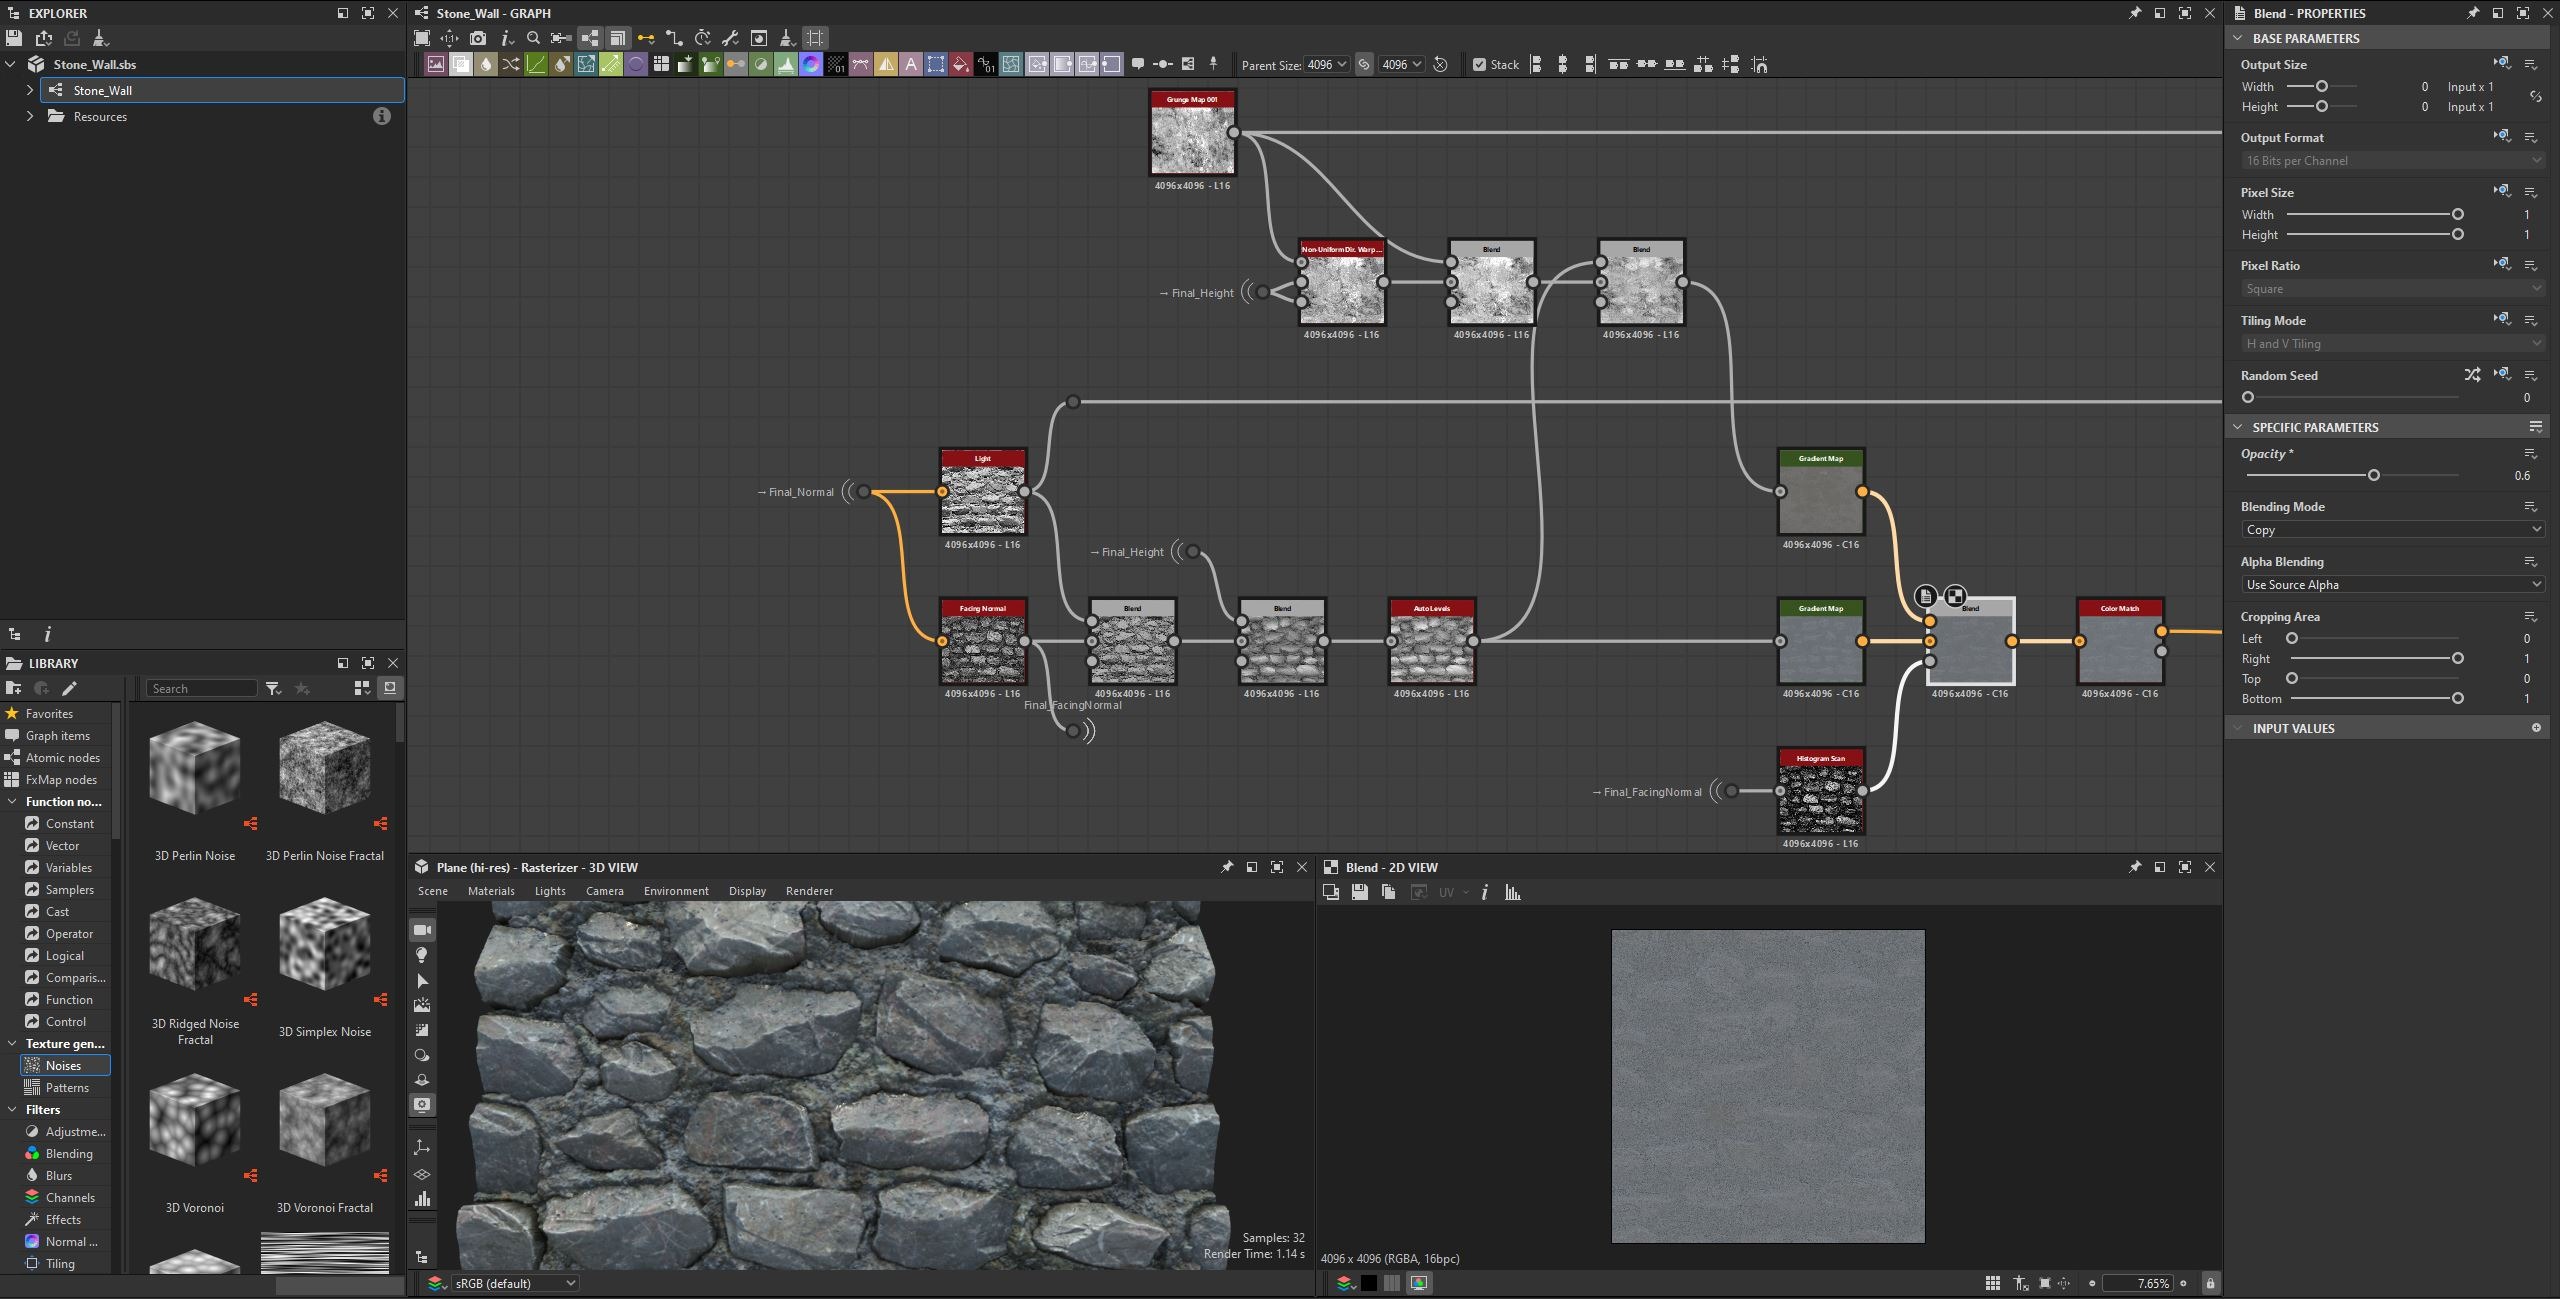
Here I should mention that most of the time I use scan data for Base Color sampling because I want to make sure I am using accurate color information. I usually get my scan data from Textures.com, which offers high-quality scans.
After this stage, I used different grunge maps and noise patterns that were close to the color shapes of my stones.
Before using these patterns, I warped them using nodes such as Directional Warp, Slope Blur, and Non-Uniform Directional Warp, driven by the final height map. This technique helps the patterns follow the height information and makes them sit more naturally on the surface.
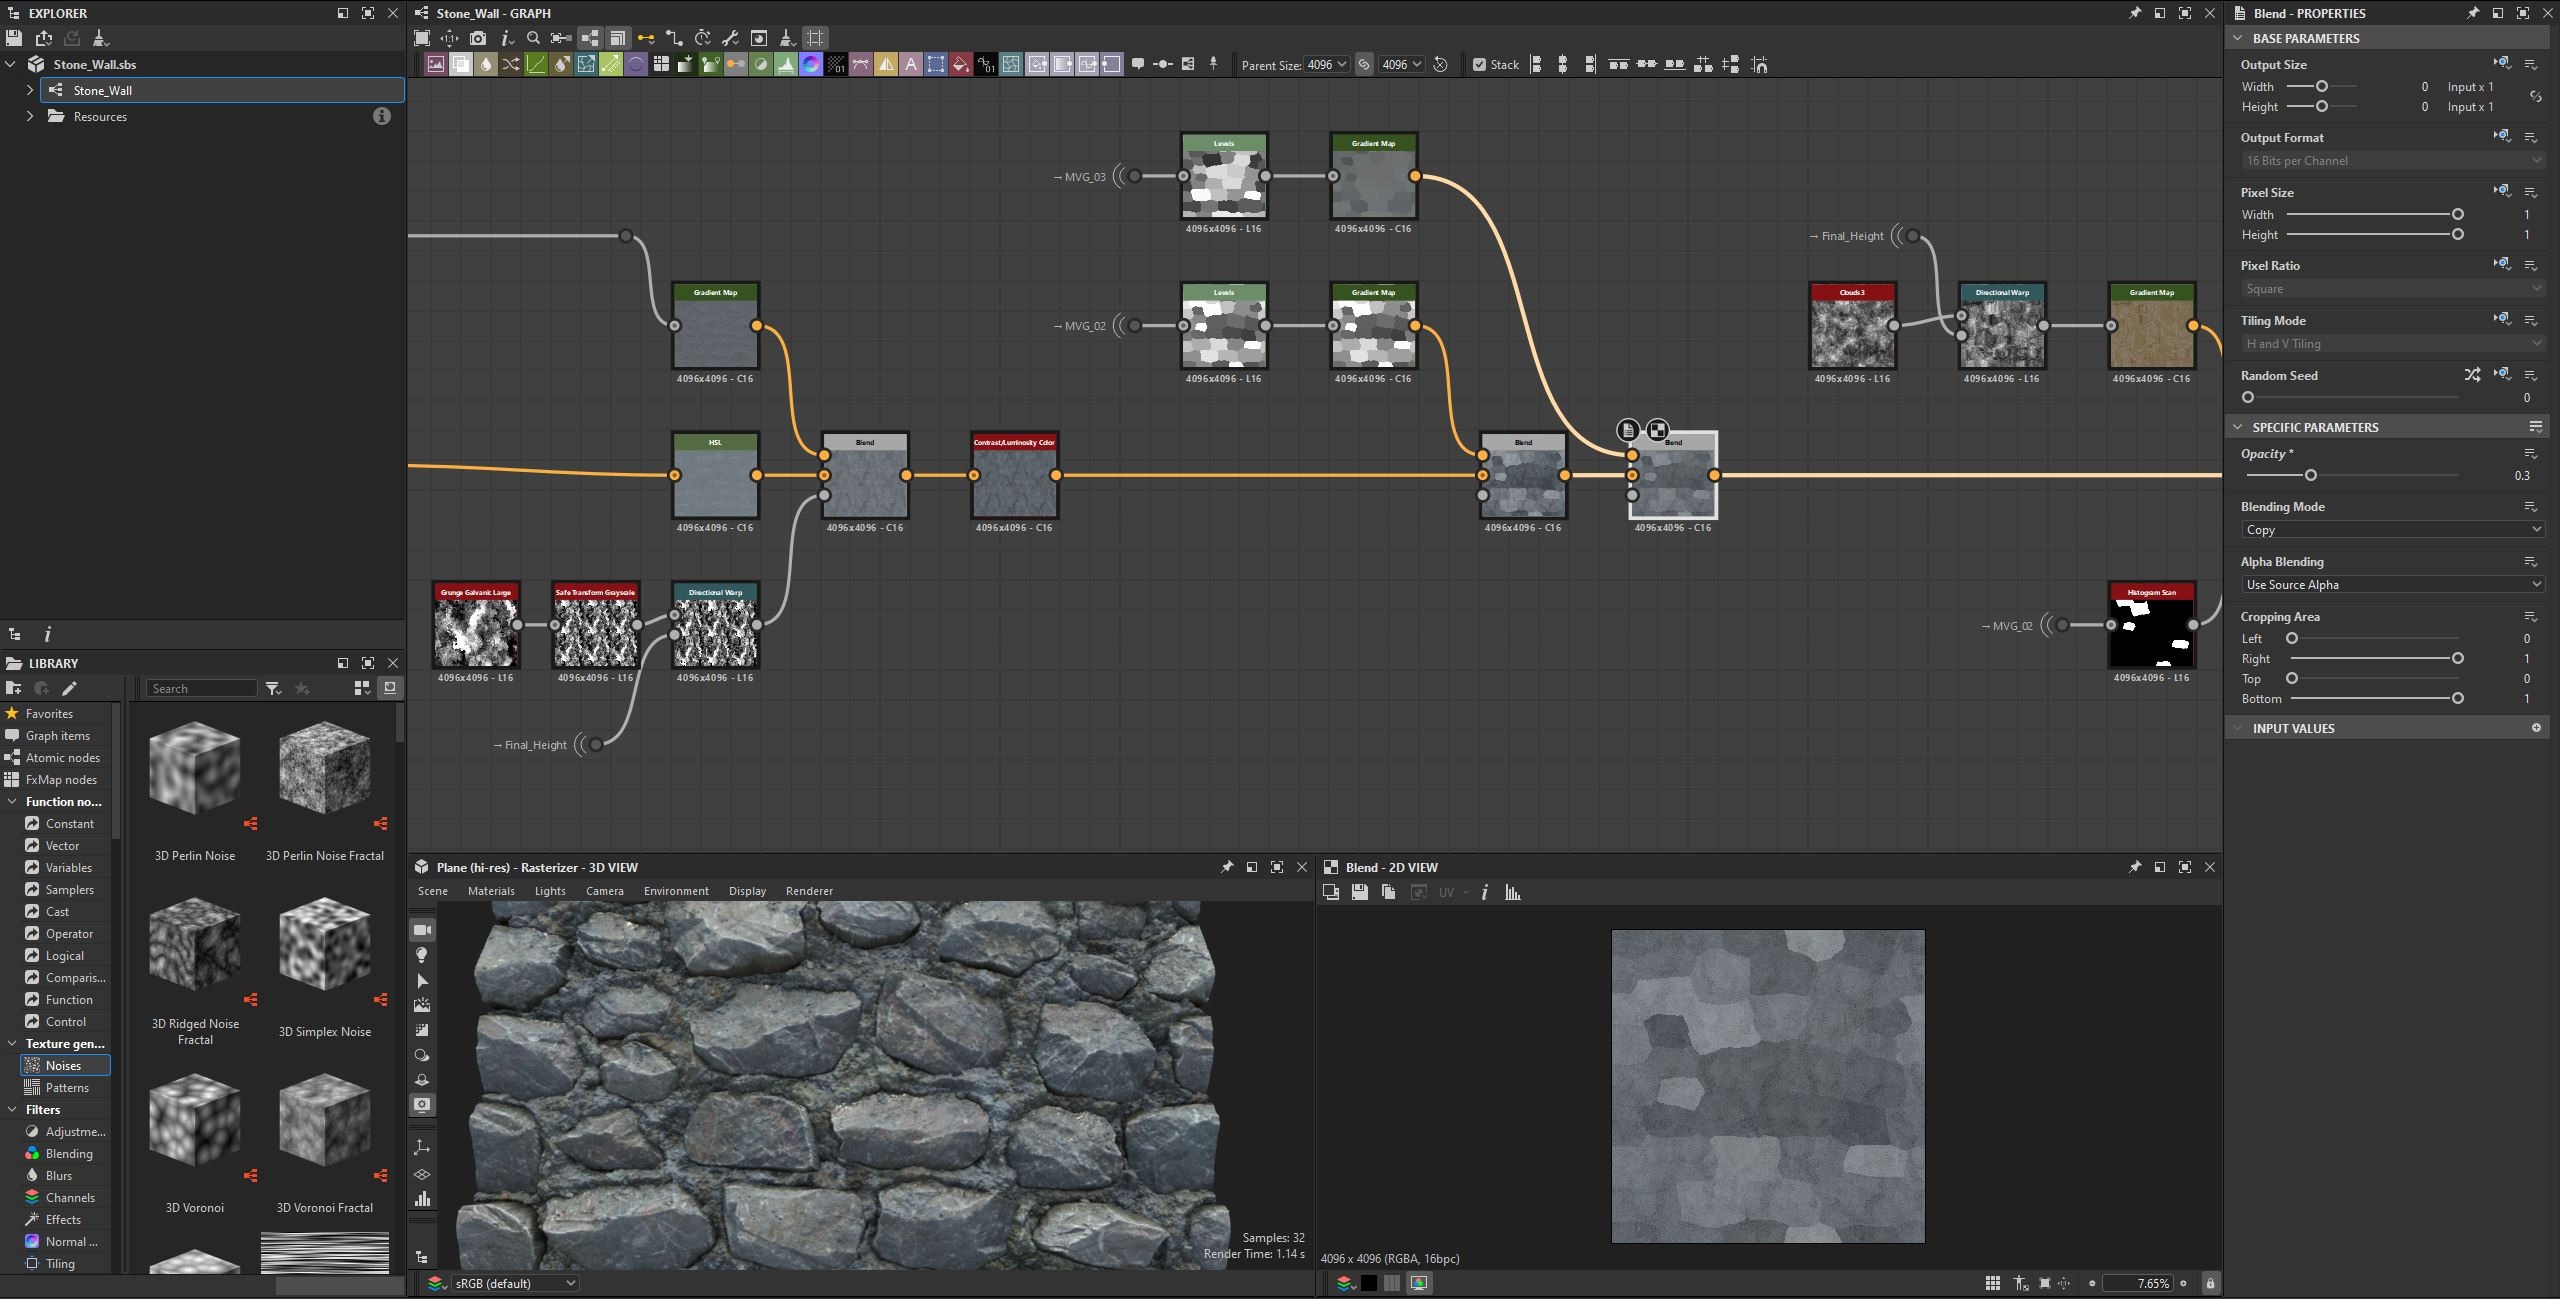
I continued working on the stone colors and introduced different details such as narrow vein lines and color variations.
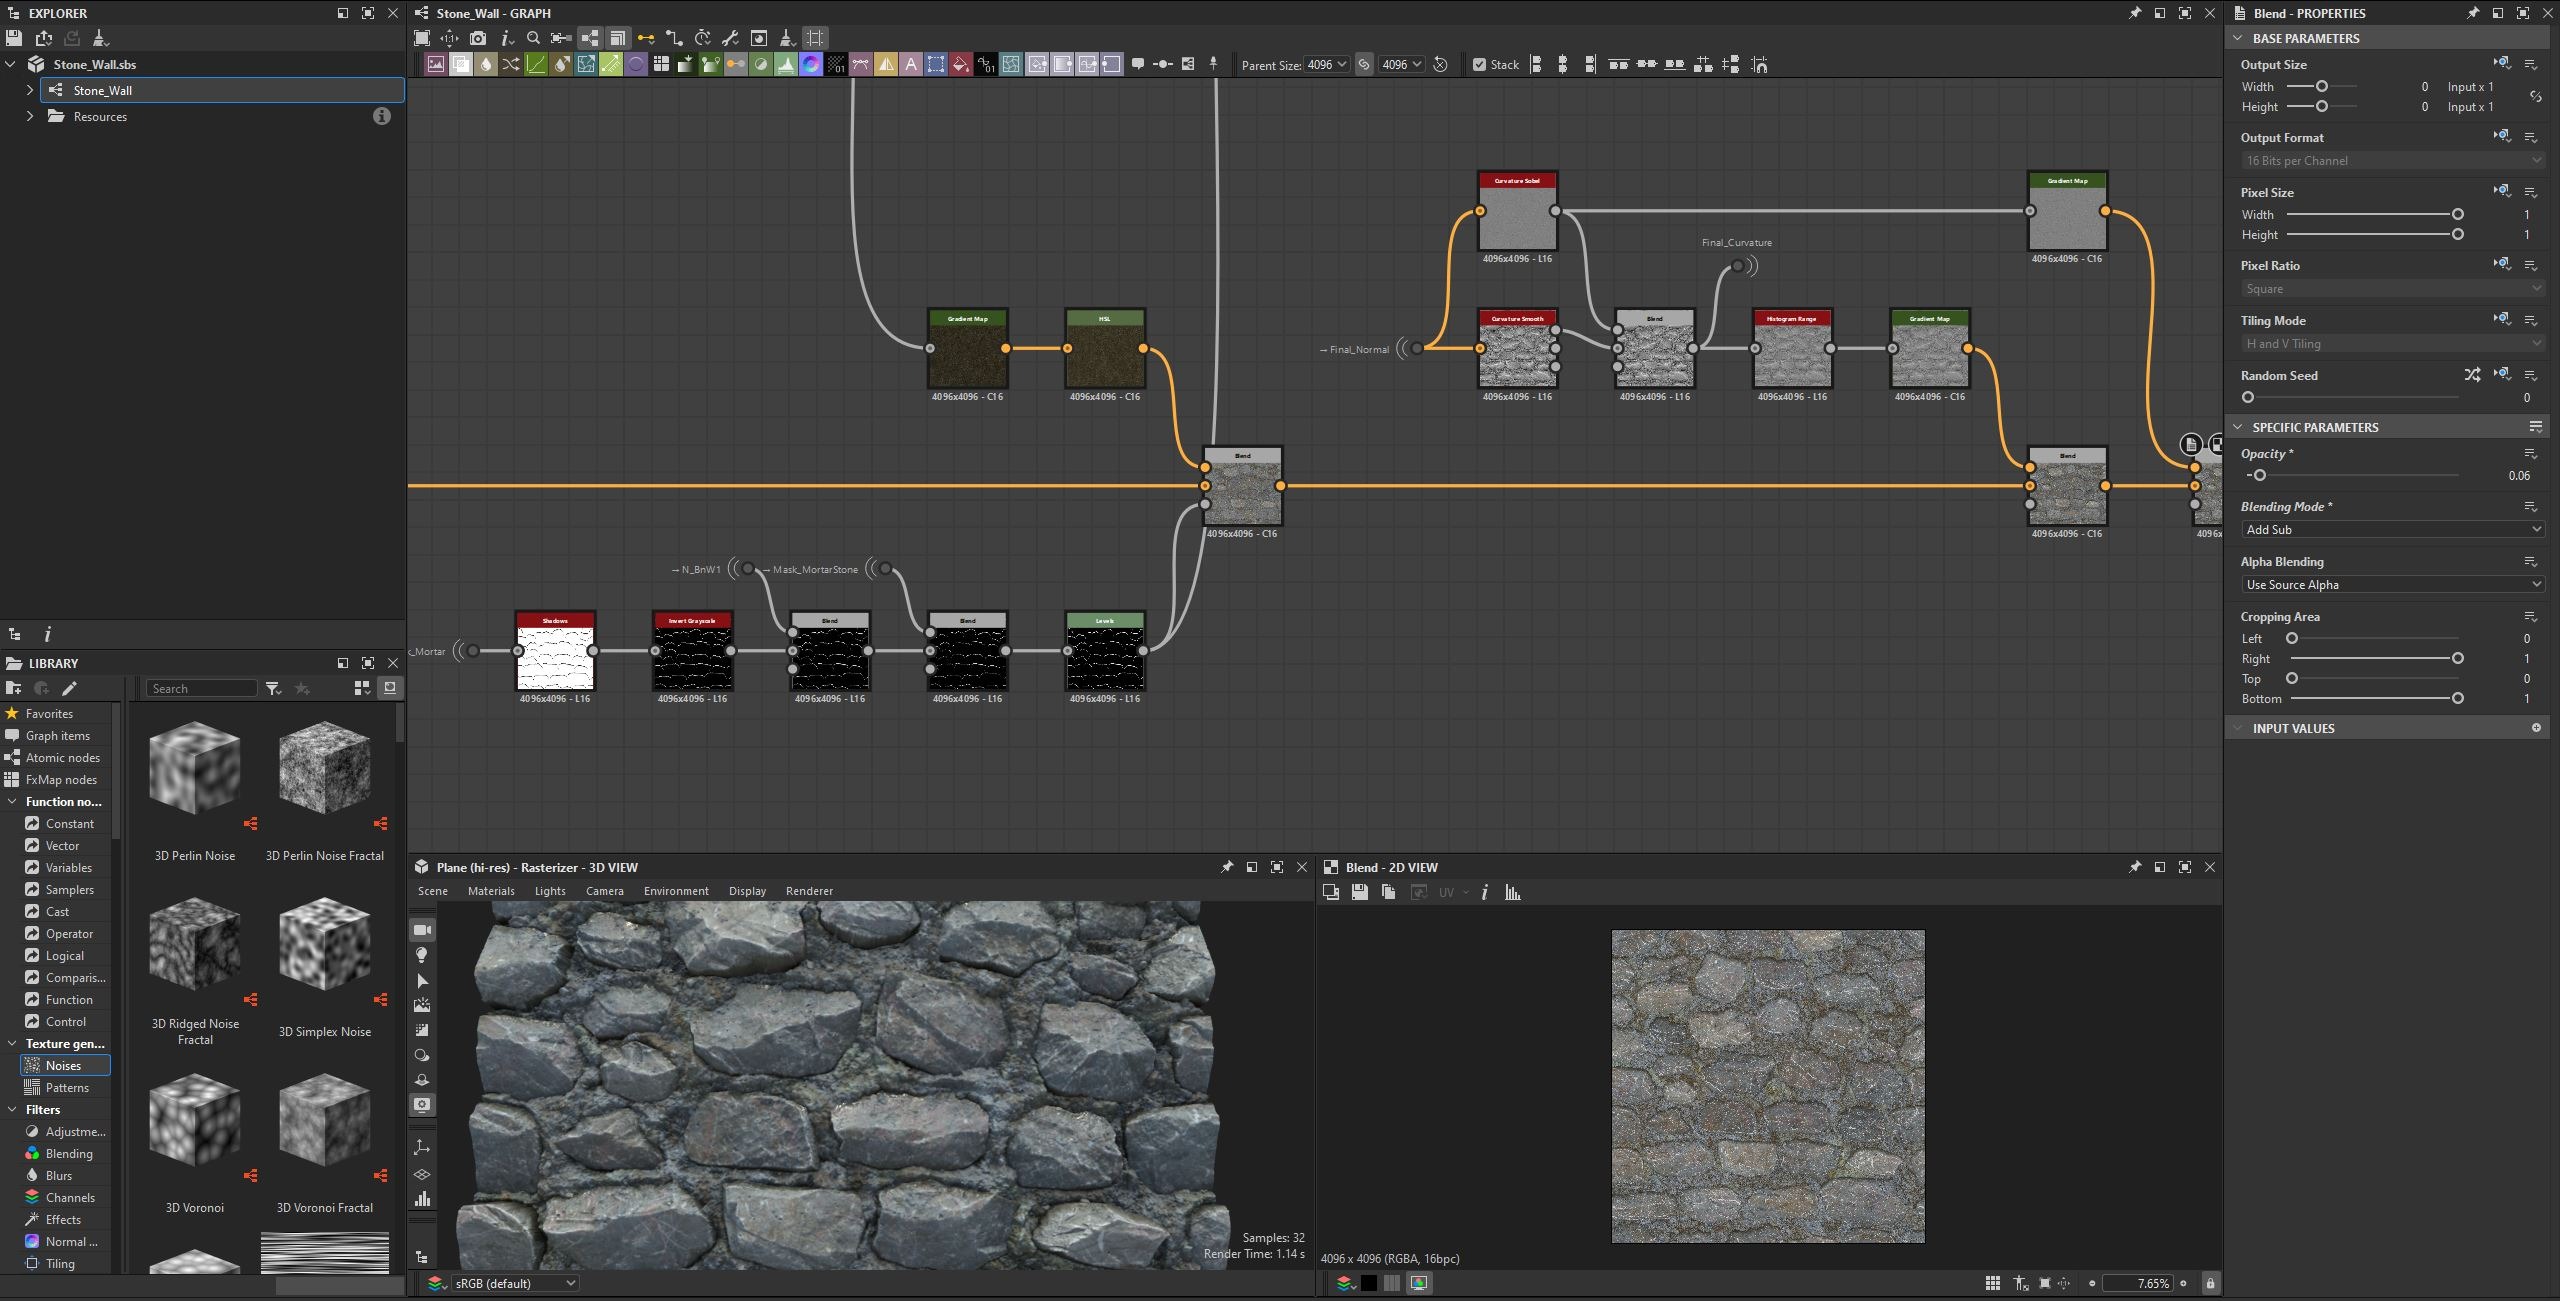
I also wanted to create some pinkish lines, so I used Grunge Map 011 as a mask. In addition, I used a Curvature map to add color variation to the chipped edges.
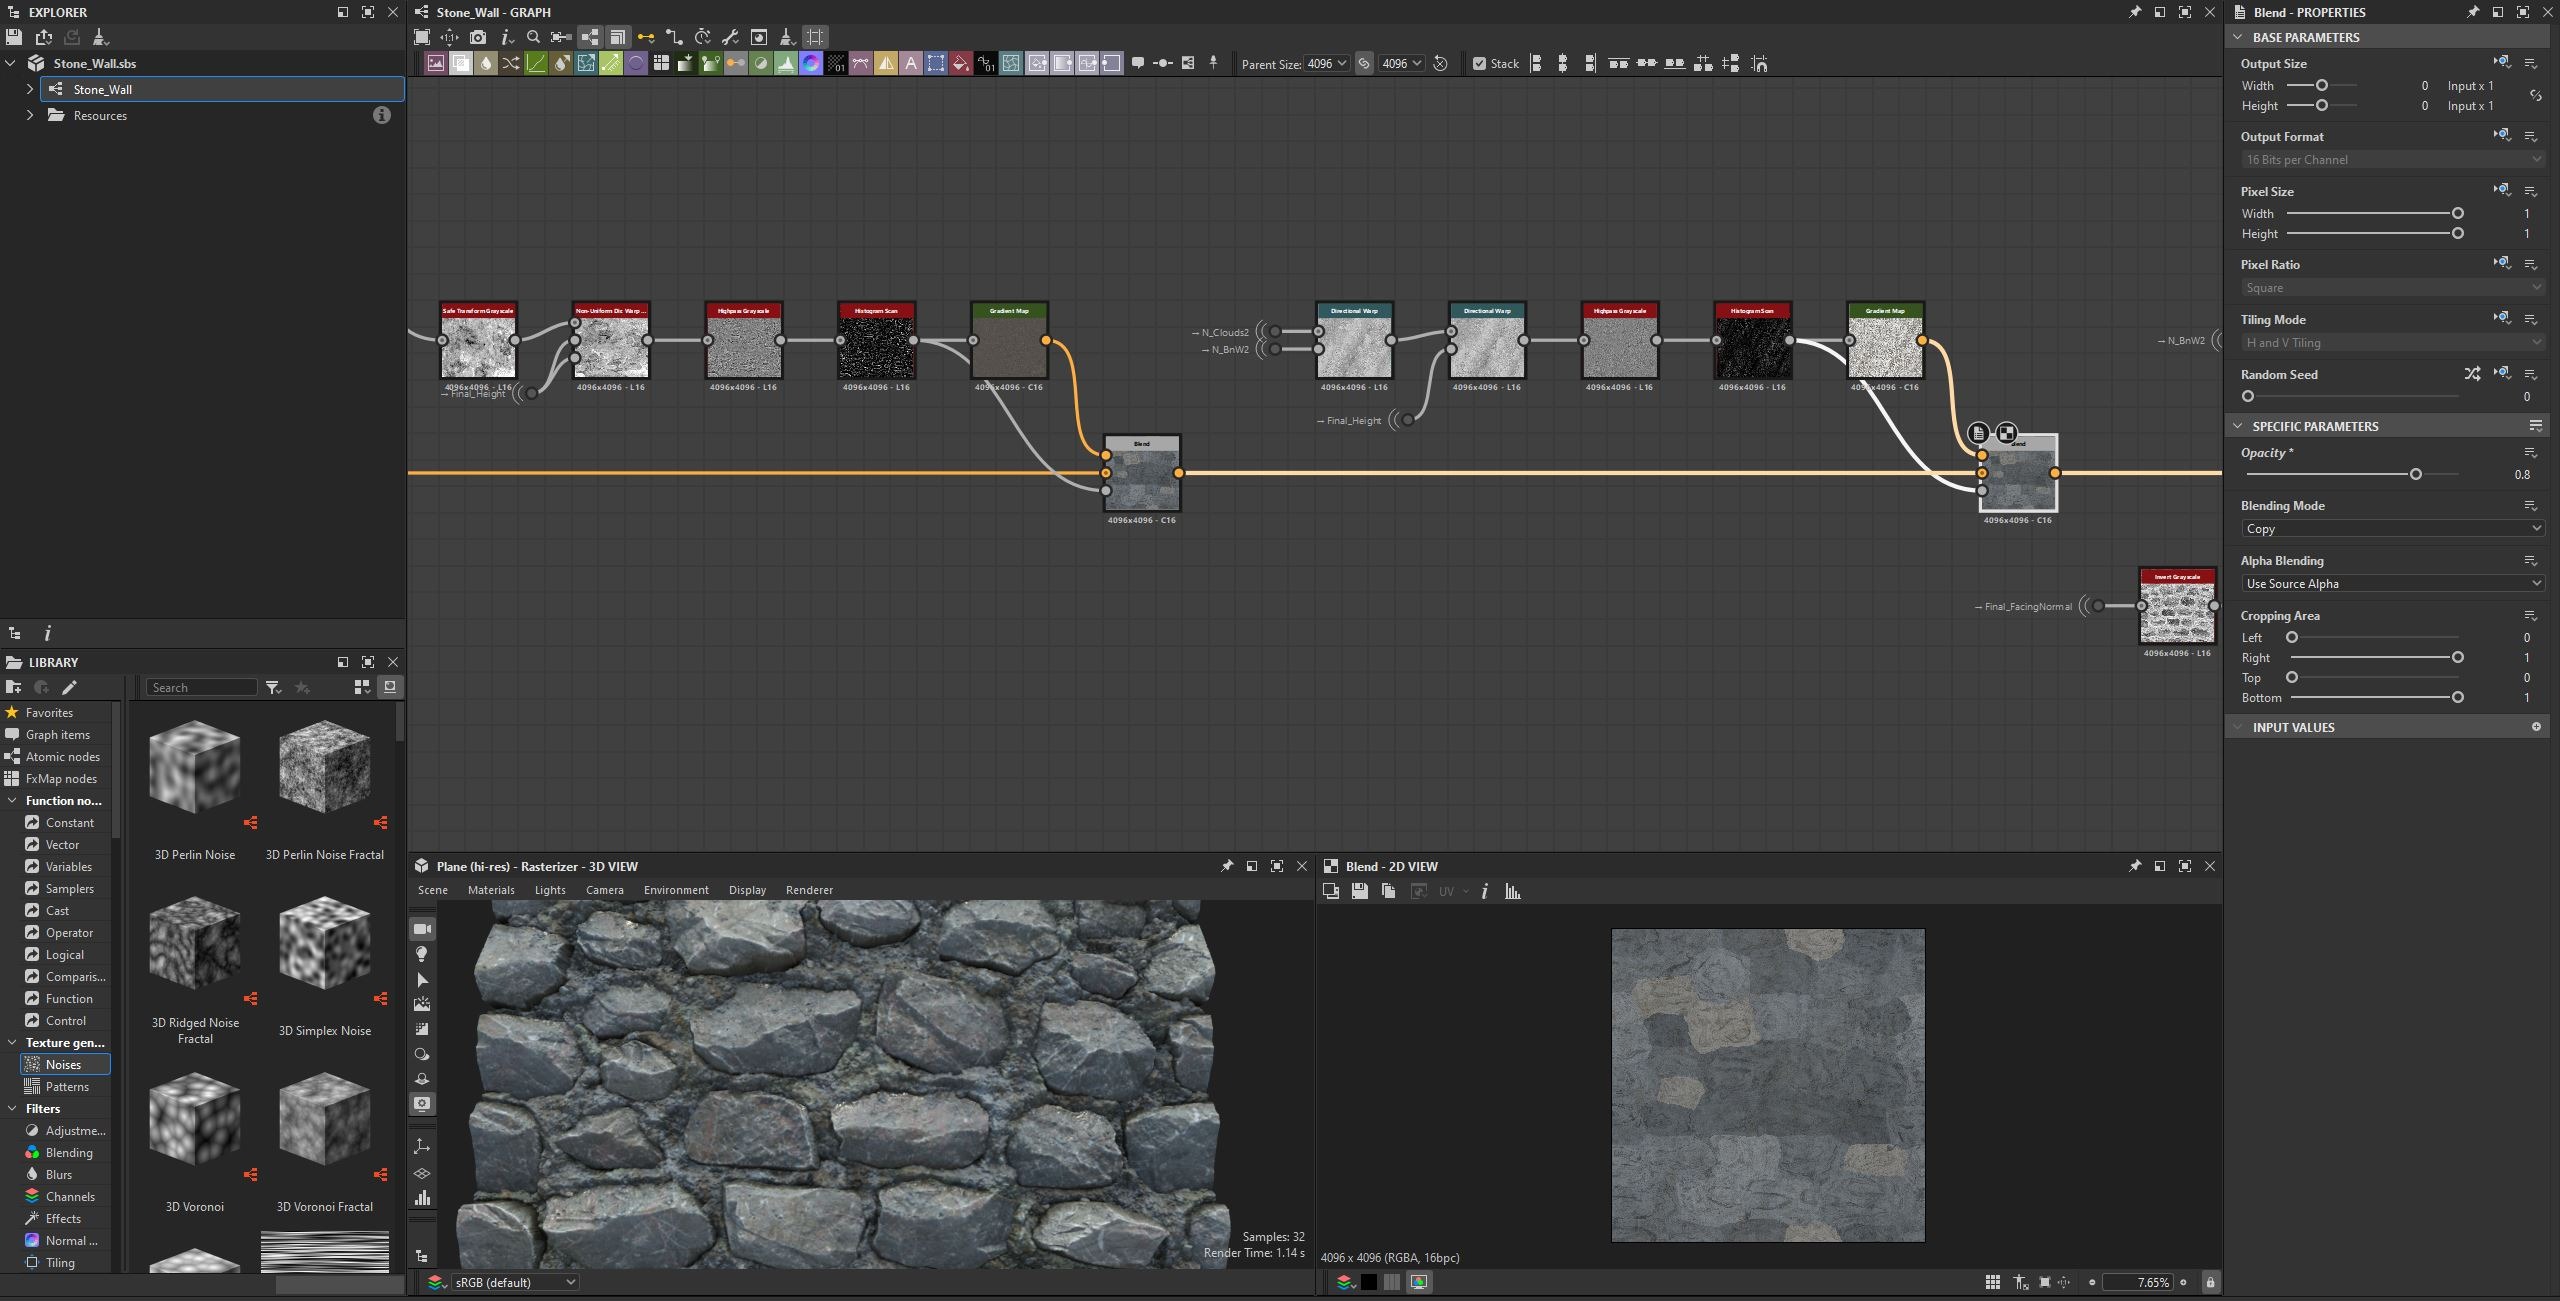
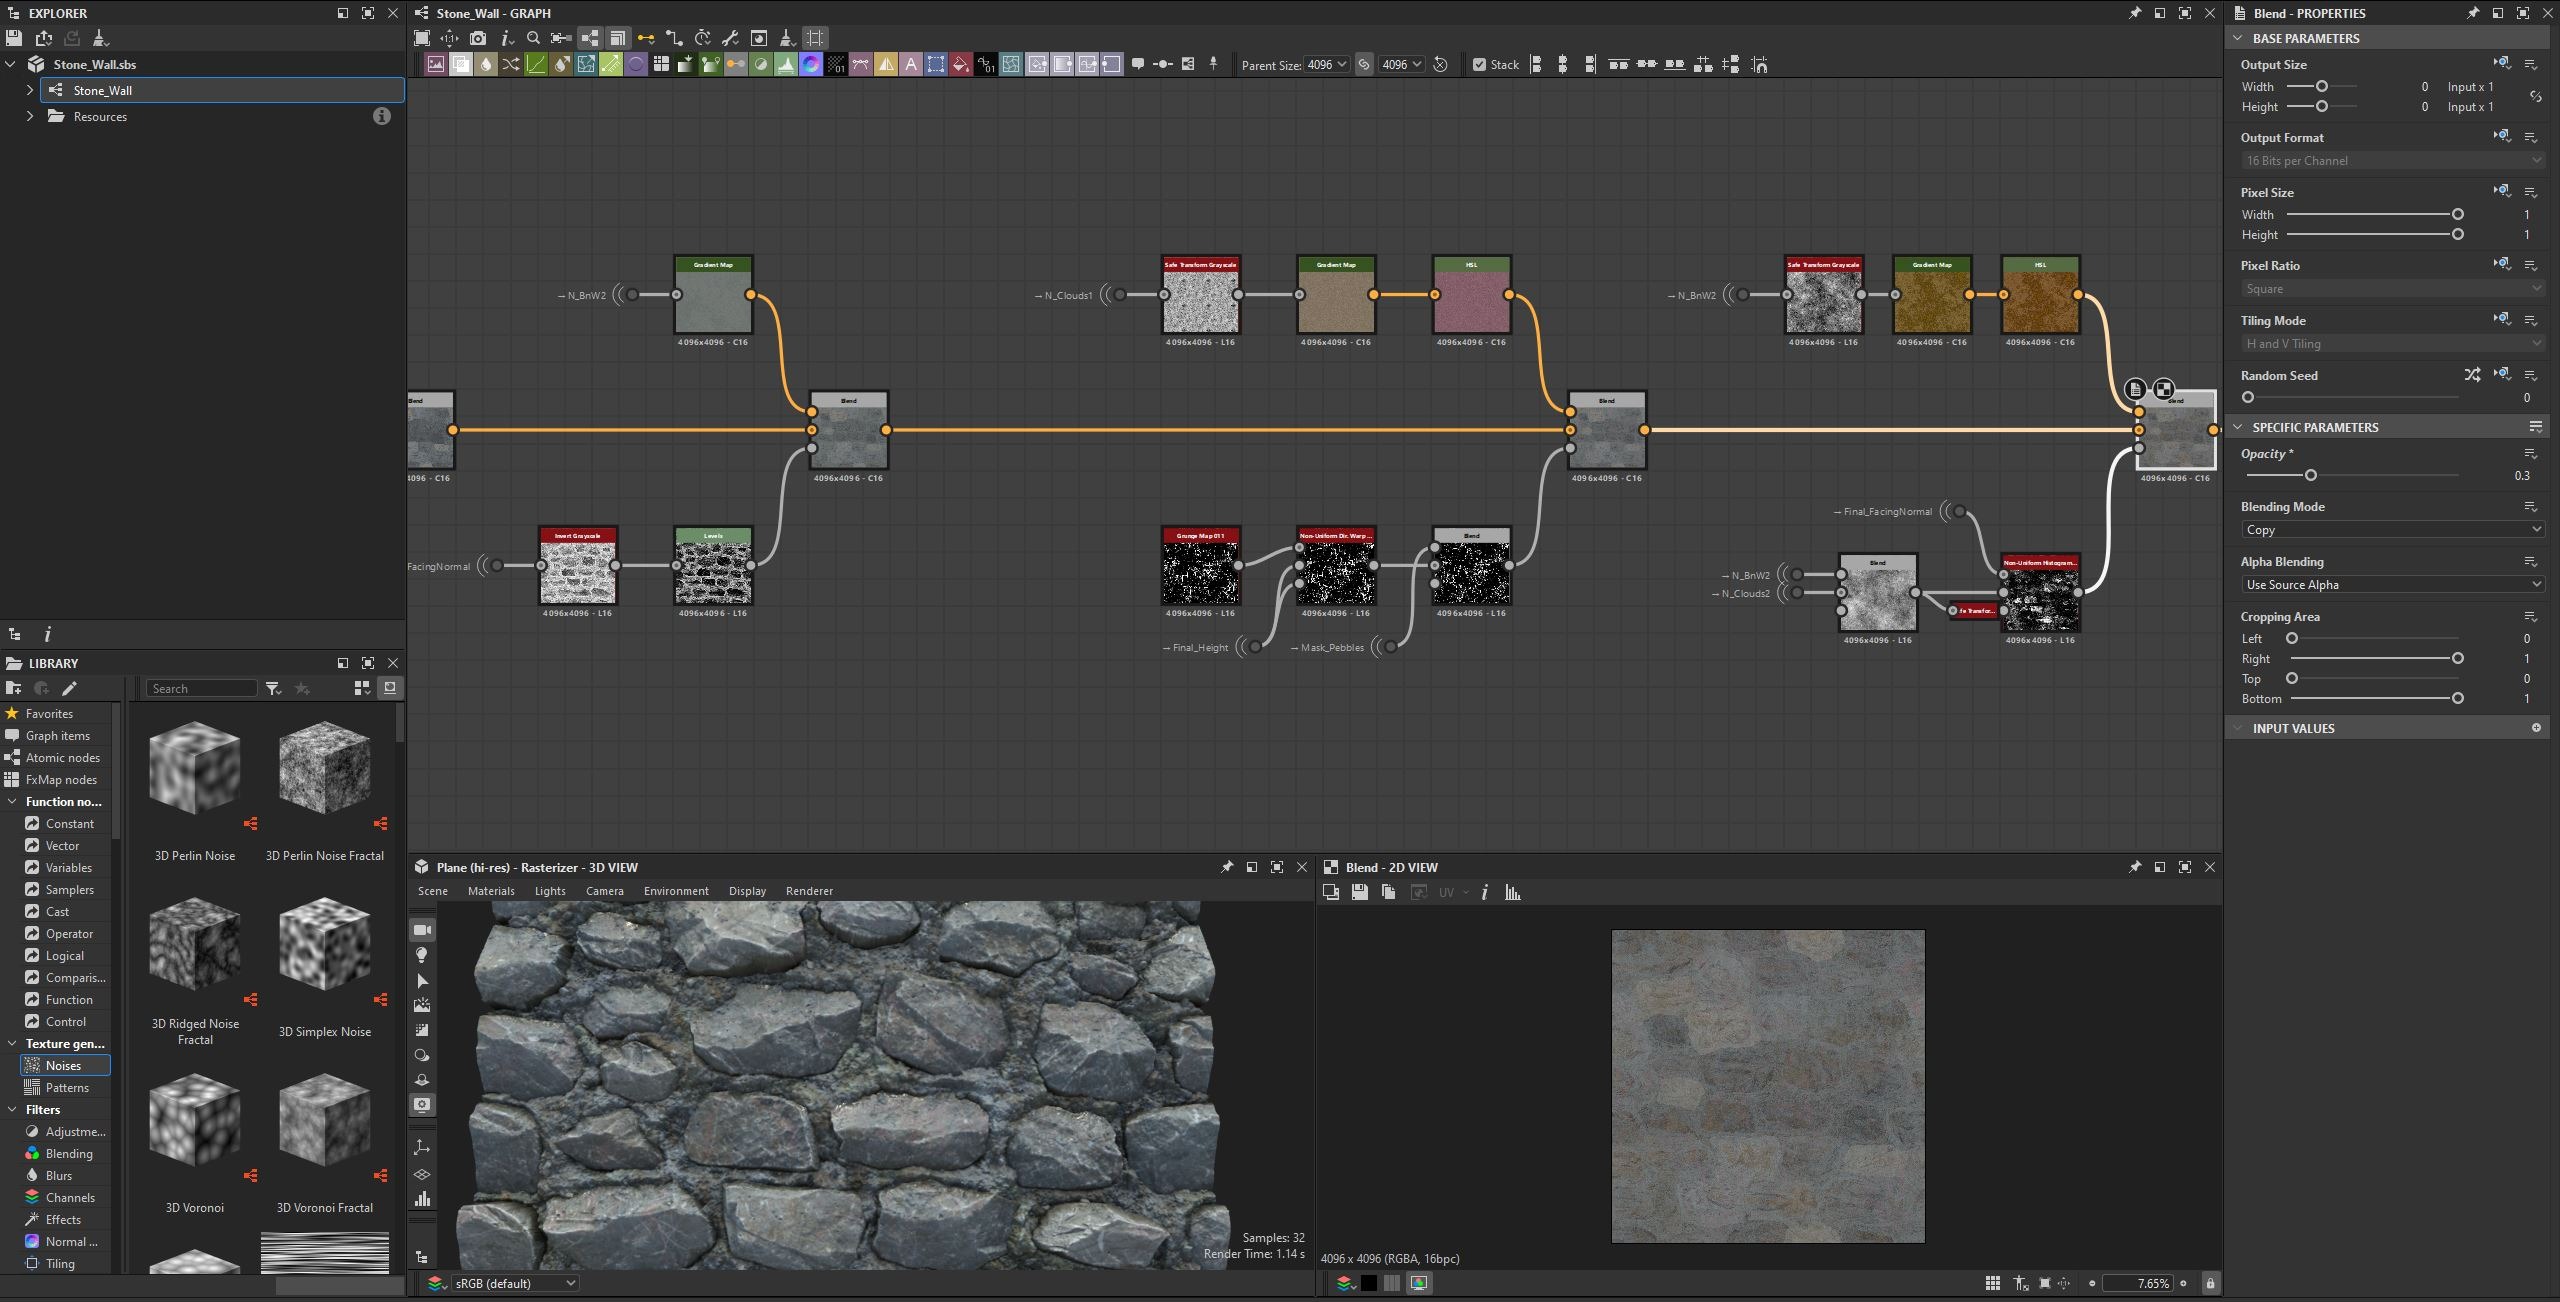
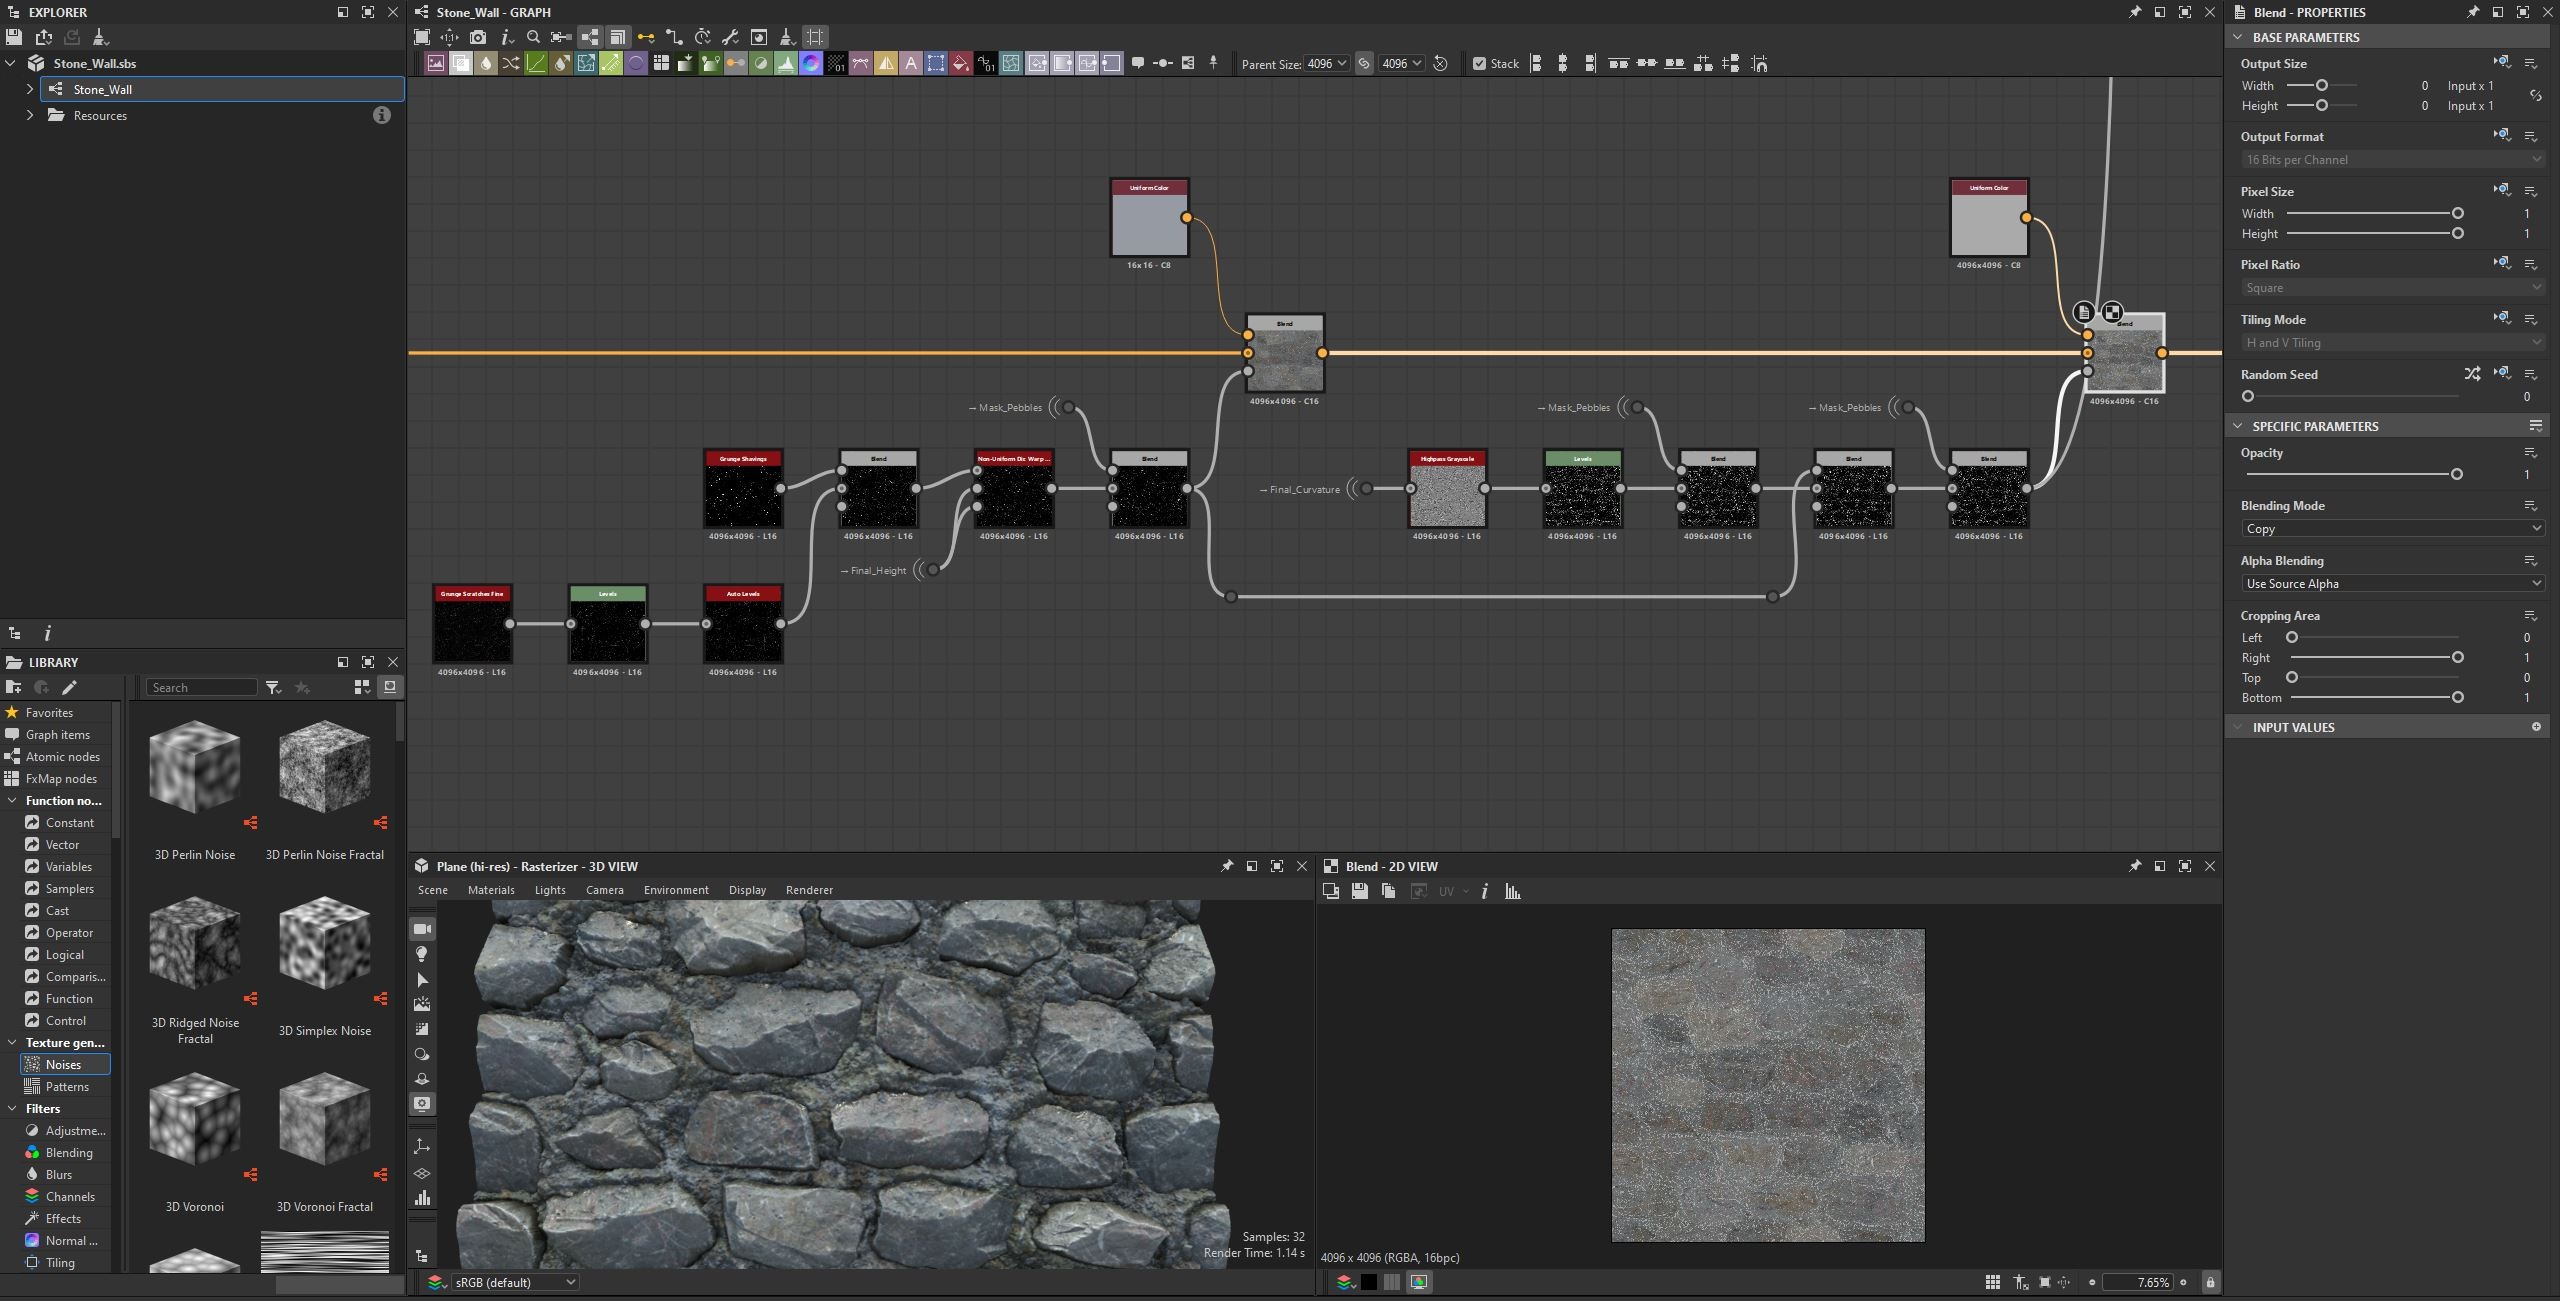
Once the stone colors were finished, I moved on to the mortar section. I started with a Moisture Noise and scaled it up by 3 to get more patterns.
After that, I made several adjustments to add more color variation and create more interesting colors.
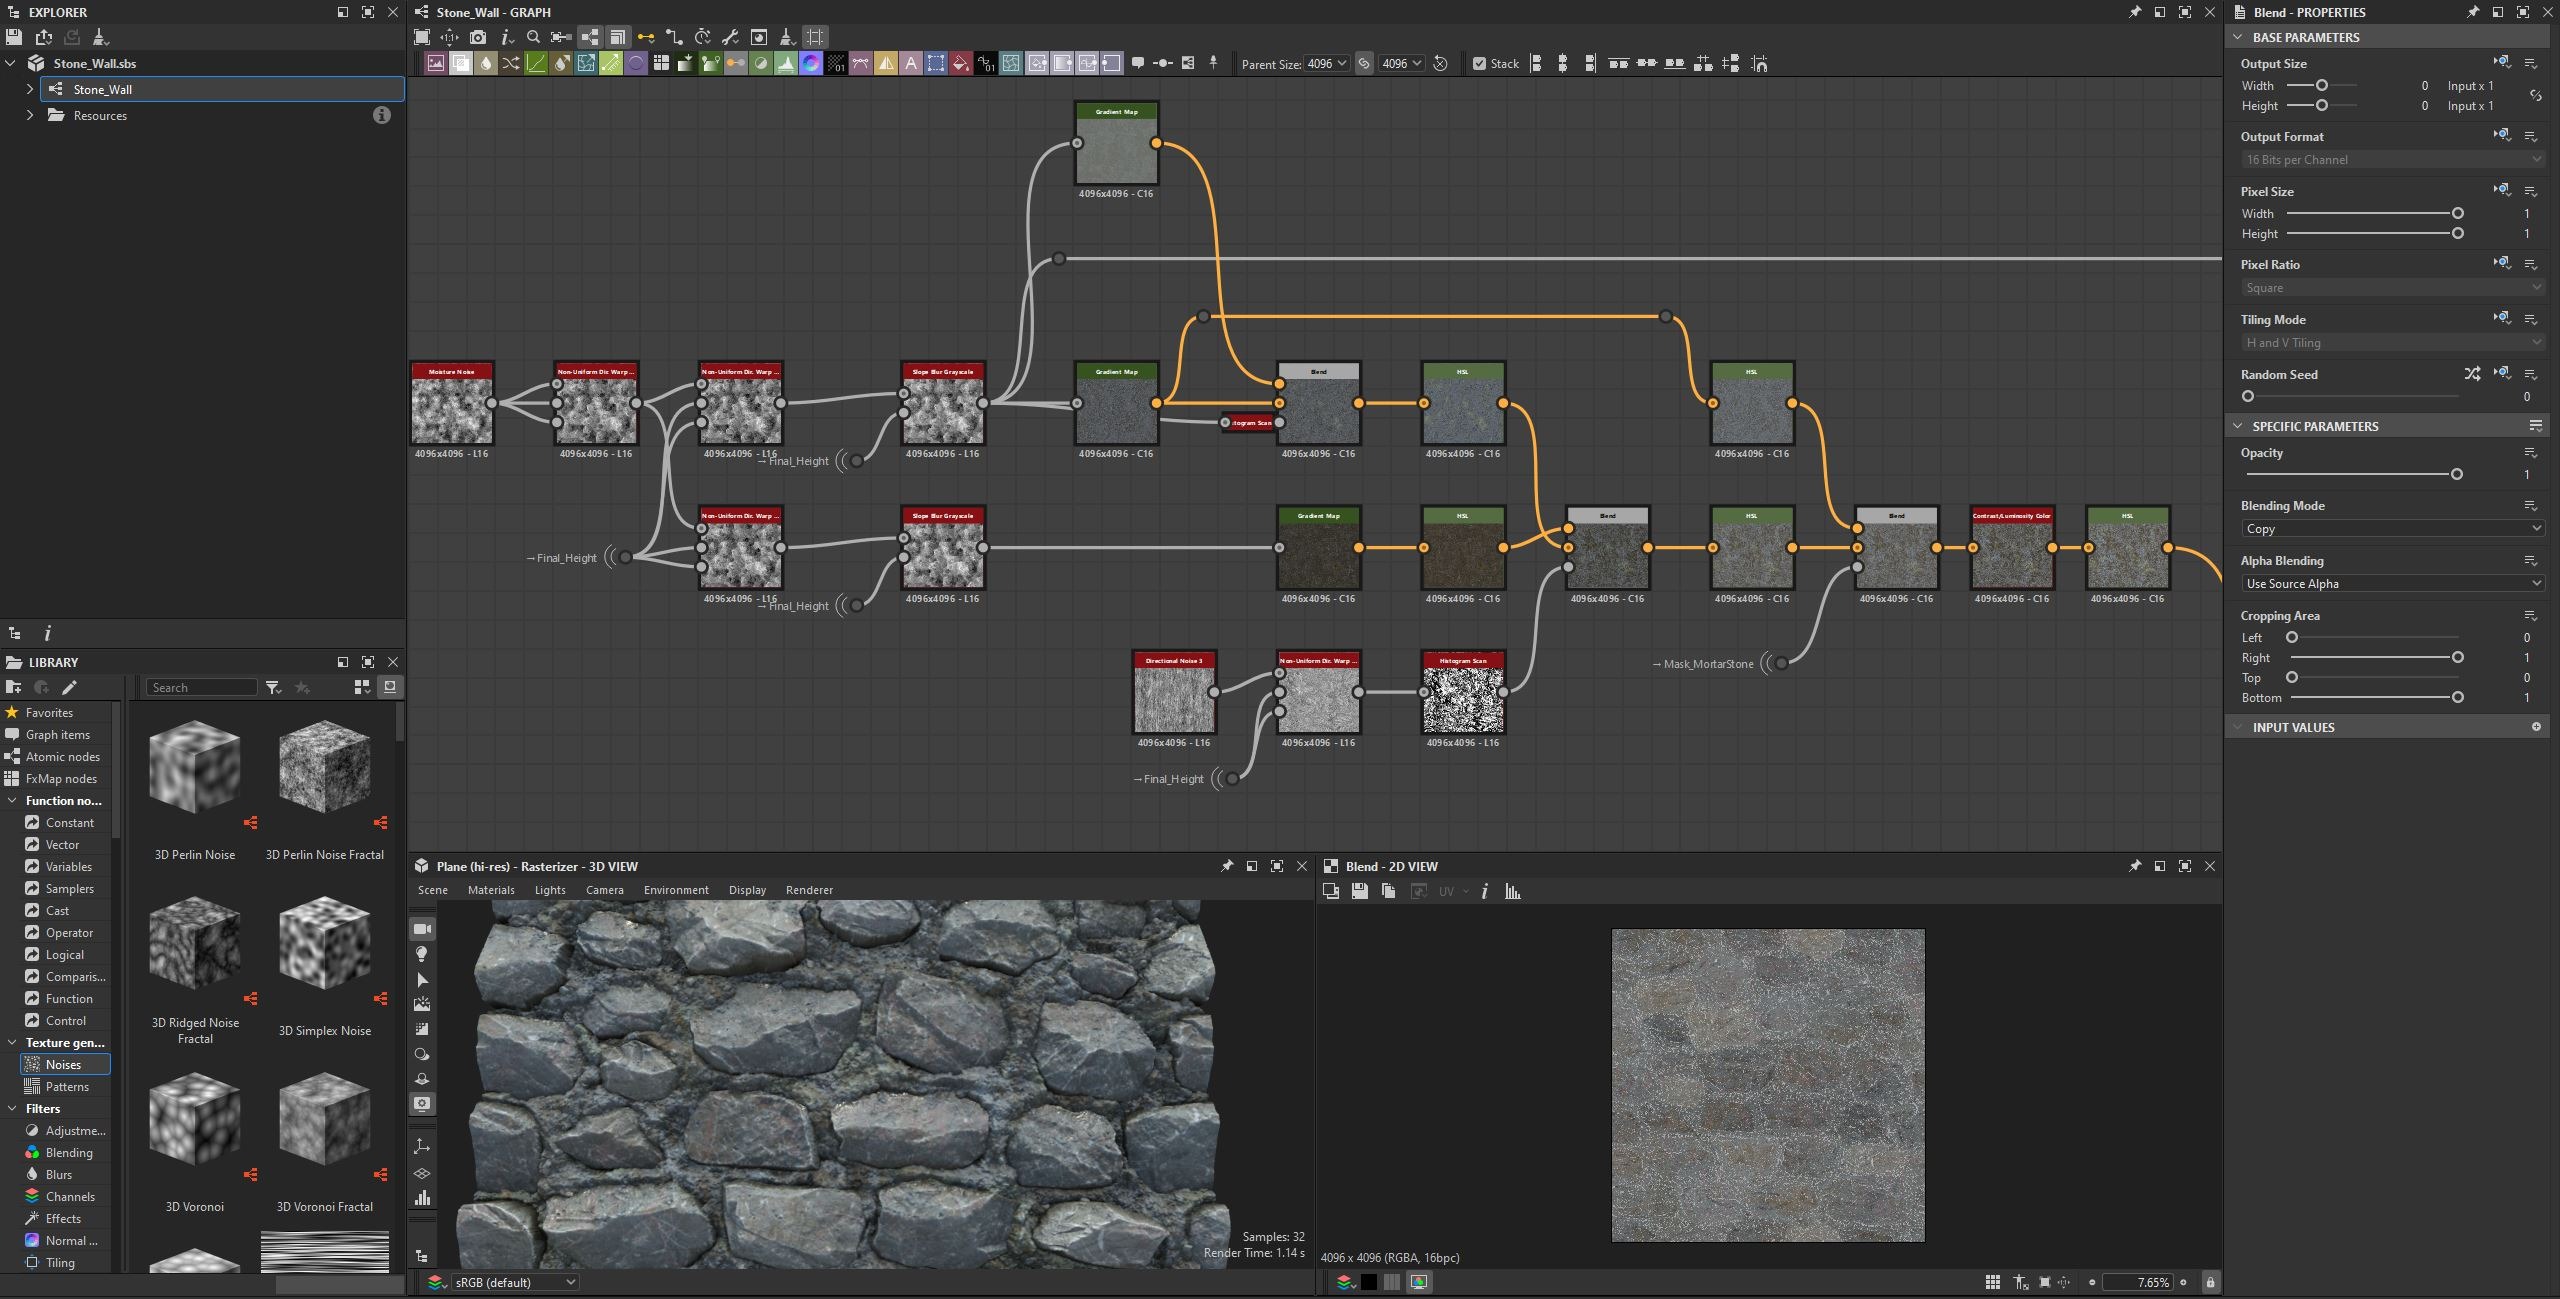
After blending the mortar color with the stone color, I added the final details to finish this section.
During the Base Color creation process, I used the PBR Validate node to make sure my colors stayed within the PBR range.
Roughness
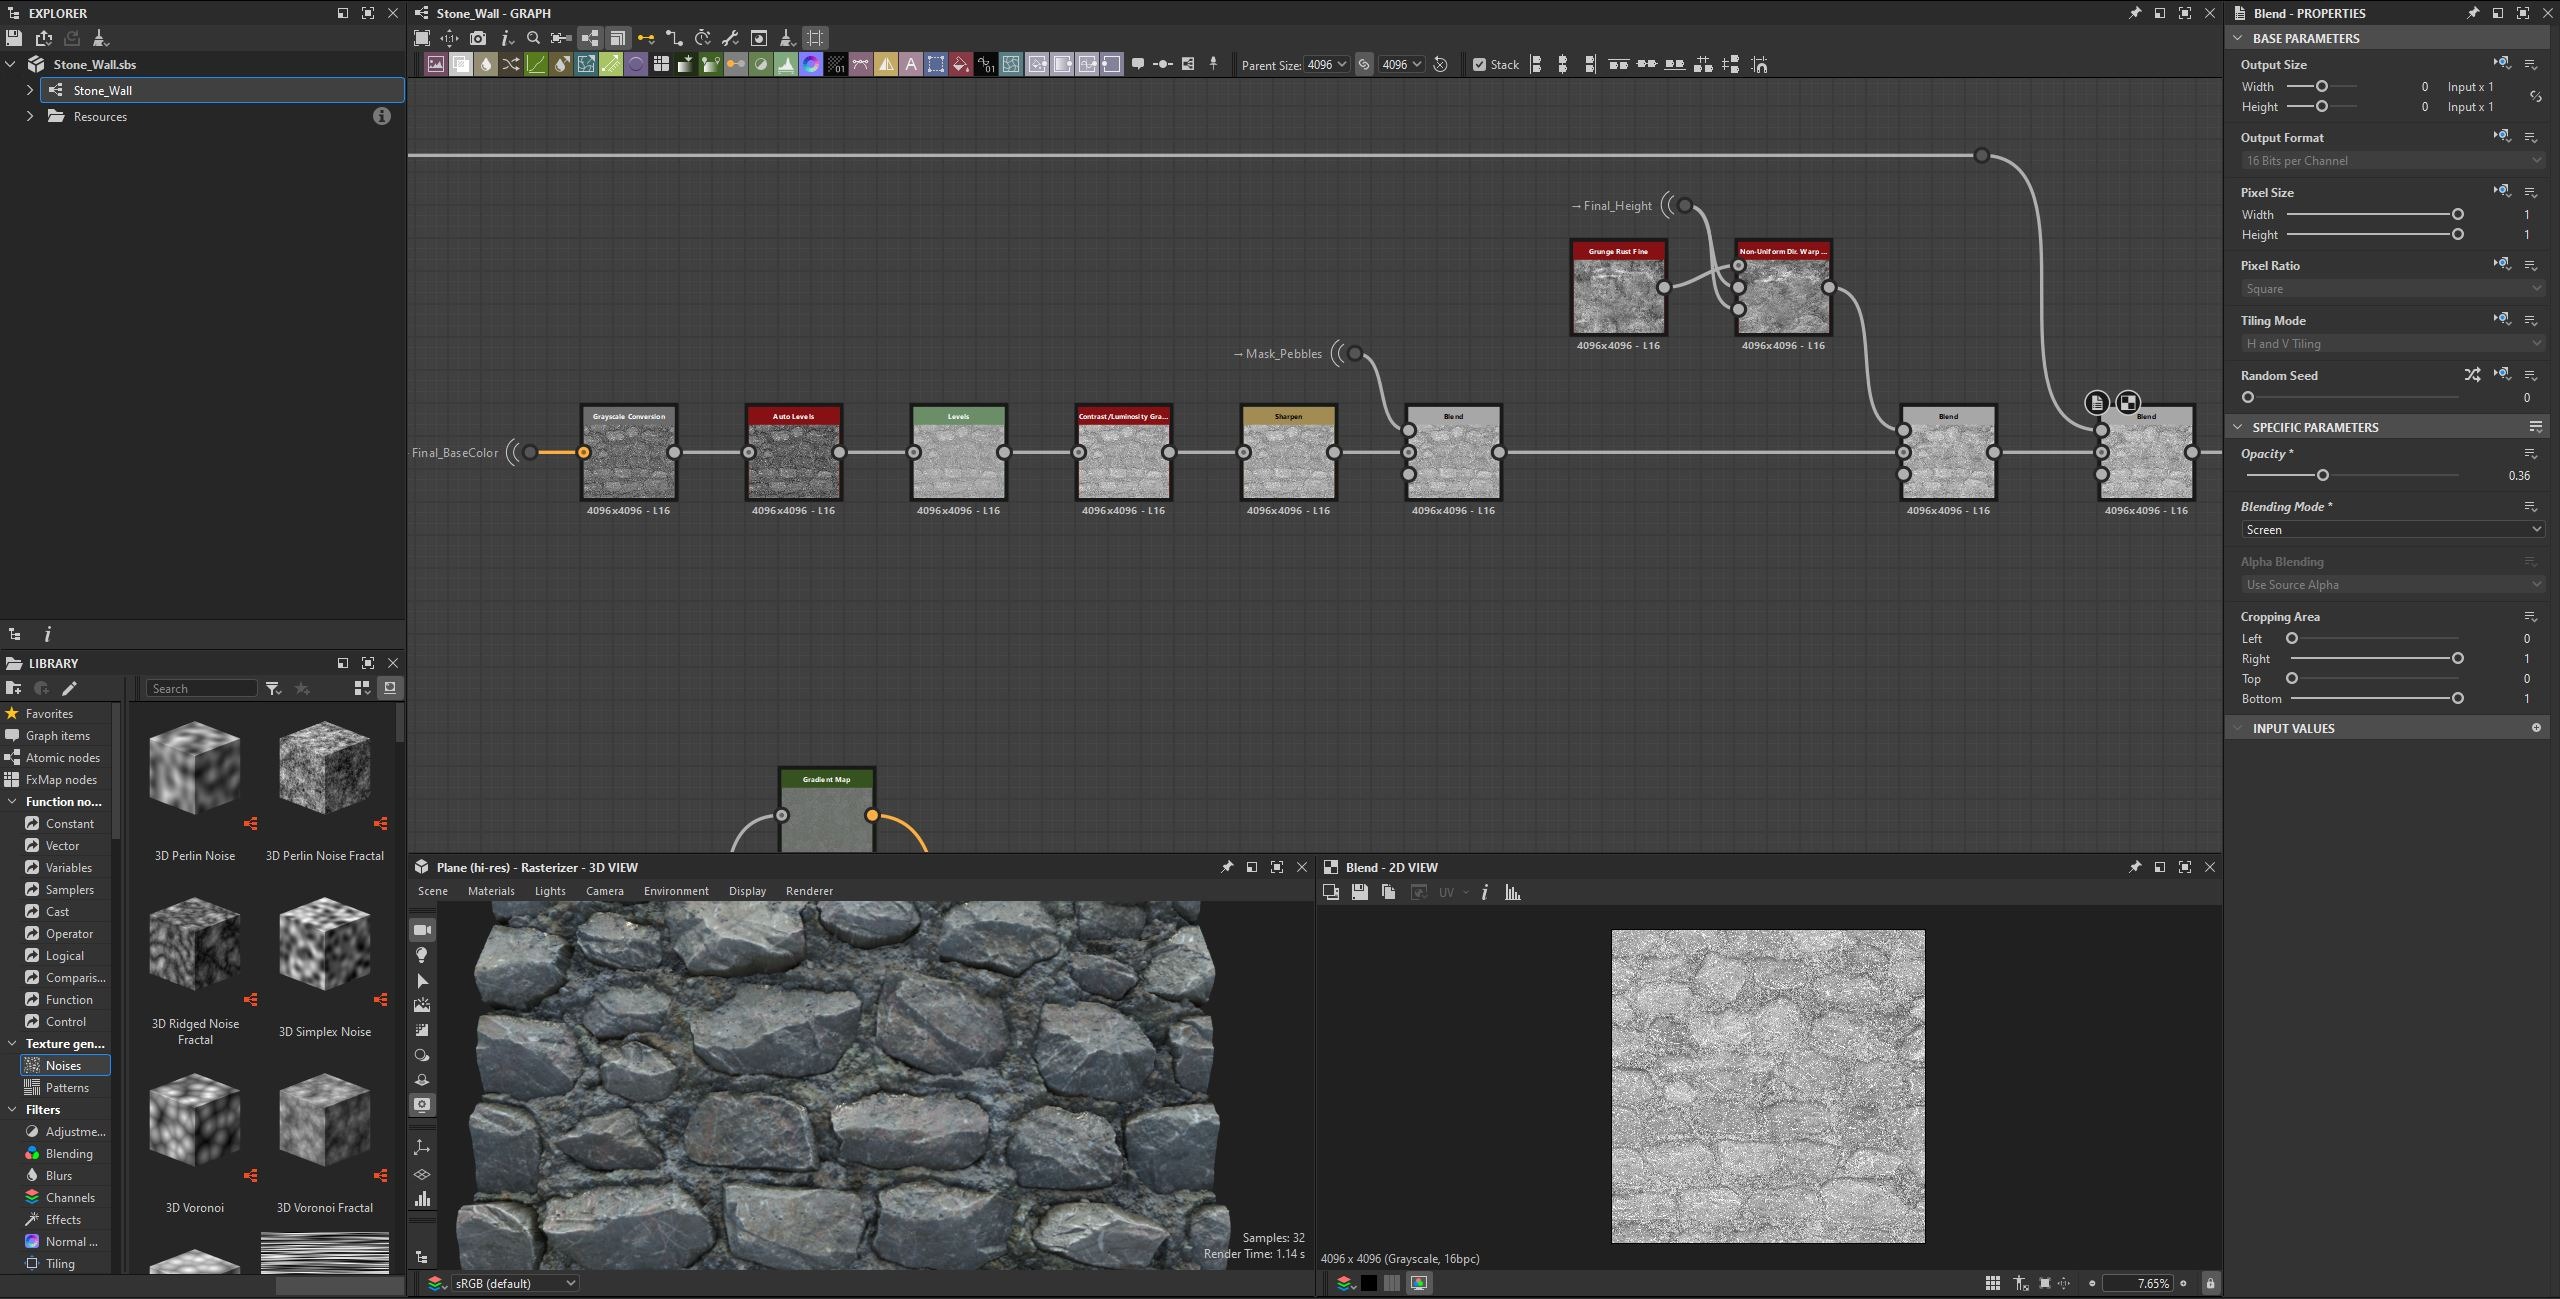
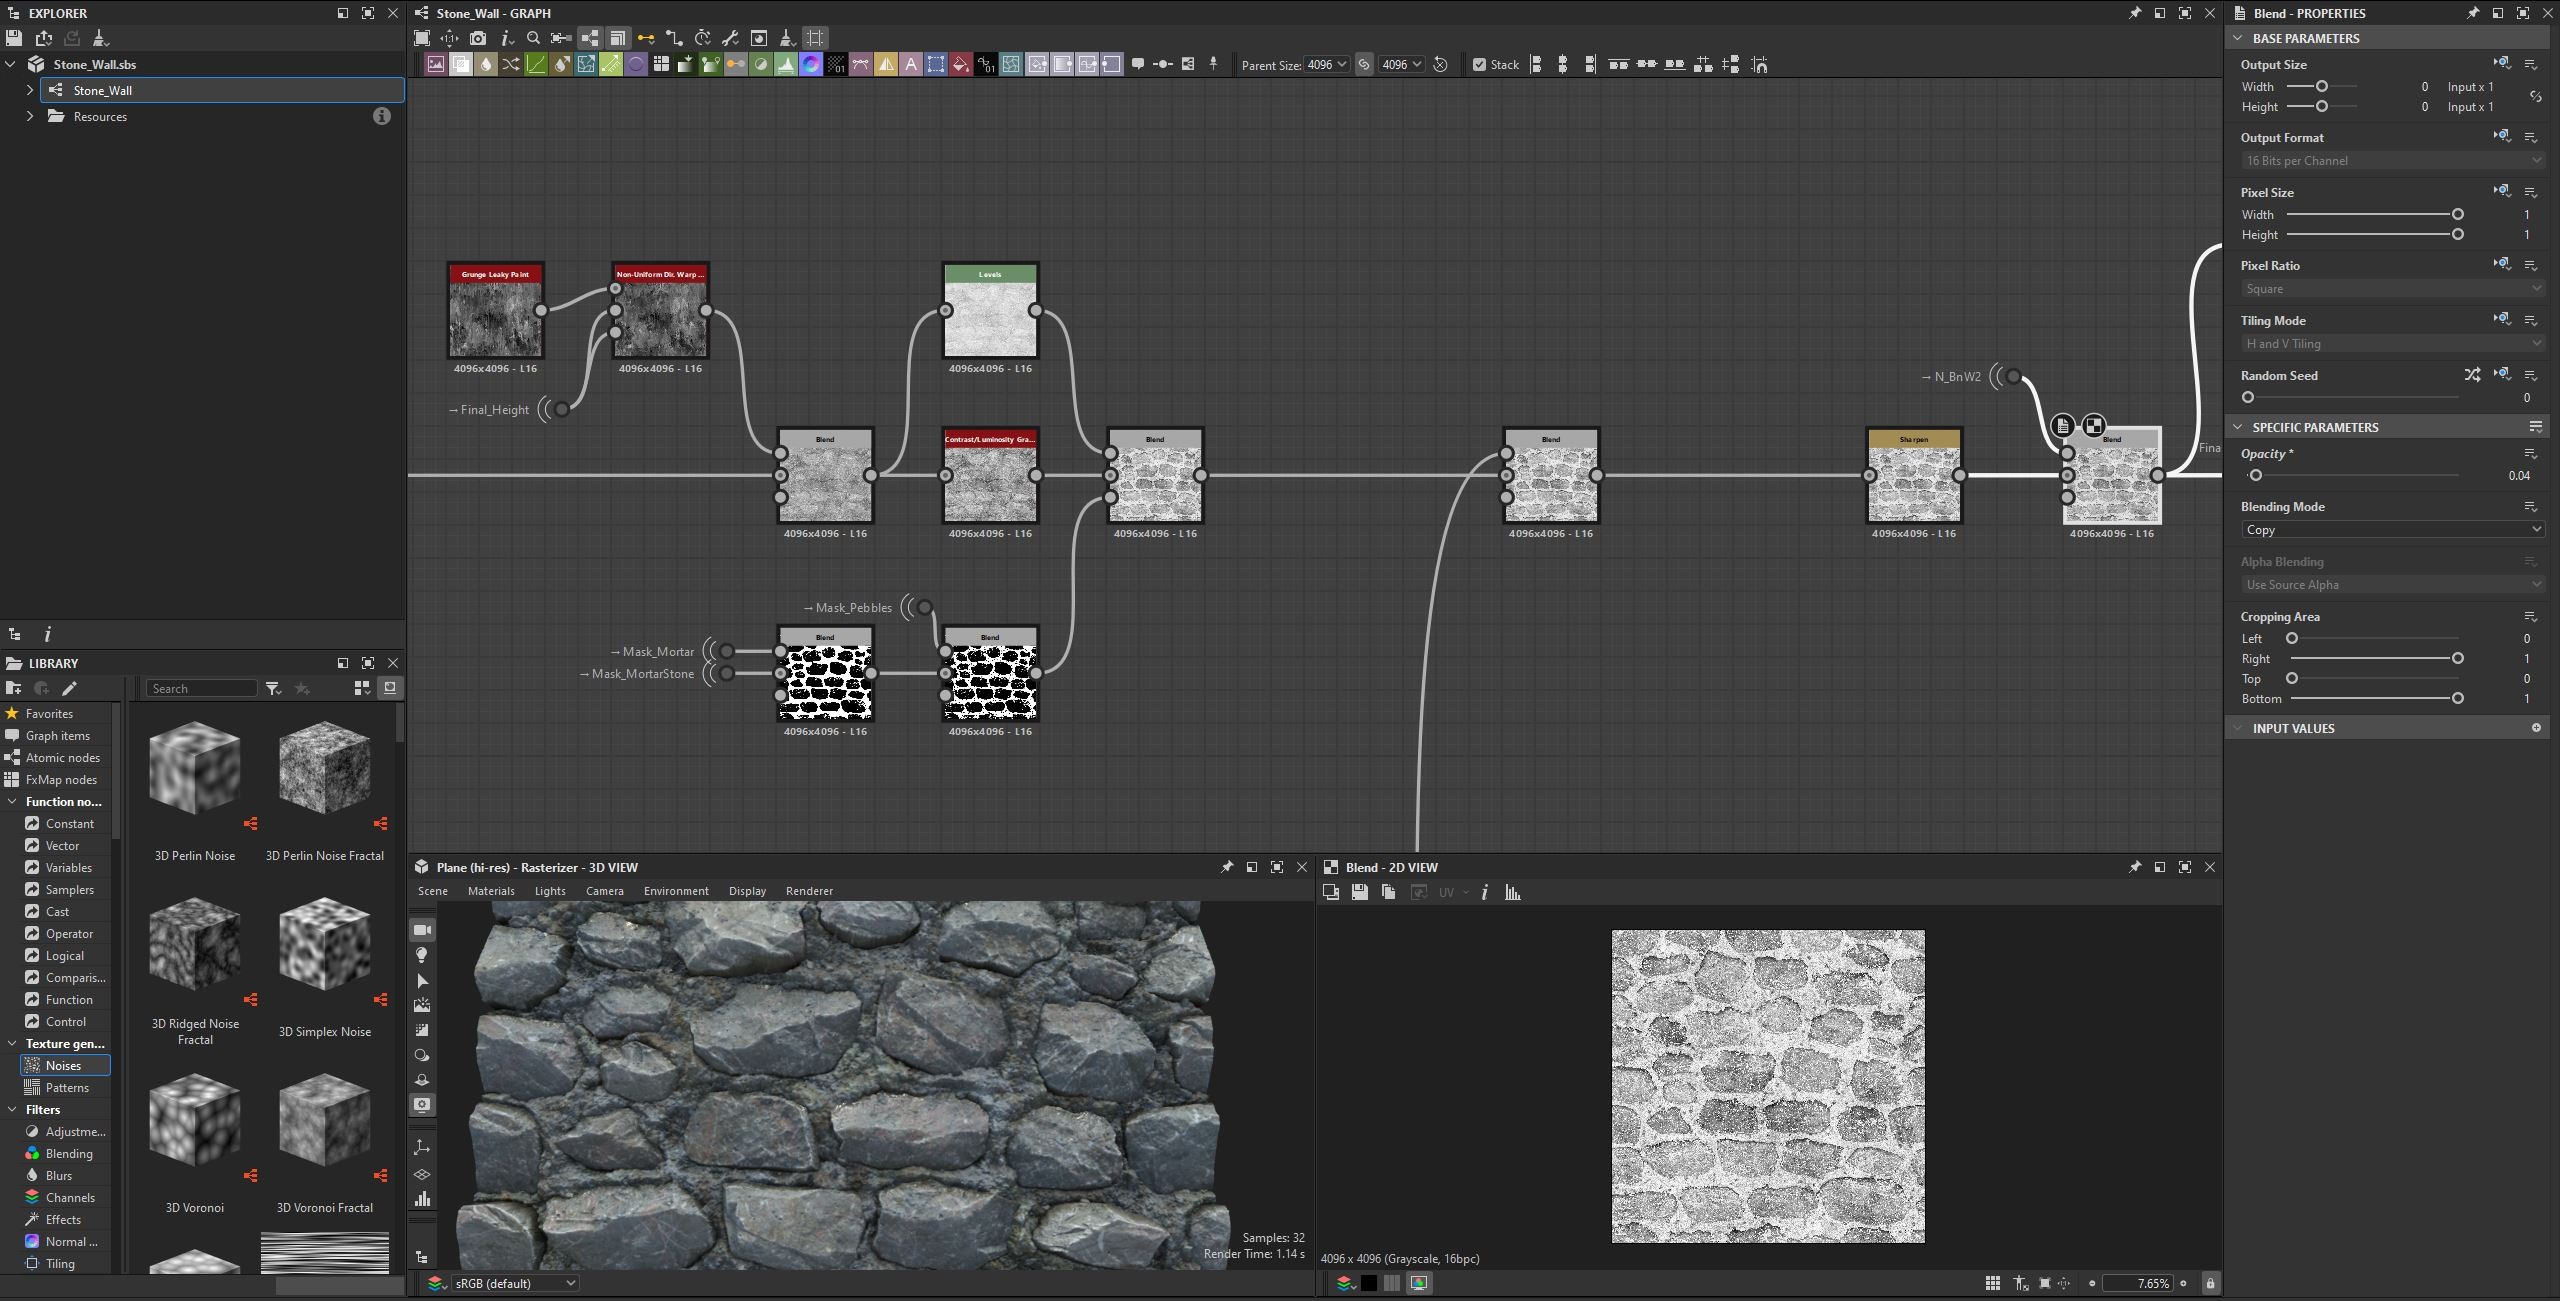
After finishing the Base Color, I used a Grayscale Conversion node to convert the Base Color into grayscale information. After that, I used a Levels node to brighten the result.
I also introduced some shape variation to create more interesting roughness patterns.
In addition, I wanted to have different roughness values between the stones and the mortar to add more storytelling to the material.
Presentation
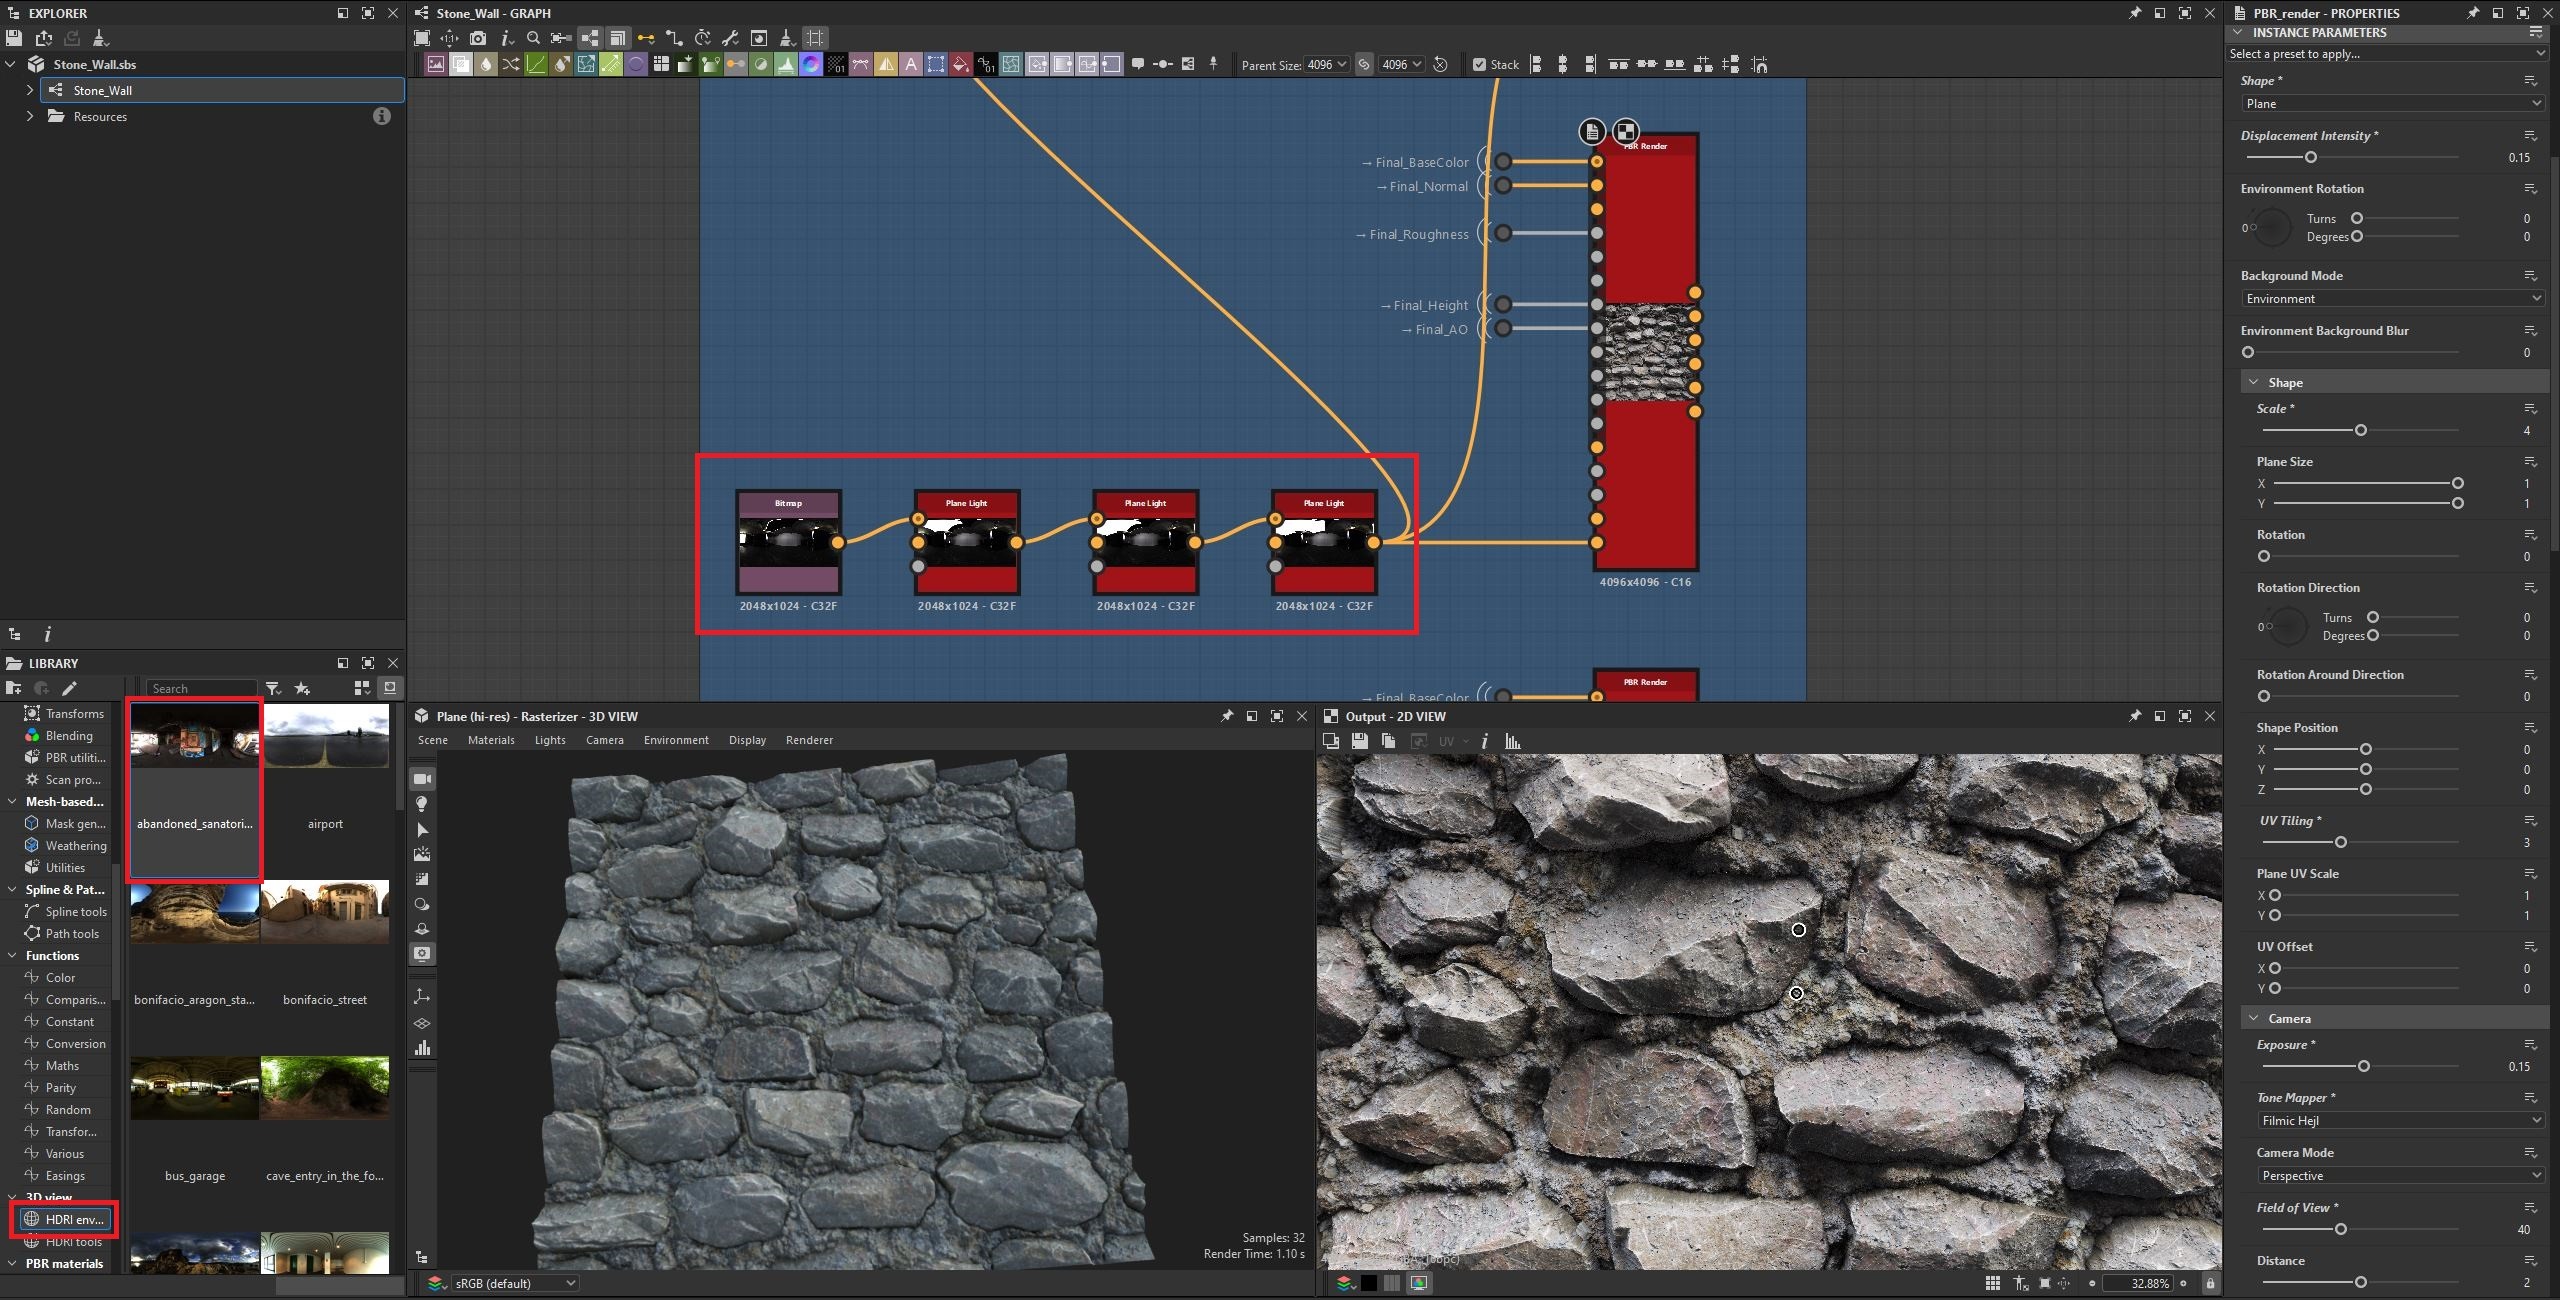
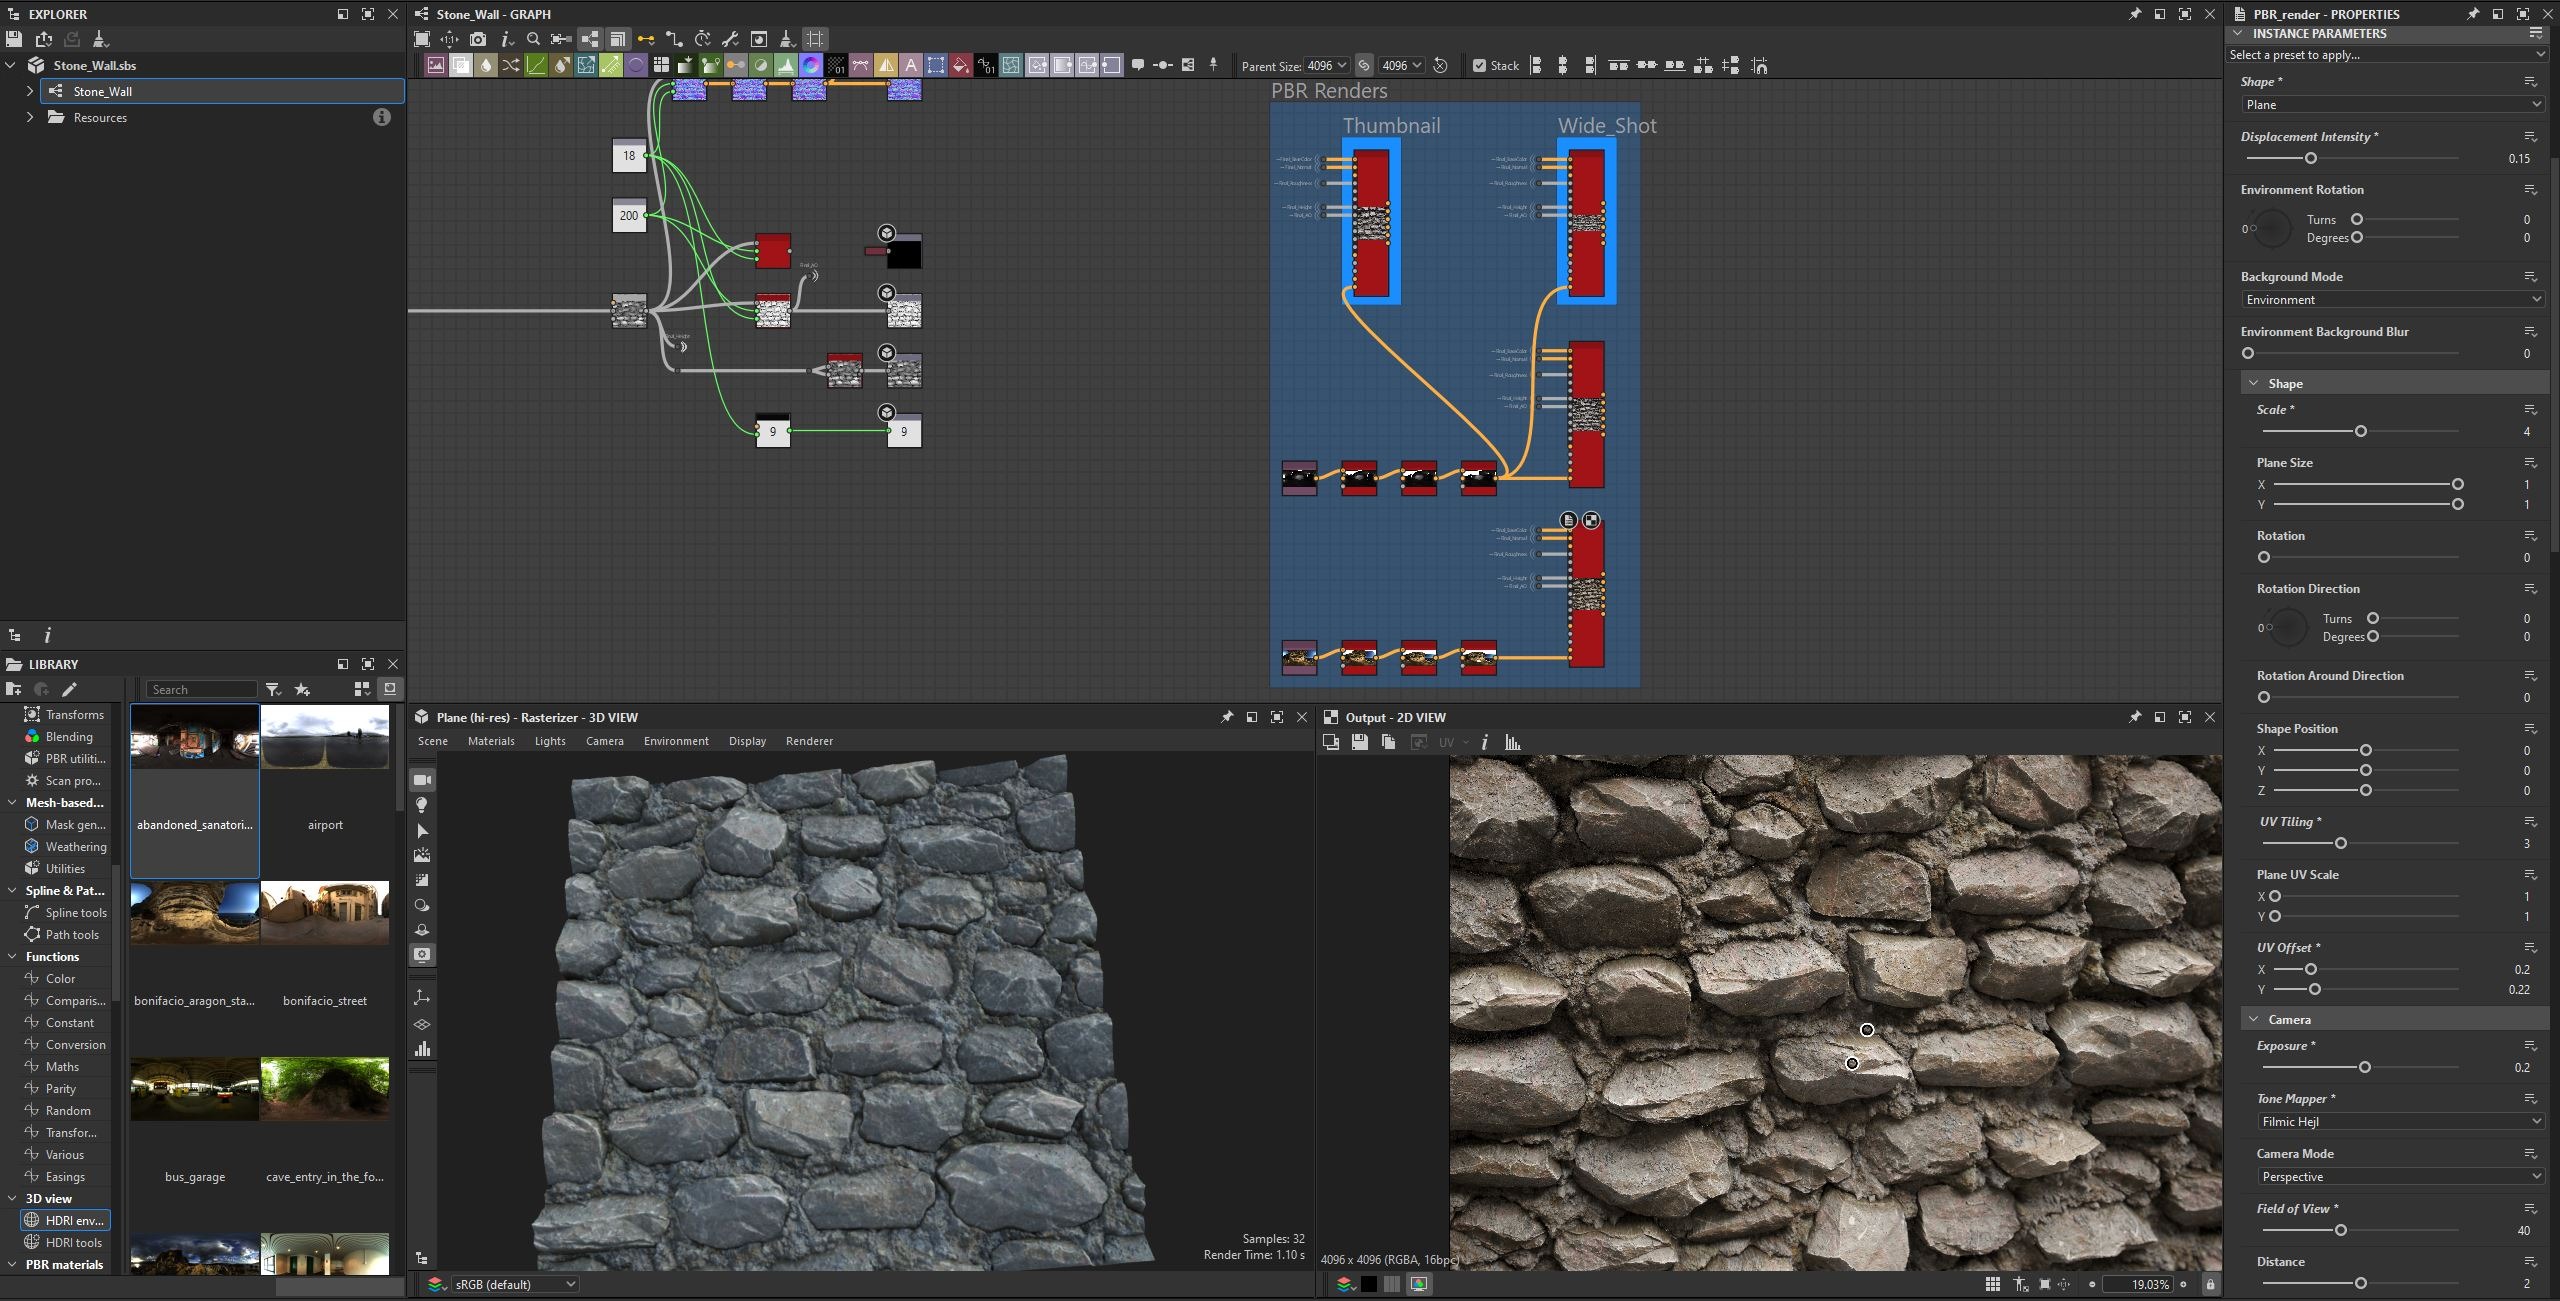
After the Stone Wall material was finished, it was time for presentation. I decided to present the material in two ways: first using the PBR Render node in Substance Designer, and second using Marmoset Toolbag.
The PBR Render node requires an environment to determine the light direction. For that, I went to the HDRI environments in the left-side panel and dragged and dropped a desired environment into the canvas.
After that, I used several Plane Light nodes to better understand the light directions. I also adjusted the parameters inside the PBR Render node based on my needs.
I should mention that there are many great tutorials online for learning more about this node. Finally, I rendered additional shots using a different HDRI environment.
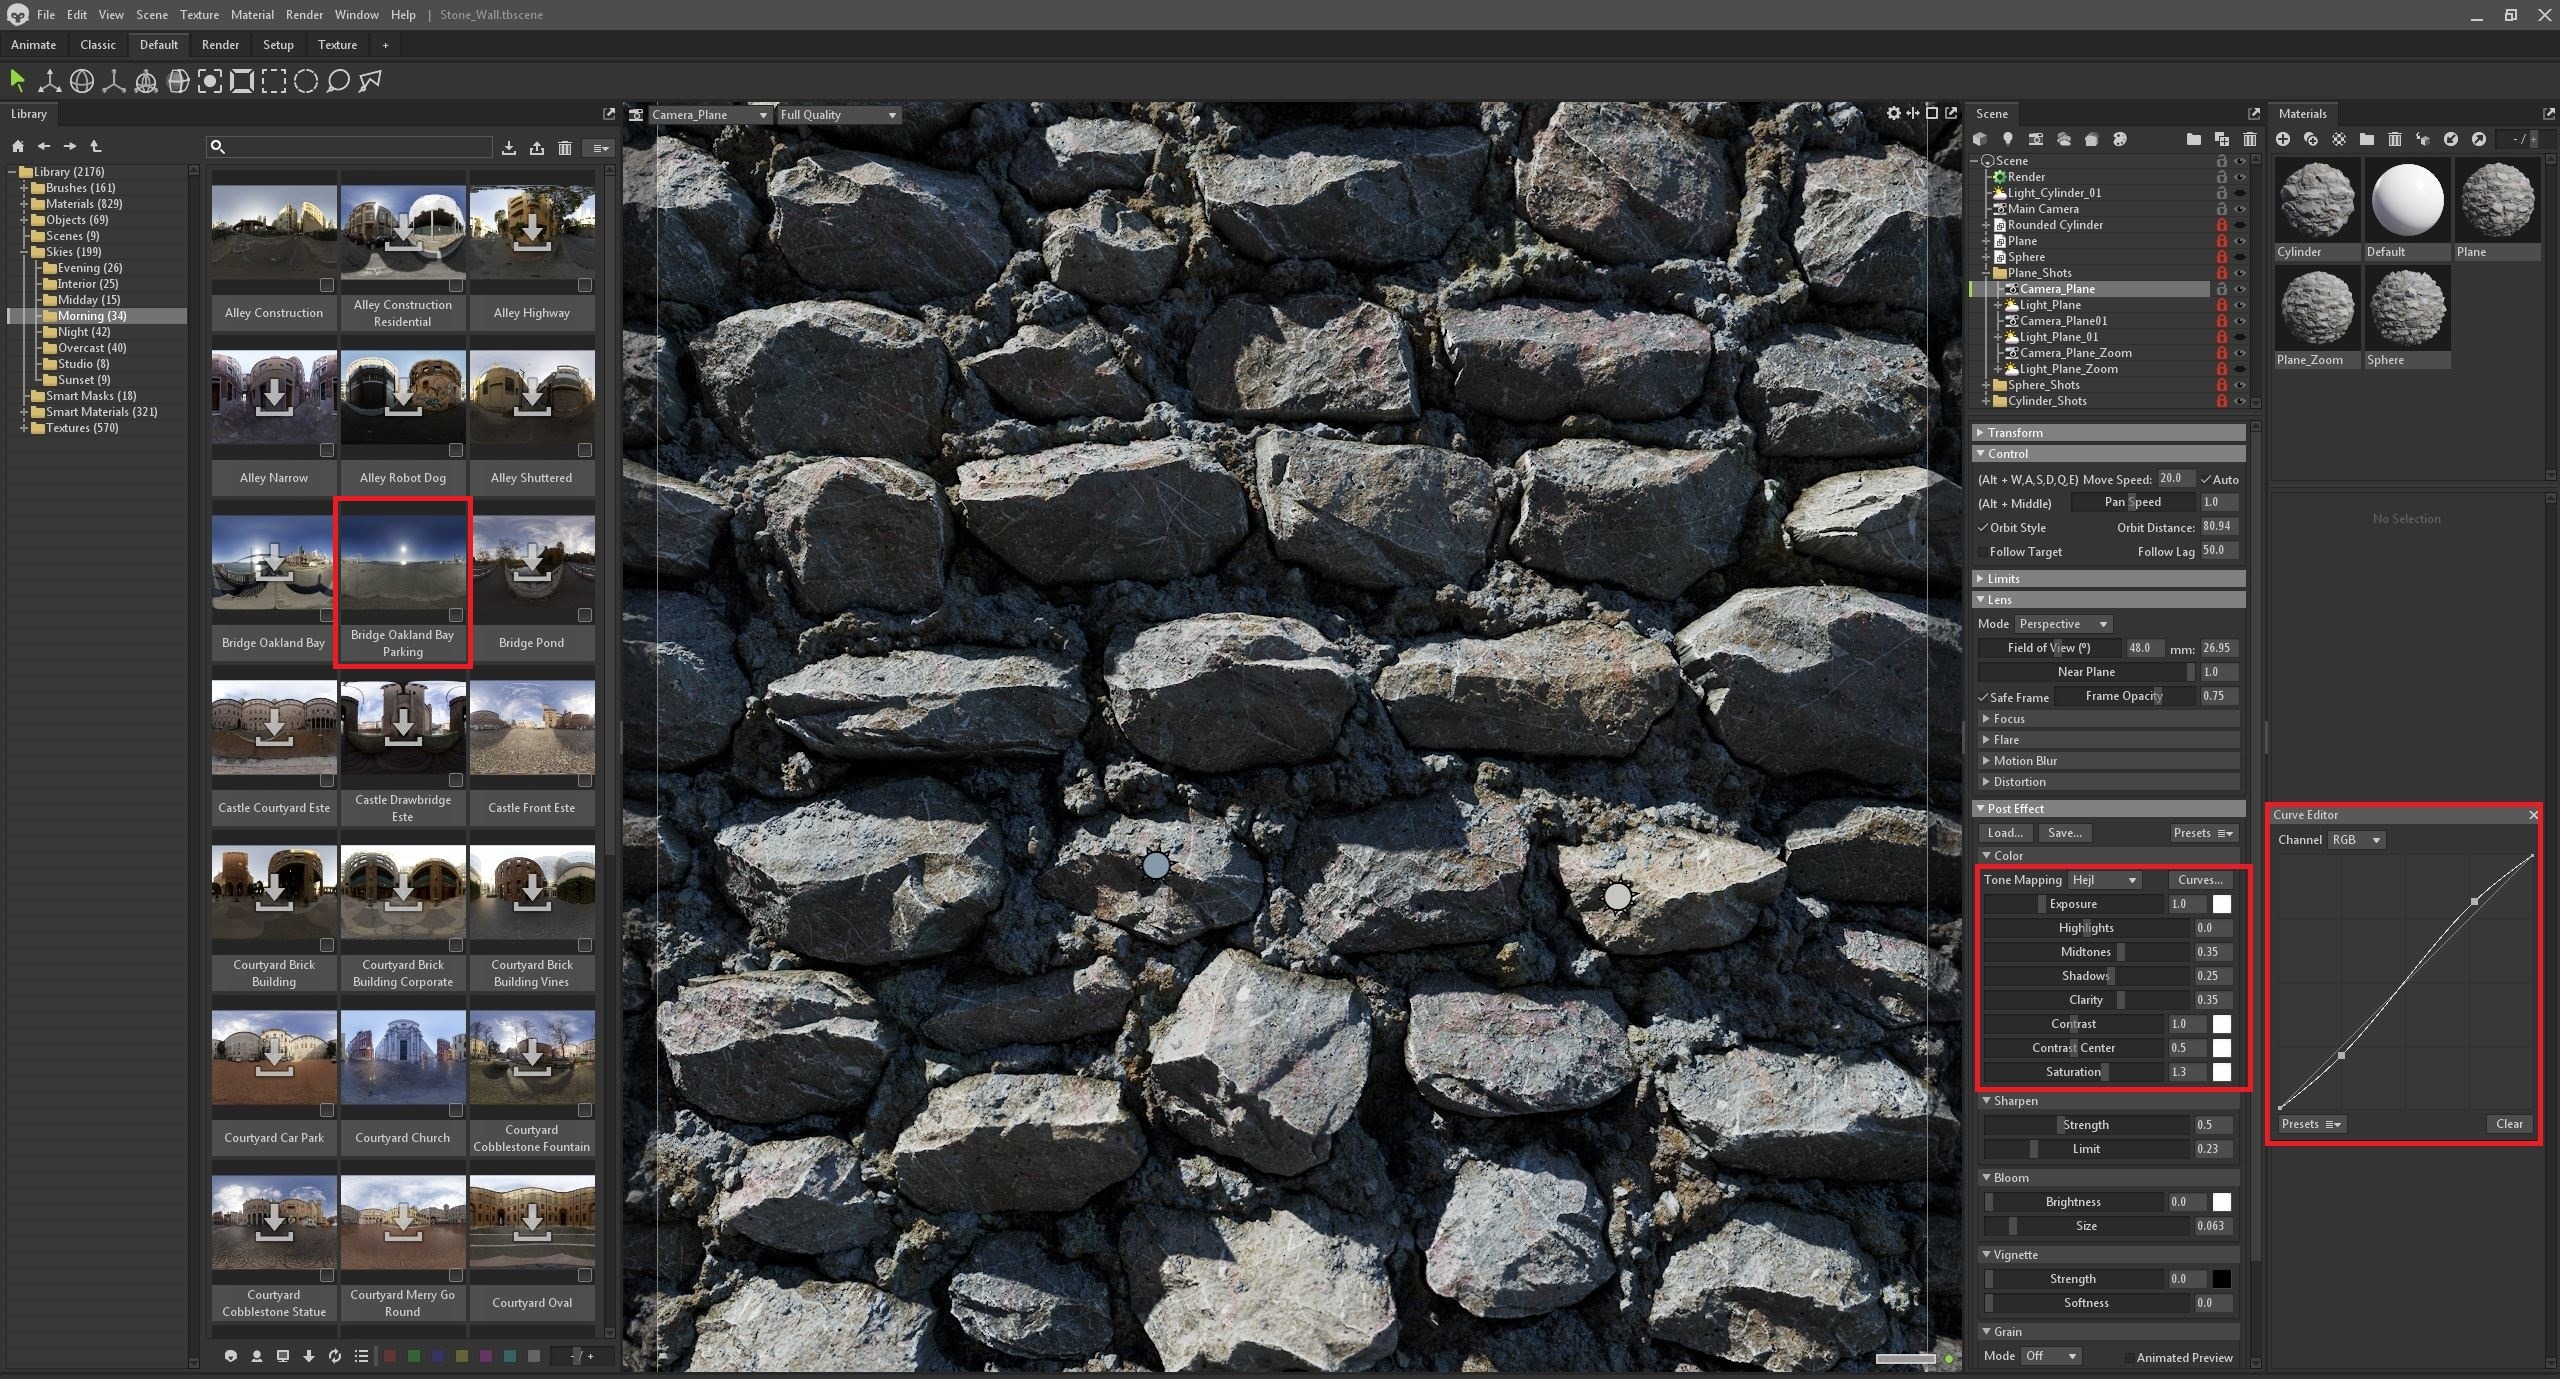
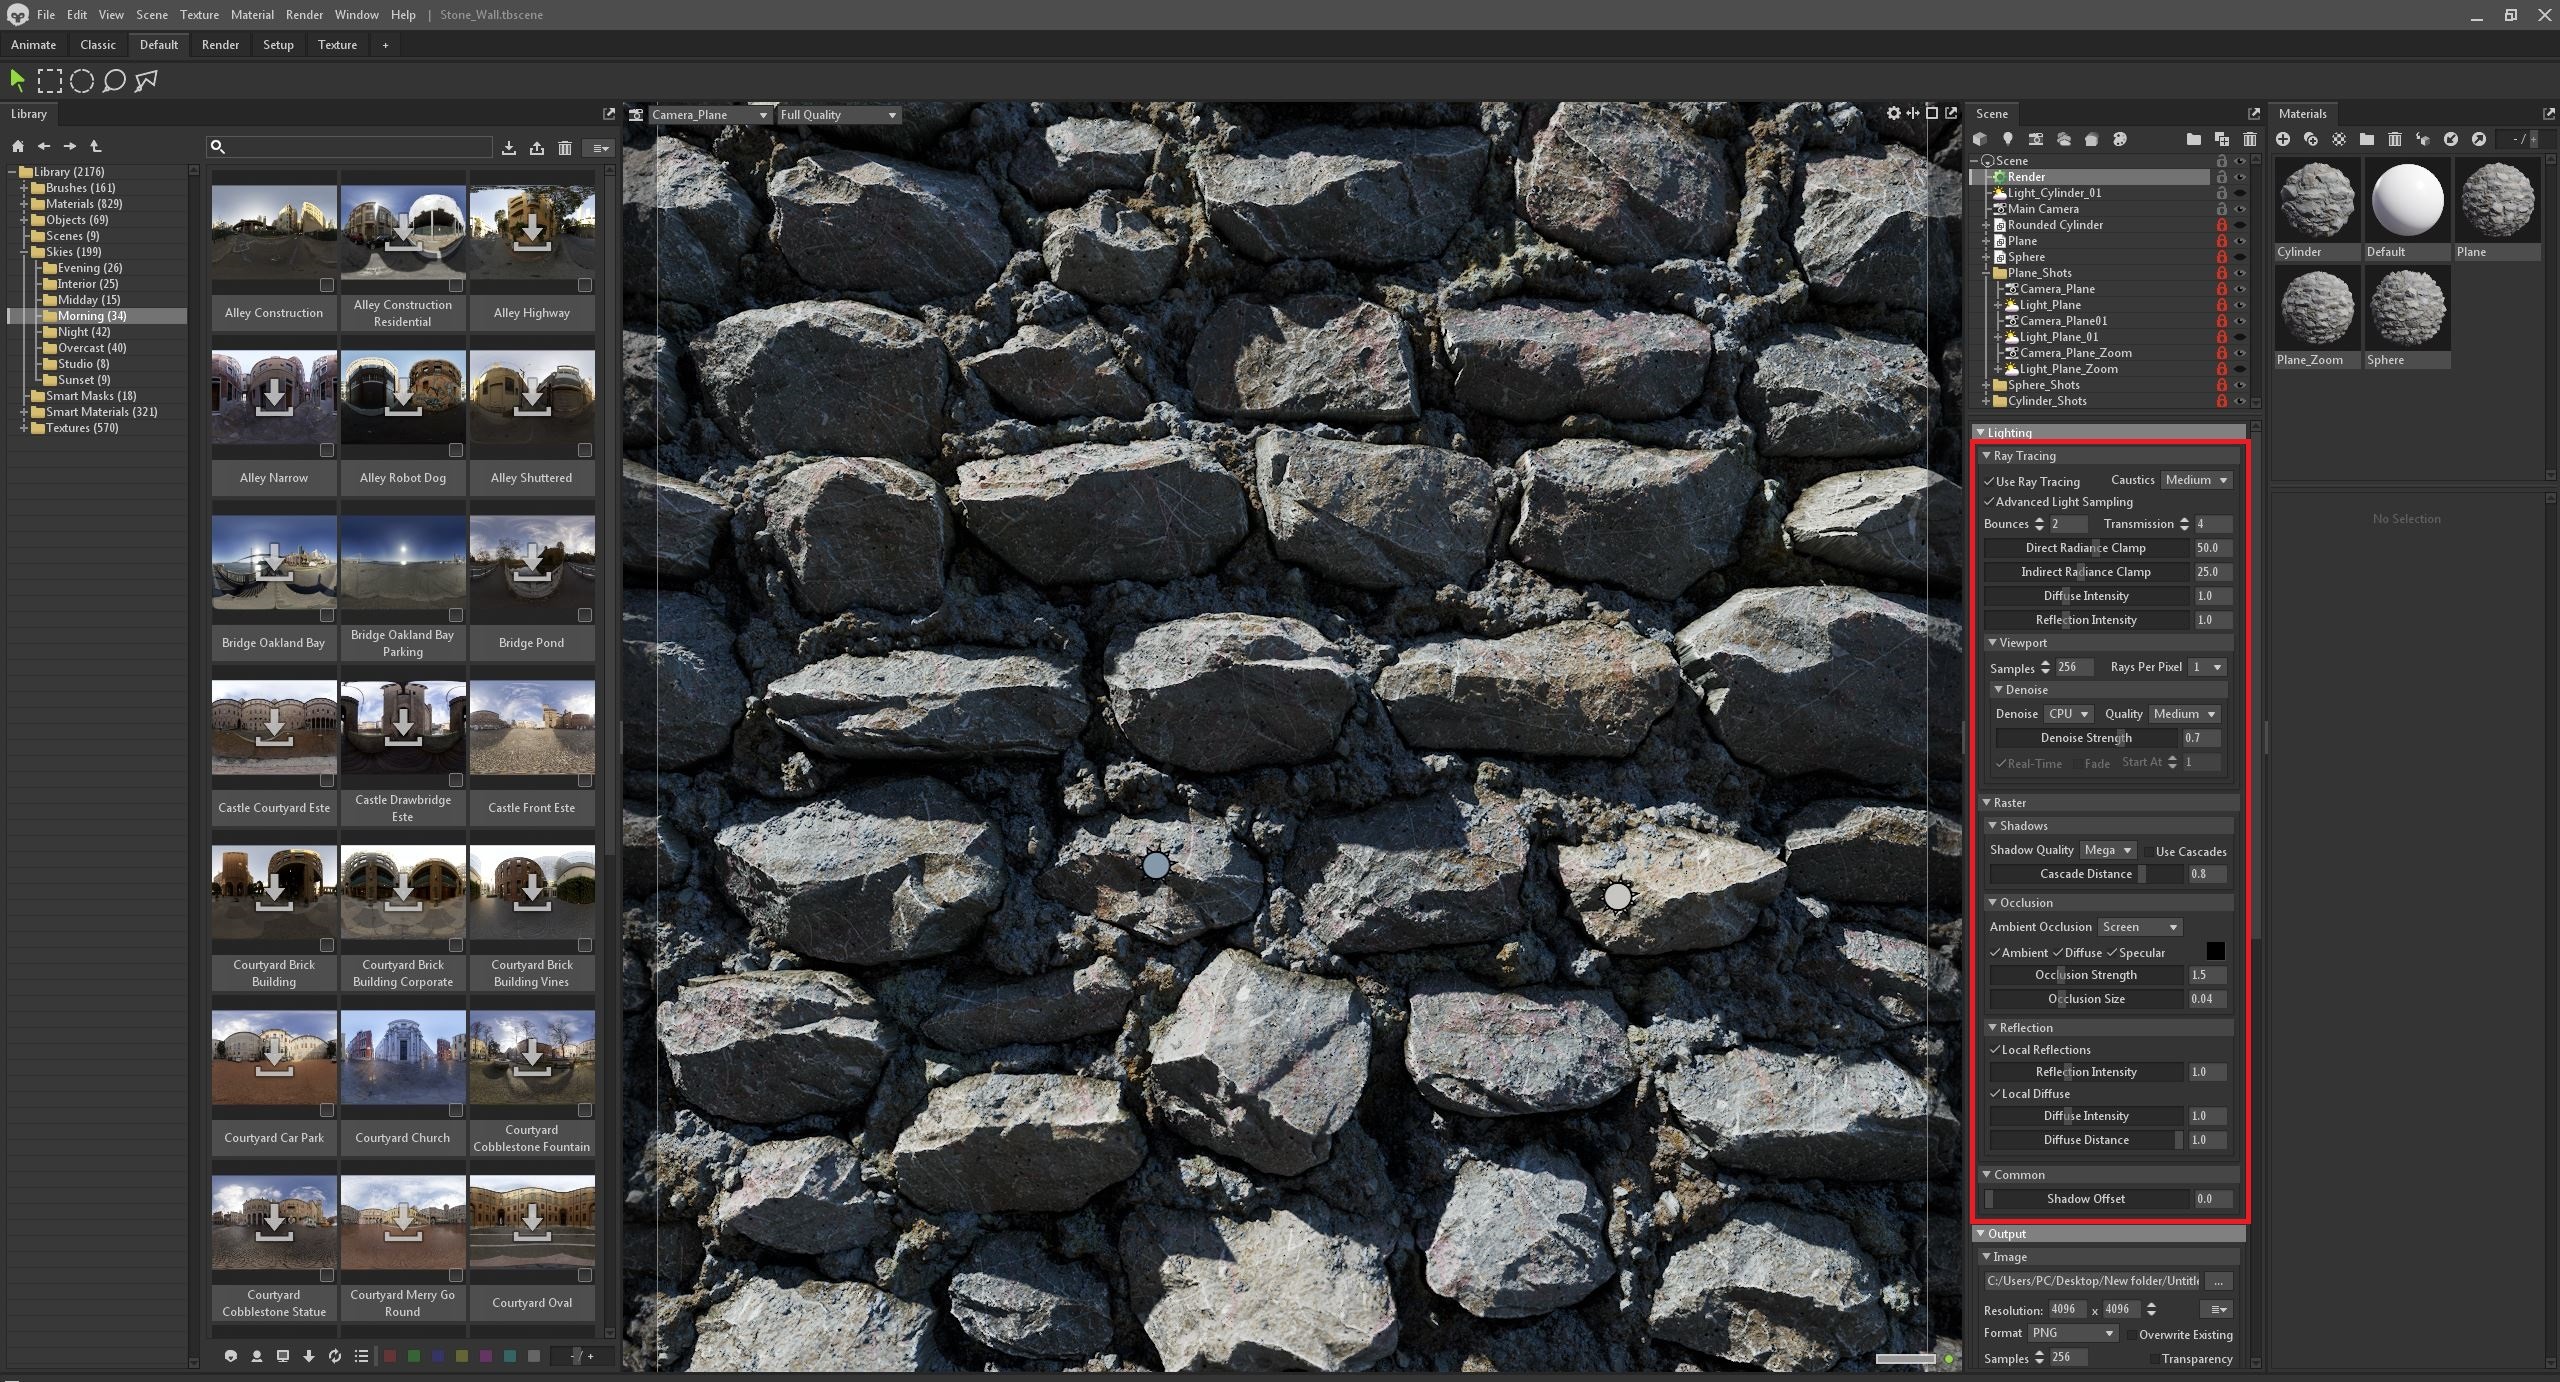
I also wanted to render some shots in Marmoset Toolbag. It is great software for rendering and very easy to work with.
I selected a sky for my scene and set up a camera for the shots. After that, I made some adjustments to both the camera and render settings to achieve the final look.
Conclusion
Before starting this project, when I looked at my reference images, I realized that creating all the stones from scratch in ZBrush would be quite challenging for me.
To make the process easier, I decided to use Substance Designer to create the base stone shapes and then sculpt the finer details in ZBrush.
I hope this breakdown will be useful for your own projects and that you learned something new from it.
Thank you for taking the time to read my breakdown!
Read more articles
You might also like these articles.