

Introduction
Hello! My name is Jorge Barros and I’m from Porto, Portugal.
I have been working at Elite3D, a videogame outsourcing studio in Valencia, Spain, for over 5 years, mostly on props and environments for titles like Call of Duty, Blood & Truth, Hitman and most recently, some weapon and vehicle work for Ubisoft’s Hyper Scape.
Star Wars Project
The Battle Droid
So I started this project in 2015, when I was planning to apply for a position in the videogames industry later that year. I started by making the Battle Droid from the Star Wars prequels, as I was pursuing a role of hard-surface artist, preferably for sci-fi games, and Star Wars had always been a major childhood crush of mine.


Battle Droid
https://www.artstation.com/artwork/J9QyR
The Droid Control Ship
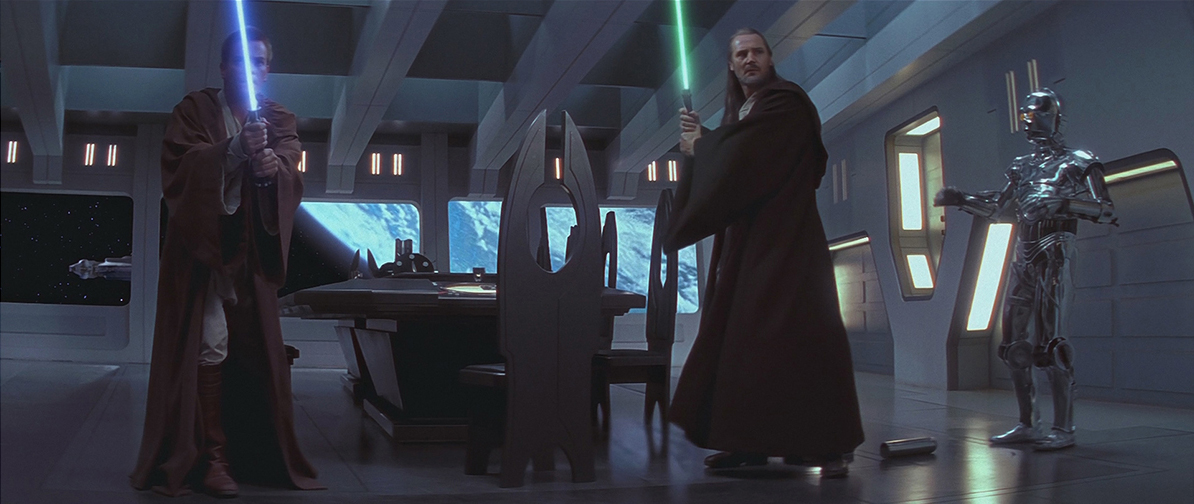
When I concluded it, I thought that recreating the environment where these droids first appear in the movies was the following natural step!.. I wanted to take the opportunity to learn some Unreal Engine 4 as it seemed like a good extra to have in my resume, and since that environment looked quite simple to reproduce in 3D – with just a couple modules being repeated all throughout the corridors – I thought I’d be able to tackle it considerably fast! Boy, was I wrong…
(references from the movie below)


Blockout
I started by going through the movie’s first scenes and print screening all the details I would need for reference. Then I started blocking out all the volumes and positioning them, first in Maya, where I recreated the portion of the map I would be doing, then in Unreal, over that 3D reference, but this time modularly, so that whenever I’d update one piece, all the other instances would update accordingly.
(Block outs in Maya below)


I had to change the diameter of the curved corridors a few times during the blocking phase until I settled, and even so, I ended up realizing later on (too late to change again) that it was still a bit off in comparison to the reference. I also had a lot of trouble figuring out which focal length I should be using for the camera, as that would have a lot of impact on the layout of the whole scenario – the shots from the movie seemed to me like they might have been filmed with different values because my scenario would match the reference in some shots, but then in others, it would be off. So this is where my first advice comes in: take as much time as you need, and then some, during the blocking phase; you can never overestimate how important this stage is.
This was not the only aspect of my environment that I did not nail right either; there are a few mismatches here and there that gave me quite a few headaches trying to solve them. For example, in order to have concentric corridors, the modules in the outer perimeter would have to be slightly larger than the ones in the inner perimeter. It’s a small difference, but enough to result in a gap between modules (or the opposite, intersecting modules). In the movie we can actually notice there are at least two different types of wall module:


(There are different wall modules in the movie – notice the absence of these elements on the module on the right)
So, because I had 4 concentric lines of wall modules, I ended up having to make 4 different versions of the piece instead of just one like I previously expected, in order to avoid any gaps or intersecting geometries:


(4 different versions for the wall module had to be created in order to avoid gaps/intersecting geometries – on the right, an exaggerated representation from above of how the walls become shorter the closer they are to the center of the circle)
And this, of course, means that the ceiling modules that connect these walls would also have to exist in three versions: one that connects A to B, one that connects C to D, and the third one for the straight corridor, where it’s a connection between A and A. And, along with the ceiling modules, the floor modules between all these would also need to be different. So this started to mean a lot more work than I had initially expected!

(Early screenshot of the blocking in Unreal Engine)
I also started a thread on Polycount to serve as a journal of my progress, as well as be receptive to feedback from anyone willing to offer it. It’s important to have different sets of eyes on our projects, as at times we lose objectivity, or simply miss aspects that other people may spot for us. I would also frequently show my progress to a couple of friends, who’d usually chime in with very useful suggestions and help me keep motivated!
(Below are some early comparative screenshots between reference and blocking in Unreal)


Planet and Starscape – Early Lighting
When I was finally done with the blocking, I created the starscape that can be seen from the windows in the meeting room, as well as the planet and its light. It’s important to work lighting and texturing hand in hand, because if you focus entirely on one of them first, then the other one might need to be a lot darker/brighter, or different color than what it really should be, so this was merely a first pass of lighting, just to start having a bit more of sense of the ambiance in this area.
For the Starscape, I used a nifty software called Spacescape, and for the planet I followed a tutorial on YouTube (that I can’t find now), which taught how to have a layer of clouds moving at a different speed than the rotation of the planet itself.
(Below is an early lighting during modelling phase, already testing with the emissive material in the meeting room)


Modelling
Regarding creating the final models for the environment, I did not make high poly models of anything (and therefore, no bakes), as I reckoned it would not be optimal to have loads of textures for each module – if I wanted to achieve a decent texel density for my bakes, each module would need a lot of texture sets, as they are so big – so I decided to use tileable textures and to model everything following the custom normals technique, where you bevel and smooth every edge that would otherwise be hard, and then set their vertex normals to point in the direction of their larger faces. This means higher tri-count meshes but saves a lot on the number of textures the game needs to load and stream in real-time.
I also tried to modularize whatever I could, to keep all modules as low as possible in geometry, so, for example, each wall module is actually composed of smaller modules.


Texturing
As previously mentioned, my texture work was not as exhaustive as it definitely would’ve been if every single module would have its own unique textures. I needed my textures to be used on large surfaces and as reusable as possible on different modules, so they had to be tileable and not contain very identifiable details. This scene in the movie is not rich in a lot of detail when it comes to textures either, so it made my life easier.
However, I did still want to make sure I wouldn’t have textures that would look too dull, so I added just minor scratches and some grime and roughness variation for the sake of giving it some love. I used Substance Painter for most of them, and Substance Designer for a couple base materials, to which I would only change the color and the roughness level for variations inside Unreal.


(Panel material, seen on the walls both in white and blue variations, made in Substance Painter and tweaked inside Unreal for final result and variations)

Floor material, made in Substance Designer – color and roughness levels tweaked inside Unreal for final result and variations)
Materials and Raytracing
By the time I finally started working on the materials, Raytracing had still not been released for Unreal Engine – or even announced yet – so I wasn’t even thinking of the possibility of integrating it in my project. Luckily, my project took so, so long to finish, that Raytracing arrived just in time. I did need to change my textures and lighting to match the difference, but it was well worth it, as Raytracing made it all look so much better than Screen Space Reflections, especially having in mind that SSR only accurately reflects the elements of the scene that are currently being rendered in the screen:
(below is a representation of the limitations of Screen Space Reflections: whatever is not being rendered in the screen does not get accurately reflected)

Switching to Raytracing meant, however, a lot more strain on the graphics card performance. I actually had to buy a new graphics card (GeForce RTX 2070, then recently launched), because my GTX 1070 couldn’t handle it. While doing research, I came across a very useful tip to help decrease the amount of reflections that the graphics card would have to deal with:
I created kind of a version of each material to be raytraced instead of the original one; these versions use numeric values instead of actual texture files. So, for example, if the wall material contained a base color texture with some color variations and subtle grunge, its corresponding reflection material would merely contain the value of its predominant color. Same thing for roughness, normal and metalness maps:
(Each material was adapted to contain this RayTracingQualitySwitchReplace node, which allowed to have a lighter version of the material to be raytraced)

Lightmaps
Lightmaps are my nightmare fuel. I had so many lights in the scene that, every time I would want to tweak something, I would have to wait 2 hours just to see the result, even when baking in Preview mode, mainly due to the calculations of the secondary light bounces, which can’t be seen in real-time. Unfortunately, Unreal does not have the option to bake only an area specified by the user, so a workaround, if possible, is to create a copy of your project and delete everything unnecessary for your lightmap tests.
When you’re finally happy with everything, you’ll need to remember every value you needed to change, in order to apply it to your main scene, so having a document where you take notes of every change you make is a lifesaver.
Even using Raytracing, for the time being you’ll still need to bake a lot of your lights, because current RTX graphics cards can only go so far. So I made a compromise between static and dynamic lights. Hopefully in the near future, lightmaps will become obsolete (fingers crossed)!
In the end, for my final product, I wasn’t even able to bake my lightmaps in a quality superior to Medium, as the engine would crash –it would take days to get to 100%, and when it seemed like it was about to conclude the process, it would just crash.
These may all be mistakes made by a novice Unreal user, but to be honest I did not find it as user friendly or intuitive as I initially expected, and I did come across a whole lot of official forum threads where users were asking the same simple questions, to which nobody was able to give a working solution or even reply at all.
Animation


In regards to animating the door opening and closing, I recurred to Unreal’s Blueprints system. This was also quite the nightmare because, apart from opening when I’d approach and closing when I’d step away, I wanted it to interrupt the closing animation and reverse to reopening whenever I’d approach while it’d be closing.
I expected it to be a lot easier than what it ended up being – the Blueprints system looks user-friendly, but you do need to know which nodes do what you desire, and I found that, a lot of the times, there would be incompatibilities between nodes that I expected to work together and no corresponding node seemed to exist for what I needed.
I had to follow a huge amount of different tutorials to be able to make my own systems work, and in the end I didn’t even get them to be flawless. One good example of this is a bug that I could never solve when controlling the droid to make it shoot its blaster.
I was able to program it to aim with the right click and then shoot with the left click while aiming, but if I am not aiming, I could still shoot the blaster, which it would do from its idle pose, where the weapon is not aiming forwards. And I just could never intuitively find out how to solve this apparently straightforward issue the perfect way, which would be to allow it to shoot with just the left mouse button, but have it use the aim pose without having to use the right mouse button – the droid would just glitch between poses when I’d try to program that in what I believed was the way it logically should work. I ended up being able (not easily at all either!) to program it to not be able to shoot unless the right mouse button is pressed, so that it’s aiming…
So I personally felt all the time like this whole system needs to be a bit more dumbed down for less sophisticated users, like having presets already made for this and other kinds of features, which you then would only need to replace with your own models, animations and whatnot.
Unfortunately, I had trouble (again) with filming the gameplay from within Unreal, as some odd bug would occur on my end while I was following a tutorial for this, so I ended up giving up on doing it within Unreal, and used OBS Studio instead, which I believe was the big cause for the visible poor frame rate, apart from me also having some more raytracing samples per pixel than my computer can handle at a decent frame rate.

I have just published on [ArtStation Store] my Playable Demo, which contains both a Raytracing and an SSR version, so that everyone can try it even if they don’t have an RTX graphics card.
It contains bugs that you may most probably find out – I did try to solve them all, but I could not.
Conclusion
This was a very ambitious project which I made sure I wouldn’t leave in the oblivion of a drawer even after I landed my current job. Throughout its progress, I lost motivation to work on it several times for months, mainly due to all the problems that lightmaps and blueprints constantly threw at me, but I wanted to be able to prove myself that I could overcome whichever obstacles I might come across and be able to finally publish it, even if with some imperfections. Mission accomplished! Now it’s time to finally advance to a new project.
If you’ve read this far in the article, thank you so much! And if you try my game demo, let me know what you thought! You can find me at https://www.artstation.com/jorgebarros

May the force be with you!


