
Introduction
Good day! My name is Ilya and I am a 3D Character Artist from Russia. I am a big fan of such game series as DayZ, Metro, Stalker, Witcher, Cyberpunk and other stylish games!
This is where I usually take my inspiration for personal projects. I think it is the point, which helps me stay motivated!


About the project
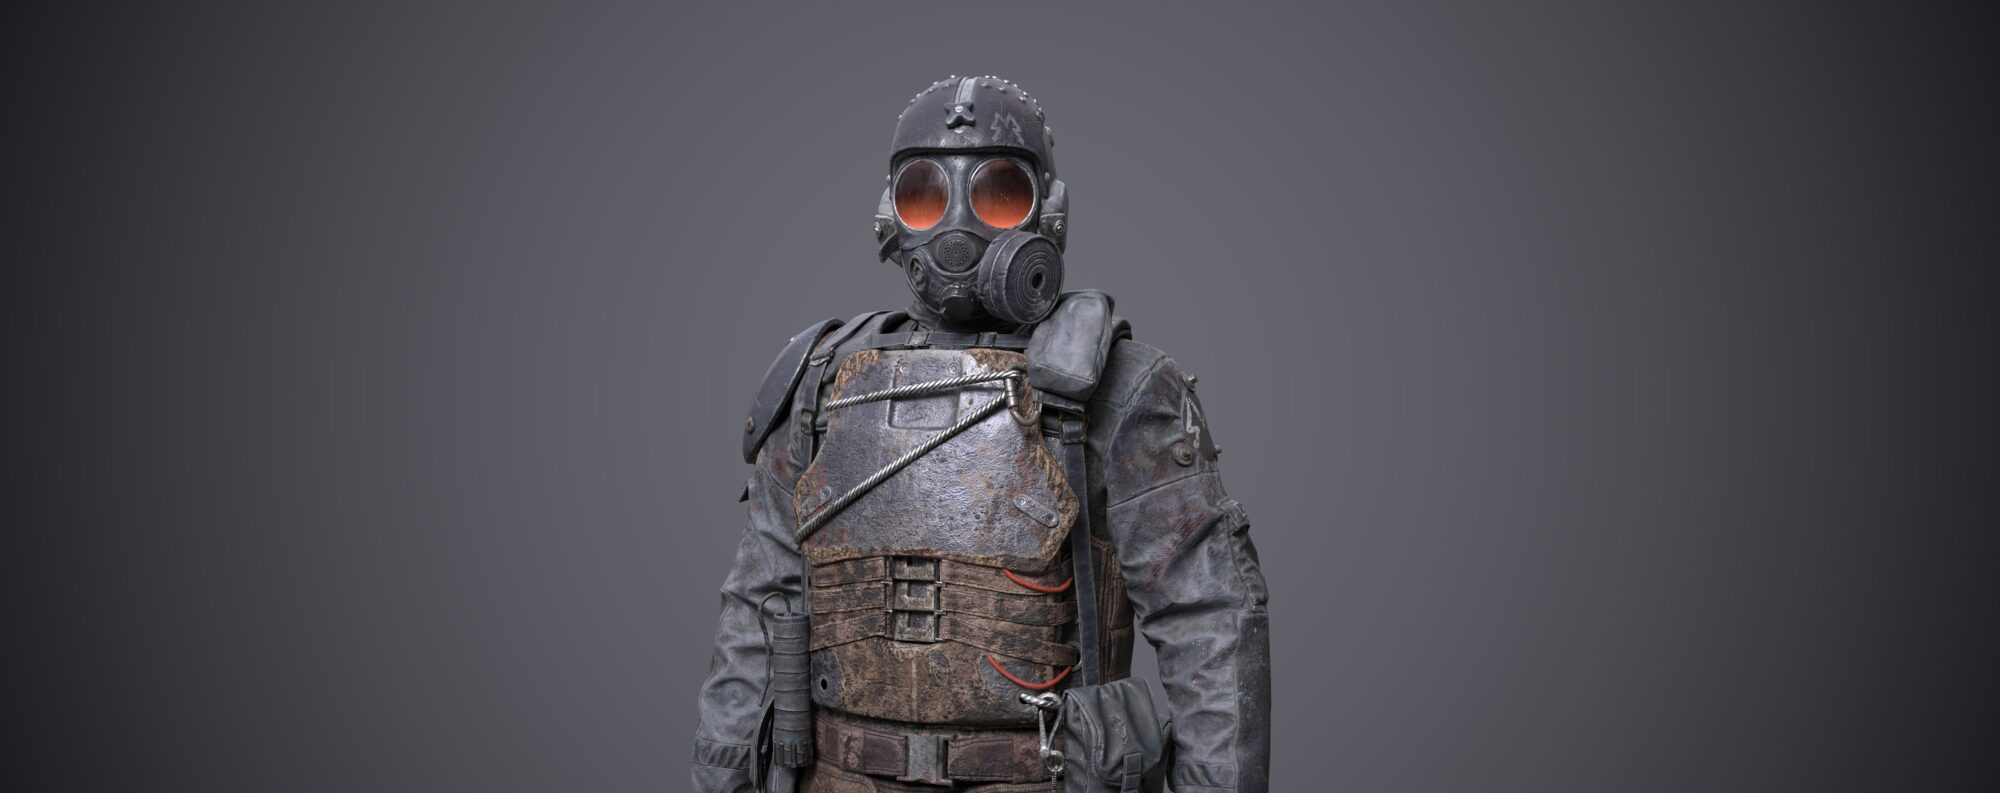
Thought of creating a character, based on concept art about Metro, came to me a couple of years ago, when I still was a beginner 3d artist and I recently finished Metro exodus.
This game made for me such a big impression, that I immediately wanted to create my own Fan Art about this series, but when I took a look at concept art by Vlad Tkach (https://www.artstation.com/artwork/4b6KGq)
I realized, that I simply don’t know how to make it. Years passed through, and I worked a lot with training my different skills, such as sculpting, texturing, modeling, etc. After this, I again had come to this artwork, but this time I finally managed the way to create it! This is how it all started.
Software
- 3DS Max – My main 3D software, this is where I create hard-surface models and put everything together.
- ZBrush – For sculpting and blocking
- Marvelous Designer – To create cloth
- Substance painter – Textures
- Topogun – Retopology
- Marmoset Toolbag 4 – Render
References
My reference pack must answer these questions:
How it works
How can I do it
How to make it look good. Pictures with beautiful details. Examples of good texturing and sculpting.
All this stuff I put in PureRef.

Blockout
At this stage, I am solving the way my character design will work. Every part of his design must feel natural. Concept Art often does not offer you information on how to do it, so you need to make it yourself. While I am creating the blocking, I am thinking about how different parts of it will work with each other, elements of the design should feel functional.
To create it I usually use the Extract tool and simple objects in Zbrush.

Cloth creation
This part is the hardest one because if the character’s clothes do not look realistic enough, it will make the entire design look bad, so I am trying to pay extra attention to this.
I am advising you to pay attention to how a garment is interacting with other parts of the character. It is very important when it comes to realism in your character.
There are some tips:
- Import objects with extra scale, folds will look more realistic.

- Do not forget to use Shrinkage, it will add some more folds. There is no need in big numbers, use 105%-120%

- My favorite cloth presets: Nylon-FeatherWeight, Trim Fool grain leather and Default

High Poly
At this stage, I add some details in ZBrush. I think, just using DamStandard, TrimDynamic and Standard brushes are enough to create a good-looking sculpt! It is rare when I use something else.


Texturing
This is my favorite part! Here you can see my workflow for creating different materials.


Conclusion
Working on this project was such a great experience, I am glad, that I was enabled to share my experience with you!
Read more articles
You might also like these articles.


