
Introduction
Hi, my name is Davi Amancio, I'm a 27-year-old, Character Artist from Brazil.

Goals
My intention when creating that character was two-fold, both to pay homage to one of my favorite video-game series. And another one was to make a full fantasy character that could be used as the main character or important NPC on a next-gen game. I wanted to explore the workflow for it from beginning to end.
With that, I wanted to see how far I have come since I last created a full male character for a game. Which I did quite a few years ago.
Software
I used ZBrush for the high-poly sculpt, Maya for retopology, rigging (Using Advanced Skeleton 5), animation and grooming (with xGen), RizomUV for UV layout, Marmoset Toolbag 4 for baking, Substance Painter for texturing, and Unreal Engine 5 for rendering.
Also, about tools, I used a scanned asset from the 3D Scan Store and a few textures from Quixel’s Megascan library. I did use Blender for a single asset as well, the blockout of the leather belt.
Inspiration
My main inspiration for this piece was, obviously, the Soul of Cinder boss from Dark Souls 3, but I didn’t want to just recreate it as is, for a few reasons. First, I wanted to create at least some of the concepts on my own, the shapes, the proportions, the face, some of the detailing on the armor, things like that.
Besides that, I thought it interesting to rethink the character as a full-fledged knight with its own identity rather than the faceless amalgamation of Lords’ Souls we have in the game (which, I will add, works wonderfully, I wanted to do something different, not better).
References
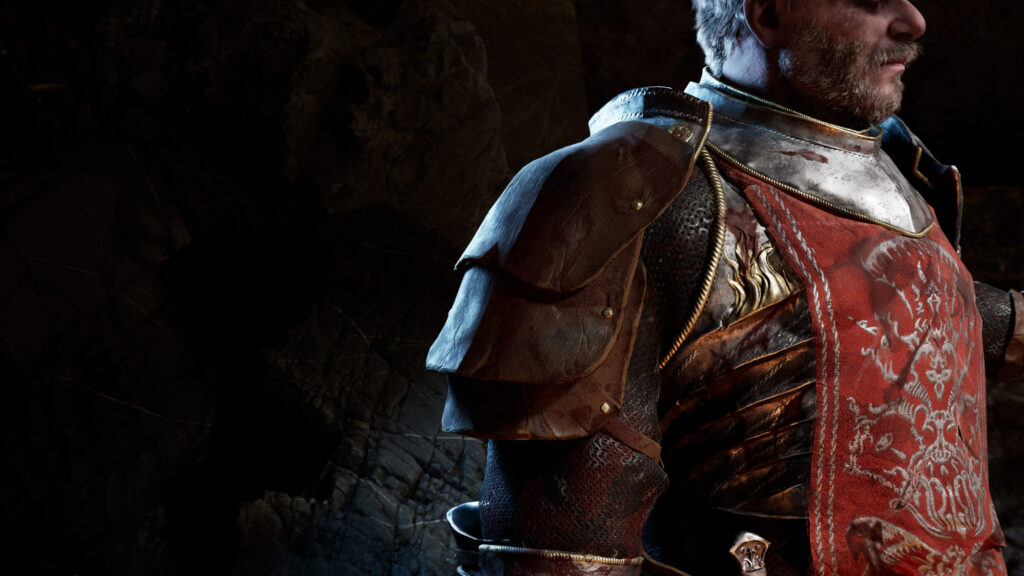
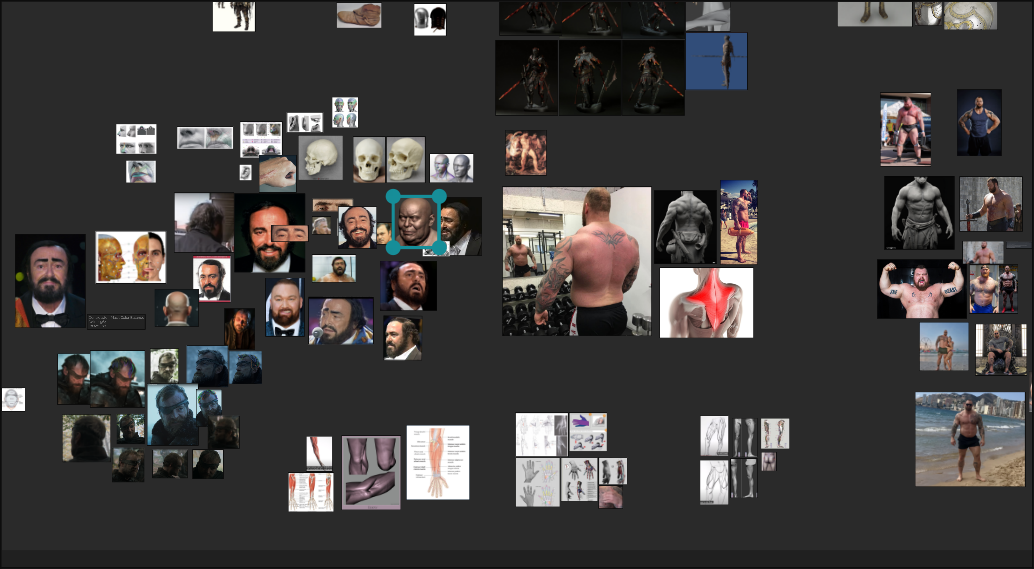
My references included strongmen for the body and overall shape, Luciano Pavarotti for the face, something I decided on after doing a portrait sketch of him since I thought it was an interesting look, and Beric Dondarrion for the hairstyle, I wanted to go for that messy, unkept feel.
Blockout
I started the blockout from a base model, one made by Arshlevon, which is pretty low-poly and clean, it’s a good starting point for sculpting if you don’t want to be distracted by pre-existing features. Before moving on to clothing I blocked out the whole body, and then I got all the major pieces of armor and clothing into place to get an idea of the overall shape.
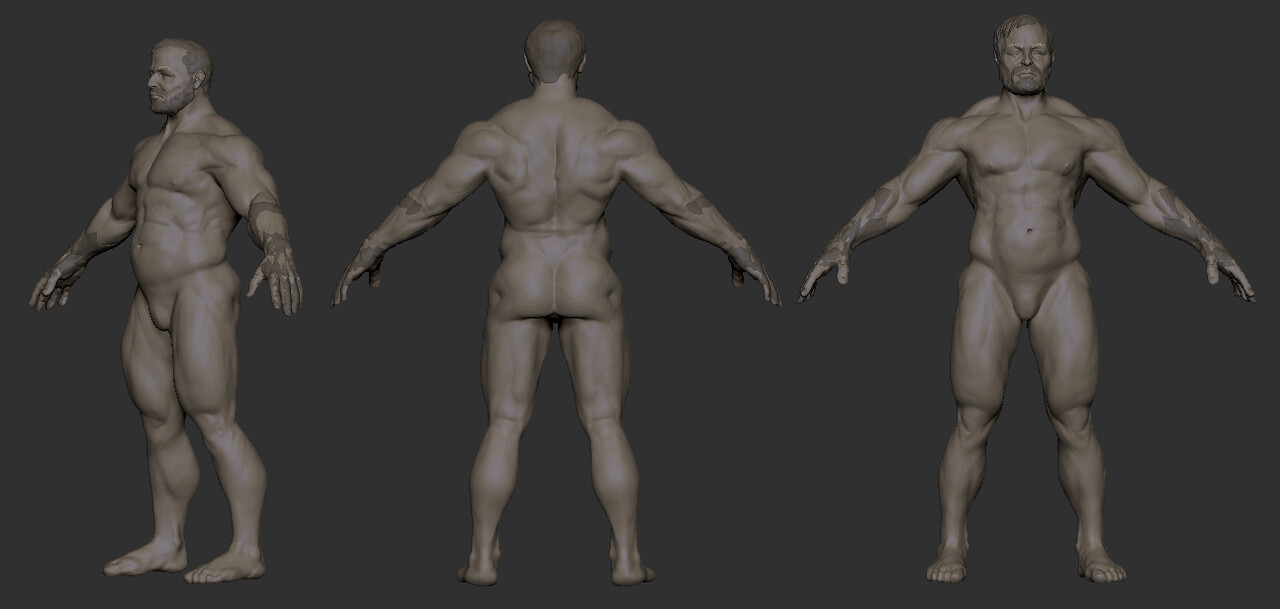
Modelling
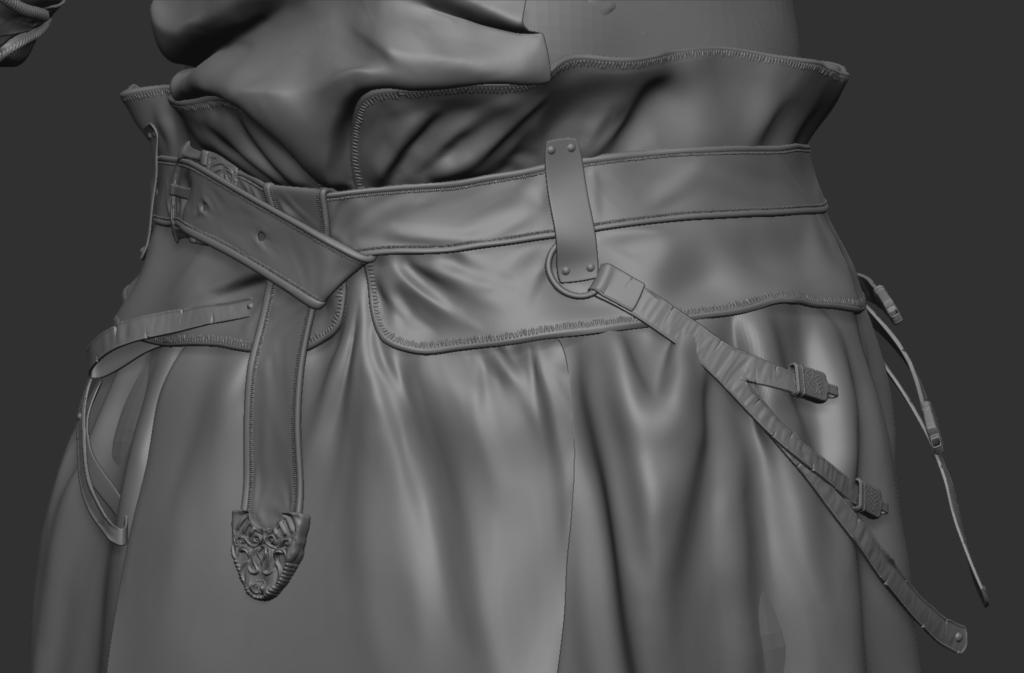
There wasn’t much modelling done outside of zBrush besides the retopology, in fact, I believe the only thing I didn’t use a sculpted model as a base for was the leather straps (which I will talk about later on) and the belt, which I would actually do in zBrush if I were to do it again, I actually used Blender for that one, since I think it’s easier to work with Bezier curves there than in Maya, and I used that to create a ribbon in place that would later become the belt.
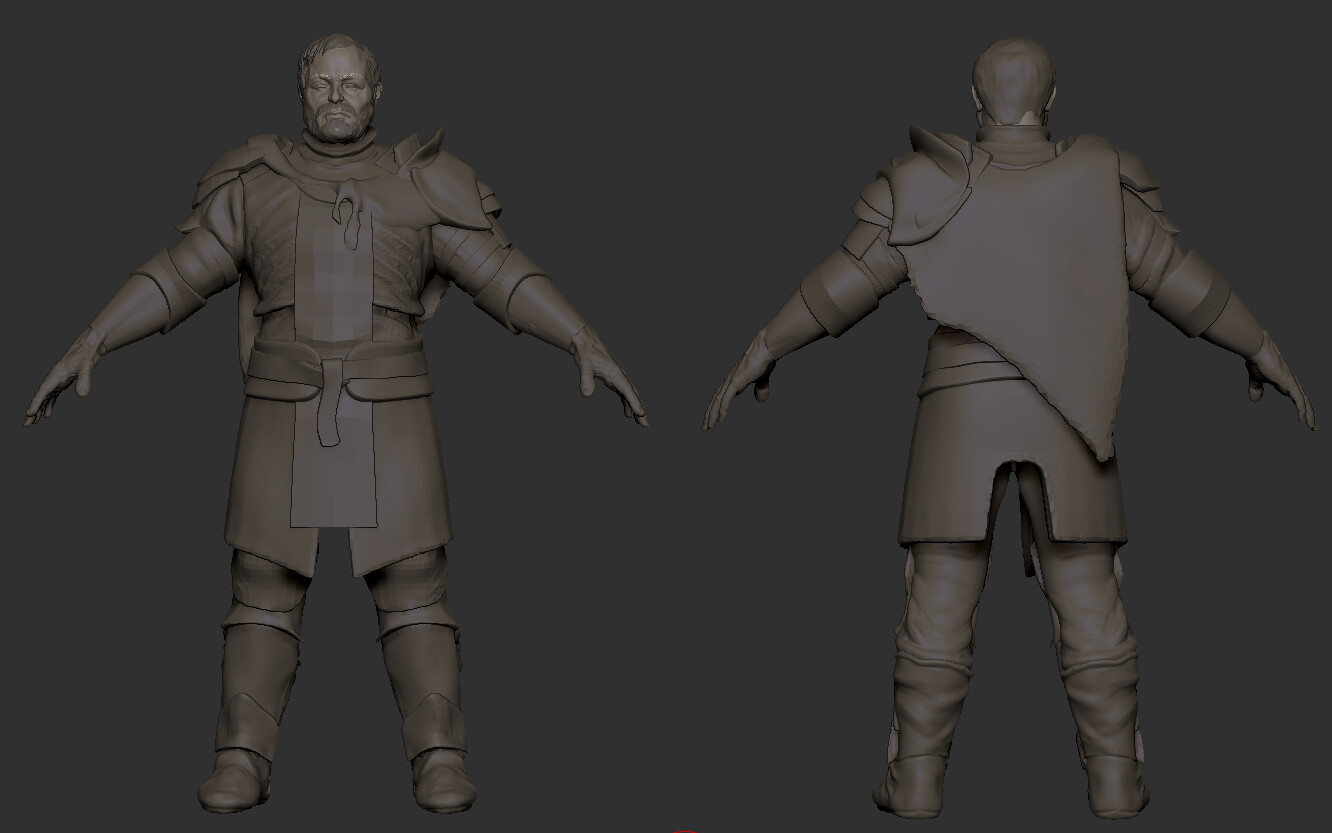
I did some testing on the hard-surface assets, for some of it I created a low-poly model using zModeller… some of it I just shaped into the overall shape with sculpting tools and then used zRemesher to control the larger form more easily. But either way, one thing I tried to do was to do at least some sculpting work on every piece, so it could feel more “handmade”, in a way, as if it was hammered into place, so I would go and carve the folds and such using clay buildup most of the time

One thing I used a lot was mixing layers and morph targets for detailing and damaging the assets, it’s a fast workflow and makes reiteration a breeze. A friend of mine, Giovane Henriques, taught me that in fact.
I would carve in a section I wanted to be damaged and I would morph the edges back using the morph target brush with a hard alpha. That CAN be done without layering, but it helps to not lose data.
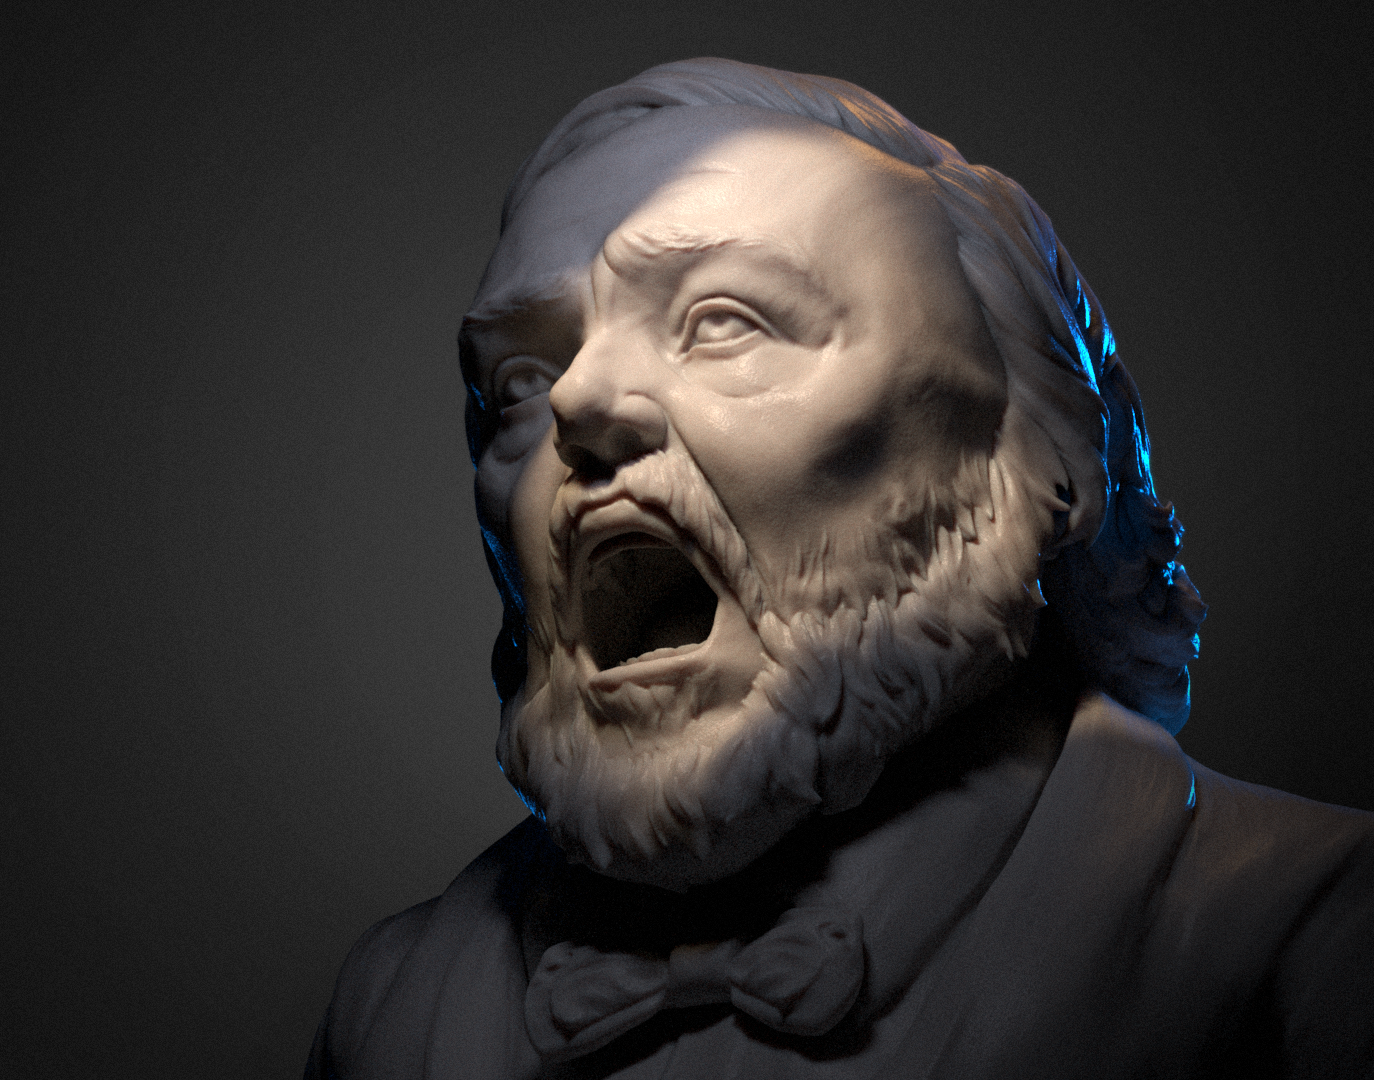
Face
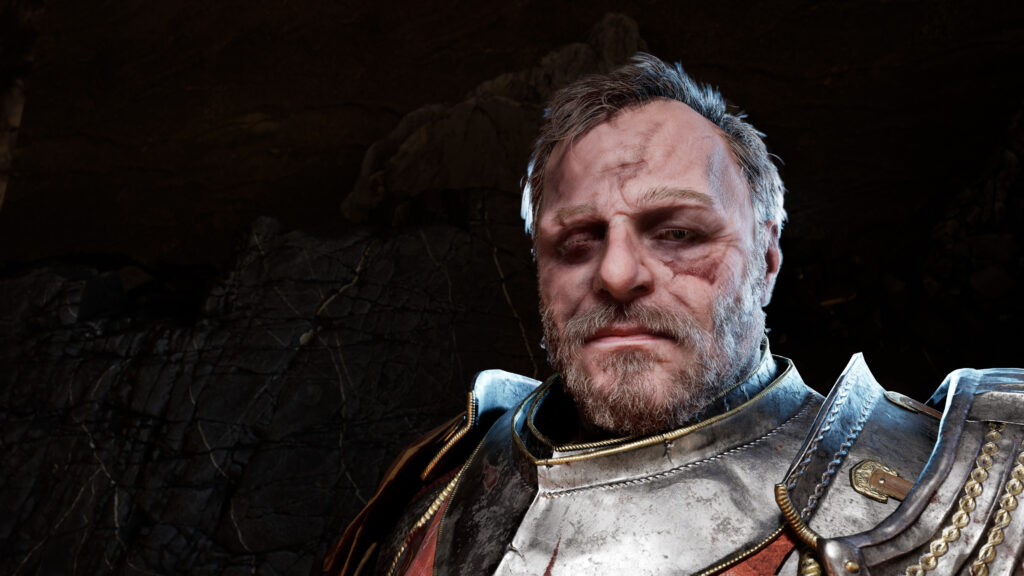
Creating the head for the model was quite a challenge, not only because of it… always is in a way, portraying emotion and the head structure in a convincing and interesting way is a great challenge by itself, but also learning the workflow for using Metahuman as a base.
First, I created the blockout in zBrush, which I did not separate from the body, in hindsight, I should have, but I was not so sure what I wanted to do with it for most of the project and having it all as the same mesh made it easier to change around if I needed it attached.
Either way, I then used the zWrap plugin to conform 3D Scan Store’s body model to my sculpted mesh to have a nice underlying topology to work with and the skin surface details. I transferred to a separate layer by using a subdivision and morph target workaround, which I can’t really go into details here and added my own surface details on top of that using extra layers.
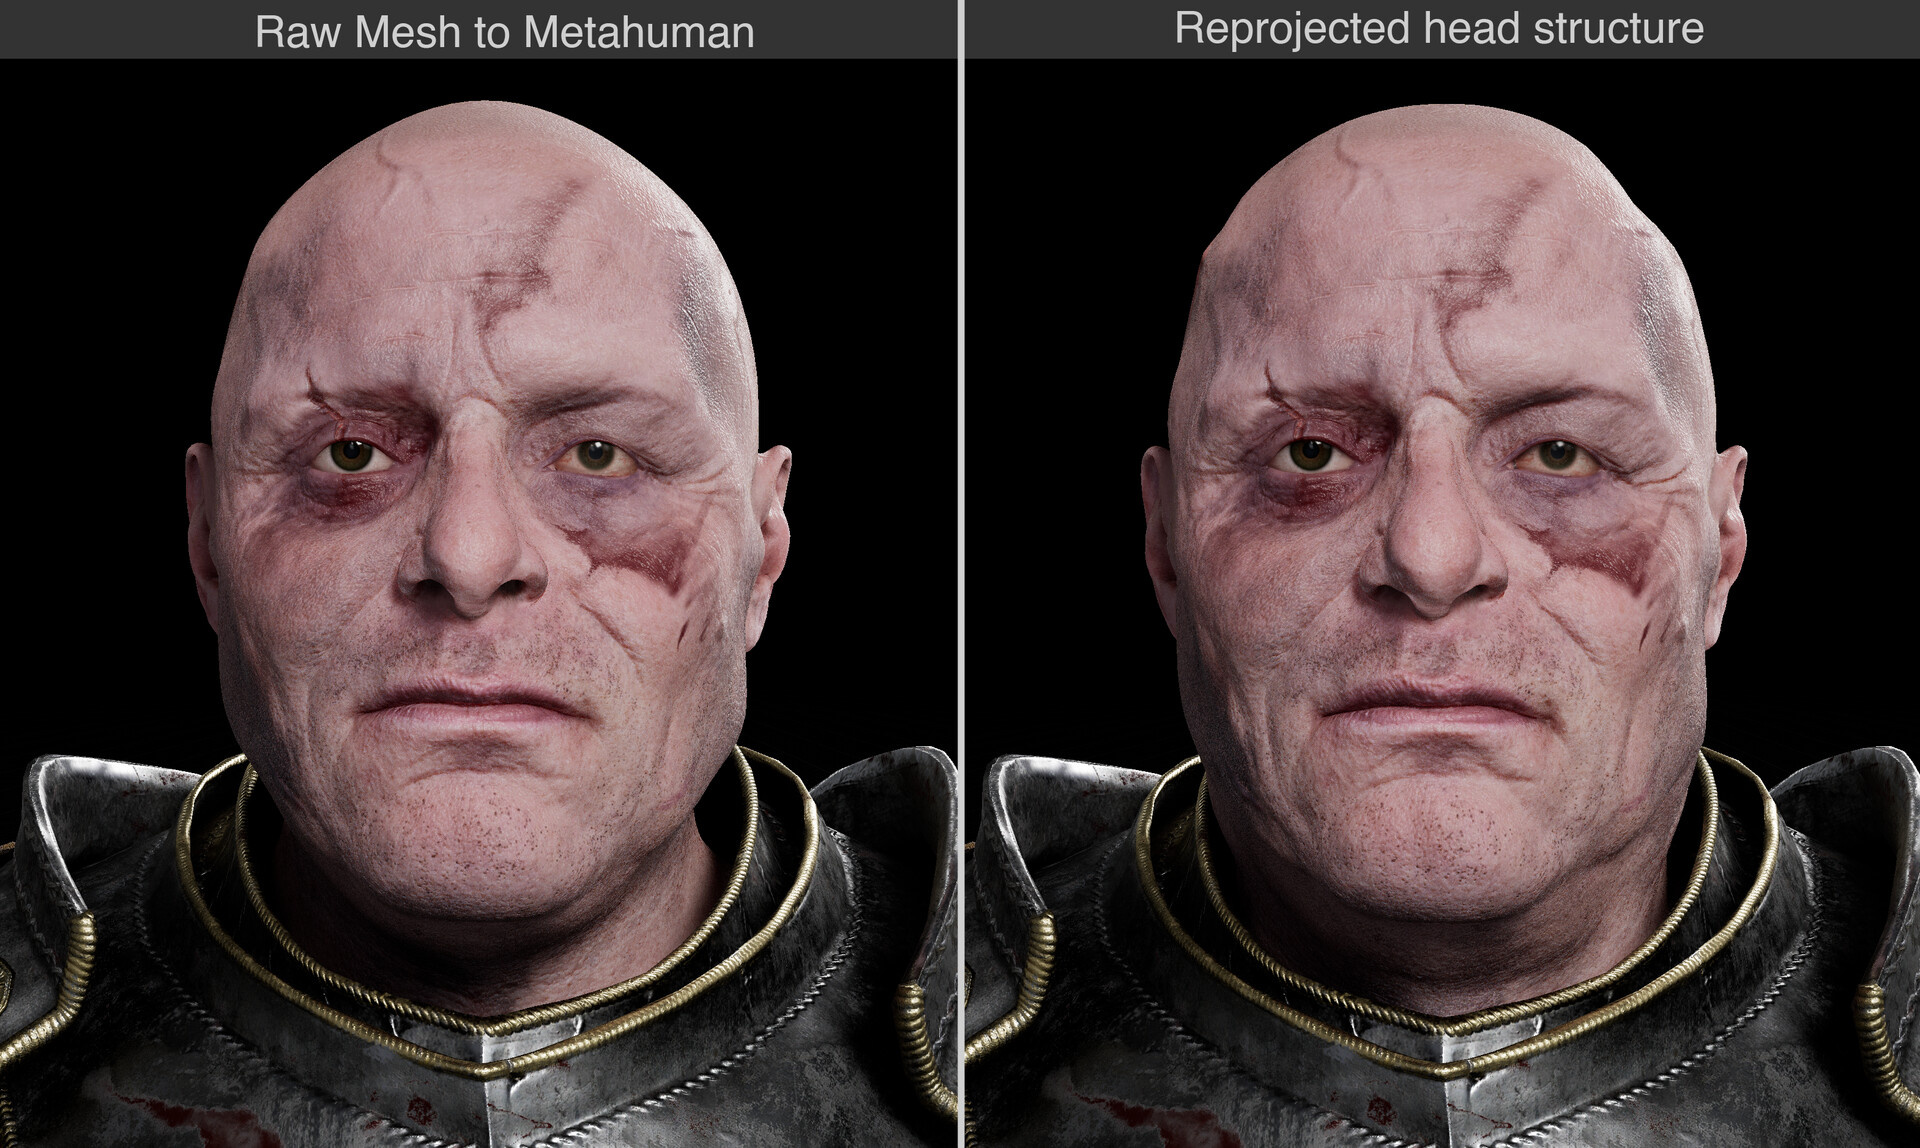
After all that work was done, I had to conform it to the metahuman model, for which I used the Mesh to Metahuman workflow provided by Epic games, the thing is, it is far from perfect. I don’t know the technical details, but quite a bit of the detailing gets washed out in the process, getting rid of imperfections and some of the shapes that make the character’s head convincing, so, I had to figure out a way to get that back.
For that I exported the model from Unreal and reprojected my sculpted model back to it in ZBrush, so the shapes would pop back into place, I used that as a morph target on top of the metahuman model, so I could keep using its rig.
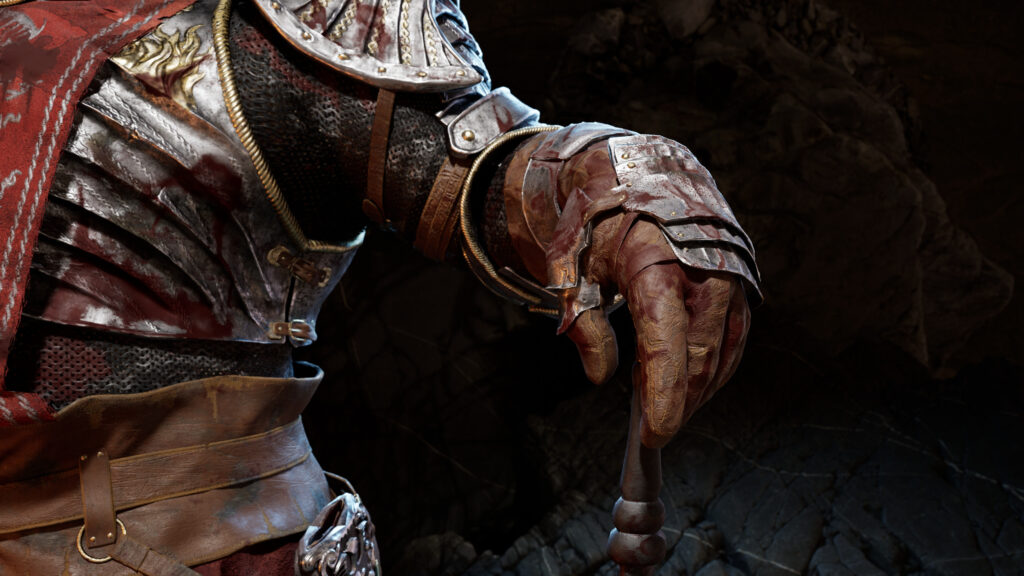
Props & Clothing
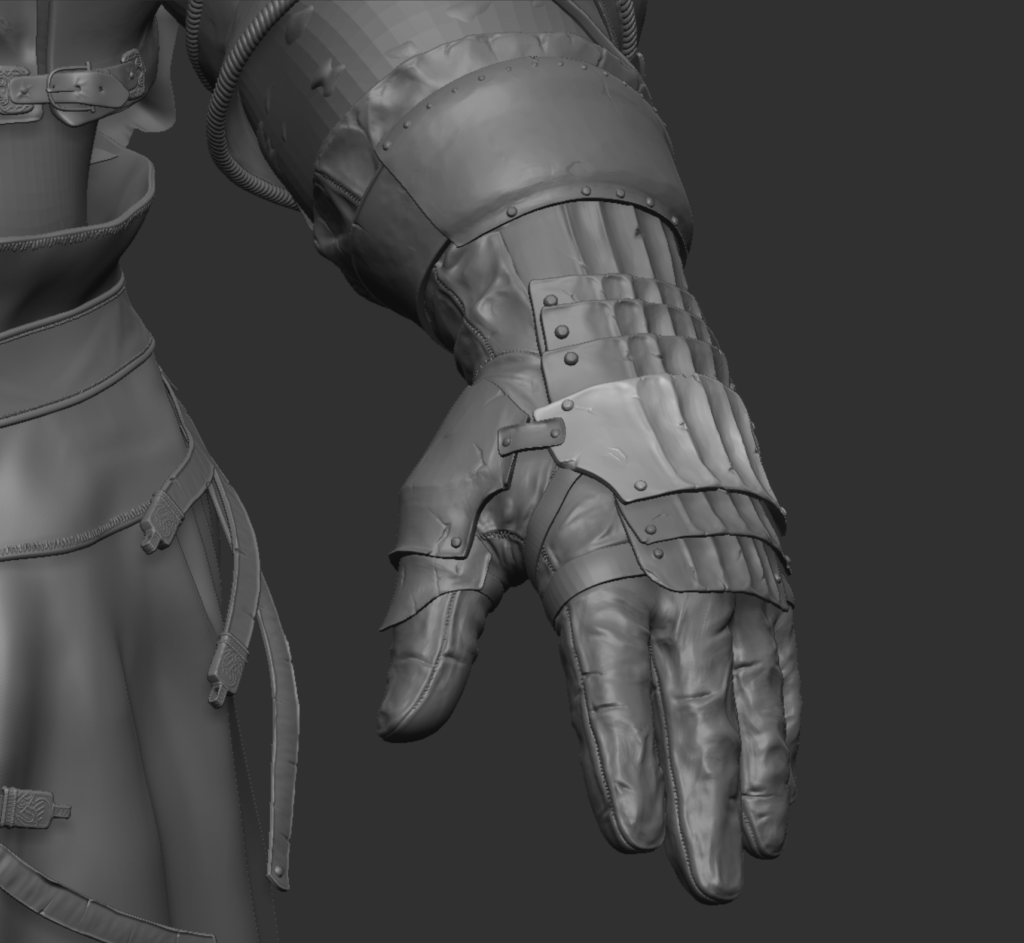
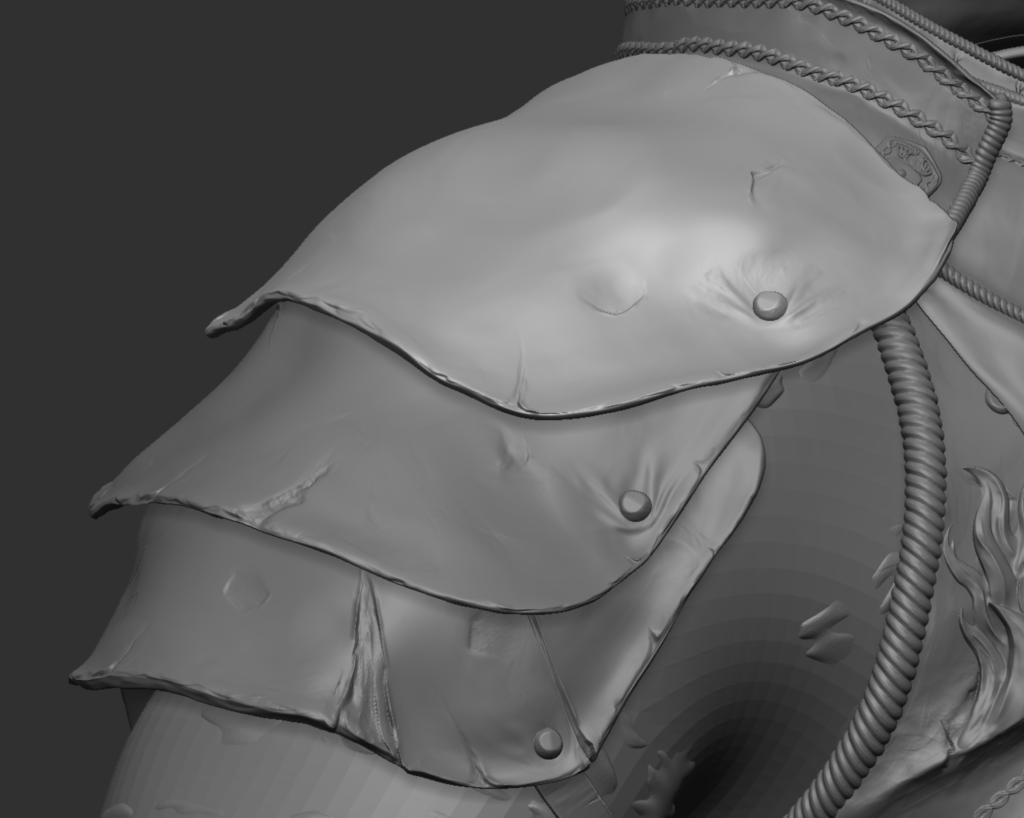
Most of the work I did on the props was pretty straightforward: Block it out from a basemesh, be it a sphere, or whatever else, zRemesh it, detail, add bolts or whatever, done, it’s ready for retopo.
However, there were exceptions.
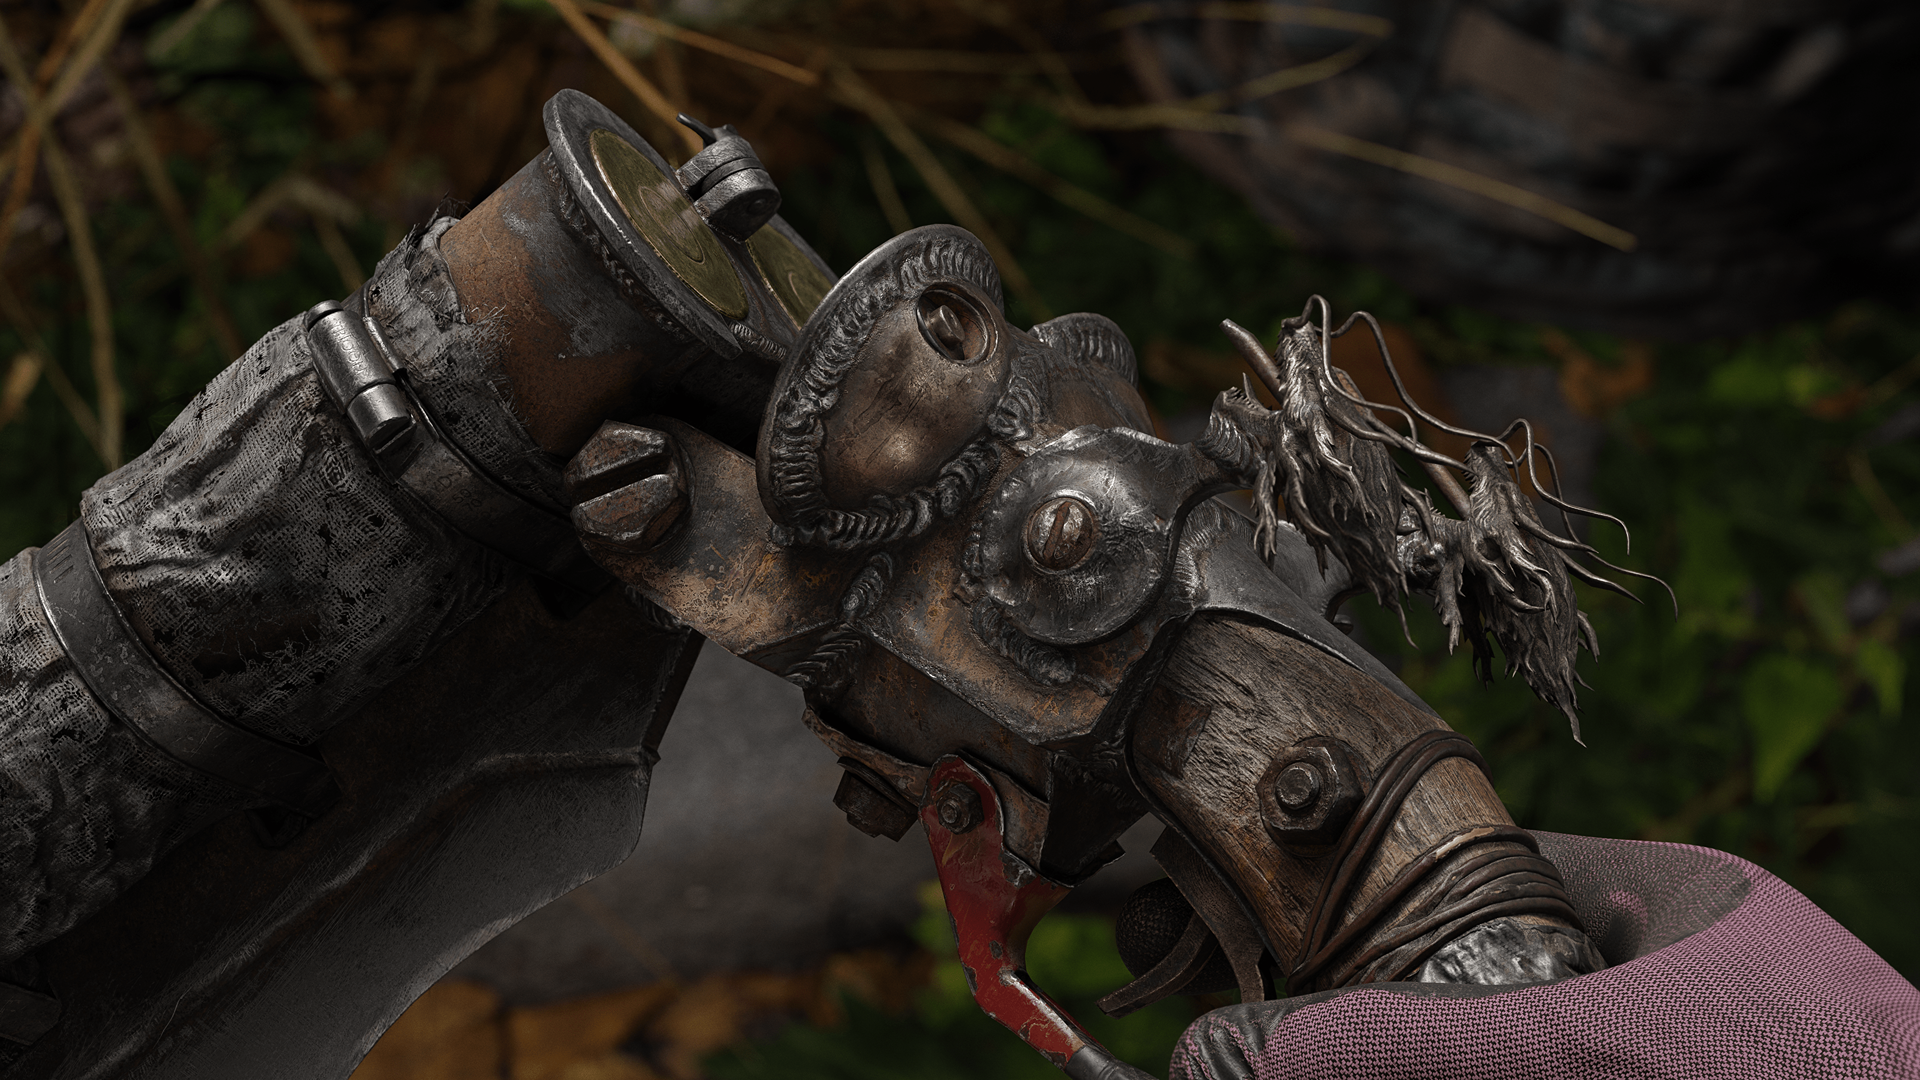
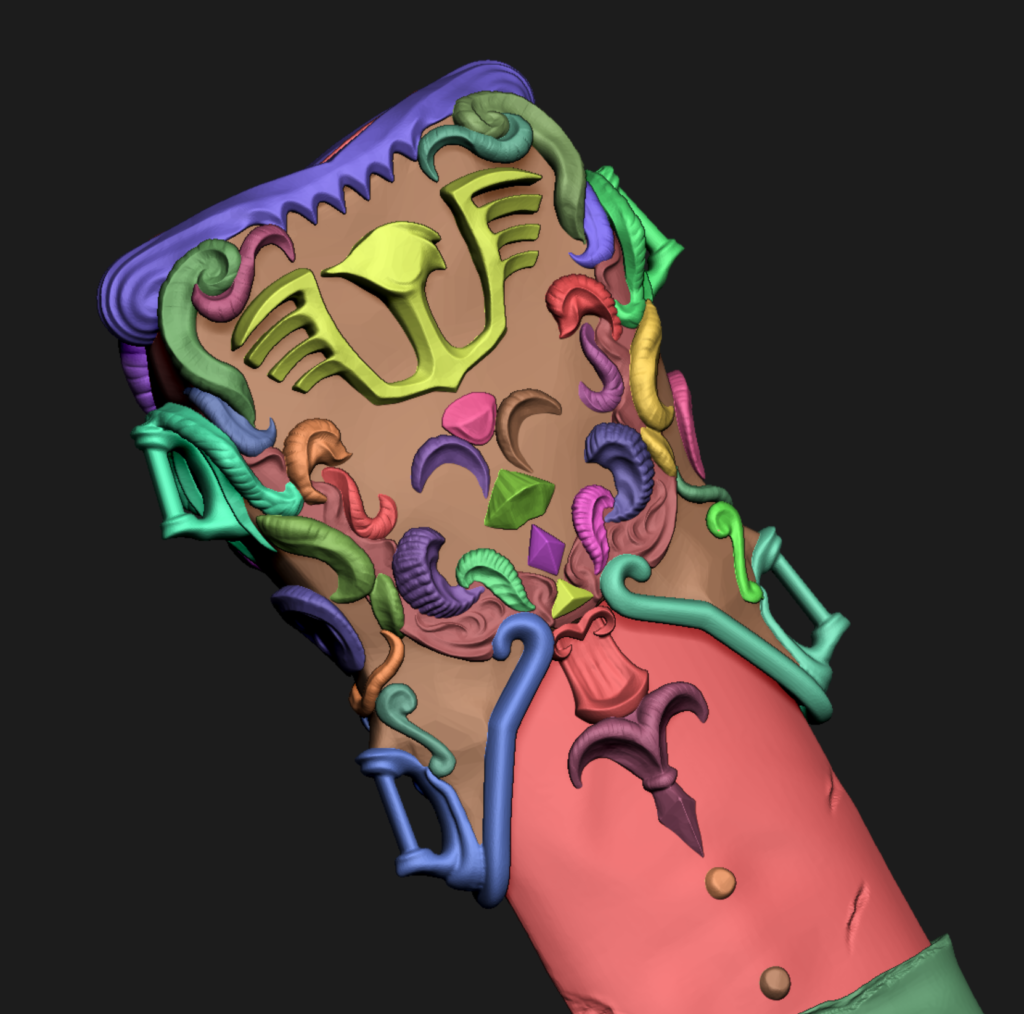
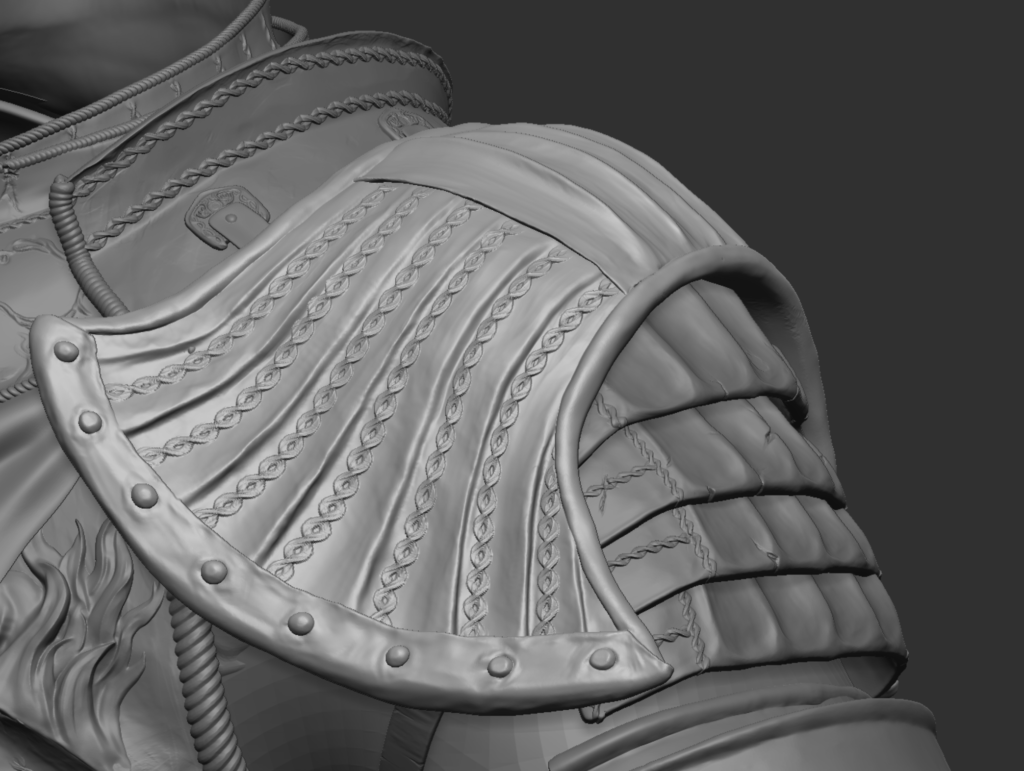
Wherever I wanted that coiled detail, such as the chest and some parts of the shoulder plates, I would use an insert mesh I created using the Helix primitive and add that using the insert mesh curve function.
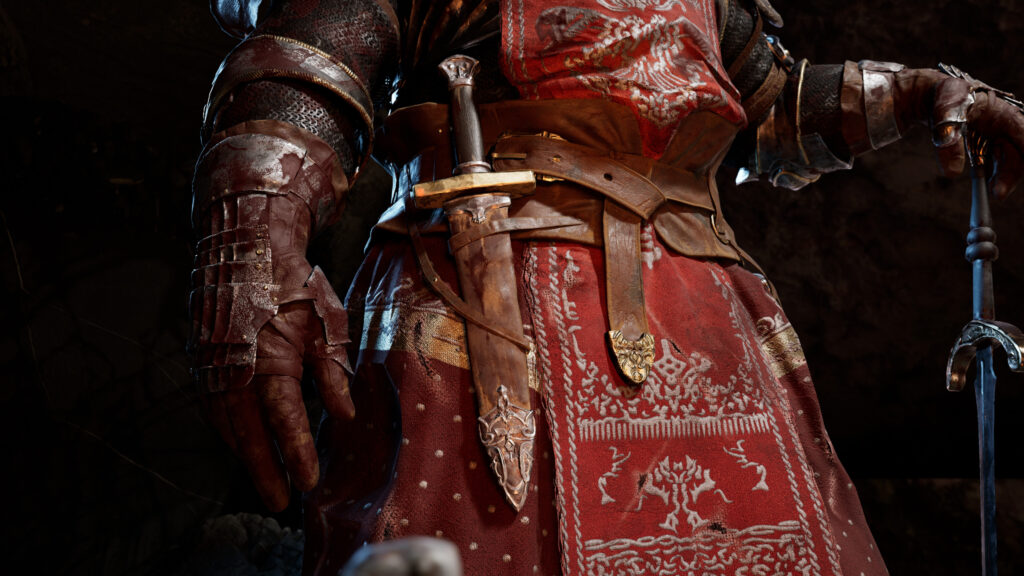
And then there’s the case with the sheath in which I initially sculpted the details on top of the upper part but decided to extract them and work separately for better definition.

Hair
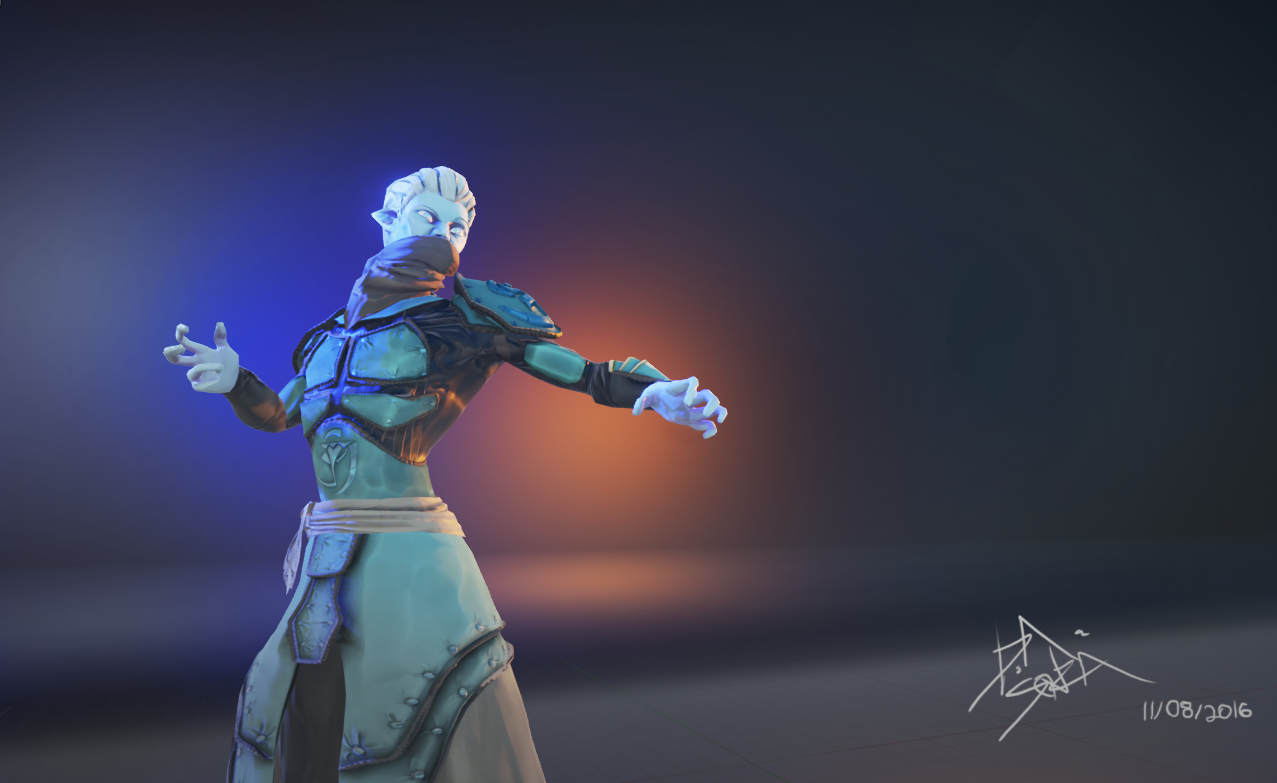
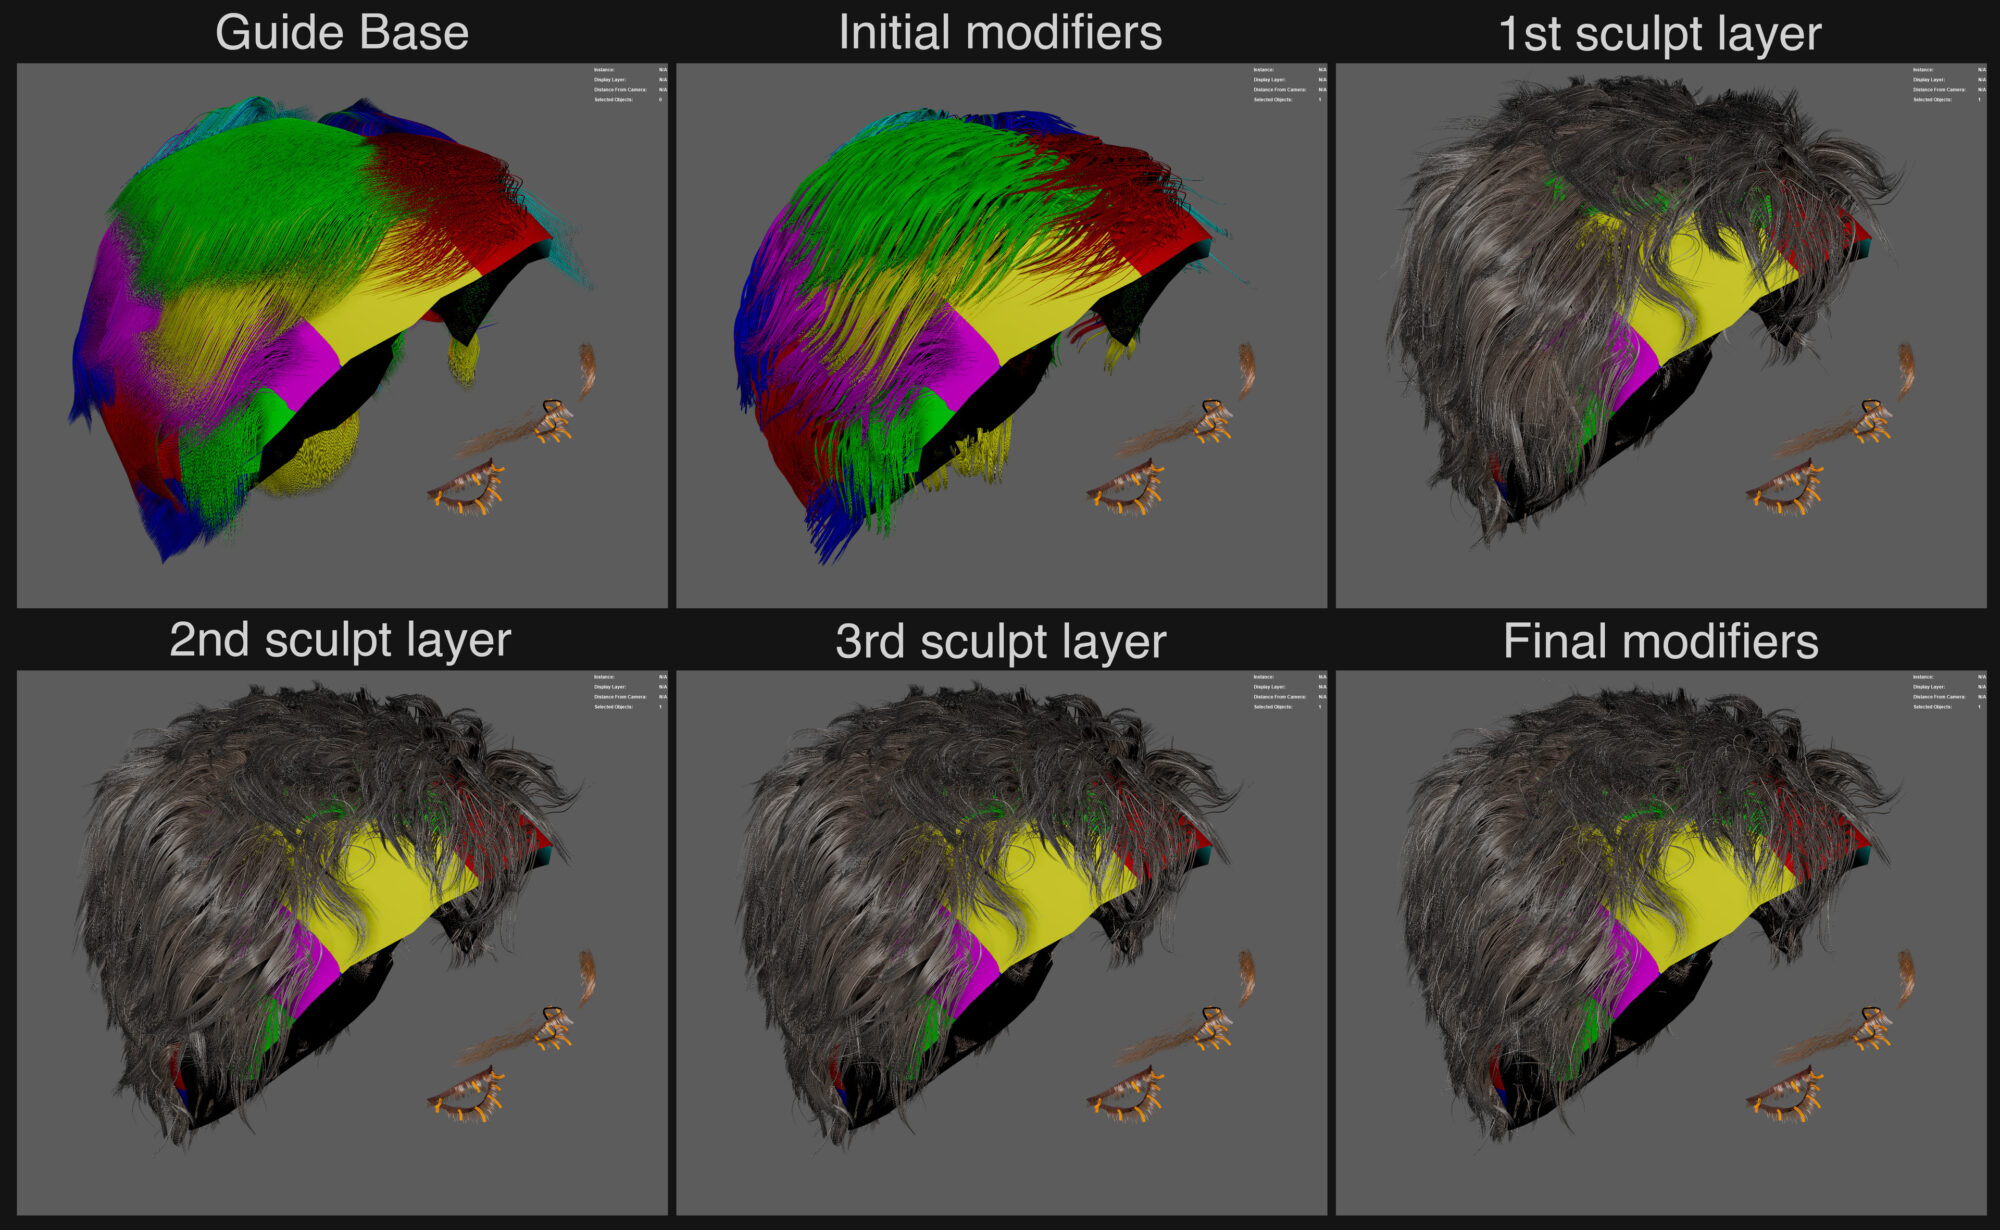
For the hair I initially blocked out the idea of using ZBrush, sculpting a hair using mass. Then decided on trying out grooming in Unreal Engine 5 for once, not because I don’t know how to do hair cards, quite the opposite, I didn’t know how to do grooming using xGen or other software like that and wanted to learn it, especially since we might need to use that kind of technology sometime in the future.
It was quite a bit of fun, even though I still have tons to learn from it, one thing that helped me was trying to keep organized the same way I do when sculpting hair from mass or making it from hair cards.
Organize the overall flow of the hair and establish the primary shapes first, then start breaking that up into smaller and smaller shapes. Unfortunately, some of that primary shapes work is something I didn’t really document, so I just have images from the secondary sculpt onwards.
Uving & Baking
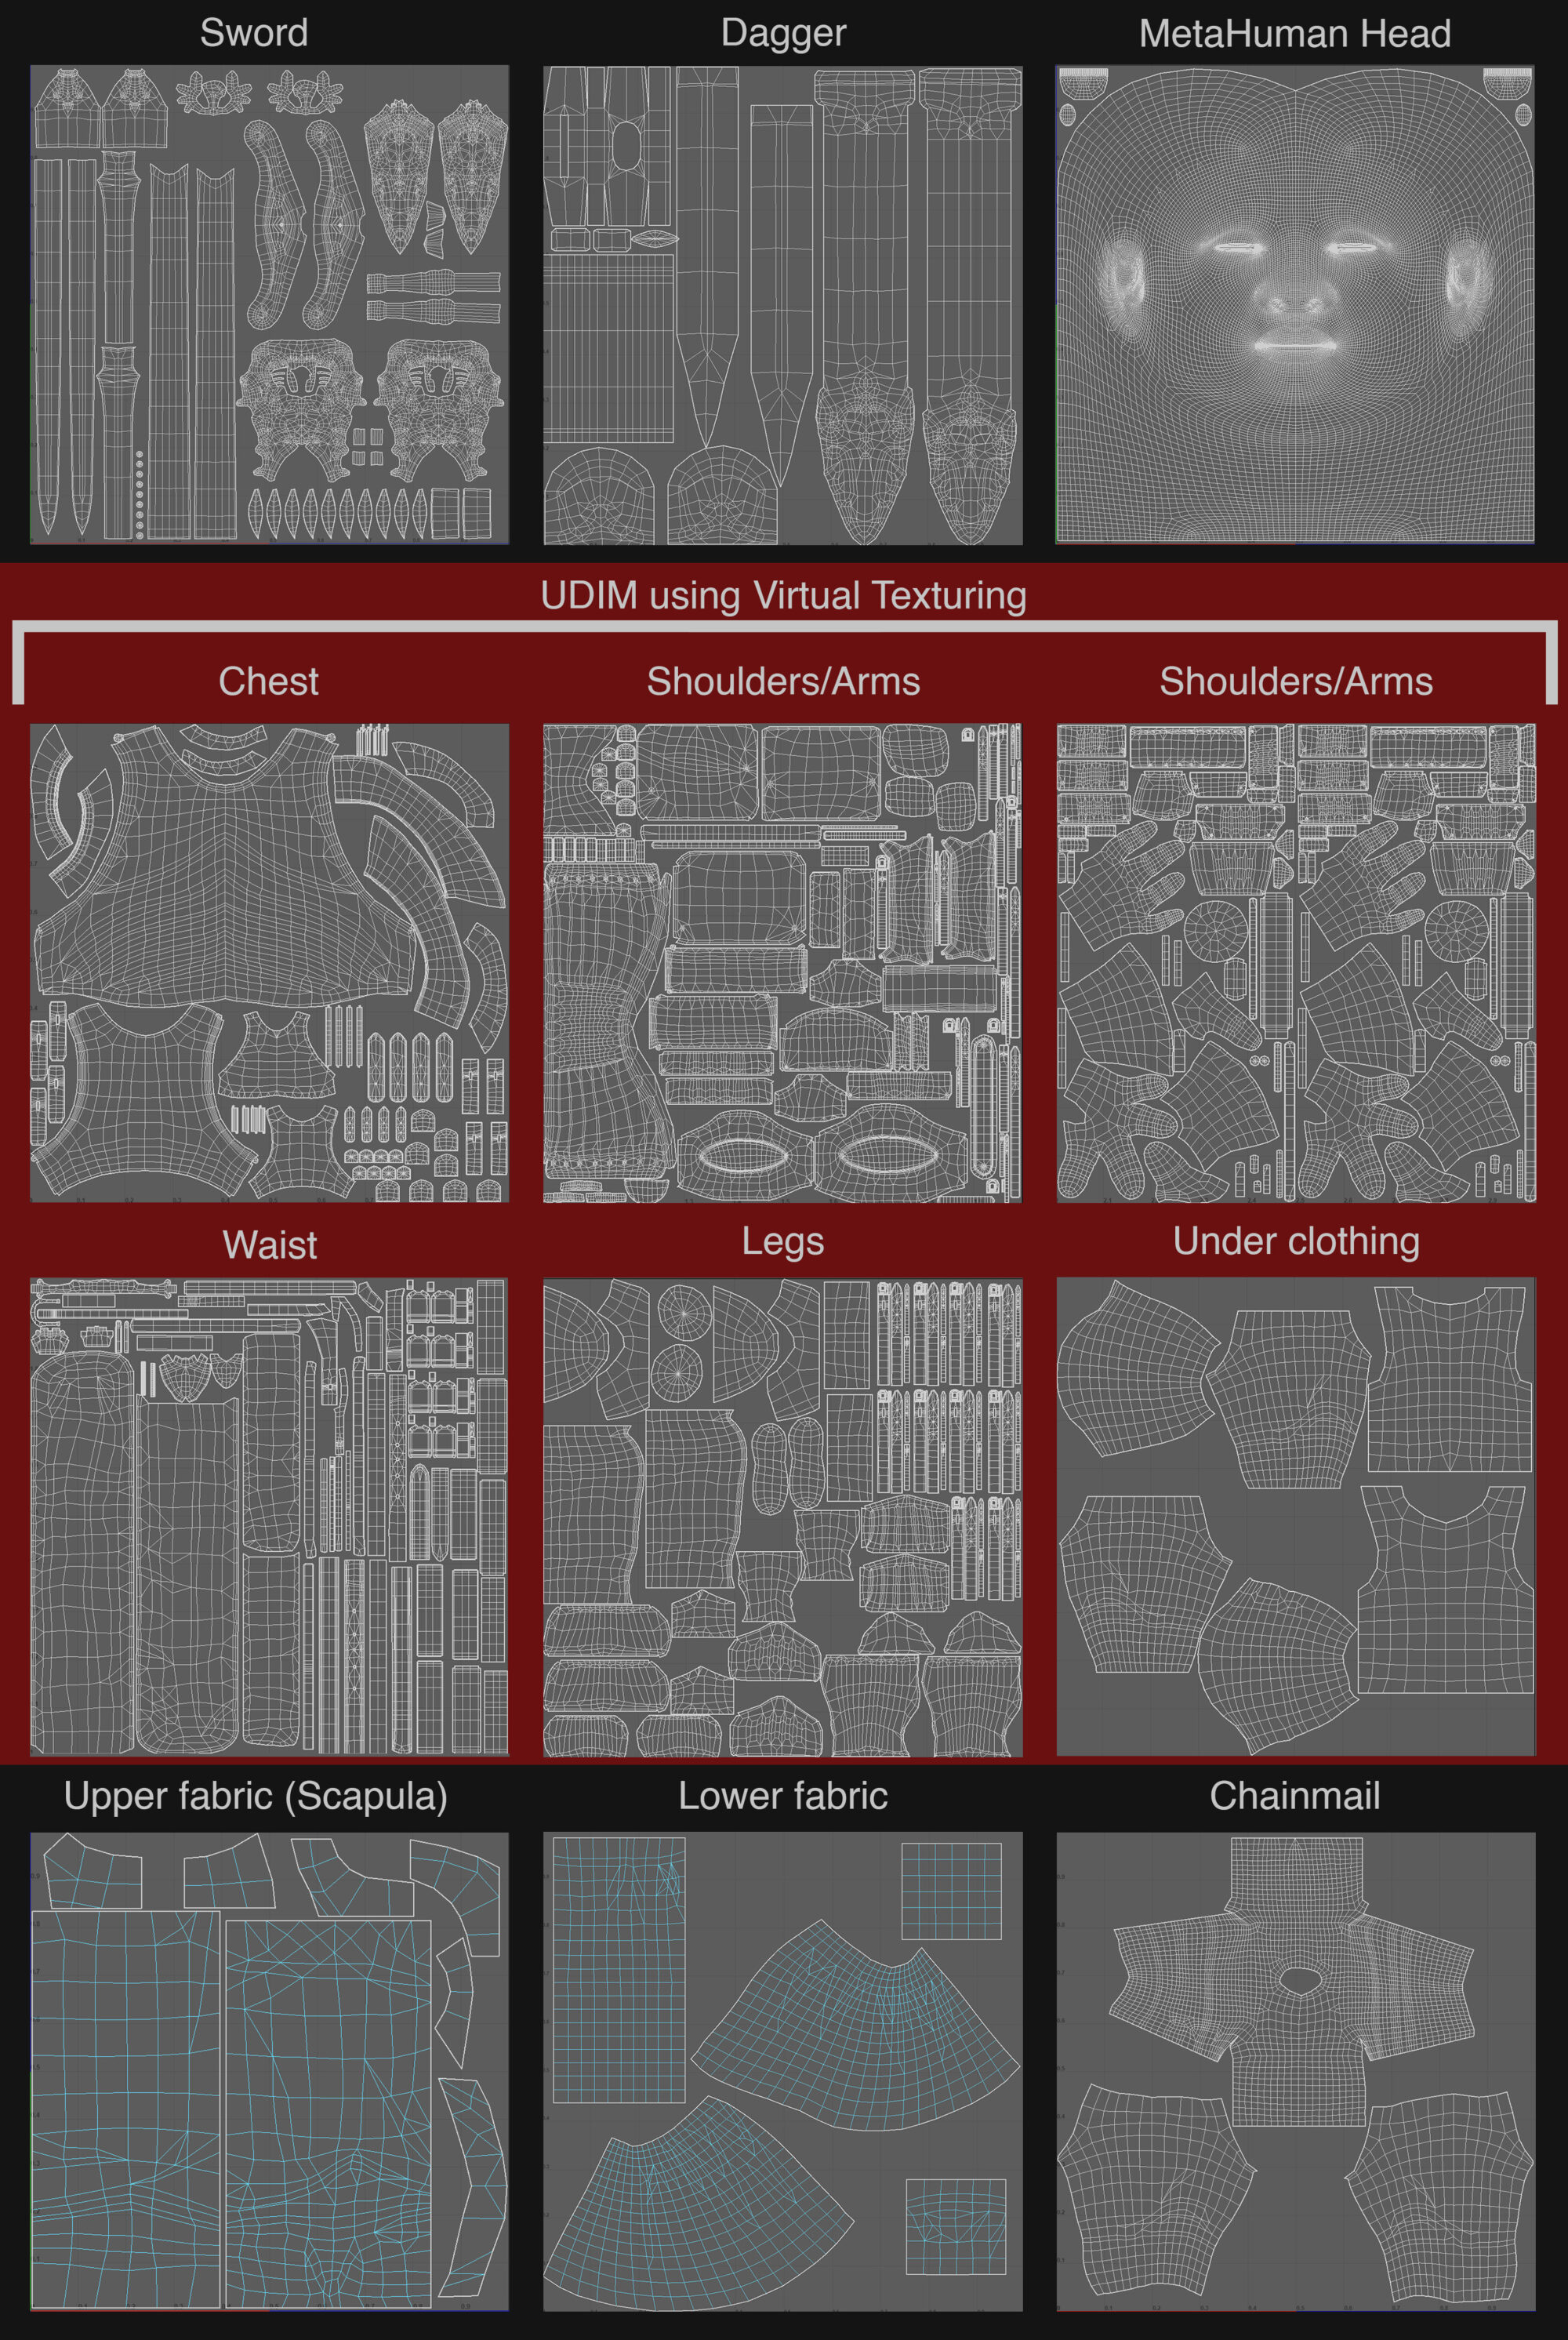
For the UV layout I used RizomUV, it works great with grouping, quick selection tools, a fast unfolding algorithm and a ton of alignment and positioning functions.
I tried to make sure I could use up the most UV space possible, most of the time, that is. There were 3 parts of the model in which I didn’t really take that into consideration that much, these being:
The lower part of the Scapula’s fabric, the chainmail, and the clothing beneath the chainmail. For these, I chose to give preference to lower distortion and a layout that more closely resembled how the fabric would be cut, the reason for that was to make sure the patterns and textures would wrap around properly, especially since they didn’t need that much resolution anyway
Besides that, I tried to make as many edges aligned to the U and V axis as possible so that wouldn’t distort the textures too much and tried to keep some degree of organization in mind.
Keeping pieces made of leather close to each other, buckle pieces close to each other, and so forth. Which wasn’t always possible, but it helps with the texturing process.
Baking was done in Marmoset Toolbag 4, where I was able to combine the parts that weren’t touching into distinct groups to avoid intersecting projections, and other problems later.
To more easily do this, I saved each high poly model to a different .obj and saved the low-poly model with its components separate into different parts as well, so I could hide and show them according to what part of the model was being worked on in each group.
Texturing
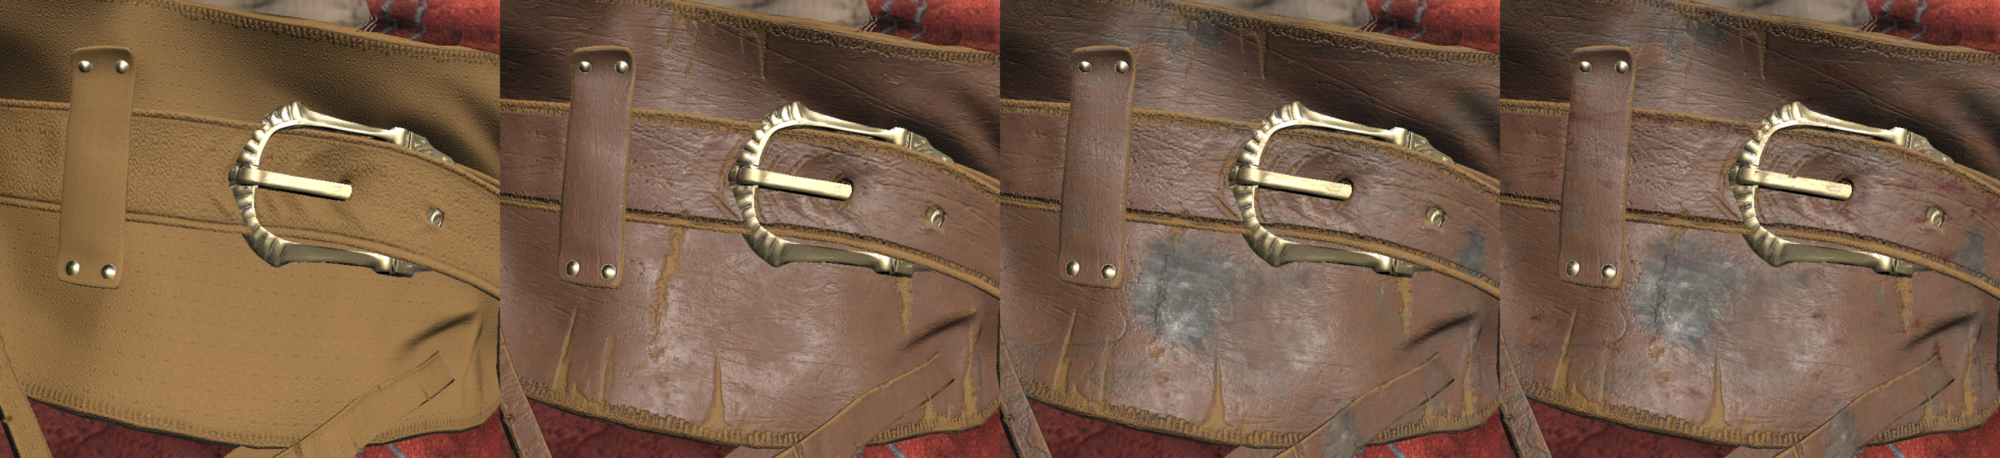
Texturing was done in Substance painter, I used the surface assets from Megascans for the base textures, such as iron, leather, etc. And tried to work in layers as much as I could, describing the distinct types of leather, for example, from raw, to tanned, so I was able to reveal them with masks to show wear and tear.
On top of this, I added layers of dirt and blood, which were masked out using a combination of generated masks and hand-painted splatters. I also used Megascans’ imperfection assets such as grunge and scratches to aid in the masking of certain effects, such as the distinct layers of aging on the metal. All this combined to make up the final effect.
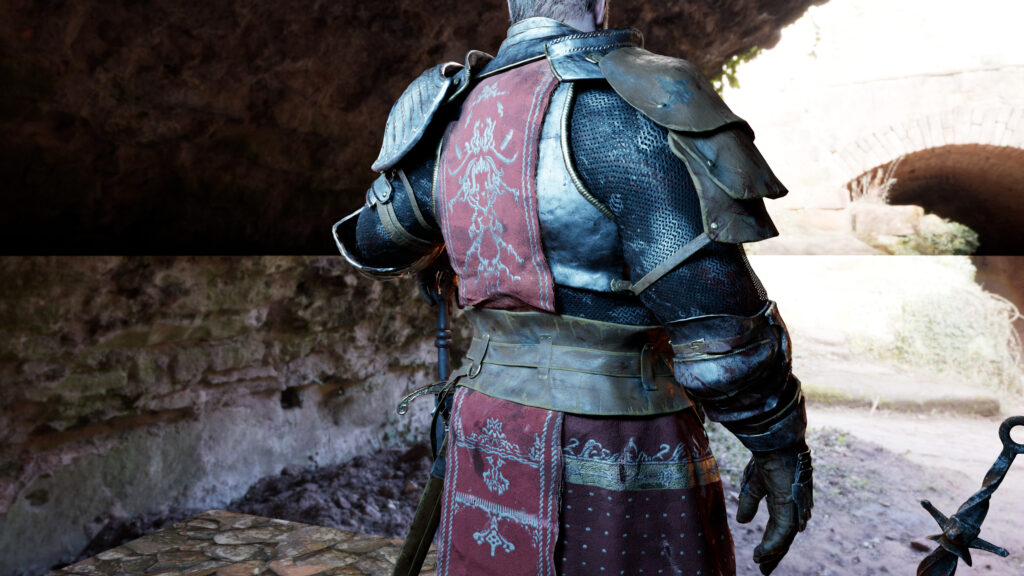
For the fabric, besides that same type of treatment, I also made a layer using a weaving pattern to make a transition from undamaged to the damaged fabric making it look “thinner” in places. And for the embroidery, I used a plugin, available on artstation called Patches Generator by Bao Le.
Finally, I added Normals detailing inside Unreal with a repeating fabric pattern.
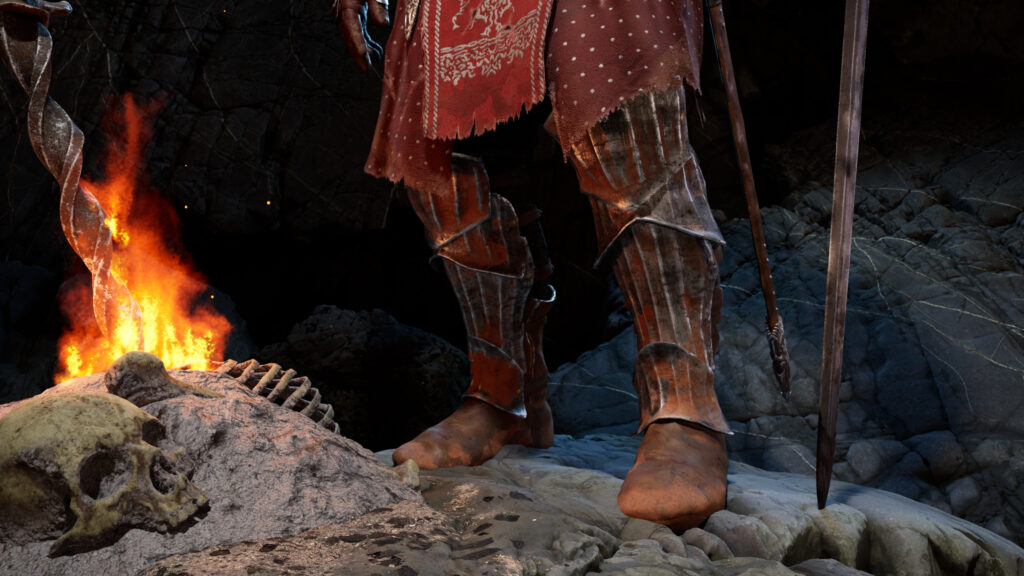
Lighting & Rendering
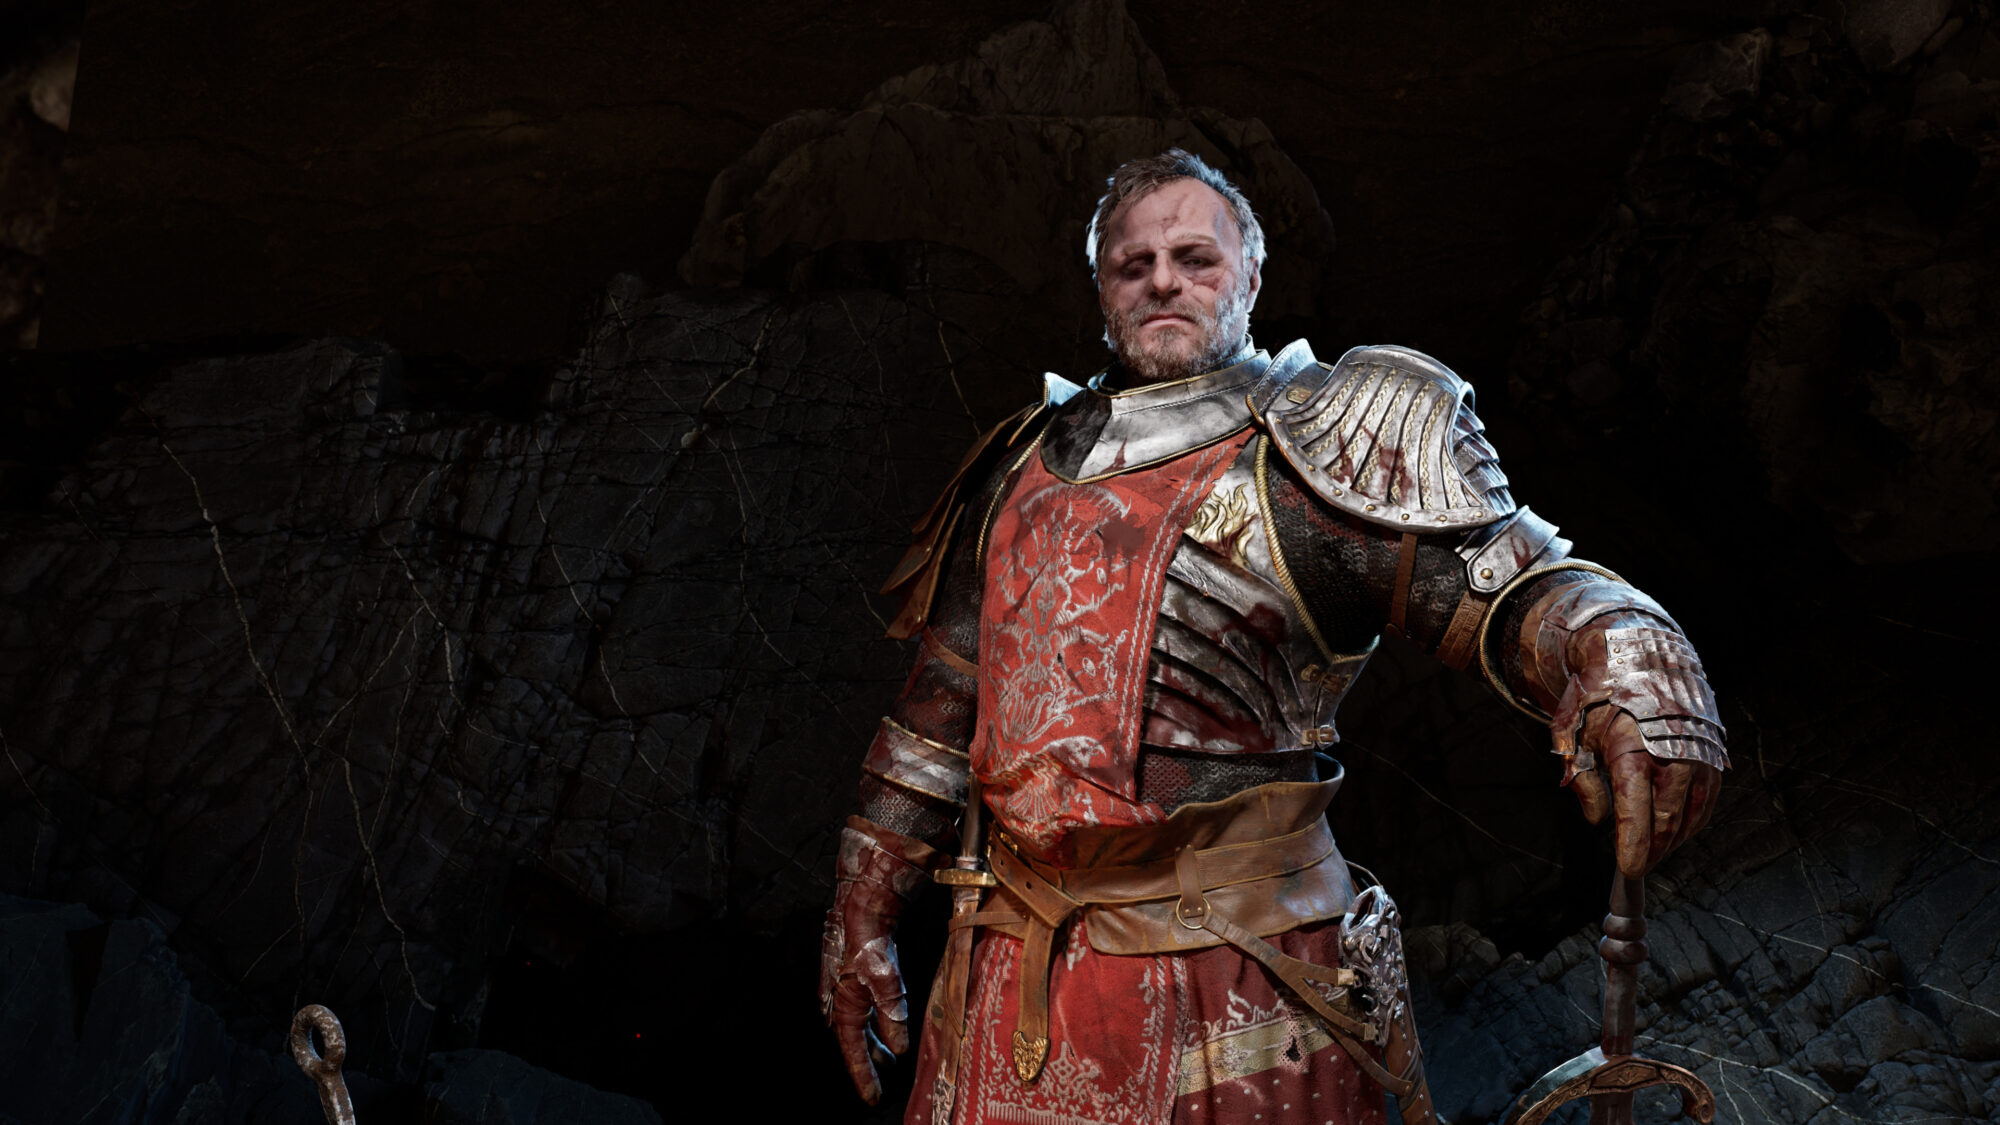
For the final renders, I brought everything together inside of Unreal Engine 5, used some Megascans assets to create a quick scene, as if inside of a cave of sorts, made a quick bonfire in ZBrush using some skeleton assets I had laying around, making a mound of ash, modelling a coiled sword, used the default fire Niagara fluid that ships with unreal.
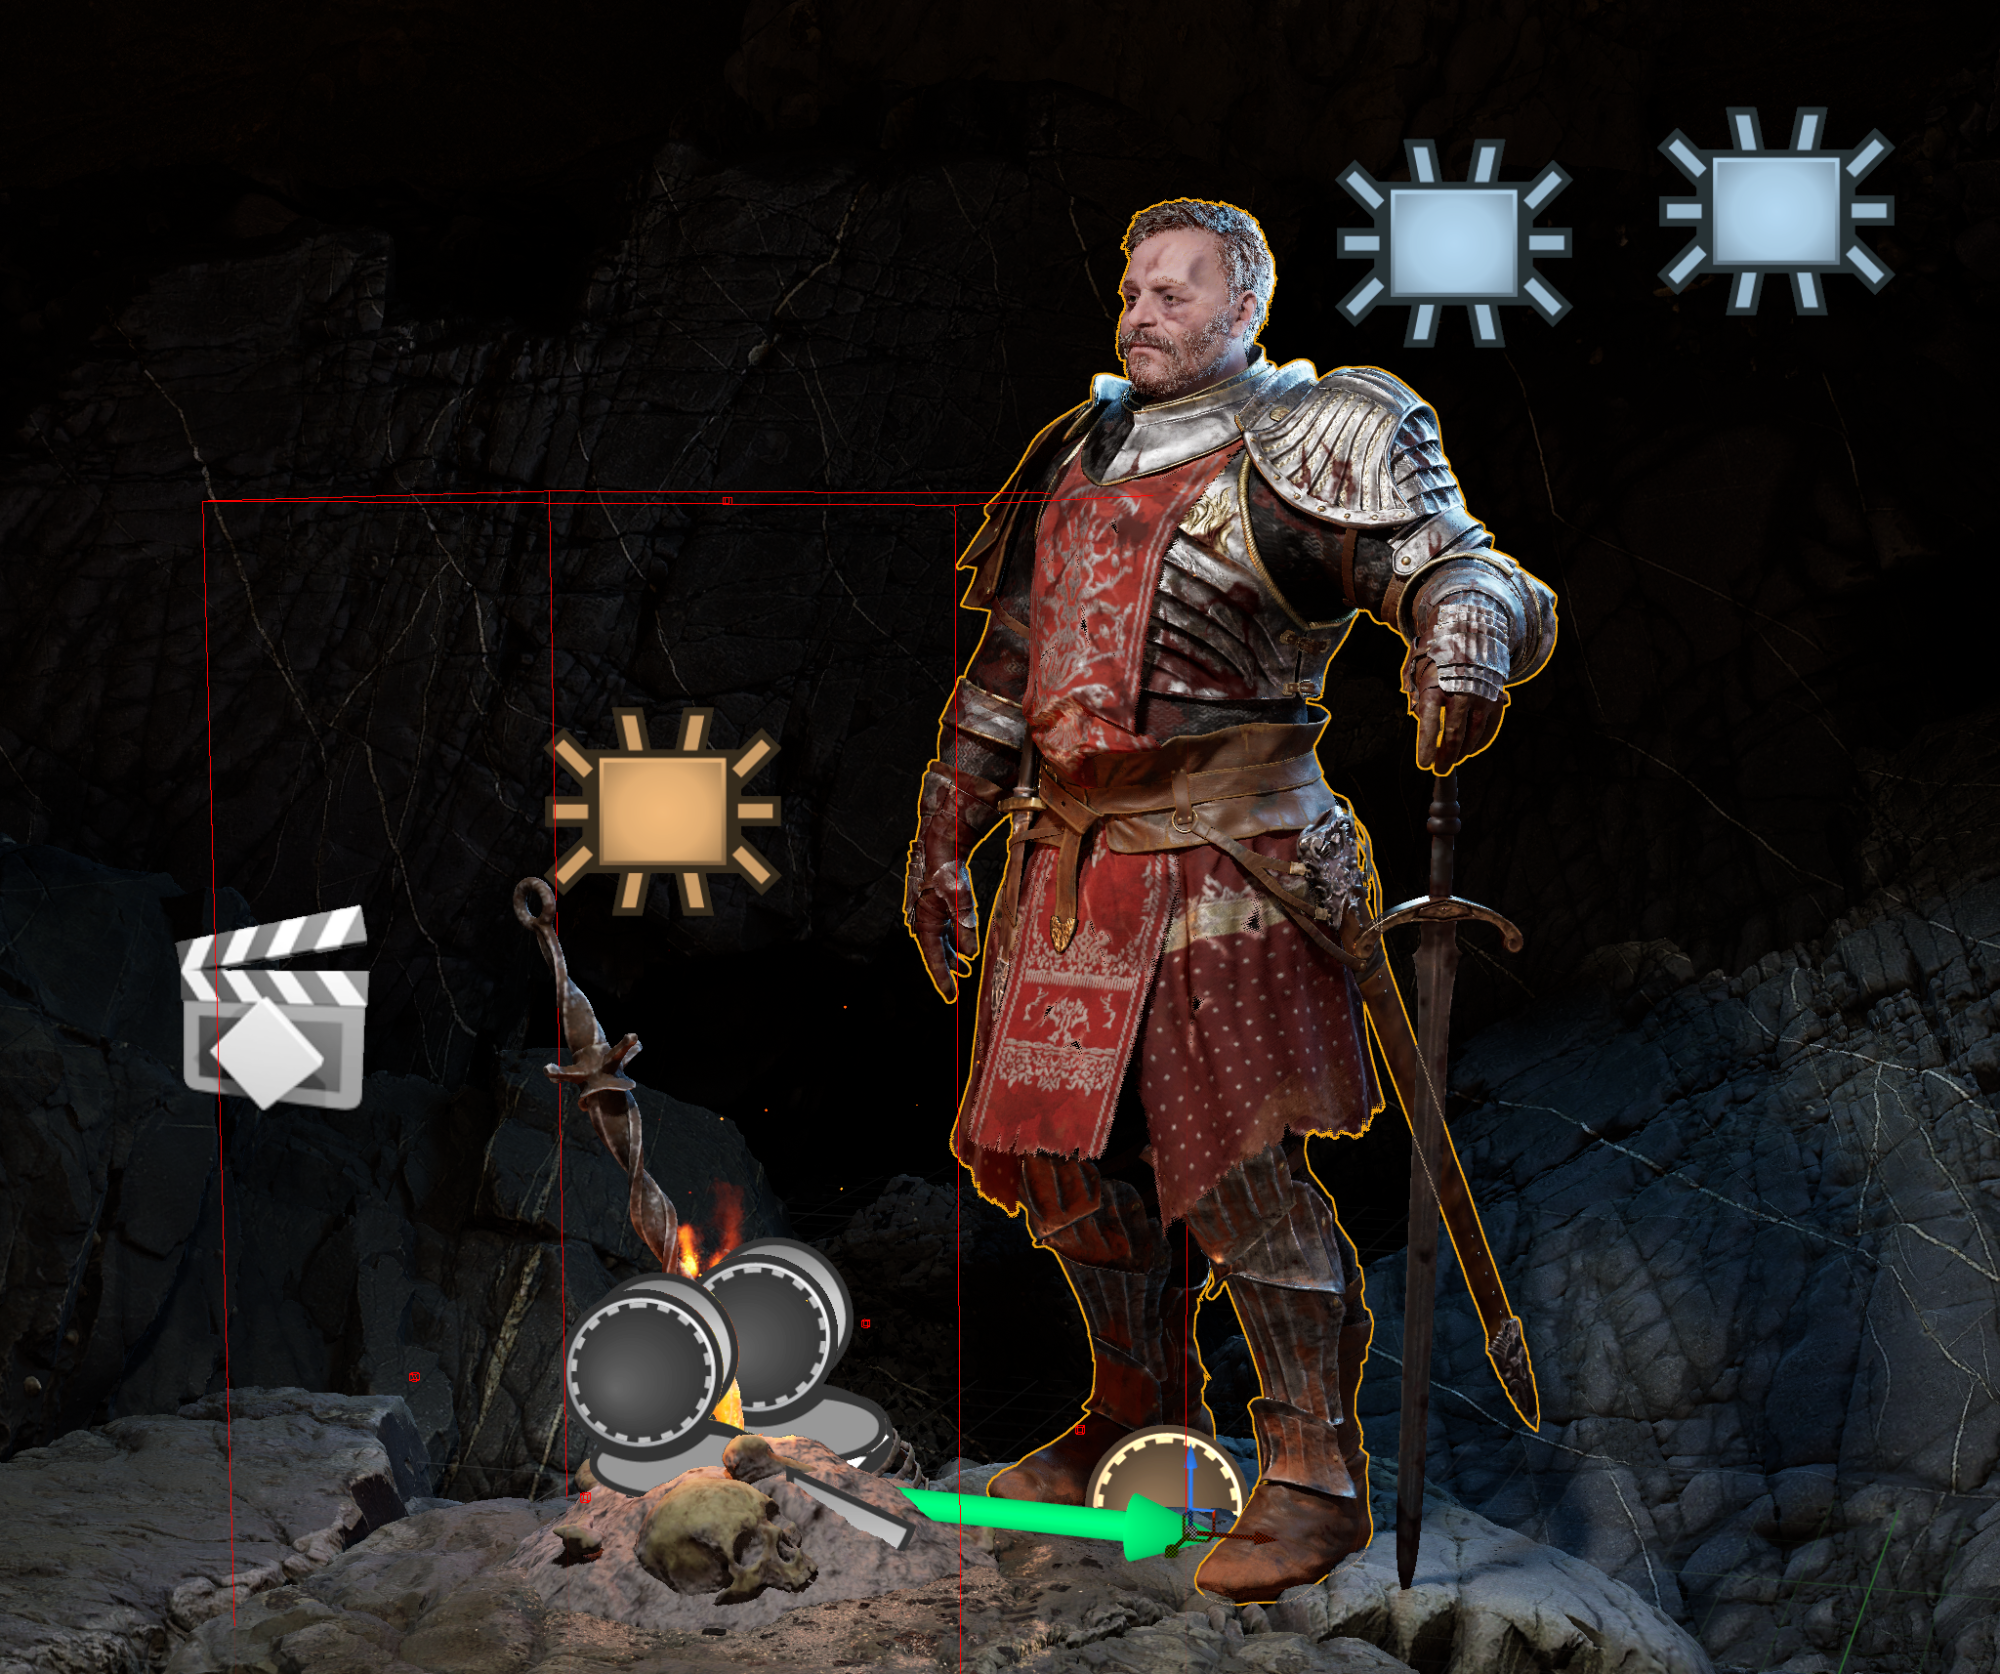
For lighting I added a key light up top, to bring attention to the face, added some blueish light for the rim and a fill orange light for mood and to increase the bonfire’s effect. I rendered everything with Lumen’s global Illumination and Reflection systems.
That being said, I also made a few renders on a studio setup using lower resolution textures and no Lumen, since DirectX 12 (which is needed for Lumen as far as I can tell) was proving to have really poor performance, on my PC at least, so I could show how it looked on a more realistic use case, and the difference isn’t even that great (although, yes, Lumens’ reflections look really crisp).

Conclusion
I had a lot of fun working on this project, and there are a few things I learned/reinforced while working on it: Rushing in when you’re making a portfolio piece, it’s not the best idea to rush in, in fact, I took longer on this project than strictly needed.
I redid a lot of stuff and tested out different workflows, if I thought of a better way to redo something that was already finished, I would go and try that out, it’s your project, of course, you shouldn’t delay it for no reason, especially if you’re looking for a job, but personally, I think it can be a good idea to try and learn as much as possible with portfolio pieces, according to your time availability.
One other thing I believe to be true, at least for me, is to not be afraid to ask for feedback, while still being smart about it. Asking for feedback from more experienced artists is great and all, but if you just have them fix everything, you won’t learn much from it.
Try to not just listen to feedback, but also digest it, give your own spin and learn from it. That being said, I would like to also thank here 3 artists that were especially helpful in this regard, Giovane Henriques, who I also mentioned before, Bento Ribeiro and Gabriel Bona.
Go through each section, talk a little about what you did and add some tips and tricks and tell the reader a few things in each section about how you achieved the final look of your Environment.
Read more articles
You might also like these articles.