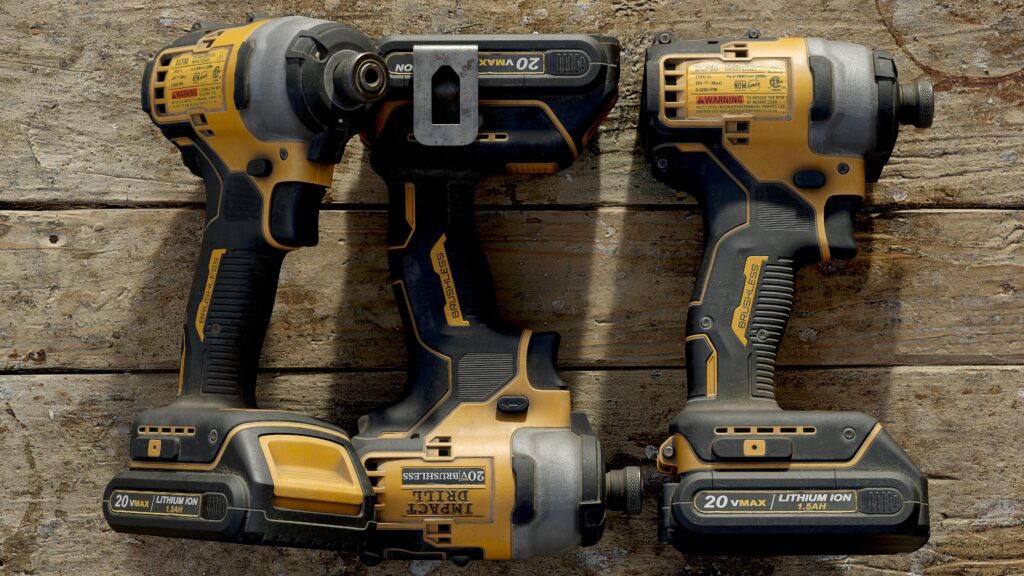
Set of Drills


Introduction
Hi, I’m Abhishek Pareek, a game artist working in the industry since 2013. I’ve previously been with 4A Games and currently work as a freelance artist.
Throughout my career, I’ve had the opportunity to contribute to several AAA productions in both permanent and freelance capacities, collaborating with studios like 4A Games, Exigent Game Art, Trace Studios, cView Studios, VOLTA, and others.
My journey into game art began with a deep love for video games during childhood, which gradually transformed into a professional path that I’ve been fortunate to follow ever since.
Project & Goals
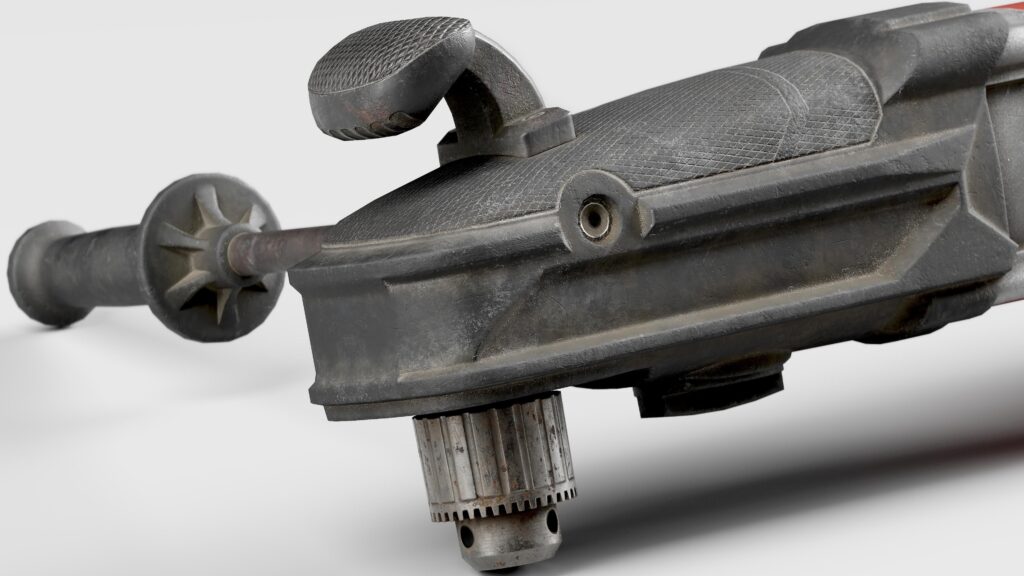
This project involved creating two interactive drill props. While certain parameters were predefined, I was given creative freedom over the visual style and direction.
I chose to pursue a realistic aesthetic, one that reflects natural wear and grime to suggest real-world usage, without pushing it so far that it distracts from the overall clarity and function of the assets.
Tools
- 3ds Max
- Marmoset Toolbag
- Substance Painter
- Unreal Engine
- Photoshop
- PureRef

References & Ideas
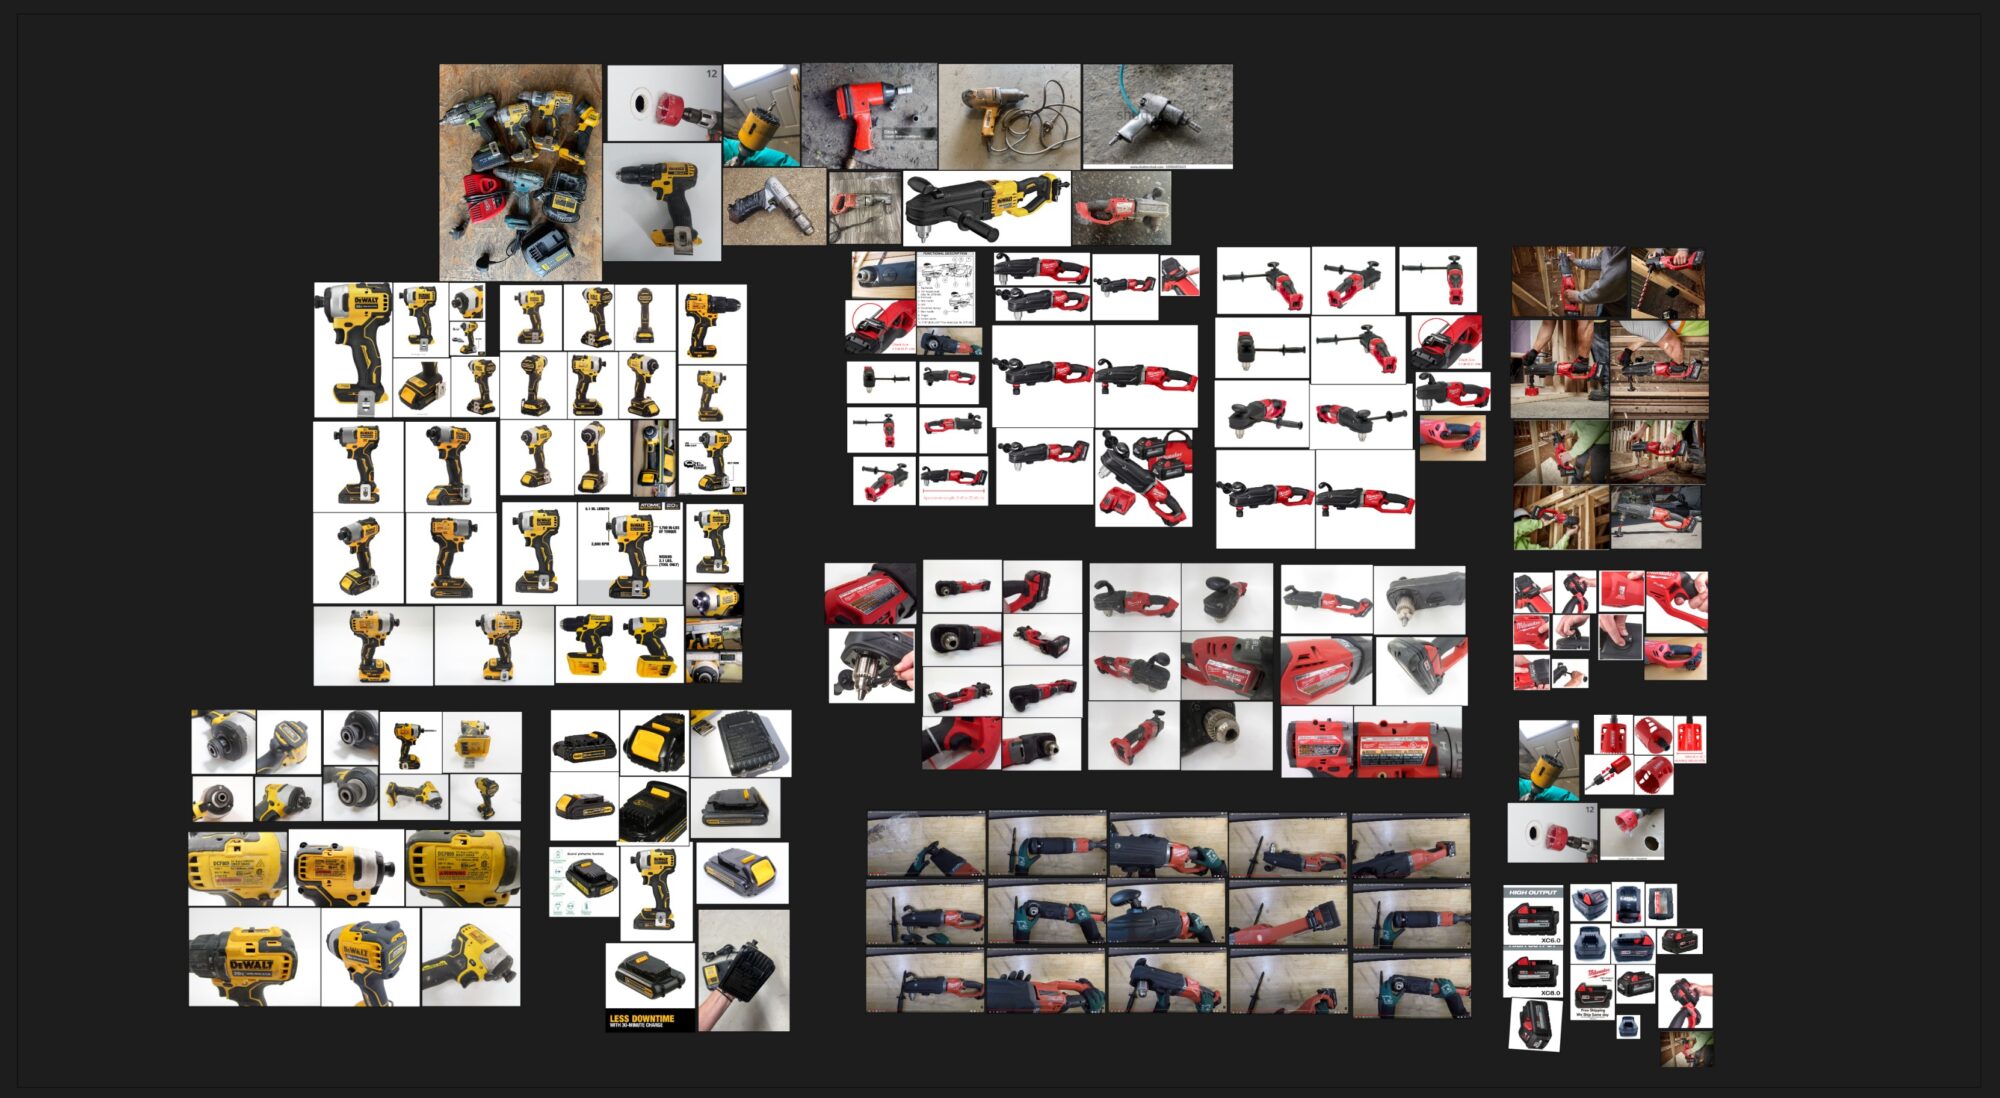
My first step was to closely examine the functionality and structure of the tool. I collected a broad range of references, both specific and general, from various angles to study its silhouette, design intricacies, and operational details.
In addition to direct references, I looked at similar tools for stylistic inspiration, focusing on unique surface features and material characteristics.
As I built my reference board, I constantly imagined how these elements could come together in the final asset, combining practical form with creative interpretation.
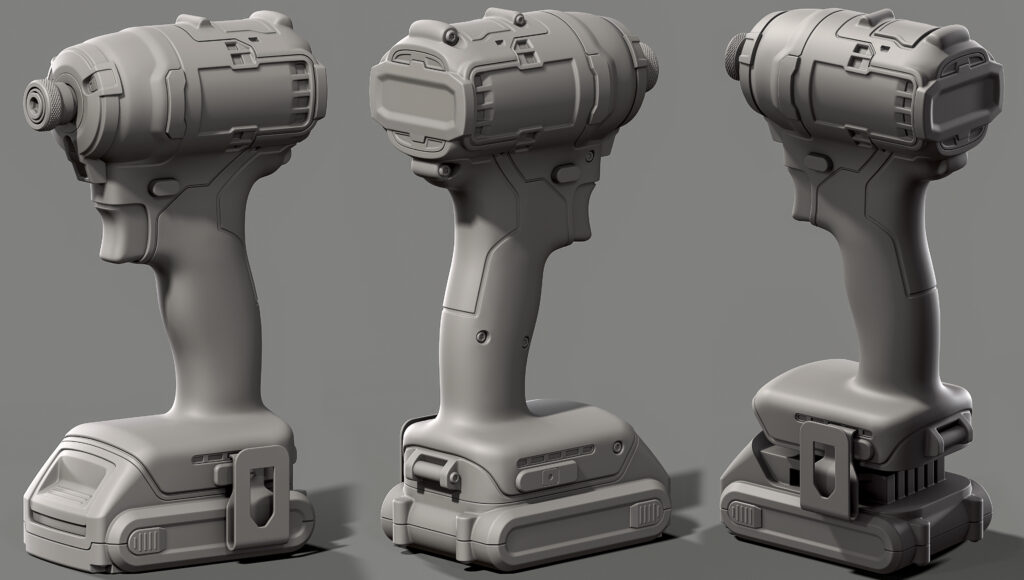
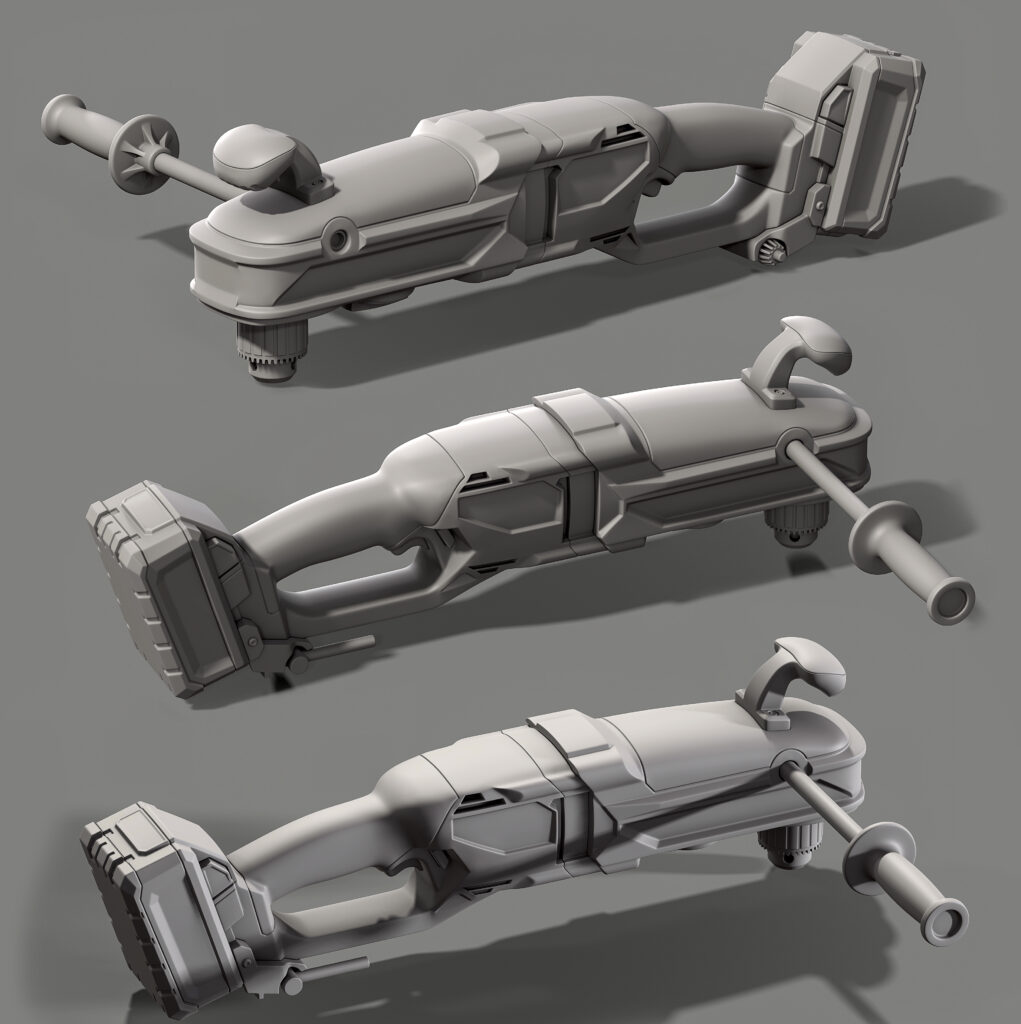
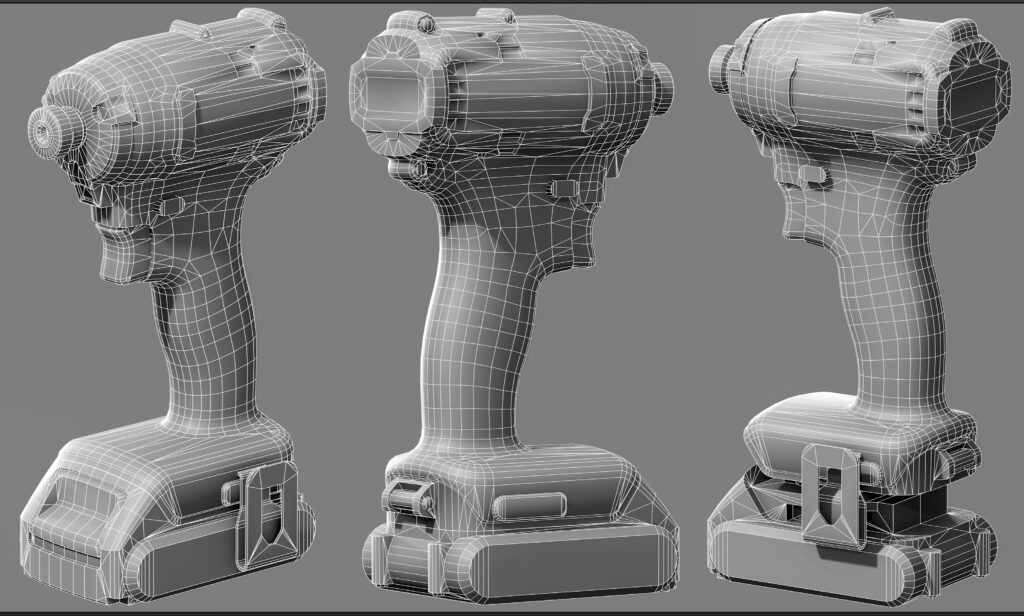
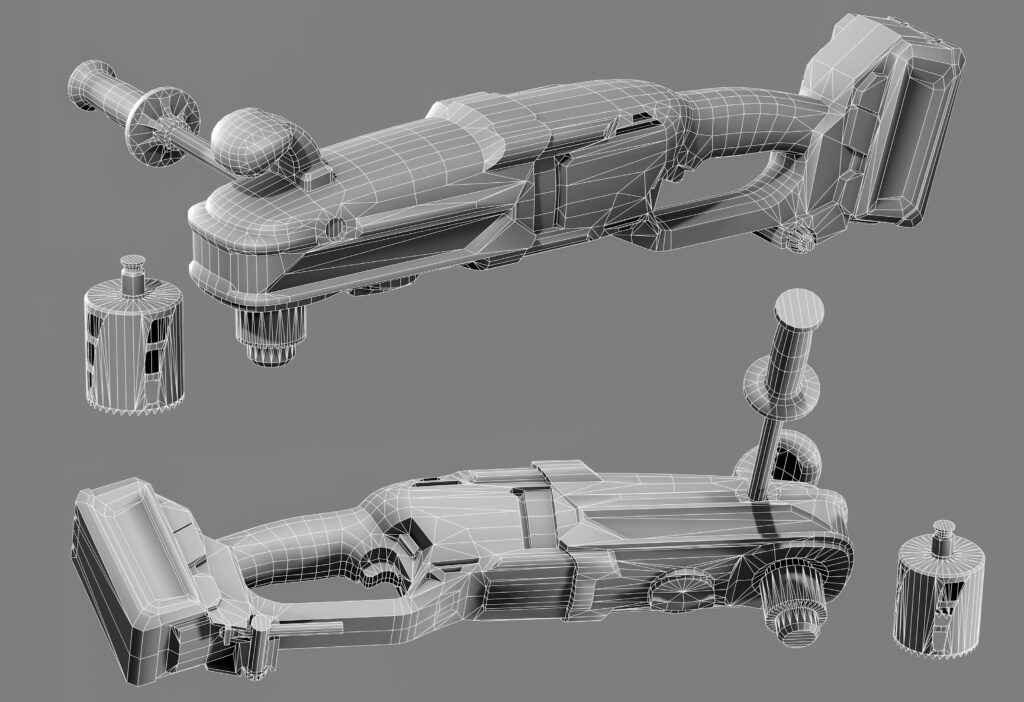
Blockout & Highpoly
Creating a strong blockout is the foundation for any successful asset. I always begin by locking down the primary shapes, making sure the forms are visually appealing and technically sound before diving into finer details.
Clean silhouettes and smooth curves are key at this stage, and I build the base model with future rigging, animation, and gameplay integration in mind.
It’s equally important to think about how the asset will function in a game setting: how it’s meant to be seen, used, and interacted with from the player’s perspective.
Once I transition from blockout to high-poly, I ensure that the materials are readable right away, even without textures or sculpted surface details.
The goal is for viewers to distinguish between surfaces like metal and leather purely through the form language, shading, and modeling techniques. To achieve this, I make proper use of Booleans, chamfering, and supporting edge work accordingly.
For handling complex modeling challenges, I mainly use 3ds Max along with tools like Plasticity and ZBrush as needed.
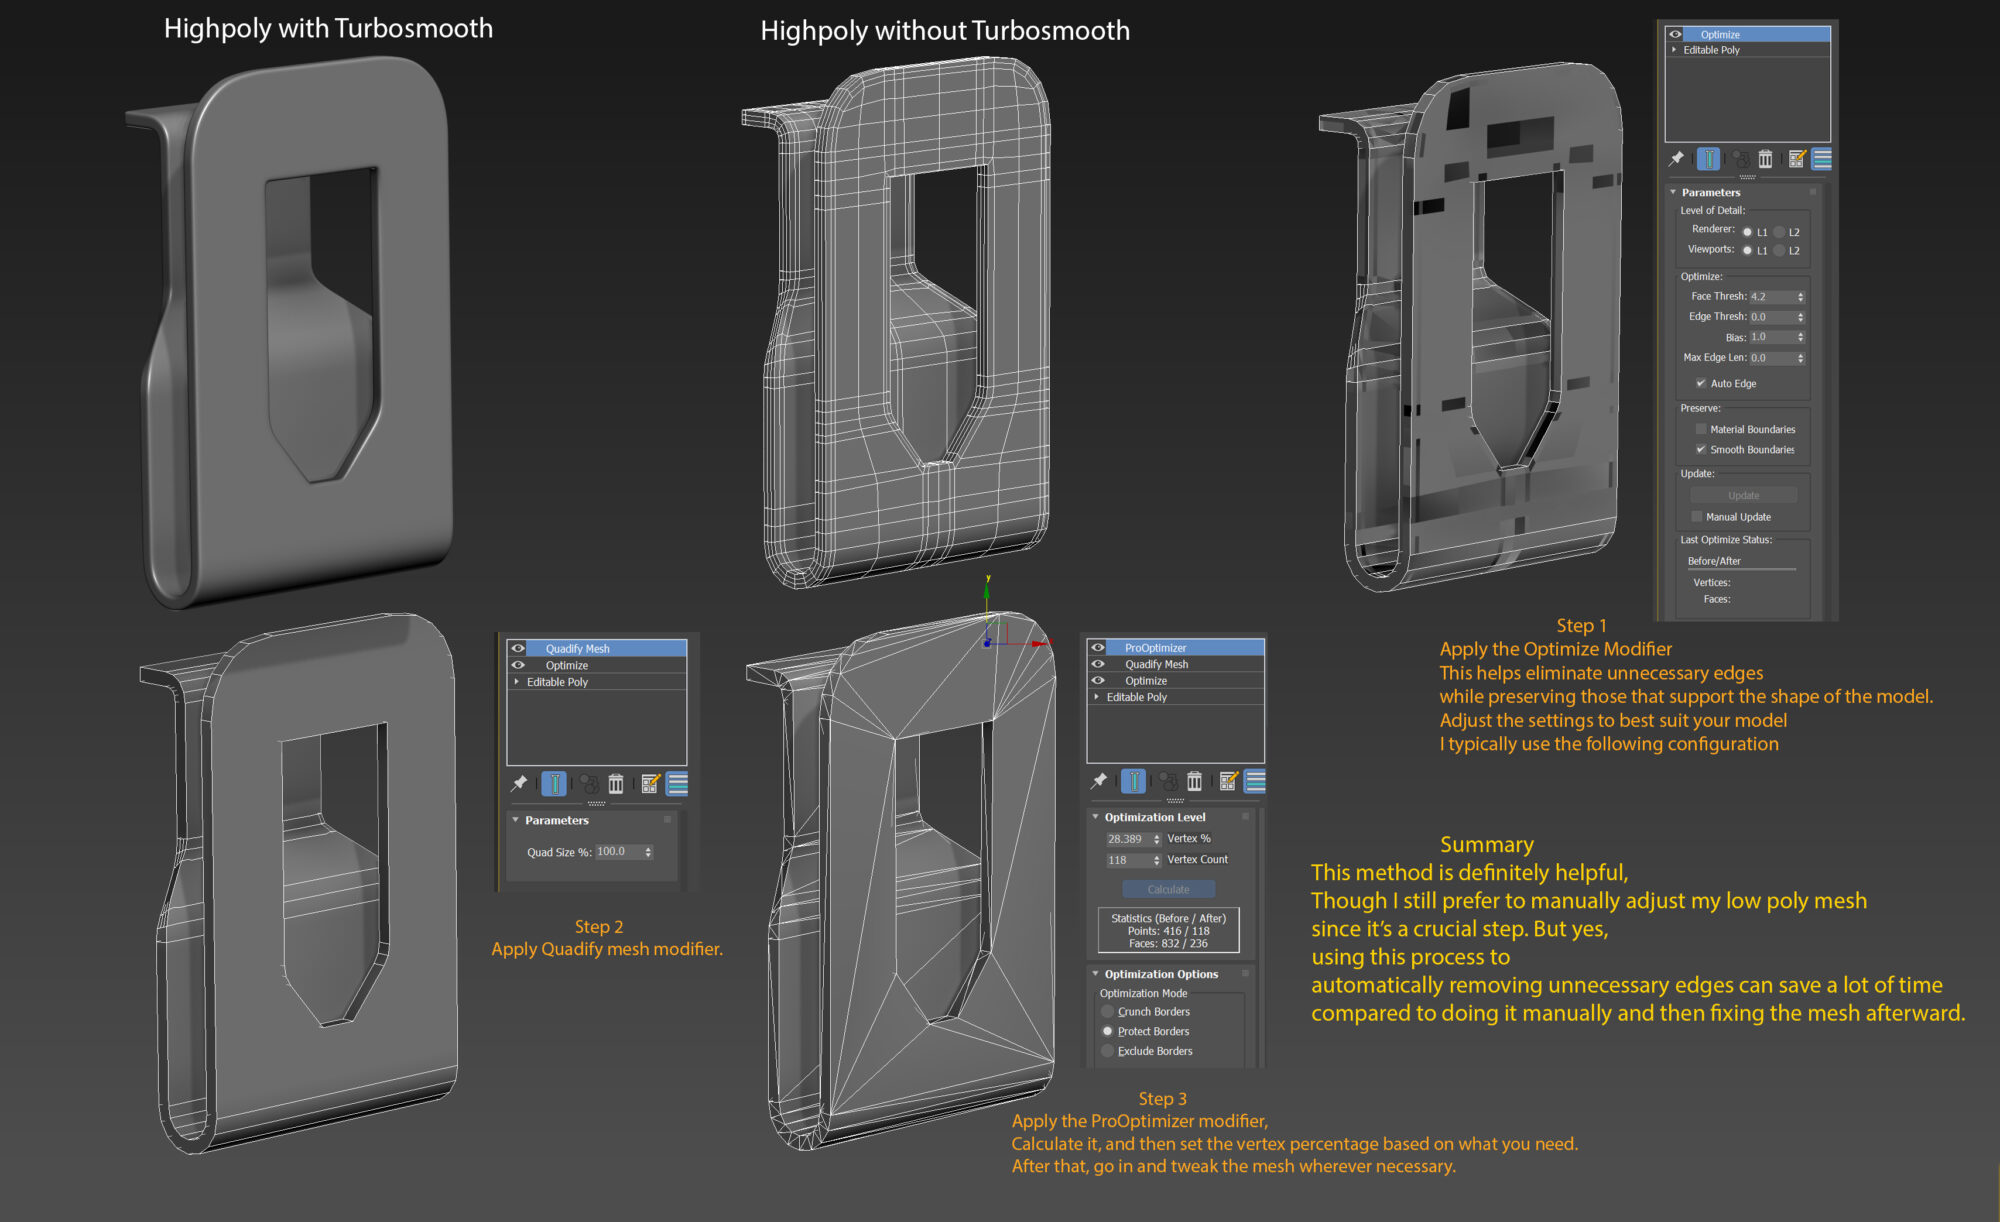
Lowpoly
Building an optimized and clean low-poly version is a vital part of the asset development process. I focus on preserving the essential curves and silhouette while ensuring smart edge placement, keeping geometry only where it adds real value.
With these drill models, I kept the polycount well-balanced.
Unlike personal projects, where budgets can sometimes be more flexible, this required practical optimization to ensure efficiency without compromising visual integrity.
For my low-poly workflow, I primarily rely on 3ds Max. It provides a solid range of tools and modifiers, such as Optimize, ProOptimizer and the built-in Retopology features, that streamline the process.
When working with characters or organic forms, I often make use of the Freeform tools in the Ribbon, which are especially useful for in-view retopology and sculpt adjustments, eliminating the need for external applications.
I also tend to approach the blockout stage with the low-poly in mind, often reworking or refining the blockout mesh itself to serve as the base for the final low-poly version.
Here is a small trick for low-poly:
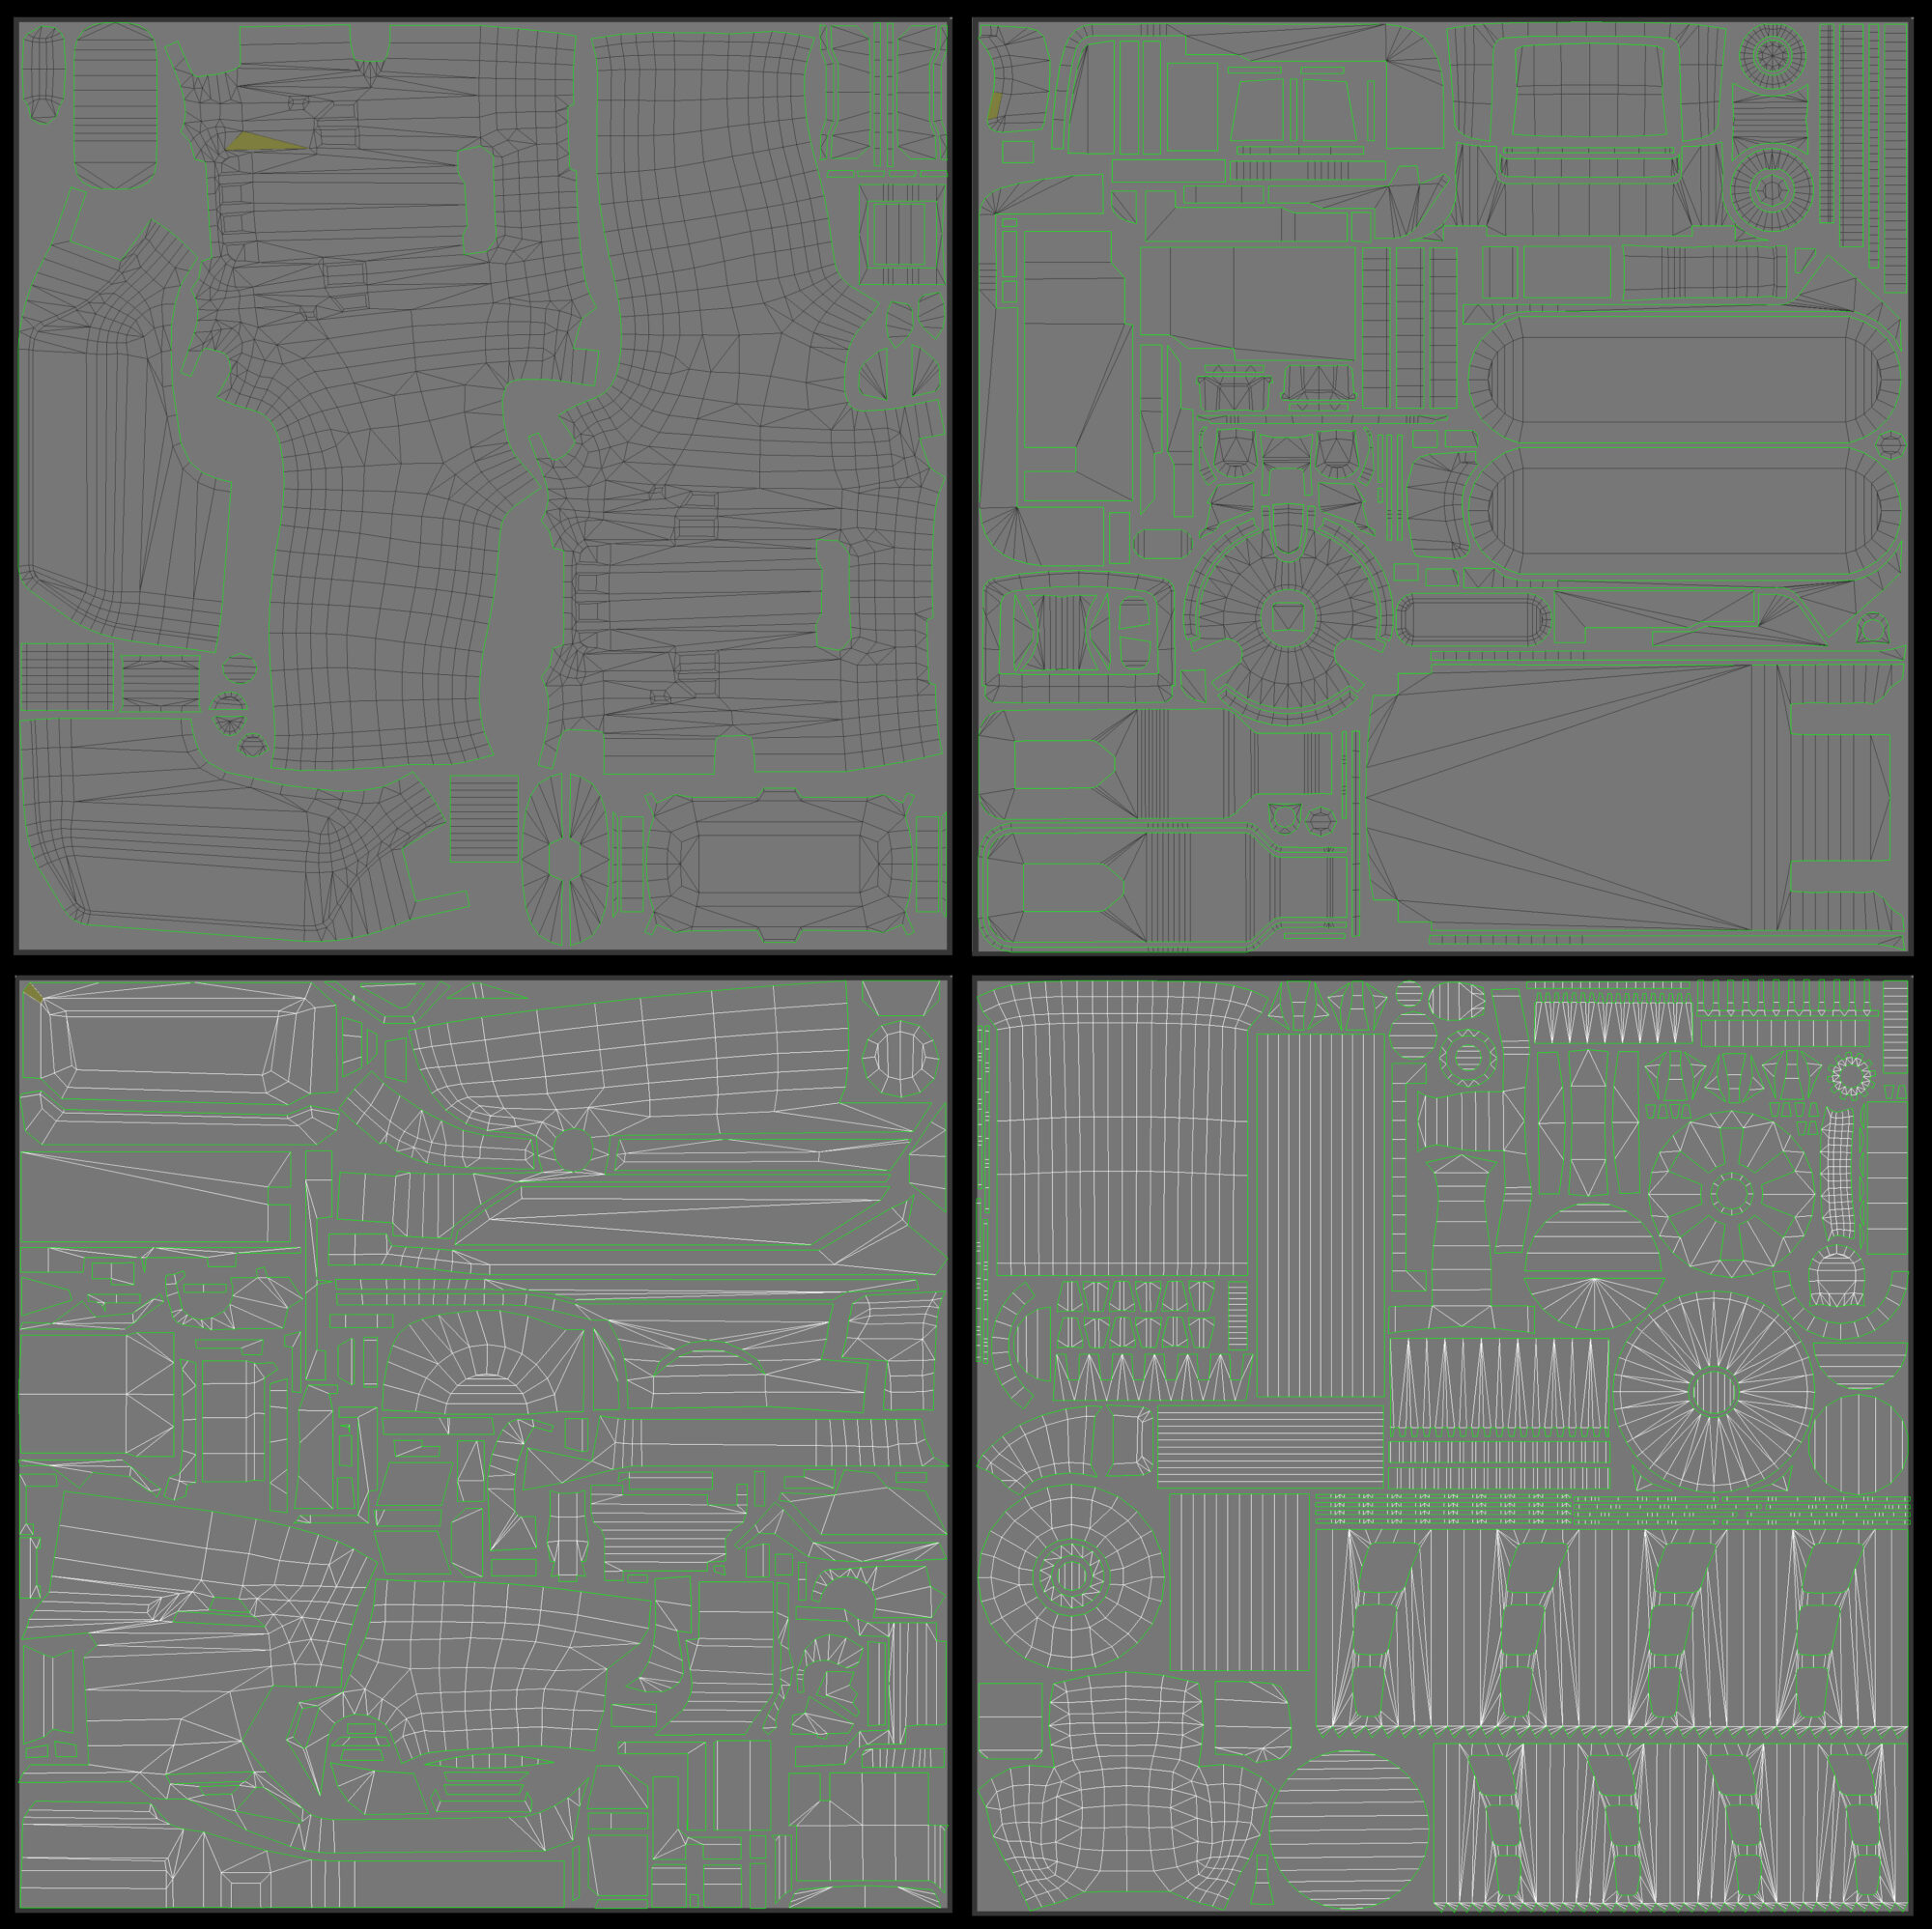
UVs & Baking
Proper UV mapping is a crucial step in asset production. I make sure to follow best practices like using checker patterns to verify stretching, maintaining consistent texel density, keeping UV islands well-oriented, and placing seams carefully to avoid shading artifacts. Efficient and tight packing is also important to maximize texture space.
For more detailed models, I usually begin by unwrapping individual parts and grouping UV islands by component type while ensuring uniform texel density across them. This method makes the final layout process faster and more space-efficient when it’s time to pack everything together.
When it comes to UV unwrapping, I use a mix of tools, Maya, RizomUV, and 3ds Max, depending on the complexity and needs of the model. In this case, since the drills were relatively straightforward and created in 3ds Max, I handled all the unwrapping there.
I primarily use the Marmoset Toolbag for baking, as it offers great control and visual feedback. Keeping the naming convention clean and organizing mesh layers properly beforehand speeds up the setup, since Marmoset picks up those groups directly on import.
A good bake largely depends on how well the low-poly matches the high-poly model. When the forms align closely, it results in cleaner bakes with fewer shading issues or projection artifacts.
I aim to get clean results straight from the bake, so I rarely find the need to tweak maps manually in Photoshop. Most of the time, careful preparation ensures everything turns out as intended on the first pass.
Typically, I handle the baking of key maps like Normal, Ambient Occlusion, ID, and Height (for tessellation) in the Marmoset Toolbag. The remaining maps are usually baked directly within Substance Painter during the texturing phase.
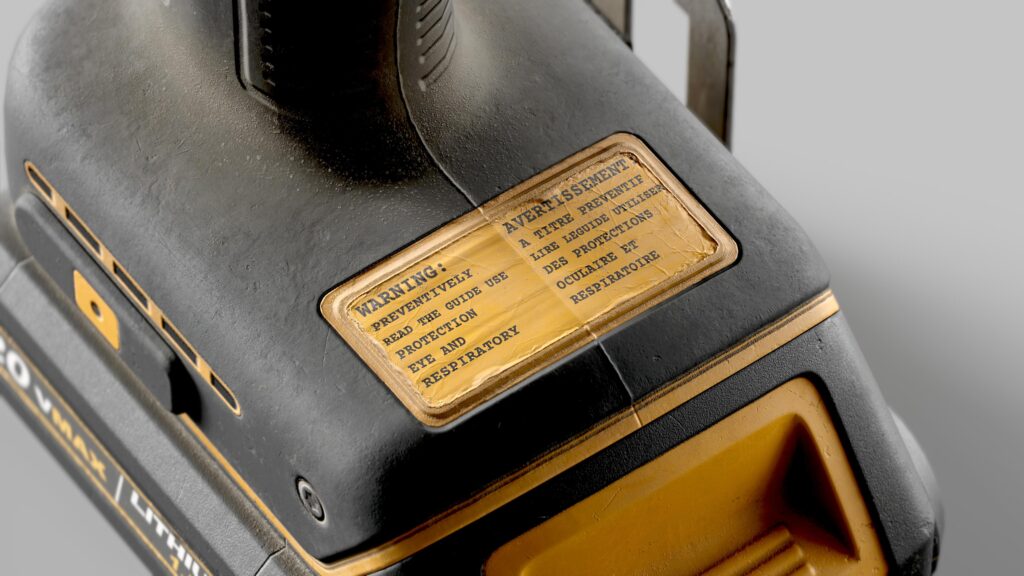
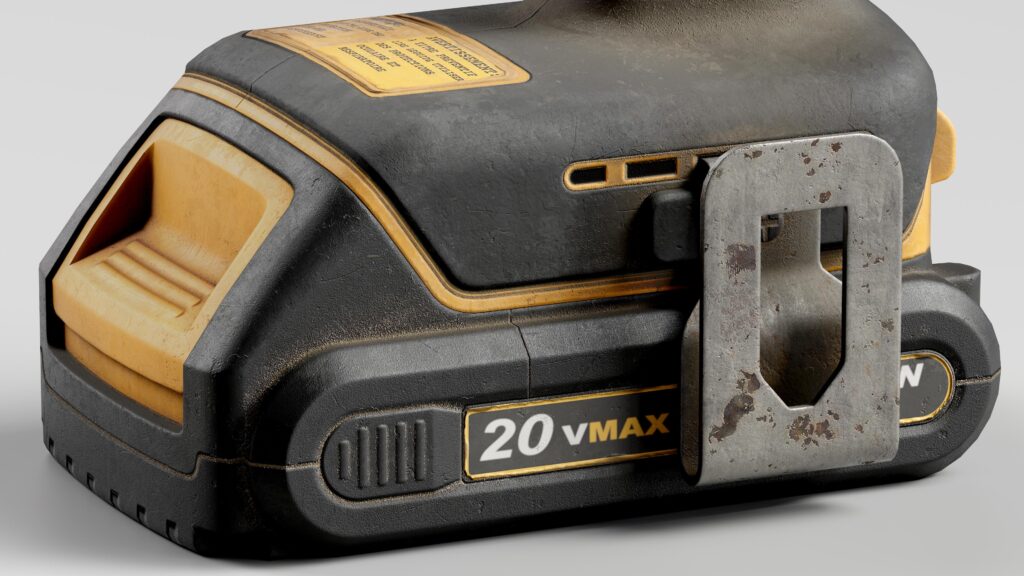
Texturing
Texturing is where the asset truly comes to life: it’s a blend of creativity, observation, and technical precision.
A key part of the process is studying the physical characteristics of materials: how they appear when new, how they wear over time, and how usage, environment, or damage affects their look. It’s also essential to align this understanding with the project’s art direction or visual style.
I begin by building solid base materials with correct PBR values and believable surface qualities. From there, I layer in additional detail, using a combination of height data, anchor points, and procedural techniques to add realism and depth.
From the beginning, I aimed to keep these assets balanced and realistic, and I followed the same approach during texturing. I first built base materials with accurate values and height information, then added more detail using various alphas, techniques, anchor points, and height maps.
When it comes to masking, I usually kick things off with generators paired with grunge maps, and then refine the result using hand-painting and alpha overlays, a process I find both technical and creatively rewarding.
Here are the layers for stickers:
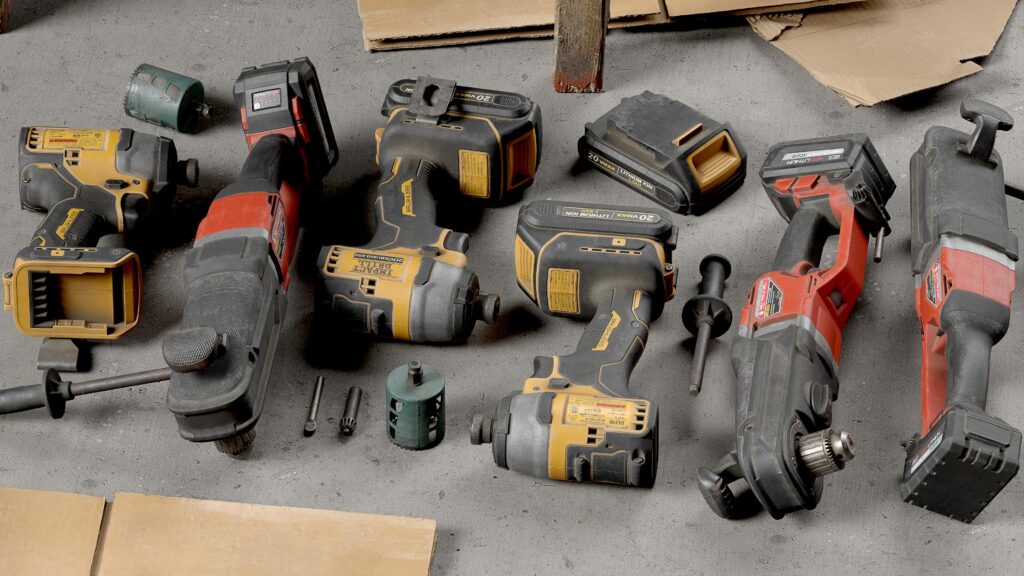
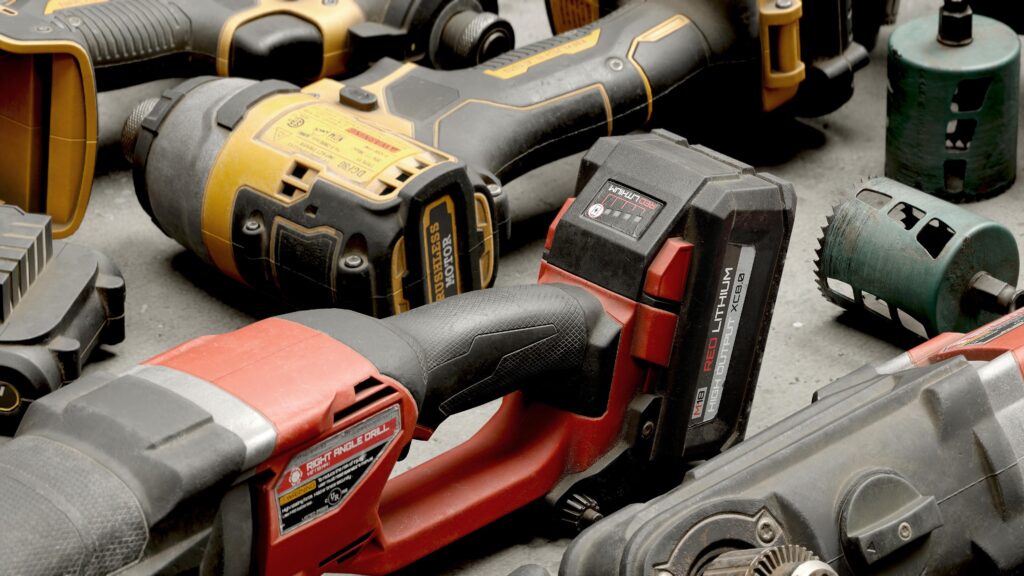
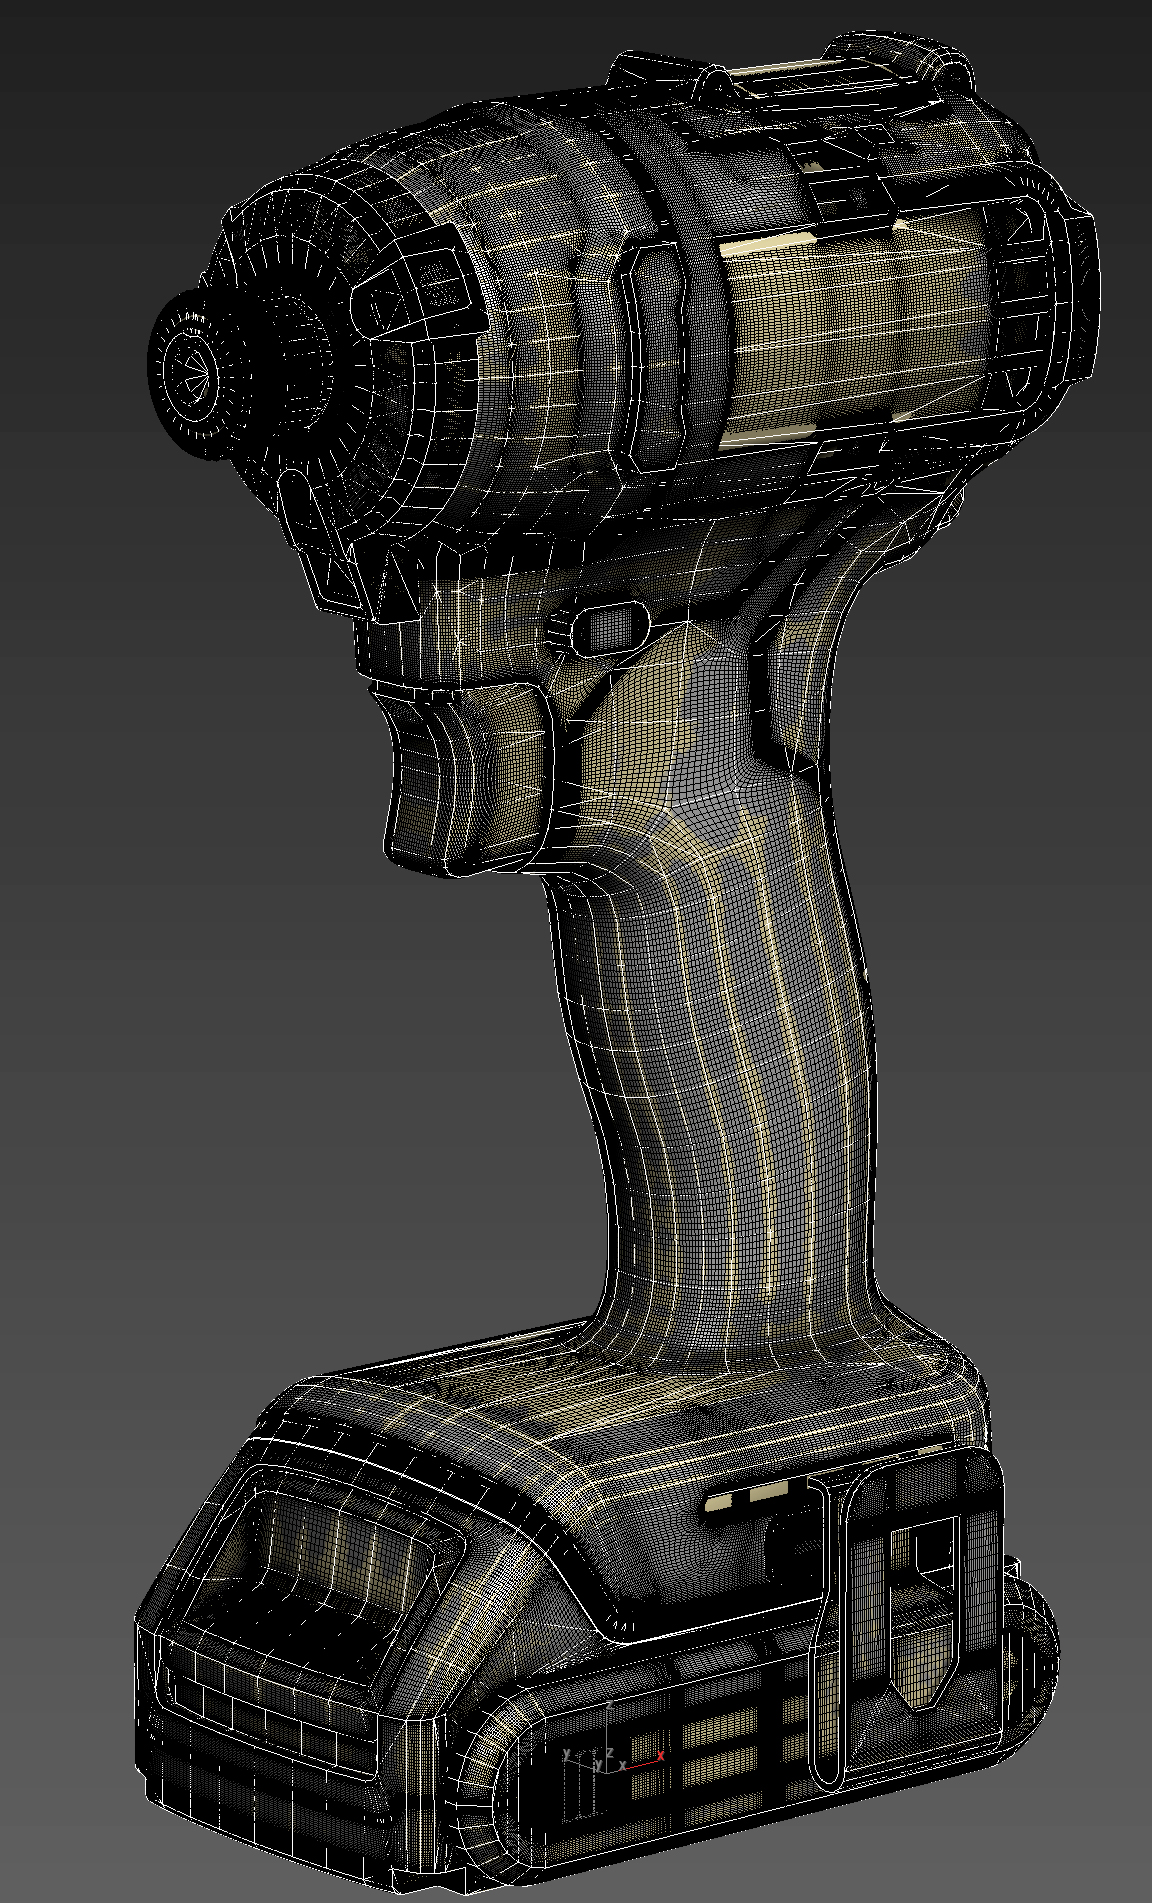
Here is the overall asset in the viewport:
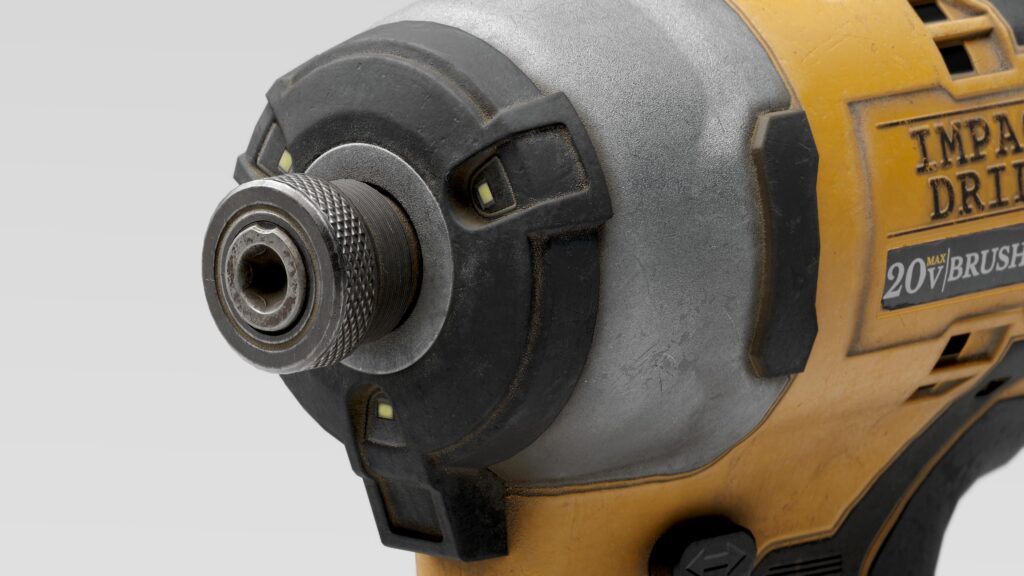
Here are the rubber material details:
In real life, everyday objects often carry subtle yet interesting details, like fine dust, smudges, or tiny surface particles, which I tried to replicate in these assets.
Knowing where to place these elements and how intense they should be is key. It’s all about achieving a believable level of detail without overwhelming the surface or muddying the overall look.
Throughout the process, I constantly reviewed the textures in Marmoset for lighting and material accuracy and then cross-checked everything in Unreal Engine to ensure the final result held up in an actual game environment.
Rendering
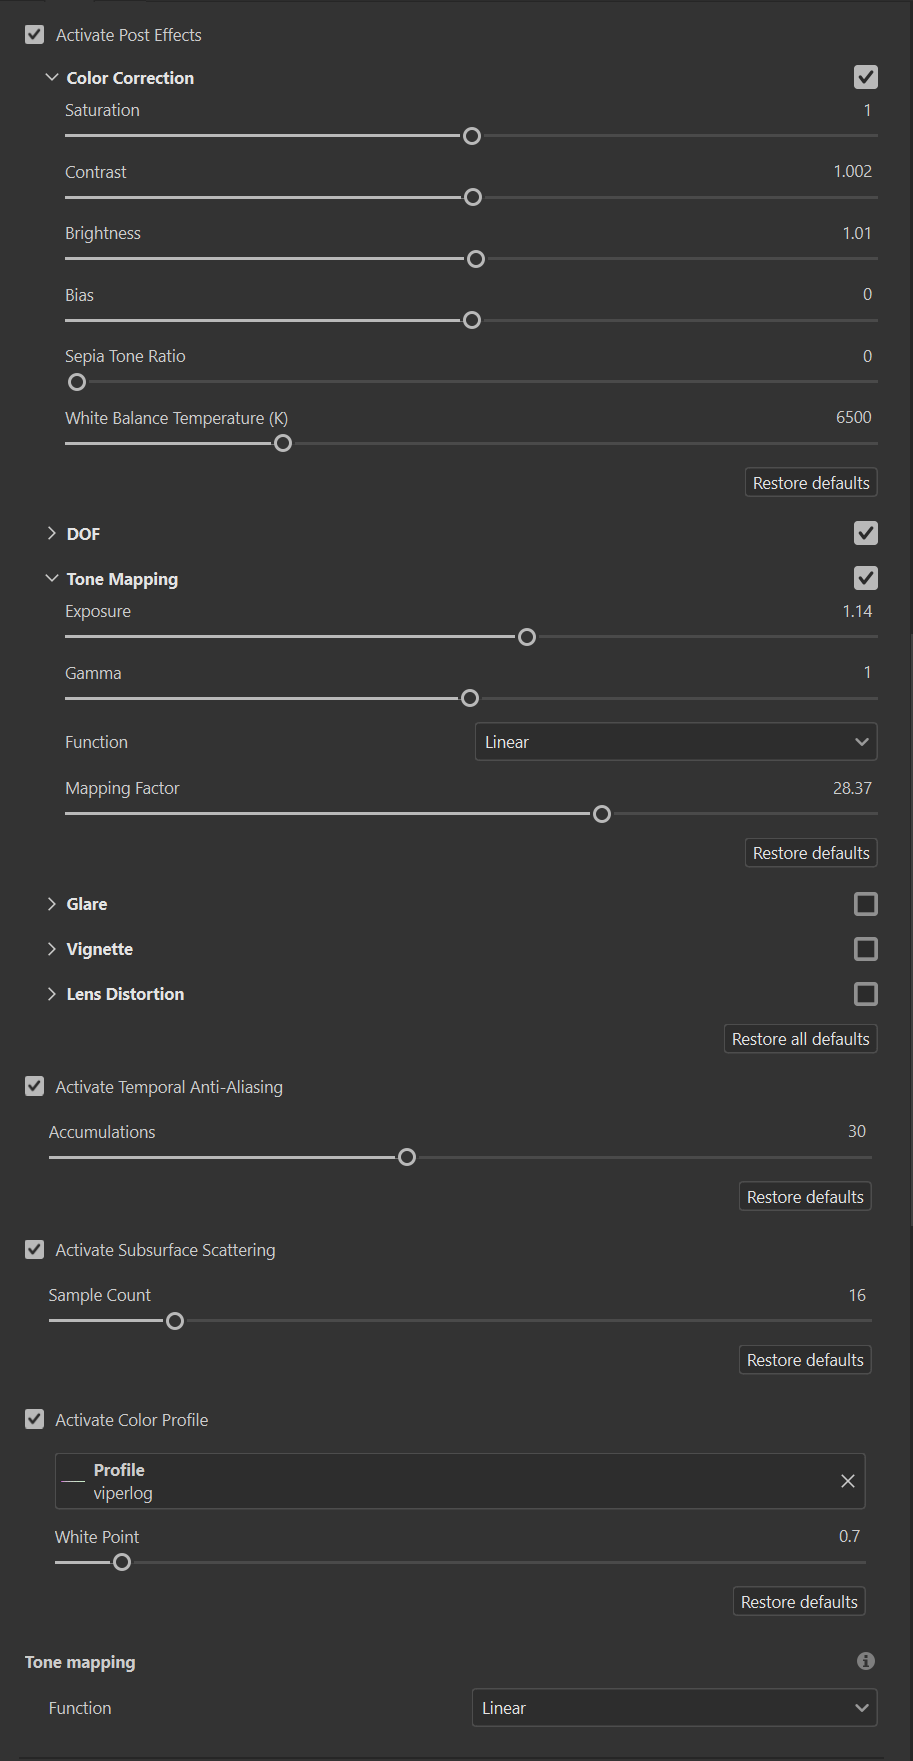
While I usually rely on Marmoset Toolbag for rendering, I decided to experiment with Substance Painter’s Iray renderer for this project. All final renders were done directly within Substance Painter.
I tested a variety of HDRI environments and lighting setups, but ultimately chose to use the default settings. With well-prepared textures, I found they provided more than enough to achieve clean and visually appealing results.
To add a bit of context and visual interest, I included a few decorative props, like a wooden surface and a cardboard sheet, sourced from Quixel’s asset library.
In terms of render setup, I used the Viperlog color profile and made subtle adjustments to contrast and exposure through the Post Effects tab to give the final images a more polished look.
Here are the render settings along with a brief example of the Iray scene.
Conclusion
These drill assets were created as part of a freelance assignment, which meant I had to work within certain constraints, unlike the creative freedom that comes with personal projects.
That said, I treated it as a challenge to push the quality as far as possible while staying within scope.
I hope this breakdown offers some useful insight or inspiration to anyone working on similar projects. Thanks for taking the time to read through my process.
Wishing you all the best in your own creative journey!
If you have any questions or just want to connect, feel free to reach out. Thanks again!
[email protected]
https://www.artstation.com/abhishekpareek
www.linkedin.com/in/abhishek-pareek-00121424
Read more articles
You might also like these articles.