Introduction
Hello everyone! My name is Jung In Baek, and I am a 3D Character Artist from Korea, now based in Canada.
I initially aspired to be a comic book artist, but my drawing skills didn't quite measure up—so here I am!


Goals & Purpose
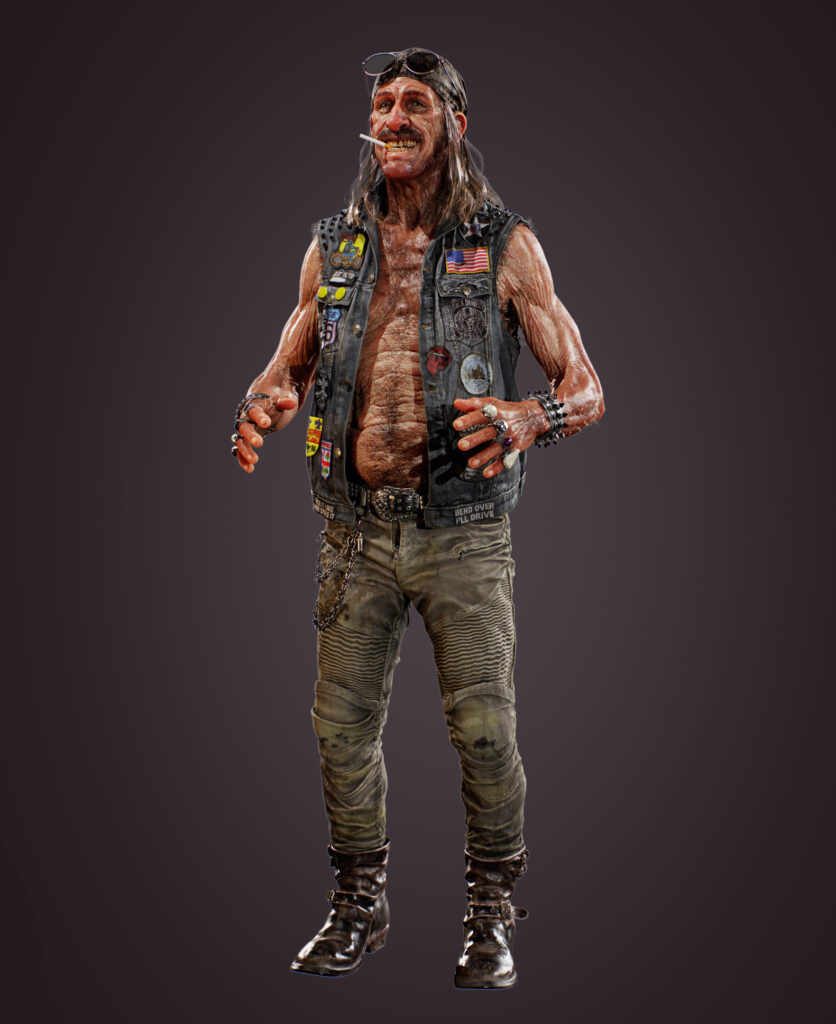
Throughout my career, I have not focused much on creating a personal portfolio. To change that, I decided to design a character that truly represents my artistic style—something realistic yet stylized, full of personality, and captivating from head to toe.
For the concept, I figured I would use someone else’s design because I did not want to spend too much time on it.
After diving into countless comic books and concept art, I chose one of the most intriguing (and delightfully disgusting) characters from my favorite comic book series, Scumbag. (Inspired by the great Lewis LaRosa’s comic book series ‘Scumbag’).
Packed with personality and interesting details, he felt like the perfect choice to bring to life as a 3D model.
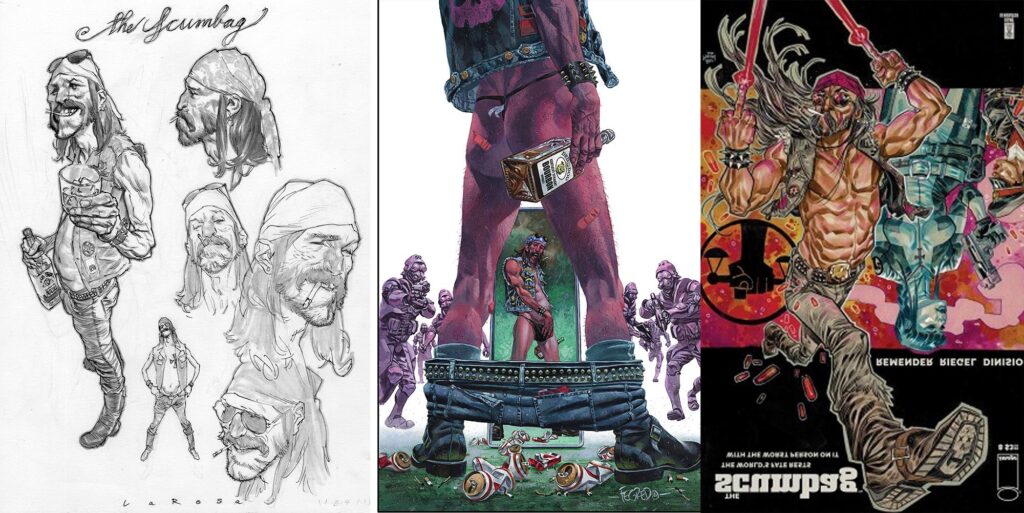
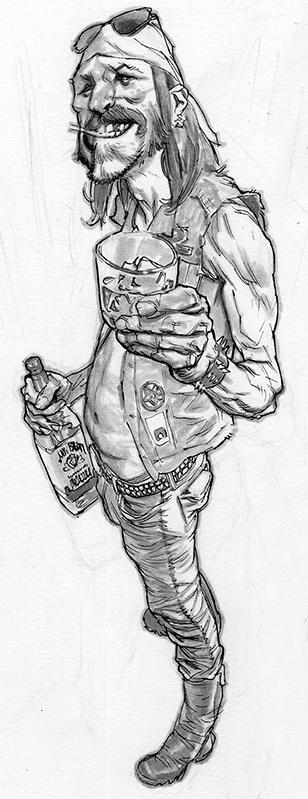
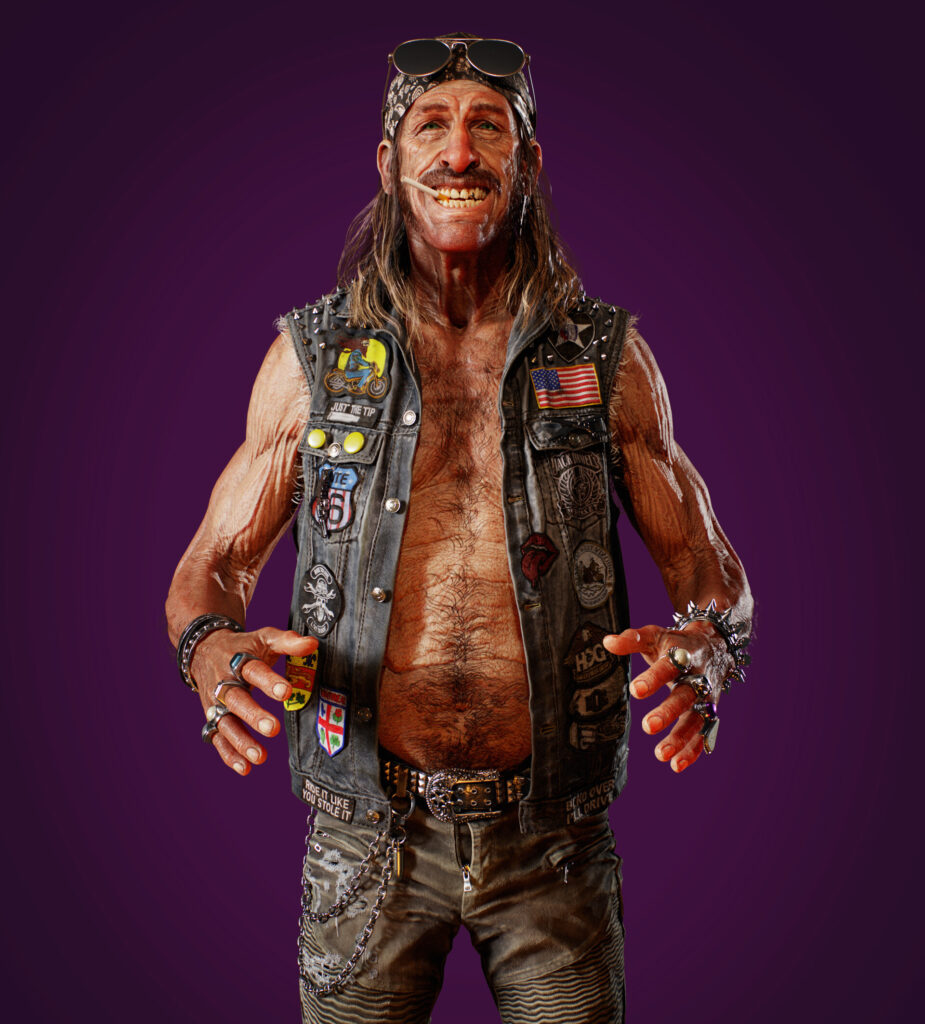
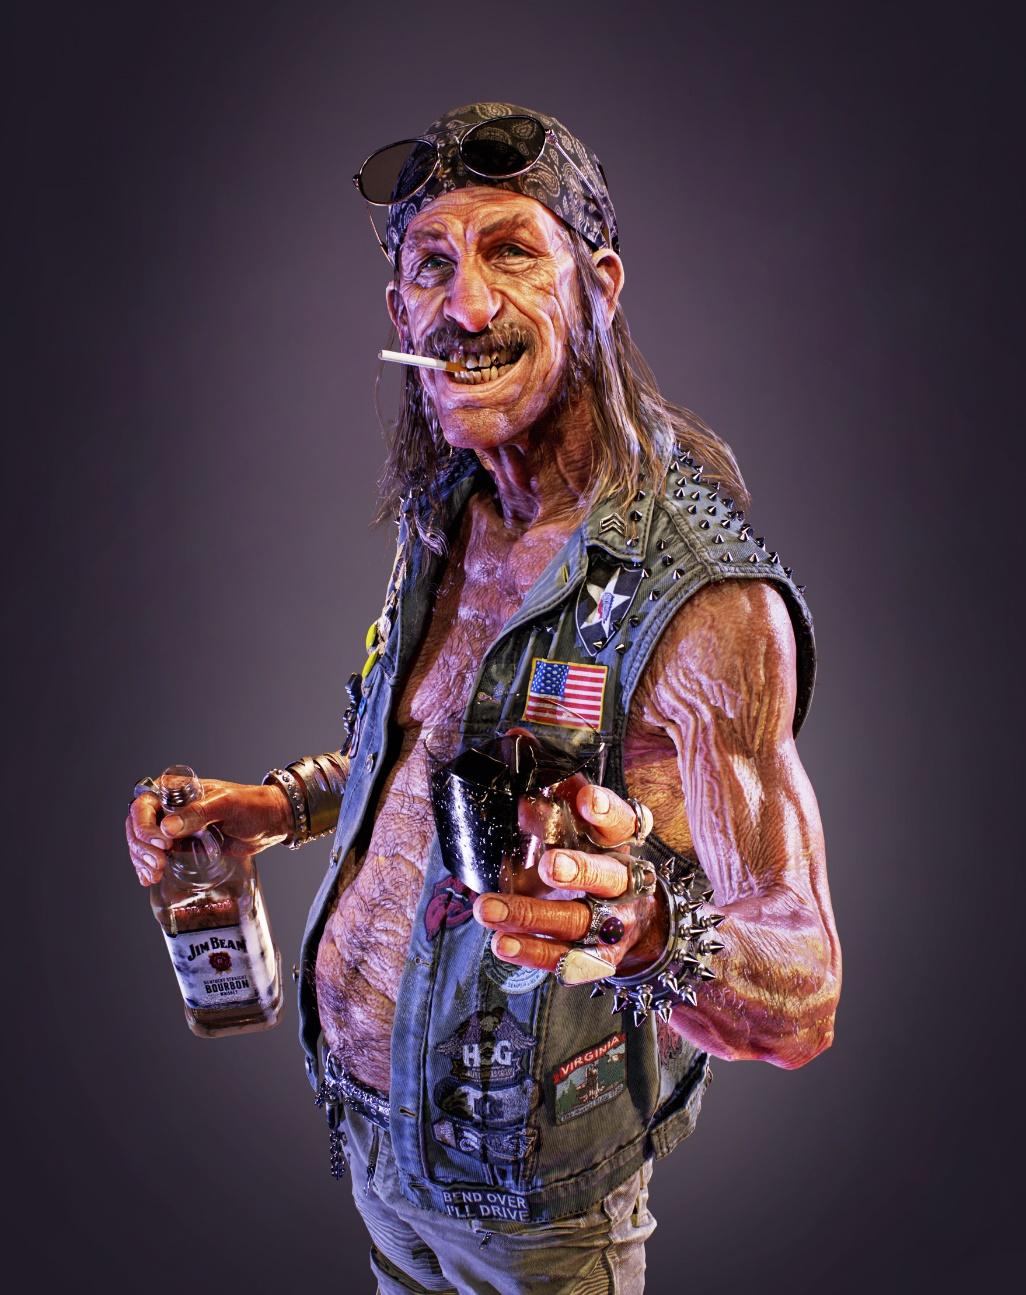
I selected the picture above as my final render reference because it perfectly captures his personality, characteristics, and a pose that highlights his anatomy.
While the original image leans toward a cartoonish style, my goal was to reinterpret him as a realistic yet slightly stylized version.
I also wanted to pay special attention to little details I could add to make him really interesting to look at.


Tools
- Maya
- ZBrush
- Substance Painter
- Substance 3D Sampler
- FiberShop
- Photoshop
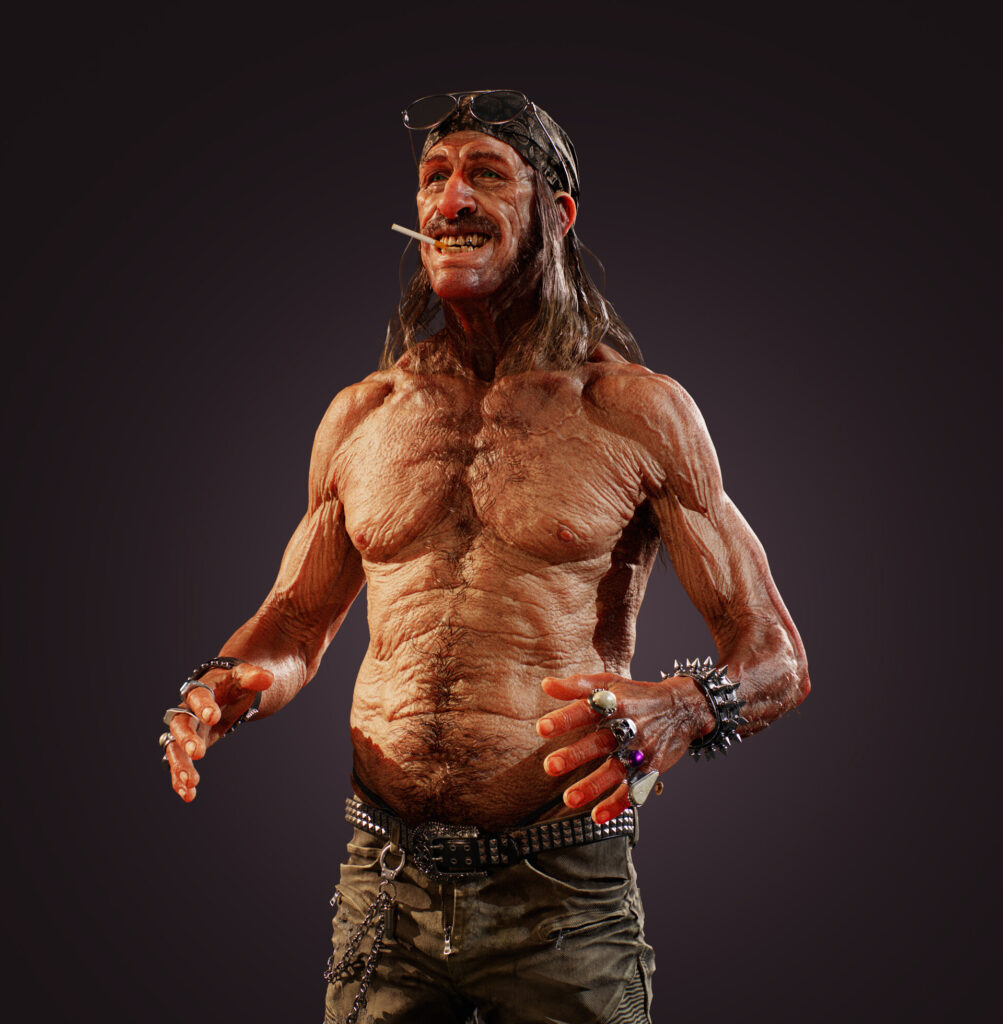
Head
Choosing the right reference or direction is the most important thing, as you all know.
A combination of Tim Blake Nelson’s facial structure, Keith Richards’ deep-set wrinkles, and Matthew Modine’s signature smirk would capture the perfect look.

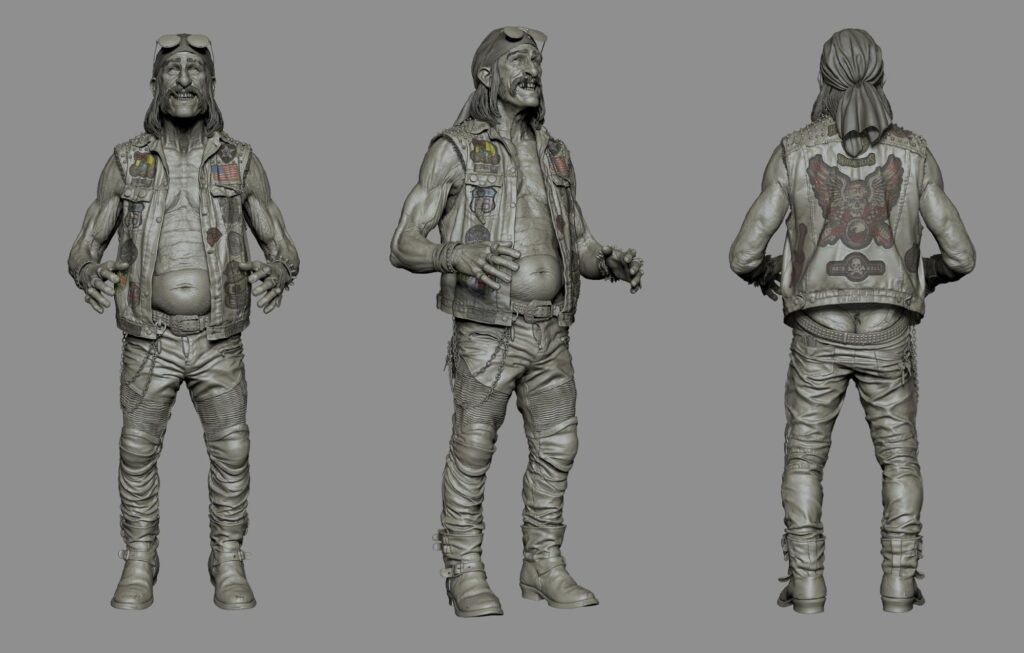
Body
He is an old, drug-addicted biker, but I wanted to give him an aged yet active and athletic appearance. He’d have big, strong hands and forearms, like someone who’s spent years working with them, paired with a classic beer belly.
As a biker, his weathered look, with deep sunburnt wrinkles, would add character and depth to his persona.
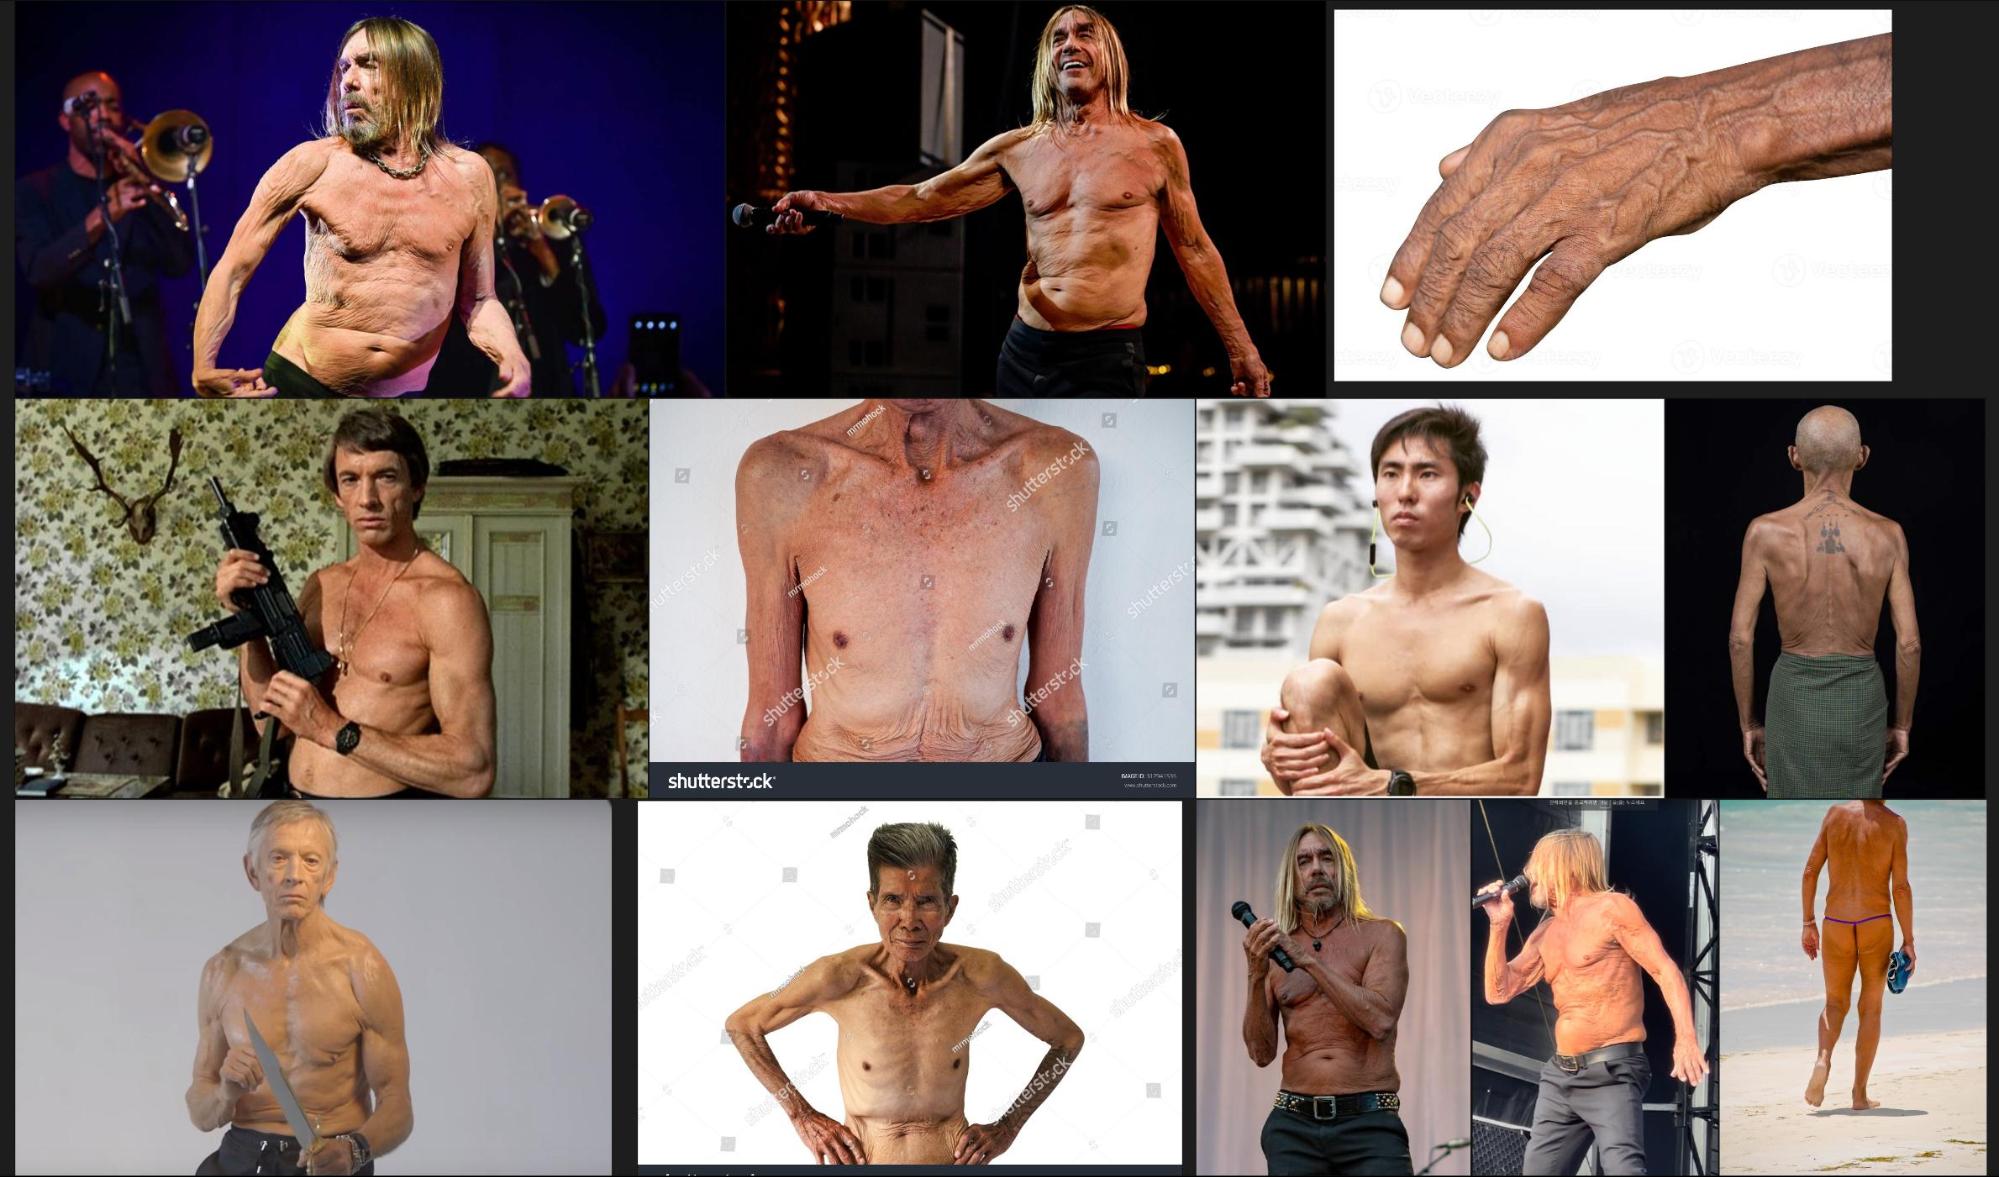
For the body reference, I first had Iggy Pop in mind—his almost cartoonish wrinkles and protruding belly—combined with Scott Glenn’s lean, aged-athlete physique.
I wanted his arms to be bent more than in a neutral pose, highlighting the forearm muscle insertions—something commonly seen in people who work extensively with their hands.
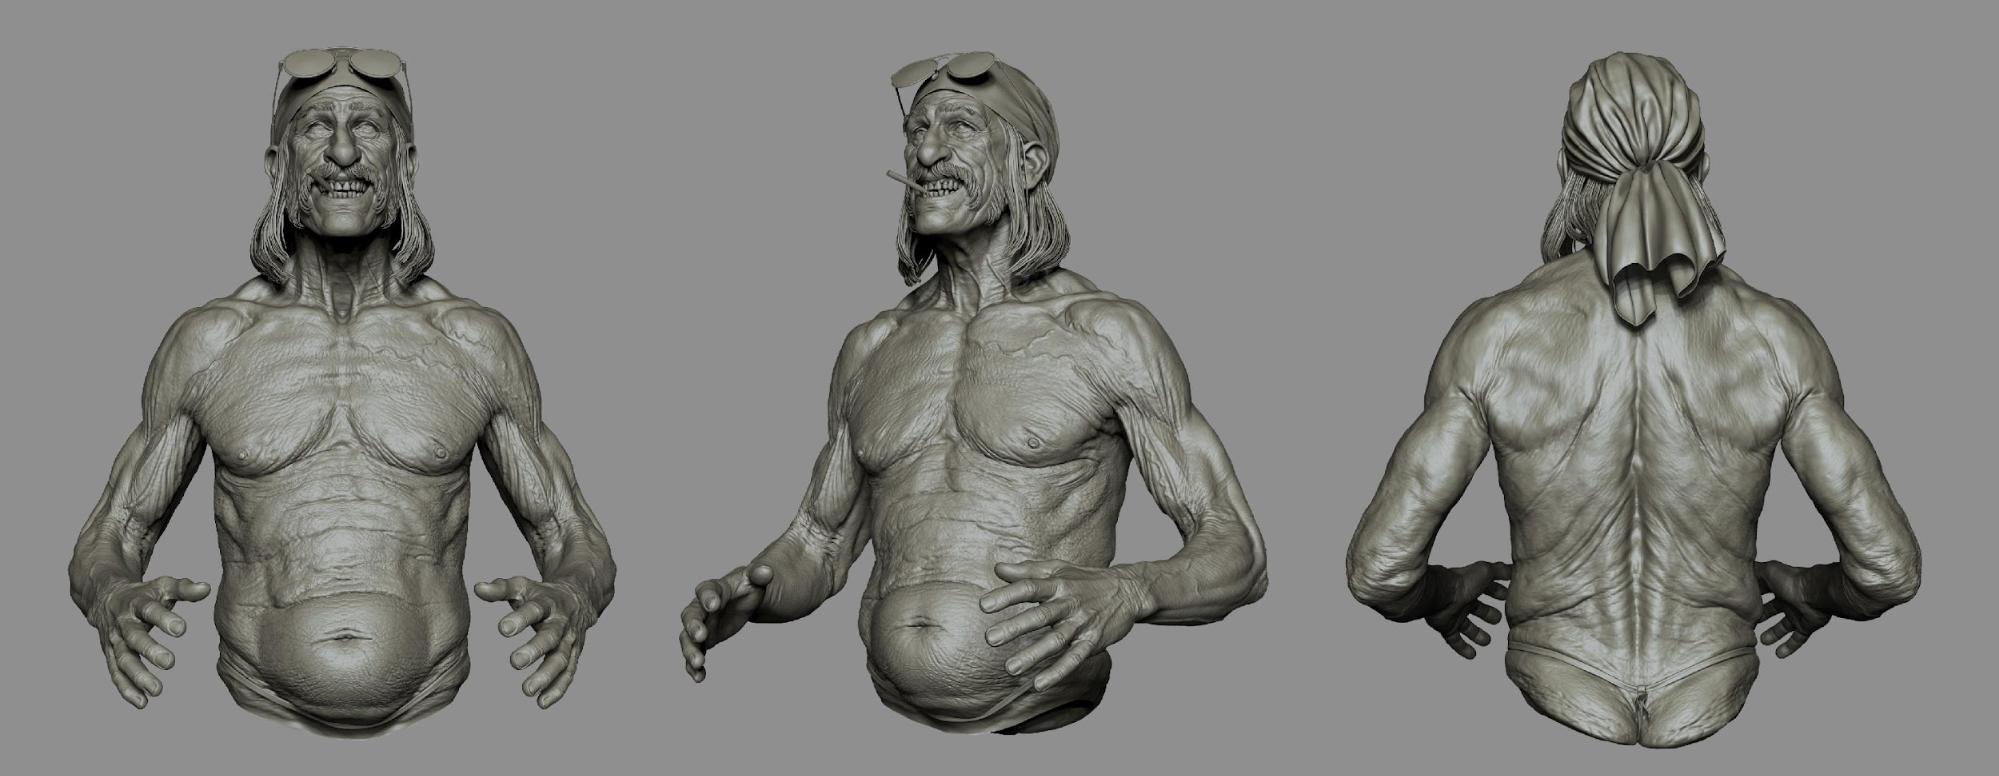
I sculpted everything with basic brushes and used alphas for skin pores with different layers in ZBrush.
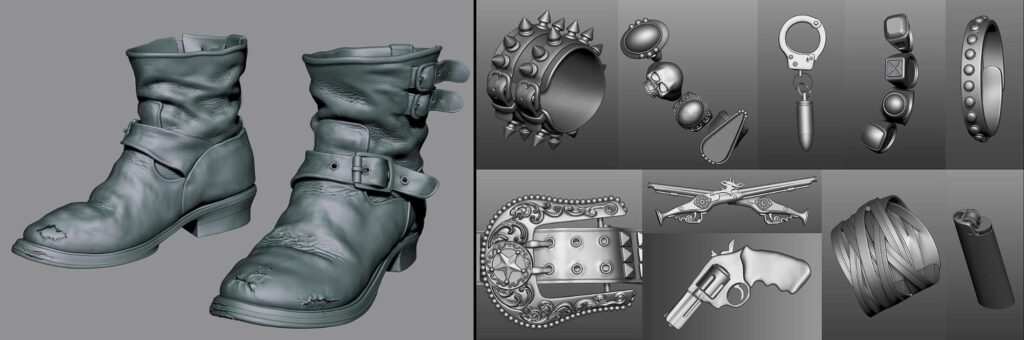
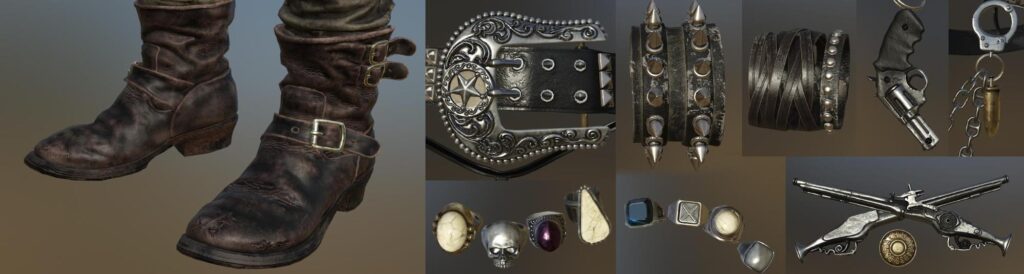
Outfit
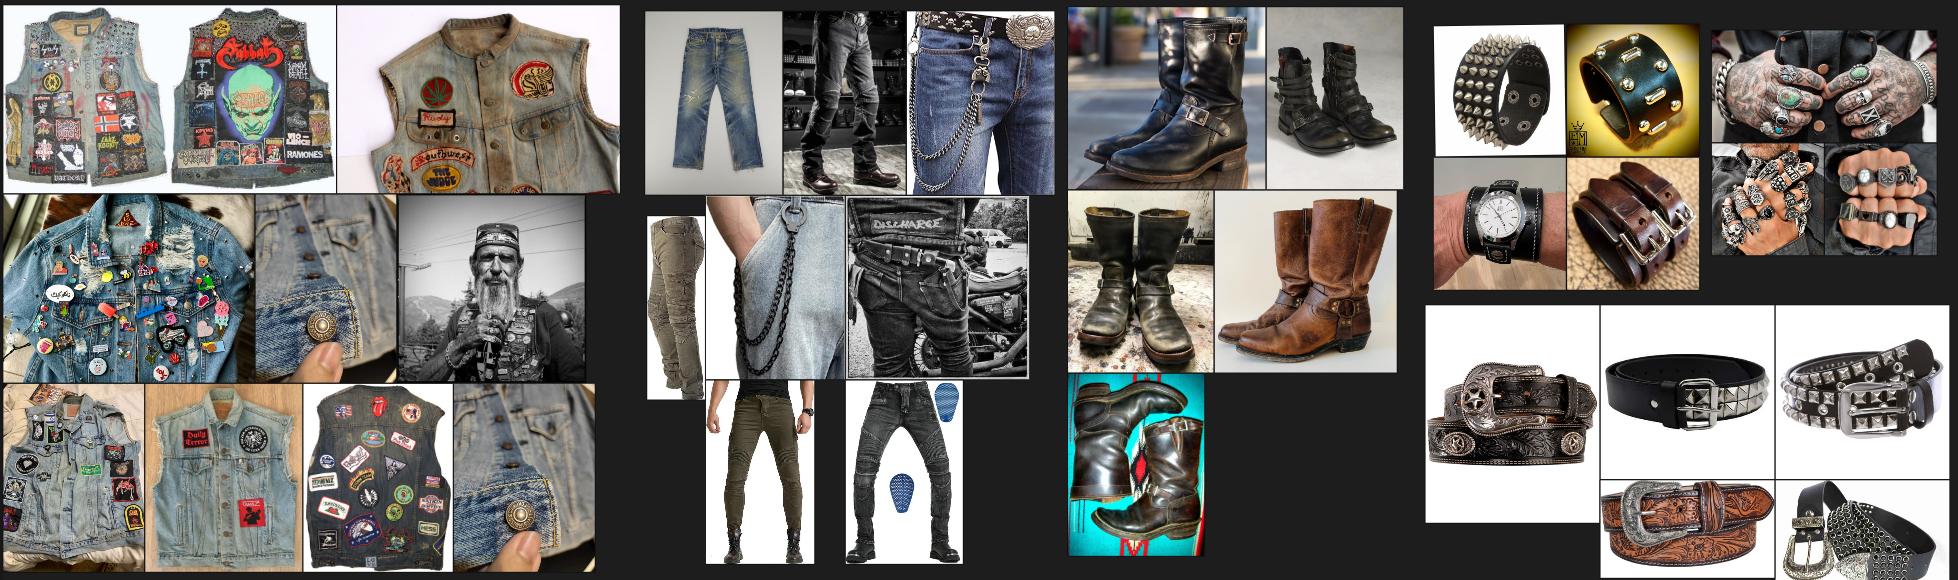
Gathering outfit references is always fun since it often sparks new ideas. While searching for pants, I also came across interesting chains, rings, and other accessories.
I used Marvelous Designer for the big folds on the jacket and pants.
I sculpted the rest of the details in ZBrush.
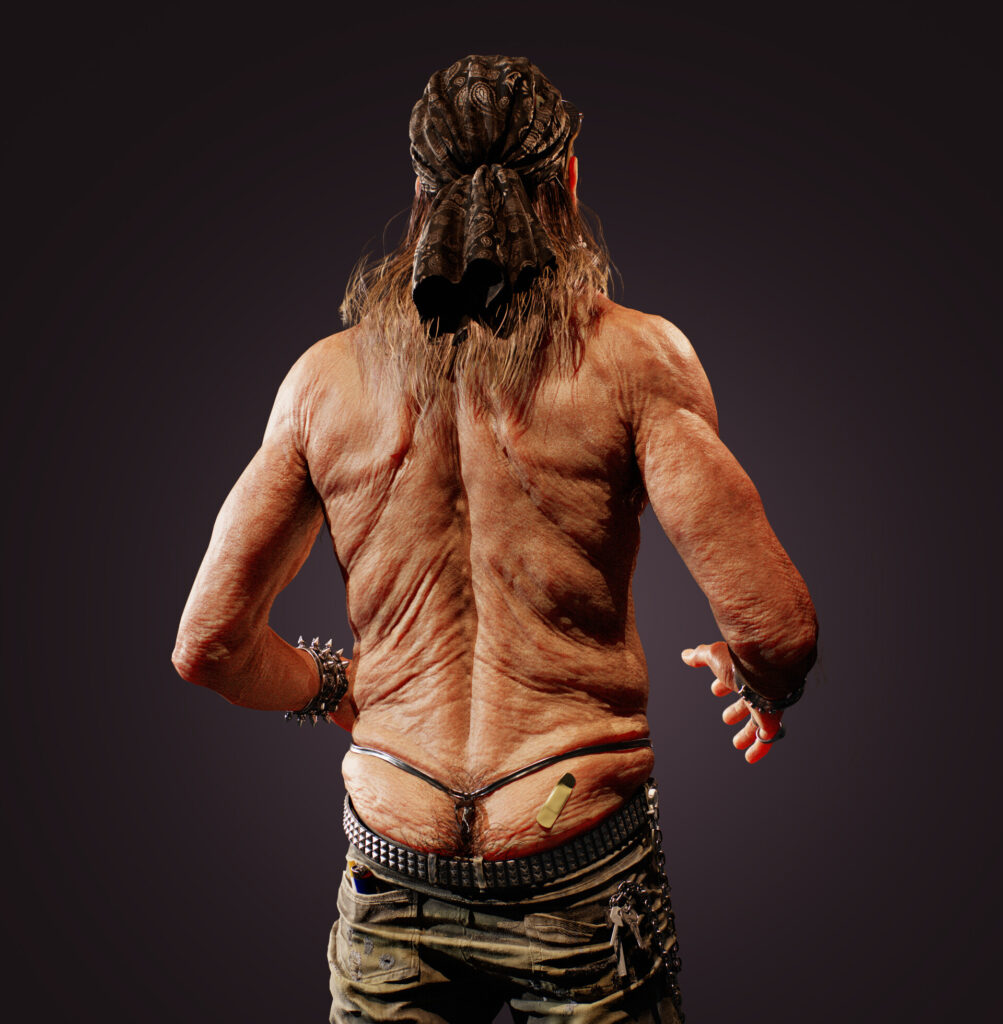
I avoided straight lines, symmetry, and predictable shapes. My goal was for viewers to truly appreciate every part of the body, focusing on the unique design and form.

I lowered the pants slightly to reveal part of the butt cheek, thinking it would add a fun touch to this character.
I added a few more accessories, such as rings on all four fingers, gun badges, and a handcuff chain, to enhance his personality.
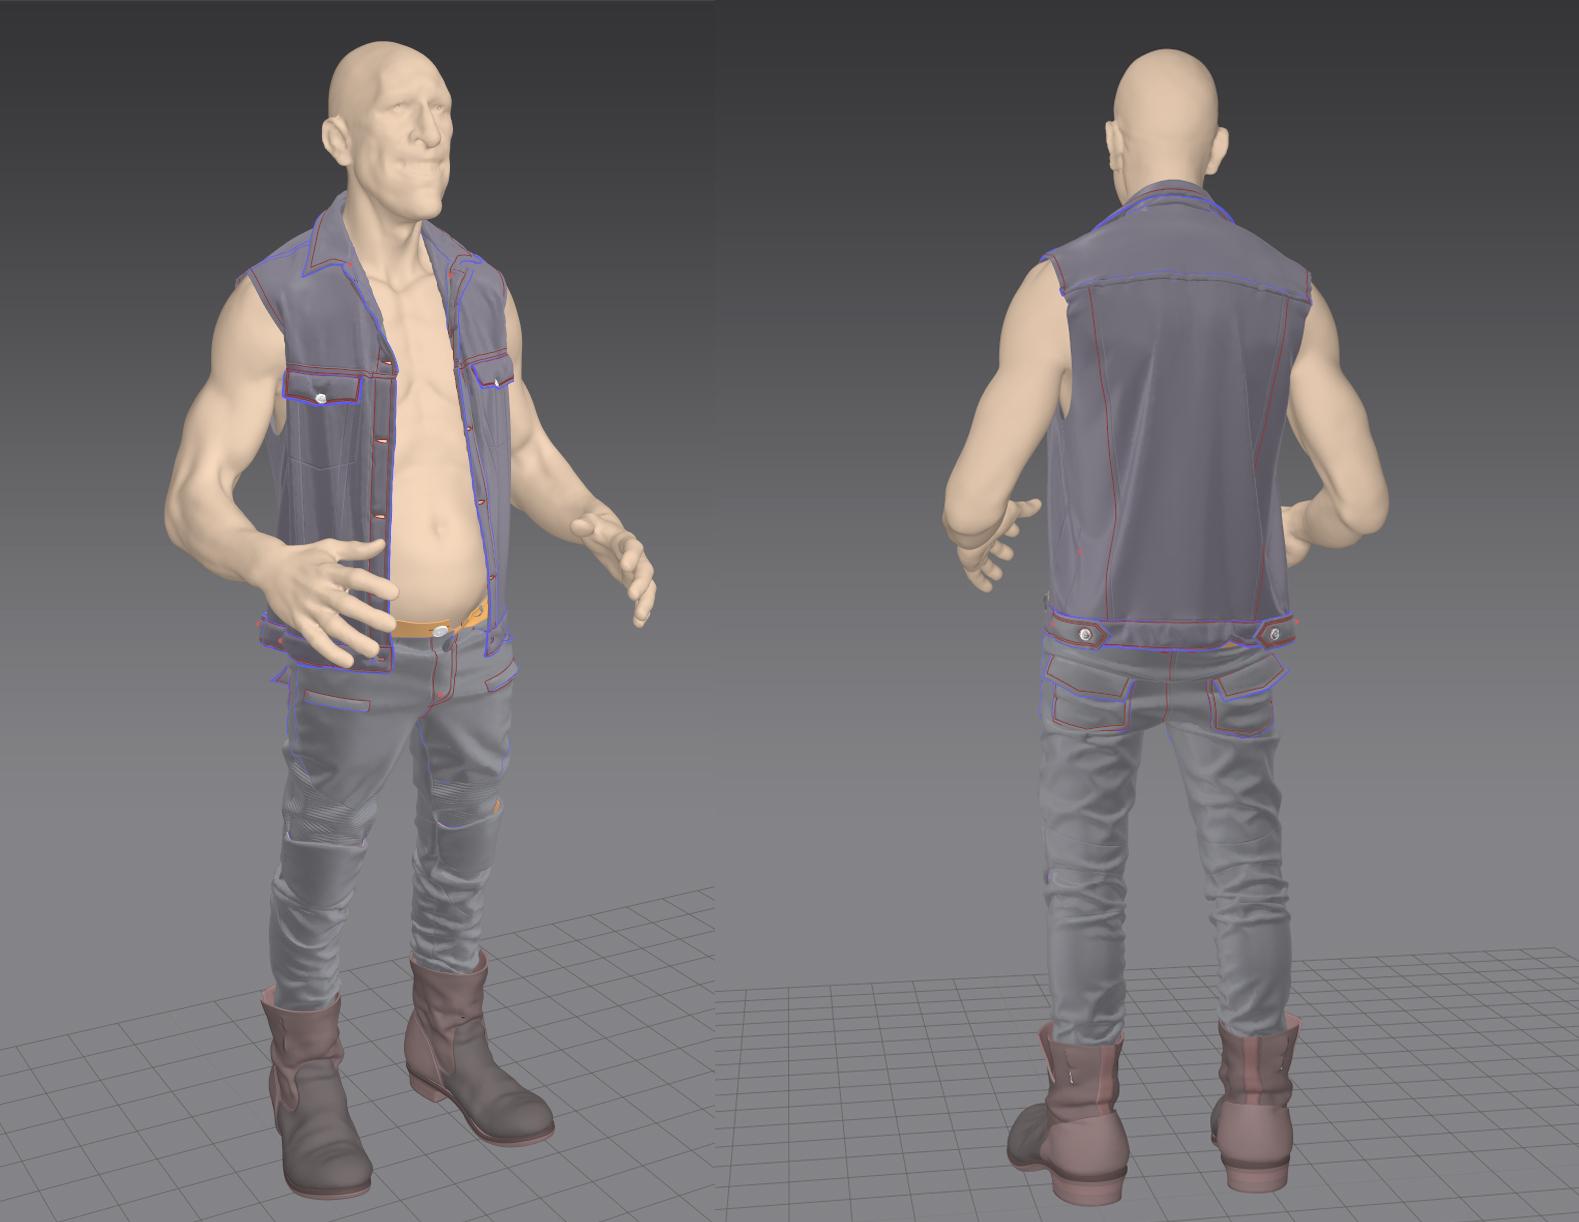
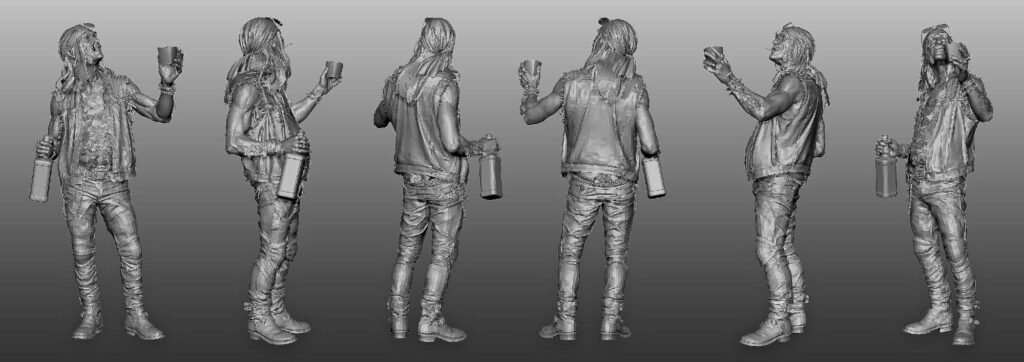
Lowpoly
I created most of the low-poly models in Maya using Quad Draw for the body, jacket, pants, and boots. For accessories with complex surface shapes, like rings and belt buckles, I used ZBrush to decimate them.

I also worked with the lowest subdivisions for the belt and wristbands, projecting them onto the highest subdivisions to maintain the original shape.
Hair
I created the textures for the hair and the torn threads on the jacket using FiberShop.
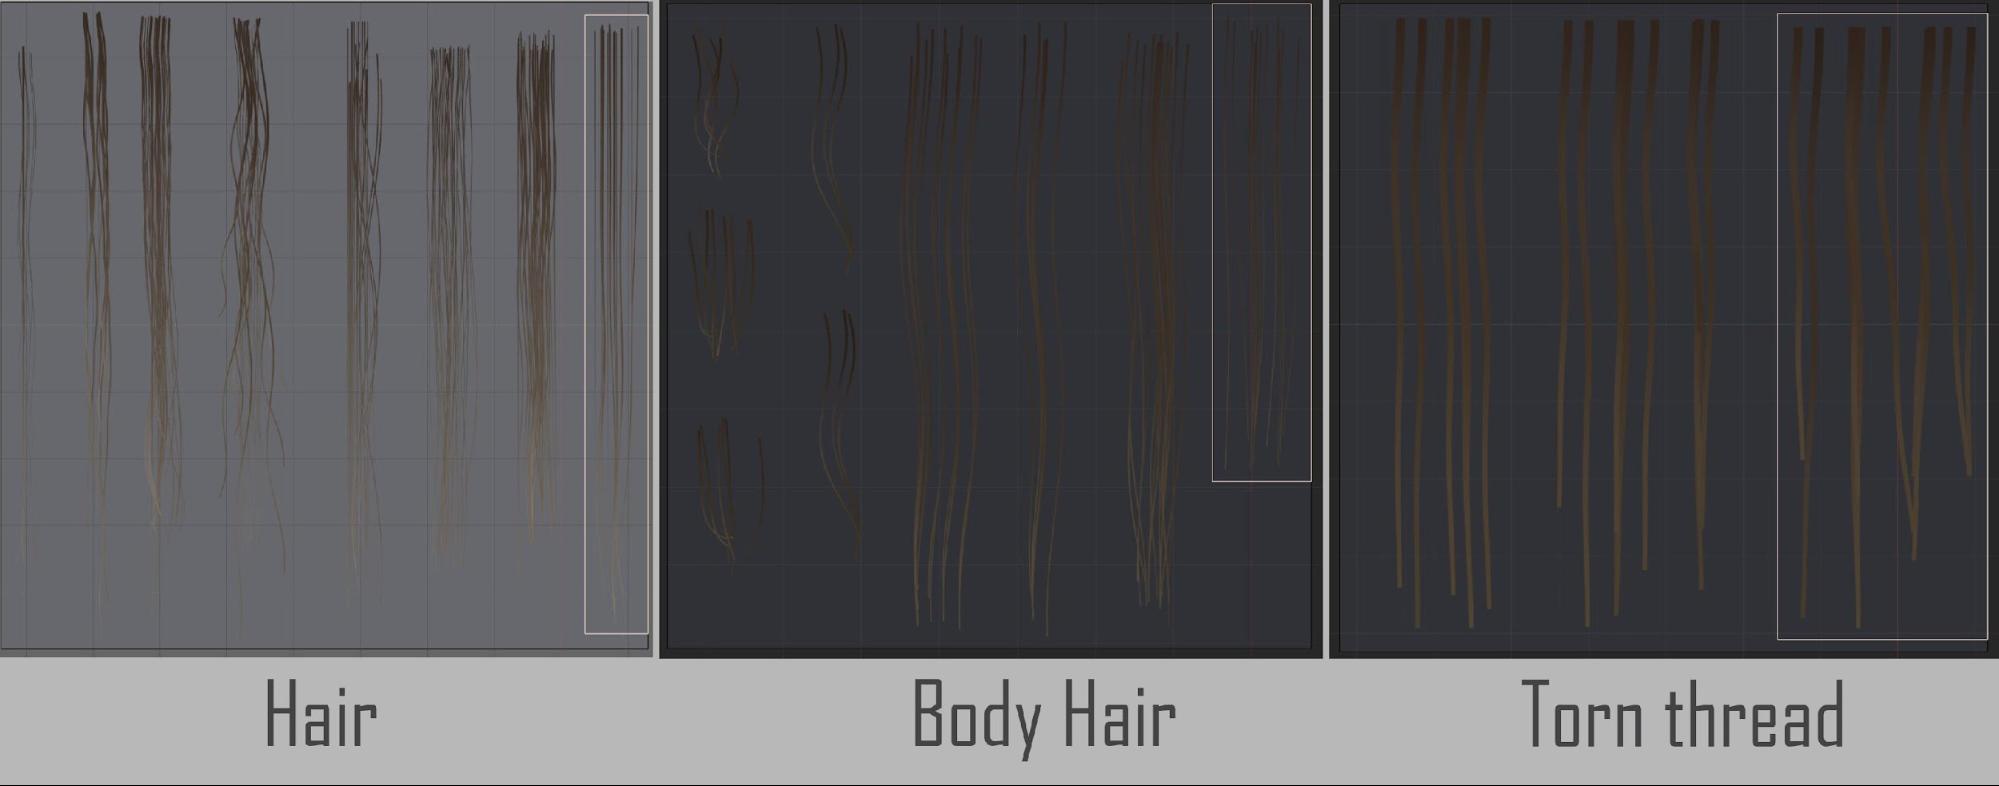
In Maya, I created all the hair and torn thread cards using GS CurveTools. While I primarily used planes, I added cylinders in certain areas.

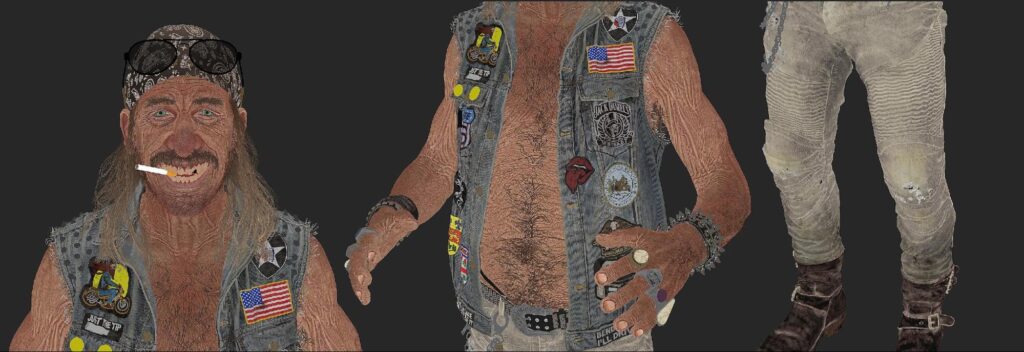
Patches
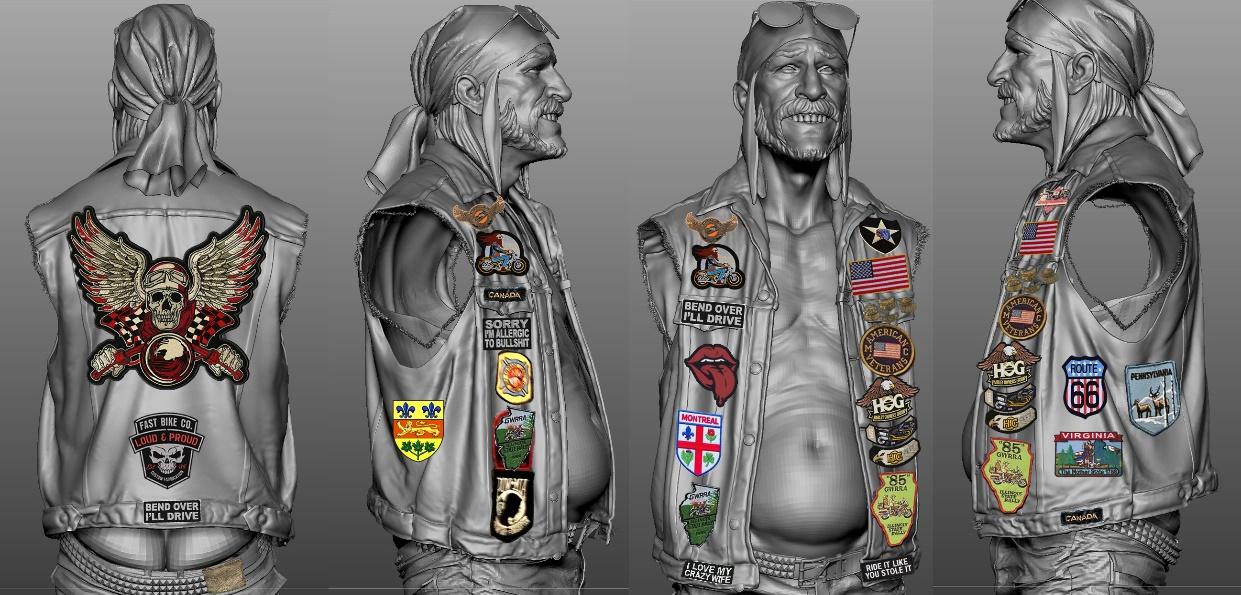
I wanted the jacket patches to truly reflect his personality.
So, I researched biker jackets with patches, studied their patterns, and replaced them with ones that suited his character.
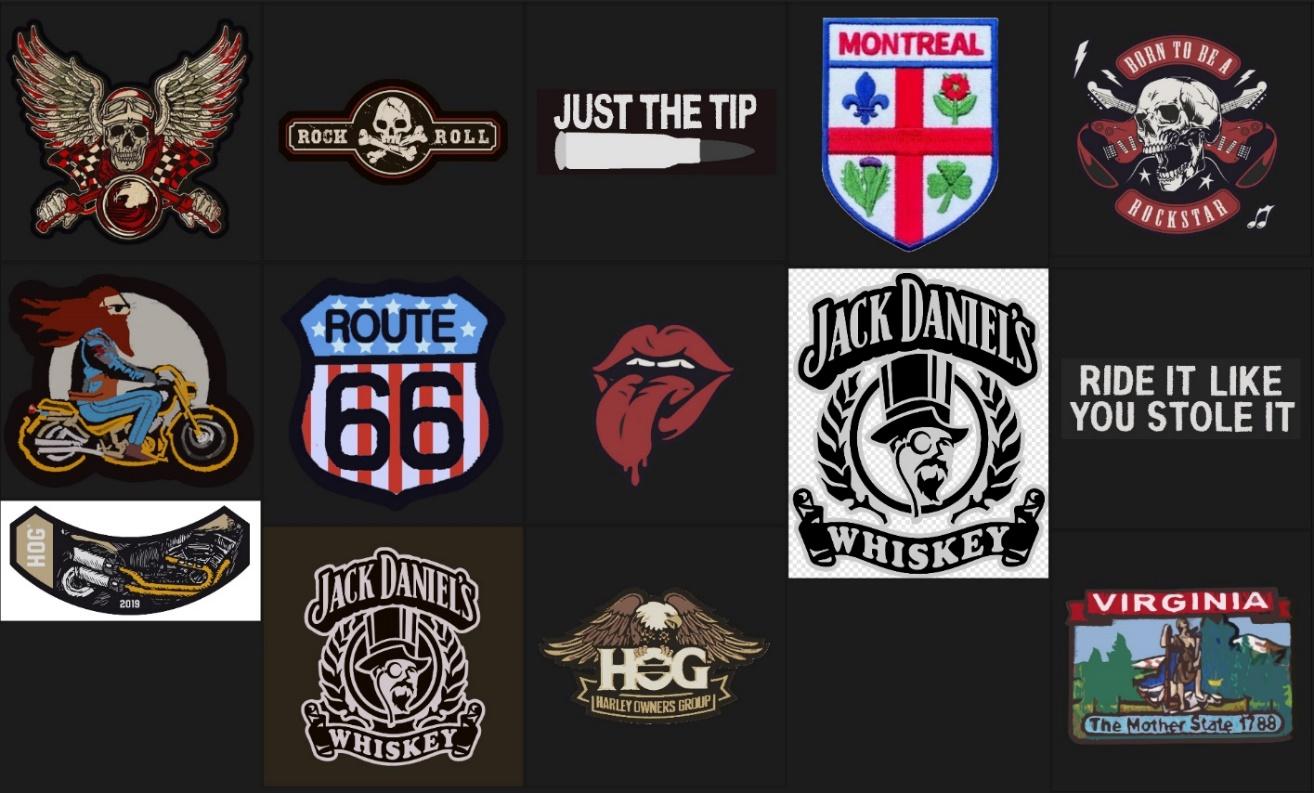
Bikers typically attach patches representing places they’ve been, things they like, and symbols of who they are.
For this guy, that meant patches that were funny, inconsiderate, ridiculous, and perverted—perfectly capturing his character. I went through many patches, comparing good ones to cheap, bad ones.
I moved them around on the jacket in Photoshop before making my final decision.
I wanted the patches to look as realistic as possible, showcasing stitches and thickness. I discovered Substance 3D Sampler, which allows you to create embroidery details from a picture.
I photoshopped the patch images so they could be used in Substance 3D Sampler, and I experimented with stitch patterns, normal, and height maps so they would fit the size, style, and thickness of the patches.

For the next process, these patches were assigned to planes with UVs in ZBrush and projected onto the jacket.
-
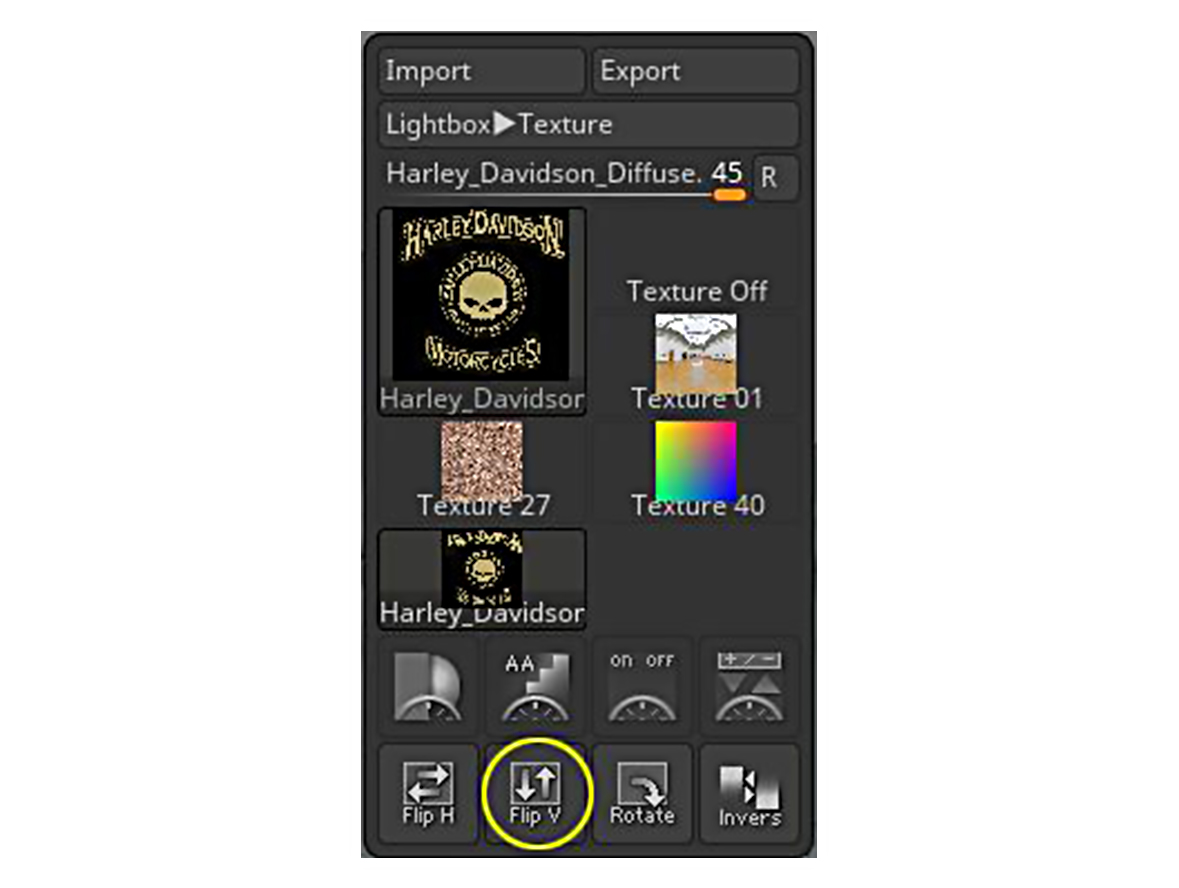
Append a simple plane with UV, import a diffuse map, and flip the V of the map (it’s automatically flipped when imported, so you’ll have to flip it back).
-
In Texture Map settings, select the diffuse map and increase the Transparent value above 0. This will make any black areas transparent.

-
You can upload a height map on Noise following Pablo Muñoz Gómez’s Embroidery Patches tutorial on YouTube if you want to see a height effect on it.
-
Use the ZProject brush to project the plane onto the jacket.
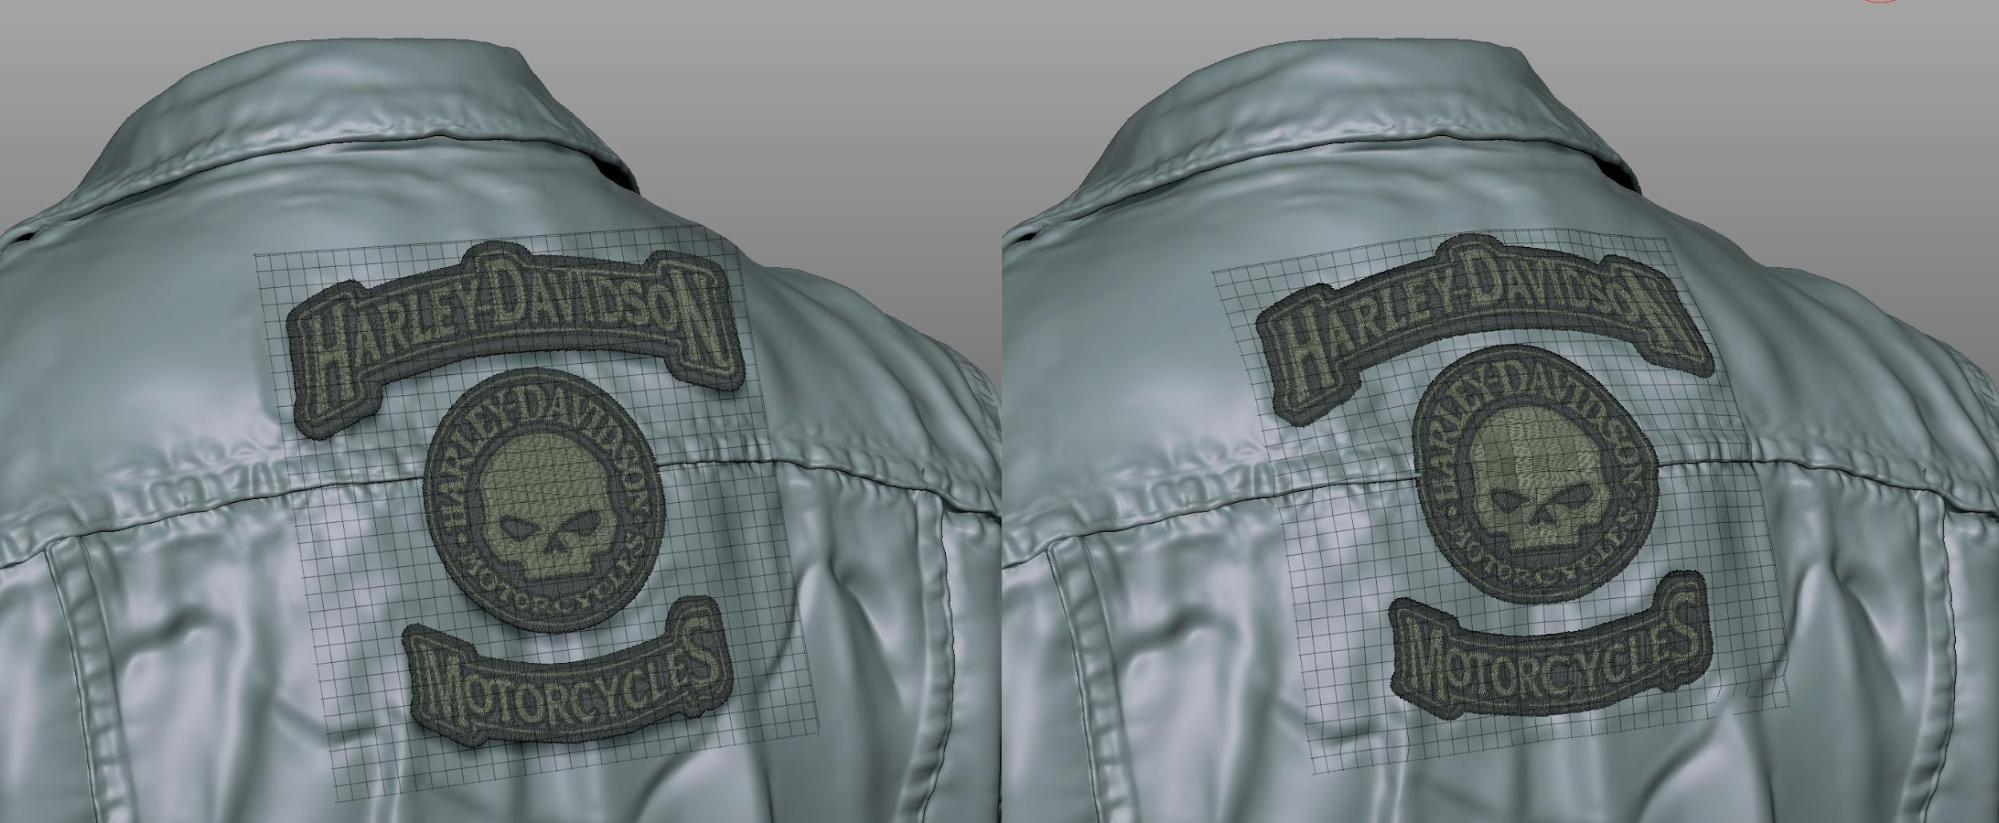
- Sculpt subtle folds around the patches on the jacket so it looks like the patches have been there for a while. I believe these little details will give the character a more complete and charming look.
UVs & Retopo Patches
Before retopologizing the patch planes, I brought them into Maya and organized their UVs.
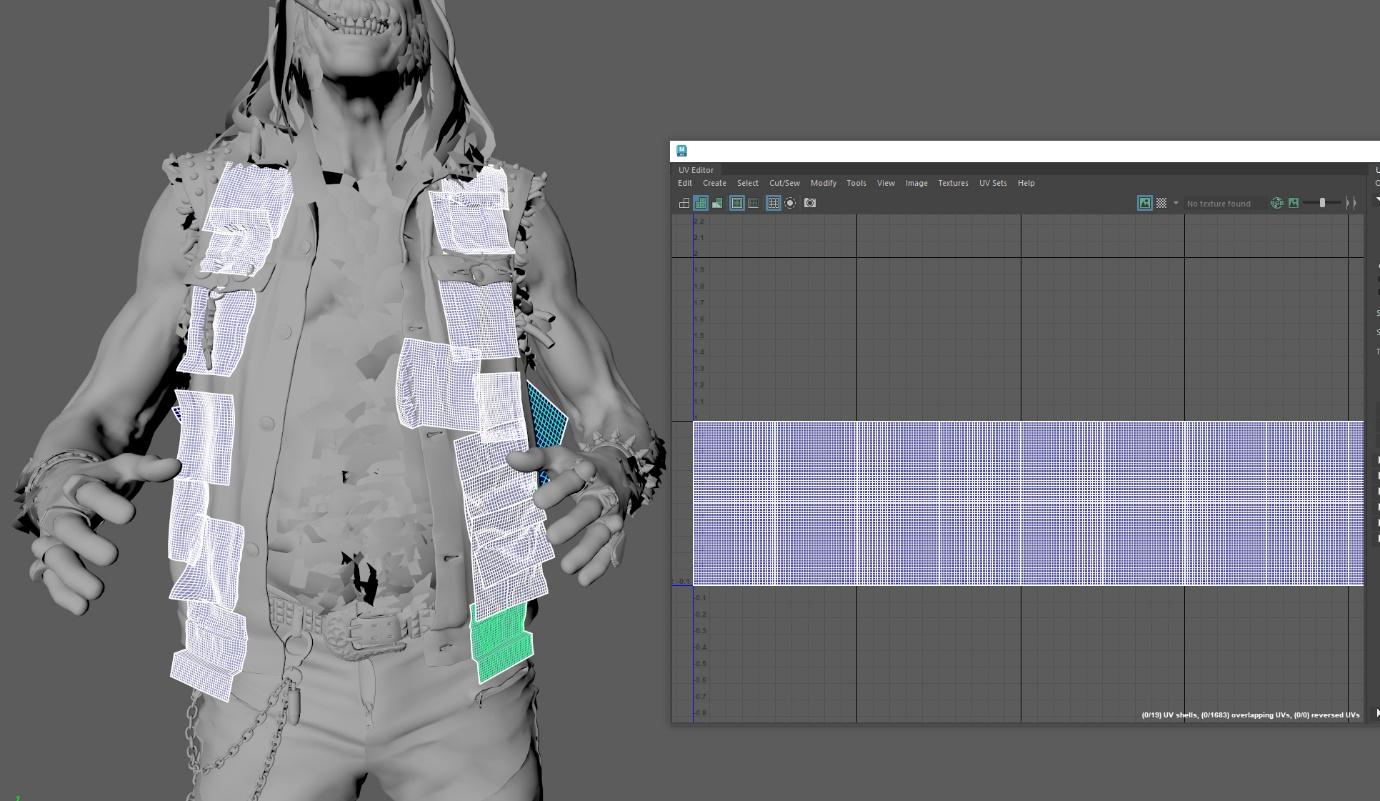
I assigned four patches to one UV set and UDIMed them. 1K per UV set was a good enough texture size to show all the details.

The next stage was to retopologize the patches:
-
Delete unnecessary faces in either Maya or ZBrush.
-
Retopologize them so they follow the same topology as the jacket.
Textures
Except for the hair and patches, every texture was baked and textured in Substance Painter.
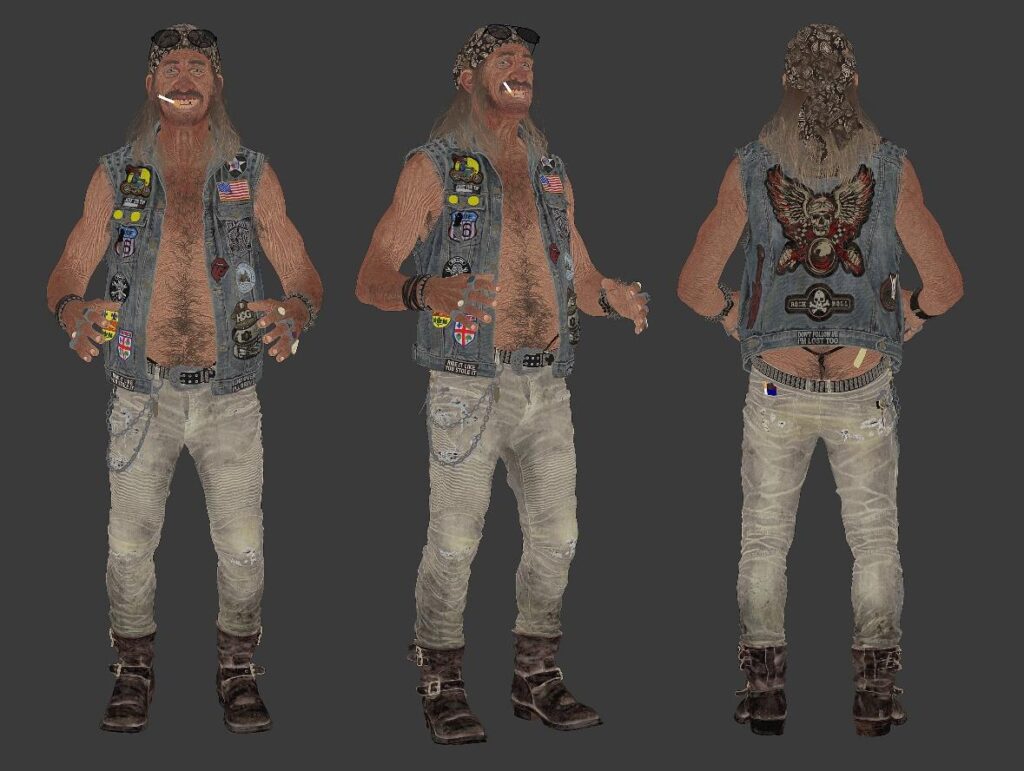
I spent quite a bit of time on the diffuse map but had the most fun with it.
I wanted to give his skin a noticeable tan while adding a distinctive dirtiness, wear and aged look to his outfit—a bit of a comic book look, yet with realistic materials.
Liquor Bottle, Shot Glass & Ice
I modeled the bottle and shot glass in Maya and sculpted the ice cubes in ZBrush.

In Substance Painter, I aimed to make the bottle and shot glass look as realistic as possible, ensuring they felt like more than just ordinary objects.
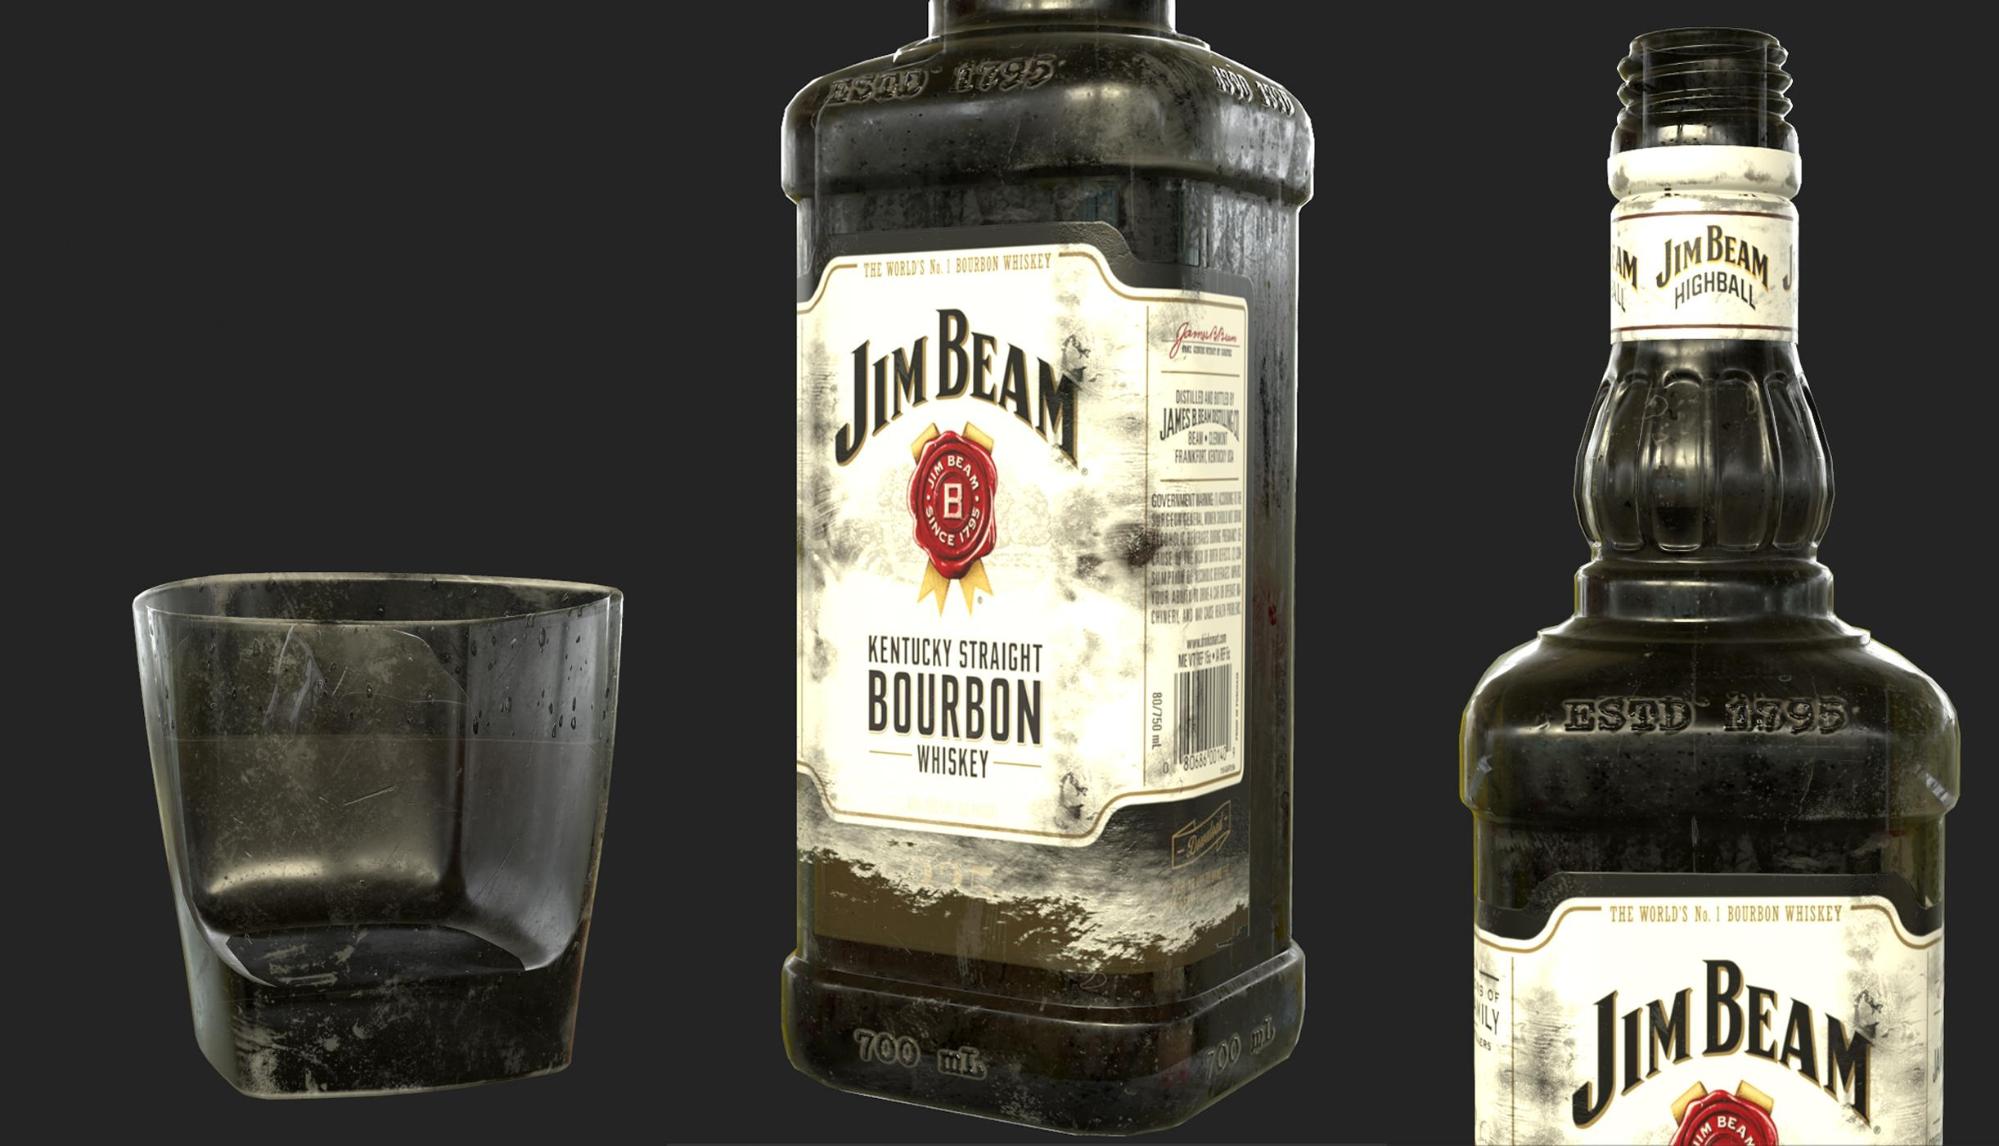
Since the shot glass is the closest object to the camera in my final render, I paid extra attention to detail—exaggerating the scratches, dirt, and wear on the logo to enhance its character and storytelling.
I used procedural paper-based sticker material for a ripped effect on the logo.
Posing
I posed the low mesh in Maya first with Quick Rig as a reference.

Rendering
I rendered it in Marmoset Toolbag, aiming to create the atmosphere of a bar with vibrant, colorful lights.
My goal was to give the character a subtle comic book effect—stylized but not overly realistic—using strong backlighting and deep shadows to emphasize shape and mood.
Conclusion
This project took a significant amount of time, but I’m satisfied with the results. I had the opportunity to learn new tools like FiberShop, GS CurveTools, and Substance 3D Sampler.
I plan to revisit it in the future—perhaps adding tattoos, improving the hair on both the head and body, adding torn stitches on the patches, and rendering with better lighting.
A huge thank you to Games Artist for giving me the opportunity to share my process. It was truly an honor to contribute.
Read more articles
You might also like these articles.