Rune Fang

Introduction
Hi everyone! My name is Yuri, and I’m a self-taught 3D artist and freelancer. I've been studying 3D for a little over two years now and specialize in hard surface modelling for game-ready props, assets, and environment elements.
I’m currently open to new opportunities and collaborations.
I enjoy combining realism with an artistic approach, focusing on detail, recognizable shapes, and surface wear to give each asset a believable character.
References, Idea & Inspiration
I’ve always been drawn to historical bladed weapons. Aesthetically, they often mix different materials, distinctive shapes, and visual storytelling, whether through wear, engravings, or textures that reflect age and purpose.
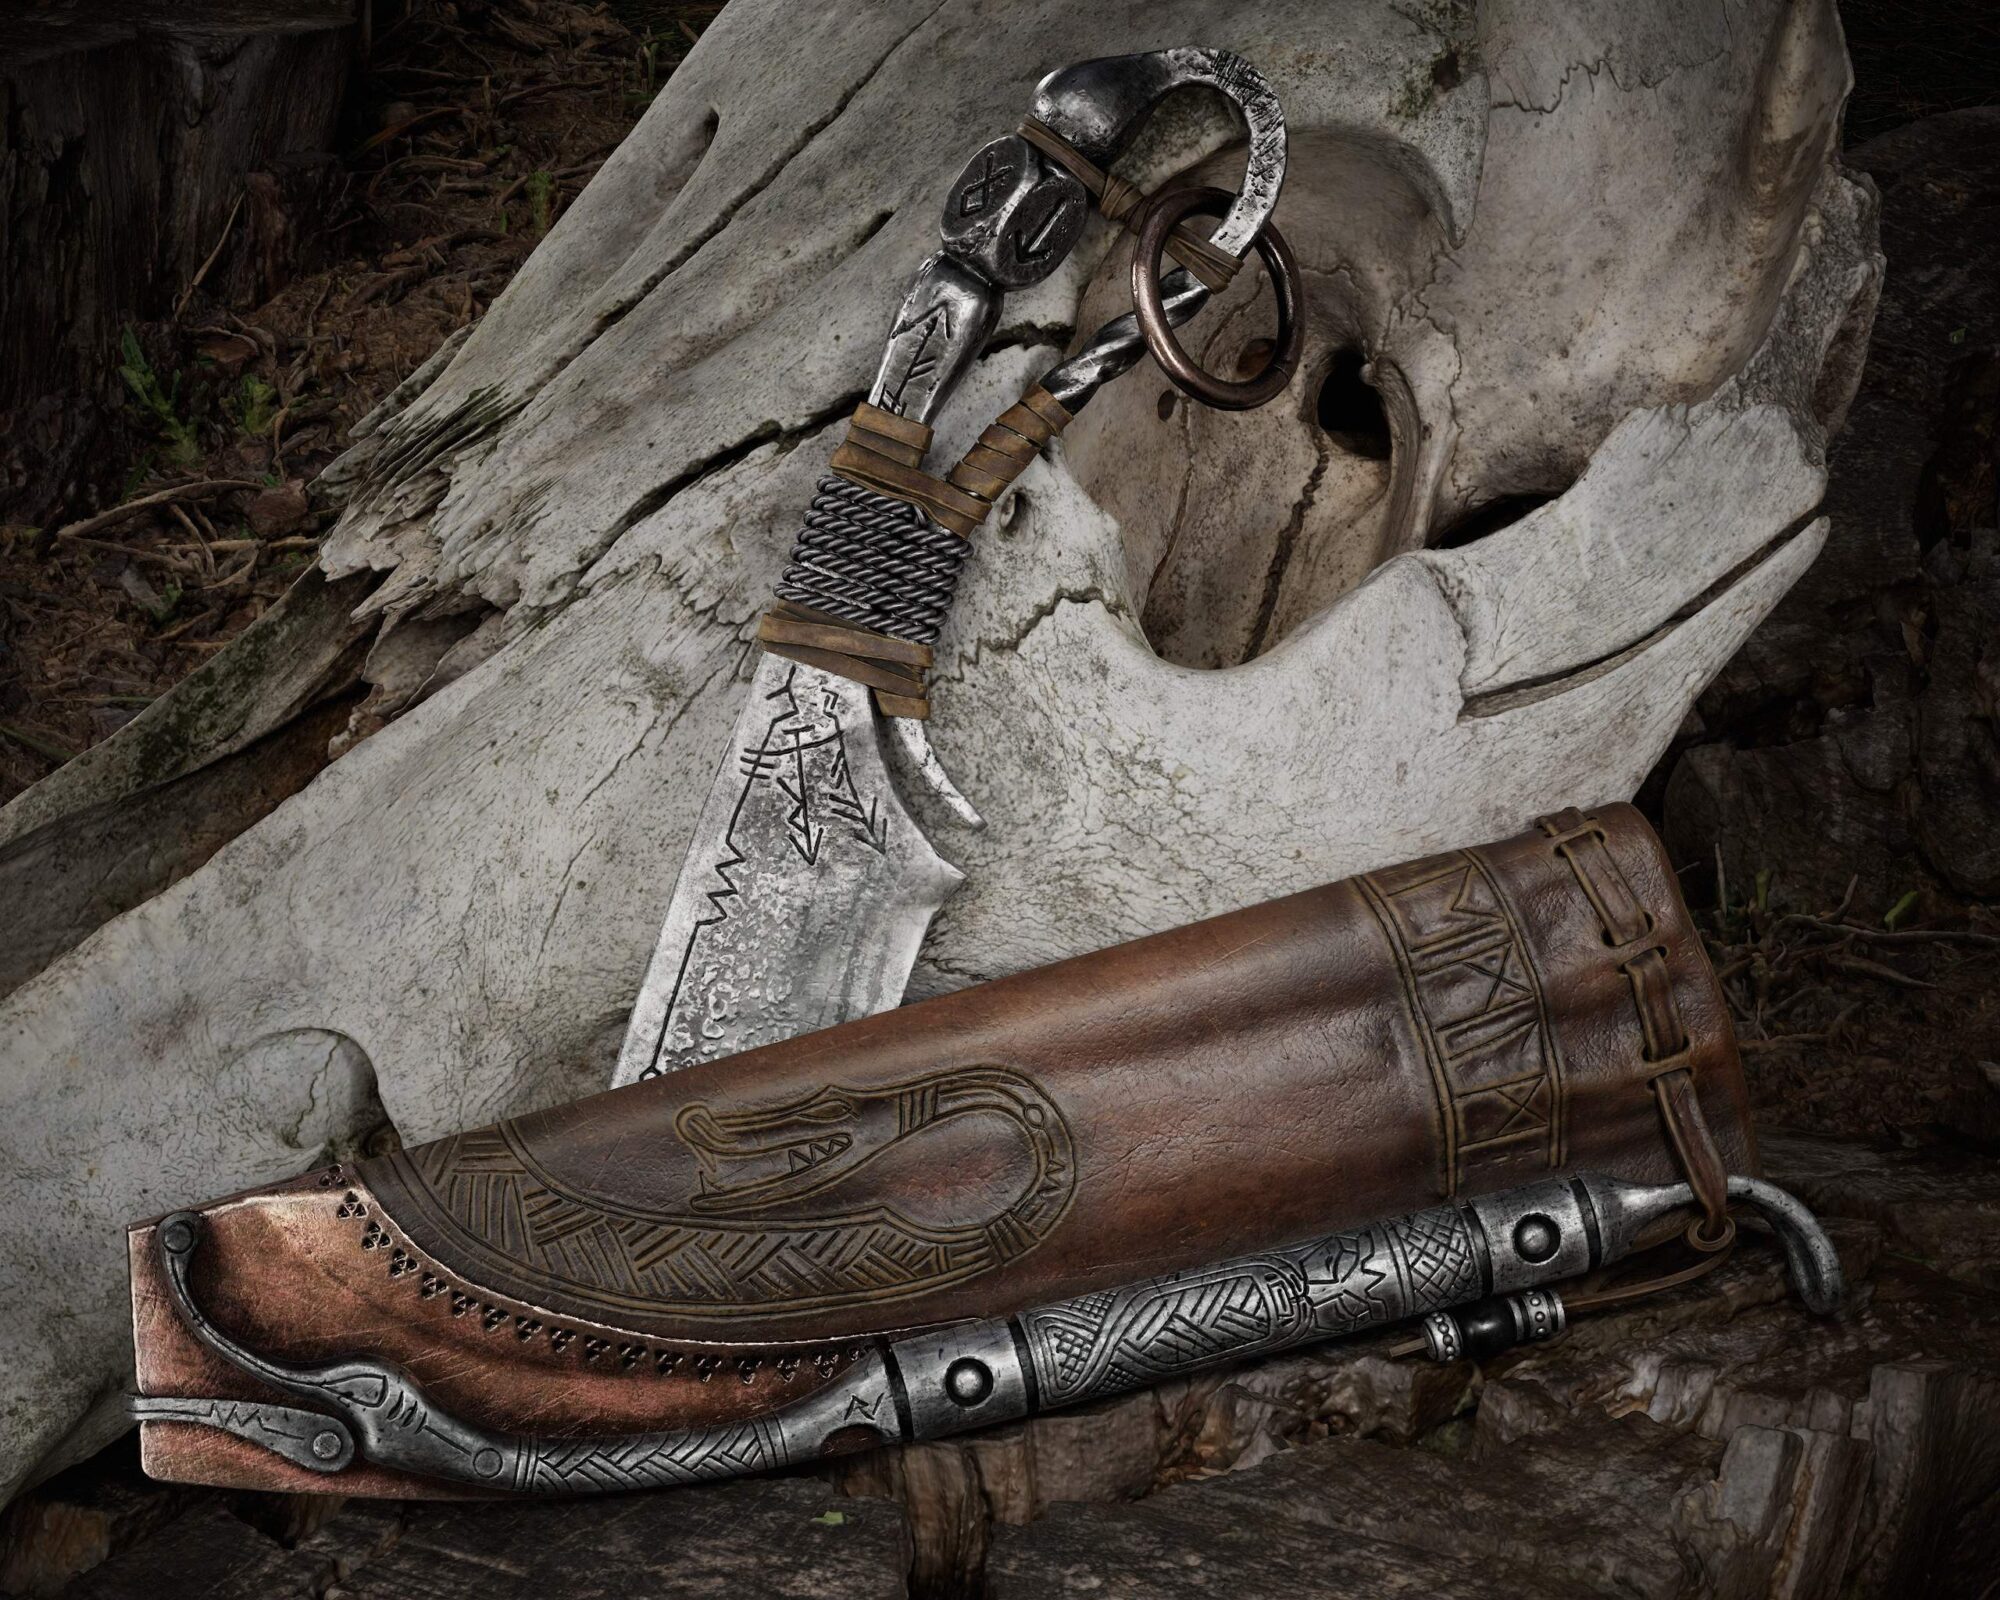
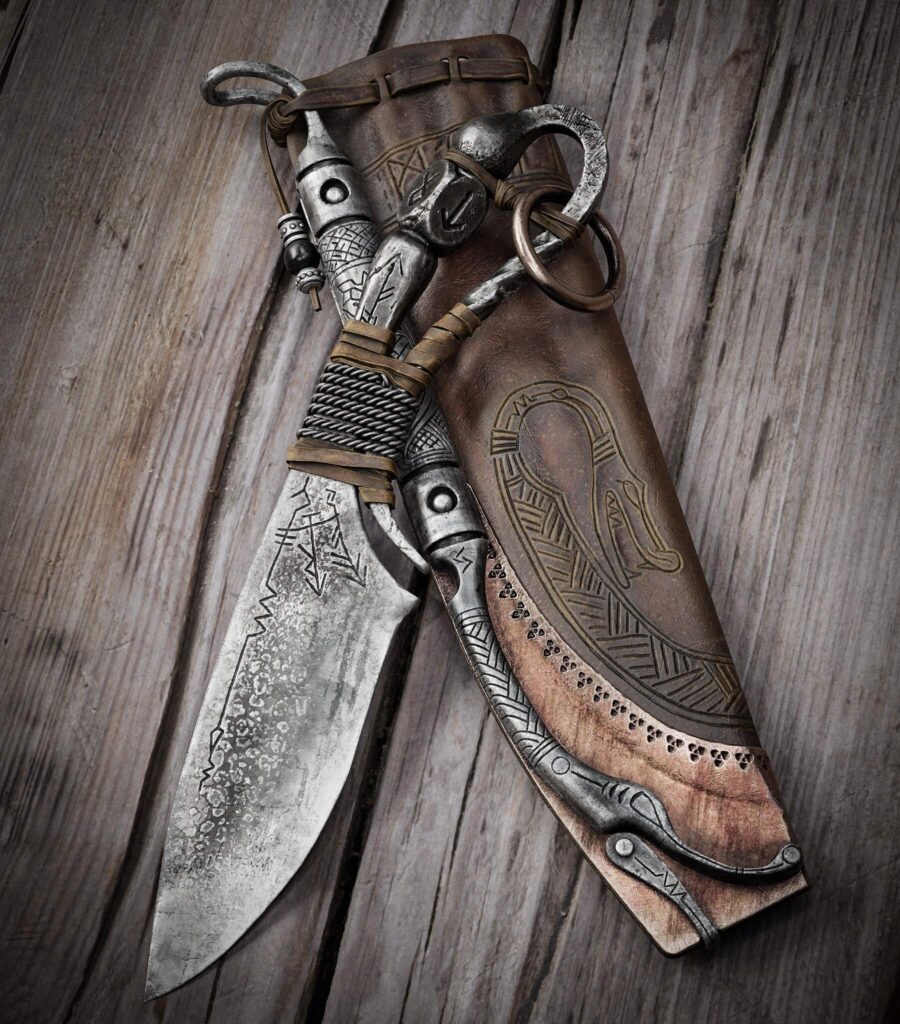
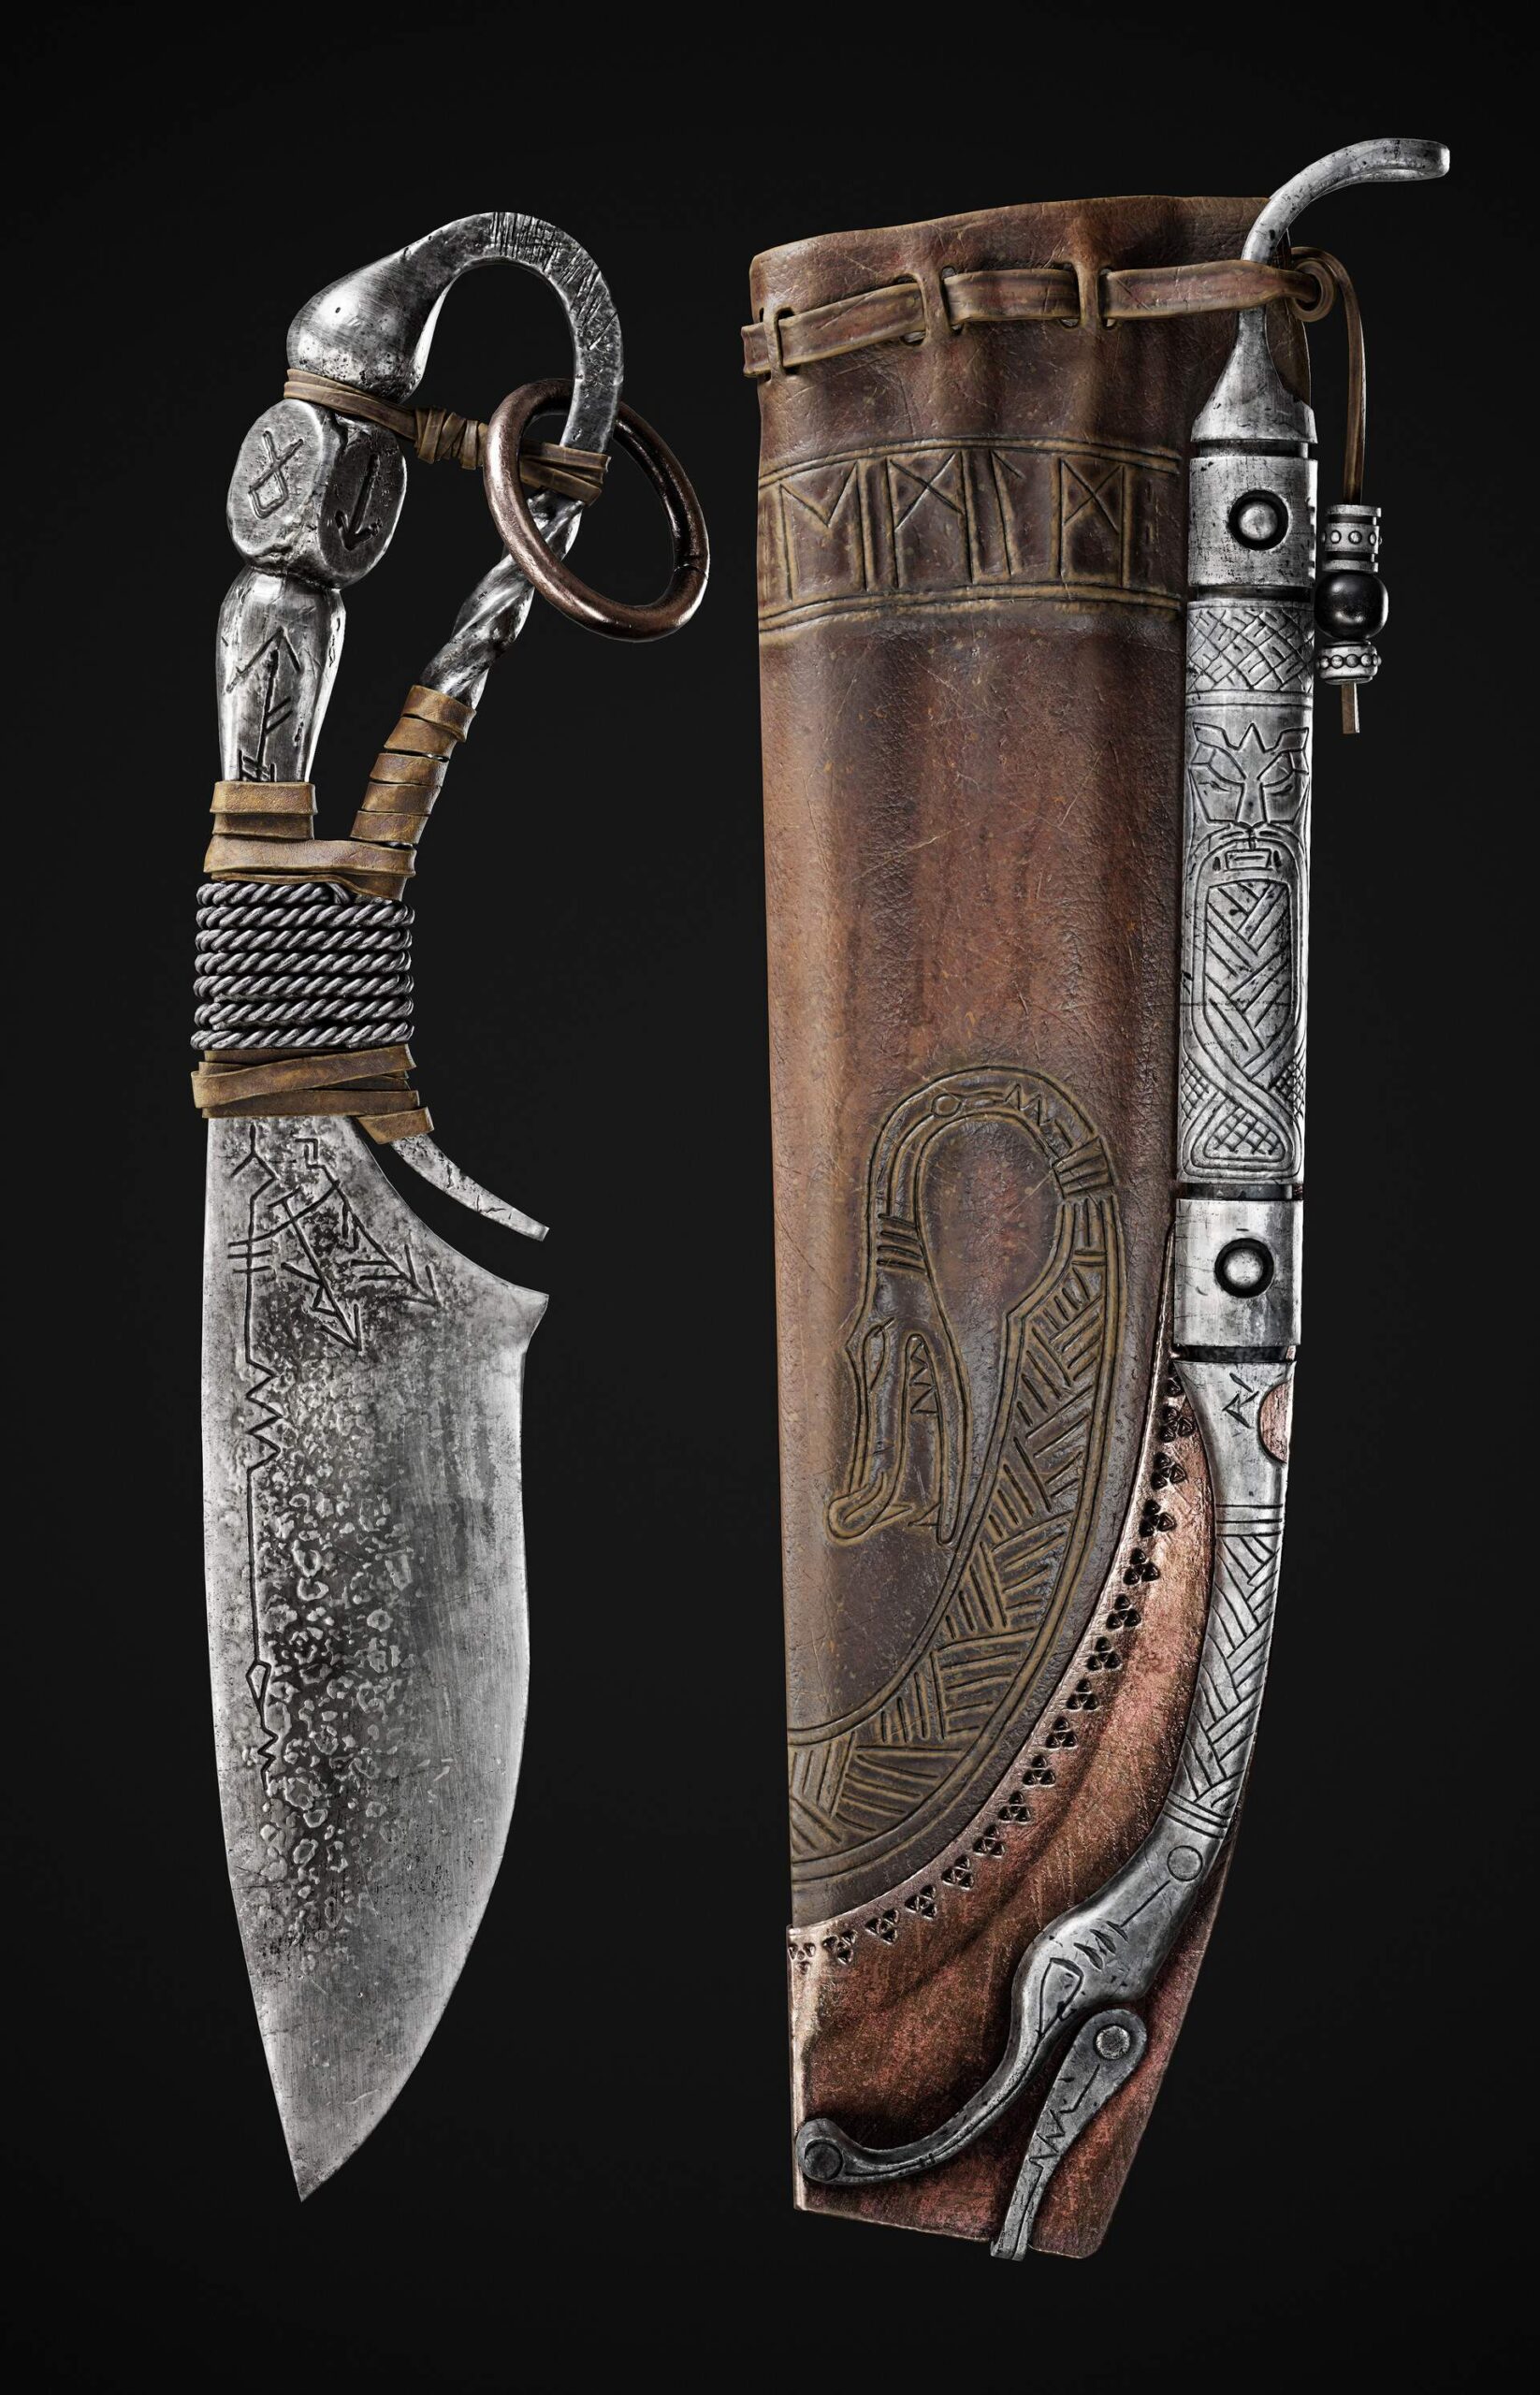
For this project, I decided to create a knife with a leather sheath in a style that felt aged and story-rich, something that could belong in a fantasy or historical setting.
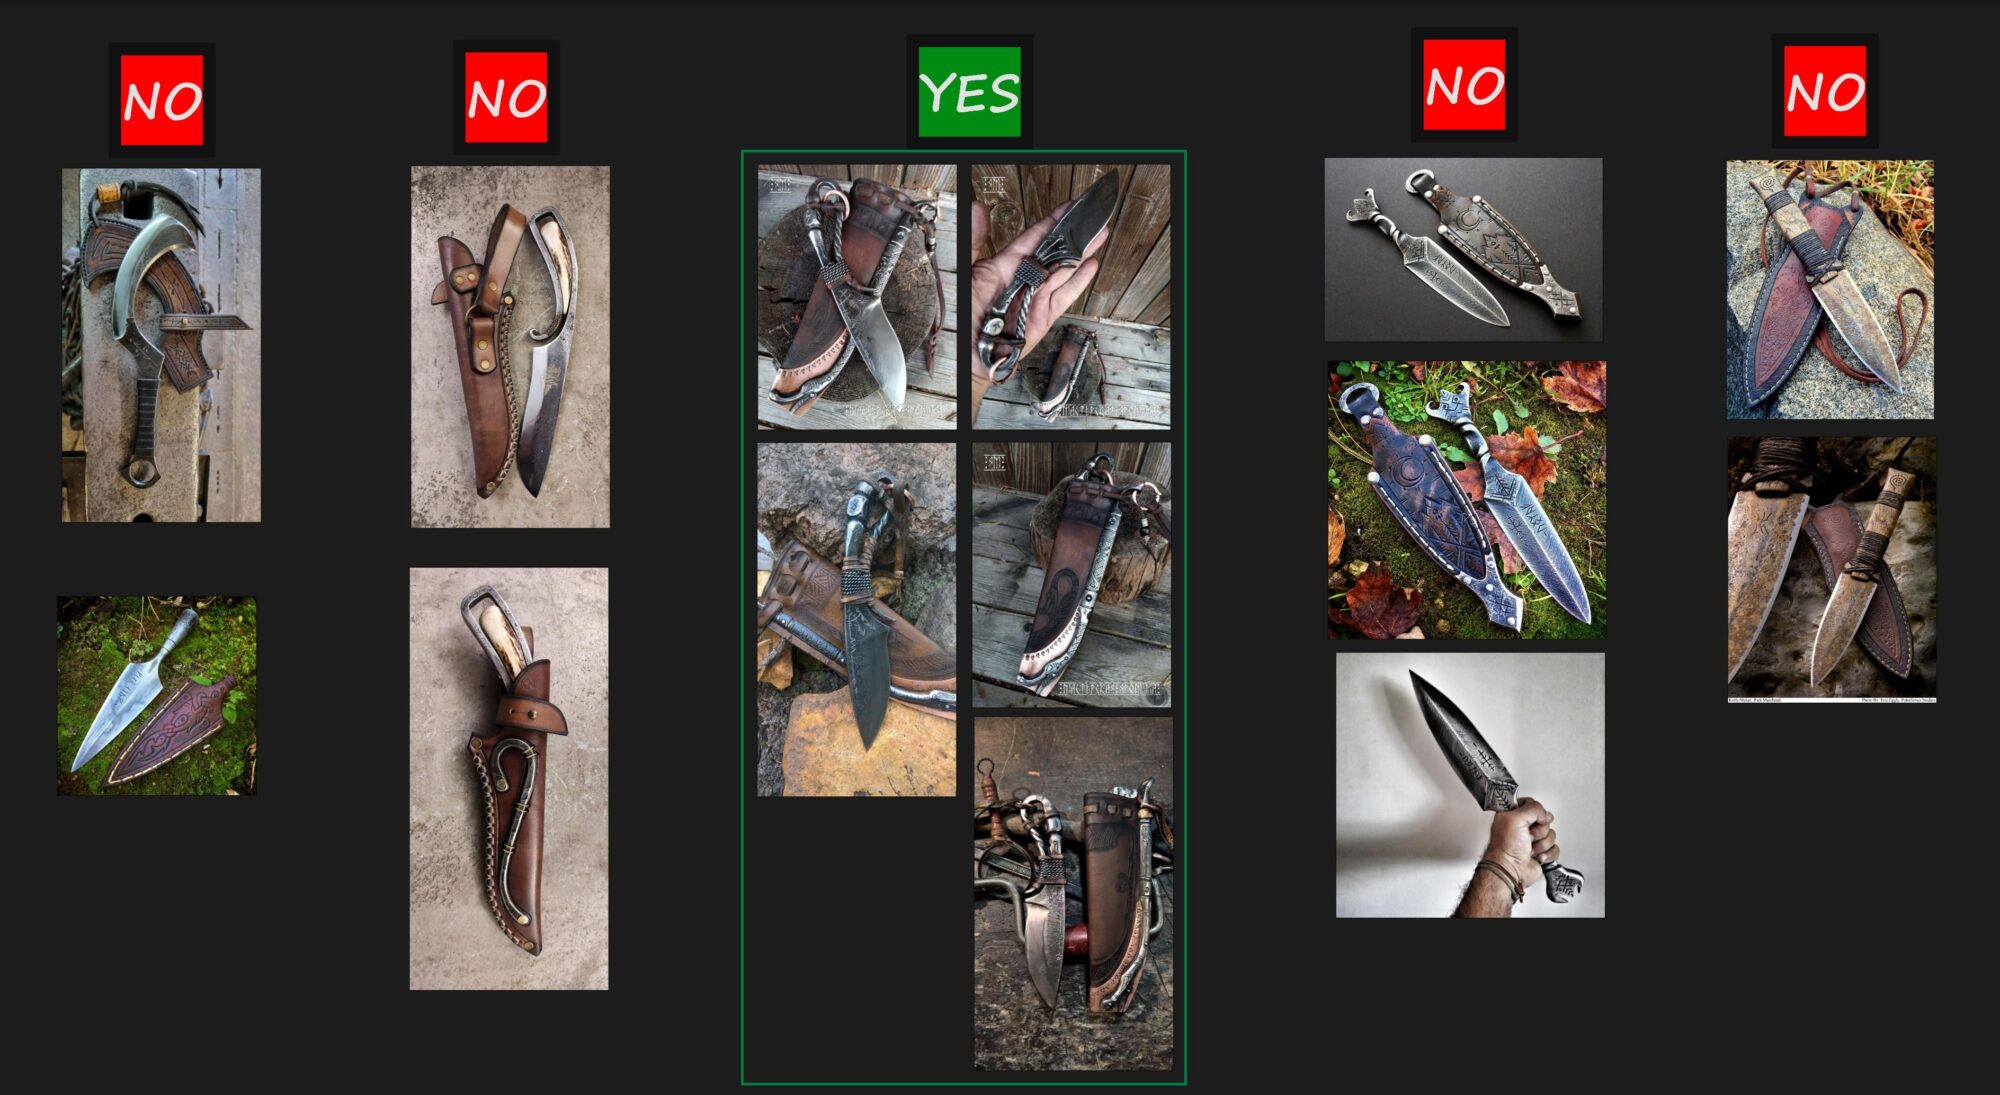
From the start, I knew I wouldn’t need a lot of references.
My focus was on picking the right subject. Since I’m still learning, I aim for projects that feel challenging at first glance. Even if the result isn’t perfect, the experience and knowledge I gain are always the most valuable part.
Project Goals
- Improve my sculpting skills in ZBrush, focusing on surfaces, damage, and decorative detailing using masks and patterns.
- Learn to work more effectively with leather.
- Create a realistic-looking model with rich, layered textures, believable materials, shapes, and wear, using a solid PBR workflow.
- Level up my rendering and overall presentation skills.
Software Used
- Modelling: Autodesk Maya, Plasticity, Blender & ZBrush.
- UV Unwrapping: RizomUV.
- Baking: Marmoset Toolbag, Substance Painter.
- Texturing: Substance Painter.
- Rendering: Marmoset Toolbag.
- Post-processing: Adobe Photoshop.
Modelling
For this project, I wanted to bring together all of my current skills and use a mix of tools, depending on where I could work faster, more efficiently, or with better quality.
Blockout & Base Shapes
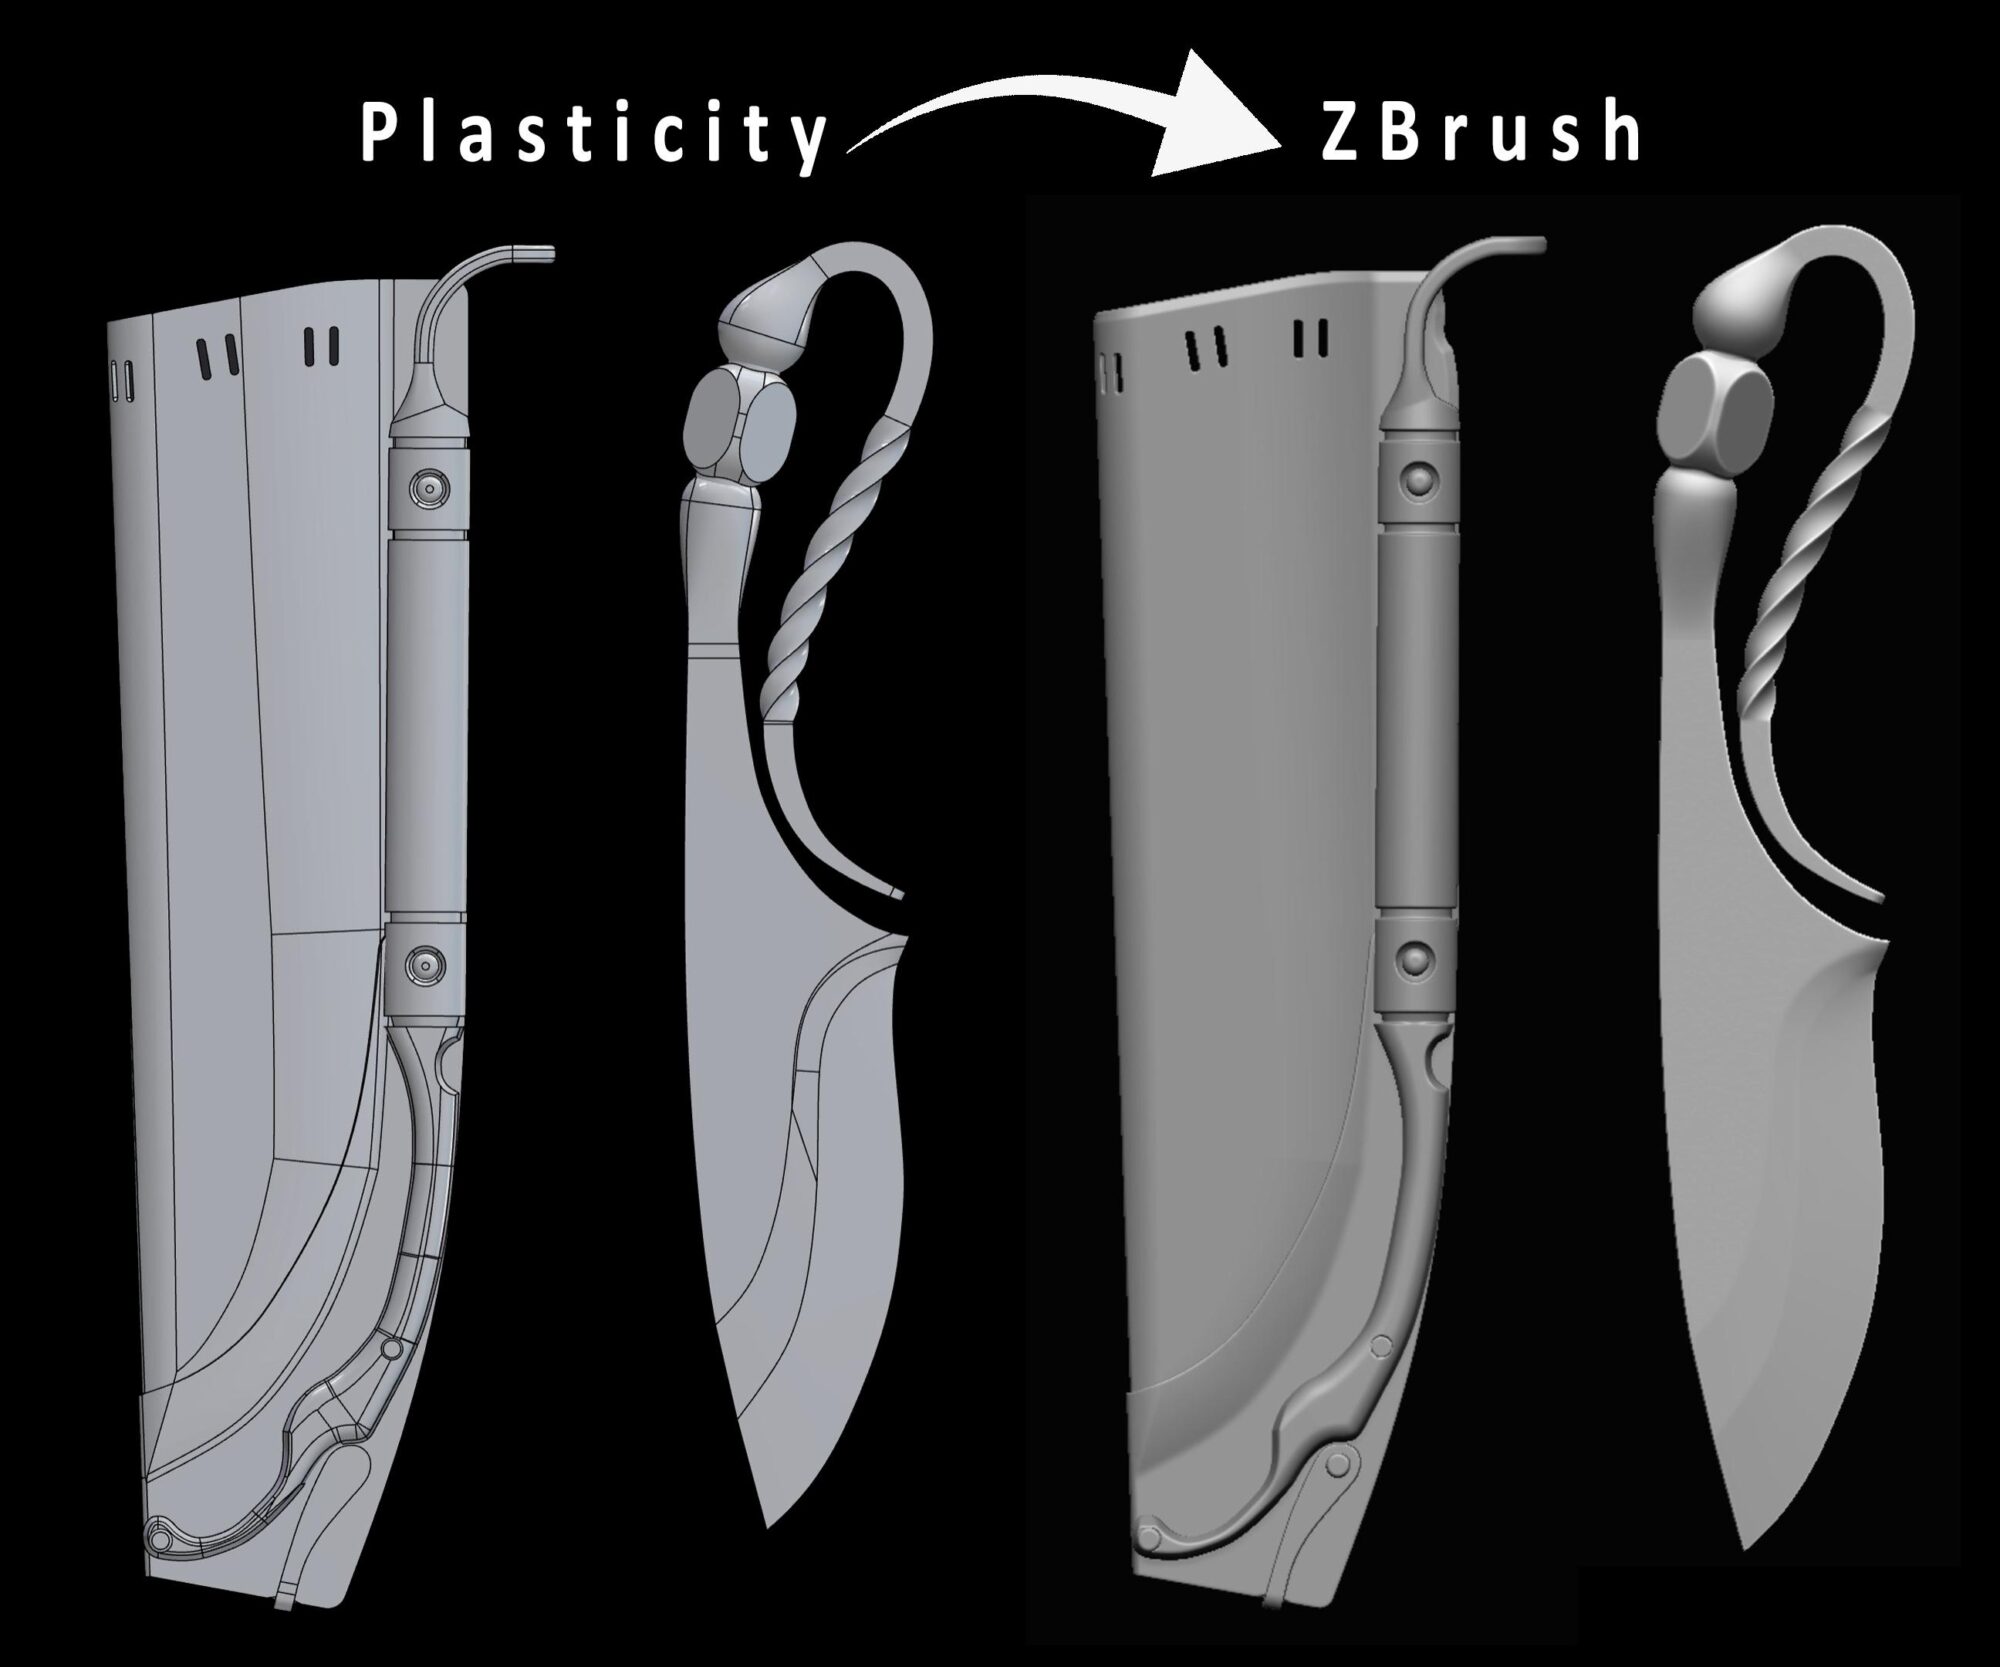
I started building the base shapes of the knife and sheath in Plasticity. It turned out to be not only really fast but also a lot of fun, especially because of how precise and clean CAD modeling can be at this stage.
After that, I transferred the CAD topology to ZBrush through a bridge in Blender. Once inside ZBrush, I used DynaMesh and smoothed out the edges with Polish Crisp Edges to get a dense, sculpt-ready mesh.
Small Details: Straps & Ropes
For the blockout of smaller leather elements, straps, and ropes, I switched back to polygonal modeling in Maya.
The twisted wire was created using the Sweep Mesh Tool — a very powerful feature that allows for flexible control over geometry along a curve.
The base curve was made with a Helix, which I adjusted to the needed proportions using scale and deformation tools.
I used the same approach for modeling the main leather strap: first the curve, then the Sweep Mesh Tool to generate the geometry.
For the overlapping leather straps, I used the ShrinkWrap Deformer, which allows you to wrap one piece of geometry over another. I usually work with the Vertex Normal and Closest modes — they tend to give the best results for this kind of setup.
I picked up this technique from a really helpful tutorial by Florian Neumann, where he walks through a complete game asset pipeline using a post-apocalyptic knife as an example, including sculpting in ZBrush and retopology in Maya.
Once all the blockout elements were ready, I brought everything into ZBrush to start working on the high poly and final detailing.
Sculpting in ZBrush
I focused on sculpting as much as possible in ZBrush to sharpen my skills and get a better feel for the tool, even if some details wouldn’t be visible in the final renders.
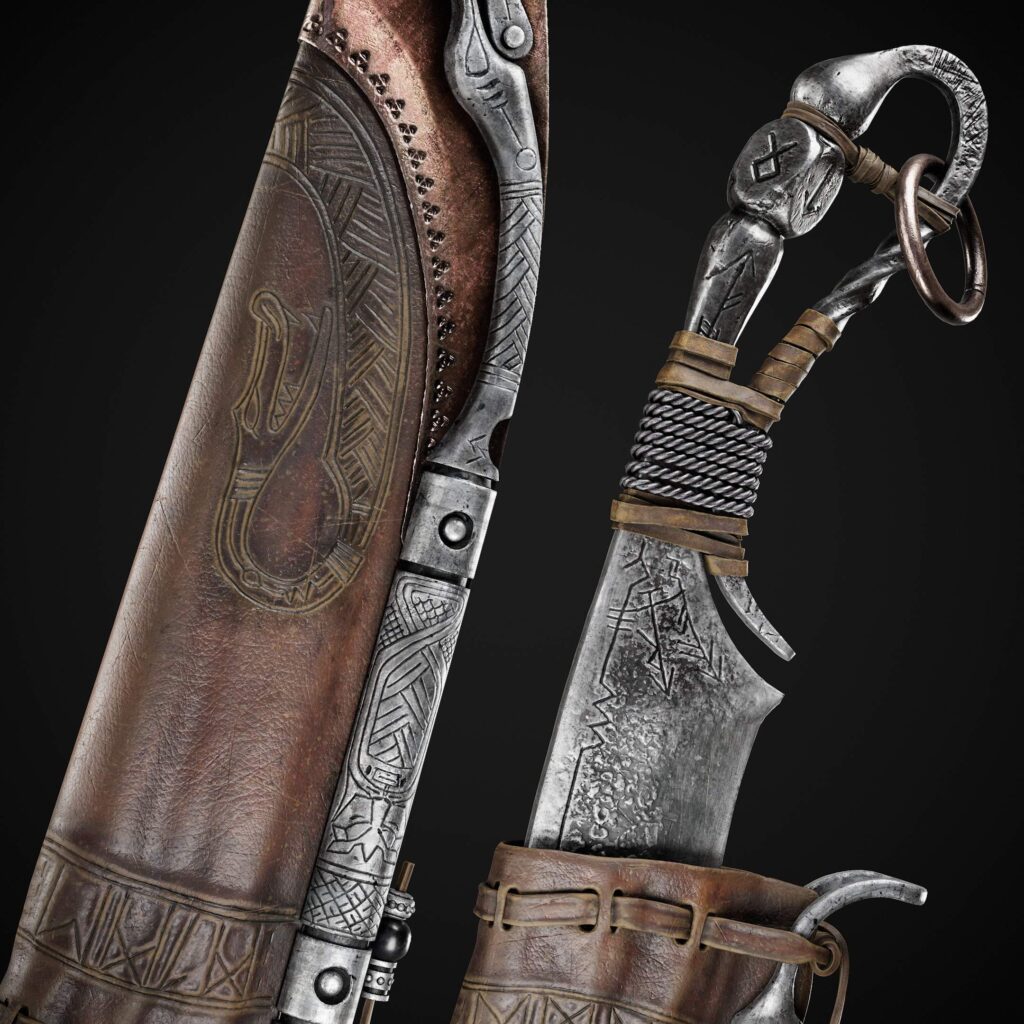
During the knife sculpting phase, I started by going over all the edges with the TrimDynamic brush, giving them a realistic, slightly chipped look.
After that, I experimented with different brushes and alphas — both paid and free. I added surface texture, dents, and deep scratches.
If I didn’t have the exact alpha I needed, I’d often use a Morph + DamStandard combo with a saved Morph Target — a great way to manually sculpt damage where needed.
All of this was done while staying close to my references to keep the look as believable as possible.
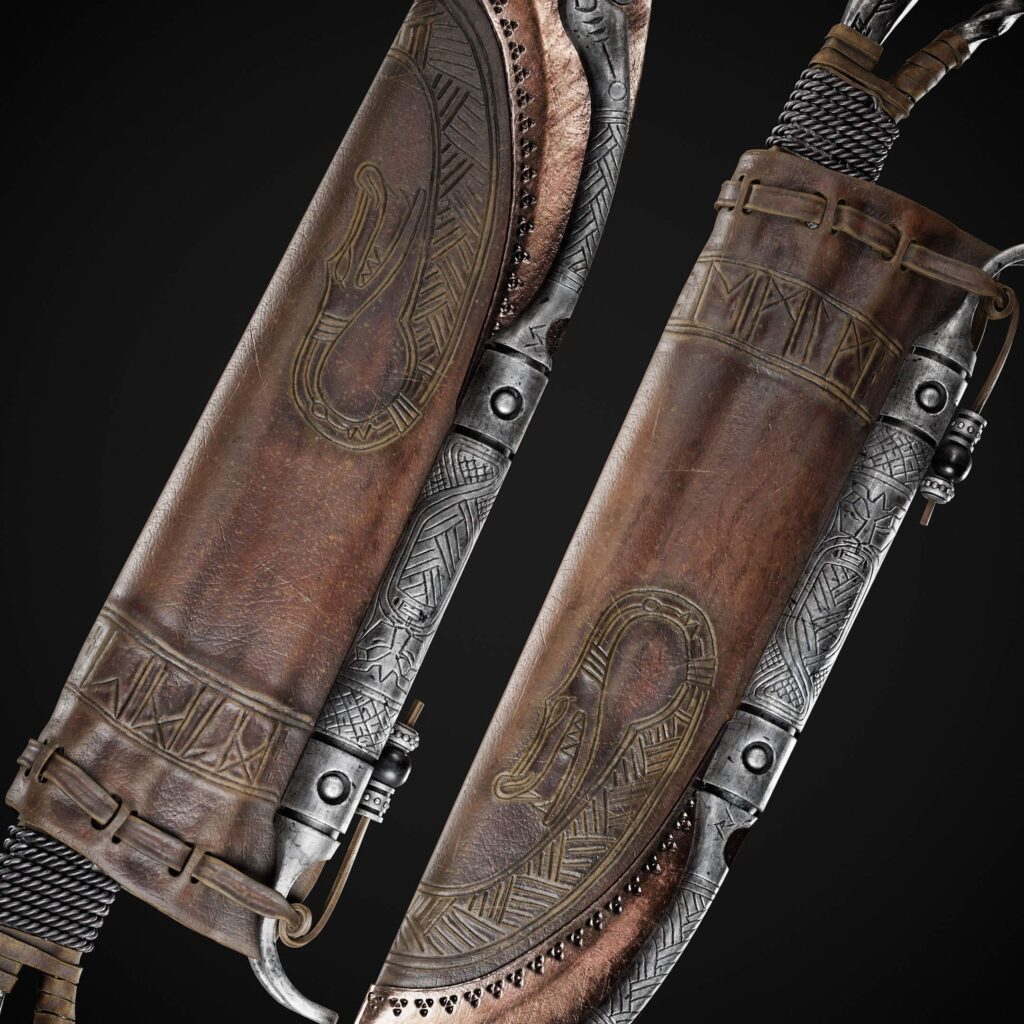
Runes & Ornaments
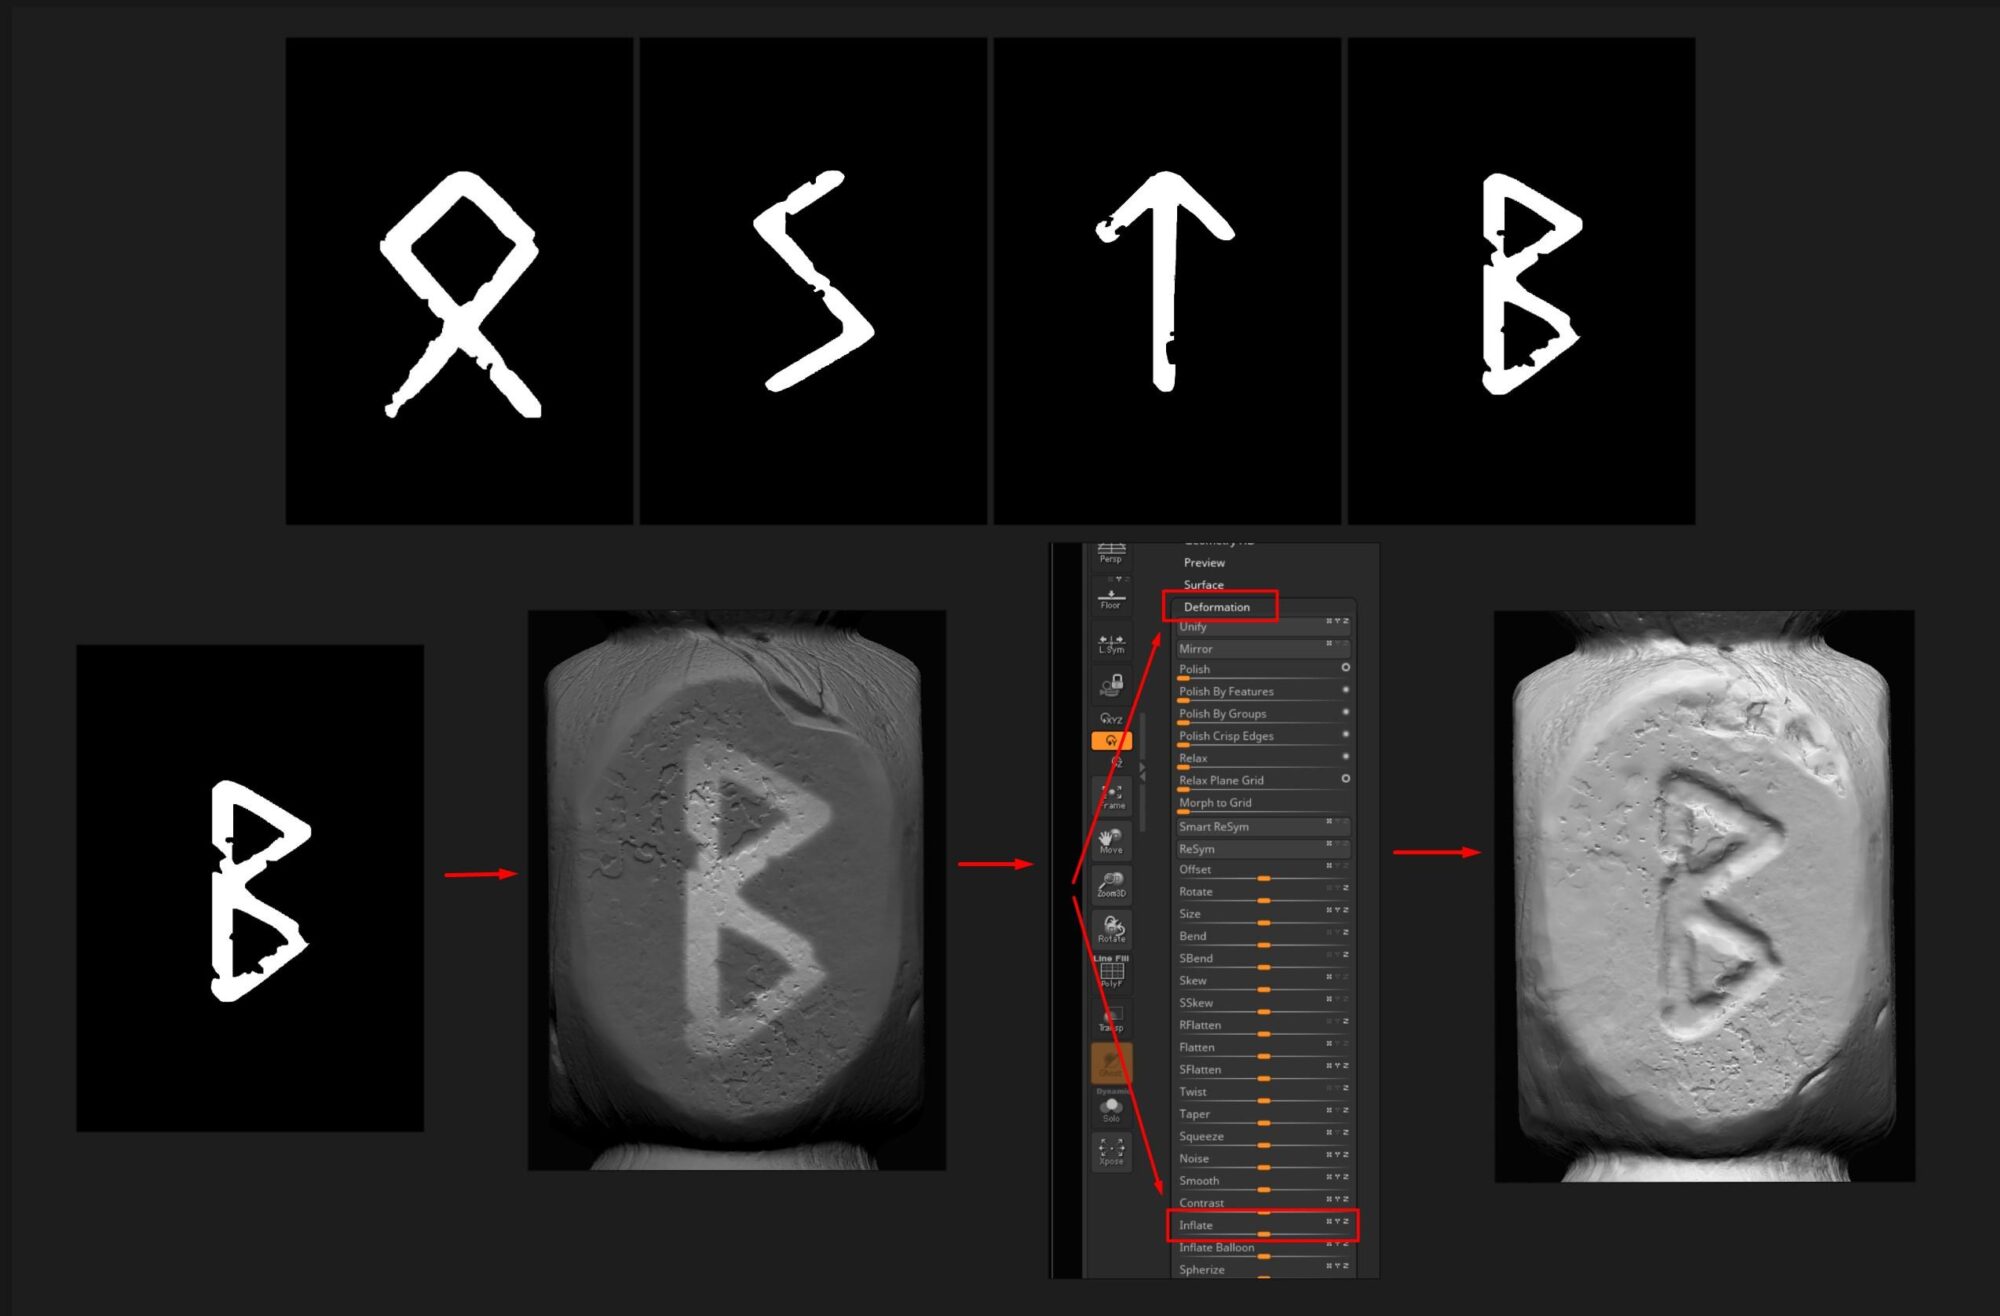
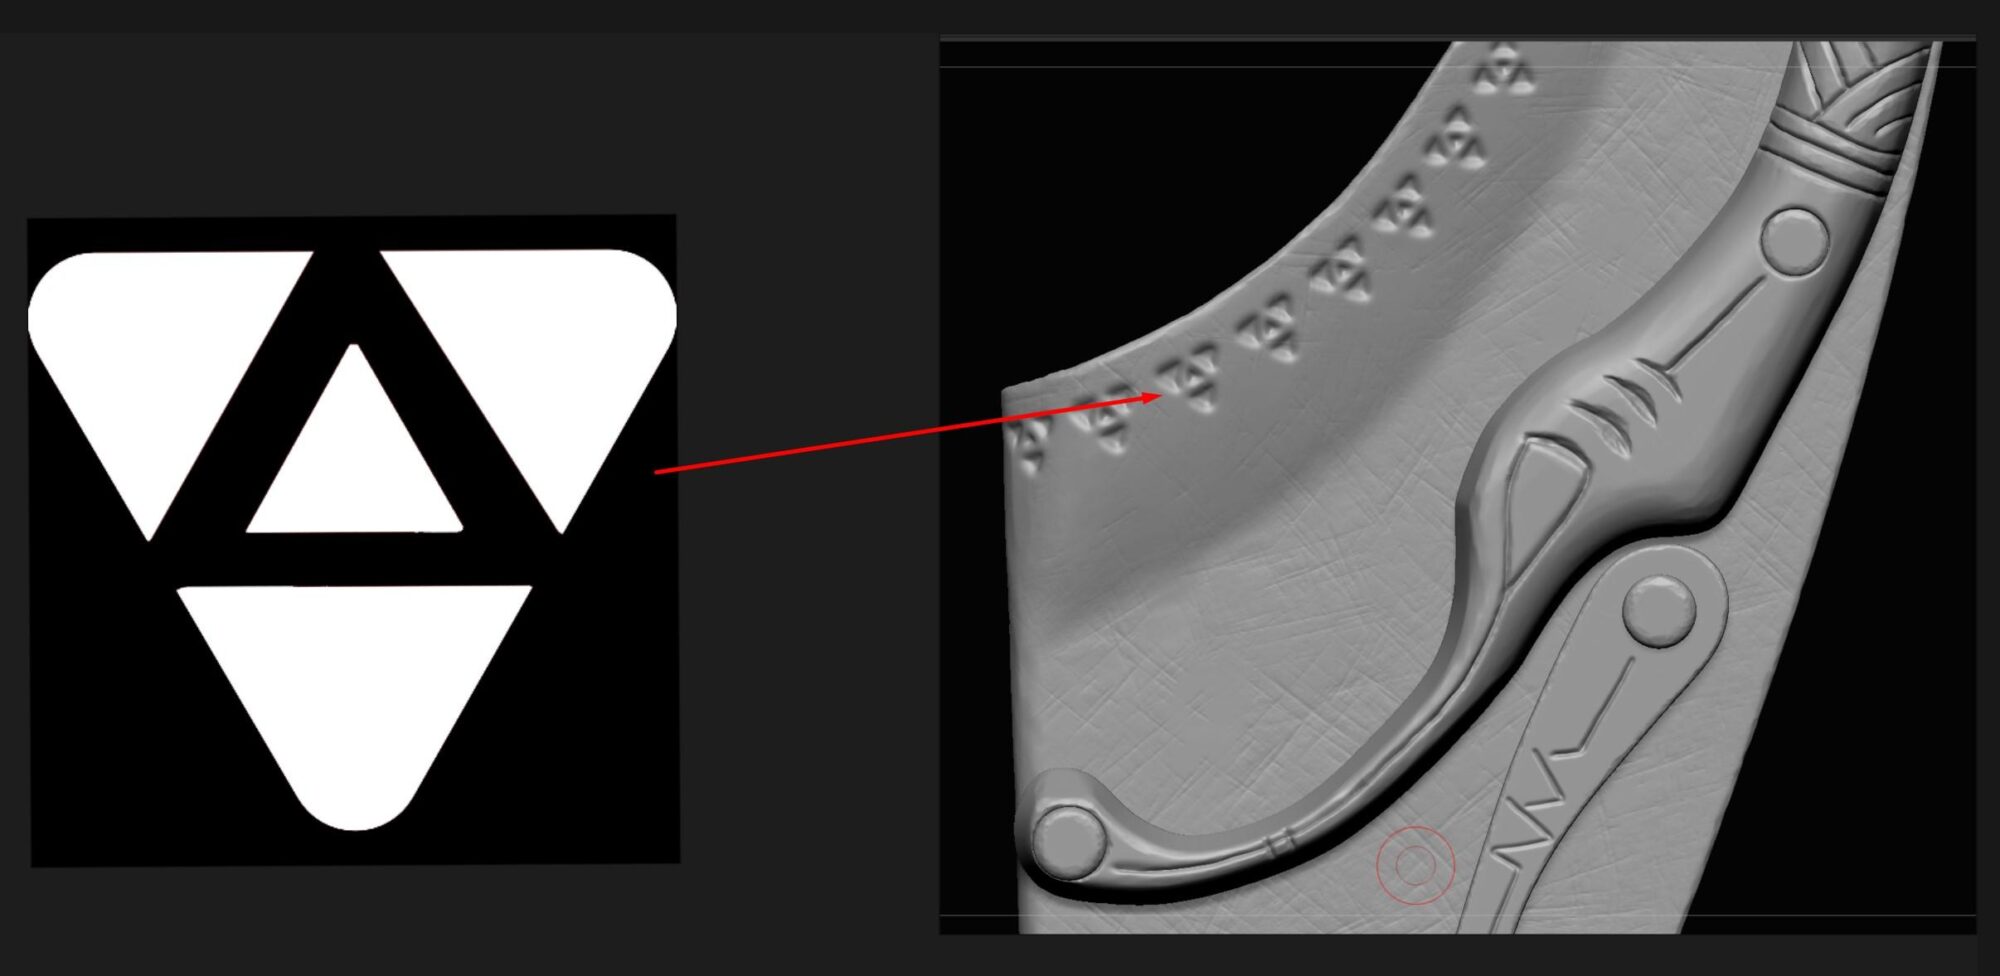
One of the most enjoyable parts of the project was adding the runes and patterns.
I created custom alphas for the runes in Photoshop, and then used the DragRect mode in ZBrush to apply masks to the necessary areas of the model.
After slightly blurring the edges of the mask, I used the Inflate tool (in the Deformation tab) to push the patterns into the surface to the desired depth.
For the ornamental patterns, I decided to practice drawing them by hand using the DamStandard brush, adjusting Draw Size and Focal Shift to control line depth and sharpness.
Morph Target also helped — allowing me to sharpen the ornament edges by restoring parts of the original geometry with the Morph brush.
And if freehand drawing isn’t working out, there’s a great little trick — the See-through feature in ZBrush.
It makes the viewport semi-transparent, so you can place a reference image in a window behind and trace it directly without needing to switch back and forth.
Sculpting the Metal Elements
For the rest of the metal parts, I followed the same approach: refining the edges, adding surface variation, scratches, dents, and manually sculpting the patterns.
For the decorative details on the copper insert, I created a custom alpha and applied it through a mask using the Inflate tool for quick and precise results.
Sculpting the Leather
When working on the leather parts, I wanted them to feel more natural, with dents, soft bumps, and slight shape irregularities.
To get the right organic look, I used Move, Move Topology, and Inflate brushes, with varying intensities depending on the effect I needed. This helped define the form of the sheath and the straps.
Next came the surface detail and wear, which I added using a combination of alphas, brushes, and the Morph + DamStandard combo.
I applied the ornaments the same way I did on the metal, but adjusted them for leather, slightly raising the edges to create a soft, stamped effect.
Even though most of the details wouldn’t be visible in the final render, I still made a point of doing it to reinforce the workflow and gain extra practice.
After a few final tweaks, the high poly was complete.
Low Poly
For this project, I didn’t aim for a highly optimized low-poly mesh. The goal was to save time and focus on sculpting and texturing.
Some of the geometry was taken directly from Plasticity and optimized in Maya, while most of the leather elements were processed through ZRemesher in ZBrush and then refined further in Maya.
The mesh, especially for the leather sheath, ended up fairly dense, but this helped preserve the fine details important for the final look.
It turned out to be a good compromise, speeding up retopology while keeping the visual quality intact.
UV Unwrapping
I used RizomUV for the unwrapping process — it’s currently my main tool thanks to its speed and convenience.
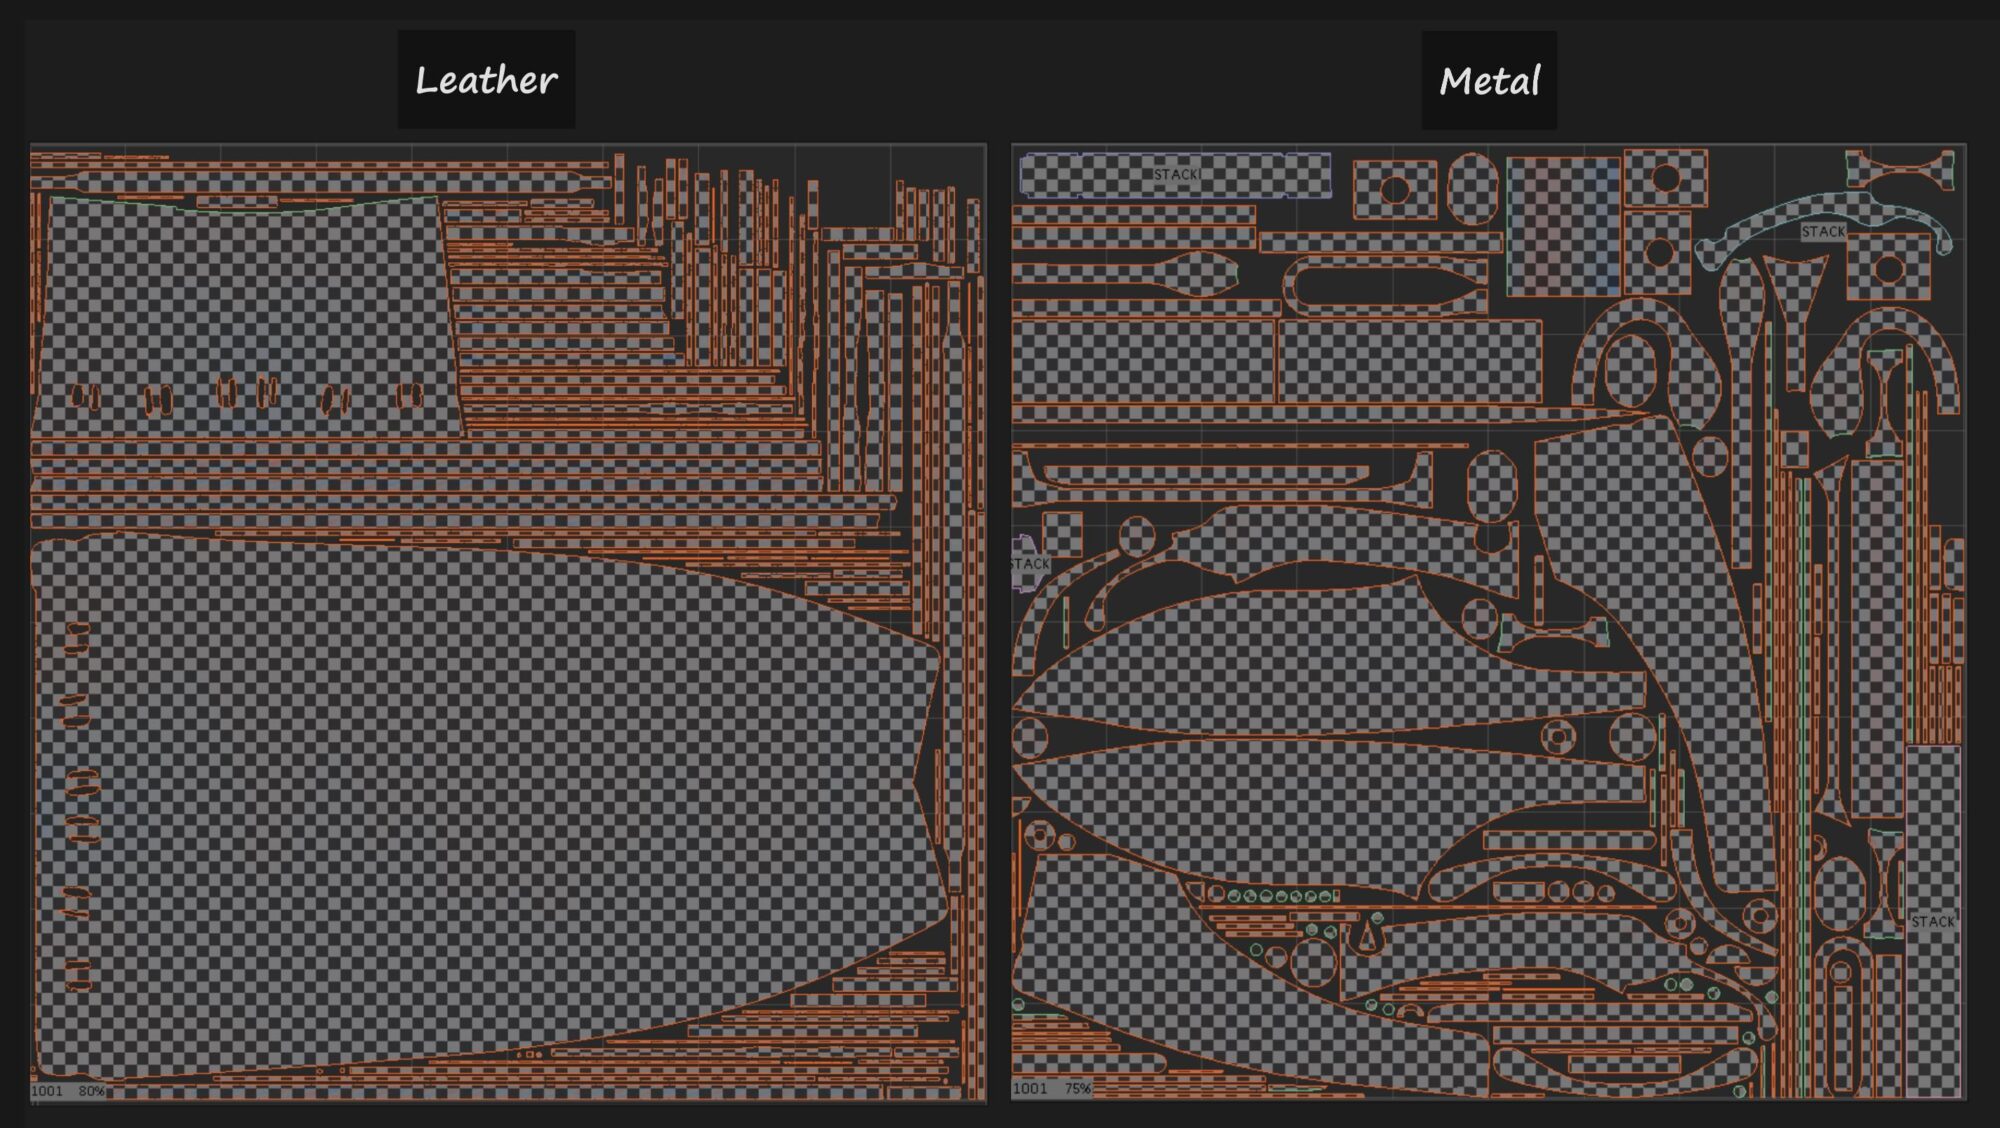
The model was split into two 4K UV sets: one for the metal parts and one for the leather. All visible elements were uniquely unwrapped, with overlaps used only on non-visible areas.
Since this was a personal project, I reduced the margin to 8 pixels and padding to 16, despite the high resolution.
I also scaled down the shells in areas that wouldn’t be seen by the camera, which helped free up more space for important parts.
Baking
I baked all the main maps in Marmoset Toolbag, following a standard workflow. The only exceptions were the Position and World Space Normal maps.
This is because baking the Position map in Marmoset can sometimes cause issues with generators in Substance Painter, leading to unwanted artifacts. To avoid that, it’s better to create this map directly inside Substance.
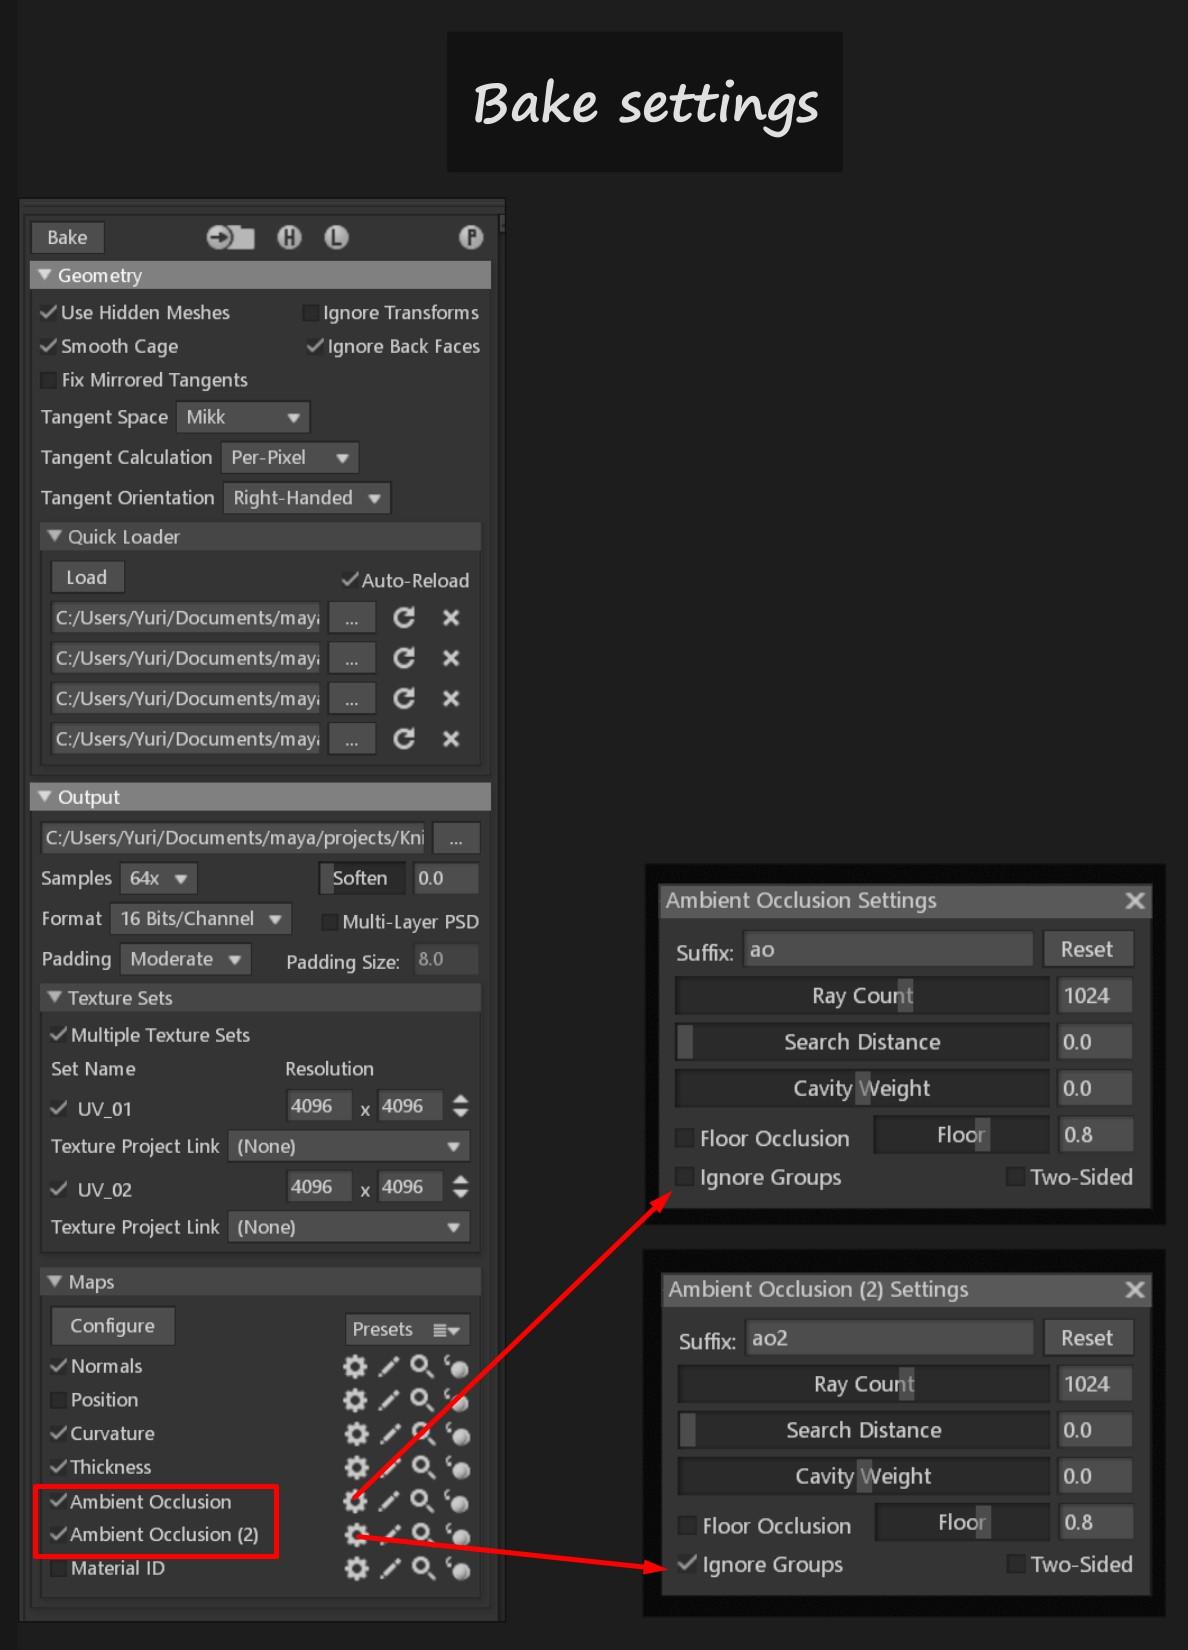
Additionally, I bake two versions of Ambient Occlusion:
- One with the Ignore Groups option enabled
- And another with it disabled.
This gives more flexibility during texturing: one version works better for soft global shading, while the other helps emphasize small details and isolated elements.
Texturing
Improving the quality of textures and the final presentation was one of the key goals for this project.
To get a fresh perspective on my work, I reached out for feedback from the talented 3D Artist Muhammad Abduhalilov, a true professional whose advice turned out to be incredibly helpful.
I’m genuinely grateful for the knowledge and insight I gained through his feedback.
I followed a metallic & roughness workflow and focused heavily on making the materials feel as realistic and expressive as possible at this stage.
Scene Setup
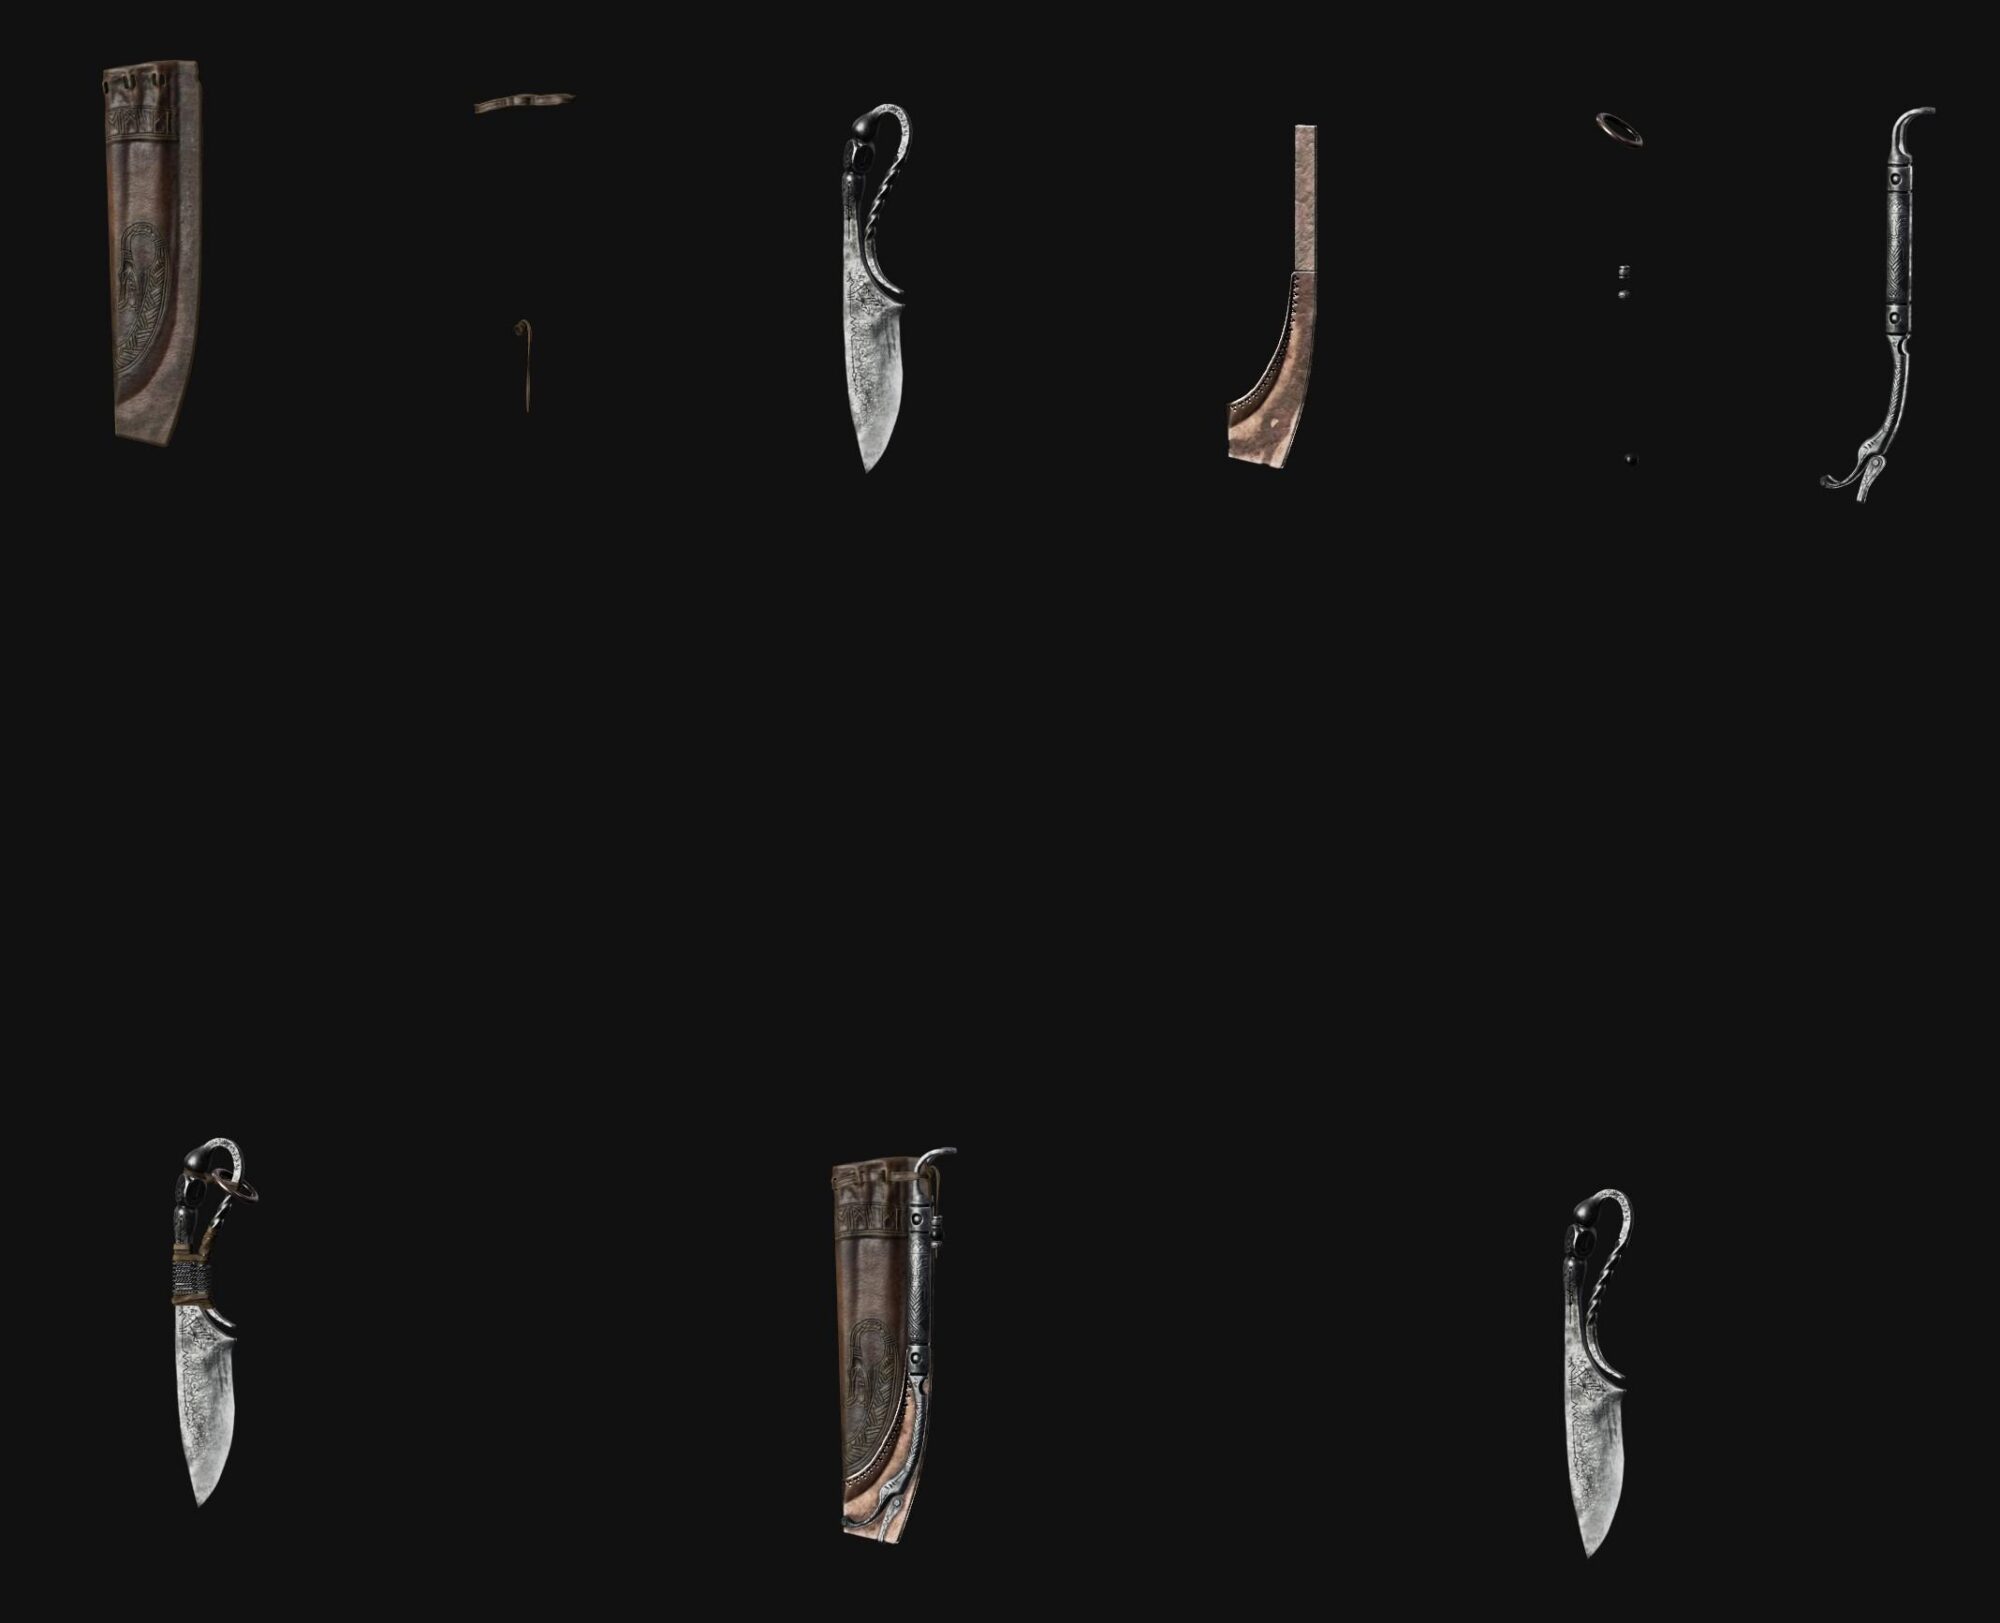
In Substance Painter, I imported a triangulated version of the model.
I also usually create an exploded mesh, breaking the asset into separate parts to make it easier to work on individual elements.
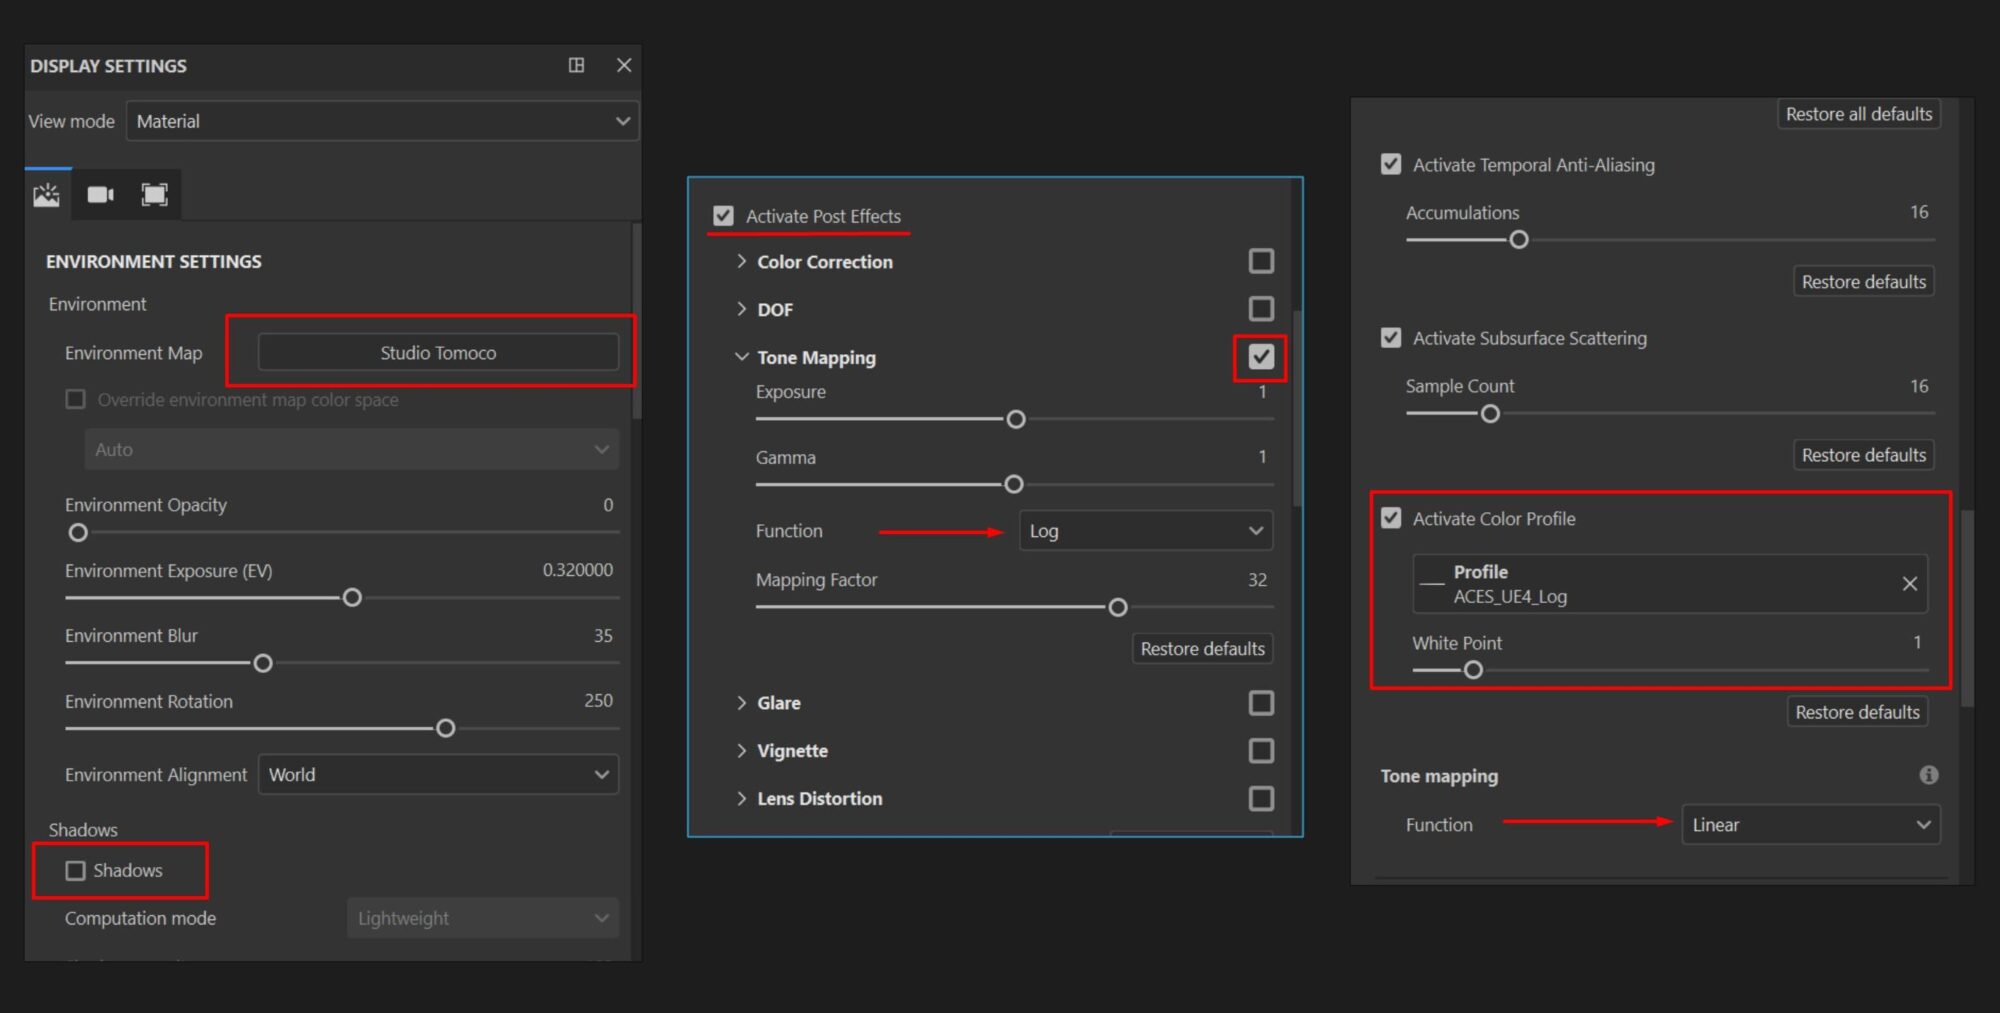
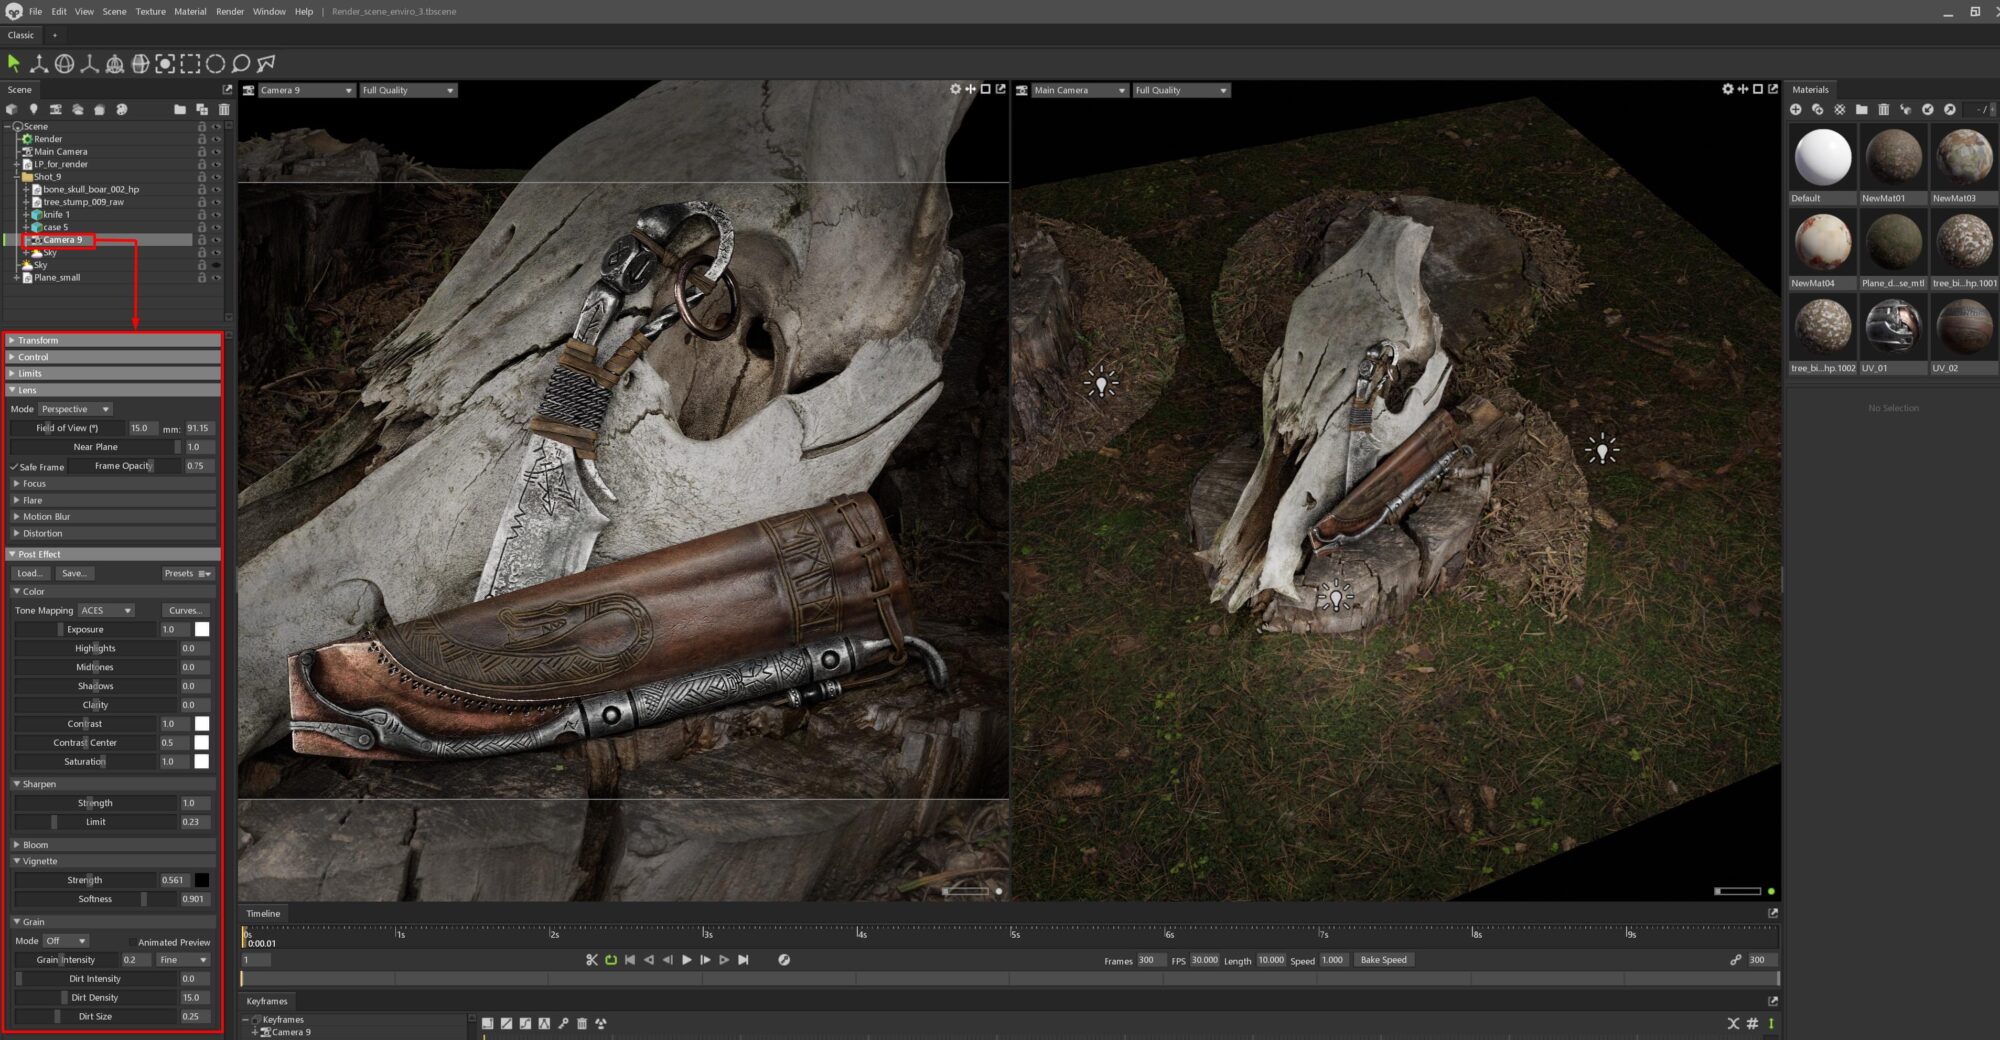
For the Environment Map, I used Studio Tomocco, with shadows turned off — this way, I could focus entirely on the materials without any influence from lighting.
Under Post Effects, I enabled Tone Mapping and set it to Log.
Below that, in the Color Profile section, I selected ACES_UE4_Log while leaving the built‑in Tone Mapping set to Linear.
This gave a softer light response and a more neutral color balance, which made it easier to judge the materials without any unwanted distortion.
Leather Texturing
I started by creating two base layers for the leather. I downloaded several textures from Textures.com and tested them to find a good starting point.
- The first layer used Base Color, Roughness, and Normal from one texture.
- The second used only Base Color, focusing on orange‑tinted details for more natural variation.
I applied an HSL filter to both layers to fine‑tune the tones and better match my references and intended mood.
Next, I added height details using three layers focused on the Height and Normal channels, two based on downloaded leather textures, and one with a scratch generator for subtle wear.
It took a bit of time to dial in the right texture and settings, but by this stage, the leather base was ready.
Color, Roughness Variations & Wear
The next step was working on color and Roughness variations. I used a mix of approaches here, including revisiting the downloaded leather textures to bring in natural tone variation that’s typical for leather.
I also applied standard grunge maps, adjusted color values, and experimented with blending modes and layer opacity.
A key part of this stage was using AO and Curvature maps. They helped add depth, highlight specific areas, and make the leather feel more “alive.”
These maps also played a major role in adding dust, dirt, and darker zones, based on the reference images I was following.
Final Detailing
After that, I moved on to the fine details. I created two separate folders:
- One focused on detail using generators
- Another built with layers containing various grunge maps
Adding wear and refining edges is honestly one of my favorite parts of the process. It always helps bring more realism and character to the material, no matter what the surface type is.
For this asset, I used:
- A Curvature‑based generator for soft, general wear and surface smoothing
- An Edge Wear generator for more aggressive, sharper edge highlights
To keep things believable, I went in with a Paint Layer and manually cleaned up any areas where the wear looked unnatural or overdone.
In the final folder, I added small details like dots, scratches, and streaks.
Once again, I used a mix of grunge maps, color variations, blending modes, and roughness values, all to give the leather a strong, expressive final look.
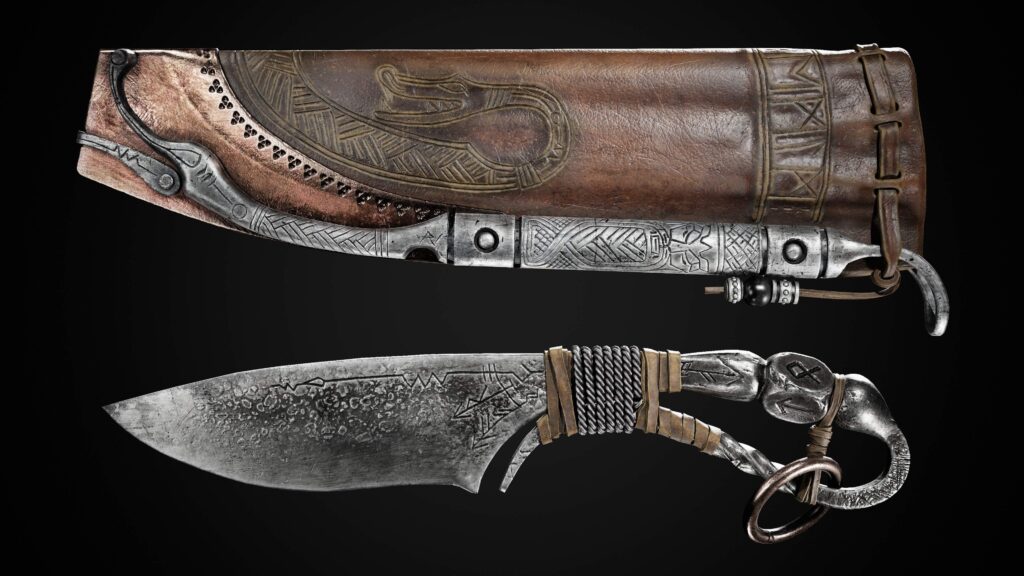
Texturing the Knife & Metal Parts on the Sheath
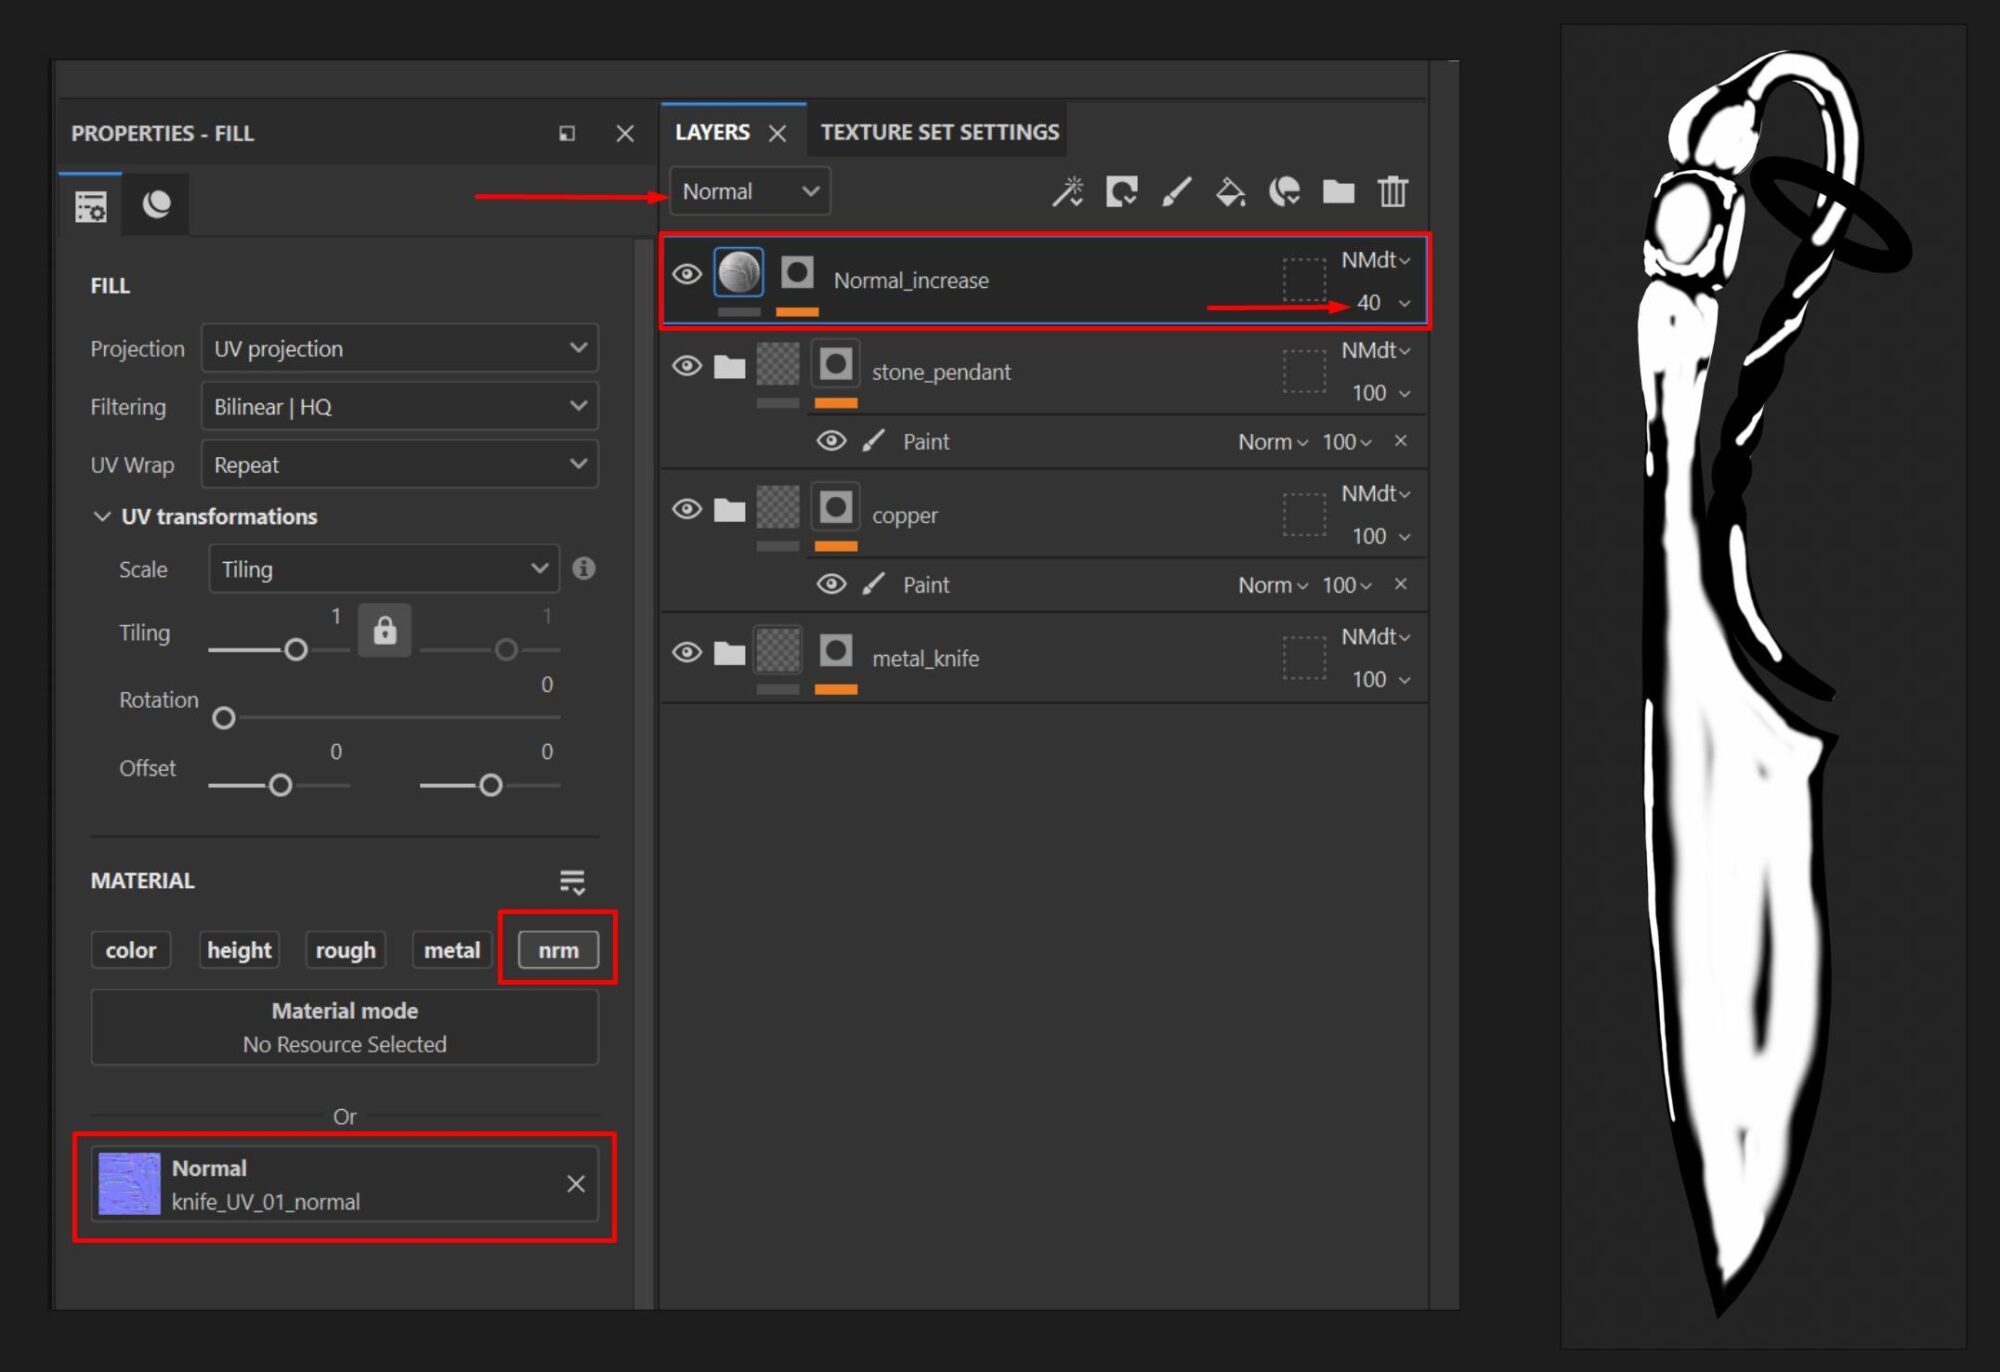
Texturing the knife started with a small technical issue. I had likely used too few polygons for the high‑poly mesh in ZBrush, while still adding a lot of fine surface detail.
After baking in Marmoset Toolbag, that detail came out too soft in Substance Painter, looking slightly blurry, which I didn’t notice right away.
To fix it directly in Painter, I added a Fill Layer above everything, enabled only the Normal channel, and dropped in the baked normal map.
This allowed me to manually adjust the intensity and bring back sharpness where needed.
Using a black mask and a Paint Layer, I also cleaned up certain areas, like the edges, where the normals looked too strong or caused unwanted artifacts.
Aside from that, the metal texturing workflow was quite similar to the leather.
I started with two base layers:
- One was a simple dark Fill Layer
- The other used a selected metal texture that brought in variation and a more believable surface feel
This combination provided a solid starting point.
Next, I added light edges in two styles:
- thin and sharp
- soft and broad
Then I focused on color and roughness variations, using generators and grunge layers to match the look I had in my references.
I also created a separate folder for damage, dents, and scratches, which helped add more wear and visual interest to the surface.
Texturing Additional Elements & Optimization
I textured the smaller details using the same principles but with a faster, simpler approach, keeping in mind that the focus on renders would stay on the larger shapes.
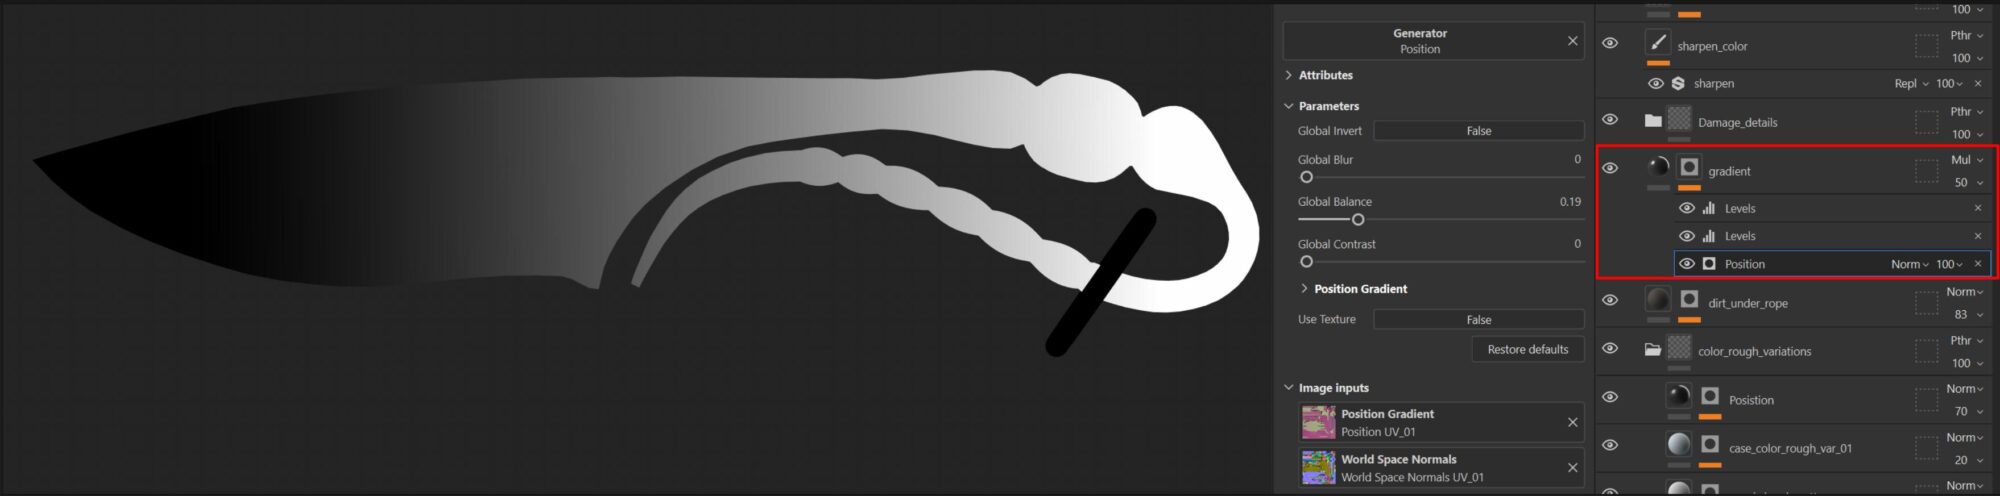
I used a shared material for the knife and the metal parts of the sheath, adding unique layers like custom gradients.
For the knife and sheath elements, I created separate gradient setups using a Position Map combined with a mask, generator and Levels, allowing for precise control over the darkened areas.
For the yellow leather straps, I reused the existing leather material as a base, copying the key layers and adjusting the textures and generators for the new parts.
This workflow helped save time without losing the overall style and expressiveness of the asset.
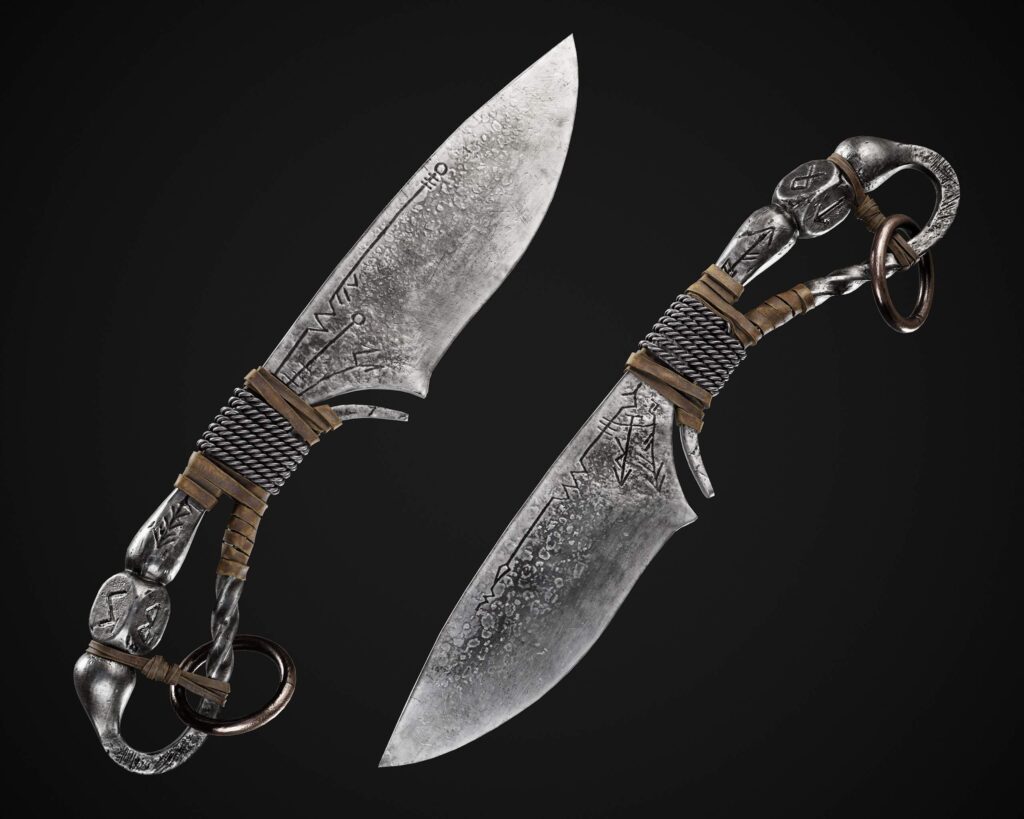
Rendering
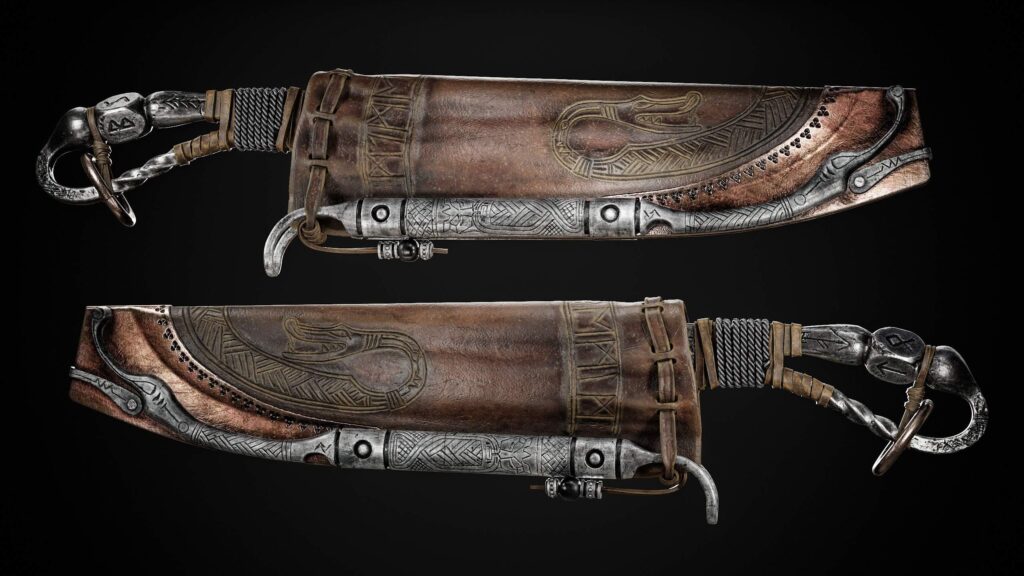
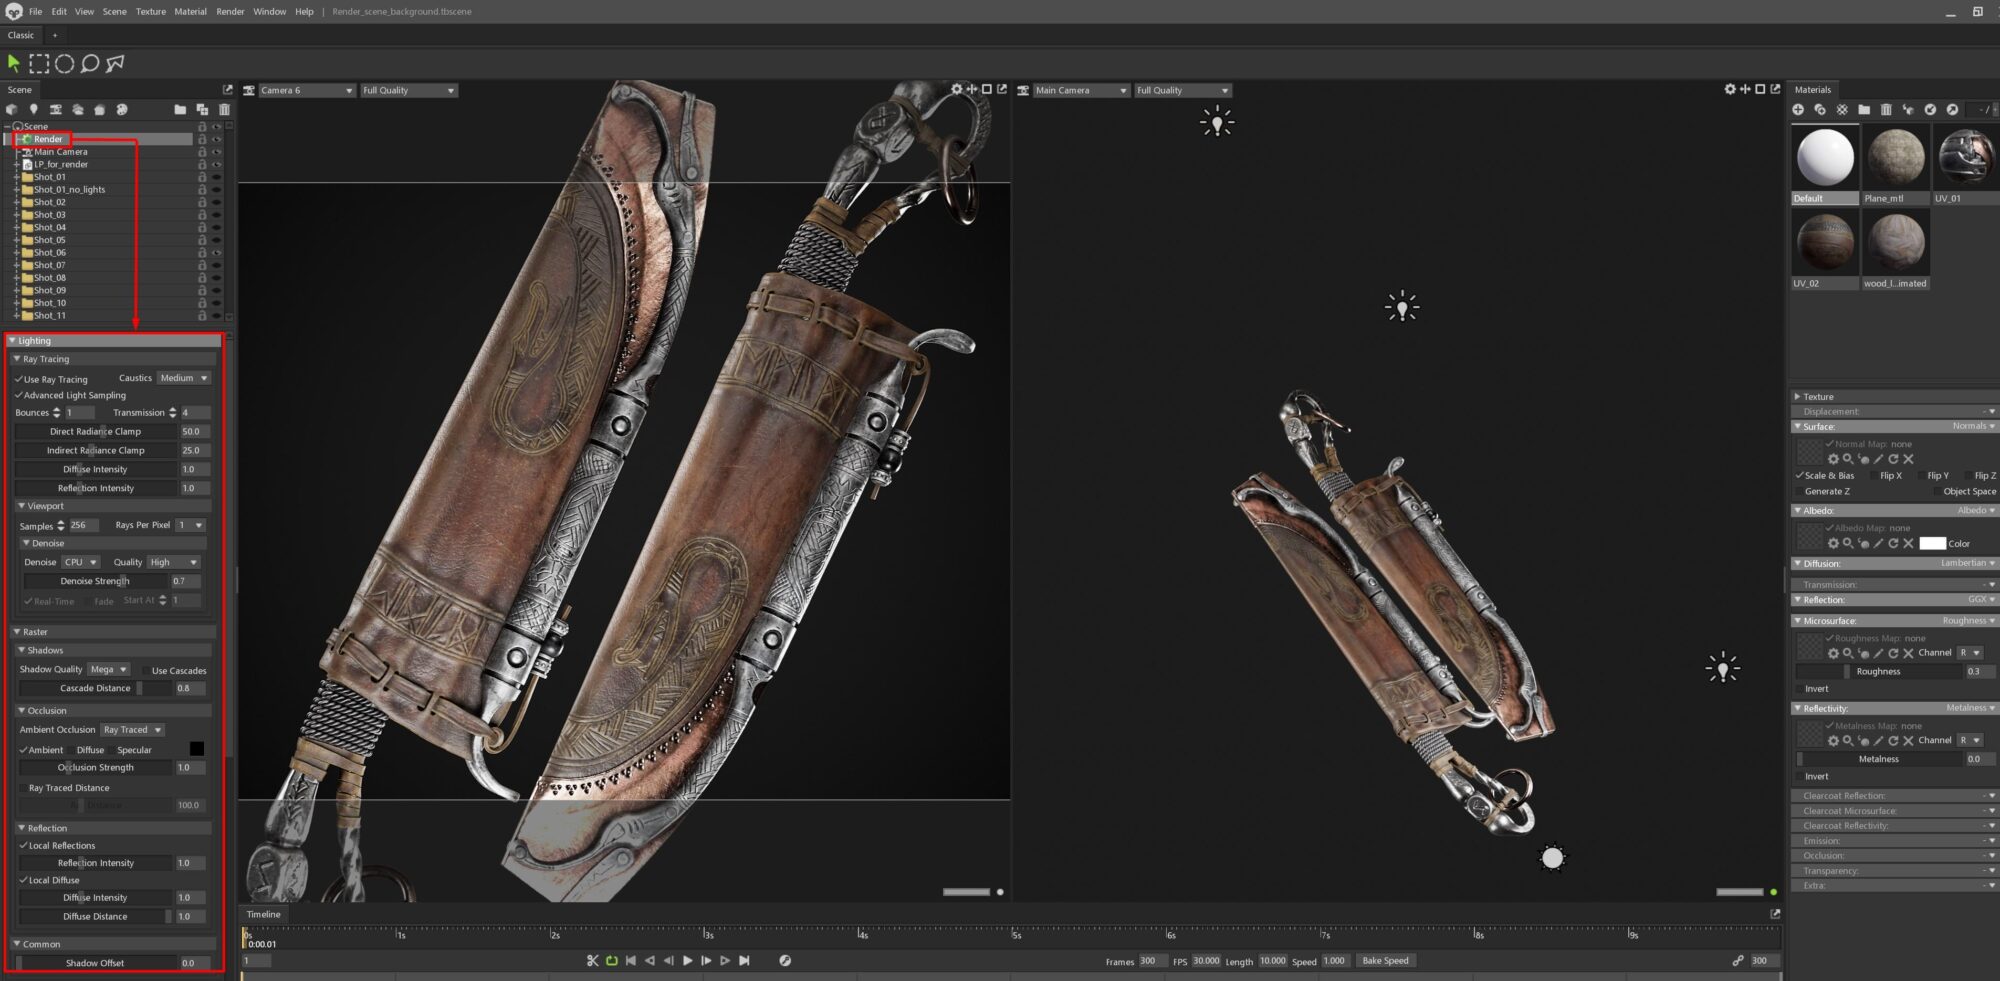
The final renders were done in Marmoset Toolbag, with Ray Tracing enabled — this provided more realistic lighting, especially for reflections, shadows, and materials, without needing extra post‑processing.
Some renders were done on a plain background using HDRI and some extra light sources:
- A Spotlight or Directional Light is placed behind the model to highlight the silhouette.
- An Omni Light for emphasizing specific areas.
For scene renders, I used a few assets from Textures.com and made an effort to rely on HDRI lighting only, which helped maintain a natural look across both the model and its surroundings.
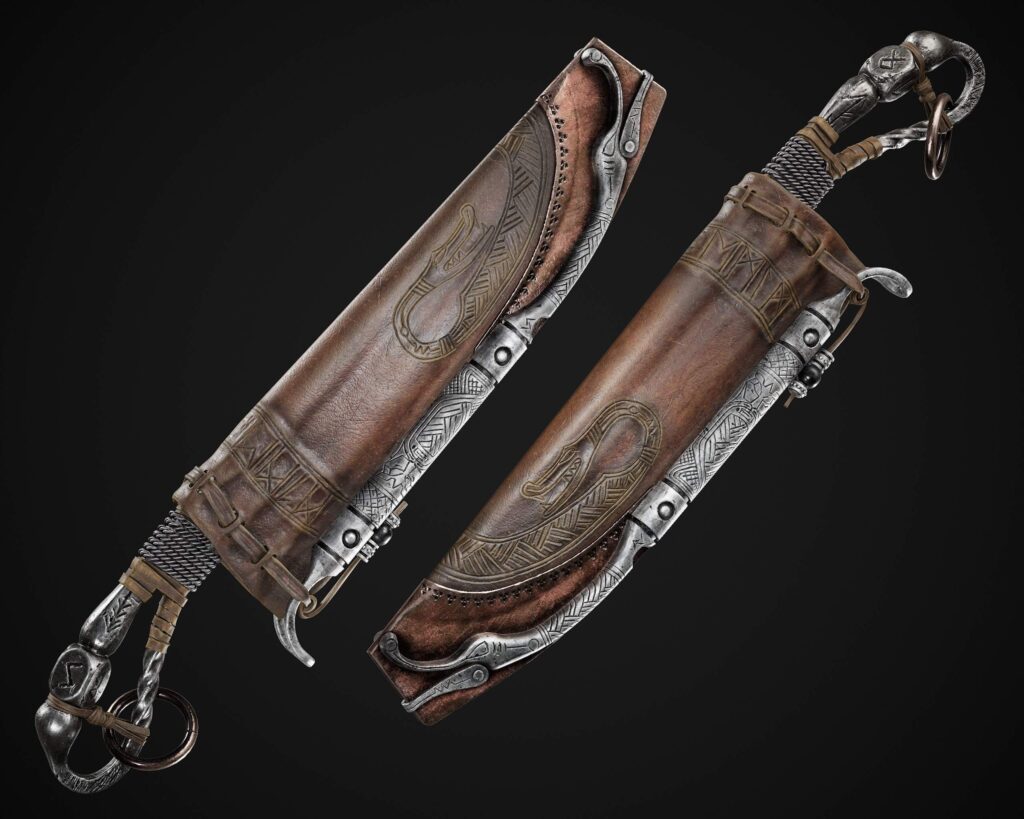
For each camera angle, I rendered several versions, experimenting with light setups, HDRIs, and camera settings, then selected the most successful frames.
I initially planned to do full post‑processing in Photoshop (Camera Raw Filter), but in the end, I only used it for the final high‑res vertical render, where I slightly boosted Clarity, Contrast and Texture to enhance the details and overall visual impact.
Conclusion
Thank you for reading all the way through! I hope this article was helpful or at least interesting to someone out there.
For me, this project was a reminder of how important it is not to be afraid of trying new things and setting challenging goals. Even if the result isn’t perfect, the experience and understanding you gain along the way are the most valuable parts.
I also realized once again how much the final presentation matters; good rendering and thoughtful presentation really help showcase the work you’ve put so much time and effort into.
Big thanks to Games Artist and especially Alfred for the opportunity to share my project and process, and to everyone who supported me and gave feedback along the way!
Read more articles
You might also like these articles.