Introduction
Hello fellow Artists!
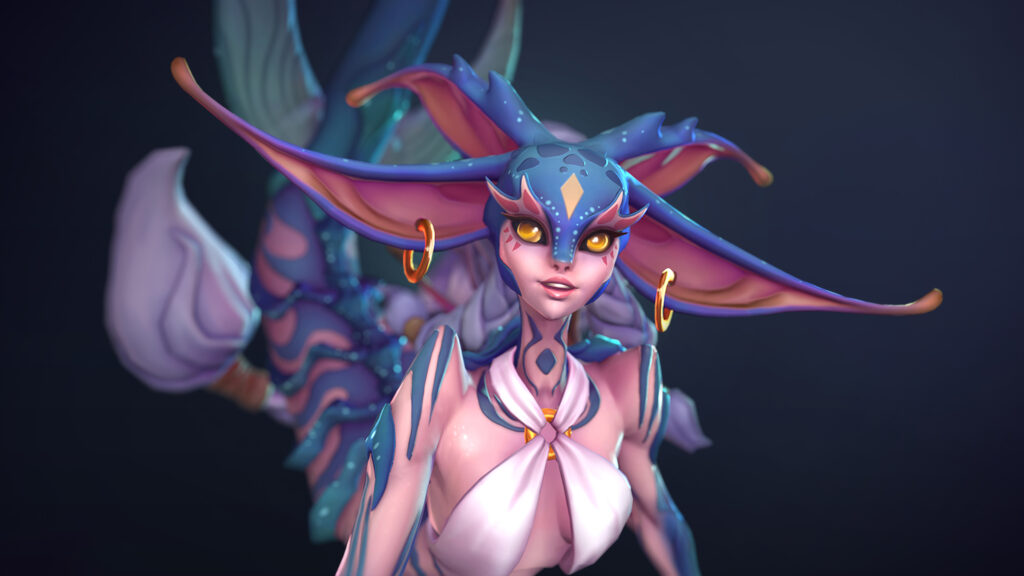
I am Lennart Berger, a character artist from Germany currently working on a range of projects for Airborn Studios.
Most recently I started working on Overwatch 2.
Goals
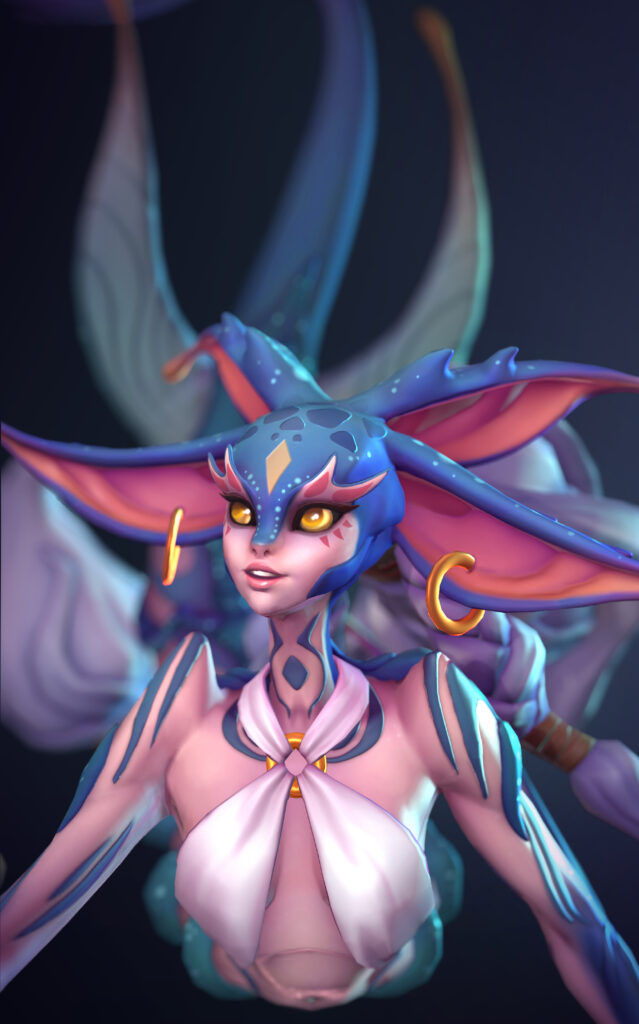
This project was my entry for the Dragons Rise Artstation Challenge.
With that in mind, I had a strong motivation to finish a personal project, something I haven’t done for almost 2 years now. A struggle many of you may be familiar with.
The Challenge
As with every ArtStation challenge the production phase starts after the concept phase, and all artists participating in the production phase are allowed to choose from the concepts submitted for the preproduction phase.
Choosing a Concept
It’s often a hard choice as there is an overwhelming amount of great concepts every year.
Personally, I chose to search for a concept that not only speaks to me but also isn’t being tackled by a ton of other people, that way I feel like I can concentrate on my take on the concept as opposed to competing with many other people’s interpretations on the said concept.
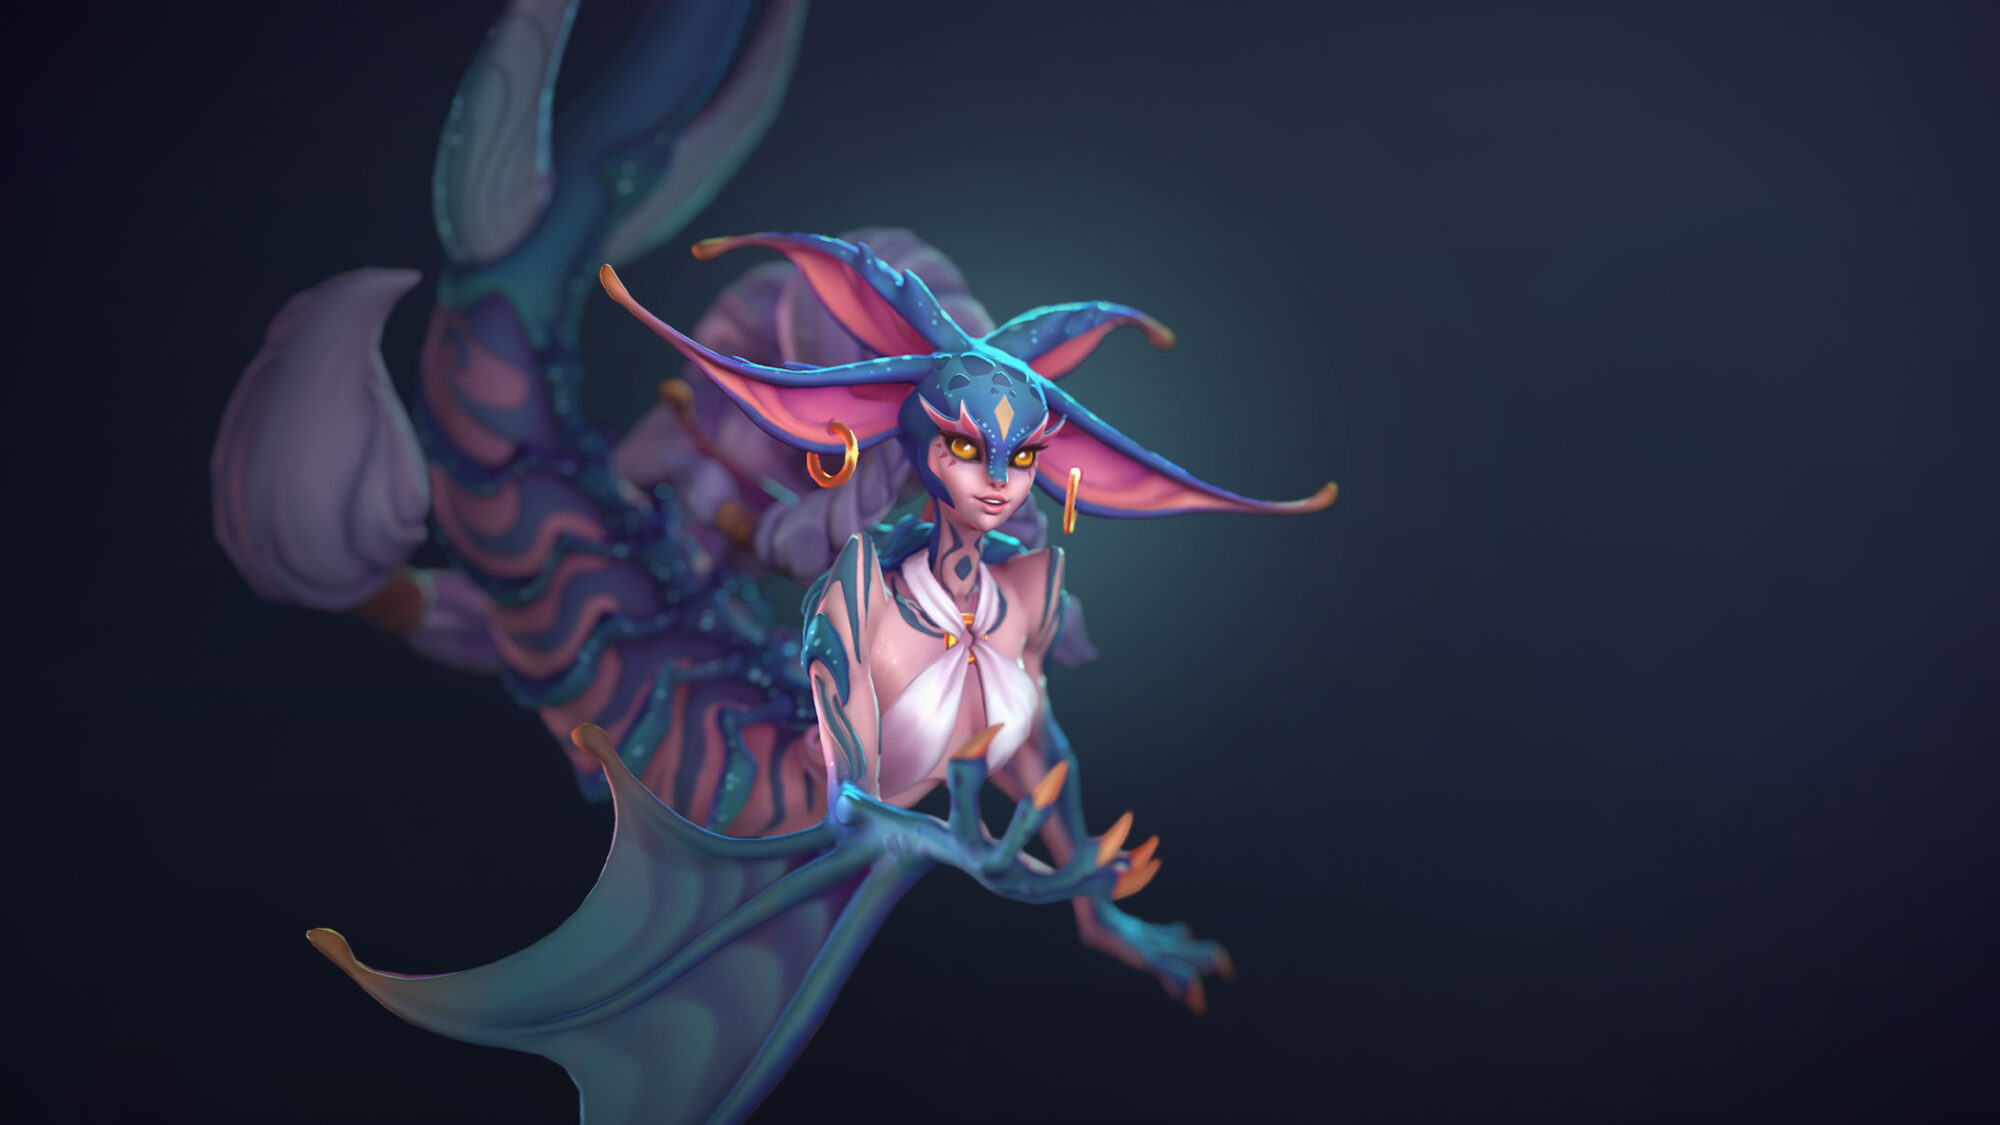
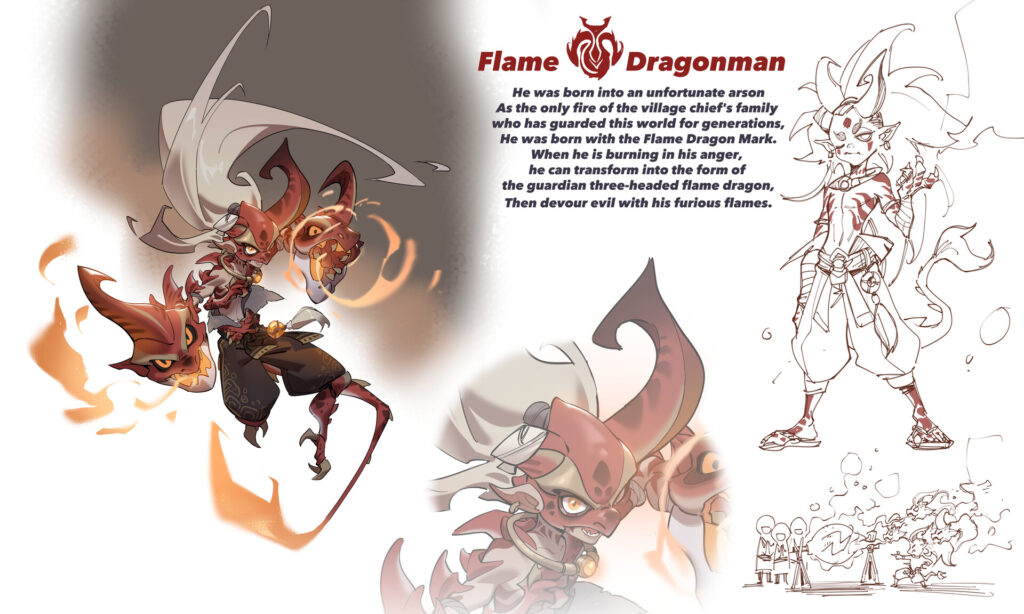
After a couple of days of observing the concepts and how popular they are, I settled on these 2 by – Lan.
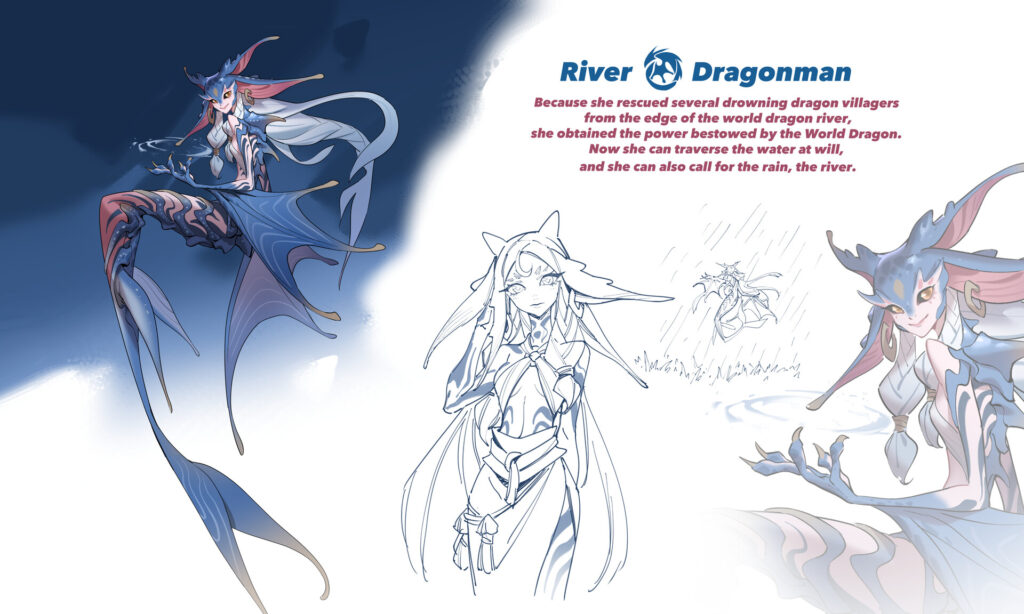
I love them equally but considering the time scope of the challenge and the fact I worked full time next to the project I went with the River Dragonman as I figured it would be less work throughout the different production phases, allowing me to avoid rushing the project.
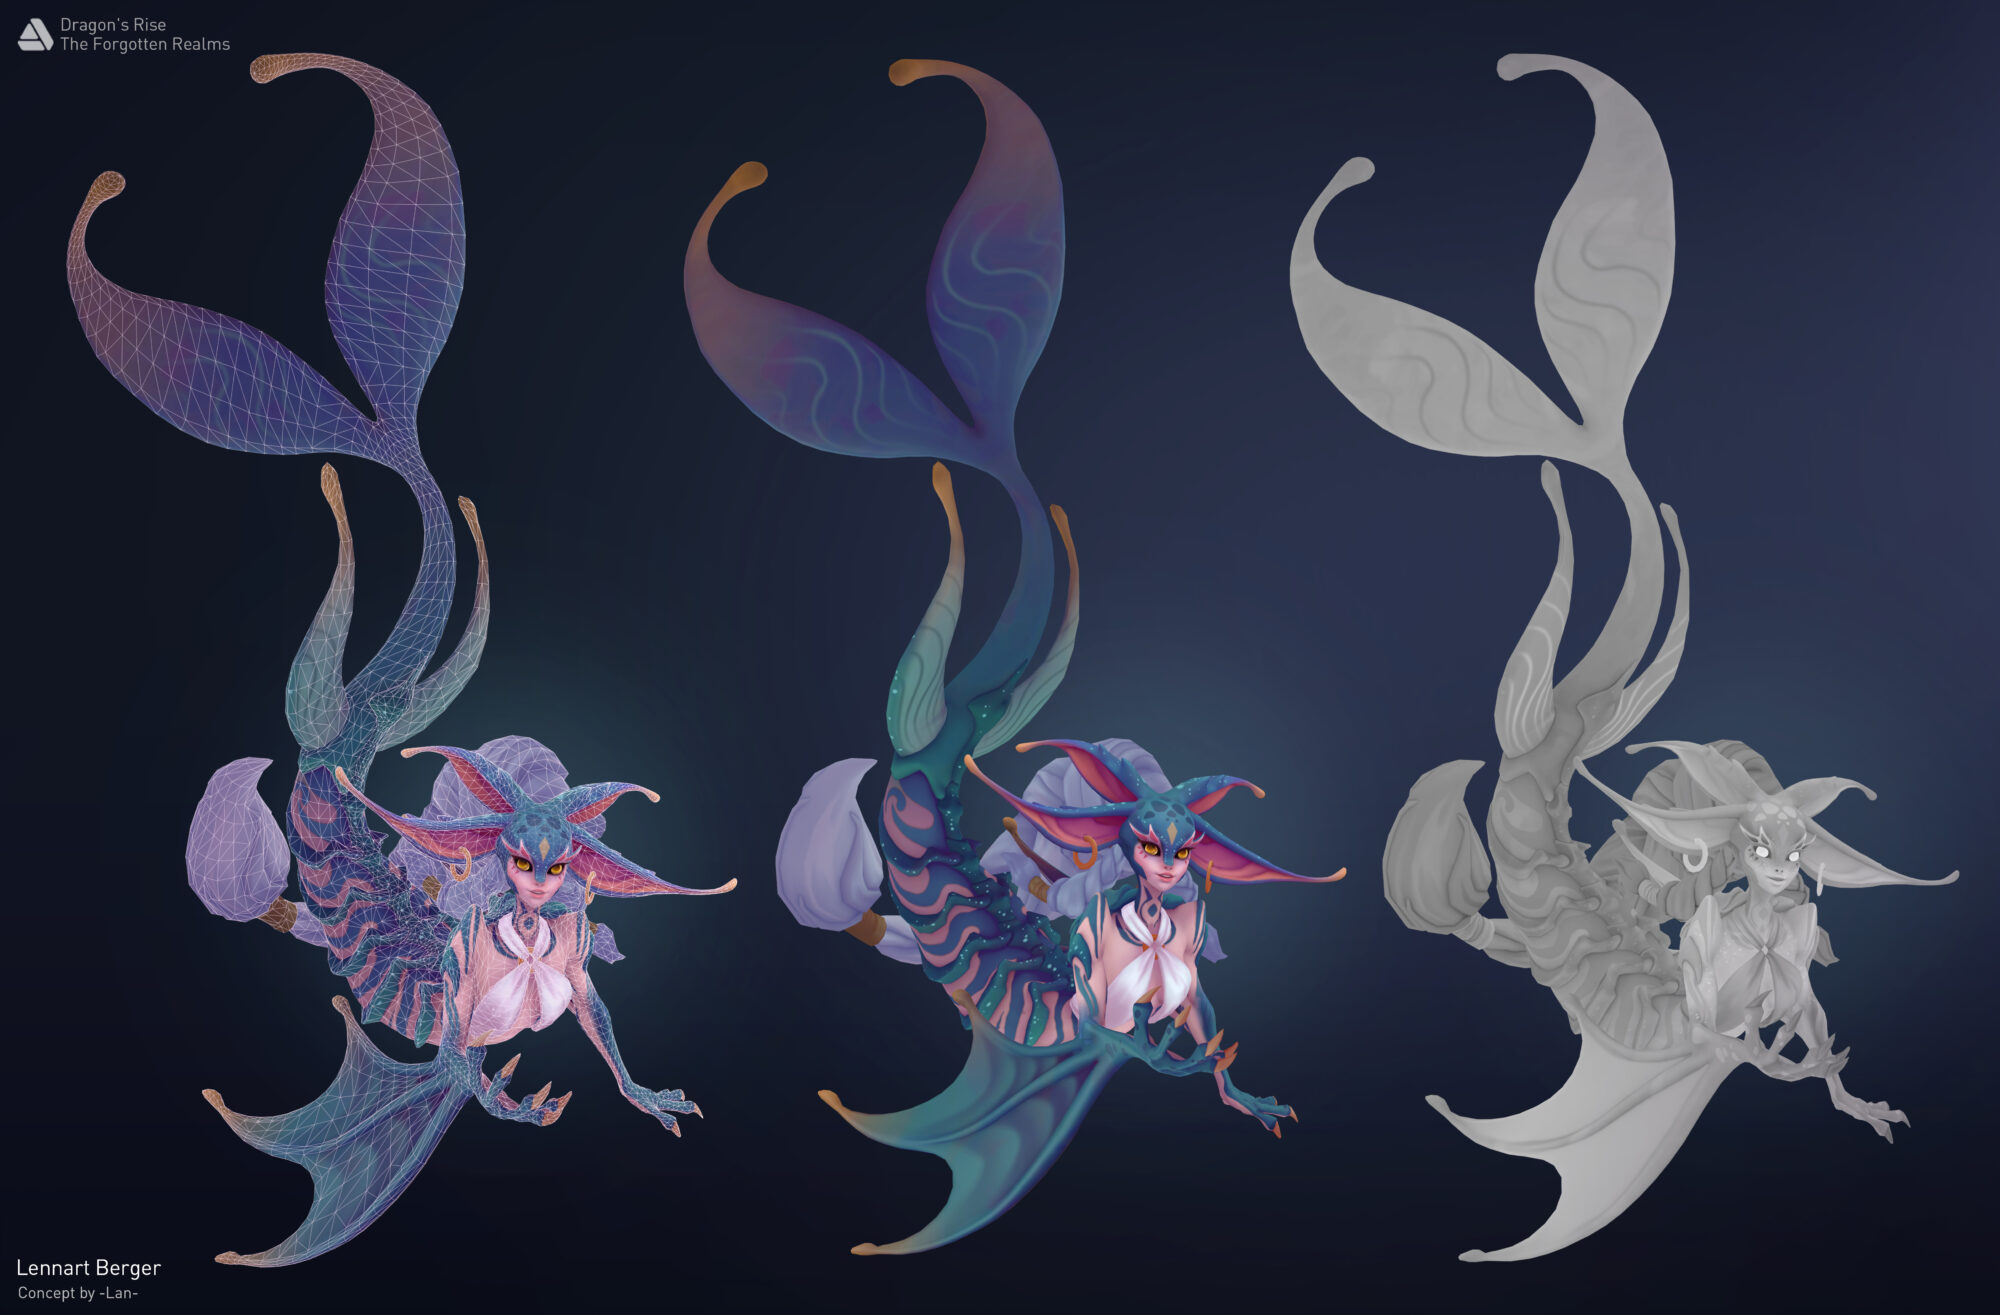
Starting with the Blockout
The blockout is the most important step to me, any mistake done here will carry through the entire project and probably grow in severity with each step. Thus I actually spent most of my time in this production phase.
Blockout and Highpoly often do end up blending together for me, as my highpolies most of the time are just lowpolies with some subdivisions.
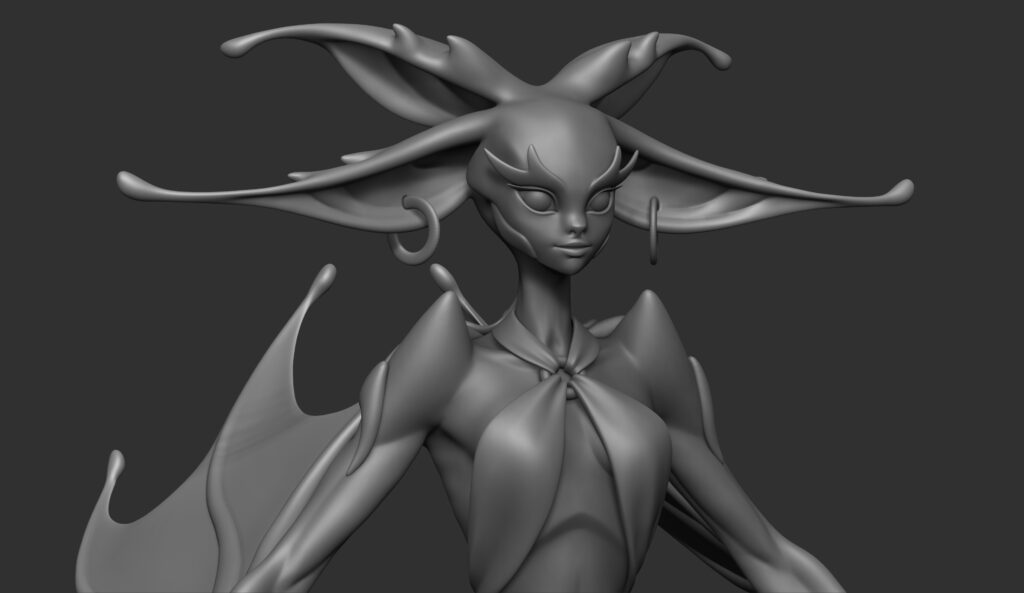
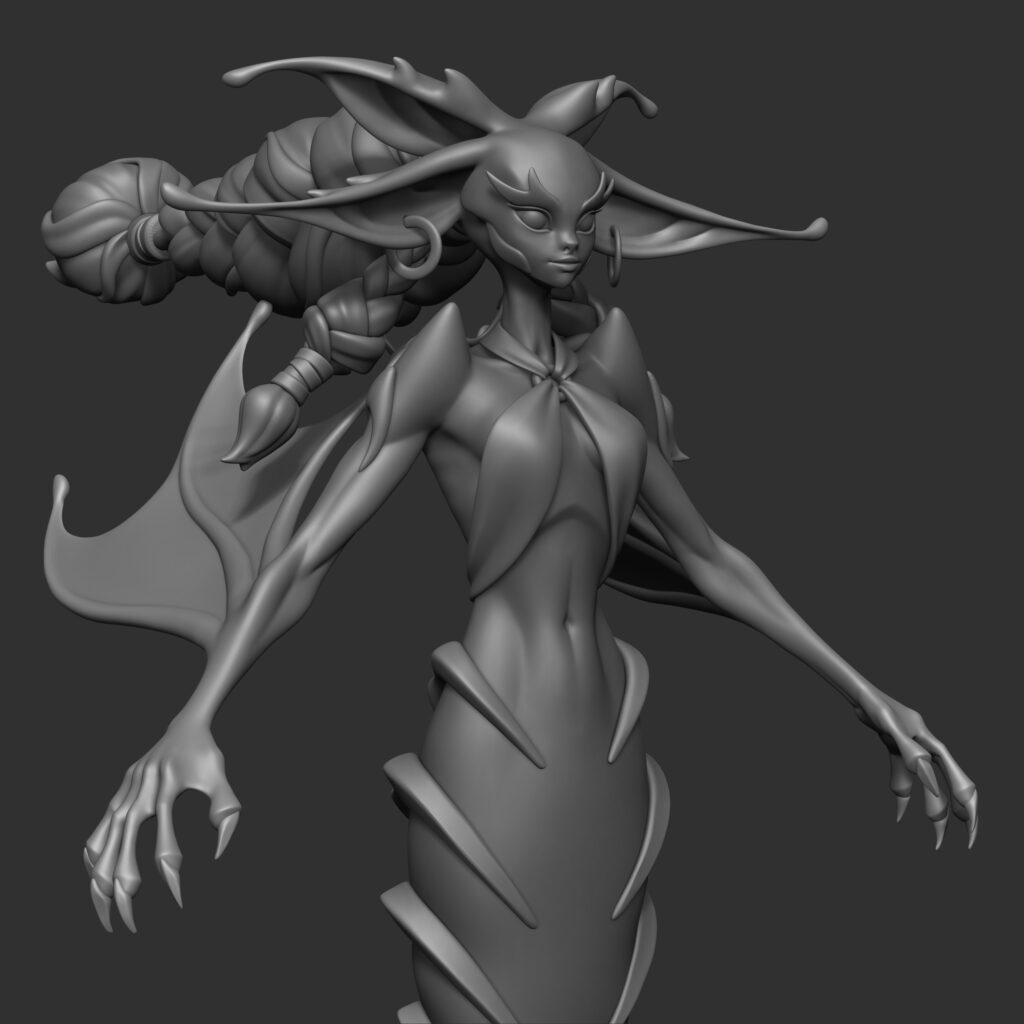
Highpoly
Entering the highpoly phase mostly consists of polishing everything up, which means I merge my blockout models and add some details that I want to be present in the sculpt.
Since I prefer stylized art over realistic I intentionally did not sculpt a lot of details here.
The fewer small details and noise your sculpt has the more glaring every unevenness and imperfection gets. Thus it is extremely important to keep everything as clean as possible. To achieve that I usually work rather lowpoly.
This way I can always smooth things out. I am also not afraid to ZRemesh or go in and retopo something like the head manually to make sure my topology is nice and clean.
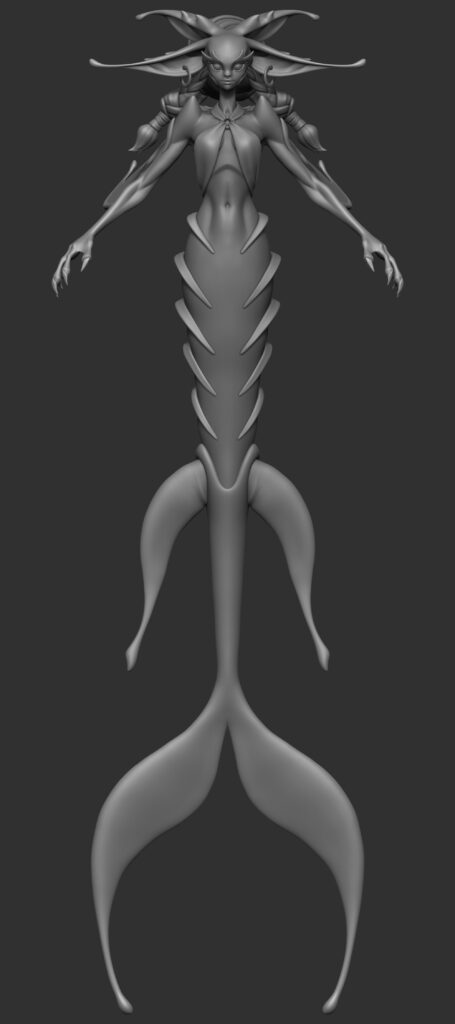
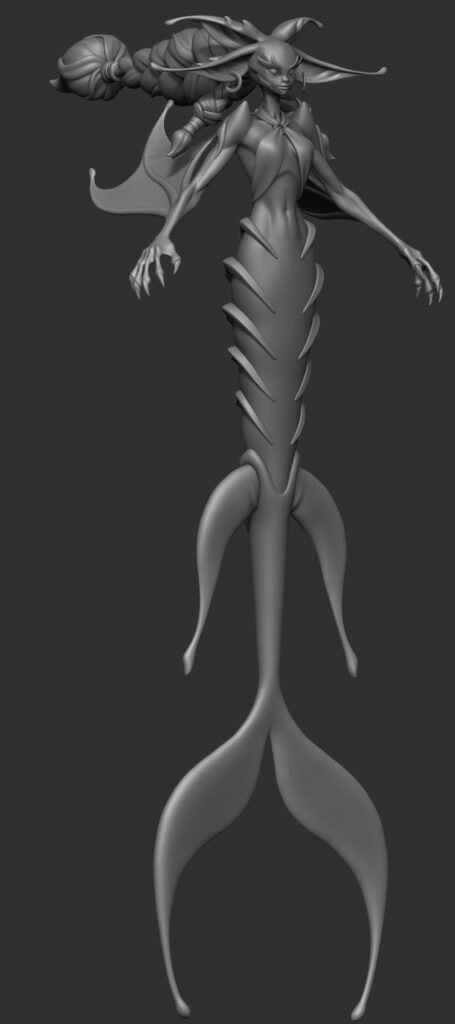
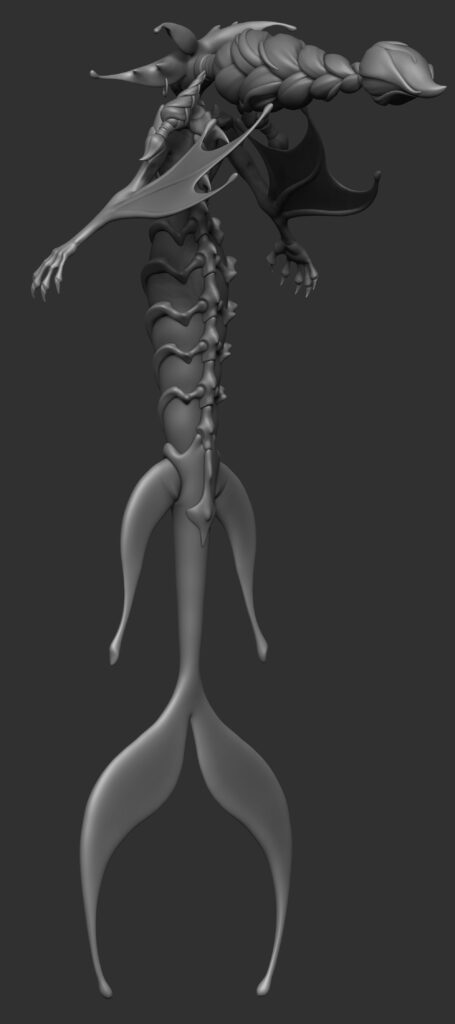
This is the highpoly I ended up working with:
Retopology
I do retopo in 3d coat, unfortunately, I went too lowpoly on this model, at least on the body, so I had to go in later to add some more geometry to pronounce the roundness. Don’t be like me , look at the silhouette of bent meshes ahead of time!
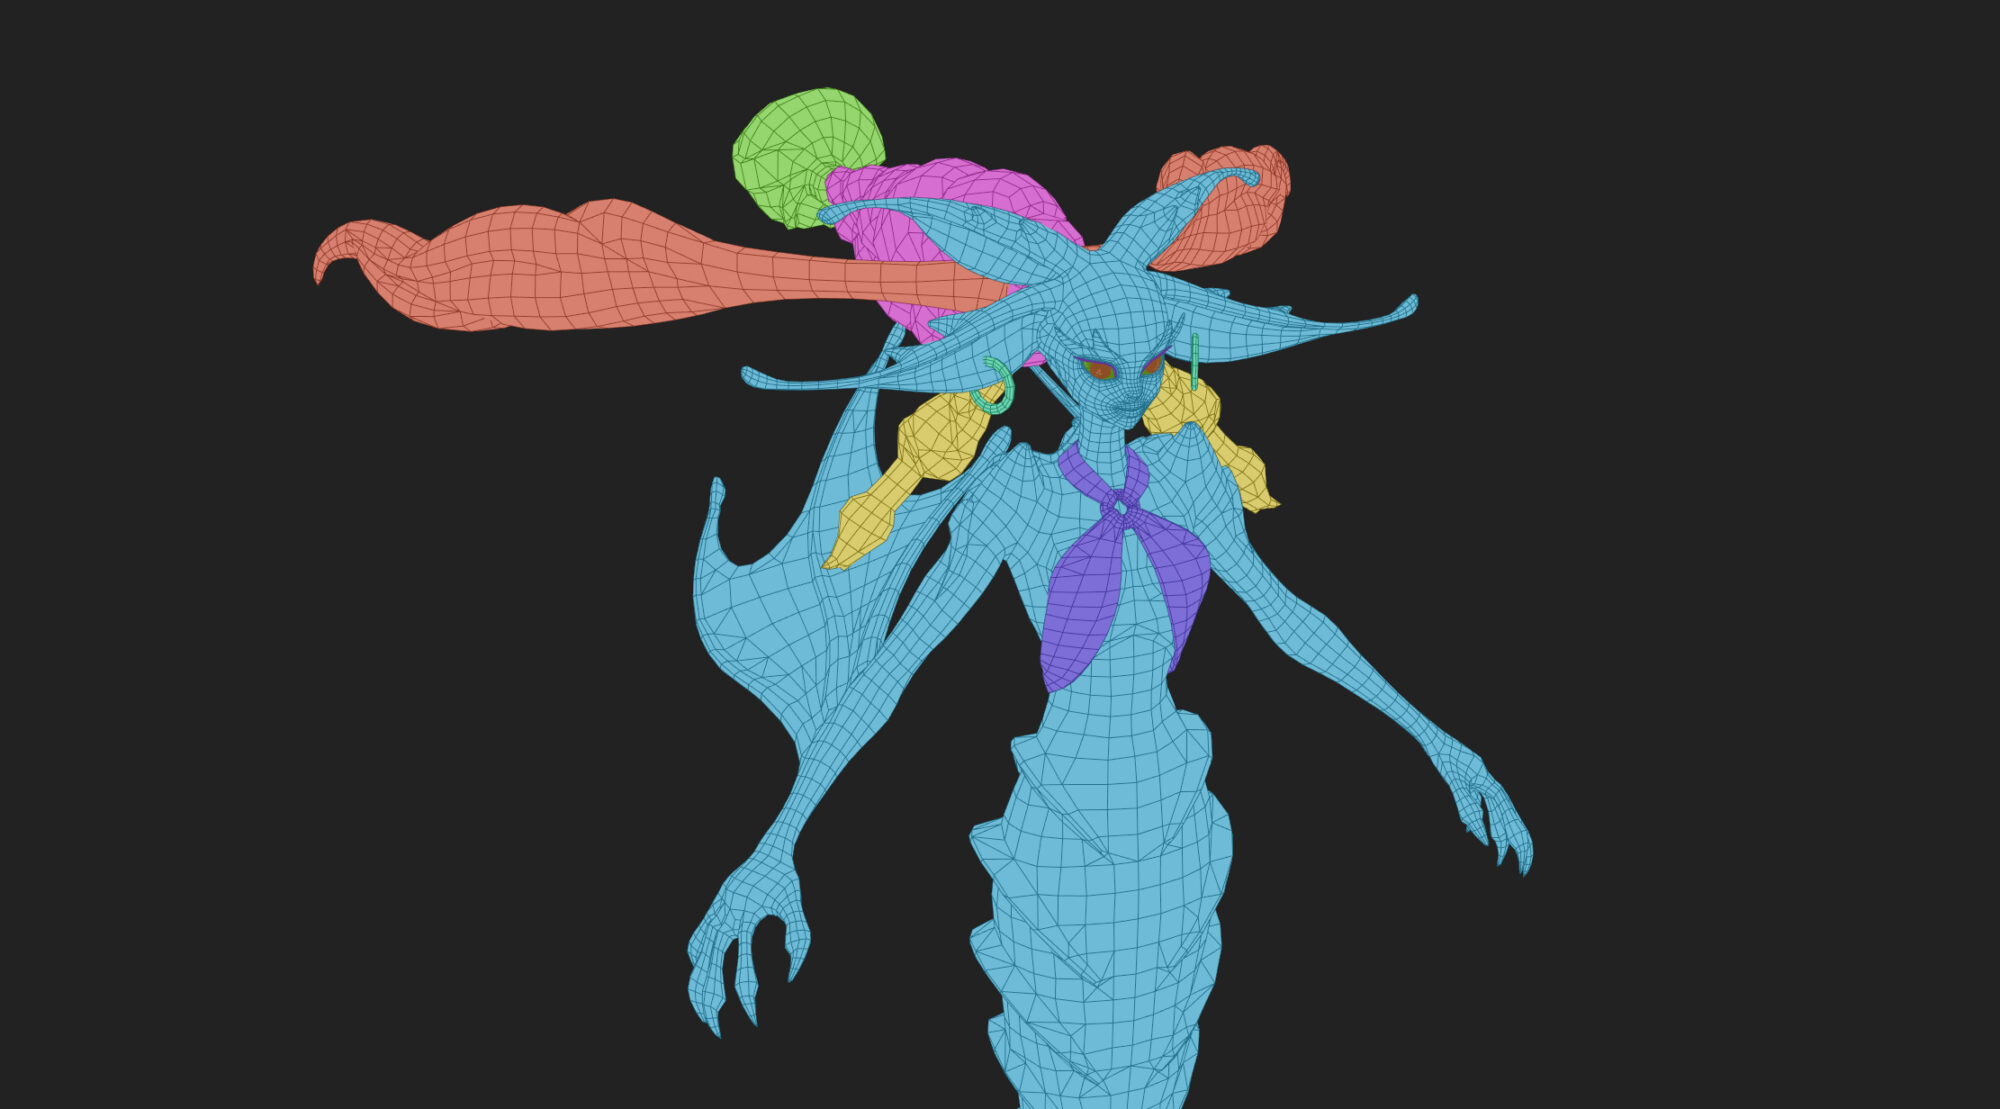
I try to think of this in my highpoly stage already but this is also where you set in stone what meshes will be combined. I try to avoid clipping lowpoly meshes where I can so I often tend to combine more than I keep things separate.
UVs
For the UVs, I make sure my Islands are straightened. Altho this is irrelevant to this project, in actual production straightened uv islands will help with lodding. Other benefits are a clear
reduction in aliasing allows for lower resolution textures and easier time painting in 2d on the UV space , if that is something you want to do.
I’ll be honest, I was quite surprised at how much surface area this lady ended up with. Due to that, I went with 2 UVs, one for the body and one for the clothing and hair.
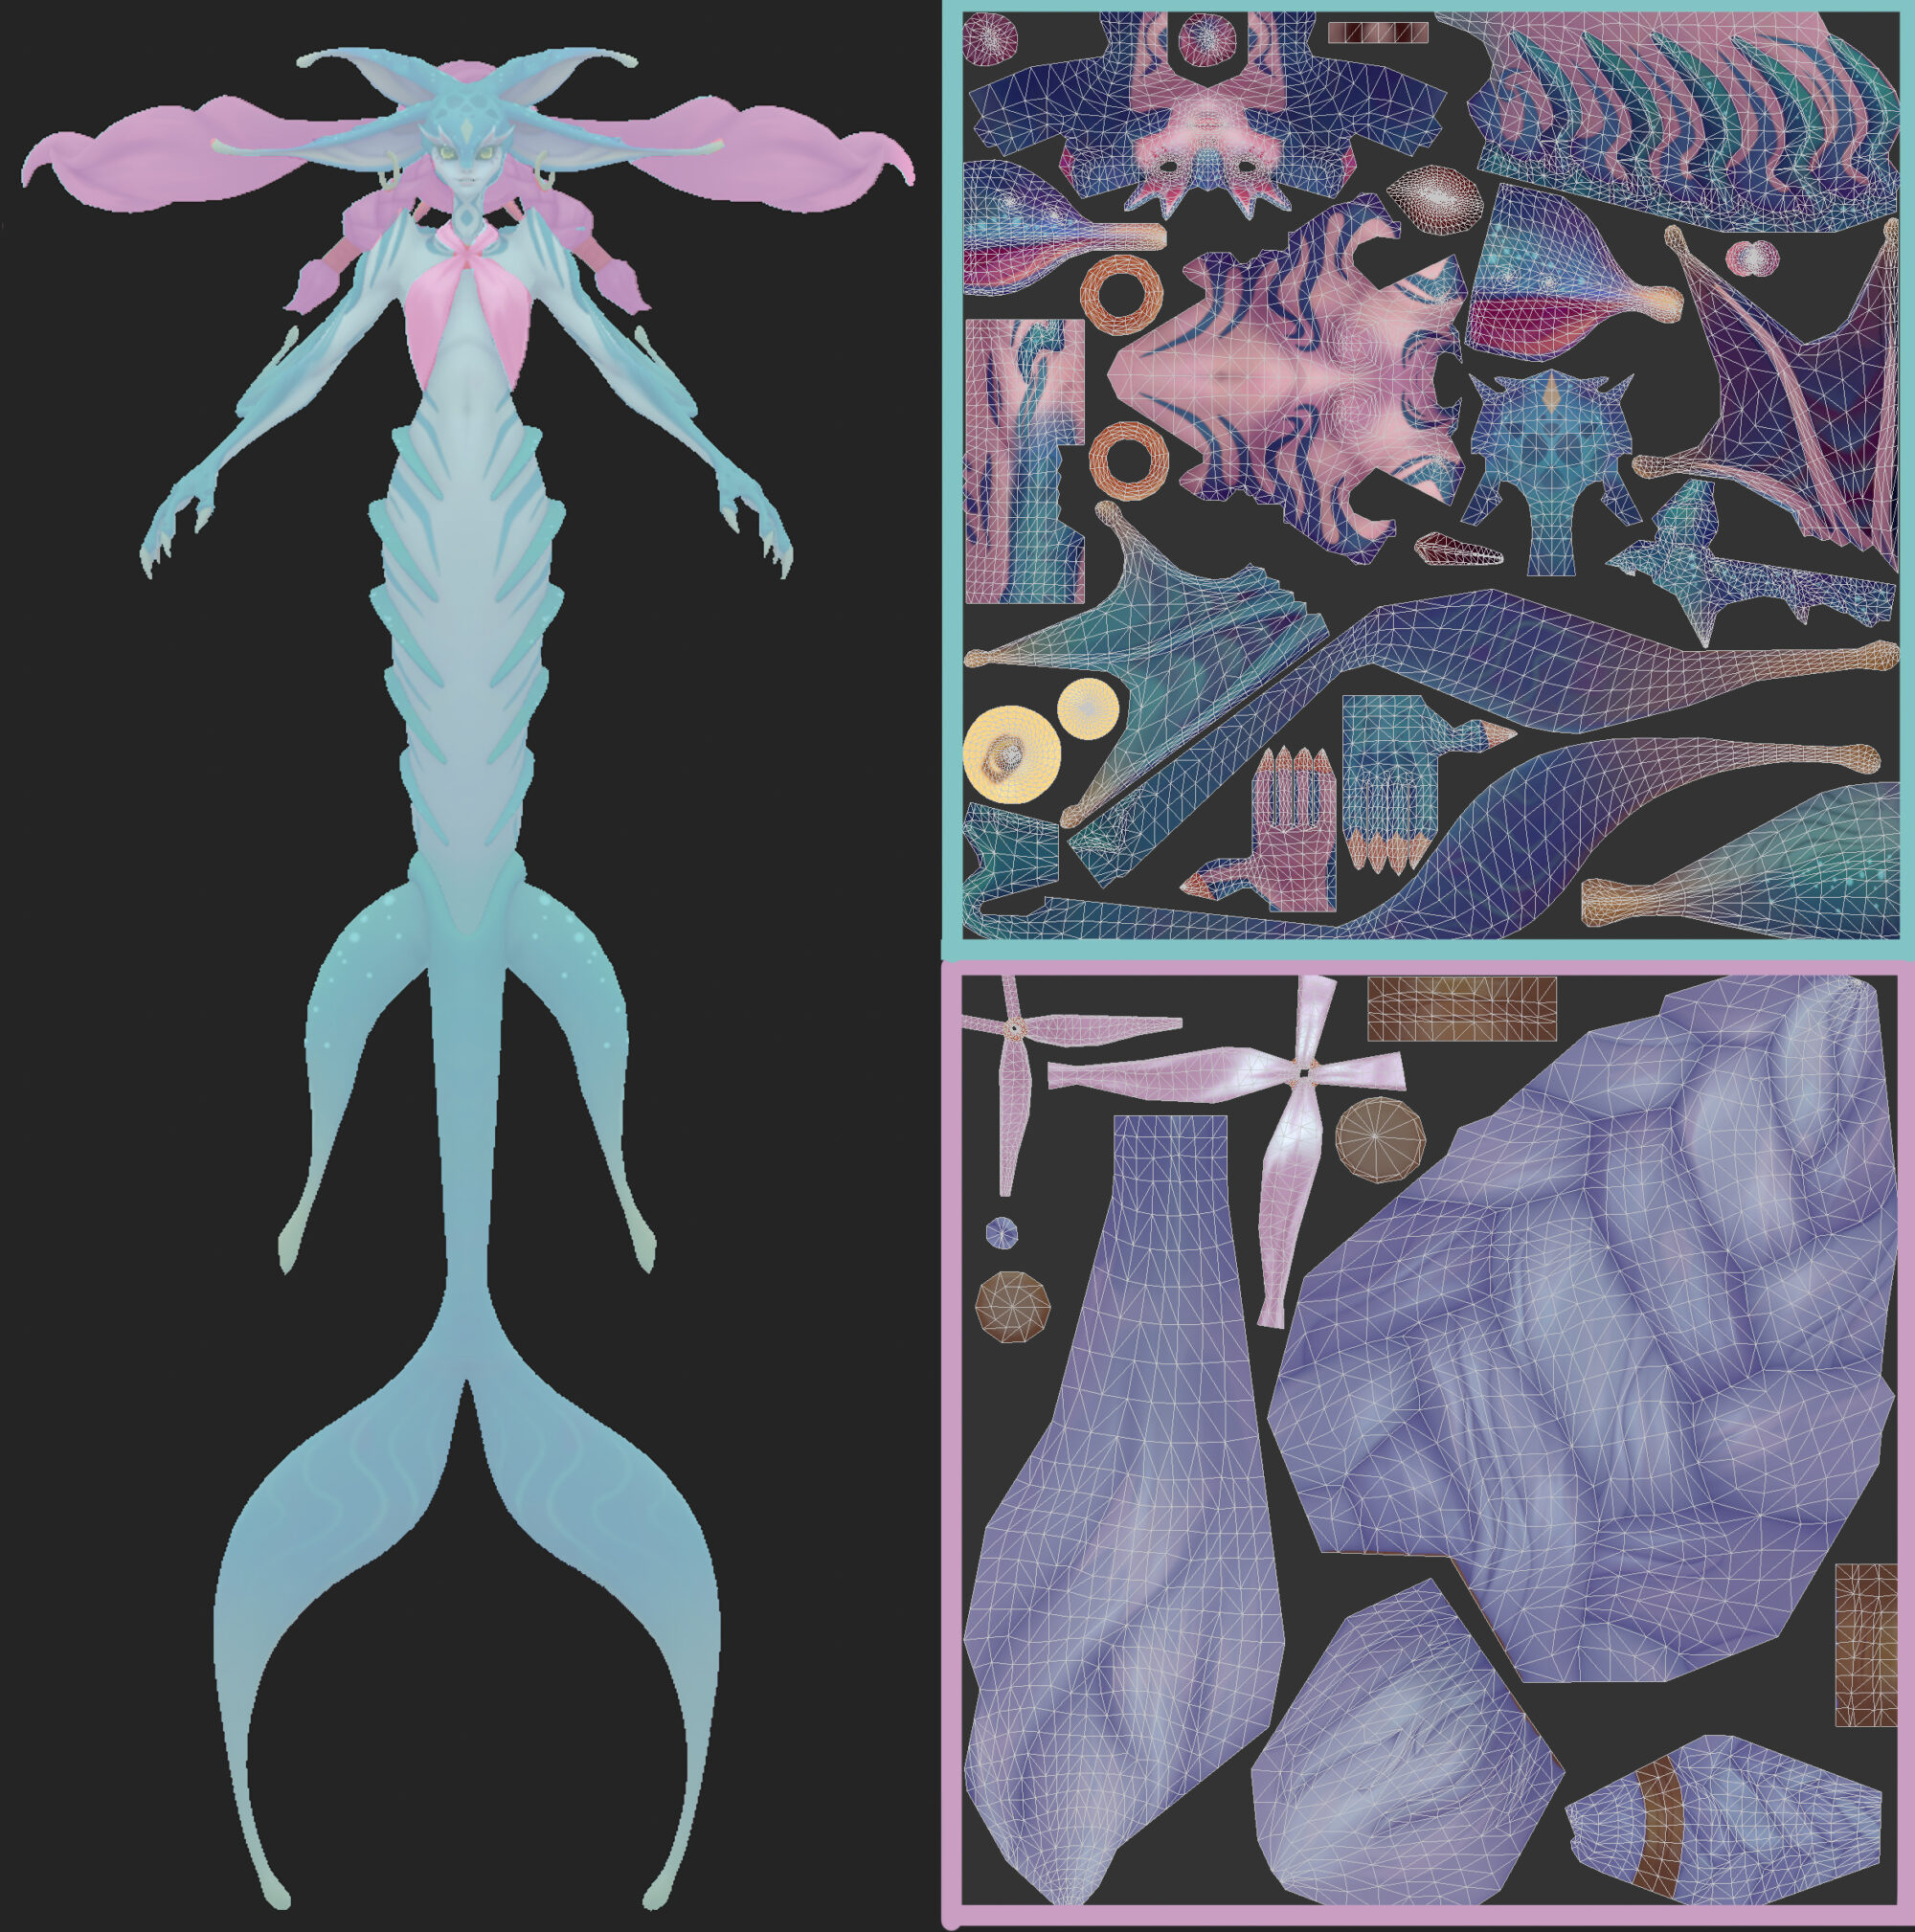
I dont like splitting my meshes into a lot of islands, seams are never pretty so have few of them and hide them well.
Texturing
With all the wrist-wrecking work of retopo and unwrapping out of the way, I baked my character in marmoset, luckily this went mostly obstacle free and let me continue right away with texturing, my favorite part of the pipeline.
To me, this is where things really start to shine. I like to implement colors that aren’t present in the concept and really push gradients wherever possible. This way every part of the model has a different hue and value.
Guiding the eye is key here.
To start off I put my entire focus on the diffuse map. I will work 50% of my texturing time only looking at the diffuse map and making sure I have the color gradients I want. A great way to push your colors and gradients to their limit is to completely overdo them and slowly go back from there.
If I do it the other way around I see myself ending up with less extreme colors and gradients.
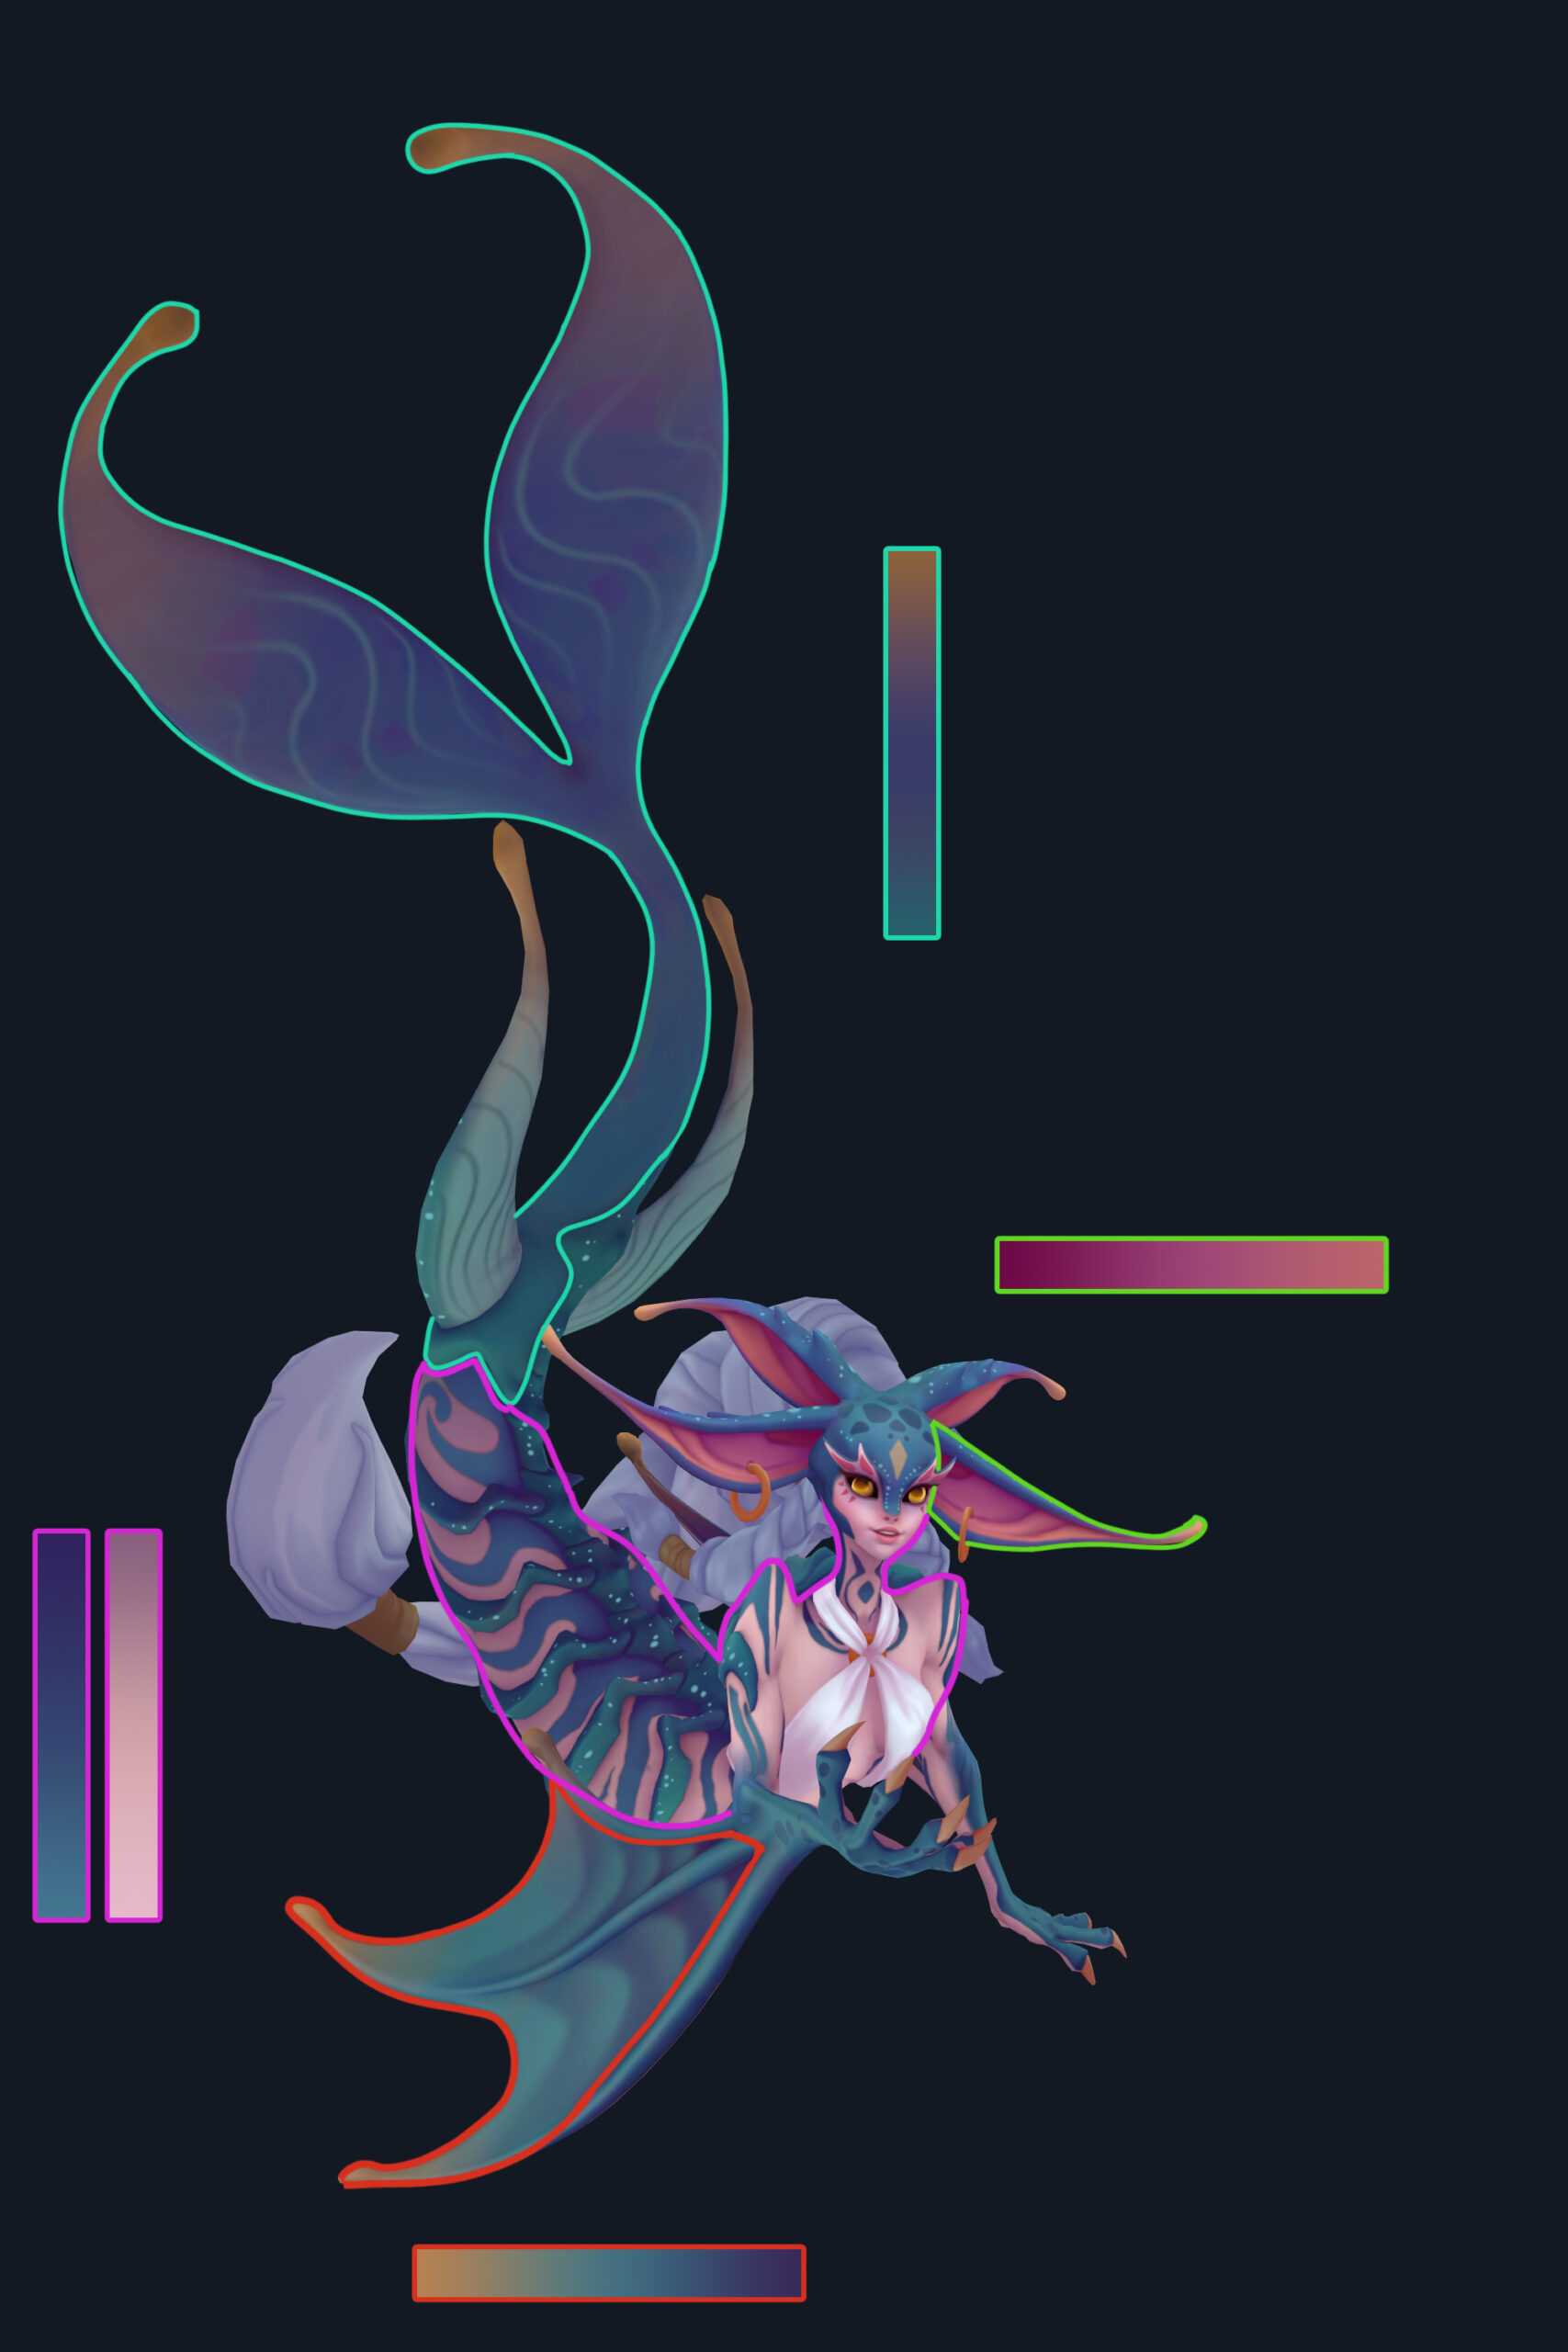
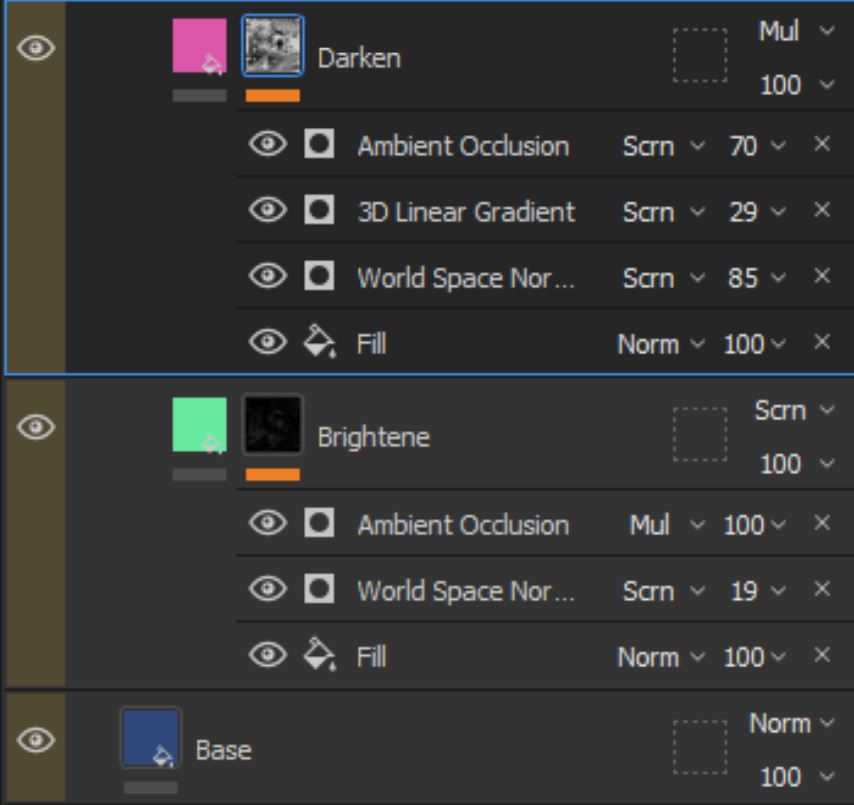
I always lay out my base the same way, but I change the intensity and color for each material on the fly.
These are the layers for the base of the body for example. I take the base color and decide on a highlight color that will be applied with a screen effect.
In this case, I only used the world space normal map to light upward facing planes of my model. you may want to use the cavity map here to pronounce edges but it didn’t work for me here. I also dim this effect in areas affected by the AO.
After that, I darken the base color with my world space normal, a top-down gradient and once again the AO.
I do this for every piece of the character to get a feeling for the whole piece, afterwards its just tweaking and adding small details.
From there on I add details starting from large to small.
Once I feel like I got everything in place, I am pleased with my colors and gradients. I start
working in lit mode. I usually go over all my materials and add a base roughness and specular/metalness where I see fit.
However, I still don’t put a lot of work into those yet as the next step is to export my mesh into the engine of choice, in this case, marmoset.
I chose marmoset because time started to run short and a complete setup in Unreal Engine would take me significantly more time. But given no deadline, I would have gone with Unreal Engine to allow for some creative shader work. Once the base scene is set up I start tweaking material properties.
This is a constant back and forth, but it’s necessary as the Substance Painter viewport can be quite deceiving from my experience.
In the end, my goal for the other maps is to enhance the colorful and vibrant diffuse map.
These are my final Maps:
Presentation
The presentation, it’s a lot of trial and error for me. First off, a pose is needed, otherwisee, the model just looks dead. I ended up creating a quick and dirty rig in 3dsMax for a rough posing, followed by a loose cleanup pass in Zbrush. Don’t forget to get references for poses!
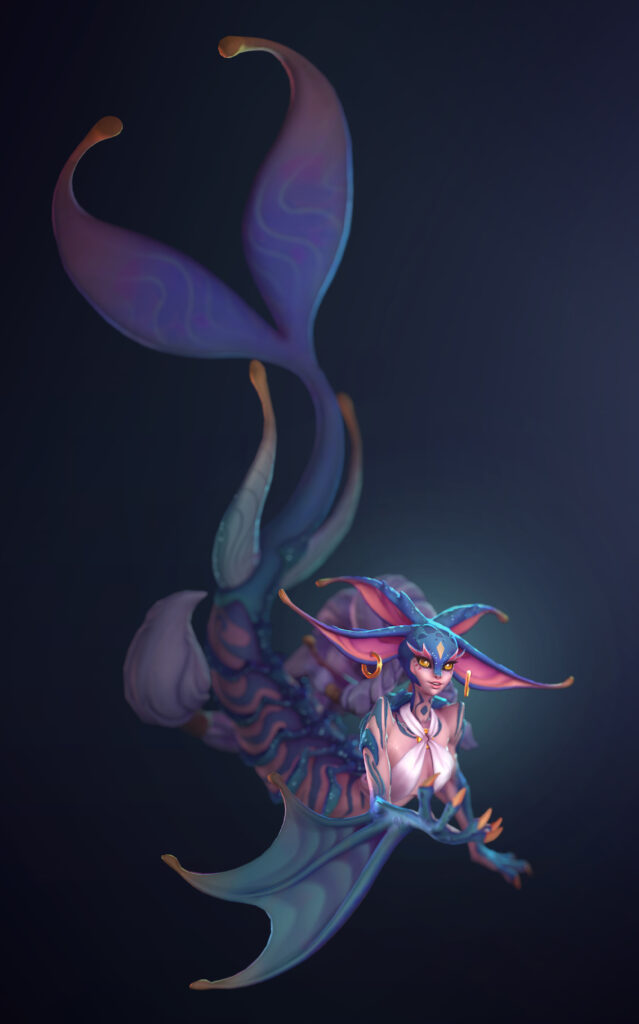
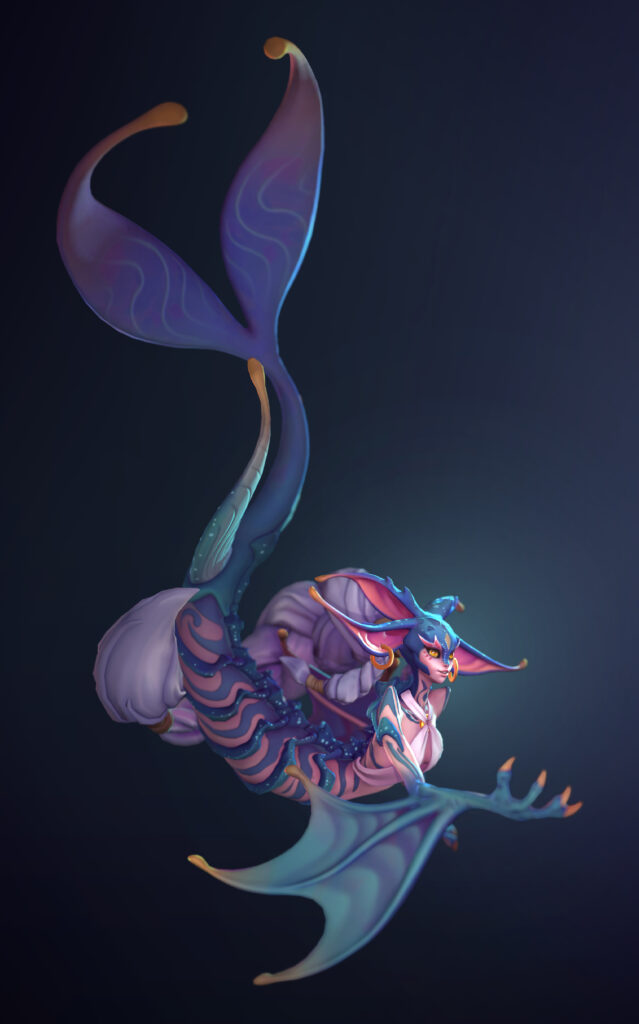
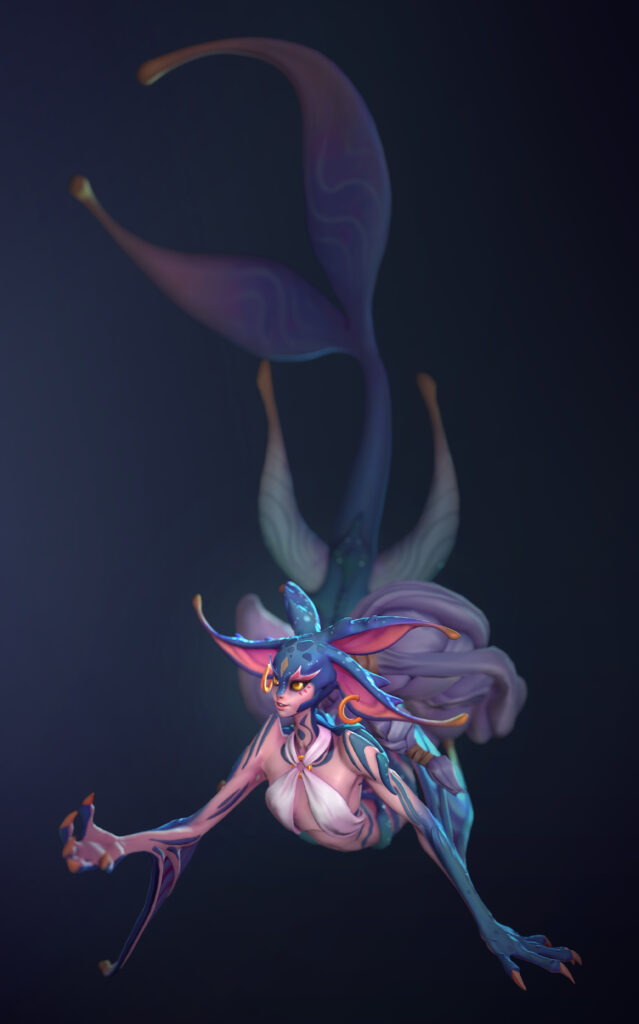
These 4 poses were my contenders.

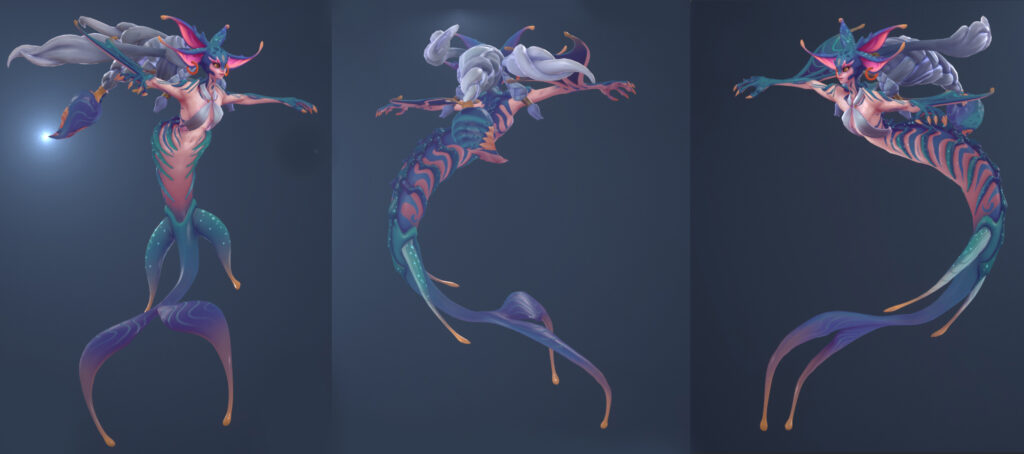

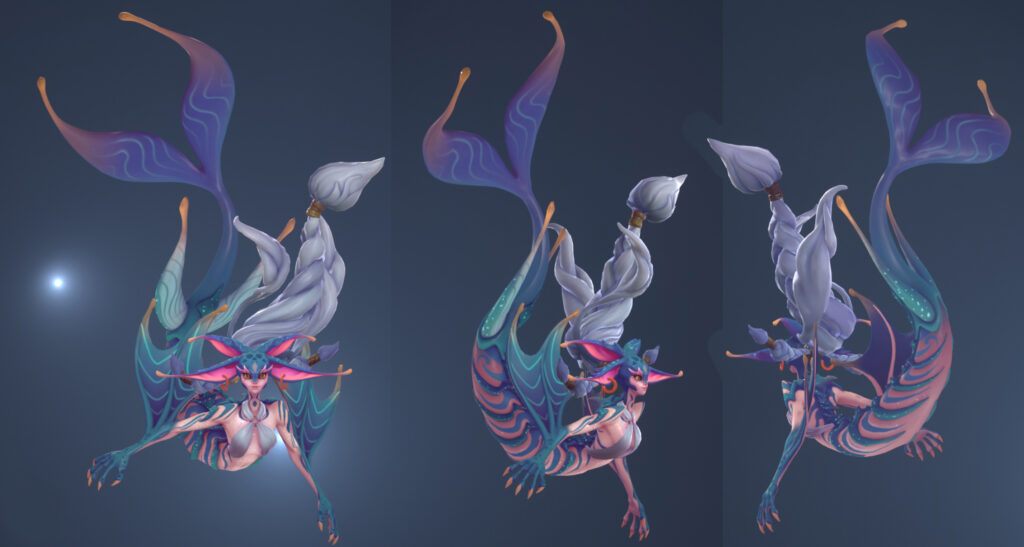
My final choice was done through public feedback and my personal feeling about the piece.
Both 3 and 4 were the most popular ones, 3 slightly ahead of 4, but the calmer and peaceful vibes of 4 spoke to me that’s why I ended up going with that one.
For the lighting, I always start out with a weak skylight to have the model slightly lit, from there I add Key lights, followed by rim lights, and in the end a couple of fill lights to brighten up areas that end up too dark.
My tip would be to go slow and try to get as much out of each light as you can , that way you don’t end up with a gigantic list of lights that become a headache to adjust.

And let’s see how things went from blockout texture to final render for good measure too.
For the background, I like to just take it to photoshop. It’s very easy to iterate, and even if you want to take final renders straight out of the engine, you can quickly mash together a composition that can then be replicated in the engine.
Final Words
And that is my character pipeline in a nutshell.
Something I probably don’t do often enough is retrospect my pipeline and thanks to the the opportunity of this article I actually got to do exactly that for this piece.
So doing that let’s take one of my renders to grayscale to inspect the values.
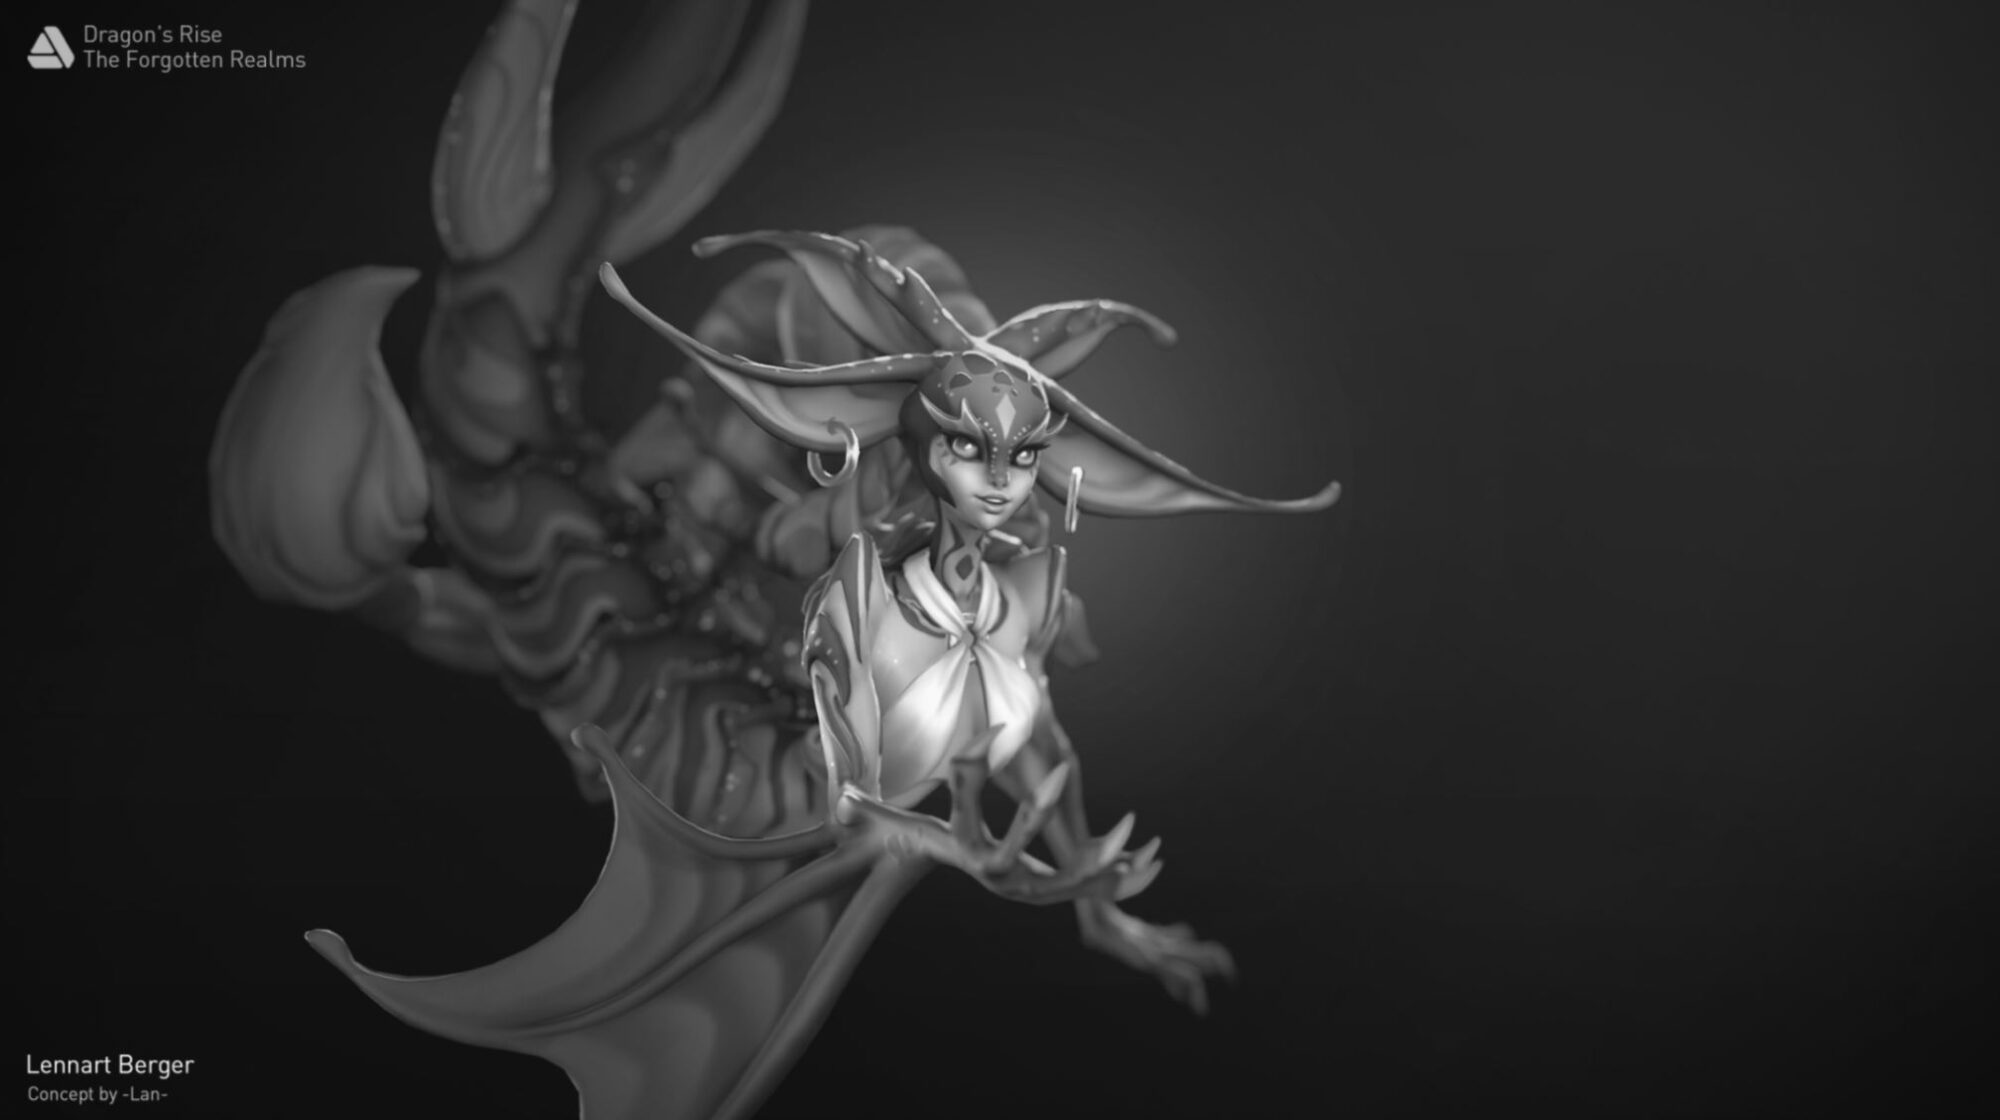
Earlier I mentioned that values are great at leading the eye, while I believe I managed to achieve this to a degree here, I am sure it could be improved.
And with a quick overpaint we can improve the value gradients towards the face, making the piece a bit more appealing, something I will try to keep in mind more for the next project.

Outro
Thank you for making it this far, I hope you learned something, just like I did. There’s always room for improvement and I am sure there are plenty of other flaws I am missing now, but
that’s just part of the journey. With that said I hope you all had a great read and have an awesome next artwork!
Cheers,
Lennart.
Read more articles
You might also like these articles.