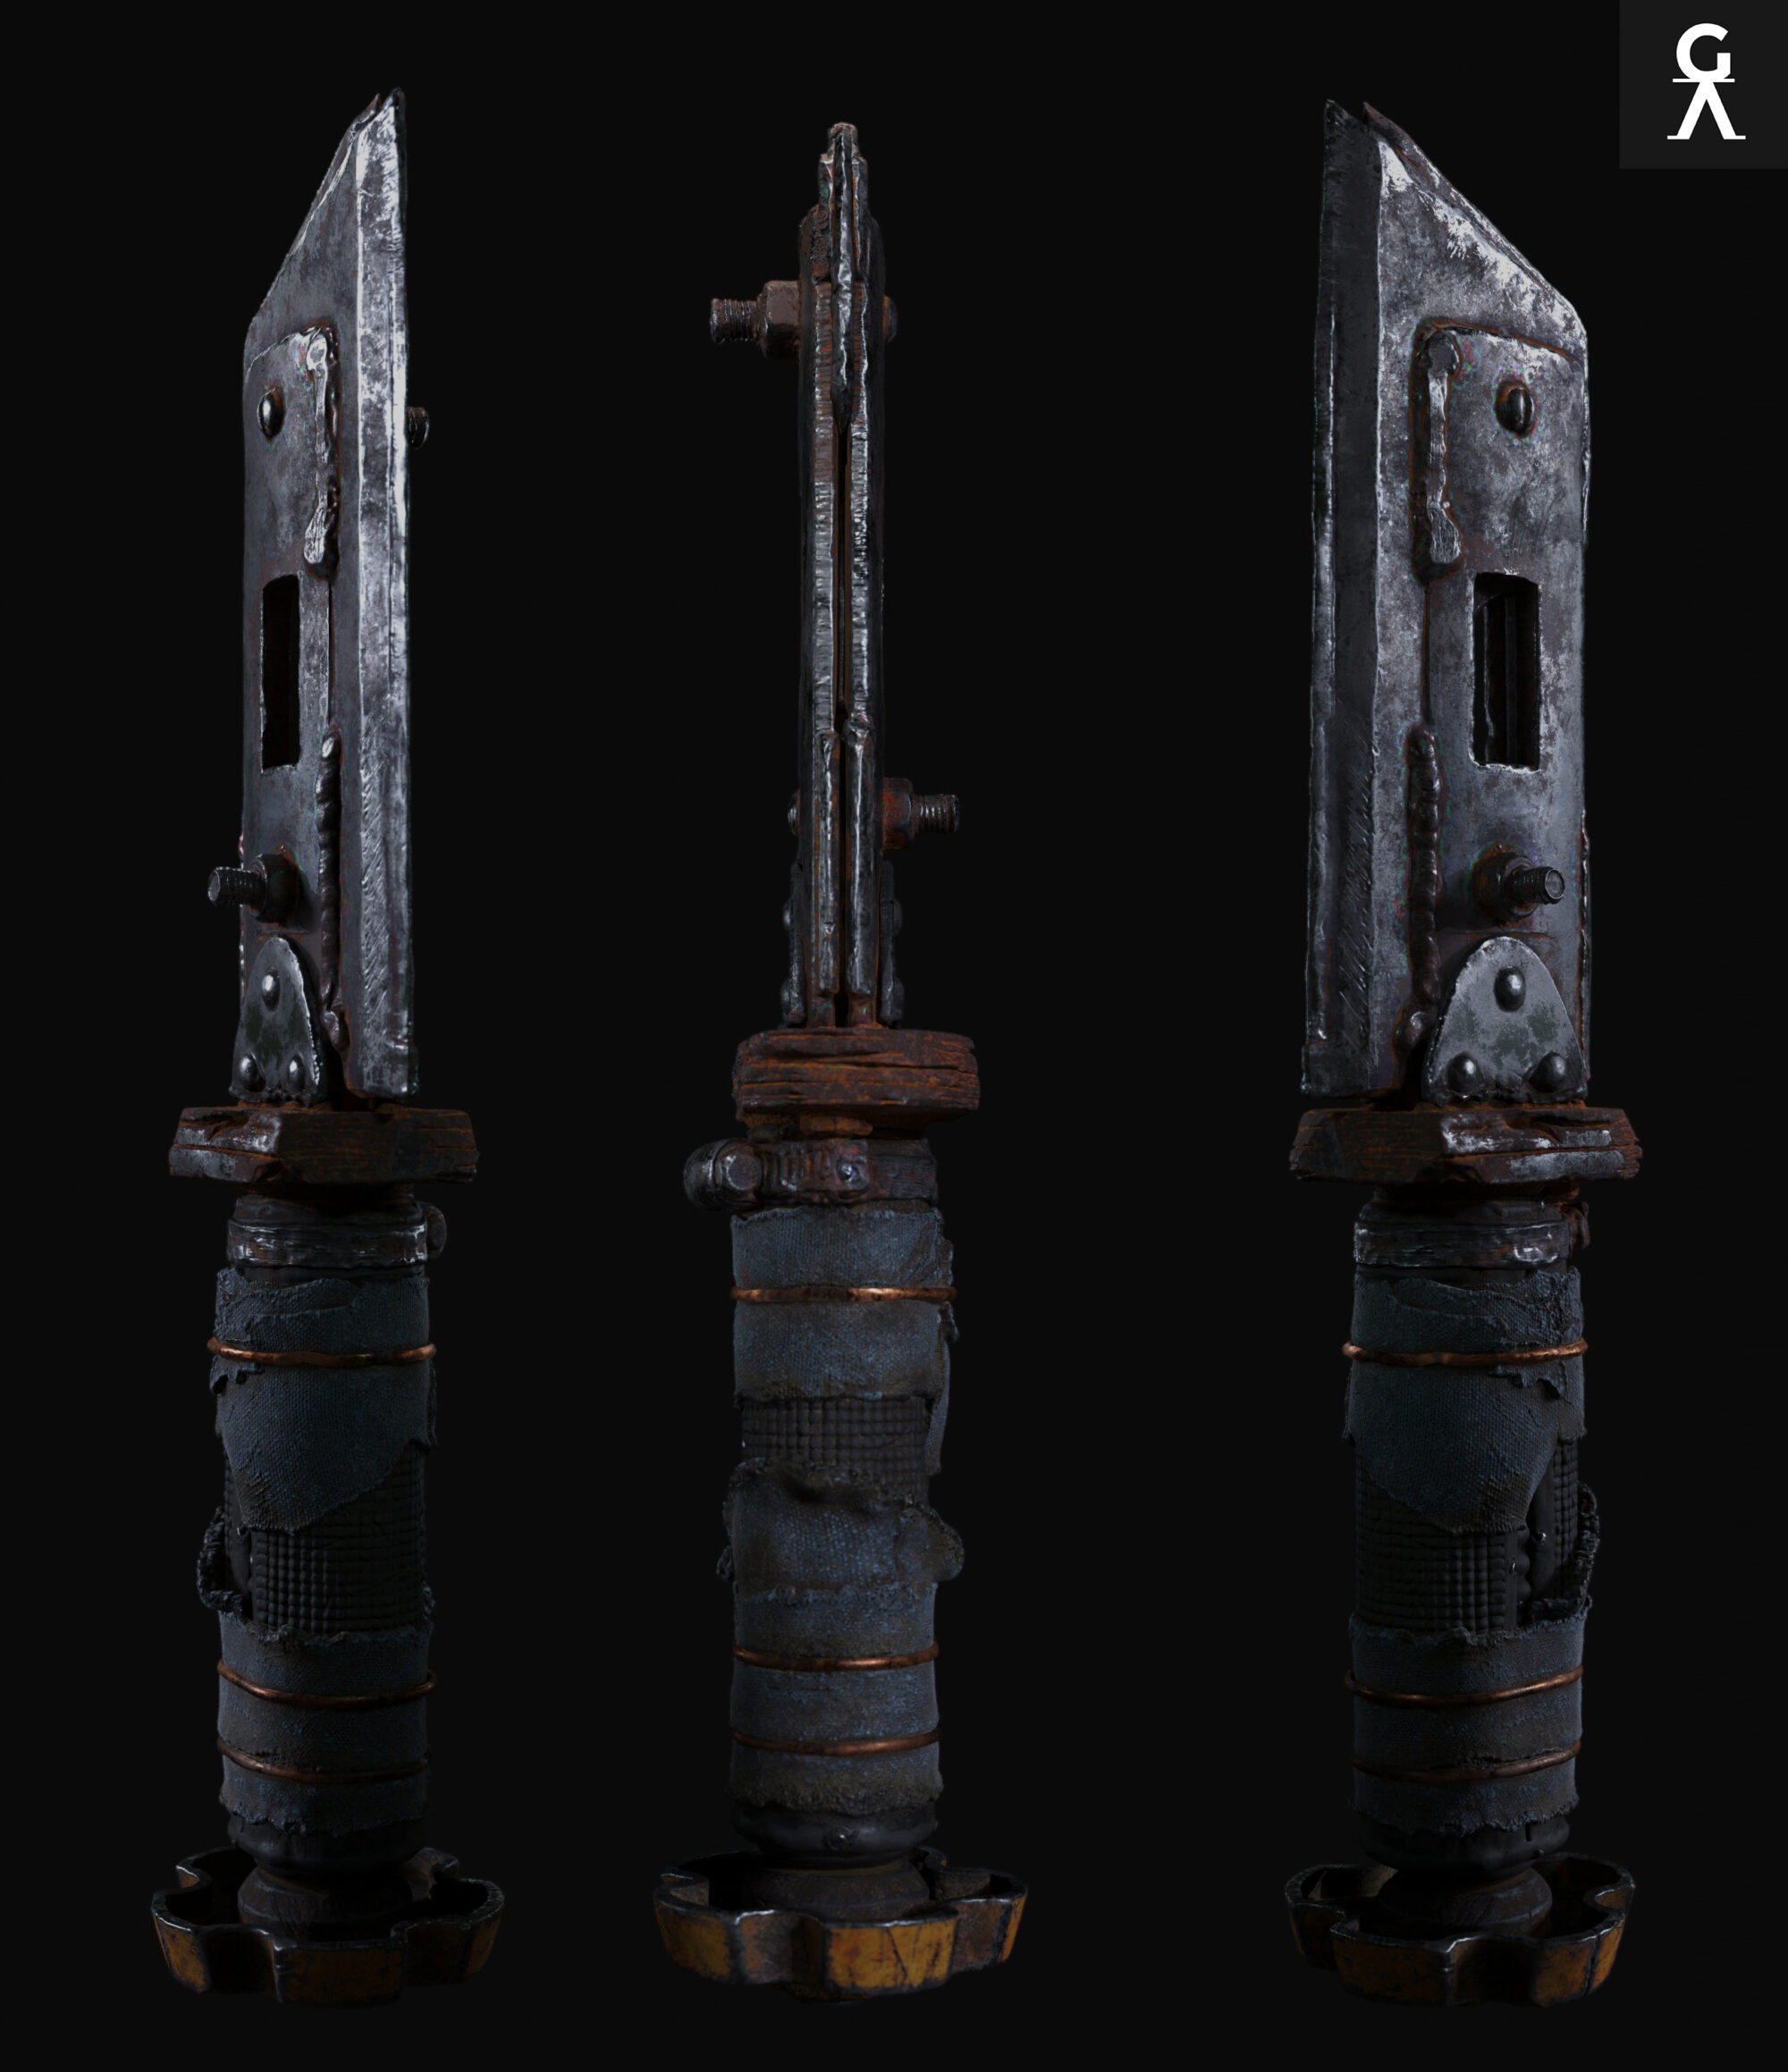
Post Apocalyptic Dagger
Introduction
Hello everyone! I’m Shashank Sharma and I'm currently working as an Experienced Hard Surface artist in Avalanche Studio, Malmö, Sweden. I’ve been working for the last 9 years in the Games Industry. I started my career as a 2D Sprite Designer in a mobile game studio for a year and then I moved to 3D Art.
Previously, I have worked in outsourcing studios like - Art media, Exigent 3D, Dhruva interactive and then gained an opportunity to work as a lead artist in CView studios Malta who work closely with 4A games Malta.
I also worked as a Freelance 3D Artist with Art Bully productions, RYZIN Art and Boss Key studio.
Working in outsourcing is its own kind of fun because you work on so many projects and in a short time, you are able to learn different pipelines, artstyles and techniques.
Software
- Autodesk Maya
- Zbrush
- Topogun
- Marmoset Toolbag 3
- Substance Painter
Workflow
I will talk about all the steps I went through while working on this asset (Blockout, sculpting, building the low poly, UV/Baking, texturing and rendering).
Every stage is really important to make our assets look the best quality they can. And every stage connects to make the final product.
Blockouts and low polys are important, as this will help with the high poly subdivisions.
A good highpoly helps your texture look as good as it can. Good UVs and baking also help with the final texture. Working on the texture with basic lighting on your final render will make a big difference.
The idea
When I saw this awesome concept series from Anton Kukhtytskyi, I decided to do my favourite one.
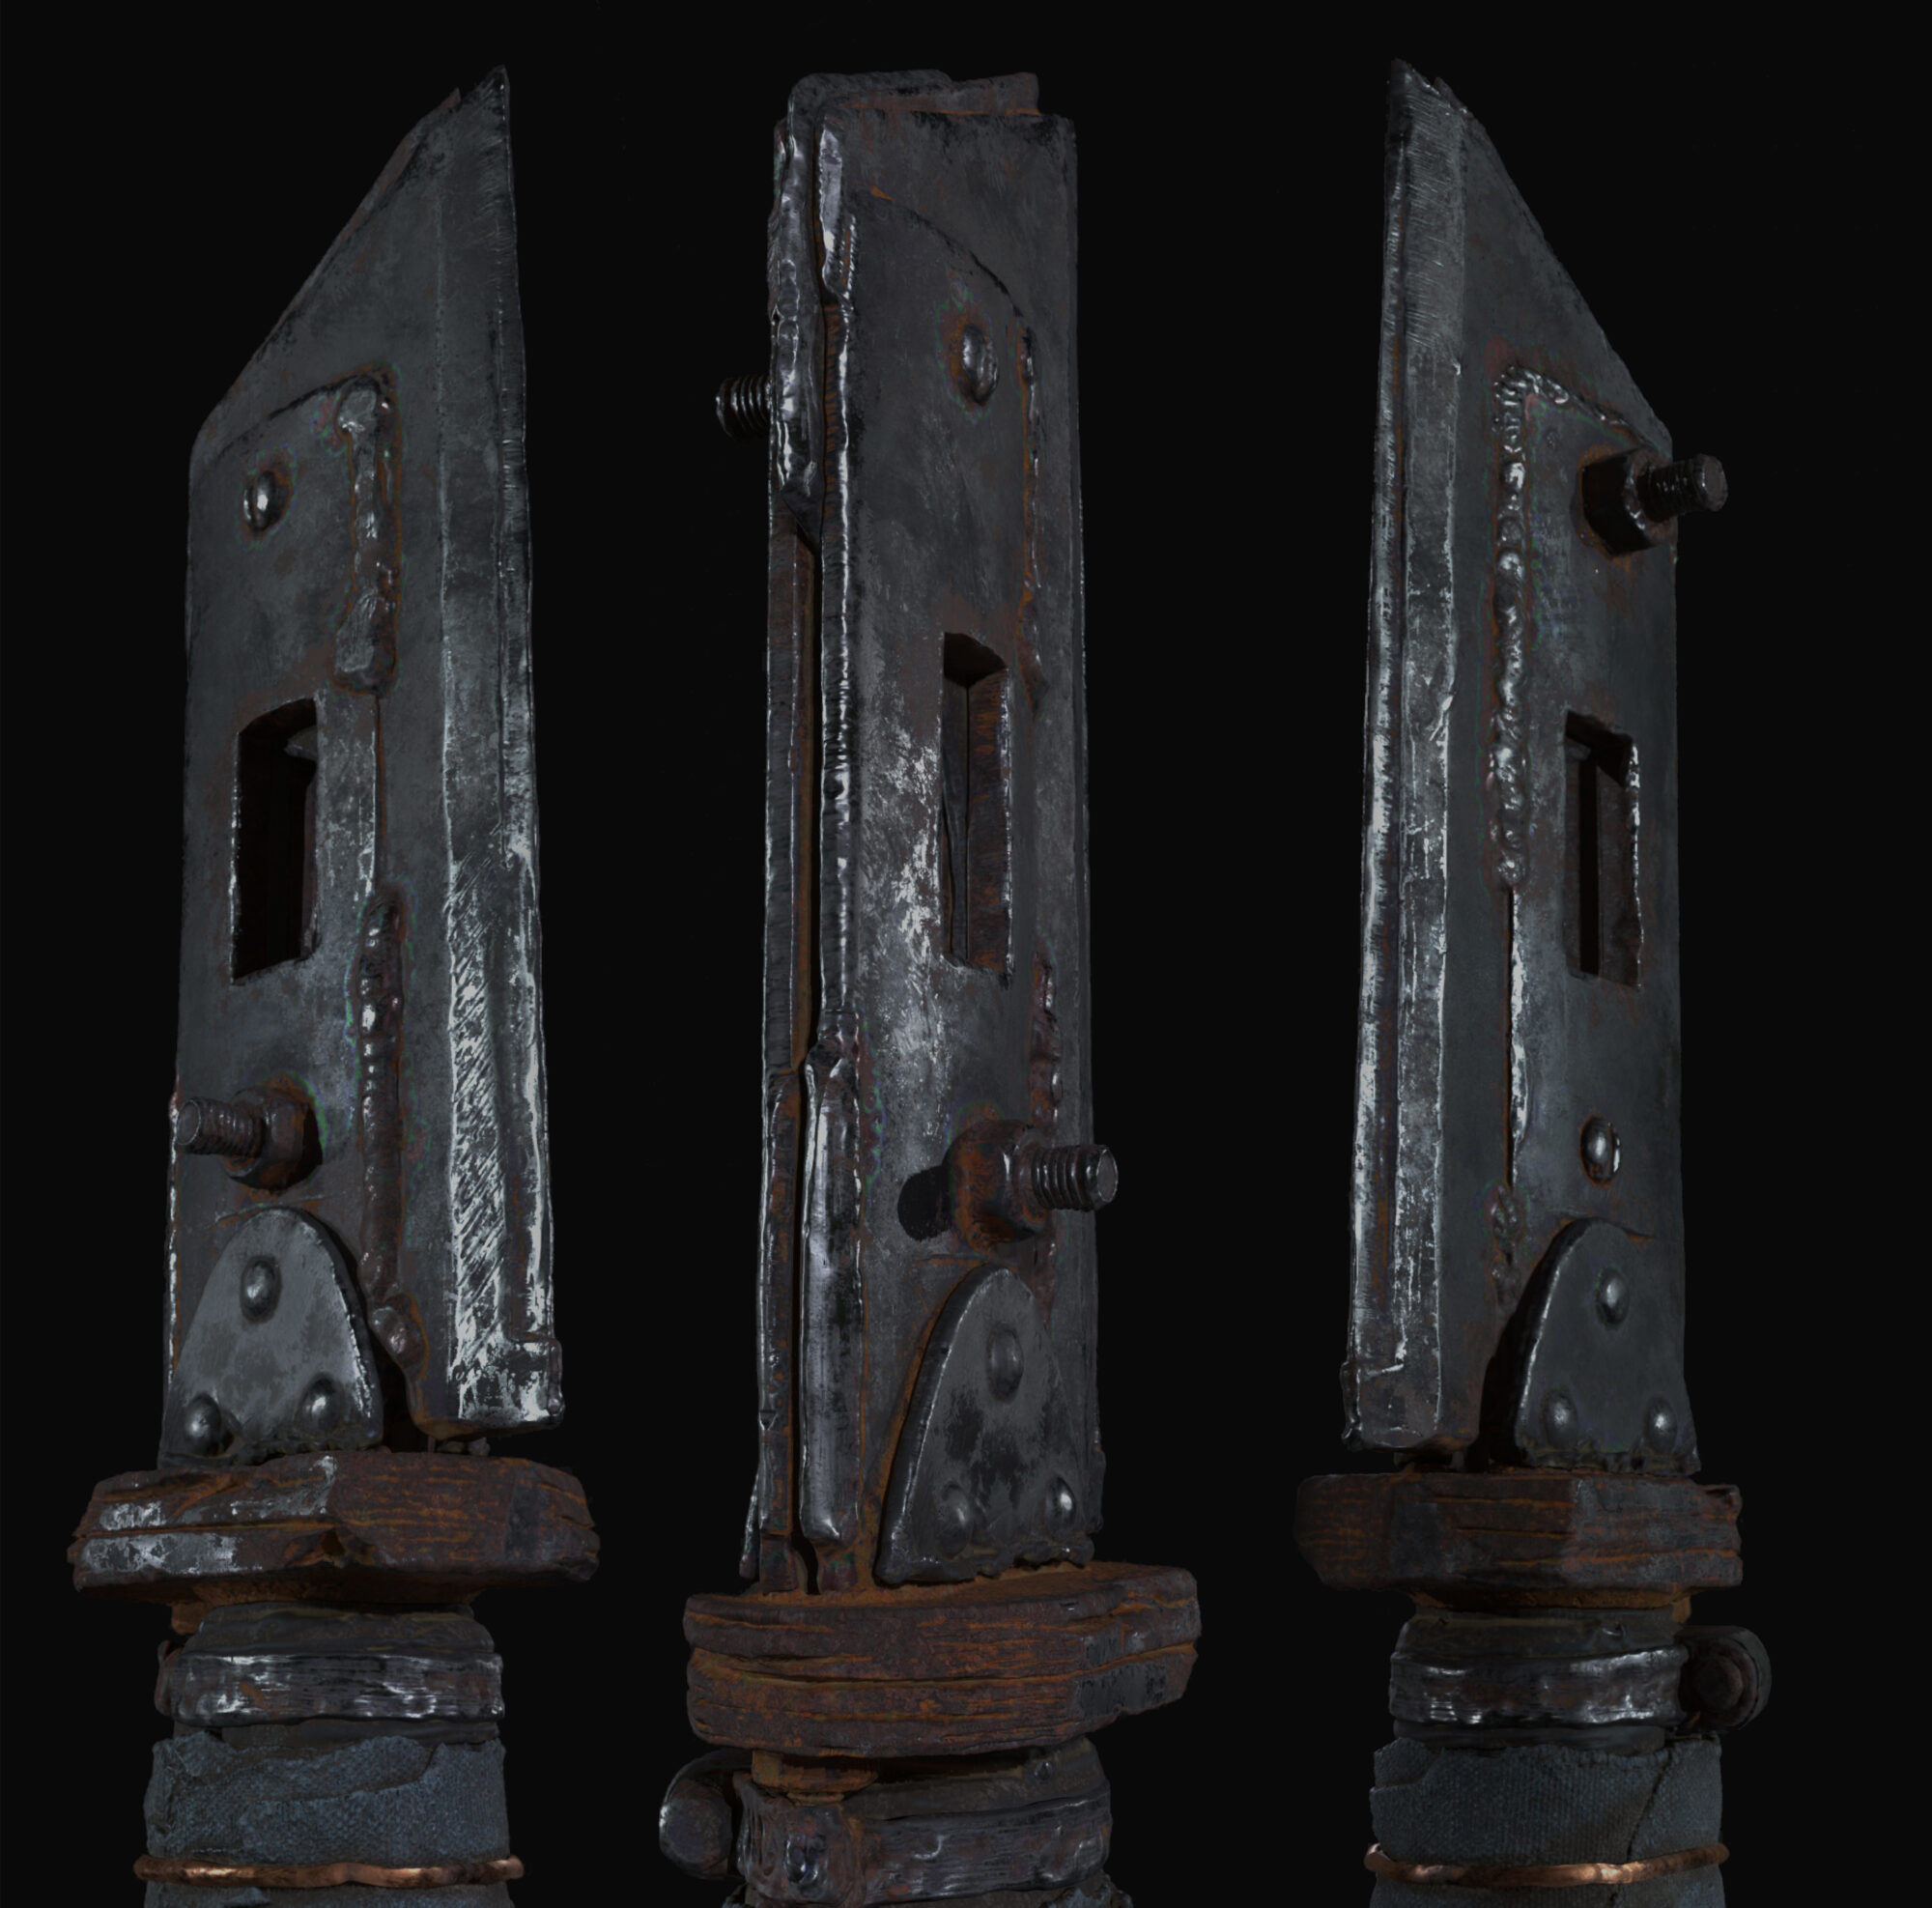
For my design, I wanted a dagger that looked strong in build and lethal to attack with.
The concept was already detailed, but I wanted to collect some more references, so I started making a reference sheet with the concept.
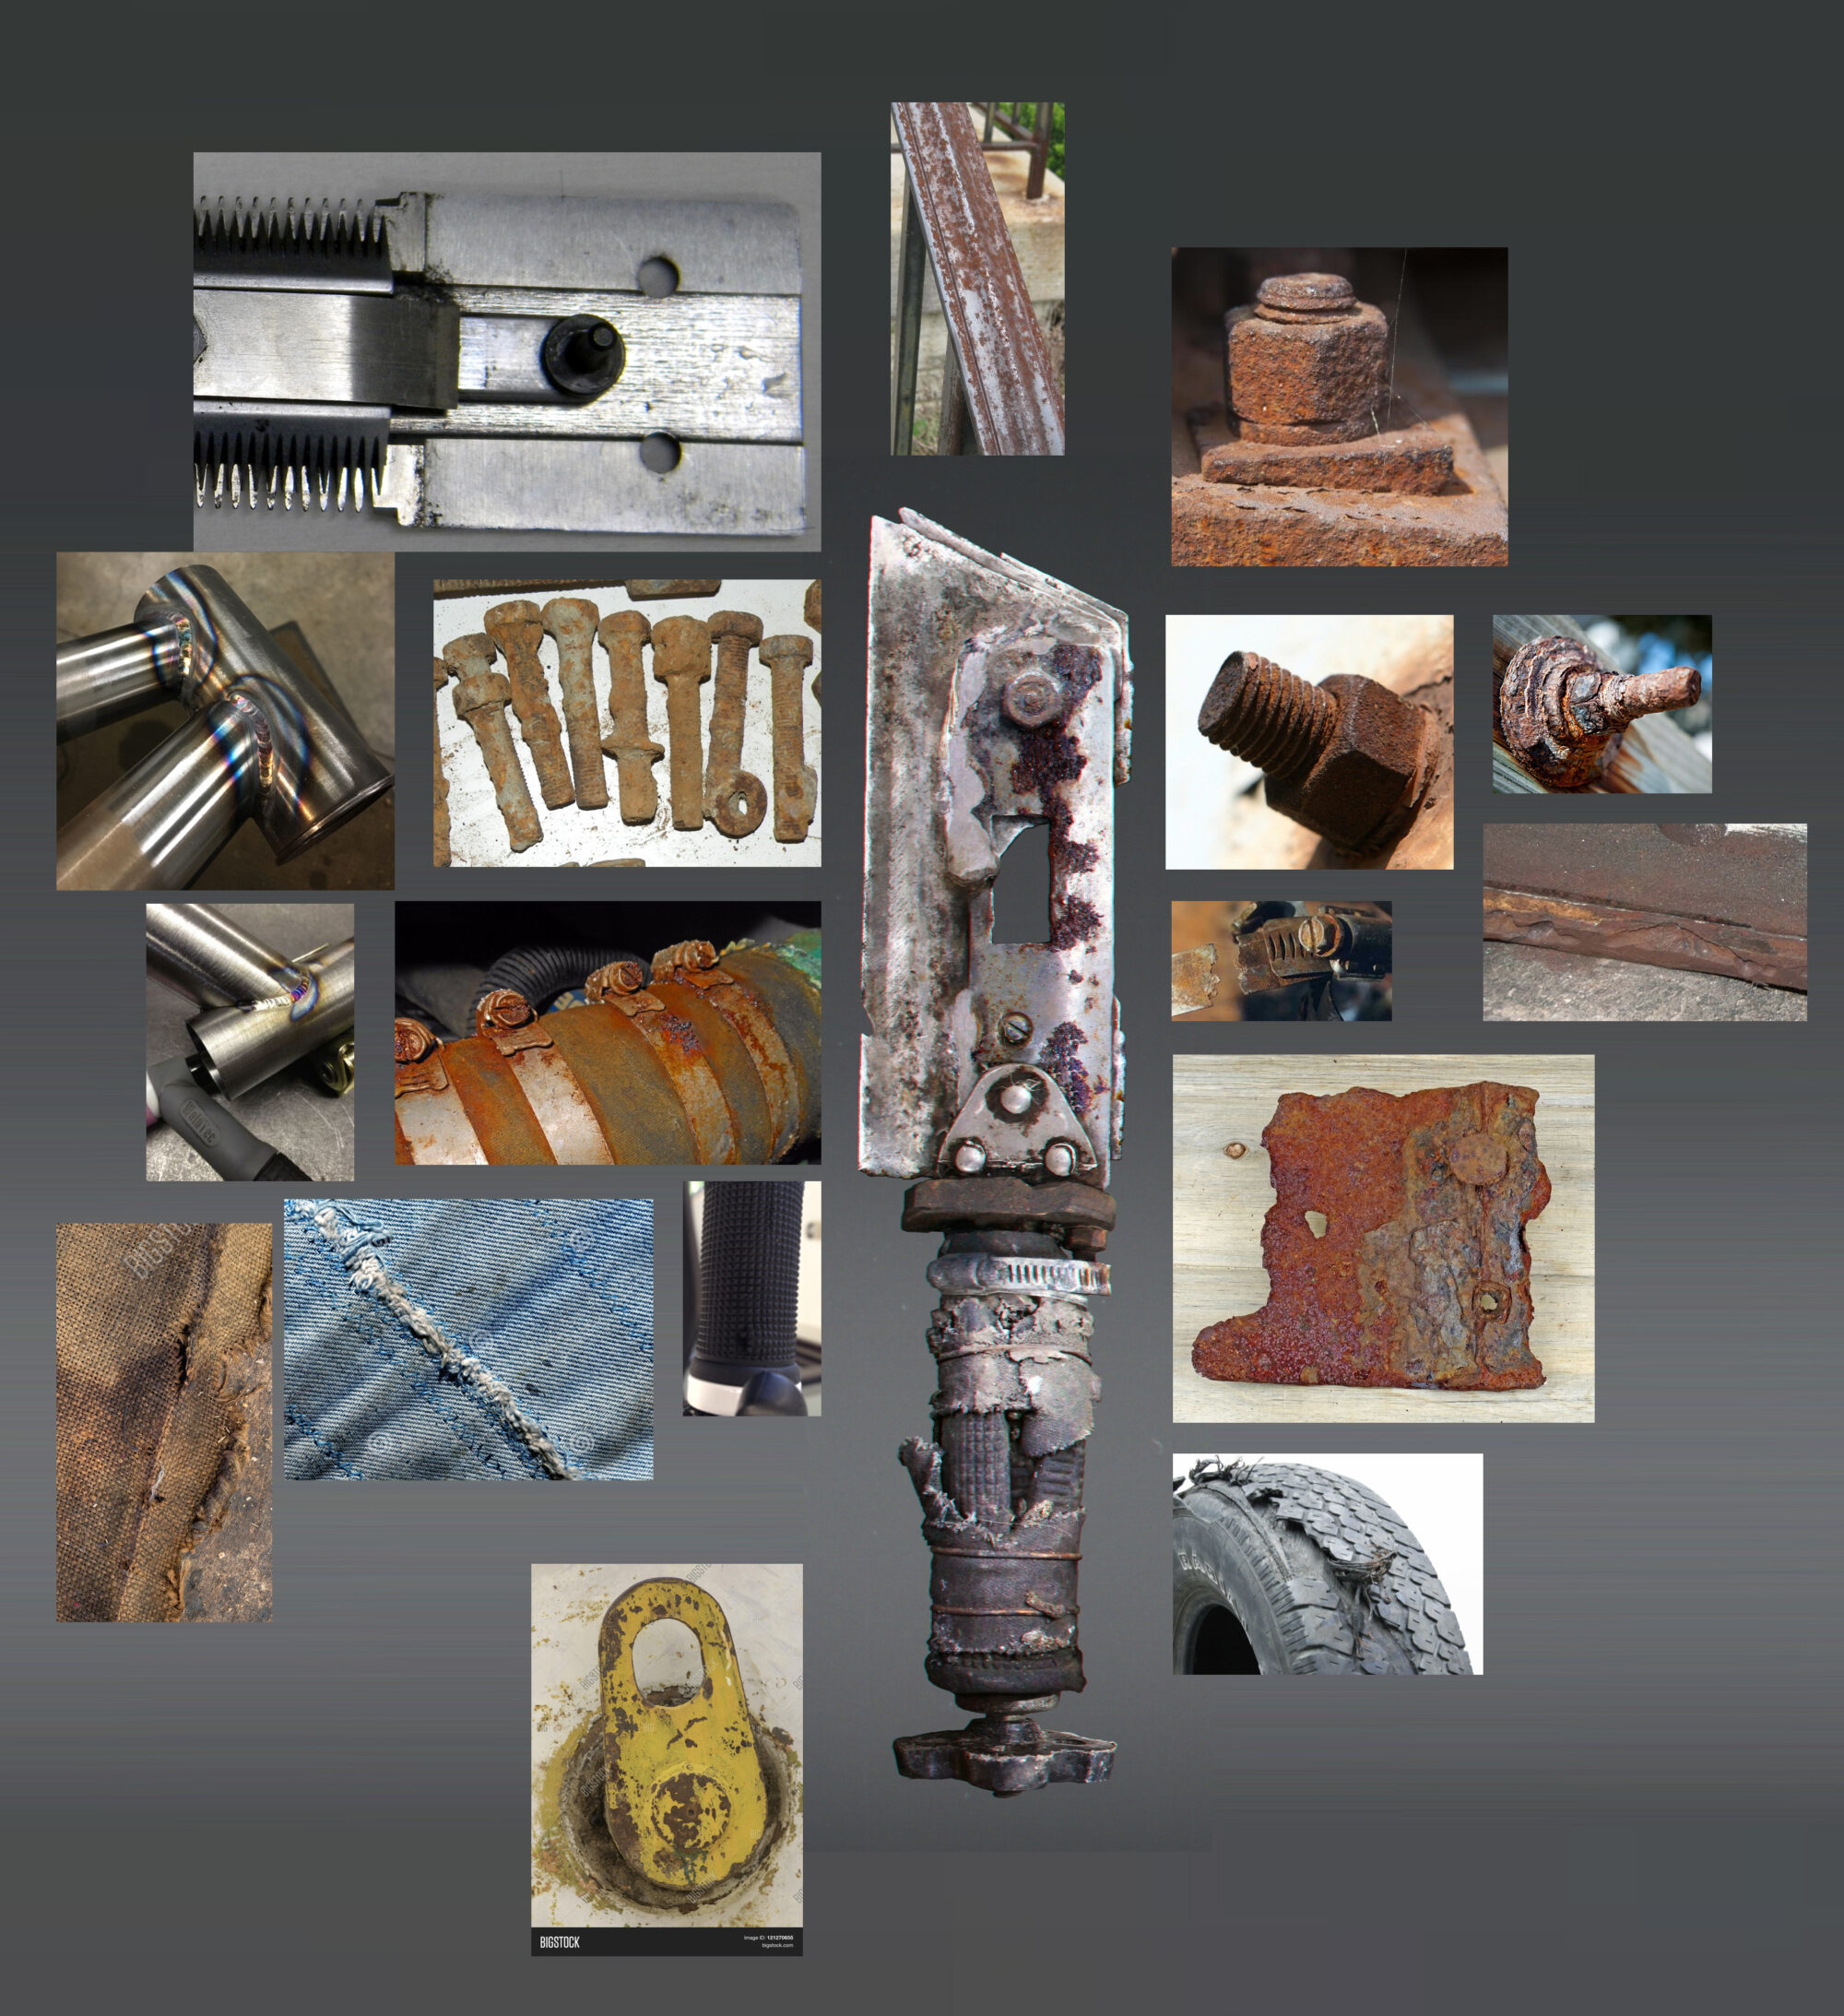
While collecting references, I always try to collect big resolution images.
Small resolution images are fine if they are interesting, but big images will help you understand the surface detail of any asset.
http://www.primeportal.net/the_armory.html
This site has some of the best references for different types of weapons and military equipment. Reference sheet making is also really important because it helps to see different images with concepts altogether.
Blocking out
Blocking out is a really important stage for our Asset. It connects with the overall look and helps with gameplay and animation.
Blocking out helps with gameplay because you can forward it to the rigging/animation team to work with it, and in the meantime, you can work on the look and feel.
In this project, I’ve used Zbrush to move shapes for a better silhouette, however, if I’m working on hard surface projects, especially guns, I will always make all the shapes, even bolts, and screws in the blockout.
The only thing I will do in the high poly stage is add supporting edges and sculpt if needed. Doing only supporting edges in the high poly stage and adding every shape in blockout will make your workflow easy.
You can also break your blockout stage into two stages (big shapes and small shapes). Using a good smoothing group or hard/soft surface will make your blockout more readable.
While working on the blockout, you need to keep these connections or parts in mind, how things move according to the rigged or functional blockout. This is really helpful for making the final high poly accurate.
Grip parts for when the player is holding your asset.
Magazine with a grip if it’s a weapon. Keep the functionality of the weapon or prop in mind. You can use the blockout to make a low-poly base and save a lot of time in the low-poly stage. I always keep loops in a round shape and poly distribution in the blockout.
Here are screenshots of my melee weapon from blockout to low-poly.
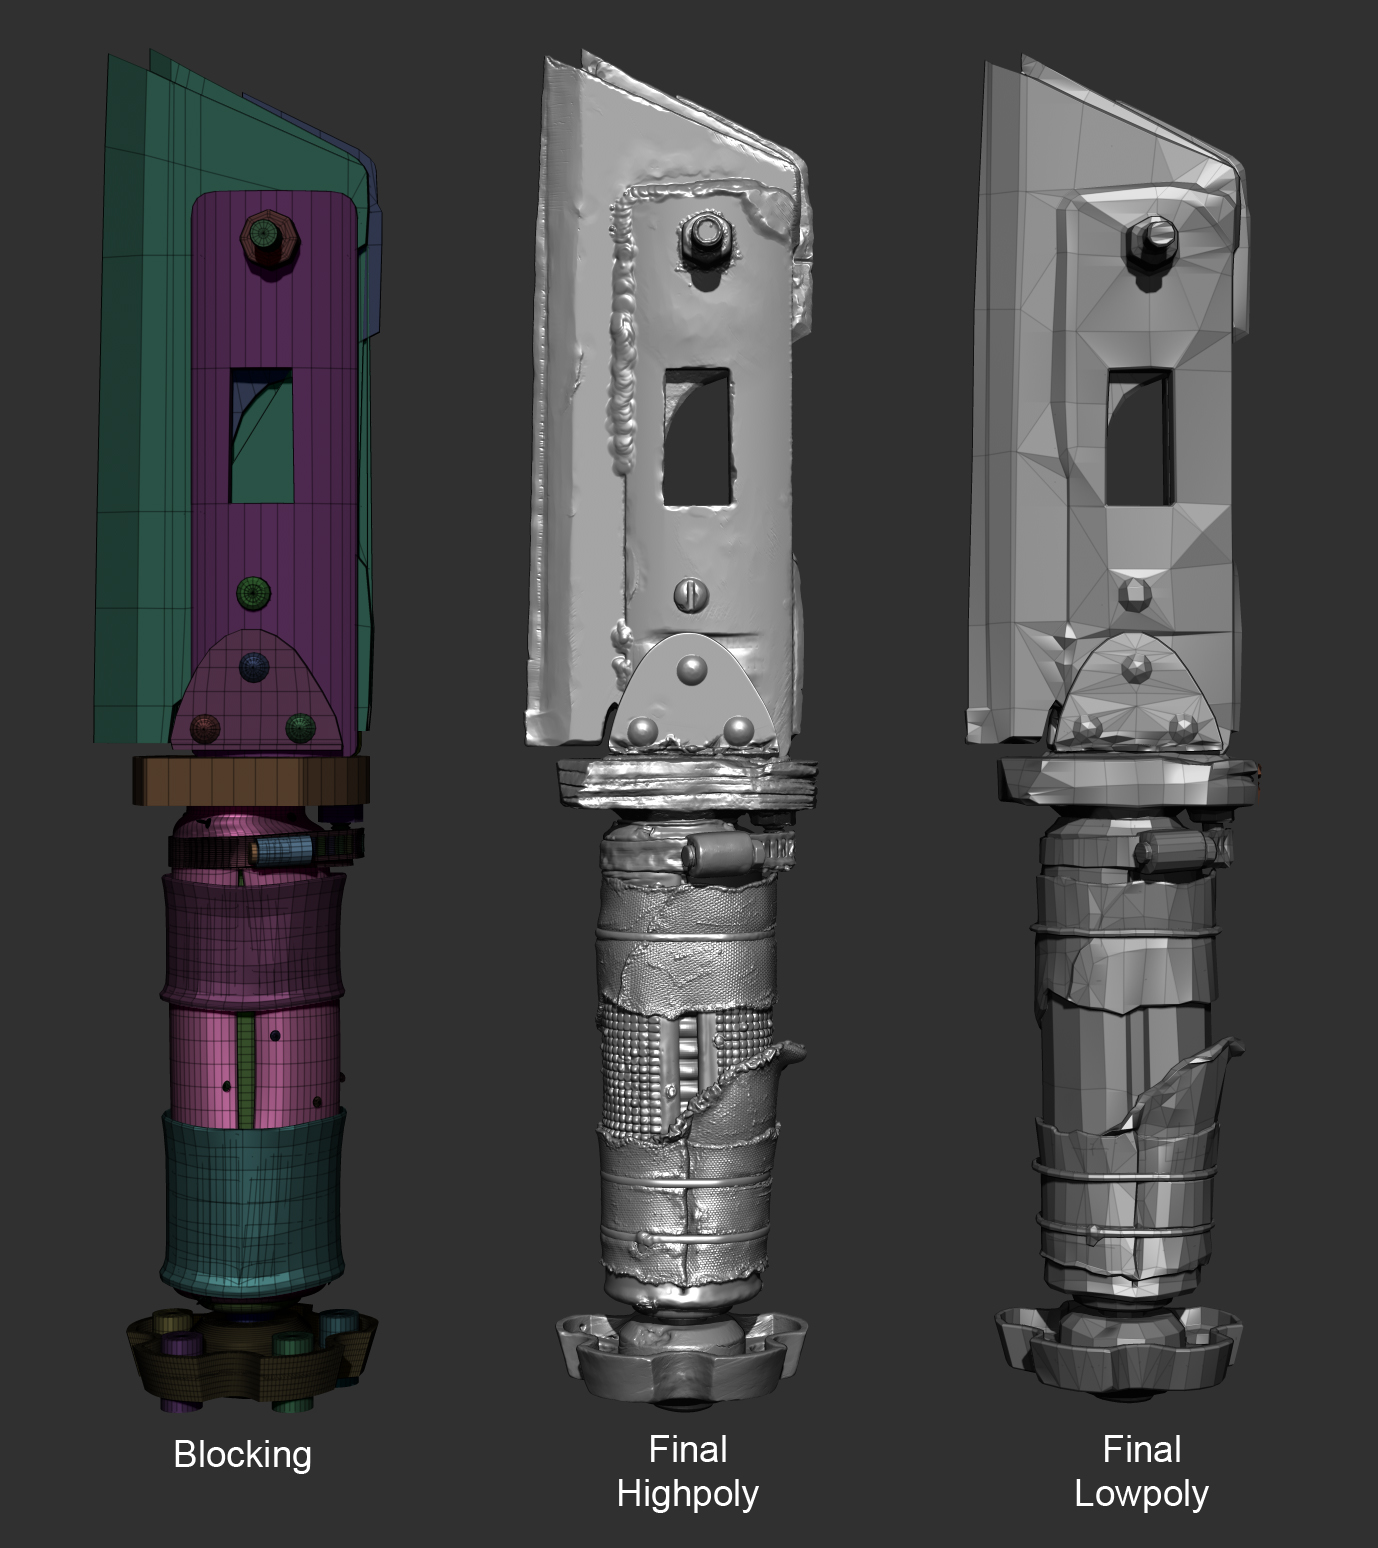
In this blockout, I used the pro-boolean and crease polygroup tool in ZBrush to get the final ZBrush sculpt ready mesh.
Also keep in mind that later, I will dynamesh different parts to make a solid piece for the sculpt while doing the blockout.
ZBrush Sculpt
While doing my Zbrush sculpt, I always think about the props’ texture and surface.
Having a well-thought-out plan for the sculpt and knowing how many small details need to be sculpted helps you figure out what details you can add in at the texturing stage.
It really depends on your project requirement. I always prefer doing the surface details in the texture (substance designer or painter) and in the sculpt, I try to do more edge work if needed. This typically gives your asset an organic kind of feel.

I always try to sculpt according to the materials used.
Your sculpt needs to read and reveal that material well. Adding surface or small details to the texture will give you more creative freedom for the prop. If you have that surface detail already in the sculpt, it’s best to stick with it.
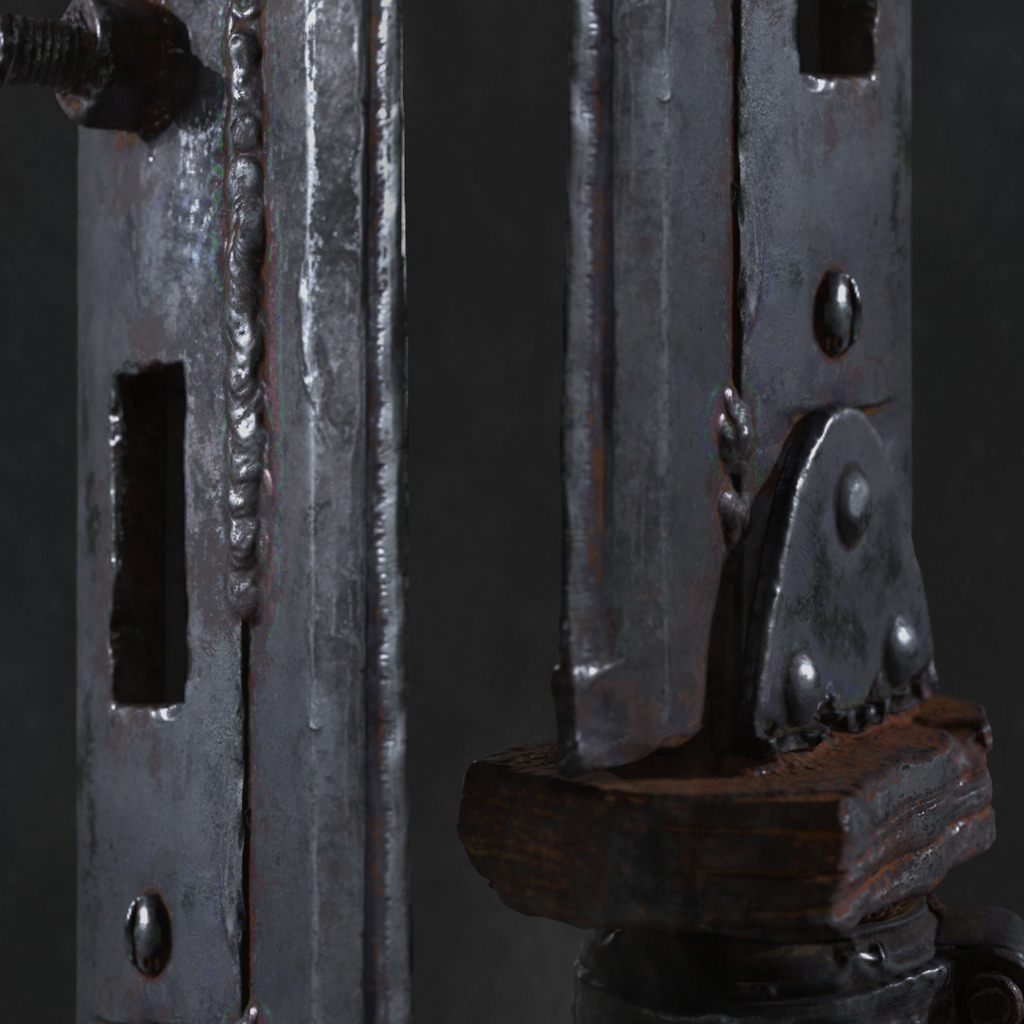
In this project, I decided to add the surface and texture details to my sculpt. I used a good set of drag brushes with different alphas and textures with the surface tool.
Here is a step by step breakdown of my weapon pummel.
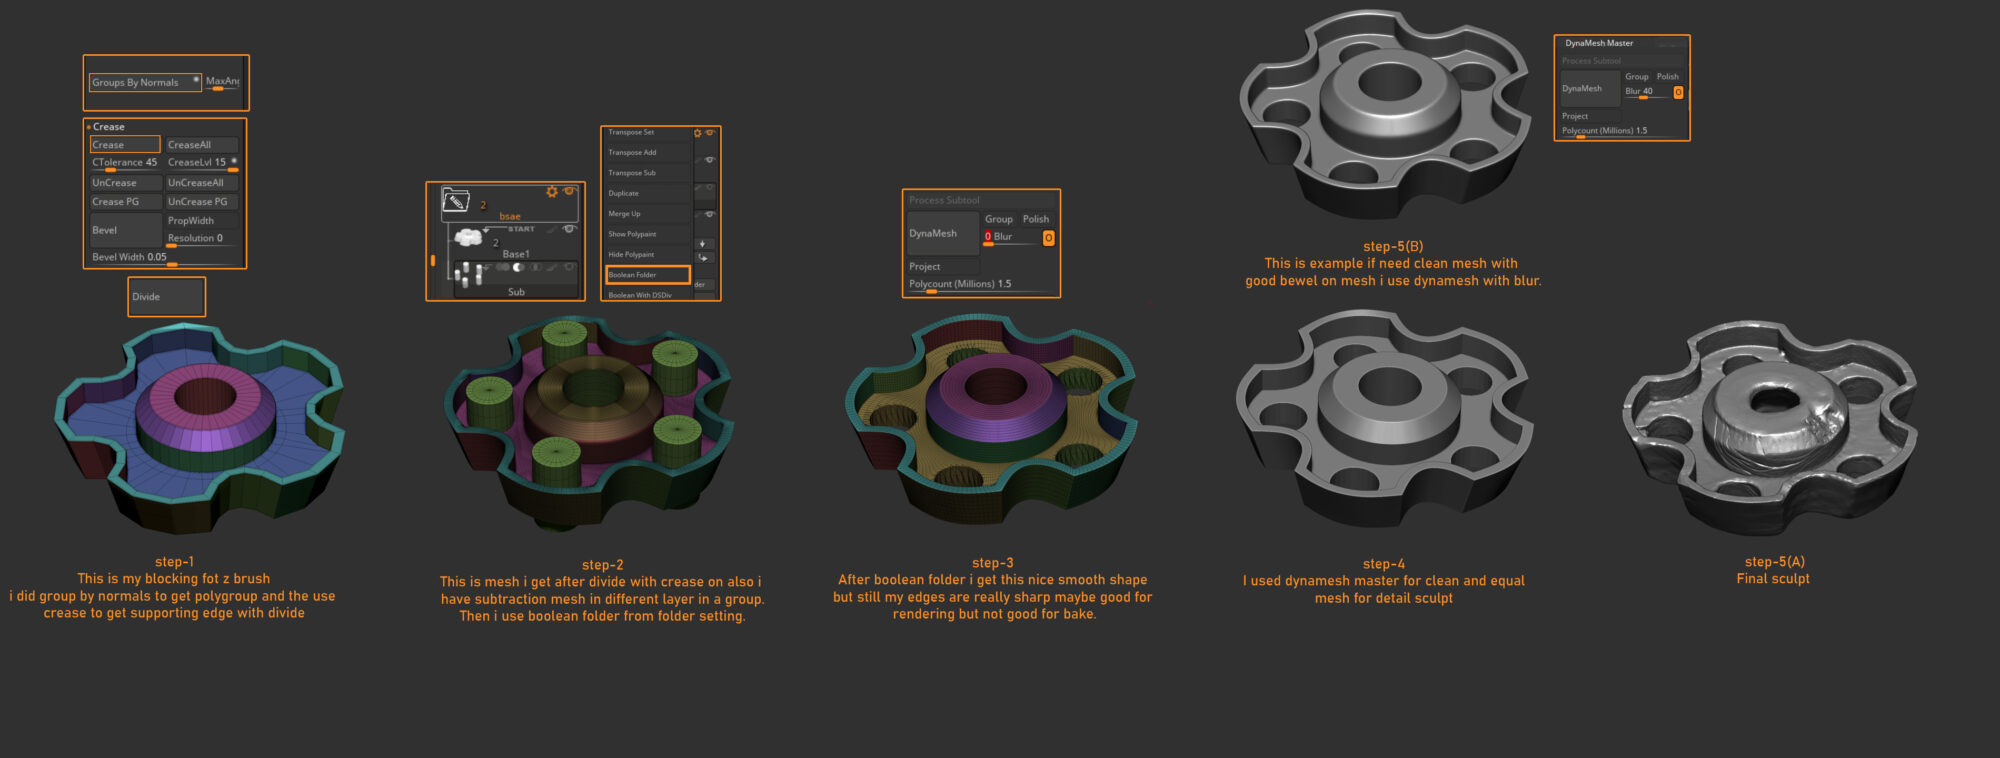
I usually use these steps for making any hard surface piece using the pro-boolean pipeline, I love to sculpt details by hand, even when using alpha or texture detail I always hand sculpt over it.
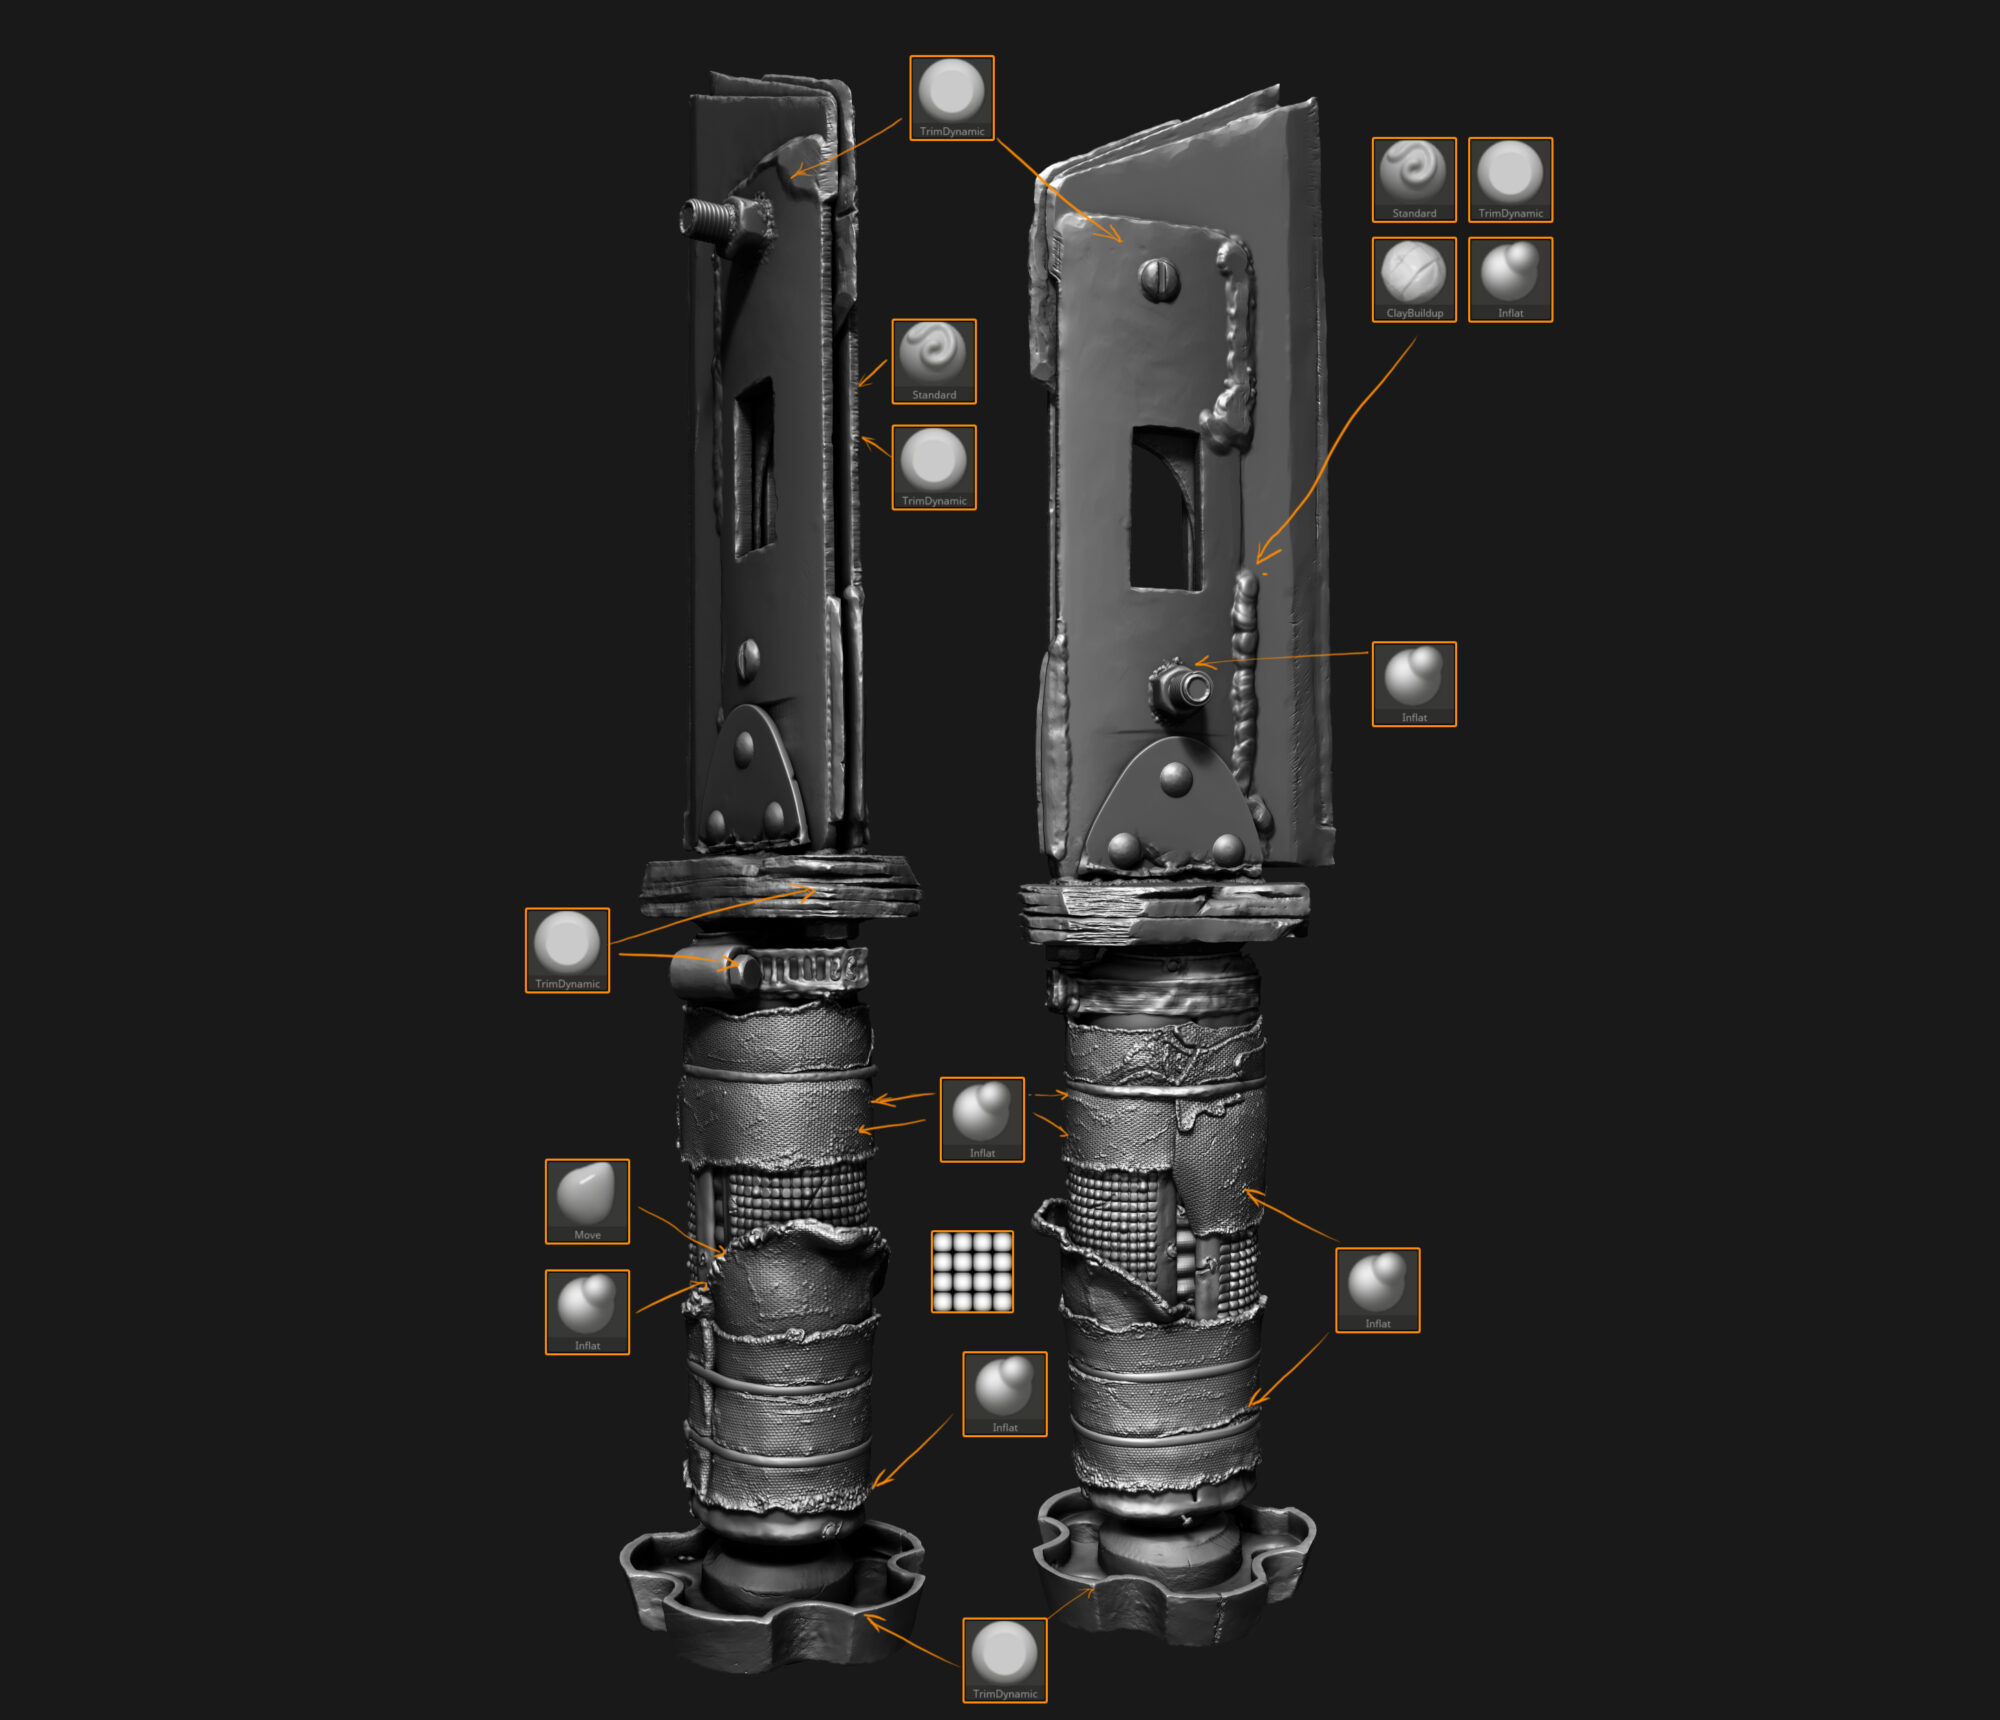
Here is an image of the brush set I used on some specific parts.
Lowpoly
Lowpoly is one of the important parts because this will be the mesh that will go into the engine. Silhouette is one of the most important parts of this.
You can directly use your blocking and adjust it according to the final sculpt. I always use TopoGun to make low poly for the sculpted parts and for hard surface parts, without any sculpting, I use and prefer Maya.
Maya’s quad draw is also a very useful tool for this, but I have been using TopoGun for a while now and I am far more comfortable with it.
In this project, I tried to merge different parts of low-poly into one mesh to get higher-quality pixel density.
I also tried to keep everything in one smoothing group with some softened edges to have fewer UV seams.
I keep 1 smoothing group for the complete low poly, for this I used some supporting edges to support the large gradients (you can see that in the blade part of the low-poly).
I decided to use Marmoset Toolbag for my final render software and using tessellation in Marmoset with 1 smoothing group and fewer UV seams helped me render awesome-looking tessellation.

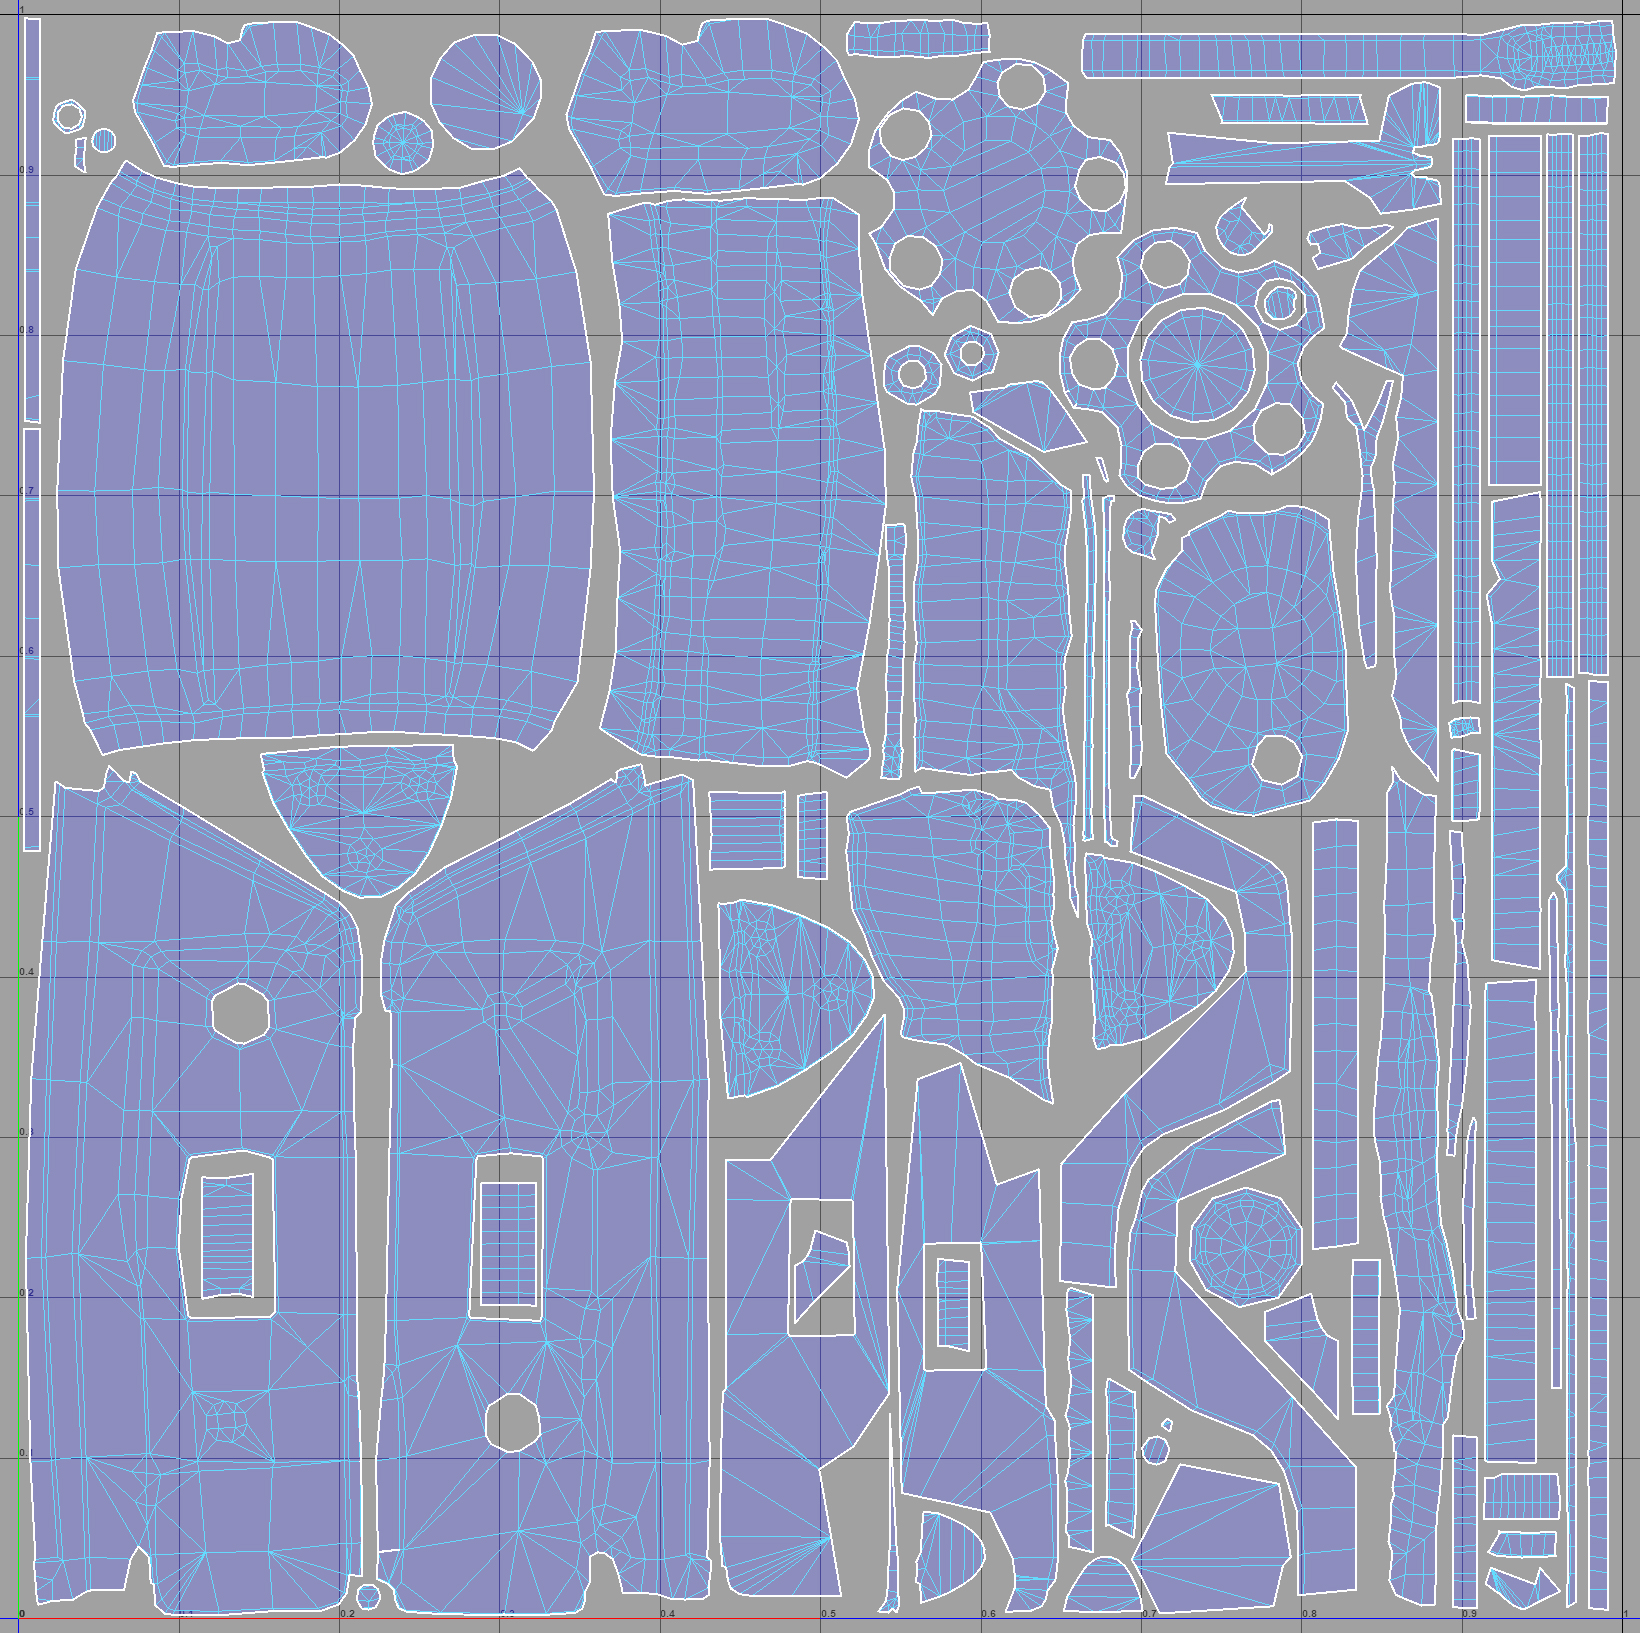
Good UVs
Creating good UVs is really important, as this will decide the texture density or quality in your final texture.
This part connects your low poly with the texture. For UVs, I use some cool and quick steps to get a final unwrapped asset. I have been using this for a while and would like to explain my method of why you should use it, too!
Automatic UVs, select all UV edges and merge them.
Select edges in your mesh wherever you want to break the seam and cut these edges in UVs.
Unfold your UV chunk with the default settings and tada, you will get opened UVs with good checkers.
For creating the UV layout, I always lay out the big chunks first, then the small chunks, and then lay them out together.
If you lay out your big chunks first, then you will get to know what shape you will need to make your small UV groups fit between empty space of the big chunks, which you have already laid out.
While doing the layout, you need to keep these things in mind:
Keep the direction of UV chunks the same so you don’t need to rotate texture orientation in the texture stage.
Keep a good space in your UV chunks so that later it will not destroy your prop while mipmapping.
Always give a little bit more UV space on small parts, especially parts that have fonts and other small details you want to show. This will help you to use most of the space in your texture sheet and give more details in small areas with text or pattern.
For baking, I used Marmoset Toolbag 3, this tool usually works best for me. It’s really fast and interactive Also being able to do quick edits while watching them live in the viewport is very handy!
Here I’ve made the low-poly groups in Maya and exported the sculpted mesh making sure that every piece has good names, so I can import them in marmoset in different layers according to its low poly groups.
You can see the Maya and marmoset outliner here:
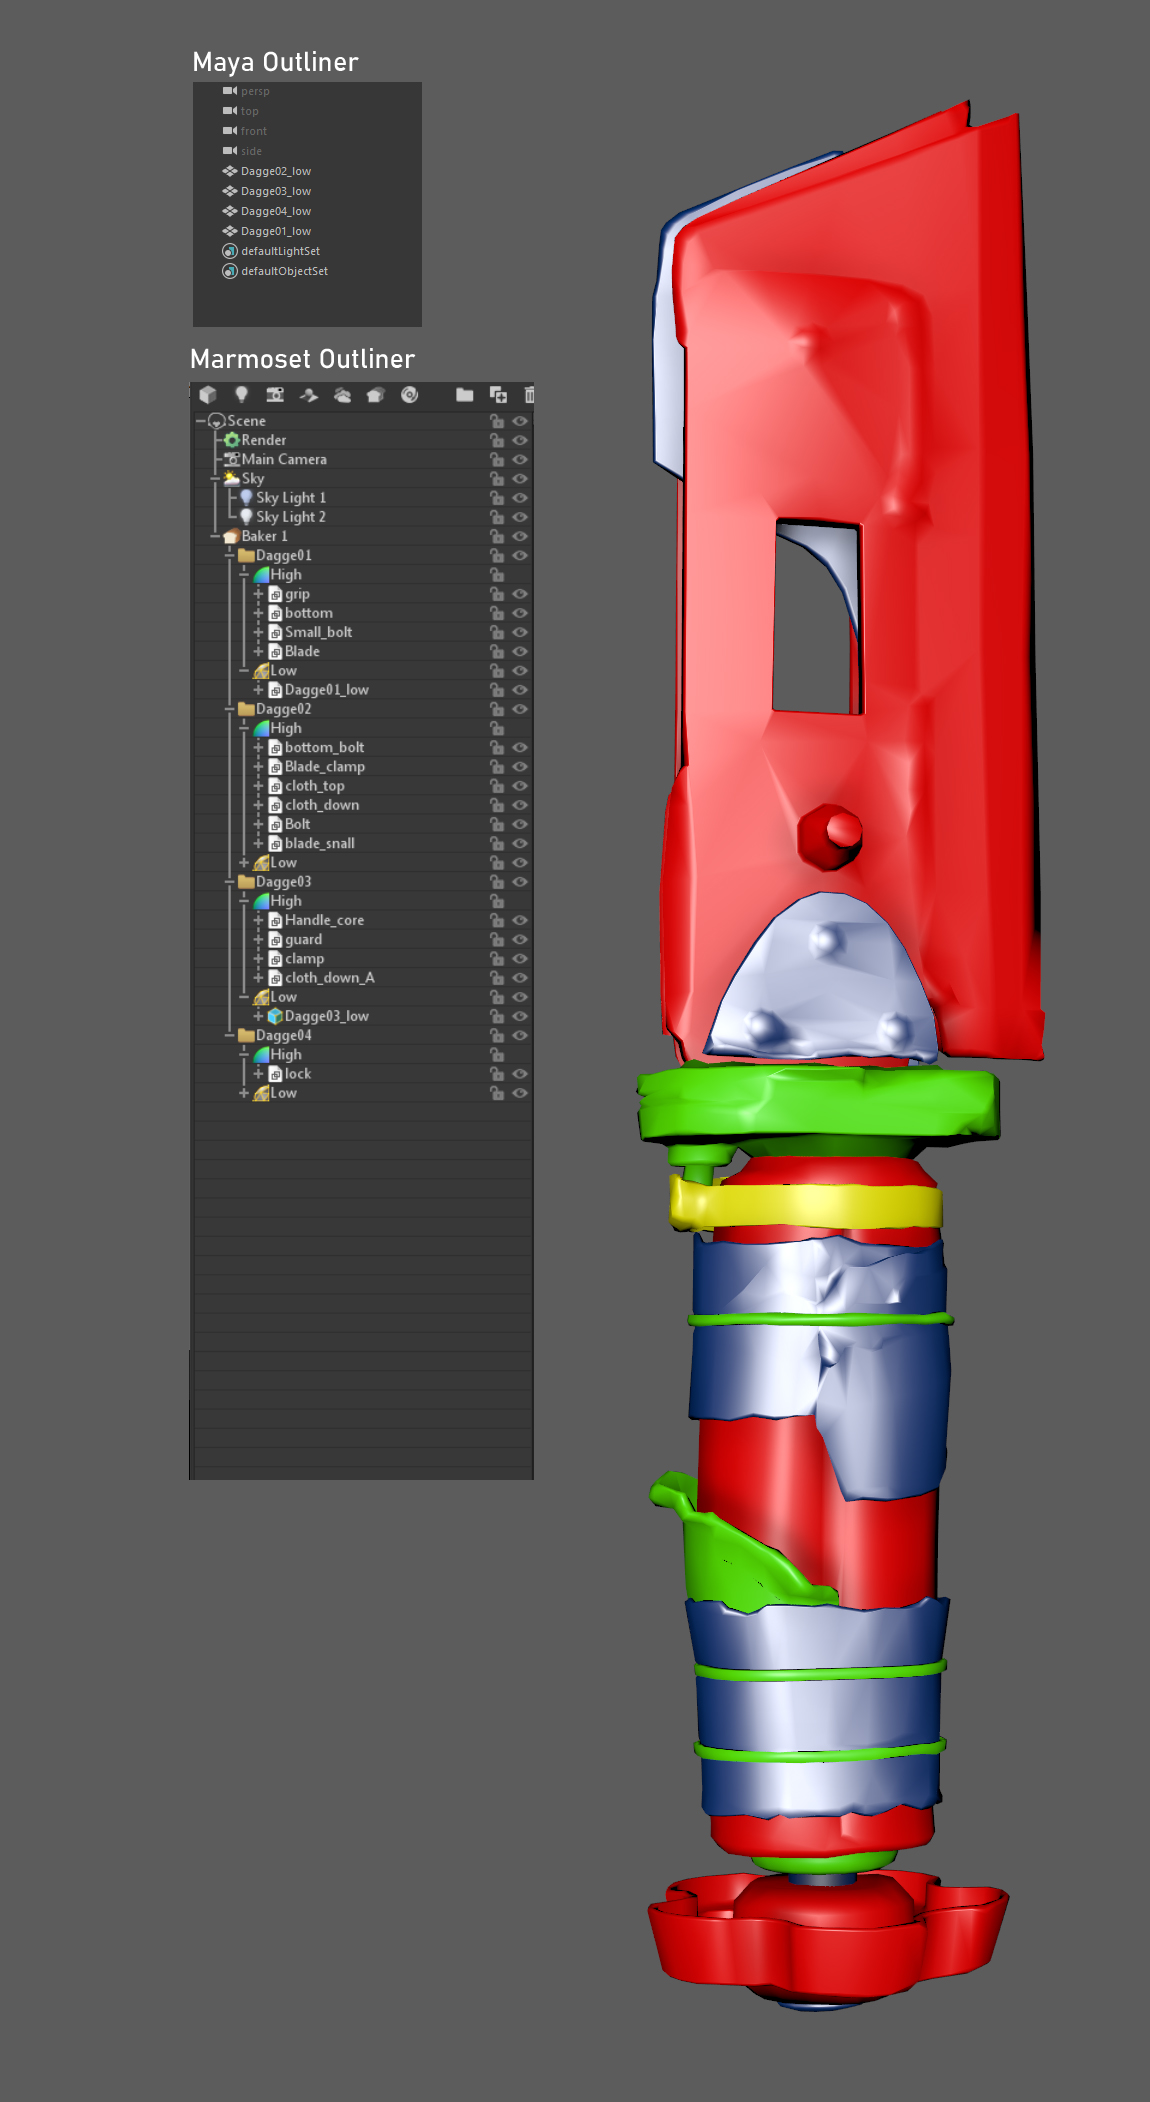
Layering options in marmoset makes it really easy to work and edit your bakes.
The paint offset and paint skew tools really help to make a cleaner bake. I always prefer not to edit any bake in Photoshop. I prefer a direct bake from marmoset even if I need to go back to low poly or UVs to edit.
Low Poly with a Height bake:

For this, I decided to bake a height map to get good looking tessellation in Marmoset, also to test it while baking and rebake if needed.
The settings I used to bake the height map, found in Height Settings:
Inner Distance: -8.0
Outerdistance: 4.0
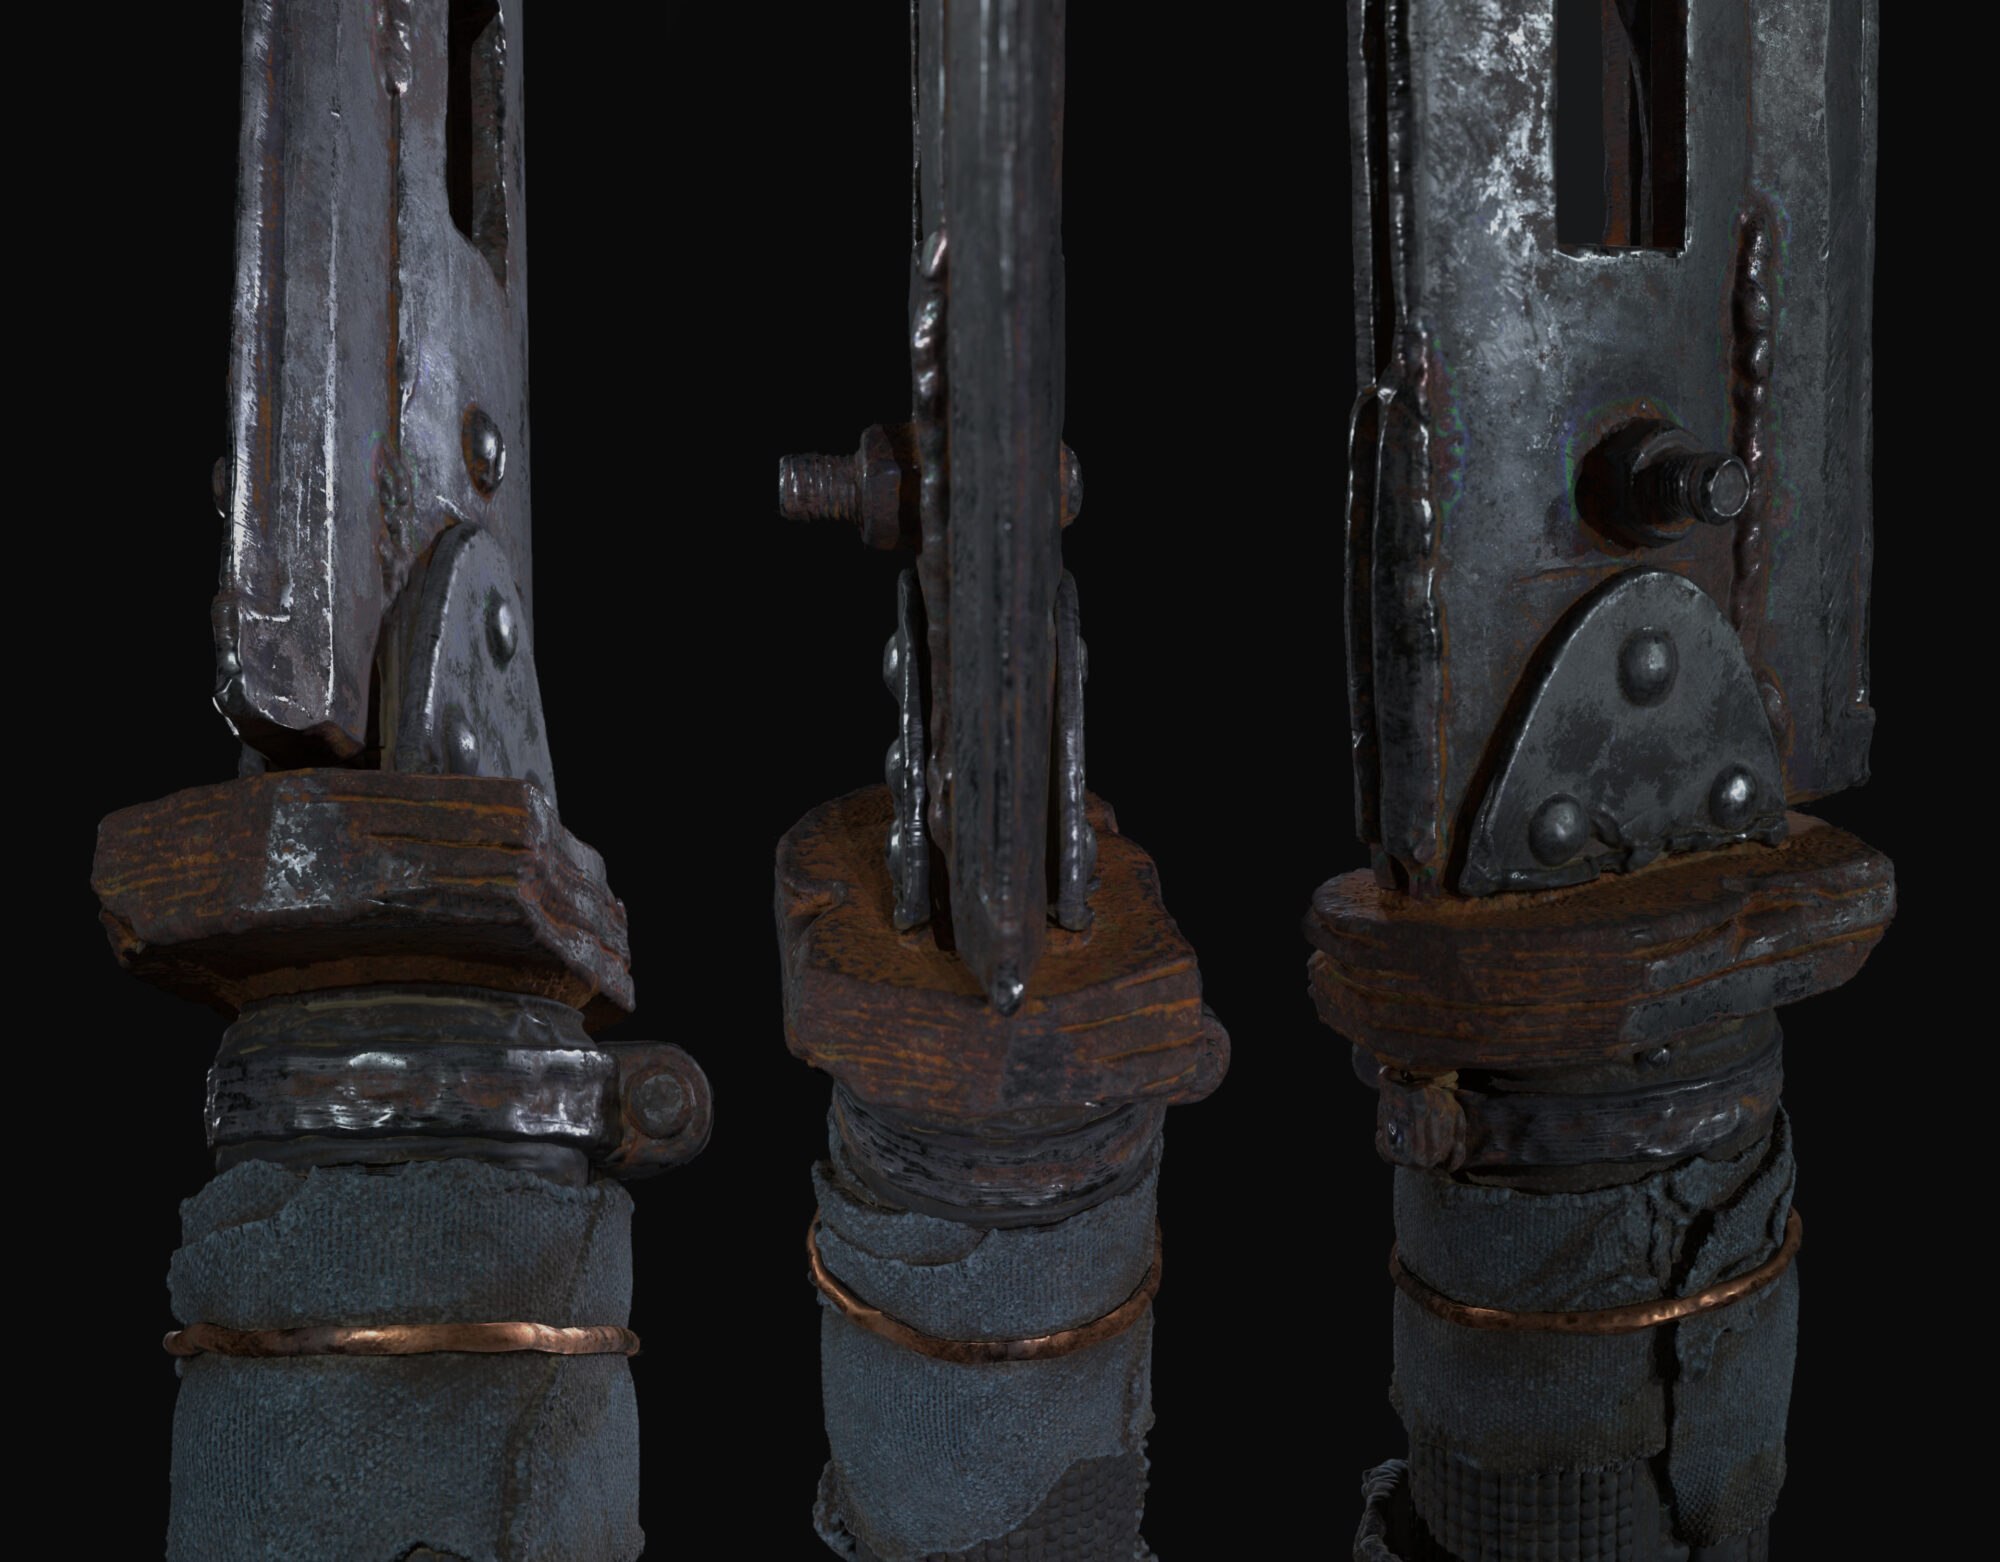
You can see in this screenshot how tesselation is breaking the straight edges of the lowpoly and giving it an organic feel.


Texturing
Texturing is my favourite part! I always try to find new ways and workflows to do things while texturing in Substance Painter.
I will say that to become a good Texture Artist, you need to observe objects and materials around you.
Observing objects properly gives you a clear idea of how to model, texture, and even concept.
For instance, learning how molding is done, there are different shapes and processes of making that material or shape in real life.
If you know how your asset is made in real life, it will make everything easy and clear at every stage of the asset-making process. Research!
When I begin the texturing process, I always make a setup in my final render software, like I am using Marmoset in this project.
So, before I start on the texture, I make a basic setup in Marmoset with a folder structure of textures exporting from Substance Painter and connected to Marmoset, that way I can quickly see our textures in Marmoset with basic lighting. I always tweak lighting while doing textures.
I always keep Substance Designer open as my second tool to make my surface height maps or masks.
In this particular project, I don’t use Substance Designer that much because I already put most of the details in the high poly sculpt; however, in most of the projects, I do use it to make height maps and use them in Painter with anchor points.
Once you set up your height maps with anchor points and have your basic details like edges and dirt, you can then easily refine them from material by material, trust me, you will be in love with this workflow.
Smart materials and smart masks are really helpful to save time and also keep the same quality in different assets of the same project. However, when working on a personal project, I always try to make materials from scratch.
This is how it looks when I turn on my layers one by one in Substance Painter.
In this image, you can see I start with basic colors and layers with different values of roughness.
Making a setup like this means I can add dirt and rust first (as we do in the modeling stage, making a blockout first, just like here the flat colors are the blockout)
In Marmoset, you always need to check your texture with the final output software with its default basic lighting setup if you have one.
You need to do this process, double check your texture in Marmoset whenever you do any big changes in Painter with your texture.
Once I am done with the basic textures using just color, I then begin to tweak them from the ground up, adding more masks, generators and layers.
In this project I didn’t use that many anchor points because we already have the detailed sculpt, later I will refer you to watch this tutorial for learning anchor points.
Hand painting also makes a big difference. Using generators is really good as a start but every asset has its own kind of mask and patches which we can make manually. I always achieve more realism by painting masks by hand.
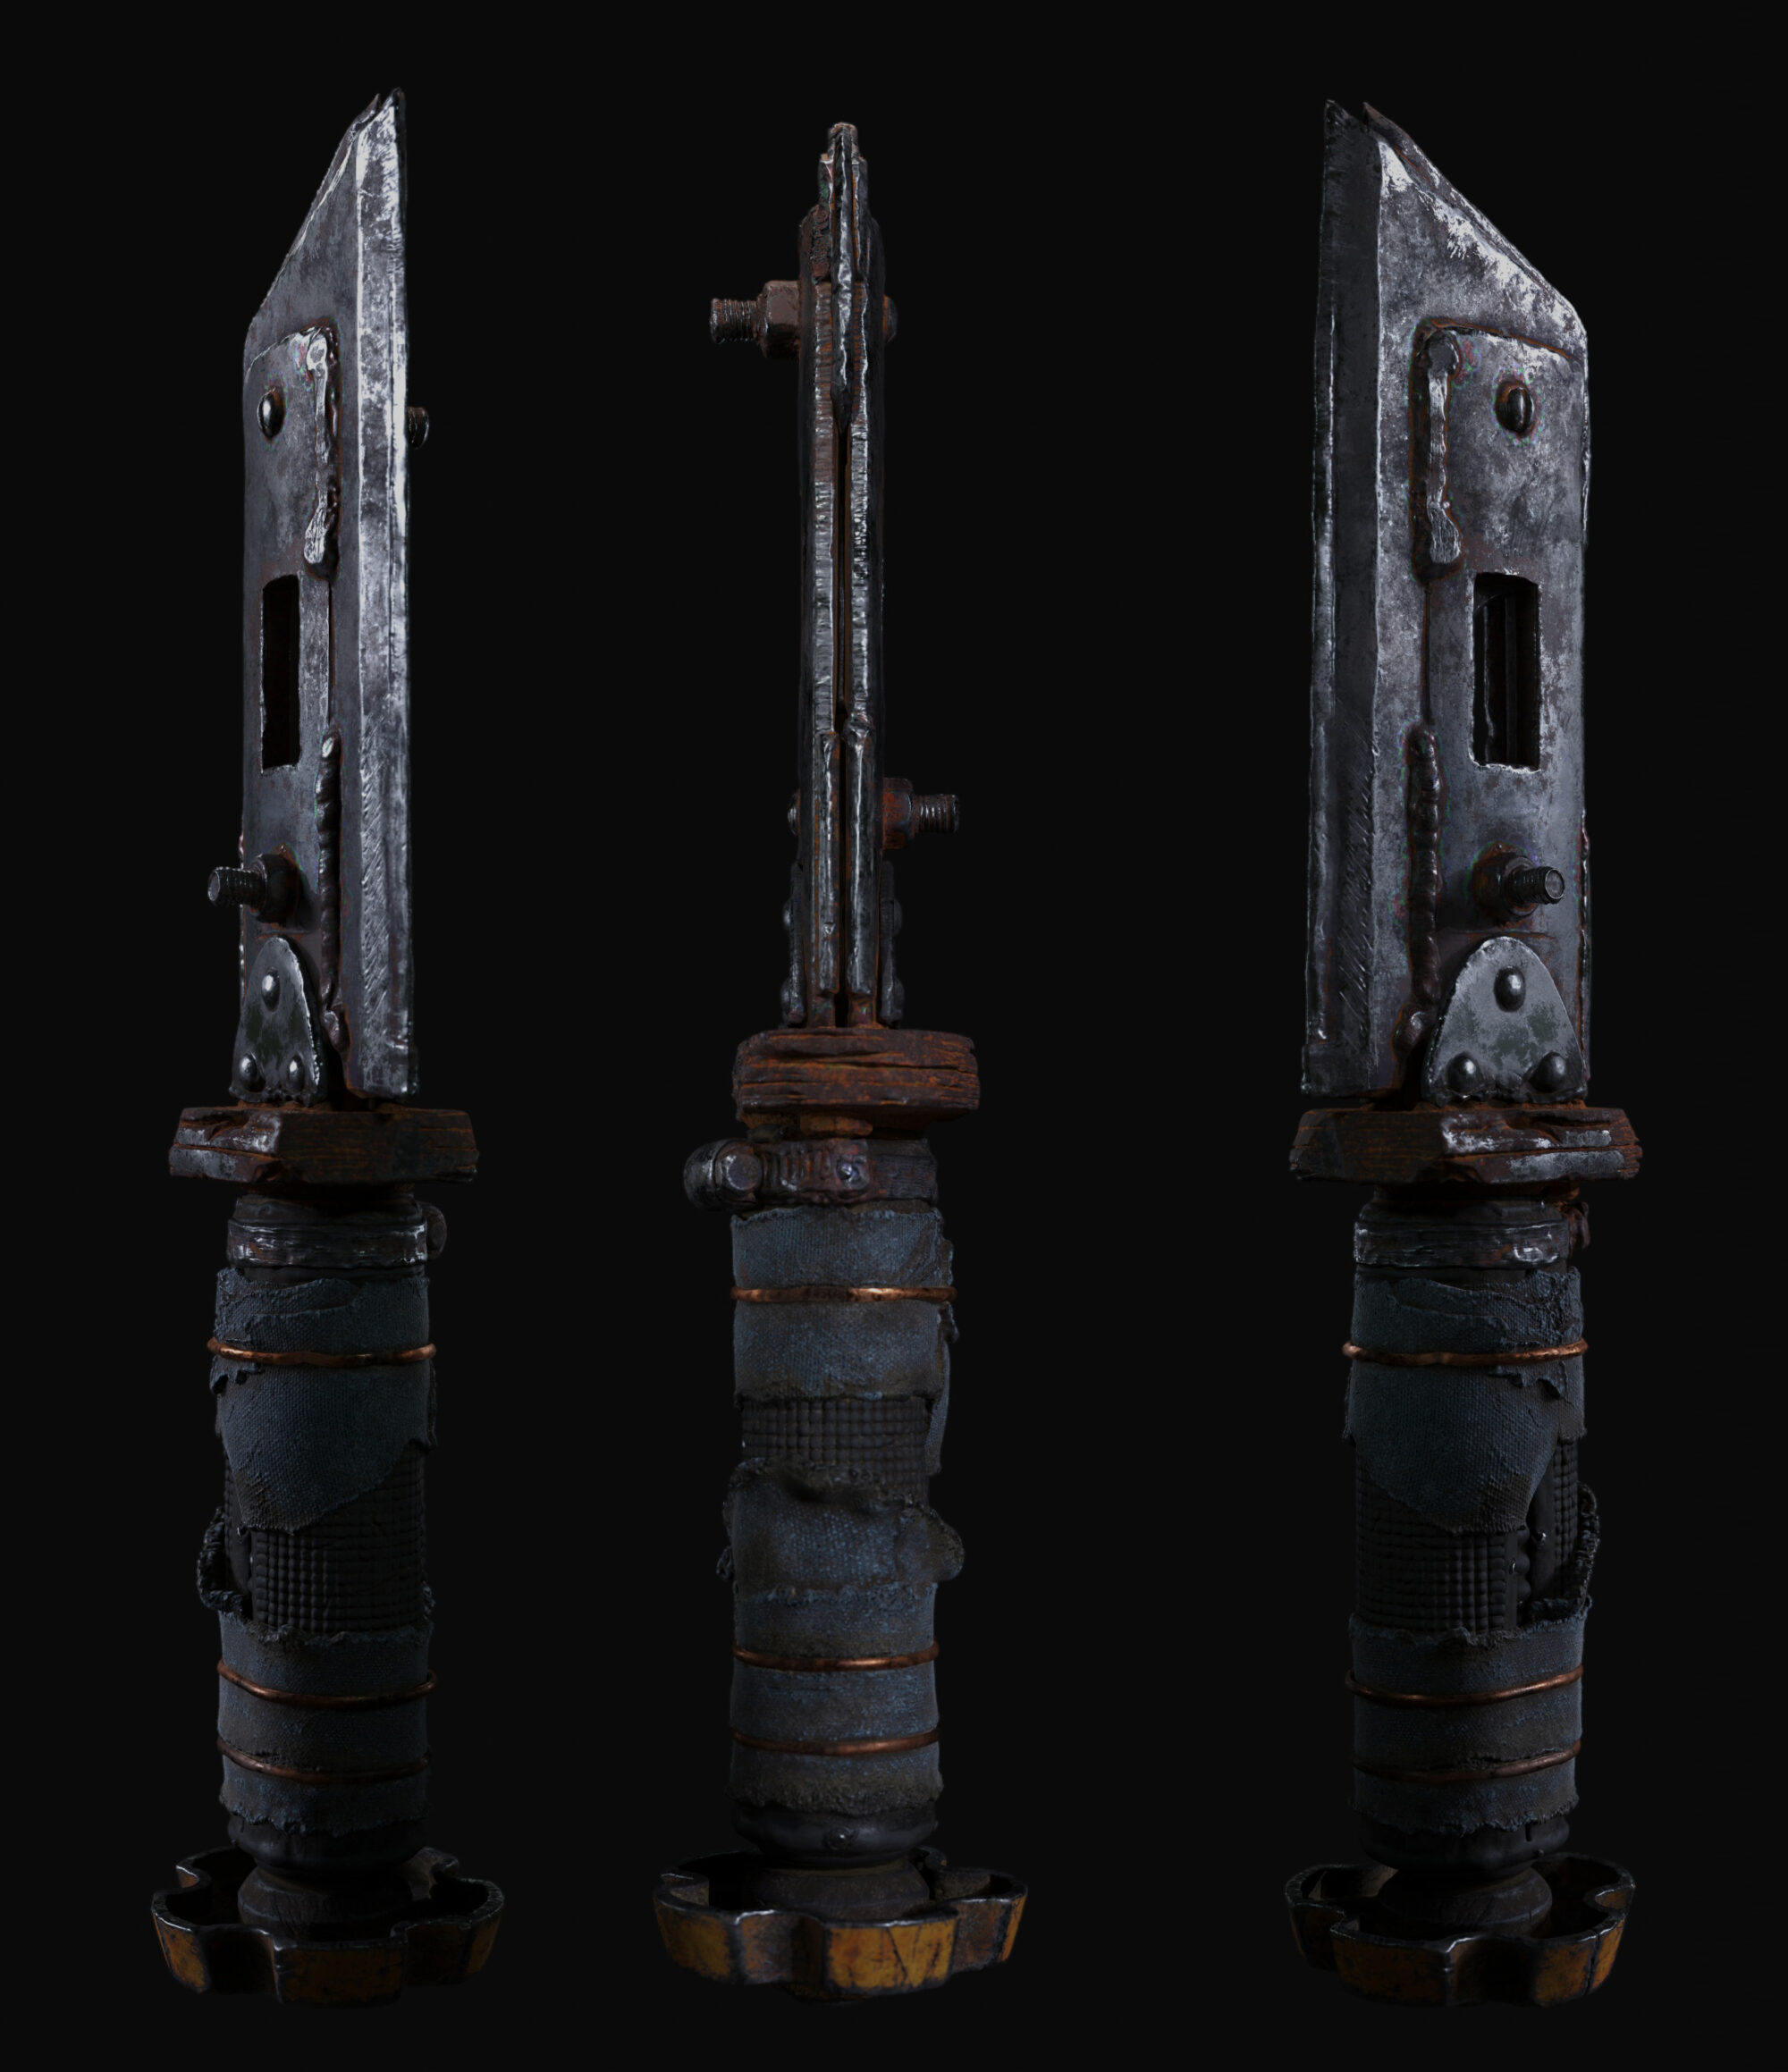
Rendering
I always improvise my lighting and try different skies while texturing.
I wanted to show more contrast in my texture without any influence of the tint of the skylight or any other light.
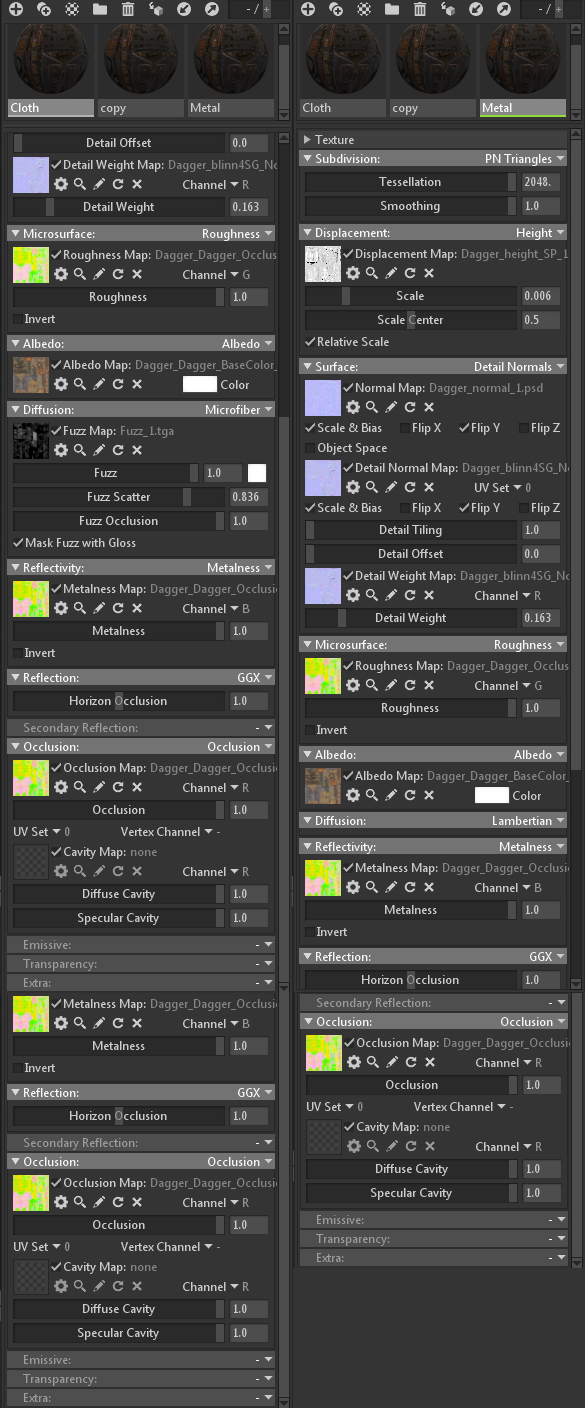
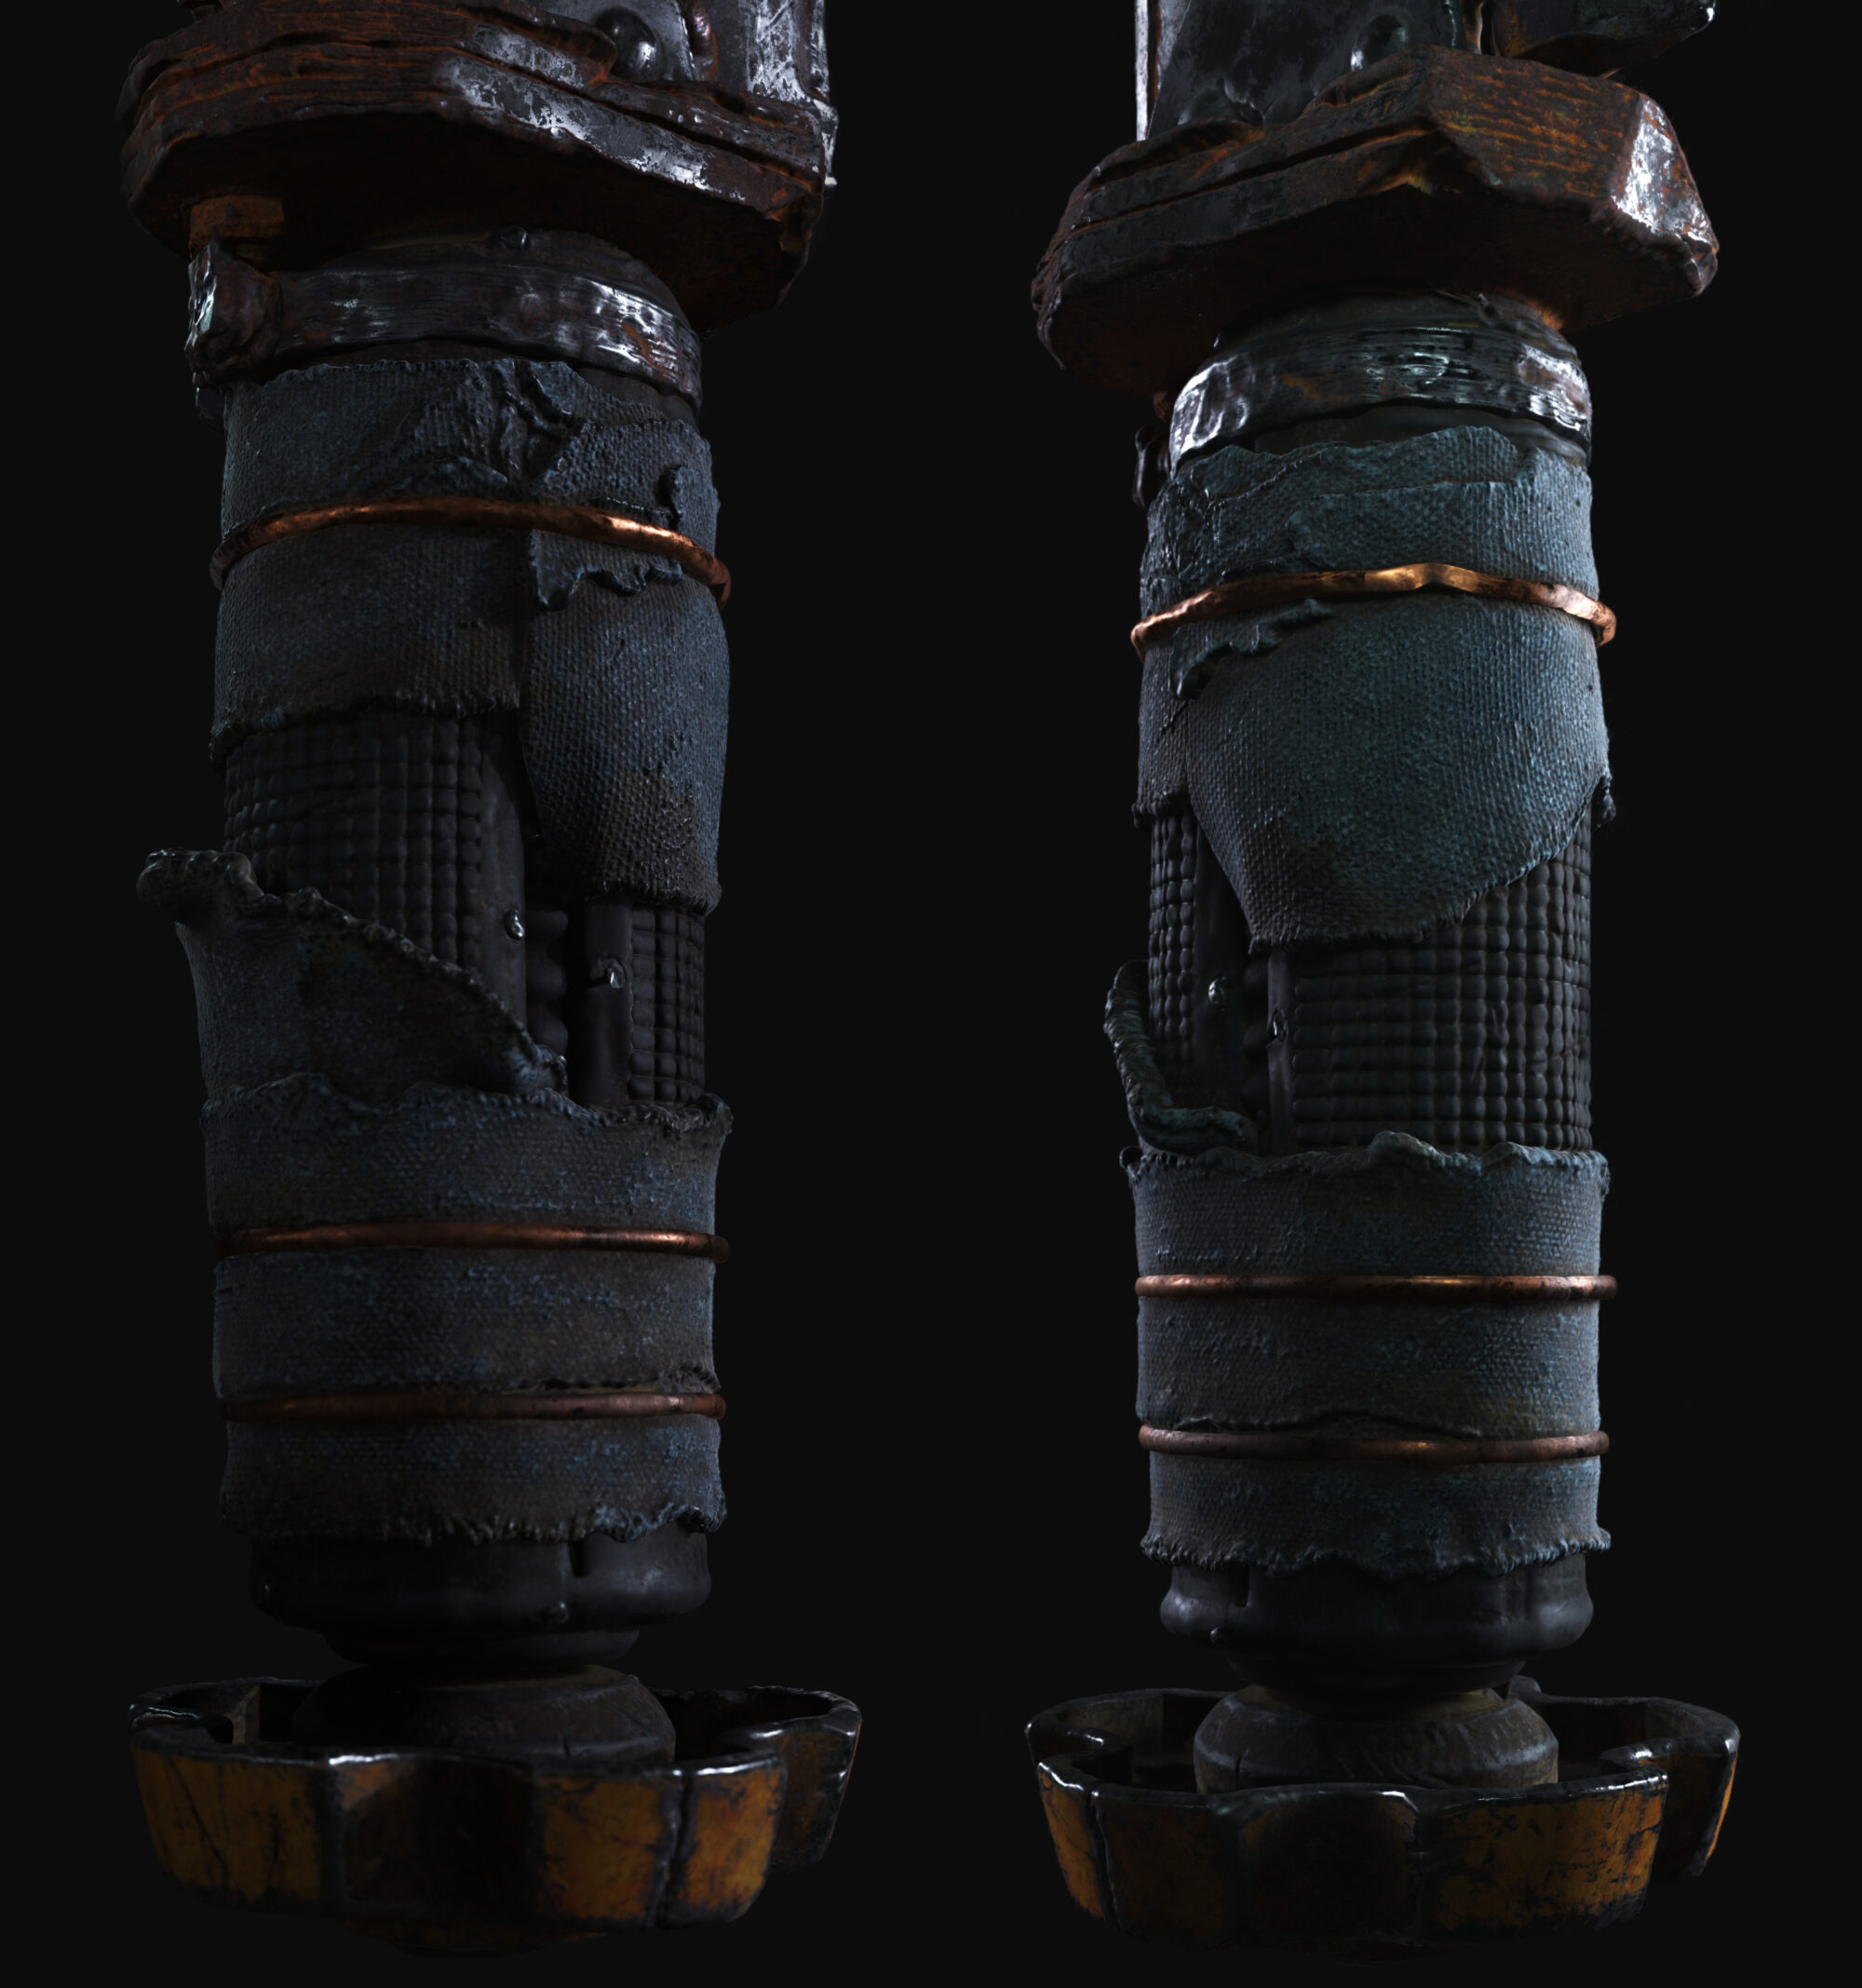
In this prop, I divide the main material into two, one for the metal and one for the grip cloth. Using the same texture but different tessellation values to give cloth parts a little more extreme tessellation values.
These are the settings of the material I used in Marmoset:
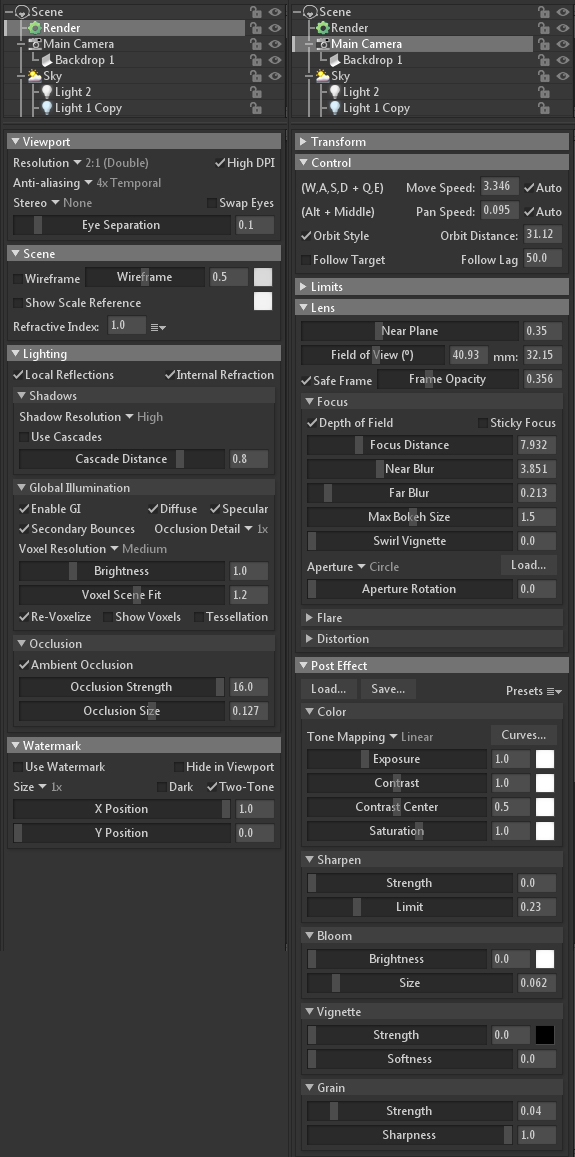
For lighting, I ended up using some skylights by pointing them in the skylight editor.
These are the camera and render settings for which I used in this project.

Closing
Thanks for reading this article.
I hope it will help or inspire you Artists, to make some cool art.
If you have any queries, please contact me here:
Read more articles
You might also like these articles.