Pollinator Wagon

Introduction
Hello, my name is Gen Amos!
I am currently a Junior Environment Artist in an indie studio in France. My specialization is hand-painted Props and Environments.
Goals
First of all, I wanted to challenge myself with a big project and see how I could manage the amount of diversity and tasks.
On the technical side, I wanted to create something modular by using trimsheets and optimized geo. Also, I wanted to push my hand-painting skills further and focus on specific materials like wood, metal and vegetation.
Software
- Maya
- Photoshop
- Marmoset Toolbag
- ZBrush
Organization
Before starting any 3D creation, I start by planning out the project. For this project, it took about a month or so to get things ready but it really was worth it to maintain an efficient workflow. The first thing I did was look for a concept!
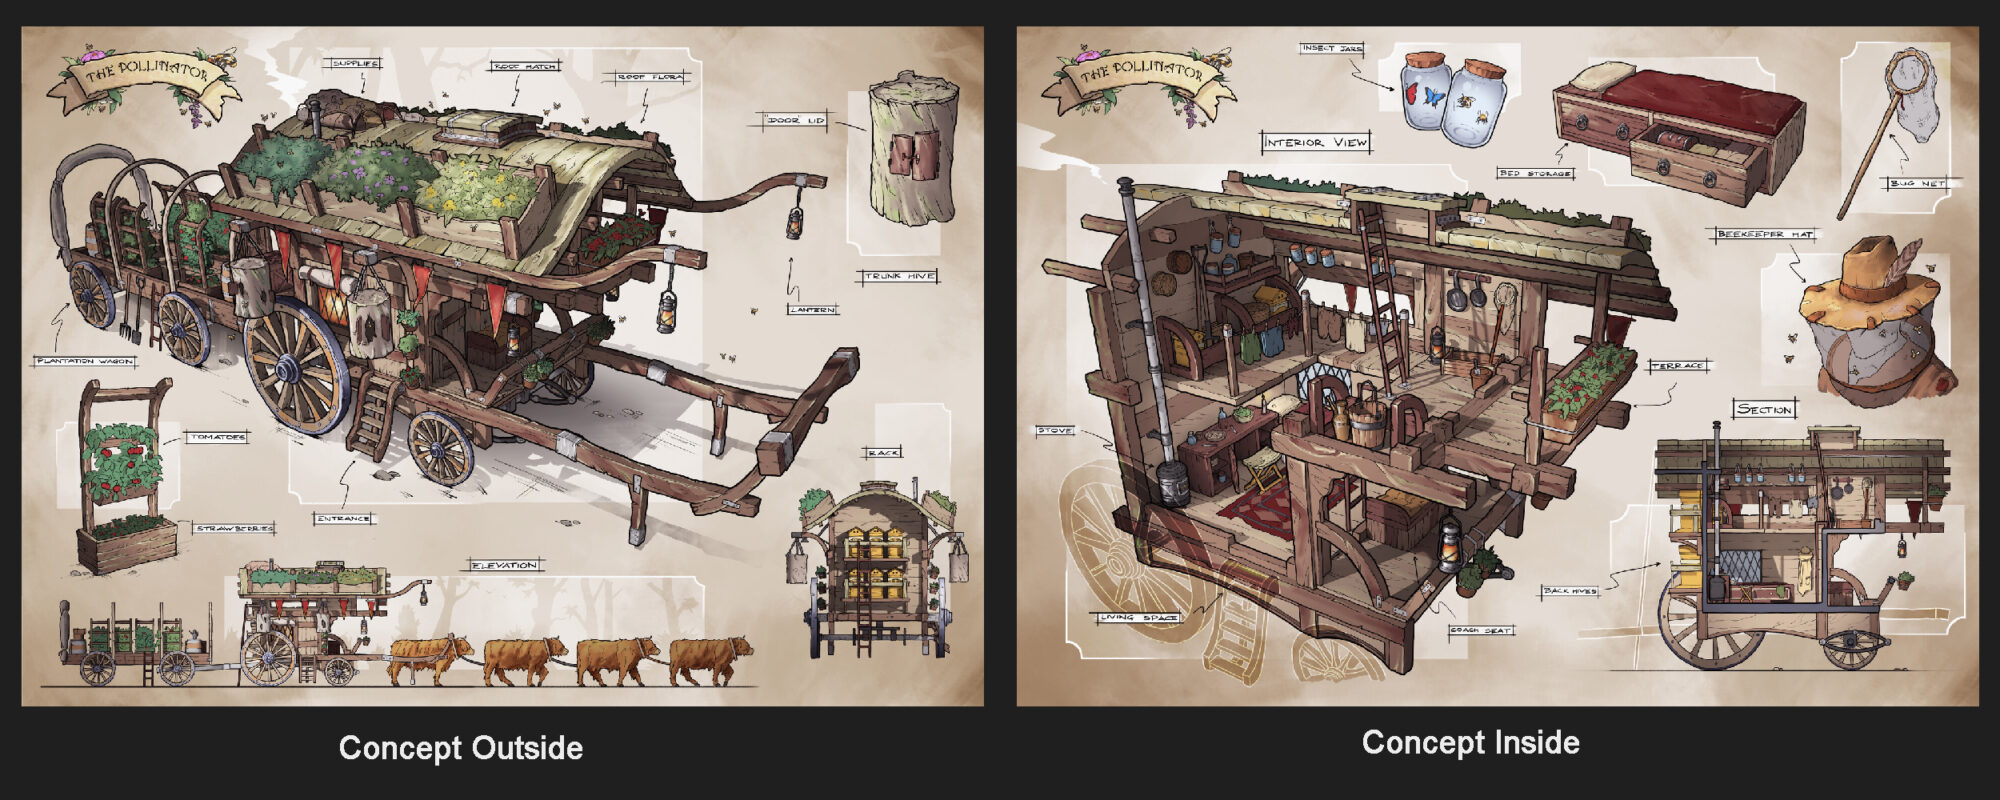
It’s good to take time here and do something that you will have fun making. So, I found this great concept from Matteo Leng. What I liked was the nature and low-tech feel the wagon was giving off. I also loved that I could envisage a fantasy story behind it, it looked really cozy to me.
It also had a lot of different materials to work on, hand-painting was my main drive for this project.
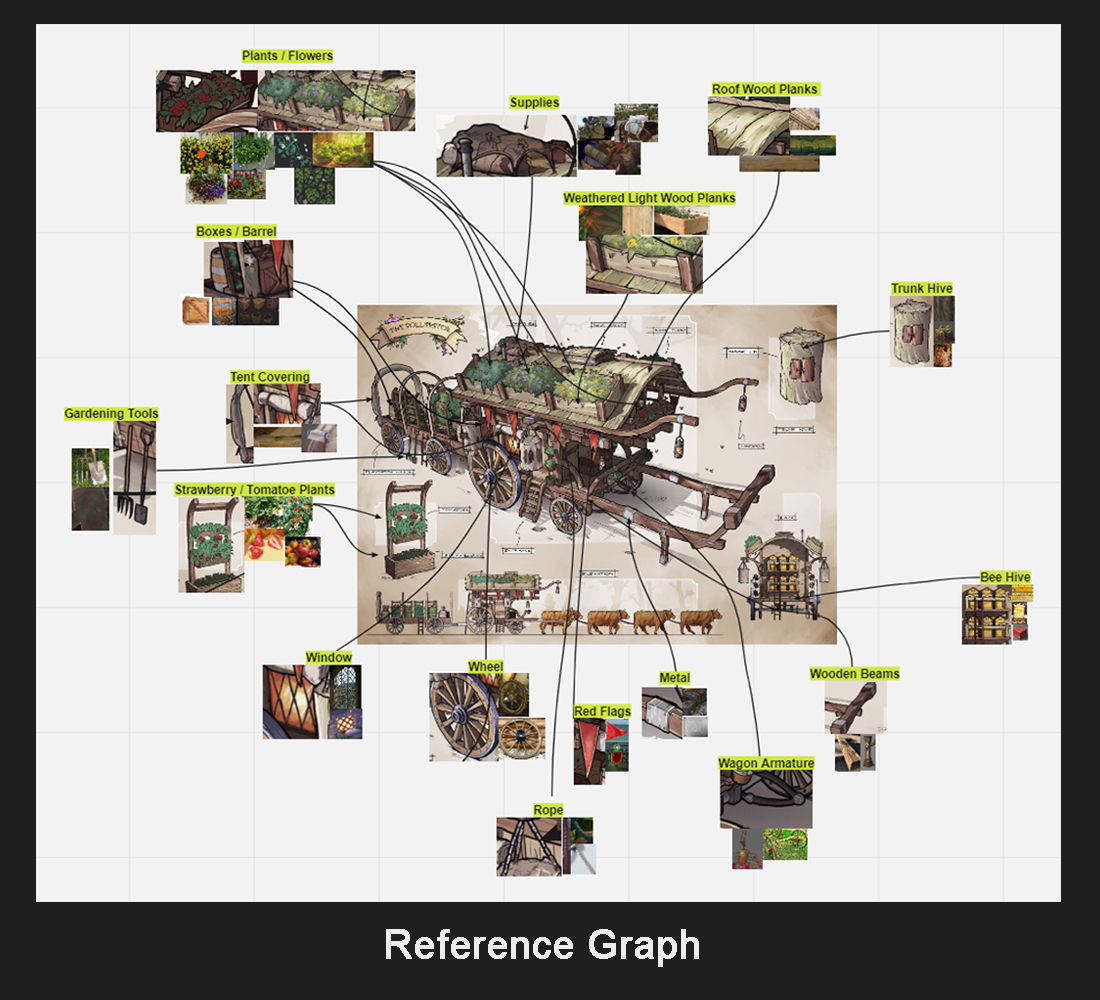
Now that I had the concept, it was time to study it. For my planning, reference and organization, I used Miro – it’s an online free app and is like a big blackboard.
Initially, I also wanted to do the interior. In the end, this added too much work and I was worried I would rush and do a poor job. Feeling a little overwhelmed I took some time to reflect and prioritize quality over quantity.
Referencing
When turning to references I like to spend the right amount of time to find two references per prop: one real-life and one hand-painted. This allows me to have a navigable design board (see below) and the right amount of reference material to have a strong stylized basis and room for creativity. If necessary, I add more references later on.
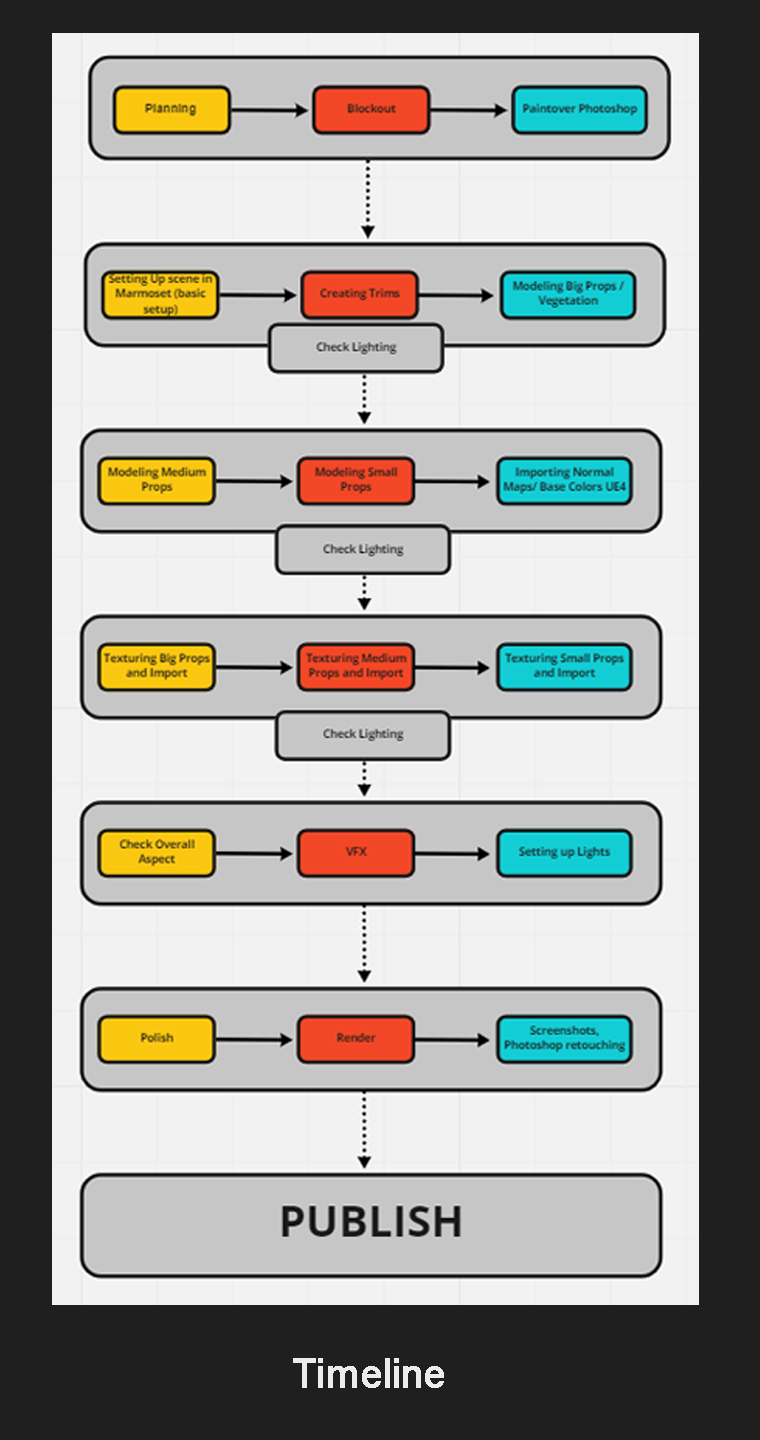
Then I created a timeline. Generally, I stick to the timeline as much as I can and readjust when I have underestimated certain tasks or made a major plan change.
This, in fact, was the case in this project. You can see that I initially planned to sculpt my trimsheets then mid-project changed this idea and removed a large part of sculpting and baking from the schedule.
I did some planning for my trimsheets by highlighting similar elements within the project, however, the amount of detail and forward planning for this part, left me a little overwhelmed and unsure of how this was actually helping me advance the project itself.
I decided to stop planning my trims and just start the project, in the end, the planning of the trimsheets came pretty organically once I started making them.
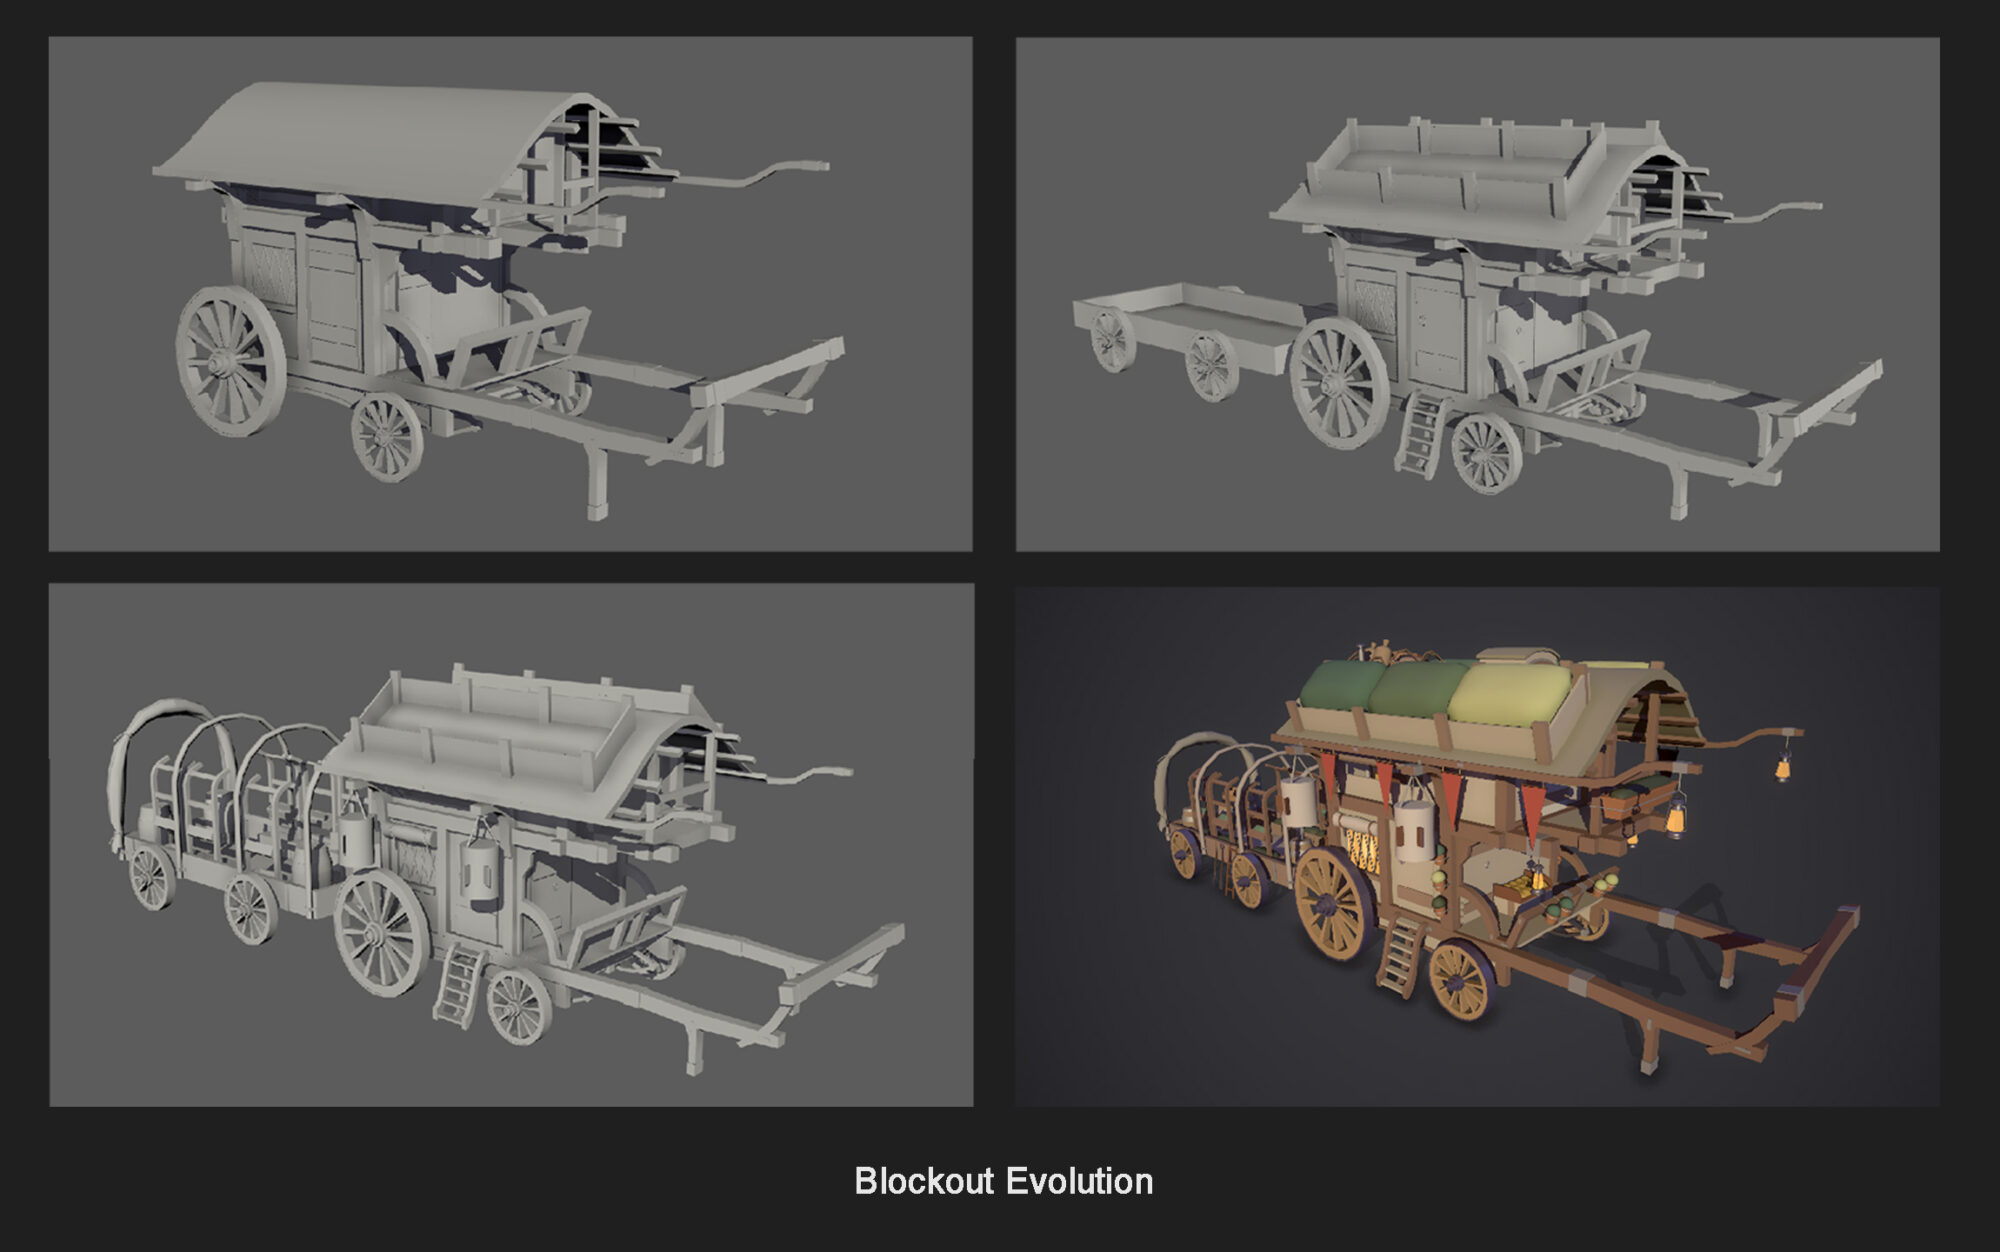
Blockout
Okay so now is the fun part! I just modelled stuff not really paying attention to the geo or optimization, the objective here was just to get the proportions correct. I also added some block colors and put them in Marmoset Toolbag.
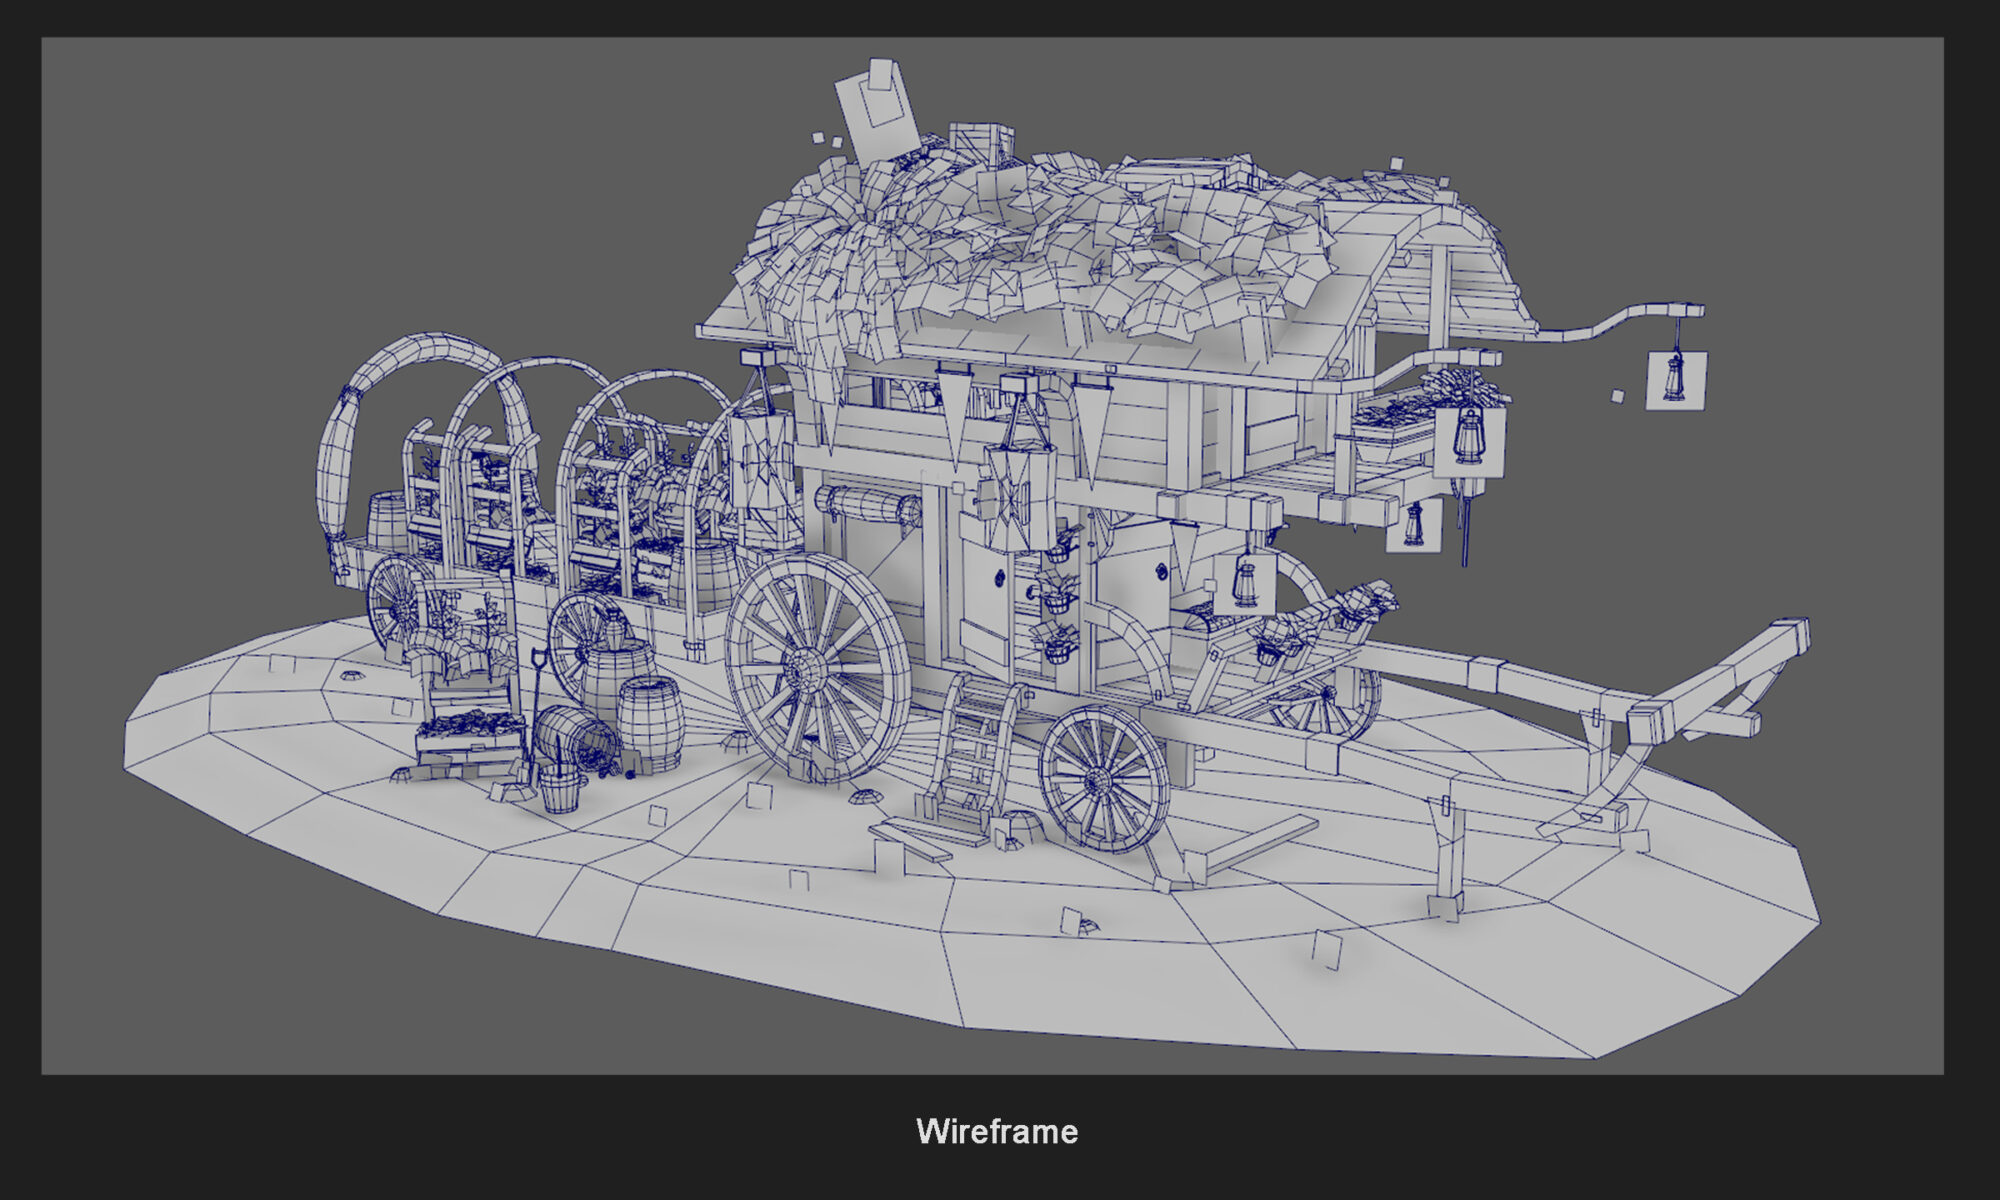
Modelling
I went over my blockout and created my UV sheets. I also tried to optimize as much as possible. In hand painting it’s very good to mirror as many objects as you can.
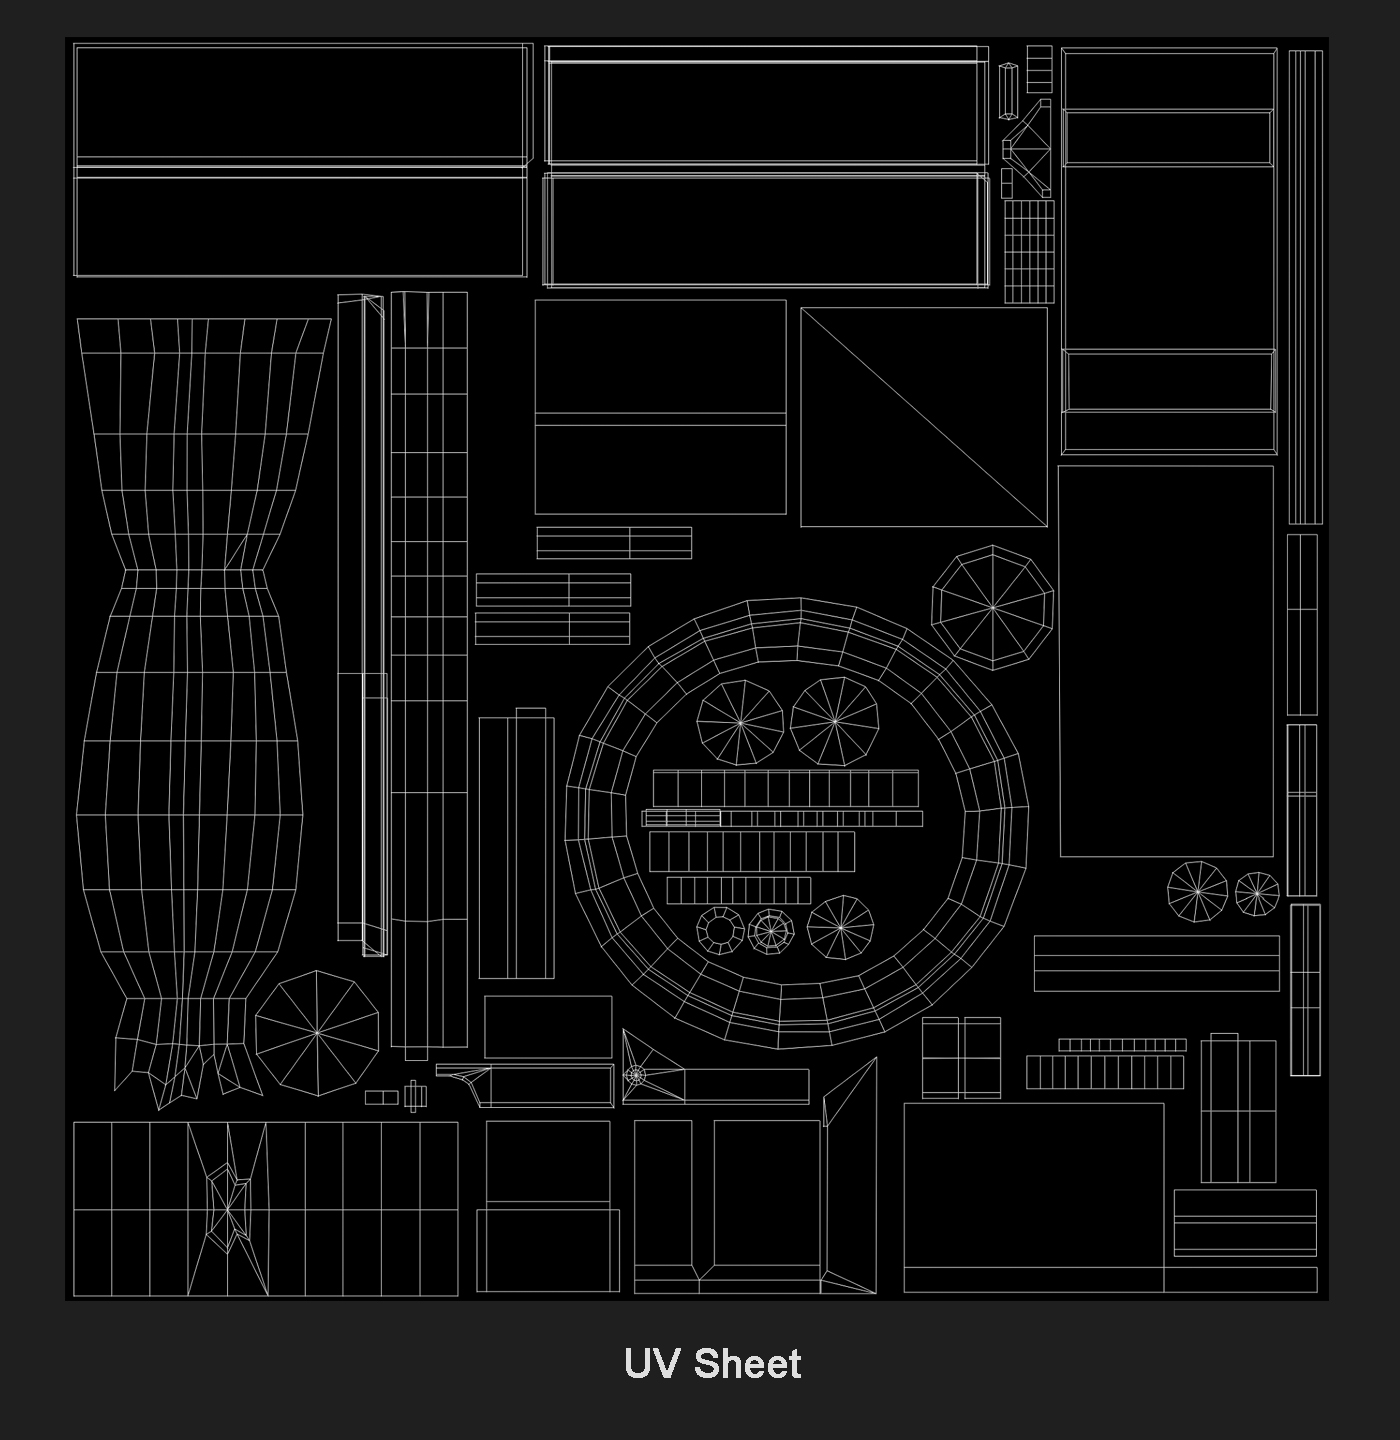
I needed also to keep my UV’s the most readable as possible. Although organizing the UVs is really important, it is also quite personal. Personally, I like to have easily read UVs to help me with the painting. For example, I wanted to keep my wheel circular so that I could use a top-down gradient.
Considering that the textures take the most time, you need to try and gain time somewhere else. To give you an idea, the textures probably took 70% of my time on this project.
Here is an example of one of my UV sheets:
Sculpting Test
After spending some time on ZBrush, I was pretty happy with the sculpt results of my wood trimsheet.
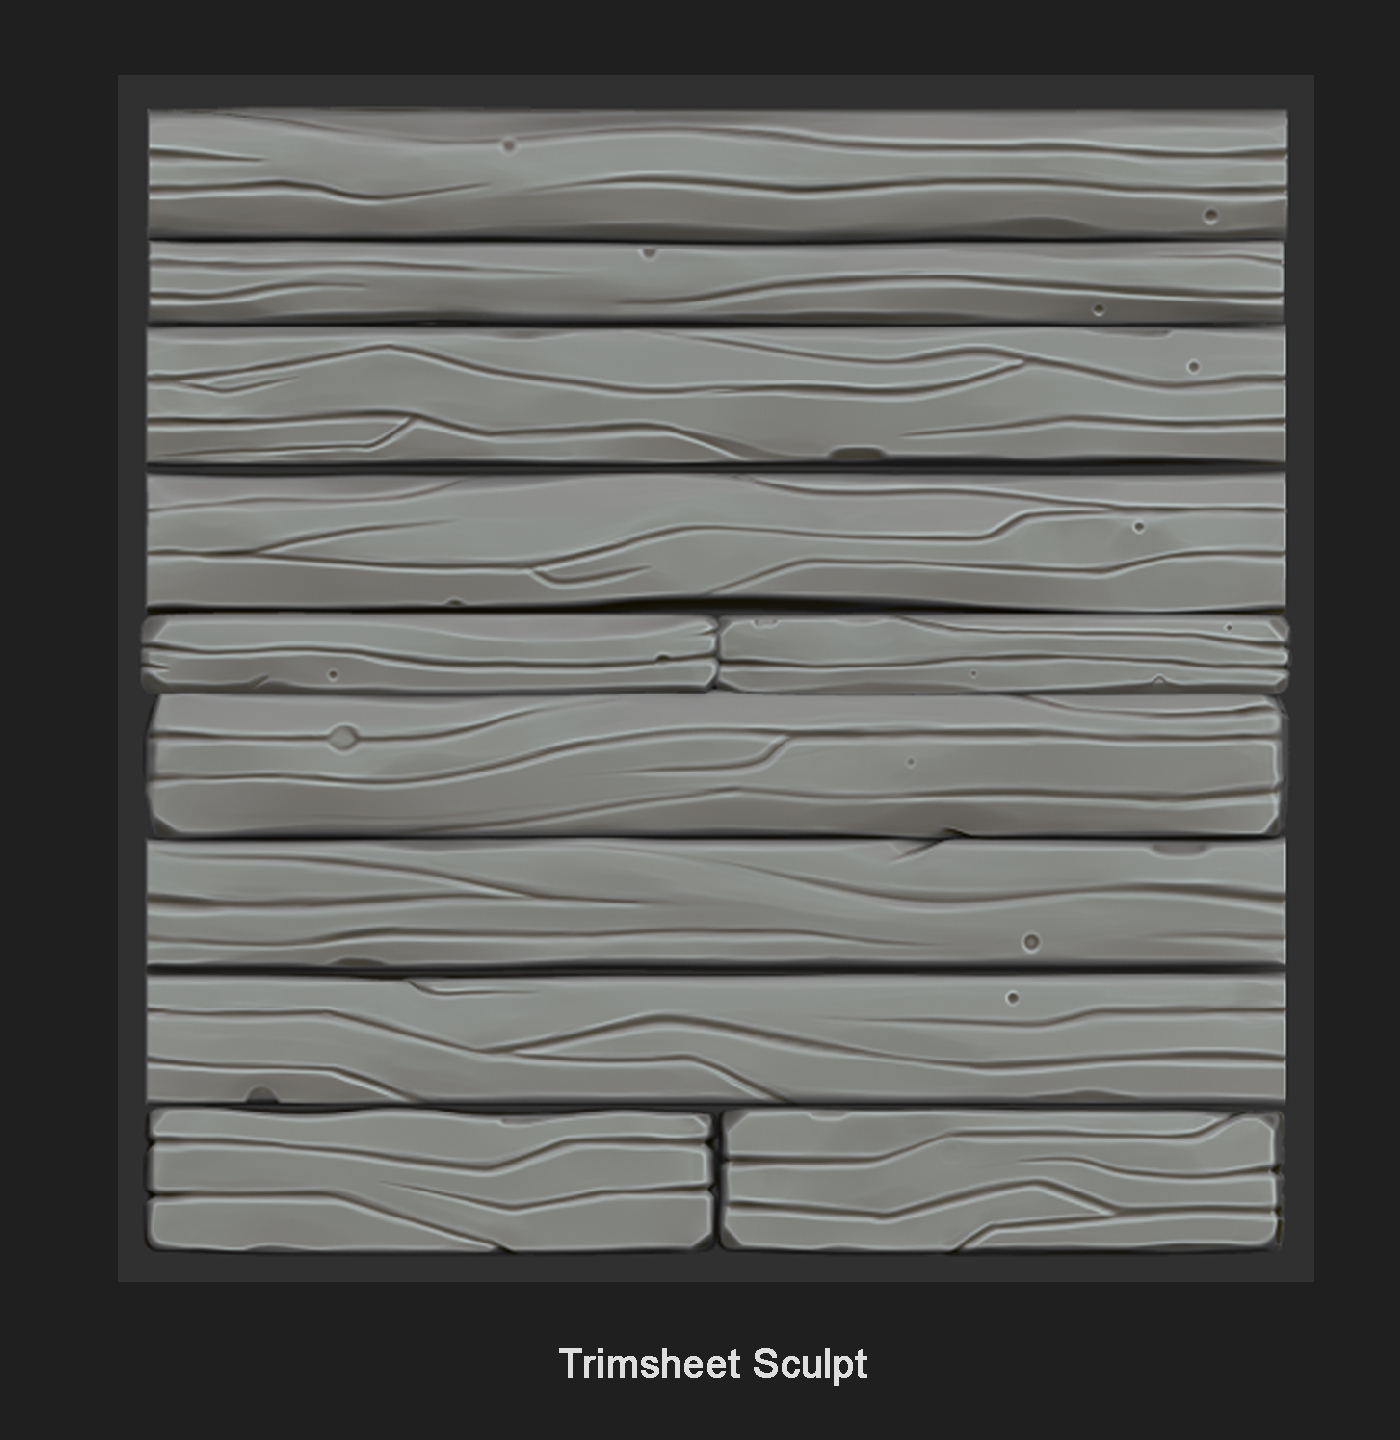
When it came to texturing this sculpt, I was having difficulty achieving the hand-painted feel.
I spent a lot of time trying to get a good result but in vain, and this was becoming very tiring mentally. I took some time to reflect and reached out to people for feedback and advice. Following this feedback, I realized that a fully 2D hand-painted trimsheet (no high-poly) was probably the way to go.
Texturing Objects
Now that I had sorted out all of my UVs, it was time to start painting them! I have a personal preference for painting directly onto my UVs but I suppose you could paint them directly on your model by using software like 3D Coat.
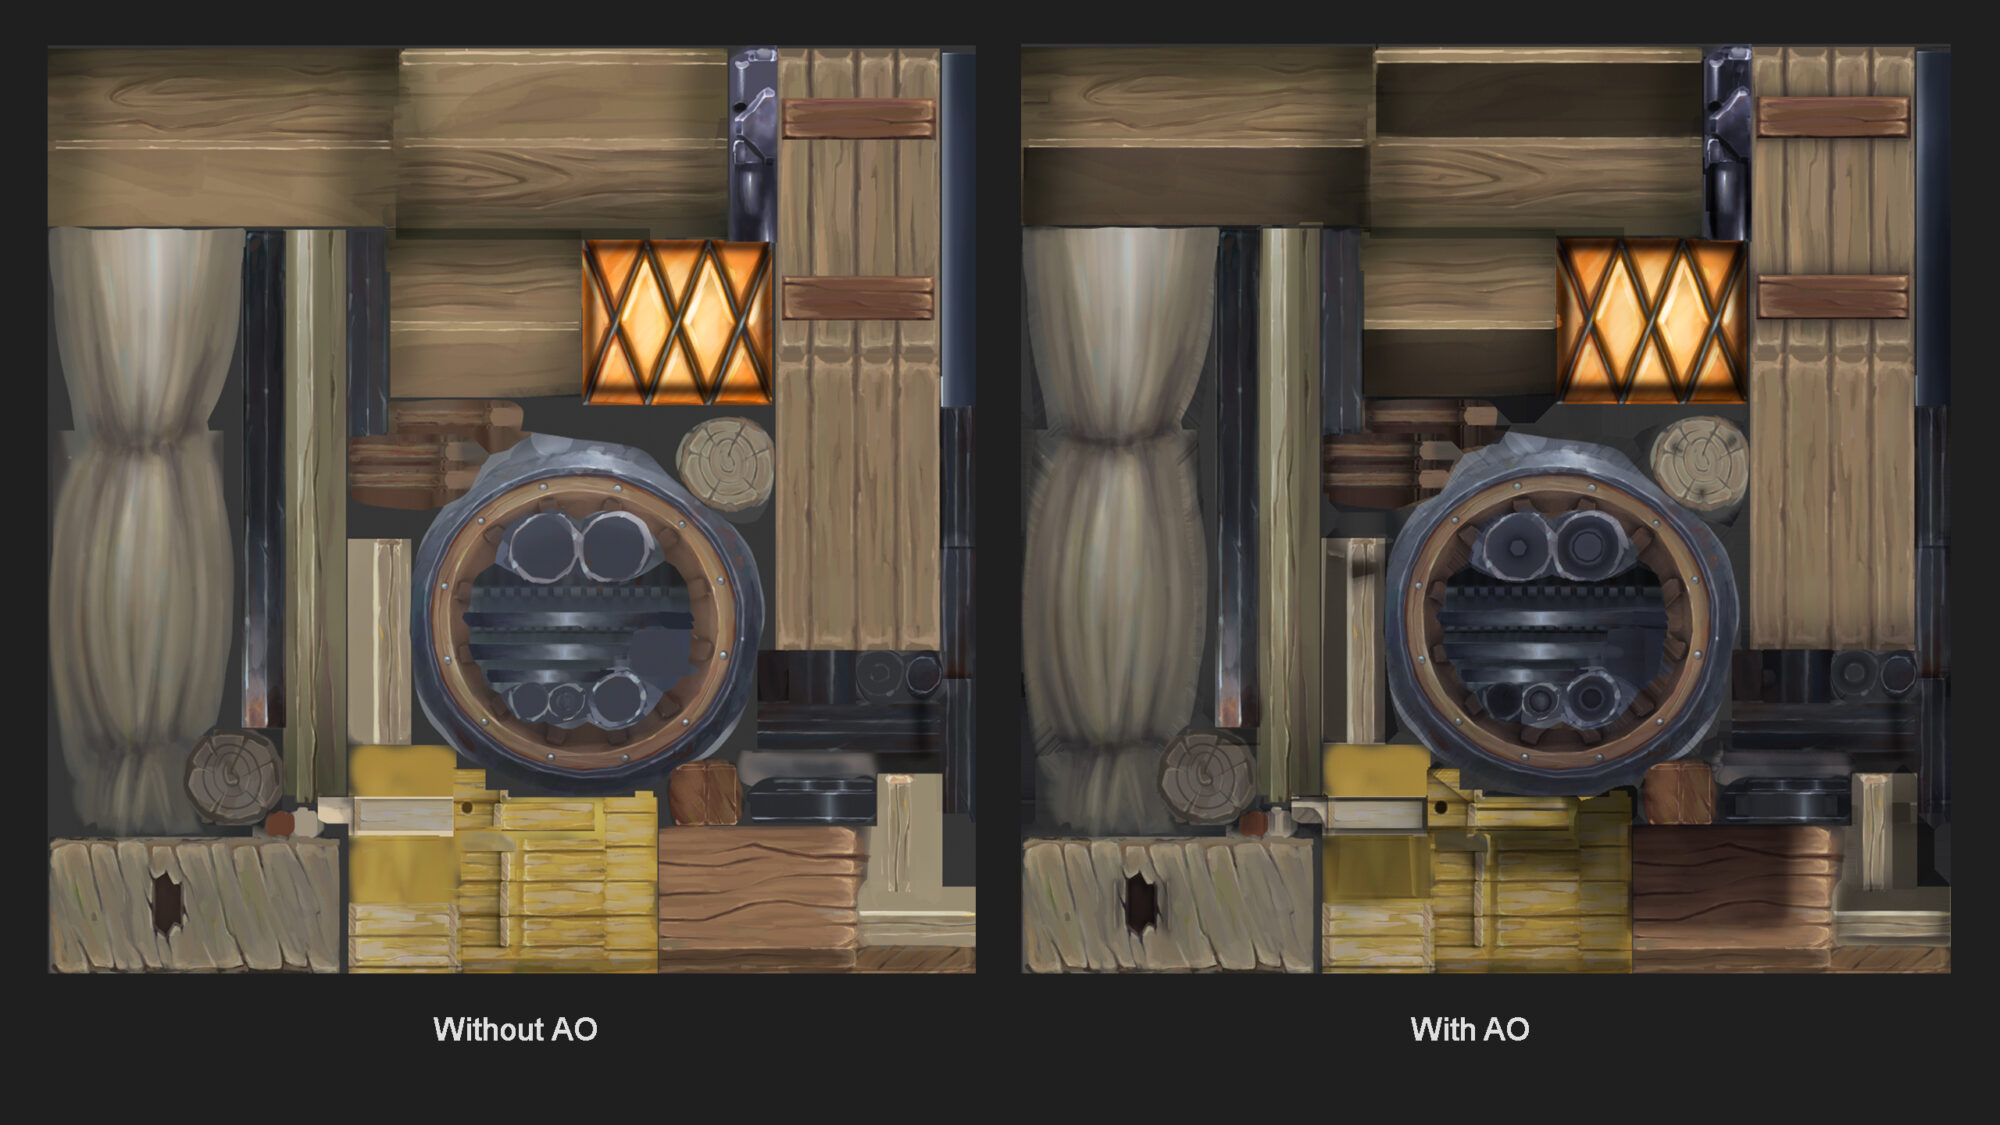
To have a nice base to start with, I like to do a quick bake of my model. The only map that I keep is the AO and I bring this into photoshop, I retouched it up a bit and gave it a blueish tint.
I put this map on top of all my painting layers and set it to “multiply”.
Inspired by the work of Riot games I wanted to have the hand-painted feel just right. From the start, I wanted the driver on this project to allow me to get as close as possible to their style so that I could understand their creative procedure.
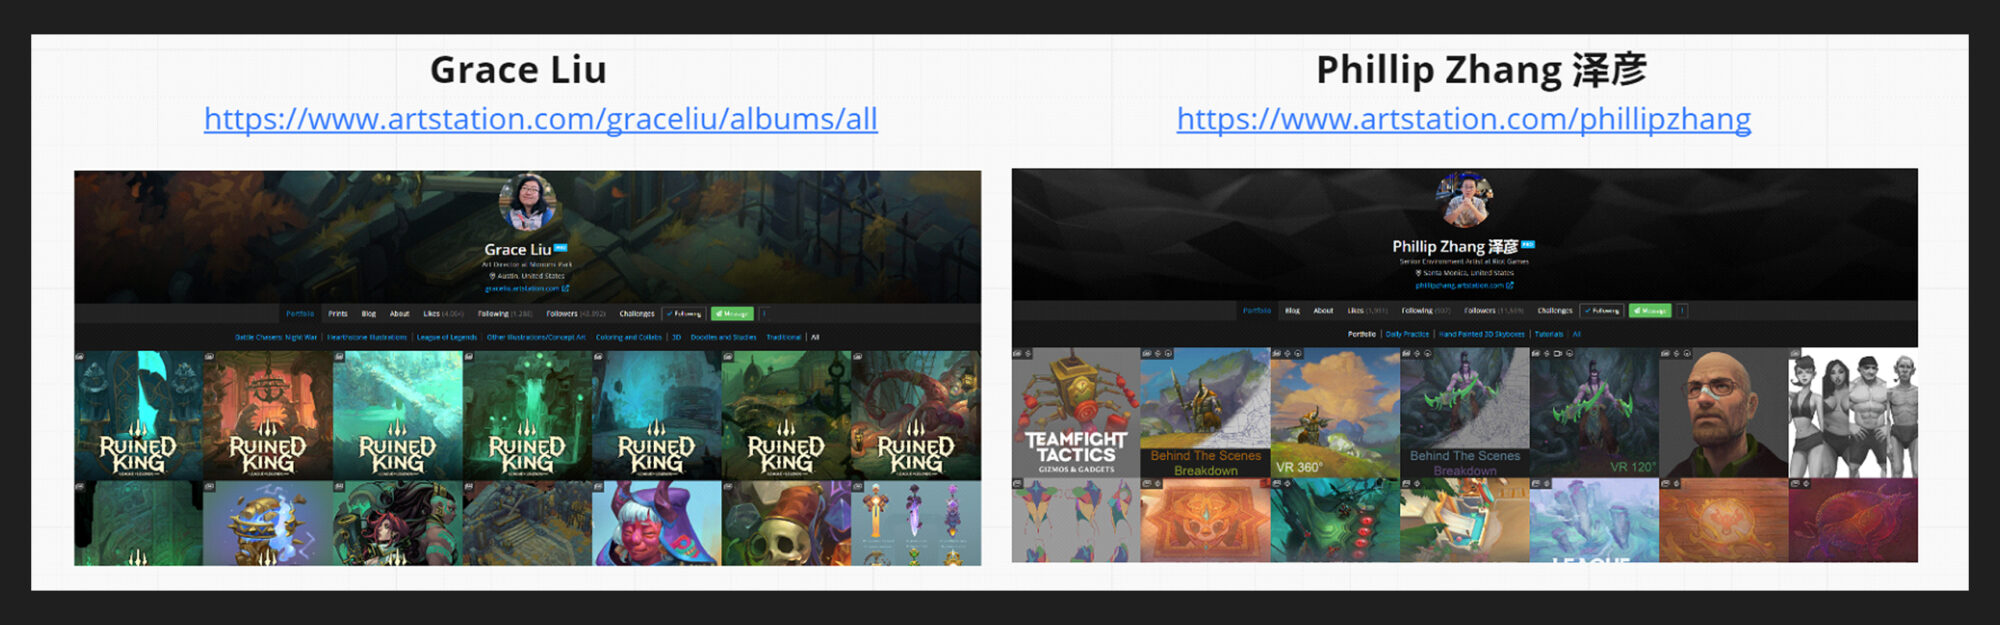
To help me out in this task I looked into the artworks of various creators, I particularly enjoyed studying the impressive works of Grace Liu with her wood textures and Phillip Zhang with his vegetation.
So I started to paint. I can sometimes get a bit nervous when overthinking painting and I found that it’s best to stick to the basics:
Start with the big move to the medium, then small details and, also, let my hand free – almost as if it was an independent thinker at this stage.
A couple of tips for hand painting:
– Use real-life references, try to not go into the small details.
– Don’t be frightened of color! Great hand-painted works have a tone of color variation, they a very subtle but that is what will make them really pop.
– Try and keep in mind your grayscale values, I like to take artworks of other artists, put them in grayscale and see how they adjust their values and compare them to mine.
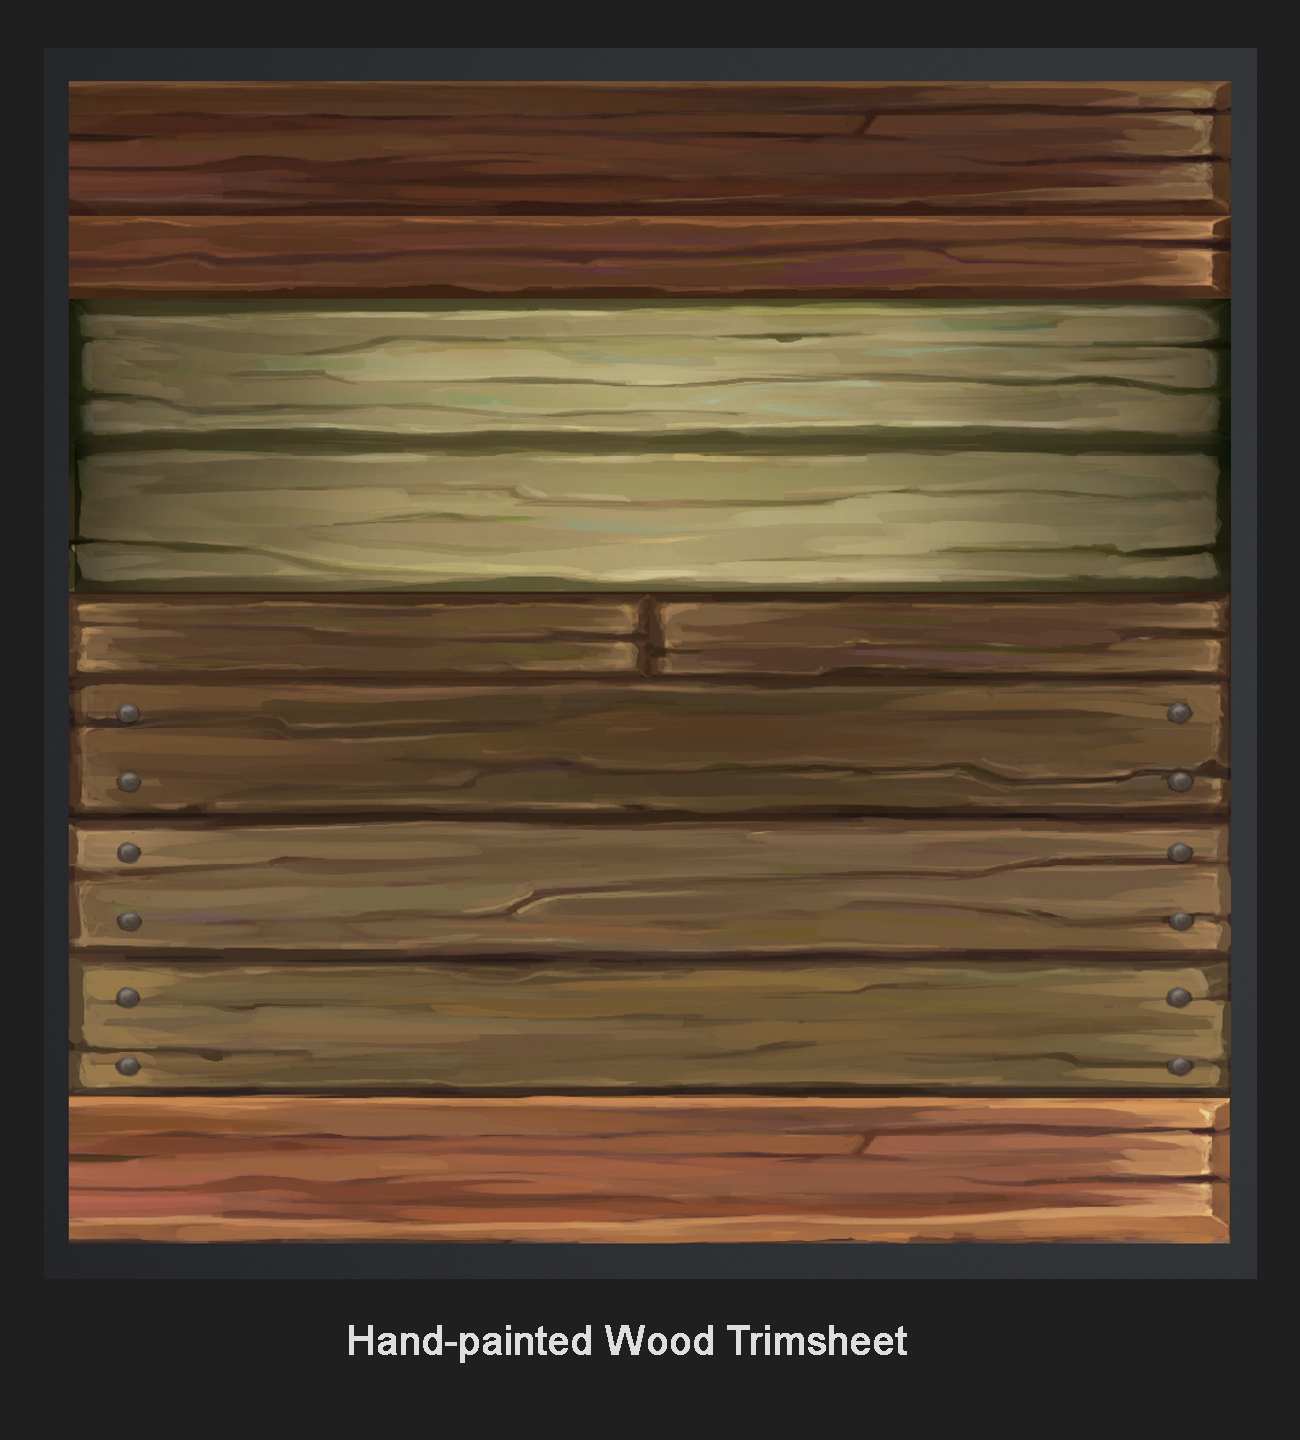
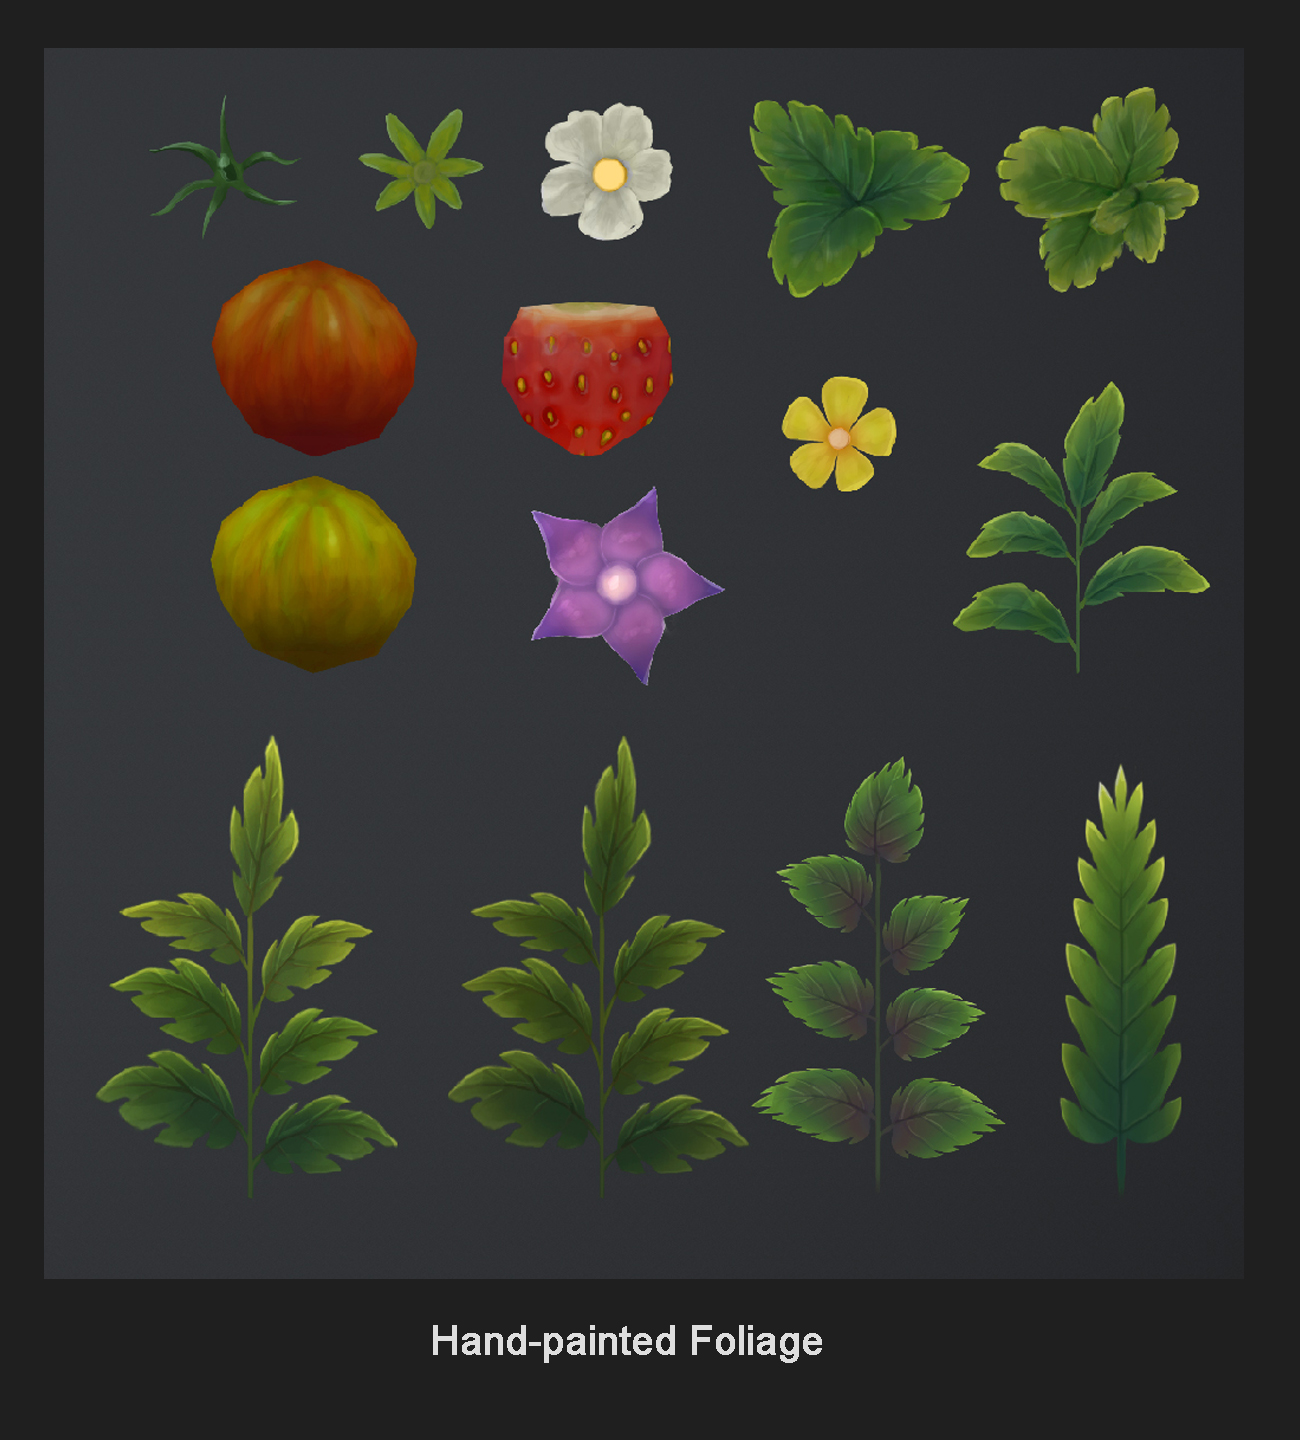
Texturing Trimsheets & Foliage
For the trimsheets and foliage, I had a different approach, I didn’t do any bake, it’s just 2D paint.
I didn’t overthink it too much. I tried to think about the purpose of each piece if it is humid, dry, worn… Thinking like this, you create different types of wood adapted for different areas in your model. I then placed the most UV shells I could on this trimsheet, you can flip and mirror your UVs to create variation.
For the foliage, I tried to gather real-time references of the different types of plants I wanted to create.
As I mentioned previously, I wanted to have a fantasy vibe and a similar style to Riot games. Phillip Zhang inspired me the most for the foliage. I noticed that one of the key things about Riot Game’s foliage was the soft and smooth highlighted edges. So, I gave it a try and realized that it indeed gave off this fantasy and brush feel I wanted.
Throughout the texturing process, I asked for a lot of feedback from my mentor and peers, I really found this useful as it helped me see my successes and areas of improvement and helped overall to boost my confidence and motivation.
Composition
Now that my textures are nearly done it’s time to see what it looks like in Marmoset Toolbag. I love this software for the ability to go back and forth between textures and render. Marmoset automatically imports your texture files, so no need to upload them each time.
I went over my composition while texturing, it helped vary the tasks I needed to do and gave me a little break from the texturing itself.

Lighting
Before lighting, I like to check my unlit version to double-check values. If it looks good in unlit you can probably start lighting
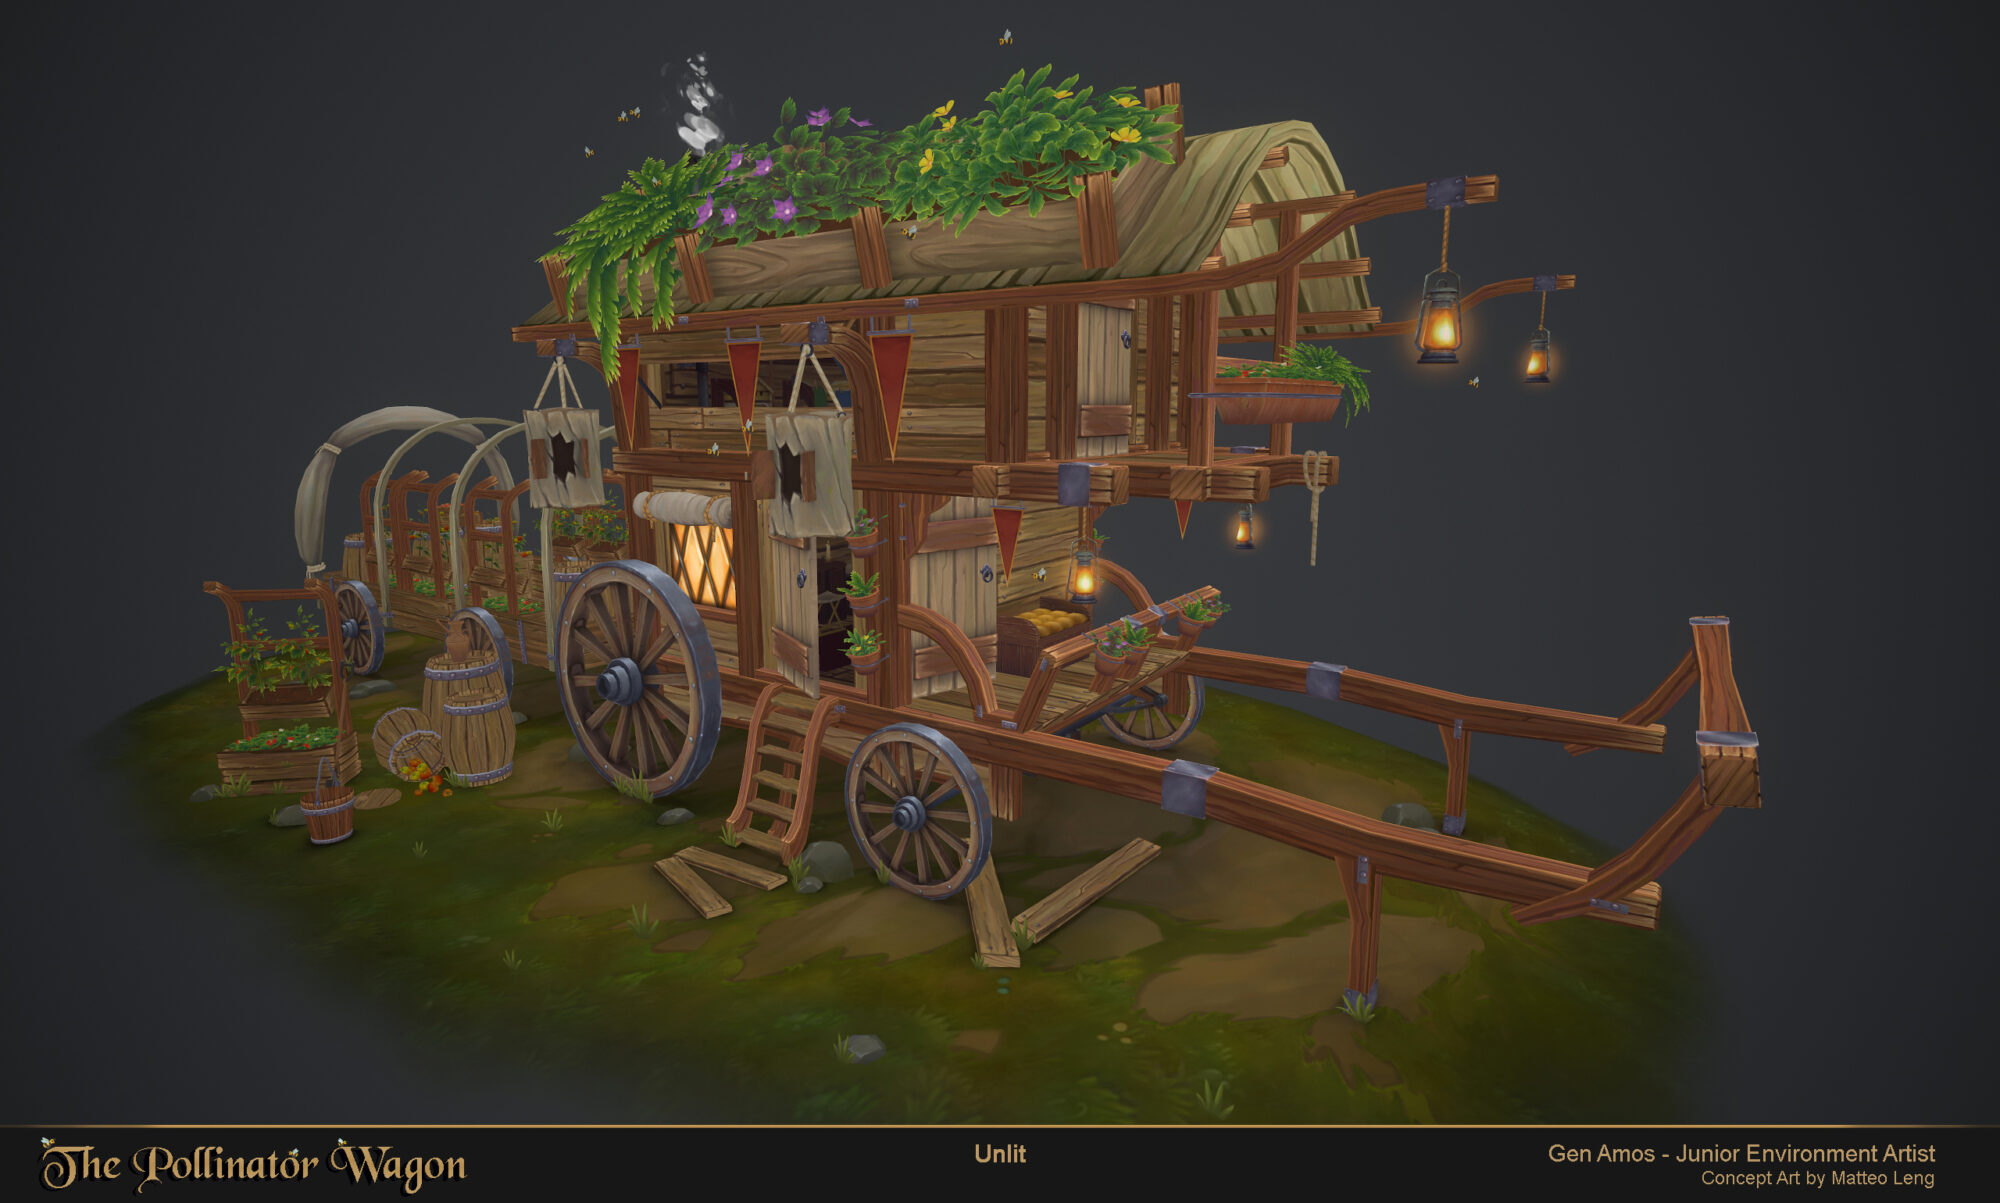
Considering I had a bit of lighting information already painted in my textures, it gave me a lighting direction.
I knew that I wanted lighting that was relatively simple and made my textures pop. Because this is a hand-painted project everything is centered on the textures so you need to try and embellish them as much as possible.
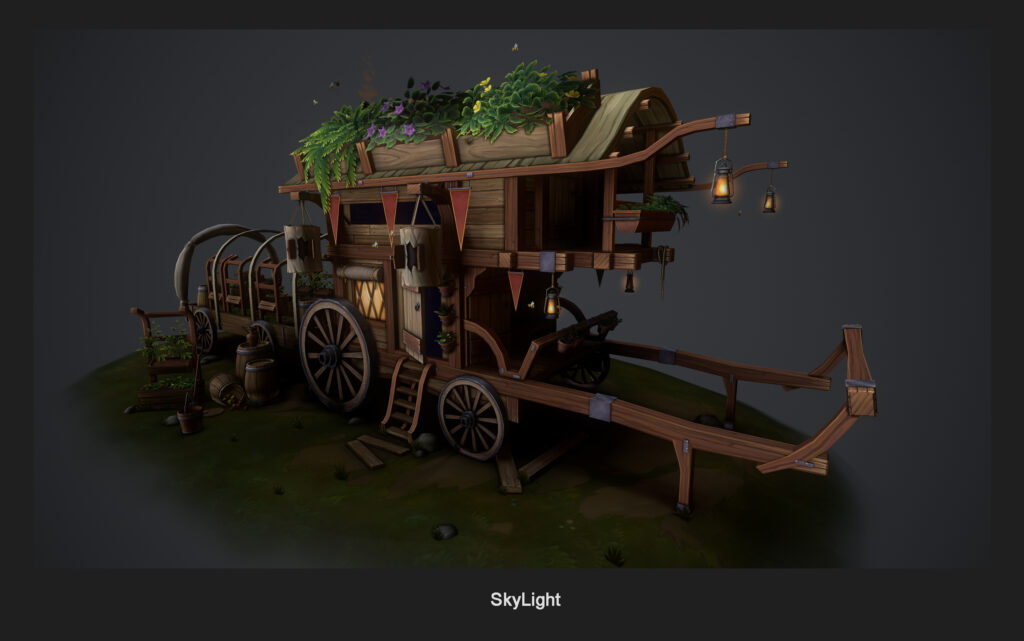
First, I placed my Skylight, which I like to use in addition to the Directional Light. The Skylight helps to brighten up the shadows, I wanted my textures to be all visible you don’t want textures to be in the dark. This is my base set-up, which is neutral.

I completed it with other lights that give some color tints.
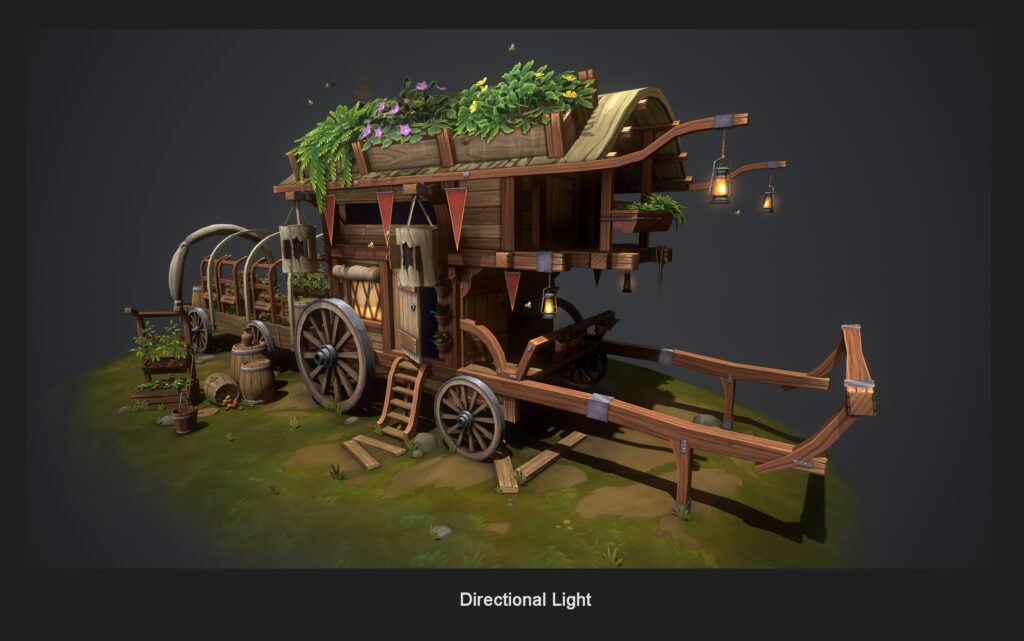
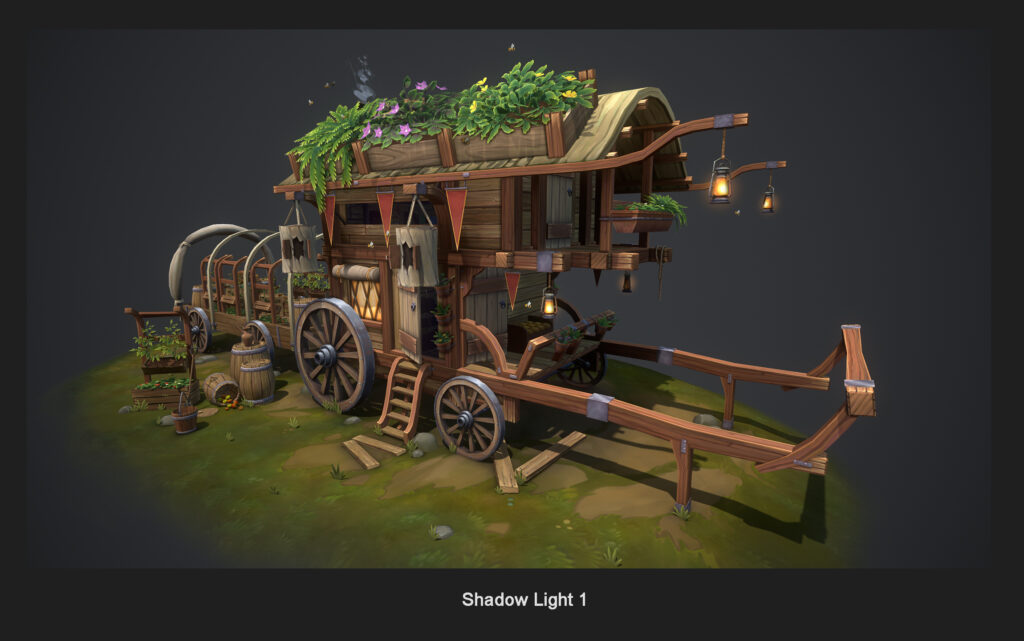
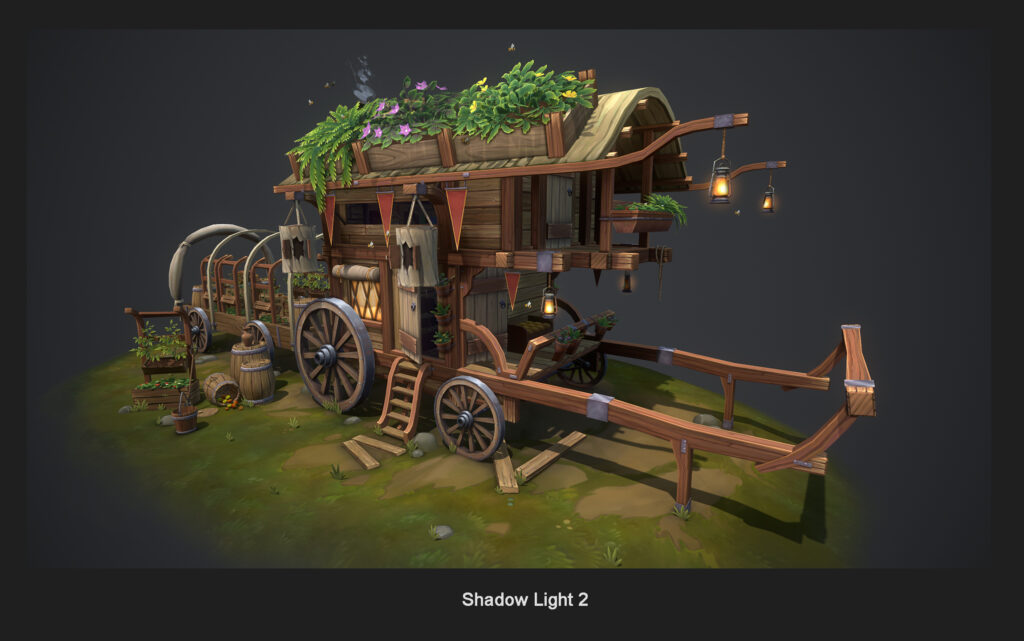
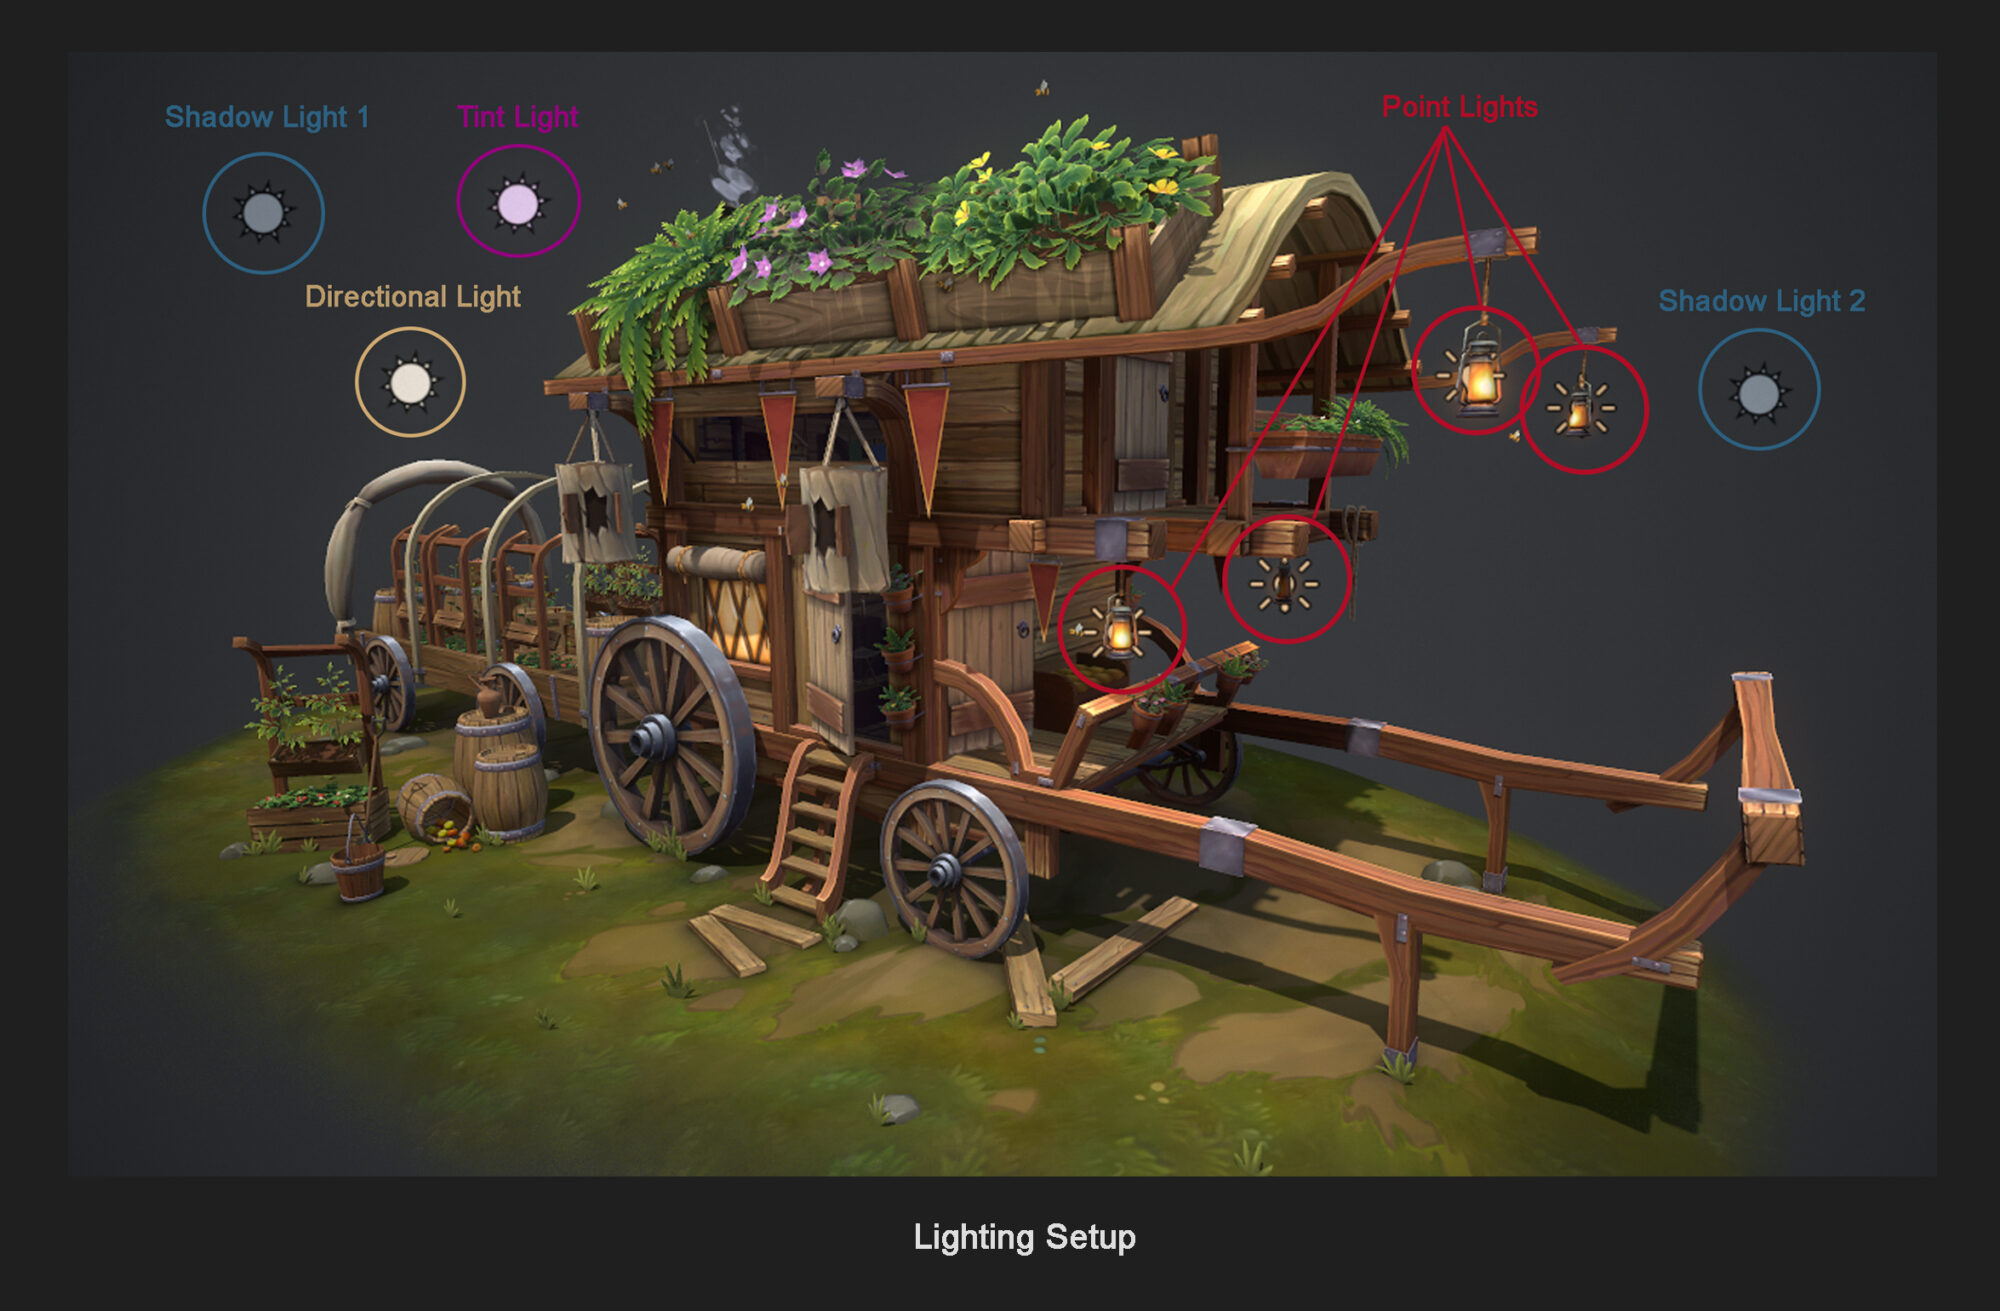
What we have here is:
– One Directional Light with a yellow tint, creating all the shadows and mimicking the sun.
– Two Shadow Lights with a blueish tint, lighting up some dark areas and making the shadows more colourful.
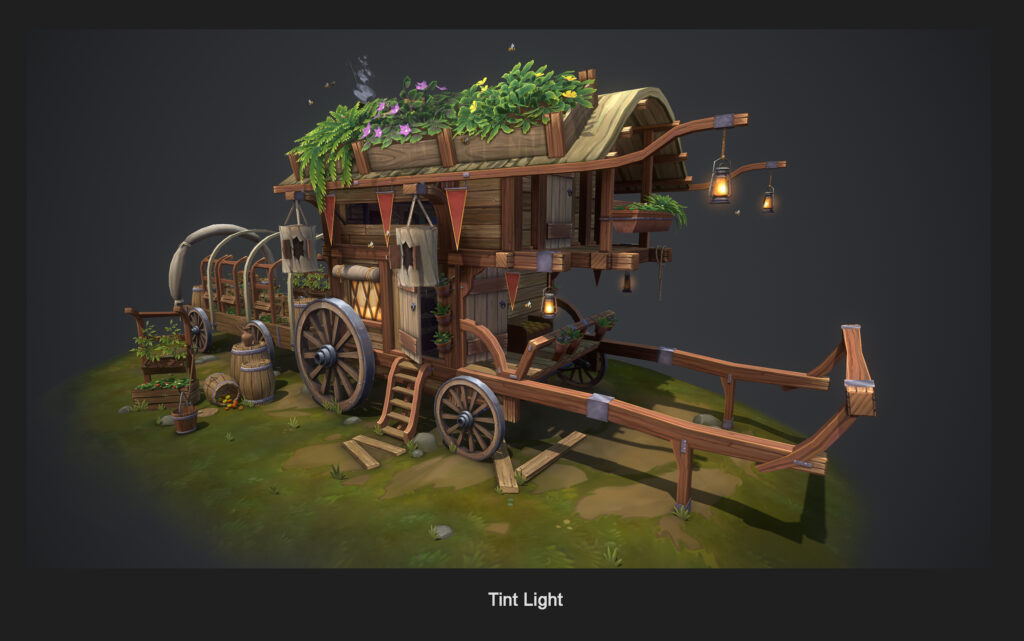
– One Tint Light with a purple tint, goes well with green and helps with the fantasy vibe.
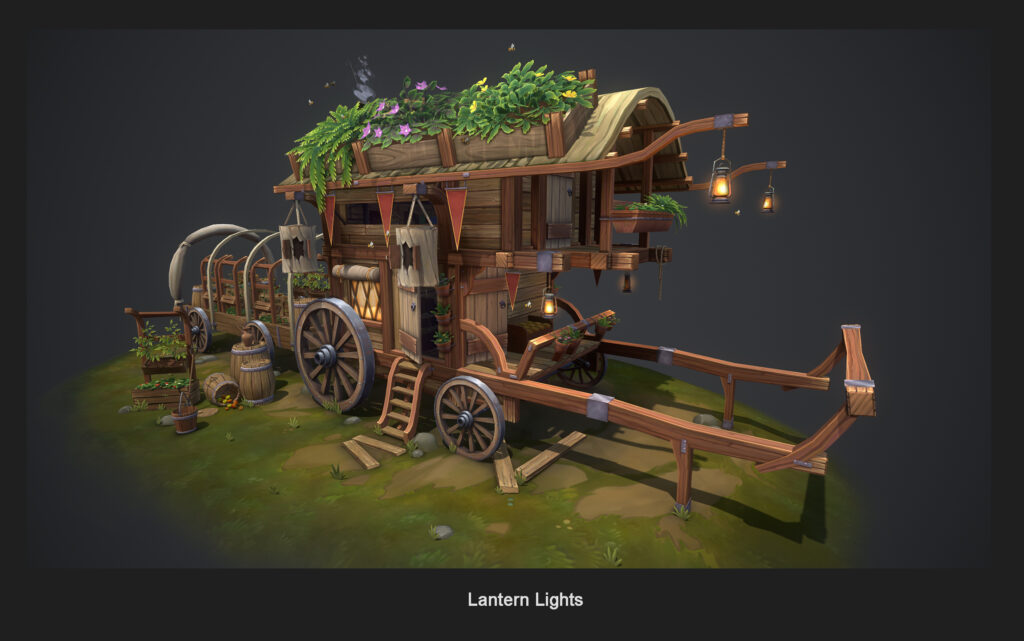
– Four Point Lights with orange tints to mimic the lanterns.
Some tips for lighting:
– Don’t start with a load of lights, set up a good base with one Directional light and the Skylight.
– Think of where your prop is situated in a desert, in the woods? From this base, you can create your colour palette.
– Stylized art doesn’t like black shadows!
– Study colour theory, this helps choose the right tints to compliment and embellish your prop and fit with the situation information you want to give off.
– Ask yourself can we see everything correctly? Is there one thing I want to highlight more than others?
Rendering
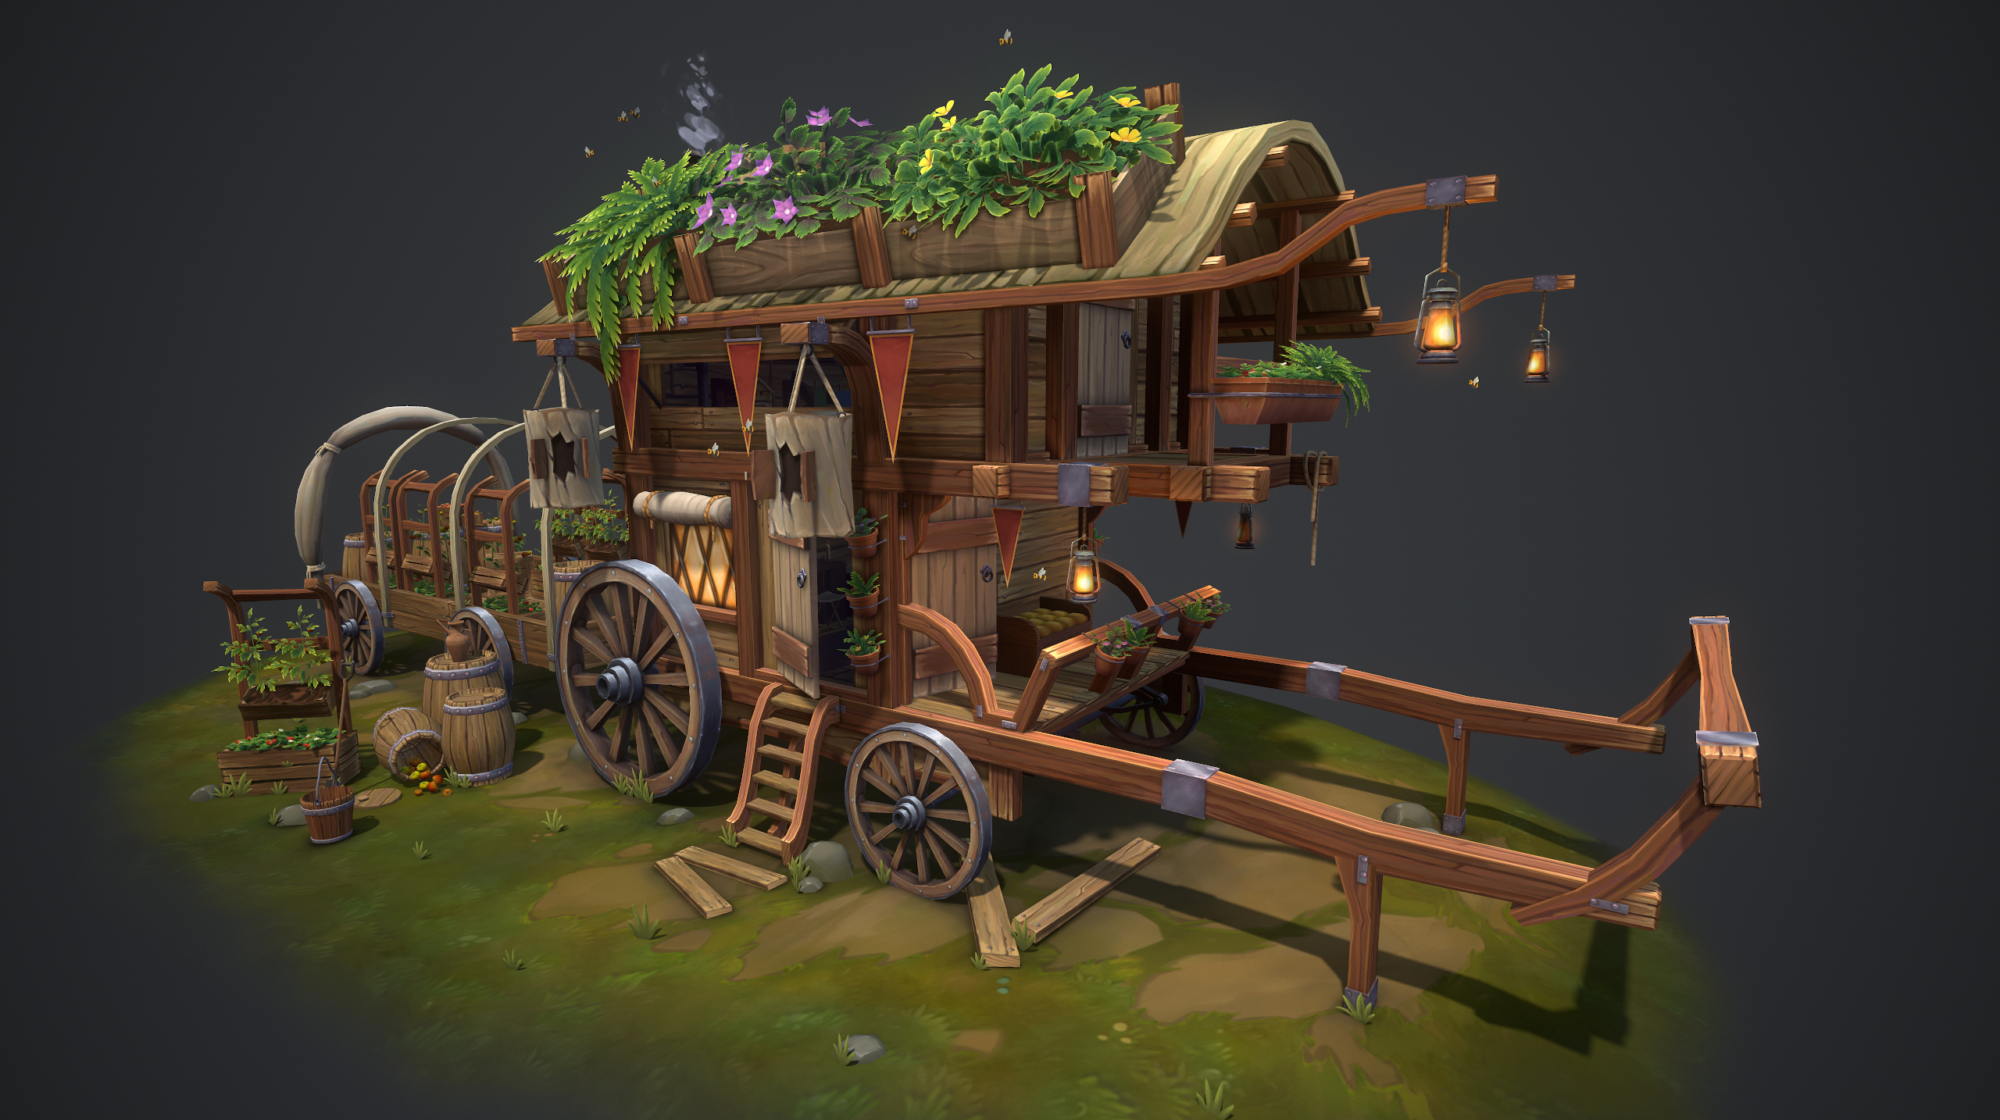
With the latest feedback, I received I made some final tweaks to my textures. I added some FX like the smoke and the bees to make it more dynamic and finally, I added some grass tufts to create more of a link with the ground.
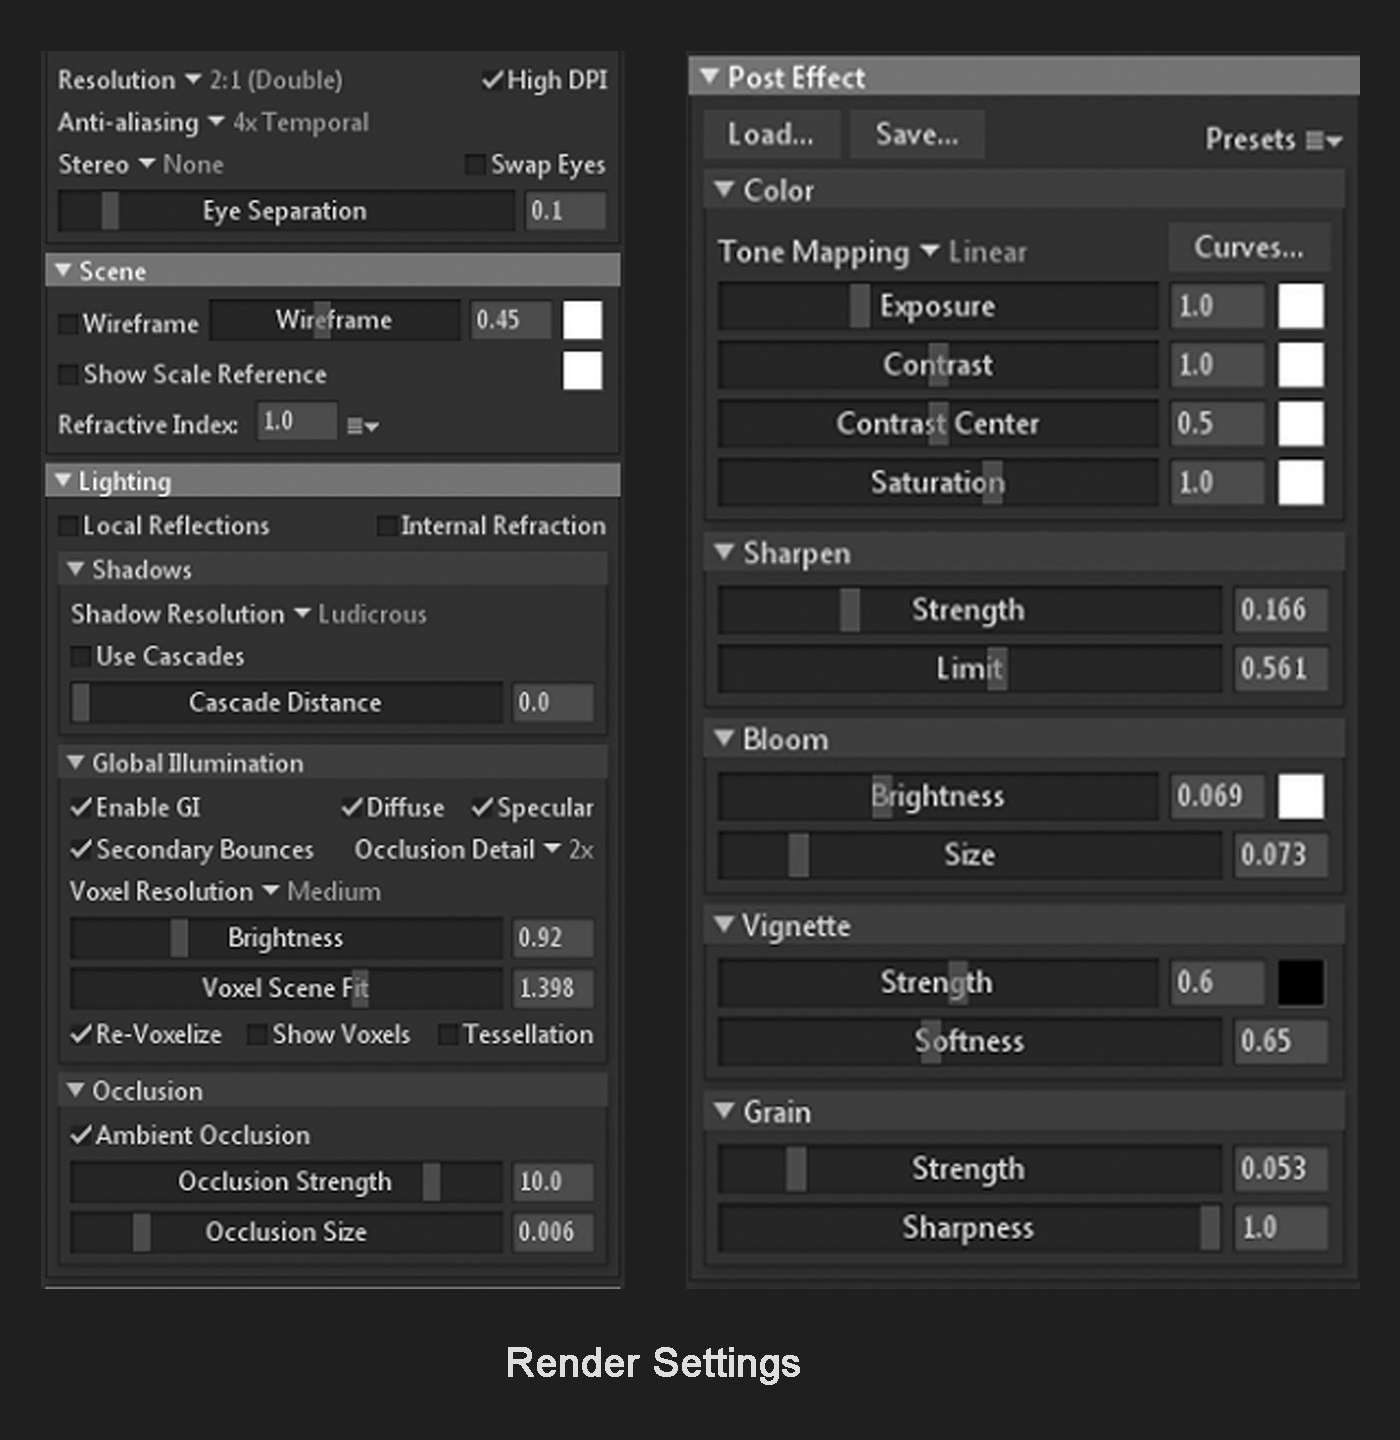
The render is pretty basic I added some AO and some Global illumination. For the post-effects, just some bloom, and small tweaks.
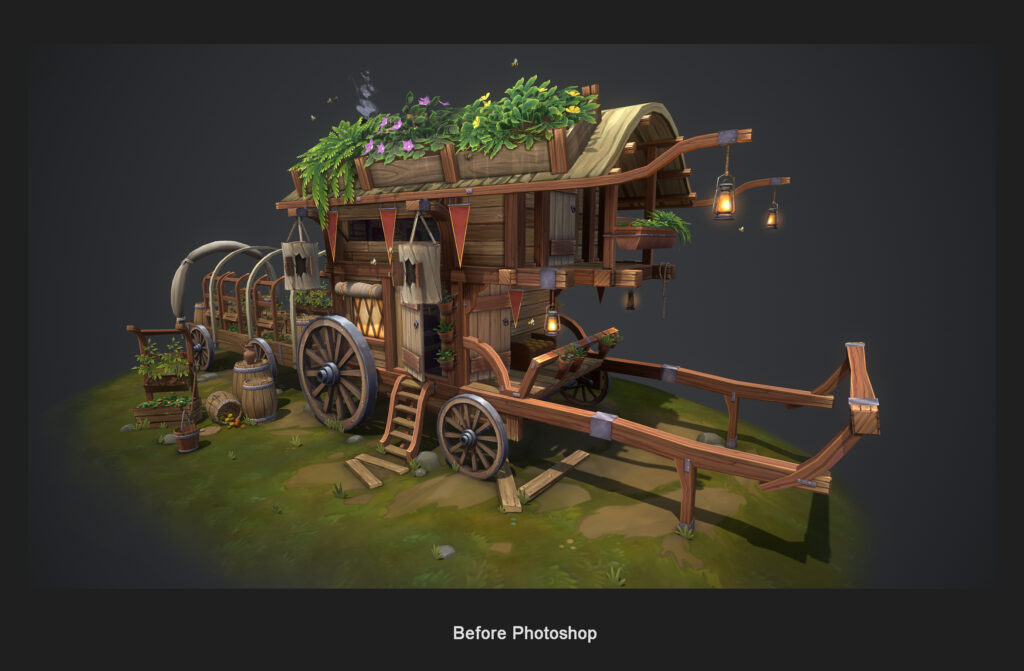
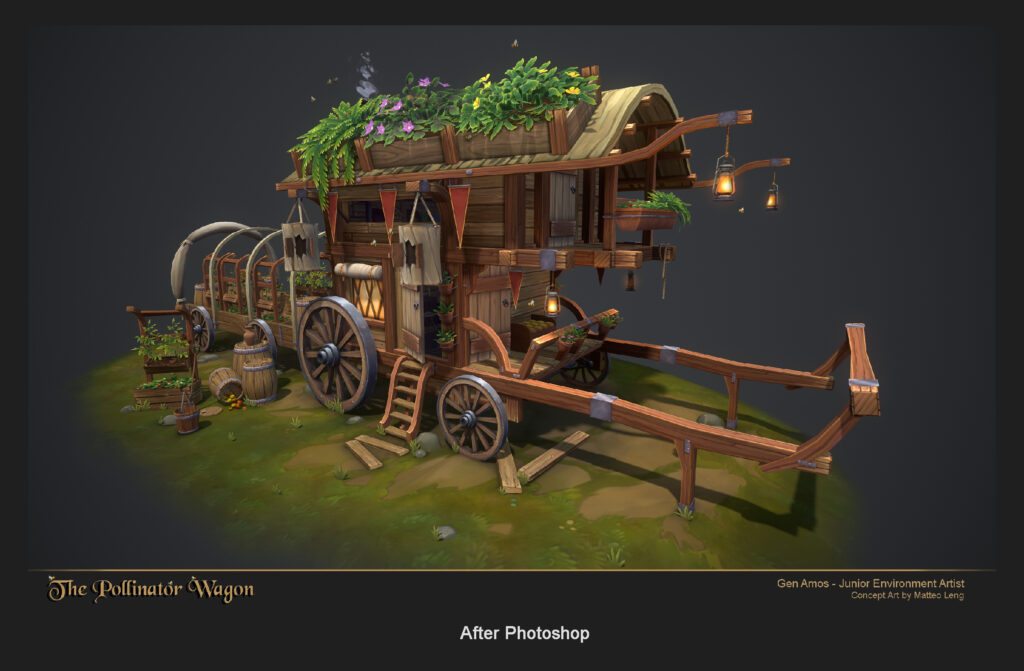
To complement this render, I imported all my shots into Photoshop and did some final tweaks, playing with levels, saturation, luminosity and contrast. Be careful to not overdo it. For me a render doesn’t make something pretty, it just gives that extra appeal to the human eye.
Too much render can lead to a loss of depth, sincerity and overall vibe.
Presentation
I think this is often forgotten by a lot of students, form and presentation make everything come together and make the piece look finished!
Take a traditional painting for example, if it doesn’t have a frame, it looks less good than if did have one, here it’s the same. So, take your time on this and inspire yourself from other artists.
As for the thumbnail, also often forgotten, take your time. If you have a bad thumbnail, no one will click on it, despite if whether your work is good or not. Study a wide range of thumbnails of various styles. I was going for a fantasy feel but I didn’t necessarily only look at those thumbnails.
Try to work out why good thumbnails are good, what attracts the human eye? Flashy colors, titles? What drives human curiosity?
A tip for the thumbnail, take a screenshot of ArtStation’s front page (or another site) and stick your thumbnail in between other artworks.
Take two steps back from your desk, close your eyes, then re-open them and see if you see your artwork in 3 seconds, if you can’t see it, I would suggest going over your thumbnail again.
Posting
This is always a stressful part and probably a good trial of patience.
I think it’s best to get a good night’s sleep and go over the project with a fresh eye the following day and post if satisfied then. This allows me to spot some final details that still need tweaking or may have been forgotten.
Conclusion
Overall, this project was a year-long side project in addition to my full-time job.
The highlight of the project was finally seeing the end textures and my improved skill over the past year.
I am really pleased with my wood hand-painted trim sheet. The thing that surprised me the most with this project was the texturing of the ground, it flowed naturally for once! All in all, this project was a great learning basis for these techniques in both 2D painting and project management and I recommend all of you give a try when you feel ready.
I am honored to have been invited to write this article and hope that it will help others. My take-home message would be to never hesitate to ask for feedback and have fun!
Big thanks to everyone who helped me out on this project.
Read more articles
You might also like these articles.