Outlaw The Gentleman


Introduction
My name is Irene Muñoz de Torres, and I’m a 3D artist and Illustrator from Spain. I currently work as a 3D character artist in Secret6 Madrid.
I have been working as a freelance illustrator for several years, painting fantasy illustrations for independent clients and some publishers. I love working in both fields and I am always interested in learning something new.


About
I have always been a big fan of realistic graphics in video games. When a new game comes out and the graphics are detailed, I always pay attention to the models and the textures and wonder how they were made, what techniques they used and how they achieved those results.
My goal for this project was to create something similar to those characters from those games I admire, like The Order: 1886, The Last of Us, God of War, and Horizon Zero Dawn, amongst many others.
That requirement implied creating a realistic highpoly and lowpoly, several texture sets to achieve a realistic resolution, and hair cards. And all of that in a way that could be rendered in real-time or used in a real video game.
This was the first time I created a complete character, so I tried my best to achieve the best results. However there’s always room to get better and learn new techniques, and while I might change the way I made certain things and optimize others in a different way, I am really happy with the result and I believe it worth the effort.
Software
- Zbrush – Highpoly and hair cards placement
- Marvelous Designer – Cloth pieces
- 3dmax – Hard surface pieces
- Maya – Retopology and UVs / Xgen hair strands creation
- Substance Painter – Textures
- Marmoset Toolbag – Renders
- PureRef
- Photoshop
References & Inspiration
For this project, I decided to go for a character that had a decent amount of technical requirements that will help me improve in those areas in which I had little to zero knowledge, or that I just wanted to improve.
If you are a beginner looking for a concept to start with for your first character, I recommend finding a character that has:
- Some anatomy exposed, like the head or hands, to improve your anatomy and organic sculpting/texturing
- Some clothes to create in Marvelous Designer or similar will allow you to learn how to create patterns and realistic folds
- Some hard surface pieces, from belts to metal parts, as most characters will always have something manmade
- Hair of some type. This one might be scary to approach, but it’s very pleasing when done right. However, beware of characters with too many hairs, or it can become your nightmare.
Following those guides, I created a folder with concept art artworks of possible candidates. I finally decided to go for a concept by Marco Hausmann I found in the Artstation Wild West Challenge, a challenge I was unable to participate in back in the day, but that was really interesting to me because of the number of cool designs artists made there.
I found this concept of a very angry-looking man, followed by a sentence, and for reasons I can’t explain, resonated with me.
Outlaw

As this was my first character, I decided to omit some items to make things easier.
As the concept is not very detailed, I translated what I saw the best way possible, but also grant myself some freedom when creating the character, something that you can’t do in a real production.
For example, I took my time getting facial references from people I thought might fit the role of this character. It was never my intention to make a 100% likeness of anybody, but I found myself imagining Jonathan Banks’s (Mike, Breaking Bad) famous glance for this buddy, so I ended up using him as my main reference for his head.
Here’s a picture of how my PureRef looked after all the collecting. Surprisingly there are vintage stores in the USA that sell old western pieces online, which was very useful for this project in particular.

Highpoly
I created a very basic blocking of the character first, using a basic human basemesh and editing the proportions to match what I had in mind, a tall and strong man, with some visceral fat and a thick body shape. His silhouette should remind me of a dangerous grandfather.
After that, in Zbrush I added all the items in a very sketchy way, just to make sure I understood how many items he was going to have and the size and shape I expected them to have in the highpoly. This phase looks a little bit ugly, but it’s essential when planning a character. It’s the only way to track the number of elements you will have to model beforehand and get a basic idea of how complex the character will be.

Once the base was settled, the first step was creating his clothes in Marvelous designer. I started with his t-shirt and trousers, followed by the neck scarf and the bandages over his arm.
Since his body type was not canonically a hero type, I had to make some adjustments to the pattern to make him fit into it. To recreate the pressure of the trousers and the leather straps over the shirt, I created some extra pieces to simulate the collision and wrinkling/folding realistically, even if I discarded those pieces later.
Once the clothes were finished, with the Edit Sewing tool I selected the sews between all the different pieces and played with the Fold Strength and Fold Angle to create some inwards volume over the sewed borders, a small detail I like to add to make them look more realistic.


With the neck scarf, I simulated a rectangular piece of cloth, diagonally folded in two, and sewed corner to corner over his neck. I simulated the knot and the two corner pieces separately in two different files.
Marvelous is not great when creating tight knots, because simulations tend to explode when a pattern is subject to such high pressure. To avoid that issue, I faked the knot this way, because the result still looks excellent and you can have each piece separately edited or move them in ZBrush, where they are imported and placed carefully.


For the bandages, I created some rectangular pieces of cloth and sewed them together. If you have many bandages, you can create the first layer with small rectangular pieces sewn, because this method is easier, and then roll up a longer strip on the second layer to create the illusion that all those pieces are unique bandages.
Trying to roll all bandages at once as it would be done in reality is a task that would require a huge amount of time, but won’t make much difference so, as many things in 3D, I considered faking it this way would save me a lot of time.
Finally, when exporting those bandages, I used the parameters Thin and Weld, so the ends of the stripes will have their vertex merged and won’t create a seam when subdivided in Zbrush. This will help create the illusion of a continuous bandage.

While working on Marvelous, I often exported the clothes quickly to check the proportions and visual appearance in Zbrush and make sure that everything looked the way I wanted. In some cases, you can’t simulate a piece exactly the way you wanted it to be.
If that happens to you, don’t hesitate to use Zbrush to move or accommodate pieces to achieve the result. You can even erase and re-sculpt wrinkles and folds of your piece if you require it, so don’t be afraid to use the tools to get there.
For example, my neck scarf was resting too high over his neck, but I really liked the folds I got from Marvelous. However, changing the Fabric Preset was resulting in a folding type I didn’t like that much. To preserve those shapes, I exported the piece and lowered it down carefully in Zbrush with the Move brush.

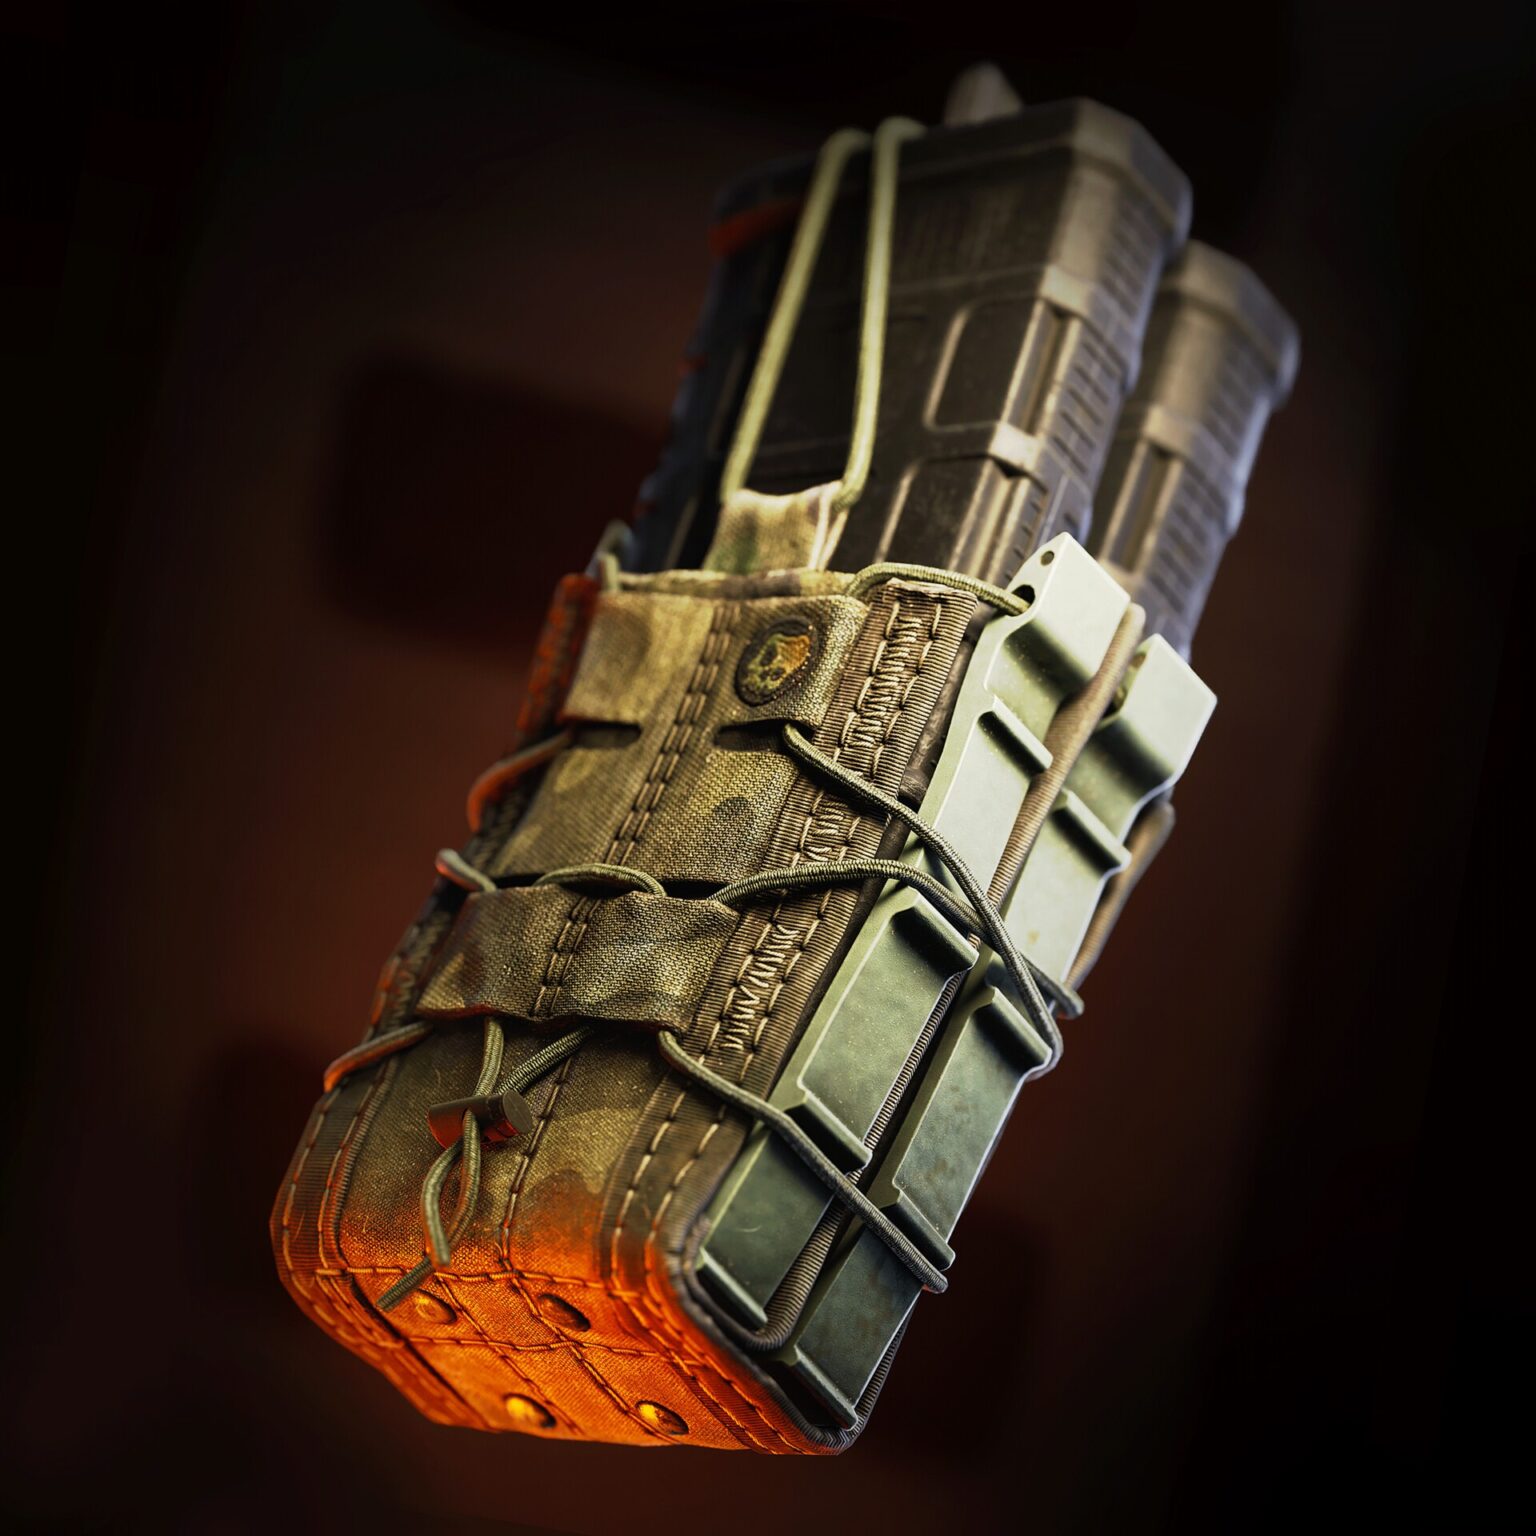
Jumping into the hard surface items, I had to create some belts with bullets, chains, other metal parts, a bracelet and a pair of boots.
The way I approached belts was modeling them flat in 3DS MAX and then placing them around his waist using a Path Deform modifier following a spline I previously created.
You can create a clean spline from scratch, but in this case, I exported the blocking belt from Zbrush and extracted a spline from an edge loop of the mesh with the Create Shape tool, to make sure the size was similar to what I wanted.
With the spline selected, under the utilities menu, go to Measure and you will find the exact Lenght of that shape. After that, I created the belt in a straight position, making sure the length of the belt was matching the length of the spline.
Once finished, I used the Path Deform modifier to place it in place. This modifier allows making a mesh follow a path, which I think is extremely useful.
For circular belts or items that need to connect corner to corner you can use a Bend modifier instead, which will create a perfect circular closed shape out of it.
When it was in place, I made some quick UVs and imported them into Zbrush, where I used the Move tool to fit them around the character.
I used the exact same technique for the suspenders.


His boots were made with a mixture of organic Zbrush sculpting and hard surface methods.
The structure was created from scratch in ZBrush, clean and with no folds at all. Once the shape was correct, I made a quick retopology in Maya to have a very clean shape to work with. On top of the clean mesh, I modeled the back and front pieces of leather and added the little pieces to the sides.
Because I worked this way, I obtained a mesh that could be easily UV unwrapped and that I would subdivide cleanly in Zbrush afterward.
When I was happy with how the base boot looked, I imported it into ZBrush and sculpted the wrinkles by hand with the help of some wrinkles alphas.
To create the stitches, I made my own stitch IMM and place them over the seam with the curve option active.
Since the base boot had UVs, I easily added some leather texture to all the pieces with the Noise tool in ZBrush, under the Surface Menu. This tool is one of my favorites inside Zbrush, and one of my most used ones. It allows you to project an alpha/height map into your geometry, to add realistic patterns and textures if you have UVs as in this case.
I used this technique to add leather detail to boots and belts and to add textures to Marvelous Designer cloth pieces as well.


Jumping into the head sculpt, I had several references, being my main Jonathan Banks. I tried my best to recreate that tired/grumpy look I imagined for this character.
I gathered as many references as possible, from different angles, but since I was not trying to make a 100% likeness sculpture, I made some interpretations.
As I started with a basemesh, I used the generic head from the model and sculpted it directly. To create wrinkles and pores, I used the Standard and Dam Standard brushes and a mixture of skin alphas. I wanted it to be very detailed to bake very detailed maps.


Export and Retopology
When exporting the highpoly, I decimated the objects twice, a low decimated one and a high decimated one. I use the low-decimated one to import it into Maya, as it won’t make the software lag as much as a high-density decimated mesh. The high decimated mesh is reserved for the bake only, as it will have more detail.
Before

Before exporting it in .fbx (.obj don’t save vertex color information), I use polypaint to fill different parts from the model with bright colours, specially those parts that I would like to bake in a single mesh. This will allow us to bake a vertex color map in Marmoset that you can use later in Substance Painter to make clean selections.

For retopology, you can create it from scratch, but in this case, I used an existing basemesh with a good topology that I later adapted roughly around my model with the help of the Sculpt brush in Maya.
In production is common to use this method, as it helps animators when rigging/reusing animations from different characters.
After that, I selected the decimated mesh and activated the snap mode with the Make the Selected Object Live tool.
The next step was selecting the Quad Draw tool with the lowpoly basemesh active. Then you can carefully adapt the lowpoly to the decimated mesh by clicking vertex/edges/faces and moving them along the surface of the Live Object. You can also use ShiftClick to Relax the surface and toggle B to create a soft selection area around your selection.
For the head, I also used a basemesh with a good topology I already had from another project, but in this case, I used the plugin Zwrap in Zbrush to adapt the mesh accurately around the highpoly sculpt. After placing, I imported that lowpoly mesh into Maya with a decimated version of the highpoly and moved and adapted some polygons by hand, especially around important areas like the eyes, nose, mouth, and ears.
For some hard surface items like belts, the chain link, bullets, etc, I used the lowest subdivision of the object as a starting point and deleted or added polygons according to what I needed in order to create and optimize the resulting lowpoly mesh.
The last lowpoly step is adding the Soft/Hard Edges properly.
As a rule of thumb, on a hard surface, when the angle is 90° degrees or acute, you would need to add a hard edge. In organic, you should use this rule as well if the surface shading starts looking weird, which is a symptom of the mesh trying to create a single smoothing group. However is important not to add too many hard edges, just use them in places where they are clearly needed.
The second rule is that Hard Edges are always cut in the UVs. This is necessary or a weird annoying line will appear on the edges of your bake.

When making the lowpoly is important to name all pieces properly, as this will help us create the baking groups in Marmoset.
If you are baking in Substance Painter, the name convention will make possible to match the _high with the _low accordingly.
UVs & Baking
I decided to divide the character into 4 texture sets: head, upper, lower and accessories.
When making UVs for characters, I cut and unwrap the pieces in Maya and lay out them by hand to optimize the space. Remember to always cut the Hard Edges!
I organized all textures inside the 1:1 square, except the accessories, where I wanted to use a rectangular texture.
To create a rectangular texture, all you have to do is organize your UV islands using two squares of the grid instead of one. In the UV Editor, once all pieces are in place, you need to compress those pieces into de 1:1 square. To do that in Maya you have to select all your UV islands, hold the D + X key on your keyboard, and then drag the Gizmo to the left bottom corner of the 1:1 square. D activates the gizmo options, while X activates the Snap to Grids.
Once the gizmo is positioned in that corner, go to the UV Toolkit menu, and under the Tool subpanel set the Scale to 0.5, highlight the U only and click on the little scale icon next to it. This will compress your pieces to half of their size (0.5), but horizontally only (U). Now your UVs fit the 1:1 perfectly.

Before exporting the lowpoly, remember to make sure all pieces are named properly to avoid issues in Marmoset/Substance Painter when baking.
I also like to add a material with a different color to the different sets to visually organize it.
Example: M_Outlaw_Head | M_Outlaw_Upper | M_Outlaw_Lower | M_Outlaw_Accesories
I export the model triangulated for baking only.

In Marmoset I created a New Bake Project item (the loaf of bread, as I like to call it), and use the Quick Loader option under the Geometry menu inside this tool to load my exported lowpoly. When doing this, Marmoset will create several folders (bake groups) using the names of the different _low objects you had in the scene.
Inside each folder, you will find a High and Low subfolder. Inside the Low folder, you will find the _low object you previously loaded with the Quick Loader; the High folder however will be empty.
You will have to drag and drop your _high meshes inside that folder in order to continue with the baking process.
I made a Bake Project for each texture set, but make sure you do one at a time. Highpoly meshes are heavy files, so when loaded they use a lot of computer memory and resources. Loading too many or too heavy ones might cause Marmoset to crash while baking or even just not work at all.
Because of that, I make a Bake Project for each texture set, but I don’t load several in a single scene.

Once each _high is inside the High folder, I configurated the bake options under the Bake Group:
- Output – I choose a route where I want to save the maps. I choose .PNG extension.
- Samples – 4x (you can choose 16k, but I don’t use this for AO because it lags badly)
- Format – 8bits/Channel (you can use 16bits, but my final maps will be .tga, only accepting 8bits)
- Padding – Moderate (this works fine)
- Texture Set Resolution – I used a 4k for Head|Upper|Lower and a 4x2k for accessories
- Maps – Normal | Curvature | Ambient Occlusion (ignore groups unchecked) | Cavity | Convexity | Vertex Color | Thickness (if required) | Alpha Mask (if required)
Once all this is set up, I bake (Bake button) my first test with only Normal / AO / Curvature and Preview it in the viewport (P icon) to check if there’s something that is causing any issues in the baking process.
The first common issue will probably be the Cage Distance, causing weird anomalies or aberrations in some places. In the Low subfolder of each piece, you will find two sliders that will allow you to change the cage size, fixing the problem.
Sometimes, changing the cage will cause one aberration to disappear and another one to appear. If that’s the case, don’t be afraid to bake two maps with different cage sizes and edit them in Photoshop, combining the clean parts only to obtain a perfect clean map. If the aberrations are too small, just use Photoshop Healing Brush or Patch Tool to fix any artifact you find.
Another issue you might find in Marmoset is Skew. It’s especially noticeable when baking stitches, buttons, or other details. The bake appears to be deformed as if the high mesh were being projected in the wrong way.
To fix that, you have to open the Paint Skew options under the de Low subfolder (under the cage size sliders), which will open another window with the UVs, and start painting in black under those areas that are deformed. You will see how the projection changes and fix the problem.
Texturing
Once all my texture sets were baked and I solved all the possible artifacts with Photoshop, I proceeded to create the Substance Painter File.
The first thing I did was convert the Normal maps I baked from OpenGL to DirectX.
Marmoset bakes OpenGL maps by default, so I converted them in Photoshop quickly by adding a Curves Adjustment Layer, selecting the Green Channel, and inverting the graphic. I did this because I wanted to work in DirectX inside Substance Painter.
The second thing I did was duplicate and place all those items that wanted to be duped in my lowpoly model, for example, the chain links or the bullets. I only modeled and baked two links, but I placed copies of them to create the whole chain. This can be also done at the end stage, but I wanted to see how he looked with all the pieces placed while texturing it.
The third thing was creating a copy of the exact same model to the side, separating all the pieces (commonly known as exploding the model) to have access to all hidden areas. This is not mandatory, but with characters who have several pieces is very useful and a practice used in the industry to access easily all the areas and paint comfortably.
The fourth thing was making sure each texture set is named properly, for example:
M_Outlaw_Head | M_Outlaw_Accesories | M_Outlaw_Upper | M_Outlaw_Lower


To create the project file in Substance Painter go to File > New and select your lowpoly file, the resolution of your textures and the Normal Map Format. In my case 4k and DirectX.
In newer versions of Painter, you can add the bake maps in this window, but I just dragged and dropped them inside the library and then placed them into the Texture Set menu.
I also configure the Display Settings as follows:
Under Environment Settings, I chose the Tomoco Studio environment map or any other studio HDRI you like, because is a neutral environment that shows colors without tinting them.
Under the Camera Settings, I change the Focal Lenght to 50 or 55mm (human eye) and Activate Temporal Anti-aliasing. I also check Activate Color Profile and choose rec709 to gain a little bit of film contrast to the scene.
To create the textures, I use a very simple 3 folder method.
1º Layer – Base color
In this folder I use fill layers with basic color/roughness/metallic information, masked with the color selection option and the vertex color map. I also add and Anchor, which I can use later to link other fill layers or folders on top and make sure they are only affecting the masked area.
3º Layer – Textures
In this layer, I add the color variations and height textures (fabric and leather tiles) needed to create the realistic textures, but in a clean stage, as if the object was new.
I create folders inside, masking different elements by calling the Anchors I created in the first layer.
3º Layer – Dirt and Wear
In this layer, I add the dirt/dust/heavy scratches/worn effects to achieve the desired texture and wear level. I also use the previous Anchors from the first layer to create selections.
Texturing is a very dense topic that could have its own written article, plus there’s no specific recipe or trick and depends so much on your taste, style, requirements, etc.
I would like to add that during the texturing process I exported the textures several times to check how they were looking inside Marmoset, as the result might differ from what you see in Substance’s viewport.
To export your final textures, go to File > Export Textures and a window will open.
Painter has several Presets, but I made my own .tga preset, used in videogames, consisting in:
Normal Map / Diffuse Map + Alpha | ORM Map | SSS map

About texturing realistic characters, I recommend the Quixel pbr textures to help with your leather and fabric texturing, as their library is awesome and very useful.
Here I’m showing how my maps looked like once I exported the textures.

Creating Hair cards
This was a challenge for me, as I never created hair cards before and I wasn’t sure which was the best method to create the hair strands. I decided to go for Xgen because it comes with Maya, yet it might not be the quickest way to create them, considering there is already some software out there that allows you to create hair strands much quicker. However, let me explain how I made them.
First I collected references for the type of beard I wanted for my character. I was looking for a thick medium beard that could cover his mouth almost completely, as I planned in the blocking phase.

With these images, I planned how many strands and how thick and long I wanted them to be. In the end, I decided to create a rectangular texture of hair strands to add more variety. With that in mind, I created a rectangular plane in Maya as a guide for my texture resolution.
Then I created smaller planes where I applied the Xgen guides to grow the hairs of each strand. I created an Xgen description for each strand.
I am not an expert in Xgen, so all I can say is I played with the xgen modifiers to achieve wavy crazy strands similar to what I was seeing in my references

Once all strands were created, I decided to export them as splines, give them some thickness and bake them afterward.
To export strands as splines, go to the Xgen Menu and select the Description to export (Example: Card_01). Under the submenu Preview/Output, go to Output Settings > Operation > Create MEL File and save. Do the same with all the Descriptions (I had 21 in total)
Now that you have your groom saved as splines, you can import them into another Maya document and give them some thickness. I used a free script called SimplePipe to add thickness to the hairs, but be careful with the number of faces and loops you add, because it can lag or crash Maya if you raise the polycount so much.
Once you have your hair converted into the mesh, you will end up with a bunch of independent hairs that you can bake directly. However I wanted my character to have scattered white hairs all over, so I decided to apply vertex color to each hair to create that effect later in Painter.
I used a script called RandomSelect that selects objects randomly, and it only works for separated objects (that means, don’t combine your hair strands yet!). So, with that script open, I select a whole strand and apply a red vertex color (Mesh Display > Apply Color – choose red) and then with the whole strand still selected, run a 50% percentage and fill them with another different color. I kept selecting and applying color until I had enough variety in the strands.
The amount of color will depend on your needs.

I created a rectangular plane, compress it until fit into the UV 1:1 (as I explained in the UV section) and moved it slightly on top of my hair strands. This rectangular plane will serve as my lowpoly mesh, while the hair meshes with vertex colors will serve as my highpoly.
I export them both as .fbx and bake in marmoset as explained in the bake section, but in this case, I also bake the Alpha Mask map you can find in the configure section.

Once maps were baked, I created material in Maya, imported the textures, and applied the material to my lowpoly rectangular mesh. I made cuts over the plane to create cards from each different strands and added some edge loops so I could easily bend them when placing them.
Longer strands will have more edge loops than smaller ones.
Hair cards could increase the polycount drastically, so you are not supposed to add too many.

To place the hair cards into place I used Zbrush. I imported the head of my character and the cut hair cards in the same tool. To visualize the hairs, I imported the alpha mask texture I baked (Texture > Import) and flipped it vertically, since Zbrush flipped UVs.
Then go to the Texture Map submenu under the Tool menu and pick the flipped alpha mask. Slide the transparency up to hide the black areas, and check Texture On to make it visible in the viewport.
I created a folder for the first layer of cards. I duplicated the card I wanted to place first and moved it closer to the area where I wanted to accommodate it. After that, I go to Customize (the gear icon that appears when using the move tool) and select the Bend Curve modifier, which allows you to add points to deform the object and move them around to create the shape of your strand.
You can also twist them slightly or change the width of the card with the conic handles, but be careful with those options if your card has a low resolution, or your hair will look broken. In addition, you can use the regular Move brush if you need it.
When duplicating cards, don’t merge them with each other so you can keep modifying the bend curve later.
If for any reason you decide you have to merge them down, make sure to have the option UV highlighted when doing so, or Zbrush won’t preserve the UVs.

While working on the cards, I exported the complete beard regularly to check the progression in Marmoset. I merged all cards with Merge Visible, applied the same polygroup to all cards and exported it as .fbx.
In Marmoset, import the cards and deactivate the Cull Backfaces option under the mesh options. Now the front and back of the card will be visible.
I applied a material with the hair cards map and checked what it looked like until I achieved a result I was happy with. You can texturize your cards in Substance as any other object.
Marmoset Lighting and Rendering
The Marmoset scene I used to render the character was very basic. I used the same Tomoco Studio environment HDRI I previously used in Painter (I copied the environment file from the Substance Painter folder). I lowered the brightness of it, so I only had soft bouncing lights coming from it.
Next, I added a soft frontal light, slightly up to achieve a natural look, to create the main source illumination.
To separate the character figure from the background, I added two bright rim lights coming from the back of my character, one to the left and one to the right. I wanted them to show the side volumes better, but I made sure they weren’t too prominent to draw too much attention to them.
Lastly, I decided I wanted to add a central light. This light darkened his eye sockets a little bit and gave a really cool effect.
All the lights I used were white default lights.
I also posed the character a little bit for the second beauty pass, but only to break the A-Pose feeling. I moved his arms by selecting the area, positioning the gizmo and rotating it. I also used the Sculpt tool in Maya to accommodate some parts better. A very simple way to pose it.
Once the character was in place, with all the materials and maps applied, I rendered several images of him with transparent background and mounted and edited them in Photoshop.
I applied soft postprocessing, adding some curves to gain some contrast and I tested several filmish LUTs to bring a little more interest to the picture.

Conclusion
This project was one of my biggest accomplishments. Trying to bring this character to life was a real challenge for me, who never made such a thing before, and I feel I learned a lot of things during the process.
For a beginner, completing a whole character is a huge experience and really eye-opening when it comes to the amount of work required to complete all the parts and all the stages of the process. It took some time, but worth it.
I hope you liked the result and that you find something in my process that might help you with your project. Thank you for reading!

Read more articles
You might also like these articles.