Introduction
My name is Laura Ramirez, I’m currently a recent 3D grad from Think Tank and a freelance CG artist and graphic designer.
Project
This is my final project for my Think Tank mentorship.
This project was based on the concept of Pavel Hristov.
Thank you to my mentor Kestutis Rinkevicius for all his feedback. And to Shtiky, for all of her support.
Software
- ZBrush
- Maya
- Xgen
- Marvelous Designer
- Mari
- Substance 3D painter
- Photoshop
- V-Ray
- Rizom UV
Reference & Inspiration
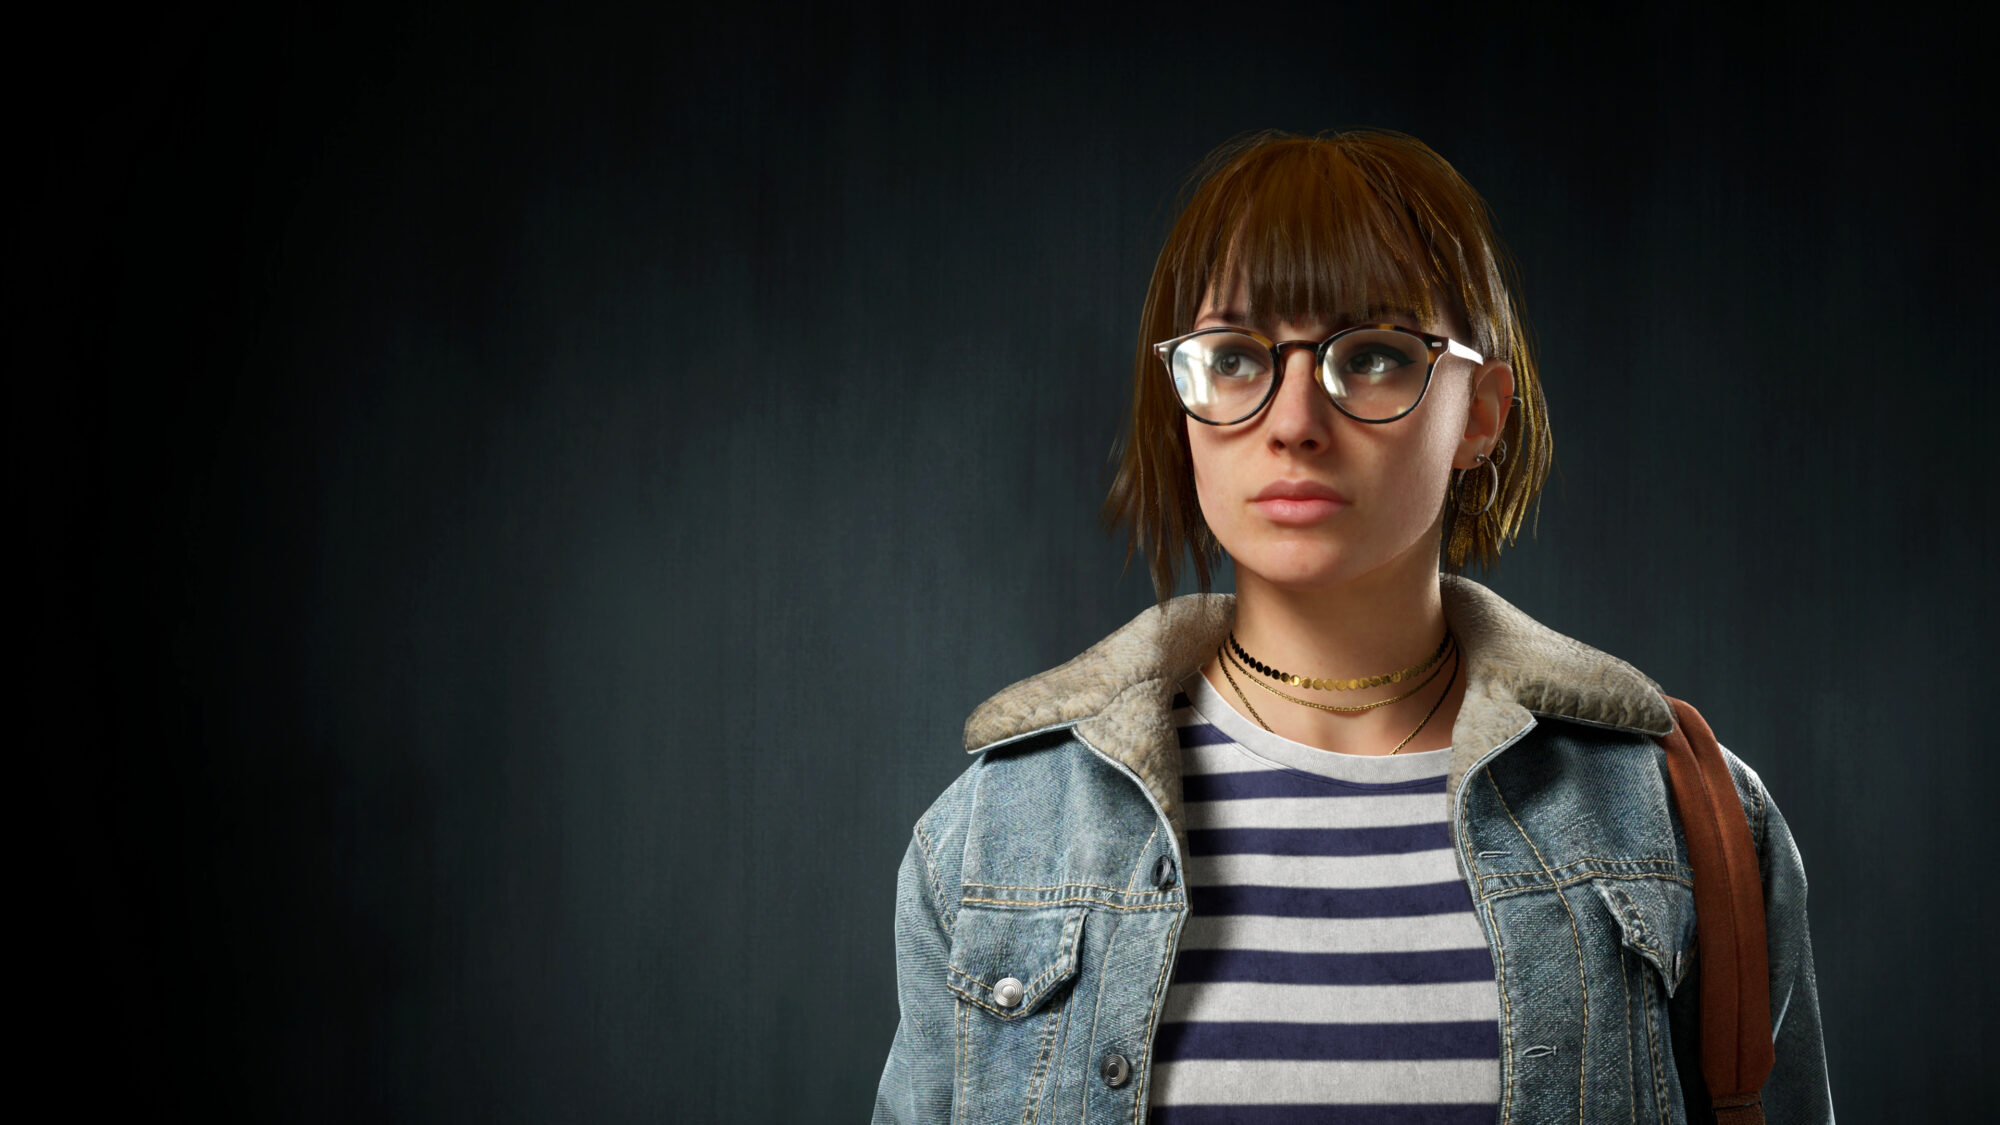
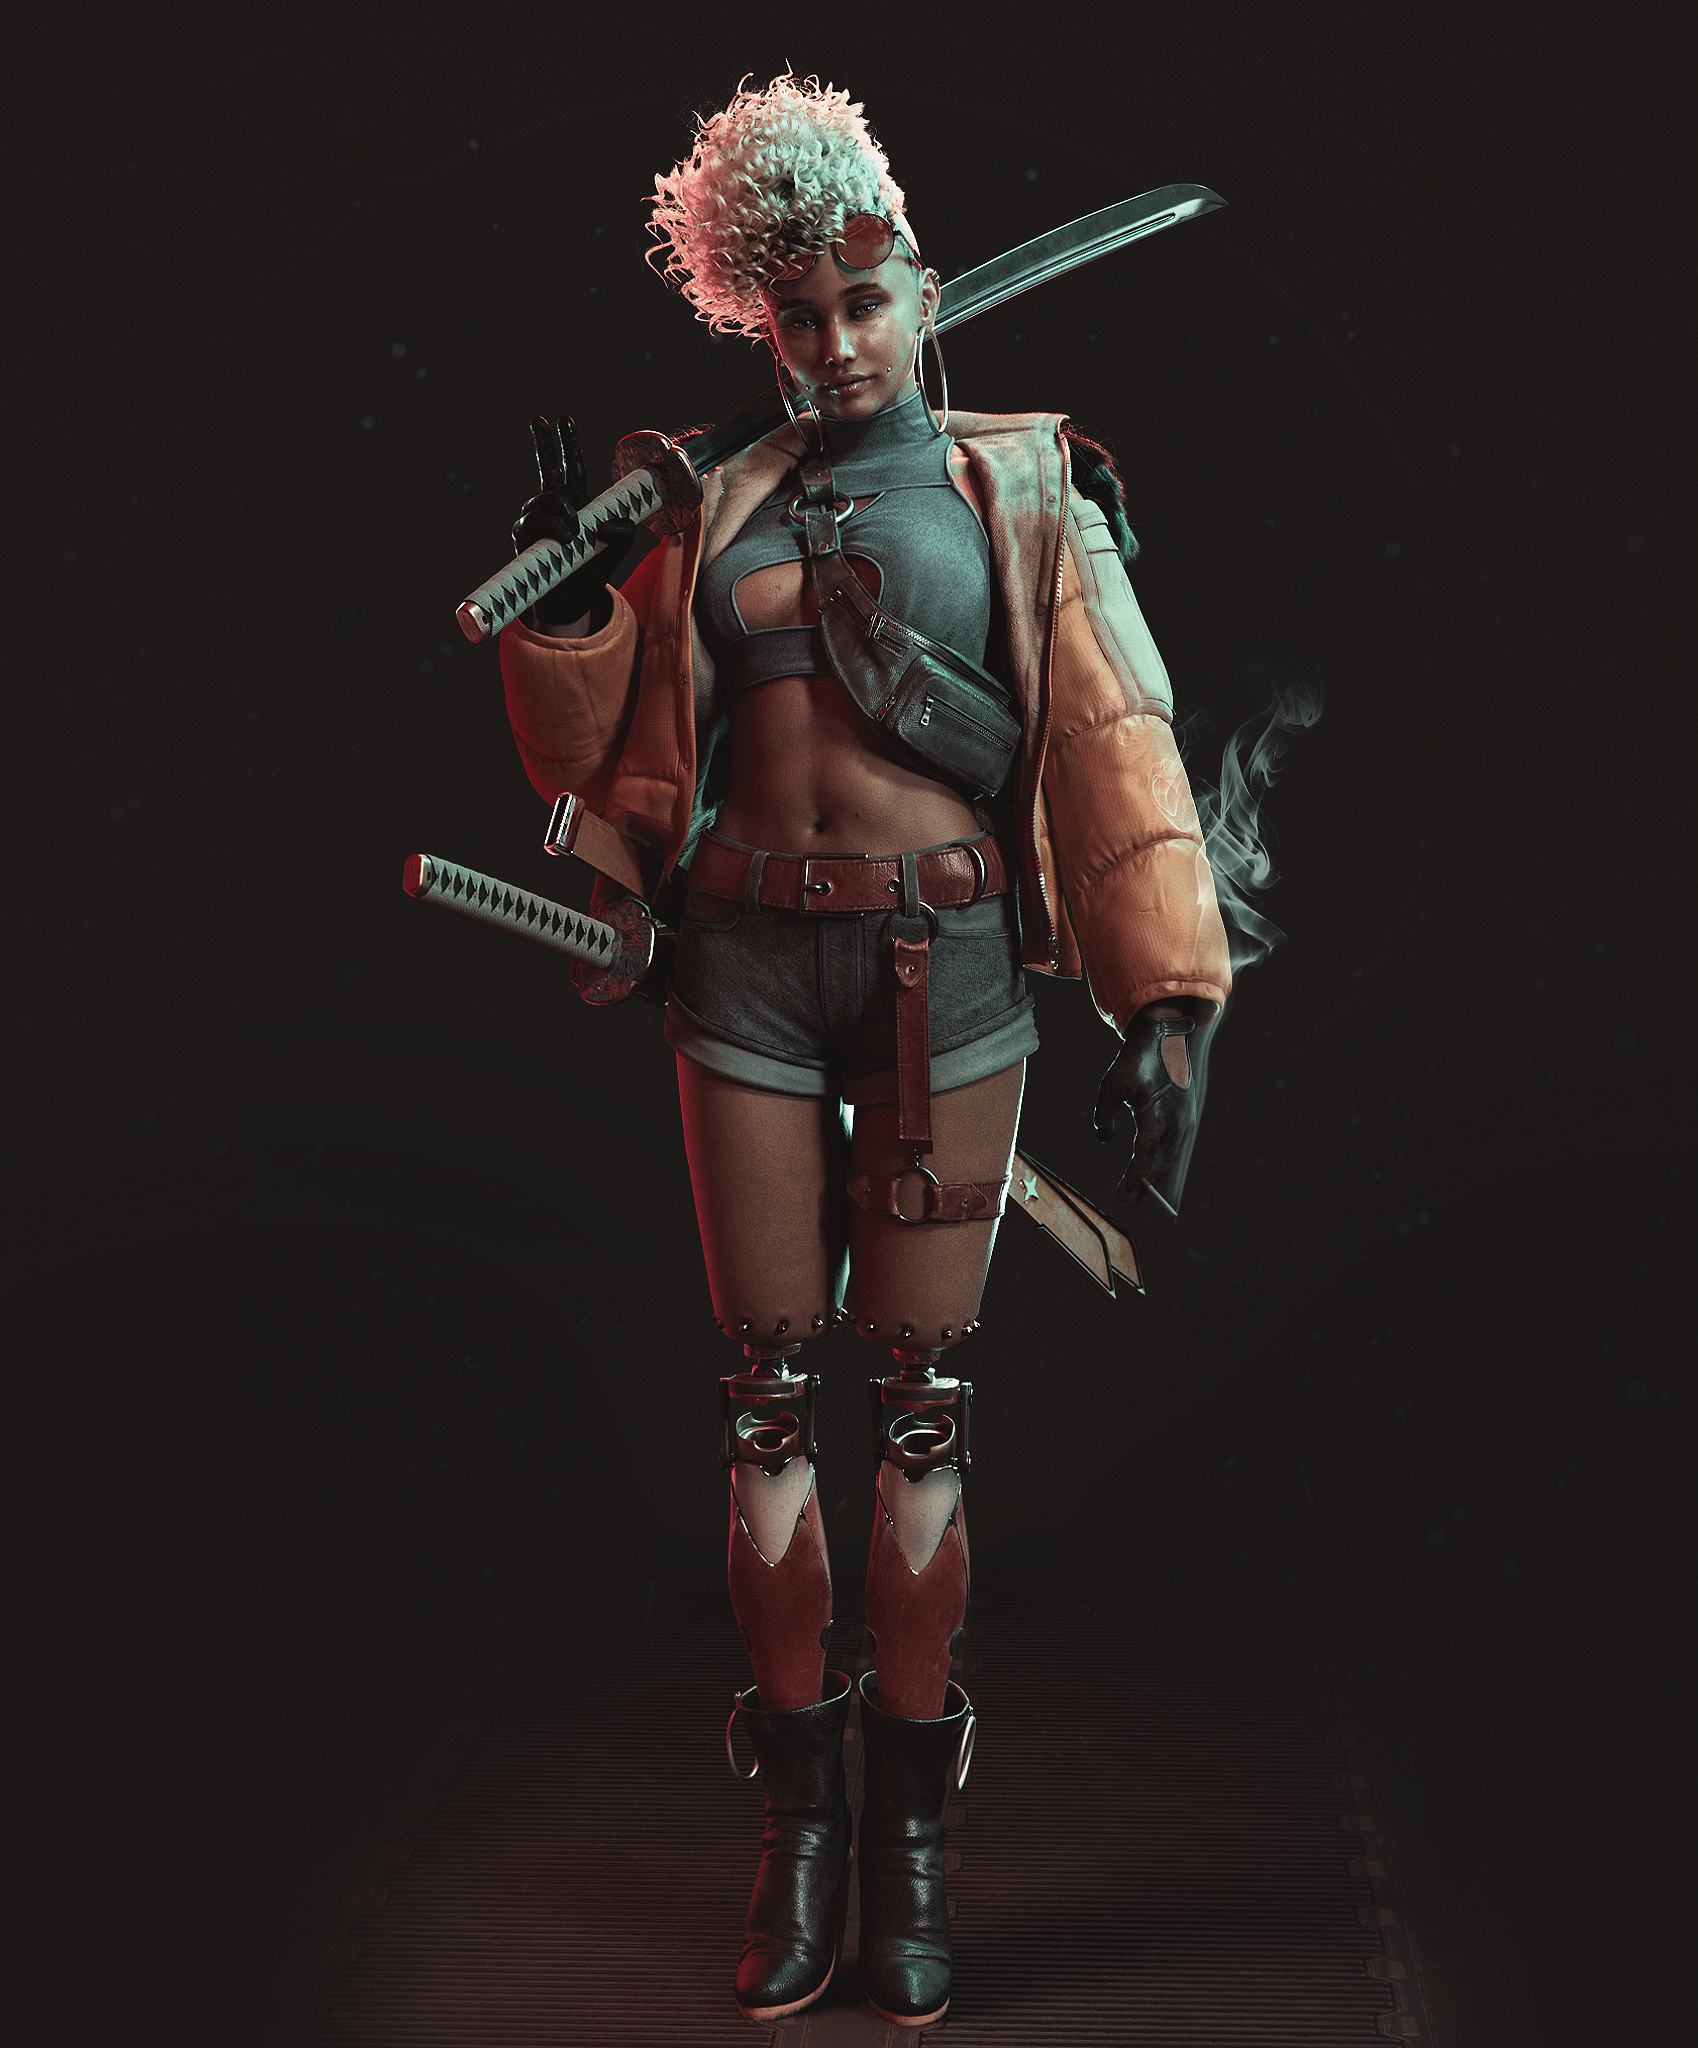
The inspiration and concept come from a great concept artist, Pavel Hristov.
He created the concept of “Niten Ichi-ryū”, a Sci-Fi character with a katana. I wanted to do this concept because it looked very challenging, and it tackled a lot of technical problems that would force me to learn how to solve them.
After fully analyzing the concept, I searched for the various elements that composed the character. This took quite a bit of time since finding all the pieces that matched the concept the most was challenging.
It was important to categorize each element into its own section, as it was going to be the guide to build the final piece of each asset, as sometimes they had to be combined to create the one needed; this made it way easier and clearer.

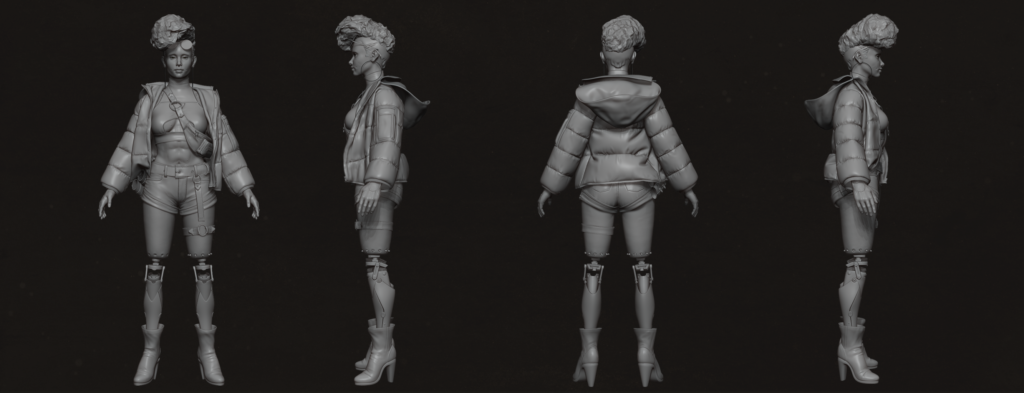
Sculpting and Blockout
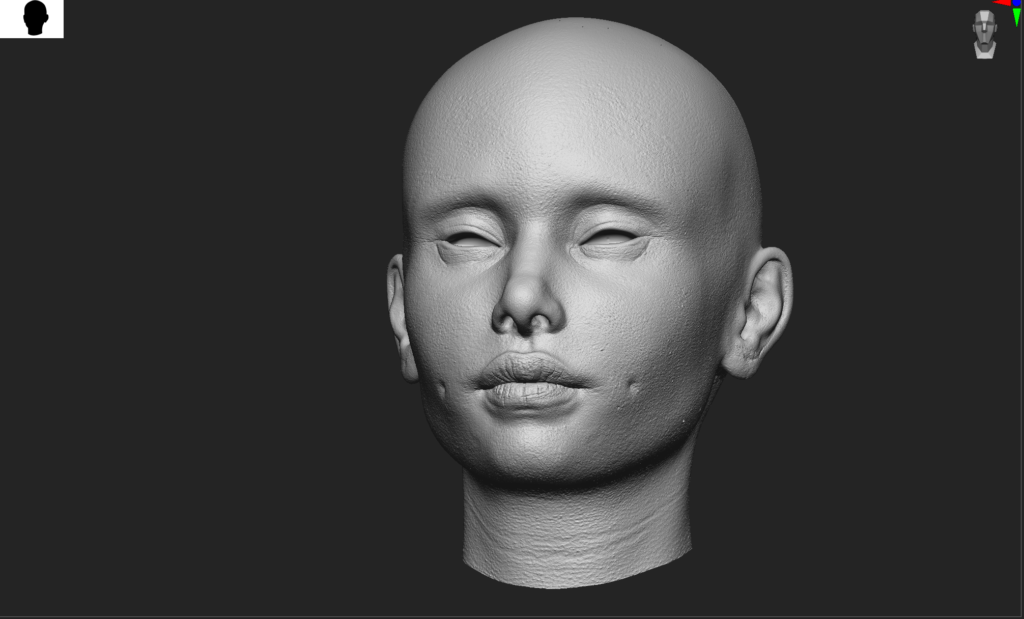
To sculpt the base I chose to start with a Zbrush head plane, and from there, I modified a body to what was required and used dynamesh to build it all together.
To understand all the elements it was necessary to create the whole block out of the character, so the clothes were created roughly with dynamesh to figure out the length and the size of them, mostly the jacket as it was very bulky and would overlap other elements, and figuring this out in the blocking stage would solve a lot of guessing in Marvelous Designer when creating the clothes, and also serve as a template.
After finishing the final blocking colors were added to ease the texturing phase and help with the hair creation in Xgen, as they would tell me exactly where the hair lines were and the position of
the eyebrows.

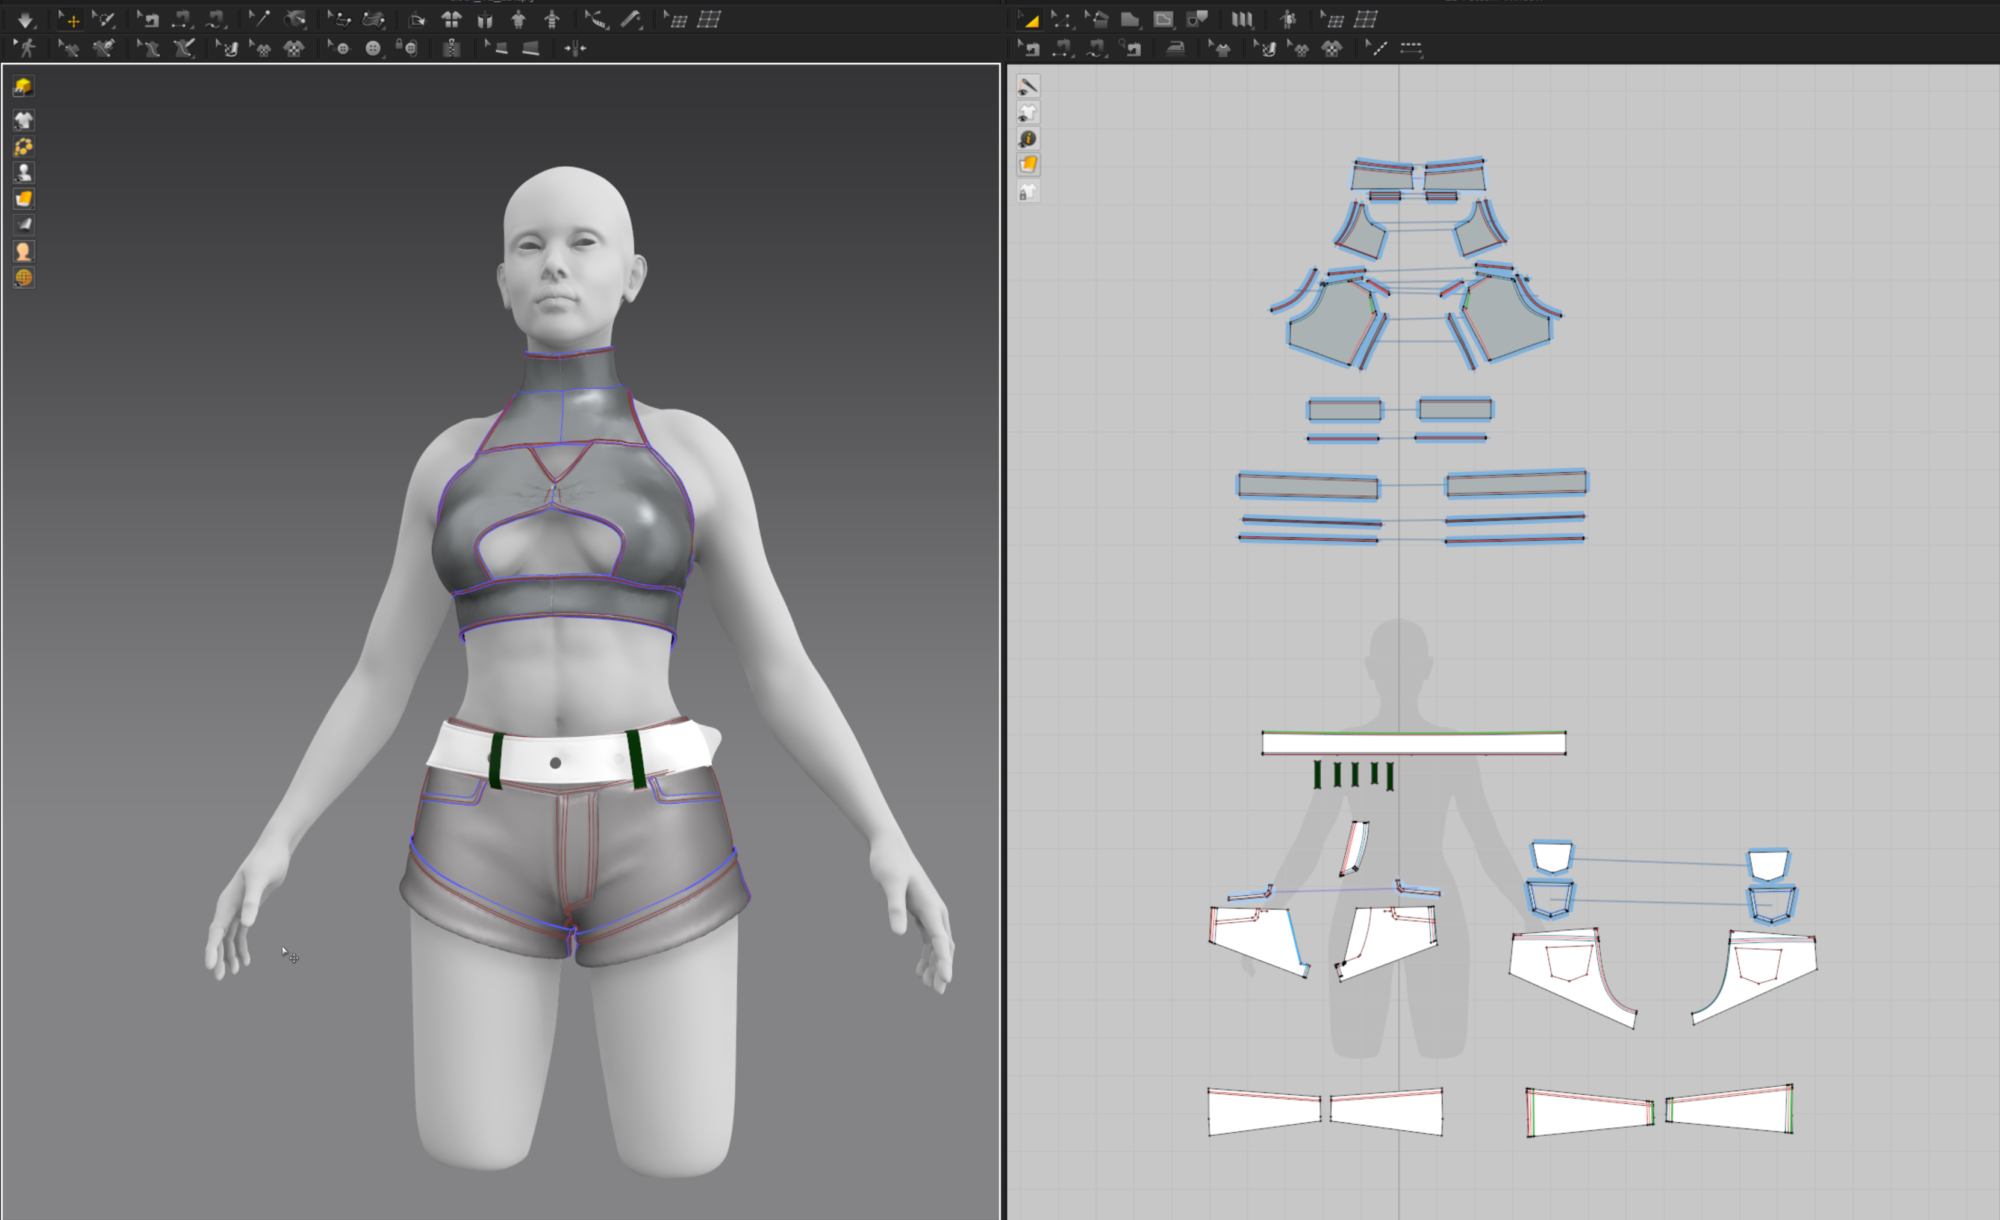
Props and Clothing
To start the clothes I exported my decimated model to Marvelous designer, and did all the basic patterns for the cloth to have realistic fitting and folds.
I would export my clothes from marvelous to Zbrush to see if the length and shape fit according to the blocking.
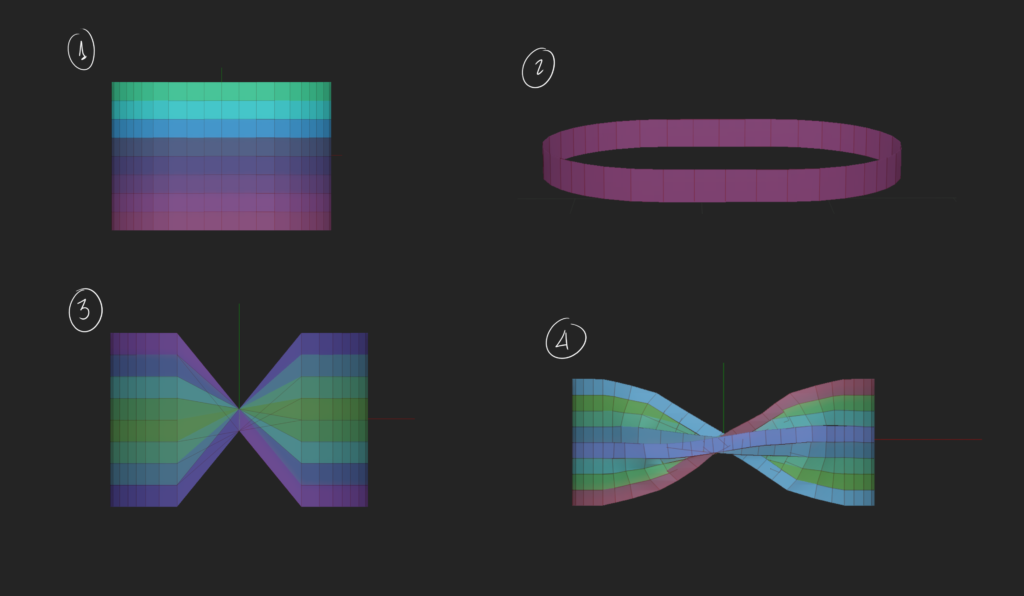
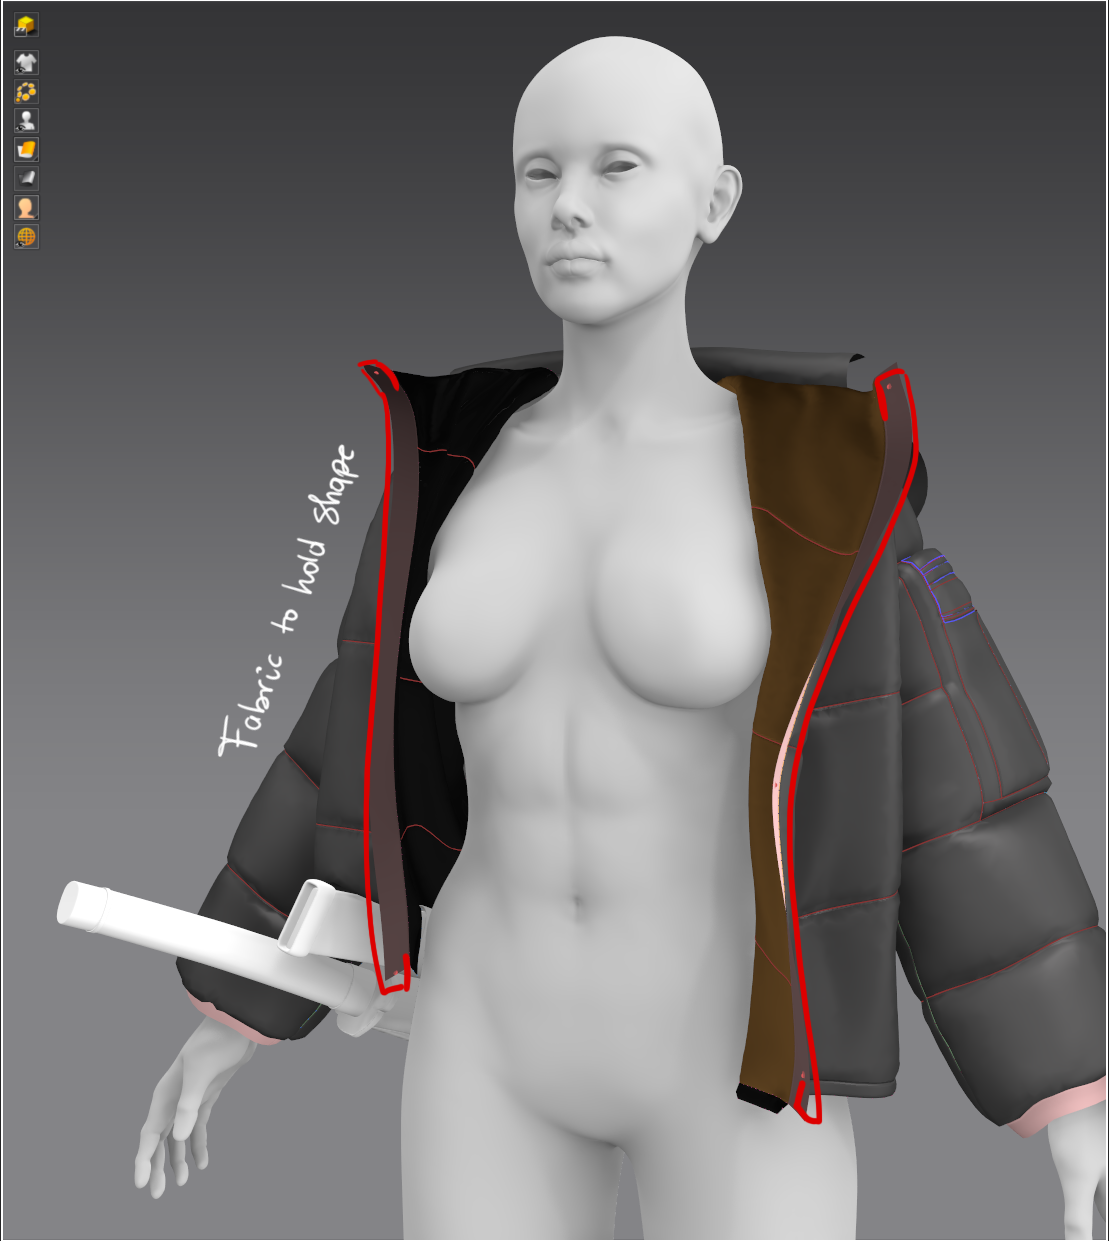
For the jacket, I used pressure to create the volume on it, and to maintain its shape and to keep it open in the position I wanted, an extra piece of fabric was added, here I would add pins and pull it loose however, it was necessary.
After this, I would hide these pieces of fabric and the jacket would hold its position without affecting the primary geometry.
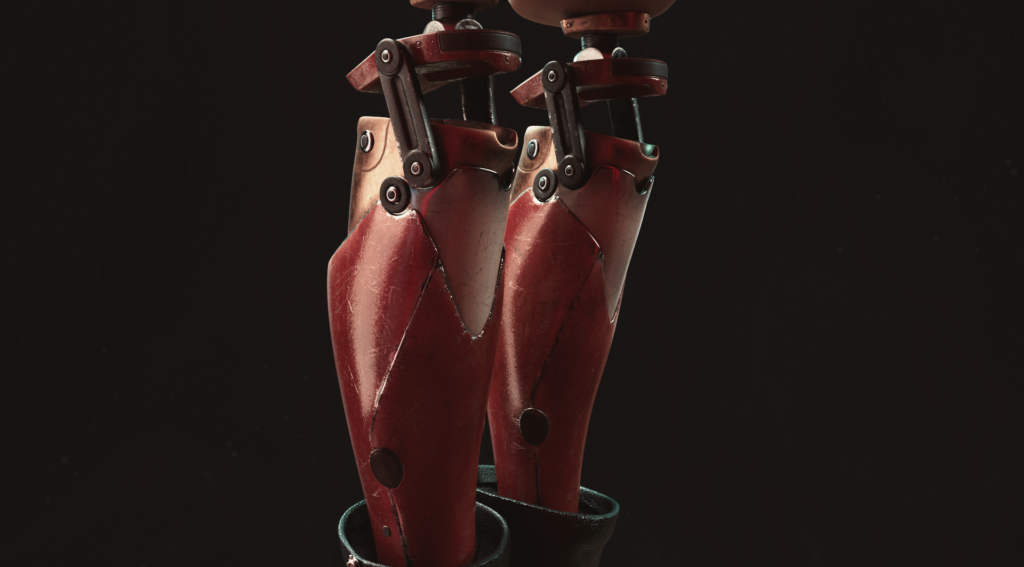
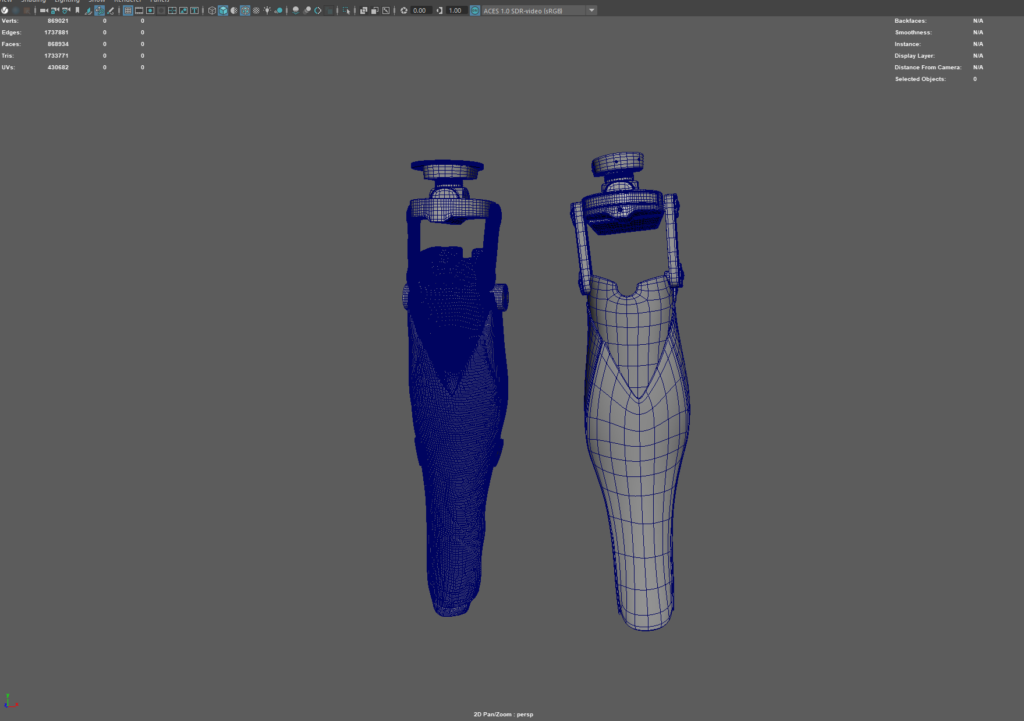
Legs
I used my Zbrush Blocking and imported them into Maya, where I used the quadraw tool for the retopology.
If I noticed the retopology was getting too bumpy, I would import them back to Zbrush and smooth the retopology mesh out and bring it back to Maya, this made it easier to have a smooth topology.
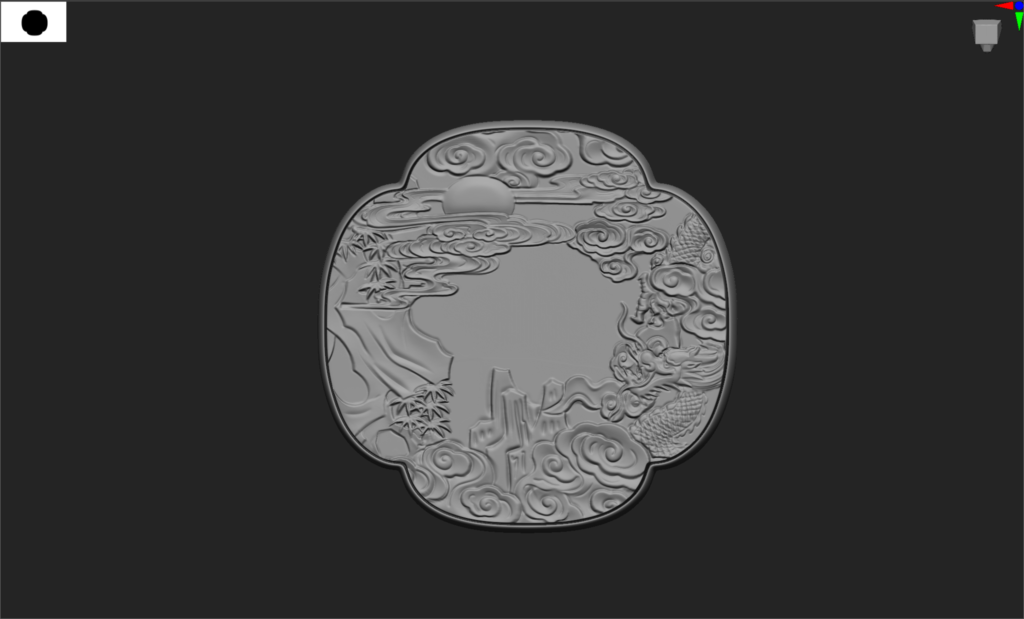
Katana
For the details on the hand guard, I used the Zbrush bas relief extracted from Stl files from https://www.ameede.net/ and would matched it with other designs, and doing the clean-up using the morph brush, after that, I would sculpt on top of them to bring out more details and make the lines sharper.
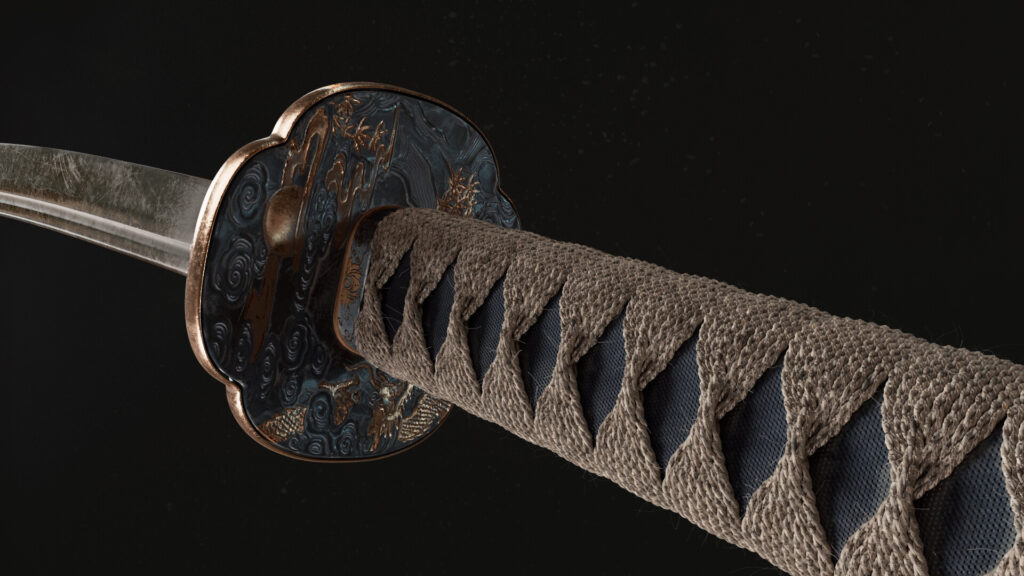
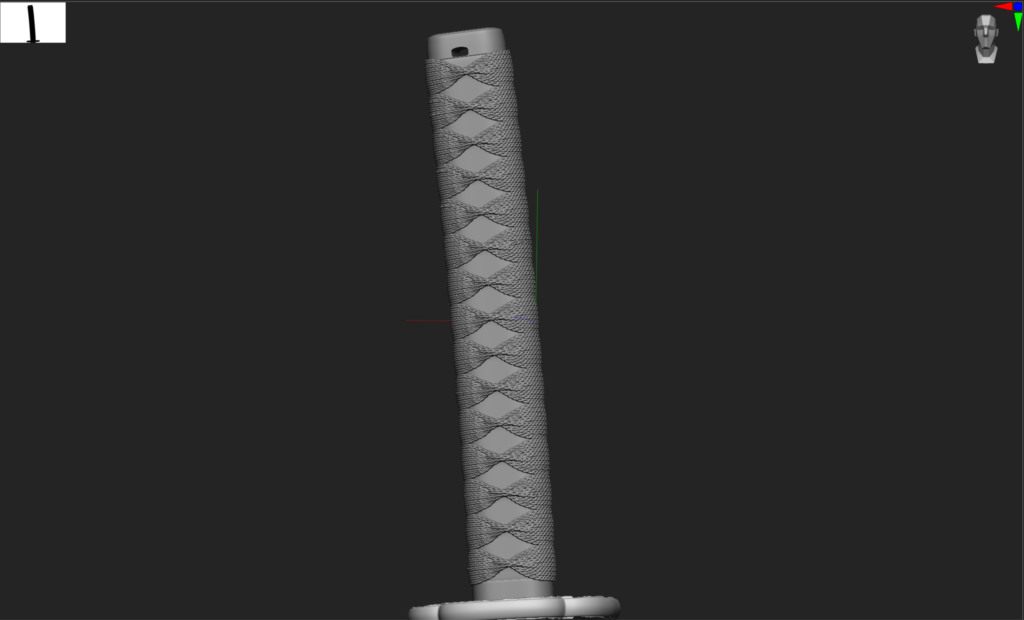
Cords
It was better to approach them using Zbrush, so I started from a cylinder and stretched it to match the handle of the Katana, deleted the base and the bottom and left a single strand which
was then duplicated to act as each cord of the handle.
Deleted the middle of all the strands, bridged them between each other, and intertwined them to simulate the crossing of the fabric the katanas have in this area.
After this, using the Dynamic subdiv menu, enabling the MicroPlyOn and choosing wire 01 would create the effect of the cords and replace the planes that were there before.
Having done this, the only thing left was duplicating all the strands along the handle, and with a Move Topological brush disorganizing some of them to give them a more realistic feel.

Retopology
For the retopology of the body, I used 3dwrap, using the base of a good topology, and transferred it to my ZBrush model, after which I would project the details back into Zbrush.
The retopology of the cloth was done by exporting the 3D mesh from Marvelous at the lowest particle distance and exporting a 2D flat version of it at a medium particle distance.
After bringing this to Maya I used the Retopology Toolkit for Maya from Derrick Sesson.
Using this the retopology was faster, and matching the edges to create seams was very precise. After this, I would bring it back to Zbrush to add more folds and details to the garments.
Texturing
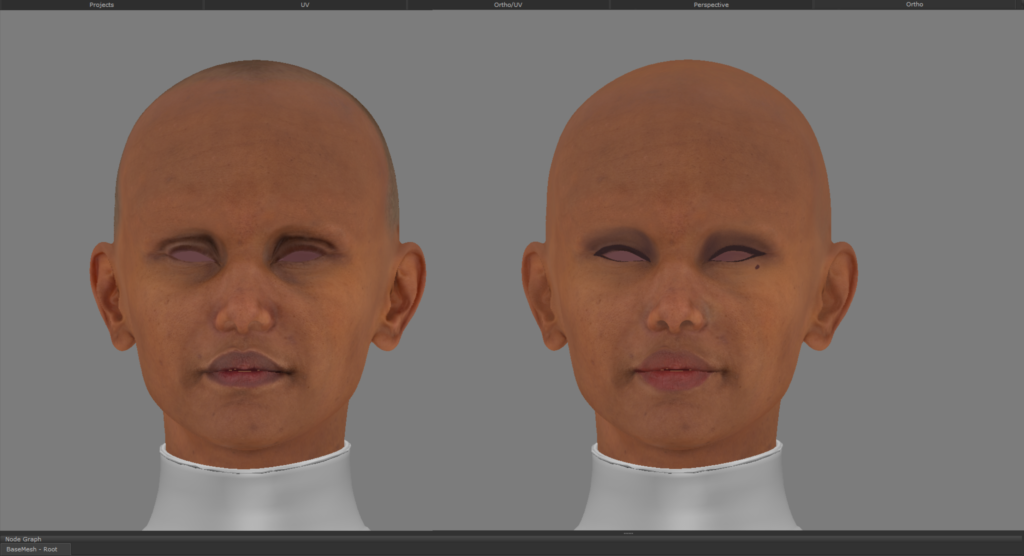
The skin texturing was done with a 3D scan store texture and retouched in Mari to clean up some areas, remove the hairline, and add makeup.
For the body I took 3 different patches of skin from the face and made it tileable, using masks I blended the 3 patches and having 3 patches of skin allowed me to give more variation to the skin tone.
The displacement map was created from the 3D scan store texture and applied to the model in Zbrush, tweaking the intensity with a layer.
When setting up the skin textures, I created 3 different maps, a Tmask (with the ears included), one for the mouth and the rim of the eyes, and one that was just cloud noises divided into RGB channels to give more variation to the skin specialist in all of the areas, while also using a curvature map to tighten the special in some areas.

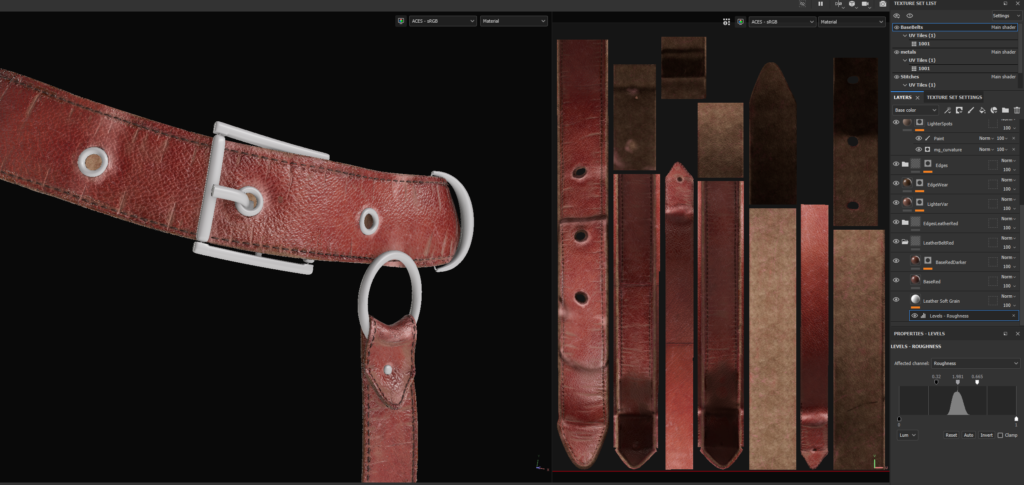
Leather
The leather items were done in substance painter, having straight UVs allowed to select the edges with a polygon fill and add a mask so a variation in this area could be created, a lighter more worn-out tone.
Also to make the grain of the leather stand out, I tighten the specular of the material. Adding soft scratches to the material helps to make it look more natural and worn out, this can only be seen at certain angles, but add to the overall feel of the leather.
Jacket
The fabric on the jacket had some shine to it, it was more of a Satin, so after some tweaking with the values on Maya, I decided to add a little bit of metalness to achieve a more shiny look.
All the clothes had a bit of sheen added to them, to give them a more soft look on the edges and make them look a bit fuzzy.
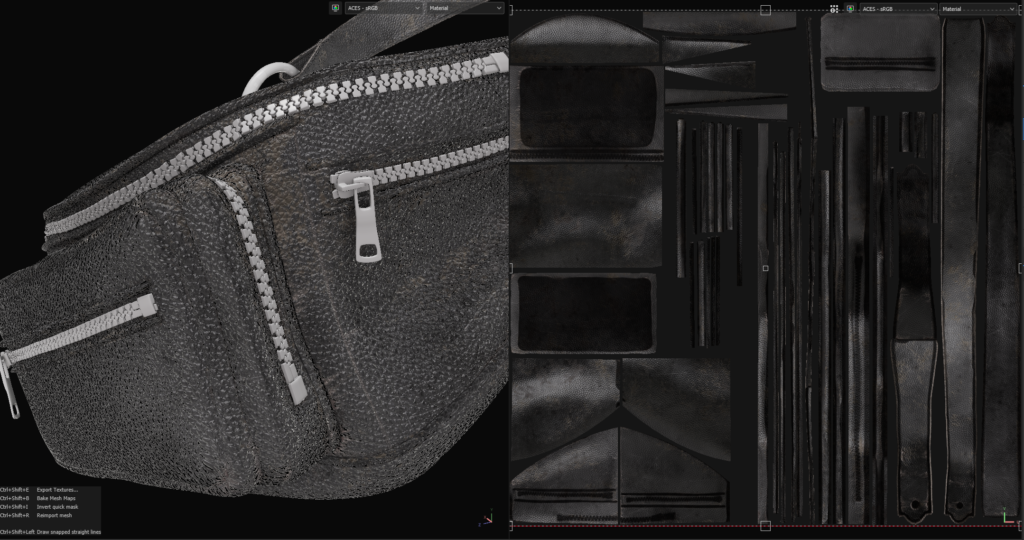
All the baking was done in substance.
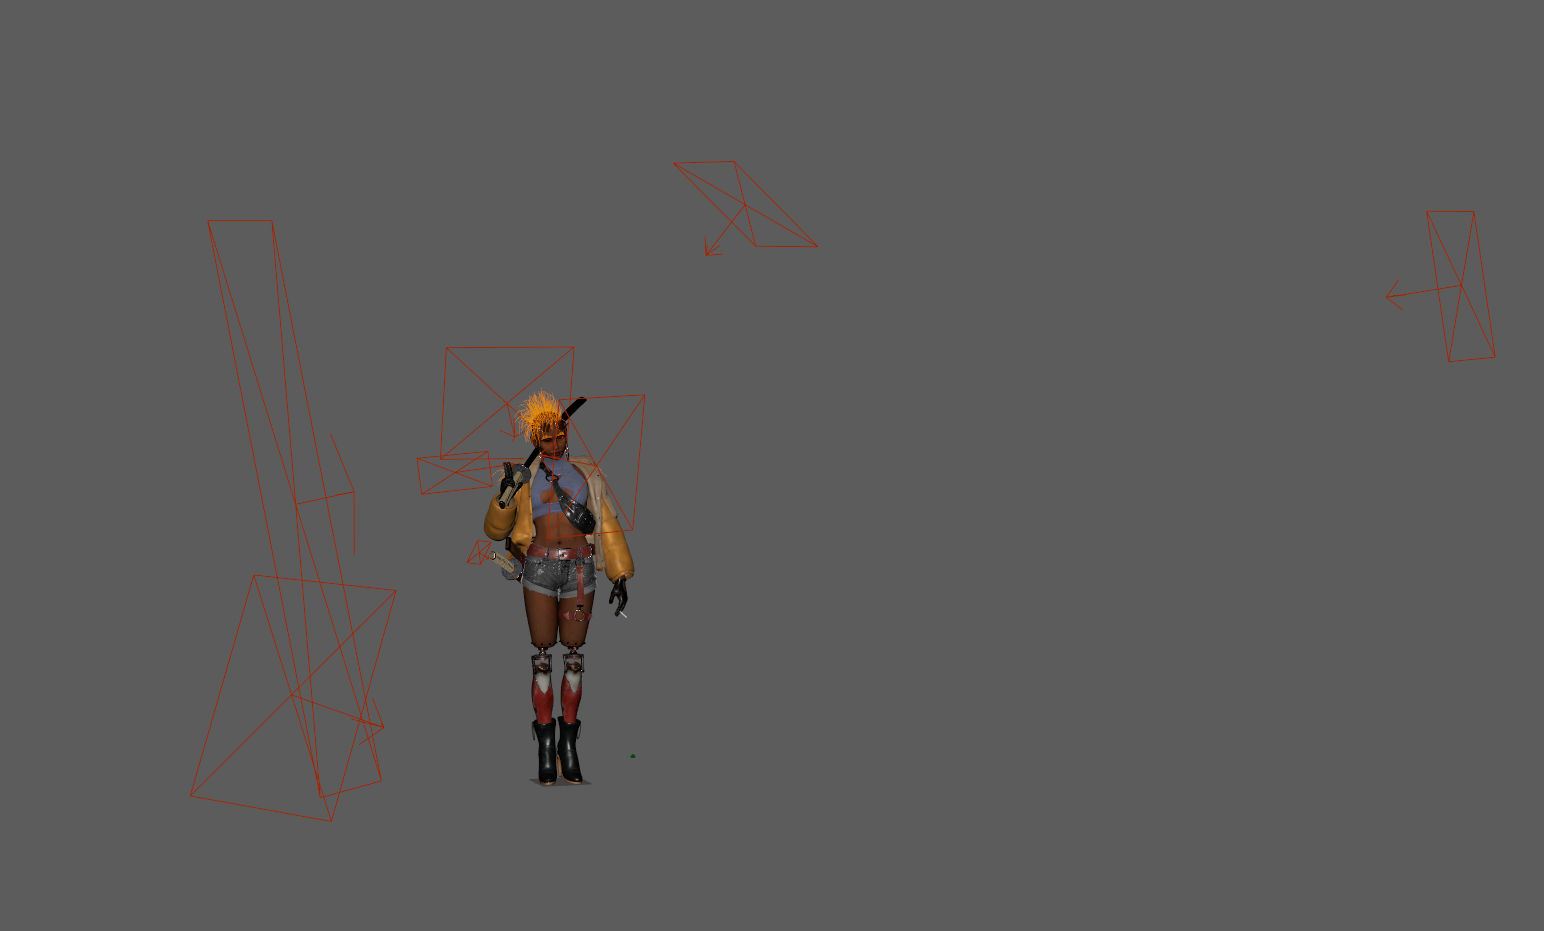
Rigging & Posing
For the posing I used Mixamo, here I uploaded the lowest subdivision level possible of all the main items and then posed it on Maya.
After being posed I brought it back to Zbrush, and transferred the pose into the high detailed mesh, making sure I kept the layer of the posing at all times, so that if I needed to go back and fix some sculpting it could be done while in symmetry adding another layer, and then go back to the posed mesh.
If fixing big areas were needed, using the T-Pose in Zbrush would make moving and smoothing all the items more effective than fixing each one individually.
The items that were not rigged were posed manually.
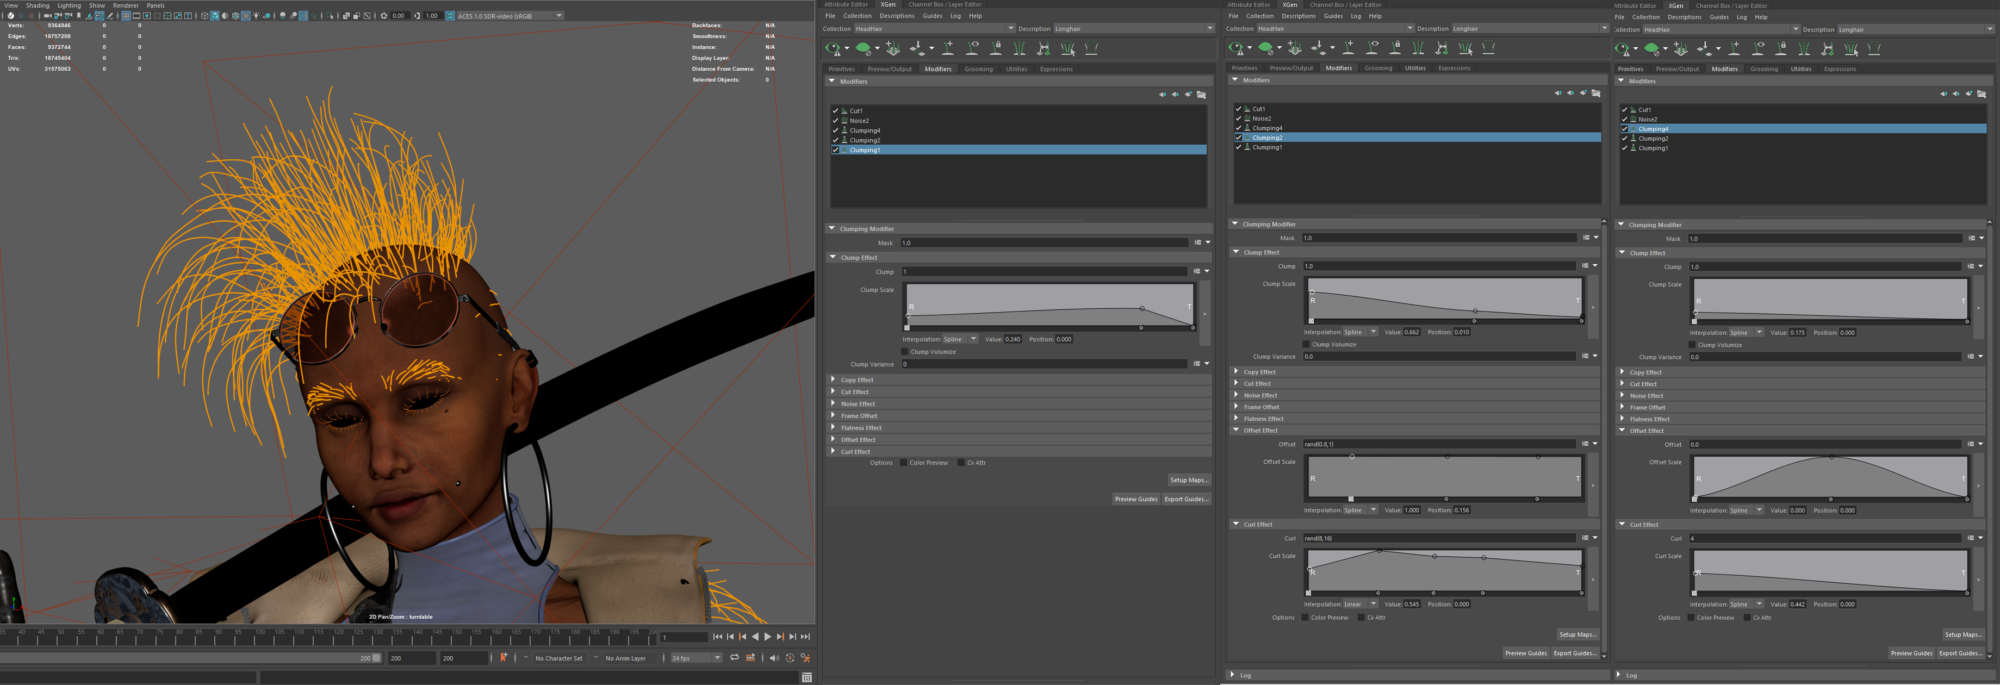
Hair Xgen
To approach the amount of hair the concept had, it was split into 3 descriptions, one for the side buzzed haircut, one for shorter curls (on the sides), and the bigger curls that needed to hold all the volume.
For the long curls, I decided to go with a clumping by guides since it gave me closer results to what I wanted, but that also required adding more guides and placing them in the positions where the curls had to fall specifically.
Next, I added another clump, which would hold the curls and tweak them without messing too much with the base and control their size by moving the offset parameters.
And last I added another clump, which would tweak the tightness of the curls, and add some variation to them.
To finish the look of the hair I added a little noise to break up the hair strands and a cut to make them all different sizes.
For the rest was just hair added through groomable splines, such as the peach fuzz and the hair on the shirt and jacket.
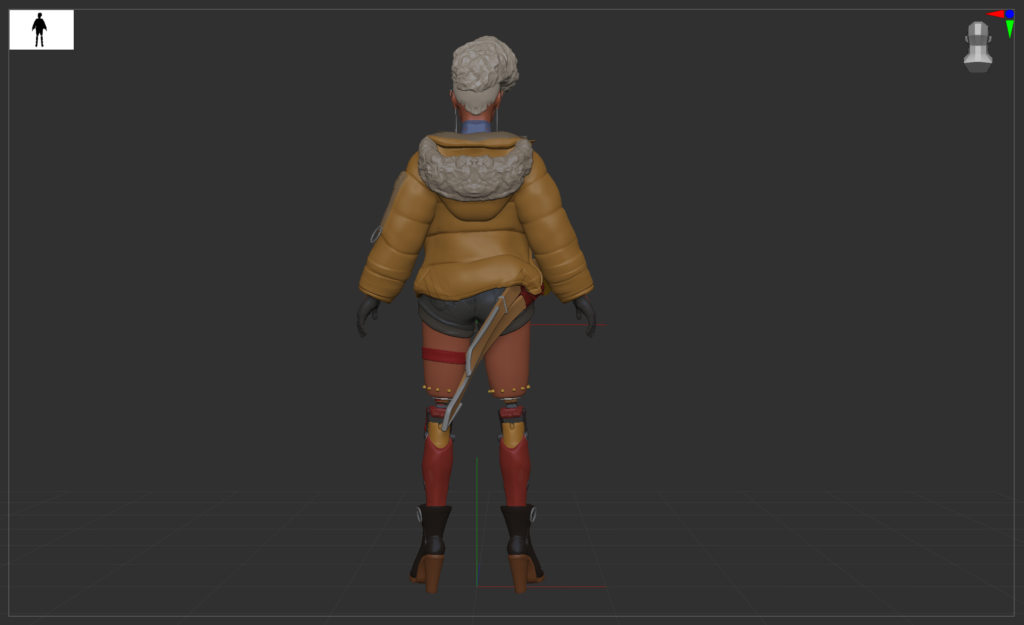
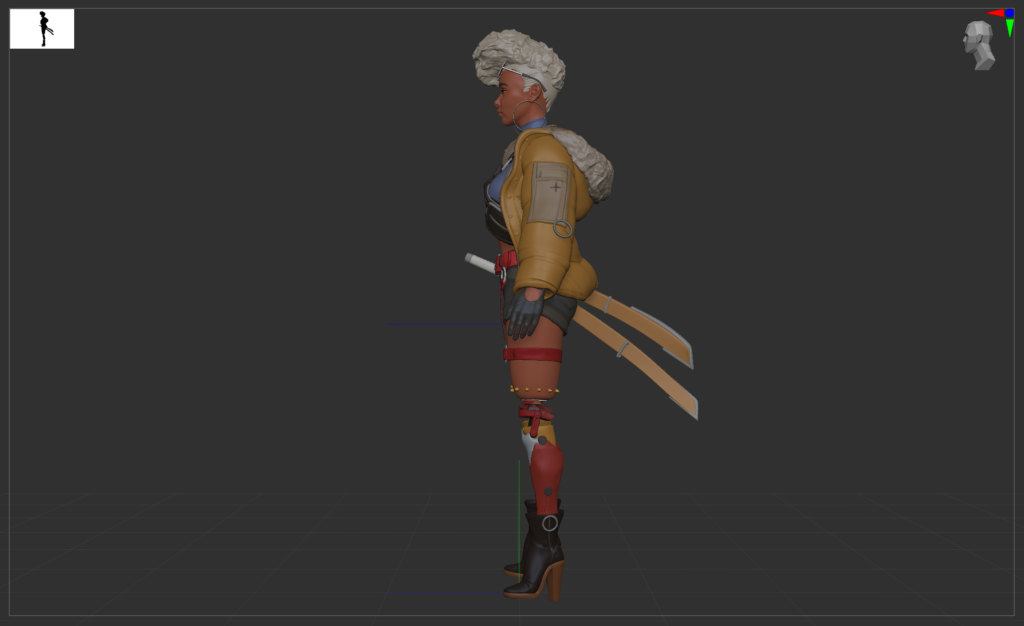
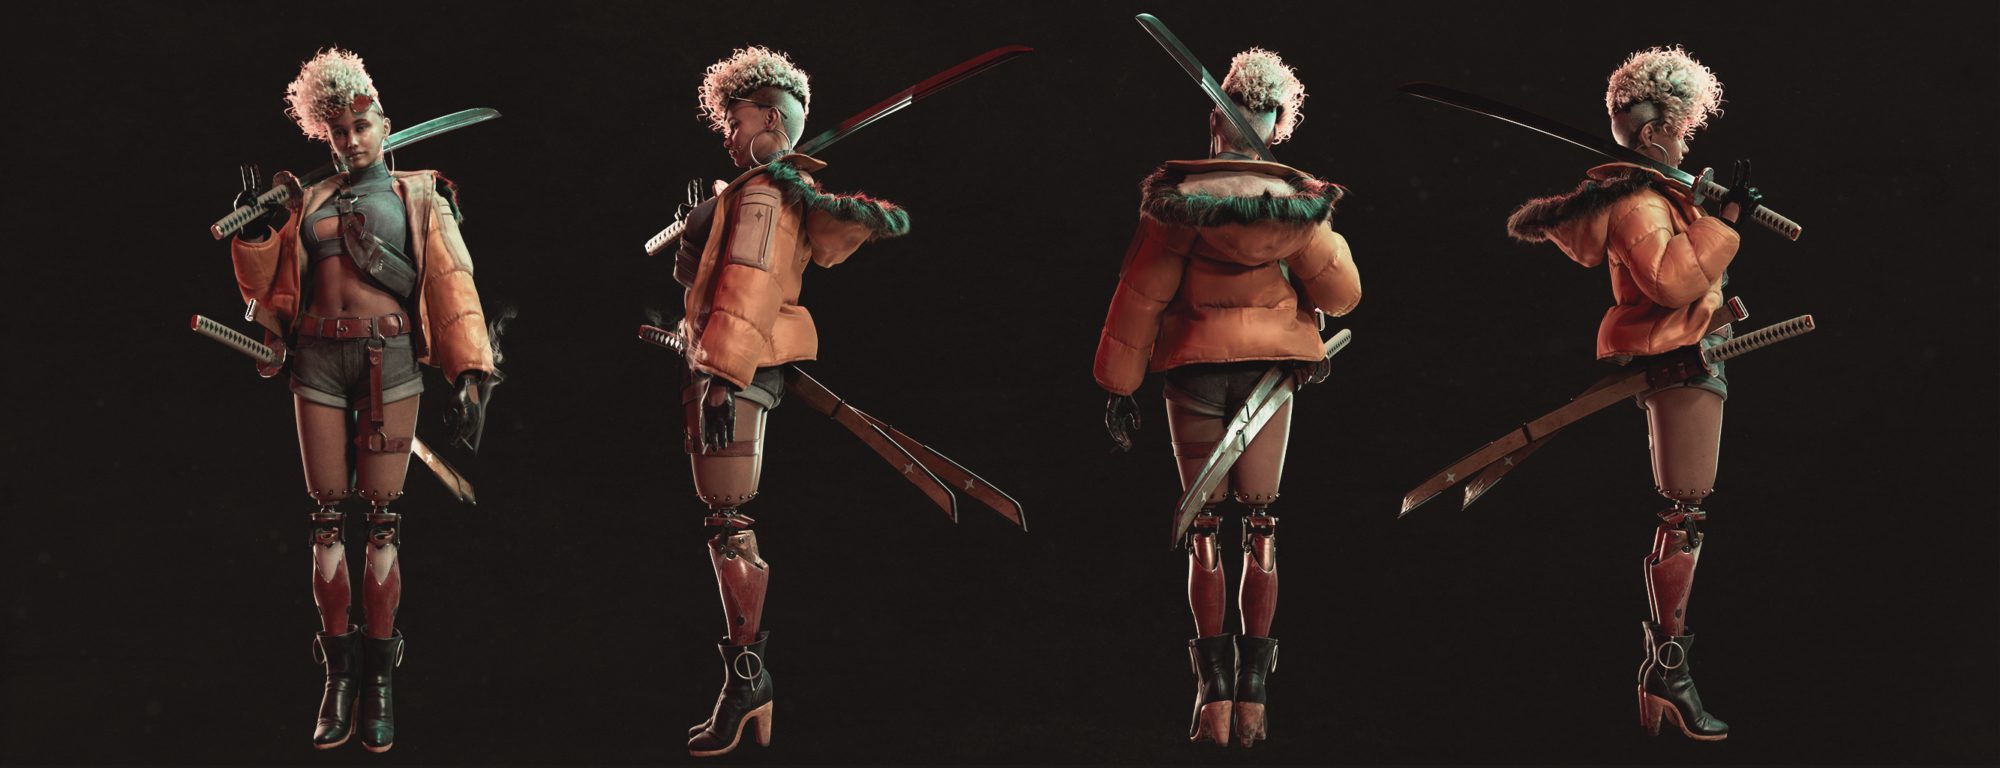
Rendering & Lighting
When lighting the scene I wanted to give it a more tinted color to the lights to make it look more sci-fi, but I didn’t want to over-saturate the picture with the colors, for an overall light I used an HDRi tinted slightly red so there would not be any completely black spots, and then went with a red rim light, and green key light, trying not to make them too strong or too dark not to lose any details
To get a shine on the Katana, I created a light and focused it on the blade and then through light linking broke the link to any other geometry.
Other lights were added to highlight some areas, such as the black gloves that were lost in the image.
The rendering was done using v-ray, and was composited in photoshop and after effects where some dust and fog effects were added, and also the smoke on the cigarette.
Conclusion
This project has been the most challenging yet, I learned a lot while doing it, and it made things more clear on how to approach my following projects.
To complete a whole character is always going to be demanding, and there will always be things to improve or change, but the important thing is to learn during the process and get a result you are happy with.
Read more articles
You might also like these articles.