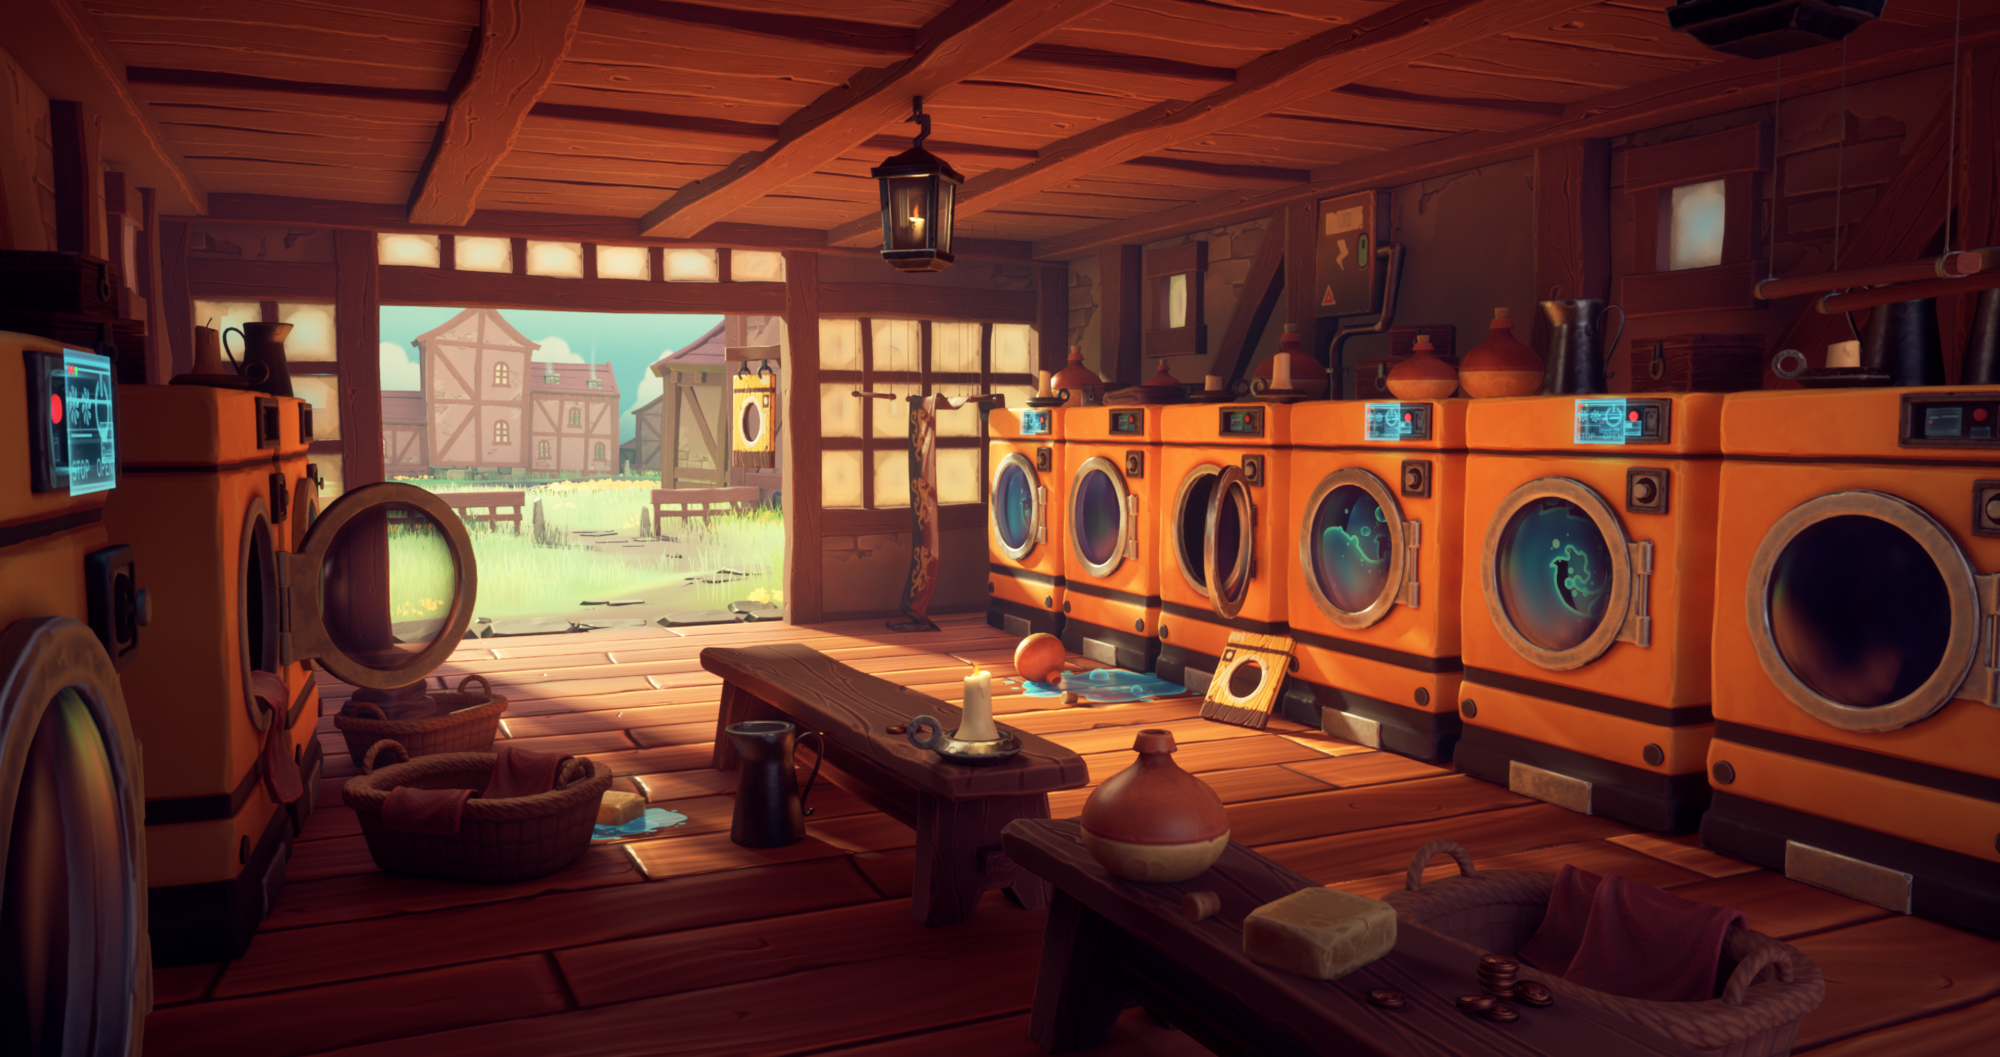
Medieval Laundromat
Introduction
Hey there! My name is Lara D’Adda, I’m a student at Digital Arts & Entertainment in Belgium.
I’m currently in my last year and I am really passionate about creating 3d environments and props.
Project
The Medieval Laundromat project is an entry for the ArtStation challenge of this year, with the theme “Medieval: Back and forth.” I decided to join the Game Environment challenge after looking at the concepts. In the past, I focused mostly on creating smaller, detailed 3D models. Now, I want to focus on bringing my skills together in bigger projects.
The concept for the Medieval Laundromat by Delphin Casado was not only very nice but also what I was looking for, as it involved a restricted space and repetitive assets.
This allowed me to focus on details and modularity. My goal was to recreate a stylized environment and become more comfortable with Unreal Engine while focusing on the props and bringing the scene together with some narrative elements and cool effects.
Software
For this project, I used:
- Maya
- Zbrush
- Substance Painter/Designer
- Photoshop
- Unreal Engine
- Premiere
Inspiration
Compared to my usual works, I didn’t use almost any references besides the concepts provided by the artists. I already knew I wanted to recreate a very chill and cozy atmosphere with warm lights and a cute vibe for the scenery.
I especially wanted to put a lot of attention on the lighting of the scene, the colors/mood, and the composition, drawing inspiration from a warm morning. I often do my own overpaints to try out stuff and see how I can improve and make artistic decisions.
During the challenge, different artists also worked on the same concept, so it was very inspiring to see how they translated the concept into 3D.
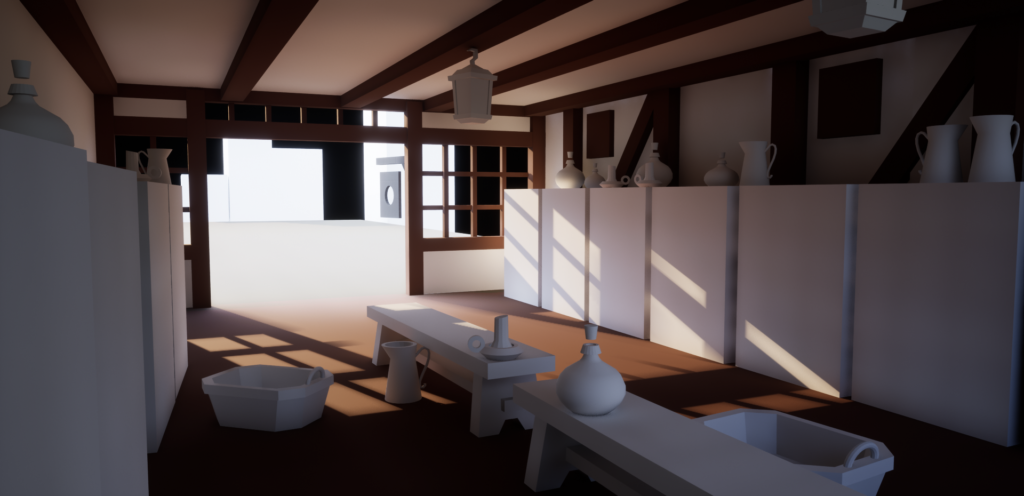
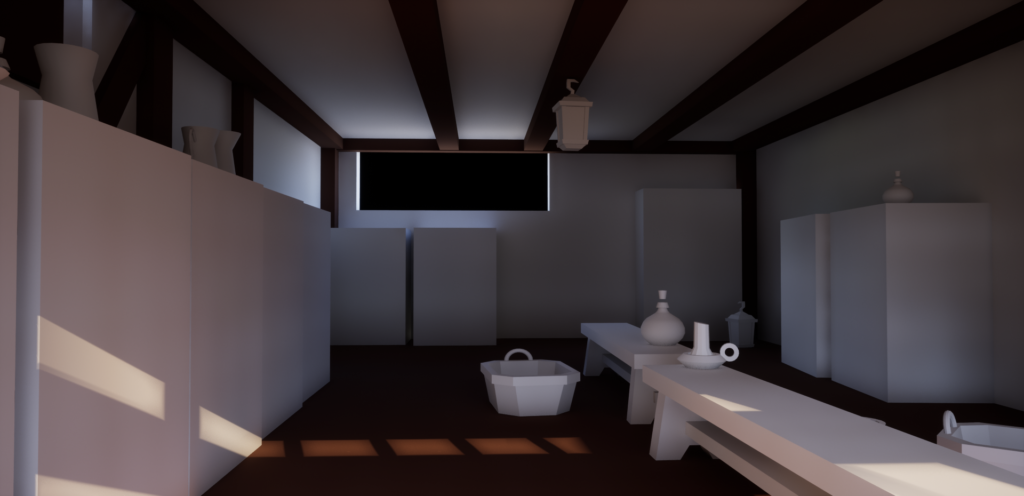
Blockout
The first step for me is always a blockout inside the engine. I use basic blocks to put together the scene and get the right proportions. In this step, I already consider my main screenshot views. I look for the angles that I like and save different camera positions in Unreal Engine with a quick shortcut (Ctrl + a number).
This helps me build the composition more precisely and with the final result in mind. I also create a quick blockout of the props so that I can easily switch them later and block out their positions.
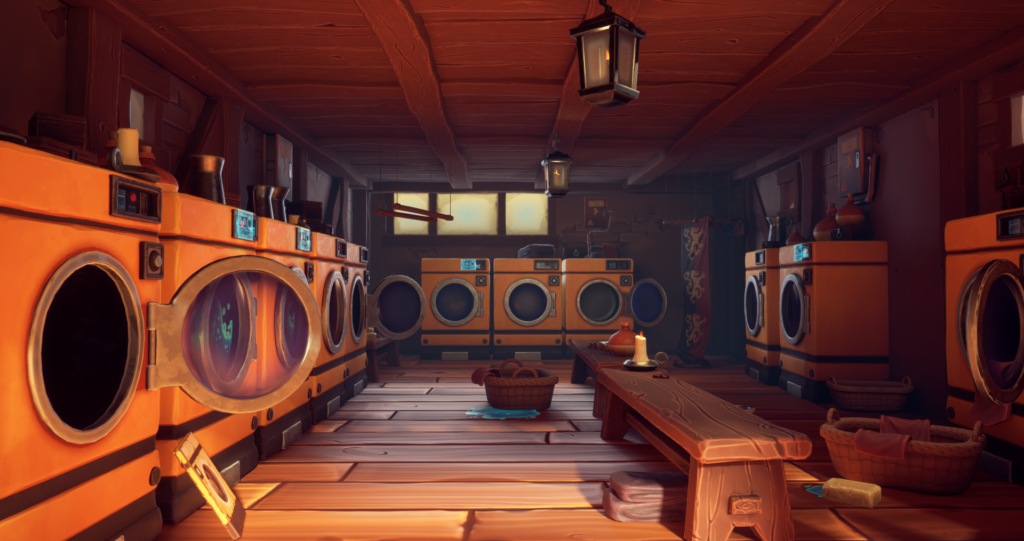
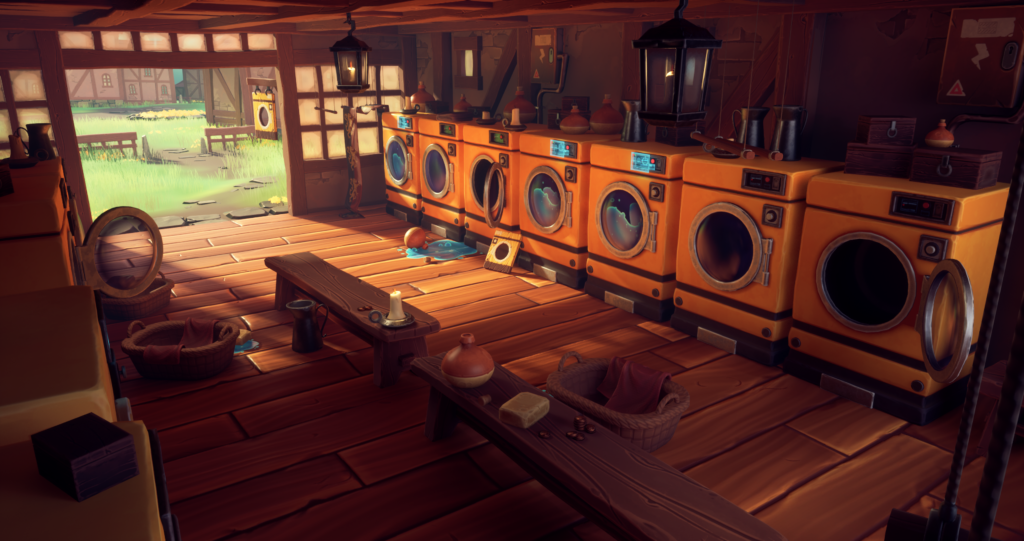
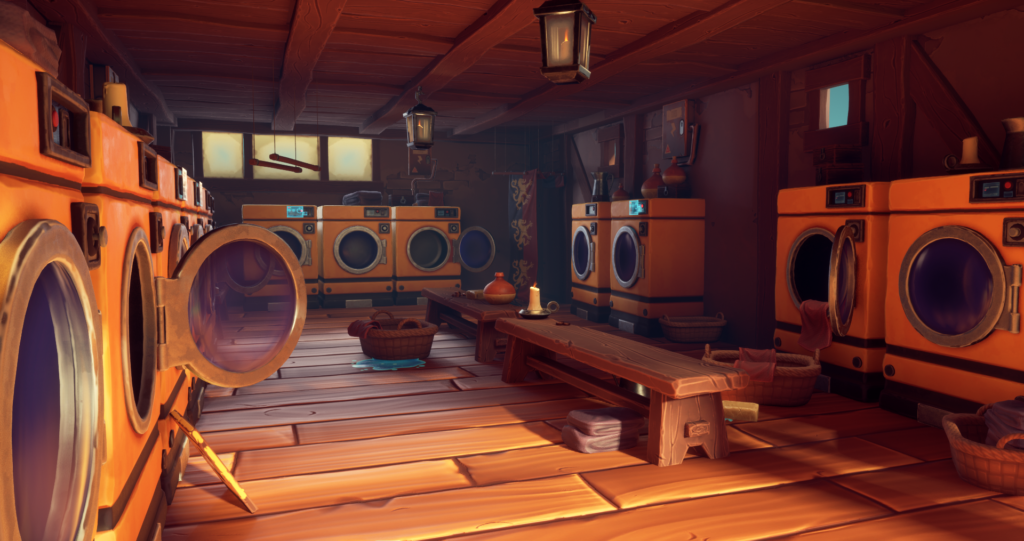
Modelling the room
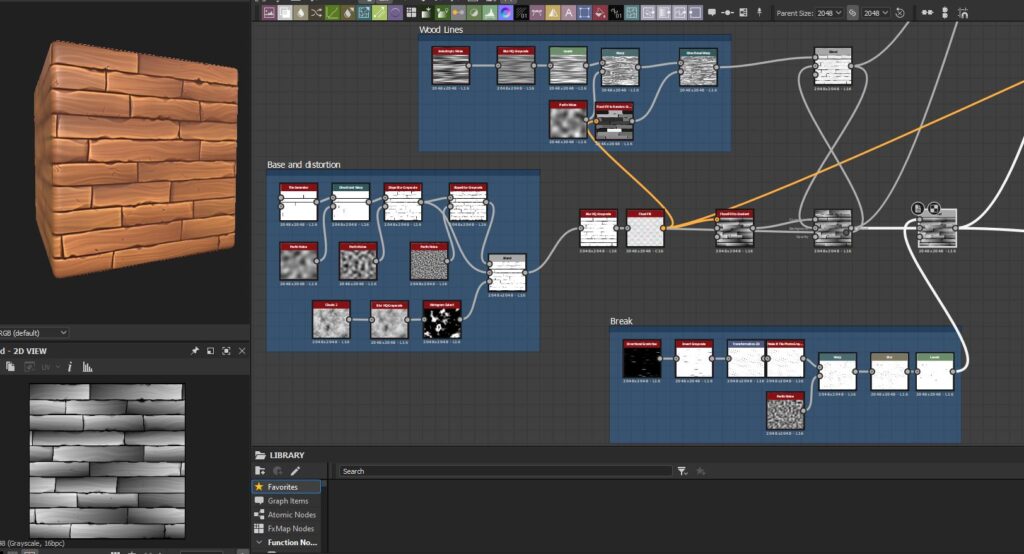
At this point, where I can see the basic elements of my project, I decide how to tackle them. First, I wanted to create the room. I decided to use tileable materials for the walls and floor, and make trims for the beams that I used again for almost all wood elements in the scene.
Being new to Substance Designer, I got some help looking at different YouTube tutorials, but the workflow is pretty similar to other programs, so it was easy for me to catch up and change up the materials.
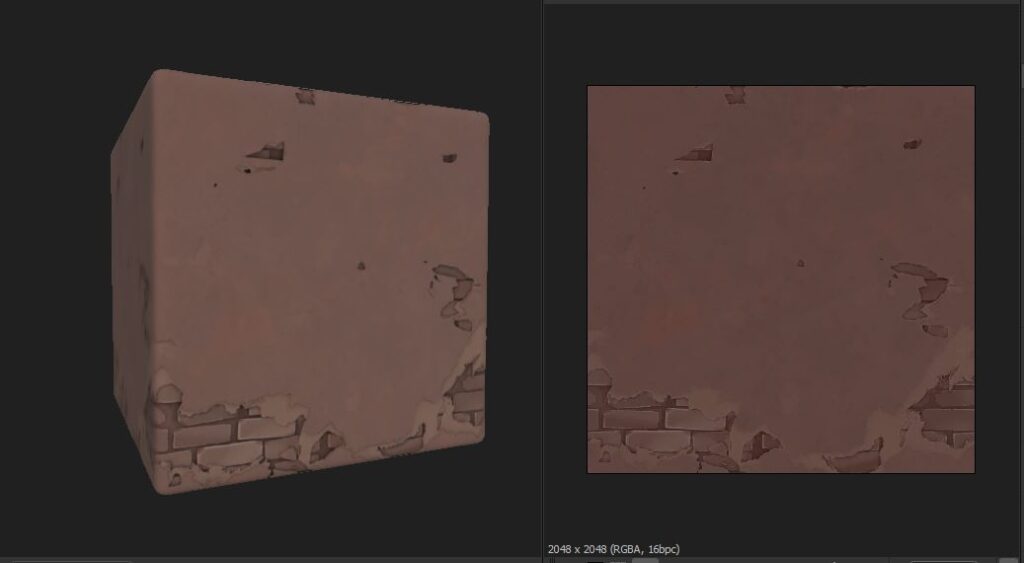
For the wall, I got inspired by this tutorial. Especially the approach to creating a mask that would show different layers under the plaster. Then I made a simple plaster layer, cement layer, and bricklayer and used those masks to show them.
For the floor, I also looked at different resources but kept it very simple. I only tried to push the normal value a lot to avoid having a flat result without depth. I doubted at the beginning if I should tackle the floor with different meshes or use parallax occlusion.
After trying it out, I realized I didn’t want to clutter the scene with a lot of details already, and a simple version of the floor would be better.
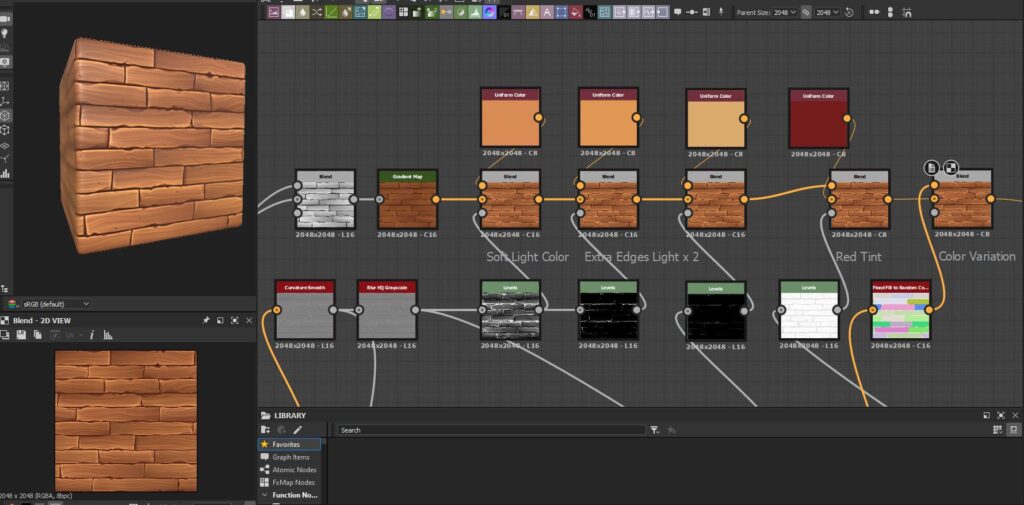
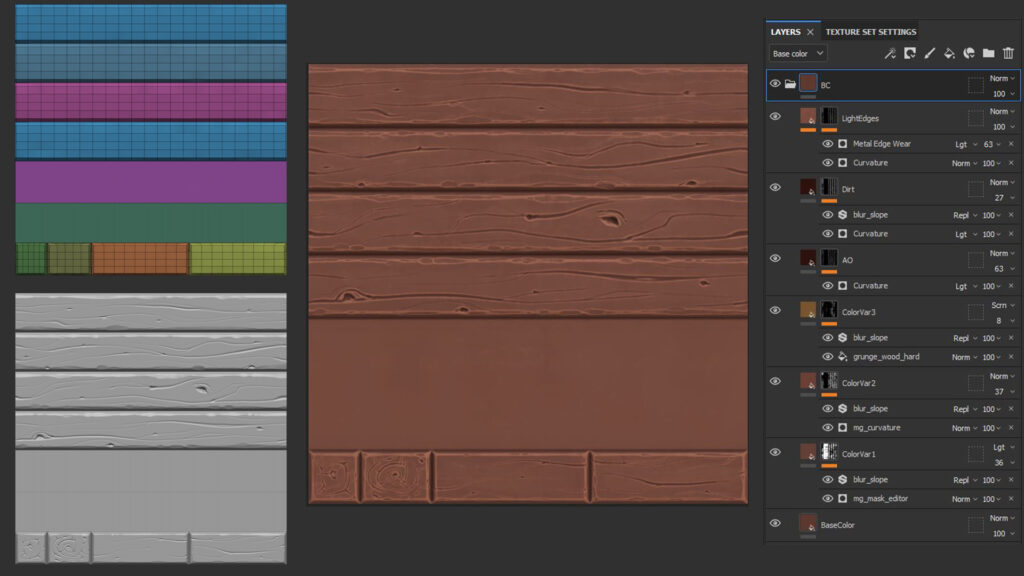
For the trims, I modeled a simple plane in Maya with big bevels for the different areas. I imported and sculpted it in Zbrush. I left an empty area to use later. I then baked it on a plane in Painter and textured it using different generators.
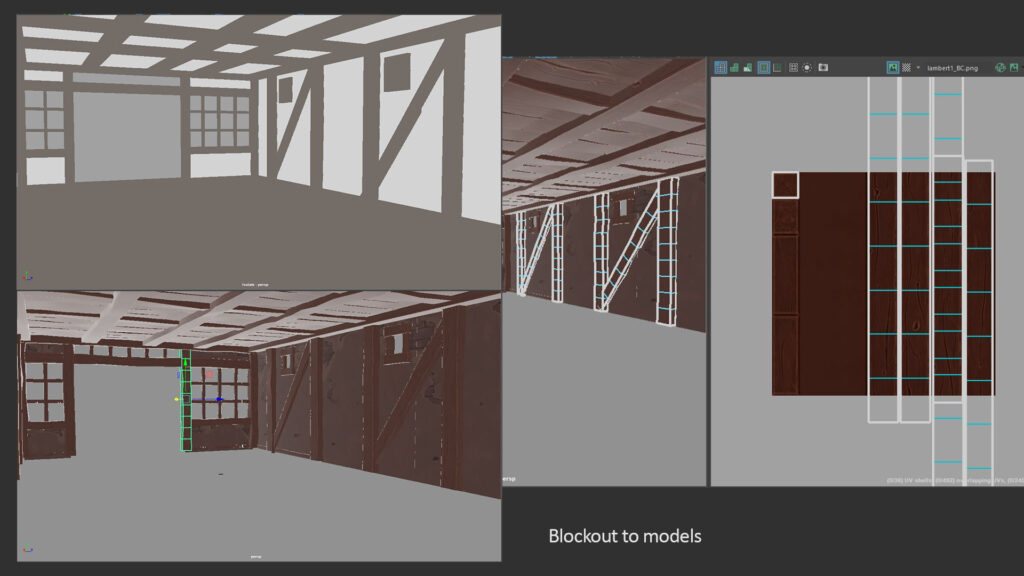
To apply all these materials, I converted the room into a static mesh and exported the blockout of the room to Maya. I modeled the walls, moving the different UVs to match the parts I wanted to show. The same for the beams. I unwrapped the sides on the trims and added some edge loops to give them a bit of distortion and make them wonky.
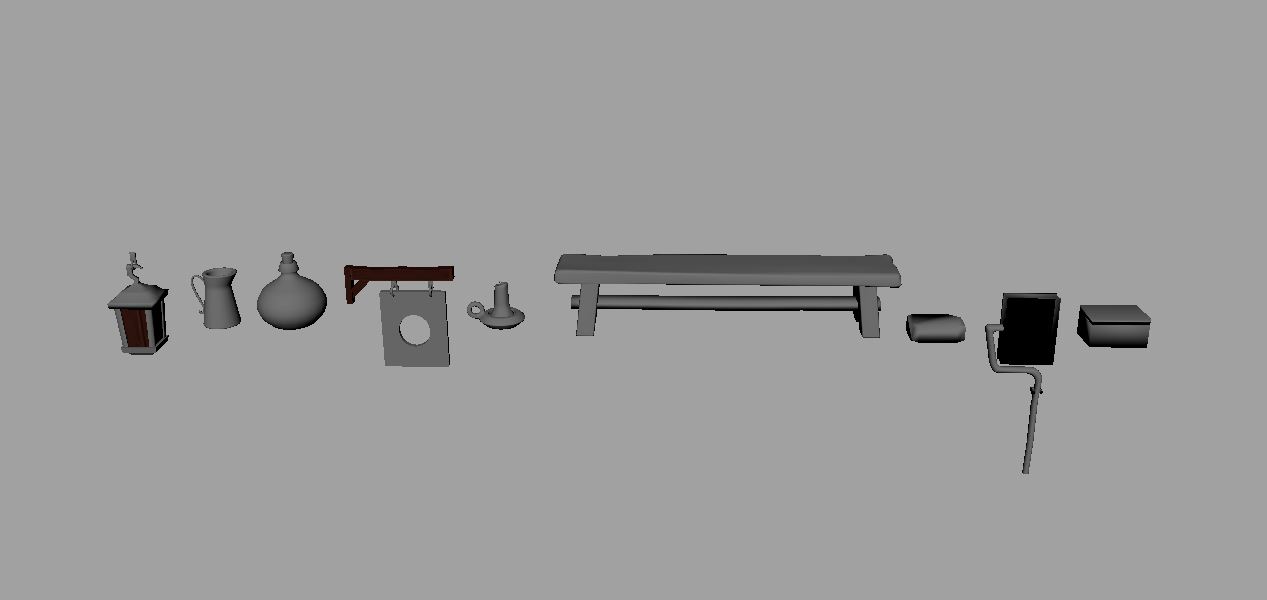
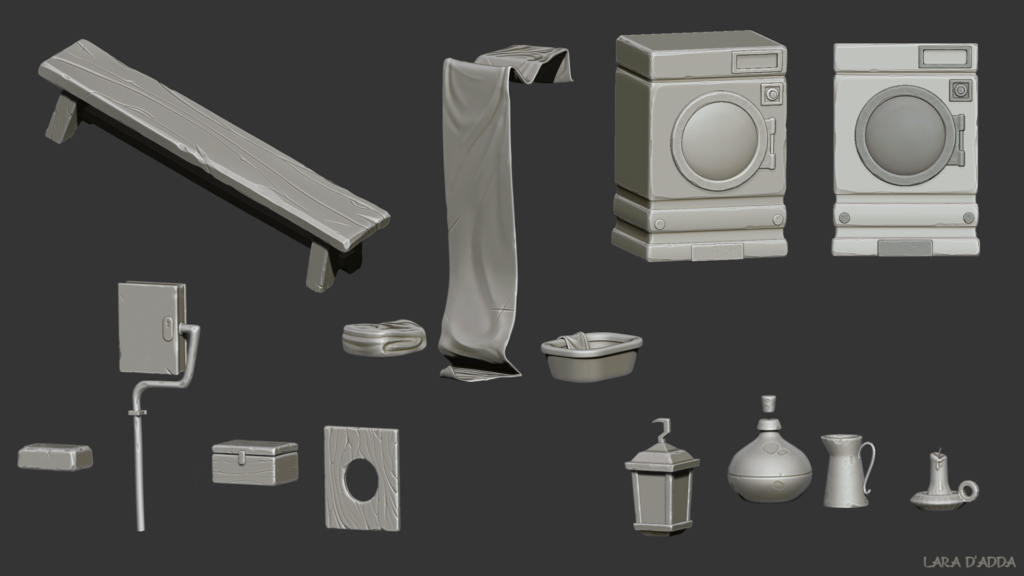
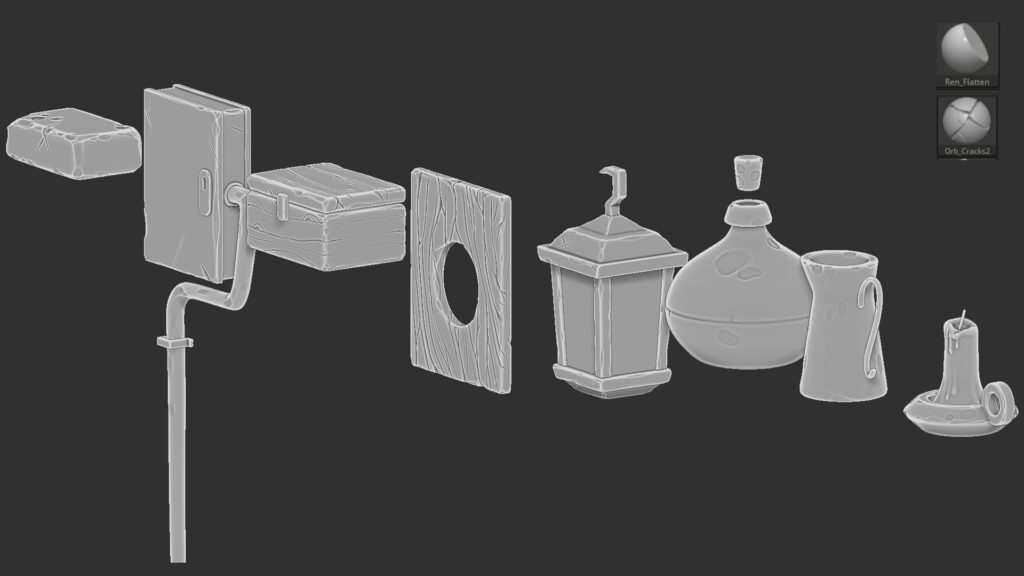
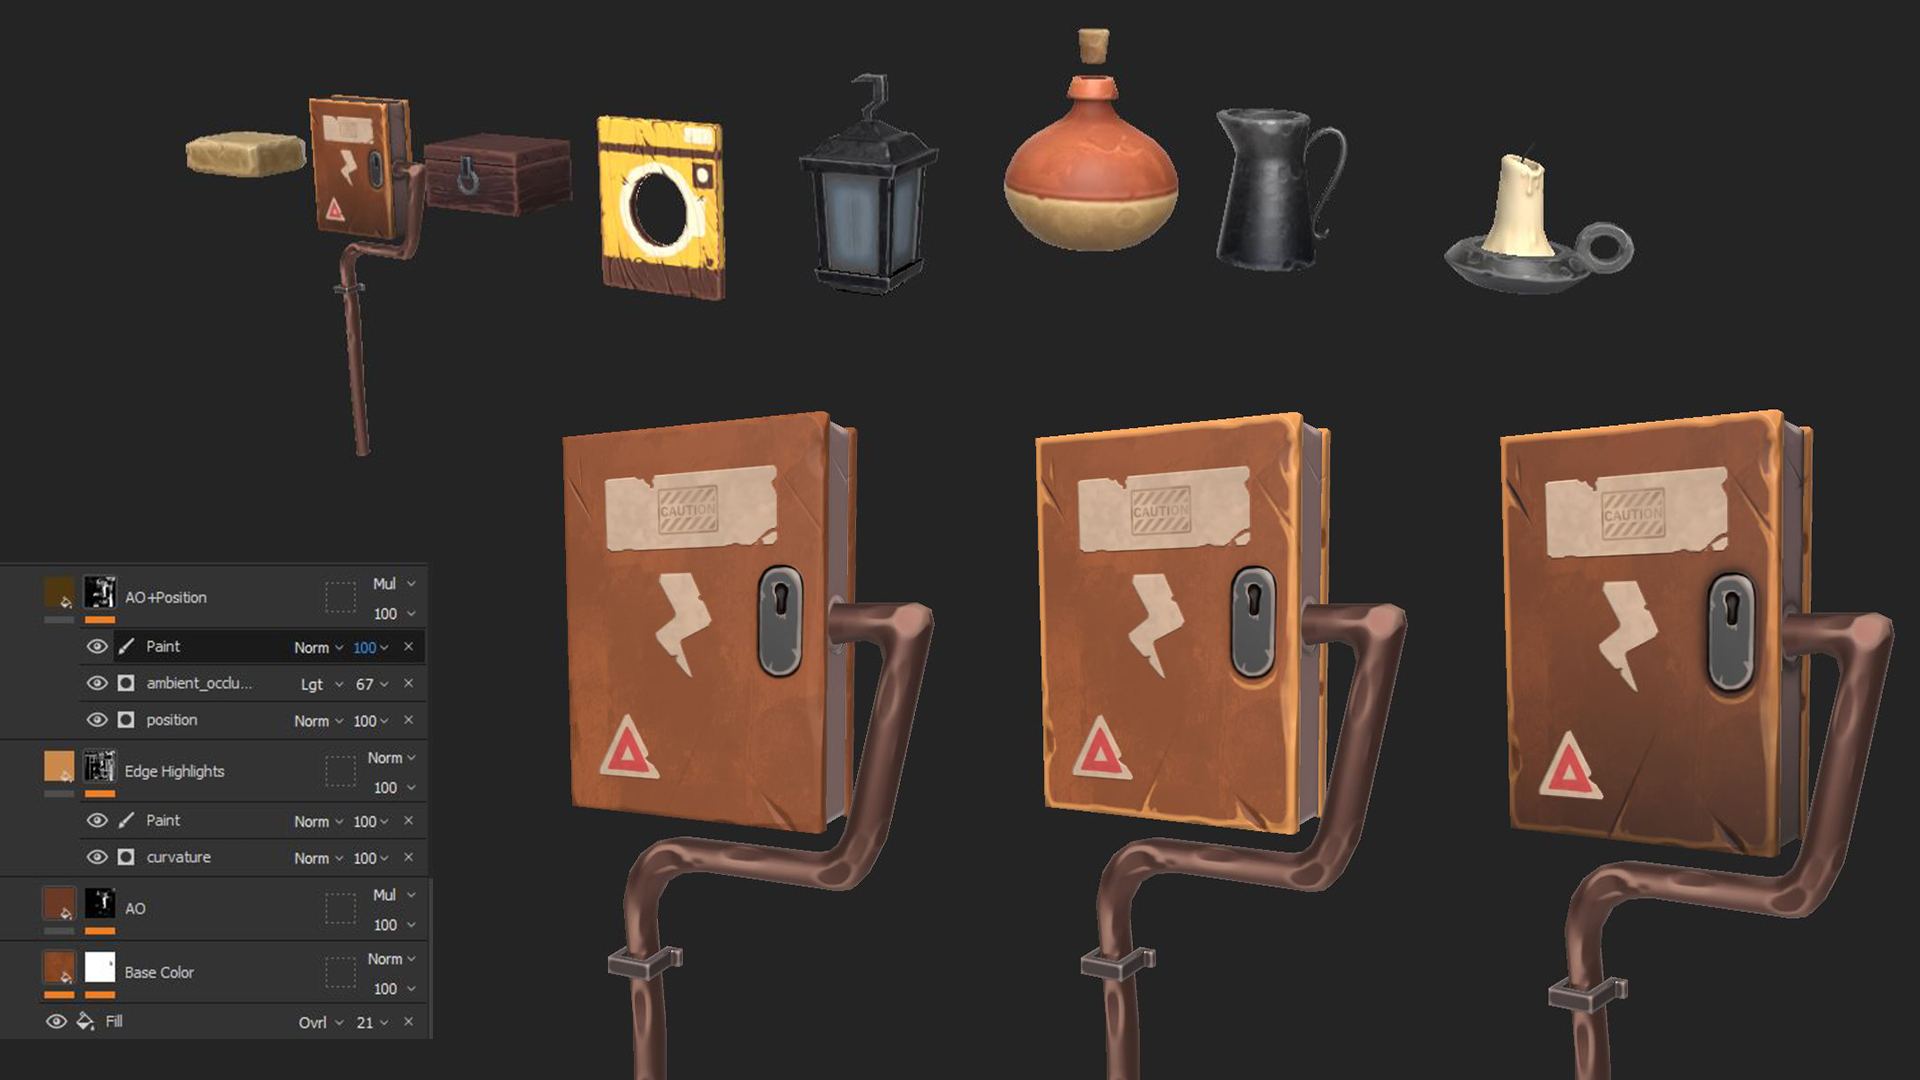
Props
I took the simple blockout of the props and made them ready to be sculpted by cleaning up the geometry. I sculpted the elements in Zbrush. I usually focus on the edges of the models and give them some texture. I mostly use a brush that flattens the edges to break them and some crack brushes to create both the cracks and the wood texture. The orb brush package from Michael Vicente has some of my favorite brushes for Zbrush.
My texture workflow is more or less always the same for everything and is actually the most fun part for me. I always use a base color with a fill for color variation. With a lighter color, I highlight the edges using a curvature mask and often add some hand-painted ones in a paint layer. For the darker values, I use a position gradient from the bottom mixed with an AO generator.
When I had to make the cloth, I was unsure where to fit it. When I don’t know how to change the composition and how to add very specific props, I do quick (very ugly) sketches and make blockouts of the props. So for the cloth, I tried some positions.
When I liked the blockout, I exported it to Maya to make a clean low poly to sculpt and texture.


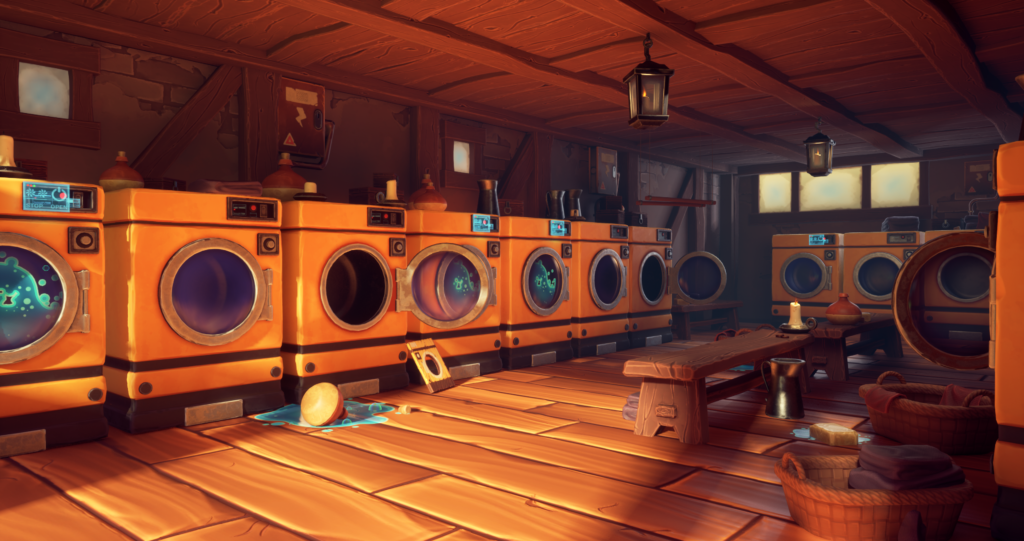
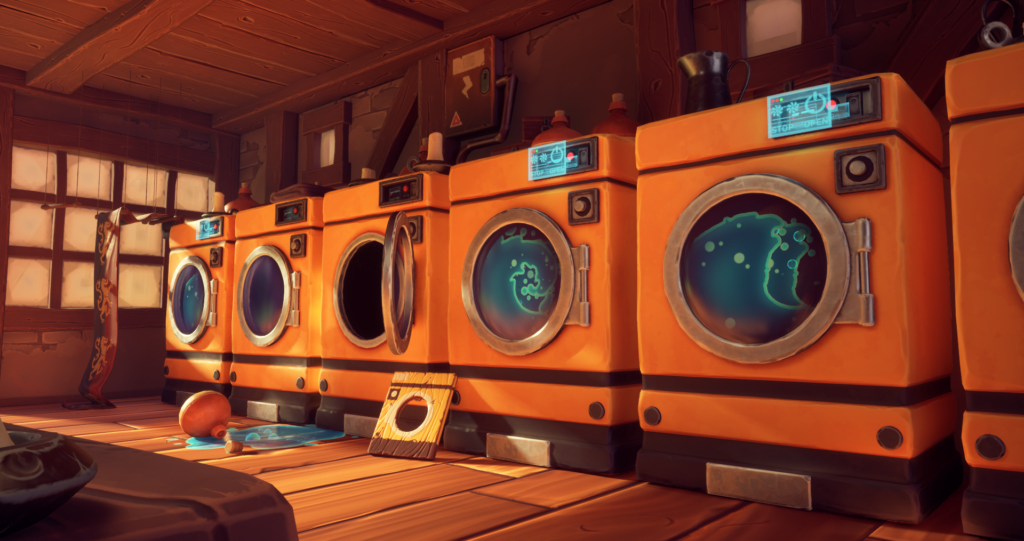
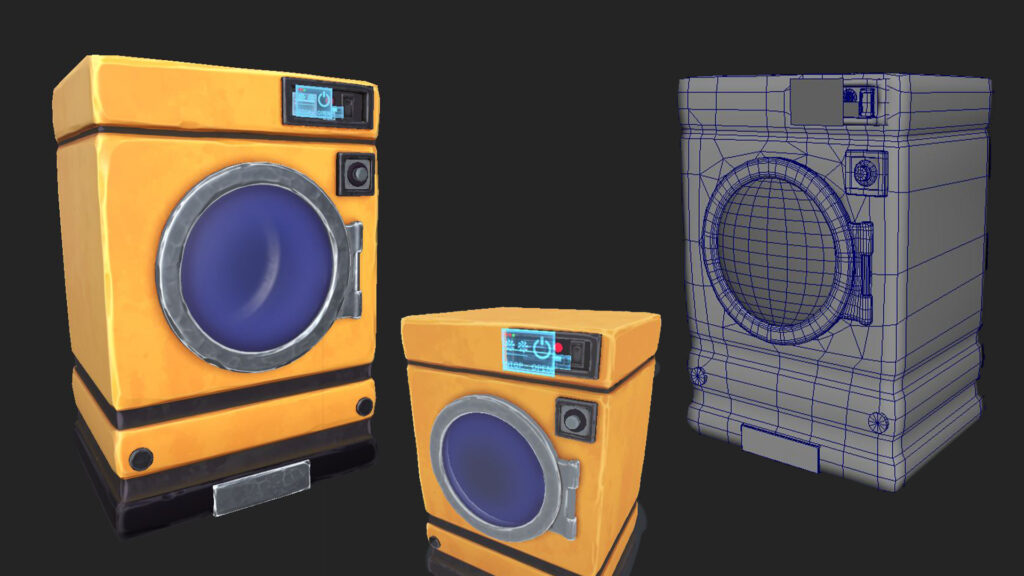
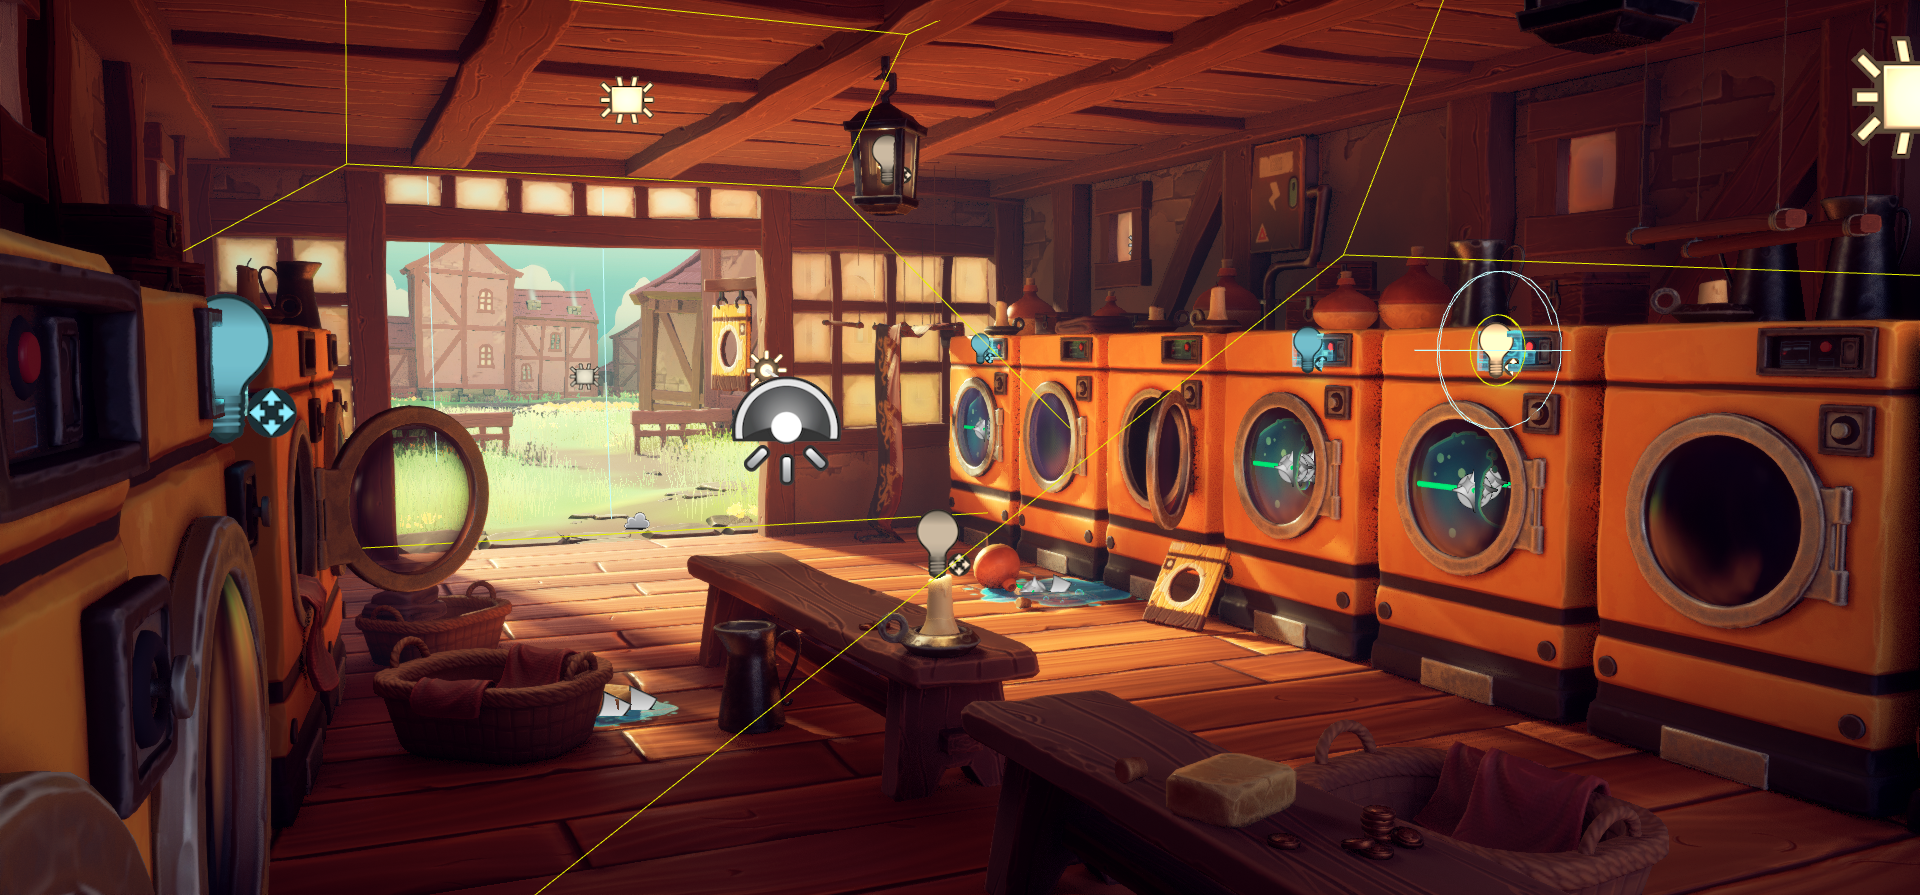
Washing Machines and Water Swirl
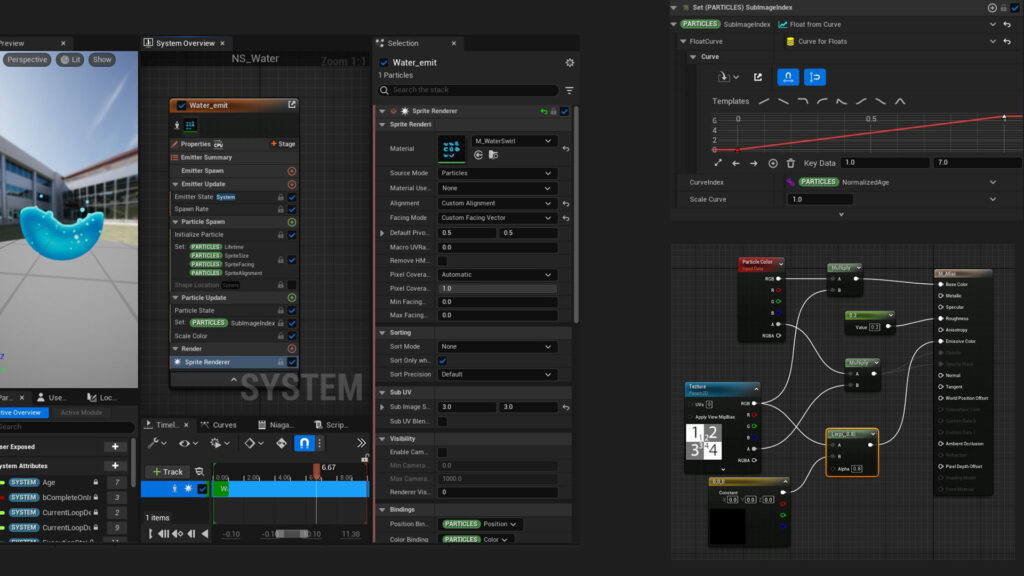
From the beginning, I wanted to give some more character to the washing machines. I actually enjoy drawing sprite sheets and making effects, so I thought about making a sprite for a water swirl in the machines.
To draw the sprite, I just created different layers in Photoshop and drew the basic shapes, always starting from the previous one and adding a bit of motion. To make it quick and keep them similar, I edited these shapes with the effects in Photoshop, such as stroke, inner glow, outer glow, and inner shadow. That did all the work.
In Unreal, I made a simple Masked material, multiplied the texture color for the particle color to be able to change it, and also plugged it into the emissive color with a lerp to change the value.
The particle uses a sprite renderer where I set the alignment and facing with a custom vector to be able to change it. It is important to change the sub-UV value based on your sprite rows/columns and change the subImageIndex in the update to load the different frames. I used a curve set to 0 from the number of my frames +1.
There are probably a lot of different and maybe better ways to do this, but that worked for me. I created different systems with a slight offset of the swirl, but I didn’t show it in the videos at the end. I feel that’s something I could have improved on.
For the machines, I also made a glitch effect for the little animated hologram screen, where I just masked the colors with a custom glitch mask and used a panner to make it move.


Other VFX
In the scene, I have other small effects. The candle flame and the chimney use the same one with just a different color and scale. These are just specific materials on a plane. For the bubbles, I have some emitters. The bubble material uses a fresnel and a hue shift.
The effects are very simple: I spawn the bubbles either on a cylinder with a value of 0 as Y or I use sphere location and a vortex force for inside the machines.


Landscape
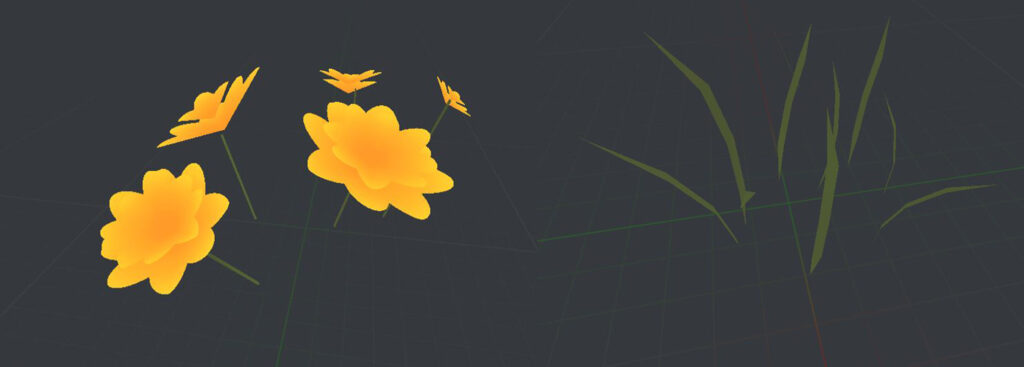
At this point, I was missing only the outside since I left it for last. To create this cozy village, I added a few houses that I made with the same trim and tileable textures of the room. I made a landscape and just followed these amazing tutorials by Victoria Zavhorodnia.
So I had just one simple grass and flower mesh that were influenced by the colors painted on the landscape, with a slight wind movement and color change.

Lighting
Lighting was definitely a challenge, mainly because I had two different settings visible: the inside and the outside. I started with a strong directional light to recreate the sun coming through the door, using the temperature value and increasing the indirect light intensity.
I also used a skylight with an HDRI with a very low value, as this was making the outside overexposed and extremely bright. I have a big window in the back of the room so some of that light could enter. But I still needed to add more light, especially to the back of the room, which was too dark, and the benches in the middle were missing some light.
So I set up some rect lights with very soft values to fill up those darker areas, and using light channels, I only added light to the elements I wanted. I also have small point lights for the candles and the screens.
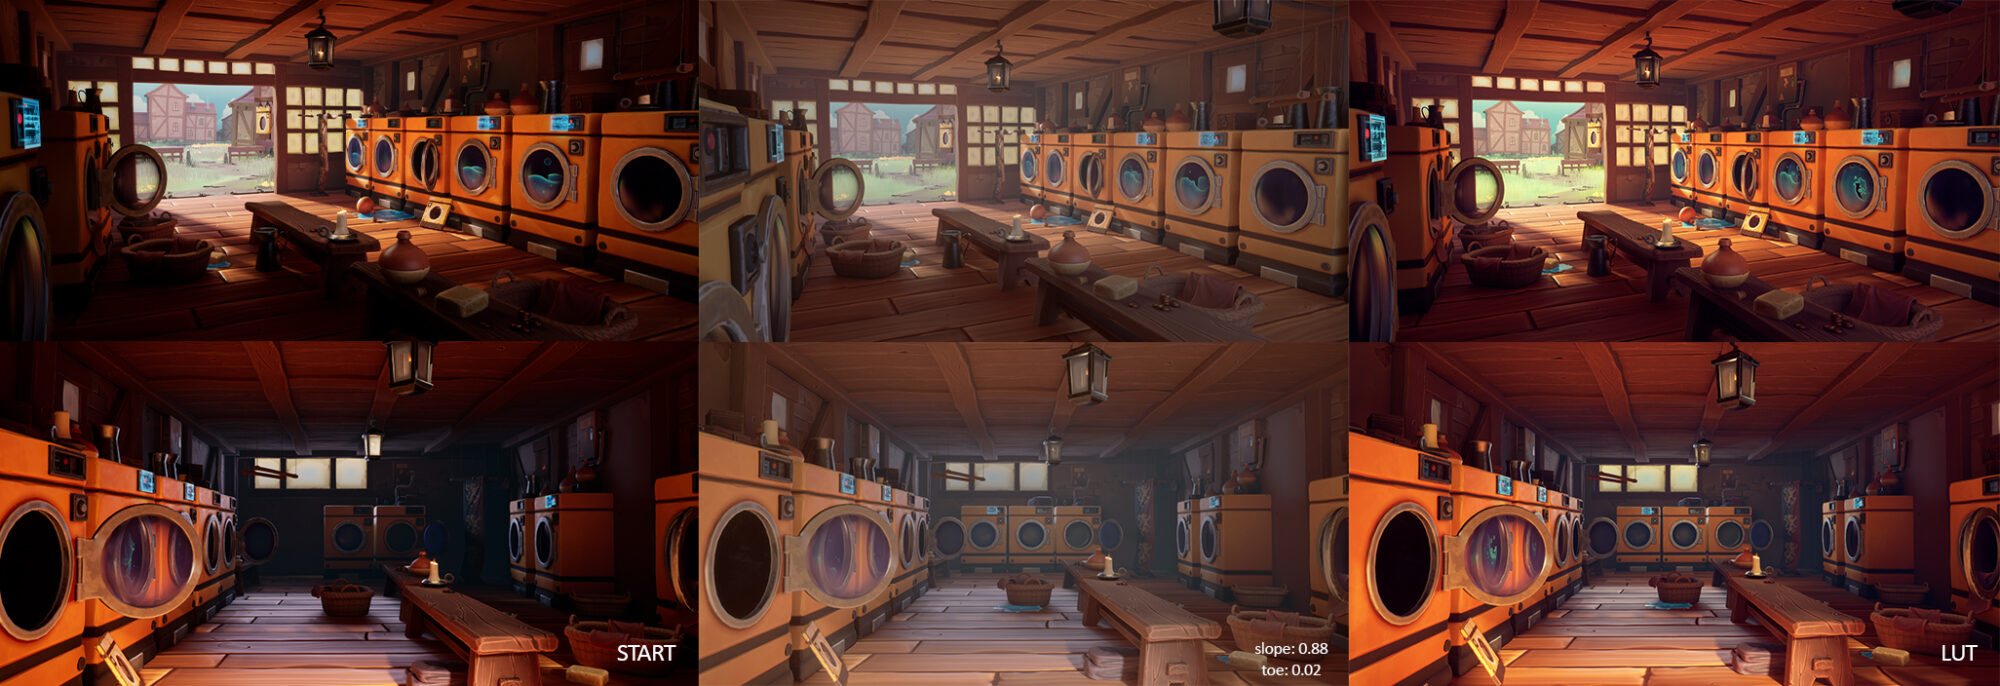
Post Production
Since I had two settings, I set up a different post-process volume for the shots taken outside. The post-process volumes don’t have many changes in them; the only thing is a custom LUT. I learned this technique in university, and I still stick with it.
First, I take screenshots of the different viewports, changing the toe and slope values in the post-process to bring back a lot of grey values in the scene. I put the shots in Photoshop and start editing them, adding curves, levels, and the base LUTs from Photoshop.
When I am satisfied with the edit, I take the base LUT from the Unreal website and edit it in Photoshop. I drop in all the editing levels I added in my shots and save my new custom LUT, ready to use.
Conclusion
Finally, I set up the sequencer and recorded videos of the different shots that I saved. I only added some music in Premiere at the end to create a cozy video atmosphere. It was very fun to work on this and add a bit of my narrative into it.
Also, having a strict deadline made it more important for me to focus on the different tasks without wasting time on less important things and leaving less time for second-guessing everything.
I received a lot of help from my friends who gave me feedback and ideas, which I am really grateful for. If you made it this far in the article, thanks for reading, and I hope all this is able to help someone else! Check out the full work here: https://www.artstation.com/artwork/QXEKWL
Read more articles
You might also like these articles.