Magicians Abode


Introduction
Hello there, my name is Raashid, I’m a 3D Environment Artist and I come from the lovely Caribbean island of Barbados. I discovered 3D as a whole when I was 13 yrs old and 22 years later, I’m still enamored with it.
My previous career was spent in 2D animation and while I enjoyed it, I’m glad to have followed this life-long passion I had for 64-weeks at the Think Tank Training. This is just the beginning!
Goals & Software
- Overcome foliage
- Make viewers think it’s a real game 😅
- Complete the project on time
- Make the environment feel calm, windy, tranquil, and breezy
- Improve my texturing


Concept
Though challenging at first, while trying to decide on concepts, I knew I wanted something stylized and at least a little whimsical. My mentor, Ben Kelly, knew this and decided to gather a small number of concepts.
It was from those concepts that I chose the current one. I reached out to the artist, Kui Hu, and after a few weeks, got their blessing. It felt great!
Planning
It’s common to schedule your projects. What may not be common, though, is what I did, haha.
I created a full Notion Gantt chart for the macro view and used the Kanban workflow for the micro/day-to-day tasks, which I then linked to my Notion and Google Calendar. Ben was pleased but gave some critical advice: the schedule is something that changes, so be okay with that.
Below are snippets of both views of my schedule.


References
I started the reference-gathering process very early and focused on foliage and the roof tiles. I am someone who strongly believes in something such as “too much reference.”
For overthinkers, this is true… trust me.

Blockout
Below is a video showing my entire blockout process. The main takeaways are to not take it too seriously, lean into simplicity, and use primitives!
Modelling
Modeling and My 10-Day Gap
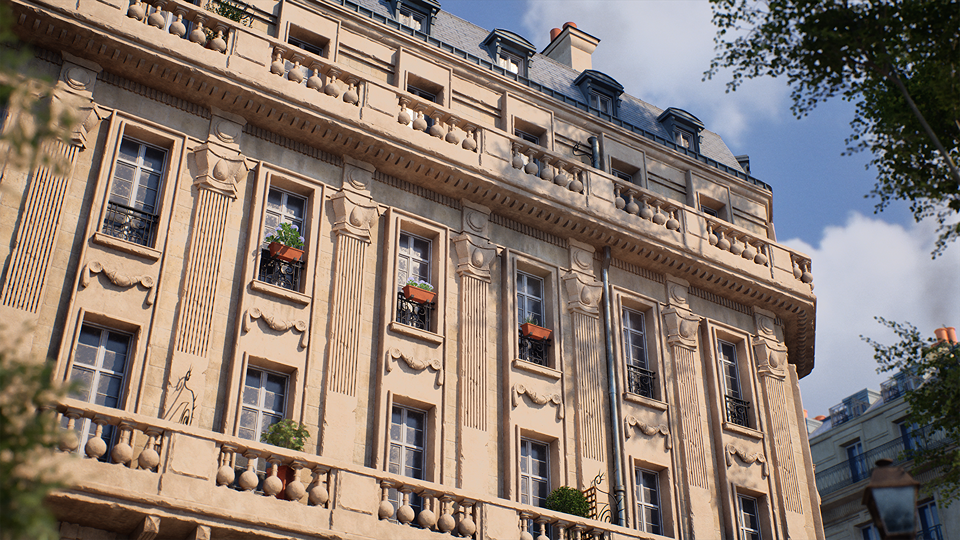
Modelling and UVs for at least 60% of the environment were reasonably straightforward, but it took me quite some time to figure out how to place the roof tiles the way I wanted them to be.
I am thinking about making a full tutorial later on my YouTube channel about what I did because it was very difficult to find resources for roof tiles on curved surfaces using MASH. Nevertheless, here’s a video featuring some of the modeling I did.
10 Day Gap of “Failure”
Somewhere during the middle of my modeling phase, I struggled—and I mean I struggled so badly that I froze entirely. I was unable to get anything done for about 10 days. I banged my head against my problems, experiencing extreme failure and frustration.
It sucked.
With time passing, I leaned on my mentor Ben, and as expected, he helped tremendously. He echoed words my wife had said before about stepping away, taking breaks, and cleansing.
With these positive reinforcements, I let go. I took about 2-3 days of relaxation, going on walks, gaming, and chilling out.
It wasn’t perfect. I didn’t magically get everything done after, but I made sure I got one thing done every day, regardless of how small it was.
It was then that I knew… I would finish this project successfully.
As for the background mountains, I did not spend a super long time in Gaea, but my mentor gave me a great walkthrough of how it works. I was even able to use my blockout geometry as a generator/base for the erosion passes. I just had to bake the high-poly down before importing them into my scene like any other object.
Texturing Iteration
Reference gathering is sometimes never complete until the project is finished. I expanded my reference board by gathering more detailed images of the textures I was trying to make. I even paid extra attention and took pictures whenever I went outside for walks, haha.
During this stage, the iteration process went as follows:
- Quick but decent texture
- Test in Unreal Engine
- Receive feedback
- Refine texture until “good enough”
- Update texture in Unreal Engine
The above process was repeated until each main texture was considered complete.
I purchased and started Thiago Klafke’s course on Stylized Environment Texturing. Though I did not finish the course, it helped me think more critically about my approach to texturing.
One cool setup I was able to create in Unreal was a Triple Vertex Blend Material using vertex colors.
Take a look at it in action:
Foliage
After procrastinating to my heart’s content, I had to face the music… or rather, the grass. Without beating around the bush any further, I did what my mentor Ben had often suggested: Brute force.
I finally modeled one “blade” of grass, then arranged it into a clump, then turned the small clump into a medium-sized clump. I repeated this process two more times with different types of grass.
Here are the single blades of grass and high-poly bake setup:


This was not done in one go, nor was it perfectly clean. The high-poly models pictured above were baked onto the plane behind them and then quickly textured in Substance Painter. The idea was to not spend a lot of time perfectly texturing a few blades of grass.
Below are the textured singles and clumps.

It’s incredible how much variation you can get from just three blades of grass! That same process was repeated for the flowers, bushes, and even the pumpkin patch leaves.
I managed to record some of that process here:
Lastly, I modeled the pumpkins in Maya but created the vine and leaf system geometry in SpeedTree.
I used forces to attract the spines to the tops of the pumpkins (a mesh I imported separately). Here’s a GIF of how that worked.
Since there were no tutorials on creating a pumpkin patch in SpeedTree, there was a lot of trial and error 😅.
I may consider making a tutorial on that later! Stay tuned!
Lighting
This part came a bit easy to me if I’m being honest. As a photographer and someone who has dabbled in 3D over the years, I’ve become quite adept at lighting.
I used one singular directional light in Unreal 5 with boosted indirect lighting settings.
In this GIF below, I was testing harsher lighting, but it was too intense.
You may have also noticed a different lighting setup for the 4th camera angle. The original lighting was just too unflattering, so I changed it upon advice from my mentor.
Here is a comparison of the original vs. new lighting:


Culling
As I approached the end of the project, I knew there were elements I would not be able to model, texture, or create. I ran this by my mentor and decided on some details to leave out, either for creative reasons or due to time constraints.
Though you can do a comparison if you wish, the main items left out were the chimneys from the background houses and the vines seen throughout the scene.
Decals
I underestimated decals. I knew they were used to add important finishing details to a scene, but I didn’t truly understand their power!
I am fortunate that I didn’t go overboard because, not only was it fun, but it was also quite easy to embellish various areas of the scene with the decals I created inside Substance Designer.
Here are the decals I used:

Here is a side-by-side of the main shot with and without decals:


Rendering & Colour
I used the PostProcessVolume in Unreal Engine to make several subtle but critical edits to the overall look of the scene. This included:
- Bloom
- Sharpen (subtle but made a difference)
- Indirect lighting intensity
- Shadow color, lifting, and toning
Because such solid groundwork had been done in Unreal, I only needed to use After Effects to do the final color grade and export the final video and stills. The images were not touched beyond that.
Here is a before and after of the color grading stage:

PS: I also exported the stills from After Effects to keep the grading consistent.
Conclusion
This project was fun, satisfying, and challenging. I am really pleased that I was able to achieve my goals of creating a tranquil scene from this amazing concept.
I wish to thank my mentor, Ben Kelly, and my two other tutors from Think Tank, John Malcolm and Kacper Niepokolczycki, for helping me throughout the journey across all terms. I also wish to thank my wife; I could not have completed this without her.
It is possible to finish great things—just try not to make them perfect.
Read more articles
You might also like these articles.