
Introduction
My name is Dmitry Bezrodny, I'm from Minsk. I have been professionally engaged in graphics for games since 2006 and creating Characters for the last 6 years.
Now I work as a freelancer. In addition to commercial projects, I try to make time to model something for the soul.

Design & Concept
I really love history, there I find images and themes for my projects. I try to choose something unusual and visually fresh. I have long been interested in the topic of the annexation of Siberia by the Muscovite Kingdom. And also, the life and culture of the indigenous peoples of the north and the far east.
The history of their interaction, trade and wars with the Russians. The tribes of the Chukchi seemed to me the most interesting, in the mass consciousness of people from the former USSR, the Chukchi are characters of jokes, rustic villagers-reindeer herders.
This contrasts greatly with the reality of the 16th-18th centuries, in which the Chukchi warriors kept their more numerous and culturally advanced neighbors at bay. They inflicted defeats with armed firearms on Russian detachments. However, militancy did not prevent the Chukchi from trading, and often peacefully coexisting with industrialists and settlers who came from the west.
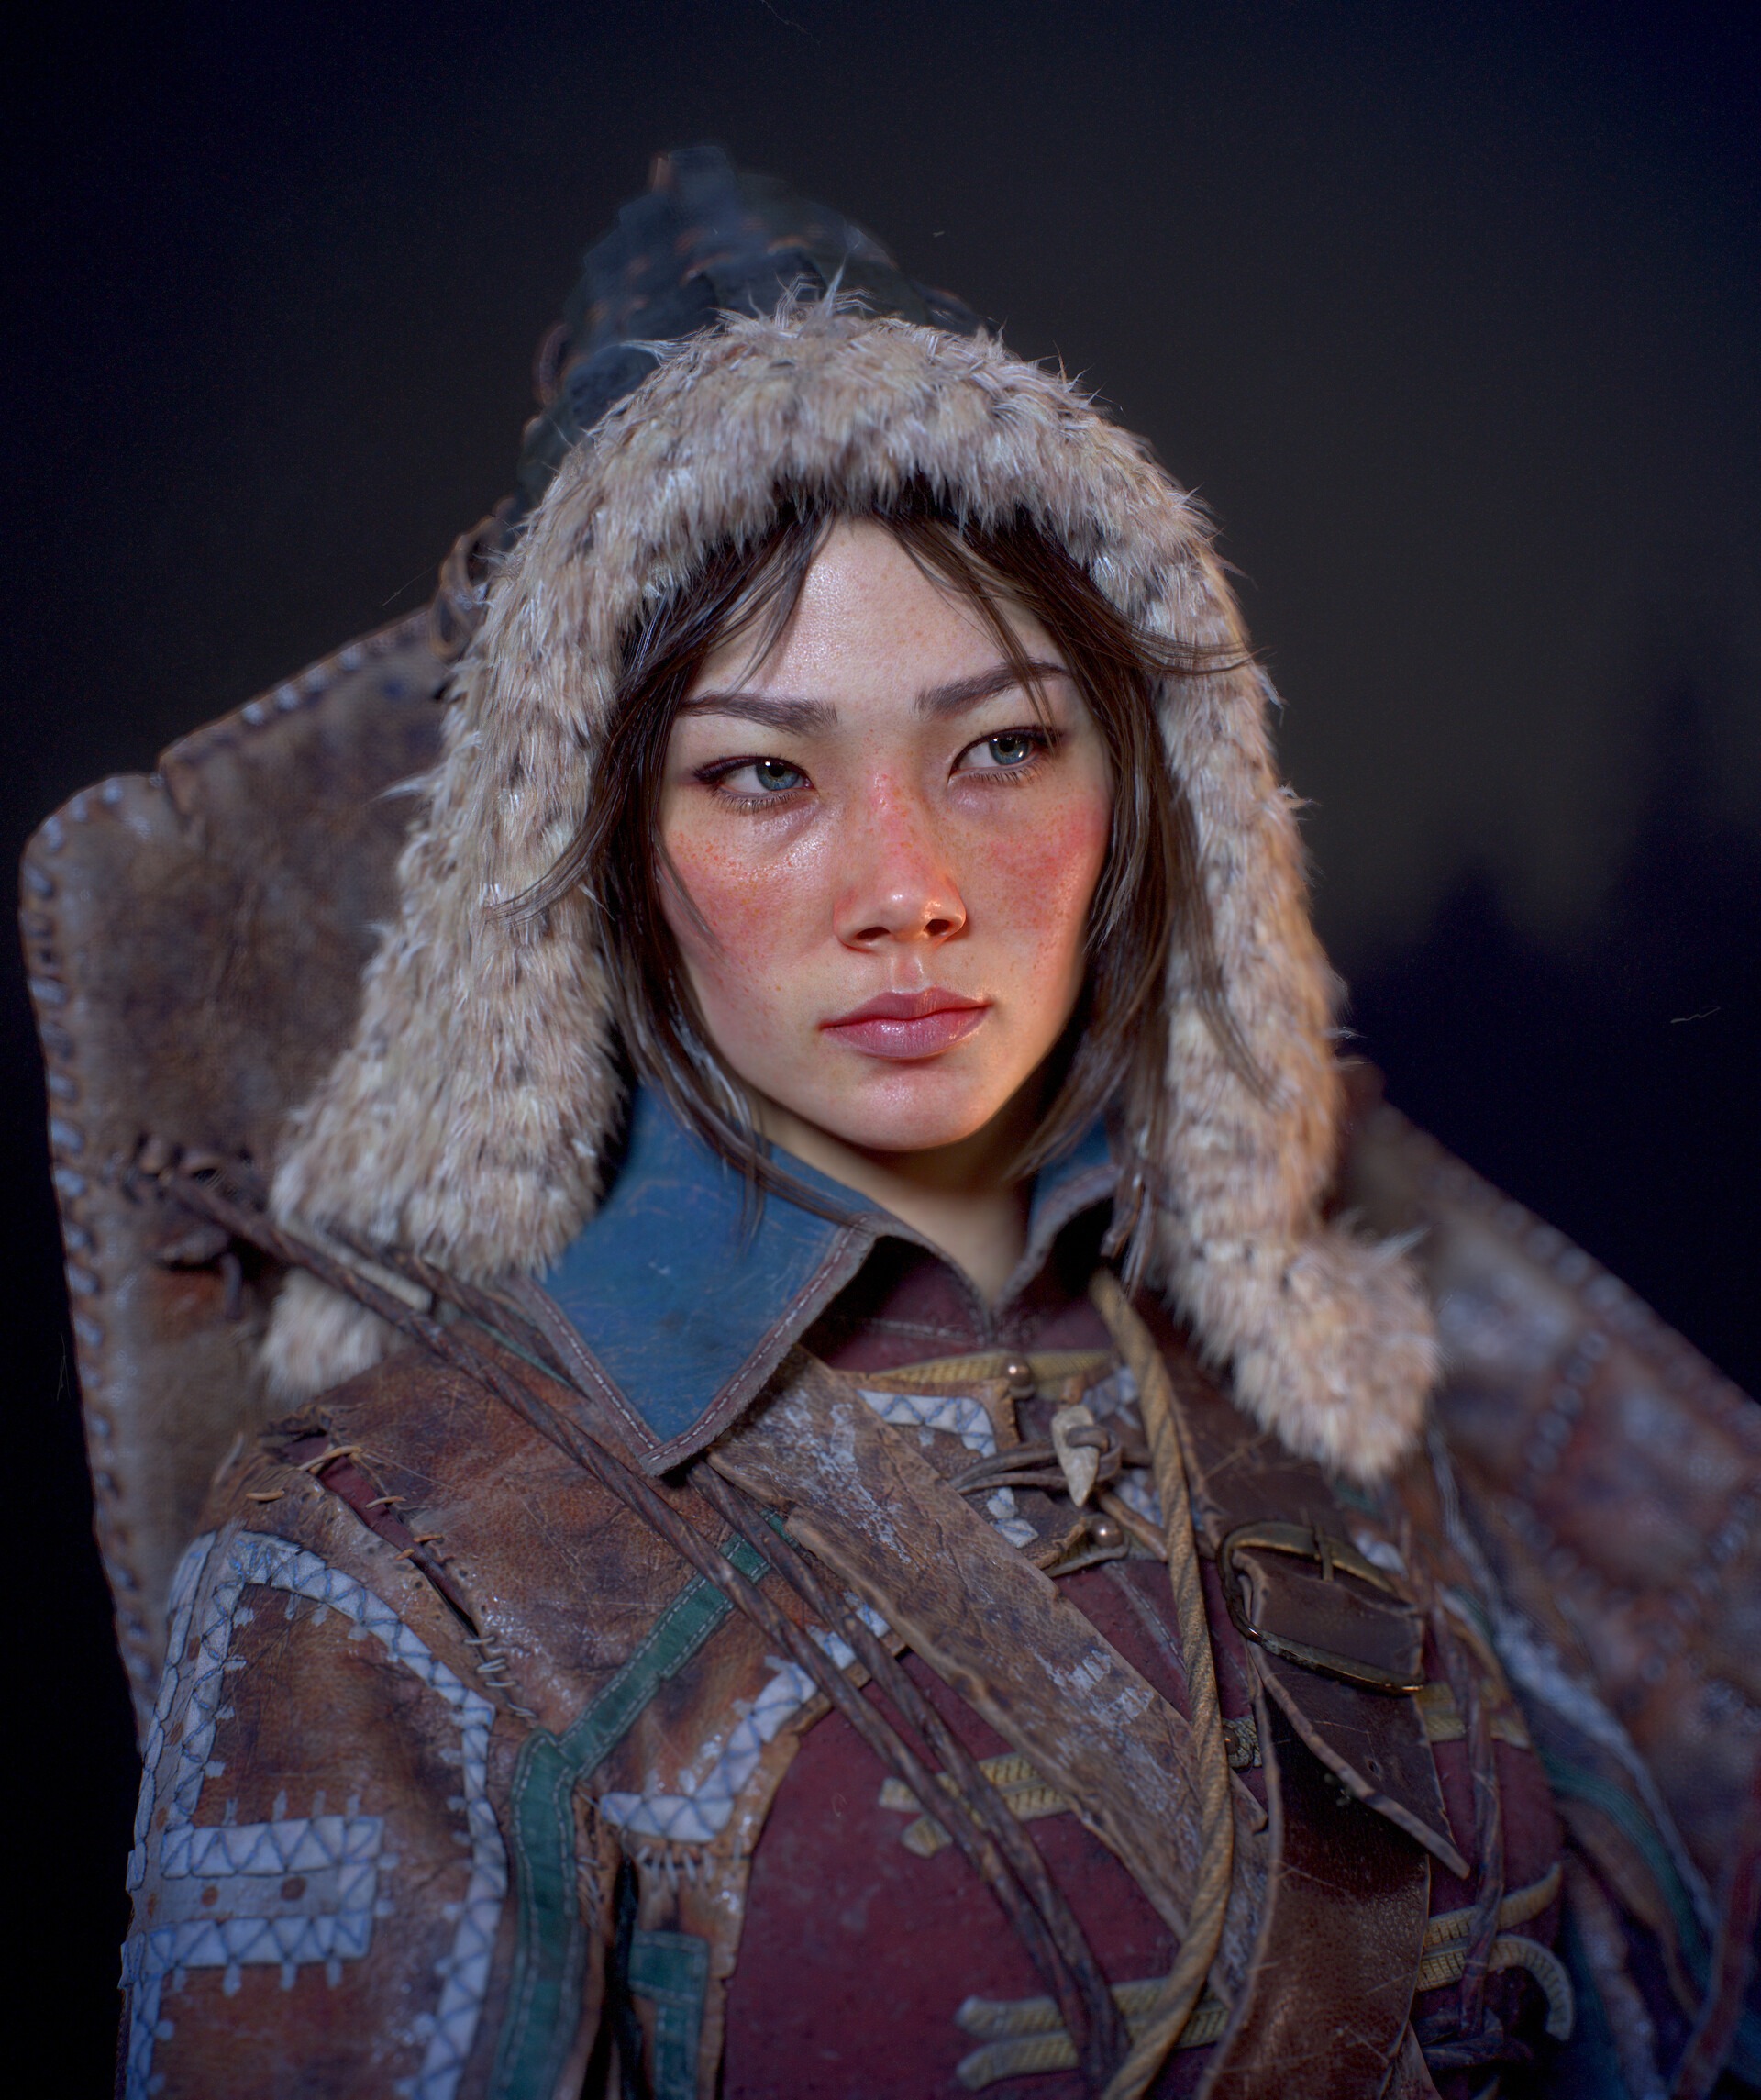
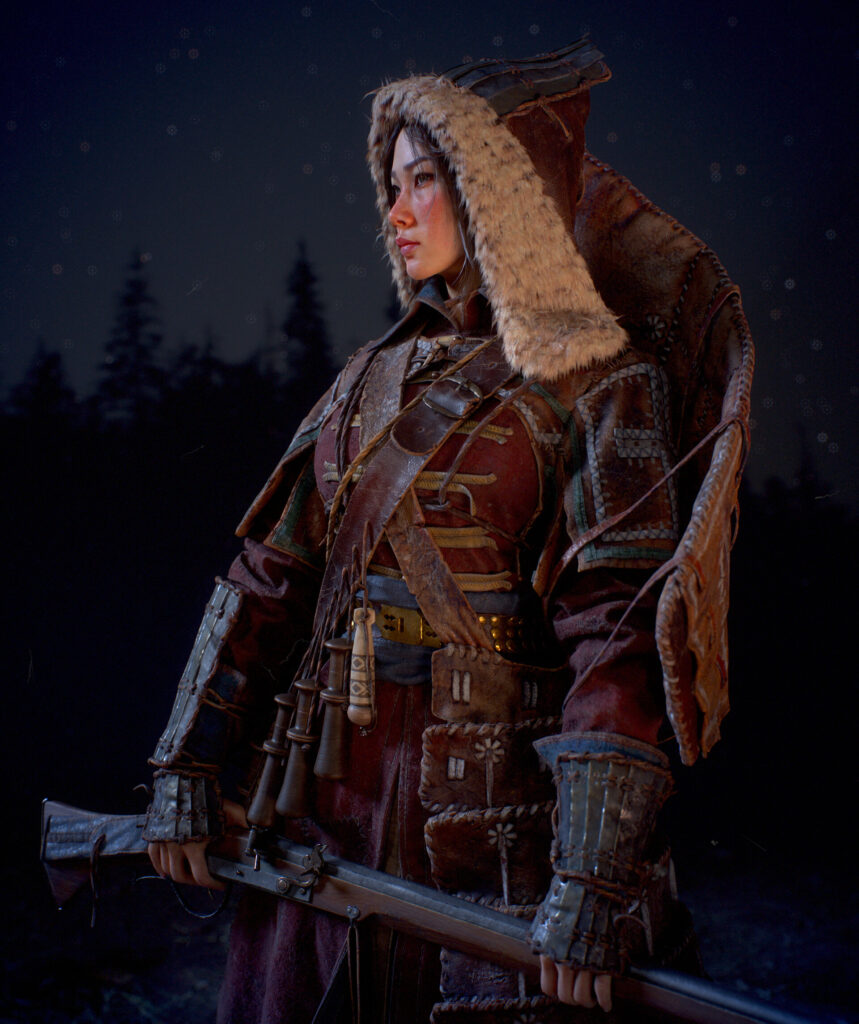
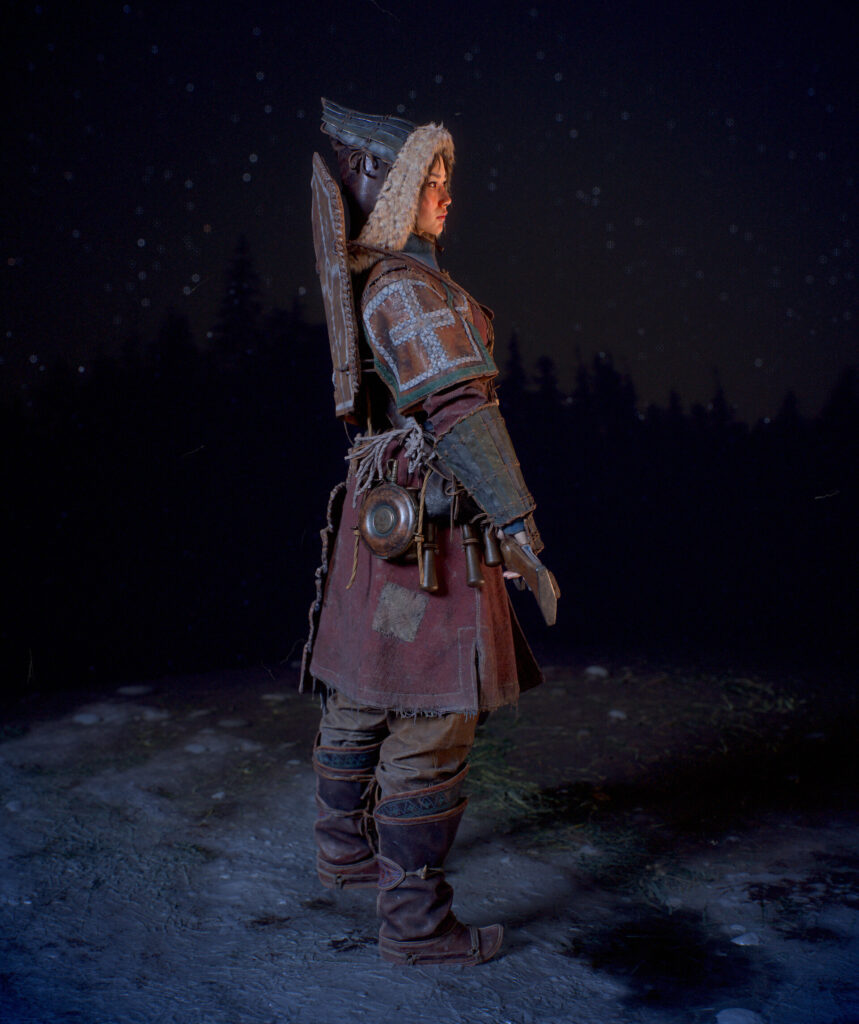
In the image of the Lilac, I tried to show the interpenetration of cultures and ethnic groups, which took place in the process of the movement of pioneers and other eager people from west to east, as they said then: ‘Meet the sun’.
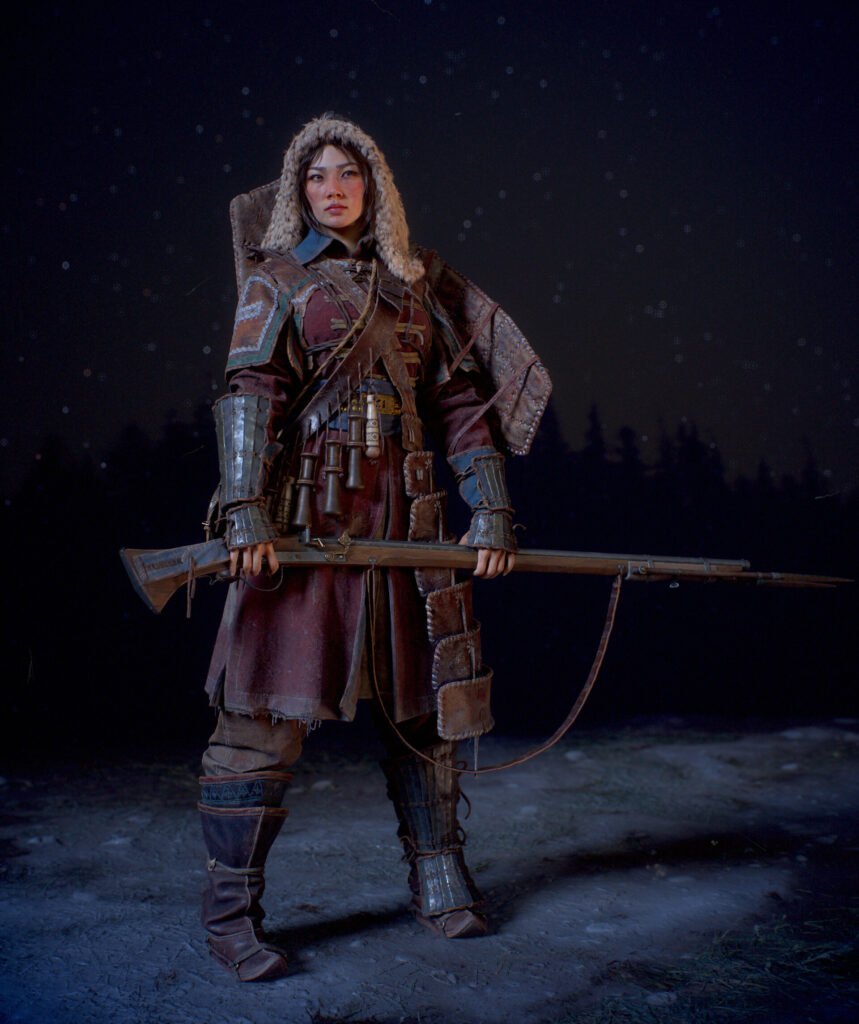
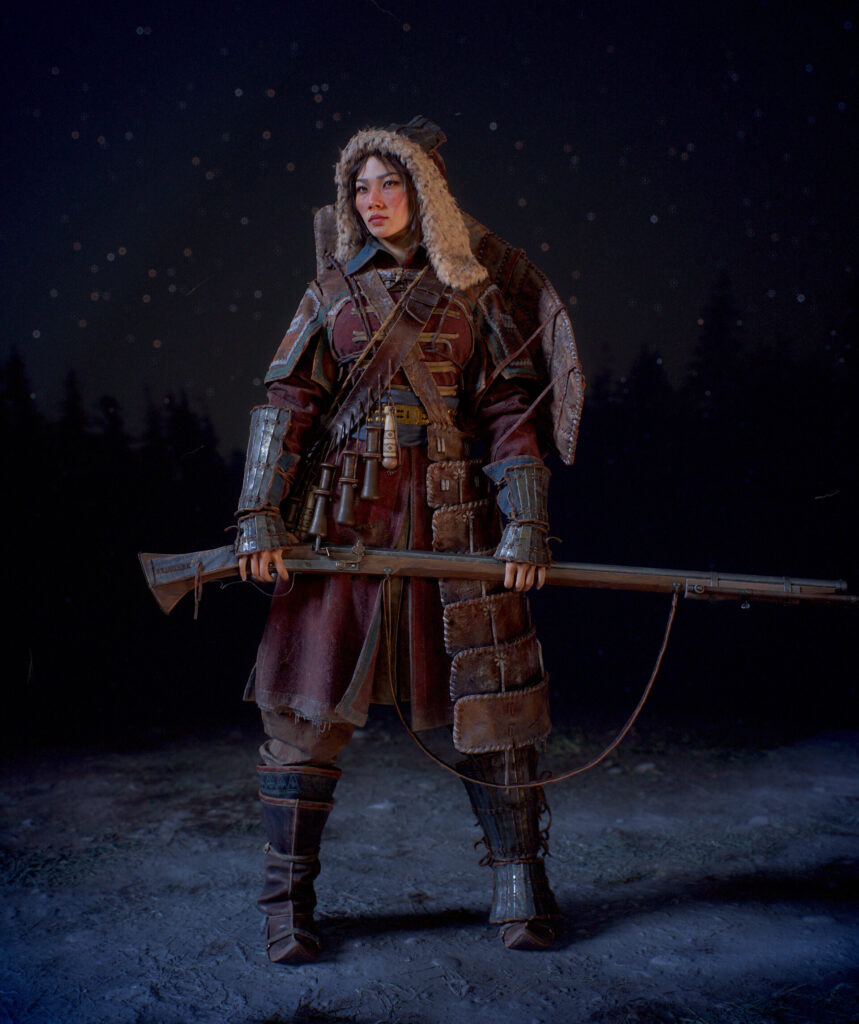
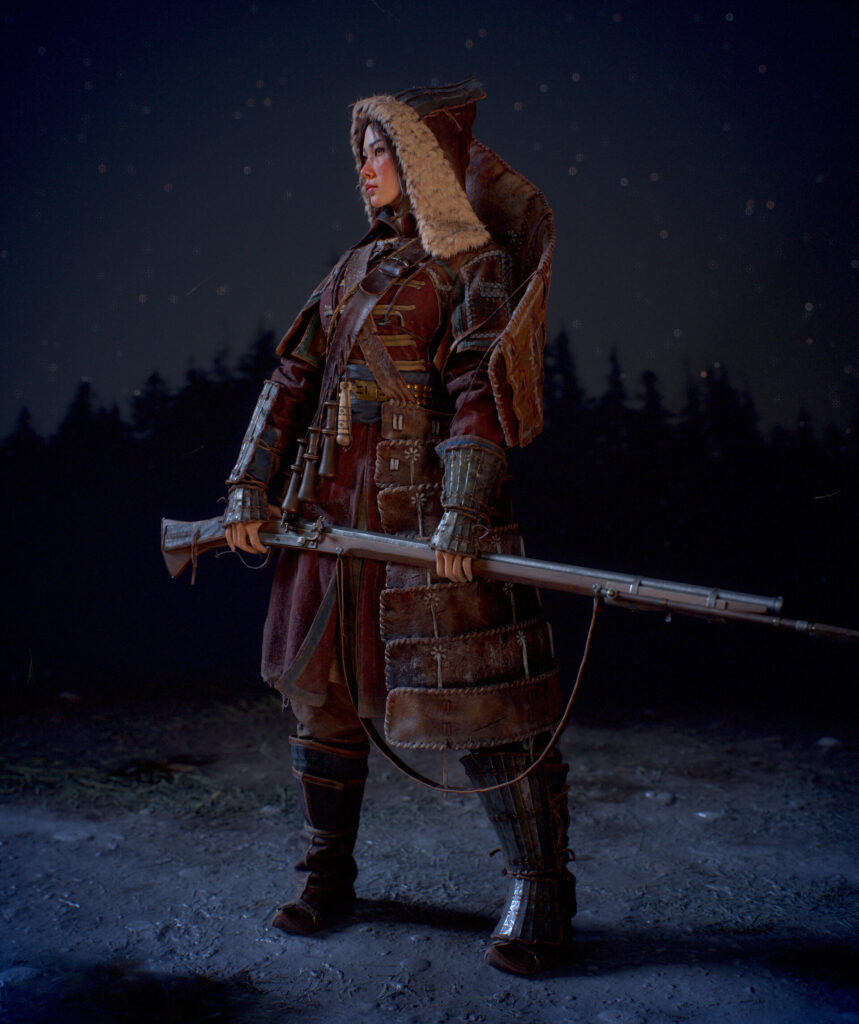
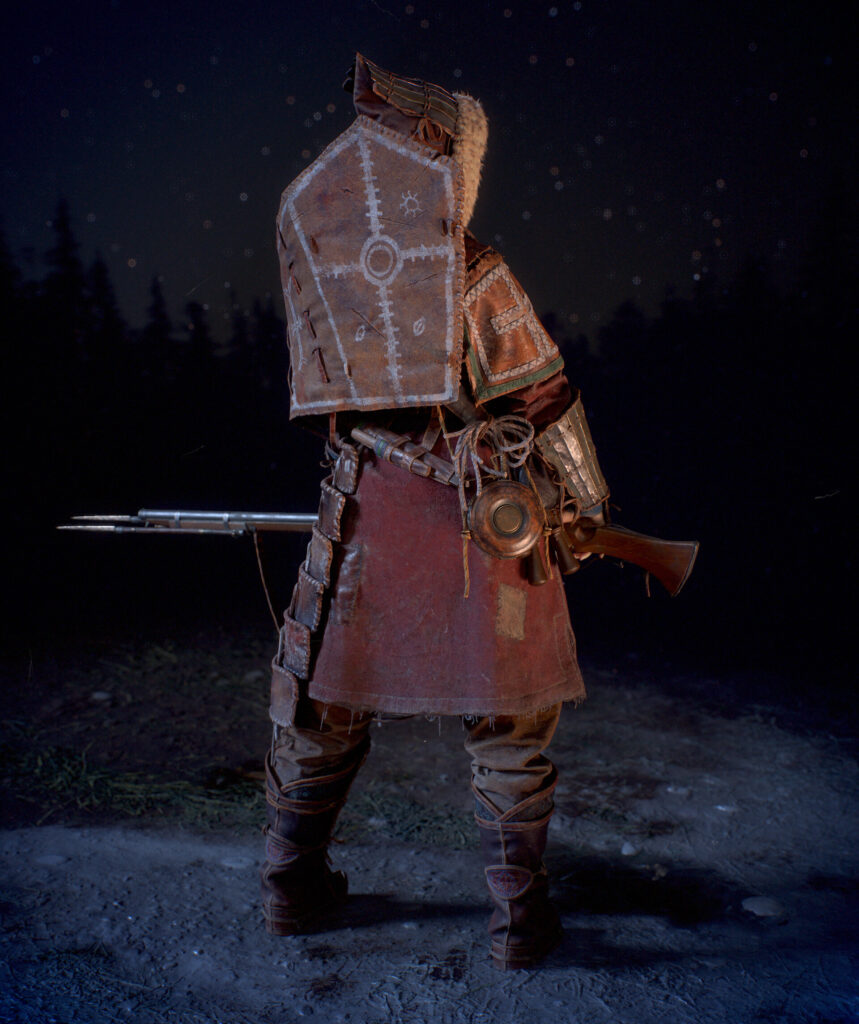
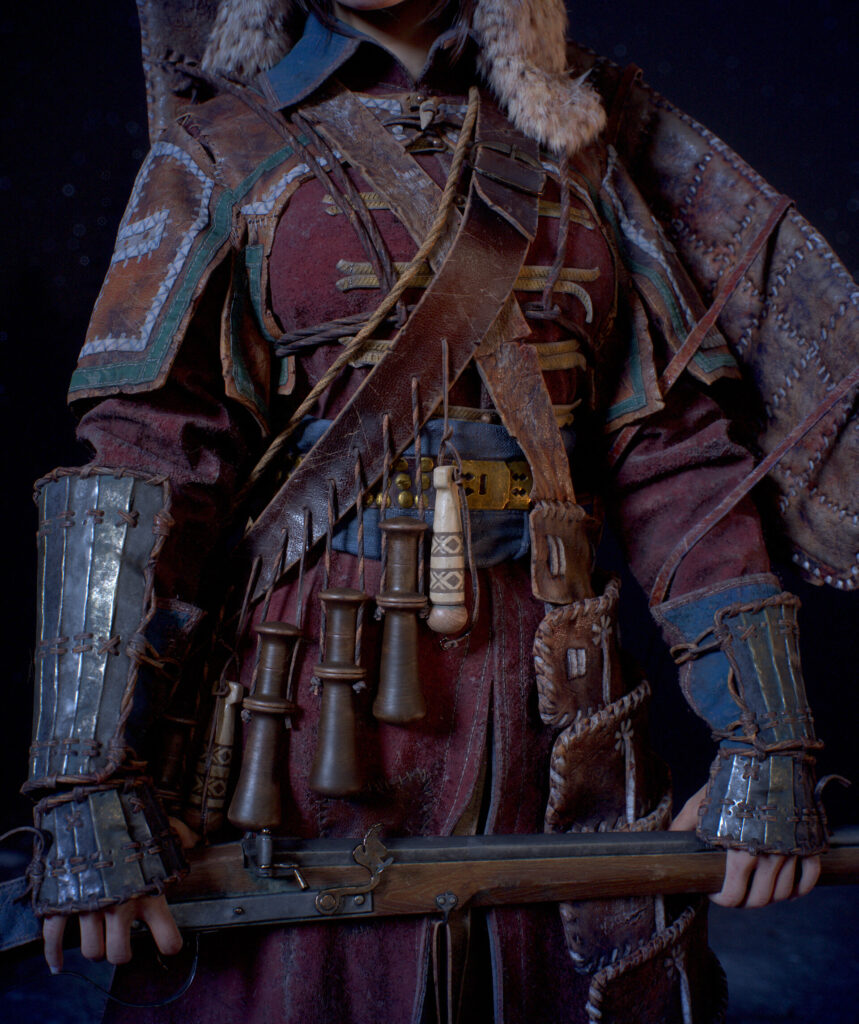
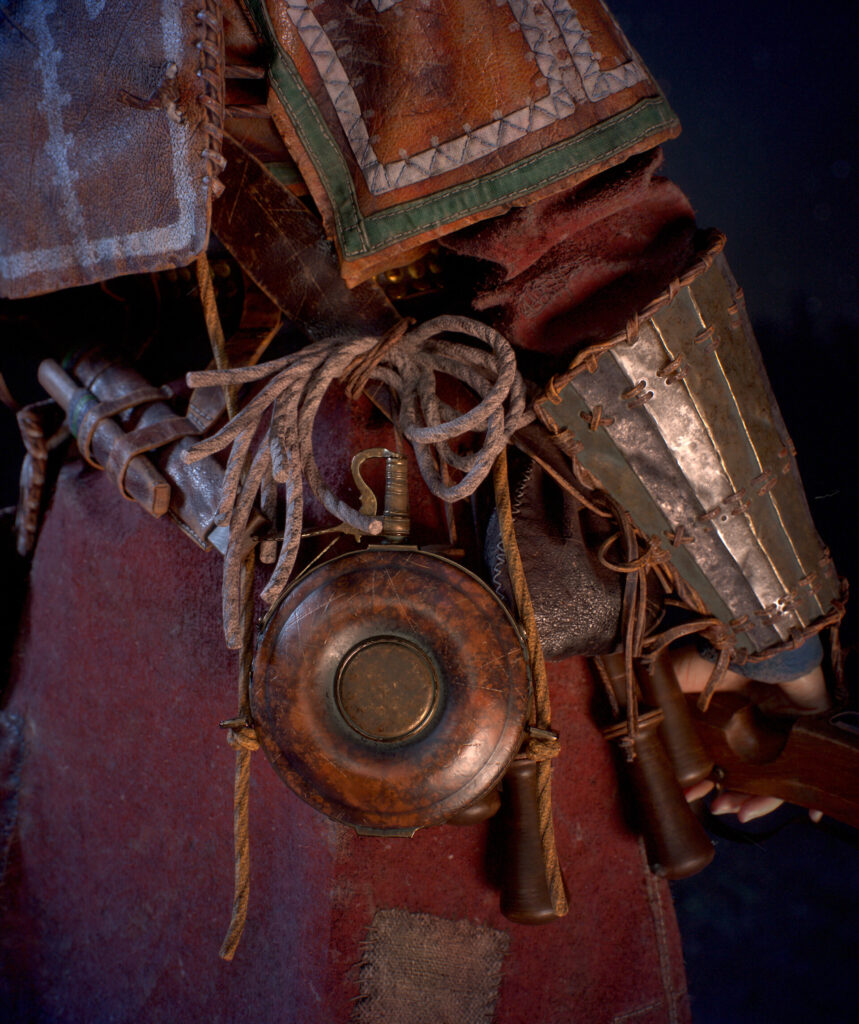
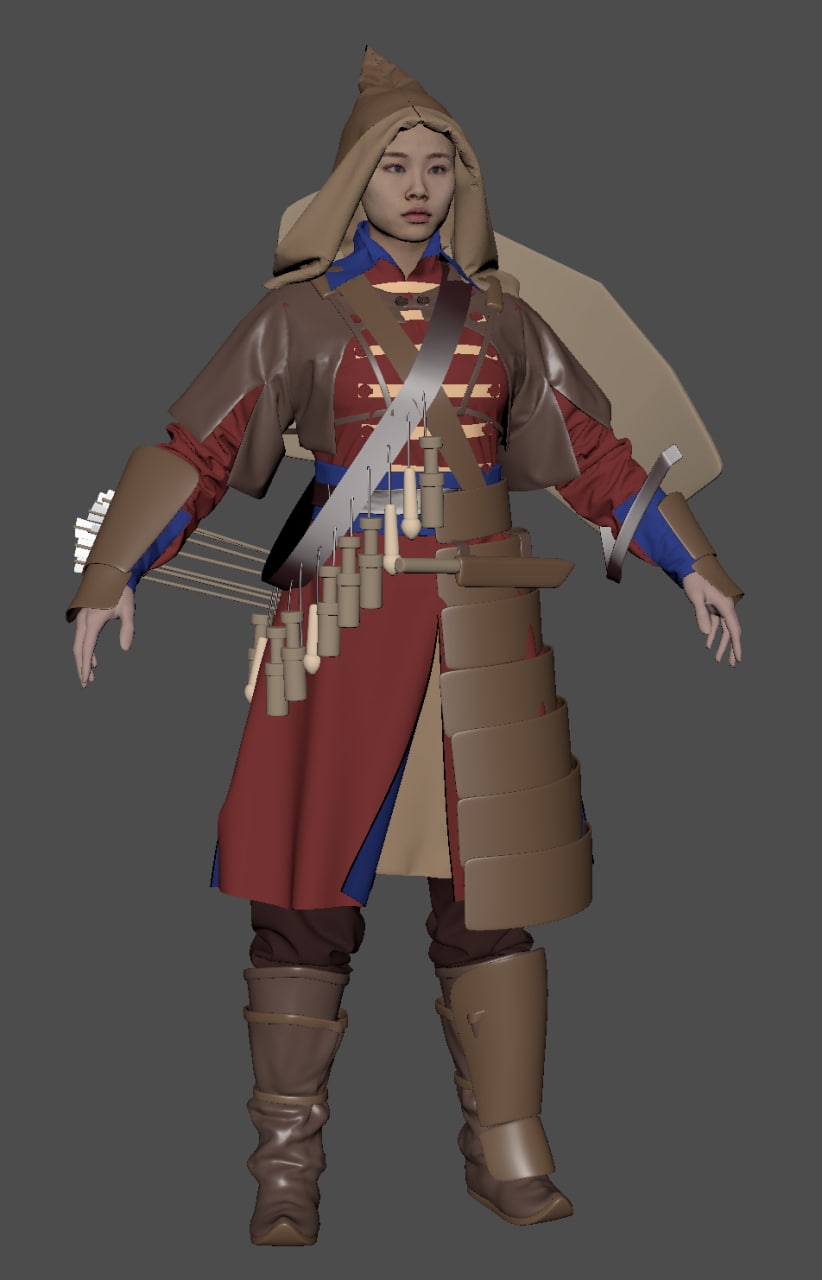
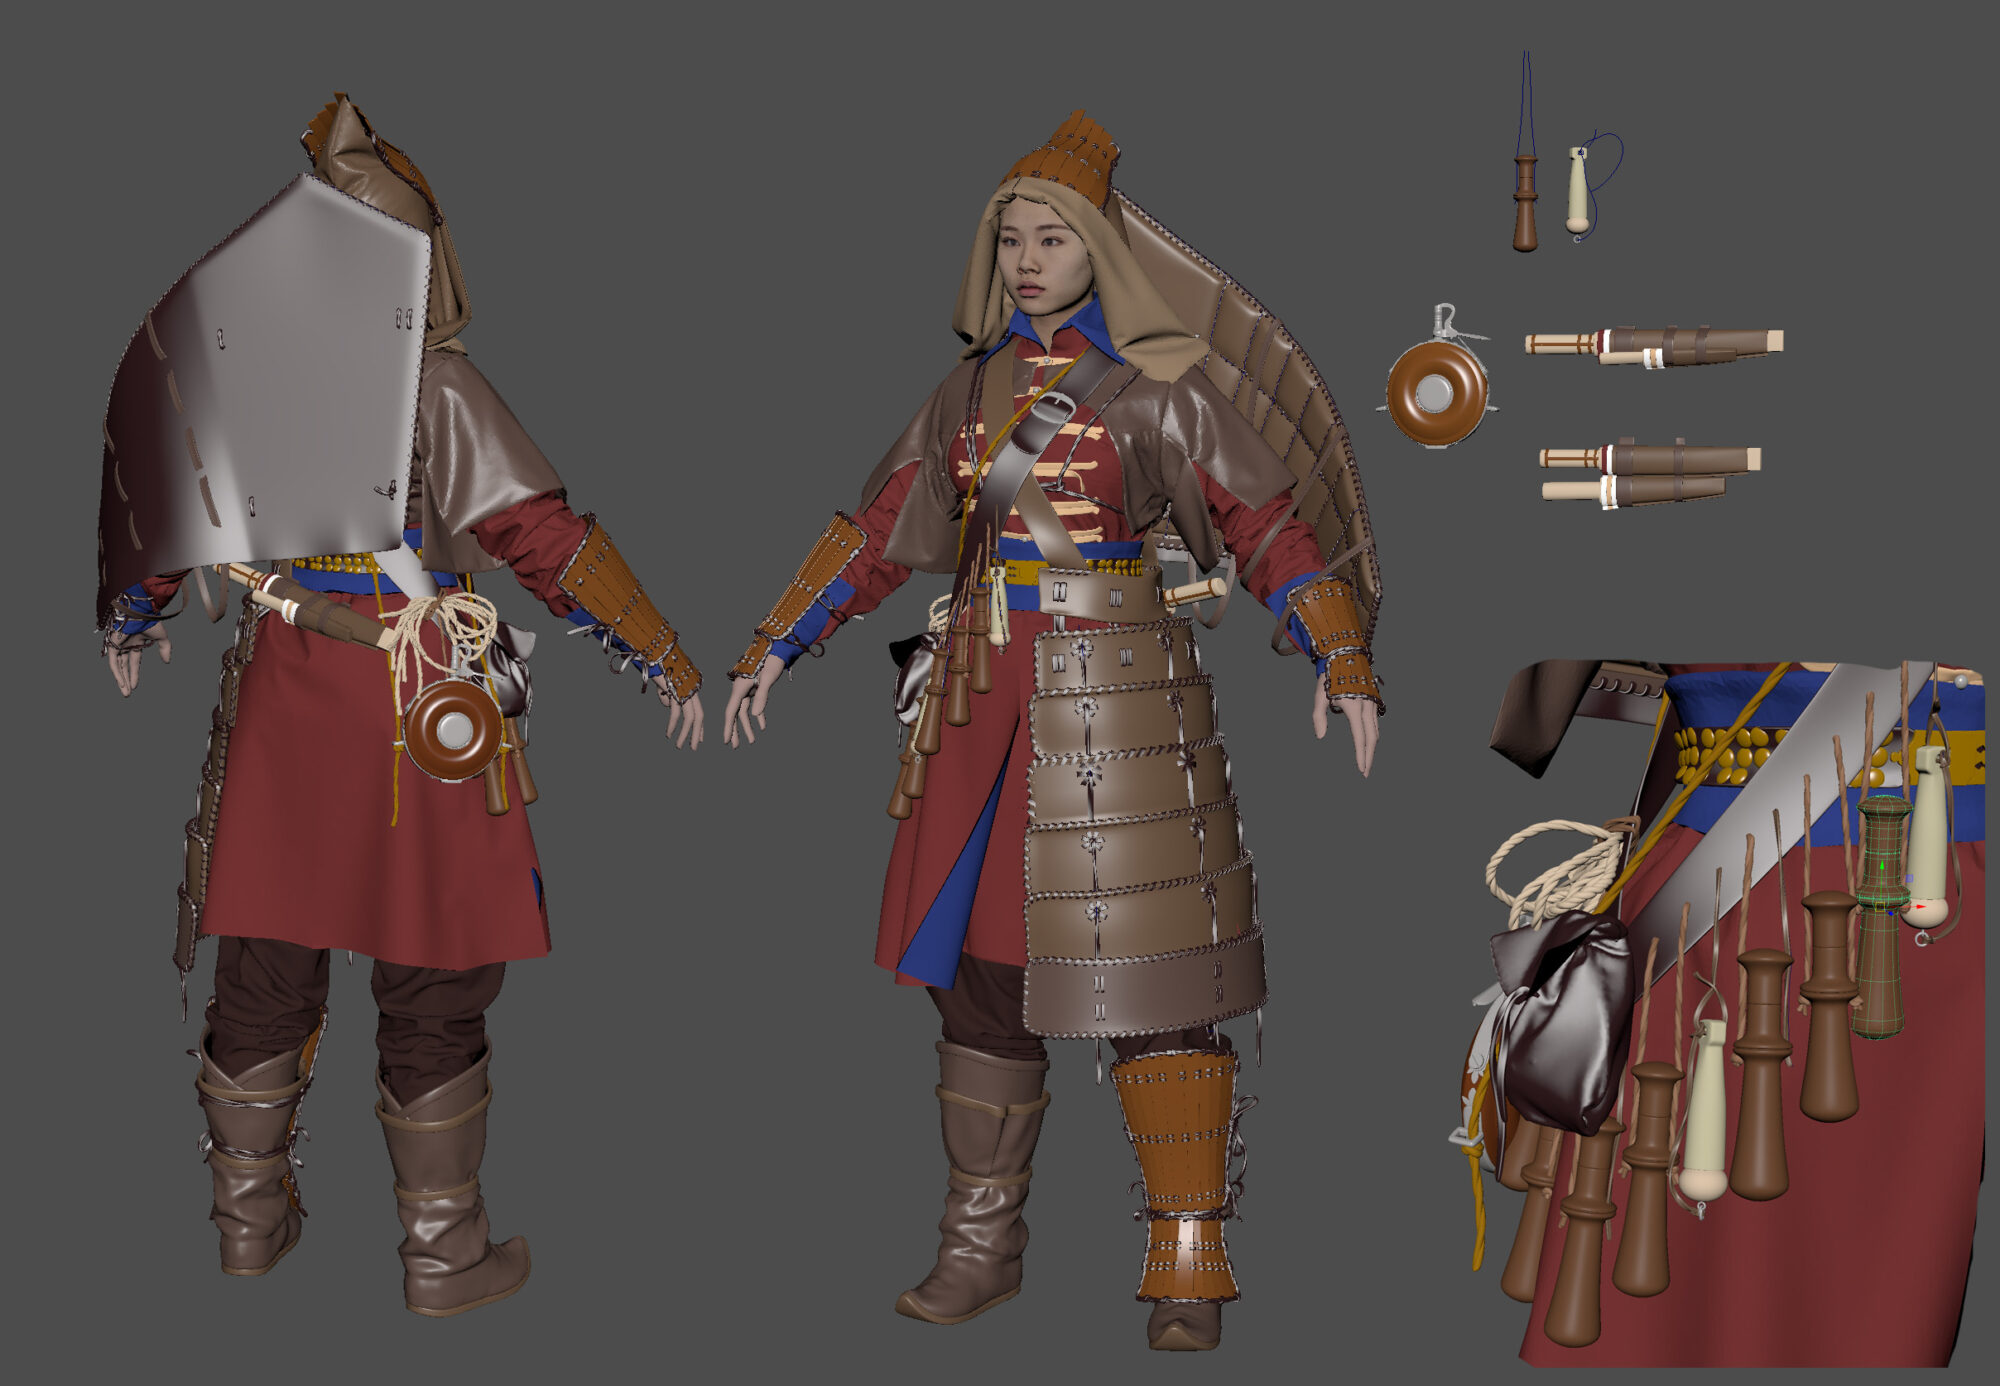
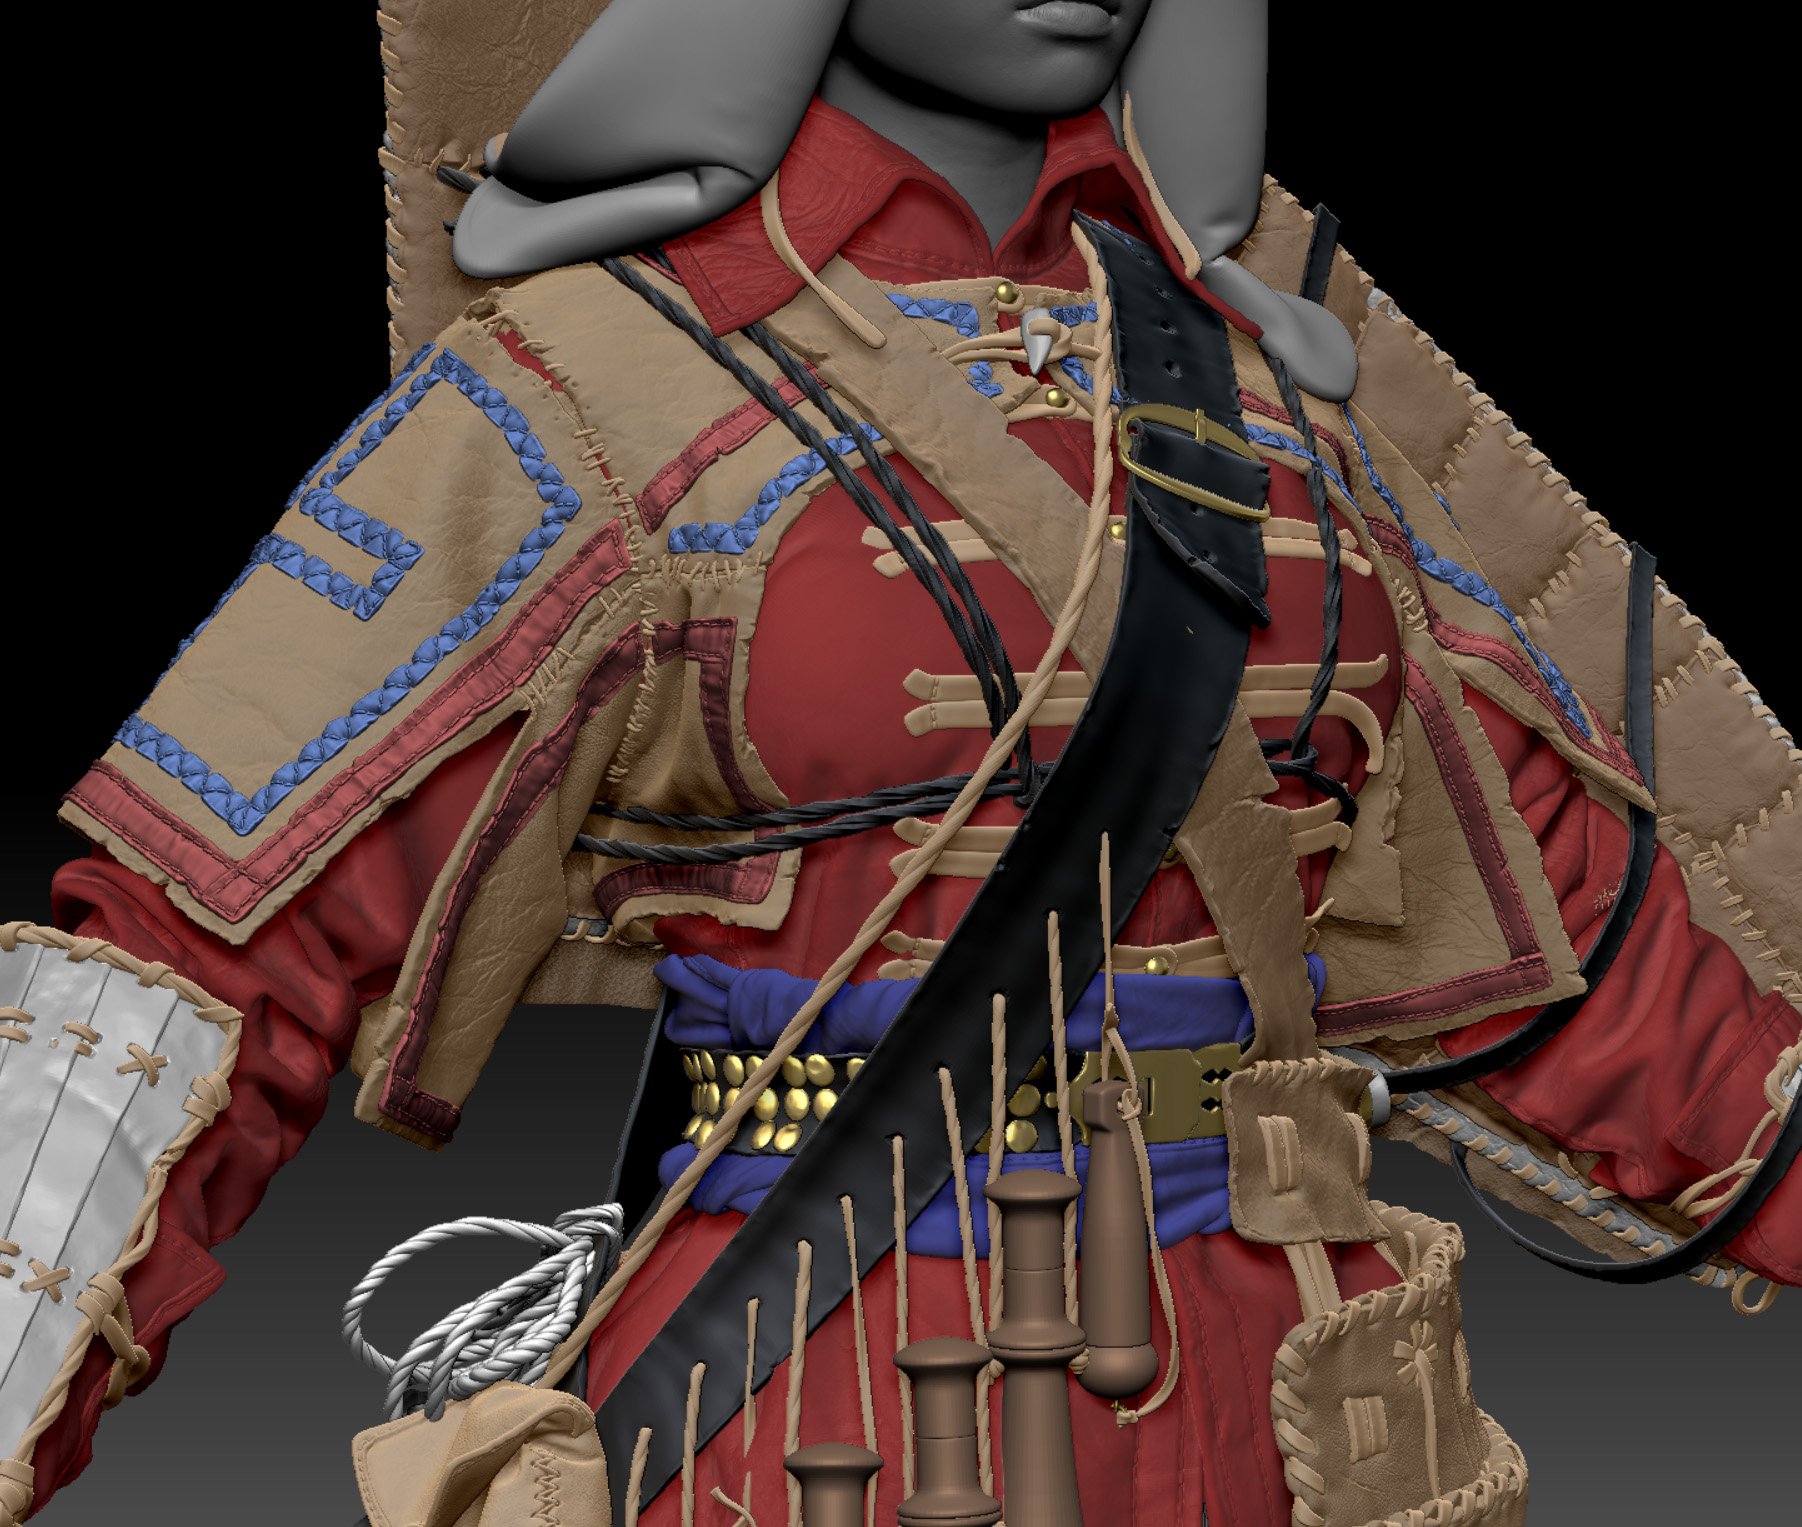
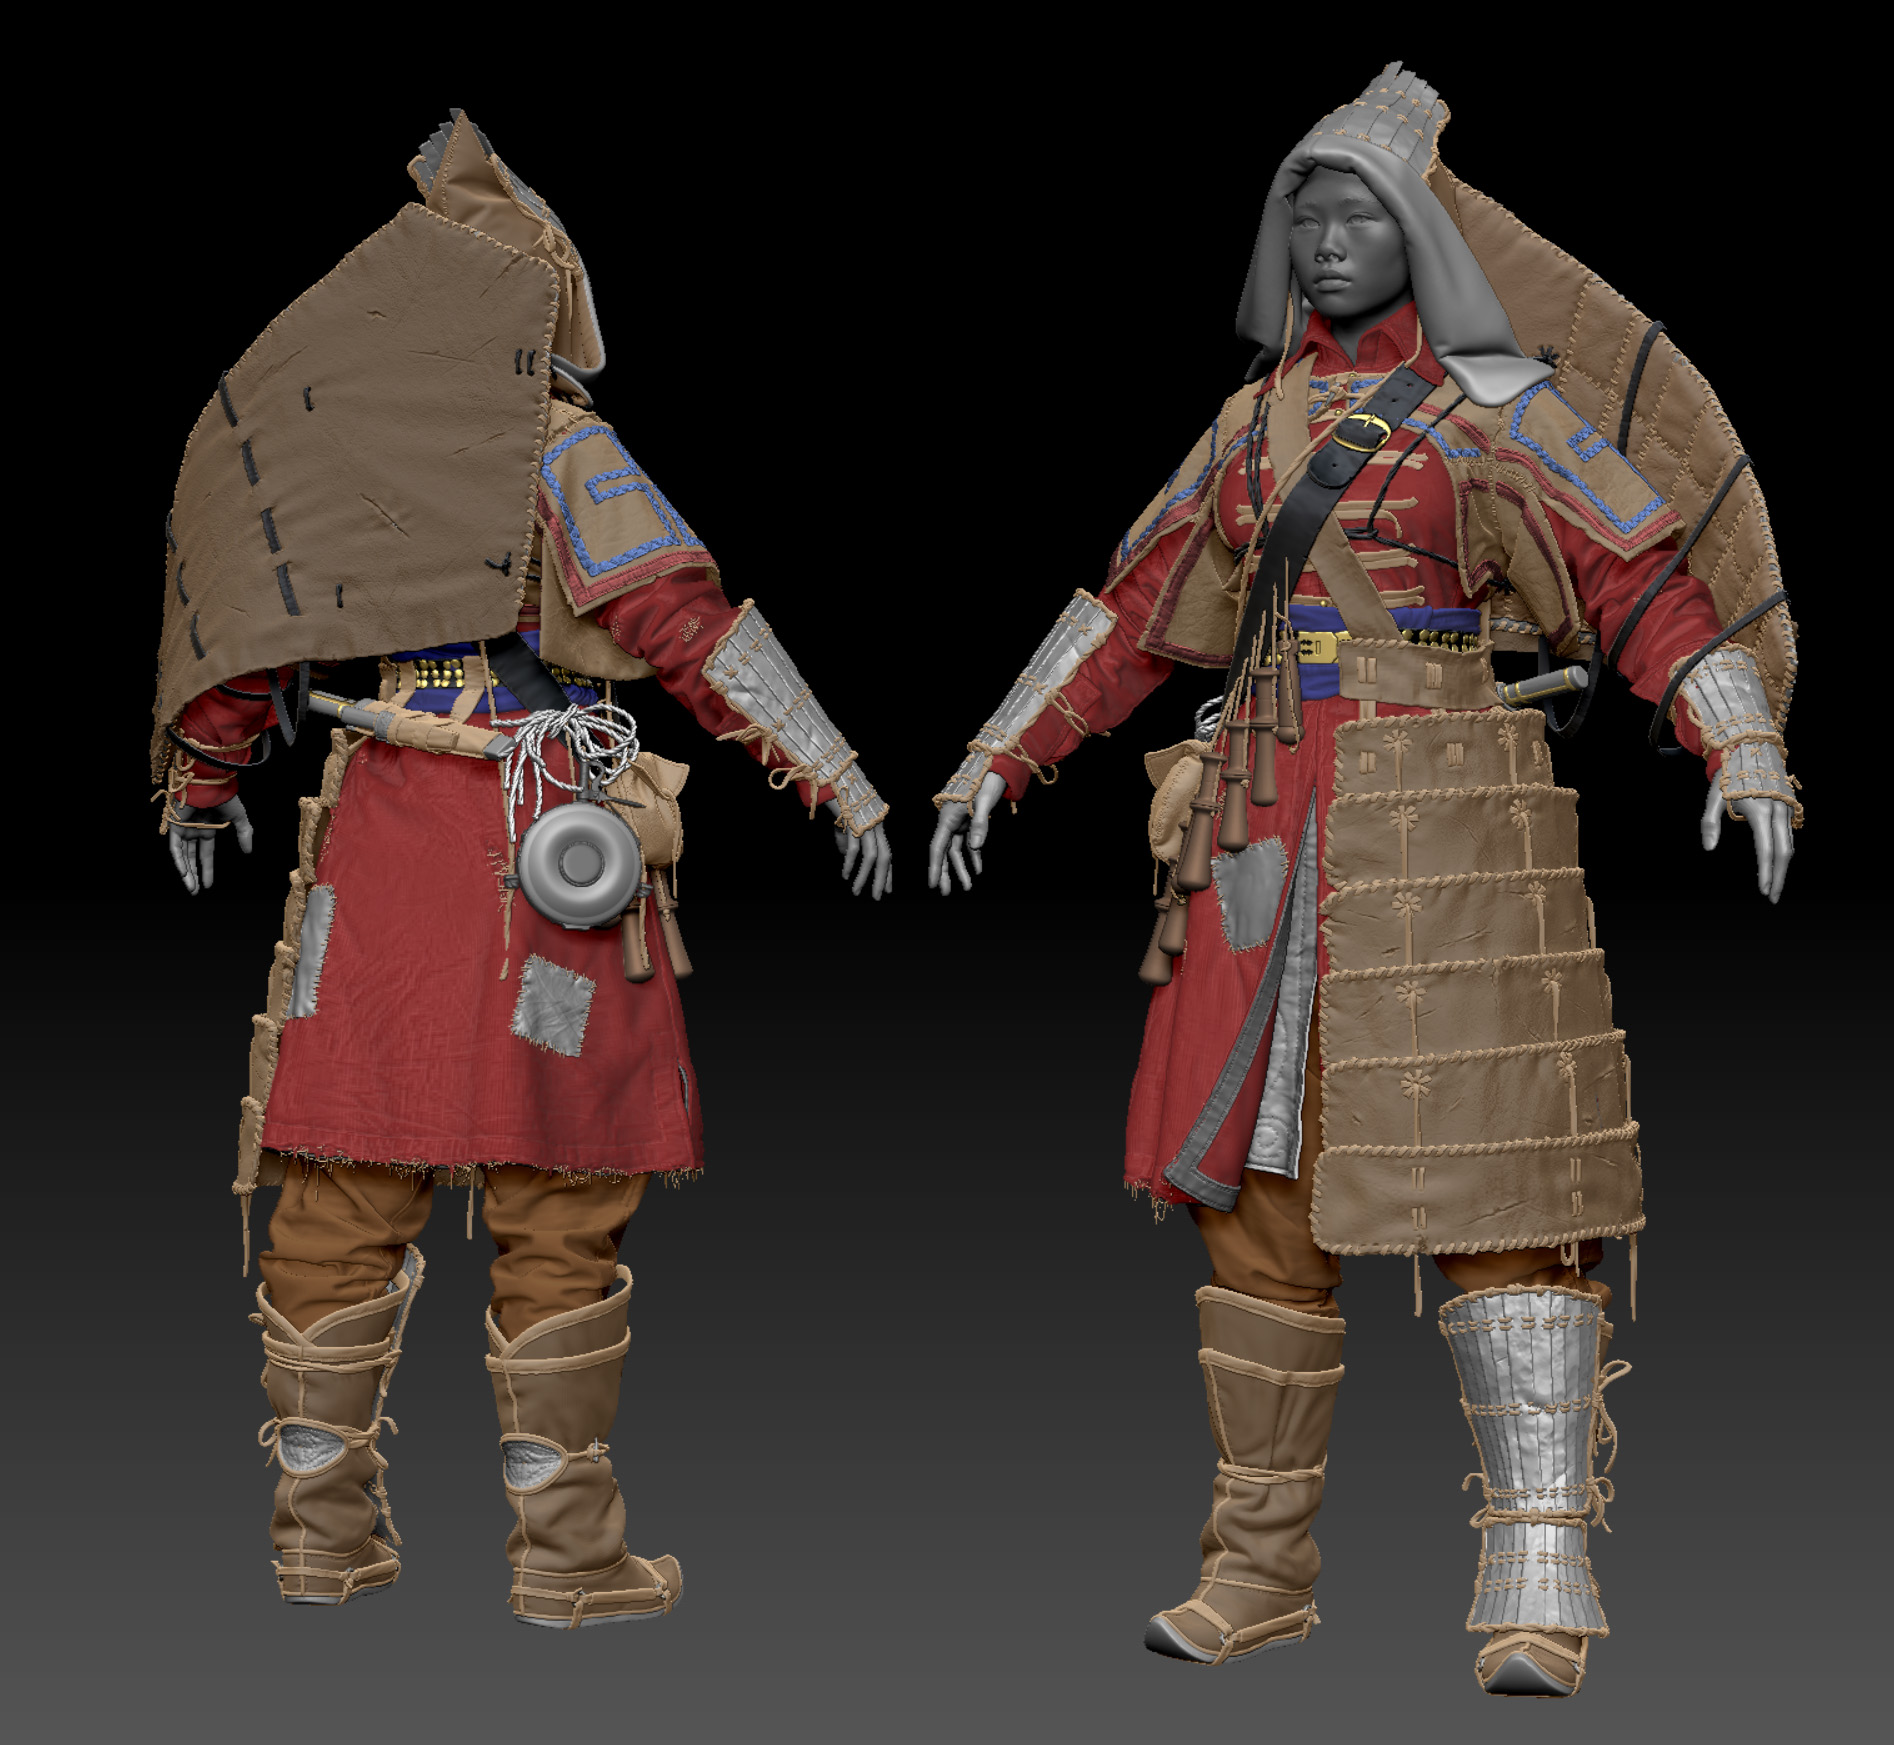
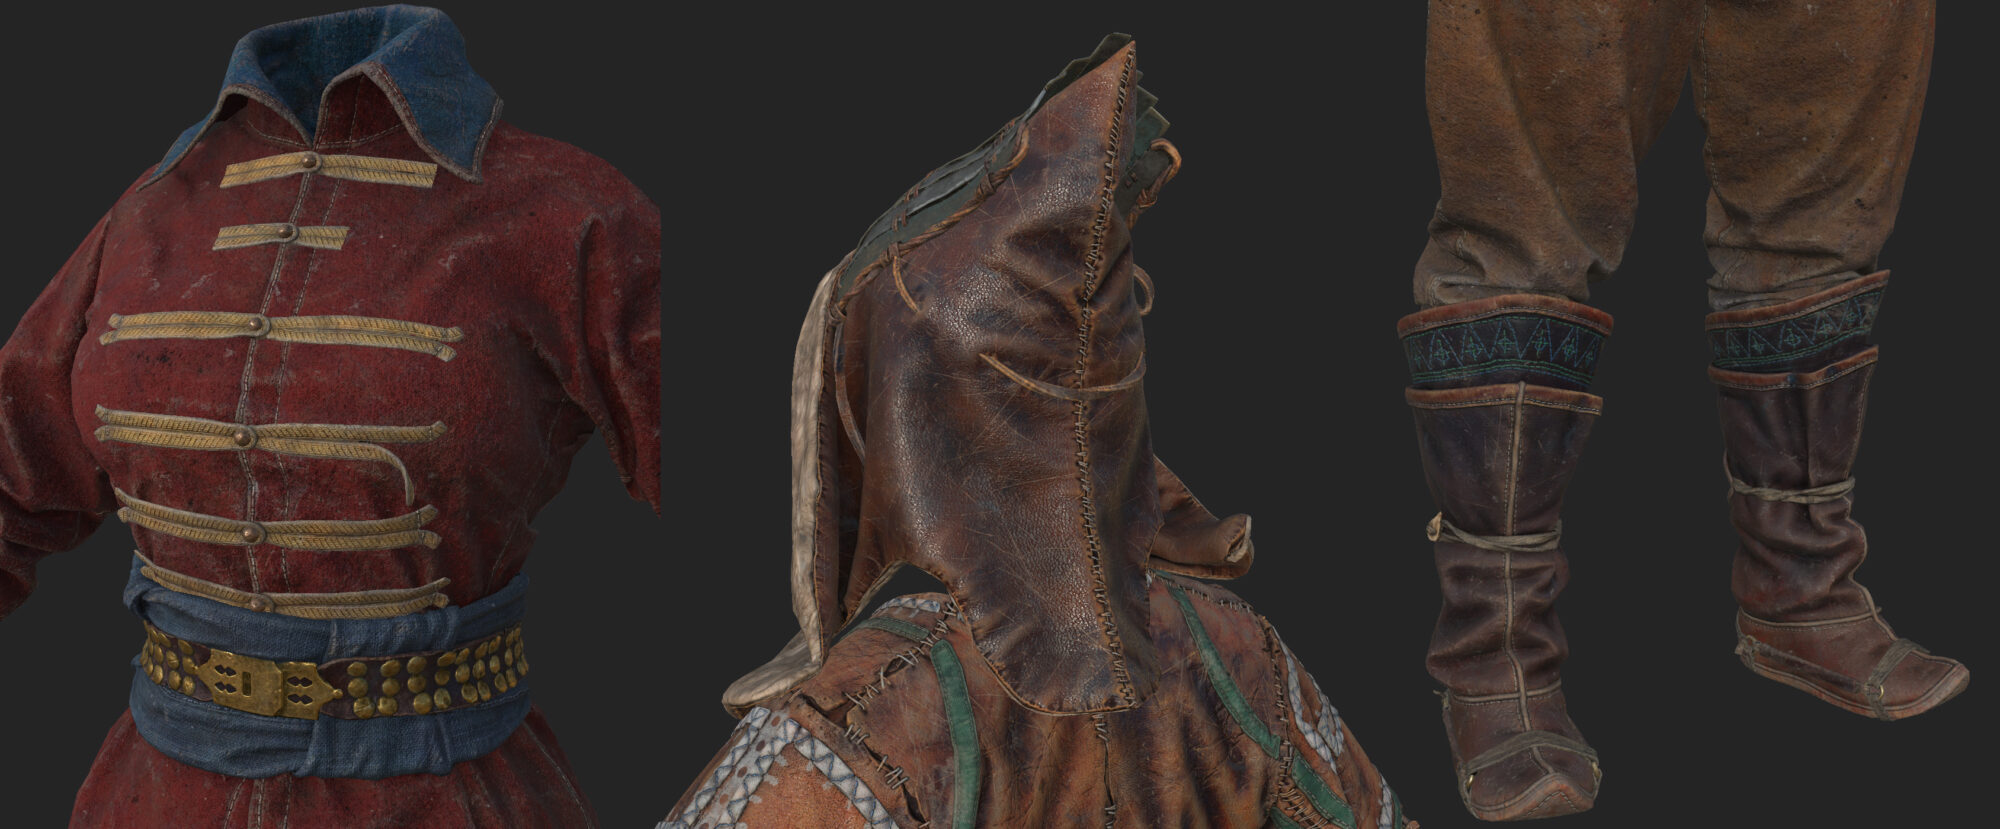
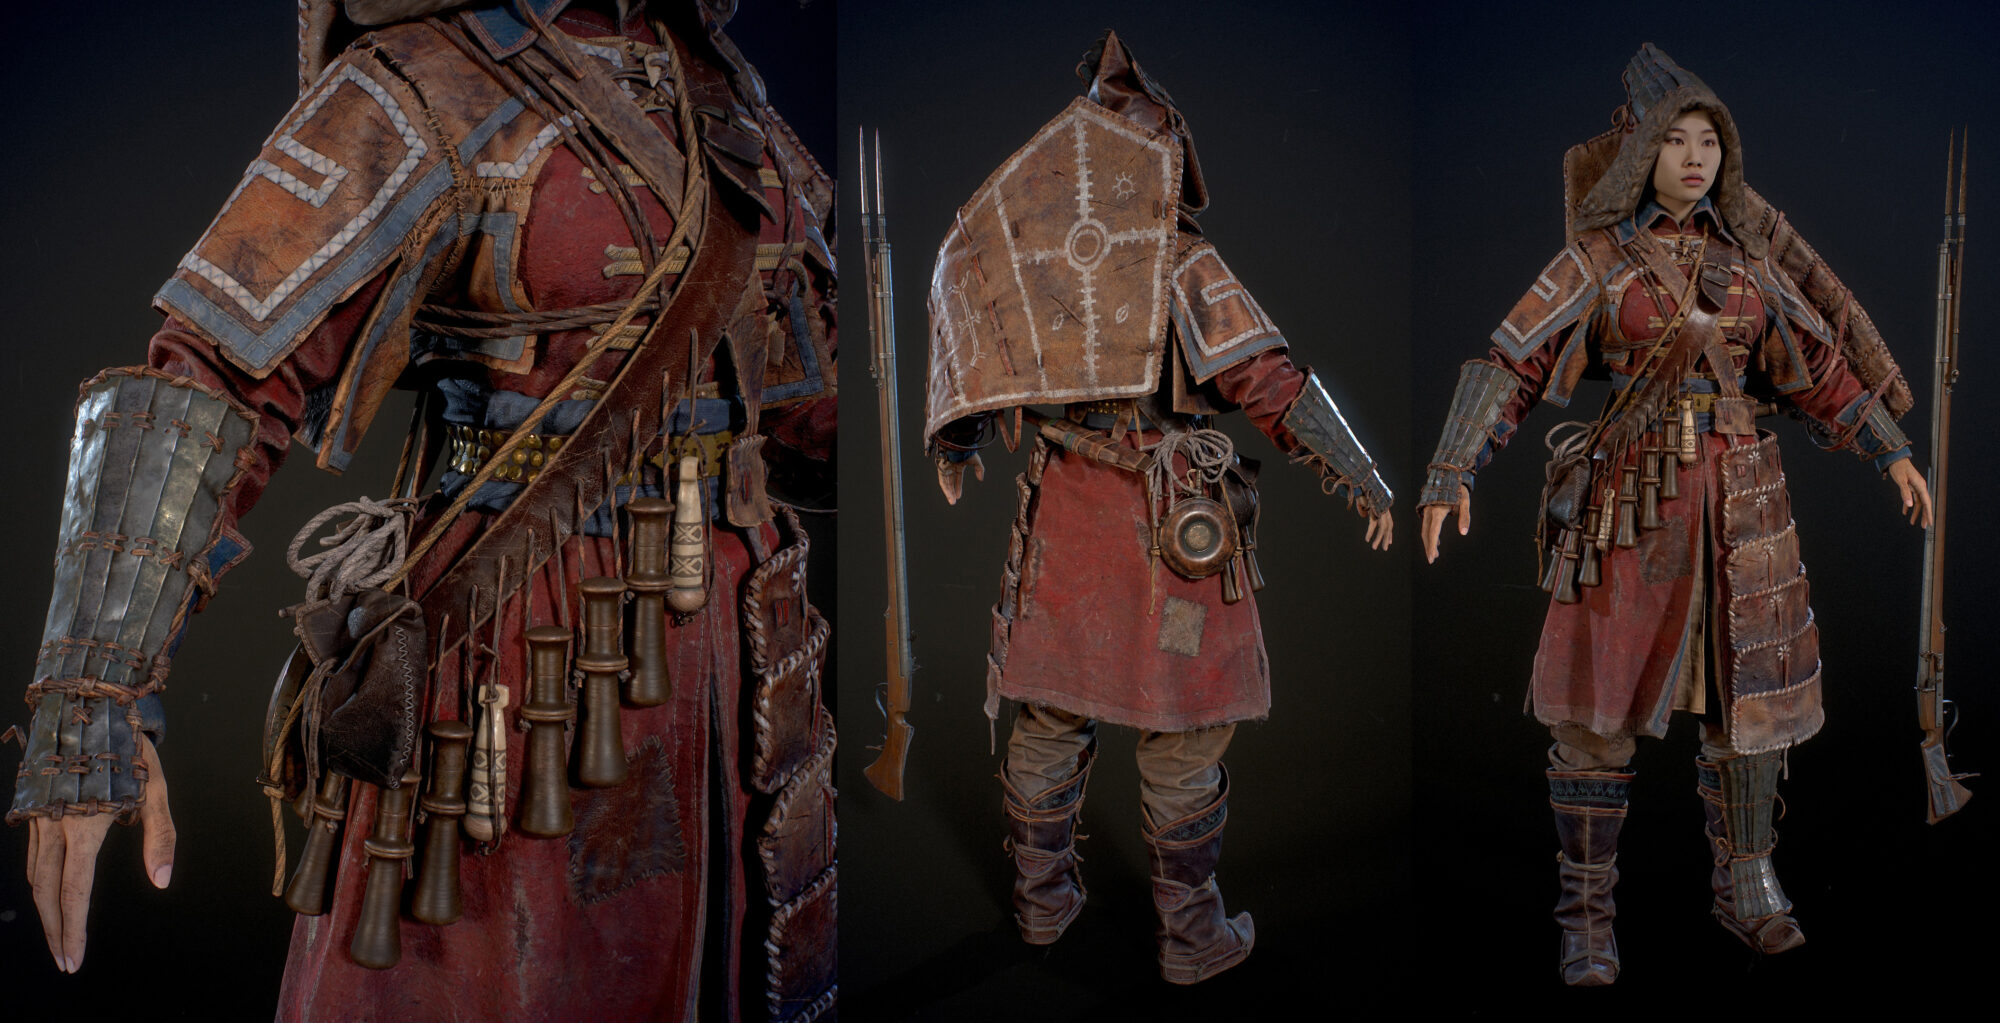
Therefore, on Lilac, a Russian archer’s caftan and a wick musket, as well as a characteristic bandolier – a berendeika, from his father. Mongolian boots and a headdress – malakhai, as well as an undershirt and a Nenets type-setting belt. Chukchi metal greaves and bracers, a characteristic winged shield and a massive skirt-gaiter inherited from his grandfather.
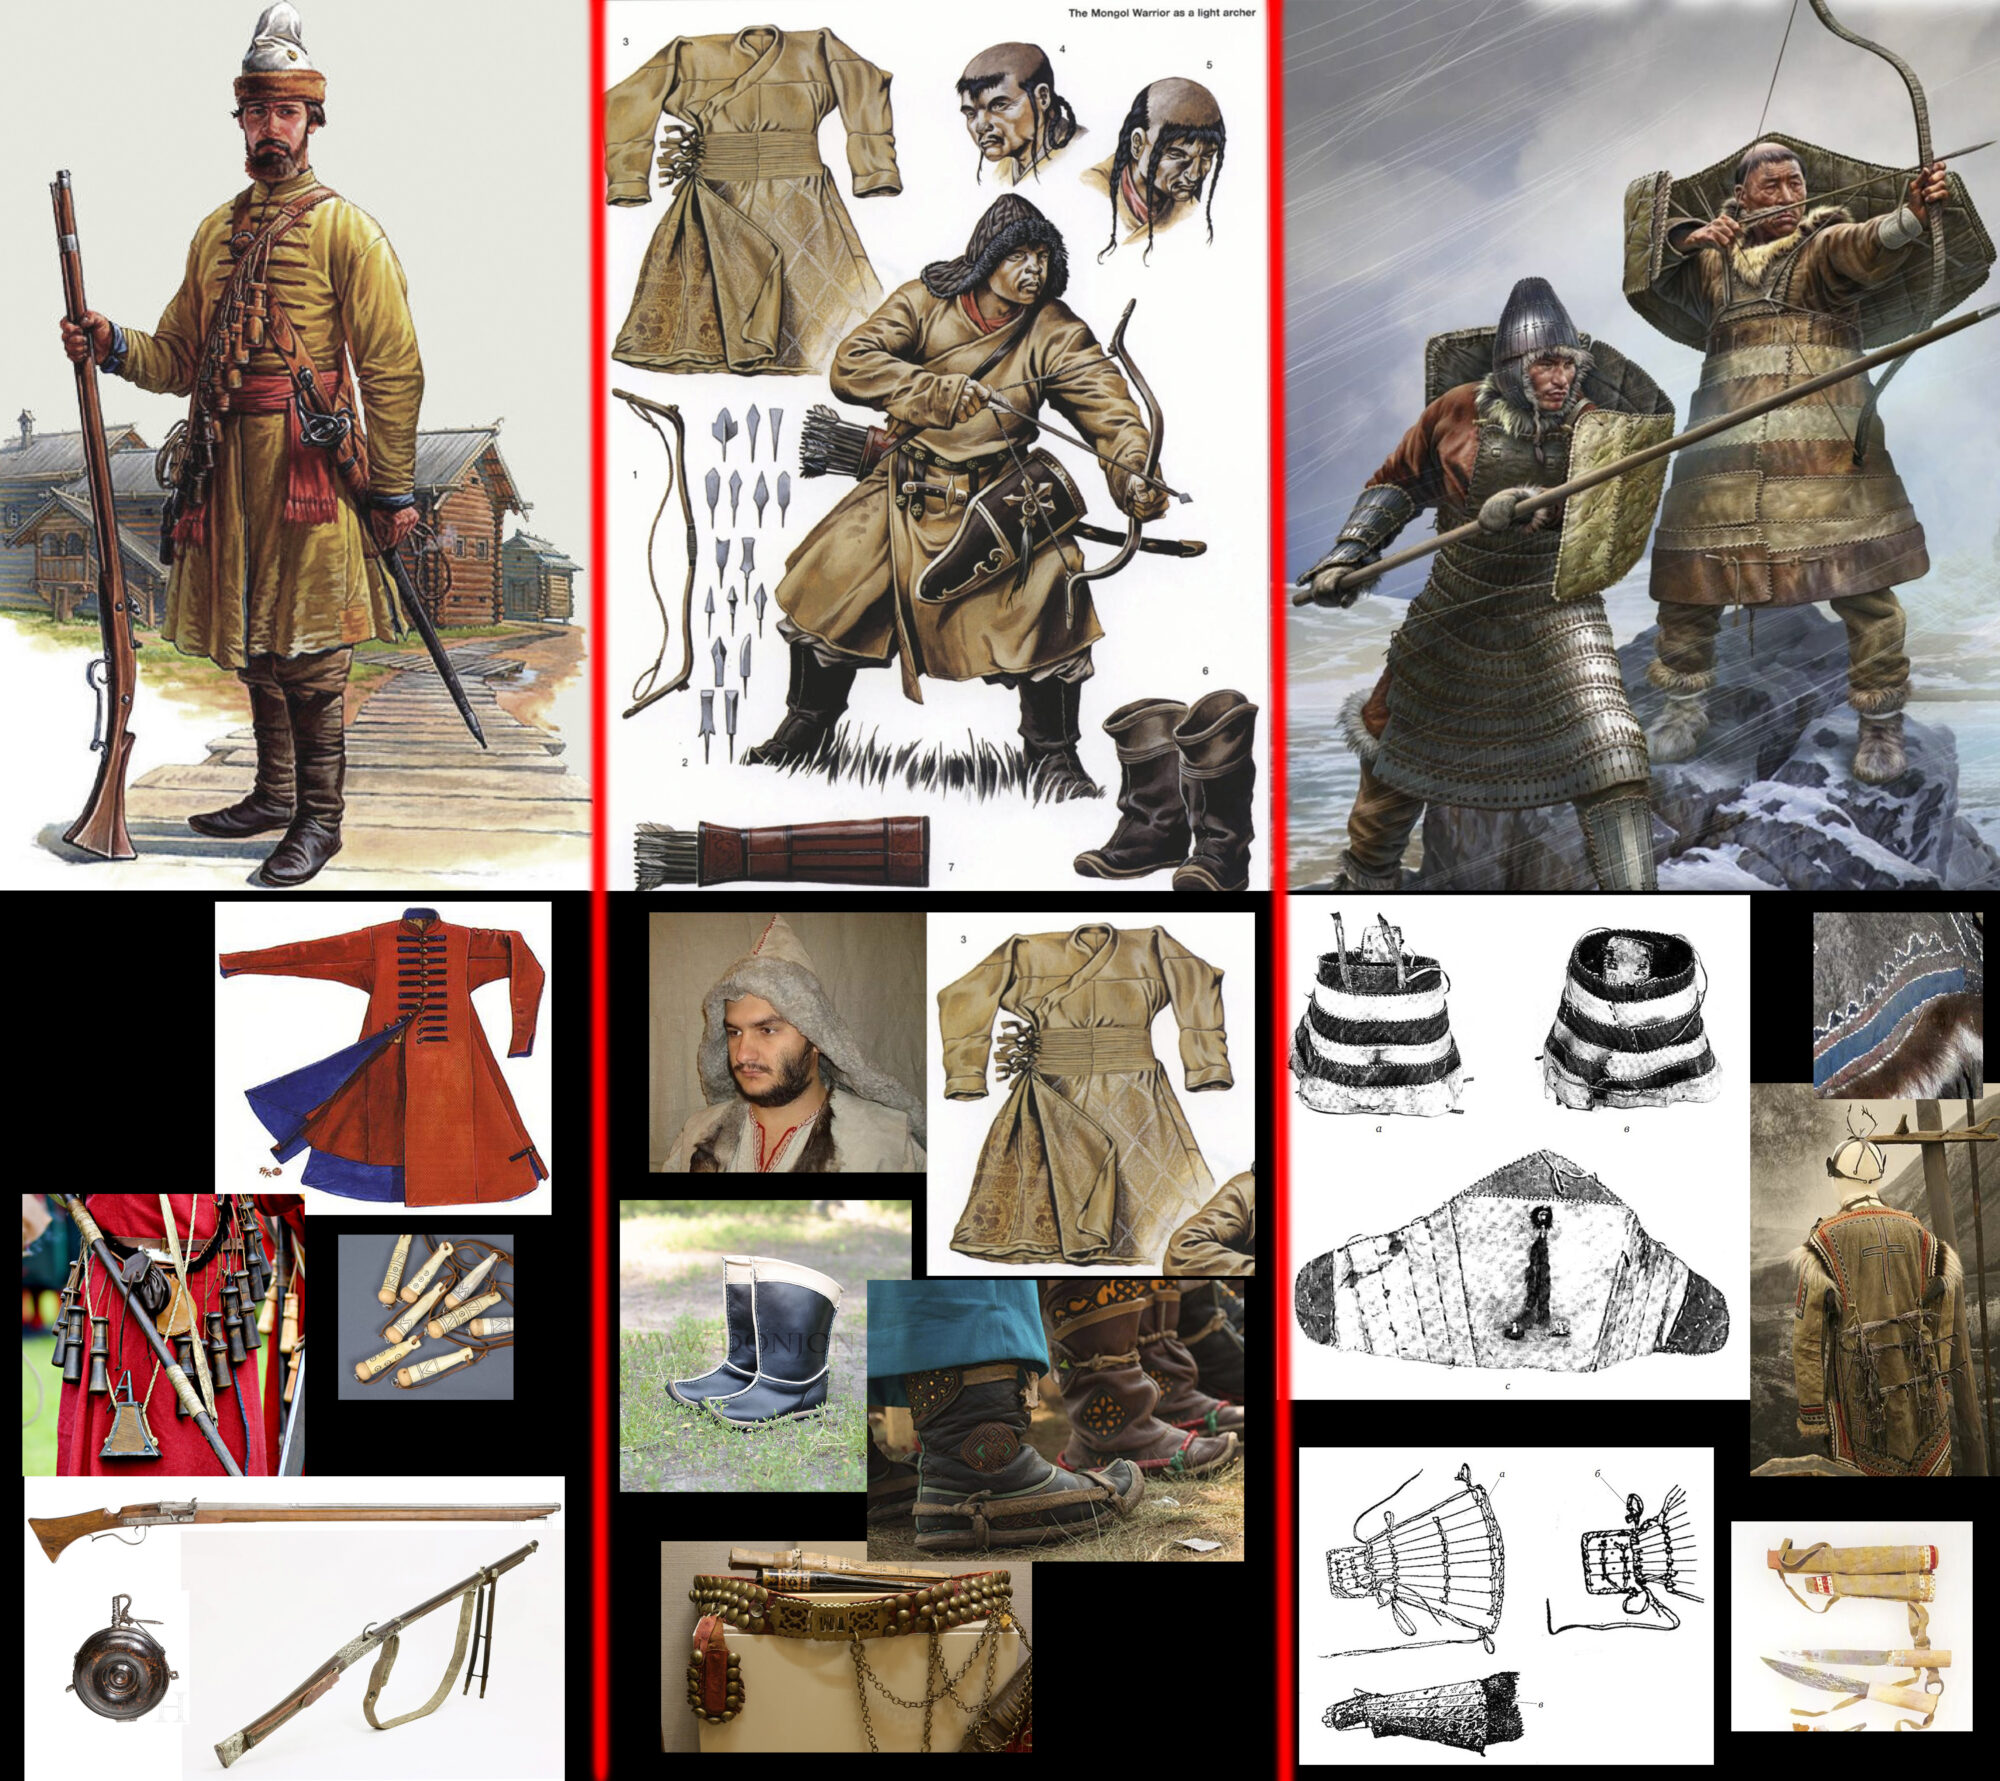
To the musket, I added elements from Chinese matchlock guns: a pouch for the butt and a bipod, which, if desired, can be used as a bayonet, as well as several Chinese-type cartridges for the Berendeyka to emphasize cultural mixing.
I increased the asymmetry of the Chukchi armor, leaving only one wing near the shield and half of the skirt. Initially, I planned to make another quiver and a bow, but I decided that this would overload the model.
Cutting & Sewing
In the first stage, I tailored fabric elements in Marvelous Designer: Caftan, shirt, trousers, malachai.
I used a GPU render for rendering, as it allows you to work comfortably with the fabric at small particle distances.

Blockout
After that, I uploaded all the clothes in Maya and sketched out the general shapes and elements in the form of dimensional meshes. At this stage, it was important for me to understand the combination of shapes and colors.
Midpoly
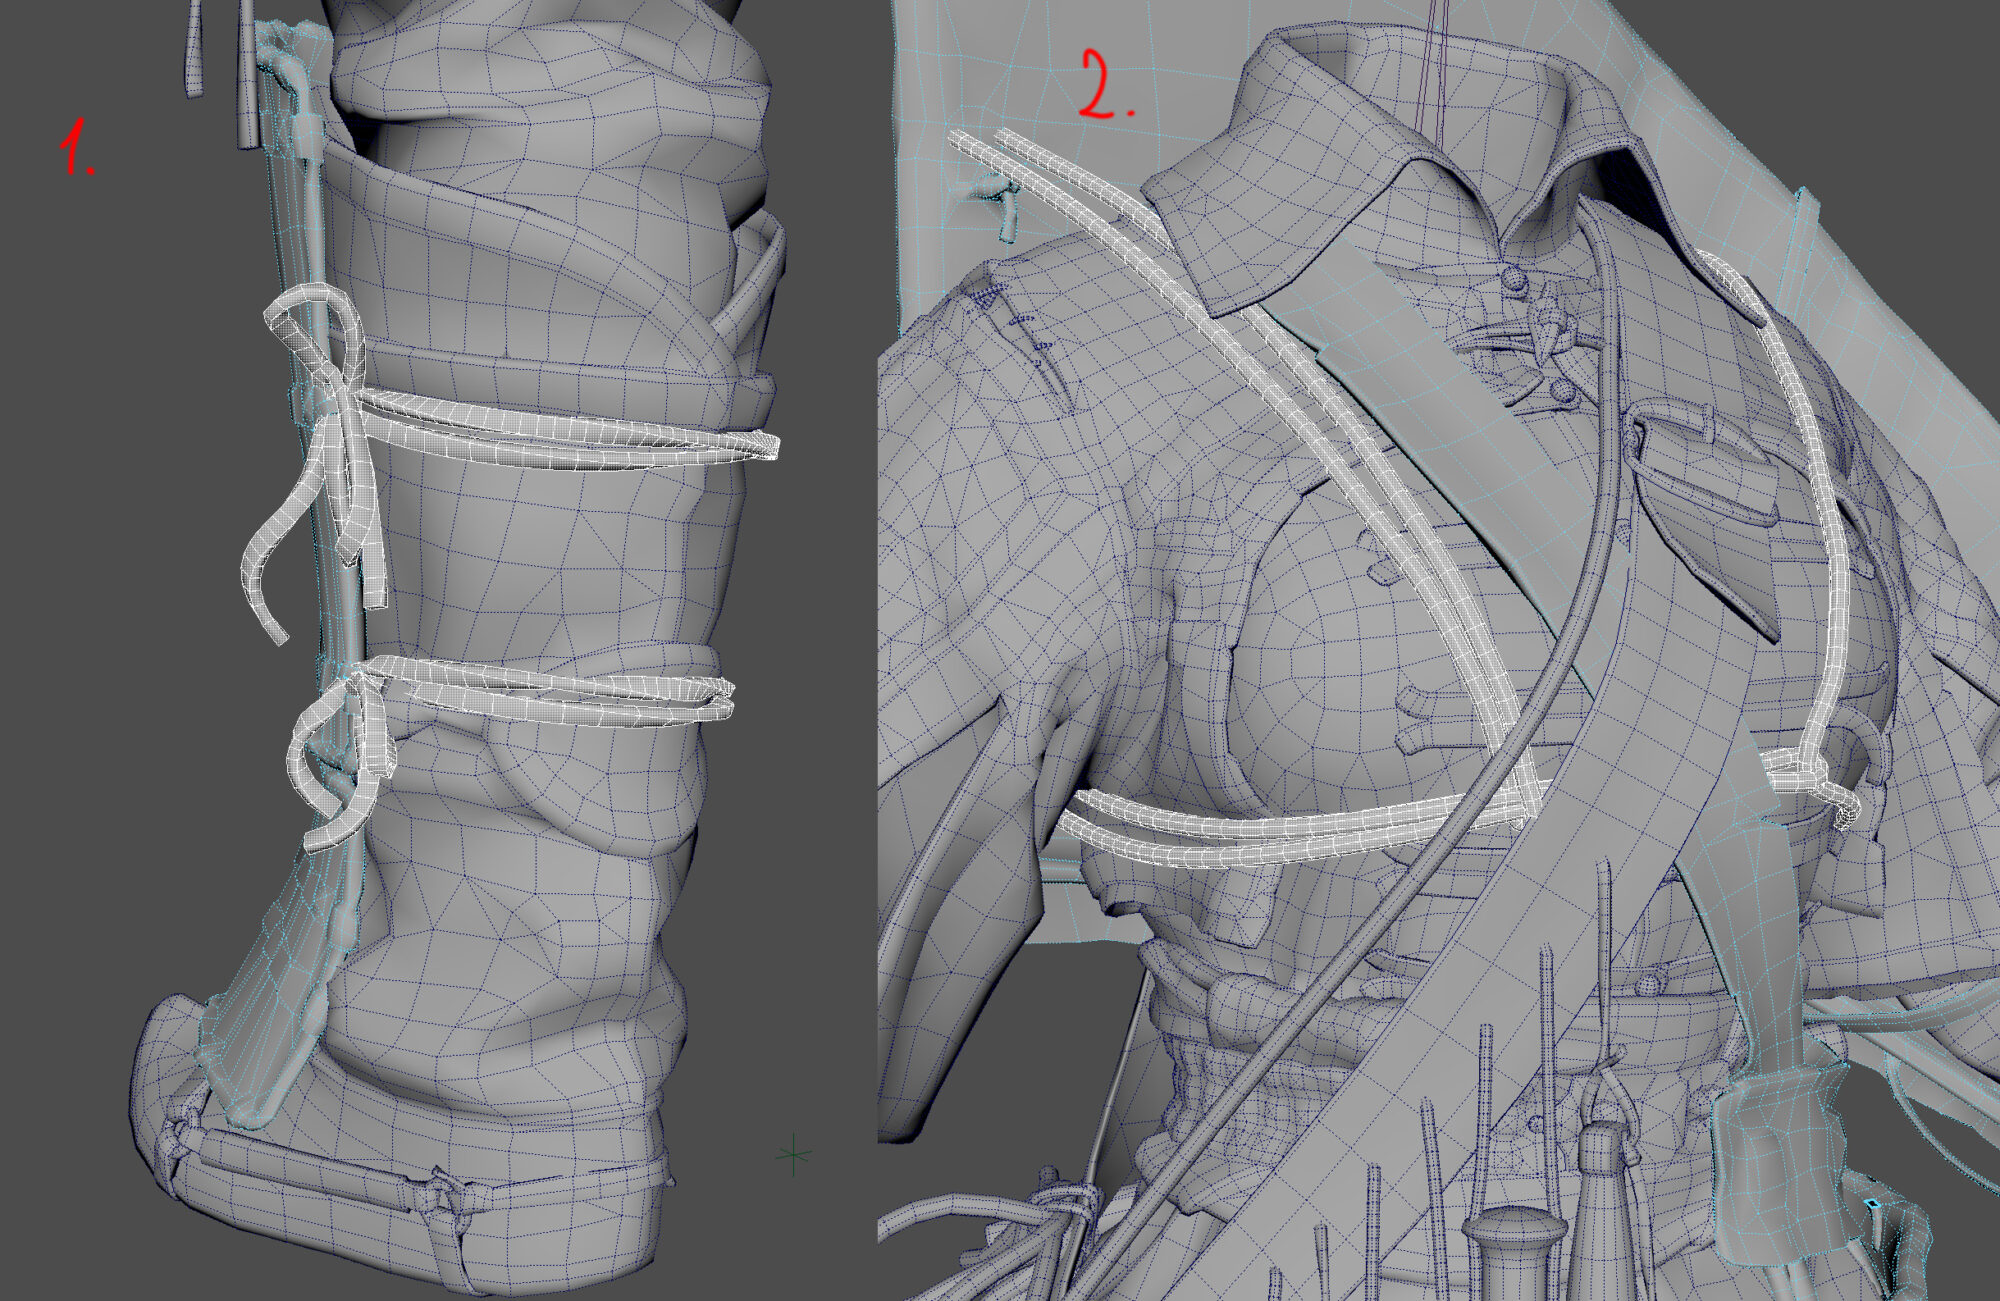
Then I started adding detail to each of the elements.
To create straps and ties, I used the extrude curve function.
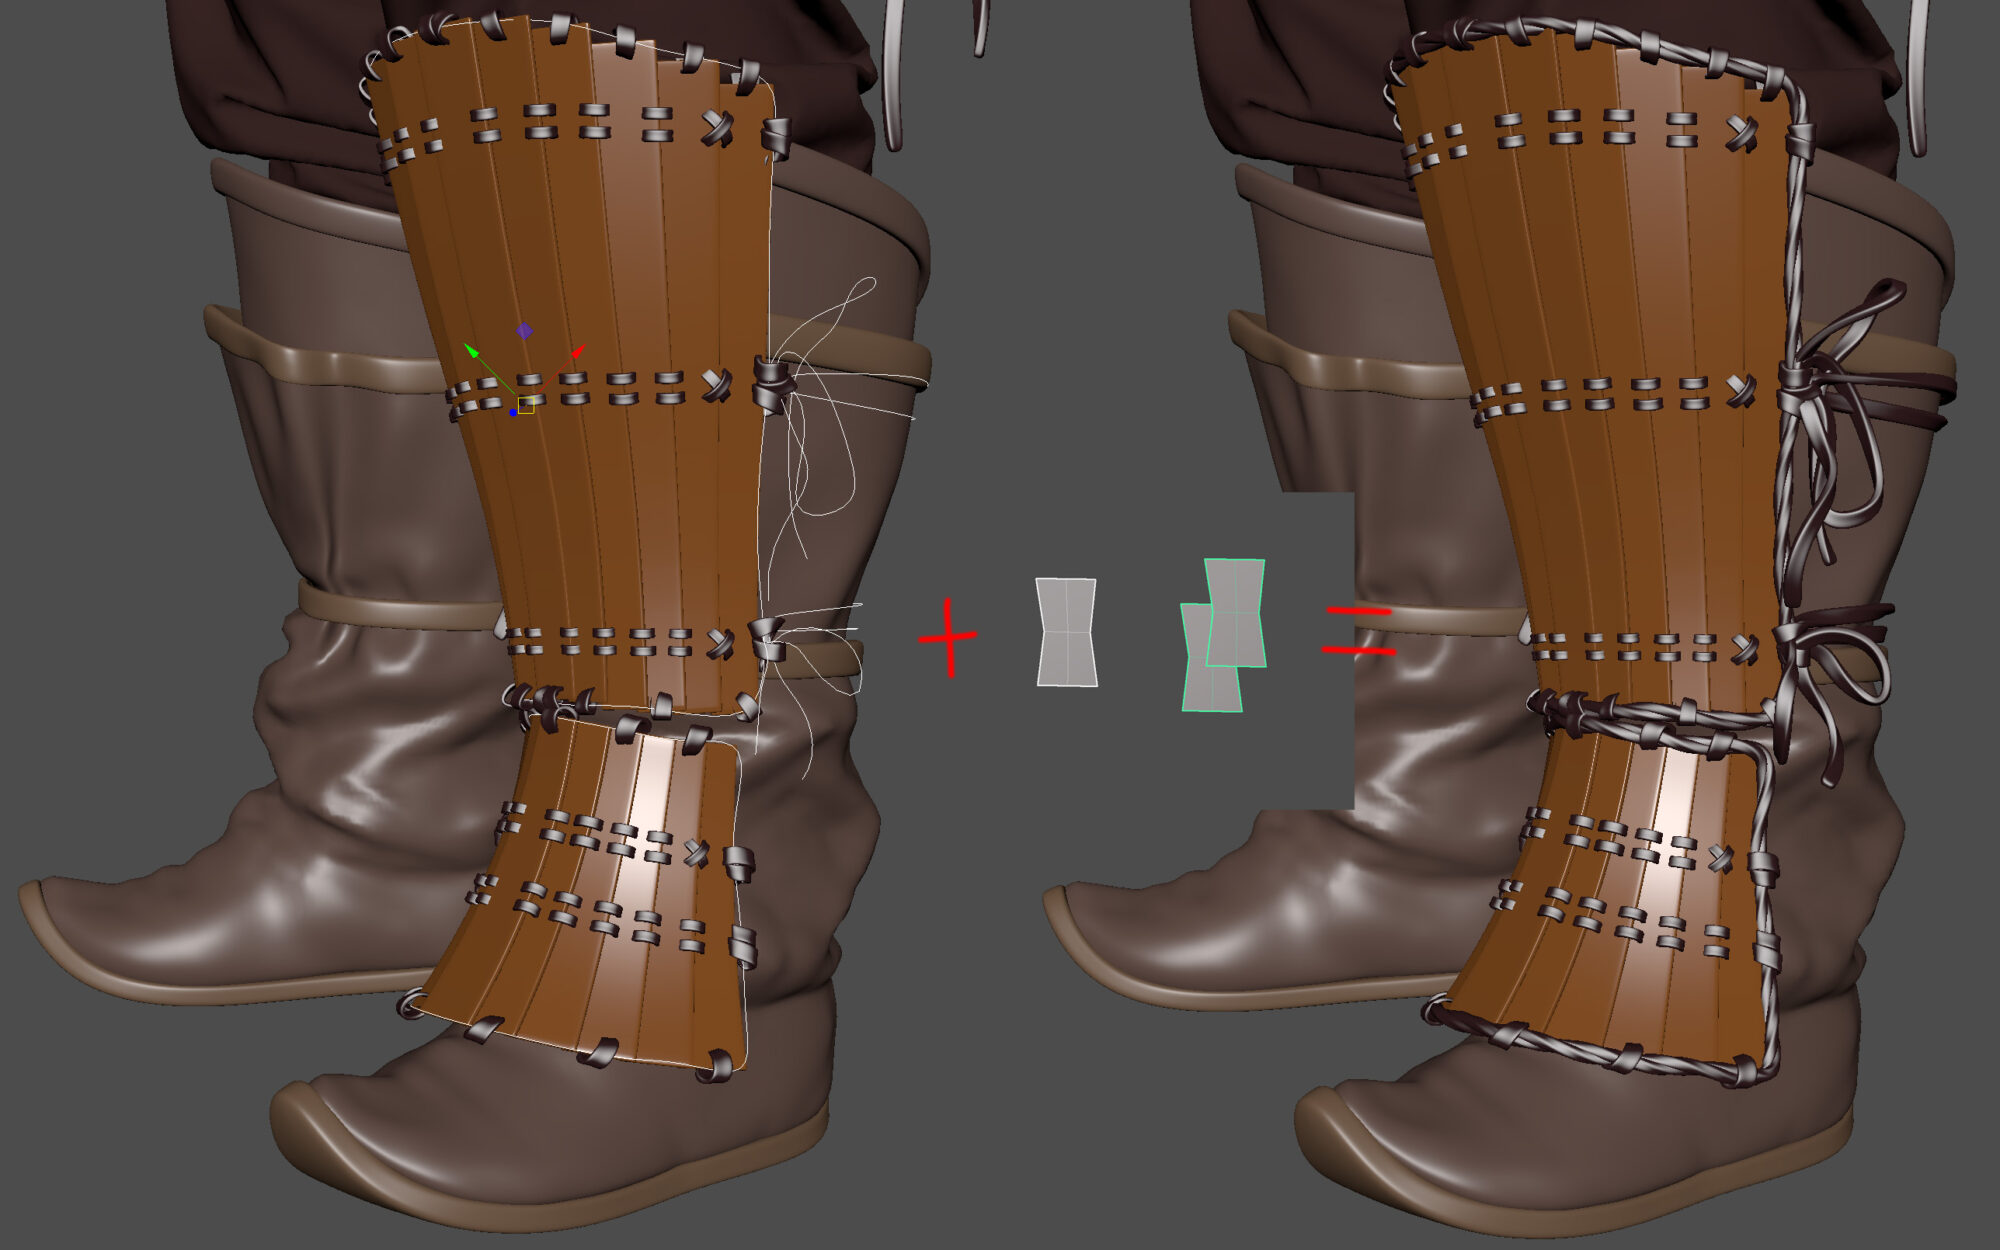
For trimming legplates and stitching on curve warp shield.

Before exporting to ZBrush, the model looked like this:
Curves and parts of this geometry can be used during retopology.
Highpoly
In ZBrush, each element went through several stages of additional detailing. Most of the time was spent on the study of leather elements.

On the fabric, I added damage, dangling threads, medium and small wrinkles, stitches and stitches, for which I used a set of brushes from JROTools, DragRect brushes based on scans for fabric and leather and slightly modified standard brushes.
As well as Easy Metal Surface Brushes pack for metal plates.

Below, is the highpoly all together:
Export & Retopology
To upload from ZBrush, I went through all the subtools with the Decimation Master, so that I get two details for each subtool. The first is needed for retopology, a maximum of 300 thousand polygons and the second for baking – a maximum of 5-6 million polygons per subtool.
A separate set of meshes for retopology is needed in order for Quad Draw in Maya to work faster.
To retop the thin belts and laces, I used two approaches:
Manual optimization of mid poly geometry.
Extrude the primitive along the curve left over from the mid poly stage.
As a result, about 180 thousand triangles were obtained.

True, without fur, hairstyles, and even heads, but about them a little later.
Mapping & Pre-baking
I map in Maya, using standard tools.
After the mapping is ready, I added highpoly to the scene, which I pulled out of Zbrush. The ones that were decimated for baking. In Maya, I assigned materials to them in order to correctly bake the color ID, after which I spaced the individual elements apart to eliminate artifacts during baking.
Baking
I produce it in Marmoset Toolbag. I like the result here better, especially curvature and AO. And also, the ability to dynamically configure the cage can be very useful. In MT I bake all maps except position. I bake it already in Substance Painter on the assembled model. Otherwise, there will be big problems with tri-planar mapping and some generators.
Texturing
The most pleasant process for me, it is a pity that it is also the shortest, it takes 1-2 weeks, while highpoly and retopology take up to 2 months. Texturing software – Substance Painter.
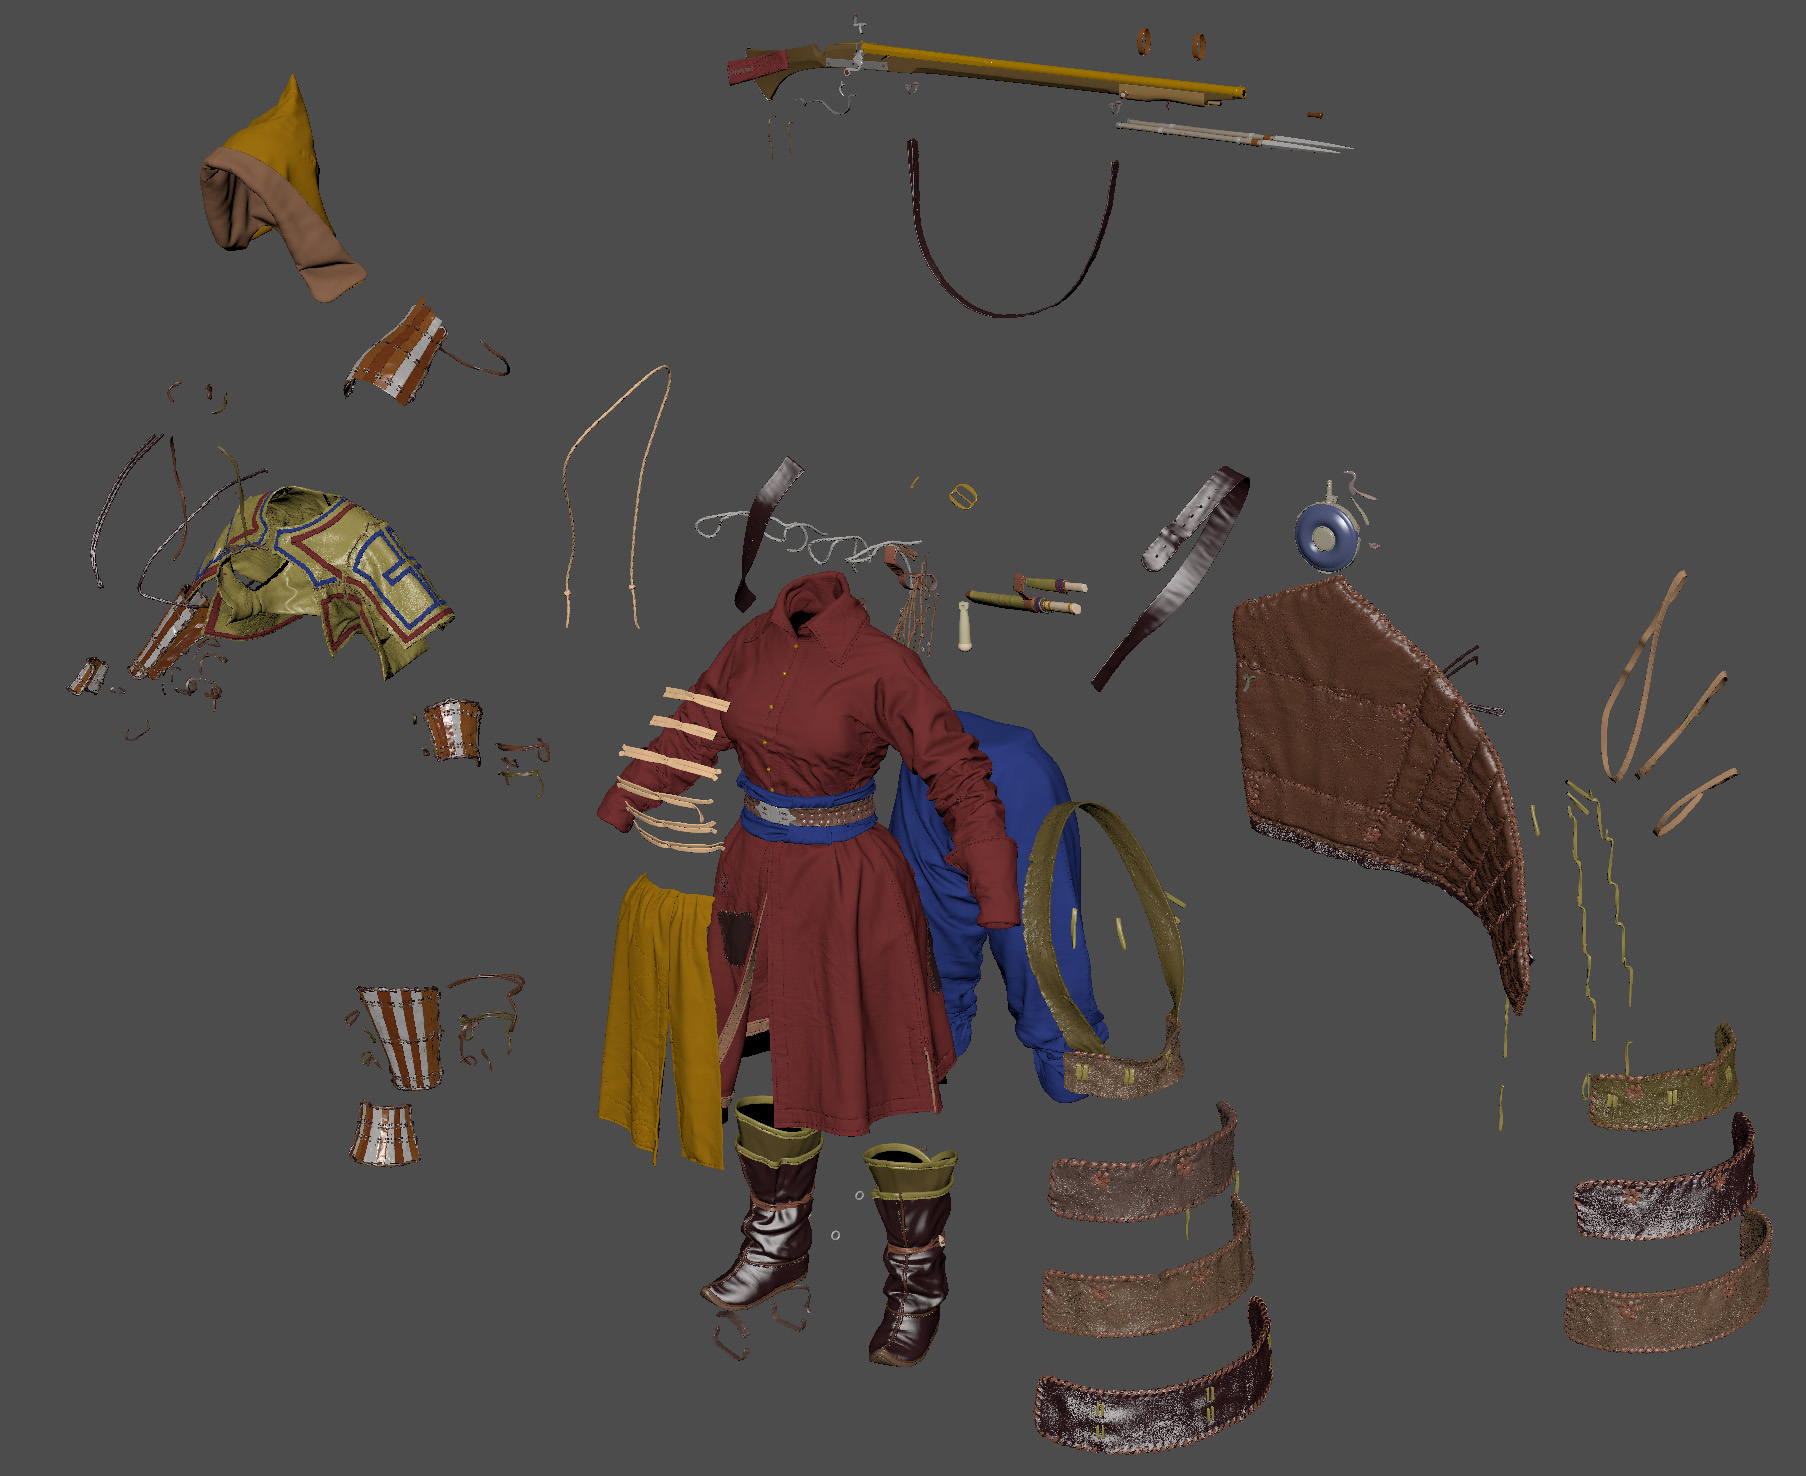
I divided the model into 6 texture sheets. To speed up the work, I prefer to create a separate project for each texture sheet, there are almost no intersections of materials between them, and everything works noticeably faster this way.

As a basis for fabrics, I used textures from Quixel Megascans, and on top of them a dozen layers that emphasize the shape and add dust, dirt and damage. But the skin is procedural, because. the main texture was given to it at the highpoly stage.
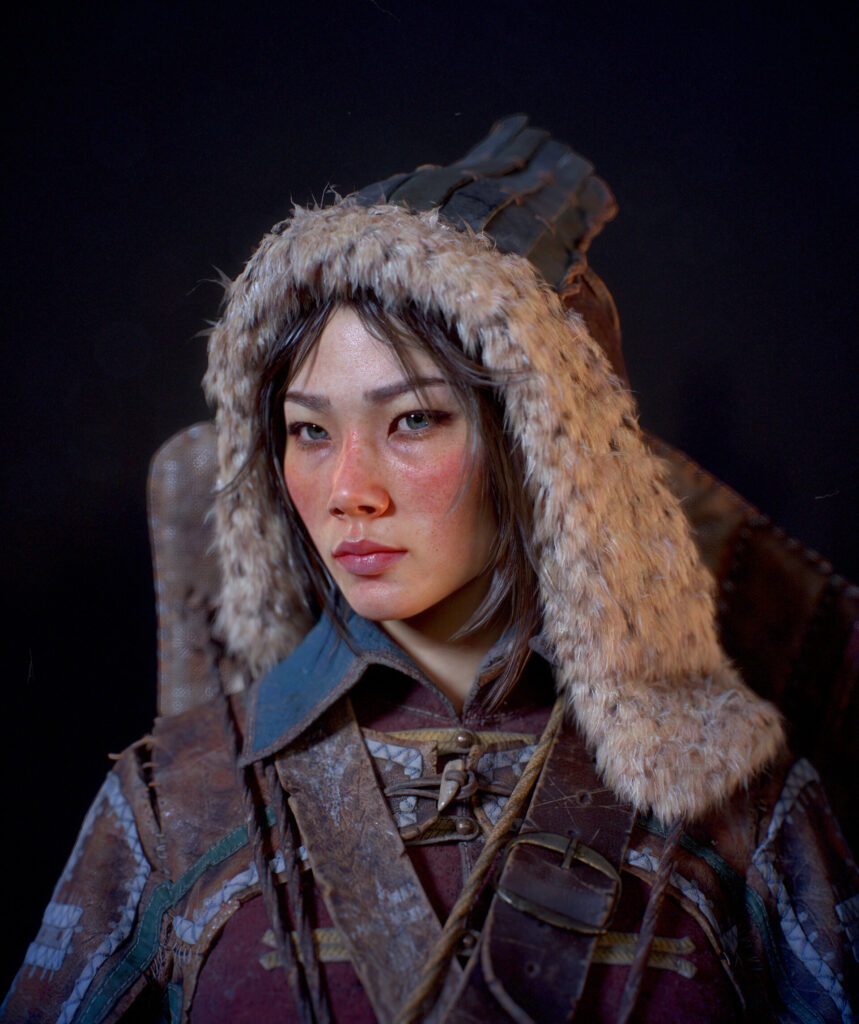
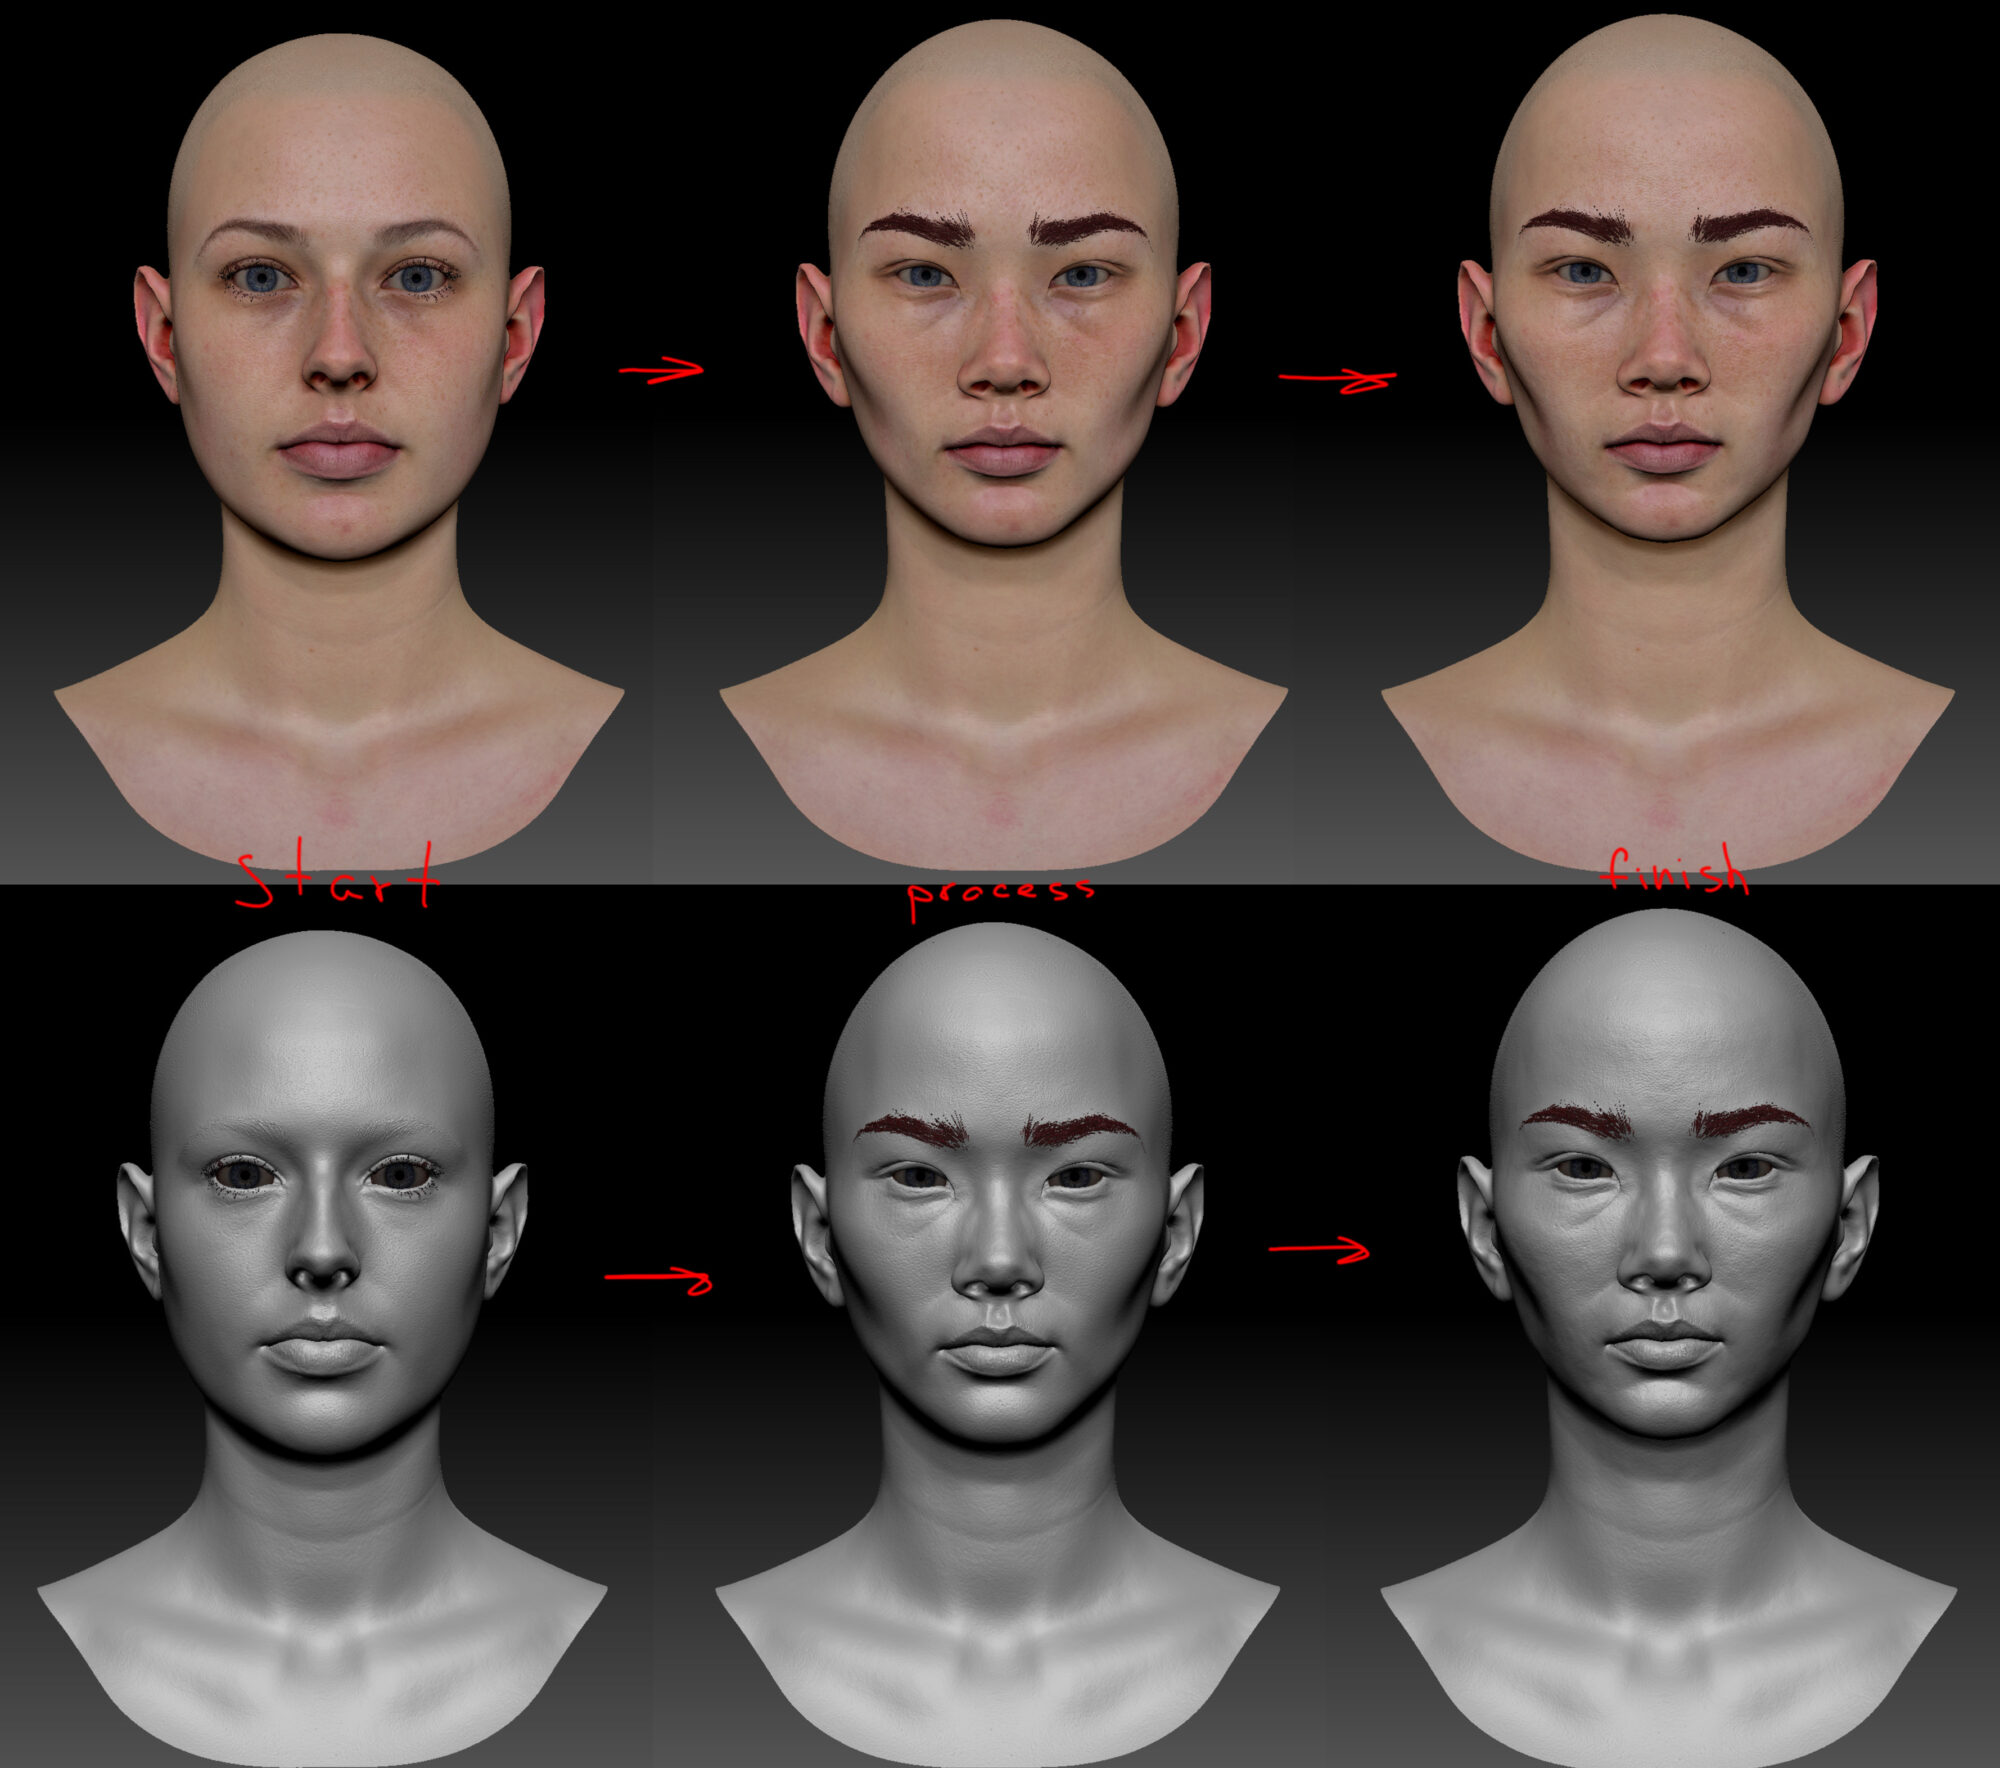
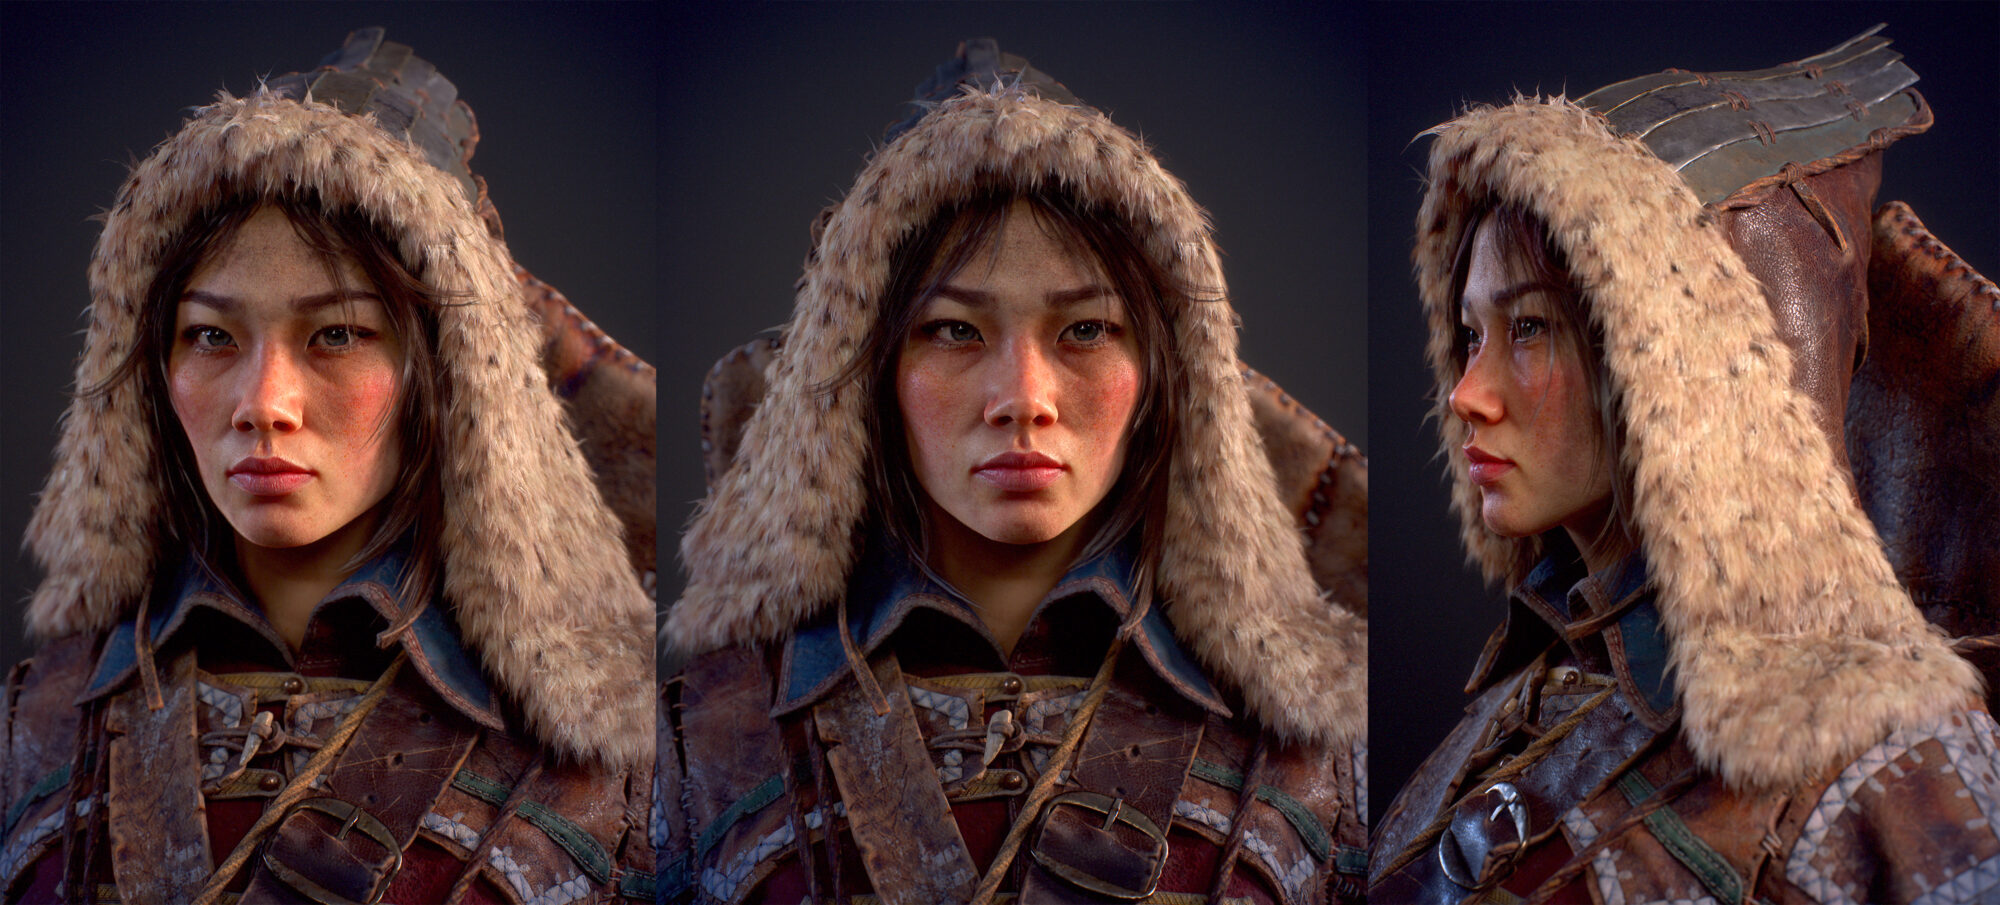
Face
This time I decided to make a collective image, without being tied to someone specific:

As a base for the face, I used a 3d scan from the 3DScan Store. The work was mainly done with the move and standard brushes, sometimes with a dam brush, I tried to use smoothness very carefully so as not to lose detail.
At the very end, I brushed with bumpy noise to add bumps to the skin, which add realism to the face when rendered.
In past projects, I constantly encountered the problem of displaying faces in Zbrush, SP and Marmoset. When in each editor the face is displayed differently.
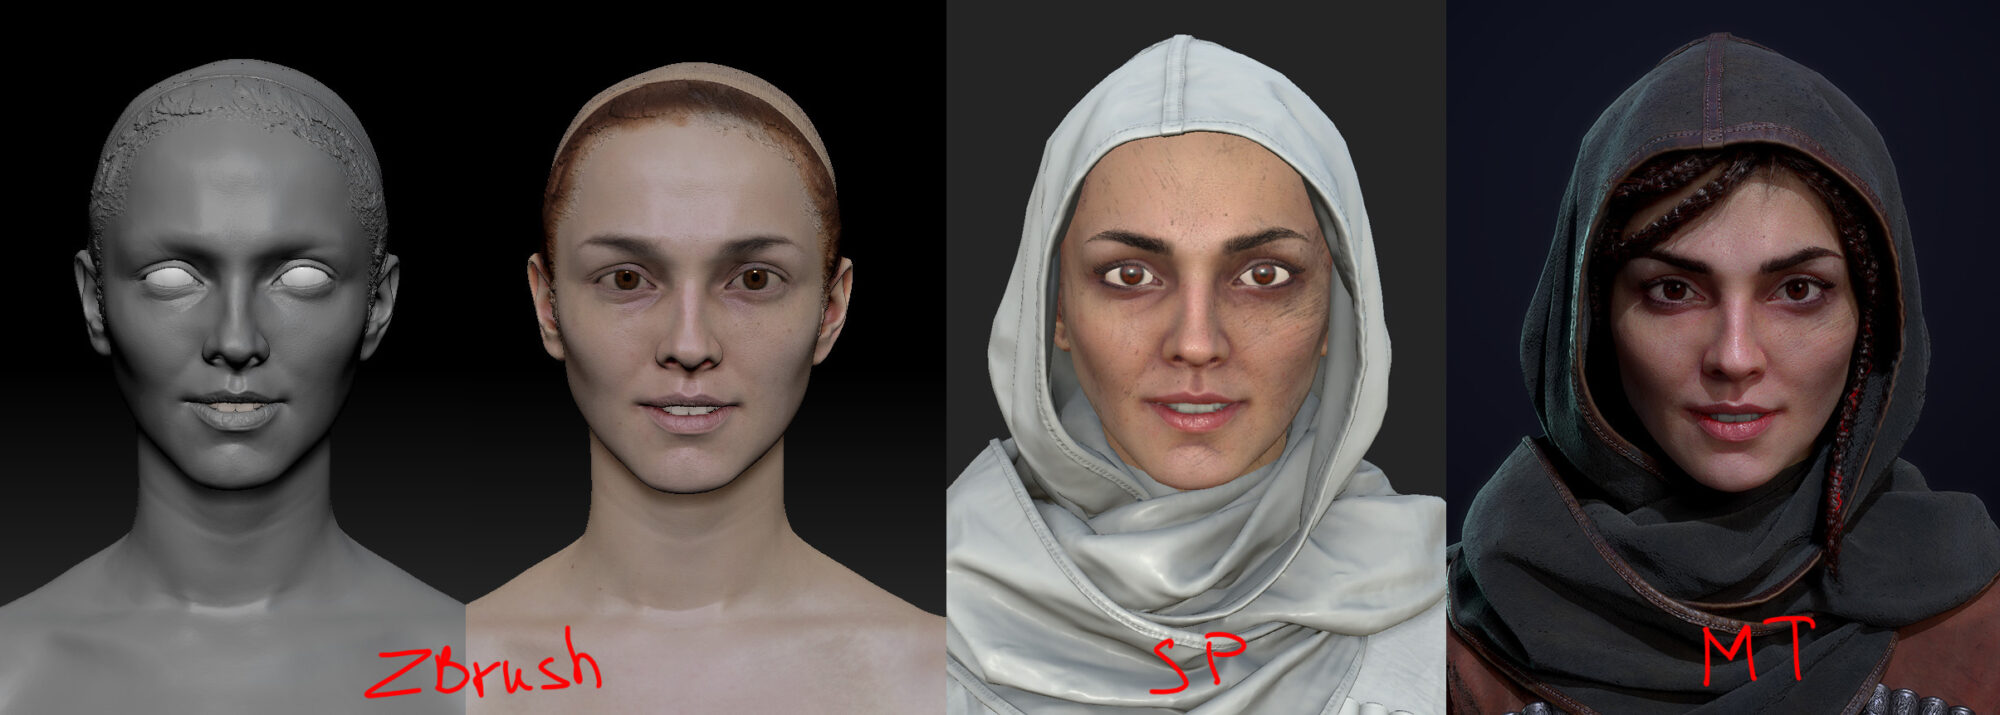
The step-by-step process of creating a face, when the highpoly is first sculpted, then the lowpoly is retouched, the maps are baked and the texture is drawn, each time led to the need to edit the lowpoly model in Marmoset, which was extremely inconvenient.
Therefore, when working with Lilac, I decided to change those. process. I began to draw the texture in SP for high and not lowpoly models, in parallel with sculpting. To be absolutely precise, I used 3 Sdivs of the original scan and baked the maps needed in SP onto it, with 6 Subdivs. This allowed me to simultaneously sculpt the face and edit the texture, and evaluate the result in Marmoset.
And only at the very end, when the face in Marmoset completely suited me, I baked all the maps: albedo, roughness, metalness on a lowpoly model, along with normal and AO.
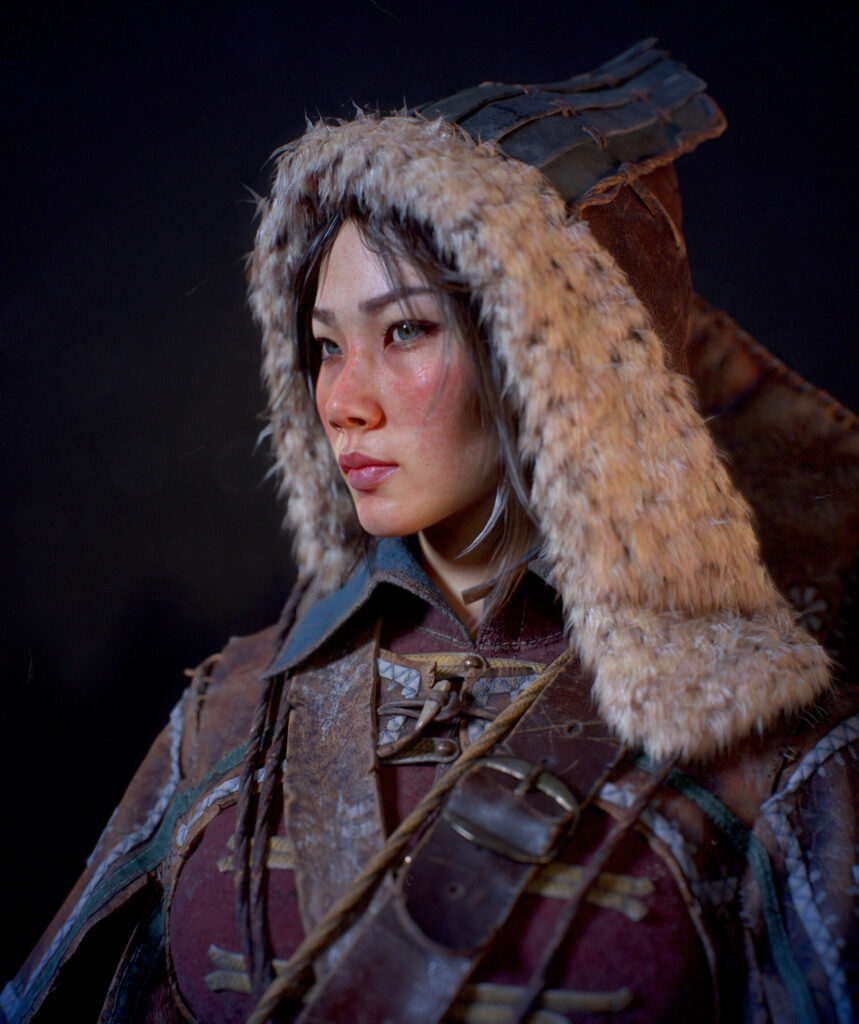
The process of working with the face: the shape was corrected, the color of the iris changed and dirt was weakened or added.

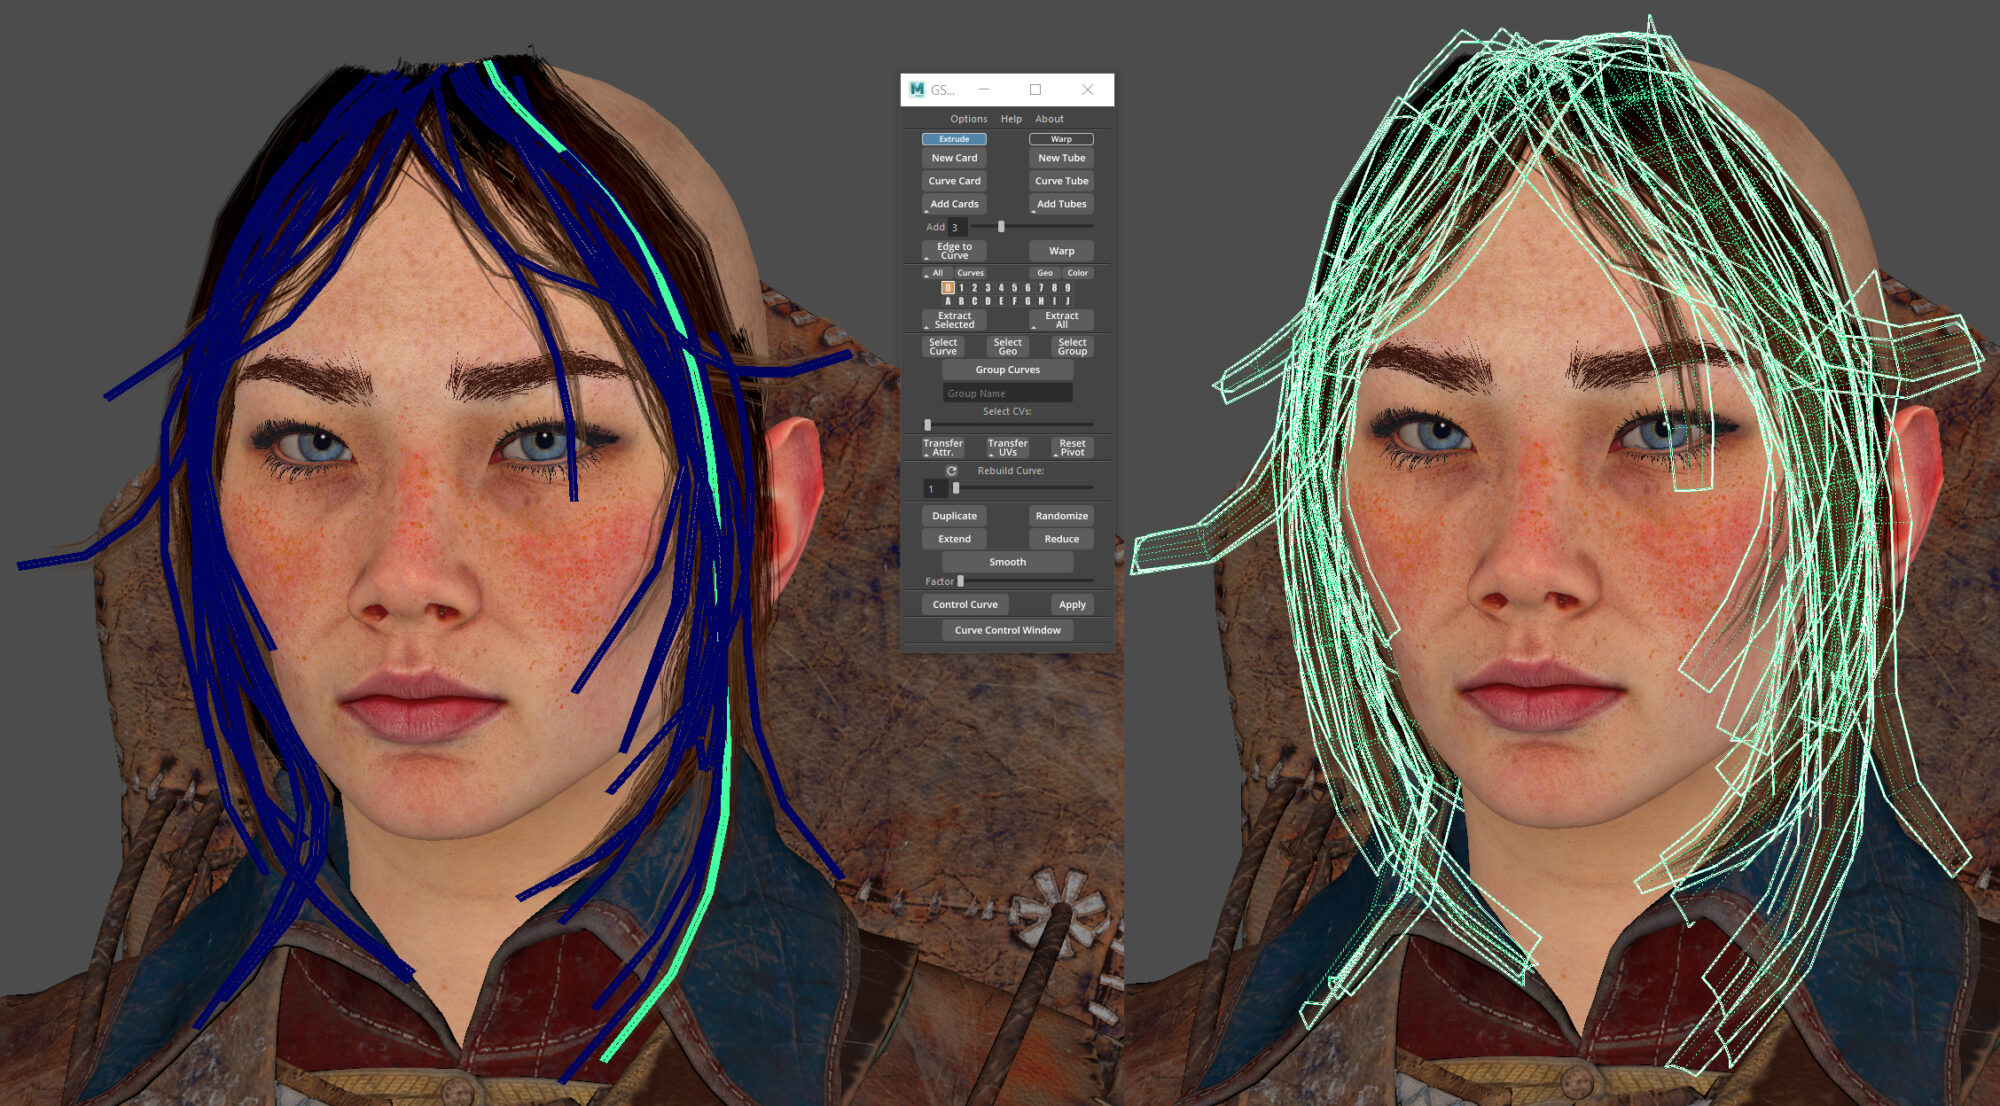
Hair
I created the texture for the hair using the application – Fibershop, they have my Black Reiter on the loading screen, but this is not an advertisement 😊. The program allows you to quickly and easily create and parameterize textures of hair strands.
And also, unload a whole bunch of useful textures. Actually, I created strands for my previous project – Black Reiter, and for Lilac I simply reused them, greatly darkening the albedo.

The polygon base for the hair was made using GSCurveTools, a simple and easy plugin for Maya.
Fur
The basis for the fur was also made in Fibershop. And here is the polygonal base I generated in ZBrush using fiber mesh. Combining 3 meshes with different parameters, I got a fur model of 80k polygons, I mapped each of the meshes into my fur texture section.

The model is now completed!
Presentation
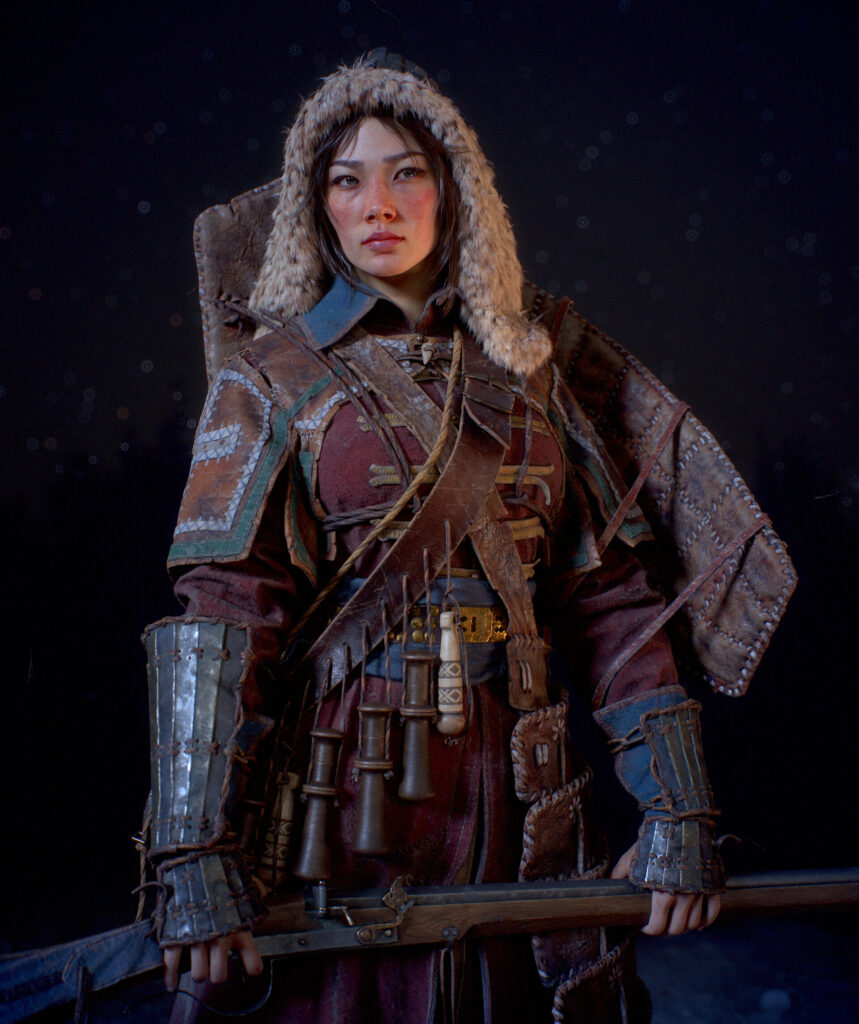
Now it’s time to prepare the presentation.
I skinned the model and used the standard rig in Maya to make it more comfortable to pose. The pose picked up almost immediately, a little later I added a couple of nuances.

An interesting incident turned out with the stars, because. Initially, I planned to make snow using a particle system, but after evaluating the result, I decided that the stars would come out of it better.
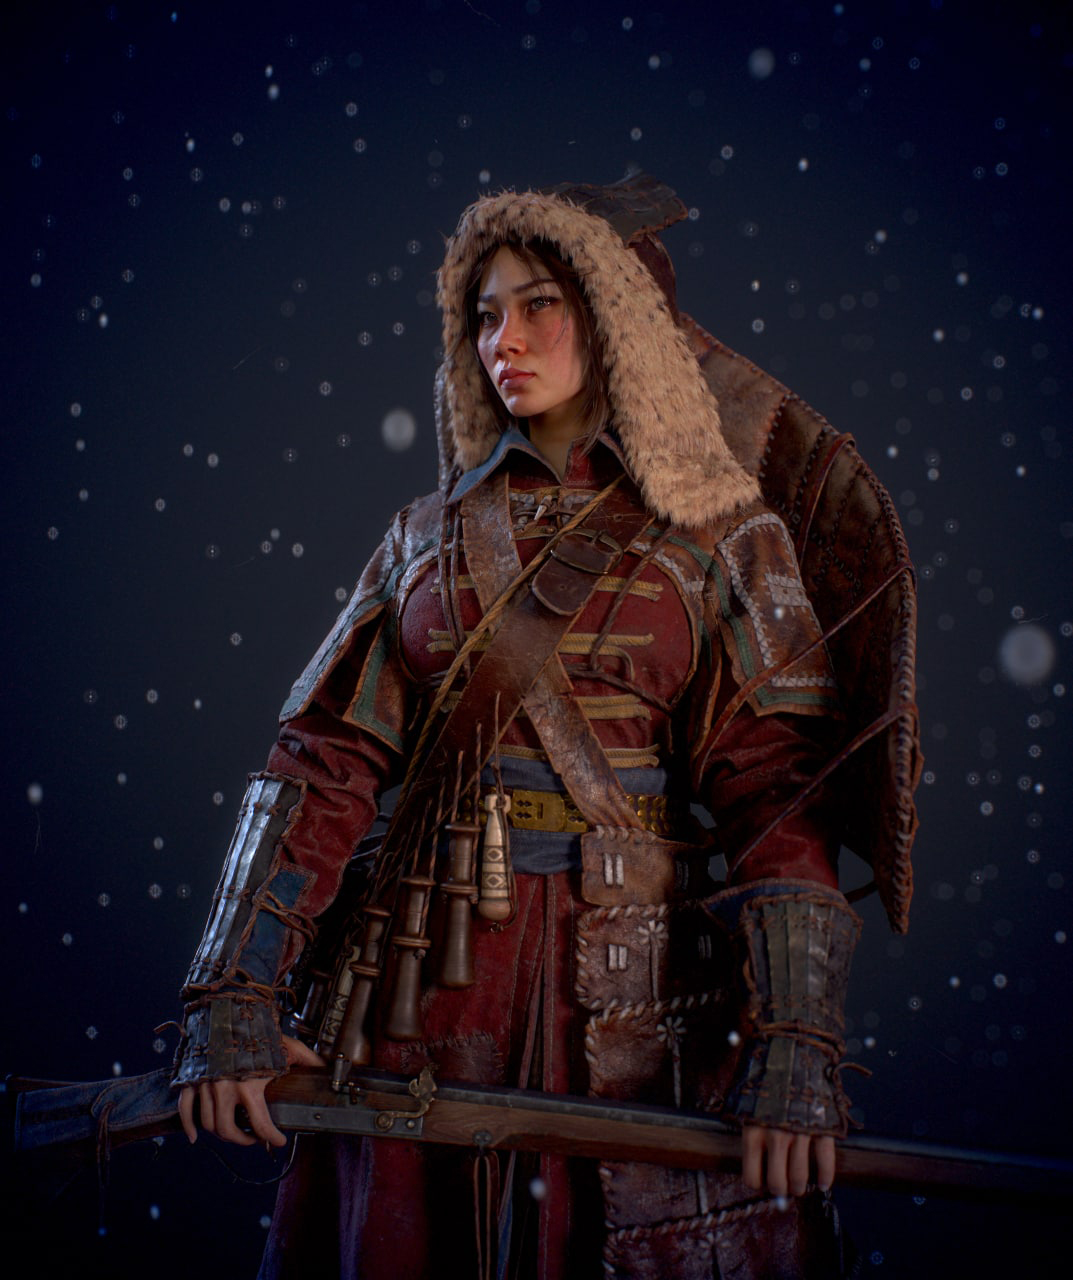
In addition to the stars, I added a forest block as a background. In this scene, I used only Direct lights for lighting, I haven’t used them for a long time, but suddenly they turned out to be very convenient when choosing lighting for the face, because they could be placed right in the portrait foreshortening and rotated, immediately observing the result, without additional. windows.

And finally, here is a turntable!
Thank you for reading, I hope you enjoyed and maybe learned something in the process.
Read more articles
You might also like these articles.