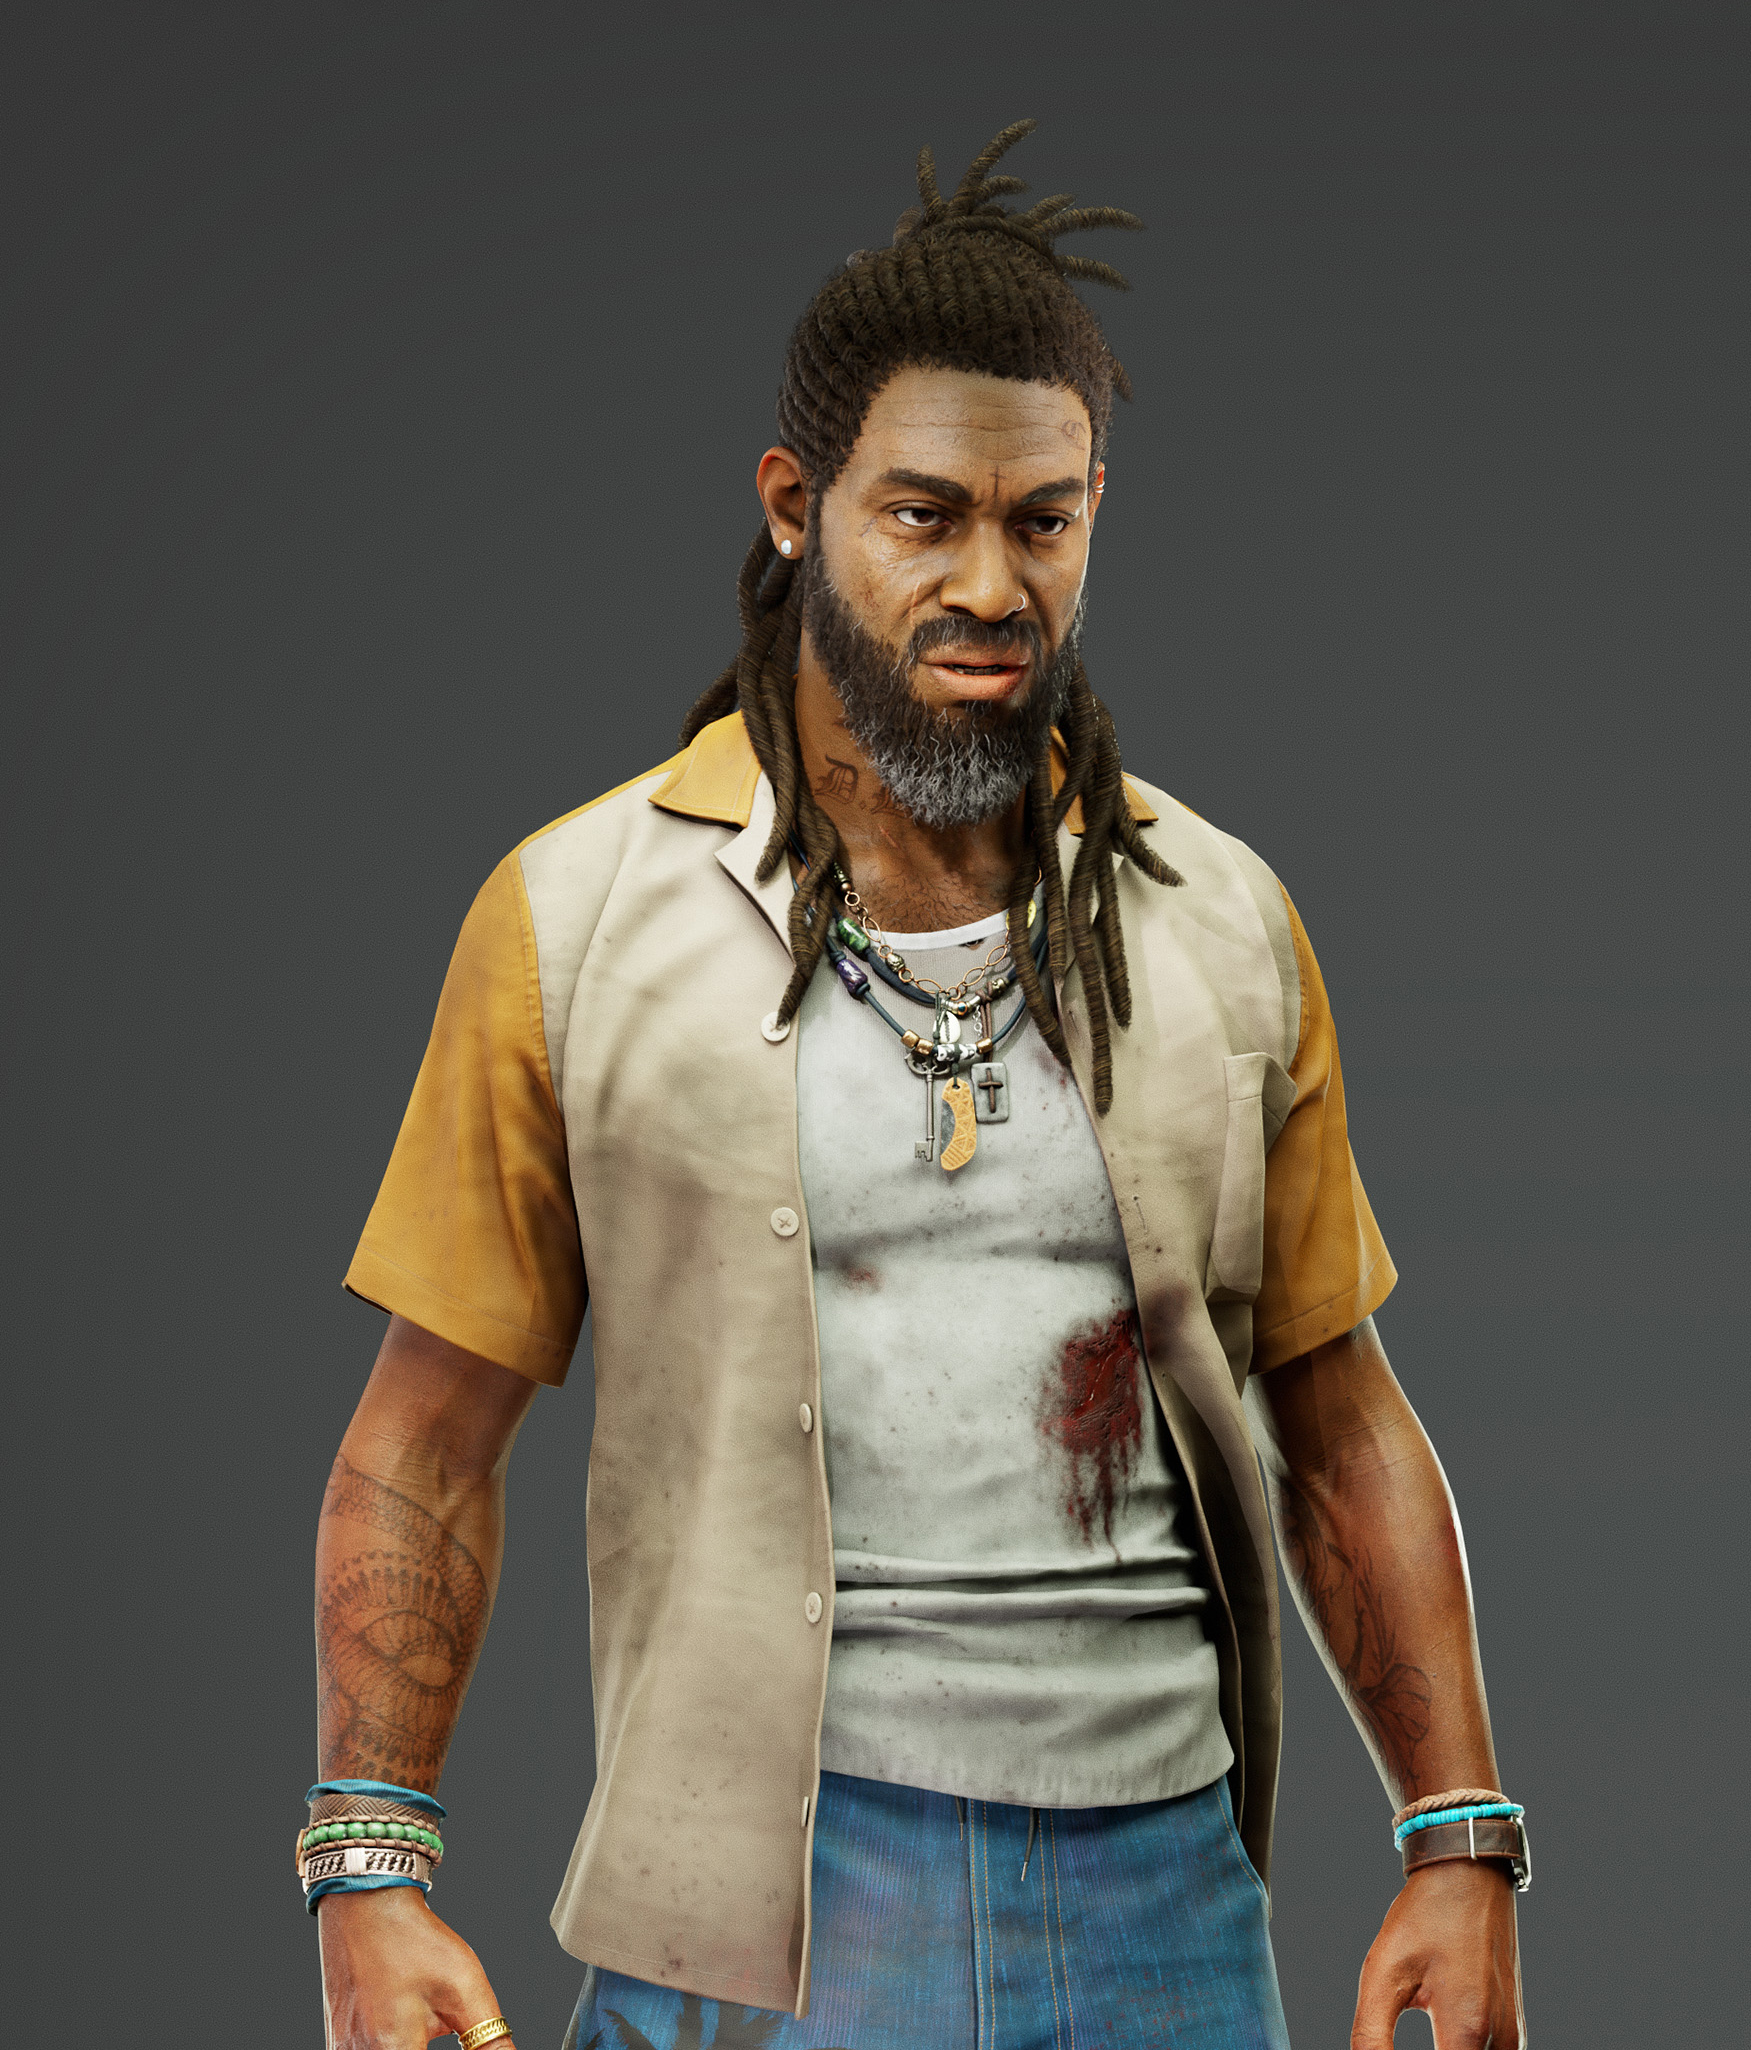
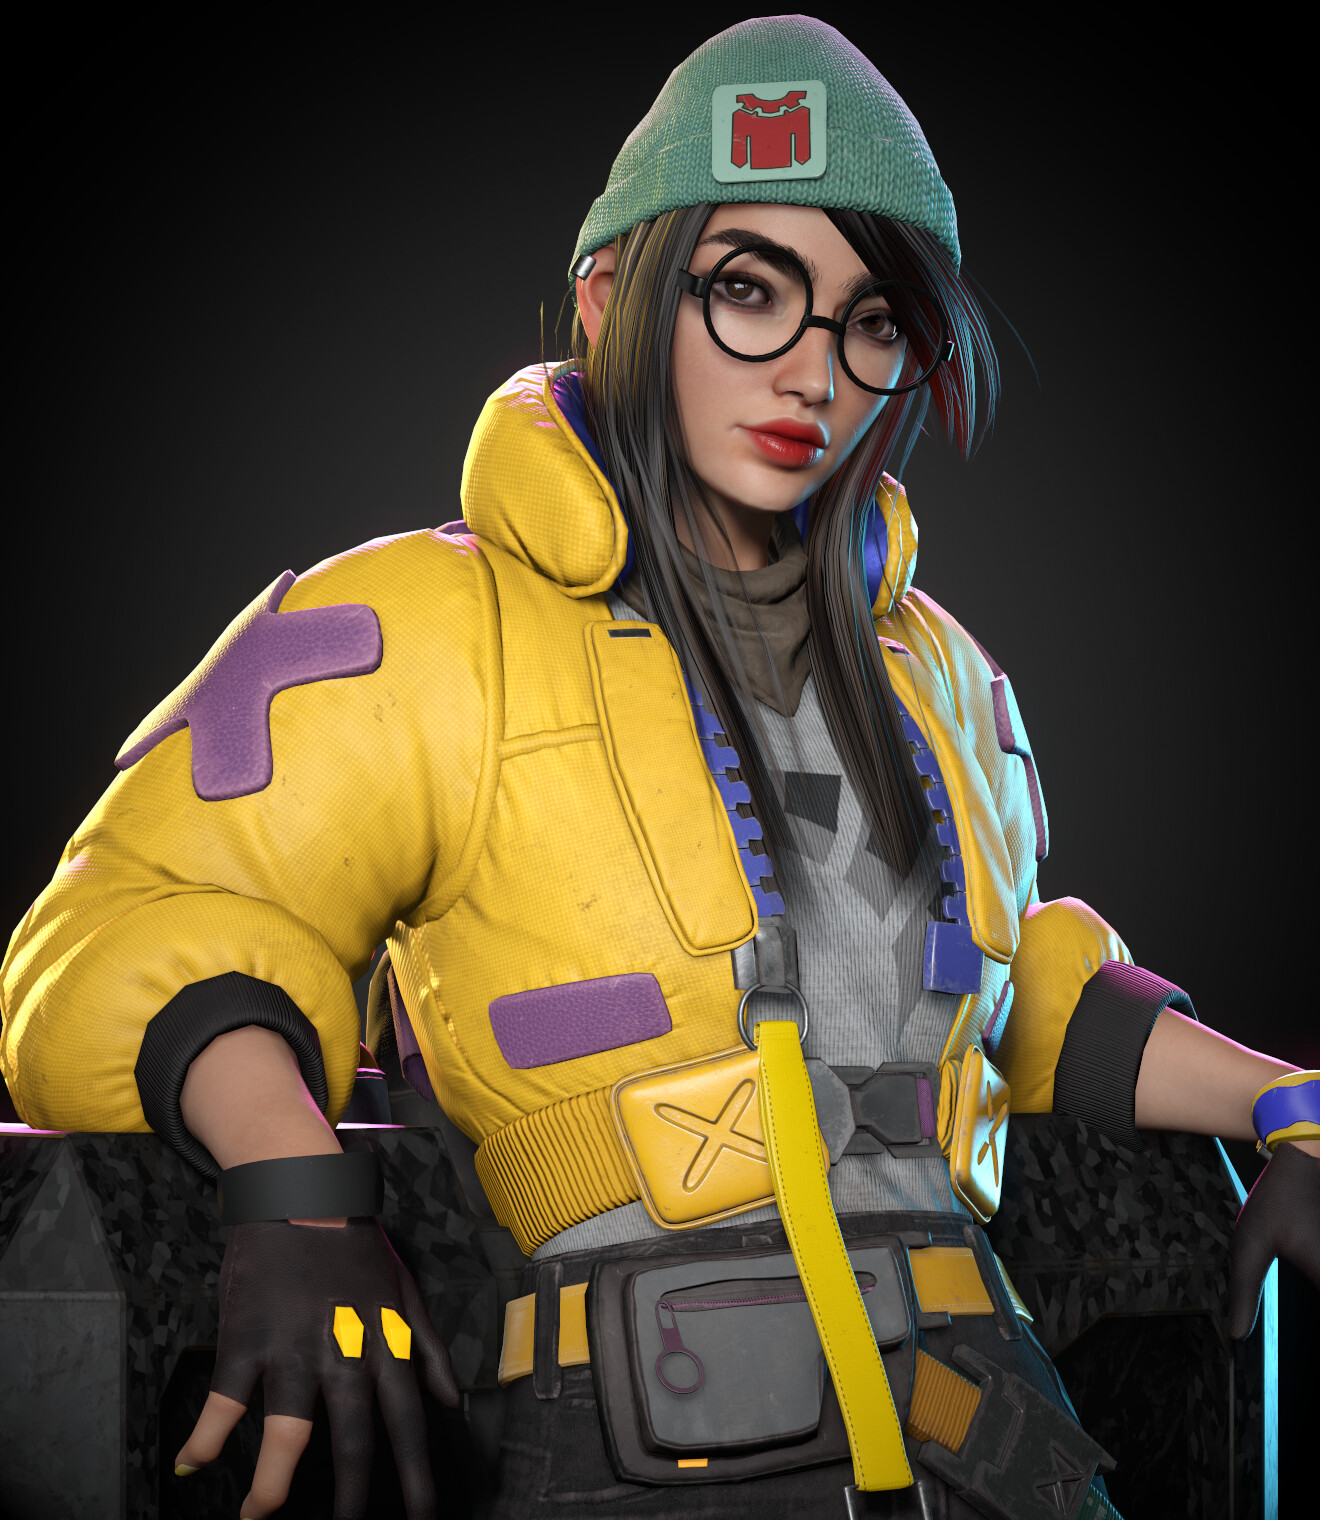
Killjoy
Introduction
Hello there! My name is Ama Ro, I’m a Character Artist from Puerto Rico.
References
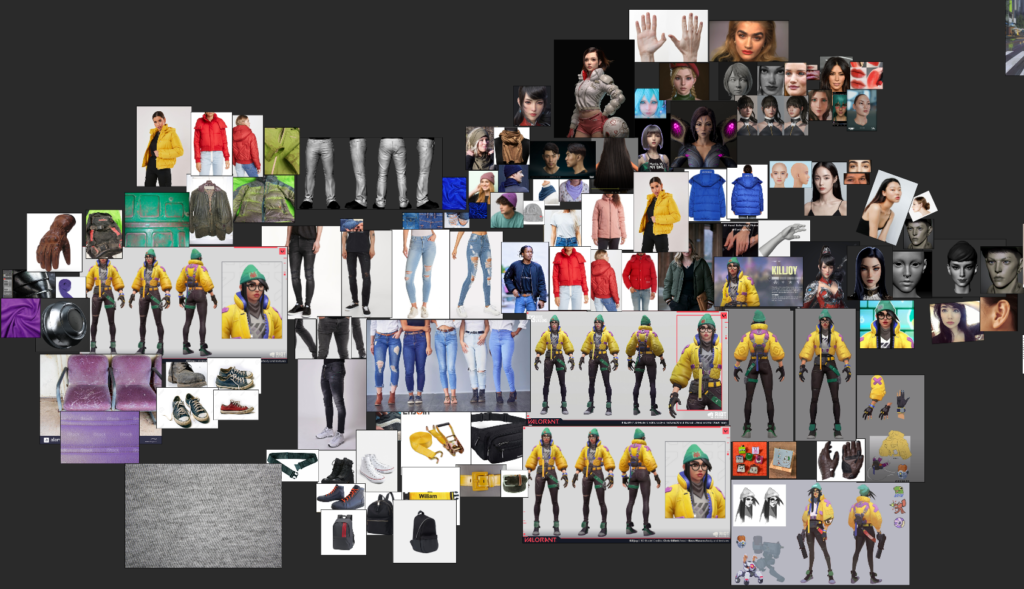
I always start with body/face references, slowly adding more references based on which part of the outfit I’m working on. When looking for the references, I like to consider which area I want to improve on. Knowing that, I look for twice as much reference.
I always decide which material I want an accessory to have before the texturing phase. These are a few of the final board of references I found through google images and Artstation:
Body
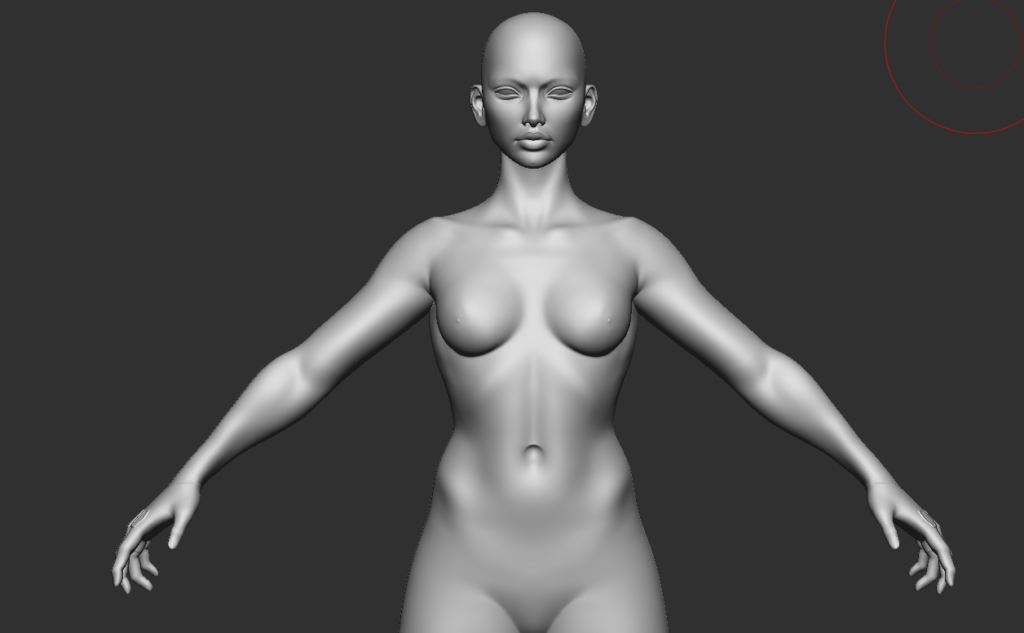
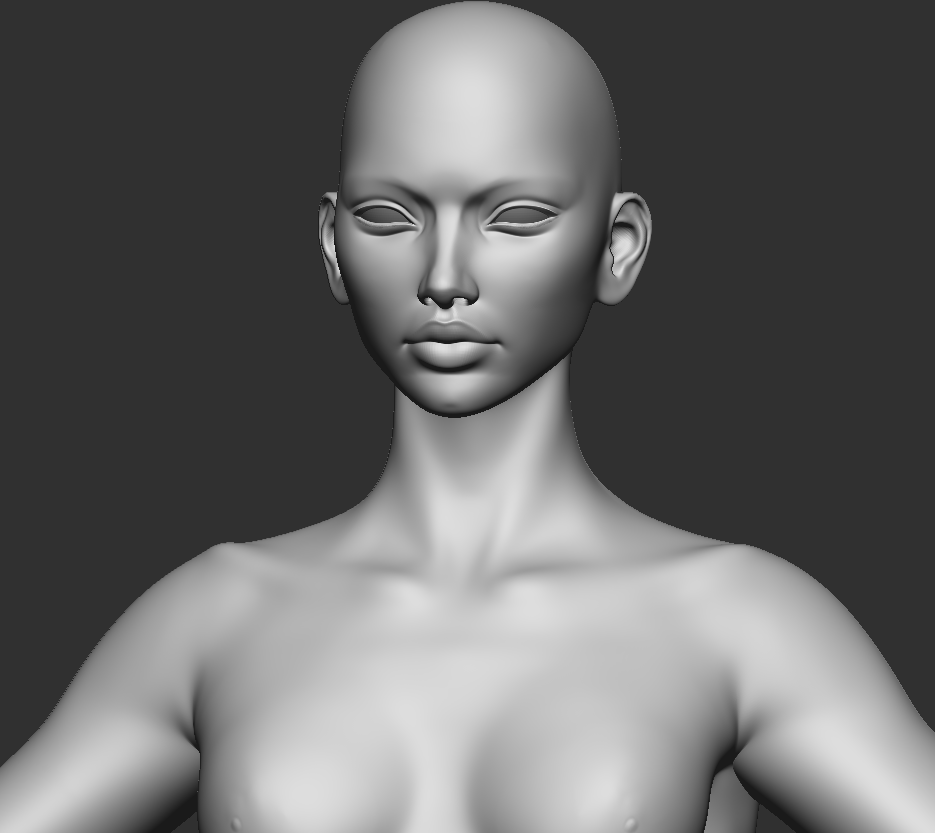
Now, I begin sculpting the body in Zbrush, in this phase I focus on the anatomy and face. I usually use my previous character models base with a lower poly count. I always try to improve the anatomy and change the face to match the character I’m creating.
A great tip is to use 3D scans as anatomy references, my mentor “WendyDeBoer” on Artstation suggested me this and I have found it very useful. In regards with matching the characters face to my realistic attempt, I usually like gathering references of people that look similar to the character and I also consider what I think makes that character recognizable.
For example, when I think of Killjoy’s face, I think of big lips and thick eyebrows. Now that I have this information I try applying it, but slightly softer to match realistic yet stylized proportions.
Clothing
Once I finish my base I like to start modelling a lowpoly base for the clothing. Once I do this, I play around with dynamic subdivision and the Z-modeller tool on Zbrush. I usually don’t model all the accesories bases just yet, I like creating the most noticeable pieces (jacket, pants, shirt) first.
After doing so, I start sculpting on them, of course, using and following the references of the desired clothing item. Once I’m happy with the sculpting of these pieces I start repeating the process with minor accesories such as her beanie, belt, backpack etc.

Modelling & Retopology
Once I finish the sculpt and have polished all parts of the character, I start the retopology and modelling stage. To save time I usually like using the lower division version of a few parts and clean the topology of them.
Only do this if the lowpoly division of the sculpt has a reasonable topology to work off of. I do not do this method nor recommend this with the body, due to the body sculpt not having a clean topology. Unless you use a base made for bodies that have a clean topology, either way, always check the exported sculpt to make sure its clean. When retopologizing and modelling by hand I use Blender.
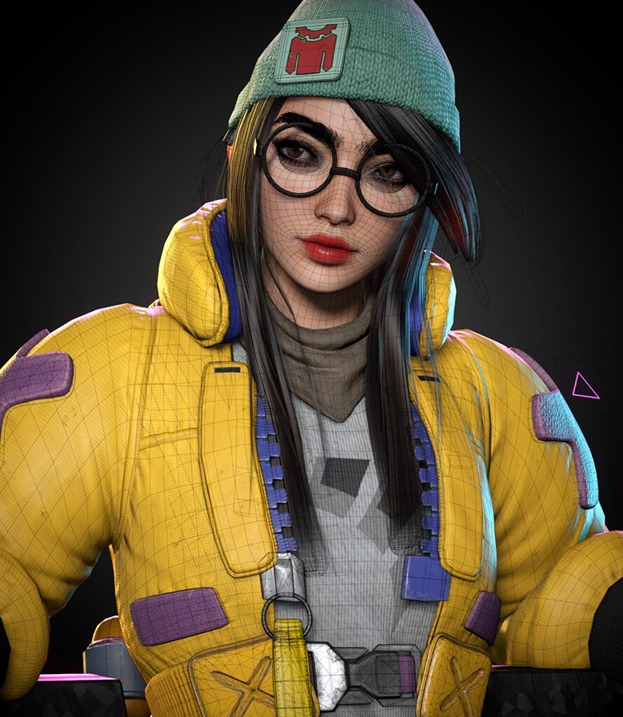
In this stage I also start working with the hair. My method of creating hairs consist of using tubes as a base then on top using hair cards for more realistic hairs. I use hair tubes to help me with the volume, that way I don’t have to worry about a hair card showing the inside of the head or looking flat.
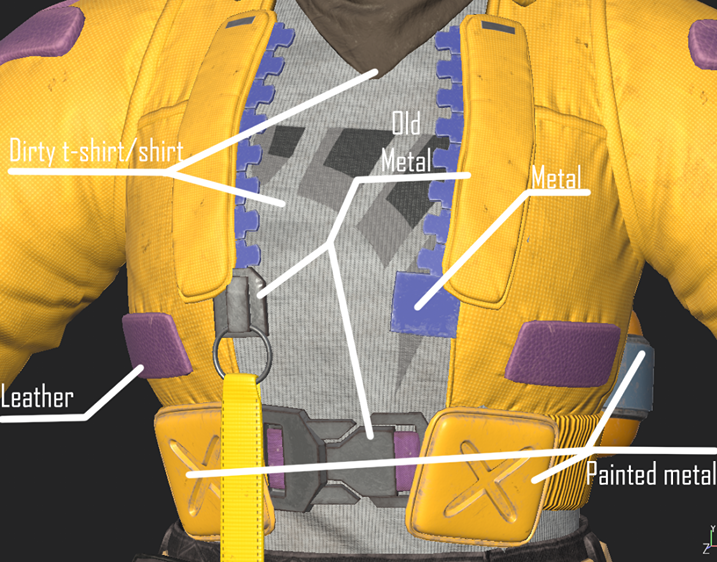
Texturing
Finally!
This is my favorite part yet the scariest. In this stage I gather as many references I need for the piece I’m working on. Regarding matching the material, I would recommend trying to copy it as much as possible.
I used to guess what a material might look like, instead of properly studying/copying it. I used to do this with skin and leather, I would just guess without actually gathering references. I didn’t know skin had so many diferent color variations until I looked for references.
I now repeat this process with other materials.

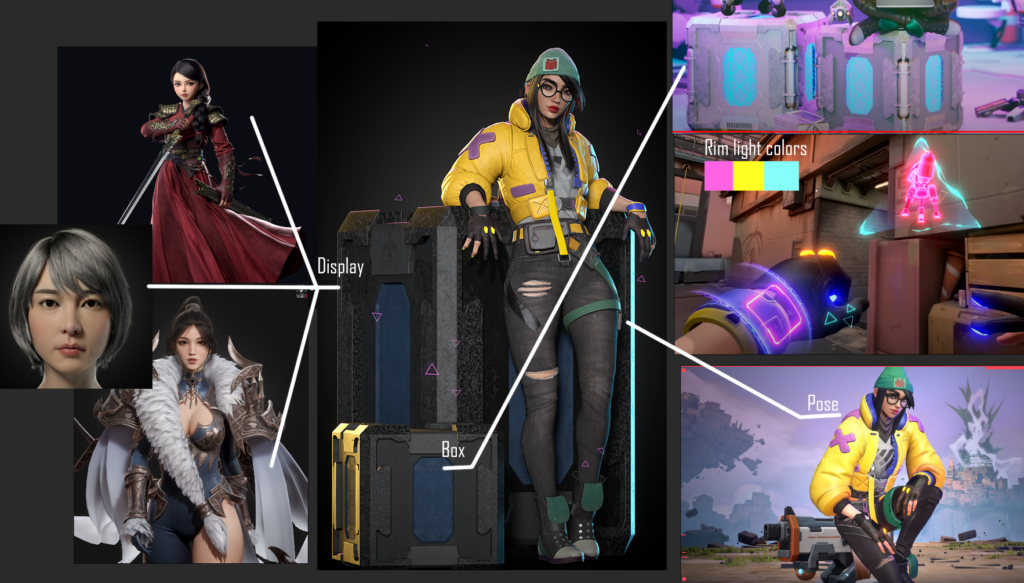
Rendering & Lighting
After a long process we are finally reaching the last stage, soon saying goodbye! Here I start deciding what I want to do, to showcase Killjoy. As always, I look up some references of renders I really enjoy.
I wanted Killjoy to have an accurate pose and lighting set up to her character, so I decided to look at Killjoys trailer and concept to see what color scheme would be a nice pop and pose I wanted her to have.
For the pose I looked for ingame shots or illustrations to get the vibe that I wanted her to feel like. I decided to go for a relaxed, smug yet slightly happy vibe.
Conclusion
We have reached the end!
This is basically my process, of course I left out some pretty boring stuff such as UV and rigging, its pretty tame. In conclusion, reference and patience is key! I used to be very inpatient but thanks to my mentor, I was able to notice that patience is the most important factor on creating a good result.
Doesn’t work out the first time?
Take a small break, go back to it with some relaxing music and take the time you need. I hope you learned a thing or two, have a good day and take care. Goodbye!! Adios!!!
Read more articles
You might also like these articles.