Katana
Introduction
My name is Kirill, and I’m a 3D modeller with eight years of professional experience. I live in Voronezh, Russia. My educational background is in programming, but I started my career in animation. This experience provided me with a strong foundation in visual arts, and since then, I’ve focused on the 3D field.
I consider myself a generalist, as I enjoy working on a wide range of tasks—from concept creation to final video processing. I work with various aspects of 3D production: modelling, texturing, rendering, animation, and compositing. My goal is to create high-quality, cohesive projects that captivate and inspire.
In my portfolio, I aim to showcase works that highlight my diverse skills and ability to work with different styles and approaches.
I’m always open to new projects and excited to take on interesting and ambitious challenges!
Project
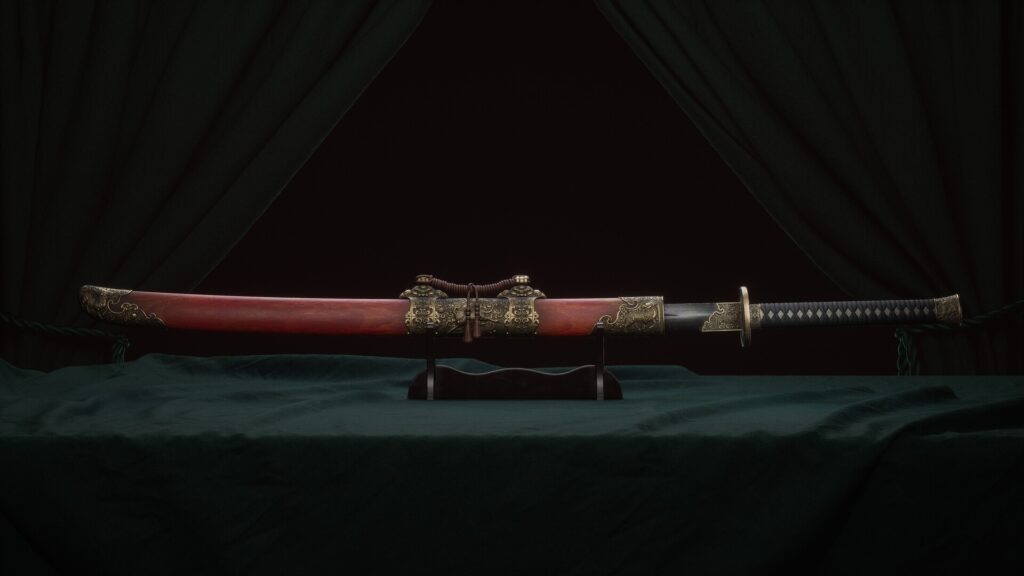
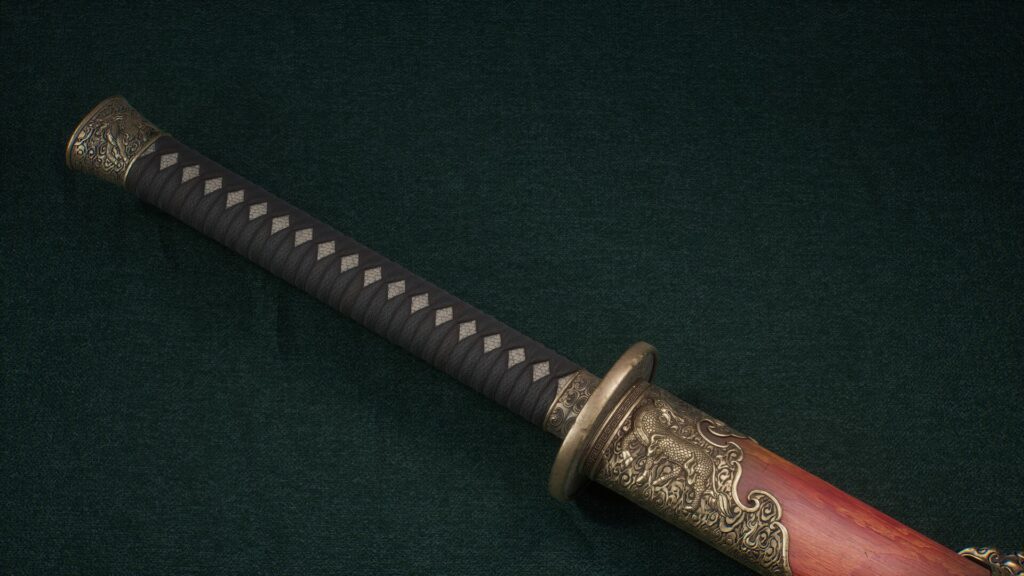
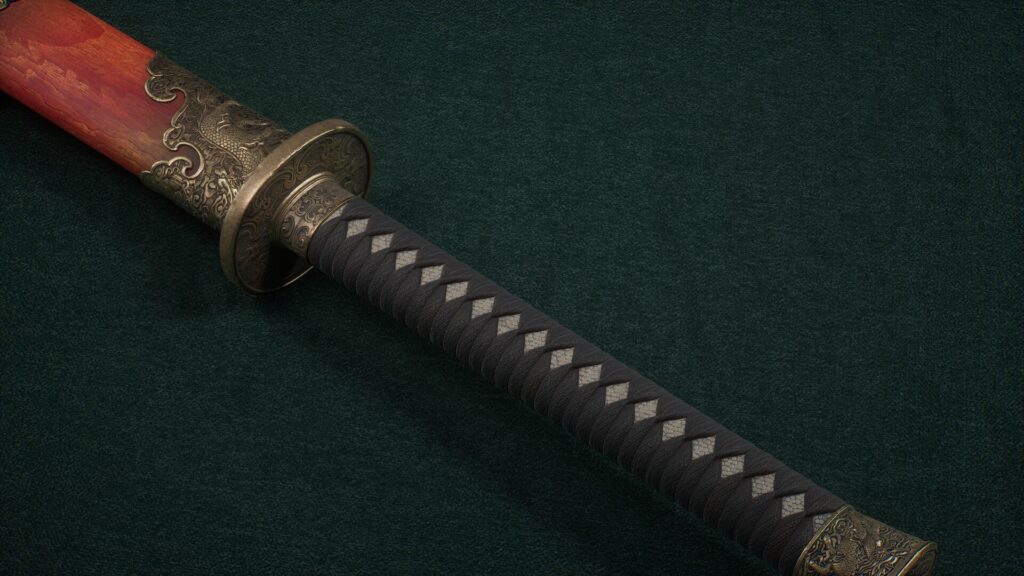
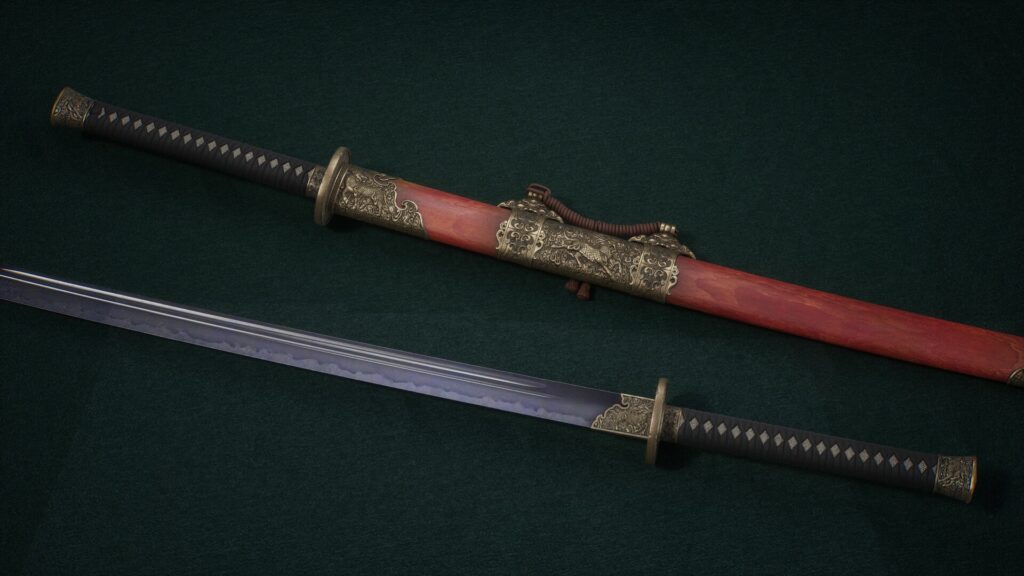
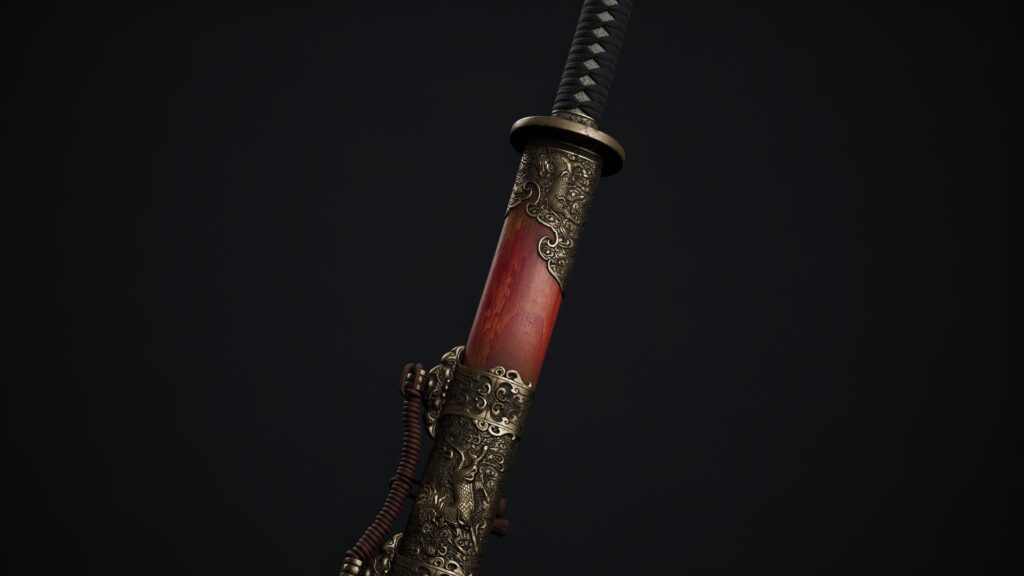
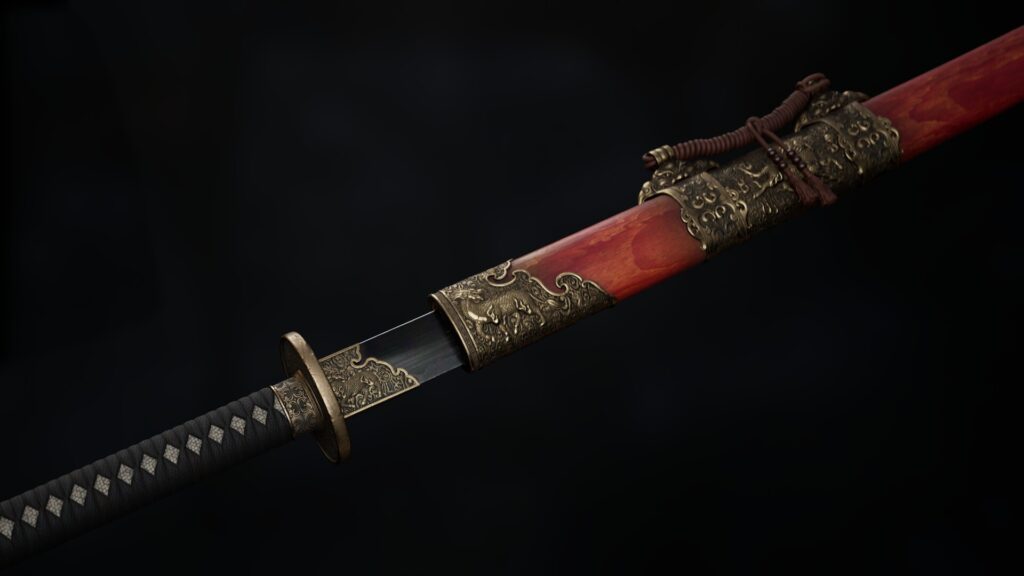
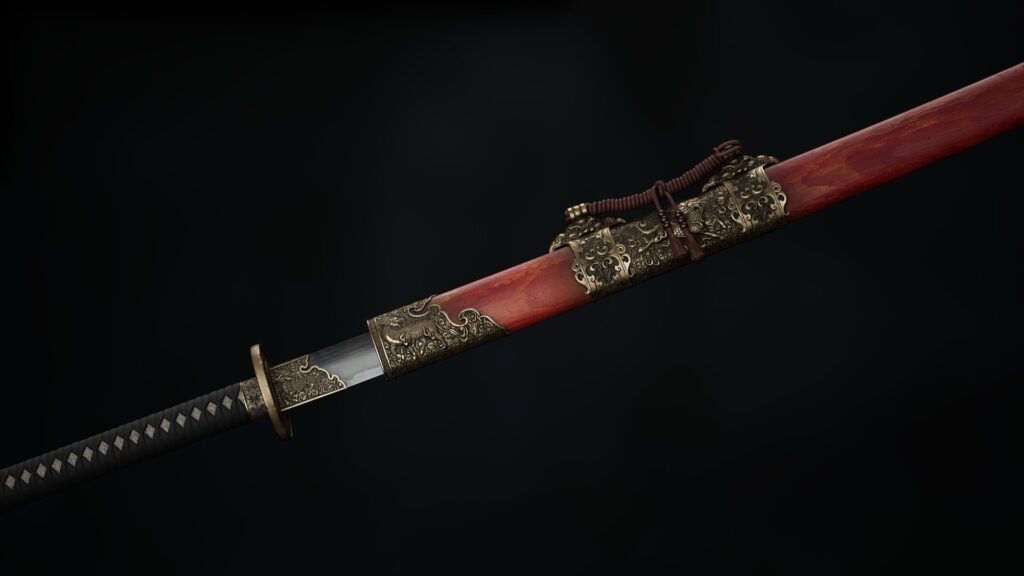
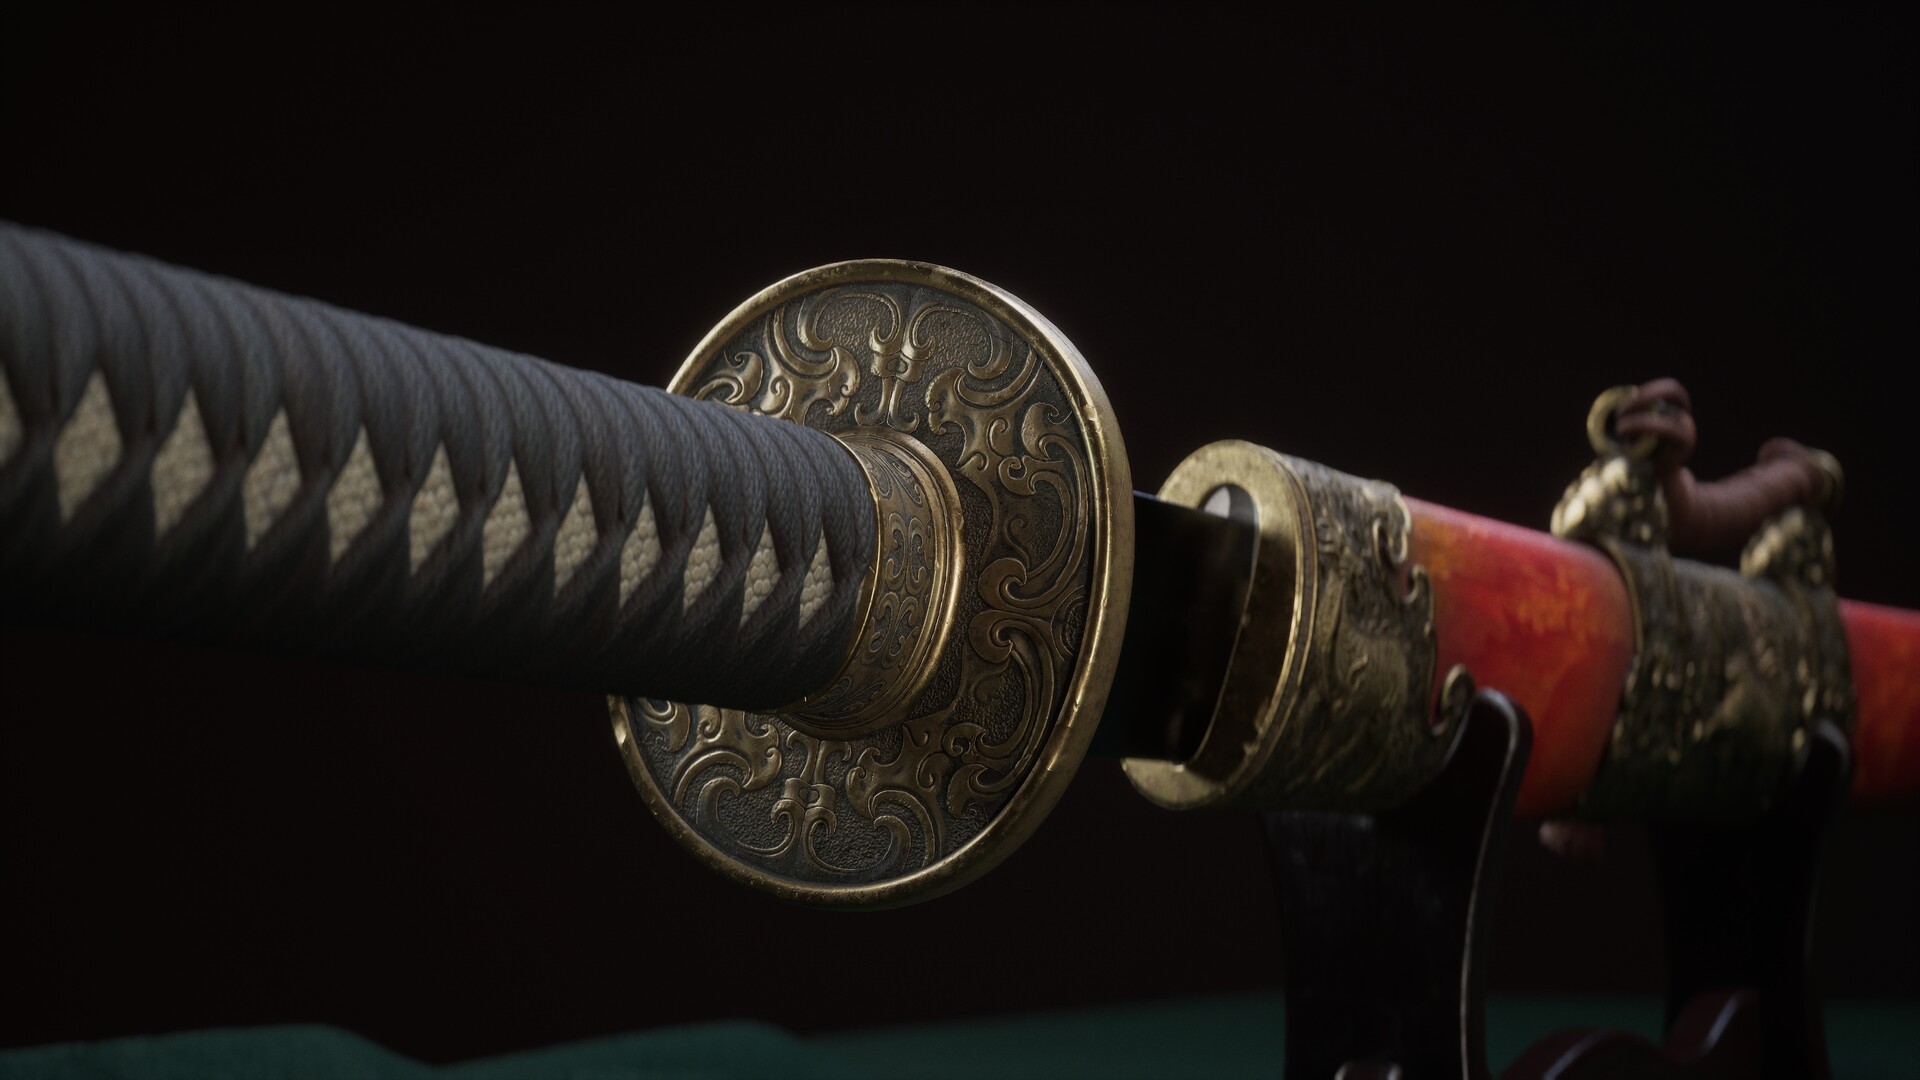
This project began with a desire to create several photorealistic swords, each reflecting its own era.
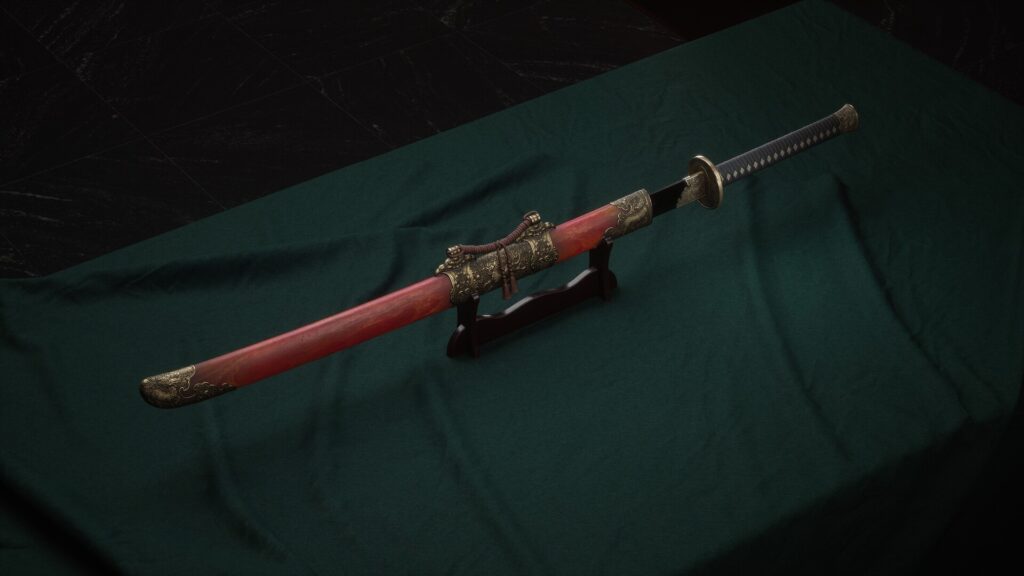
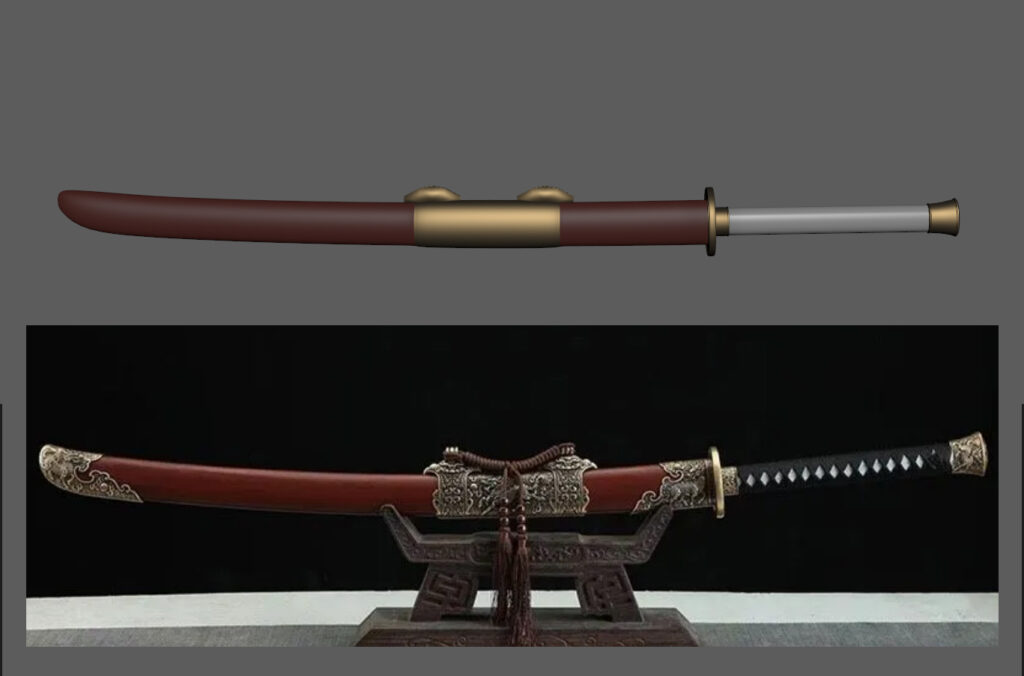
For this article, I chose a Japanese sword and decided to recreate it with 98% accuracy, allowing myself only 2% creative freedom.
In this article, I’ll walk through the process of creating this sword.
To be honest, I didn’t know the name of this weapon at first – I was simply browsing for modeling references online when I stumbled upon this beauty on eBay.
I will go through every stage: modeling, sculpting, retopology, UV mapping, texturing, and working in Unreal Engine.
I hope my experience will be helpful to those looking to improve their skills in creating 3D objects and that this article will highlight key aspects of crafting intricate patterns.
Tools
For this work, I used:
- Maya: Modeling and UV mapping
- Substance Designer
- Substance Painter
- ZBrush
- Marmoset Toolbag 4: Baking maps
- Unreal Engine 5: Final render and post-processing
References
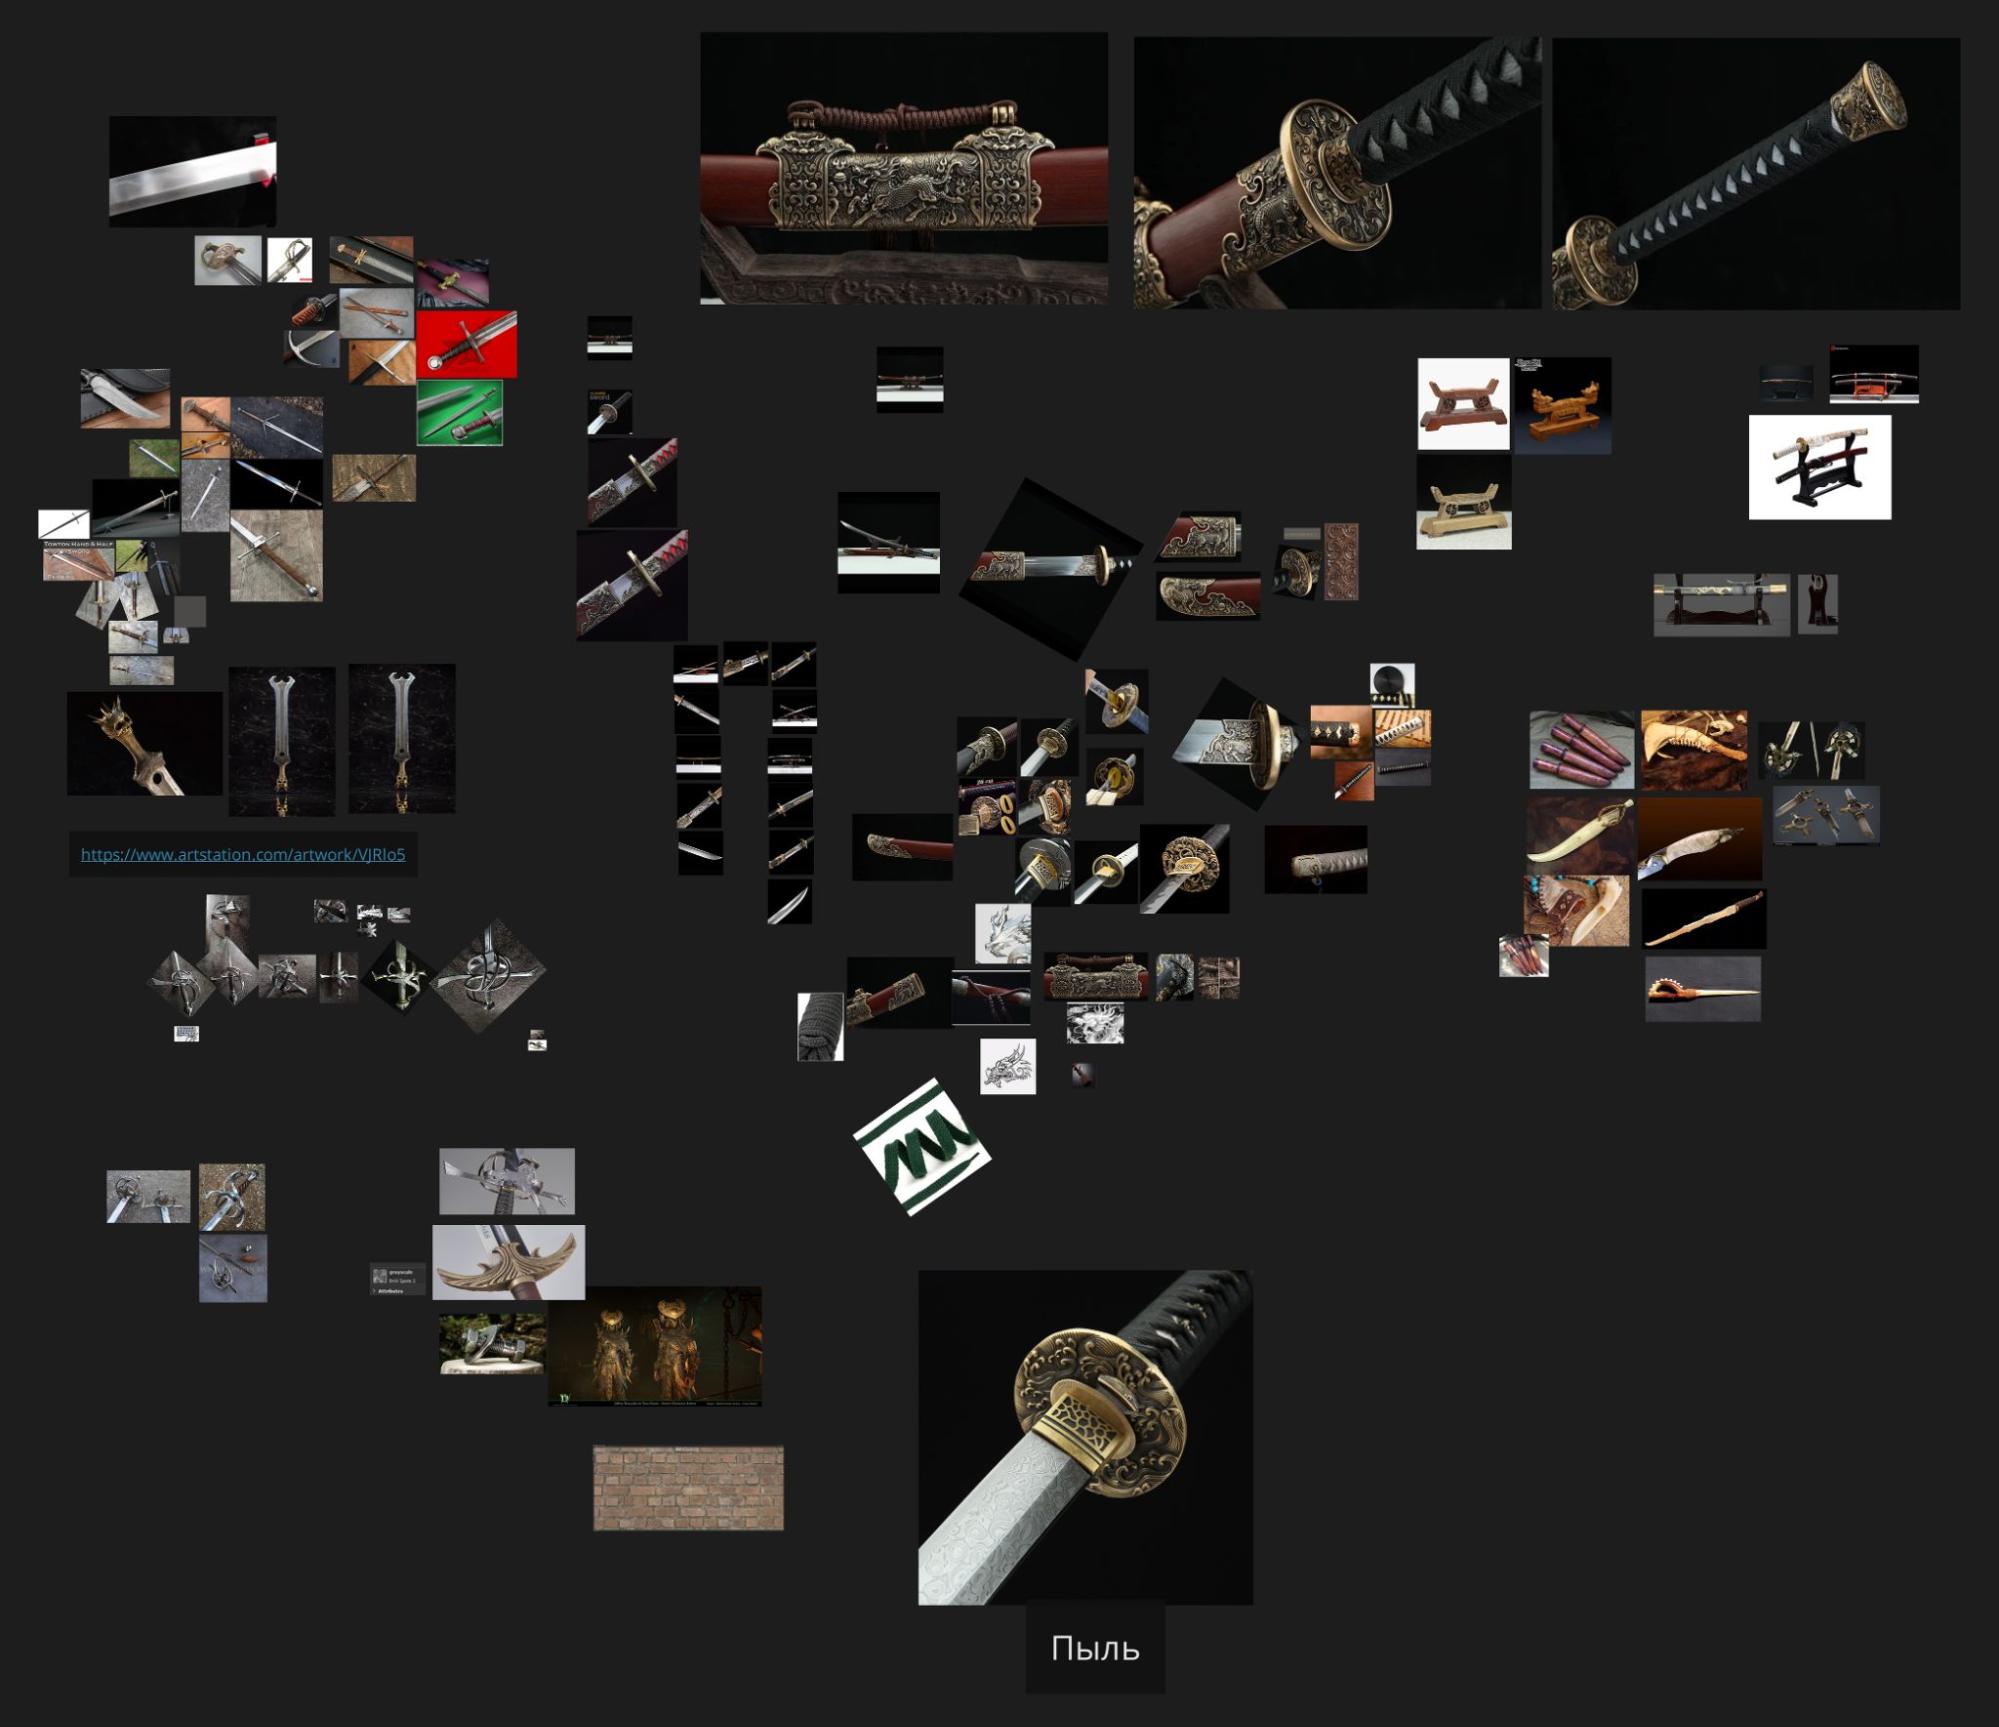
I found images of this sword in an online store. Overall, the quality and number of pictures were decent, showing patterns and fine details, which covered about 80% of my reference needs.
The remaining images were mostly focused on the surface materials and examples of texture implementation.
Blockout
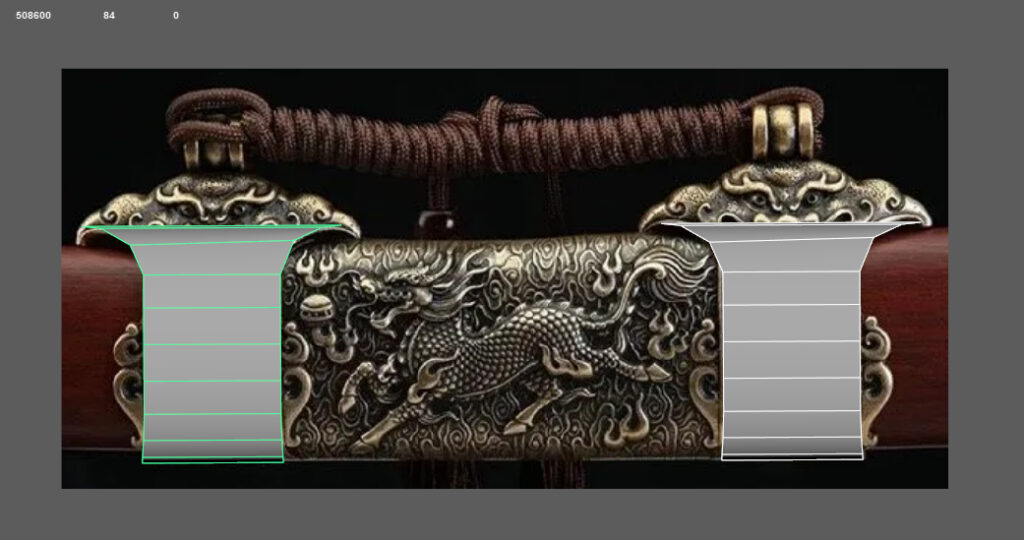
I always start with blocking shapes. Using the reference in a 3D scene, I modeled the basic large shapes of the sword based on the image.
In Photoshop, I cropped individual parts of the image to align them with the modeling process, ensuring the design and shapes were as accurate as possible.
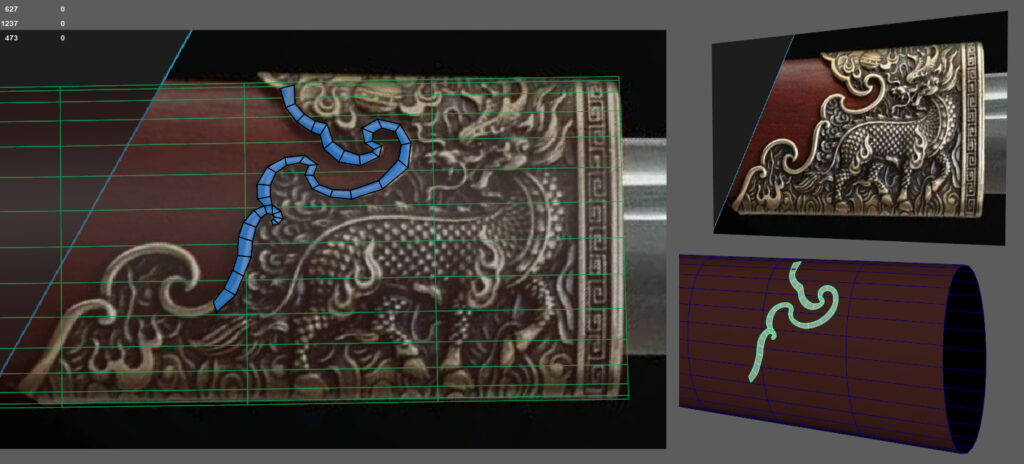
For more complex elements, I used the Quad Draw tool, placing the scabbard’s base into Live Surface to make the new geometry curved right away.
Next, I added thickness to the model, beveled the edges for smoothing, and applied Smooth to avoid issues with N-gons in ZBrush.
With this, the blockout for sculpting was complete, and I moved to ZBrush for detailing.
ZBrush Sculpting & High Poly
Next comes sculpting and detailing, but some technical preparation was needed first.
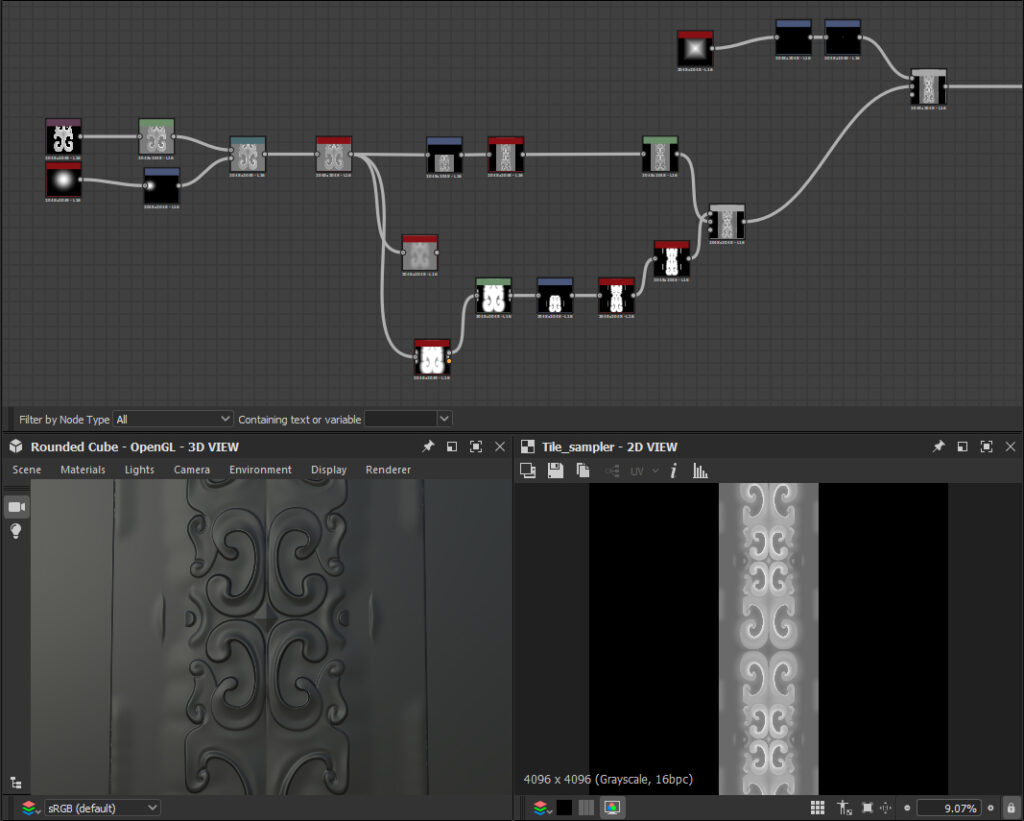
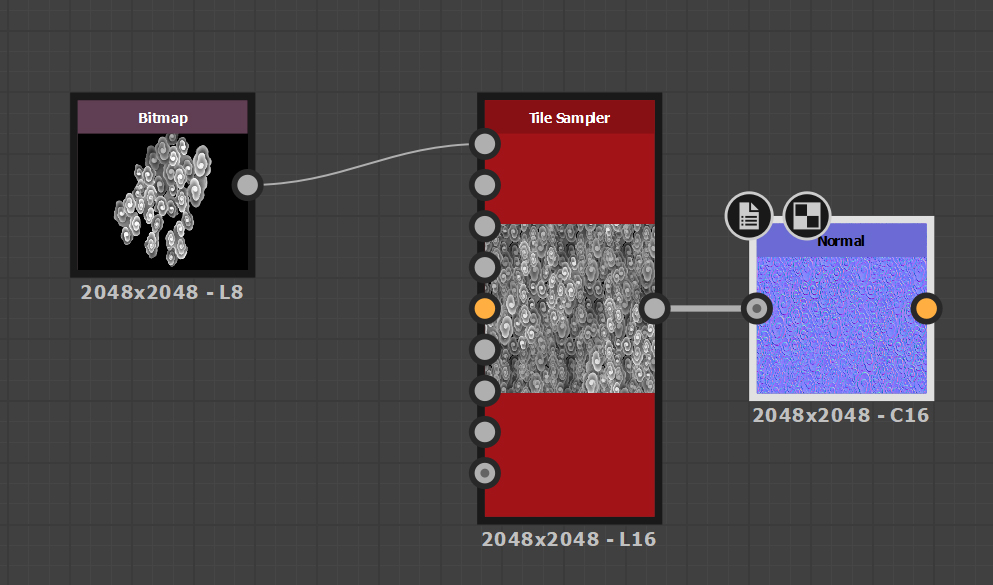
I found an image of Japanese clouds similar to those on the sword. Using Photoshop, I isolated individual elements to make it easier to tile them in Substance Designer and created a height map for ZBrush.
Since the original image was low quality, I upscaled it using AI tools. I also converted it into a Normal map to better monitor the pattern application quality in Maya.
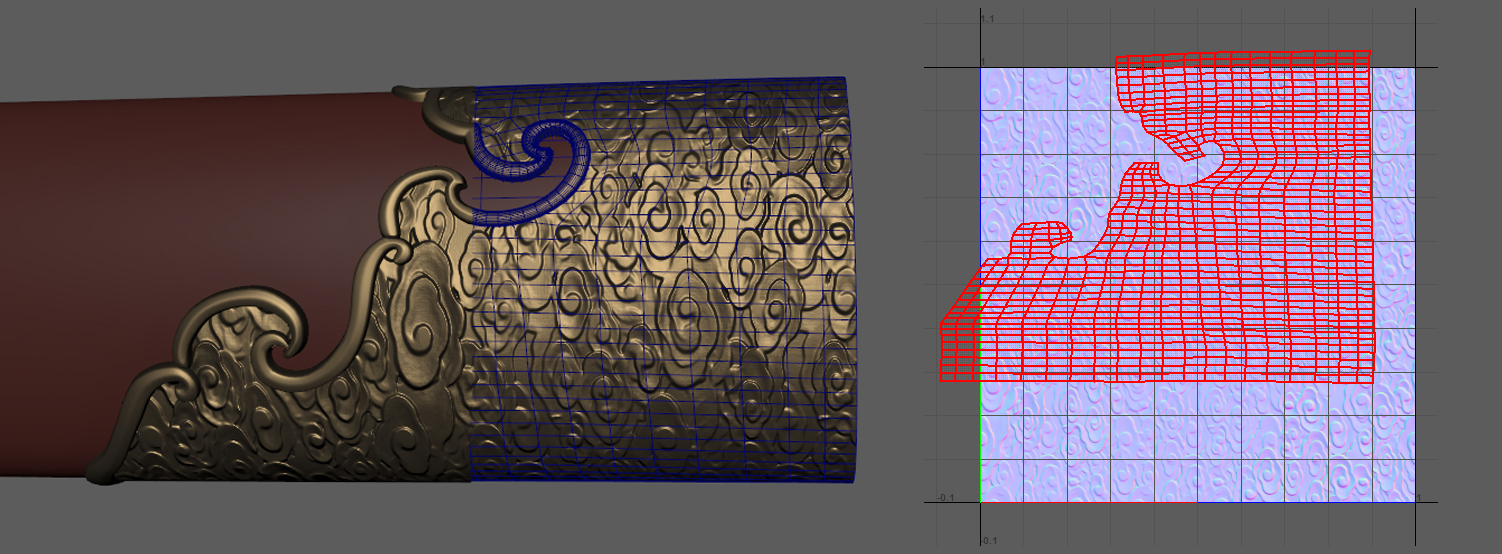
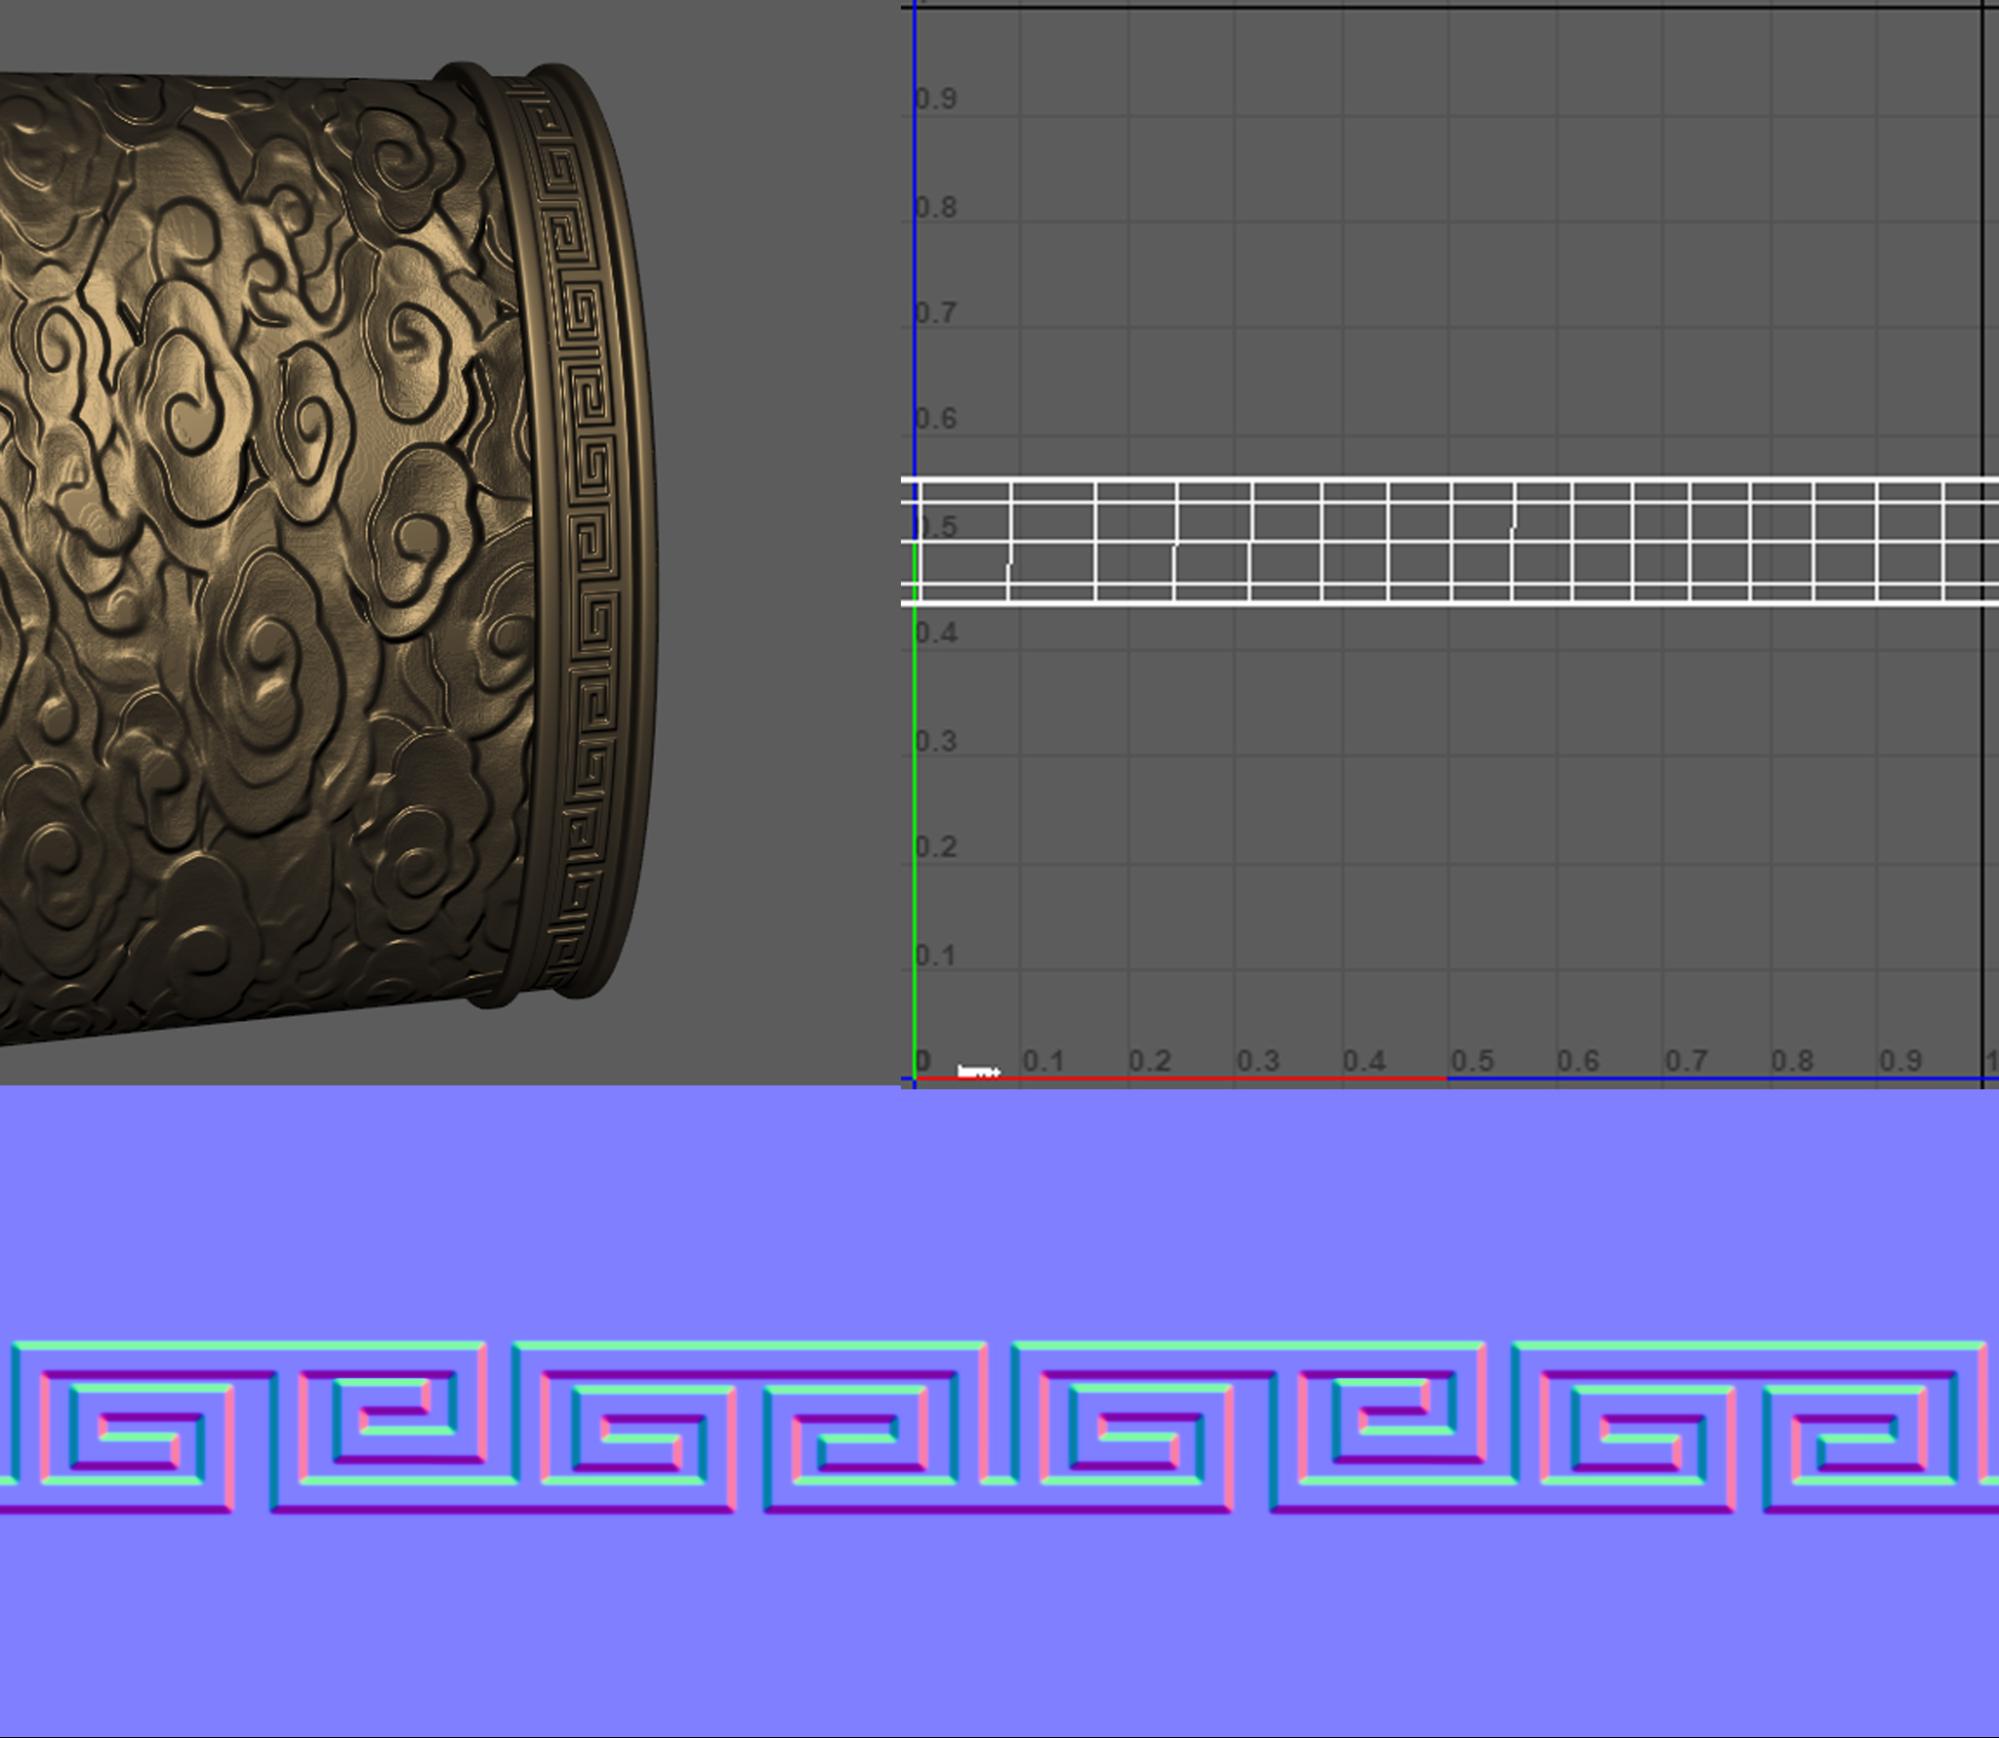
Then, I unwrapped UVs on the MidPoly, created a material, and assigned the Normal map with the cloud patterns.
I adjusted the UVs to achieve satisfactory results and repeated this process for all other surfaces featuring this pattern.
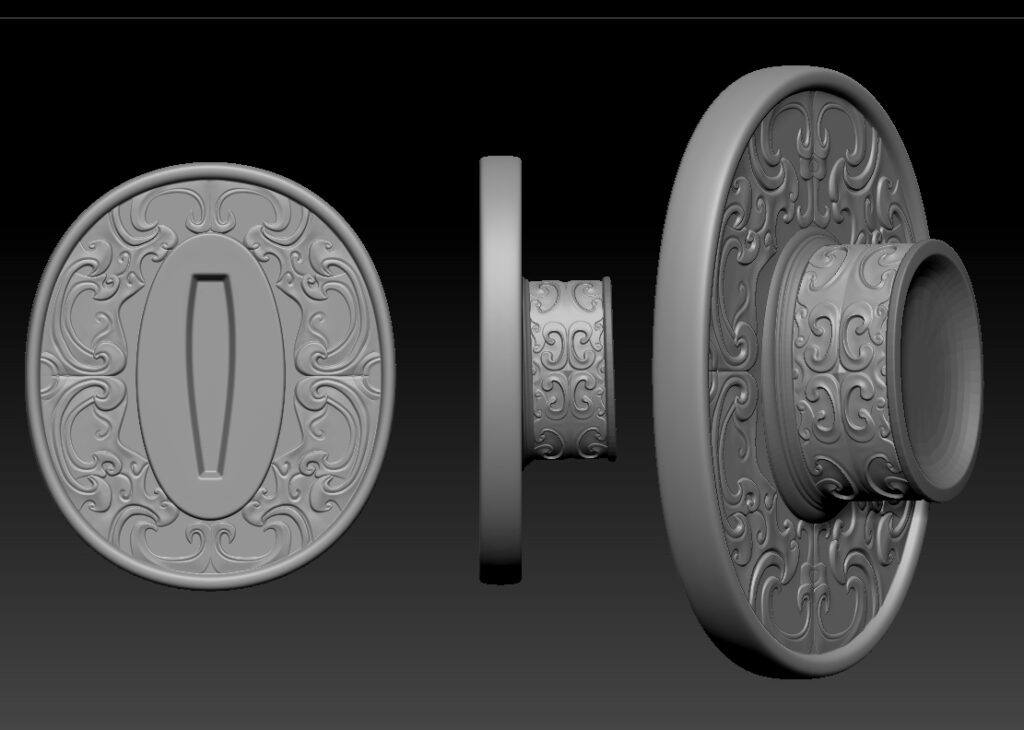
Using a similar approach, I created the pattern around the scabbard’s hole.
I prepared the image, processed it in Designer, and generated a Normal map.
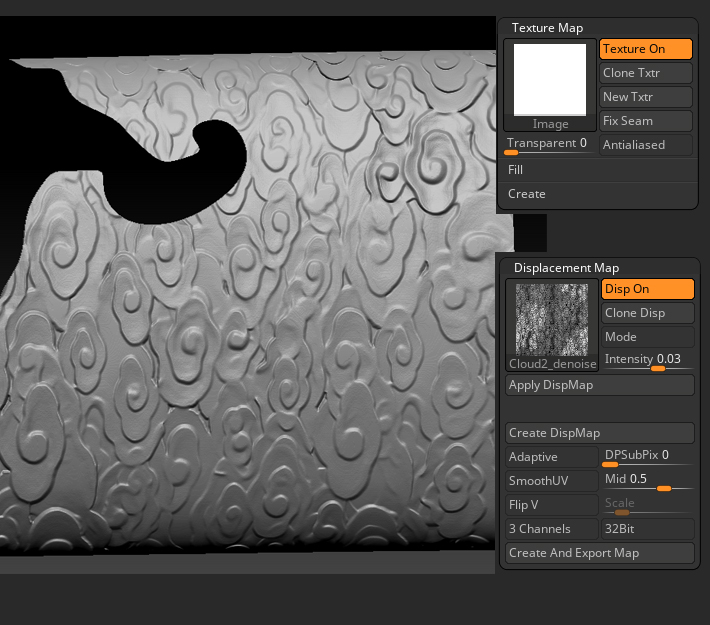
It was time to work in ZBrush! I imported the UV-unwrapped models into the program, navigated to the Texture Map section, and clicked “New Txtr” to create a texture.
Then, in the Displacement Map section, I clicked the square window and used “Import” to load the height map with the clouds.
I enabled “Disp On” for a preview, adjusted the extrusion strength with the Intensity parameter, and pressed “Create DispMap” to apply the effect.
I repeated this process for all objects and then moved on to more complex elements.
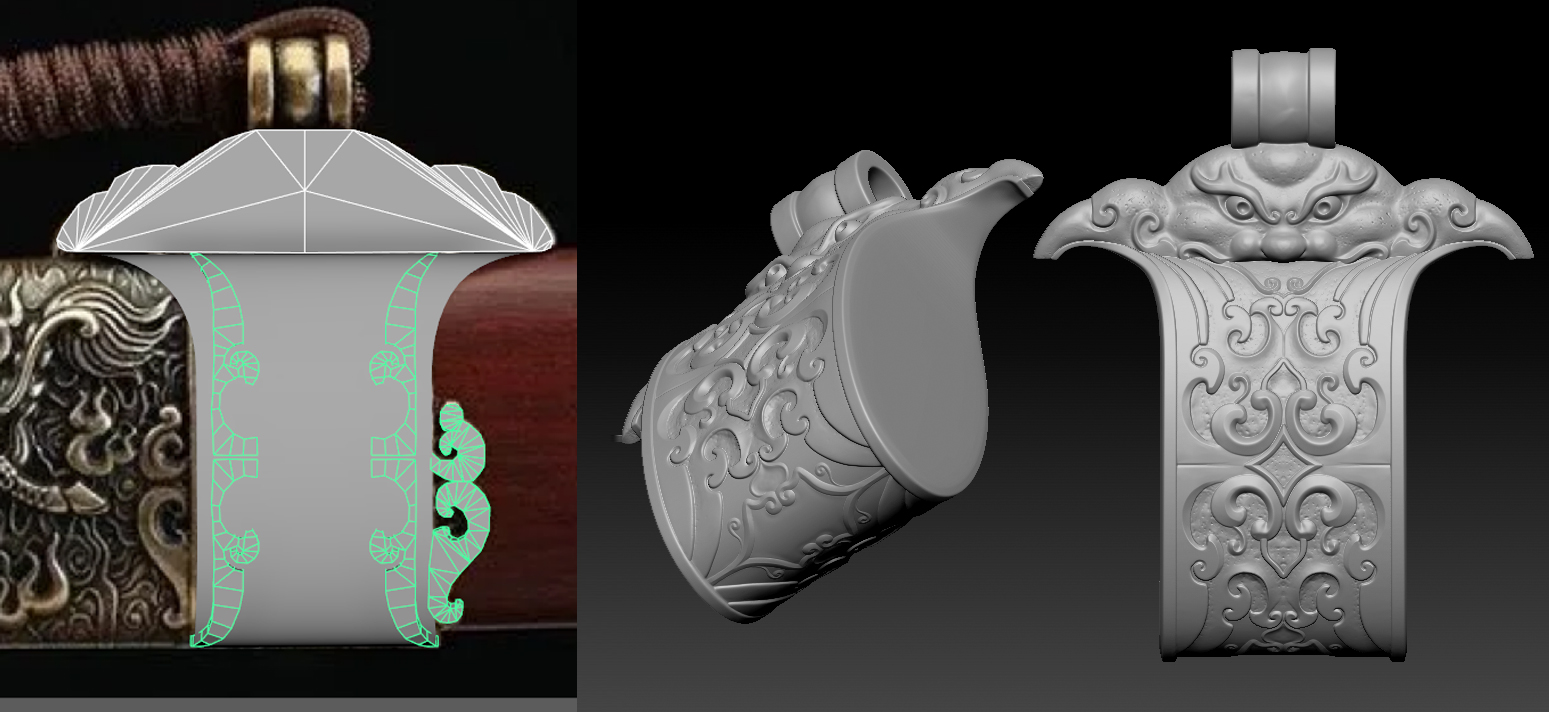
Sculpting the Scabbard Decorations
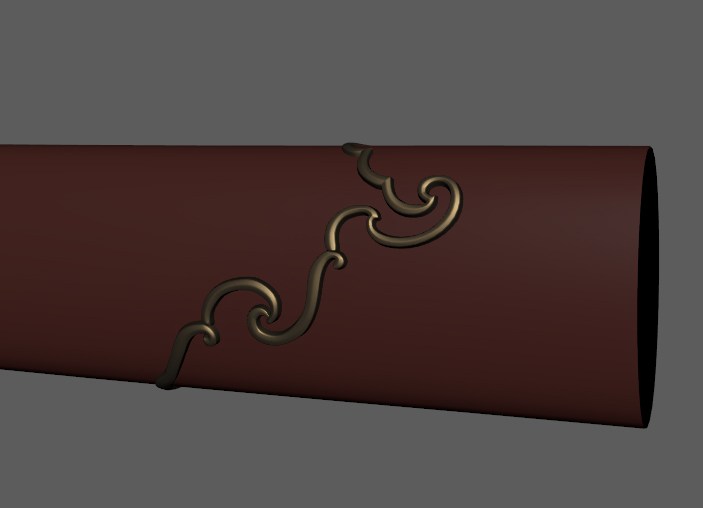
For the fastenings and central scabbard decorations, I combined Quad Draw with sculpting. After creating a rough base, I refined the details.
For the face, I started with a simple silhouette base and finished the detailing in ZBrush.
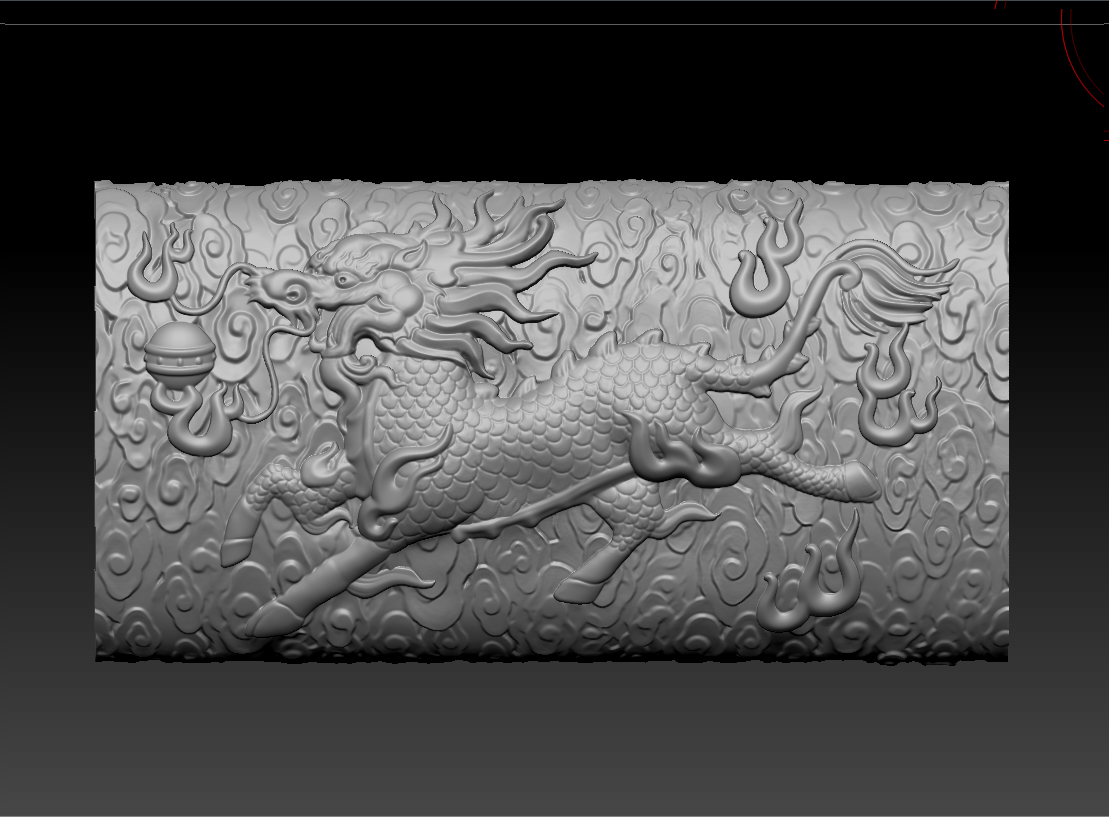
Sculpting the Tigers
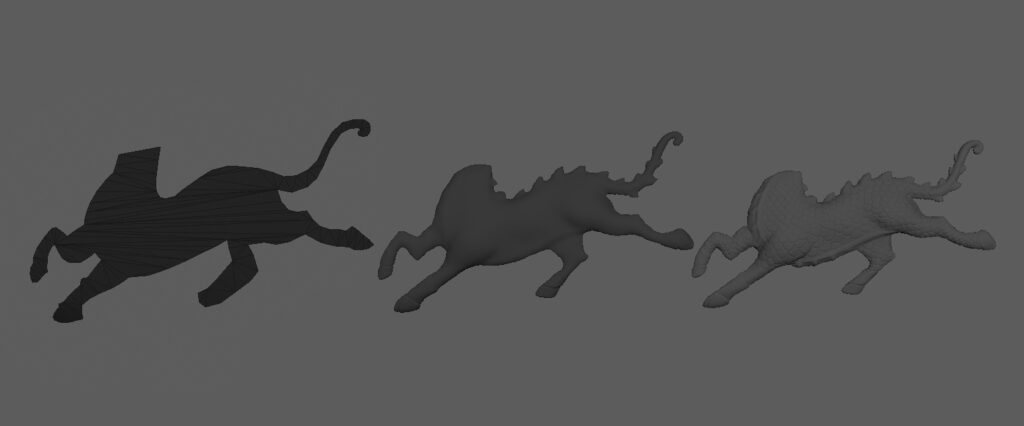
The first step was to create the geometric silhouette of the animal using the reference image to determine the positions of the legs, knee bends, and the head’s future placement (the head itself was made later).
I started with the body!
I added thickness to the silhouette, imported it into ZBrush, and sculpted it systematically.
First, I created the body’s contours, added volume to the legs, sculpted the hooves, and finally manually crafted the scales based on the reference using the standard brush.
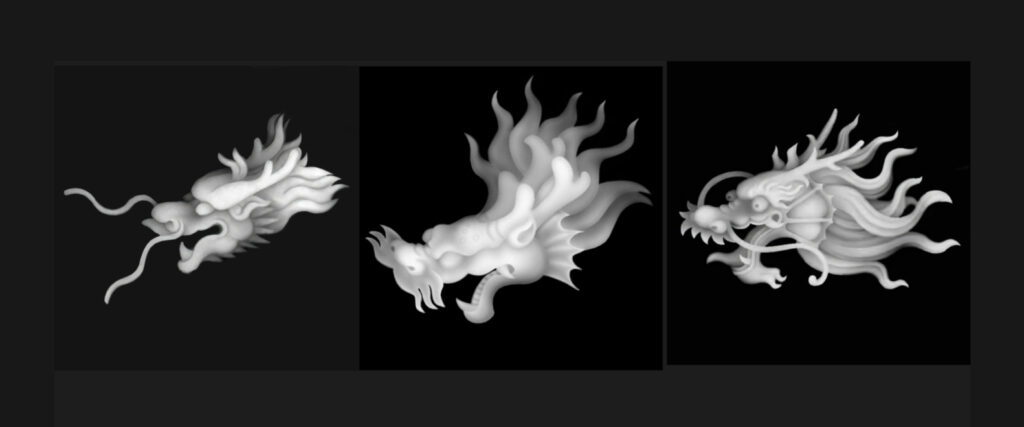
For the head, I found bas-relief images of suitable Chinese dragons online. I selected three for variety, prepared them as 1024×1024 maps in Photoshop, and used ZBrush to shape the dragon’s head with the brush tool.
I removed unnecessary parts and sculpted the head’s details. After completing the head, I merged it with the background and applied DynaMesh to create a unified piece.
I also added decorative elements like a sphere and fire, which I simply modeled in Maya.
For the other dragons, I repeated these steps, mixing bas-reliefs for the heads.
To create the guard’s decor, I followed the same approach as before:
I prepared a base through retopology, refined it, and merged it with the main part in ZBrush. For variety, I decided to create a Height Map pattern in Substance Designer.
I modeled ¼ of the design based on photo references and then replicated and refined the decor in Designer. Finally, I applied Displacement to sculpt the details.
MidPoly with Normal Map Details
Handle Wrapping
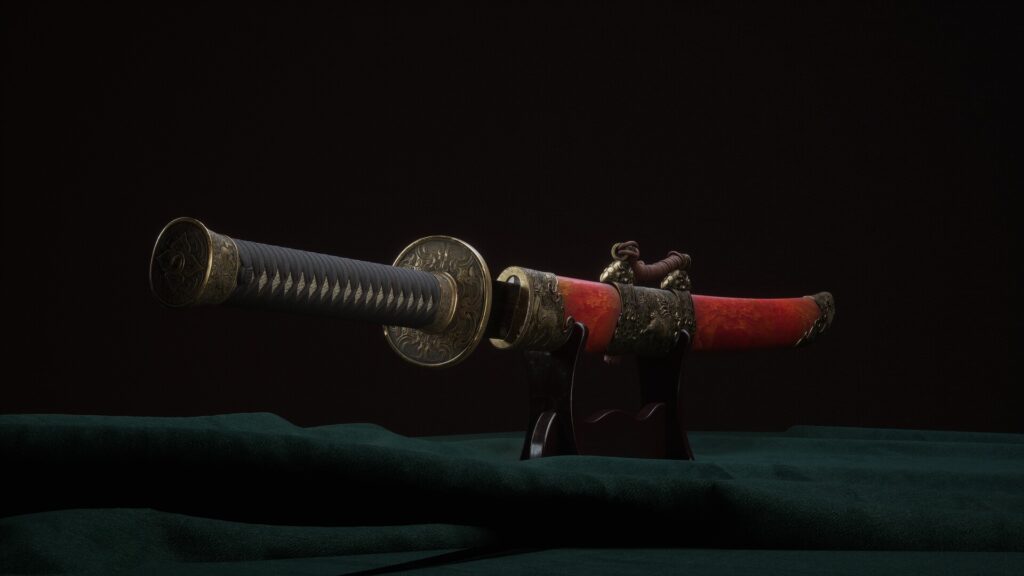
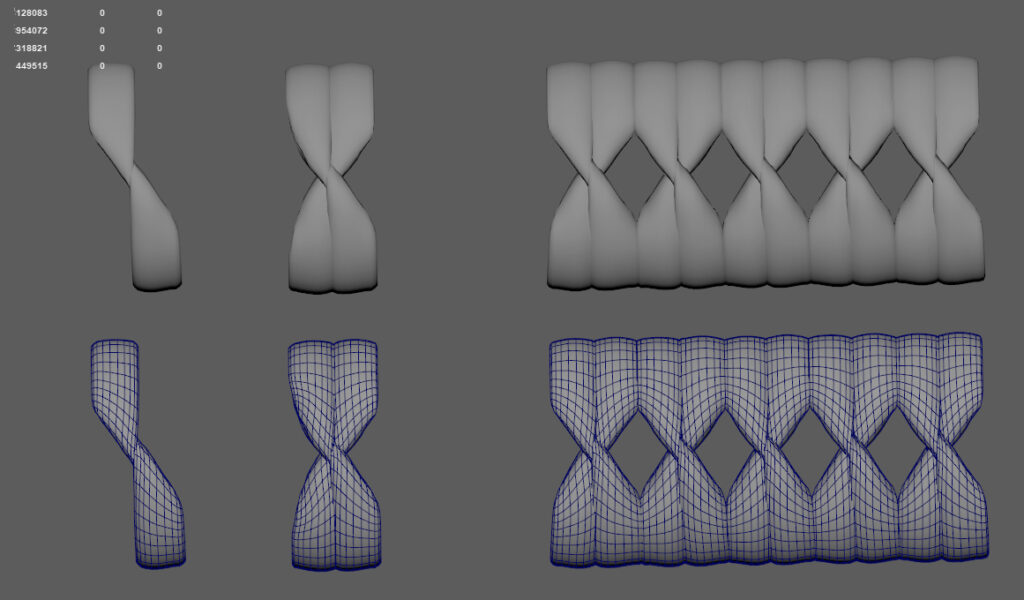
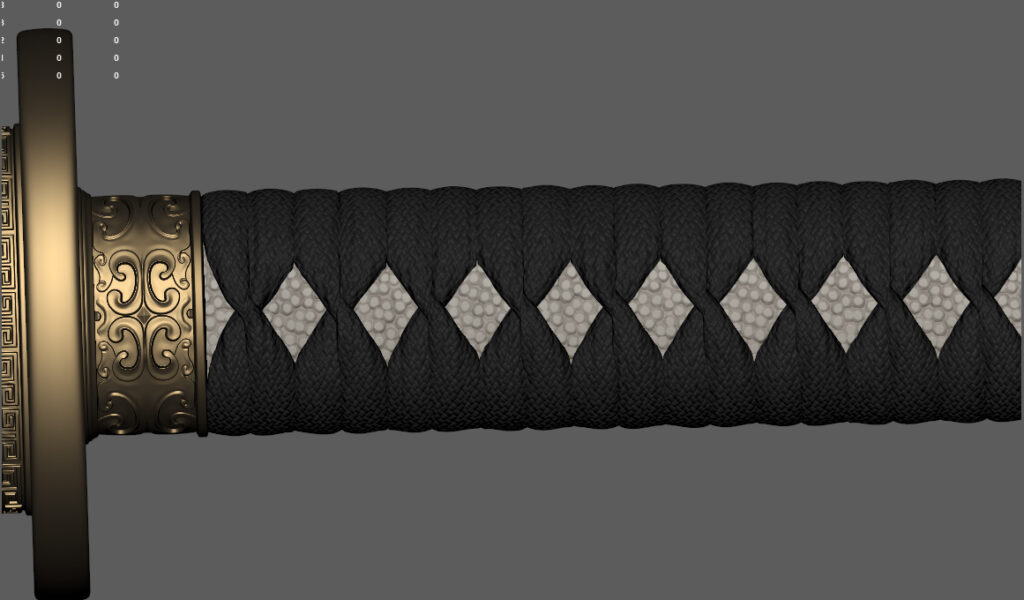
The handle was modeled using a traditional approach based on reference studies. I started by modeling a single segment and mirrored it along the axis to create a pair. Then, I duplicated this pair repeatedly to extend the wrapping along the handle.
After positioning the segments, I fine-tuned their shape using the Move tool in Maya to achieve a natural and seamless alignment.
Before this, I unwrapped the UVs for the first segment, ensuring that I could later apply a fabric lace pattern to it without distortions.
This preparation allowed for precise texture application and enhanced realism in the final render.
Textured Dots
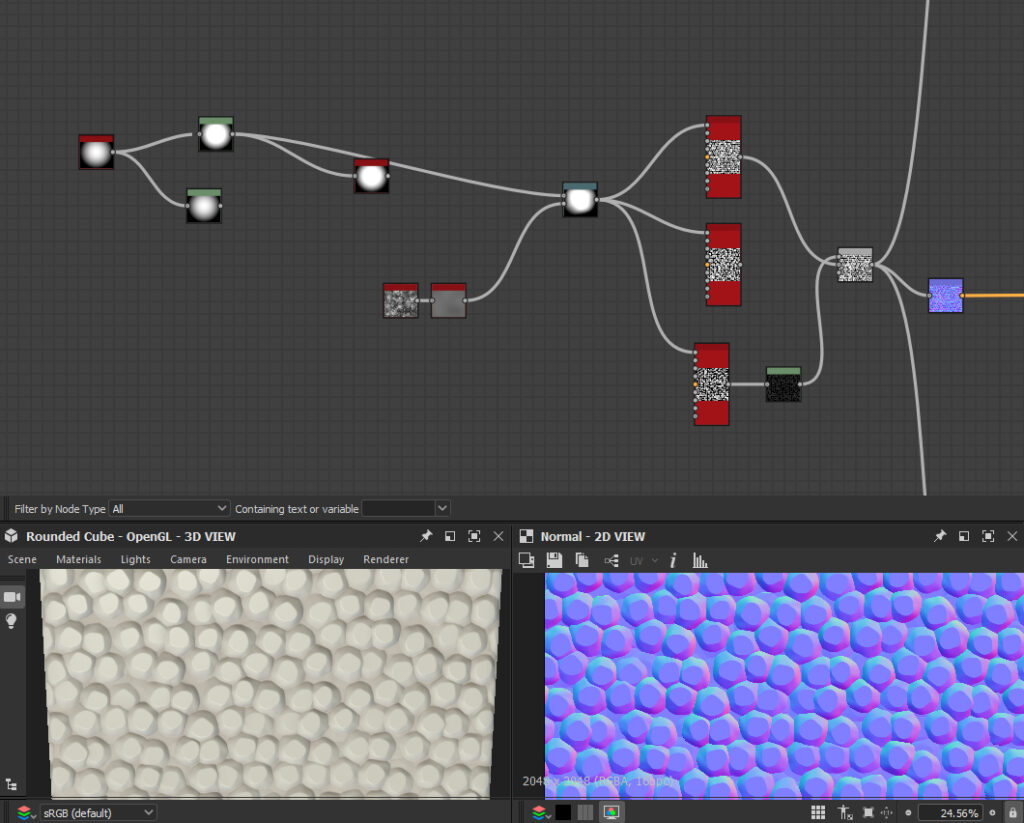
Manually modeling or placing the dotted texture on the handle in ZBrush or Maya would have been too resource-intensive. To optimize this process, I created a “textured dots” material in Substance Designer.
After preparing the handle’s UVs, I applied this material using a Normal Map, allowing the dot pattern to seamlessly wrap around the surface.
Later, I baked this detail onto the low-poly model in Marmoset Toolbag, ensuring that the dots were incorporated into the final baked Normal map.
Once the textured dots were in place, I detailed the wrapping pattern in Substance Designer and baked it onto the low-poly model in Marmoset as well.
Cord and Tassels
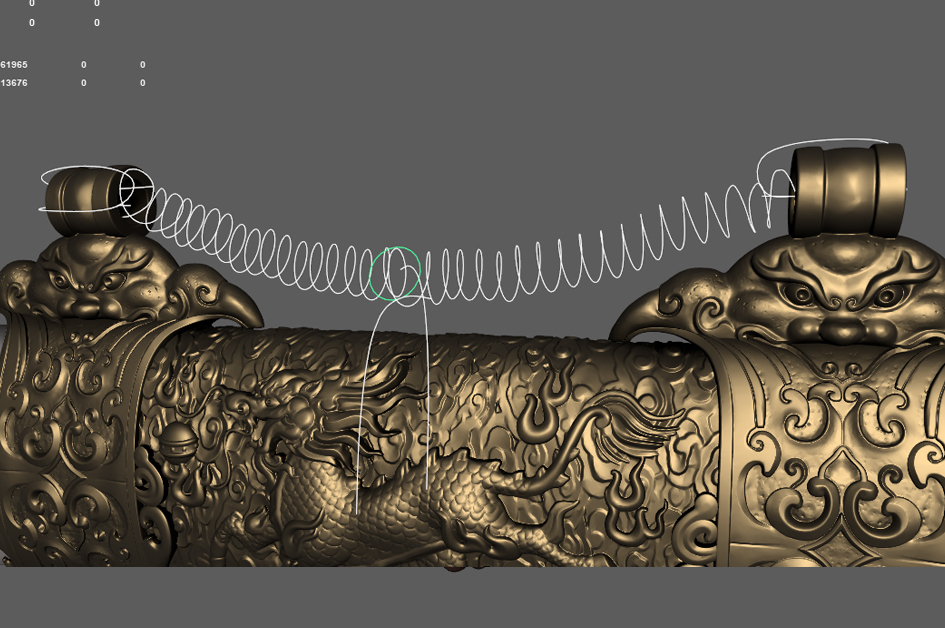
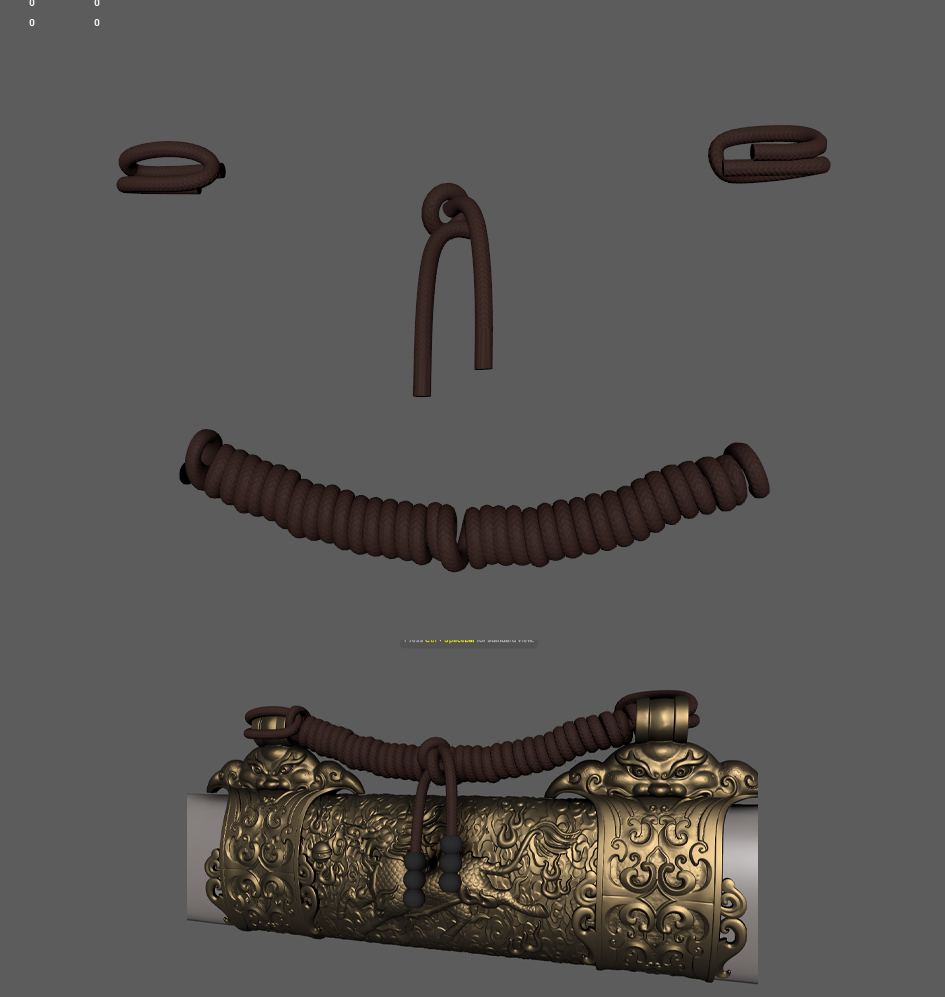
To create the decorative cord on the scabbard, I used a Curve tool in Maya, which made it easier to control the shape and direction. The curve structure was divided into four key parts:
- Two knots between the cylindrical sections
- The central spiral wrapping
- The loose, hanging ends of the cord
Once the shape was finalized, I extruded a cylinder along the curves to create the braided effect.
After completing the basic structure, I unwrapped the UVs for all cylindrical elements and applied detailed textures in Substance Designer.
The loose ends of the cord were modeled separately as thin tubes, with UVs pre-unwrapped to allow for later Normal Map detailing.
I arranged and layered the strands carefully, then adjusted their shape using the Move brush in Maya.
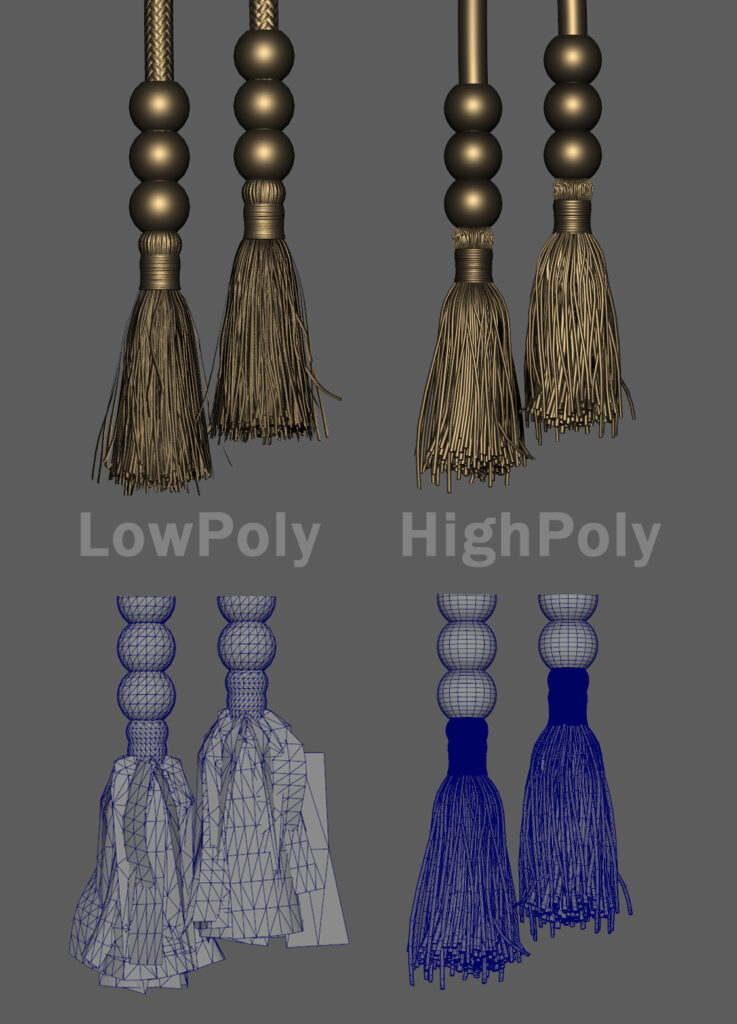
The upper wrapping of the tassel was created using small torus shapes, which I duplicated and slightly modified to create an uneven thread-wrapped effect.
Optimization
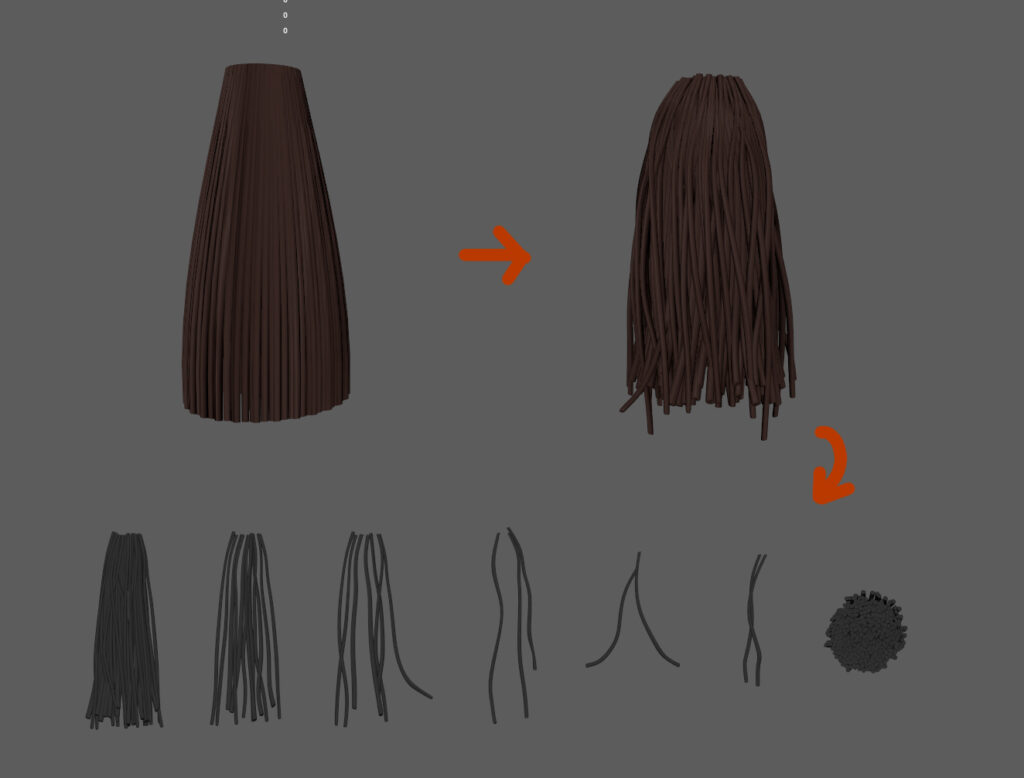
To optimize the tassels, I first selected the most visually effective strands from the dense group. I created six unique high-poly thread bundles and a placeholder mesh.
These elements were baked into low-poly geometry, similar to the approach used for hair assets.
The top sections of the threads were simplified and baked onto primitive geometry to ensure an efficient polycount while maintaining a high level of detail.
Low-Poly & UVs
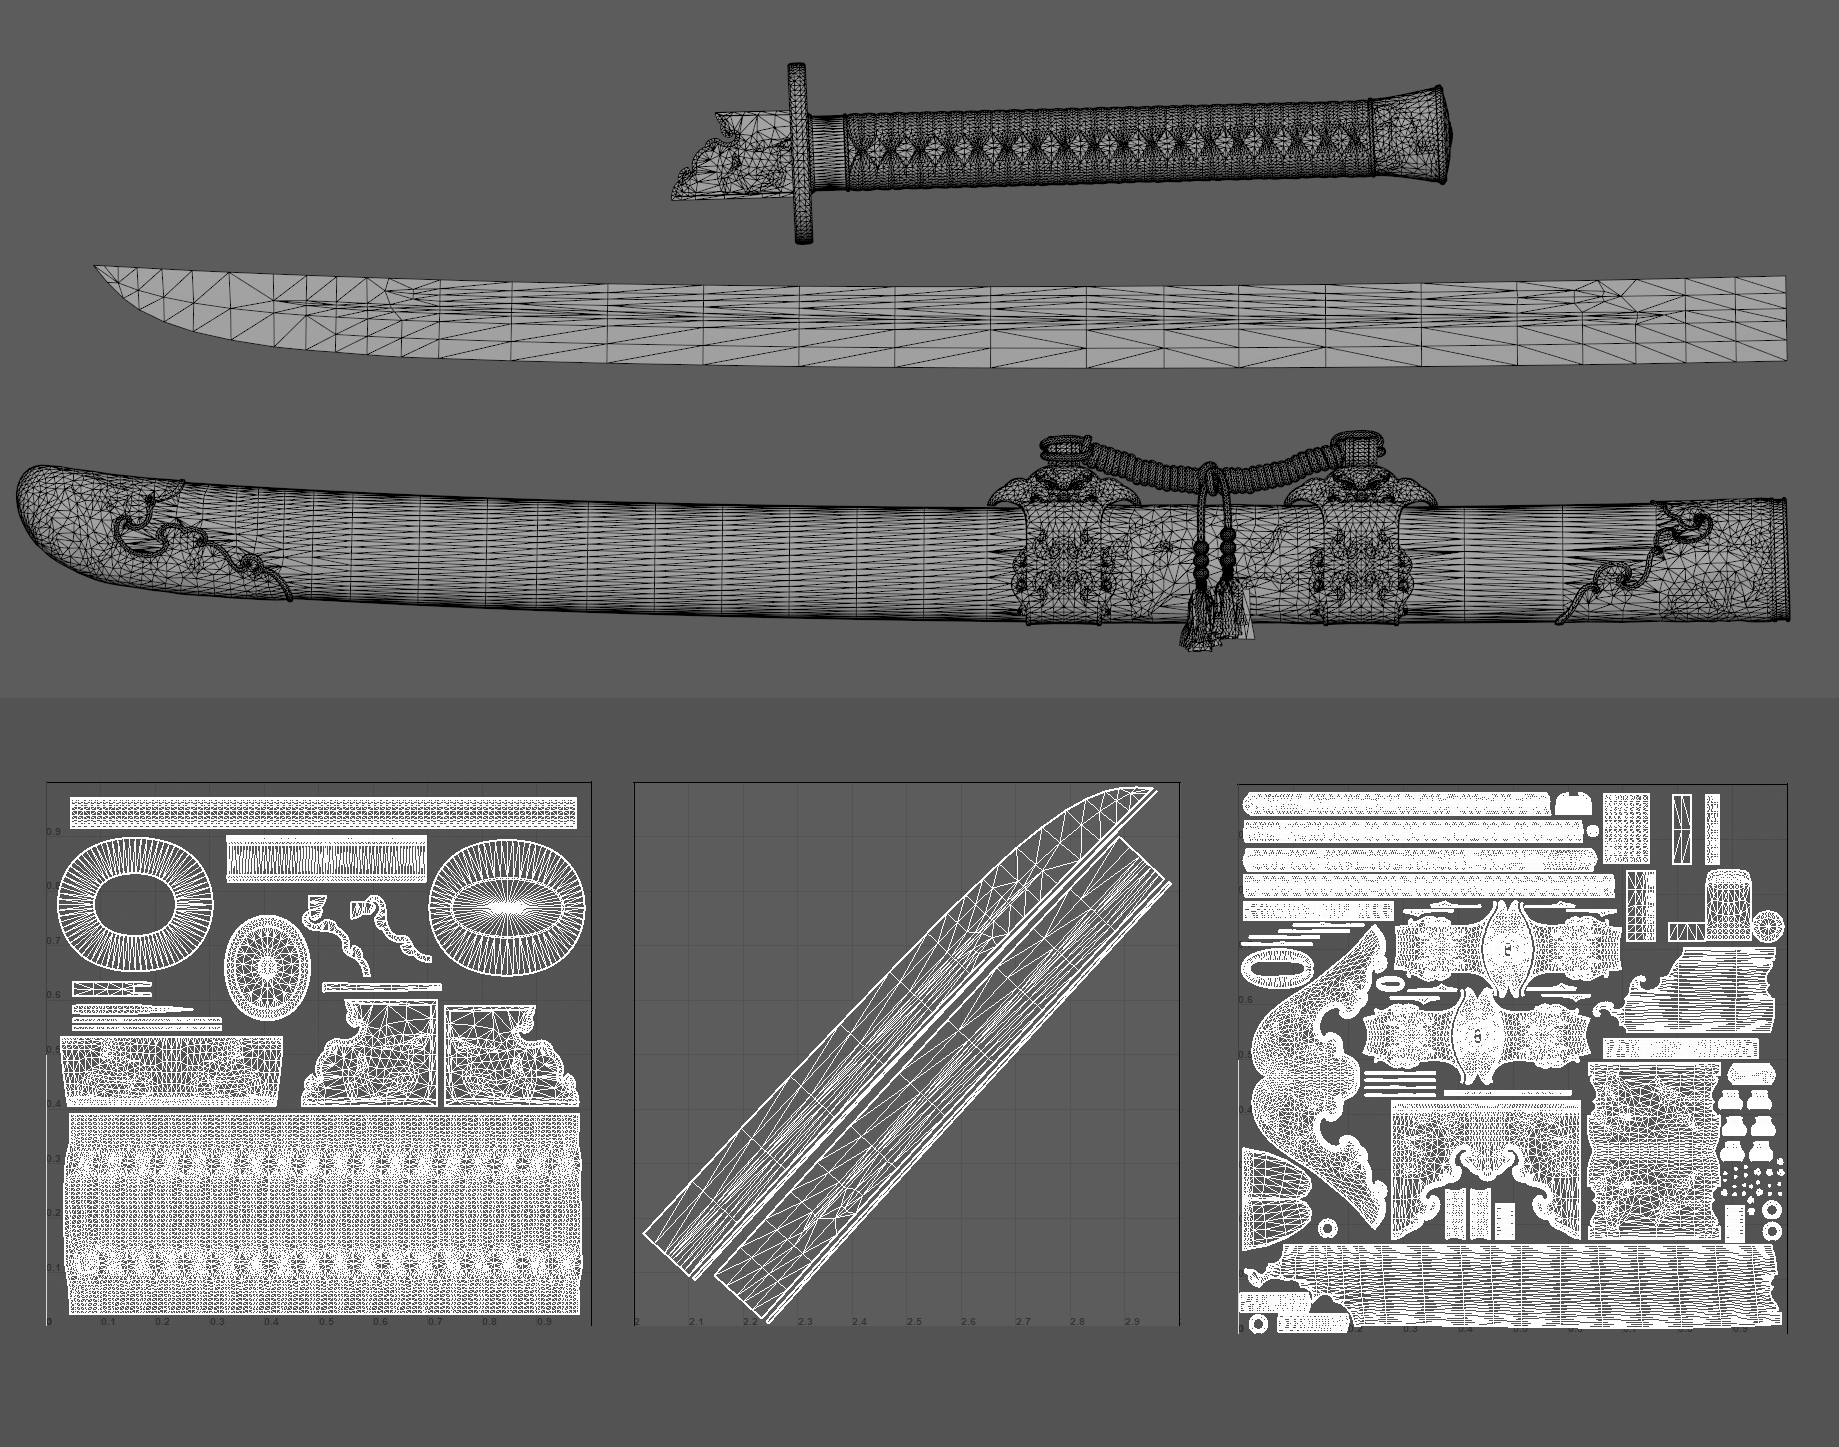
The retopology process followed standard practices. I used classic modeling techniques combined with the Quad Draw tool, which proved to be highly efficient and convenient.
Ultimately, I structured the model into three types of geometry, further separating them into three UV sets. The final triangle count totaled 72k.
When organizing the UV layout, my focus was on achieving consistent texel density rather than maximizing packing efficiency. I utilized overlap wherever possible while ensuring that each section retained high detail in close-up renders.
Baking
I baked all texture maps using Marmoset Toolbag, covering the three UV sets.
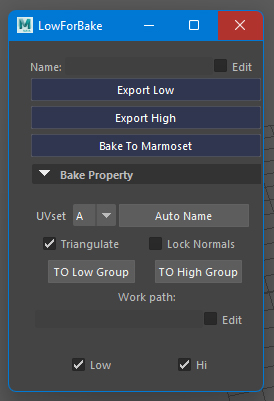
The baking process itself was straightforward, but to streamline workflow, I used an automated script to prepare the models efficiently.
Automated Baking Workflow
- High-Poly Preparation – Using ZBrush’s Decimation tool, I optimized the high-poly model and imported it into Maya.
- Script Execution – The script automatically splits the high-poly and low-poly models into matching objects, ensuring proper alignment for baking.
- Auto-Naming & Organization – The script renamed each object pair (HP & LP), organizing them into subgroups.
- Exporting for Marmoset – Once prepared, I exported separate high-poly and low-poly files using the Export Low and Export High functions.
Inside Marmoset, I imported both files, which were automatically sorted into subgroups. I fine-tuned the offset and skew settings before initiating the baking process.
Additionally, I baked Convexity and Concavity maps, which later helped add grime and depth effects in Substance Painter.
For specific elements like the handle wrapping and textured dots, I followed a slightly different approach.
First, I created a custom material in Substance Designer, where I applied the dot pattern to the Normal Map slot. This detail was then processed through baked AO, Curvature, and Convexity/Concavity maps for optimal texture depth.
Texturing
Metal Texturing
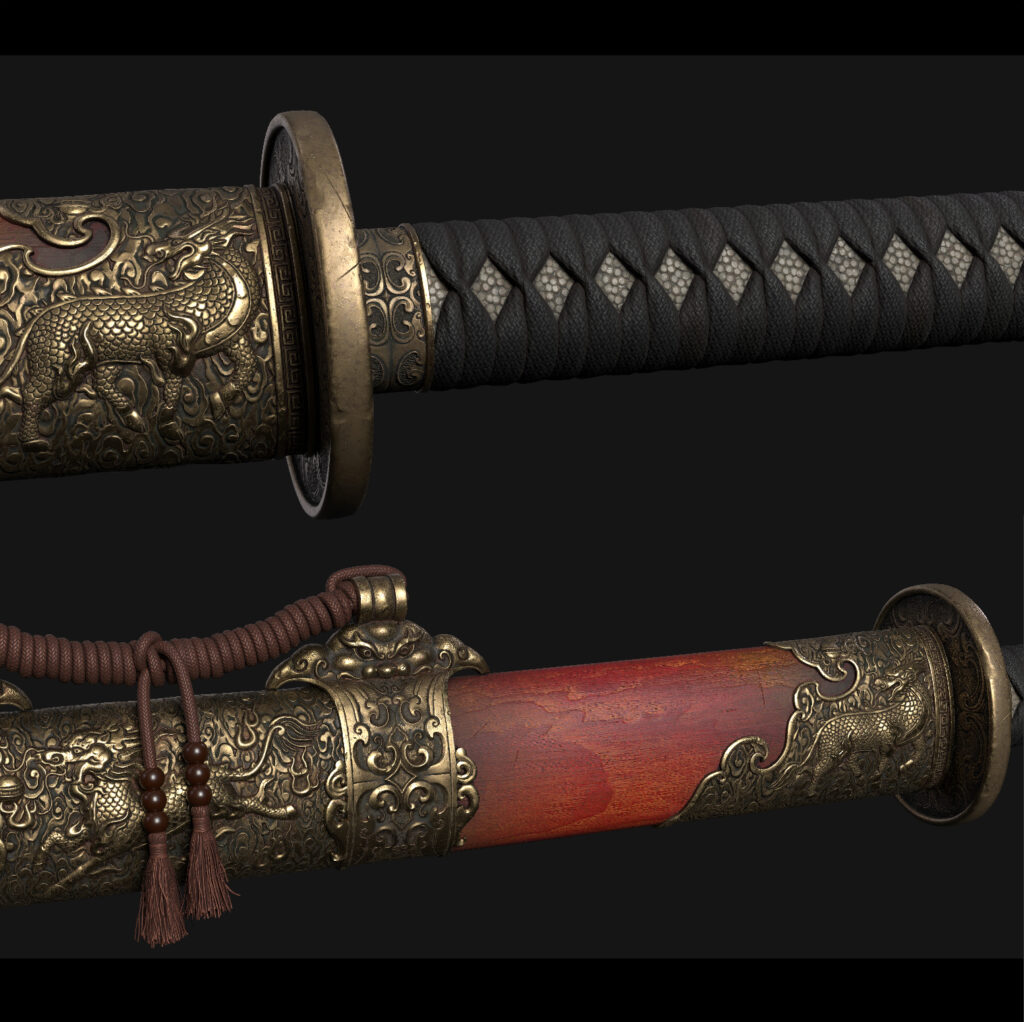
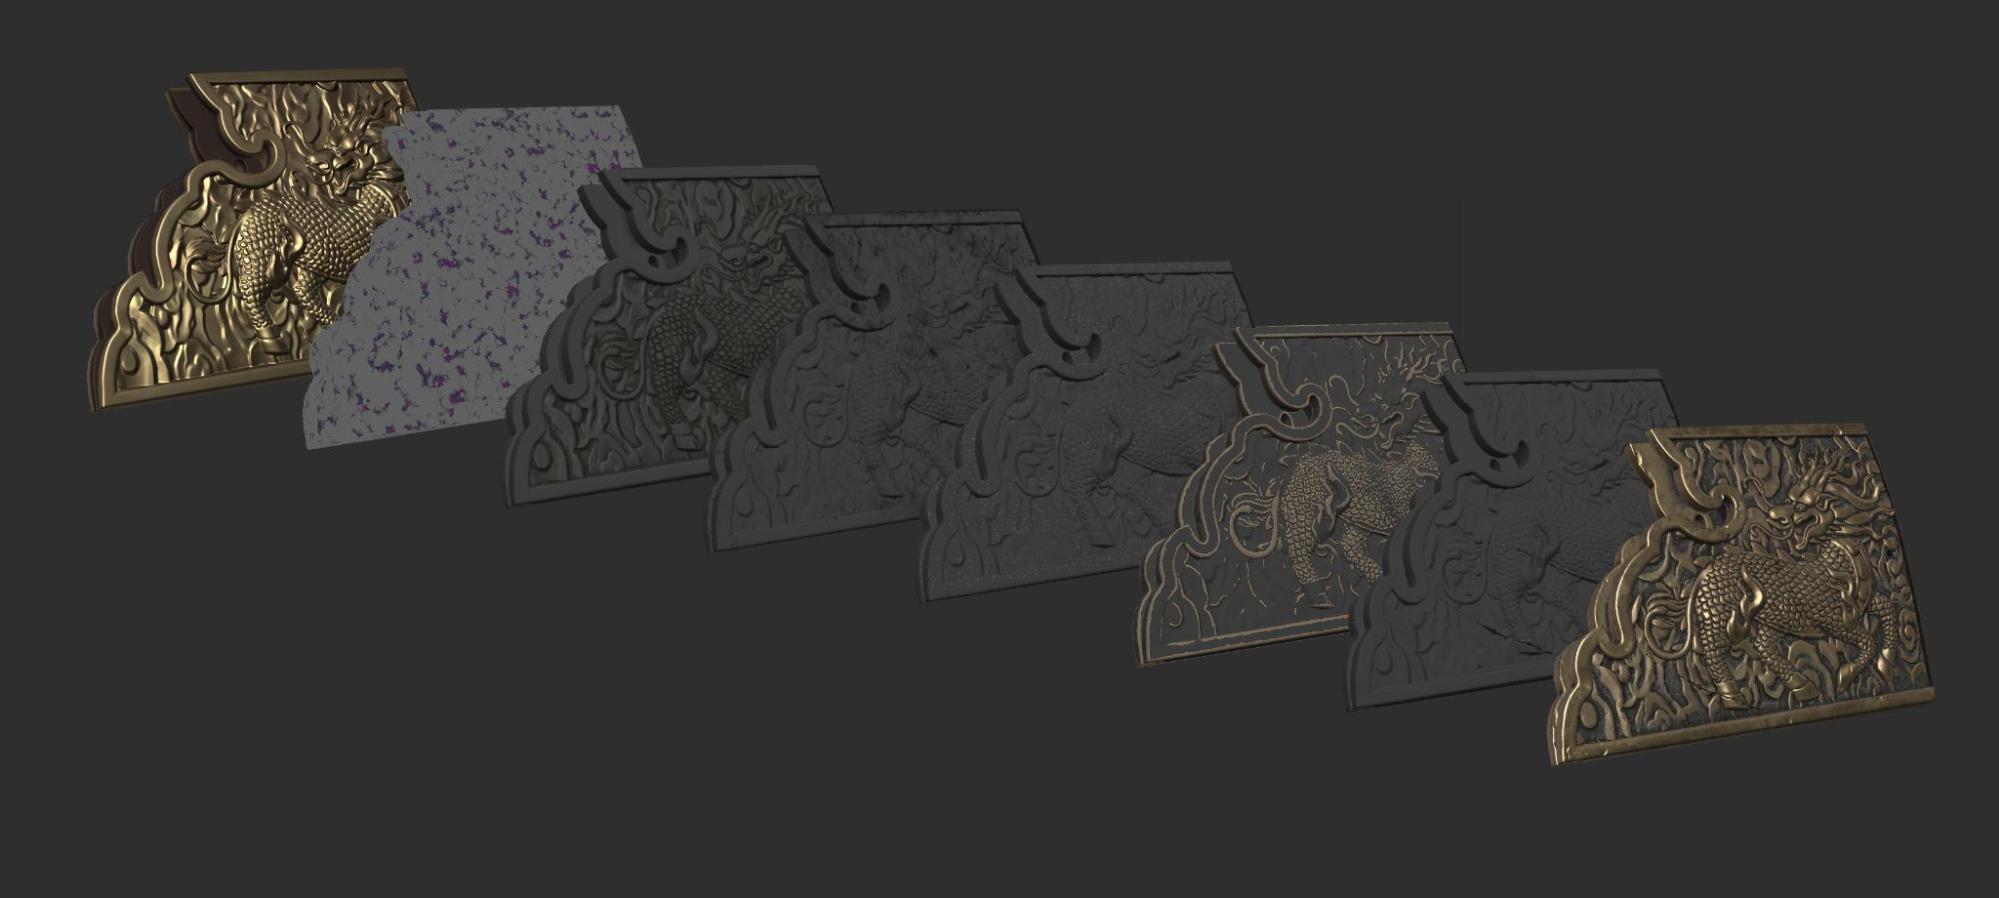
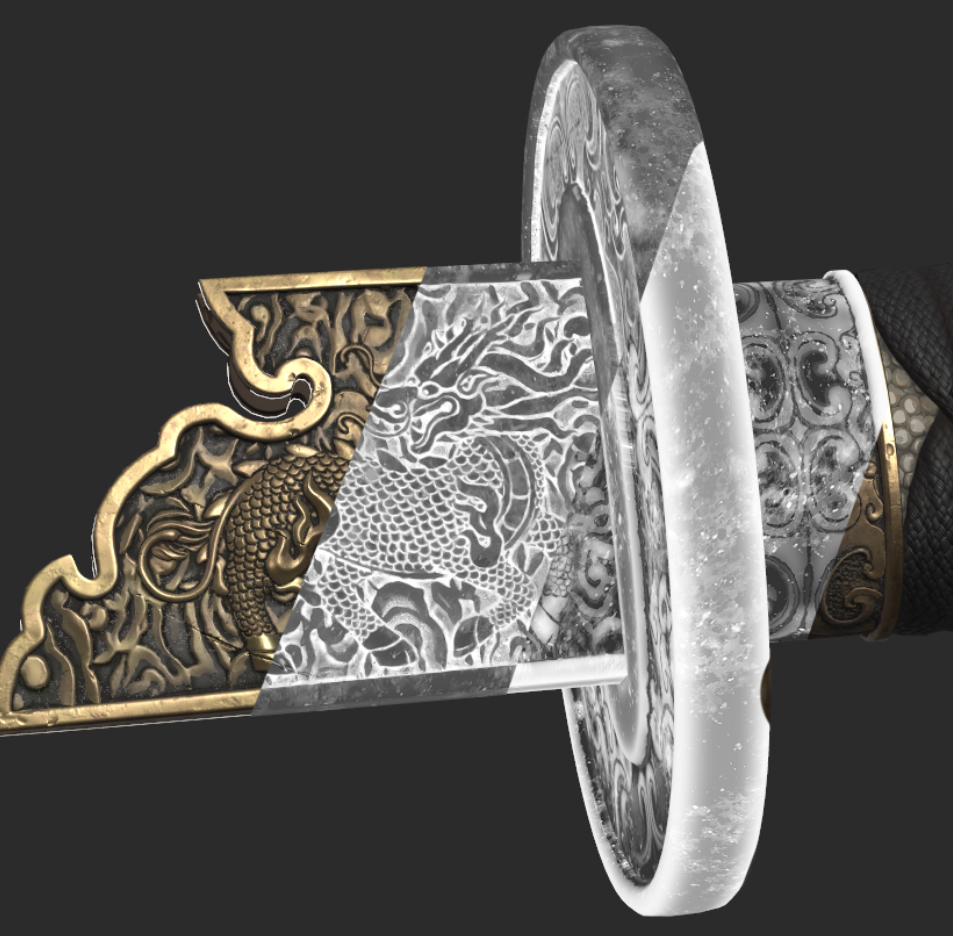
All materials were created and applied in Substance Painter. For the gold material, I focused on enhancing the contrast between the polished and recessed areas.
I first applied a high-roughness layer to darken the engraved animal and cloud patterns, increasing their visual depth. This technique ensured that the volume wasn’t just defined by the Normal Map but was also visible in the Albedo Map.
To refine the surface further, I built up layers of dust accumulation and edge wear, carefully matching the reference to achieve realism.
Wood Texturing
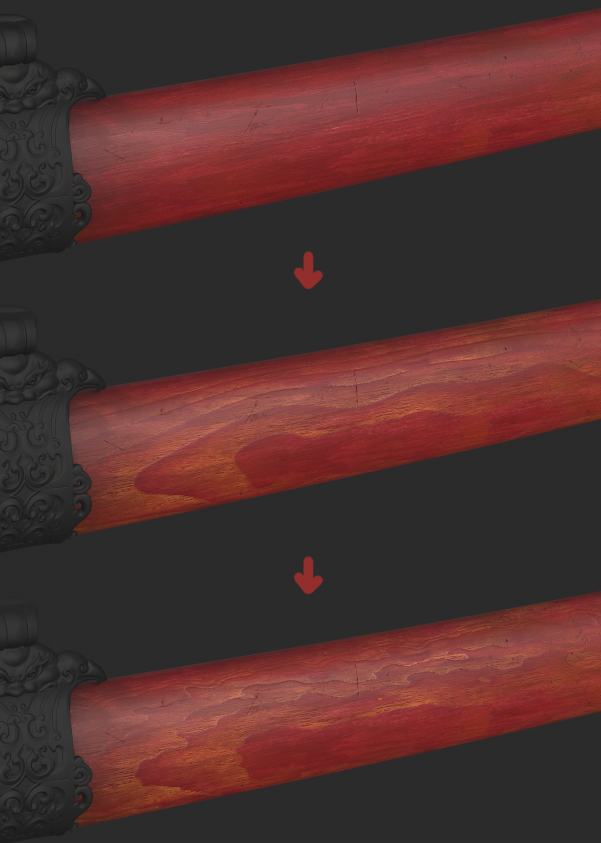
The wood texture was one of the most complex parts of the project. I started with a Smart Material base in Substance Painter, adding subtle wear and gradients. However, it still lacked the organic feel I wanted.
To add natural grain, I created a wavy high-detail mesh in FBX format and overlaid it using Planar Projection.
This created a realistic woodgrain effect, which I further enhanced with Blur Slope and Wrap effects. Additional fibers were applied via masking and subtraction layers.
Roughness and Metallic Maps
To enhance the final texture, I meticulously fine-tuned the Roughness and Metallic maps.
This added subtle variations in reflectivity, ensuring a visually engaging and realistic surface.
Scene Setup
For my Unreal Engine 5 scene setup, I disabled AO in viewport previews to maintain a clean look. For HDRI lighting, I used Studio Tomoco, which provides neutral highlights and accurate colors without tinting.
Throughout the process, I validated textures using Iray Renderer in Substance Painter, ensuring accurate color and material behavior before moving to the final render.

Final Rendering
I chose Unreal Engine 5 for rendering due to its real-time lighting capabilities.
Compared to traditional rendering engines like V-Ray or Arnold, UE5 provides a faster, high-quality workflow.
Scene Composition & Animation
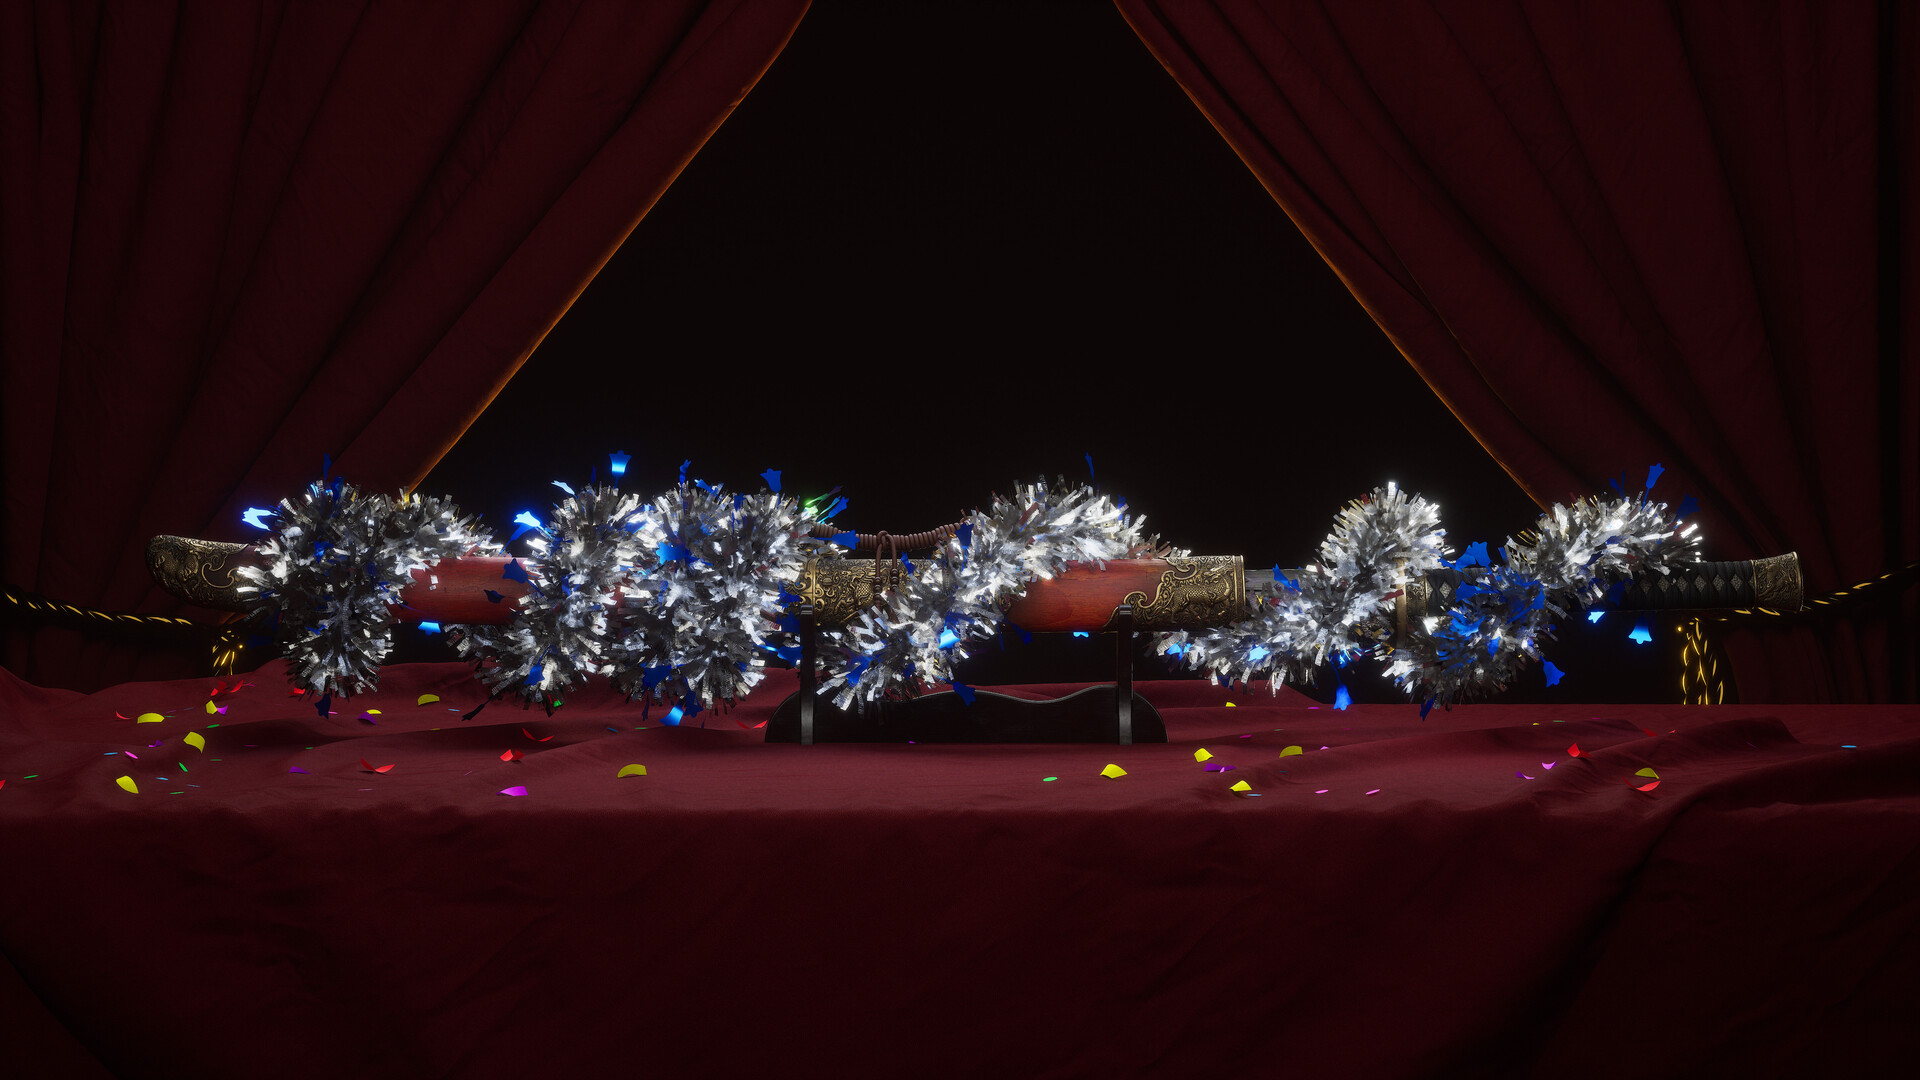
The idea for a curtain-based background emerged during rendering. I quickly simulated realistic fabric drapery in Marvelous Designer, using Megascans textures to refine the look.
The folds were further enhanced in Substance Designer.
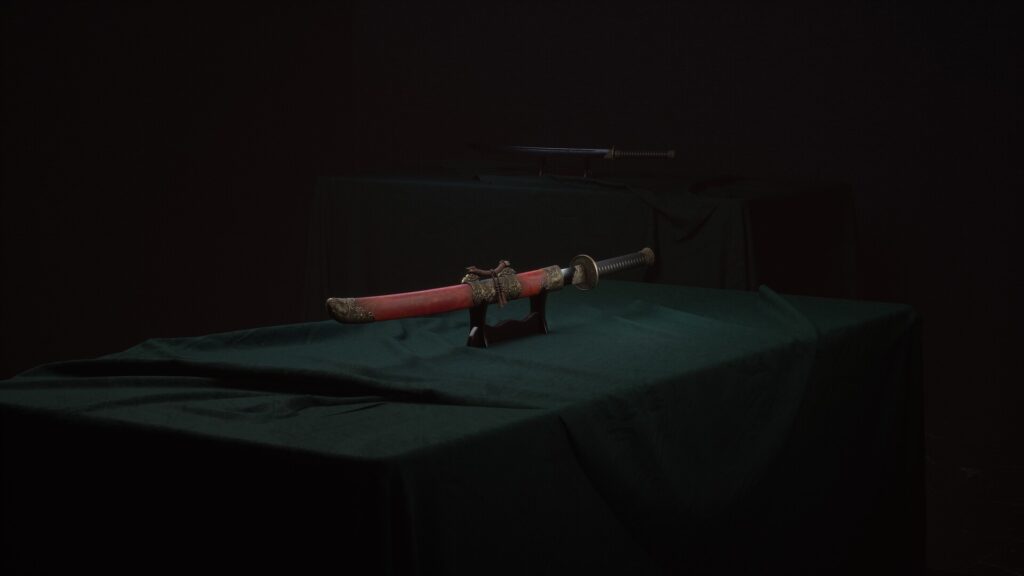
For the final composition, I experimented with various angles while keeping consistency with my previous sword projects. I relied heavily on PostProcess filters in Unreal Engine, eliminating the need for Photoshop adjustments.
For animation, I added rotating camera movements around the sword, enhancing the cinematic presentation.
Since this project was completed right before New Year’s Eve, I incorporated festive decorations for additional visual appeal.
Conclusion
Thank you for reading I hope this article helped and added to your workflow!

