Anime Tokyo

Introduction
Hello everyone, I'm Yan Ru, an environment and lighting artist, as well as a game developer.


Project
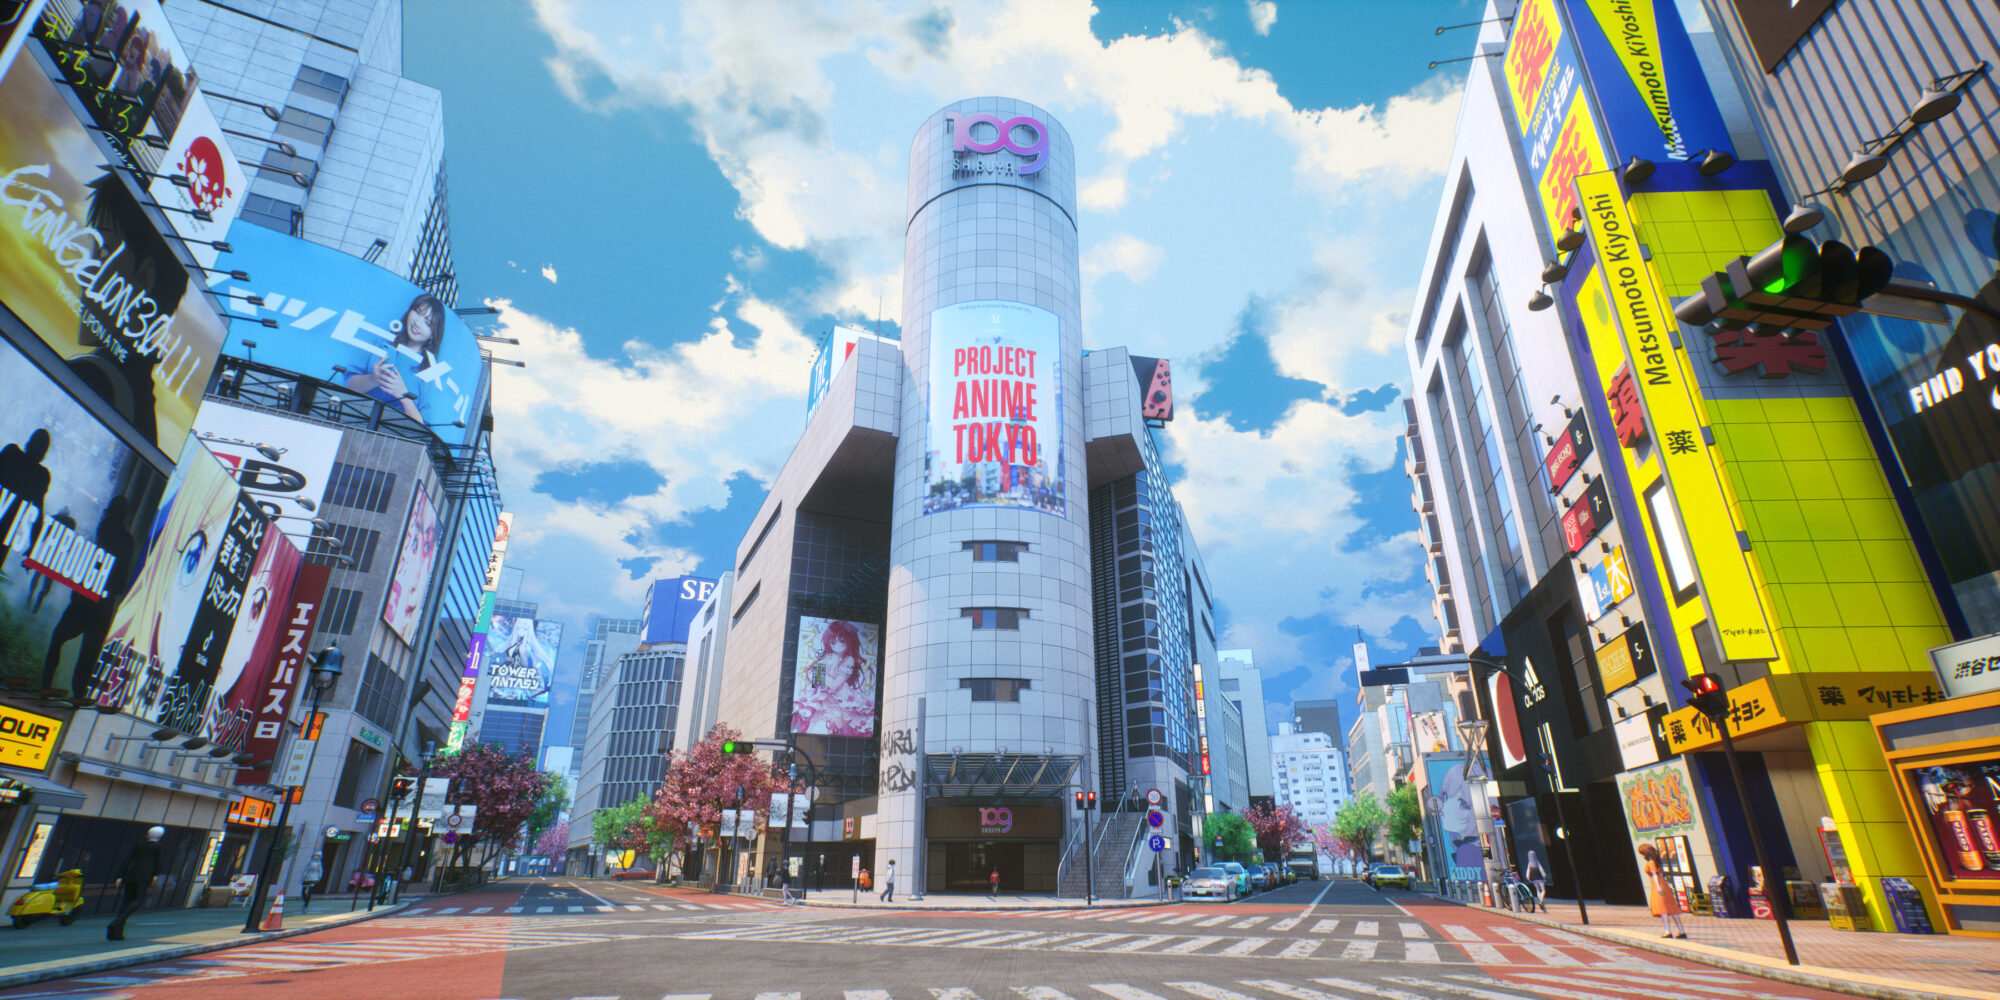
Firstly, let me introduce the project. I have planned an indie game developed using Unreal Engine 5. In April, I showcased some early work on the environment called “Anime Tokyo.” Since it wasn’t complete, I released a preview demo on my Artstation.
This demo creates a cartoon-style city based on the real-world streets of Tokyo Shibuya, allowing players to control a character navigating the scene. Although it has some shortcomings, it also has some merits.
If you’re interested in this project or want to do something similar, I recommend downloading and checking it out. This project contains a lot of content, and I will focus on sharing knowledge related to environment making.
Preparation & Reference
To begin, I looked for city photography images to use as inspiration. I added them to Pureref to understand how photographers capture cities. I also included some ordinary photos without much color adjustment to see the initial appearance of the streets.
Additionally, I studied the works of 2D artists and screenshots from films directed by Makoto Shinkai, as well as games like the Persona series. These references helped me understand how experienced artists create beautiful cartoon-style works.

These reference images give me a lot of ideas, but a 3D city obviously needs more references, and the one I use most often is the Google Street View map, which takes many views and even keeps many photos from different periods.
Because many places change frequently, I get a better idea of what a place is for by comparing photos from different periods.
For example, if I look at photos from different periods and find a place that is a public advertisement rather than a commercial, I will pay attention to this when designing the texture.

I also used a 3D city model import plugin PLATEAU. The GML format file used for the import was provided by Japan MLIT and includes drone data collected in Tokyo and other Japanese cities, that can be used to create city models.
Although they are some simple models, they are very intuitive as a 3D layout reference.
These are models created in the unreal engine by PLATEAU and I only use them as a reference in the production process.

When I made it last year, the plugin needed to be downloaded from GitHub. Now that it has been released on the Unreal Marketplace, it can be more easily installed directly from here: https://unrealengine.com/marketplace/en-US/product/plateau-sdk-for-unreal

I recommend using the offline GML data import model, which can be downloaded from this page: https://www.geospatial.jp/ckan/organization/toshi

Once you have completed the setup as described in the PLATEAU plugin documentation, you can select the area from the map to load the model.

Model & Layout
Many of the buildings in this project are from NoneCG’s SHIBUYA commercial model, which was created 10 or more years ago but follows the exact dimensions. I have made some re-edits according to the recent years of Shibuya and then put them into use.
I have also created some street buildings and props in 3ds Max. Due to the large number, I usually do this in a quicker way, with UV mostly using BOX mapping, which is very easy to use.
A lot of the work on these models also lies in organization and layering. I started by identifying the static objects and dividing them into a few broad categories: buildings, roads, greening, street signs, traffic lights, fences, and details.
Each object was then assigned a separate naming to make it easier to return to when working in the engine but finding that the model needs to be modified.
The building is the most important aspect, and for ease of use in the engine and to simplify the quantities, I will complete all model edits up front, naming the buildings after their realistic names so that they can be distinguished.
Then the whole building is combined into a single unit, and multi-sub materials are assigned.
Some unimportant building materials may be baked into a mixed texture. Here I need to make some preparations for Nanite or the rest of the needs, for example, the glass should be separated, and some objects that require frequent material editing need to be separated.

I created a separate Unreal project for importing models and checking that they were ready to be put into use.

The more detailed the checking work, the better it is to avoid subsequent troubles. Although I have avoided some of these, I have still encountered the expected problems.
I found a problem with a model that needed to be returned to be modified and re-imported. As there were many shared textures and parent materials from the rest of the models, it couldn’t be imported as a new material but needed to be specified again one by one.
Otherwise, it would create new folders to disrupt the order, which is something annoying, so try to do a good check earlier on to avoid that.
I additionally imported building block models of distant cities from the OSM map to use as a distant background. The reason why I did not use PLATEAU’s models was that their line structure was less regular.
Because these blocks already matched the original layout better in plan position based on realistic measurements, the Z-axis position needed to be manually corrected.
The way I did this was to raise them to a higher position, make sure all objects were completely off the ground, then use the END key to drop and match the ground. These blocks also needed to be merged, otherwise, unnecessary performance would be wasted due to the number.
When working on merging objects, it is also necessary to back up the original models, and I usually use a separate level to save them.

I took into account that I could not use simple blocks for all the distant views, so I created a number of building models to reuse at a distance, starting with just four and increasing to eight later.
Again following the same principle as before, in order to use Nanite, I separated the glass and then merged it together in the engine using blueprints. This merging does not modify the models themselves in the engine folder, so it doesn’t need a backup.
Reusing models is an important aspect that must be considered. How many types of street lights will be needed, how many trees, and all other objects that can be taken into account? Try to have a rigorous plan. This will not only make the scene run more efficiently but also make your workflow smoother.


Then I started the importing, and I created some cameras at this time to view. This is what it looked like in the engine at the time.

The distant building blocks also work well.

By this time, the project had been going on for 3 months, which involved a lot of editing, organizing, naming, sorting, importing, and checking of models. This inevitably got boring at times, so I did some other things to relax myself, but also things that were conducive to making the project better.
I would watch films shot in Shibuya and compare old films as well as new ones to see how the environment has changed and what people like to do in the area.
For example, the screenshots below show the Hachiko statue in 2008 and 2022, respectively, with the Hachiko statue remaining as it was, but the shrubs next to it have been removed, so the view is much clearer.

Materials & Textures
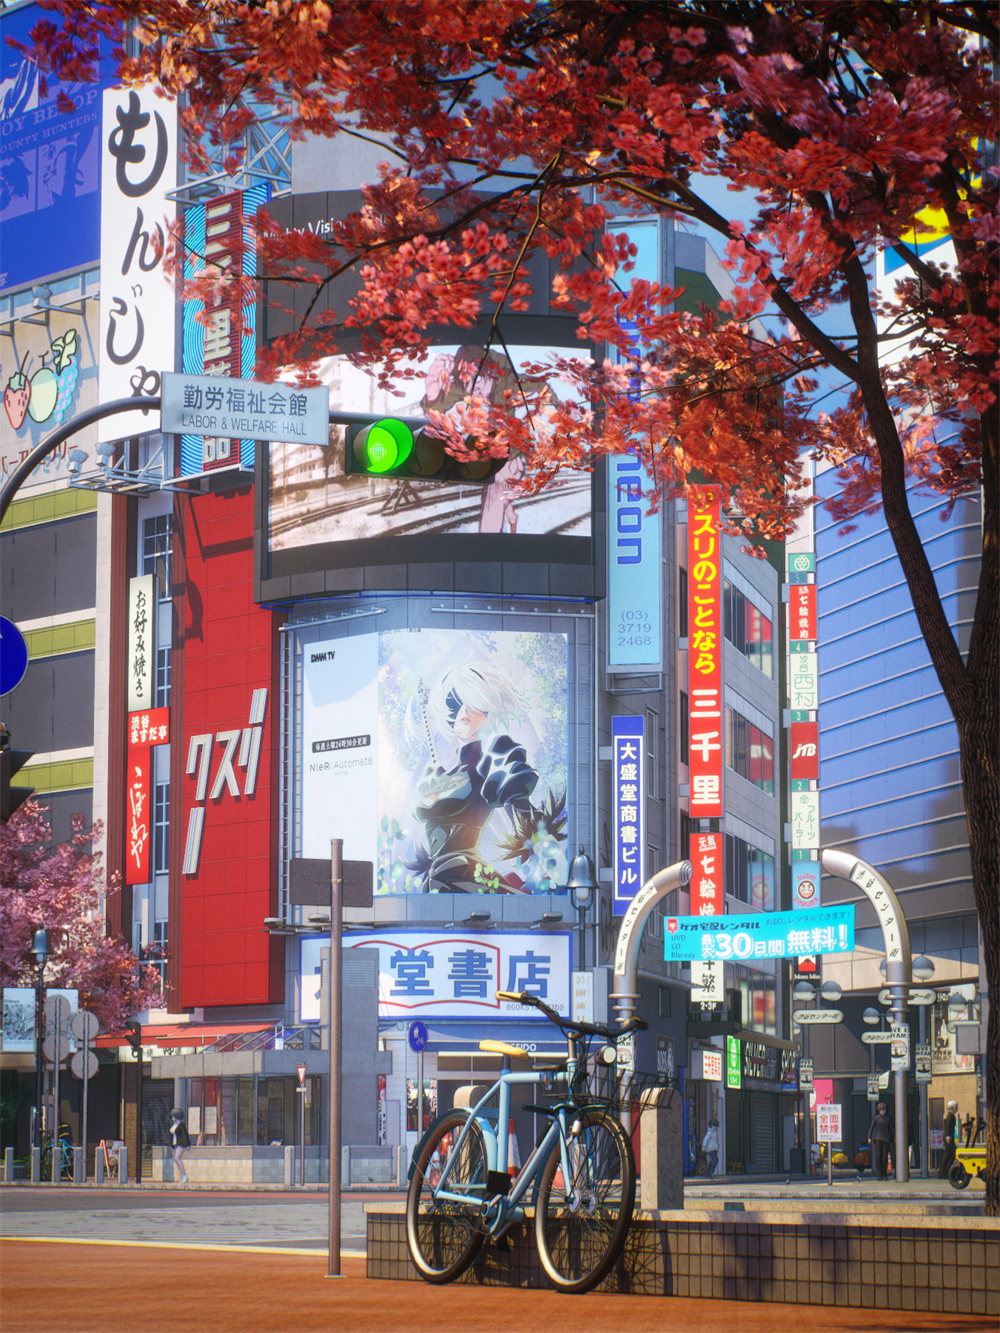
Texturing is the most involved part of the process as there are a very high number of textures. Usually, it involves graphic design work, mostly done in Photoshop. Some are done by hand with typography fonts and backgrounds or using hand drawing, some by reprocessing web images for use, and some by extracting photographs for processing.
Billboard images are also designed in Photoshop, and when doing this, you need to be sure of what you have in mind. Is the city relaxed, stylish, and modern, or is it cold and deserted after encountering changes? What should the town look like? Imagine more and then use it in the design.


Some of the shop signs I would take from photographs, correct for perspective and color, and then use them in the scene.


My scene had a lot of branded images from these realistic stores, which actually had some copyright issues involved.
Paying appropriately is one way to do this, and nonecg, as a commercial company, helped me out a lot with some familiar logos like Taiseido and 109, being allowed to continue to be used.
Regarding some of the other textures, I needed some quick mapping methods at this time, so I checked some legal knowledge and decided to just use these as a temporary solution and then recreate and replace them after this demo was completed.
Again, I have to say, it is a huge work, and something to keep in mind if you’re also working on a game that’s ready to be released to people.
Take care of these things, just a few suggestions. I would then like to discuss some work on getting the textures closer to the animation. This applies to some realistic texture conversions, or you can additionally choose to use software like Substance Designer.
There are many ways. I have observed and learned their methods from the work of a number of 2D artists. Usually, it is a combination of doing some blurring, smearing, and brushing layers, and blending overlay layers.

Sometimes these treatments can lose a lot of detail. For example, text on the original textures can become illegible.
This is actually something that should be done, as the mission of some objects is to act as a background and not to allow too much visual distraction to the player.

Of course, these are just some examples and not universal processing, and they should be handled differently when targeting different objects.
When confused about how textures should be handled, take a look at some 2D paintings or at those animations that are handled directly through photographs, as many Japanese animations often do.
In the 2023 anime, ‘Bocchi The Rock!’, which I love, is a good example of photos that have been treated to an excellent anime background.

There are some materials in the scene that need to appear as pure colors, such as the red tiles in the image below.
I would set the roughness to 1 and remove the specular so that they are not affected by reflections. Many materials have a similar treatment to ensure that the color blocks are neat and integral.
In some of the materials, to make them stand out more, I also used emissive intensity values, even though they are not luminous objects. Related to this, there are also values such as reflection intensity and other settings, plus I have set very high sub-surface scattering values in the leaf shader.
The scene is actually full of unreasonable materials, but with the right amount of planning and settings, it can develop its own artistic style. With regards to fake materials, I also wanted to talk about how the glass material of the QFRONT building in this scene was created.
There is a large area of glass here, and even with Ray-tracing, the reflections are not guaranteed to be clear and usable, so I used Scene Capture 2D to create a 360° Panorama HDR image, exported it to Photoshop to adjust it, and then imported it again as Cubemap.
Add it to the emissive channel and use it to create an image reflection effect. But you have to adjust the parameters; otherwise, it will look very strange.


One caveat here: Lumen does not capture GI in Scene Capture 2D, so you will need to switch the lighting settings to Screen Space first, capture the HDR image, and then switch back to Lumen again.
This is what I got in UE5.0, and I’m not sure if Epic will improve it in later engines.
The finished reflection is very believable; it has some angular viewing limitations due to the use of image reflections captured at a fixed location, but it is very suitable for large objects such as buildings, as people are small compared to a building. Therefore, the player cannot quickly switch the viewing angle.

The greater benefit of this approach lies in the savings in performance consumption.
Translucent materials in Default Lit shading mode are among the most costly in terms of performance, and this glass uses Unlit shading, which is much less costly than normal glass, as can be seen in the shader complexity view.

I have used the same method for the rest of the glass material.

Electronic screens on which video could be played existed in several places in the scene.
First, I determined the location, number, and type based on the video of the scene.


I used the media framework in Unreal Engine, enabled the Electra player plugin, then created the relevant media materials, as well as binding the sound component to the object, and finally enabled the calls in the level blueprint to enable the automatic play of video files in the scene.

A description of the use of the media framework can be found in the documentation. It is important to note that you should read the file format and encoding requirements carefully; if your file is not playing properly, it is usually due to this.
For handling media file formats, I usually use Format Factory, which solves almost all problems.

Editing
Next, let’s talk about some of my thought processes when editing the scenes.
In this session, I will often look at those references I mentioned at the beginning. Shibuya is a famous place, and it has good street planning, but I will do some subjective thinking and discard or change some things.
For example, I don’t like these trees by the exit of the metro station; they are not in good shape, and the branches are too overgrown and obscure everything. So I have free rein in these places and don’t think about what’s actually there.

I replaced the trees mentioned earlier with cherry trees, and the final image looks like this.

I also observe what is in the streets and how they are placed, such as some bicycles.

Examples are the vending machines and the graffiti on the walls.

In front of some restaurants, there are shop-specific delivery motorbikes and also communal bikes.

Look at these details more often to help yourself lay out the scene better. But It’s impossible to include all the details; it’s a matter of trade-offs.
You can’t make it too cluttered, as that would be unattractive, and you can’t make it too empty that the audience doesn’t feel a bit of life.
Breaking up the sense of order in the area by adding little markers can add some fun, and I usually use decals to do this, such as the graffiti below.

I have created a comparison between reality and the game.


Lighting & Post-Processing
I have set up three types of lighting for the scene: sunny, overcast, and highly saturated lighting. Both the sunny and overcasts use a very simple and easy-to-use lighting mix, while the last special lighting is a little more complex.
The sunny lighting mainly comes from directional light and skylight, with very slight height fog. In the few dark areas, I have added some extra light. This is the first version of the lights I set up, and the differences from the final version are minimal.

I think the first important thing is the relationship between the intensity of the lights, which needs to be adjusted back and forth to keep the picture in the correct light and shade relationship and the exposure values suitable for viewing.
The backlit side of a city on a sunny day is not too dark unless it is overshadowed, or for a particular artistic purpose. Some city works with an anime feel will also enhance the dark areas to weaken the light and dark relationships, making the geometric or linear composition of the image more prominent and creating a manga experience.
For example, the image below is from Omorphia Visual.

In sunny lighting, I pay extra attention to the brightness and saturation of the shadows.
This is a filtered photograph where the shadows are adjusted to a more saturated blue than usual, which brings out a more relaxed mood in the viewer.

In my past work, I have noticed this interesting stuff and approached it in my own way.
I will make the brighter areas warmer, and if you look at these areas in the red mark, you will find very strong contrasting colors of warm and cold.

In this project, I have continued to use a similar approach, and you can see that there is a clash of light and dark colors on the ground.

The overcast situation will be slightly different, but it’s also a simple combination of the skylight taking care of most of the work, with directional light being reduced to very low values, and shadows set to be very blurred.
Usually, a cloudy day with some rain added to the effect is better, which is something I’m considering going for.

Next up is a kind of highly saturated lighting that I set up, which is more of an experiment. Many of you may have seen a similar style of work, usually found in 2D paintings, where the emphasis is more on some clash of colors art than on other designs for scenes or characters.
Of course, other designs can be brilliant, but in this case,, the colors are the first sensitivity for the viewer, who will notice the unrealistic colors at first glance.

I wanted to try this interesting style in the engine and took the time to find out if anyone had tried to make a real-time piece in this style, but it didn’t seem to be available.
So I had to experiment back and forth on my own, without any guidelines. It is more exciting to try to come up with some nice colors by trying, but the biggest difficulty doesn’t lie here.
This is a scene that can be run by the player and every viewpoint needs to be considered, so how to keep the colors in harmony with each other despite this is the biggest hurdle.
To achieve this, I added 5 directional lights, mixed using different angles and intensities, which can be seen under the editor’s view as having some lighting that doesn’t make sense but won’t be noticed when the player is running.

Having many directional lights adds a lot of consumption and reduces the rendering speed by about 2.5ms.
Well, in this scene, it is acceptable to make such a change, but it is still a not-so-good approach. I think there will be a better way, and I will continue to try.
Moving on to the post-processing settings I used, I just tried and applied some simple parameter configurations. There is no need to replicate my settings as this is not generic; each project has separate matching settings, and the parameters are different under my different maps.
Firstly, Bloom.
This is a very important setting. By looking at those Japanese commercial animations, you will see that they put a lot of emphasis on the Bloom effect. Also, these parameters are not complicated.
Bloom in Unreal has only two calculation modes: standard and convolution, and convolution is basically never used in games. So, just focus on these parameters here and experiment a lot.

Then there are some slight exposure corrections, chromatic aberration, and local exposure settings. Local exposure is the more important setting here.
If you don’t want to make your scene too dark, you can set it here quickly to change it but don’t rely too much on the settings here.
This is only good for some minor adjustments. If you feel the light and shade relationship in your scene is not correct, start with the lighting settings first.

I also set Lens Flare textures. The default Lens in Unreal doesn’t work very well. You can get some stylized effects with different texture settings.
Similarly, just experiment a lot and choose what you think suits you.

The color grading also has some parameter adjustments, but they are really too slight, so I won’t describe them. The last item is the post-processing material.
Many people have asked me if I applied any special shading in the post-processing, but in fact, I did not. I only applied a very simple outline material. This is a comparison of all post-processing, completely off versus on.

Settings
I will describe what else I have done. The focus of this article is on the environment, and I will only briefly mention the other systems. I used the foliage system, not just for arranging trees but also for some props in the street, such as street lights, signs, and other things.
As mentioned before, since this is a scenario that runs in free view, it needs to take into account all the angles the player is viewing as they run around.
So you should have guessed what needs to be done about this: setting up all the places the player can see while they are in the city, even if they can’t reach it.
Some developers usually use some mapping at a distance, but since Nanite is turned on, I am using models everywhere. It sounds a bit arbitrary, but you still need to plan well and use more instances; otherwise, Nanite won’t save the frame rate.
For the character setup, I used the VRM4U plugin, as well as some generic setups for third-person character blueprints. VRM4U is a plugin used in conjunction with Vroid, a very easy-to-use software for making cartoon characters.
The characters in the scenes are made using it, including playable characters and passers-by on the street. Many of them come from the Vroid Hub, an open community where many creators upload the characters they create, and some offer open access to the models.
VRM4U has an accompanying cartoon shading that can be used in Unreal, as well as a skeletal and physics scheme, but it’s not really applicable to the game. This is the cartoon rendering provided by VRM4U, which I didn’t use because it didn’t behave very well with multiple light sources.

I’m only using a temporary PBR solution in this demo, so the shading system for the characters is also something I need to work out.
The physics simulation for the main character uses the AnimDynamics solution, which is an easy but useful system that uses nodes to define the physics operations for a section of the skeleton individually. I set the bones for the hair, the backpack and the clothes separately.

I used the blueprints to set up the cars and crowds running in the scene.
Now there are only a few very simple features, and it is a system that still needs improvement.


The final remainder was some work on level settings, UMG, performance, file optimization, and many run tests. This was also some tricky work, but I won’t describe it.
It involved too much knowledge. If you’re using Unreal Engine 5 though, check out the articles from the Fortnite team; they share many methods that apply to Unreal Engine 5.
Feedback
After 6 months, I posted the work on Artstation and on Youtube. In fact, I wanted to wait until I had done better, but after some consideration, I felt that I couldn’t just work on my own from start to finish.
So I wanted to listen to other people’s opinions before continuing, and I also needed to learn more; otherwise, I wouldn’t be able to do better.
So, after publishing, I decided to stop working on the project for a while, to learn something new and, in the meantime, see what people had to say.
It was a mixture of good advice and criticism. Some artists usually encouraged me, and some game developers made friendly suggestions about improvements, but most of the comments I received were from the players.
There were many compliments, but most of the criticism came from here too, as the players were obviously more demanding. Sometimes I am emotionally affected by unfriendly people and very amateurish comments, but I soon calm down and spend time on my studies. Good or bad, these opinions are valuable to me.
Feedback from players is incredibly important because they are the audience, and some of the advice from professionals has helped me learn more. But as an artist and developer, it is important to listen to others as well as stick to some of your own ideas, which require some balancing act.
Defining the next steps Using this feedback, I have listed in my own worksheet some of the shortcomings that are frequently mentioned by players and could be improved upon:
- Need for more reliable crowd on the streets.
- Some of the cartoon feel is not created enough.
- The map needs more explorable areas.
- Lack of abundance of street props.
- Performance optimization. Actually not too bad right now, but could do with more optimization work.
Anime Tokyo is just the beginning; it’s positioned as a free environment experience project and is now available on the Steam page, where you can add it to your wishlist. These environments are eventually included in another full game, and I am working on other plans for:
- Story, worldview.
- Other maps.
- Some combat design.
- Some cinematic design. It will take a long time to accomplish these things, maybe a year, maybe two years, maybe more. Improving yourself is a long process, but the excitement when you really notice that you have made progress is unforgettable.
Conclusion
Finally, I would like to give some advice on creating art or game work, new things, new techniques and new art are constantly emerging, so learning is an ongoing, never-ending process, and I have been helped by many people in this process, so I would be happy if my advice could help you too.
First of all, interest and love are essential; without them, it can be very painful and inefficient to do these things. If you’re not too sure, try playing more good games, watching some good films or animations to get a feel for them, and that these are ideas that can be well incorporated into the creation of art.
I spend a regular amount of time each day browsing the web, checking out new work by great artists or demonstrating techniques that I find really interesting, and often learn something new or get inspired. It’s a habit that keeps me in a fresh mood.
You can choose a few artists that are particularly good and suitable for you to study as your idols, and then divide your time proportionally and spend more time on them as your focus, e.g., in animation, I like the work of the famous director Makoto Shinkai, in illustration, I like the style of loundraw, in 3D mixed with 2D artists I like Arseniy Chebynkin, but not too much, otherwise, it may lead to confusion.
For knowledge about game development, check out GDC or some of the other companies that share sessions. I watched almost all the GDC videos that interested me, and it was very helpful.
Even if there are some companies with technology that you can’t do on your own, it can open your eyes. Finally, for UE learning advice, apart from video sites and documentation, the Unreal Engine forums are a good place to look.
There are many tutorials, people sharing their work, and some QA, where you can often get help if you encounter a problem and also look up solutions to some existing problems.
It’s all a matter of taking your time, and in any case, seeing and thinking more. Many things have become habitual for me, and I think this is beneficial.
That’s all I have to say; I hope you got something out of it. I’m sure you’ll see something better if you keep following this project of mine. See you next time.
Read more articles
You might also like these articles.


