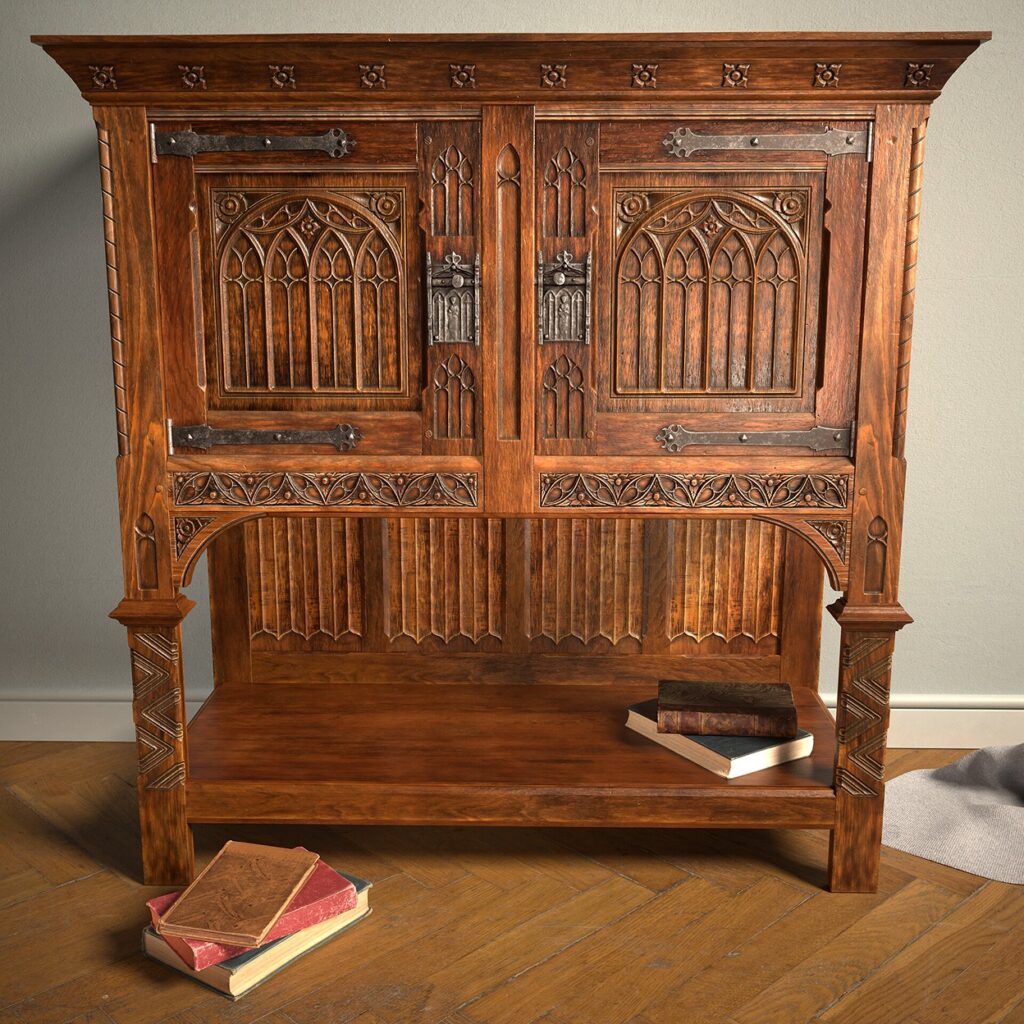
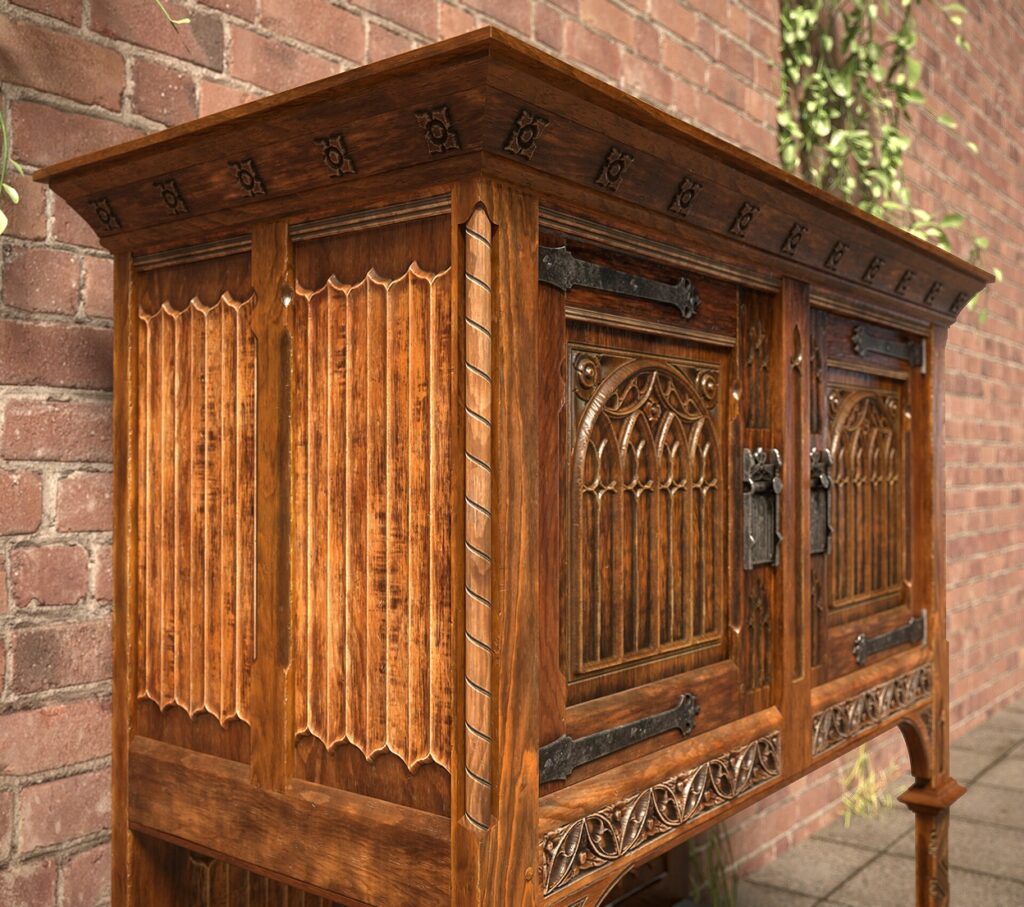
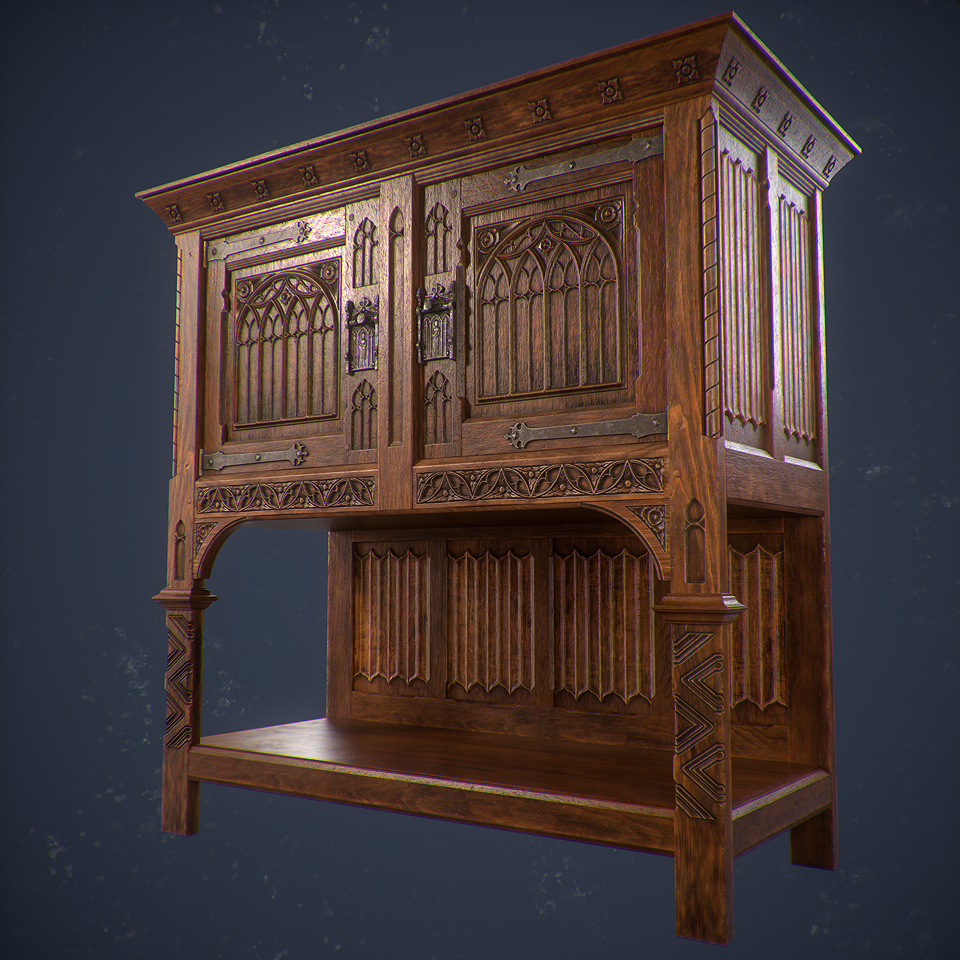
Gothic Cabinet

Introduction
Hello everyone! My name is Anton Tcepov. I’m a 3D Props and Material artist. Currently, I’m working as a freelancer but am looking for my first Game-Dev studio to work with.
I have been doing 3D modelling for over three years. I’ve explored many directions in the field of 3D graphics, and now I’m focused on two of my favourites:
3D Props and Procedural Materials.
References and Inspiration
I completed a tutorial “Antique dresser trim” by Max Kutsenko. It was great, I learned a lot of new techniques and decided to make my own prop using new knowledge.
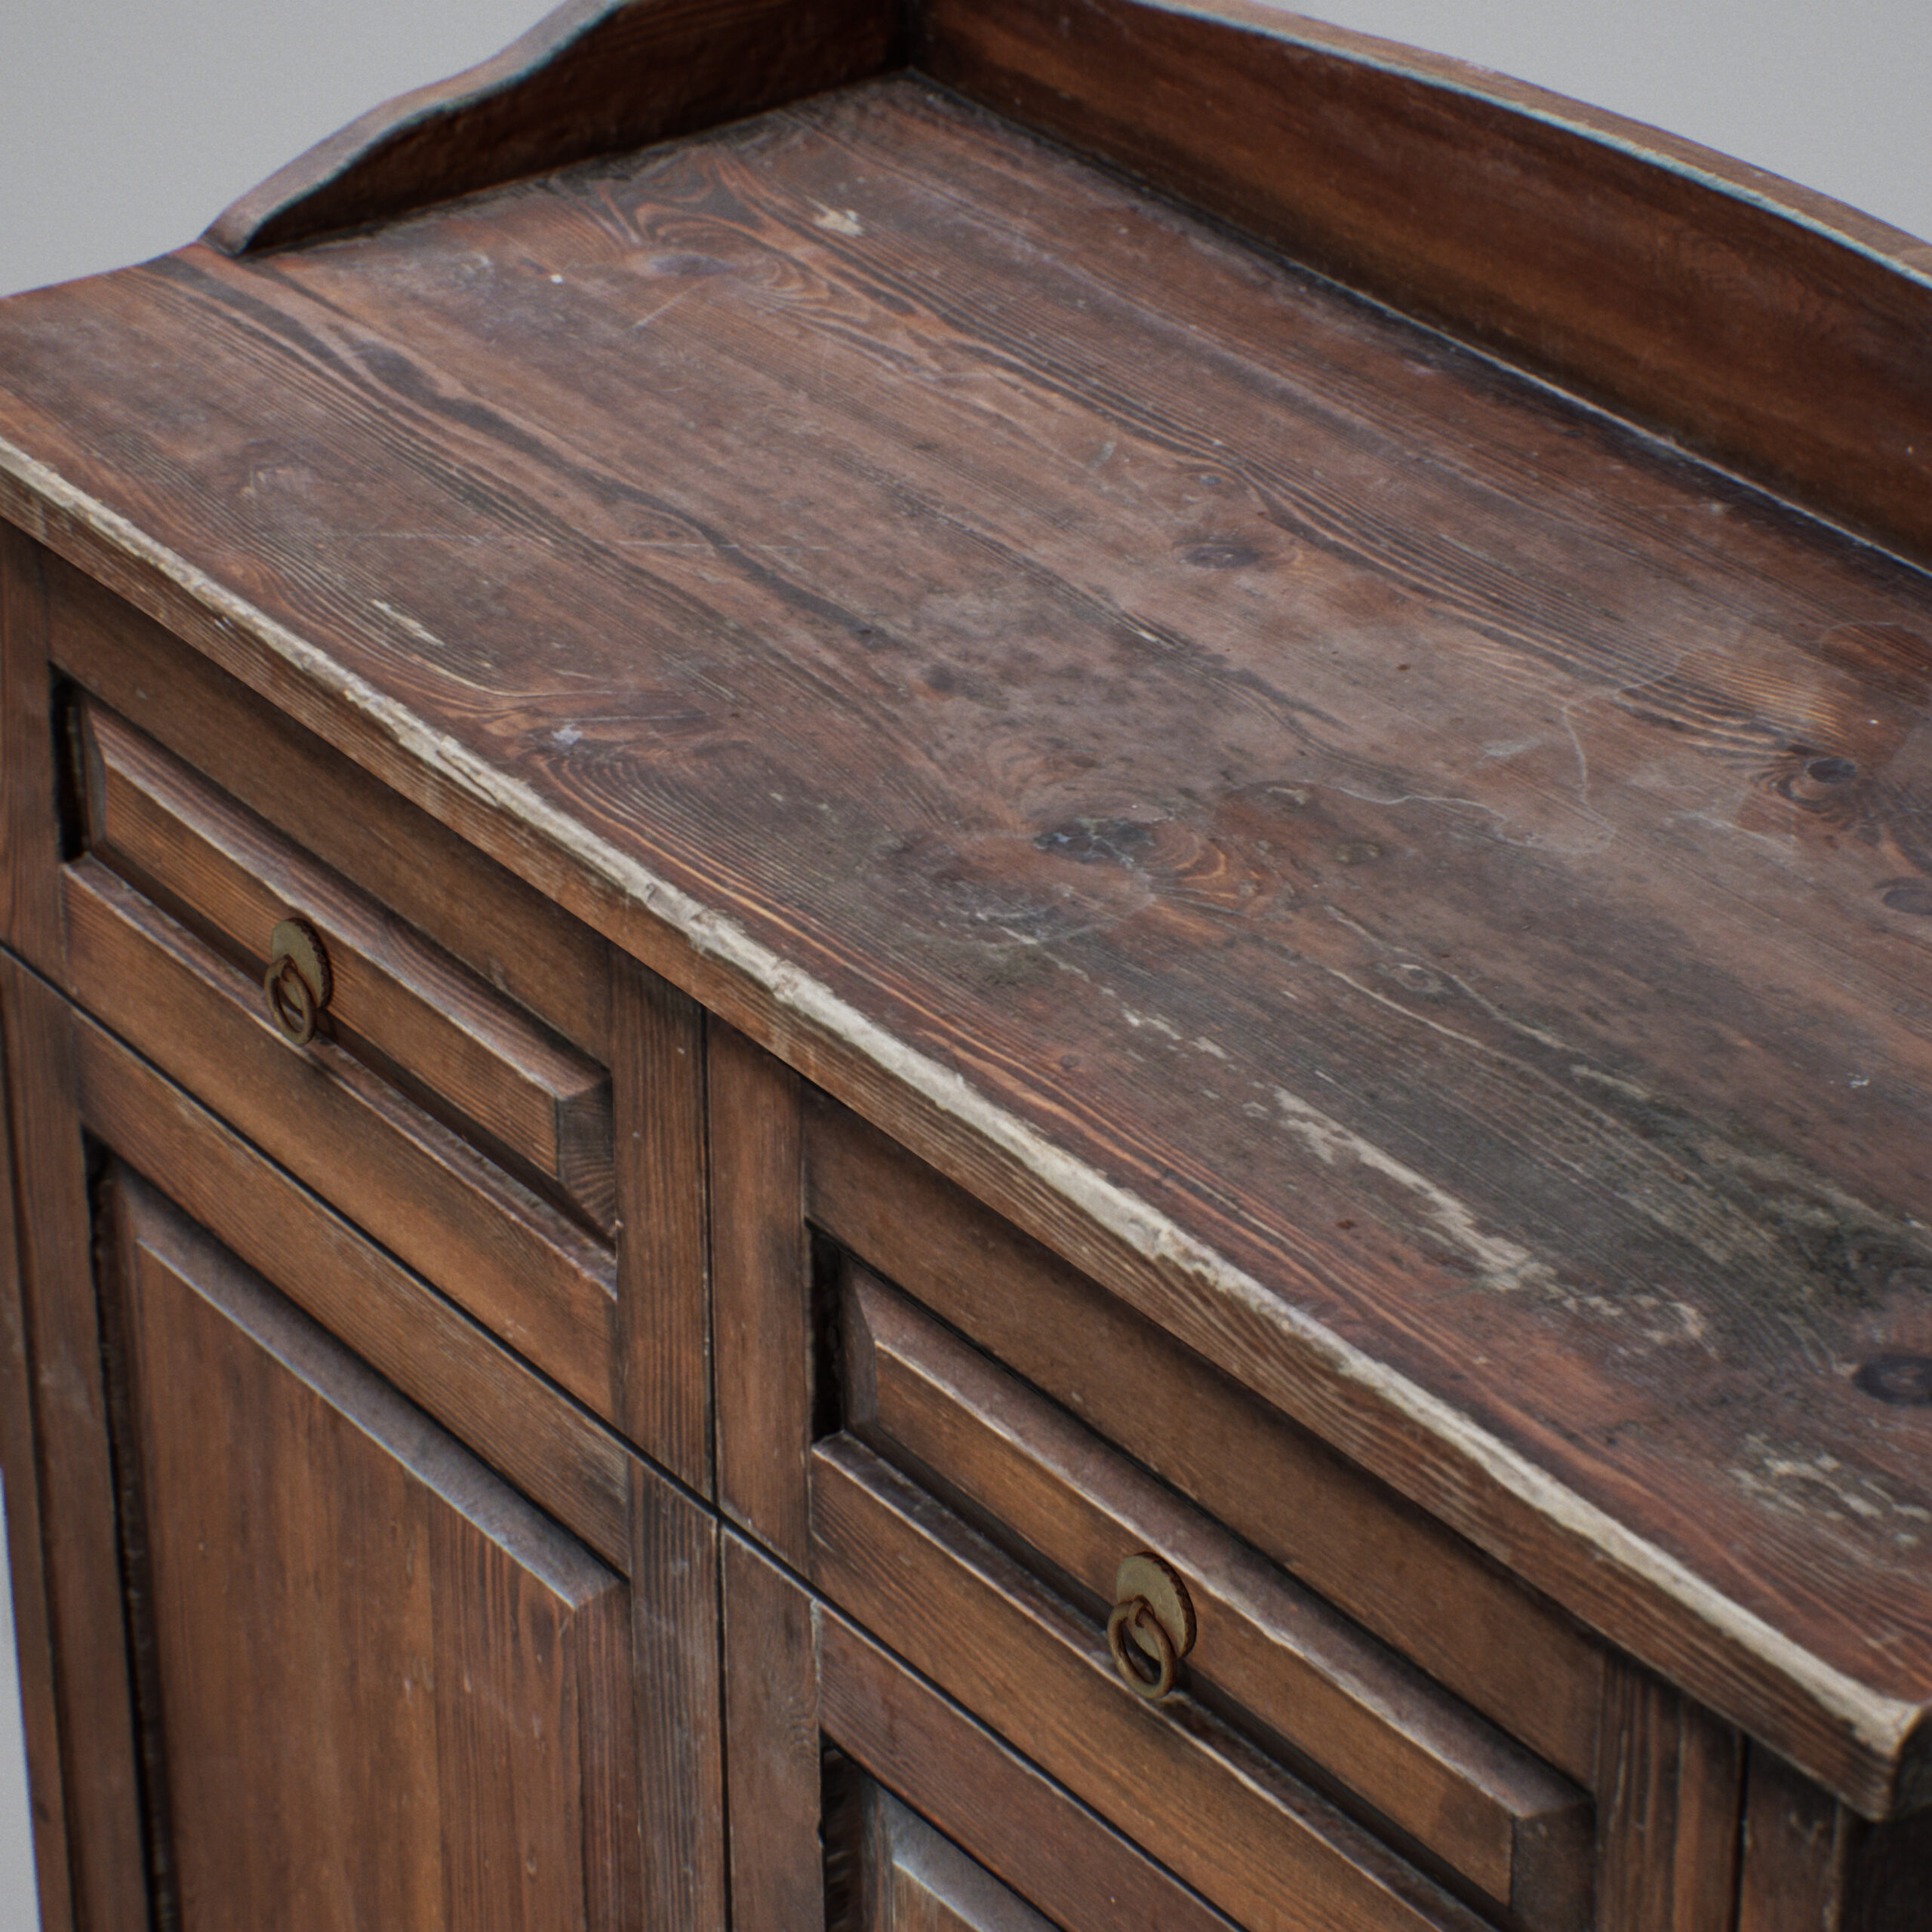
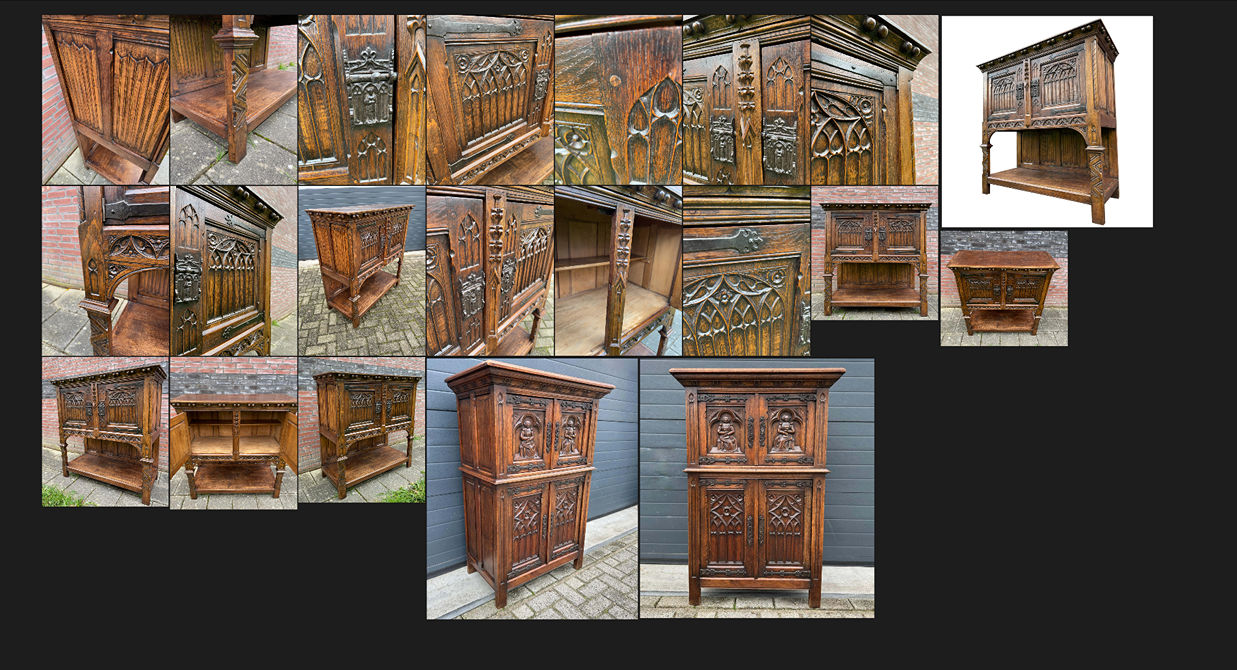
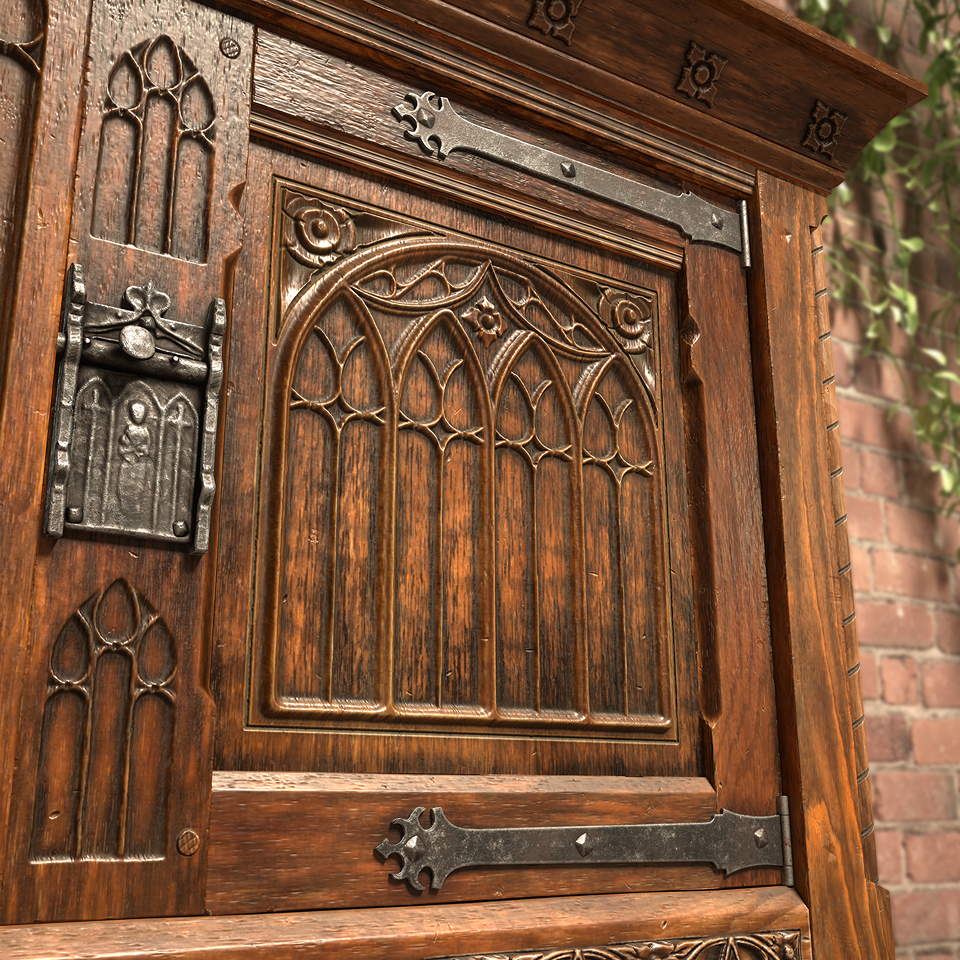
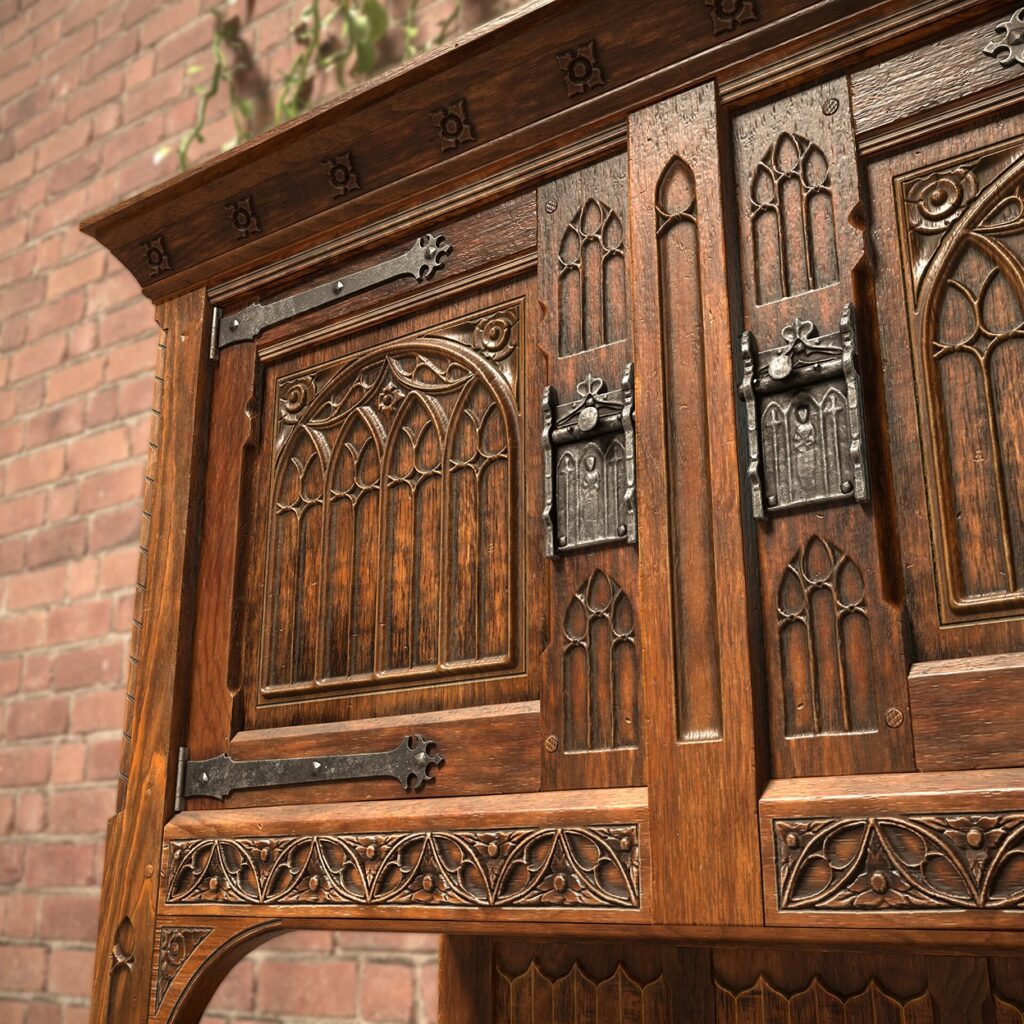
First of all, I started looking for real life references. I searched for a wooden dresser/cabinet/chest or something like that with wood ornaments.
Goals
When I started working on this asset, I aimed to practice the following:
- Creating textures for an asset using primarily Substance Designer.
- Creating trim sheets and applying them to assets.
- Crafting various ornaments using Substance Designer.
- Enhancing my skills in creating presentations in Marmoset Toolbag.
Tools
For this work, I used:
- Blender: Modeling and UV mapping.
- Substance Designer: Tiling materials, height patterns, and texture setup.
- Substance Painter: Metal parts.
- ZBrush: High-poly version of metal locks.
- Marmoset Toolbag 4: Presentation.
- Photoshop: Post-processing.
Modelling
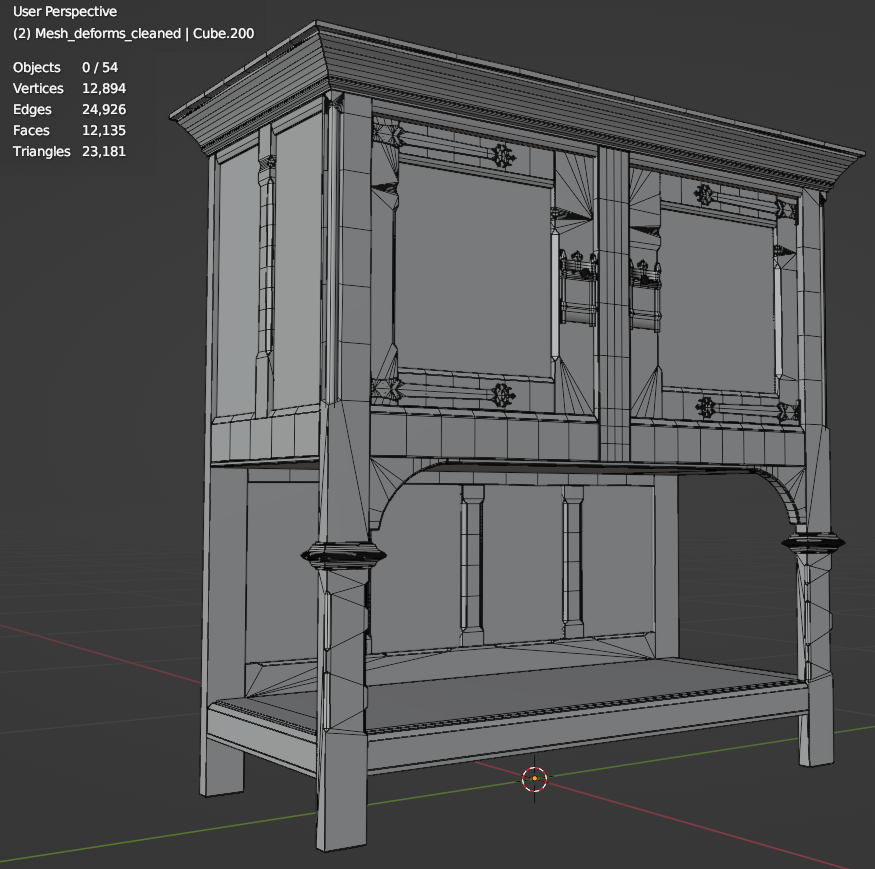
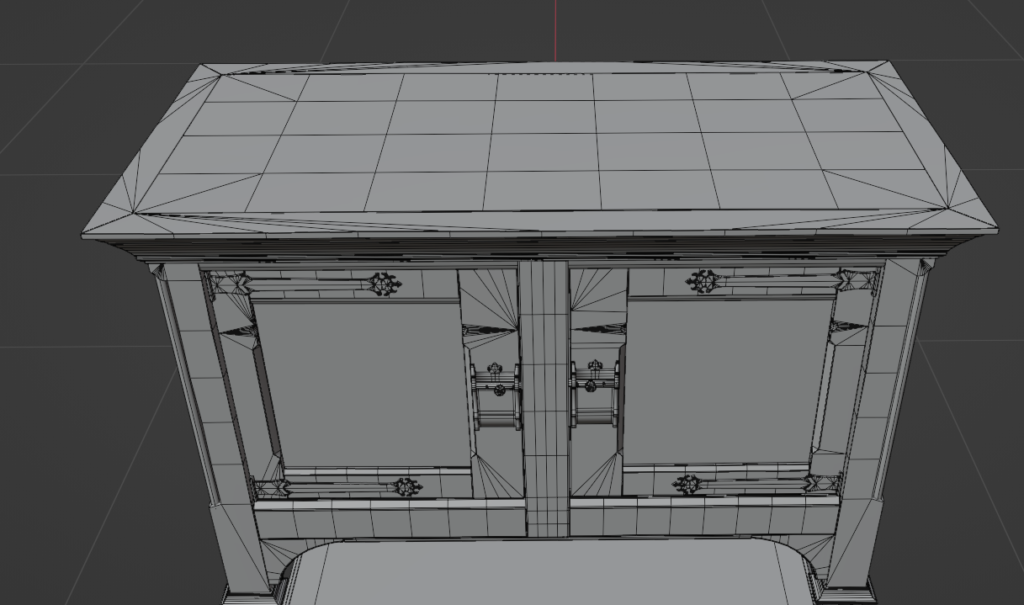
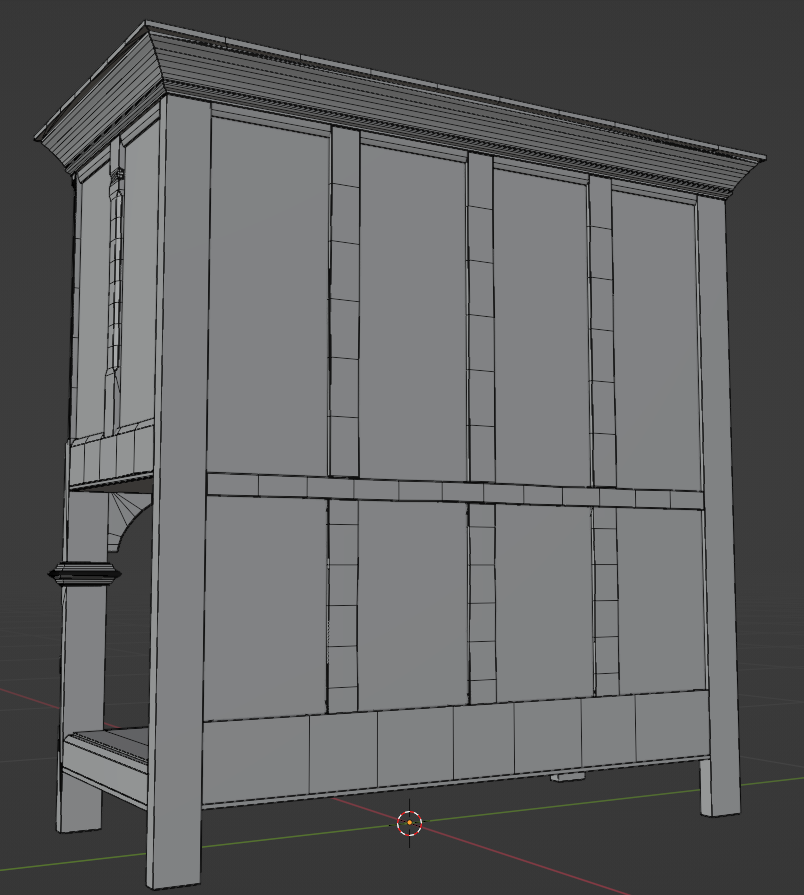
When I was watching Max Kutsenko’s tutorial, I liked that his model was pretty simple and he didn’t use anything special for modeling. There is no high poly version and everything in the final result was achieved on just a simple low poly version of a model.
I decided to do the same.
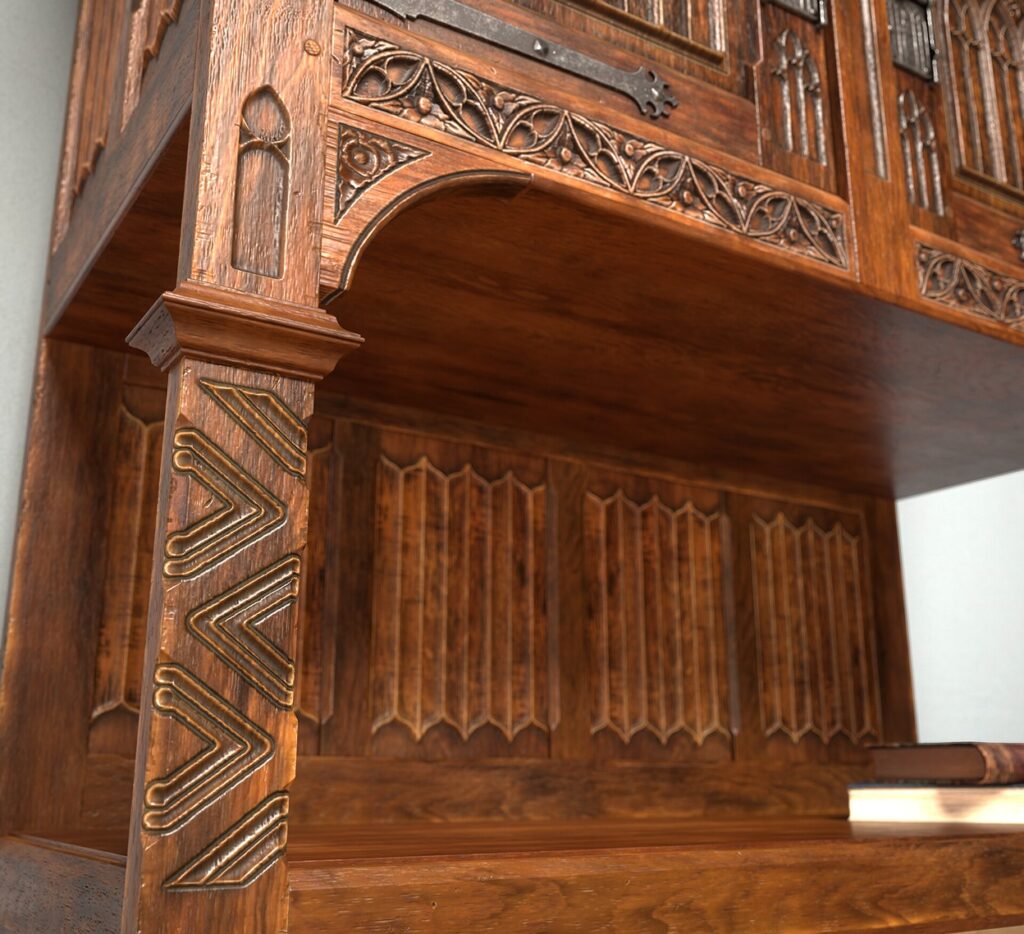
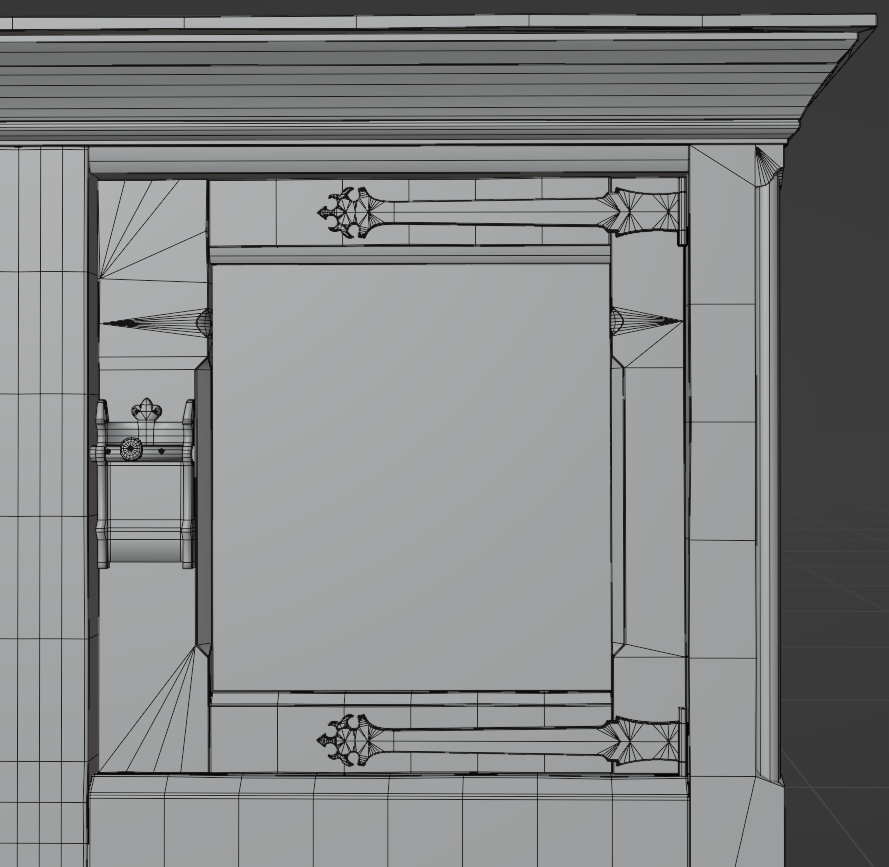
I learned that placing extra loops and manual displacement of vertices in the mesh can work well on wooden assets to make it more realistic, breaking up the “directness” of the mesh.
It’s also helped me to make shapes of mirrored parts look a bit different from each other. Thanks for this tip to Timothy Dries from Beyond Extent community. Also I placed small bevels in some areas to smooth the corners.
Texturing
This was the most critical part of the work in this case.
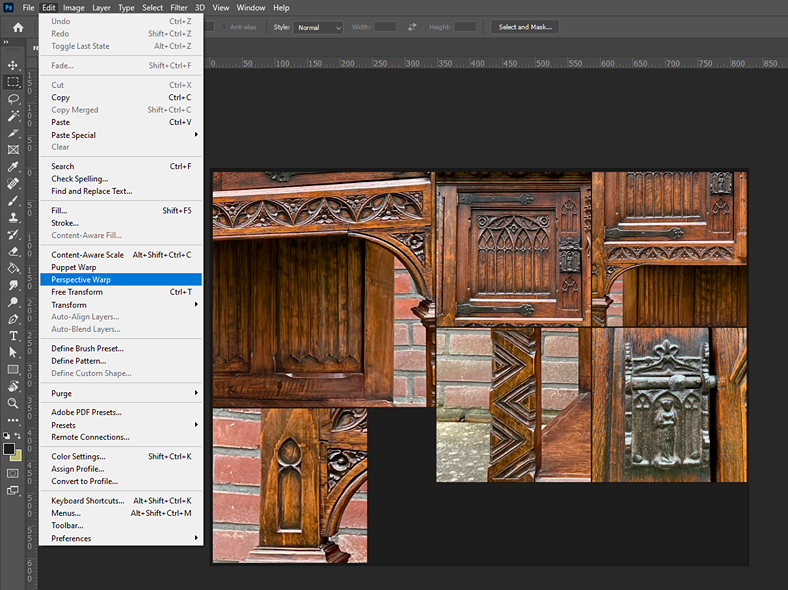
First, I created separate images of each pattern from my references. Using the Perspective Warp function in Photoshop, I could easily align my images. Aligned images are much easier to work with in Substance Designer.
To create wooden ornaments I used spline nodes. There is a nice tutorial from the Adobe community if you want to learn more about spline nodes.
I mostly used these nodes as a base for my patterns.
I used a Non-Uniform Blur Grayscale node for the first time.
Below are the Non-uniform blur and Bevel results.
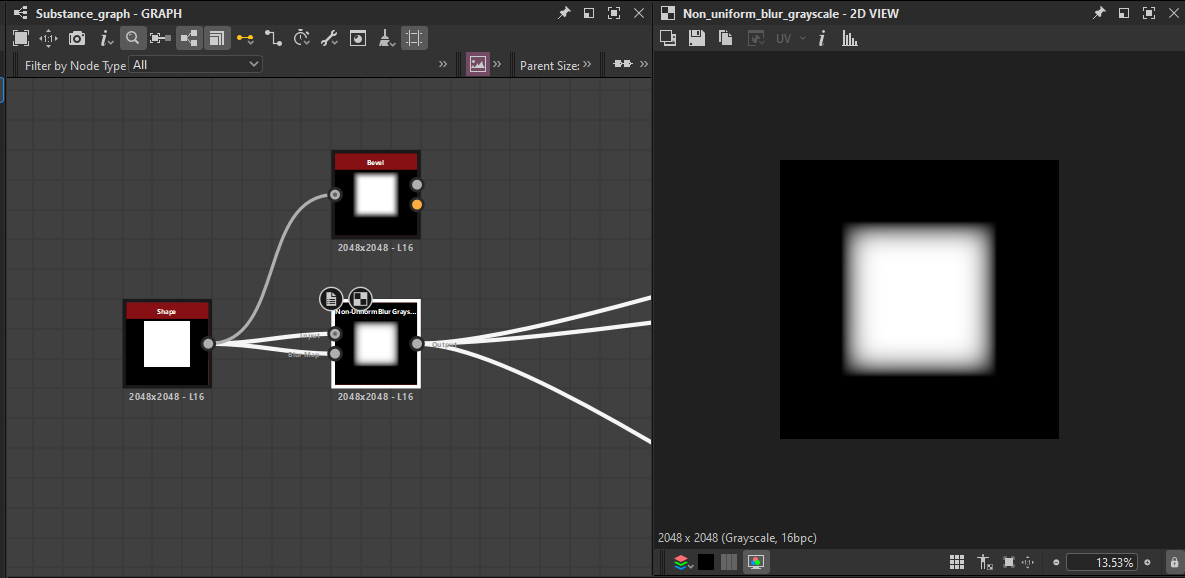
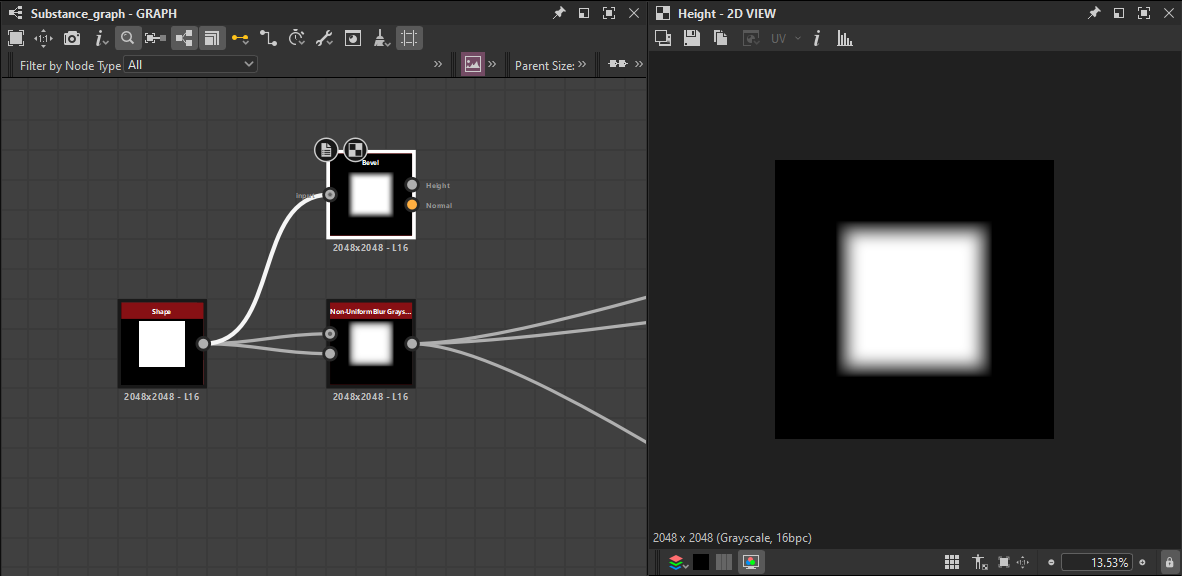
I found that the non-uniform gives me a slightly smoother result than the bevel, and in this case, it is easier to set up. Nevertheless, bevel can also be used for this purpose.
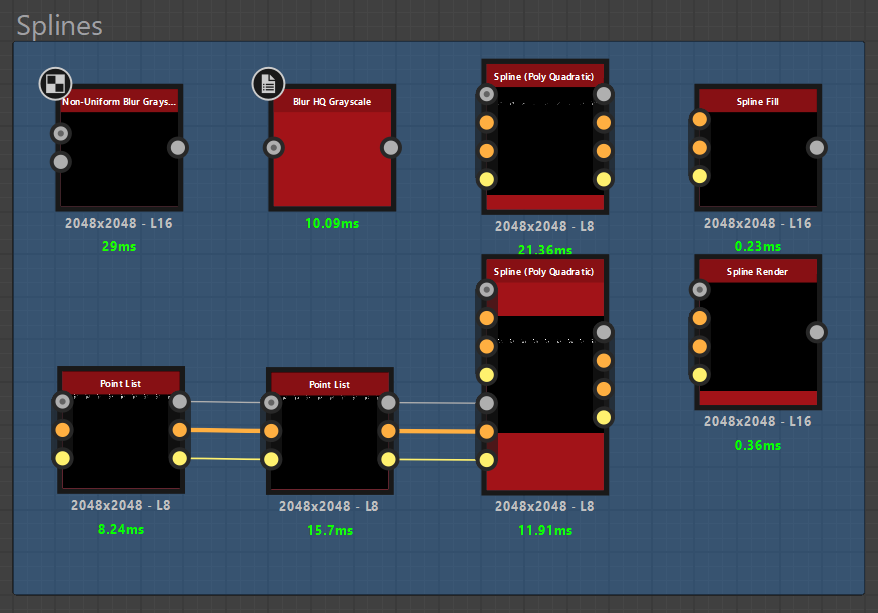
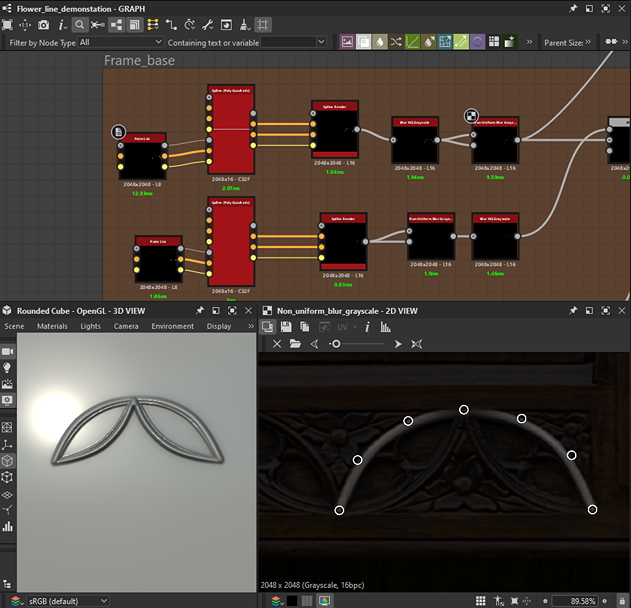
- Spline Fill and Spline Render are the key nodes to manipulate your splines. Spline Fill can help when you want to create a certain shape and fill it.
Spline Render is used to control your single spline options: its smoothness, thickness, segments amount of your spline etc.
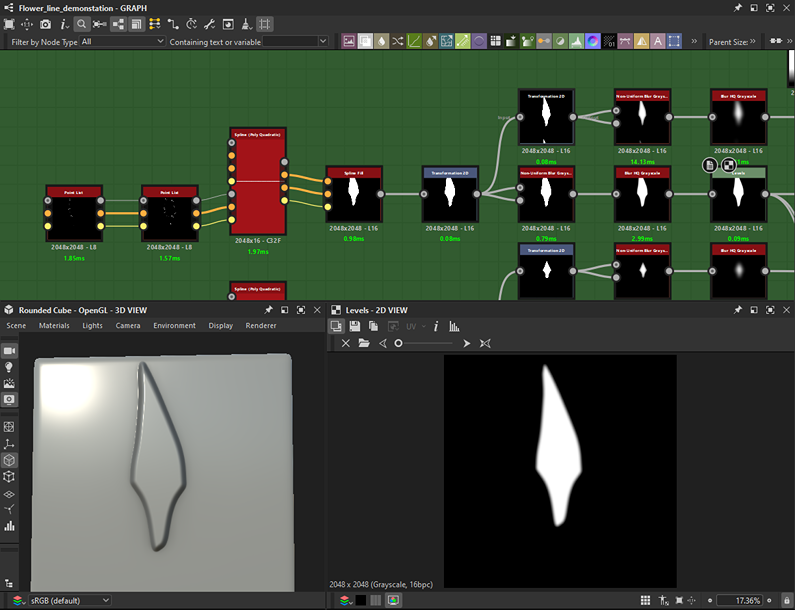
For example, the work process for my flower ornaments starts with a single frame just using Point List, Spline and Spline Render nodes. In Point List options you can choose the correct amount of points that you need.
This node can be duplicated and connected to the previous one to increase the number of points. It’s very useful for complicated shapes because you don’t have a limit on the amount of points.
I started placing my points creating the desired shape. (Below is the arc of the flower pattern for the first step).
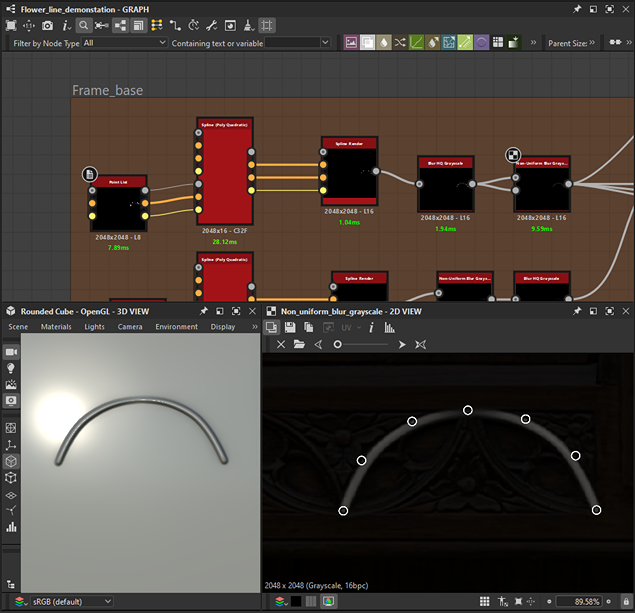
After that I combined a few of my splines to achieve a basic shape for my frame. Best decision is to blend splines with “max lighten” blend option to achieve a smoother result.
(Below is the Completed arc of the flower pattern).
In the same way I did my flowers. I started with a few Point Lists and used a Spline Fill node to create my first leaf.
Combination of “Non-Uniform Blur” and “Blur HQ” nodes gives a good amount of control for smoothing your edges.
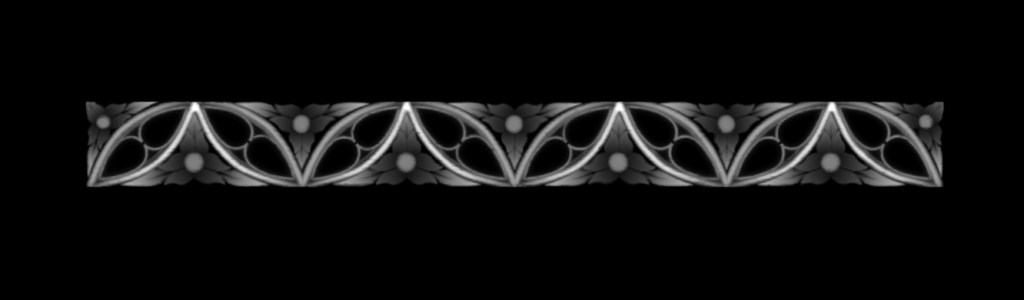
After repeating this process with other flower leaves and combining them with the frame parts, I duplicated them using the “Transformation 2D” node and got my result.


It’s cool that you can create your own patterns with splines and after that use your height maps for example in Zbrush to make a high poly sculpt from it.
This thing I decided to do with my metal locks. I made a height map of the ornament in Designer.
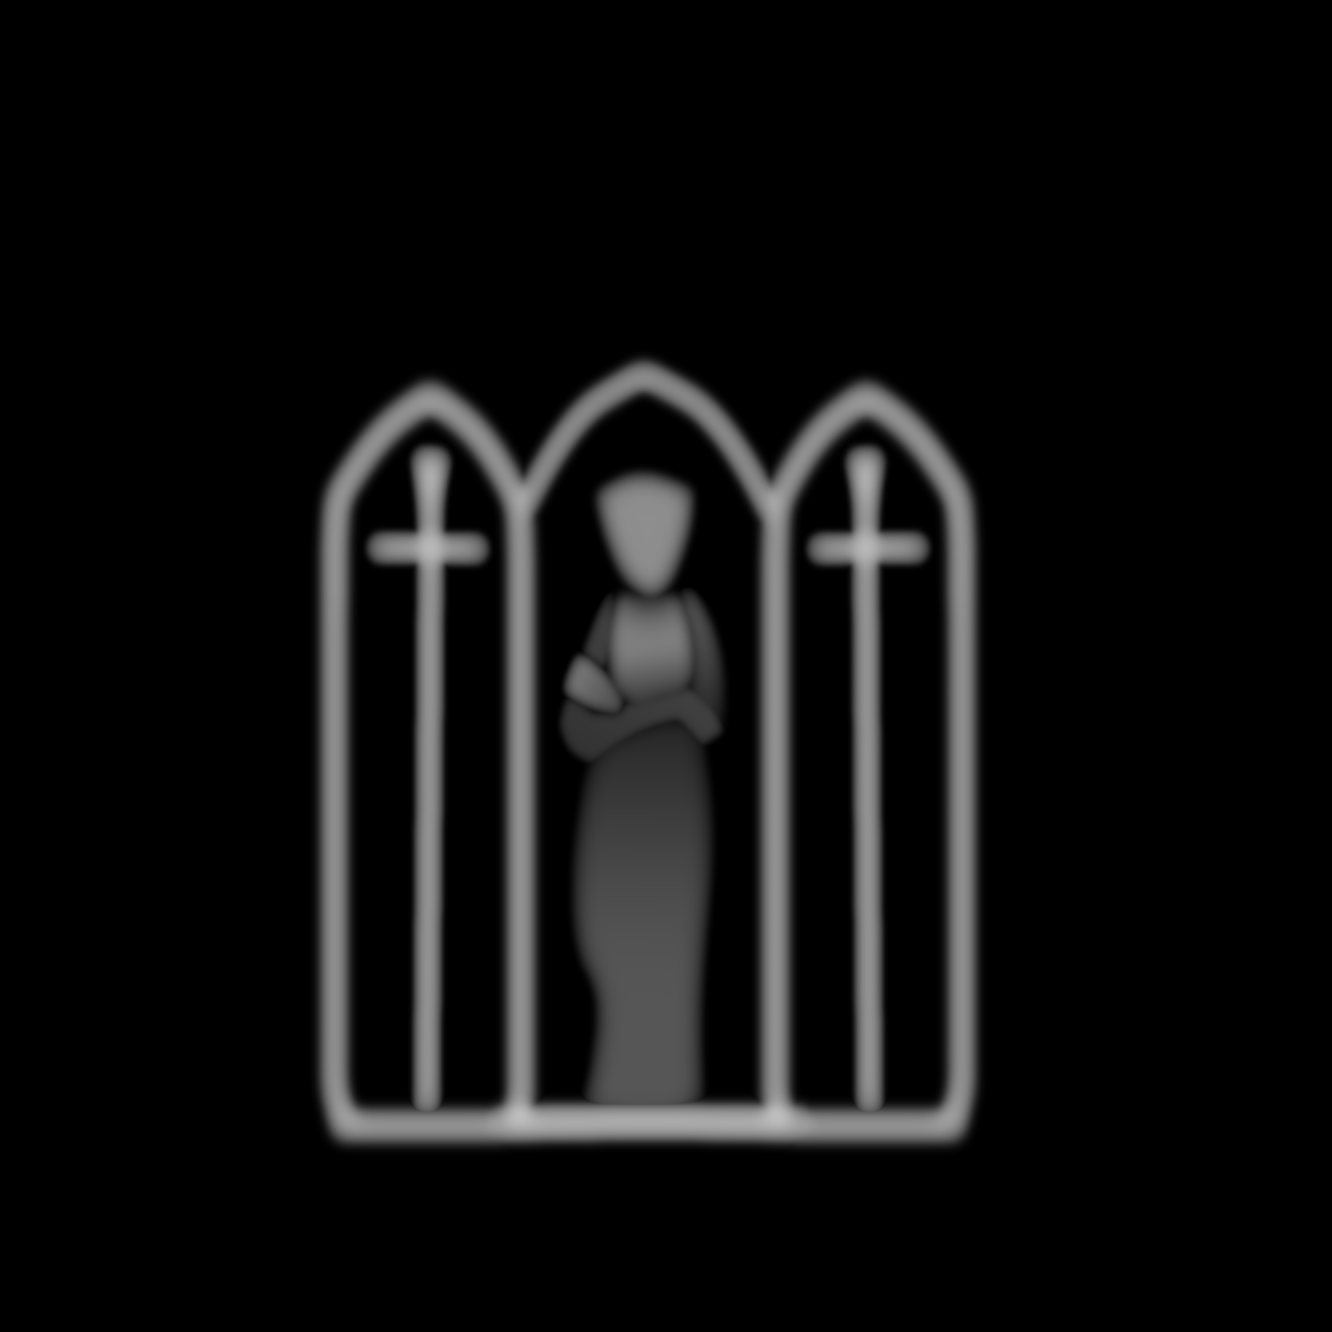
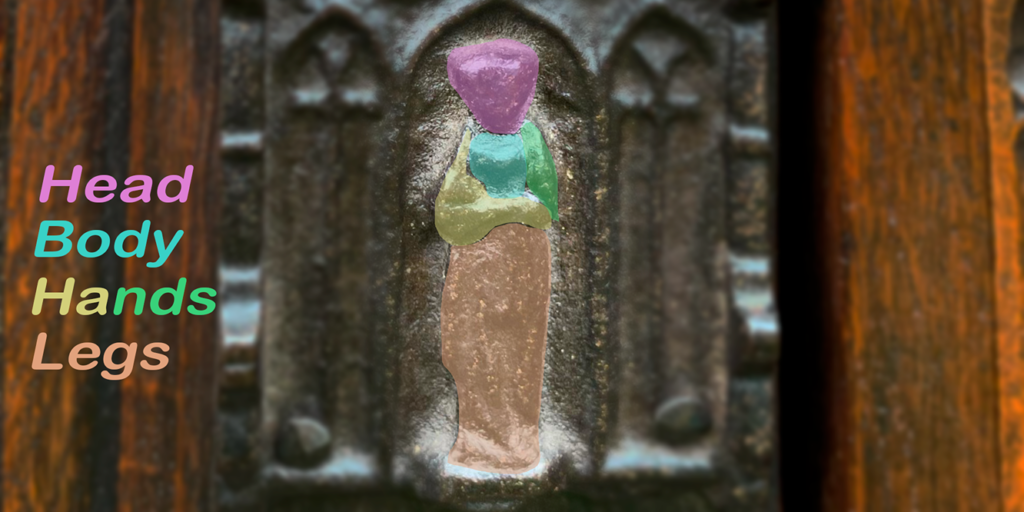
I learned how to use splines to work with complicated shapes. The first step is always to divide the pattern into its component parts.


I used my height map to extrude the pattern from the mesh. After that I created the rest of my high poly manually.
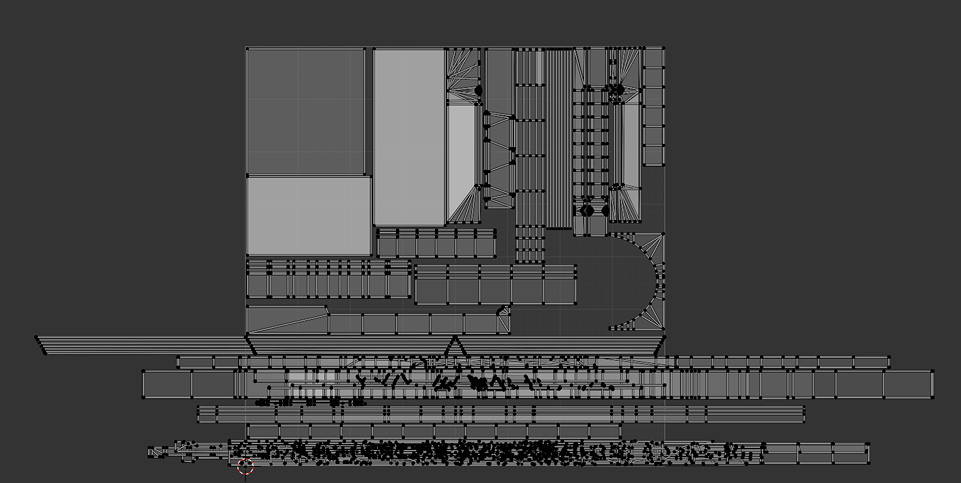
When I was done with some of my height patterns, I moved back to Blender to create my UV map. That was also an interesting process for me.
I divided the parts of the model into three categories:
- Parts for unique textures.
- Trim sheets.
- Large parts that will only be textured using a separate tileable wood texture.
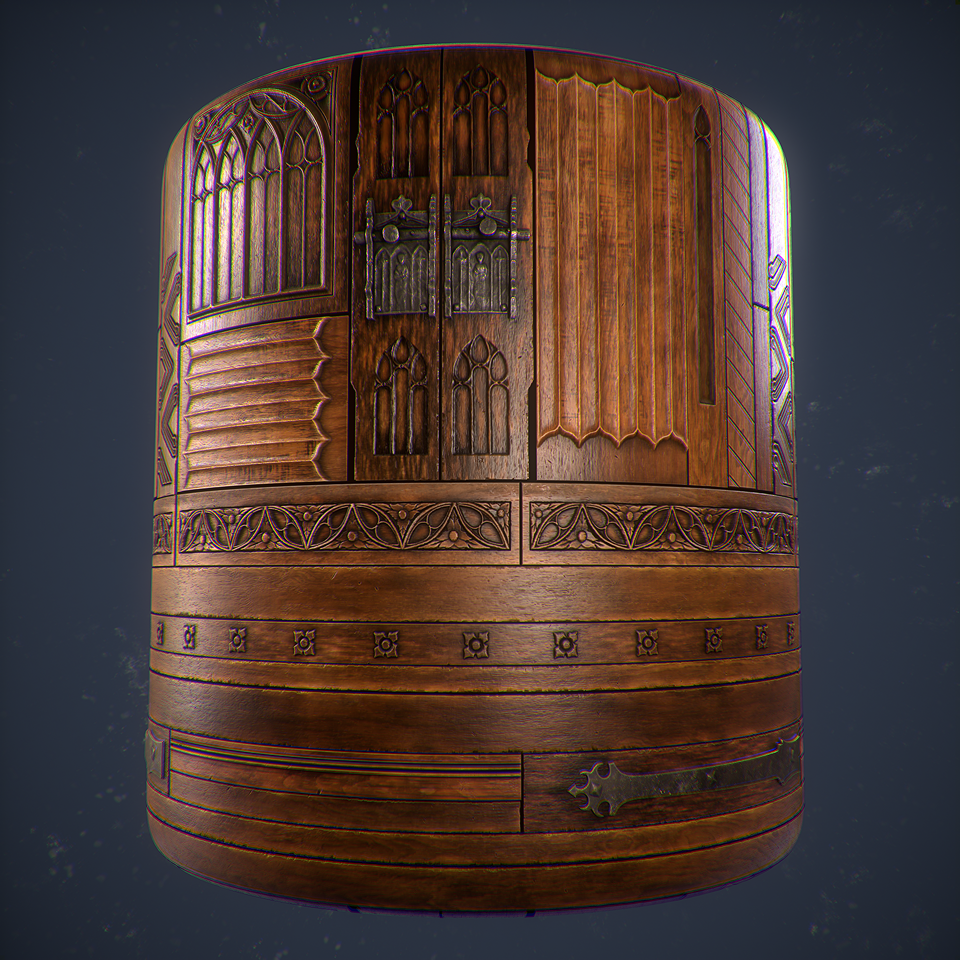
It’s important to say that to save my UV space and get a better texel density I used overlaps for my similar wood ornaments (for example door ornaments or wooden parts with flower line). So when I was working with textures I always kept that in mind.
My goal was to create textures that would look unique at first glance. I wanted to make small details appear natural, so you could notice that they use the same elements only upon closer inspection.
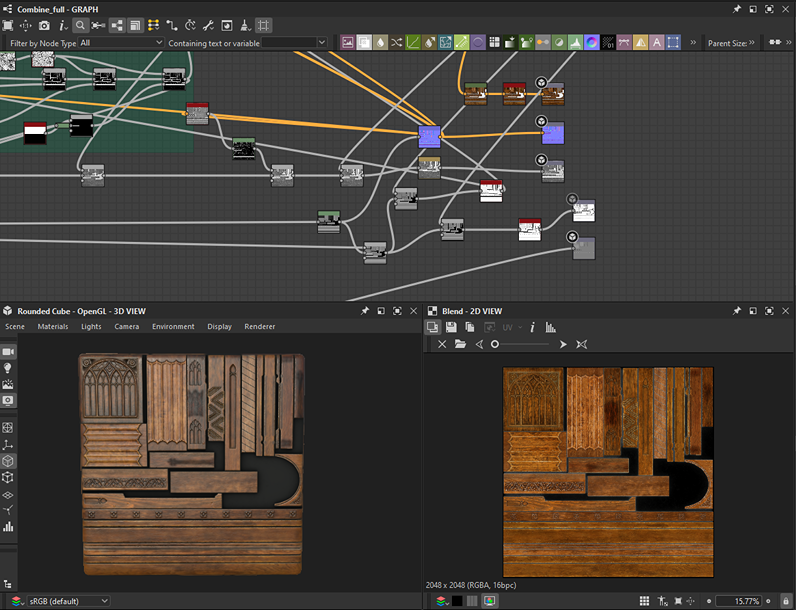
Let’s go back to Designer.
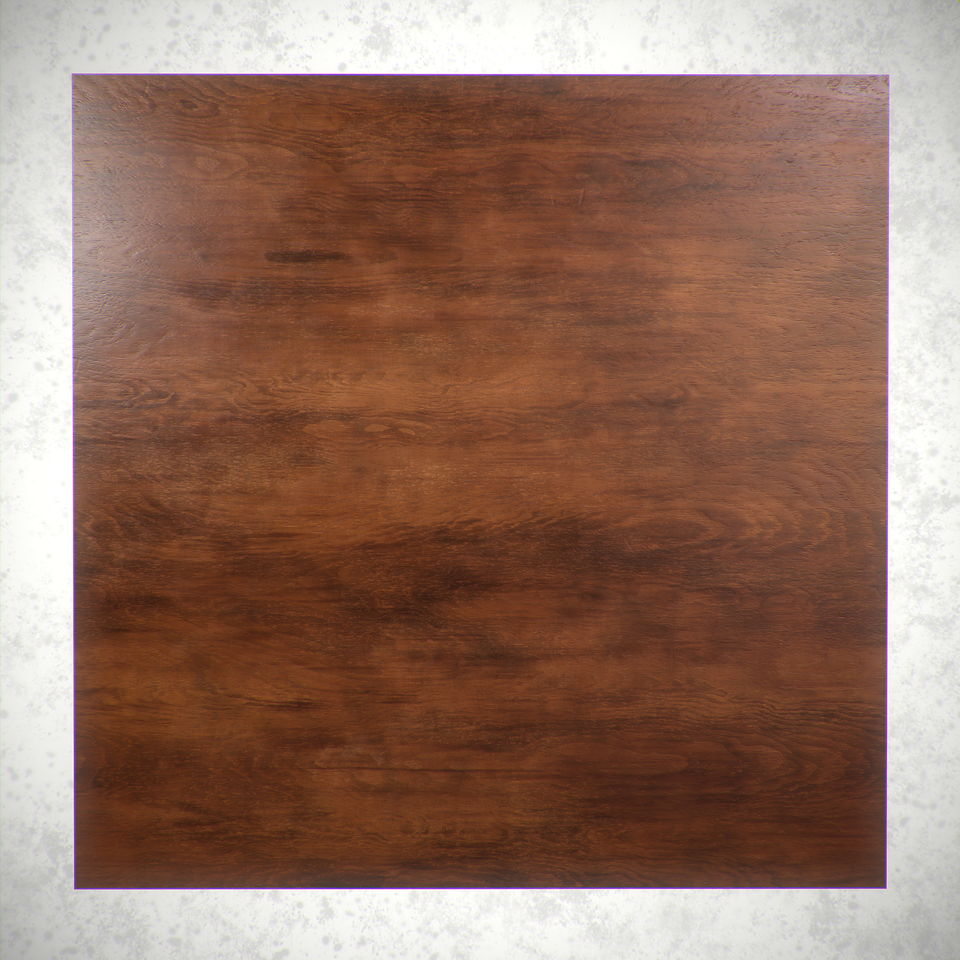
The next step for me was to make wood tiling materials. Looking at my references I noticed that there are two different wood materials: oak wood and dark oiled wood.
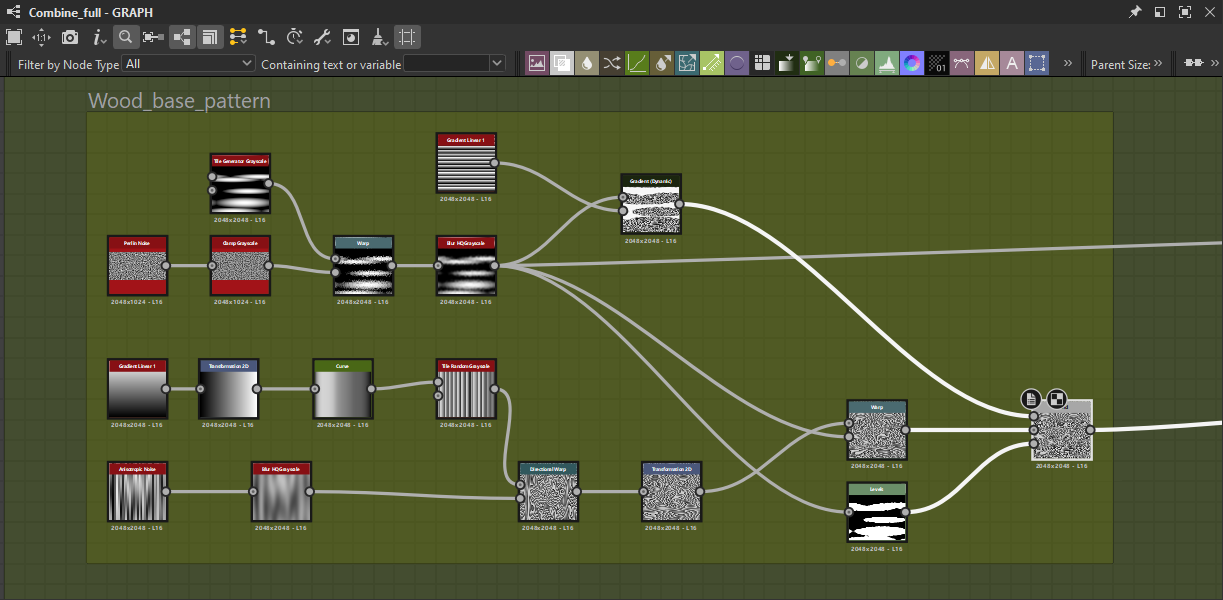
To create my wood I used techniques which I learned from Max Kutsenko’s tutorial. I created my base wood and after that I used its height map for the base of my dark oiled wood.
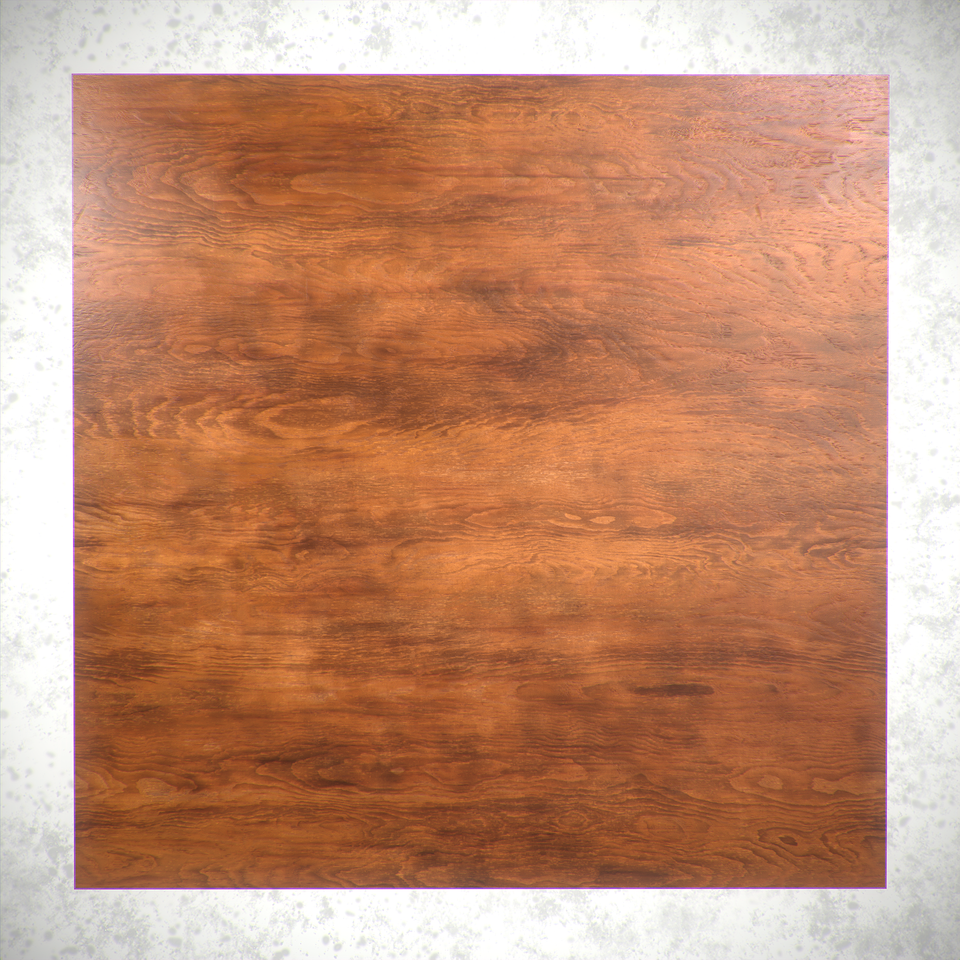
When the wood materials were ready, I combined them with different masks and all my ornament patterns.

Presentation
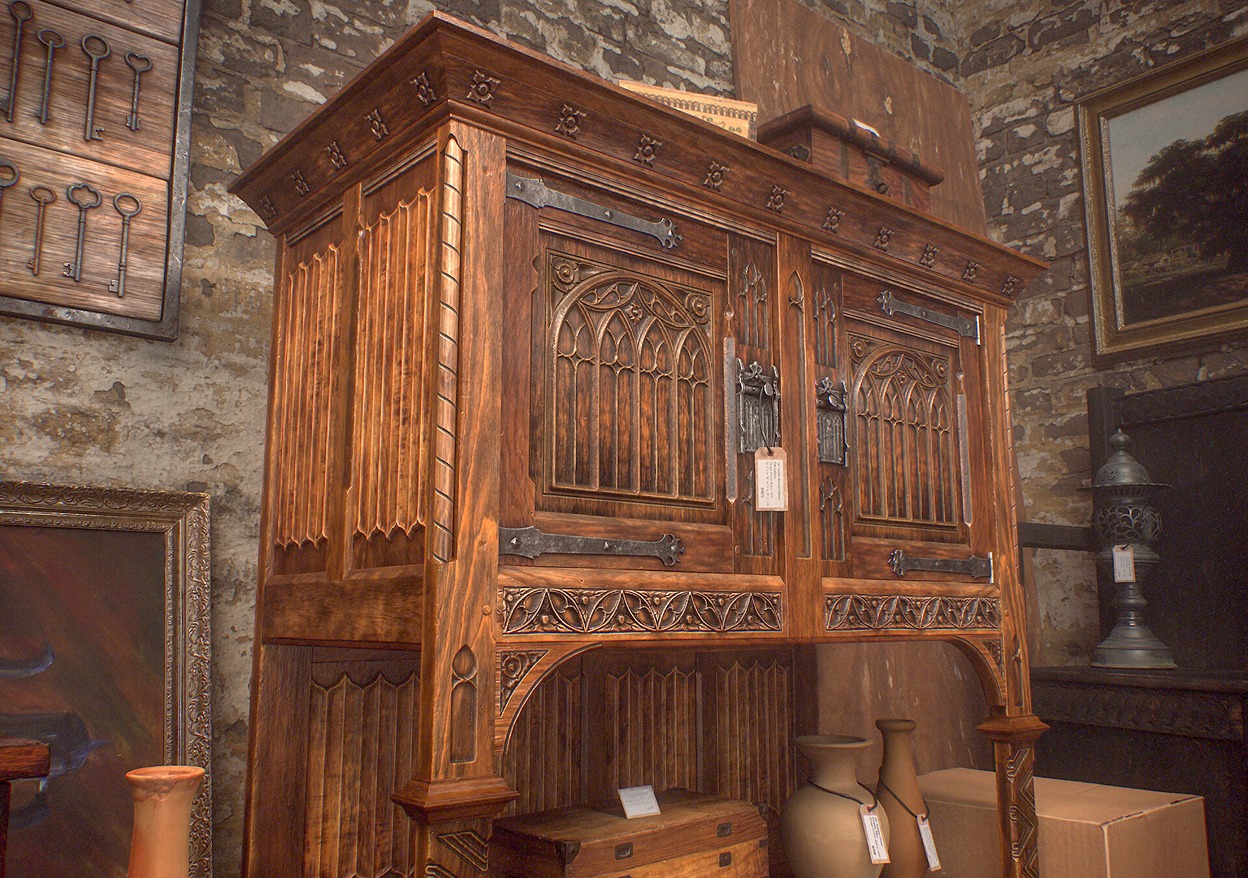
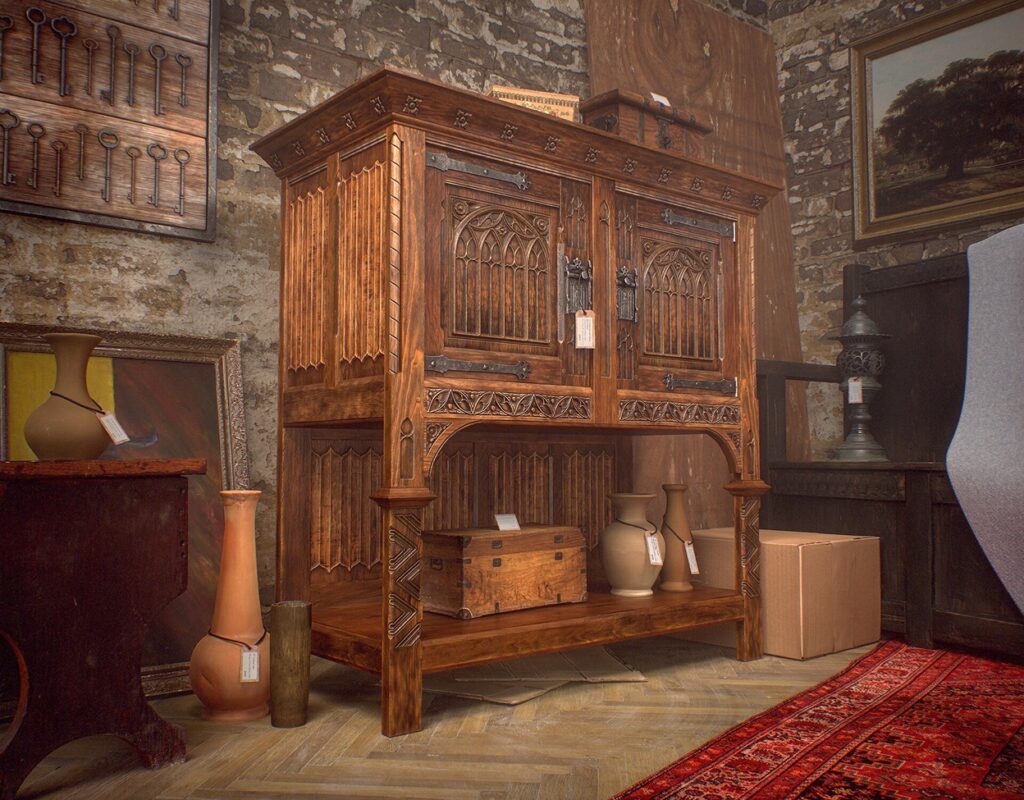
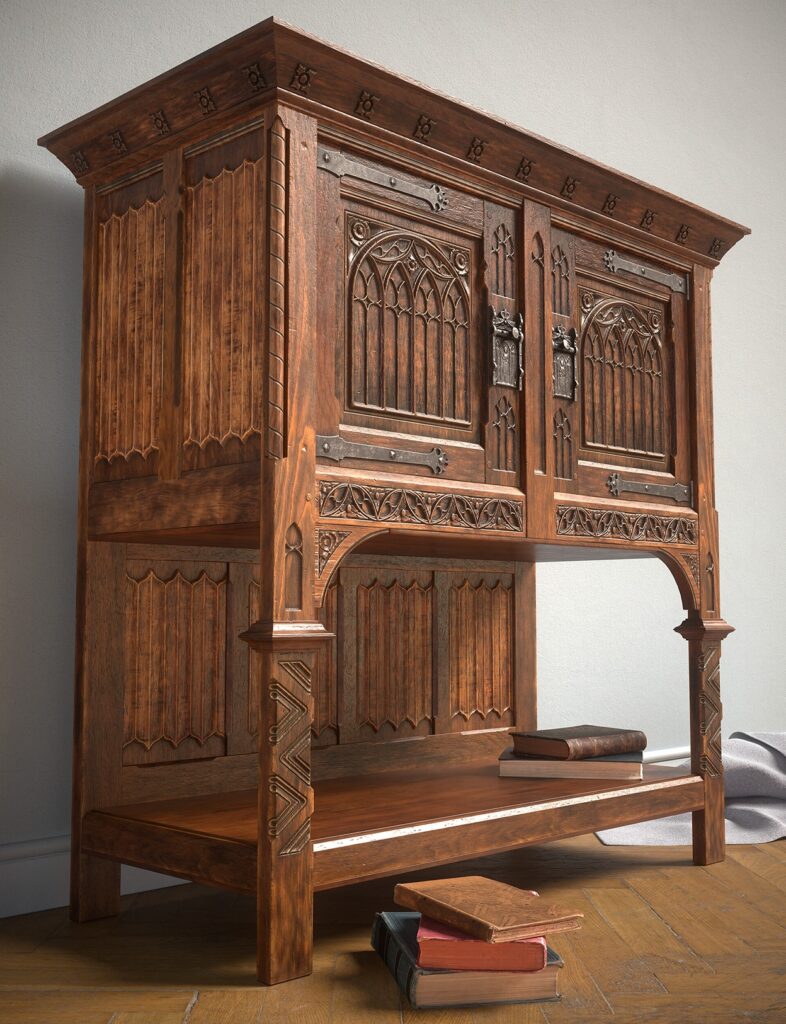
For the presentation I set up several scenes, most of the resources I took from Megascans and a few free assets from Sketchfab.
I took my time, tried to highlight the strengths of my work and placed the props in different environments, including playing with different lighting settings.
My work process on the presentation looks like that. I worked on the scene: set up the lighting, set up materials, chose the correct HDRI, imported assets and placed them.
At the end of the day I tried to get good looking screenshots which I liked. When I got it I stopped the work and went to rest. The next day I would return to these images and evaluate them with a fresh eye and refine them.
Conclusion
In this article I wanted to share with you some knowledge about how to use trim sheets and basics of work with Substance Designer spline techniques.
Many thanks to Max Kutsenko for his great tutorial and for sharing his interesting view about how these techniques can be used in the working process.
After this project, I felt much more confident working in Substance Designer and am onсe again convinced of the flexibility and capabilities of this software.
Thanks to the Games Artist community for the opportunity to present and tell people about my work!
Read more articles
You might also like these articles.