

Introduction
Hey! My name is Sean Webber, I am a Master's Graduate of Games Design from the UK.
Project Goals
In this article, I will be talking about some of the processes I used to create this fantasy tavern.
Growing up with video games, I have always been fascinated by the different worlds I could escape to as a child, which fuelled the inspiration for this project. With it being the final project of my third year, I wanted to demonstrate a range of skills that I want to specialize in.
About the project
Around the time I did this project, I was overwhelmed with the stresses of university, balancing creativity with time constraints. Before starting production, I wanted to really ground the goals I wanted to achieve with this project, which includes:
⦁ Modelling and texturing
⦁ Foliage and vegetation
⦁ Set dressing and narrative
⦁ Lighting and composition

With a huge interest in fantasy worlds, I started researching medieval buildings that would be found in a fantasy setting before eventually settling with a tavern. Through my research, I came across an amazing piece of concept by Yusuf Artun. I was looking for something more structurally appealing and this piece really jumped out to me.
Yusuf Artun’s Artstation – https://www.artstation.com/yusufartun
Blockout
I began by breaking the tavern up into manageable pieces. In hindsight, this project would’ve been a great opportunity to explore trim sheets, however, this was a big learning curve for me at the time and so I settled on a somewhat ‘kit bash’ workflow. The blockout didn’t need to be anything spectacular, so long as the pieces fit together and there were no obvious gaps that would allow light to pass through in engine.

Modelling
As this environment isn’t being built for a game, I used a mid-poly workflow, using bevels to round off the edges of each timber beam and simply using planes to fill in the gaps. For the windows, stones and other smaller props, I used a high to low poly workflow, sculpting my details in Zbrush and baking them down in Marmoset Toolbag before texturing in Substance Painter.

I also want to mention that scripts are a great way to speed up your workflows. During this project, I made use of the ‘ModIt’ script for Maya created by the amazing Wizix on Artstation. Go check out his stuff!
Wizix’s Artstation – https://www.artstation.com/wizix
UVing
When unwrapping any mesh, you want to pack the UV’s efficiently, making the most of 0 to 1 space, taking into consideration padding so your textures don’t bleed across to another UV shell. The geometry in this project wasn’t overly complicated, but due to there being a lot of components, it took a fair bit of time to get everything unwrapped.
When I unwrap in Maya, I make use of planar mapping to break up the mesh into multiple shells which make the UV’s more manageable. From here I can further cut or connect different UV shells taking into consideration seam lines that will be visible when texturing.
Baking
For my high to low poly baking workflow, I found that Marmoset Toolbag’s baker gave me excellent results without any messing around. If you are dealing with multiple meshes, you can make use of Marmoset’s baking groups. For more complicated bakes, Marmoset offers editing tools that allow you to clean up your bakes in real-time.
If you’re under time constraints, there’s nothing wrong with using Substance Painter to bake down your meshes. You will save time baking and texturing in one software rather than constantly switching between the two.
Always bake with a higher resolution and compress down, for example, most of my bakes were done at 4k. Overkill some would say, but it’s important to get as much detail as you can out of your baking and texturing process before you decide to lower the resolution.
Materials
With any project, I start researching materials and textures early on and often find myself mocking up some preliminary stuff in Substance Designer before going back and touching it up later. This could be working out how to create certain shapes or patterns or following tutorials on more complicated detailing.

Texturing
To texture my models, I took the materials I created in Designer and imported them as ‘smart materials’ into Painter. I wanted to go for a more dilapidated, overgrown look so I blended moss into most of my assets using different generators and masks.

I followed the original concept as close as I could, texturing according to the reference. For the wood, I wanted to add a little edge wear using the curvature map I baked from Marmoset to add some variation to the colour. This was done by using a lighter colour ‘beech’ wood as a base and a darker wood I had created in Designer as a top layer with a curvature generator.
The glass for the windows was something I spent a little more time on as I wanted to capture an interesting reflection for my cinematic shots in UE4. I wanted them to look grungy, but still, maintain a reflective surface. To push this effect, I used a galvanized metal filter that gave me the result I was after.

Foliage
I knew I’d be working with foliage in this environment, so I wanted to explore a workflow to produce the grass. I started by creating 3 different fibre meshes side by side in ZBrush that represented grass. There are a lot of parameters that come with the fibre mesh tools that modifies the way the grass grows so it took some playing around to get the look that I was going for.

Once I had the look I was going for, I exported the high poly fibre mesh, imported it into Maya and set up a simple plane to bake the grass onto before baking down in Marmoset.
Now I had my grass texture maps, I jumped back into Maya and set up a transparent material in the hypershade editor and started to create some low poly clusters.

The spruce trees in my scene were set up the same way, using planes to create the different pine branches. This workflow was learnt from 3dex’s tutorials.
Blueprinting
When creating material blueprints for my environments, I don’t like to overcomplicate them, just simply provide the parameters I would need to make minor changes to the overall look of the material. This saves you going back and forth between UE4 and Painter and allows your to make subtle changes in real-time.

Channel Packing
As textures are accessed through memory, we can save on this by packing our maps in the RGB channels of a texture. For PBR materials this includes your ambient occlusion, roughness, metallic and height. The alpha slot in your packed texture doesn’t get compressed but can still be packed. Note that if you are using POM (parallax occlusion mapping) in your project, you can’t use a packed height map. Normal maps also can’t be packed as they use a different kind of compression.

Vertex Painting
Vertex painting is a perfect way to break up the monotony of textures in your scene. I mostly used it for my terrain, breaking up the grass with dirt and gravel paths. The more materials you want to vertex paint, the more complicated the blueprint can get. To avoid this, set up material functions that contain all the textures for each material. These functions can then be used in the master material.


Optimisation
When creating any kind of foliage with planes, make sure you minimize as much unnecessary space within these planes as this directly affects overdraw in the engine. Despite only being able to see only a blade of grass on the plane, the GPU still has to render the different layers of pixels within those planes. The impact this has on the engine can be demonstrated in the picture below.

The different between these two images is the types of material used for the foliage. In the left image, I am using a translucent material and every layered pixel is being rendered, impacting the overall performance. On the right, I am using a masked material to minimise the cost. For bigger environments, especially for games, this level of optimisation is necessary for and improved performance.

The ‘shader complexity’ viewport indicates how expensive your scene is through a colour spectrum, It is used to visualise how performance-friendly your scene is by calculating each pixel in the viewport. Simply, if your viewport is green, your scene is very inexpensive.
If you are new to UE4, I recommend giving the view modes documentation a read and checking out what each of the different viewports mean. When your having performance issues with your project, sometimes these can show you the reason behind it.
Lighting and Post-processing
I wanted to capture a cold, blue atmosphere that engulfed the surrounding environment with warm sunlight coming from the sun. I also wanted to work with light shafts, having the sunlight bleeding through the trees, shining and giving life to the tavern. Visually, I wanted these light shafts to point the viewer towards the tavern.
My scene is setup using dynamic lighting, allowing the environment to update in realtime if changes are made. This is the closest you can get to a realistic lighting setup however it is very expensive for an engine to compute.
Lighting can be a frustrating part of development and working with dynamic and static lighting both comes with problems. Sometimes it takes another person to point you in the right direction and that’s okay. So don’t be afraid to ask for feedback!
Post-processing is a great way to push the aesthetic you are trying to achieve. For this project, I used post-processing at the end as I didn’t want to keep making changes throughout development as it would cause inconsistencies with the overall lighting of the scene.
After doing my final lighting pass, I notice I had lost a lot of the blue atmosphere I was originally going for. The colour palette was very flat and boring so I used post-processing to push the colour grading, working with the shadows, midtones and highlights.

If your new to lighting in UE4, head over to Tim Simpson’s Artstation for some great material!
Tim Simpson’s Artstation – https://www.artstation.com/pixelmasher
Composition
No matter how beautiful your scene may look, the camera work will either make or break your final shots, so spend that extra time making sure you capture your environment using the right camera settings.
Firstly, make sure you’re using the ‘CineCamera’ which will provide you with additional settings to adjust so you can make the most of your camera work. For my shots, I usually stick with a 30mm lens, giving me a more narrow, magnified shot.
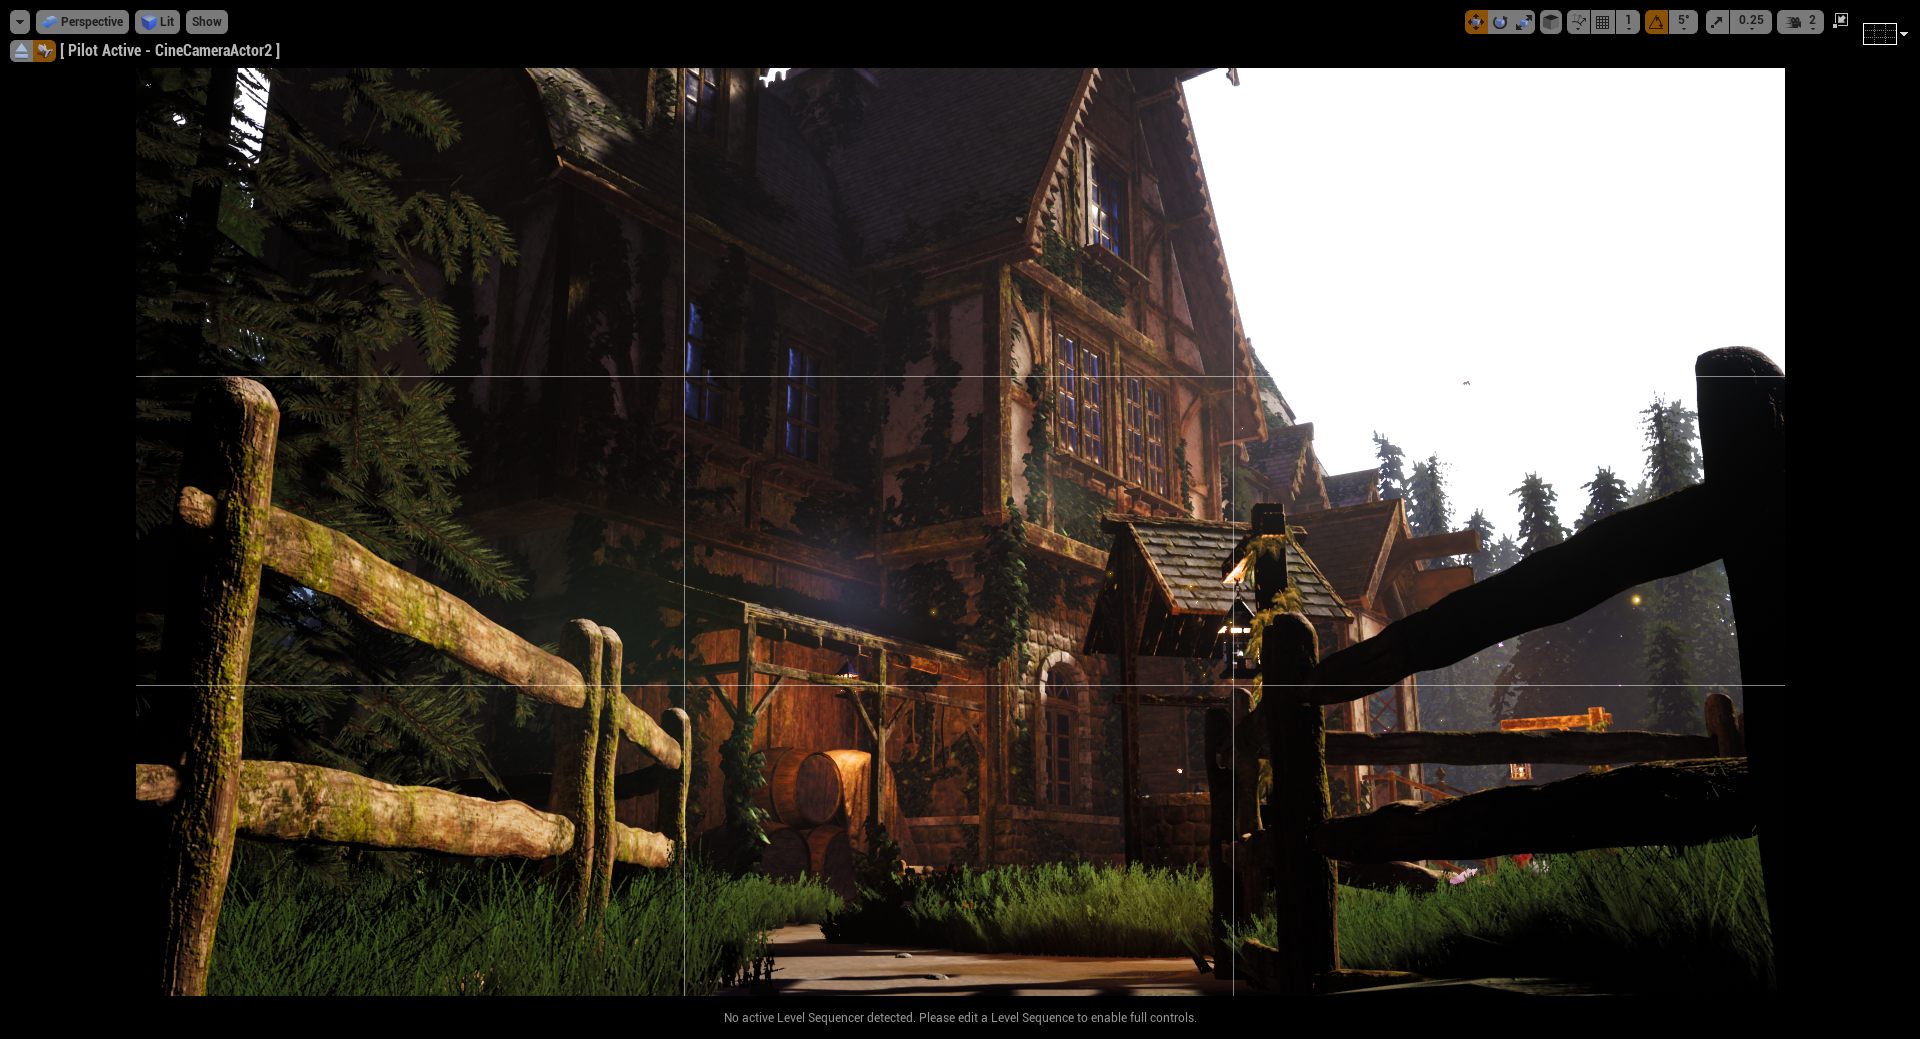
I then adjust my minimum and maximum aperture from 0.1 to 22, giving me more control when changing the ‘Current Aperture’ parameter. With the draw debug focus plane on, I adjust the ‘Manual Focus Distance’ to blur out either the foreground or background, creating depth of field in my shots.


This project was such a big learning curve for me, allowing me to learn new skills and workflows and giving me the opportunity to improve on my weaknesses. I’ve learned to spend just as much time on the lighting and camera work as these can both make or break your scene.
If I could go back, I would really push the texturing I did for the tavern and explore the use of trim sheets with a modular workflow. Despite having a few setbacks though, I’m really happy with what I achieved in the end.
Thank you for taking the time to read this article and please go check out some of the other articles published by Games Artists, you can learn so much from them!
If you have any questions you can find me across these social media links.
https://www.artstation.com/webbes09
https://www.linkedin.com/in/sean-webber-0a11b3b7/
https://twitter.com/SeanWebber95

