
Introduction
My name is Ian McOran-Campbell, I've been in the games industry since 2016 creating concept art and as of 2020 getting involved in creating fully realized 3D characters.
Currently, I'm working in the industry but this latest artwork is part of an ongoing personal passion project called Cinis. A game that I hope to share with you more in the future.


Inspiration and Concepting
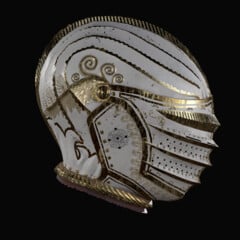
Historical arms and armor have had a huge impact on my work as a whole and this armor set was no different. My initial inspiration started from a particular helmet made in Milan for the Duke of Savoy in 1585.
It was made in the ‘Alla Turca’ style which was prevalent at the time as Turks were seen as formidable and powerful. Big thanks to the Discord I run which helped provide the references and information on its source and one member Lord of the sixth House for helping me track down information on this helmet.
After this initial burst of inspiration, I did more research into Turkish arms and clothing. This search branched out into general armor, textiles fabric and heraldry research. I did my best to section off my reference board to help me navigate the concepting process easily.

After collecting some useful imagery I began the concepting phase. I generally establish a silhouette first and then work inside of it. My concepting days are long gone so I generally don’t take anything past a rough sketch as I know what I have in mind and don’t need to specify details.

I also found some references for faces and did a few sketches as I think having a character in mind helps influence your overall design.
I then add the final sketches to my mood board so I can easily refer to it in the next stage, blockout.


Cloth Simulation & Blockout
I like to begin my blockout often alongside my concepting, just trying out a few of the stronger designs to see if they work roughly in 3d. This helps me eliminate designs if I’m stuck between two. Once I have the rough block done I move straight to cloth sim to help quickly bring the blockout into a much more realized phase making the other areas easier to flesh out.

For the cloth simulation I just referred to some patterns I found online and did the simulation. I don’t normally spend too much time here as I know everything is going to be adjusted down the road. If using Marvelous Designer make sure to quadrangulate the mesh before exporting so you can subdivide and sculpt on top of it without any issues.

I used this series of images of the helmet to show my rough process for blockout to the final mesh of an object. I begin with a rough sculpt in zbrush to get the shape in. I retopologize it and then begin adding the additional components just through basic modeling.

Highpoly & Retopology
With my blockout finalized and details added I begin creating the high poly mesh in Zbrush. For armor, I normally crease the hard edges subdivide and increase everything to have nice even bevels across the surface, in other projects
I’ve also added metal detailing in this phase but more recently have stopped doing this as I often can create the same effect easier in substance Painter. For clothing, I subdivide up the cloth sim and then add in details such as creases, additional folds, or fabric piling around stuff like belts, etc. These are all just details that I couldn’t get into the simulation. For the gloves and boots, I just sculpted the pieces from scratch.

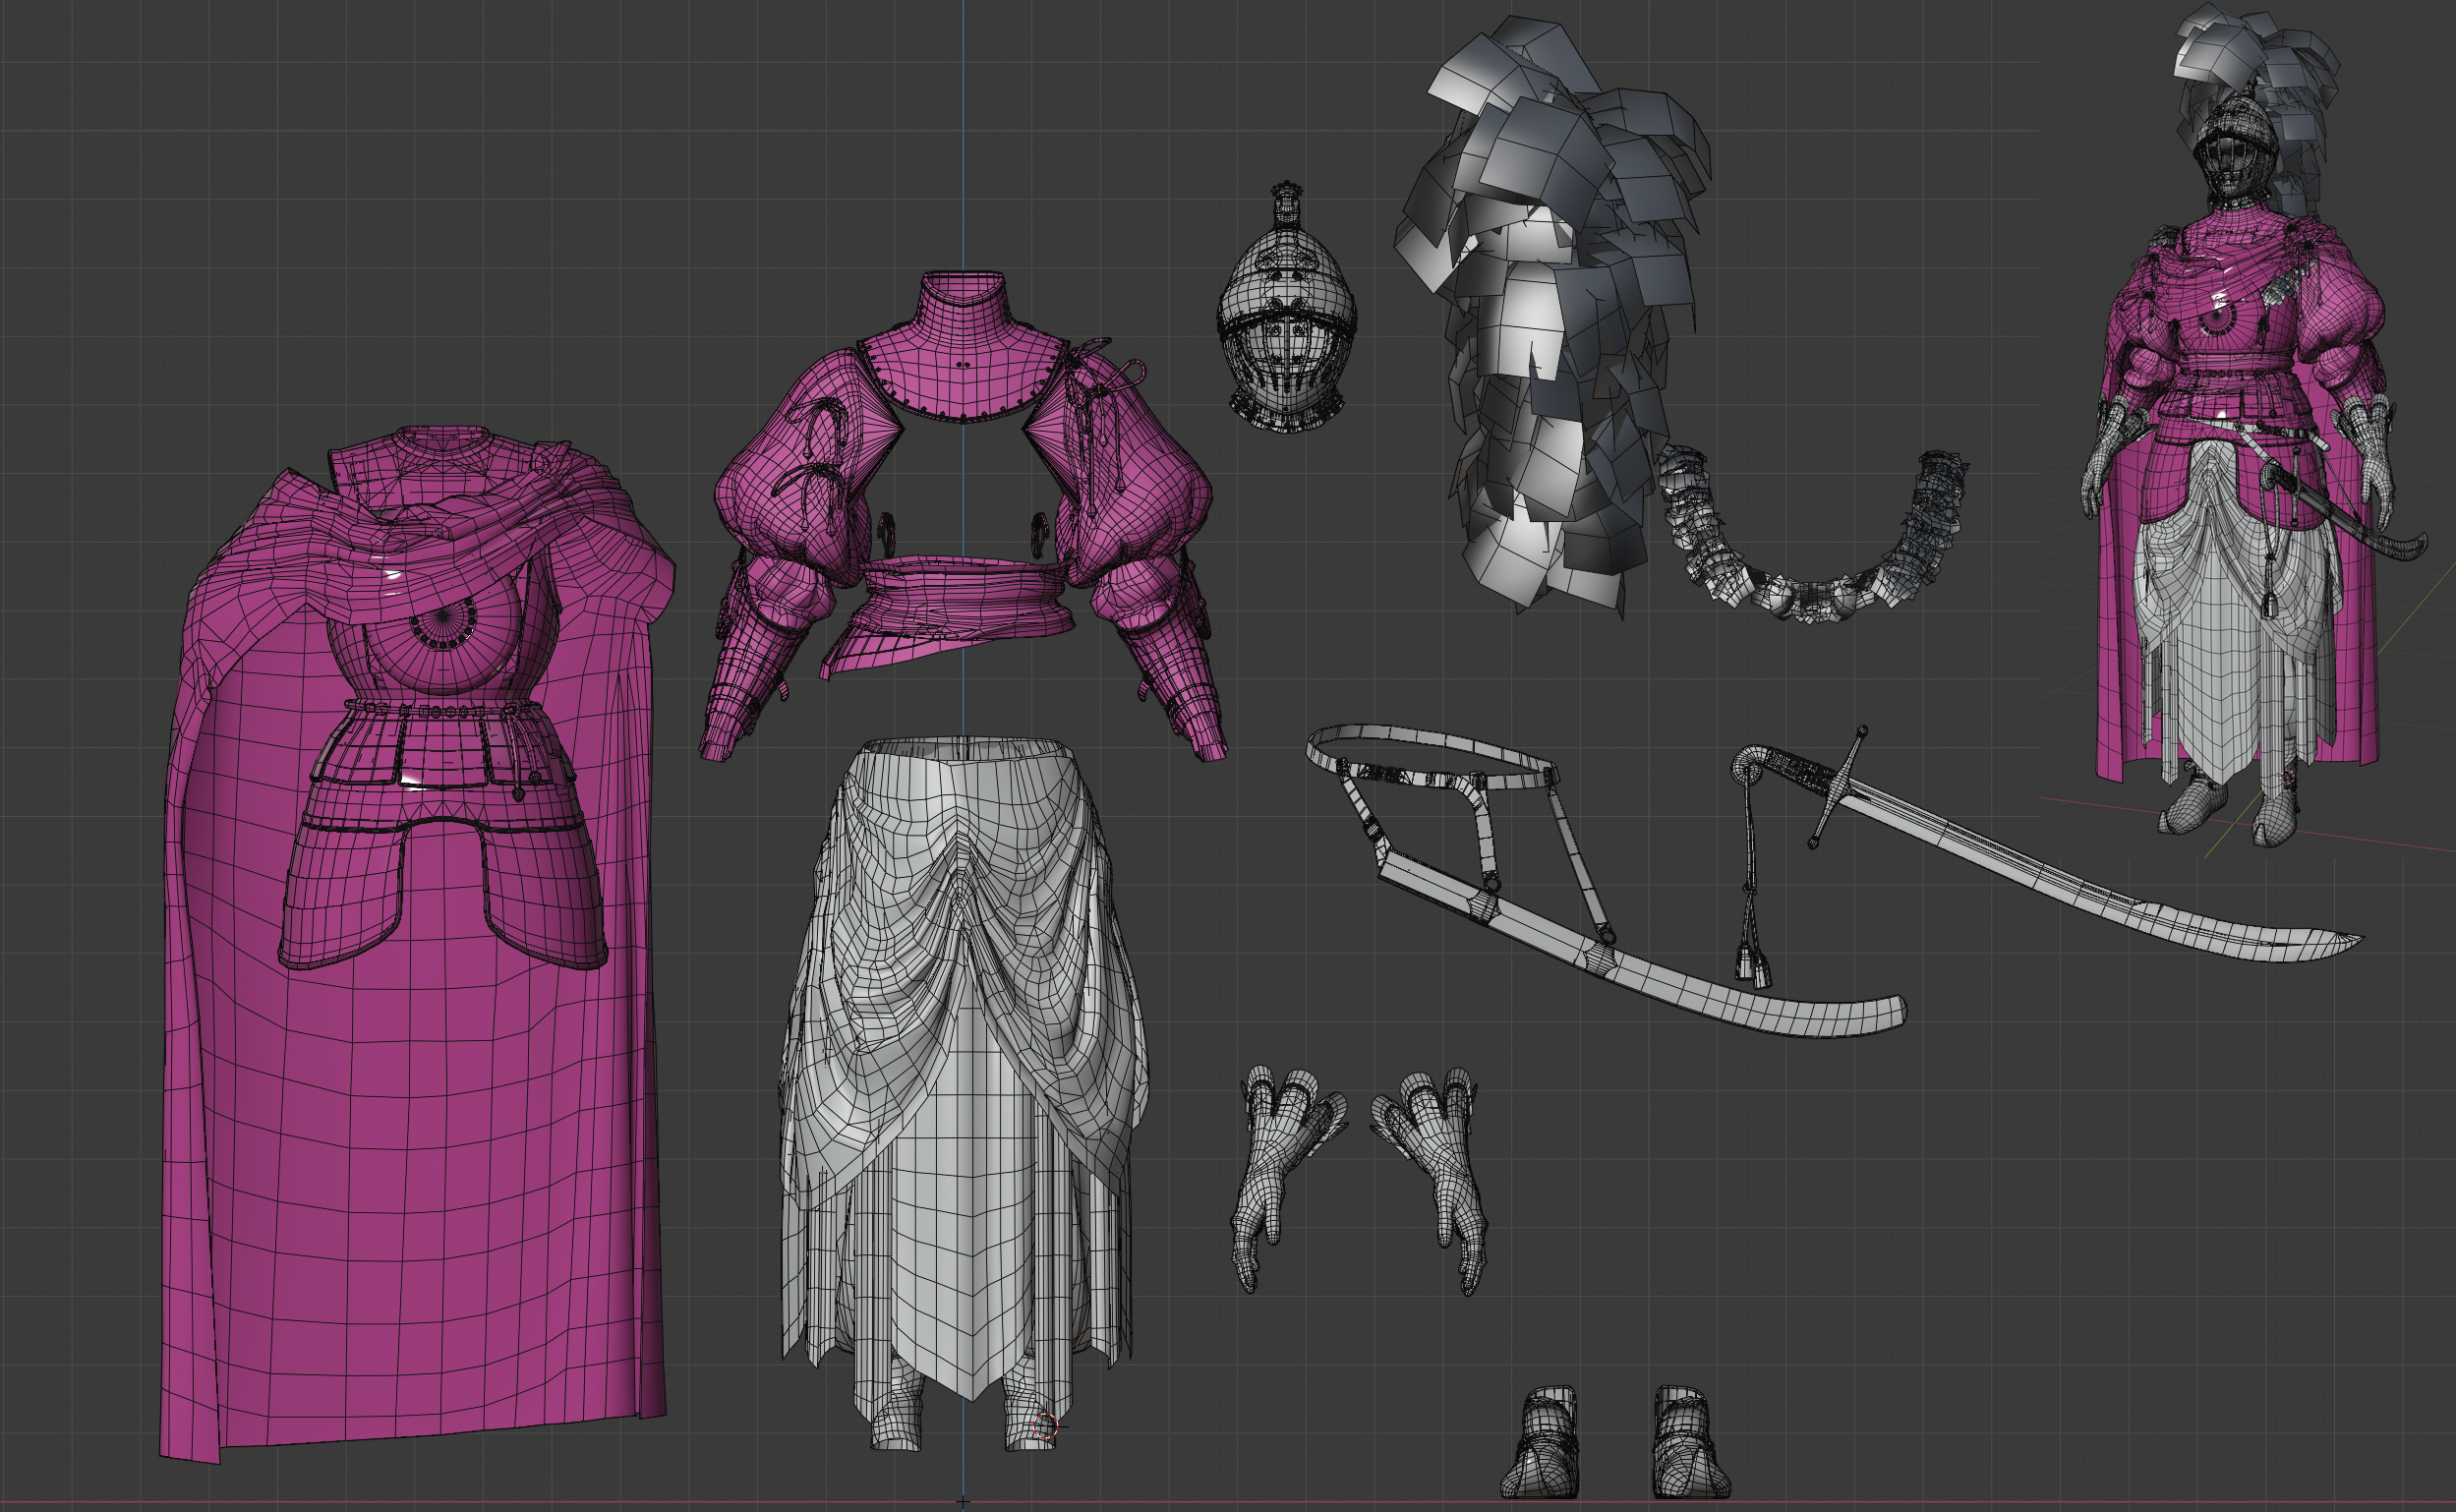
After the high poly is complete I create the final topology, retopologizing the cloth and adjusting the other bits of topology. For instance adding topology to the base mesh to fit the high poly better. The band on top of the helmet started as just a flat strip. I added the detailing too and then retopologized.

I usually use Retopoflow in Blender or 3dCoat to help speed up the process. This helps save me from doing complex modeling which takes me much longer. With the final topology done the outfit was sitting at 94k triangles. This is slightly too dense for a game-ready mesh, I often don’t worry about poly count until the outfit is complete. Having more of a mid-poly mesh makes baking easier and makes for a nicer rendering.
It’s easy to come back and optimize meshes that have been retopologized properly. I then split the textures into 10 UV sets with the Feather and Fur having their own separate UV sets and materials to make setting up later in the engine easier. This image highlights the individual texture sets with them separated by mesh.
Baking
For baking, I use Marmoset Toolbag since its functionality is more useful than Substance Painter. In Marmoset, you have the ability to manually adjust the cage for the bake and paint in the skew which is particularly helpful if you are creating meshes with harder edges.
I bake the Thickness, Curvature, Ambient Occlusion, and Normal Maps (make sure to flip the Y axis in the setting if working with DirectX). I load all my maps into Substance Painter and I’m ready to begin my favorite phase of the project, Texturing!
Texturing
For texturing, I use Substance Painter pretty exclusively. It’s a very powerful tool that is all-encompassing and a must for creating high-quality textures. I’ll start by sharing some of the elements I use to create believable fabric. You may have noticed in the high poly I didn’t include details such as the fabric weave or textile pattern.
I use a fabric alpha inside Substance painter where it’s easier to control Its influence scale and blending type. I use Mohameds 70 fabric alpha’s here which are very high quality and super useful.

The base of the fabric is very simple, just the color I want with some white noise. I then add the fabric alpha to a mask on a Paint layer with height and color selected. I then set the layer blending to Color dodge and adjust the base color for the alpha to bright highlight color. It’s worth noting that since it’s set to color dodge it will wash your base color out so you might have to adjust the opacity of the alpha and the base color to get the desired results.

The clothing on this model all uses this fabric material as a base. I then add grunge maps on top and add edge highlights to help pop out the fabric details. I also like to extrude a strip of polygons around the edges of my fabric to add some additional details like edge trim or stray pieces of fabric to help break up the shapes.

Creating the designed element on the cape was something of a happy accident. That being said, I’m going to experiment with the technique I’ll detail here in the future to see if I can consistently create similar results.

This sculpt shown here was initially going to be part of a necklace but I found the chest area was getting too noisy so I scraped it. Later in the texturing phase, I found the cape created a perfect large canvas to create a unique texture.

I revisited my sculpt and decided to try wrapping it around the cape and I then baked out the AO map to provide a base for the texture. I then added a series of different colors with different blending modes to highlight some of the interesting shapes in the sculpt.
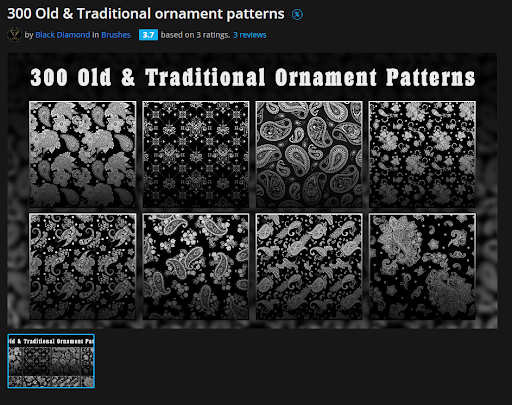
After that, I did some paint over and blended it into the fabric texture using some grunge fill layers in the subtract blend mode. Then I painted some background elements and lastly added an ornament alpha from Black diamond to fill out some of the negative space.
Next, I would like to talk about a workflow for creating filigree and decorations in Substance Painter. Personally, sometimes I find it easier to work decorations in during the texturing phase instead of sculpting them in as I have a much more consistent result with adjustable parameters.
I do this in Substance Painter by initially painting the basic shape with just a flat round brush and then applying a mask outline line filter on top of it to create a more dynamic shape.

With the mask outline filter and levels, you have a lot of control over the bevel of the shape, or even if you just want to outline the perimeter of the shape you have the ability to do this and adjust it easily later on. In this example, I used it to bevel out the shape shown in layer 1.
Next, I created another paint layer With a height and color channel to outline the inside and outside of the shape giving it a very detailed look. Next, I added a highlights layer by creating another fill layer with color and height, created an inside mask outline and decreased its size to create the illusion of a peak highlighted in a brighter gold. I used this technique all throughout the armor elements.

It also has useful functionality for creating faux ambient occlusion. On the sheath anywhere I added gold elements I added a mask outline to create the illusion of AO around the metal to help it stand out and look less flat.

For creating the texture for the top of the helmet I used the tried and true method of painting in photoshop.

I began the process by drawing out the area I wanted to paint so I had a reference once I was in photoshop. I then exported the texture with the reference areas drawn in and painted on top of it. I then reimported the painting on an opaque background and added them to the texture using a fill layer.
I then added some grunge to blend it in using a subtraction layer to chip away at the painting and added grunge on top of it. I also painted some metallic gold into the halo areas around the head to help them pop. Overall it’s a very subtle detail but one I like nonetheless.

The Character
For the face of the character, I began by creating a base sculpt on the existing game resolution topology I had already created prior.

When it comes to creating highly detailed faces I recommend getting a helping hand from scan data as it does help create a level of believability that’s hard and time-consuming to achieve through sculpting/texturing. I used this scan from 3D Scan Store Animation Ready Body Scan / Female 02.
With the base sculpt done and all of the main features of the face placed I transferred the texture from the scan data to the UVs on my game topology. I had already previously wrapped the scan mesh from the 3D Scan Store onto my game base. This is a pretty straightforward process that is explained very well here if you want to see the whole process start to finish Fast photorealistic body texturing using scan data.


With the textures transferred to my UVs, I then loaded the texture onto my head sculpt in Substance Painter. With the scan data setup, I also baked the base sculpt onto my head to bring in the details from the sculpt.
Next, I began painting over the scan base color to help bring more life to the character and to fix any artifacts from the texture transfer (I also replaced the eyebrows with something I felt worked better).

I always set up a new head sculpt in marmoset to make sure it’s working. Here I used the Marmoset scene supplied by 3D Scan Store to see if the character is working. Once I’m satisfied I move onto the hair.


For this project I elected to use a high quality hair asset from Maria Puchkova. She makes and sells excellent quality hairstyles and as I wanted to get this project done I just modified one of her hairstyles. In the future I want to revisit this and remake her hair from scratch so it’s more inline with the character I had in mind.

Rigging
The last phase before we can start setting up our render scene and also the most grueling for me as the end is in sight but I have to get through the monotony of rigging. Luckily there are some really great tools for speeding up the process.
I primarily use Blender for the rigging process as it’s what I’m most familiar with and I am far from being an expert in the rigging. I use Auto Rig Pro to get a baseline. Unfortunately with all the sample meshes and floating geometry on this character it required a lot of cleaning up to prevent floating geometry etc.
With the rigging at a baseline, I began coming up with poses for the character. I went through about 10 poses before coming up with two poses I felt were in line with my character. With the rigging just being basic I went through the poses and fixed any little bits of clipping or stretching. I’ll revisit and clean up the rig before this character goes into the game in the future.

Marmoset scene
The time has finally come to bring everything together for the final renders. For lighting setup, I try to keep it pretty simple with the main light, rim light and ambient light adding in some lights for specific areas that need light to show detail. I don’t want to overlight the scene and wash everything out but I also want the details to be visible.

For the background, I wanted something that felt like an oil painting backdrop. So I just painted it in photoshop and loaded it as a backdrop in the scene. With everything set up I gathered my final images and was immensely relieved to call this project done!

Conclusion
This project has been one of my most ambitious personal works to date and I feel I have improved a lot over the course of it. Overall I’m very satisfied with the end result but there are still lots of areas where I can improve which is hugely motivating for when I jump into my next project.
Read more articles
You might also like these articles.


