Arches


Introduction
Hey there. I’m Toivo, an environment artist from Finland, currently working on an exciting unannounced AAA project in Tokyo-based studio Shapefarm.
Project and Goals
My latest project “Arches” was my first venture into UE5, produced over 4 months whenever I had the time and energy. I wanted to push details as far as I could, so I couldn’t go as grand in scale as my previous project. This cozy piece by David Yan was my pick for reference, as it was very much down my aesthetic valley with the abandoned look and overgrown foliage.
The work was divided into 4 main passes to keep my sanity and schedule in check:
Blockout/architecture
Nature/scatter
Lighting
Polish
In this order, let me tell you a bit about the process! As is the case with every 3D scene, this too involved a ton of mundane chores, so I’ve picked some of the more interesting areas to break down.
Blockout/Architecture
A loose blockout, business as usual. I like to get some lighting going on straight away to get the ball rolling.

I gave the main architecture set a quick sculpt pass to aid texturing. To take full advantage of Nanite, pretty much everything was textured the good old Substance Painter way. To make Painter’s life a bit easier, I baked the sculpts to mid-poly meshes – around 100k for the pillar for example.

A custom smart material did most of the heavy texturing lifting, and a separate moss material, that used the AO and thickness maps to blend a couple of different scanned moss textures, provided extra detail.
For meshes interacting with the ground directly, I opted to include hand-sculpted soil in the export to allow more precise control over Unreal’s landscape. Most of this will be covered with scatter but it’s a nice base.

The big wall on the center of the composition, well… is just a wall. So I knew I needed to give it some extra love that it deserves. I utilised a number of different weird, perhaps unnecessary techniques. It’s essentially an intricate mix of booleans, RGBA masked materials, POM decals and normal decals.

For easy edge breakup, I used the chosen materials (just some Megascans bricks) height map to boolean out parts of the base mesh.

To skip unwrapping, I am using Lukas Stratmann’s procedural UV project addon.
This also allows the boolean object to be moved freely and still have UVs line up with the base mesh, so booleans & textures will always be aligned.
The stripped-off stucco toward the bottom of the wall is a mesh decal, boolean-treated (with the same boolean object as I used for the wall itself) to blend it seamlessly. A simple POM functionality in my shader gave it juicy depth.

The decal itself is a mix of Textures.com and Megascans; I replaced the original bricks with the Megascan ones that I used on the wall. Top plaster damage comes from a second Textures.com decal. Some faked AO to make it POP.
Then, on a 2nd UV channel of the base mesh, I painted a hot RGB mess that drives different tiling materials in the shader – green for plaster and red for bricks in this case.

Some carefully placed Megascans decals later we have ourselves a nice weathered wall.
The ornamental architectural pieces, although looking intricate upon first glance, is pile cubes, displaced with some alphas.

Naturally, the thing was later destroyed in Zbrush for that ruined look and textured in SP.

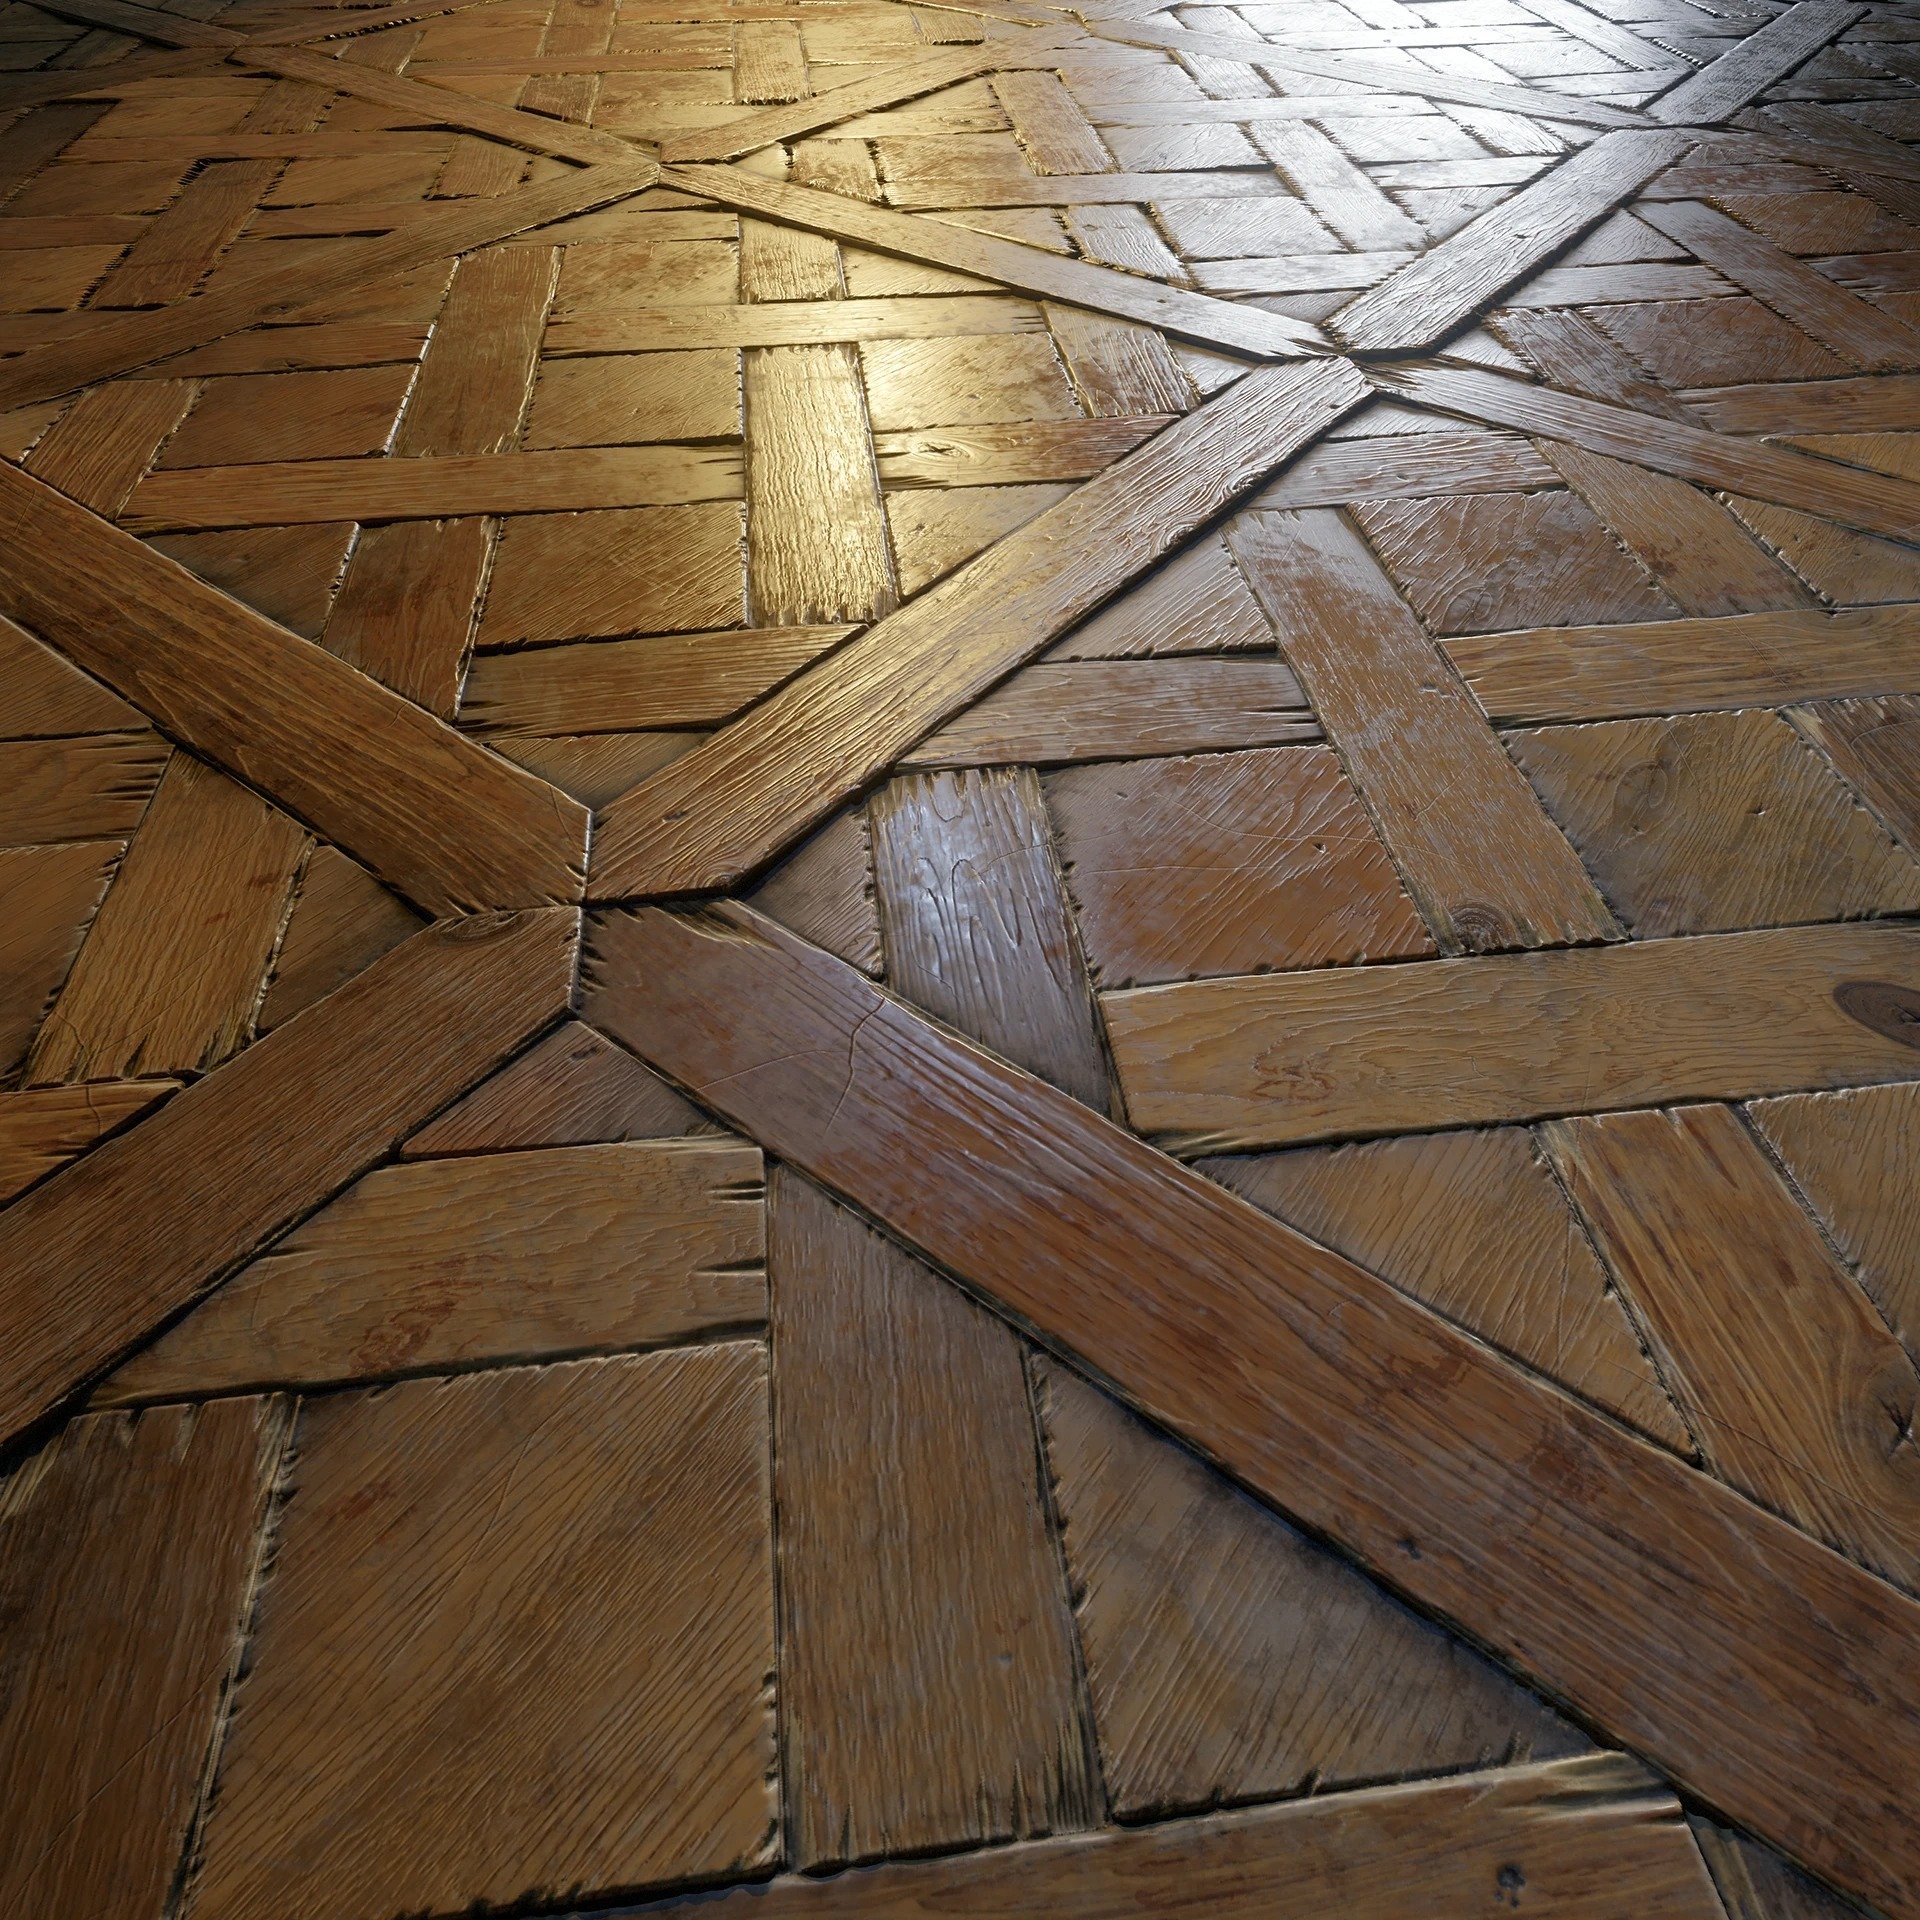
Brick Floor
The colour palette was in need of some warmer tones, so I thought an orange brick floor would be a nice touch. I wanted a specific pattern so I sculpted the material from scratch in Zbrush.
A nice benefit to doing a custom material was the ability to use the same brick sculpts to bake a few meshes, which I could seamlessly blend with the tiling material.


I again used offline displacement to squeeze more juice out of the material. Weight paint to dictate displacement strength, and decimate before importing to the engine.
Nature & Scatter

IVY
Ivy was a challenge, as it is the MVP of the whole scene. Let’s start with the branches.
To get full artistic control, I opted to create the branches in a non-procedural fashion. The base was modelled using skin+subd modifiers, and displaced with a Megascans bark texture to get free detail. Again, textured with SP, not worrying too much about tiling at this point.
The result is essentially a mesh trim sheet that can be arrayed to be as long as is needed.

I exported the whole UE scene to Blender to begin growing ivy. Tons of curves-adjusting fun.

A last minute addition to this was subtle swaying in wind – shoutout to anyone who noticed that. My wind material uses 2nd UV channel gradient to dictate wind strength, so the lower the given part is in the UV space, the wilder the wind gets. I arranged the new UV islands (project from view worked great for this, as overlapping is no issue) where I felt swaying would look good.

The leaves were modelled based on photos and baked into a sheet, using a similar workflow Anton Syrvachev used in his project “Shoe Maker’s Corner” – there’s a workflow time lapse with some golden information nuggets that I used here as well.
For the different colour variations, bright red leaves and dead ones, I made quick base colour variations in Designer that could be vertex painted in engine.


SCATTER
The scene was feeling a bit too clean, so I smashed some of my earlier sculpts to little pieces to throw around.

For larger rubble piles, I tweaked some Megascans in Mixer to remove any unfitting debris (plastics etc) and adjust colour to fit my use case. Some offline displacement in Blender and some of my own sculpts mixed in.
Just because Nanite could handle it, I also did some buildup of fine sand.

DECALS
To support my shader’s simple Z-up moss, I created a triplanar moss decal, that has a toggle to sample scene distance fields to sort of emulate natural moss growth.

WATER
The water was perhaps the most tricky thing to get working. Unbeknownst to me when I started the project, UE5 doesn’t yet support reflections on translucent materials, which is a problem when trying to create realistic water. Luckily Artstation Learning came in clutch with the new Environment Production series; artist Stef Velzeboer explains his water shader step by step, which offered a genius workaround to this problem – reflections are faked with a cube map plugged into the emission input.
My shader is largely based on this tutorial, with some added functionality such as vertex paintable murky water, caustics and little debris floating on the surface.

Faking the reflections also meant that they were entirely art directable, which came in handy, as I wanted the surface to be less reflective to show what’s underneath.
Aquatic foliage is from Megascans, some with small modifications, such as these long bois; top part is flattened to give the illusion of it interacting with the water surface.

Lighting

Lighting’s mostly hand crafted to achieve a painterly look. I was constantly playing around with different setups as I was building the scene – ultimately I ended up relying mostly on fog cards to have maximum control, which worked well.
Here’s a breakdown of the different components.
Directional light
Whole scene is encompassed within a box, which has little holes on the roof for the sun to pass through. This gave me nice splashes of brightly lit areas, but also reduced the effectiveness of Nanites GI, so fill lights were needed.
Fill lights
Carefully placed rect lights to support GI and highlight central areas.
Caustics
Fake caustics with a spot light, which has a simple light function with two panning caustics textures on it. Here’s a nice tutorial to achieve the effect.
Godrays
Cylinders with a custom animated god ray material.
Fog sheets
Using a slightly modified version of the material found in Epic’s “Blueprints” demo scene; I added a function to use custom opacity masks instead of procedural one. Slowly panning noise texture gives the fog movement, and the built-in depth fade node allows it to interact with the scene in interesting ways.
Fog was also used to reduce visual clutter in certain areas, such as the background in the far right and left of the final image, where most of the detail is purposely obscured by the deep turquoise mist.
Emissive materials
I’m using slight emission to make some of the foliage pop, namely the red flowers and underside of ivy leaves to support subsurface scattering.
Final Thoughts
Balancing work and personal projects is an art form of its own, and I definitely overworked myself on some occasions during this. Time to have a little break from art and play some games.
Thanks to Games Artist for the opportunity to break down my scene 🙂
Cheers!
Read more articles
You might also like these articles.