Atomic Purple Game Boy Color

Introduction
Hi Everyone!
My name is Thibault MINIOU. I’m a 24-year-old French 3D Environment and Props Artist with about three years of experience in the game industry.
I first discovered 3D modeling in high school through my engineering classes and CAD software, and that’s where it all clicked. Wanting to mix this with my passion for video games, I naturally moved toward game art.
Goals
For about a year and a half now, I’ve been learning, in my free time, how to repair electronic devices and practising microsoldering in general. I mainly work on Nintendo systems, which I find at flea markets and garage sales. I take them apart, clean them, and repair them.
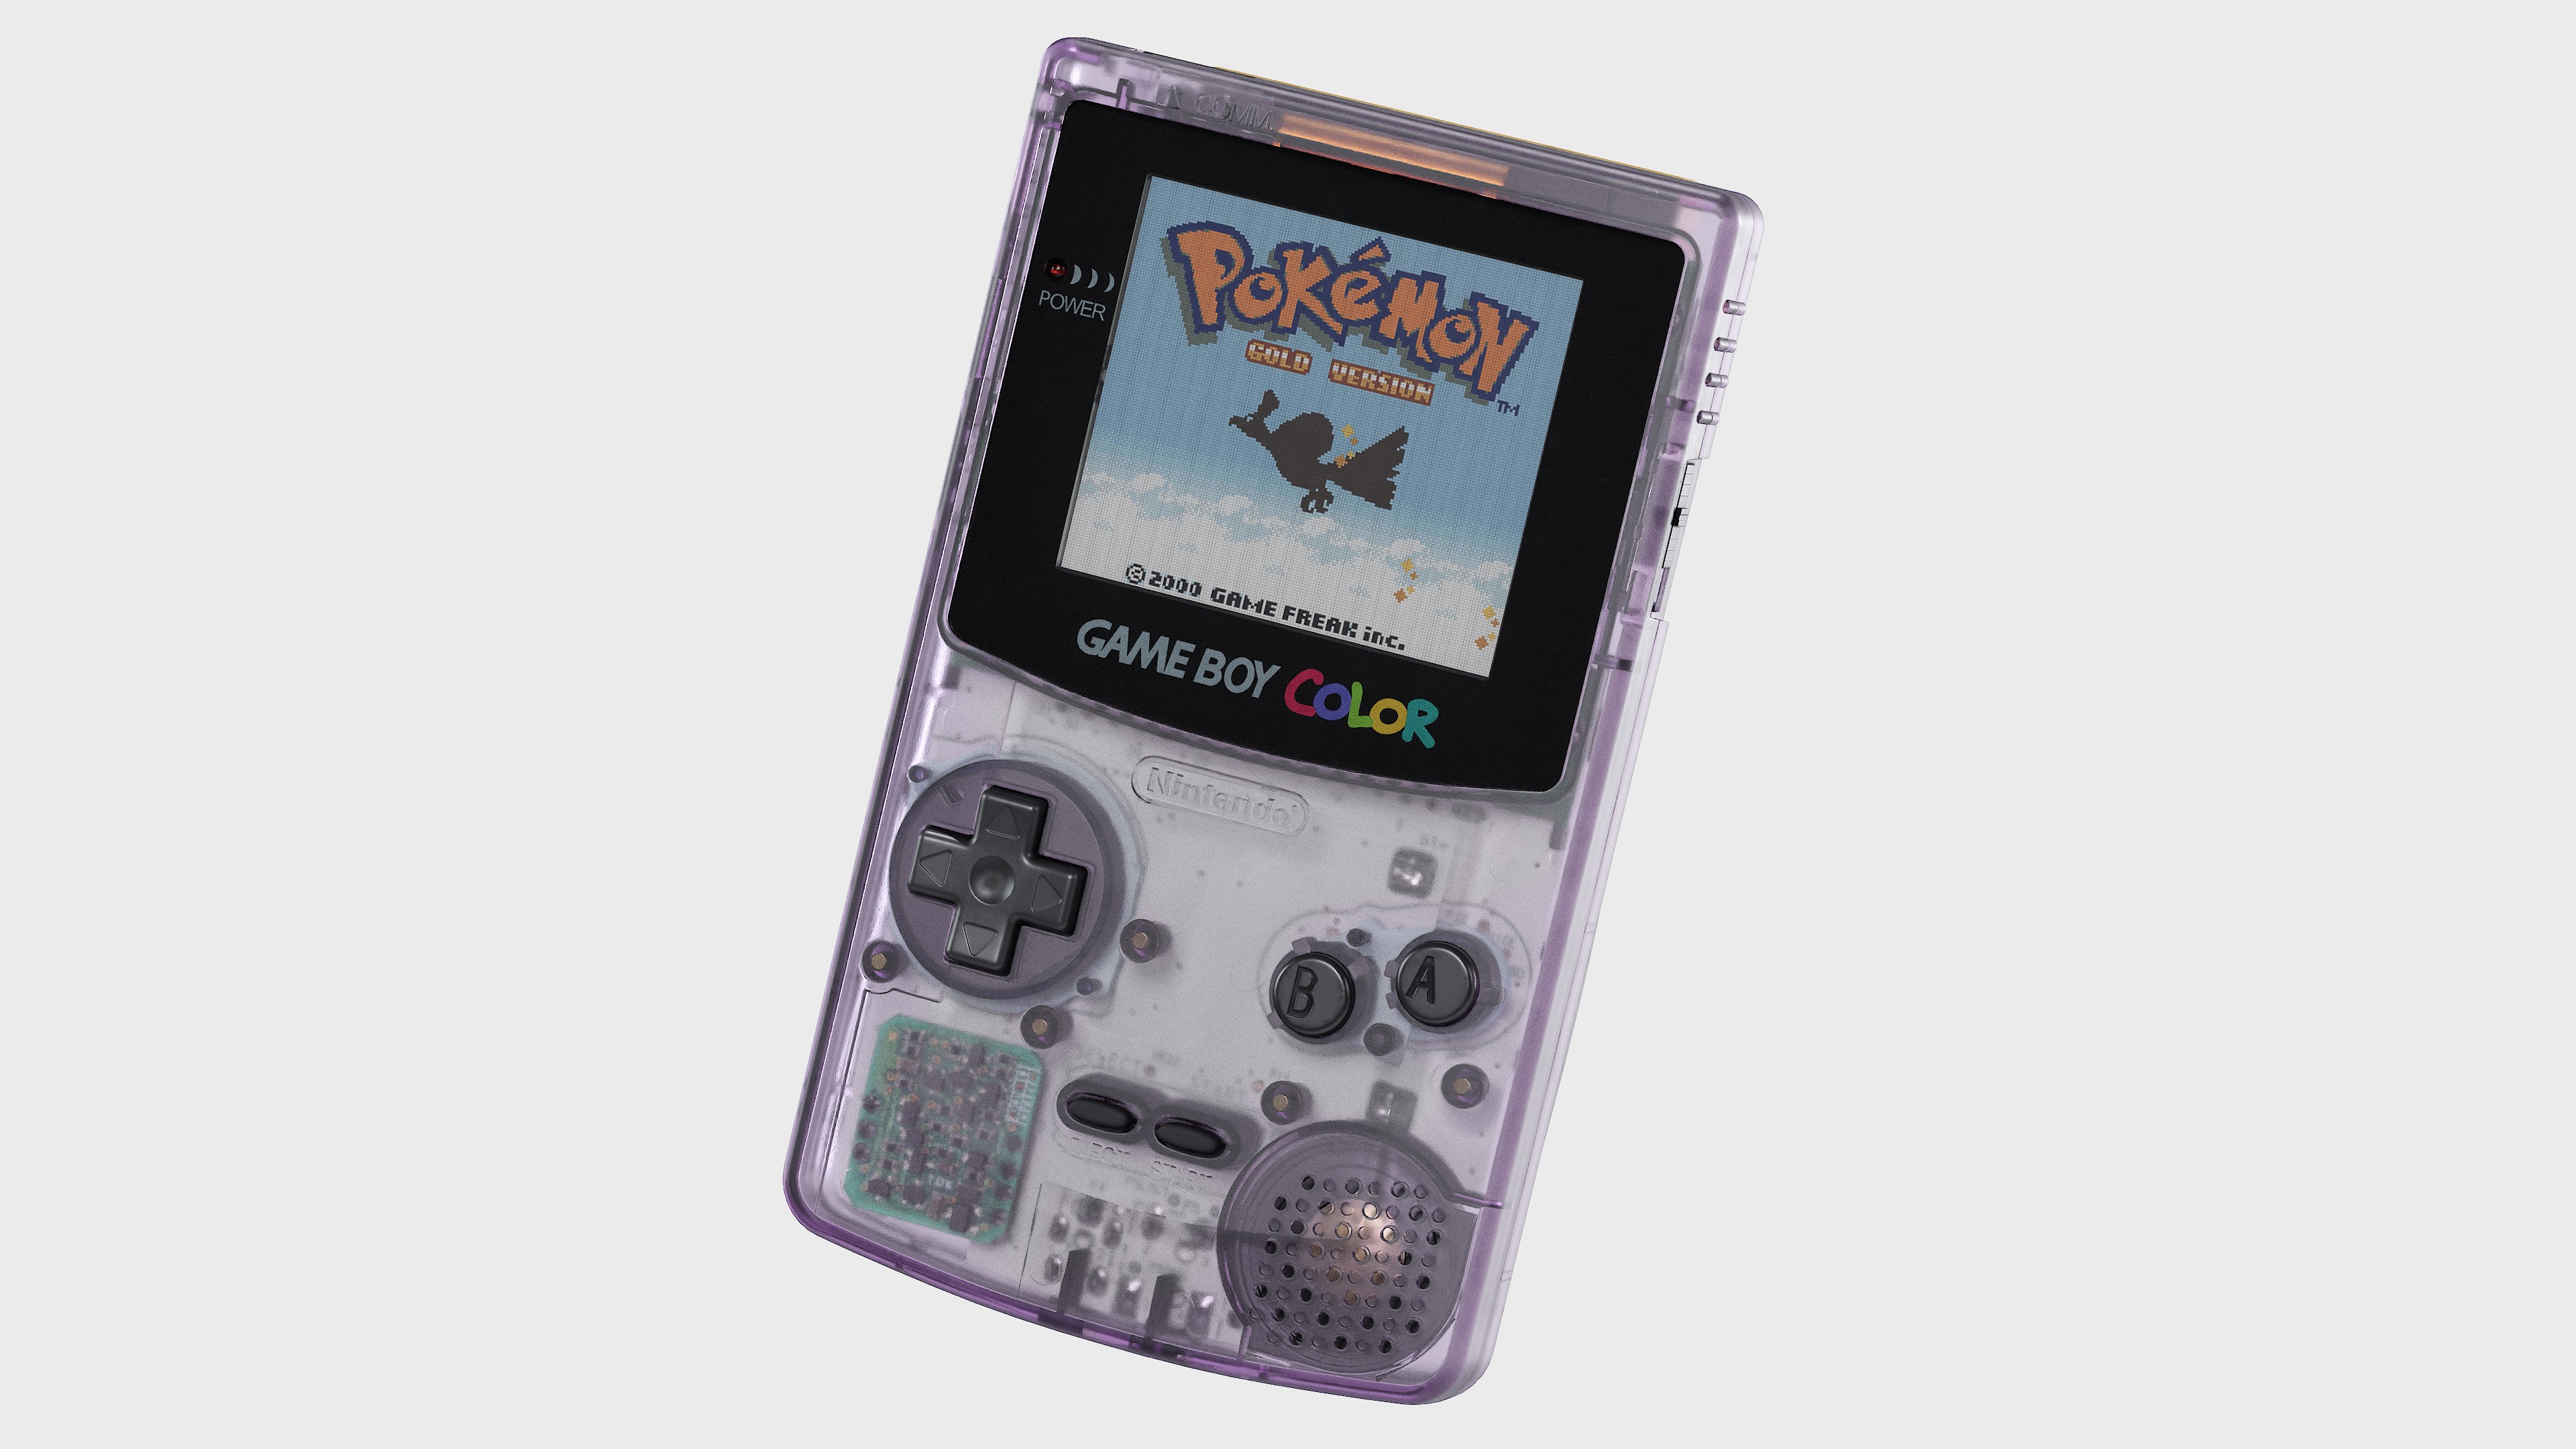
So, when it was time to start a new personal project, I turned my attention towards the Game Boy Color, specifically the Atomic Purple model, with a simple goal in mind: to create the most realistic version possible.


Software Used
- Blender (Low Poly, UVs)
- ZBrush (High Poly)
- Substance 3D Painter (Texturing)
- Substance 3D Designer (Normal Map Generation)
- Photoshop (Alphas)
- Marmoset Toolbag (Rendering)


References
As mentioned previously, before starting this project I was already very familiar with the Game Boy Color’s internal architecture.
On top of that, with all the repair projects I did, I had plenty of spare parts, components and console shells lying around which made it easy for me to get good high-quality references.

Modelling – Low Poly
Due to the transparency of the Game Boy model I chose, I had to make the plastic shell feel authentic and convincing, with proper thickness, inner details, and believable light behaviour.
To do this, I relied on a non-destructive workflow using booleans to quickly block out and refine complex shapes. Once the main forms felt right, I applied all my boolean modifiers and began to clean up the topology and optimise the mesh.
Nothing too fancy for the other parts and components. They were pretty straightforward to make with the usual box modelling workflow.
The last step was to do a quick UV pass over the whole Game Boy. The goal here was not to achieve a clean UV sheet, but rather to split parts of the mesh that I wanted into their own separate UV islands. This is very important so that later down the line, ZBrush can identify each island and turn them into PolyGroups.
If this makes you want to try this workflow and you’re not quite sure how to split your UVs, you pretty much need to make a seam on every hard edge you want to keep.
High Poly
Once these UVs were laid out, I simply exported my meshes to ZBrush, which is my software of choice for high polys, even for non-organic meshes.
My ZBrush High Poly workflow consists of 5 steps:
- Import mesh from Blender
- Choose “Auto Groups With UV” which turns our previously unwrapped UV islands into separate polygroups
- Dynamesh the model to add enough geometry
- Hit “Polish by Groups” to tighten up the polygroups
- And “Polish Crisp Edges” to smooth out the model’s edges


All that was left was for me to decimate each part of the Game Boy and import them back into Blender as my High Poly.
UV Unwrapping
In my opinion, far too many people tend to overlook their UV unwrapping job, but to me this is one of the most important steps. Good UV mapping with proper texel density is key to achieving good-looking textures.
A lot of people like to use RizomUV, but I personally prefer Blender even though the default UV tools aren’t the greatest. We can fix that with a couple of amazing addons that I recommend to every Blender user:
- TexTools – gives the ability to “Rectify” and straighten UV islands and has a very important feature that lets you smooth your model’s normals while keeping the seams sharp
- UVPackmaster – the best addon I’ve found for overall UV manipulation and packing in general
What I usually do at the end when I’m done with my UVs is run a Texel Density Checker map through the mesh and look for any artefacts or scaling issues.

Texturing
Before moving on to Substance Painter, I first had to spend some time creating custom alphas in Photoshop. These would be very useful later on when adding all the logos, markings and small surface details onto the model.
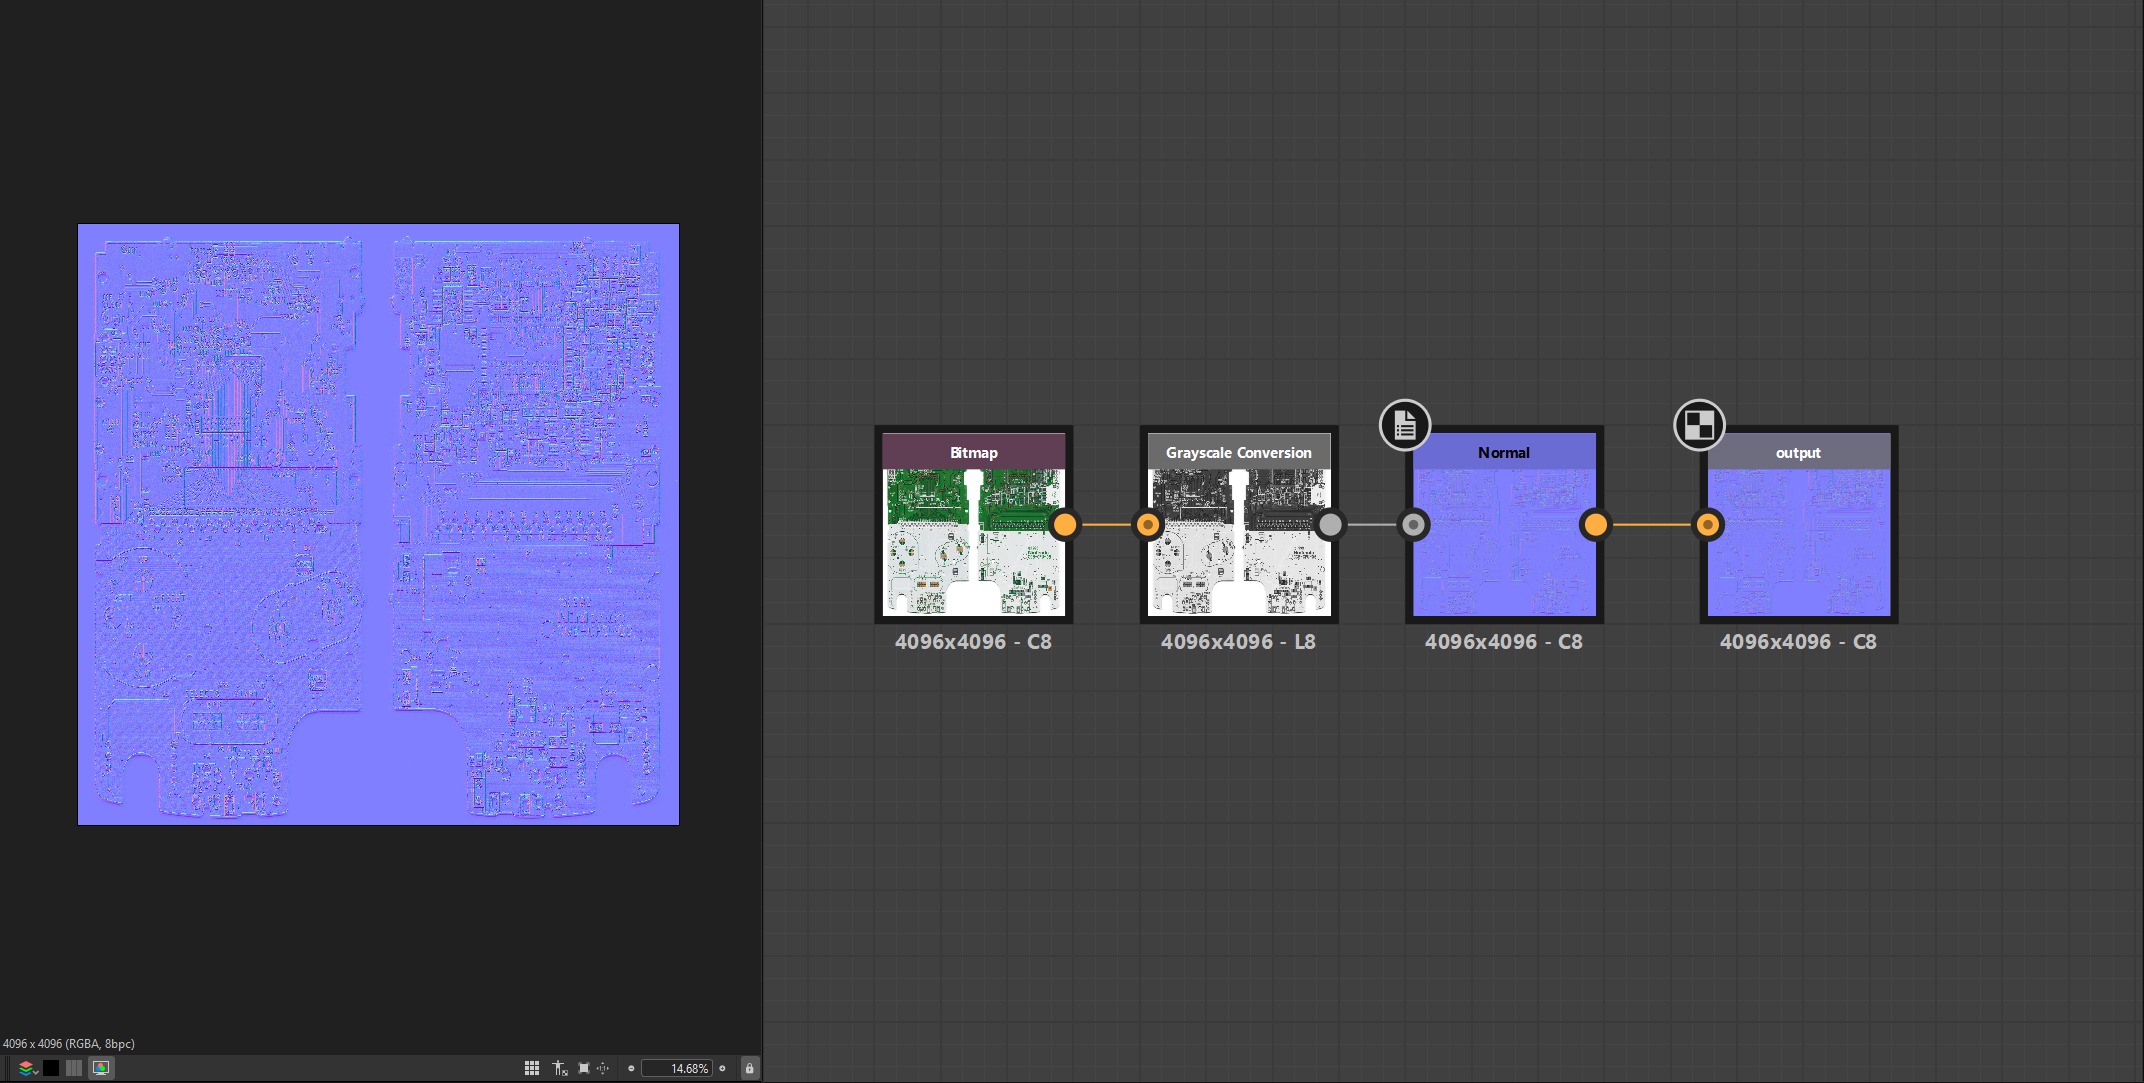
While browsing online for additional references, I stumbled upon a website that had HD scans of both the front and backside of the motherboard.
I loaded them into Photoshop, made some adjustments and tweaks, then sent them over to Substance Designer where I turned them into a normal map with a quick 4-node setup.

My texturing workflow itself is pretty simple and can be broken down into a few distinct steps:
Base Material During this first step I start by applying basic materials to each surface type (plastic, metal, etc.) without worrying about wear or small details yet. My main goal here is to get a solid base colour and good PBR values.
Markings + Height Details Using the custom alphas created in Photoshop, I added all the logos and markings on the mesh. This is also when I added other height information such as mould lines, injection marks and even that slightly grainy texture present on the Game Boy Color shell.
Colour + Roughness Variation This phase is really what starts to tie everything together nicely. It is achieved with a combination of grunge maps, generators and hand-placed stencils.
Weathering + Final Details All that’s left to do is add a weathering pass: dust, scratches, fingerprints, scuffs, etc. This is also when I made the stickers and added the Game Boy Color logo on the screen.

After multiple tests I decided to only export the normal map and roughness map for the plastic shell.
I found that the results using the Refraction and Transmission system inside Marmoset Toolbag were far superior to what I could achieve in Painter due to its limitations with translucent materials.
Rendering/Lighting
Now that the textures were finished, I had two main objectives for my renders.
The first was to project video gameplay onto the Game Boy screen. I thought it would be as easy as dragging a video file into a material in Marmoset Toolbag, but the renderer doesn’t support video files or GIFs. I found a workaround thanks to an amazing plugin made by Mustafa Berke Güreltöl.
Even though the addon was originally made for VFX sprite sheets, I arranged my video frames into a 16×16 sheet and it worked perfectly.


My second objective was to create an animated exploded-view render similar to product visualisation shots. This was done in Blender with a simple animation and a few keyframes, then imported into Marmoset and linked to a turntable.
For the final renders I kept the lighting setup fairly simple: one studio HDRI as the main light source and a couple of spot lights to keep everything clean.


The plastic material itself was created directly inside Marmoset Toolbag using the Reflectivity and Transmission tabs, which gave me a realistic translucent plastic effect with convincing depth and thickness.
Additional post-processing was done in Photoshop: sharpness filters, colour tweaks and overall look refinement.

Conclusion
In conclusion, this is probably one of the most enjoyable and fun projects I’ve ever worked on because it combines two of my biggest passions: 3D art and repairing old game systems while studying their internal architecture.
Speaking of which, if I had any advice for new 3D artists I would say: I know it can be tough to find ideas and it’s hard not to compare yourself to others when you’re a beginner, but choosing a simple object or subject that truly matters to you and just getting started is often the best way to build momentum and improve. Don’t overcomplicate things, do your stuff, keep practising, spend time studying references, and improvement will come naturally.
Lastly, I would like to thank GamesArtist who reached out to me and gave me this amazing opportunity to share my work and breakdown with you today.
Read more articles
You might also like these articles.


