Unknown Island
Introduction
My name is Lili Bruijn and I'm a stylized Environment & Prop Artist from the Netherlands, who recently started freelancing. I recently graduated in July and I have 6 months of professional experience.
Goals
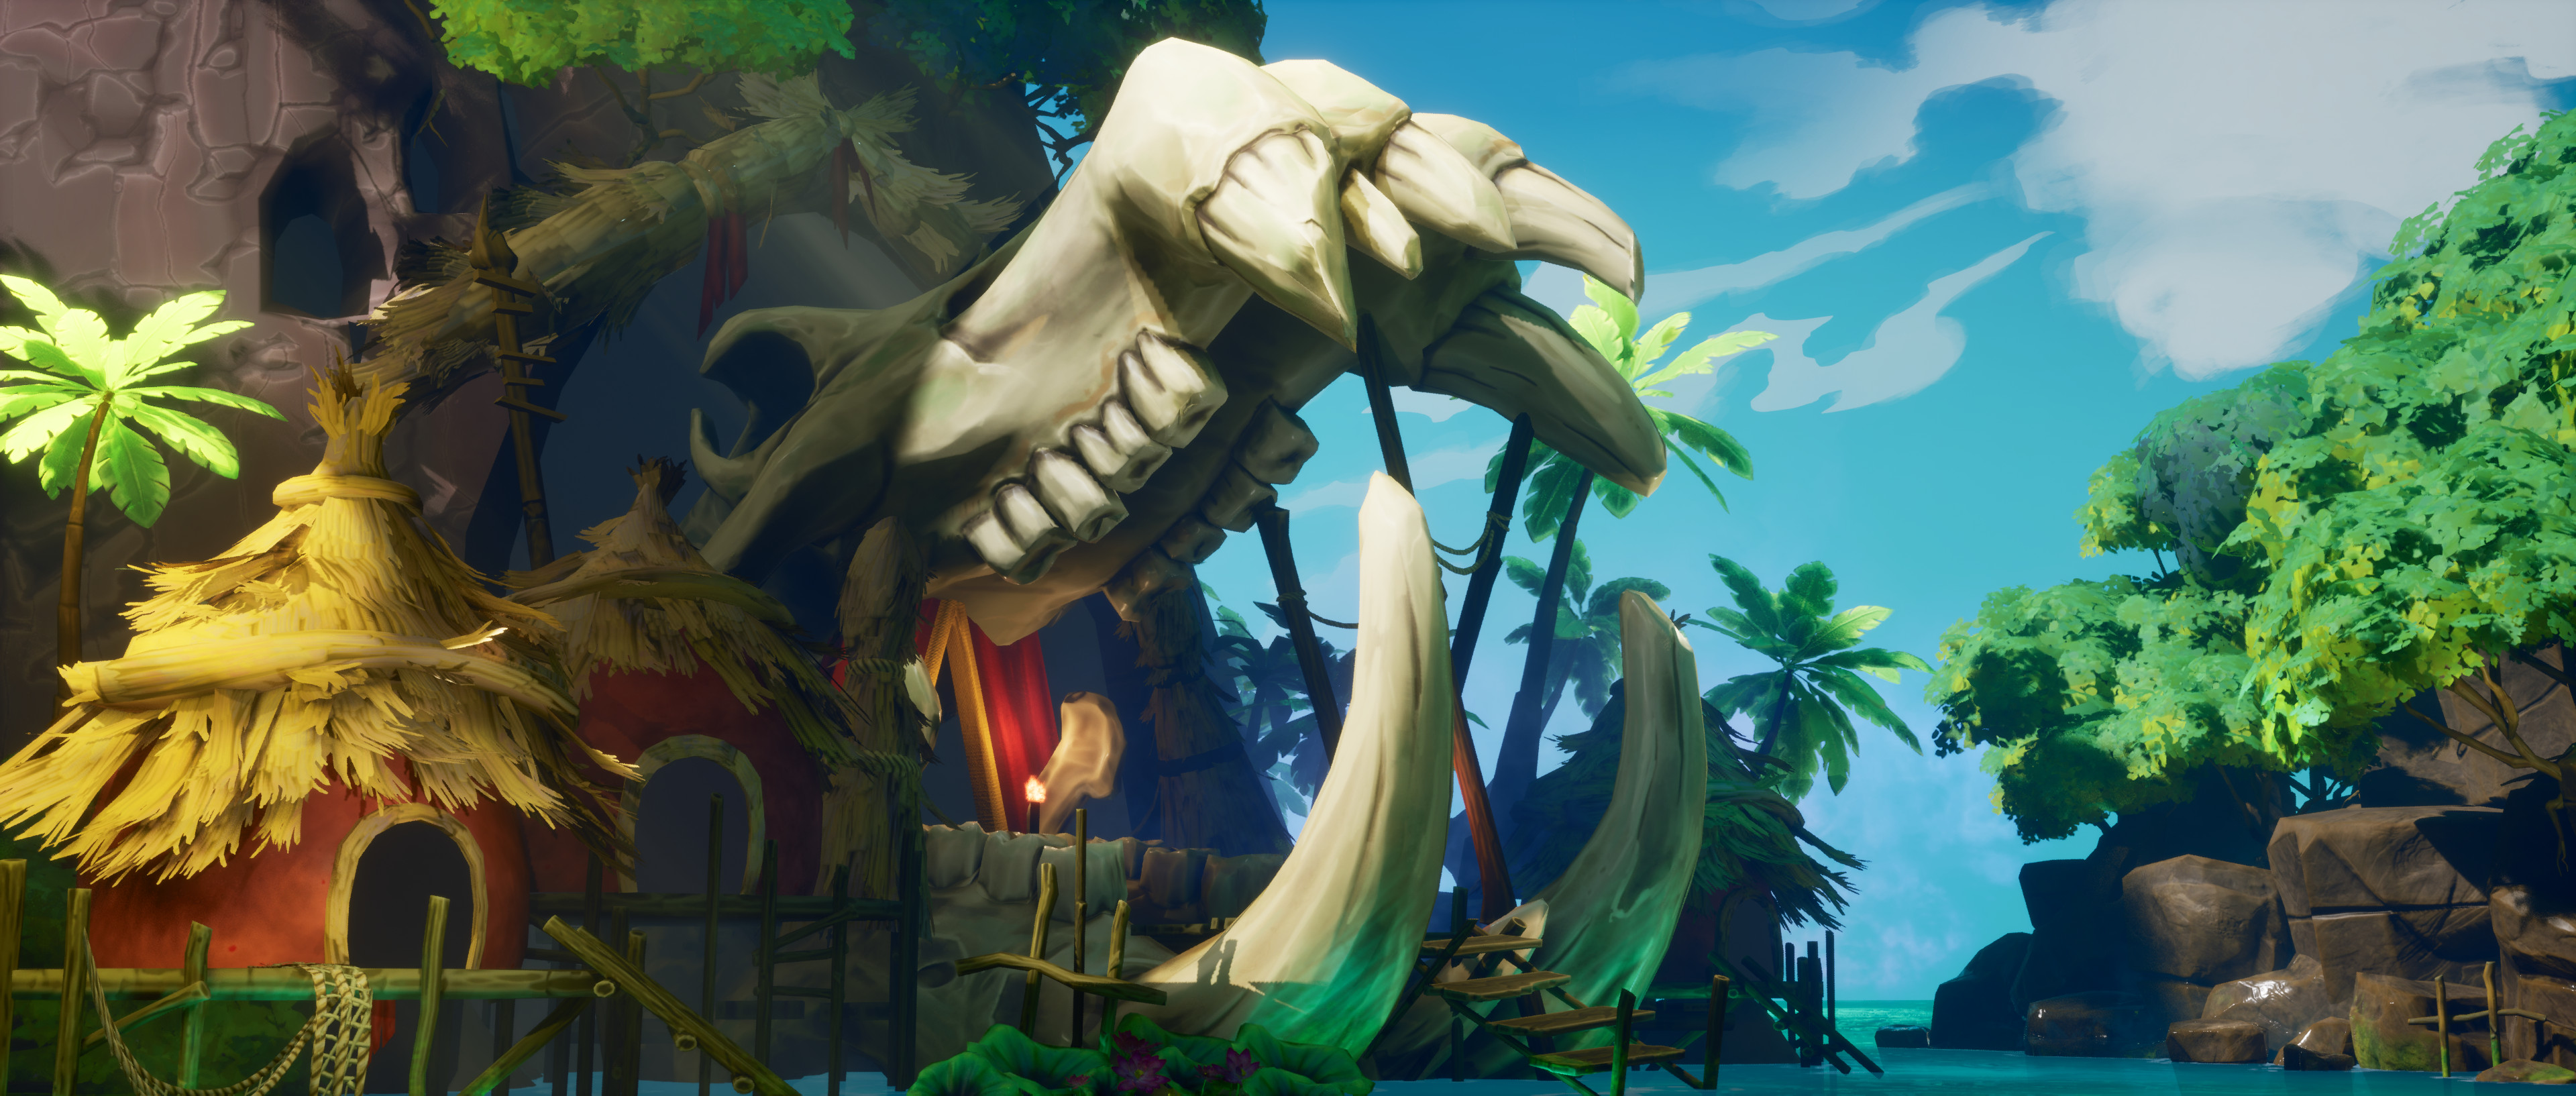
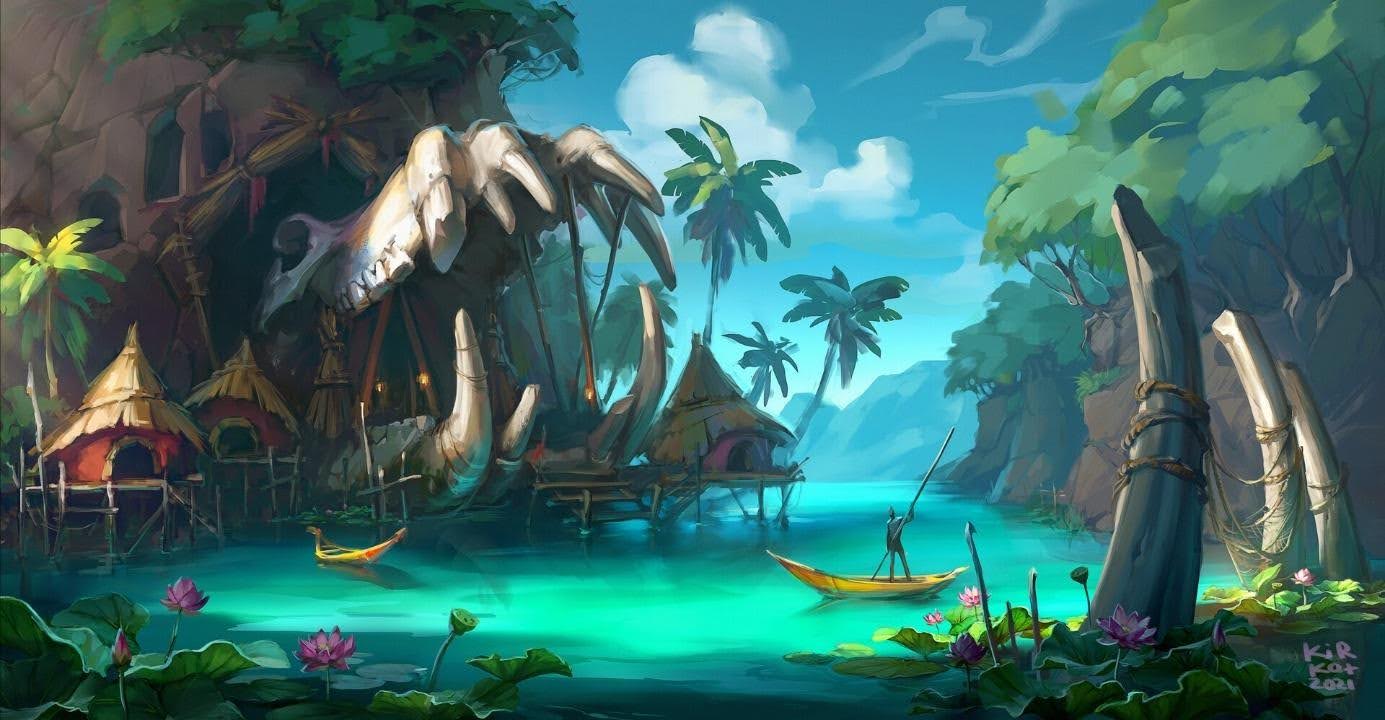
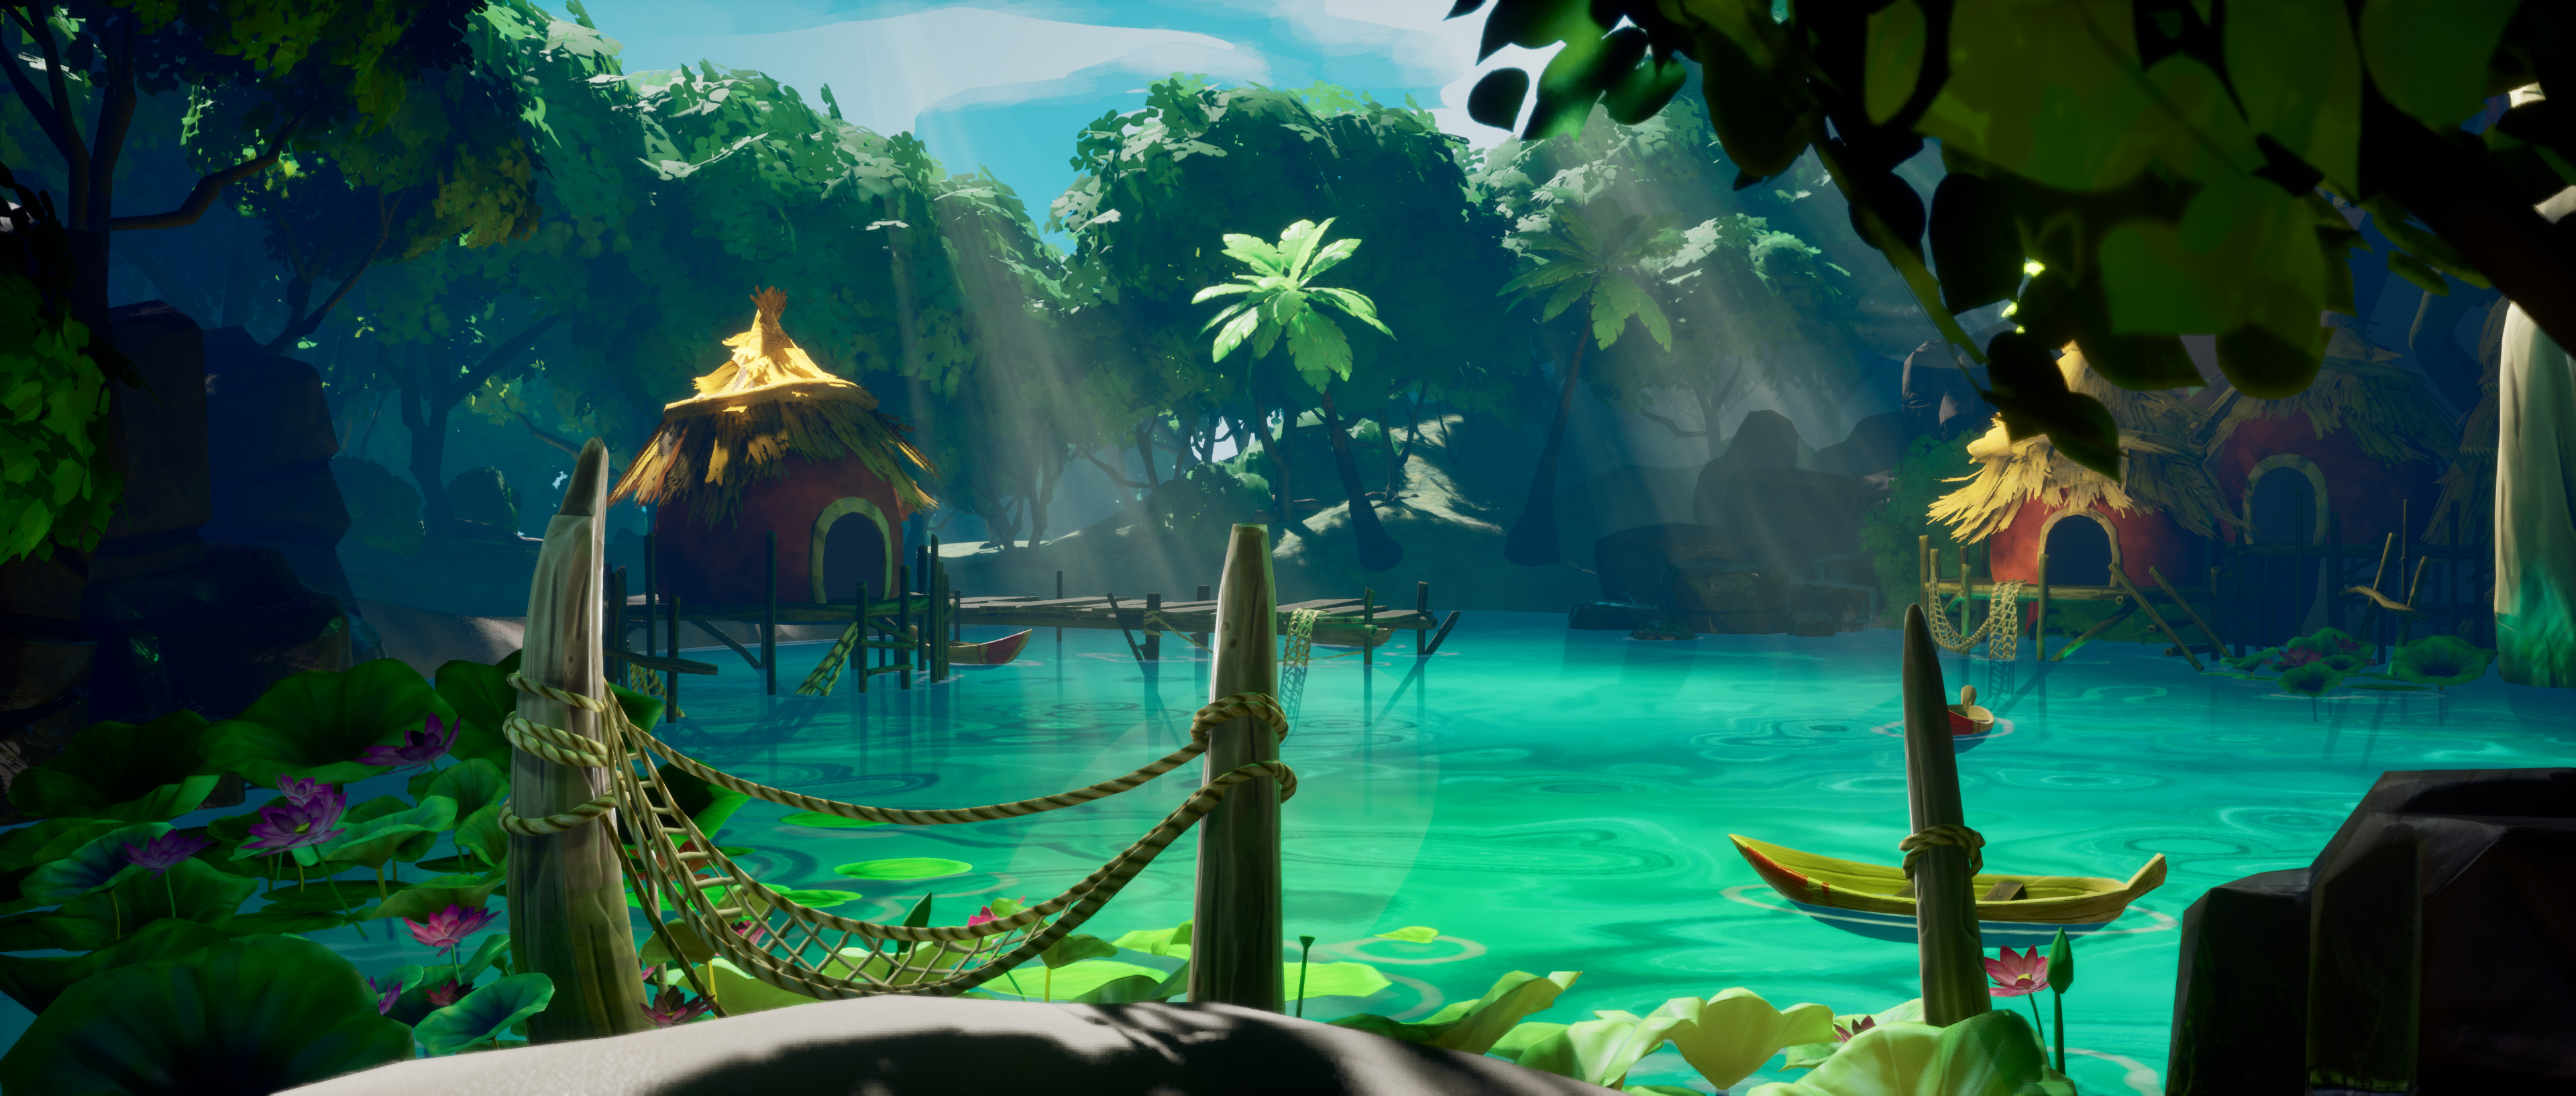
When I was looking around for concept art to get inspired for my next portfolio project, I bumped into the Unknown Island concept, made by Kateryna Kyrkach. I really loved the colors and atmosphere and it really got me excited to recreate it in 3D.
I also wanted to try to make a bigger scale outside environment on my own. During the Beyond Extent Team Challenge, we created an outside environment and I wanted to try it alone.
Software
- Blender
- Unreal Engine 5
- ZBrush
- Adobe Substance Painter
- Adobe Substance Designer
- 3DCoat
- Adobe Photoshop
References & Inspiration
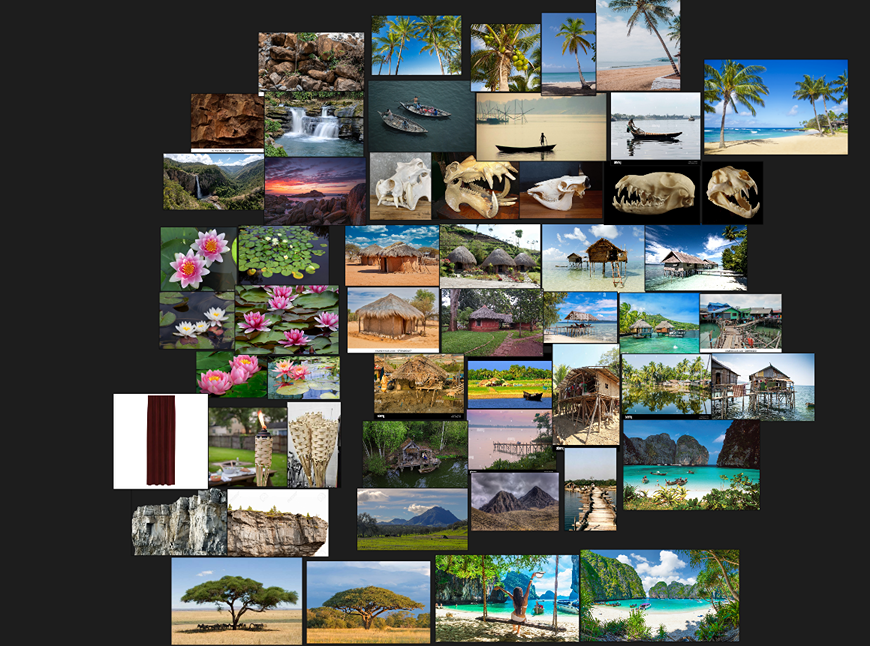
At first, I gathered images of the real life objects that were in the concept. Images of huts, plants, trees, boats and the water. I use PureRef for creating reference boards and moodboards, since the software stays on top of other software and it’s a place to store a lot of images.
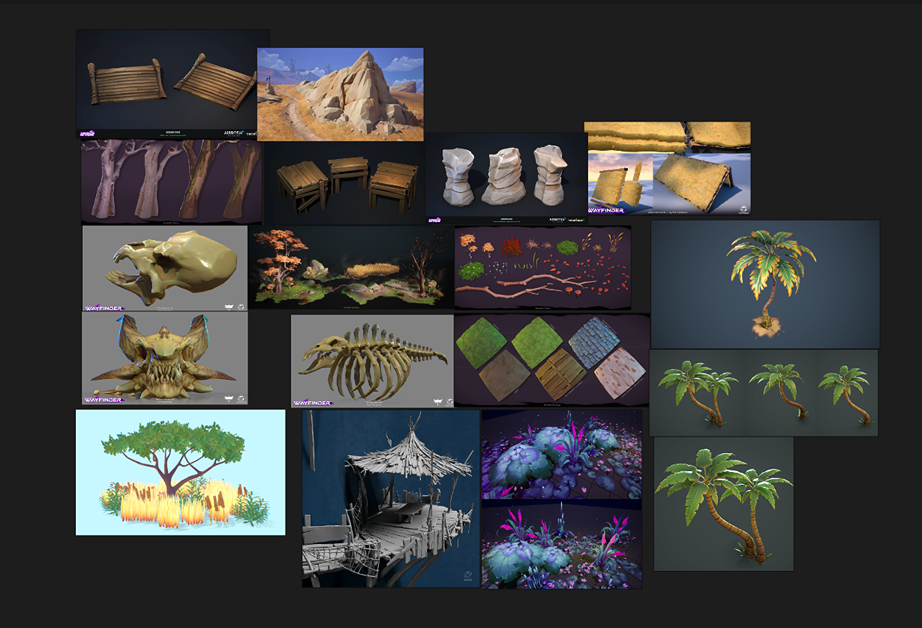
After gathering all the real life reference, I started gathering reference for the art style I wanted to go for. I really like stylized art styles and was mostly looking at Wayfinder, together with art of other artists like Mateo Chilla and Axel Blin.
Blockout & Modelling
I really wanted to build the scene as quickly as possible, so I created a few blockout models and downloaded some models from Sketchfab/Fab as placeholders for within the scene. I downloaded a placeholder for the skull, flowers in the water, and palm trees.
The other blockout assets were created by me in Blender. I kept the shapes very simple and tried to get the proportions right.
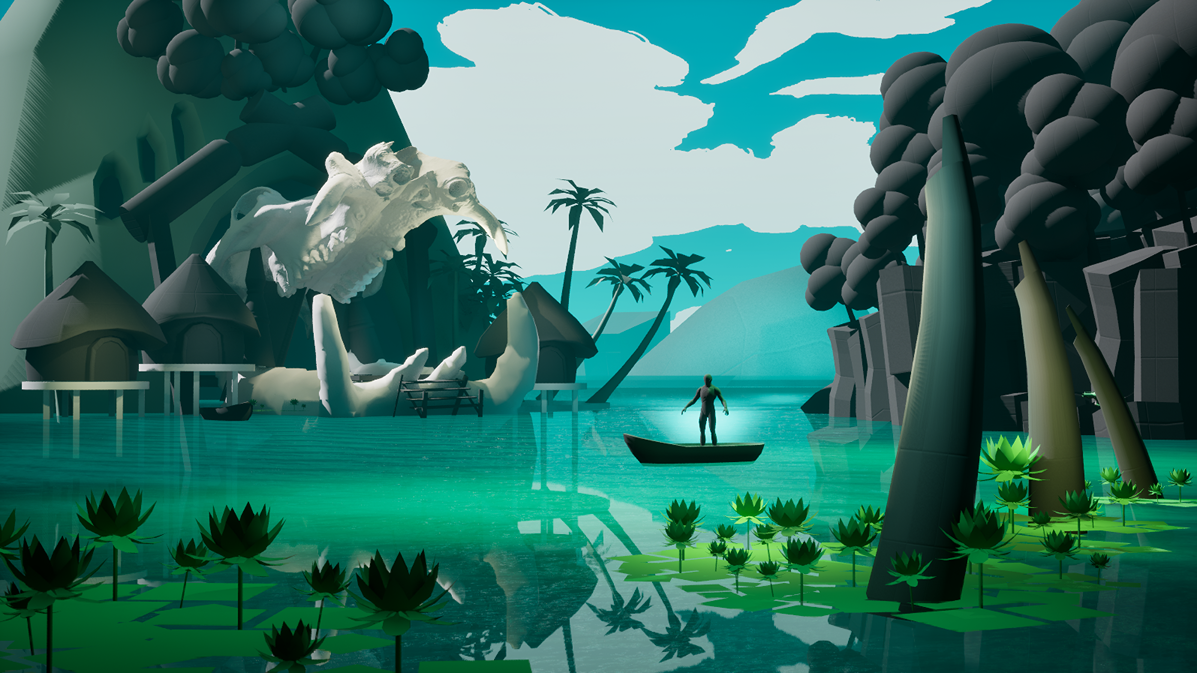
I also started with very basic lighting during the blockout stage, as this helped me see if everything looked similar to the concept.
During the blockout stage and a bit during the production stage, the placement of the skull, mountain and huts moved quite a bit forward. I received feedback that those elements were too far back and that moving them forward would make them stand out more and match the concept better.
Props
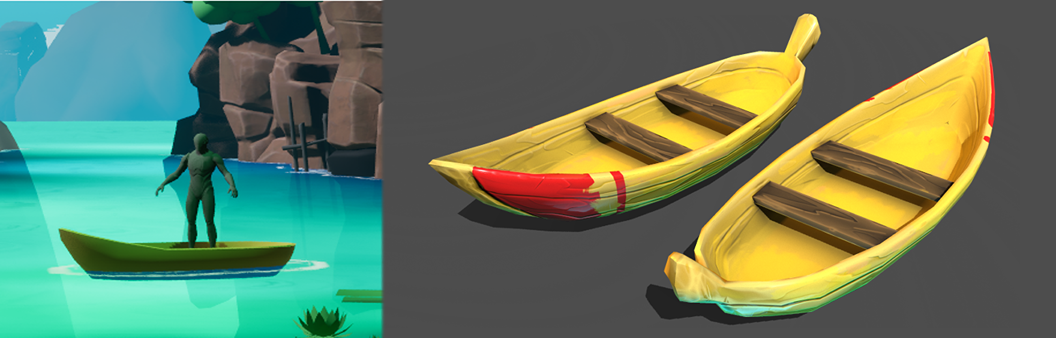
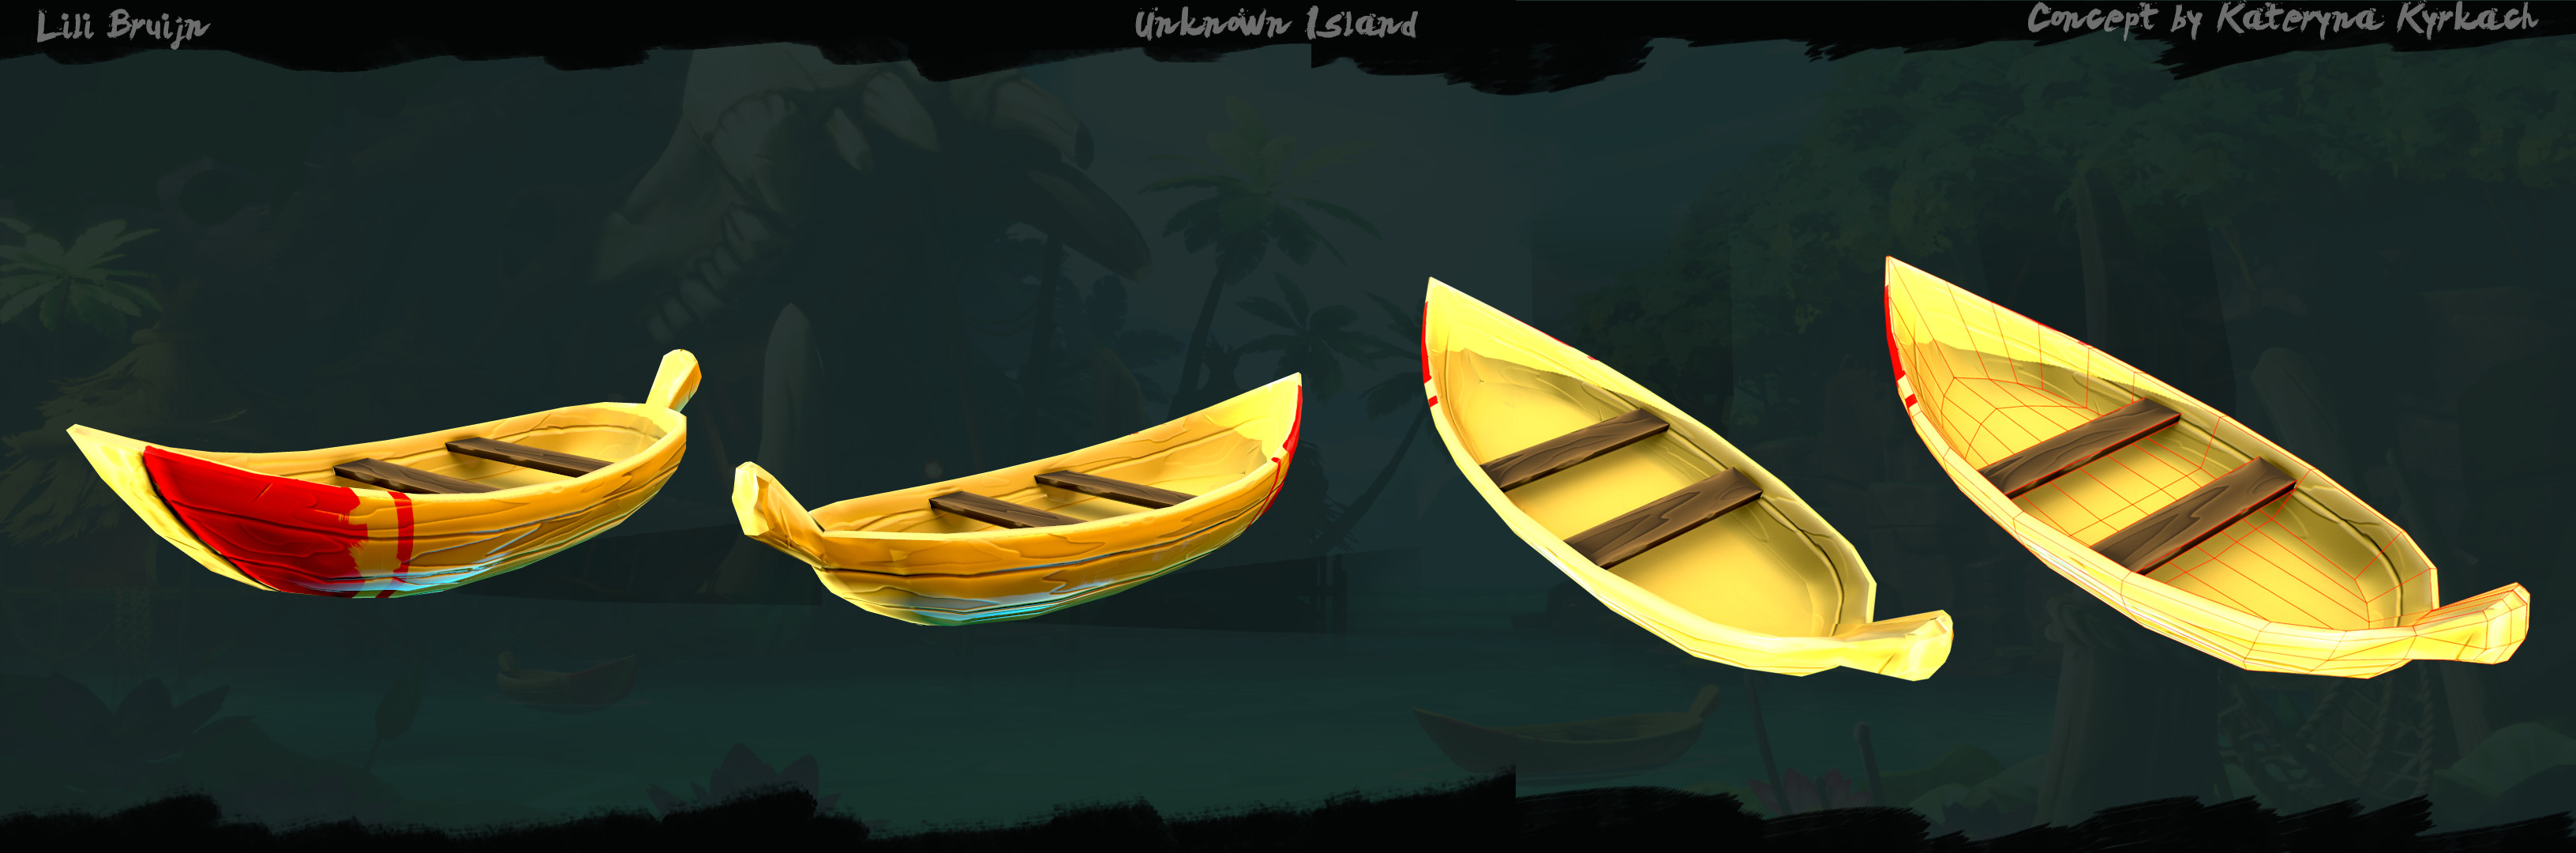
For the props, I used the low-poly model as a base. For the boats I kept the shape very simple, but when I wanted to start making the polished version, I re-used the low-poly and adjusted the shape to match it better with the concept and the reference I had gathered before.
I also added seats into the boat during the polish, because I didn’t add this element during the blockout stage.
When I model and texture my assets, I always check how they look in engine. I want to see if the shapes and colors work in the environment, because they have to work together with the other elements in the scene. I used the same workflow for the ribs and rocks as well.
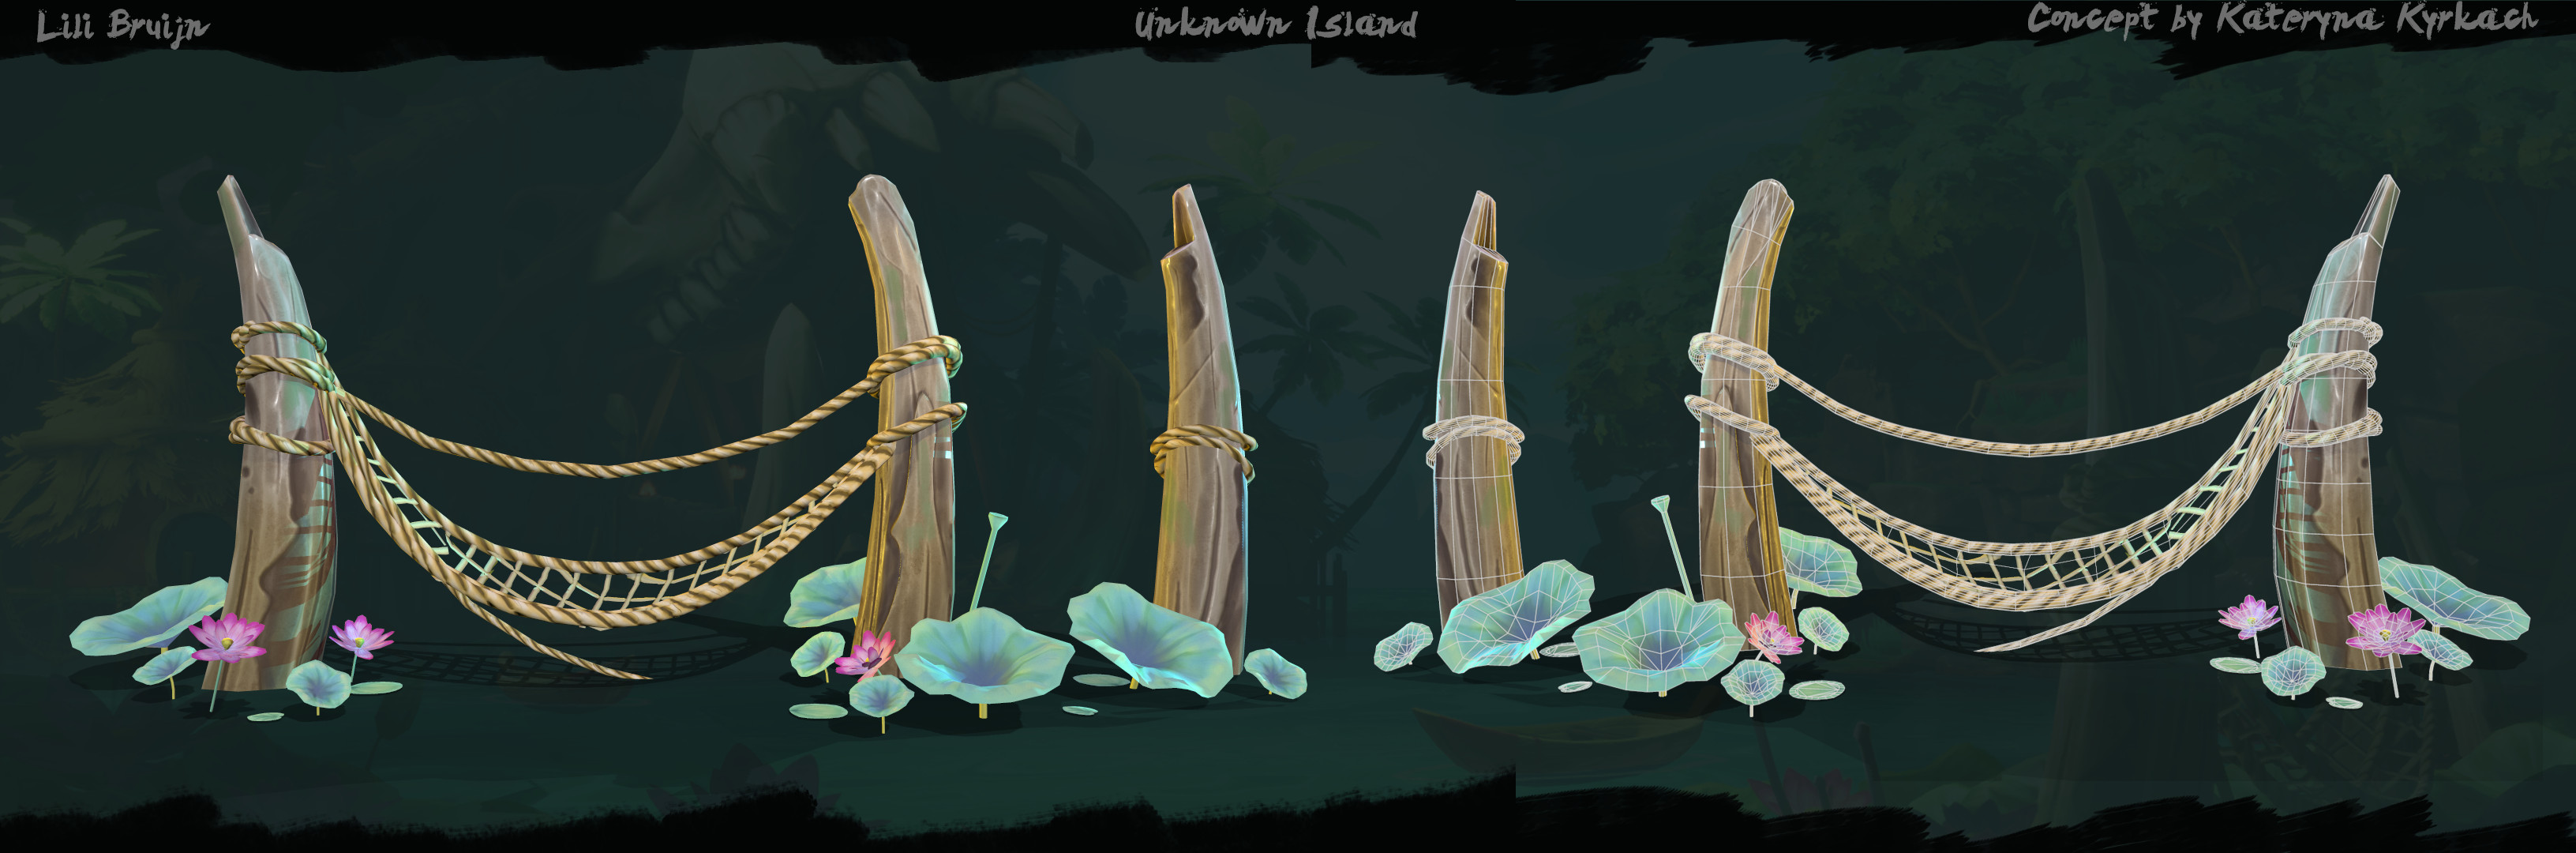
Since I didn’t add the ropes and fishnets into the blockout from the start, I had to model these elements from scratch. I would model the base shape, and check in engine if it would connect to the ribs and how it would look from the camera view. I added more polygons during this process and adjusted the length and tightness around the ribs a few times until I was satisfied with the way it looks.
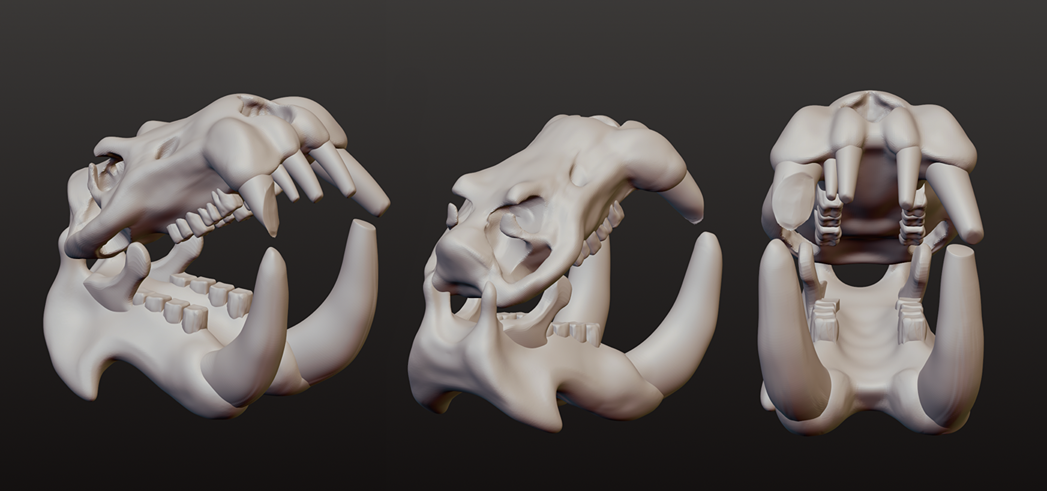
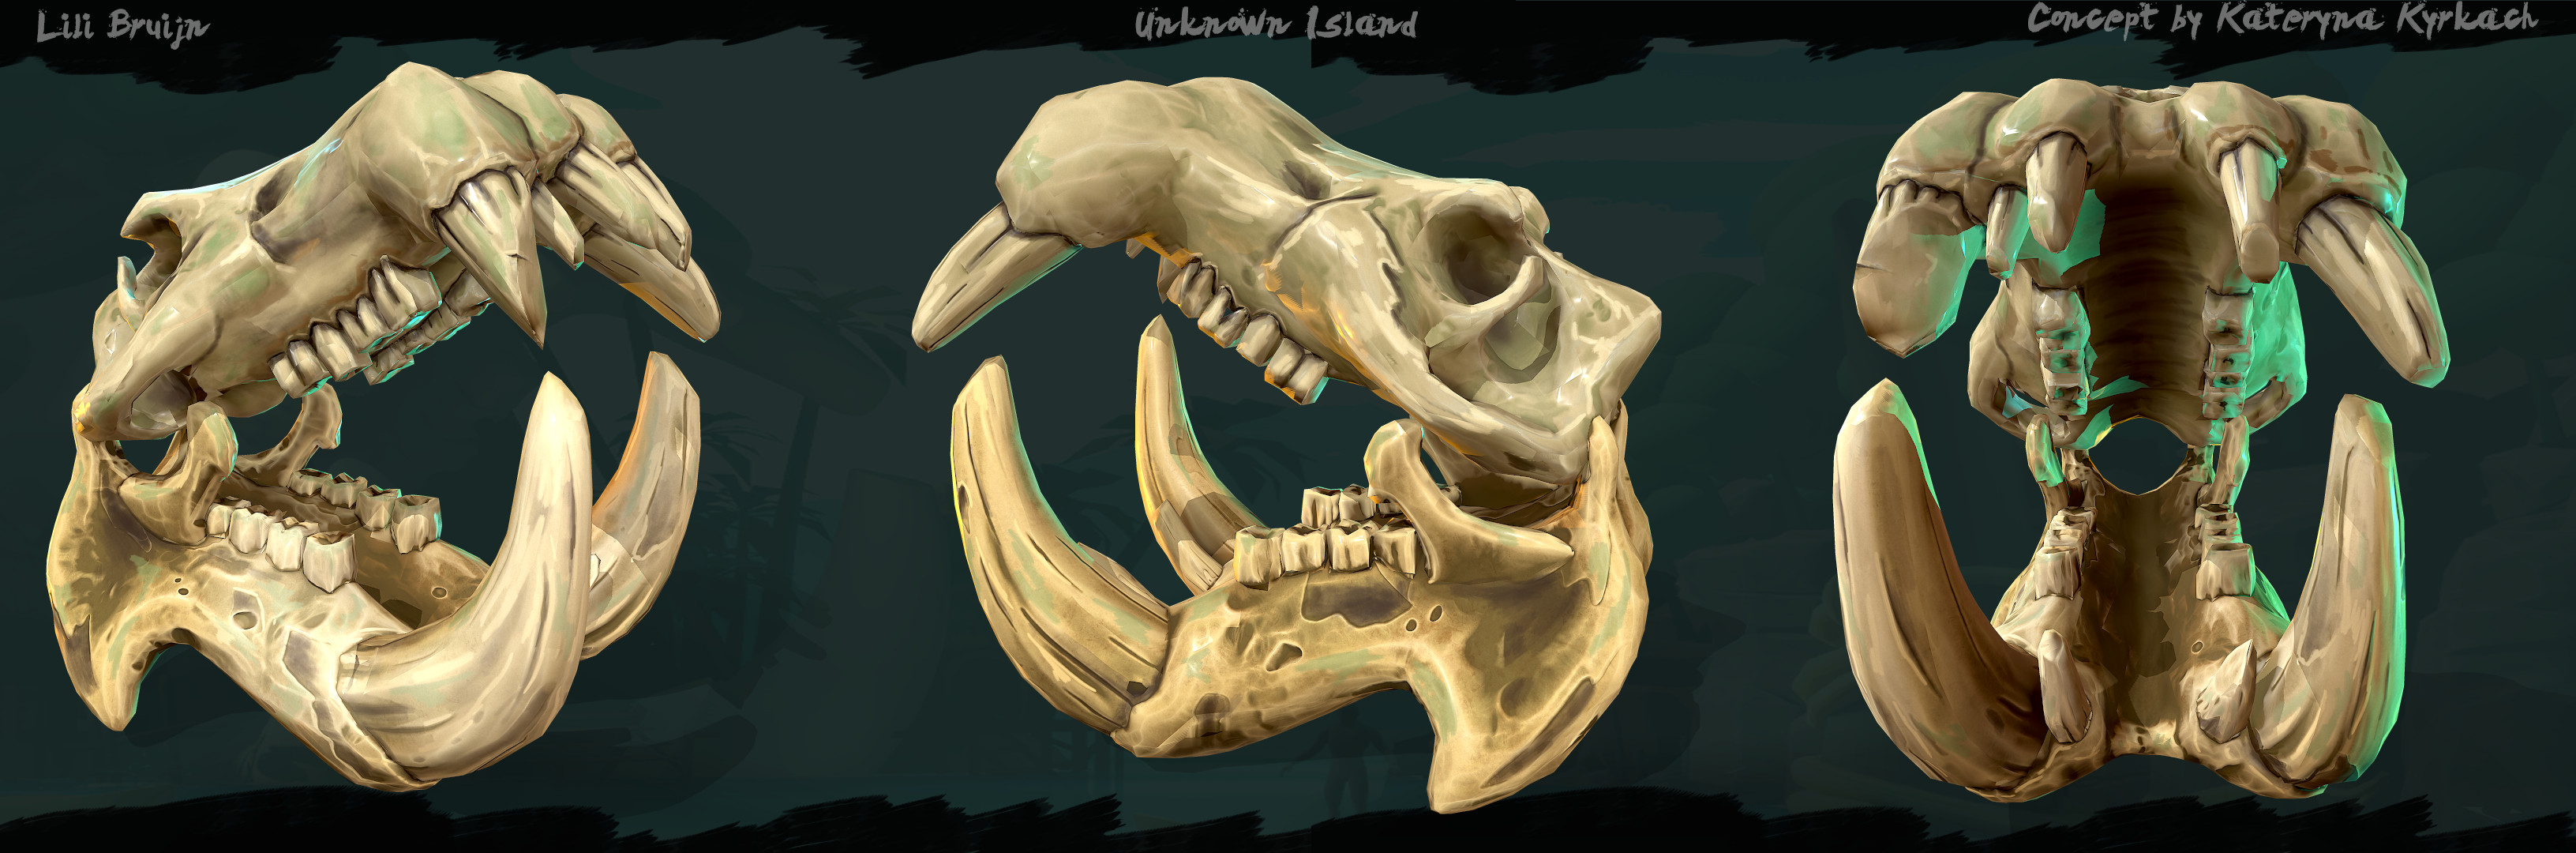
For all the assets I started with a low-poly version, except for the hippo skull. Sometimes I had to travel for a few hours and I wanted to try sculpting the skull while being on the train. So I started with the base in Nomad Sculpt on my Samsung Tablet.
While sculpting I kept the real life reference next to it on my phone, so it would look accurate to the real thing. Since the concept art looked a bit different, I adjusted some proportions and added elements to match the concept better, but also kept elements that belonged to the real life version.
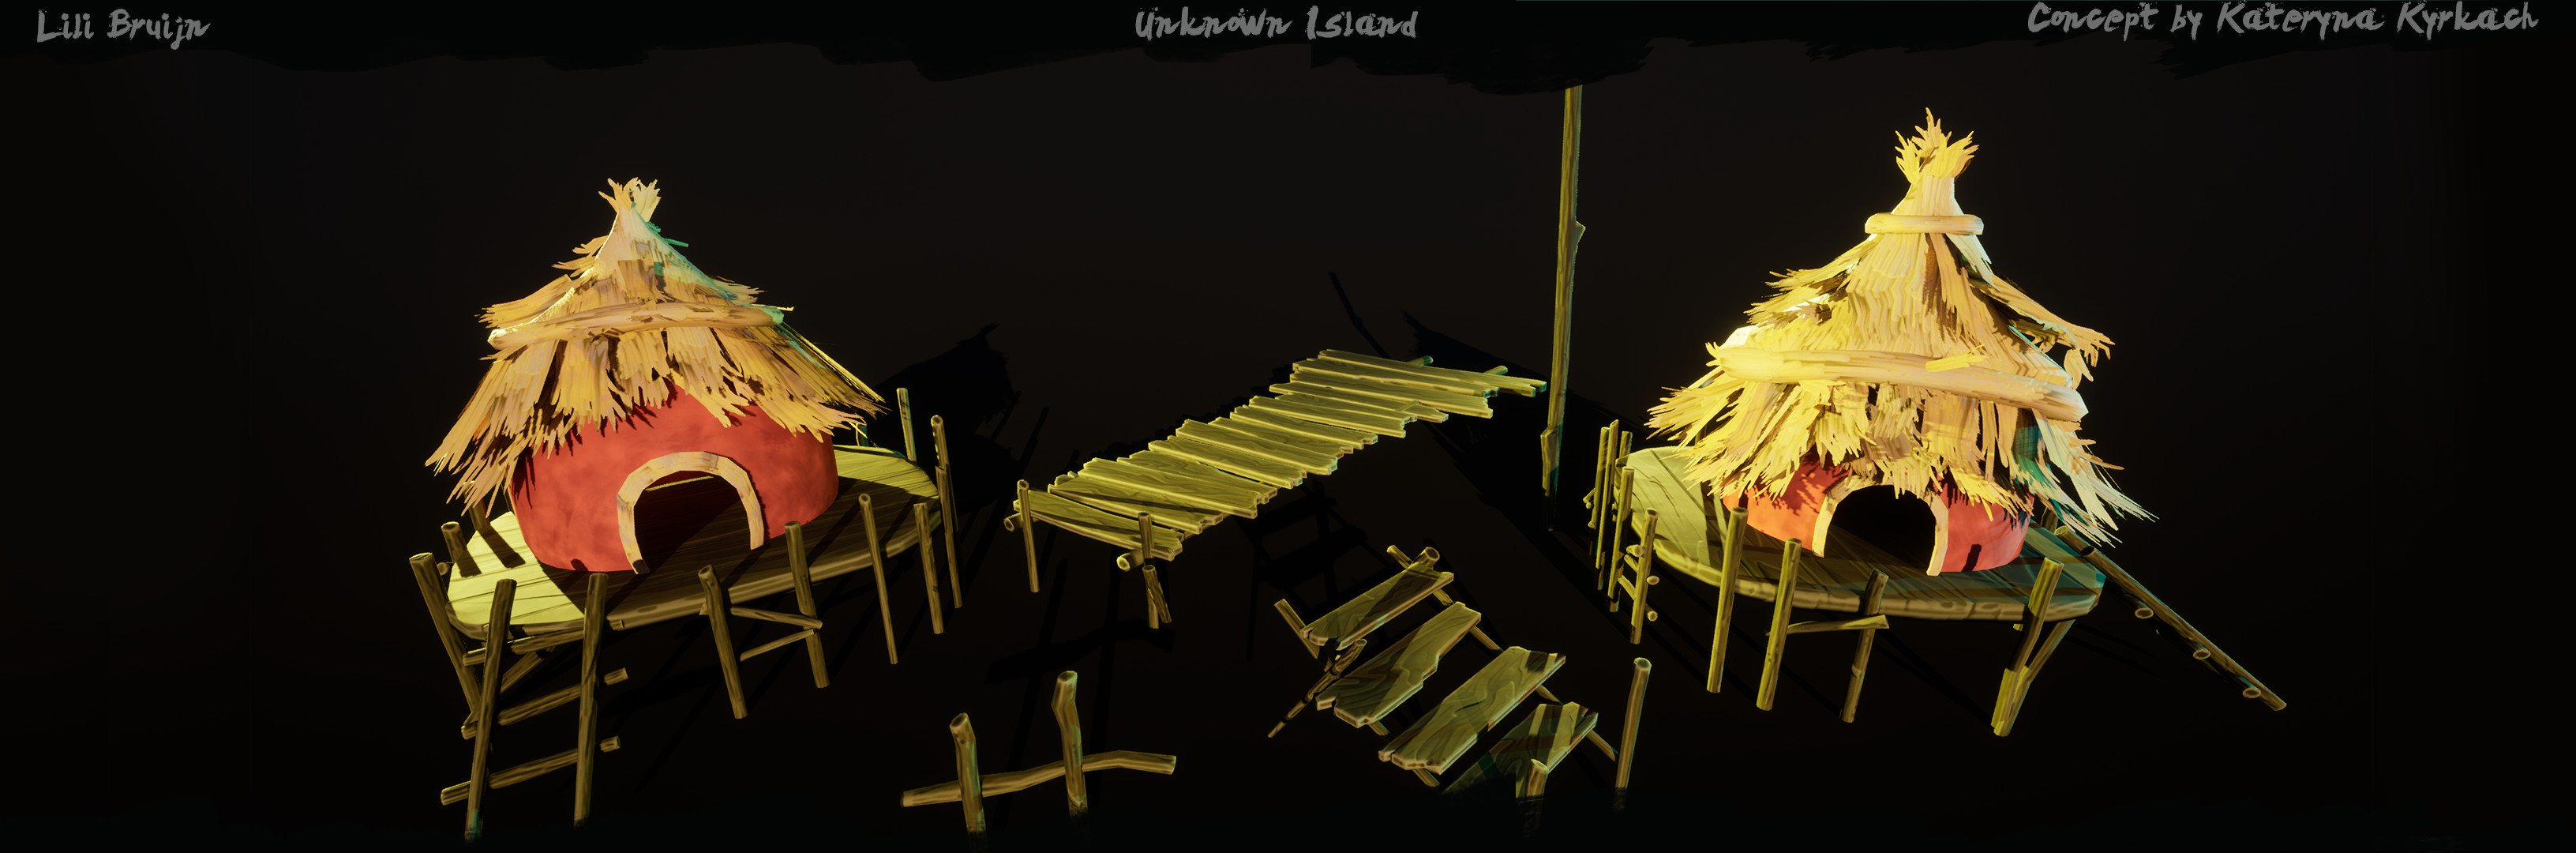
There was also quite a bit of wood in the environment, like the beams and planks by the huts and skull. So I decided to build a wood kit, where I sculpt and polish a few wood elements and re-use them as much as possible in the environment.
I used 4 planks, one big beam, one deck for the huts to stand on, a ladder and 4 smaller poles for around the deck of the huts.
Terrain & Foliage
For creating the landscape, I used the landscape mode and created a terrain big enough for the environment. I liked the idea of having the water connect with a beach and sand, just like in the reference images I gathered.
So I kept those areas a bit more flat, while the back had more hills. For the textures, I used tileable sand and moss materials I had made before in Substance Designer.
I really liked the idea of this location being in a dense tropical forest, like you discover this location as a player. This is why I surrounded the environment with dense trees, to bring in some darkness and to create the feeling that you have discovered this hidden location.
For the grass I created simple planes with an alpha texture. I mostly used the grass on top of the rocks in the environment. I also created some hanging grass over the rocks in a few areas. I did this by creating a plane in Blender, subdividing it, and adding cloth physics to make it bend nicely over the rock.
For the plants in the water, I created a low-poly variant and sculpted the high-poly in ZBrush for baking a normal map later on. In Substance Painter I created a base for the colors I wanted to use on the plants.
Afterwards I brought the plants into 3DCoat and hand-painted some details and shadows into the base color. The plant textures had a lot of back and forth between 3DCoat and Unreal Engine, because they always look a bit different in engine.
I also changed the shape of the plants a couple of times, to get that organic and crinkly feel in the leaves.

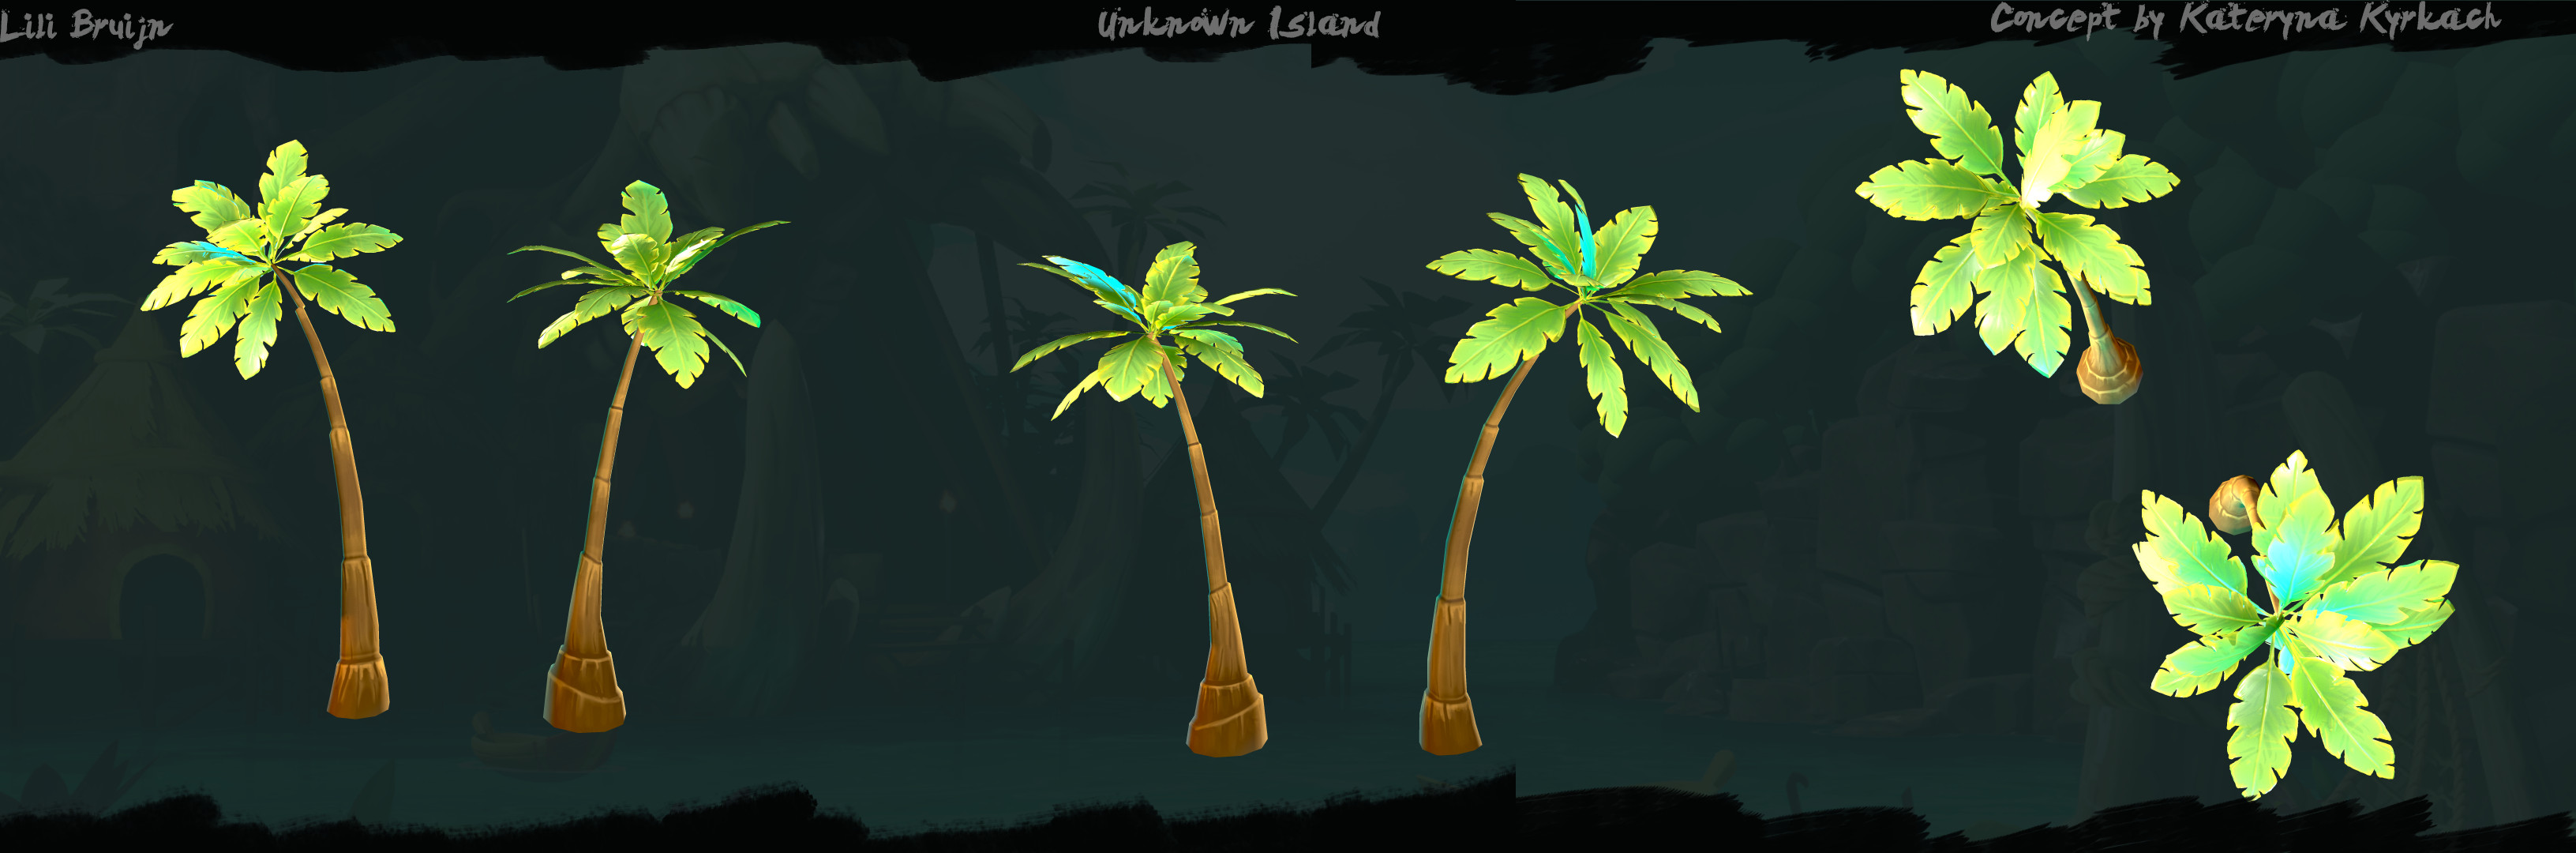
For the environment, I created 2 types of trees. One was a palm tree and the other was a thinner tree with a fluffy canopy. I created 3 variants of palm trees: one that was quite straight, another that was a bit bent, and the last one was very curved.
The reason I created 3 variants was because it was easily noticeable when I re-used the same tree from the same angle. I sculpted the palm tree leaves and baked them onto planes, to get a more 3D feel to them with a normal map.
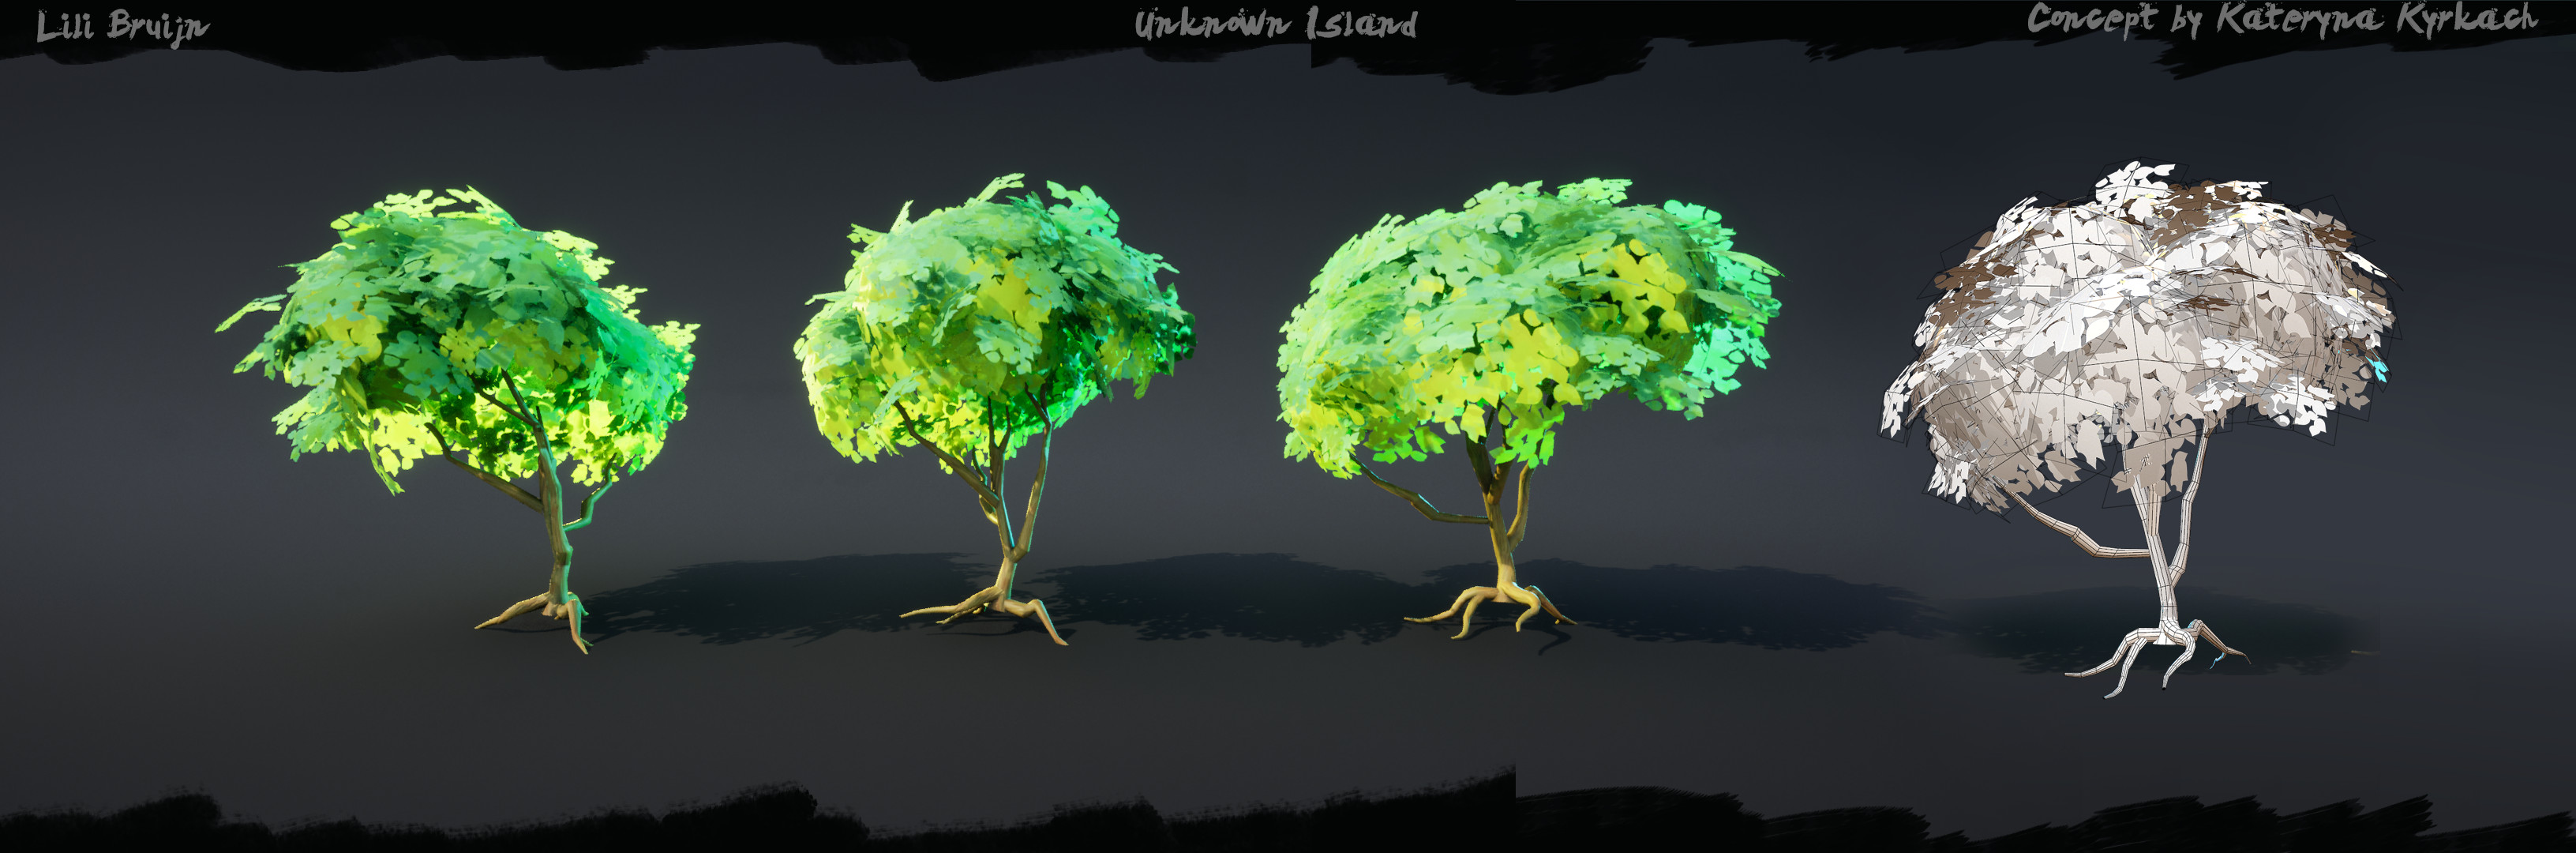
For the thinner trees, I only created 1 variant but I wanted this tree to look quite different from different angles. This did cause a bit of repetition, but I managed to break it up by adding bigger canopies with a different shade.
For the leaves, I created a simple alpha texture for the mask and a base color texture with different types of brush strokes on them, to get more color variation in the leaves.
I also used the canopy clumps as bushes in the environment. They were mostly placed outside of the main frame to fill up the environment from the other viewports.
Texturing, Materials & Tileables
For this environment, I really wanted to create tileable textures in Substance Designer. I really want to create more with it and get better at the software, while also showing the skill of implementing tileables nicely in the environment.
While creating the material, I often checked in the engine how it would look. The materials don’t look incredible on their own, but they worked well in the scene and that is what mattered to me the most.
For the hay rooftops, I followed a tutorial to get the shape of the hay. But after getting the shape, I started building on top of it by adjusting levels, building up colors, etc.
For the hut material, I wanted to keep it very simple. I wanted to have some details in it, but I didn’t want the material to get too noisy, since the roofs were already quite detailed.
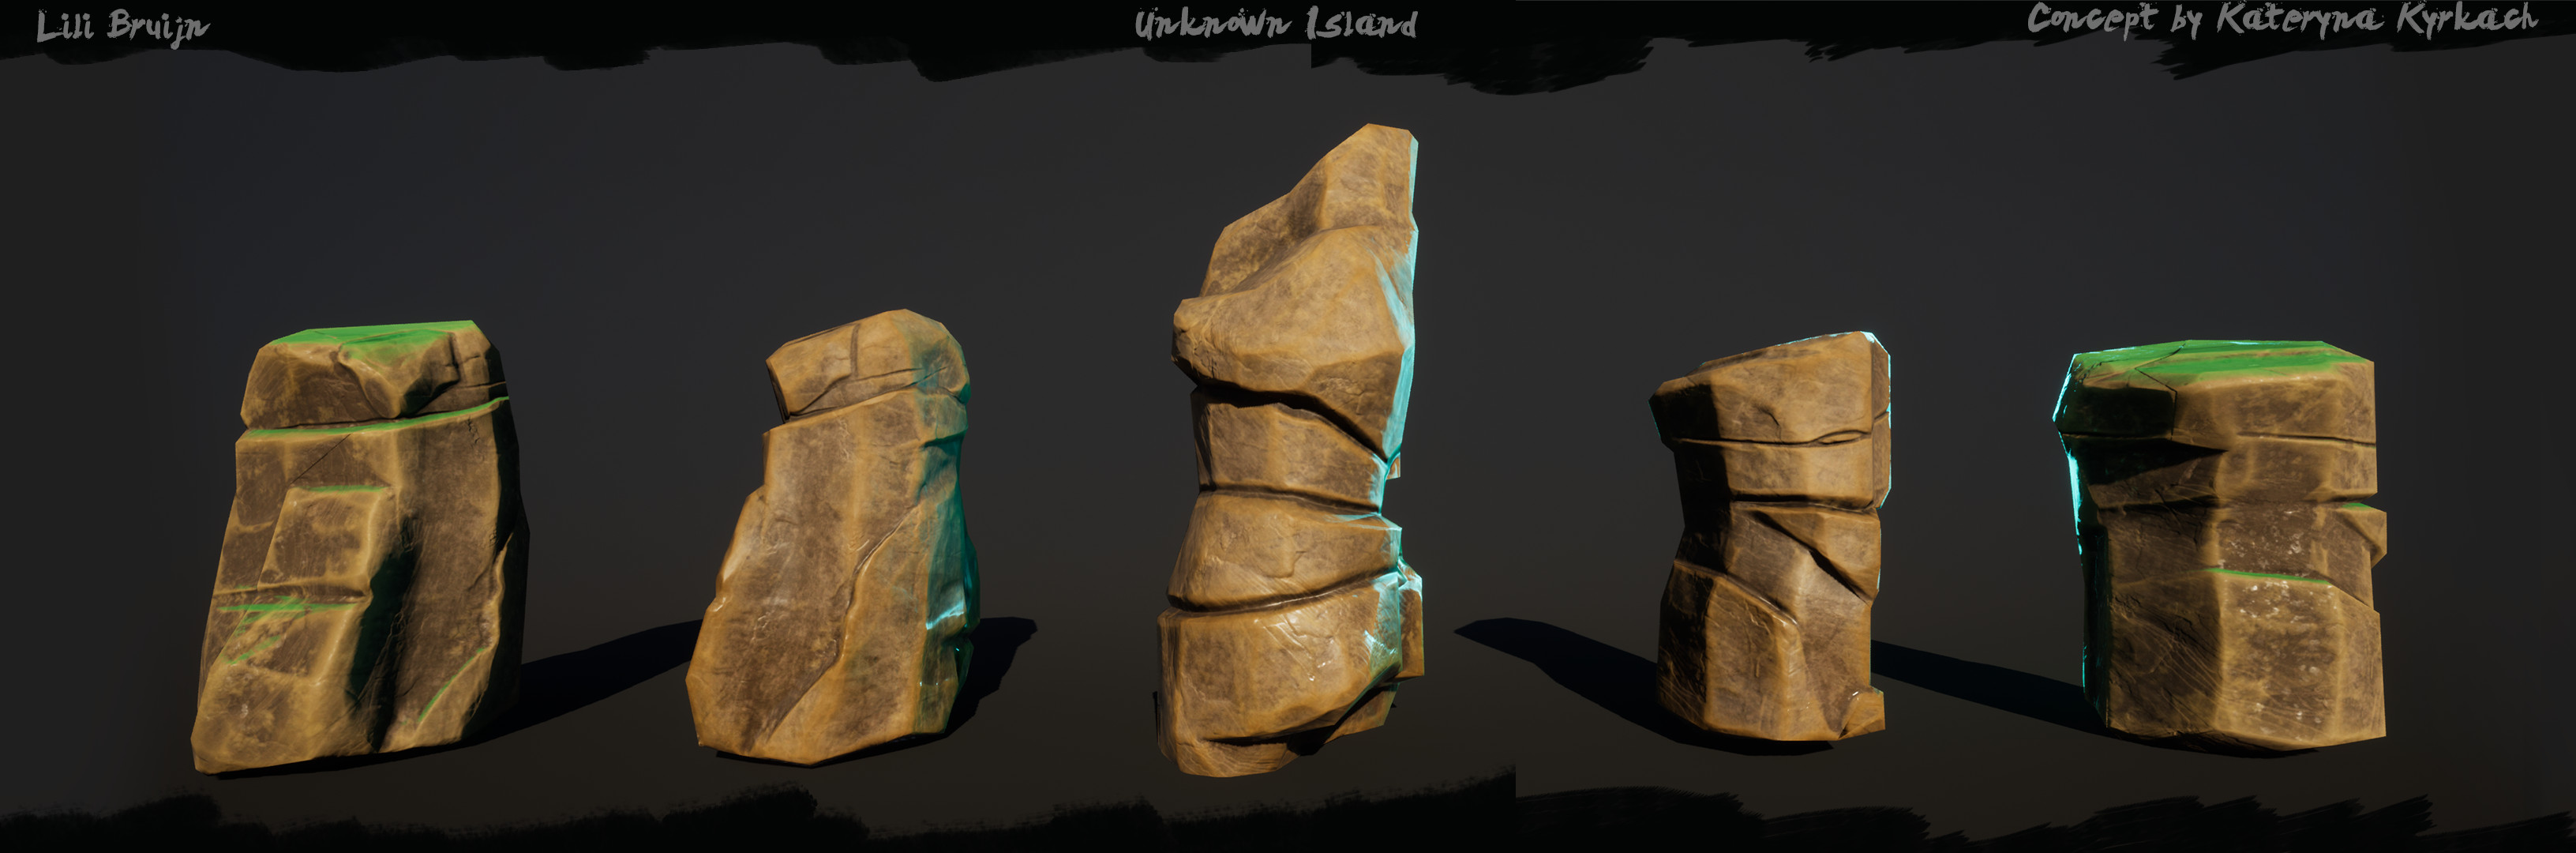
The rock material for the mountain was quite hard for me to get right. I tried a few different tutorials to get some broken up shapes in the material. It took a few tries to get right, and I also only looked at the tutorials for the shape building of the rocks – adding the colors and other elements were done by me.
Stylized Art Workflow
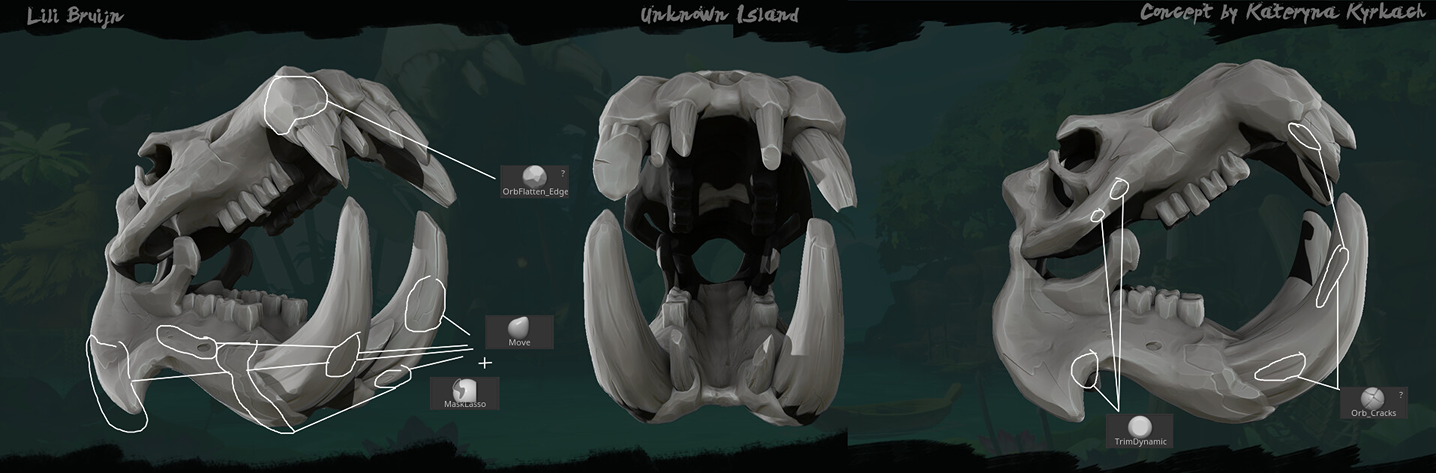
The workflow I have lately been using in ZBrush is masking using the lasso tool and using the move tool to add details. I started using this method since I tried making a fan prop of Wayfinder and studying their art style. I also use the OrbFlatten_Edge, TrimDynamic and Orb_Crack1 brushes a lot for stylized sculpting.
You can find the brushes for free with this link:
https://orb.gumroad.com/l/nOkHw
Here is a quick video of how I use the masking lasso tool with a combination of the move tool to get the desired results:
https://www.youtube.com/watch?v=swYPylI4oIs
After sculpting the high-poly, I bring the low-poly into Substance Painter and bake the normal map using the high-poly. Once the bake is done, I start building up layers inside Substance. I start with a general base color, and add colors on top in combination with generators, like the curvature generator.
I add darker tones for the inside of the model, and lighter colors for edges. I also add a layer for some roughness variation.
Sometimes, once I build up the layers in Substance Painter, I import the mesh with the textures into 3DCoat for some extra hand-painted details. This really depends on the models, how much they stand out in the environment and how big they are.
I added a hand-painted polish on the skull, ribs, trees, water plants and the ropes.
Technical
While working on this environment, I knew there were going to be some technical challenges for me. The moving boats with blueprints was something I had never done before, the same for swaying trees. I have made water shaders in the past, but I really wanted the water to look good and colourful like in the concept art.
The first thing I picked up was the water shader, because I knew it would take a few iterations to get right. During the blockout stage, I had a rough version of a water shader built, but it took a couple of tries to get the water to be colorful and bright, transparent but not too transparent, and to have some nice relaxing movement to it.
For the final water, I followed this tutorial and made small adjustments during the process:
https://www.youtube.com/watch?v=sIcrFDOyAkE&t=887s
For the moving boats, I set up a blueprint with a timeline added to it. I don’t have a lot of experience with blueprints, so I also followed a tutorial about adding a timeline and setting it up.
Link to tutorial: https://www.youtube.com/watch?v=oYHIbhmwQfQ
I looked up reference for boat movement in the water, and adjusted the timeline a lot to get a more natural feeling to the movement. In the end, the movement is not super dramatic, but I also didn’t want the movement to be extreme and distracting.
This is how the timeline ended up looking for the boat movement.

For the swaying trees, I also followed a tutorial for the setup of the functionality. It took me a bit to find a video about swaying movement, but this video helped me a lot!
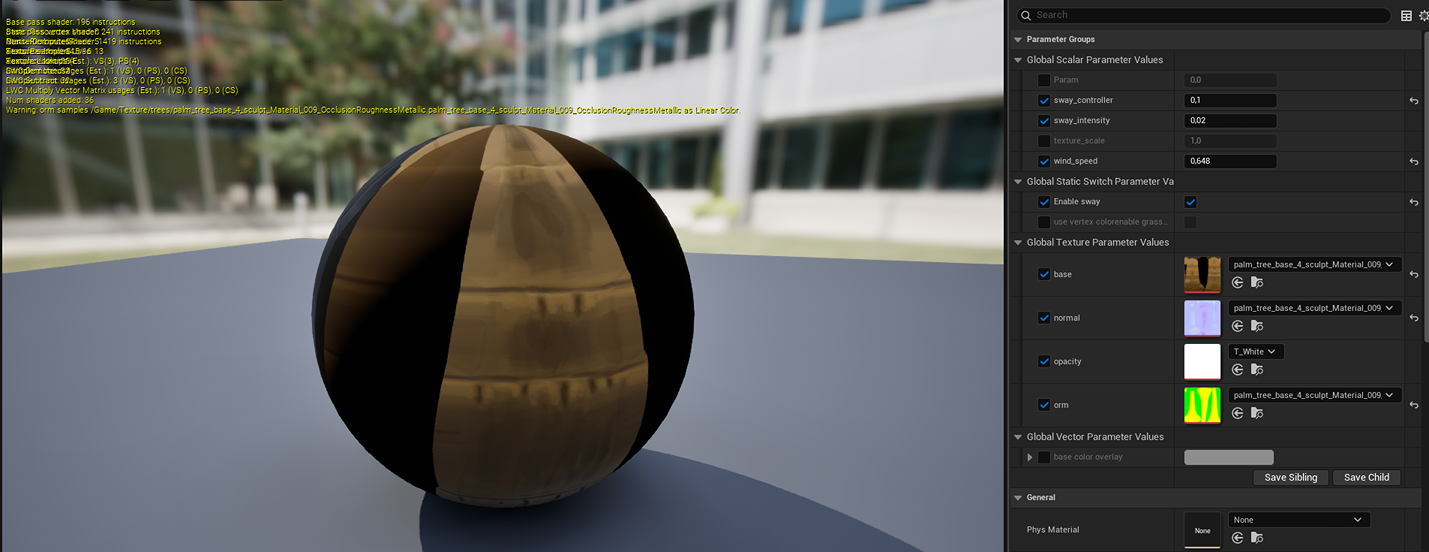
These were the settings I settled with – the movements were calm and not too extreme. Make sure the leaves and the base of the tree have the same swaying values, or else the movement will be out of sync!
I also duplicated this material and changed the values, because I had 3 palm trees in a row and the movement felt exactly the same. This felt a bit weird and unnatural to me, so I decided to have the middle tree have a different swaying range.
Polishing
For the final touches, I received some tips to maybe add some algae to the surfaces that were touching the water. I decided I wanted to use decals for this, because I didn’t want to add vertex painting to the already existing materials.
I didn’t want the materials to be super bloated with all kinds of settings and values. So I made an alpha texture in Photoshop, and re-used a tileable material I already had in engine for the algae. I added the decals to the rocks, and also to some wooden elements at the huts and skull.
I also wanted to try making hanging grass patches for the rocks, because this was something still missing from the concept and I thought it would be a nice addition to the scene.
I took a plane in Blender and subdivided it, and used cloth physics to let it fall on top of one of the rocks I had in the scene. I then created another alpha texture for the grass shape, and used a basic color in the material. I tried adding a texture with details, but the grass got too noisy and I wasn’t a big fan of it.
I also tried to re-use the fishnets by adjusting the shape in Blender and hanging them around the huts in the environment.
This was a bit tricky to do, because I didn’t want to break the UVs by stretching the nets in weird ways, but it all worked out!
Lighting & Rendering
I always find lighting quite difficult to get right, which is why I often start with setting up lighting in the early blockout stage.
I know that when the scene changes or assets get added, the lighting needs adjustments. In the concept art, there were some shadow areas, but because of the directional light, those areas were fully lit. The solution I used for this was creating shadow catchers to create shadows in the environment.
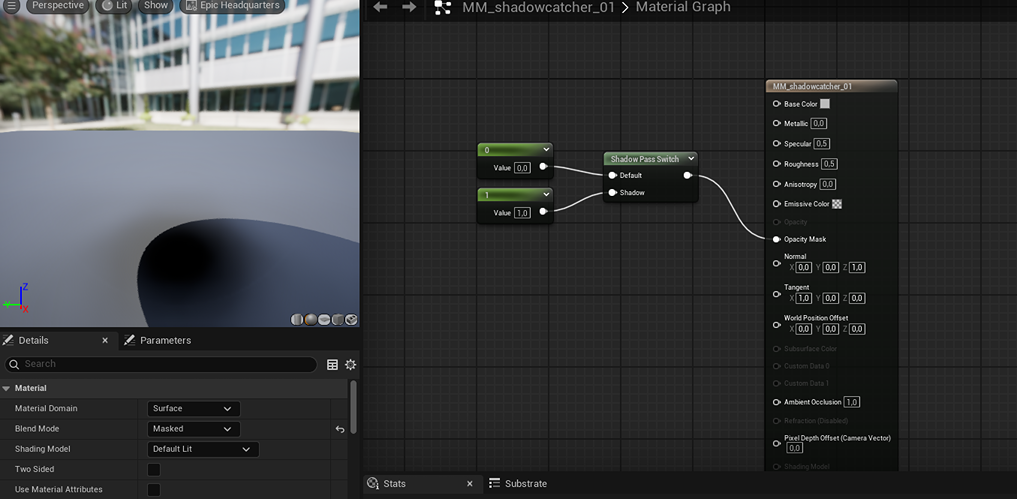
This is the material for the shadow catchers. This creates a shadow in the shape of the object you add it to. If you want to have, for example, leaf-shaped shadows in your environment, you replace the value of 1 with a param2D node and use an alpha texture.
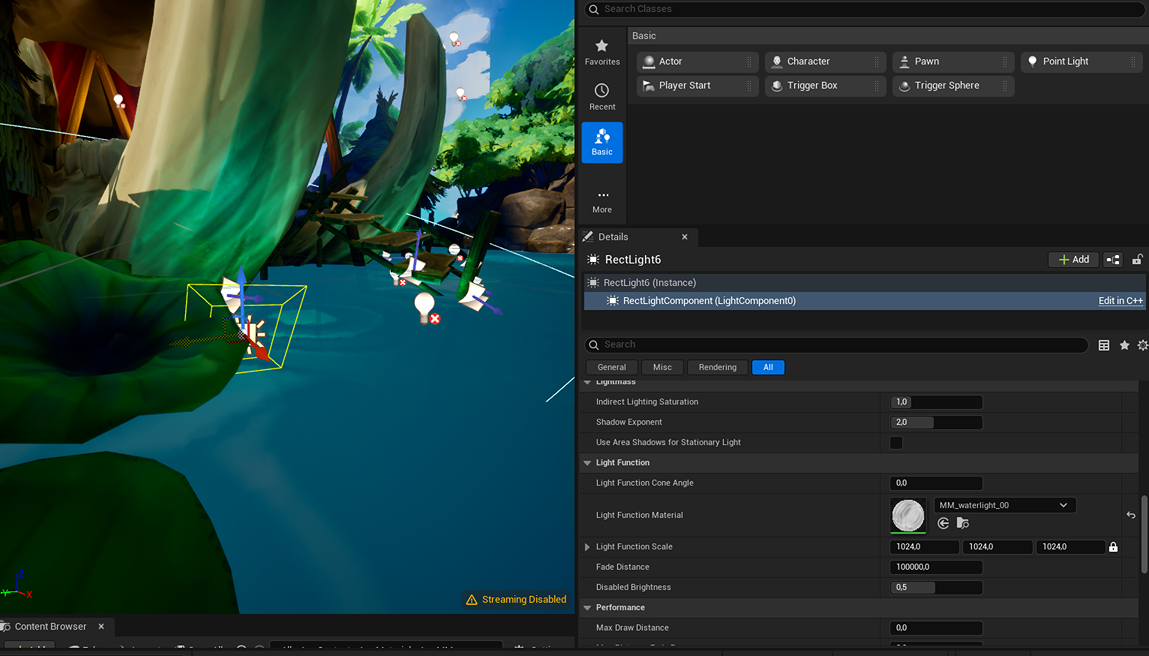
For the water refraction effect on the fangs of the skull, I created a material and set it to light function on the left of the details panel. As a texture I used a noise cell texture, but you can experiment with other noise textures to get the effect you want.
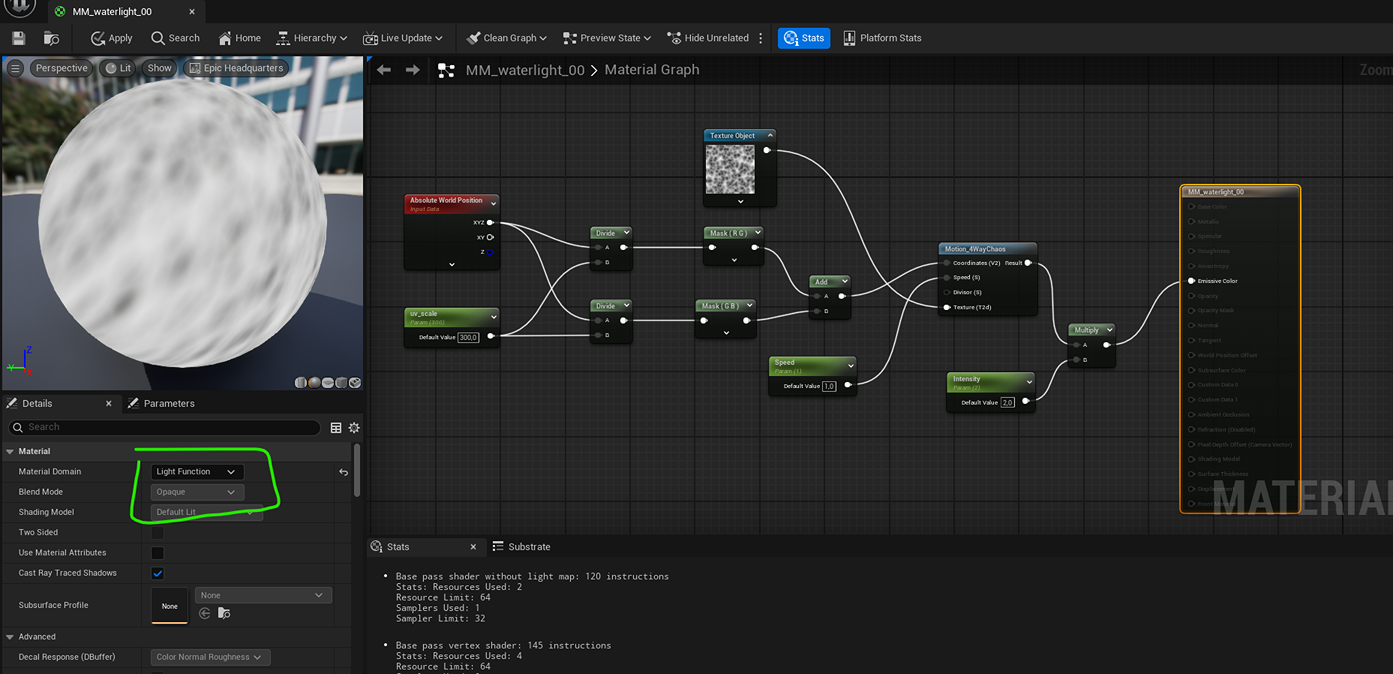
Once you set up the material, you add a light to the scene and add the material volume to the light in the light function area.
Conclusion
I’m satisfied with how the environment turned out in the end, but I feel like some areas could have used more polish or could have been worked on for longer. You can experience this feeling with almost all your work – it can always get better, but sometimes it’s good to leave things as they are, or they will never be finished.
For next time, I want to set up cameras at different angles from the start of the environment and not around the last stage. This meant I would have to fill in the environment in other areas in a polished way, and doing this last minute made it feel rushed. While I was working on this environment, I received feedback almost weekly and from different sources, so I really recommend doing the same when you are working on something like an environment or prop!
I posted in the Beyond Extent Discord server, where you can ask for feedback weekly on Wednesdays. I also posted in the DiNusty Discord server and received feedback from other server members in the critiques channel. I really recommend joining and getting feedback often.
I really hope this article will be useful to other young artists, and I’m really glad I received the opportunity to write my breakdown in this article!
Read more articles
You might also like these articles.