Introduction
Hi all! My name is Bogdan Potikha, I am 20 years old, I live in Ukraine, and I'm a student.
In 2018 I started getting interested in 3D and in 2022 I started actively studying 3D modeling. I love to model weapons.
Goals
In creating this model, I wanted to strengthen my texturing knowledge on some not-so-complex objects.
Software
- PureRef – Collecting references
- Blender – Blocking and lowpoly
- Zbrush – Highpoly
- RizomUV – UV
- Substance Painter – Texturing (Metal/Rough)
- Marmoset Toolbag – Baking and rendering
- Photoshop – Post-processing renders
- DaVinci Resolve – Video post-processing
Project Idea
It all started when I came across some interesting tutorials on YouTube from Dmytro Mykhailyk. I highly recommend them for viewing. He also has his own blog on ArtStation in English.
I really wanted to improve the result on something that didn’t require extensive modeling and could maximize the effort put into rendering and presentation.
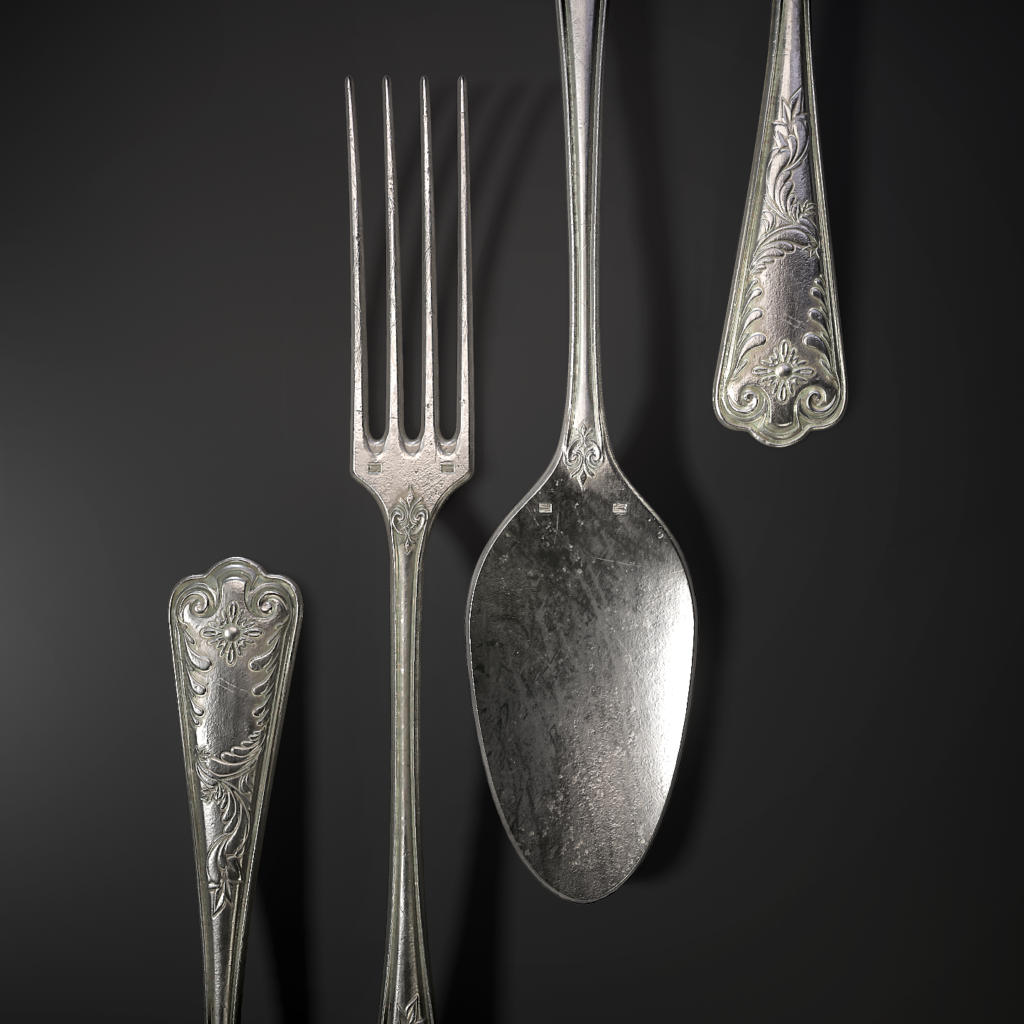
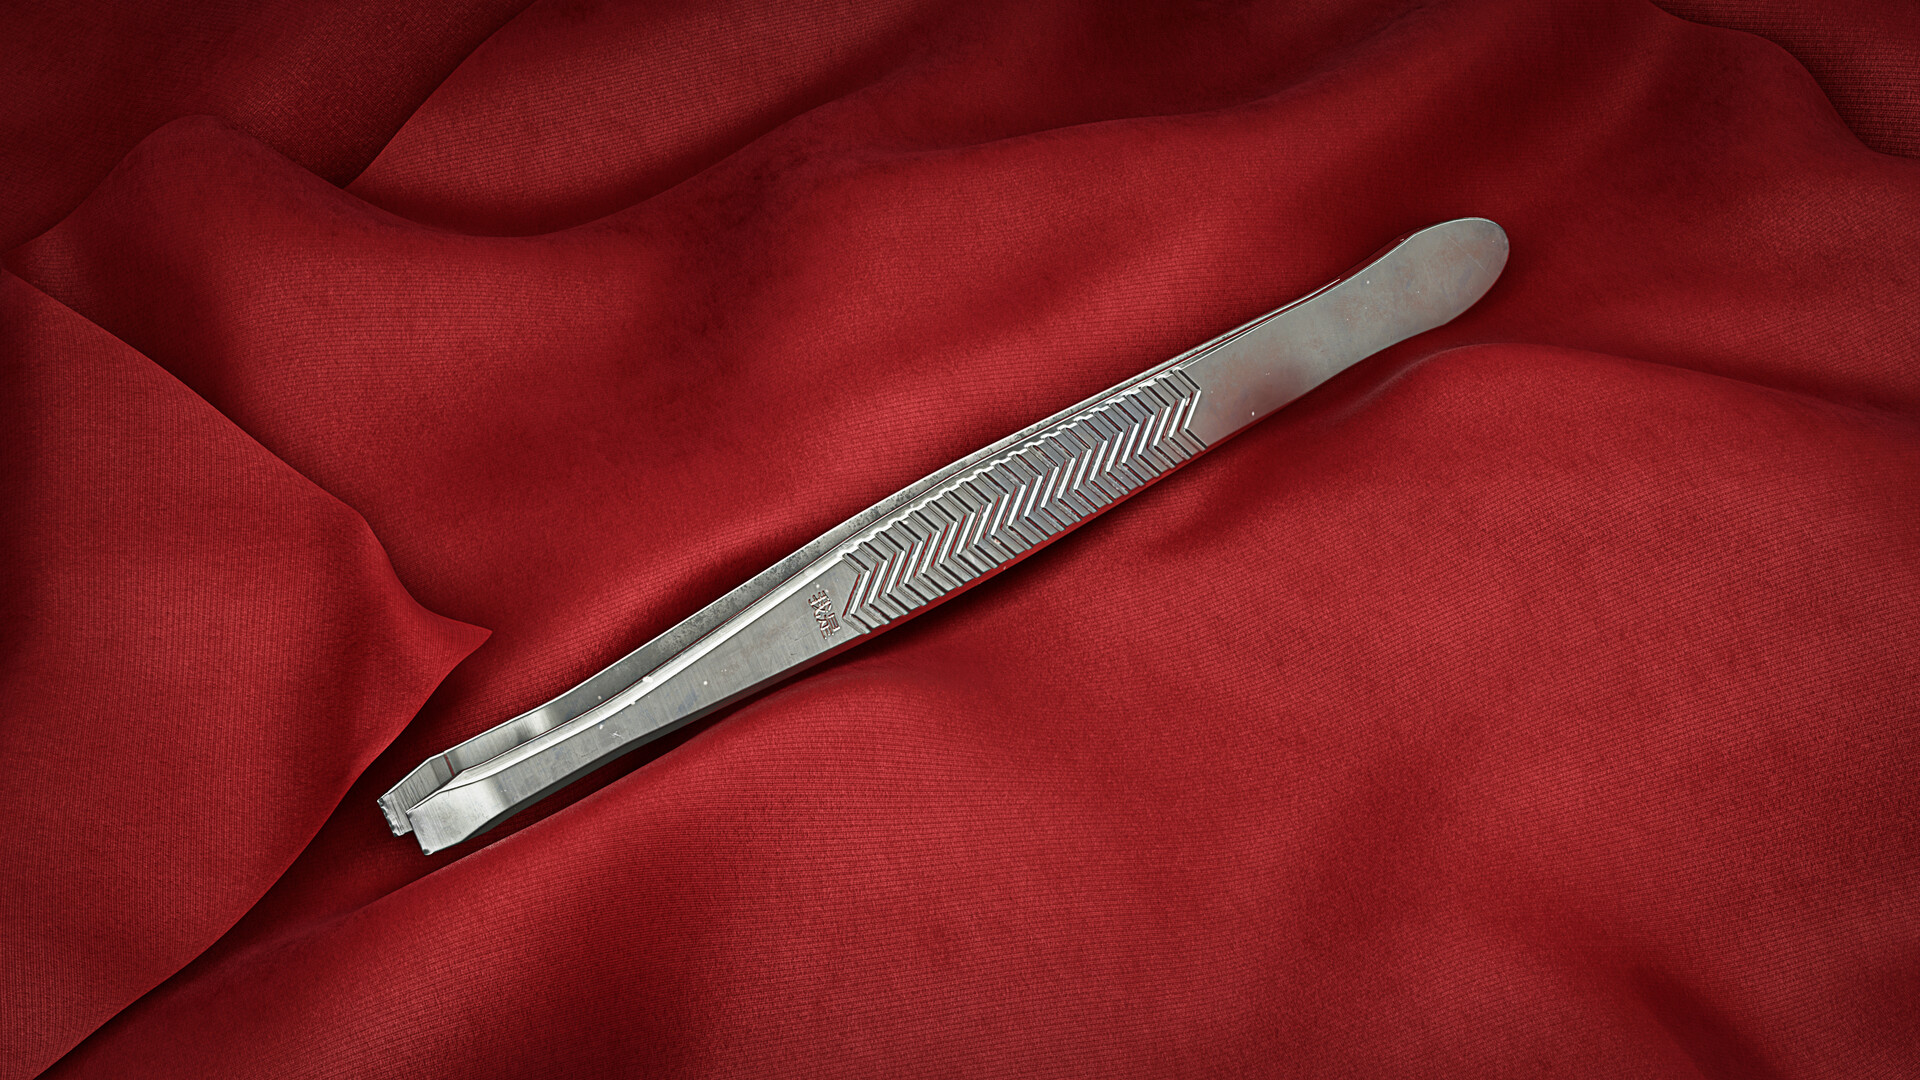
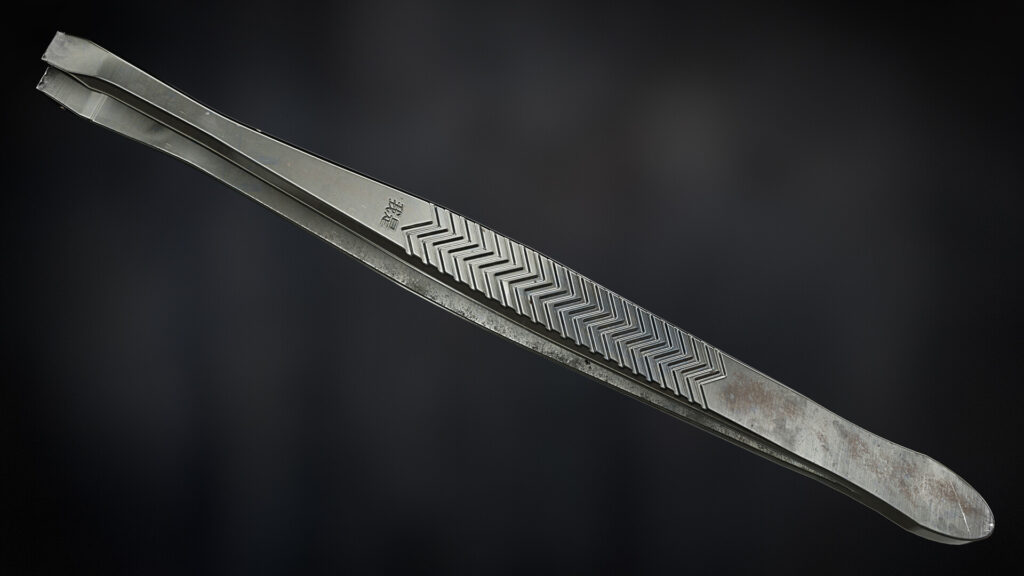
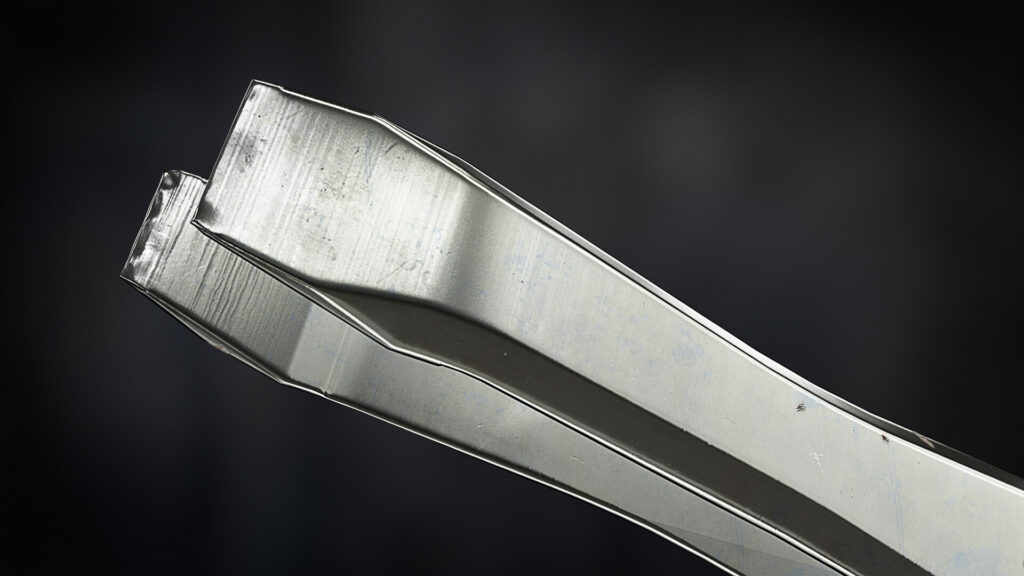
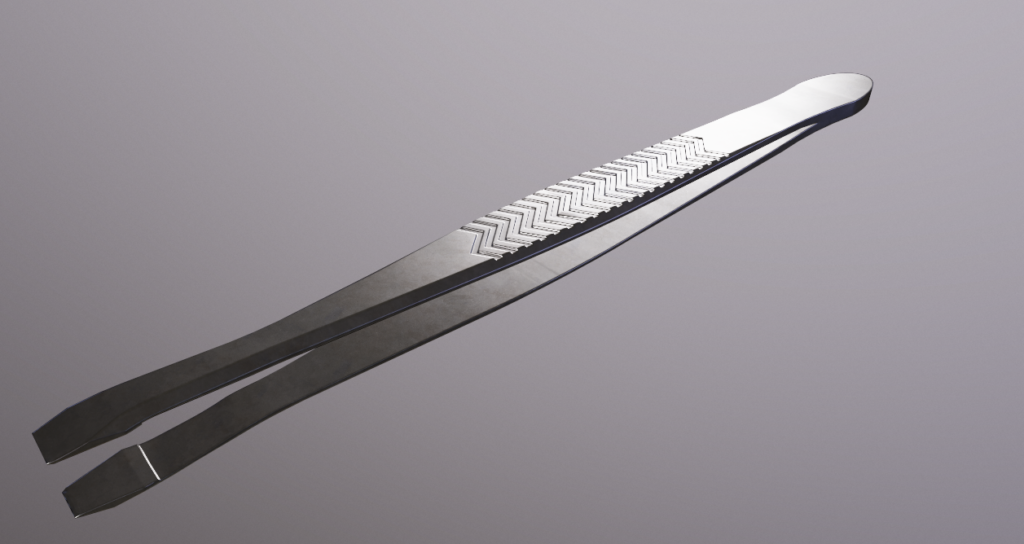
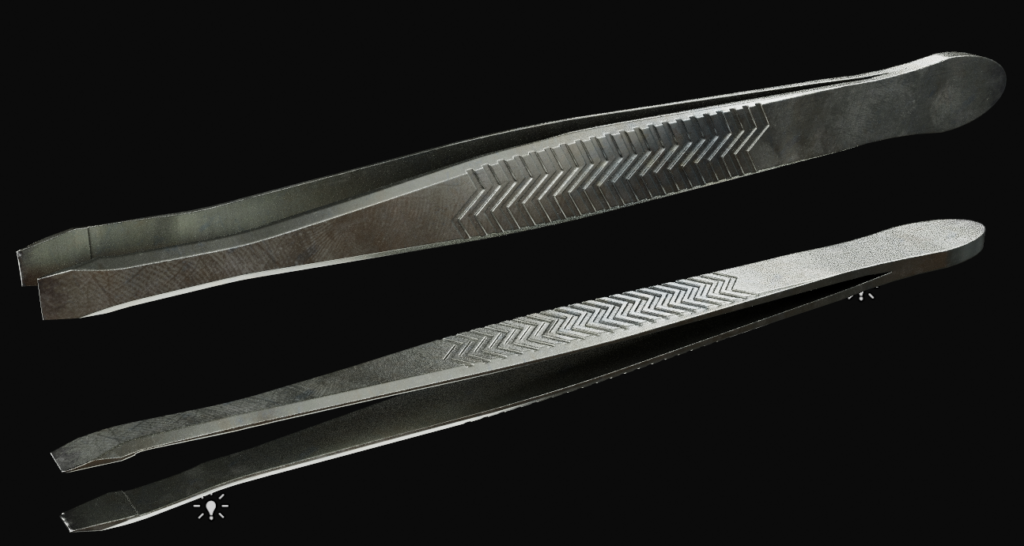
I had a pair of tweezers right in front of me for quite some time that had piqued my interest earlier. When I stared at it for a couple of minutes, I noticed many interesting details in the material. I couldn’t resist and decided to create it!
The challenge was to present such a small and simple object in a way that showcased my work effectively.
References
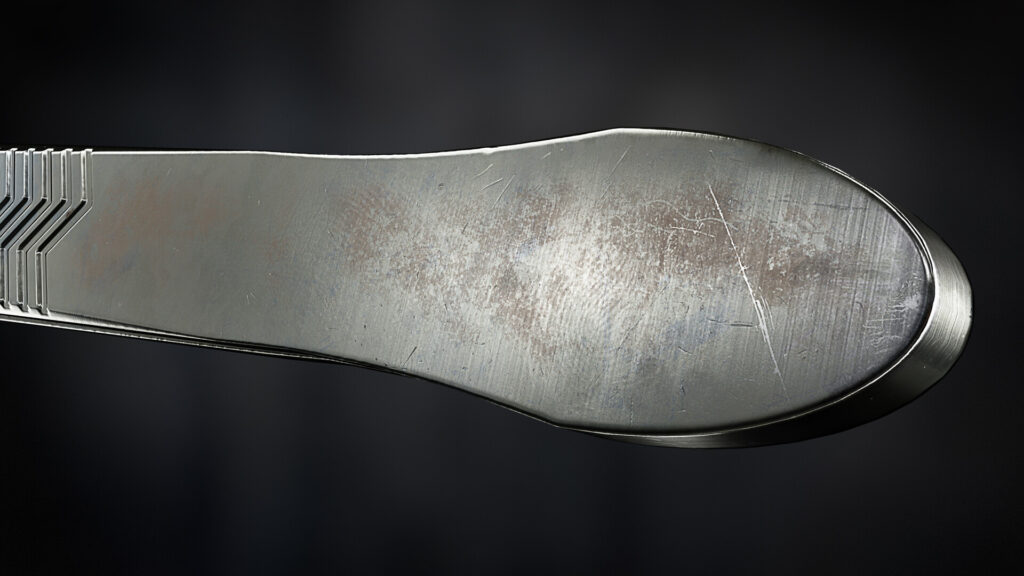
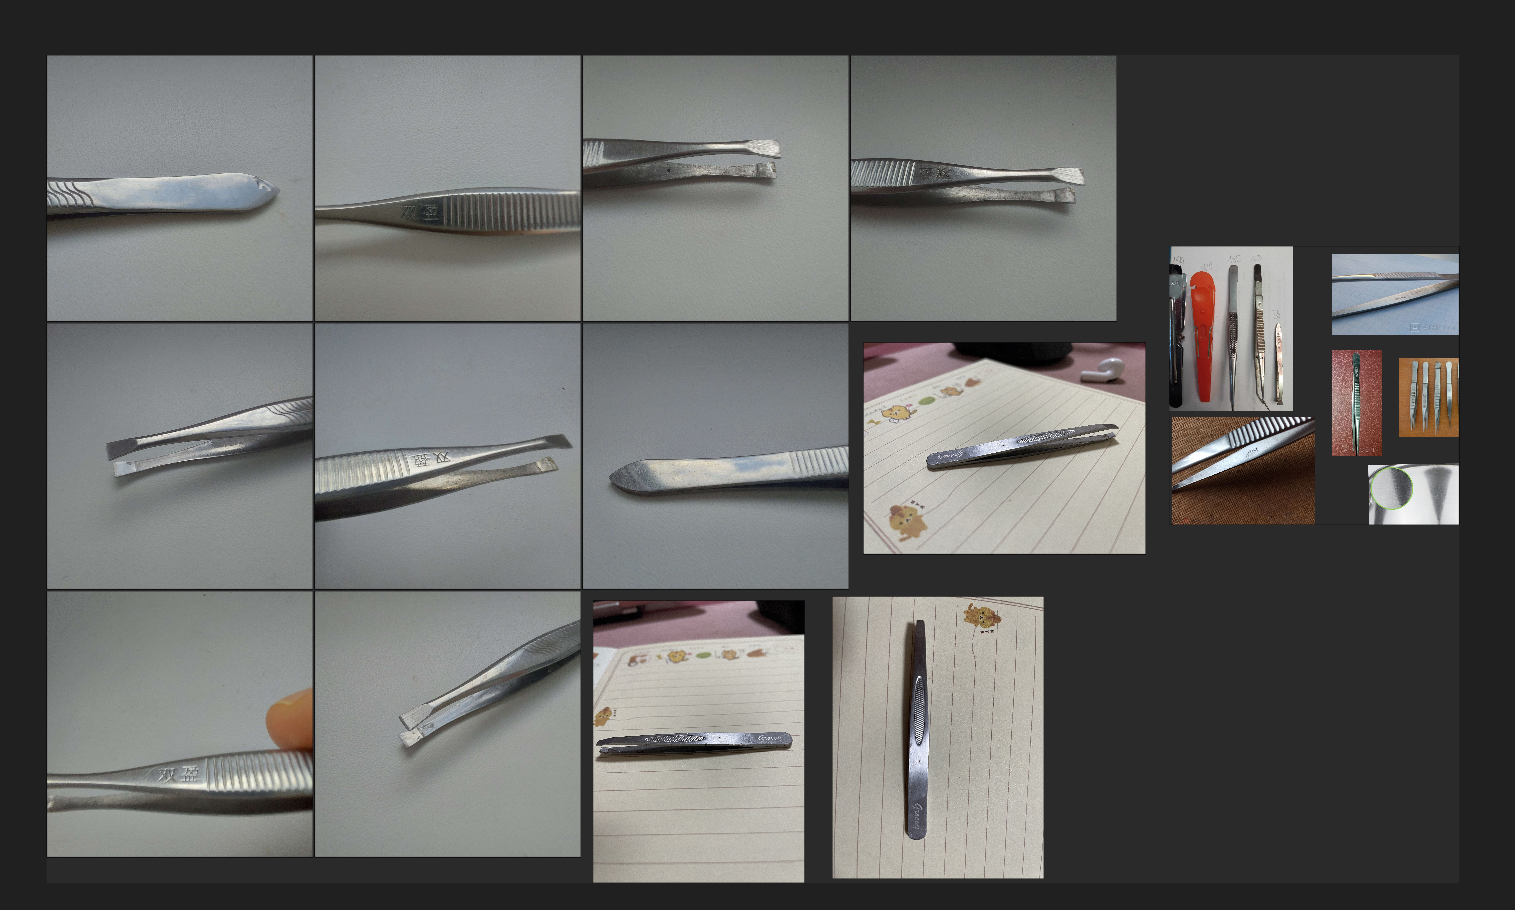
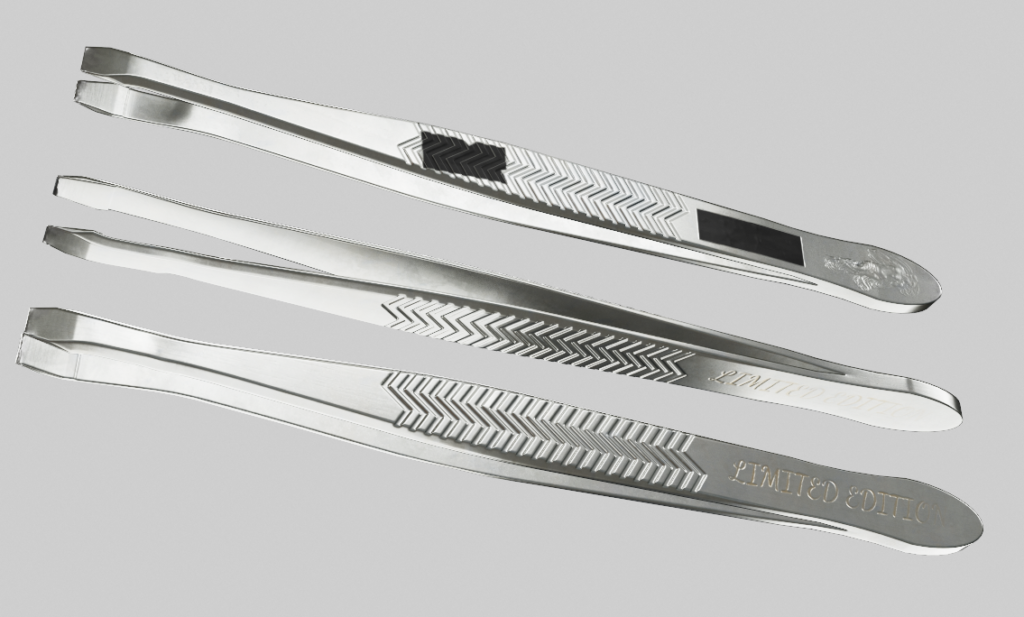
I had no problem finding references; they were right in front of me. I also found a couple of pictures of very old tweezers on the Internet. Additionally, some kind ladies sent me pictures of their tweezers from different climates, where materials wear differently.
This helped me add more details to the simple object.
Modelling
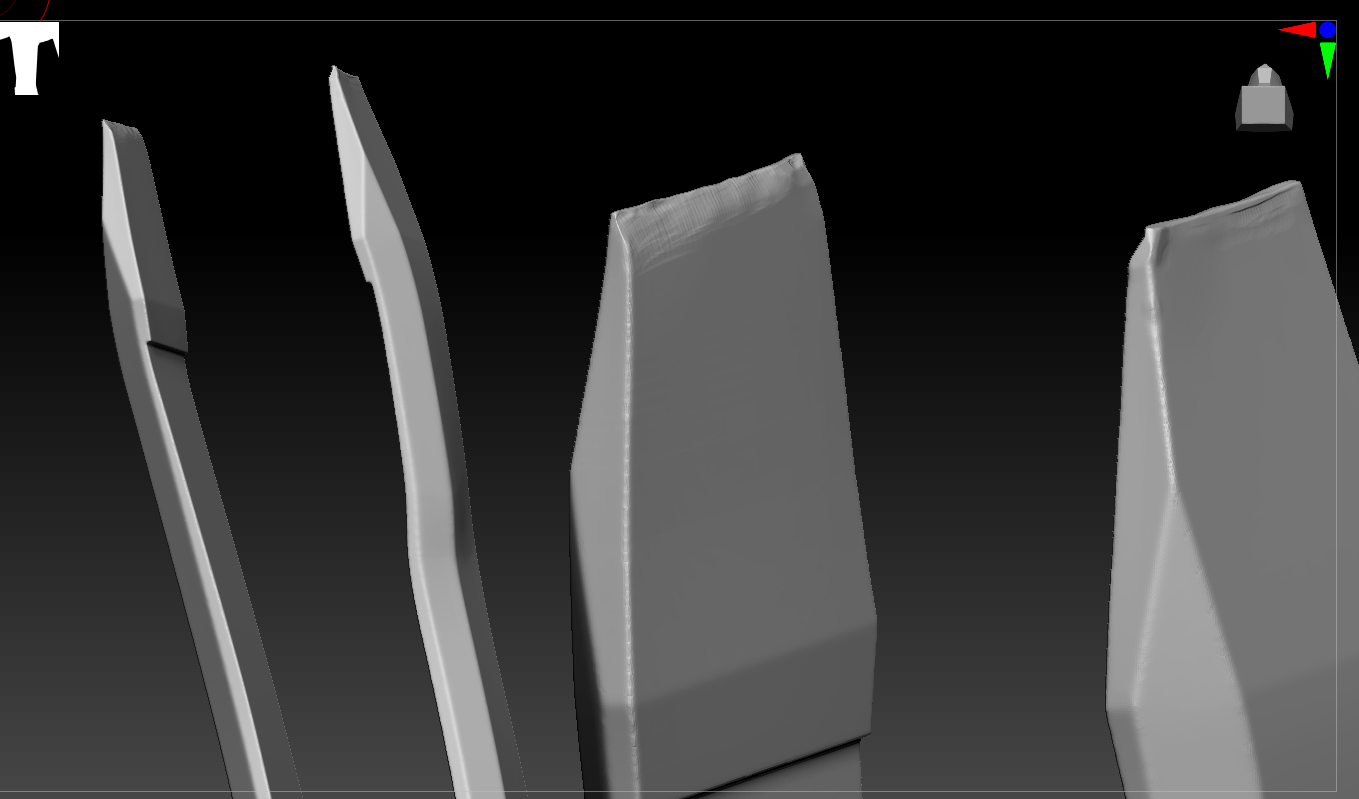
Since it’s not a complex object, I used the standard Boolean to Dynamesh workflow. You can read my previous article where I described the second method of creating the model.
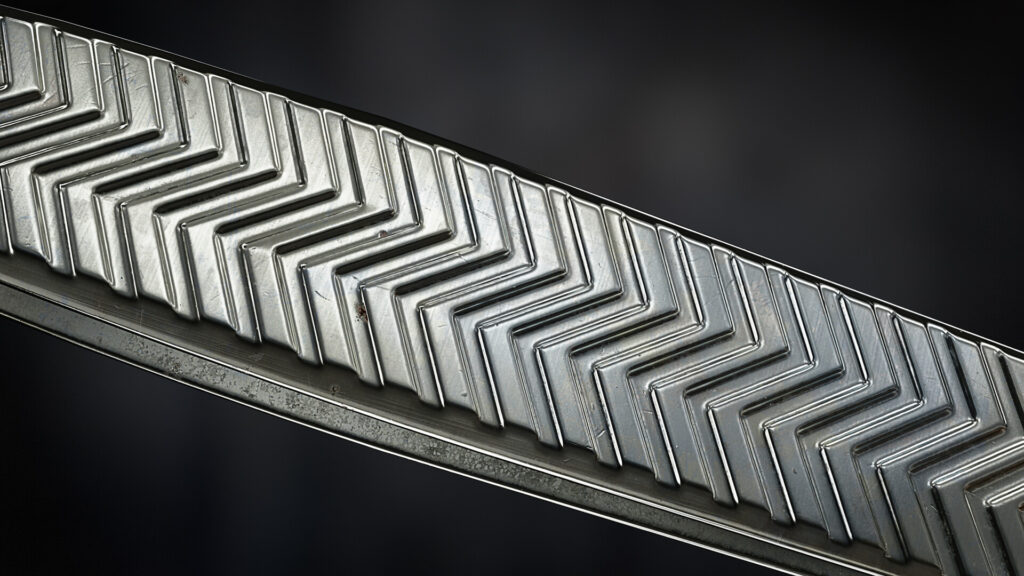
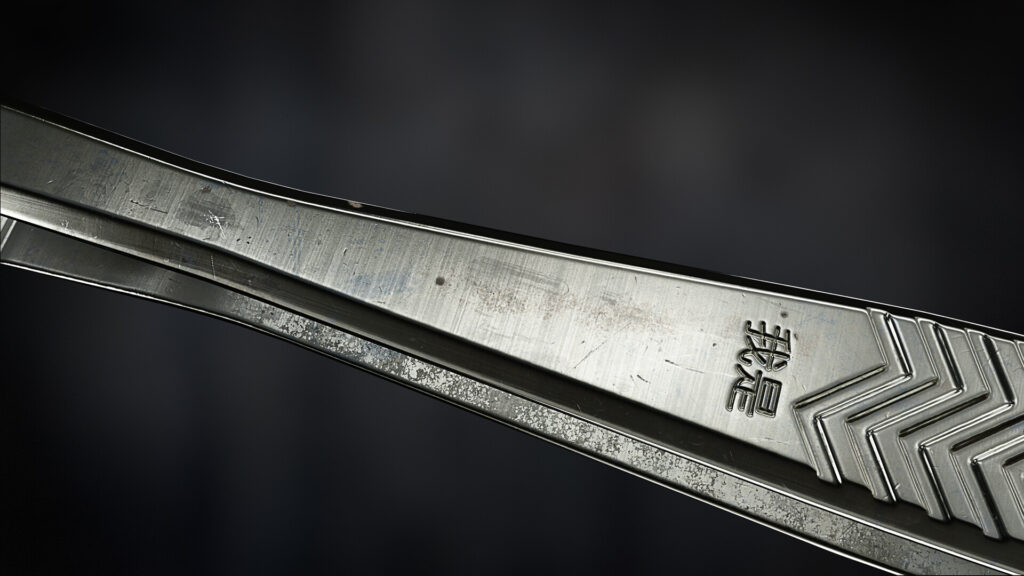
The only interesting thing I can share with you is the wear sculpting in Zbrush.
UVing
This time, I used RizomUV because it proved to be a very handy tool for aligning shells easily.
Texturing
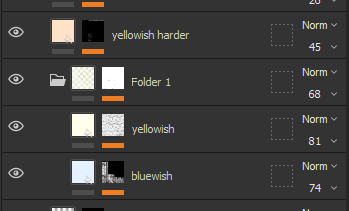
When everything was ready, I opened Substance Painter and set the project settings as follows:
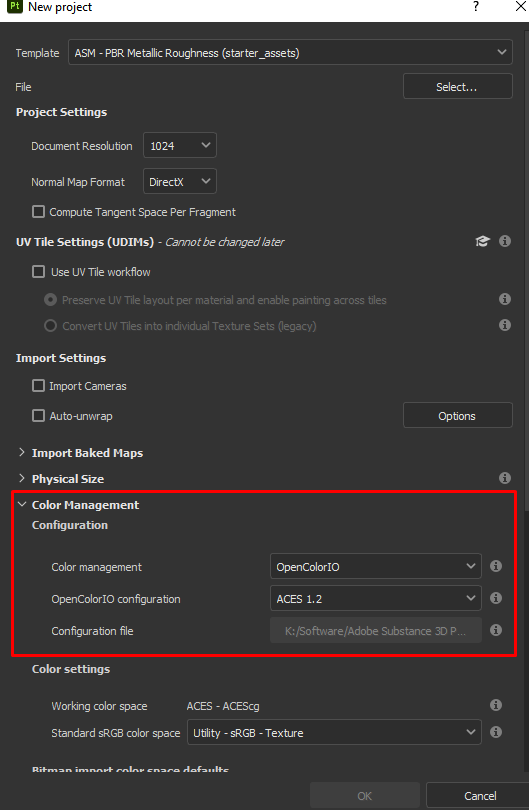
This allowed me to view the asset in Marmoset or UE5, as well as in Substance.
Then I finished the maps I needed and started texturing. At this stage, I worked layer upon layer, taking a day or two off from texturing to look at the material with fresh eyes and make improvements.
I asked for feedback and gathered new references while texturing. I edited the layers many times, deleting some and adding others. I tested various ideas, from engraving to duct tape.
As an example of the search for variations, I have included the following screenshots that I saved during the process:
Don’t forget to check how the material behaves in Marmoset/UE or any other 3D package where you plan to present your work.
To briefly describe my texturing process, I have variations in roughness and color, as well as blending between each layer, excluding empty anchor layers.
The link to the video showing the process in all its details, by Dmytro Mykhailyk, that I mentioned at the very beginning.
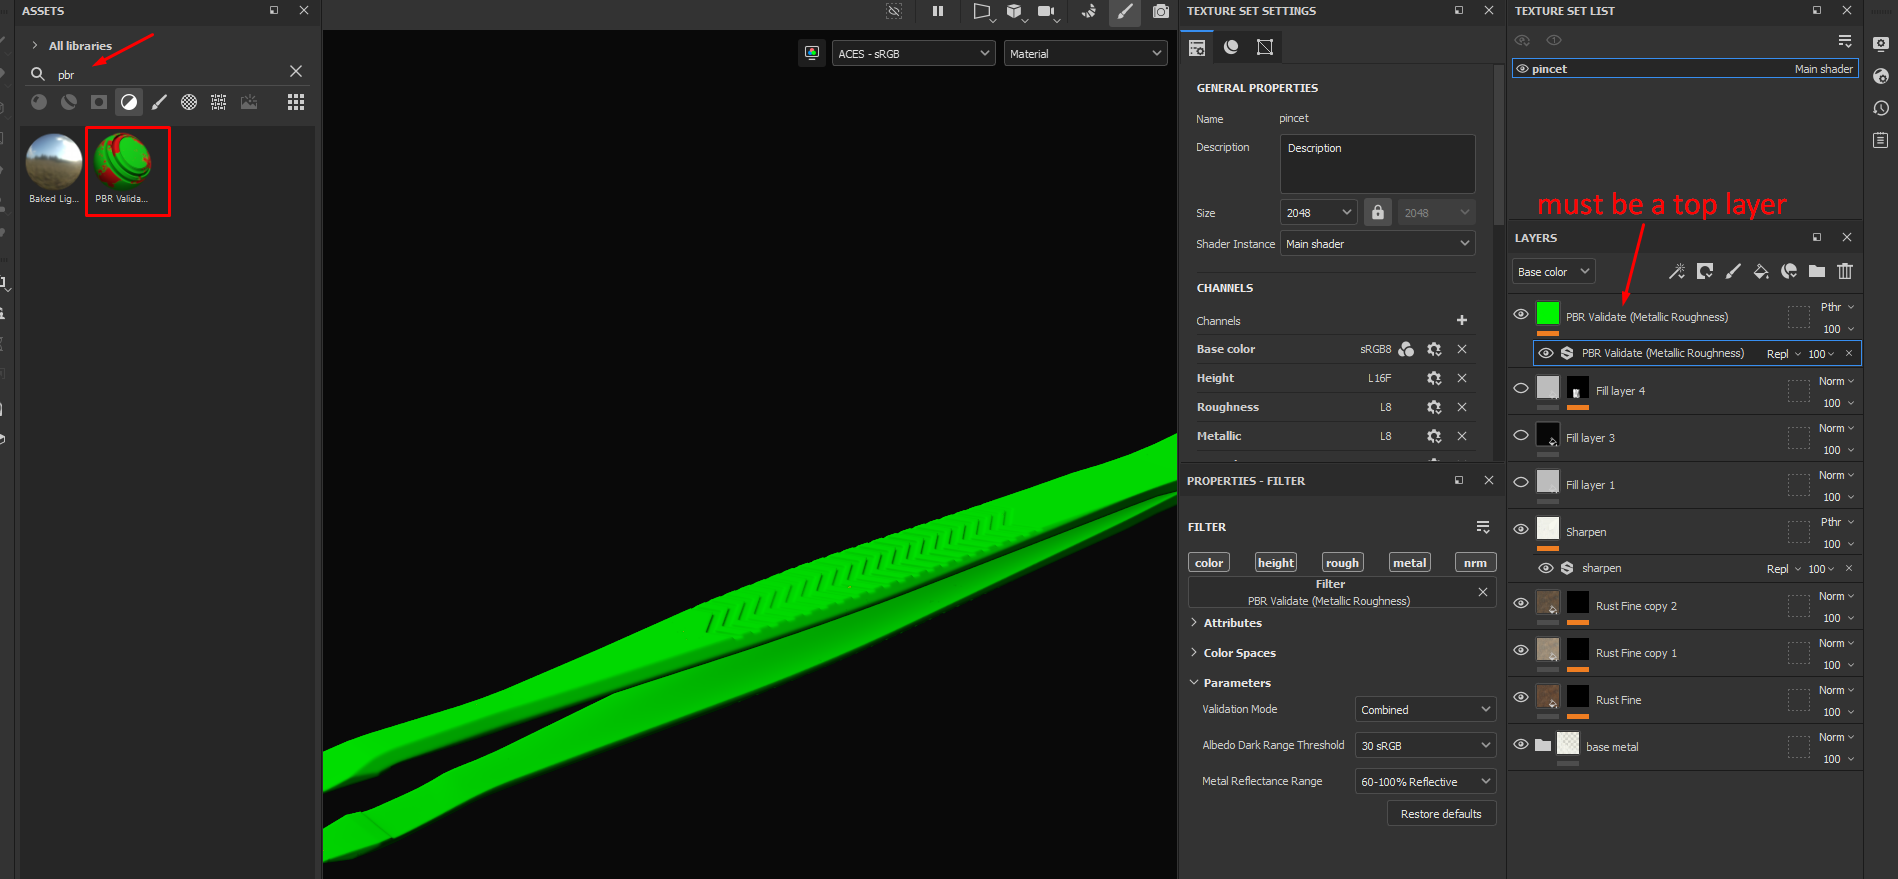
Also, do not forget to check your materials with the PBR checker, as it is a good indicator when the model is completely green.
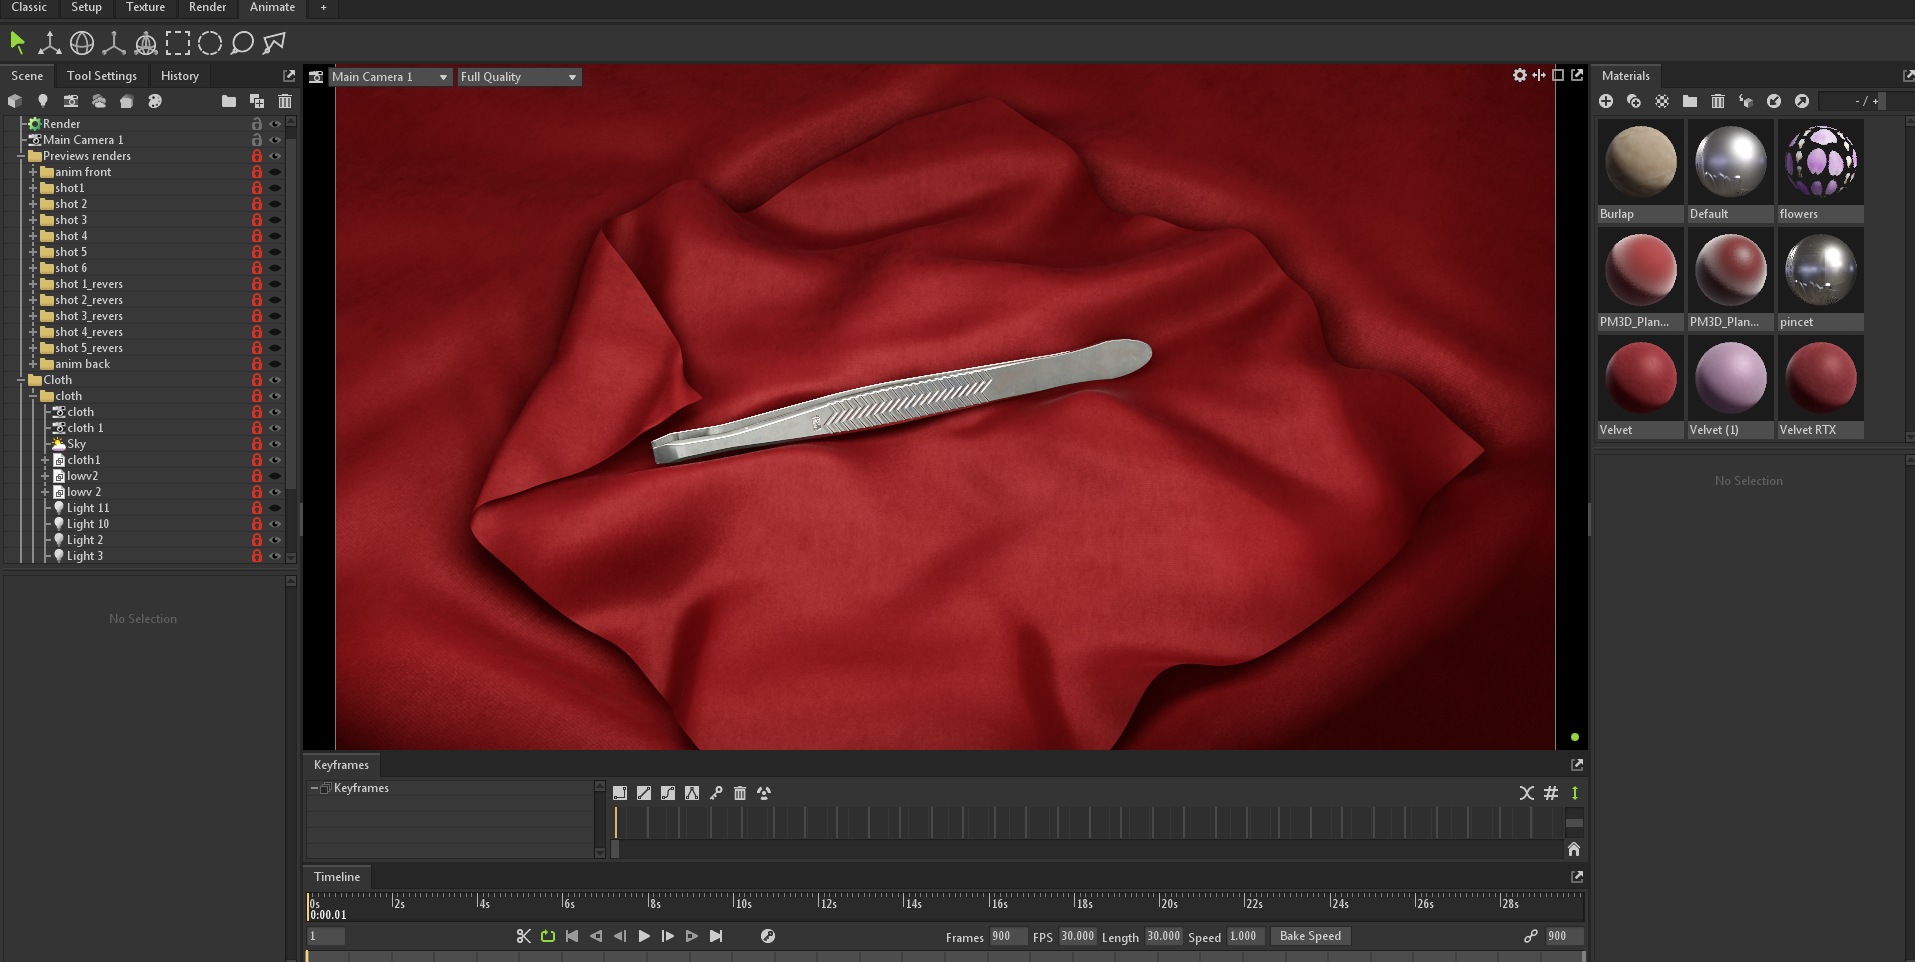
Rendering
The presentation took a lot of time to work out ideas. Originally, there was an idea where tweezers would fly and leaves would fall, all accompanied by calming music.
However, in the end, it was decided to render the main frame, which served as the basis for the preview, on fabric to evoke a sense of pathos.
The fabric was created in Zbrush, the UV was unfolded in Blender, and then the material from the Marmoset library was applied and fine-tuned.

I also grouped each shot into folders where I adjusted the lighting perfectly for each angle.
Conclusion
Thanks to GamesArtist for the opportunity to write a second article!
I would like to express my gratitude to everyone who helped me in the process of creating this asset. Based on my experience, I would like to offer the following advice:
- Don’t be afraid to explore different options and ideas that come to your mind. It may take more time, but if it’s a personal project, it’s better not to rush.
- The more high-quality references, the better.
- Take a break for a day or two during the texturing and rendering process to refresh your perspective.
- Seek feedback – it helps you improve!
Thanks for reading or scrolling down here.
Read more articles
You might also like these articles.