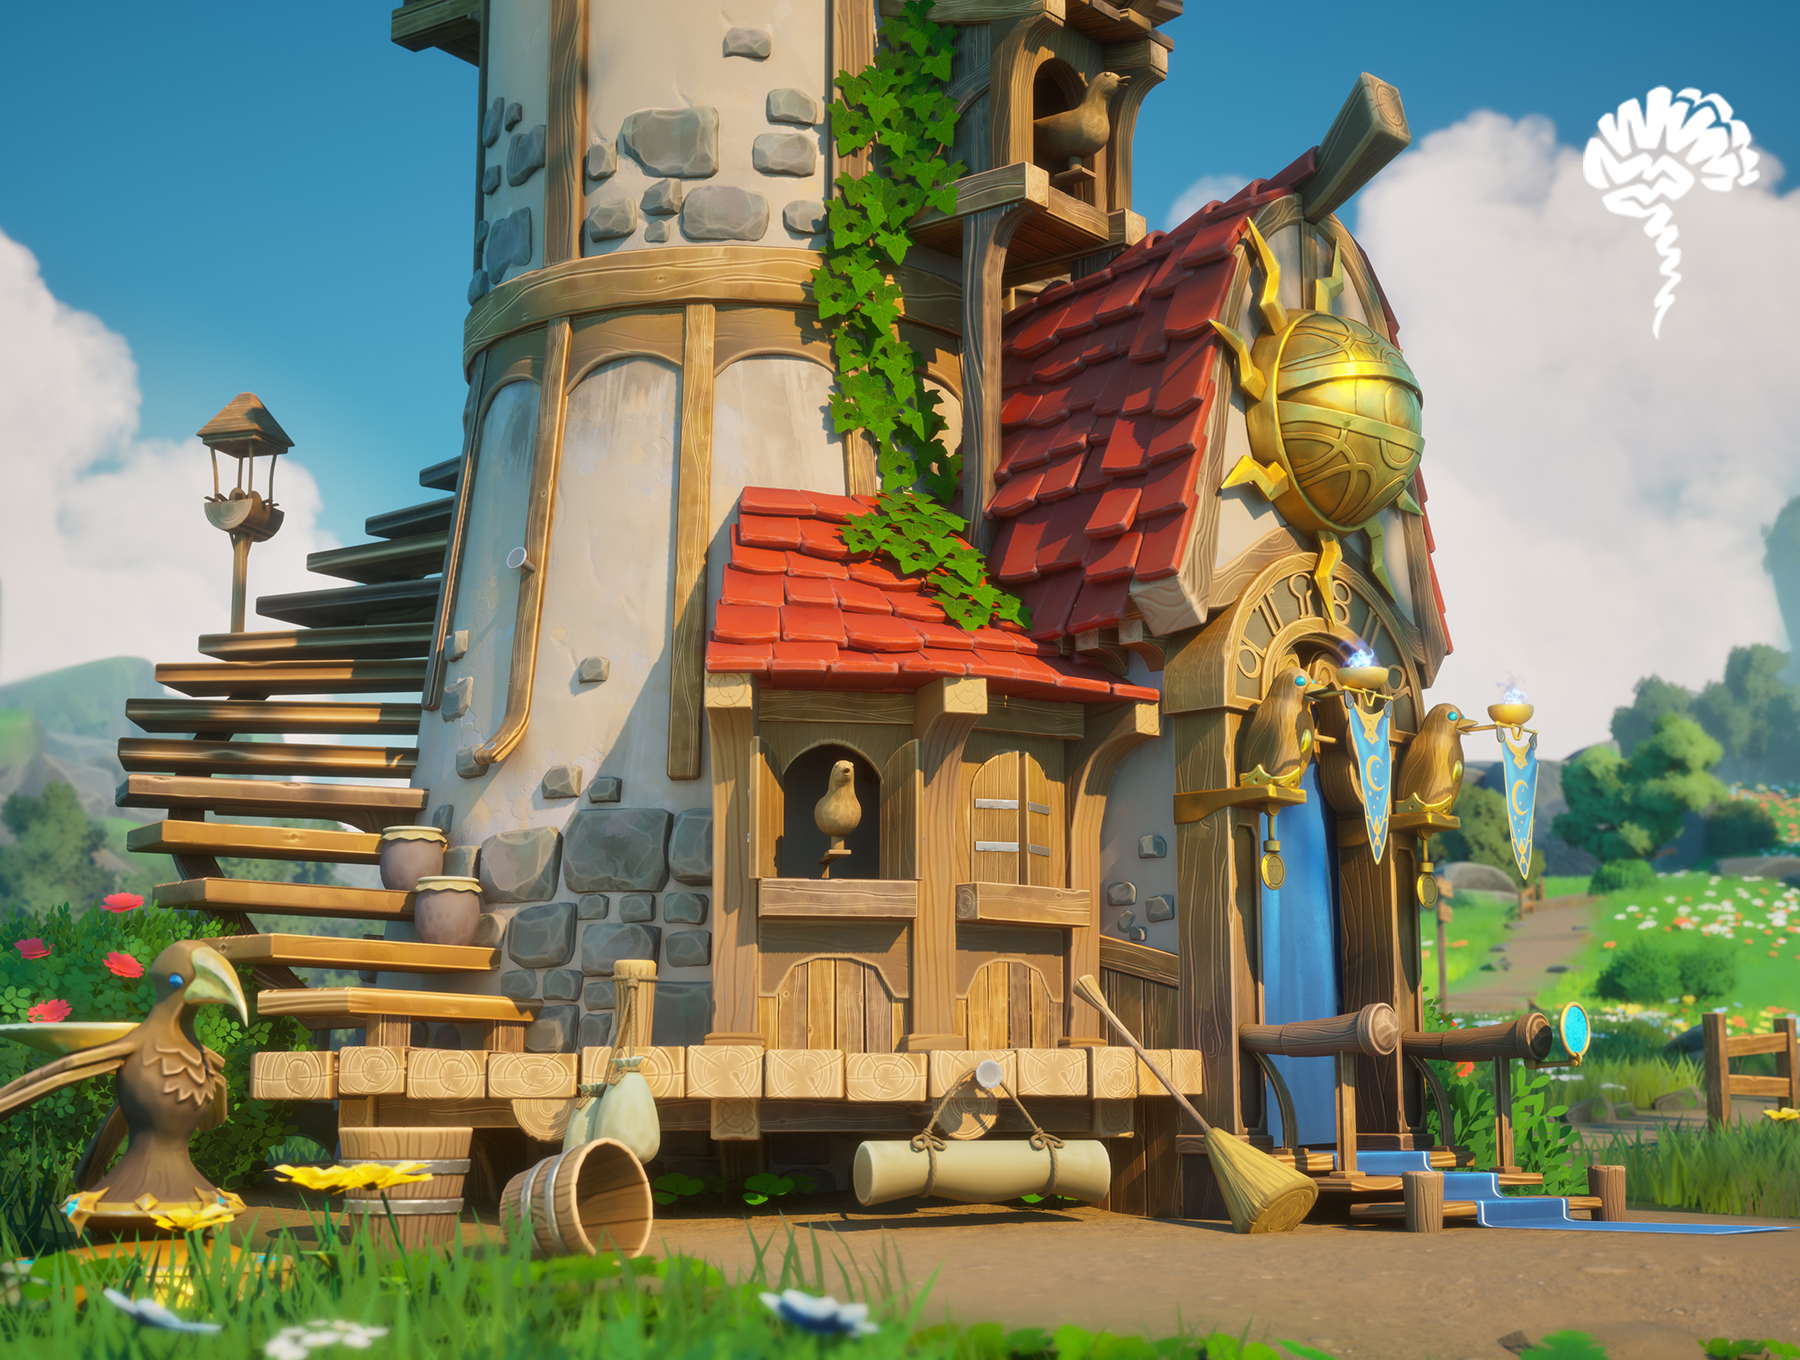
The Wizard’s House

Introduction
Hello everyone, my name is Rita Poulus and I'm a 3D environment for games student at Think Tank Training Centre.
I originally graduated as an architect and worked as such for a few years.
During that time, I started learning digital painting in hopes of becoming a concept artist, but eventually my interest in 3D art kept growing, and so I took the next step and joined Think Tank.
Goals & Software
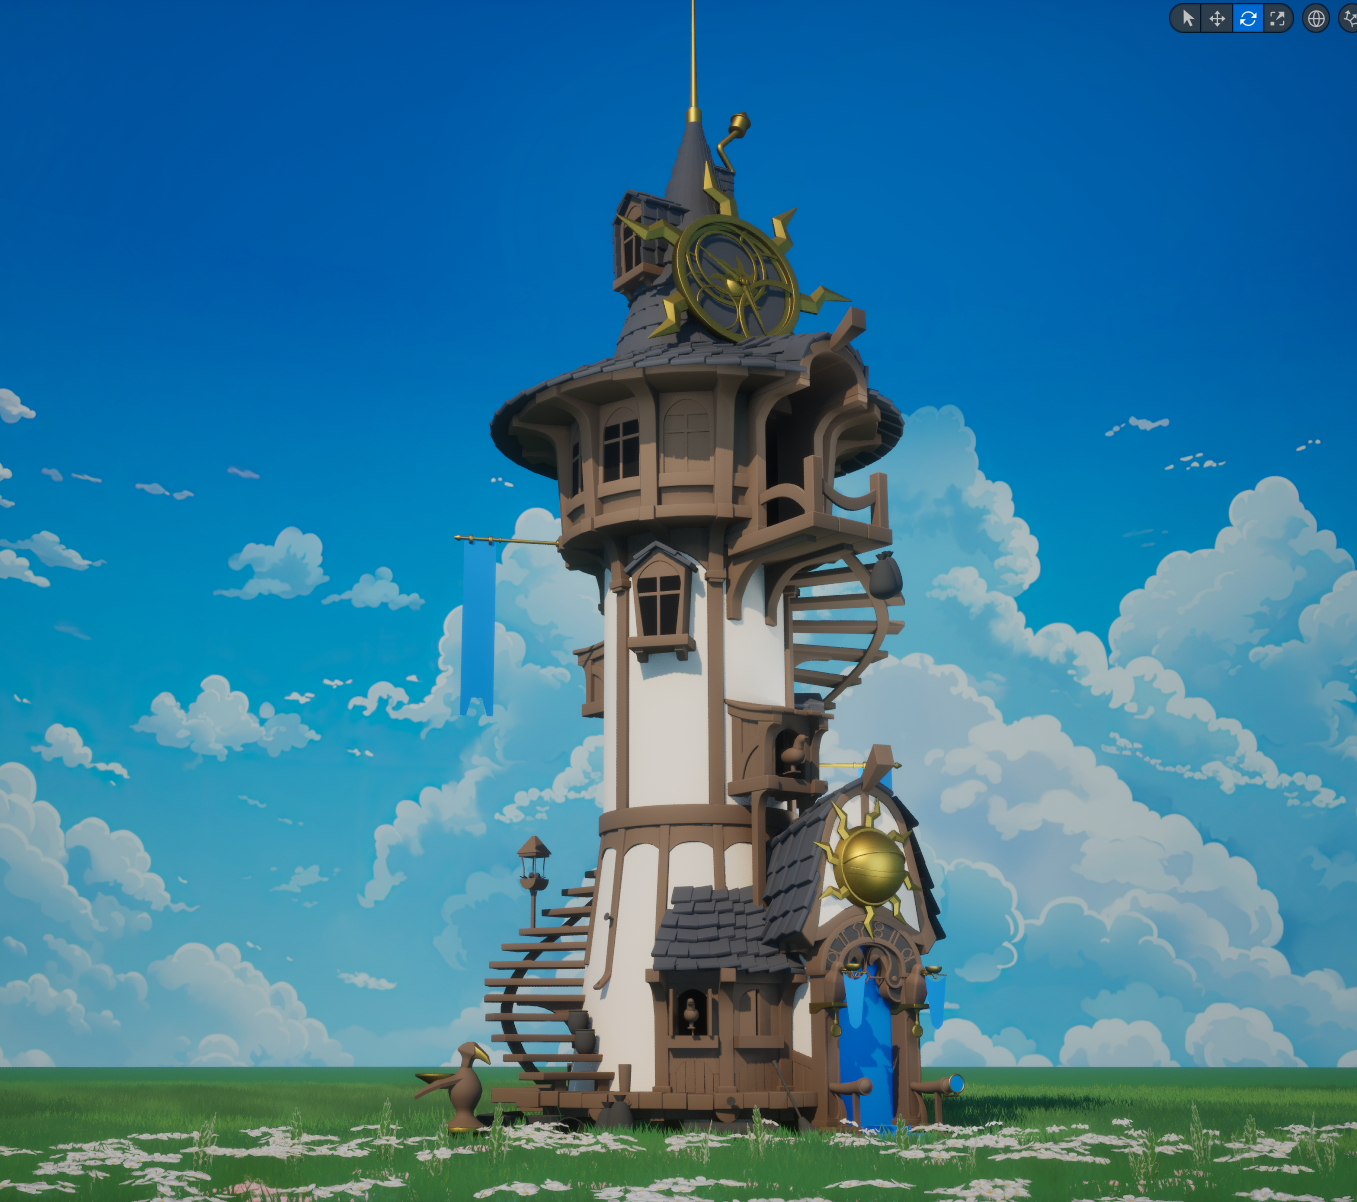
The Wizard’s House was my final project for my intermediate term, and we had a tight deadline of 5 weeks. My goal was to challenge myself to design and create my first environment in Unreal Engine within that limit.
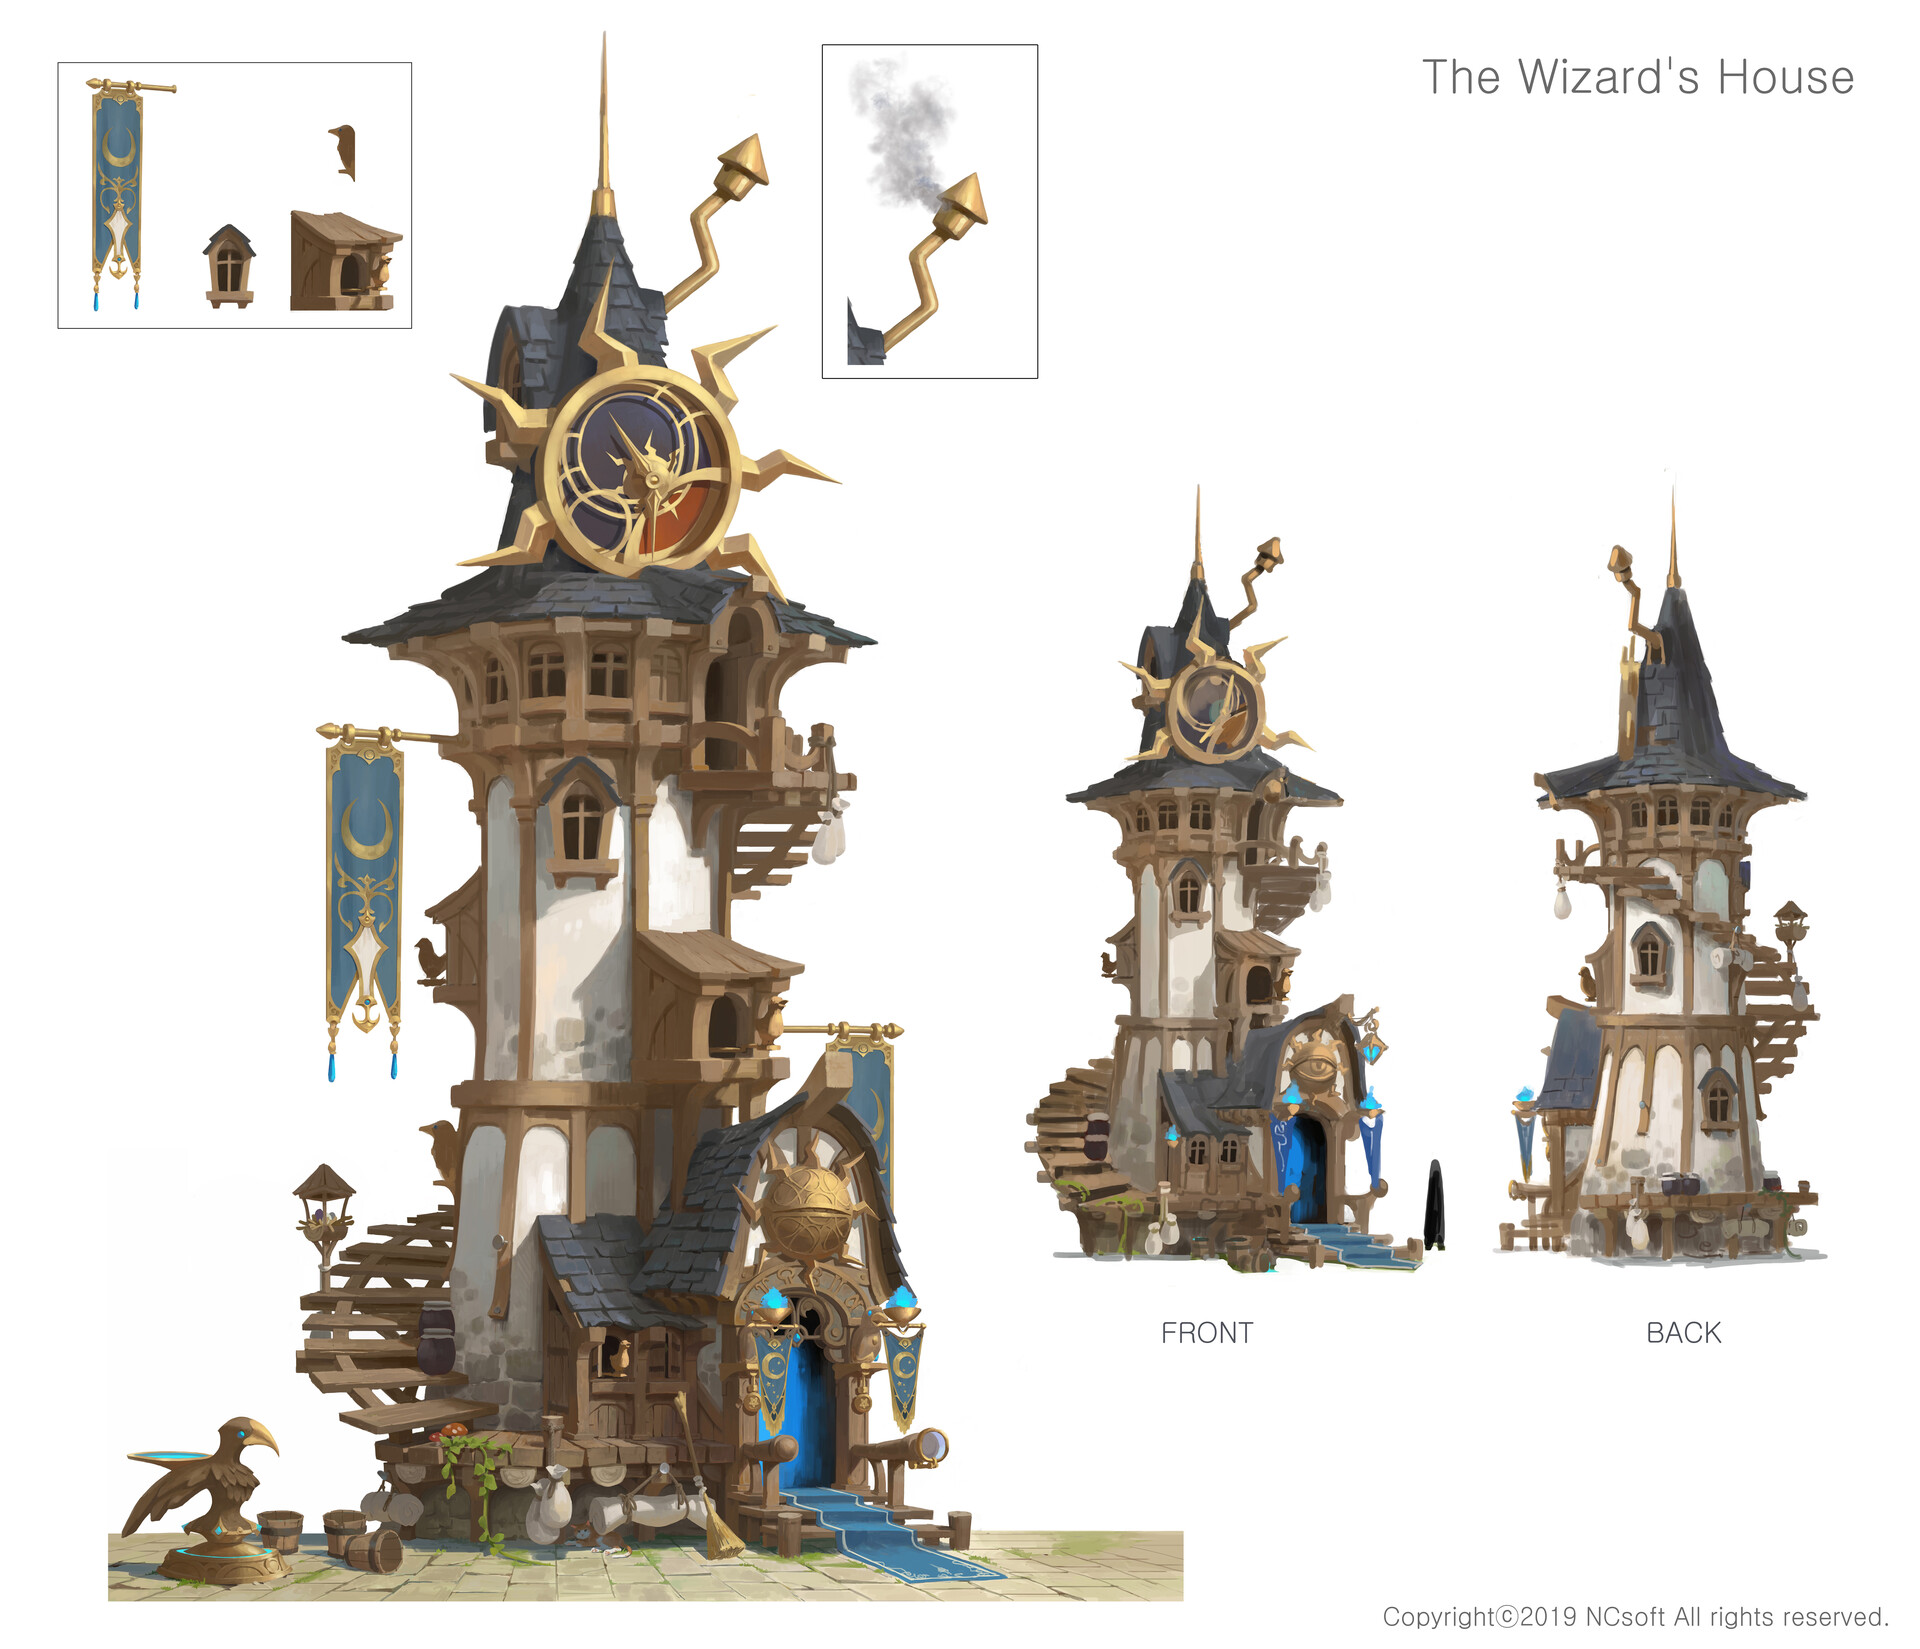
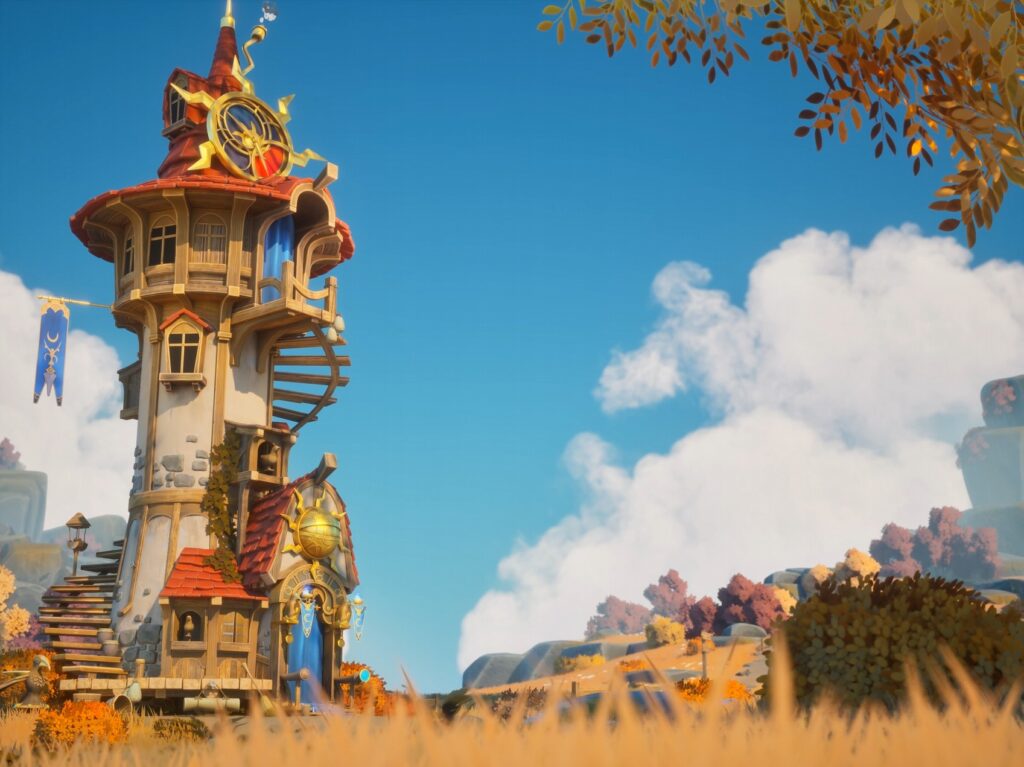
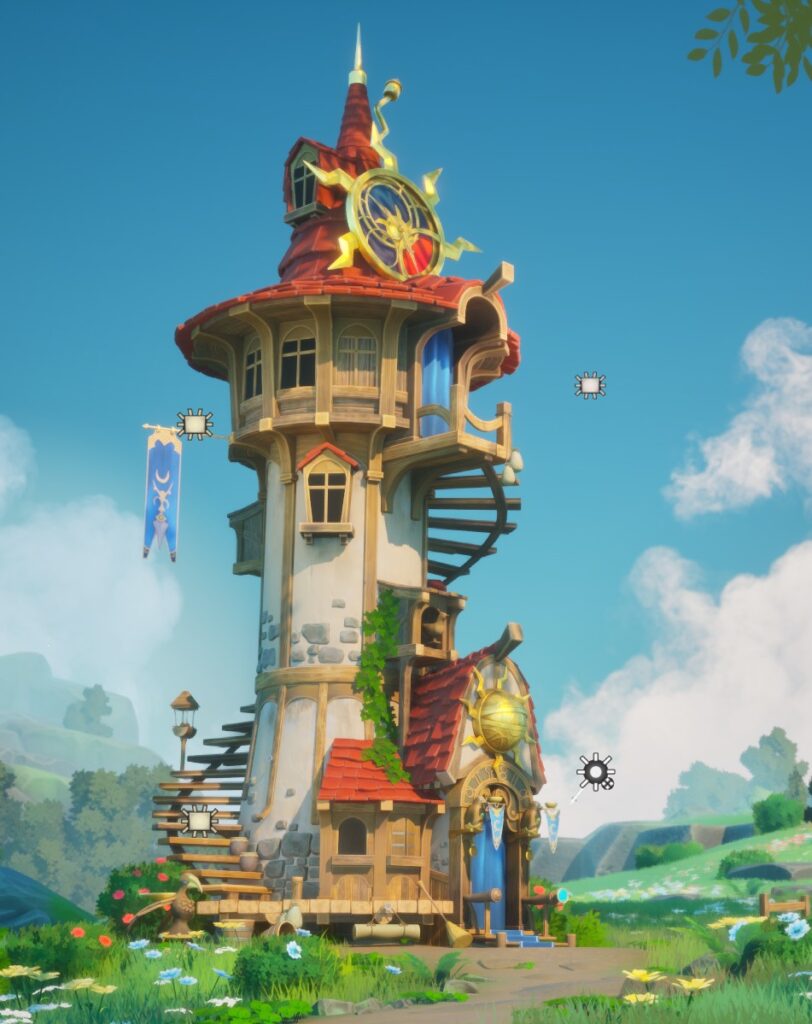
When I saw this concept by Yeonji Rhee, I could see a vision for it in my mind, inspired by Yen Sid’s tower from Kingdom Hearts, so I decided to try and design an environment around it with a Studio Ghibli theme.
Software
- Maya
- ZBrush
- Substance Painter
- TreeIt
- Photoshop
- Unreal Engine
References & Inspiration
At first, I tried to study as many projects with a similar theme to determine how big the surrounding environment would be, what elements I would include, and how I would use them to tell a story and lead the viewer’s eye towards the main focal point, which is the tower.
I gathered a lot of references to create a mood board and asset lists. I definitely kept in mind that the colors and mood of these projects needed to match the cheerful theme of my goal, so I could stay consistent.
In the end, I stuck to a much smaller collection as my style guides, because having too many references can be confusing and can distract from the original goal.

Blockout& Modelling
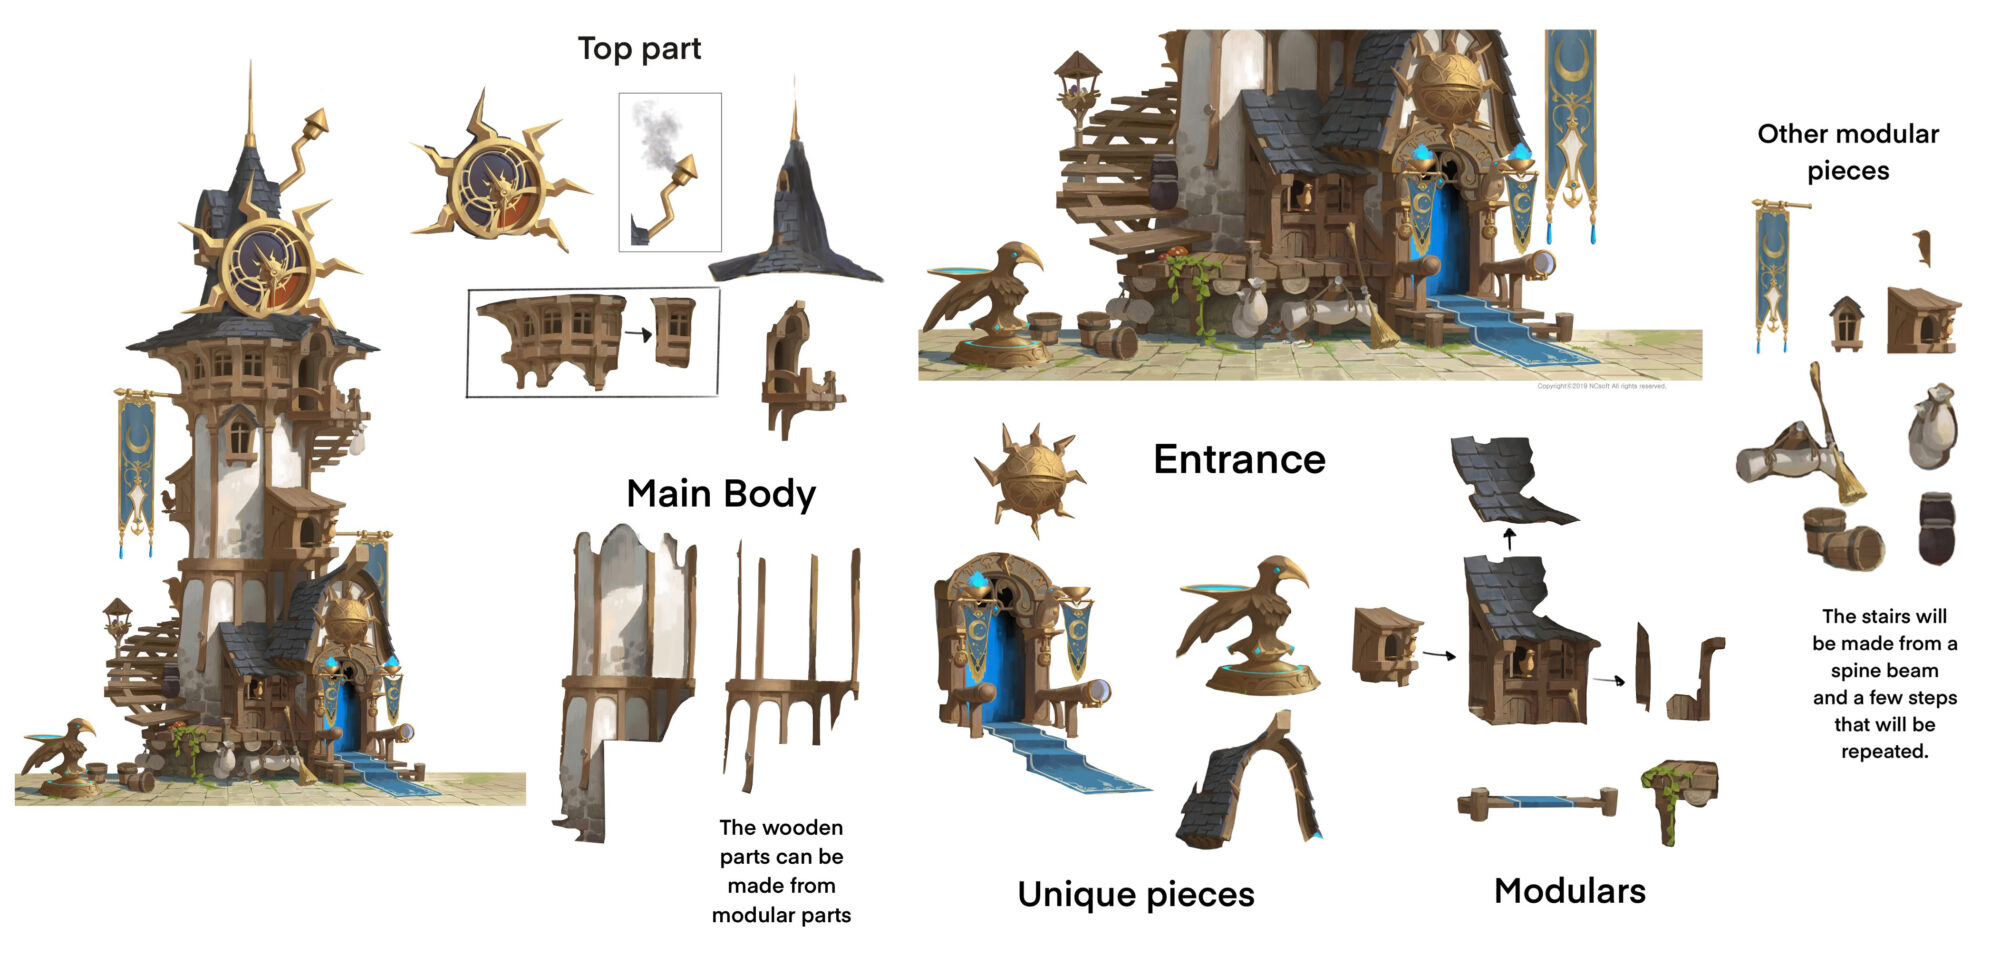
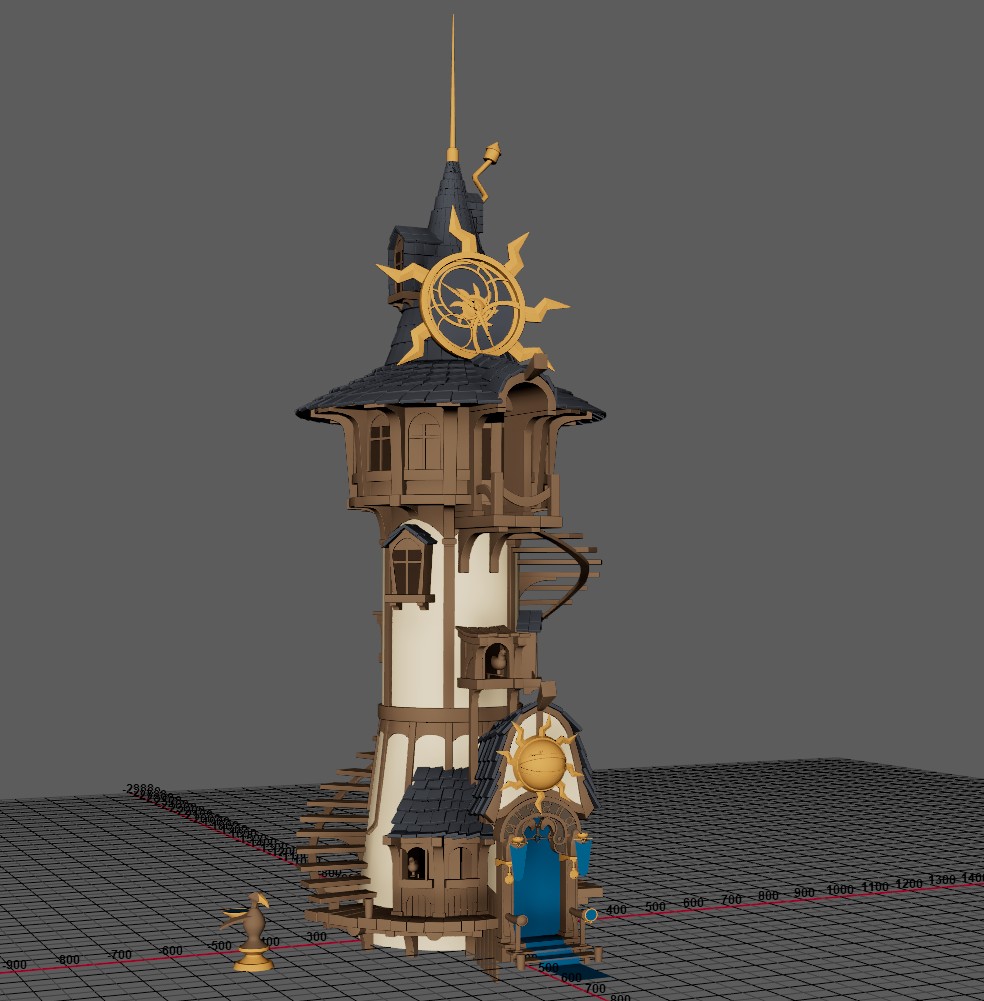
Before beginning my blockout, I studied the concept and tried to classify the parts into what was unique and what was repeated in order to save time.
I created simple shapes to figure out my scale and proportions, then I proceeded to model the low-poly of as many props as I could, since the concept is made from simple shapes.
I kept the simplicity while still focusing on keeping the stylized shapes and silhouettes to maintain the charm of the concept.
Props
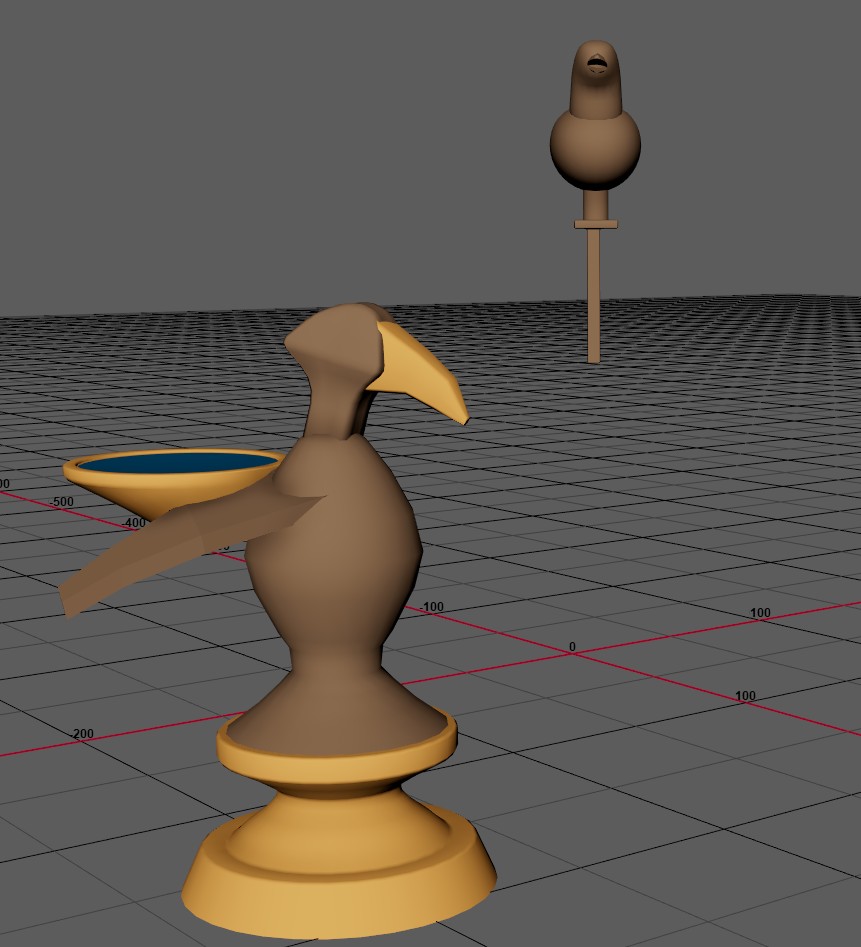
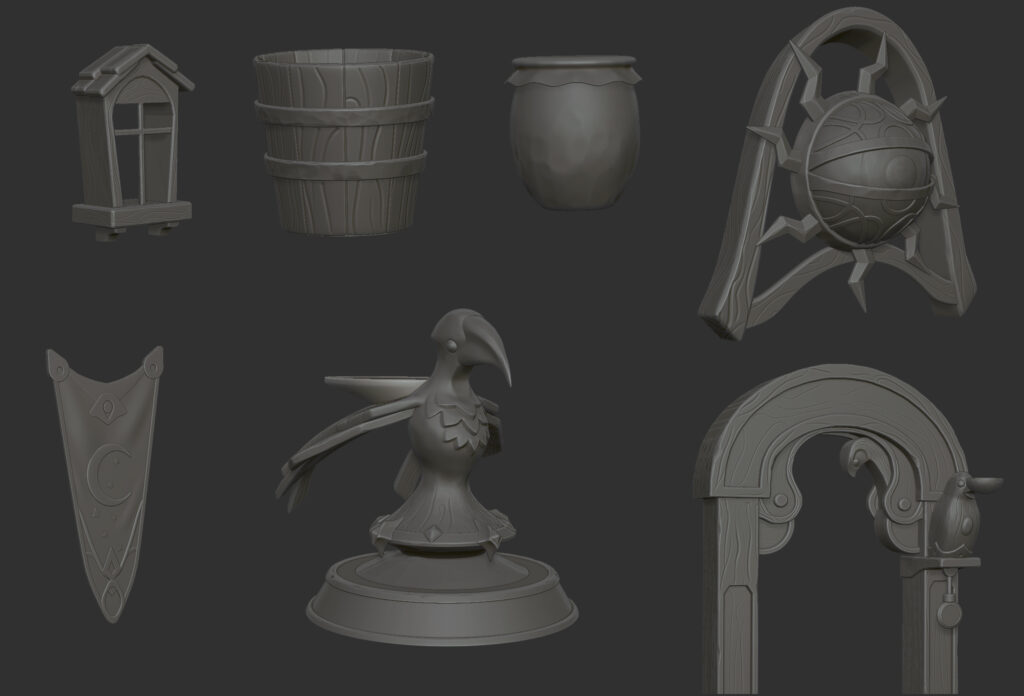
For the props I used the same method. Most of them could be modeled as low polys from the get-go, except for a few like the birds as they were more organic.
I put together simple spheres and cylinders to get a rough approximation of their shape, then took them to ZBrush to sculpt them and then retopologized them in Maya.
Vegetation & Terrain
For the landscape, I started with grass. Most of the landscape elements I created using the methods explained by Viktoriia Zavhorodnia on her YouTube channel.
For the gras,s I used runtime virtual textures for the landscape, and I modeled very simple blades in Maya and scattered them around using the foliage tool in Unreal.
Next were the trees. I used both TreeIt and the Sapling Tree add-on in Blender to create the meshes of a few trees, distributed them around, and scaled and rotated them to create variety. I used the same method for the bushes.
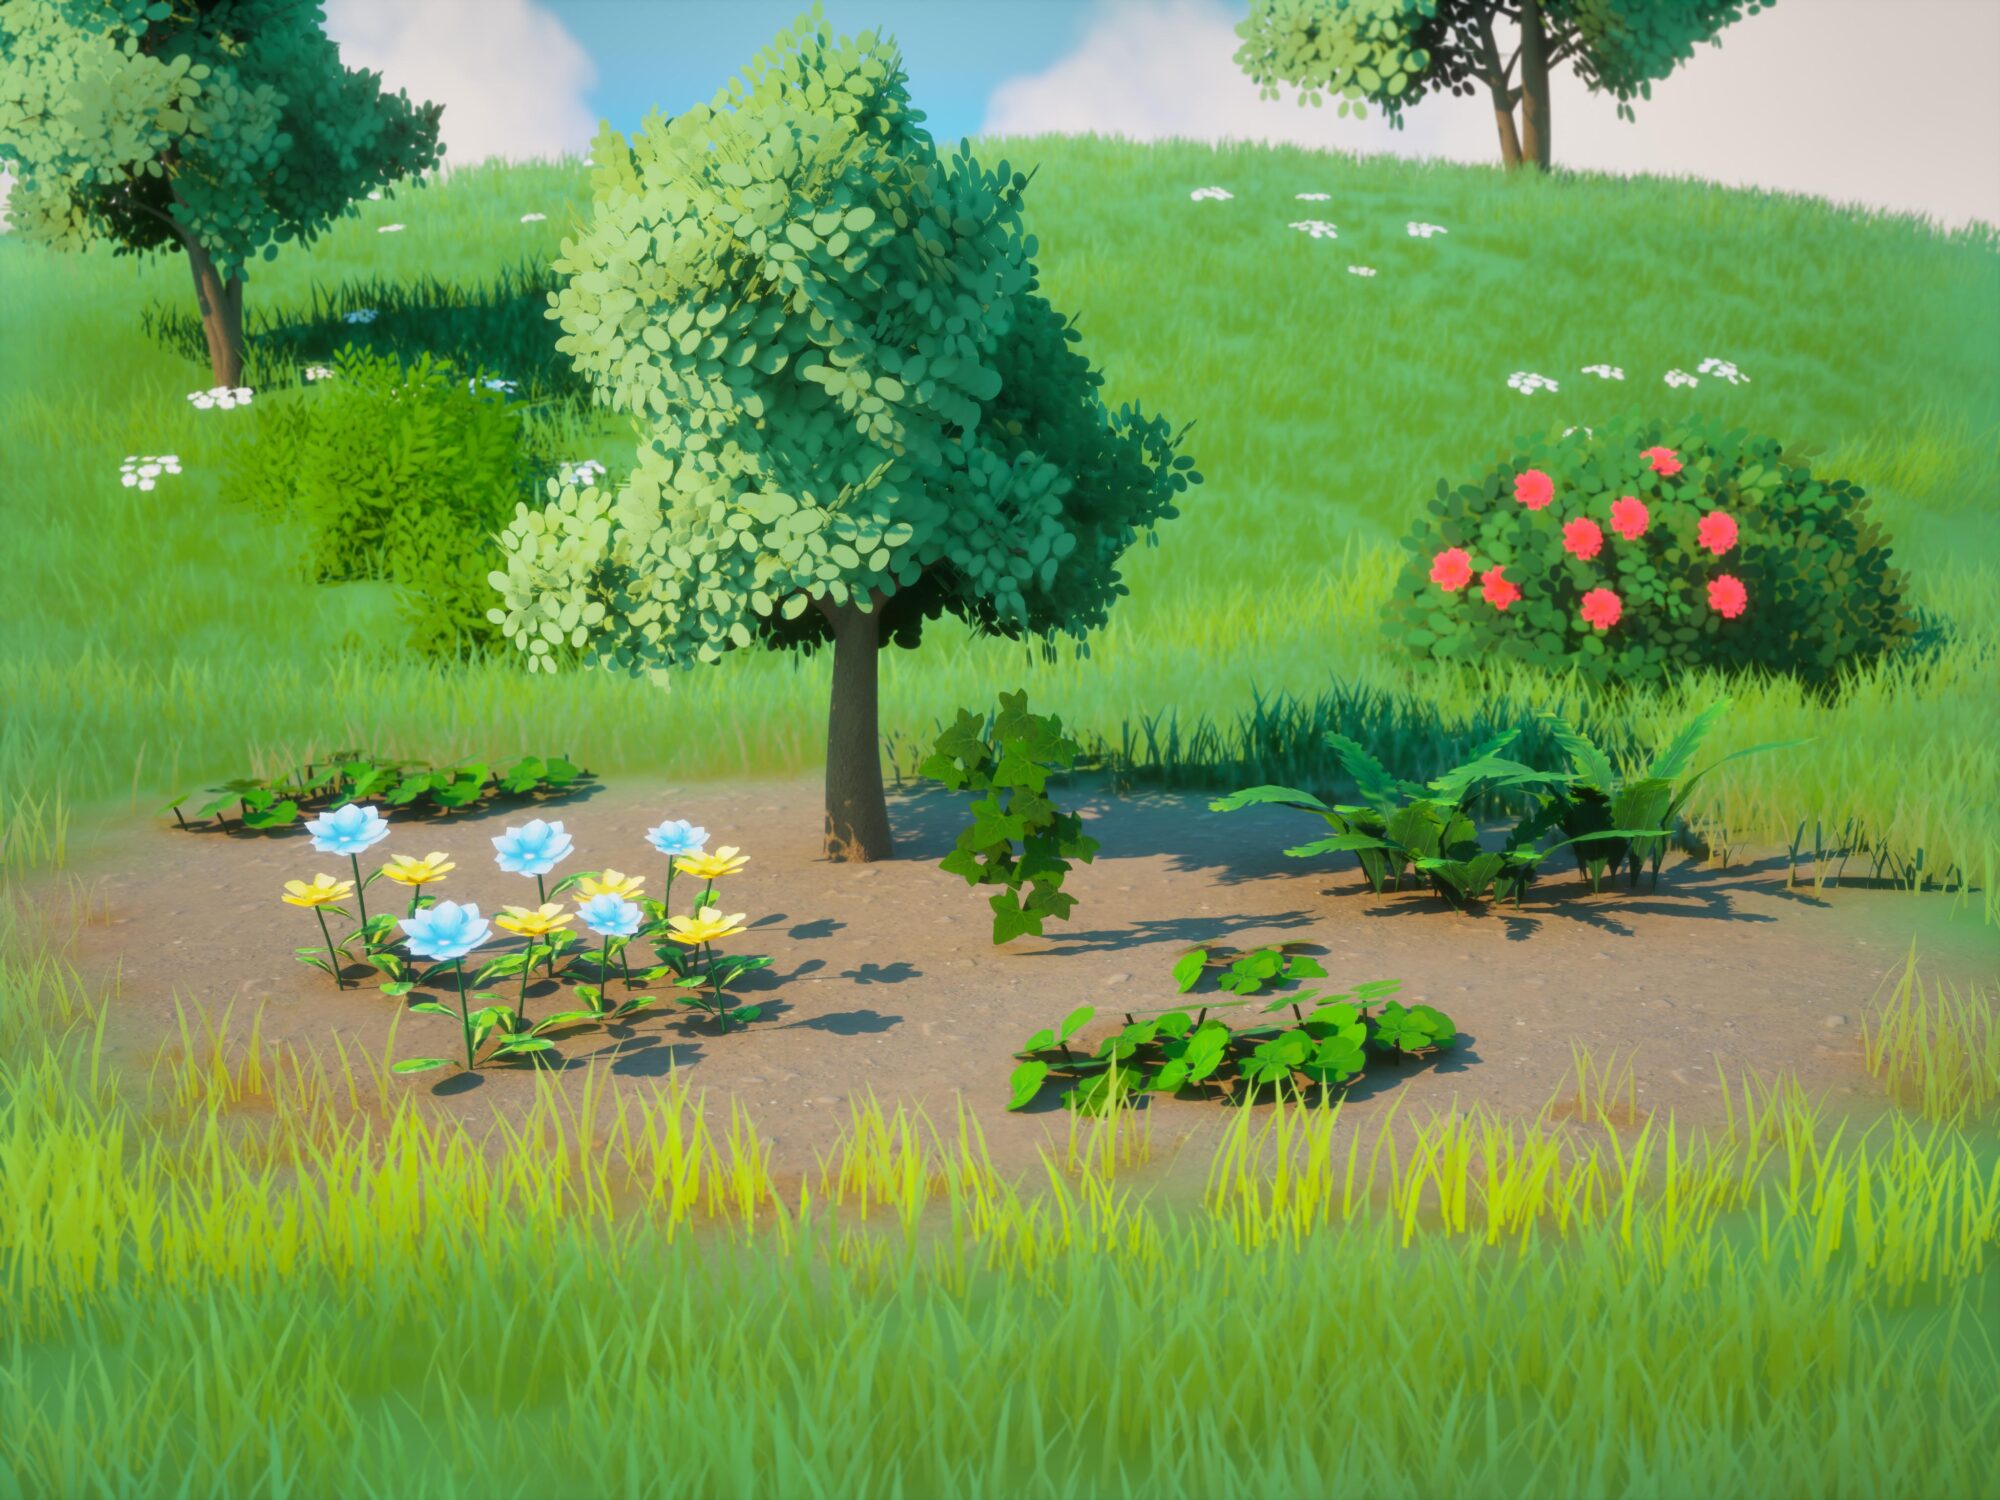
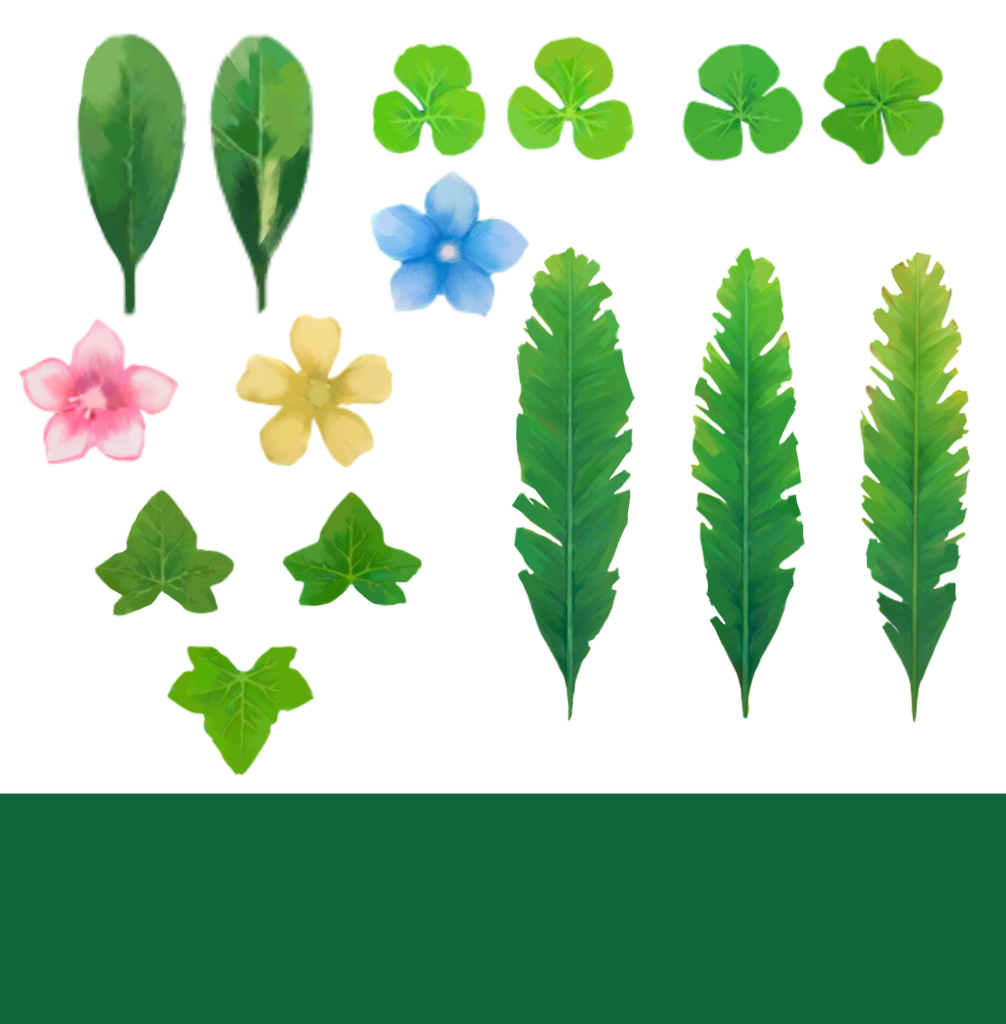
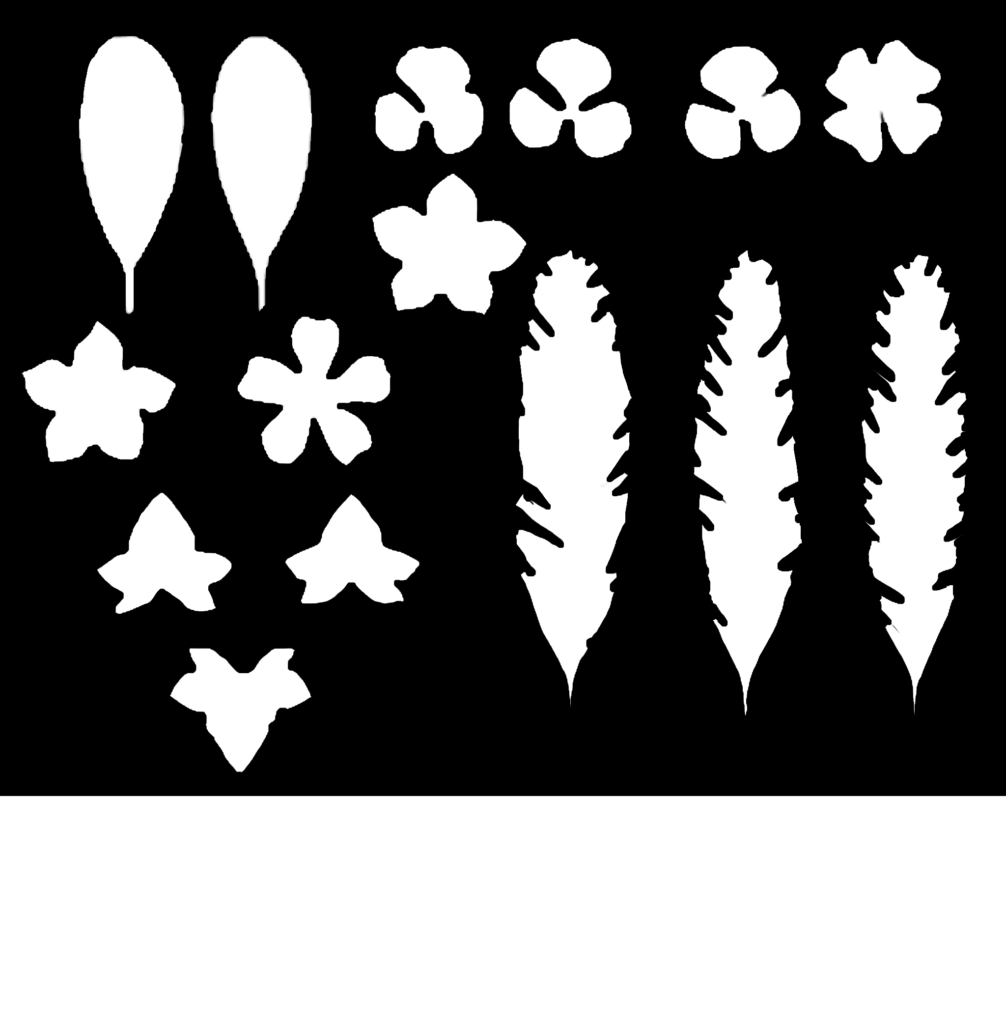
For the flowers and other plants, I simply painted an atlas in Photoshop along with its opacity mask and used that with the mesh I modeled in Maya.

Finally, after creating most of the foliage, I began sculpting the terrain inside Unreal Engine using the engine’s Landscape Sculpt mode.
This process went through a lot of back and forth and many feedback sessions before I reached a result I was happy with.
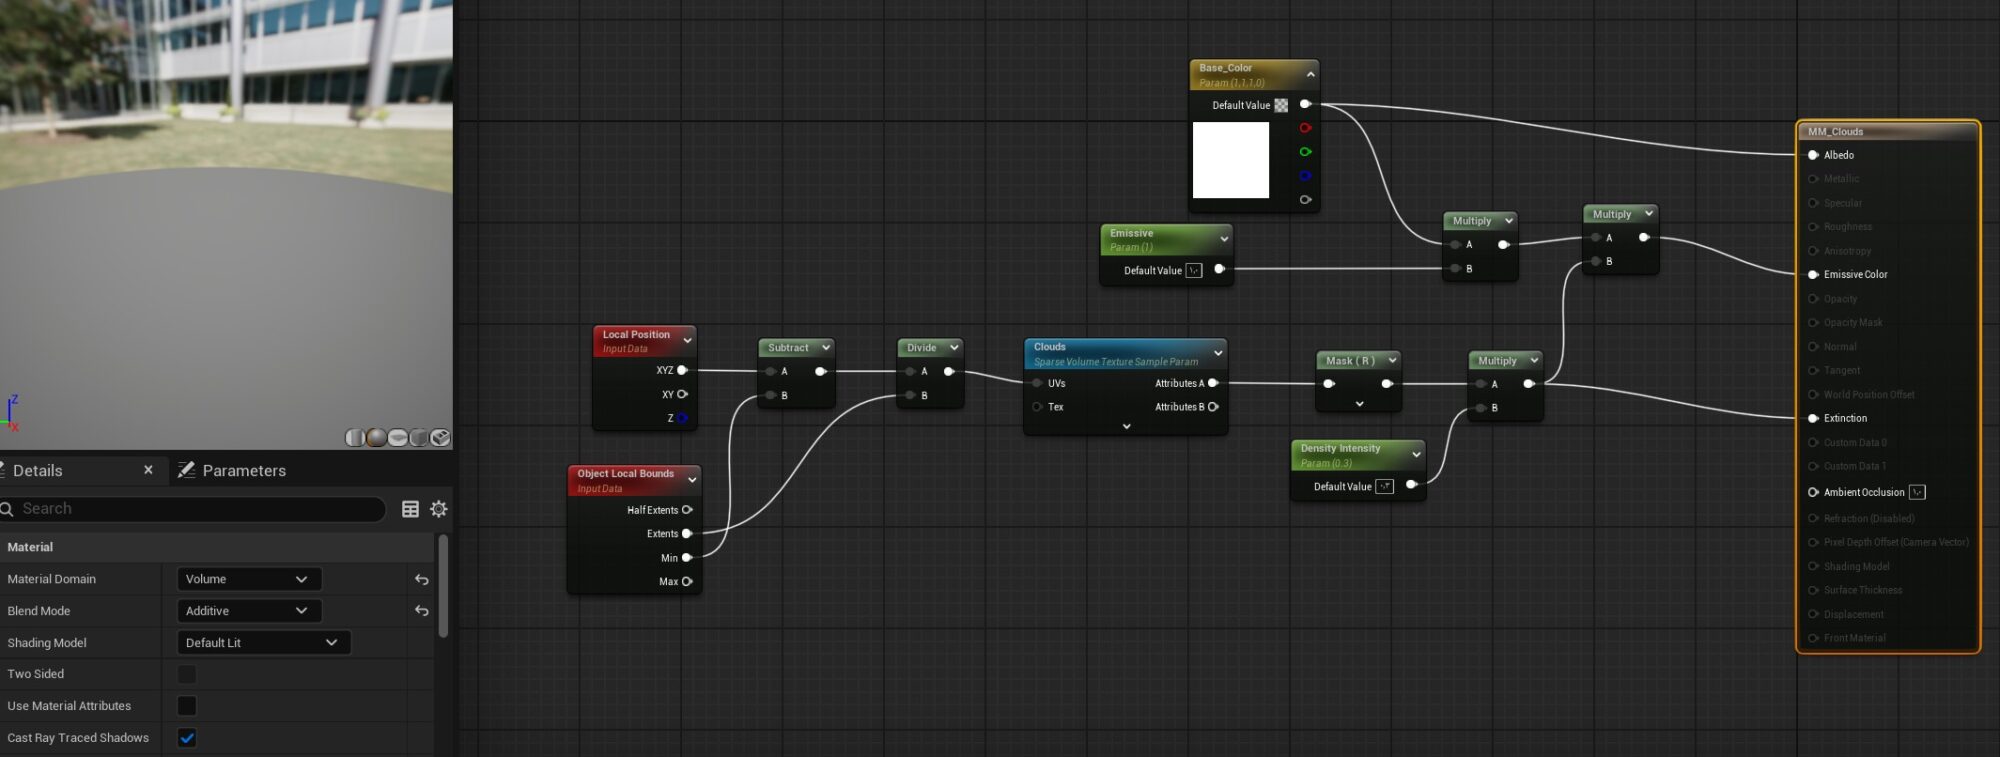
For clouds, I started with a custom skybox and an HDRI for a Ghibli look.
But then I learned how to import VDB clouds that I could set up a shader for inside my environment with full control, so I used that to frame the tower even more and create a slope that leads the eye towards it.
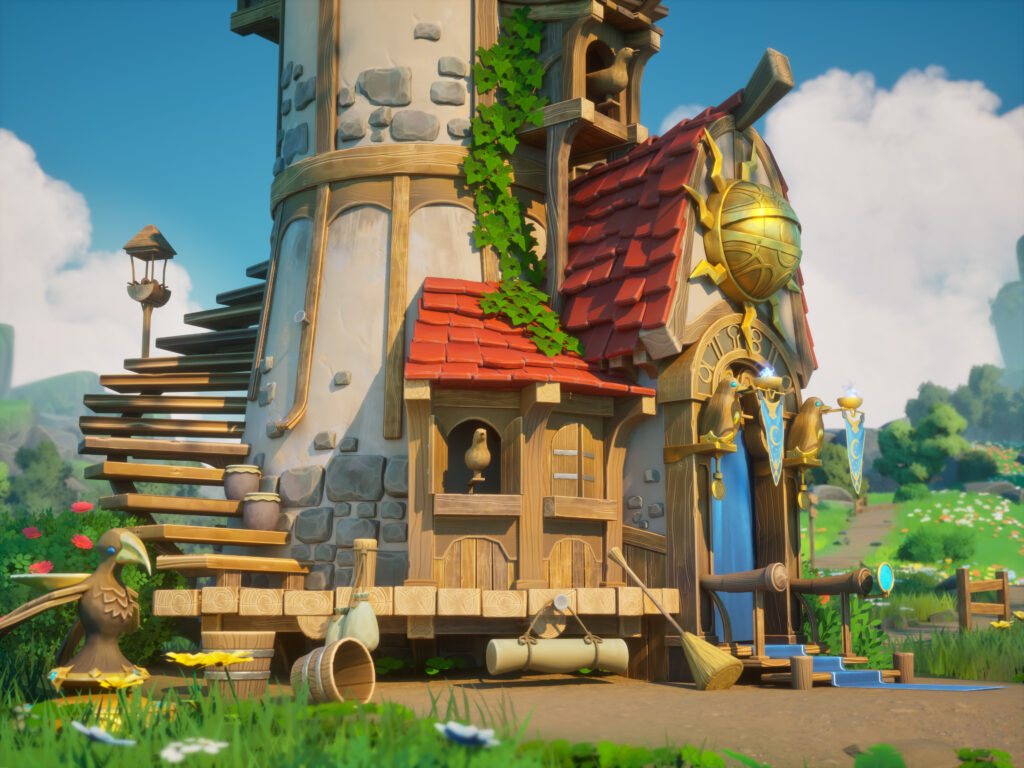
I added more elements to the landscape to add more storytelling, like a dirt road, parts of a fence, and a signpost.
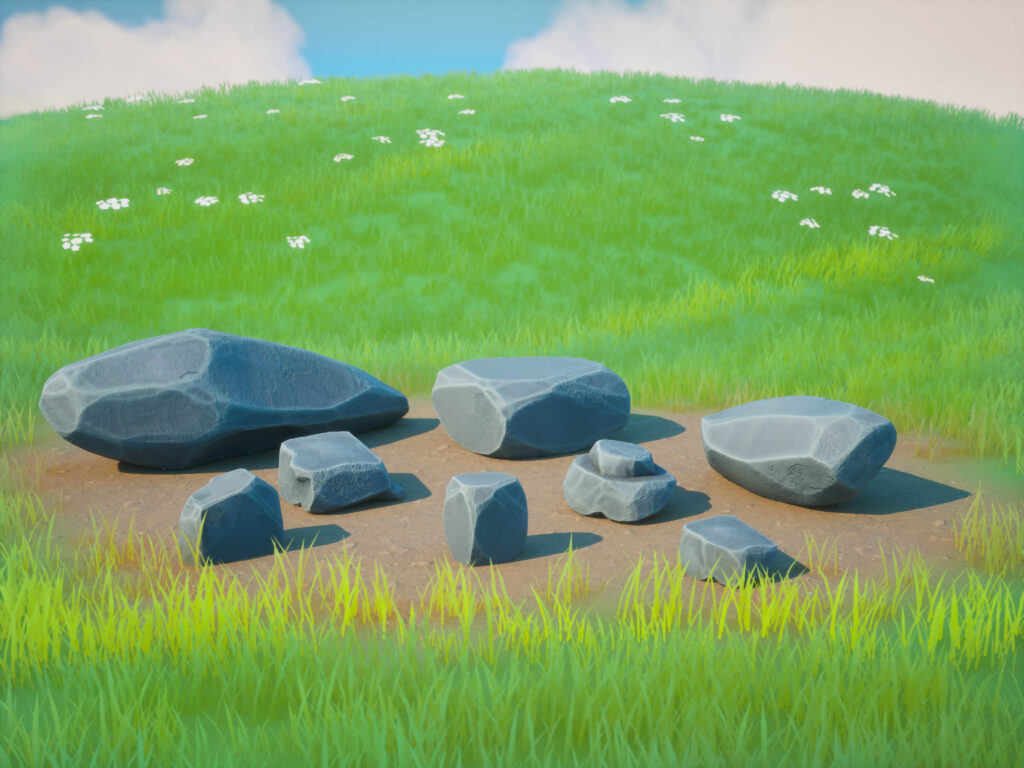
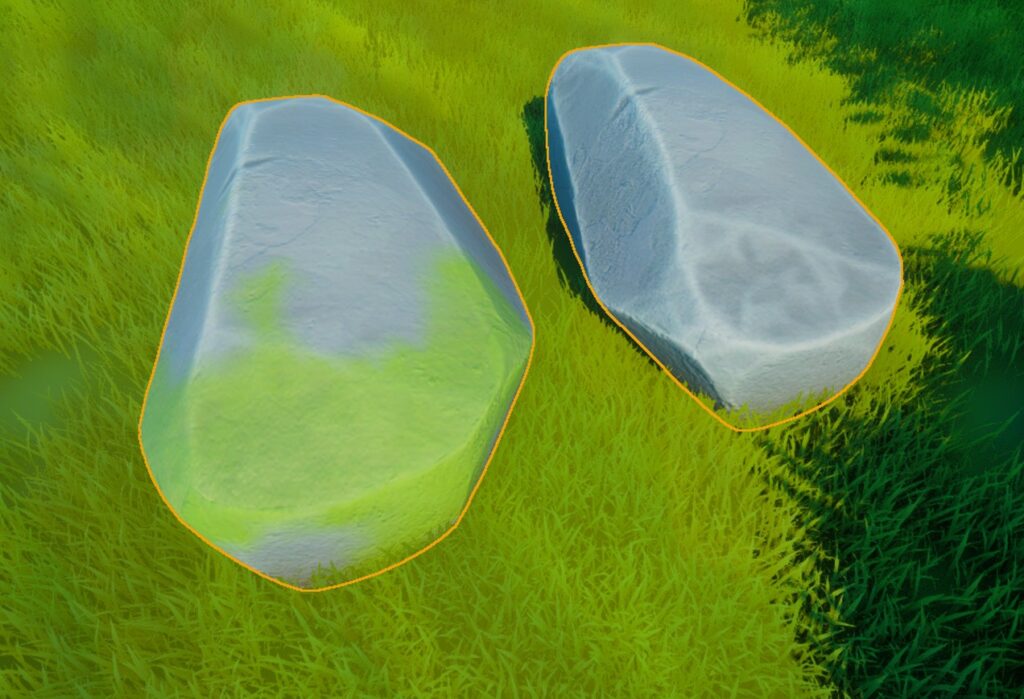
I also sculpted multiple rocks in ZBrush to use in a variety of sizes, from small pebbles to background mountains.
In front of those, I added some fog cards to create even more depth and make the scene look more vast.
UVs & Baking
The UVs were fairly straightforward since I modeled most of everything as simple low polys, so I quickly UV unwrapped everything inside Maya, then started baking inside Substance Painter.
Texturing
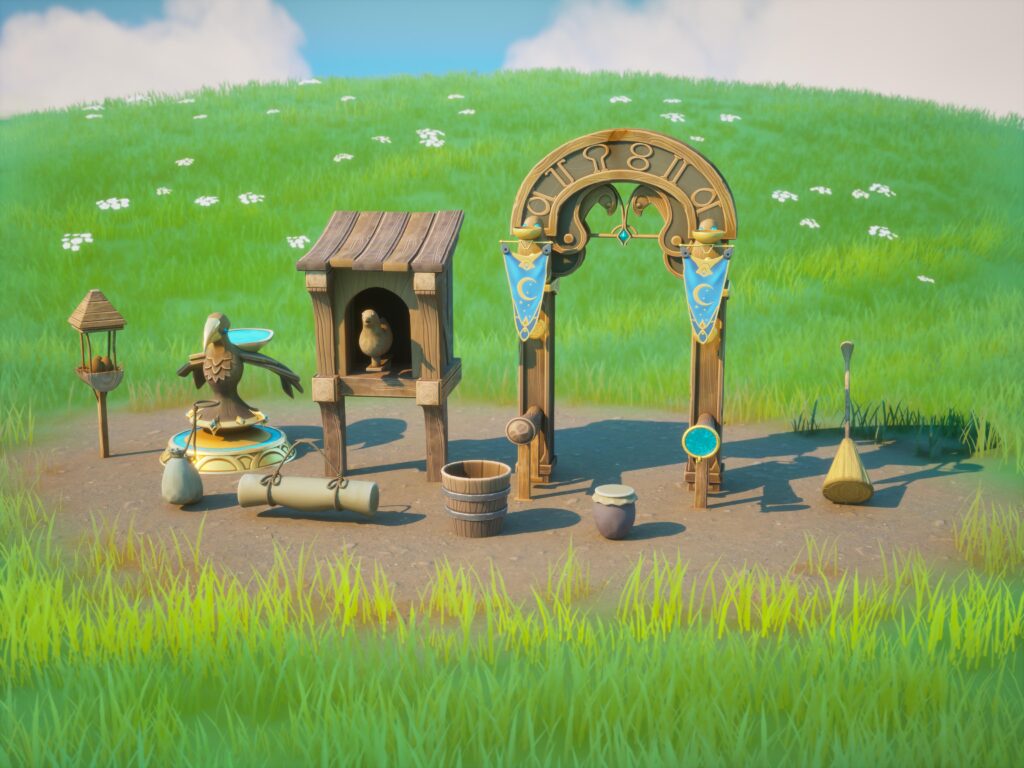
For the texturing process, I had two main elements. The first was a trim sheet for the wood that I sculpted in ZBrush, then baked and textured in Substance Painter. This served as the texture for most of the wood in the scene.
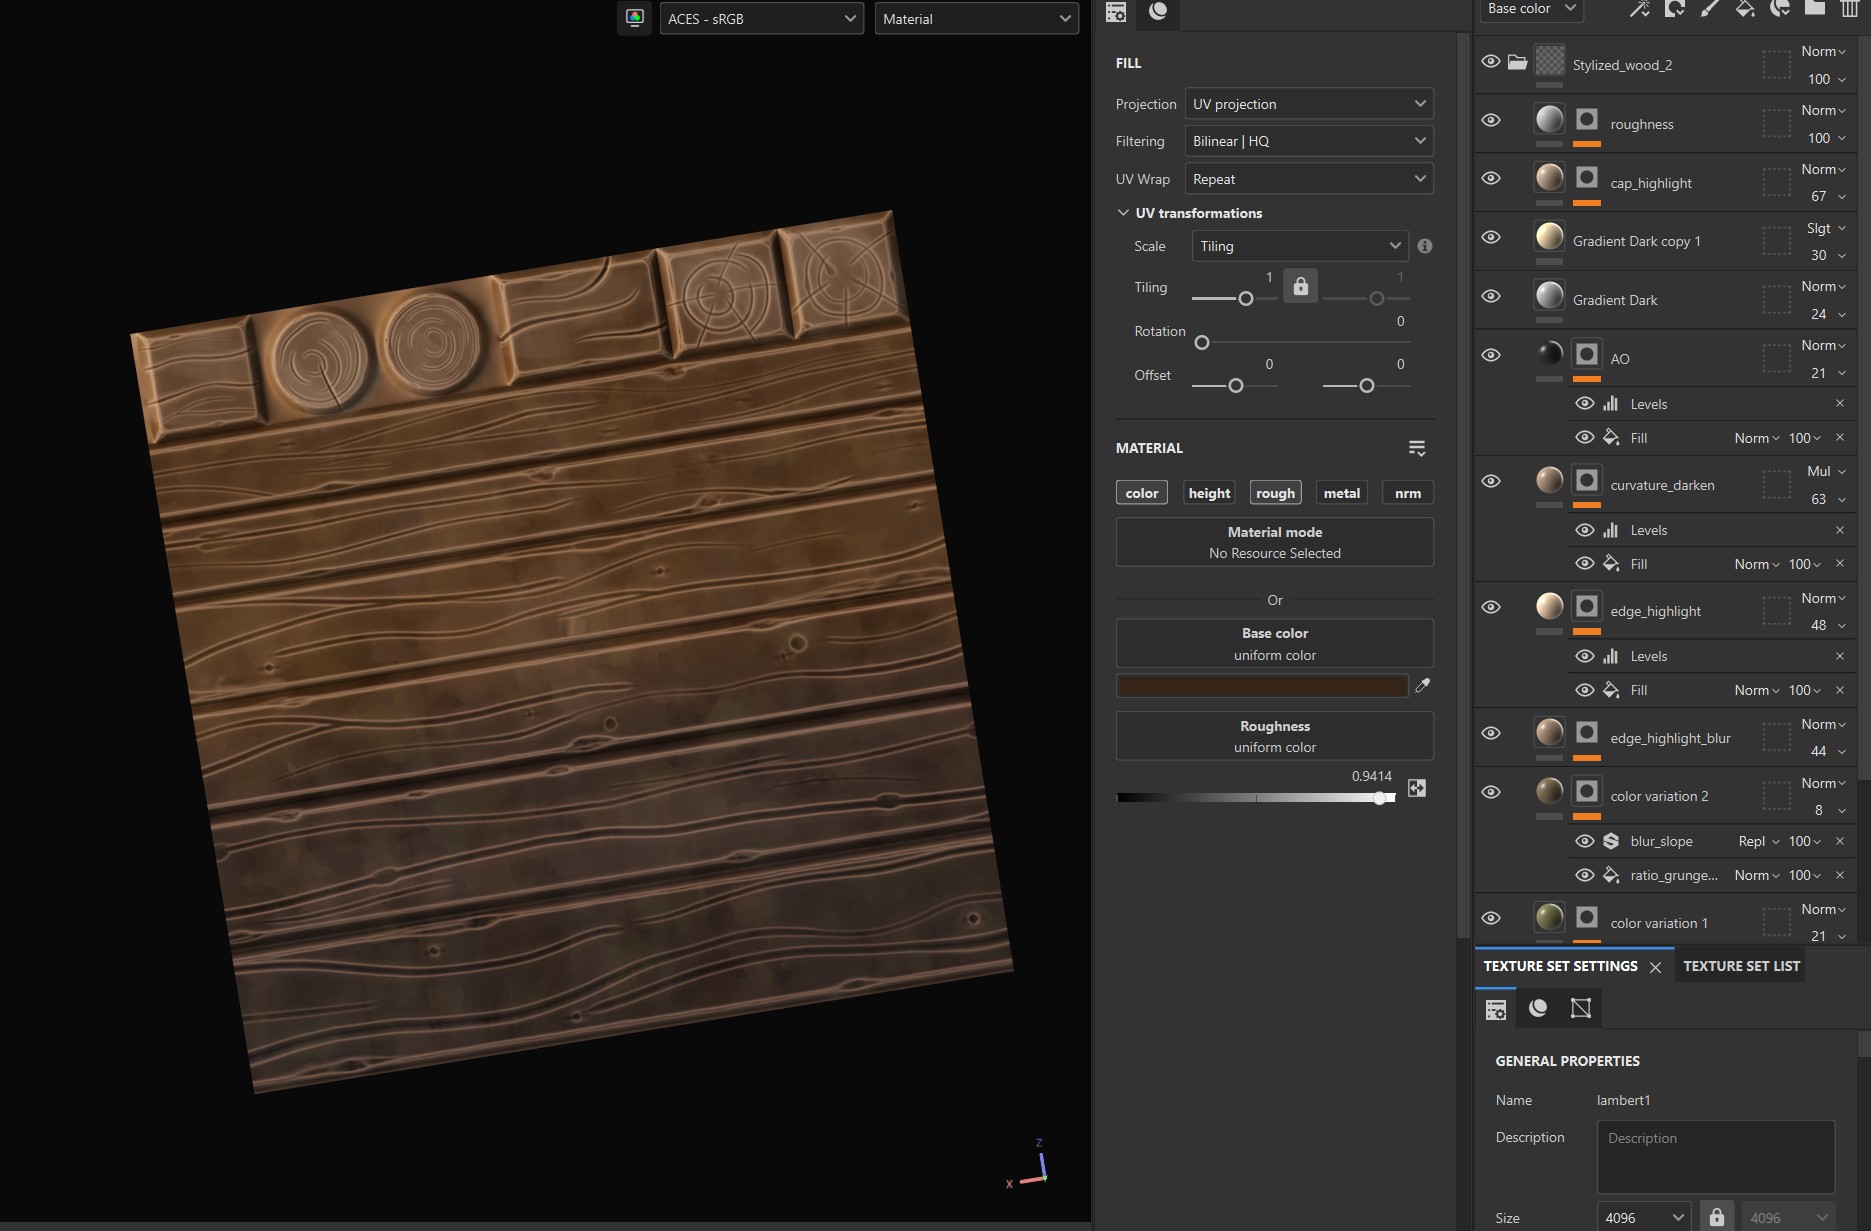
The second element was the actual texture that I created by studying many tutorials on stylized texturing.
I used the baked details from the Curvature and AO maps to define the wood grain on top of vibrant, saturated colors, then added more color variety using grunge map masks and the slope blur filter.
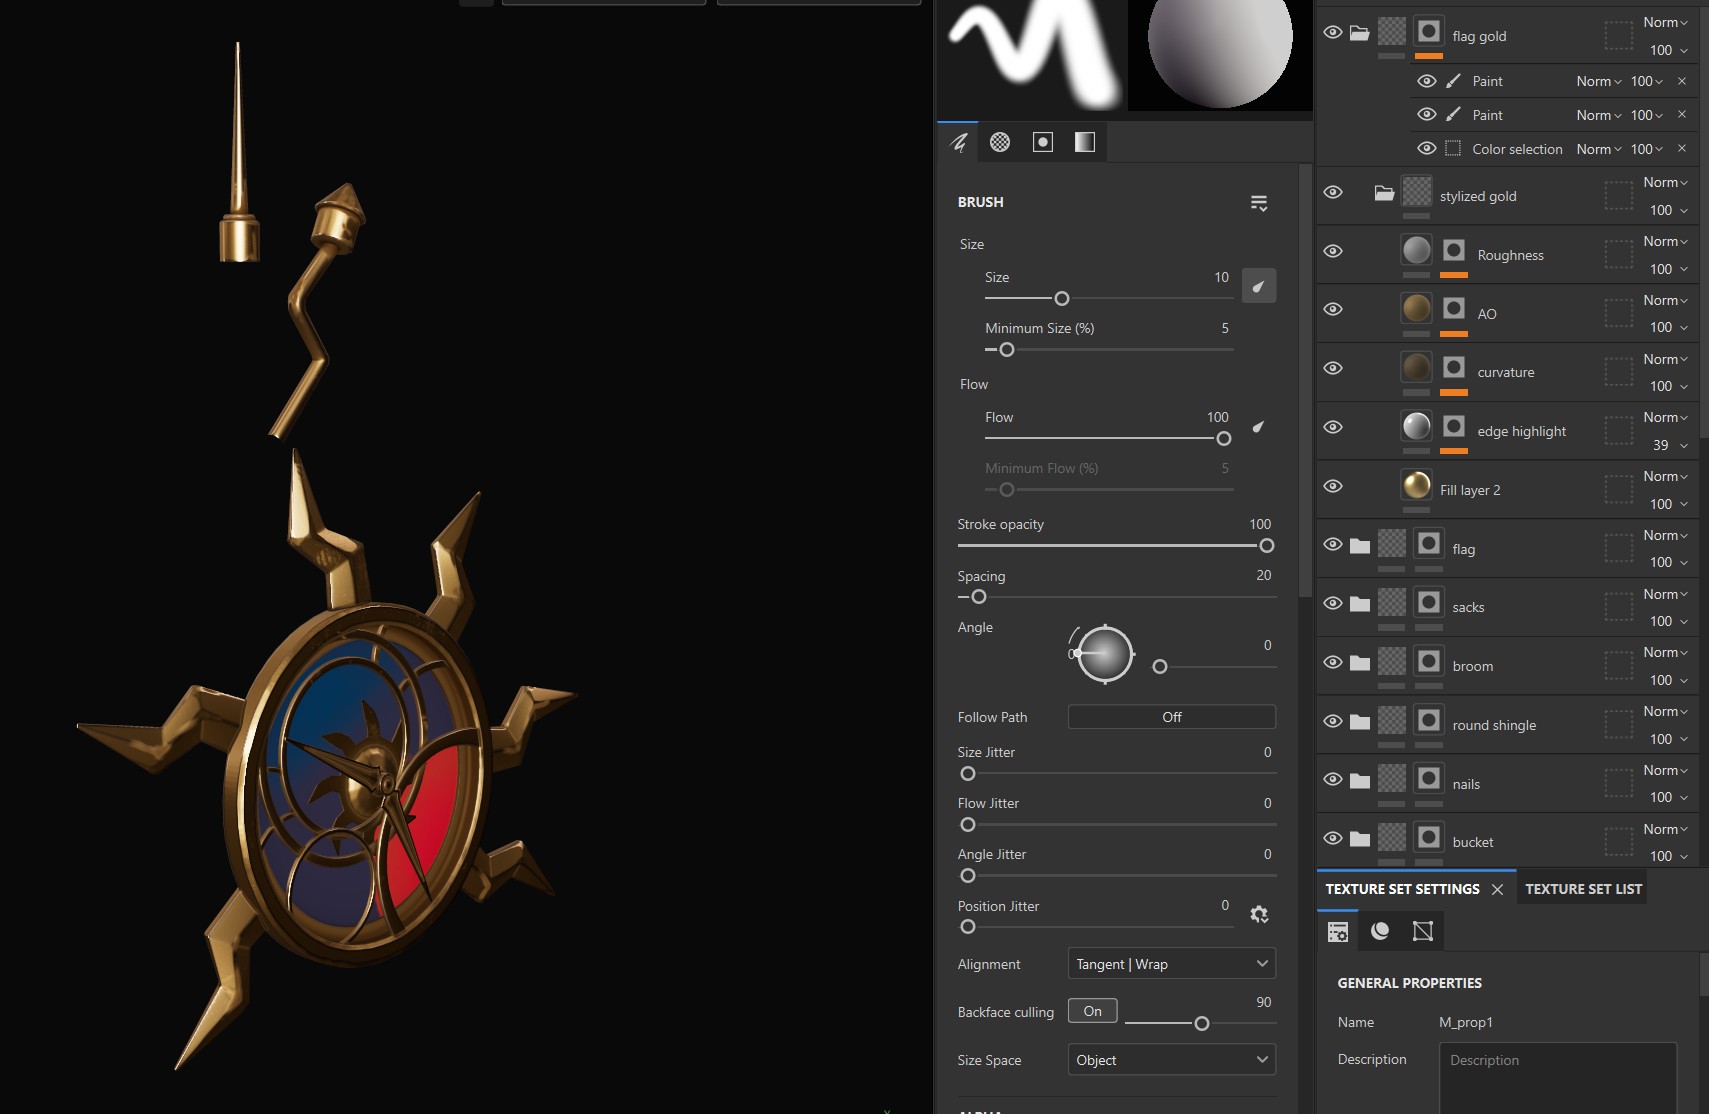
I turned this into a smart material that I used for most of the props, including the rocks of the environment.
I simply changed colors, roughness, and metalness levels to create different surfaces, and this saved me so much time.
I kept the withering and wear to a minimum in order to maintain a whimsical feel for the overall scene.
Level Design
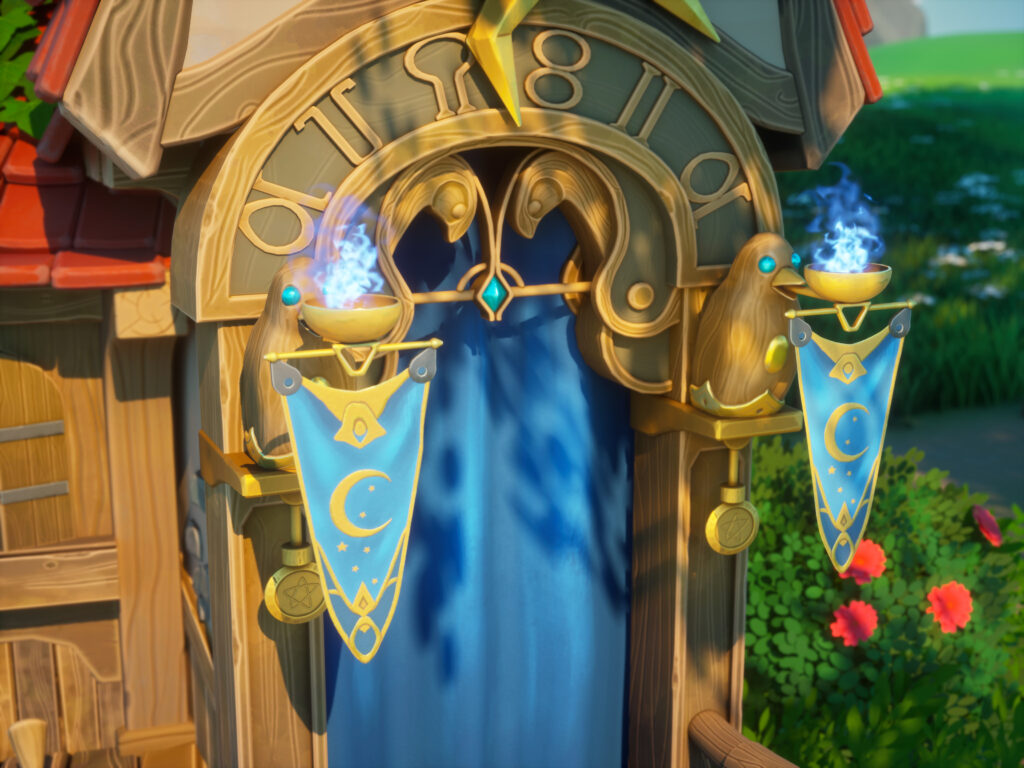
The placement and assembly of the assets were fairly simple. The animations were also split into two. Some, like the fire, smoke, and wind wisps, were made using Unreal’s particle system, Niagara.
Since this was my first time ever trying it, I relied heavily on tutorials online to get them working.
I used this tutorial to create the stylized wind, and while it is for Unreal Engine 4, it can be applied easily with minor edits in Unreal Engine 5.
The cloth was animated using a simple grass wind method.
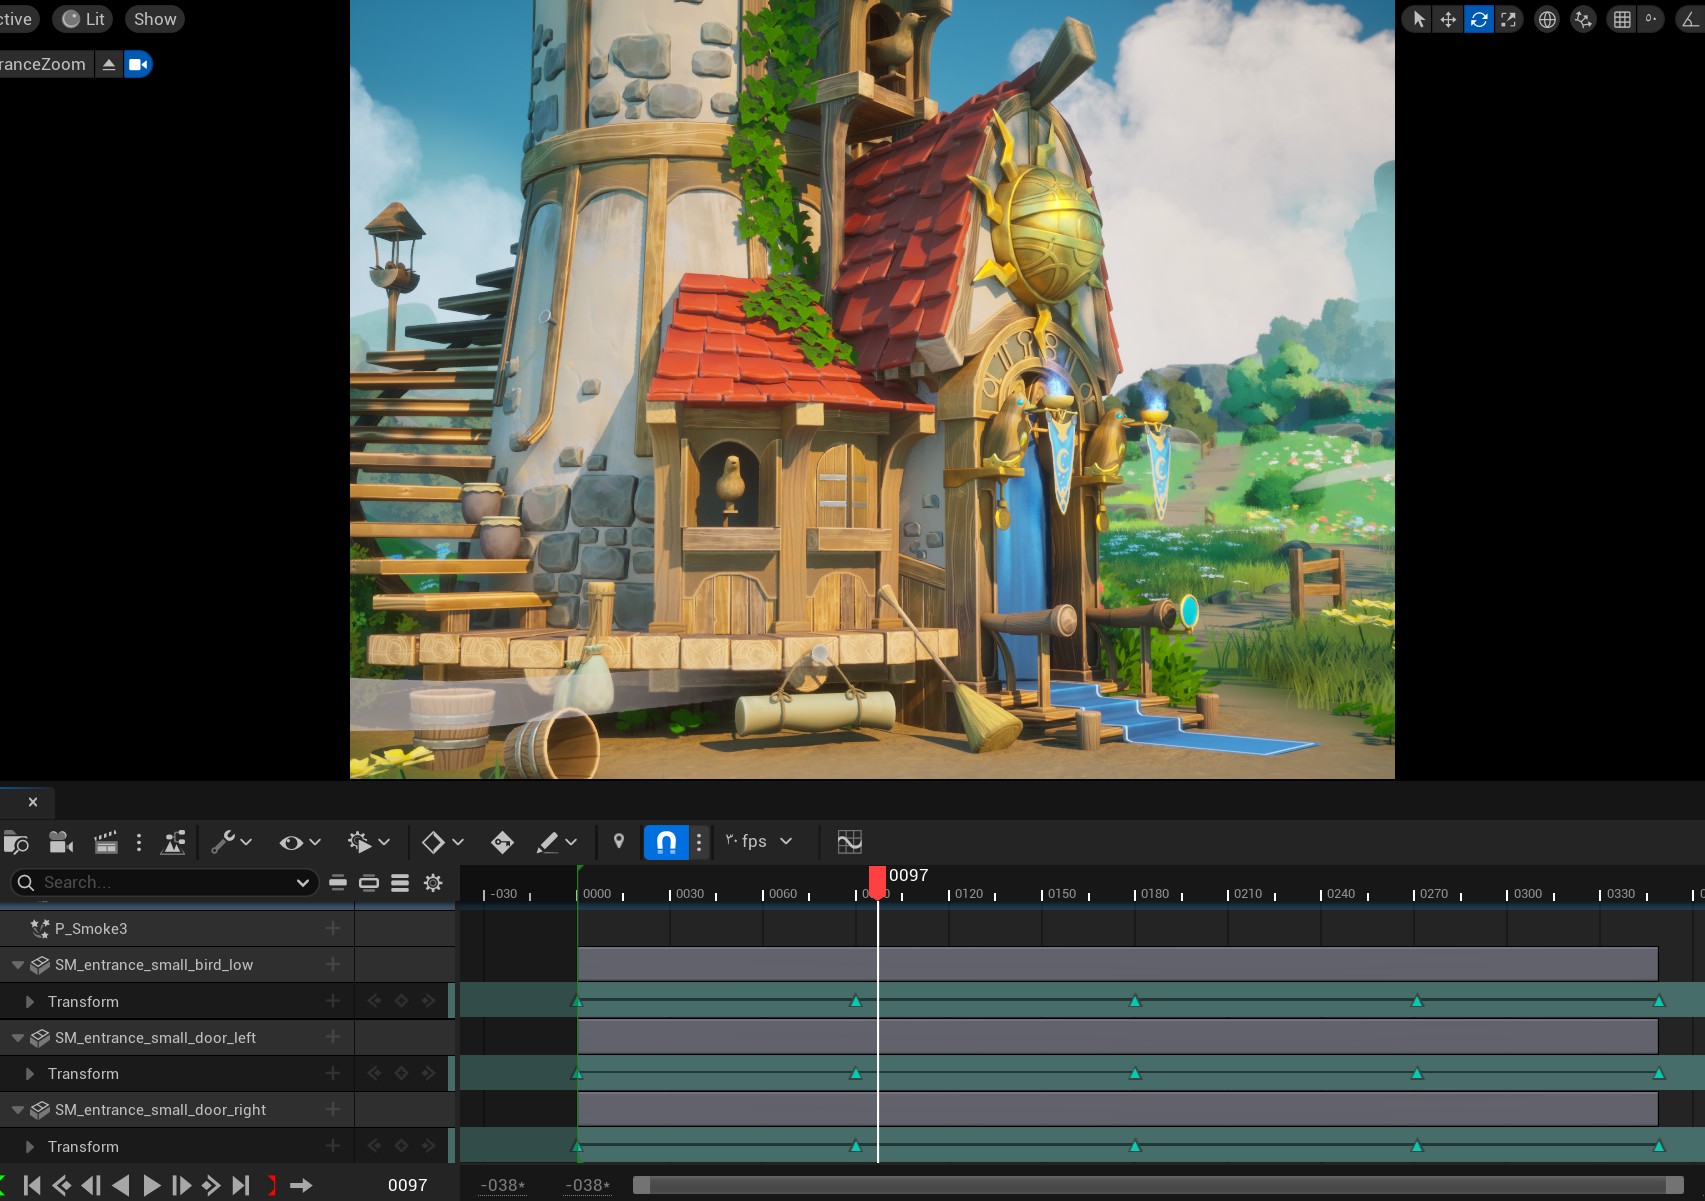
The second part, like the bird movement and the door opening and closing, was simply made inside the sequencer by dragging the meshes inside the sequencer and assigning keyframes based on the position and rotation of the mesh.
Lighting & Rendering
After putting all of the previous elements in the scene, I started tweaking the color tints inside Unreal and editing the placements of everything.
I added some moss to the rocks by vertex painting it on top and then finalized the lighting.
I kept it fairly simple: one directional light and 3 rect lights to define details that were lost in the shadows. I also increased the saturation slightly in the post-process volume.
Then I had the idea to introduce a season change, as I was inspired by other artists who did it.
I duplicated my level, removed the flowers, and changed all my colors to a variety of reds, yellows, and oranges to create the autumn atmosphere.
I simply recorded the same video on both levels and merged them with a smooth transition in Adobe Premiere to create the final video.
Conclusion
The project was both challenging and fun. It gave me the opportunity to get a lot of experience with Unreal Engine while also diving into the process of designing a small environment.
One of my biggest takeaways was learning the importance of working from bigger parts to small details, starting with a clear overall vision and then refining it gradually.
I found that using fewer, more targeted references helped me stay focused and avoid getting overwhelmed.
Creating mood boards and doing early research were essential in defining the scope of the project. It’s always better to begin with a small, manageable scope and build on it as the project develops.
I also came to appreciate how valuable it is to stay open to feedback and be willing to edit or rework parts of the project.
That flexibility is often where real growth and improvement happen.
Read more articles
You might also like these articles.