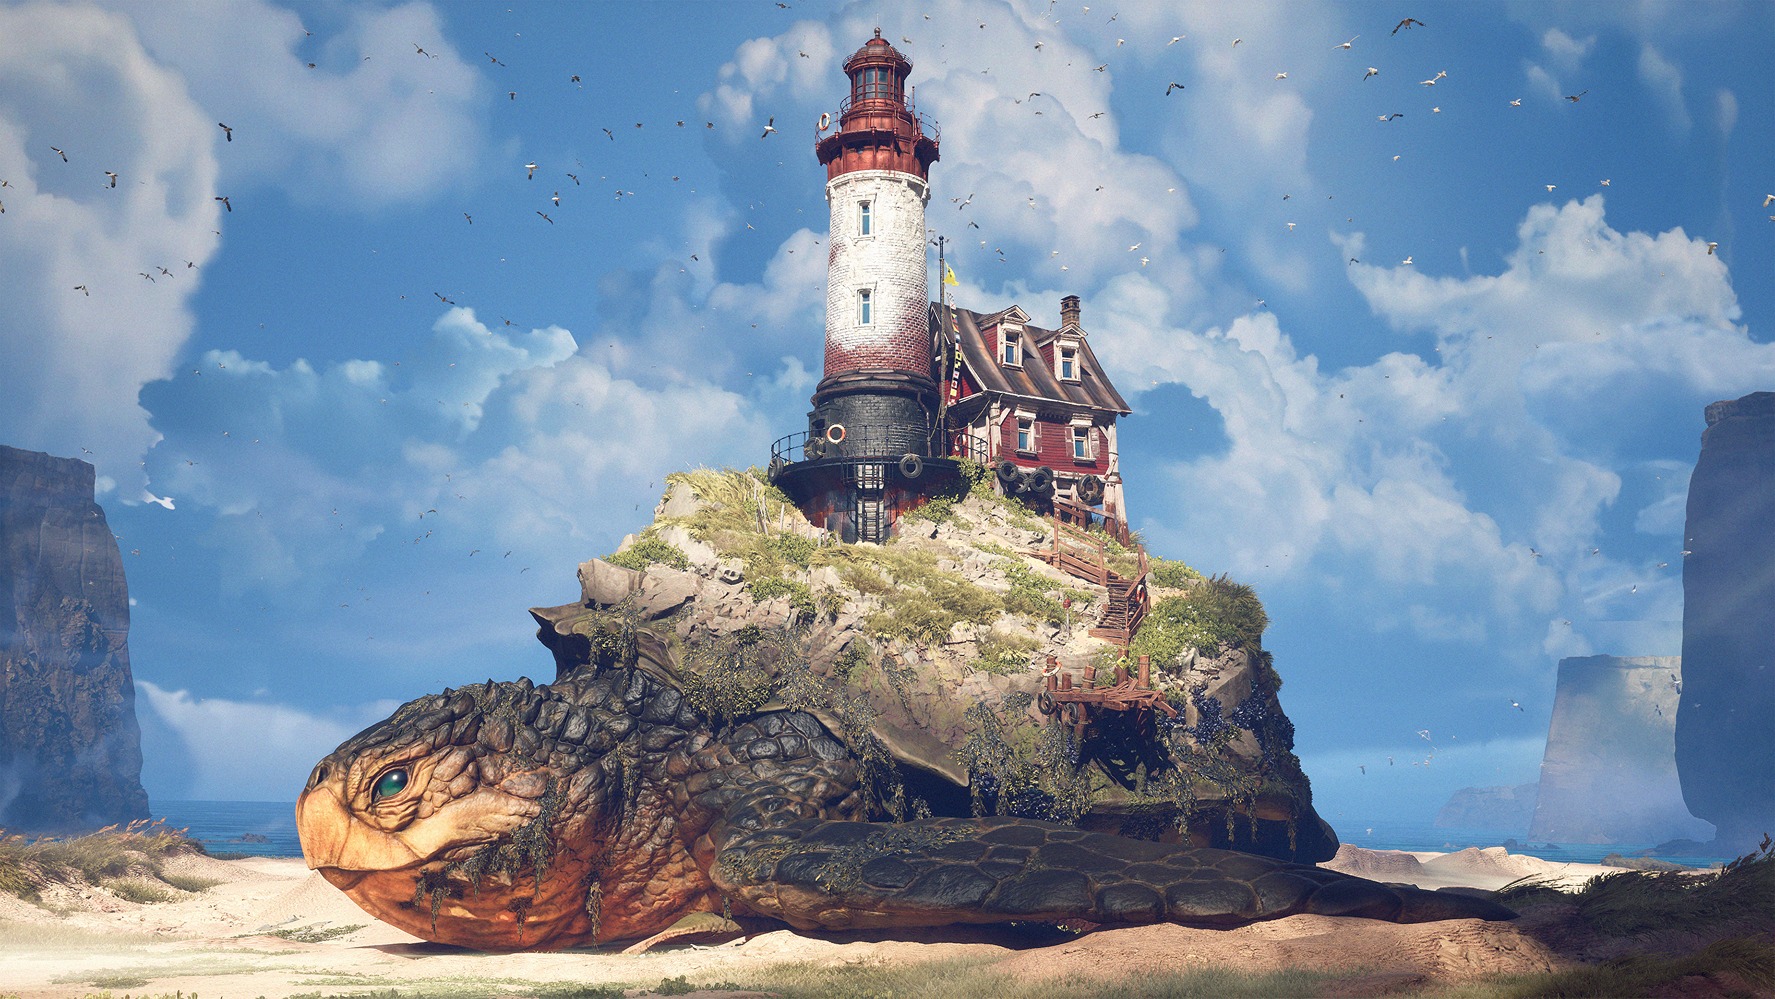
Stranger On Low Tides


Introduction
Hello! Let me introduce myself! My name is Zurab Barisashvili and I'm a Senior Environment Artist at Sharkmob.
This environment was inspired by Piotr Kupsc’s concept art – Low Tide Pub.

When I started, I wanted to stay somewhat true to the concept and recreate the general feeling and composition. However, as always, I wanted to put my own spin on it. In the end, I got inspired by Lovecraftian themes and combined them with a heavier, darker, but mysterious and somewhat colorful outcome.
My initial impression was that blocking out the scene for this project would be simple, but I was very wrong. It proved to be quite challenging to align everything according to the composition.
That’s where the good old way of doing things came in handy. Usually, I set up the composition using primitive shapes in UE, but in this case, it proved to be more effective to do a rough but closer blockout in Maya first, then import it and make adjustments in Unreal, and then go from there.

This was the first attempt at blocking out within UE5 using primitives.

And here is the first-ever imported blockout from Maya into UE.

The semi-finalized result before starting on detailing.
Many more adjustments followed during the detailing stage, but that’s just how things go.
This project was made by combining Megascans and custom assets.
The goal was to achieve a seamless transition between the two. The project heavily relied on in-engine UE5 tools to speed up the workflow.

Using Megascans to quickly shape out anything that was possible while staying true to the concept.

Here, you can see I have already imported quite a few custom-made assets to dress up the scene and get a better feel for the overall shape of the composition and detail scale.
I have also started experimenting with clouds and lighting to set the mood.

It’s a bit hard to see, but I basically had everything almost set up here, and I was trying to get some of the ground detailing right.
The mood was almost there, and the composition looked more or less at the finish line, but there was still a lot to be done.

This was more or less what I wanted to settle on for the time being. I added some baseline decals, damage and minor storytelling details, and had some particles already set up, like the smoke and rain particles you can see.
This is where the most time-consuming part of this project started. I now had a baseline visual and the mood set, but I knew I wanted it to be very different from what I was seeing.
So I started adding color grading and post-processing effects to get a feel for the final result and to experiment and see what interesting visuals I could find.

This is the first-ever color grading iteration. To clarify, all the color grading was done using LUTs. I would take a quick screenshot inside of Unreal, bring it to Photoshop, color grade it using Unreal’s LUT workflow, and then import it back into Unreal, resulting in a pretty much 1-1 result.
Although, as a side note, not all the settings carry over, as Unreal’s color grading is somewhat limited. So sometimes you have to add additional adjustments in the post-processing volume on top of the LUT.

Now, the numbers are going to get silly, but for the sake of showing iteration numbers, I’m going to include them.
This was color grading and adjustment iteration 14.

Color grading and small details iteration 47.
And the final render came in at the 66th iteration of color grading. As you can see, they’re somewhat close in their looks, and that is because early on, I realized what I wanted to achieve as a final result, so I was trying to perfect it.
Something very tricky to keep in mind when working on any project is color balance in artwork.
It is very tricky, for example, these renders will look very different from one monitor to another, and fine-tuning smaller details is very complicated and, to some degree, impossible.
Regardless, I tried to do that and managed to get a satisfactory in-between result while comparing three of my screens. (In the process of fine-tuning colors, I also used eight different monitors from my friends, and they looked completely different on all of them.) Another significant part of this project was the windows.
As you may have noticed in some of the progress pictures, there is just an emissive color for the windows. Although it looked okay, I wanted to push it even further.

So I made very simple but, in my opinion, practical emissive windows.
From the get-go, they already looked quite good, especially from a distance.

I also set up a material for the windows where they randomly flicker to give them a more dynamic feel.
(The window assets will be available on my Unreal Engine Marketplace store very soon.)

(The monochromatic pass is very important for figuring out the values and focus.)
When I started on this environment, I knew for sure that I also wanted to showcase different lighting scenarios.
It was a relatively simple step but impactful nonetheless.


Setting up lighting scenarios was just a matter of adjusting the directional light, volumetric fog, volumetric clouds, post-processing, and color grading.

And with this detailed lighting pass, I want to conclude the breakdown of this environment.
I hope you enjoyed reading through and learned something new!
Read more articles
You might also like these articles.