Steampunk Town

Introduction
Hello everyone! My name is Pablo Blanes, and I am an Environment Texture Artist from Madrid but based in Quebec, Canada. Currently, I am working for Ubisoft Quebec.
I have been working in this field for a couple of years now, and I worked on several projects, such as Medievil or Metroid Dread.

Goals & Software
My main goals for this project were to cover a full environment by myself; taking care of all the texturing, modeling, lighting, and post-process. I wanted to put into practice all the areas of environment creation, mixing between several software depending on the need. For this one, Unreal Engine 4, Substance Designer, Substance Painter and 3DsMax were crucial.
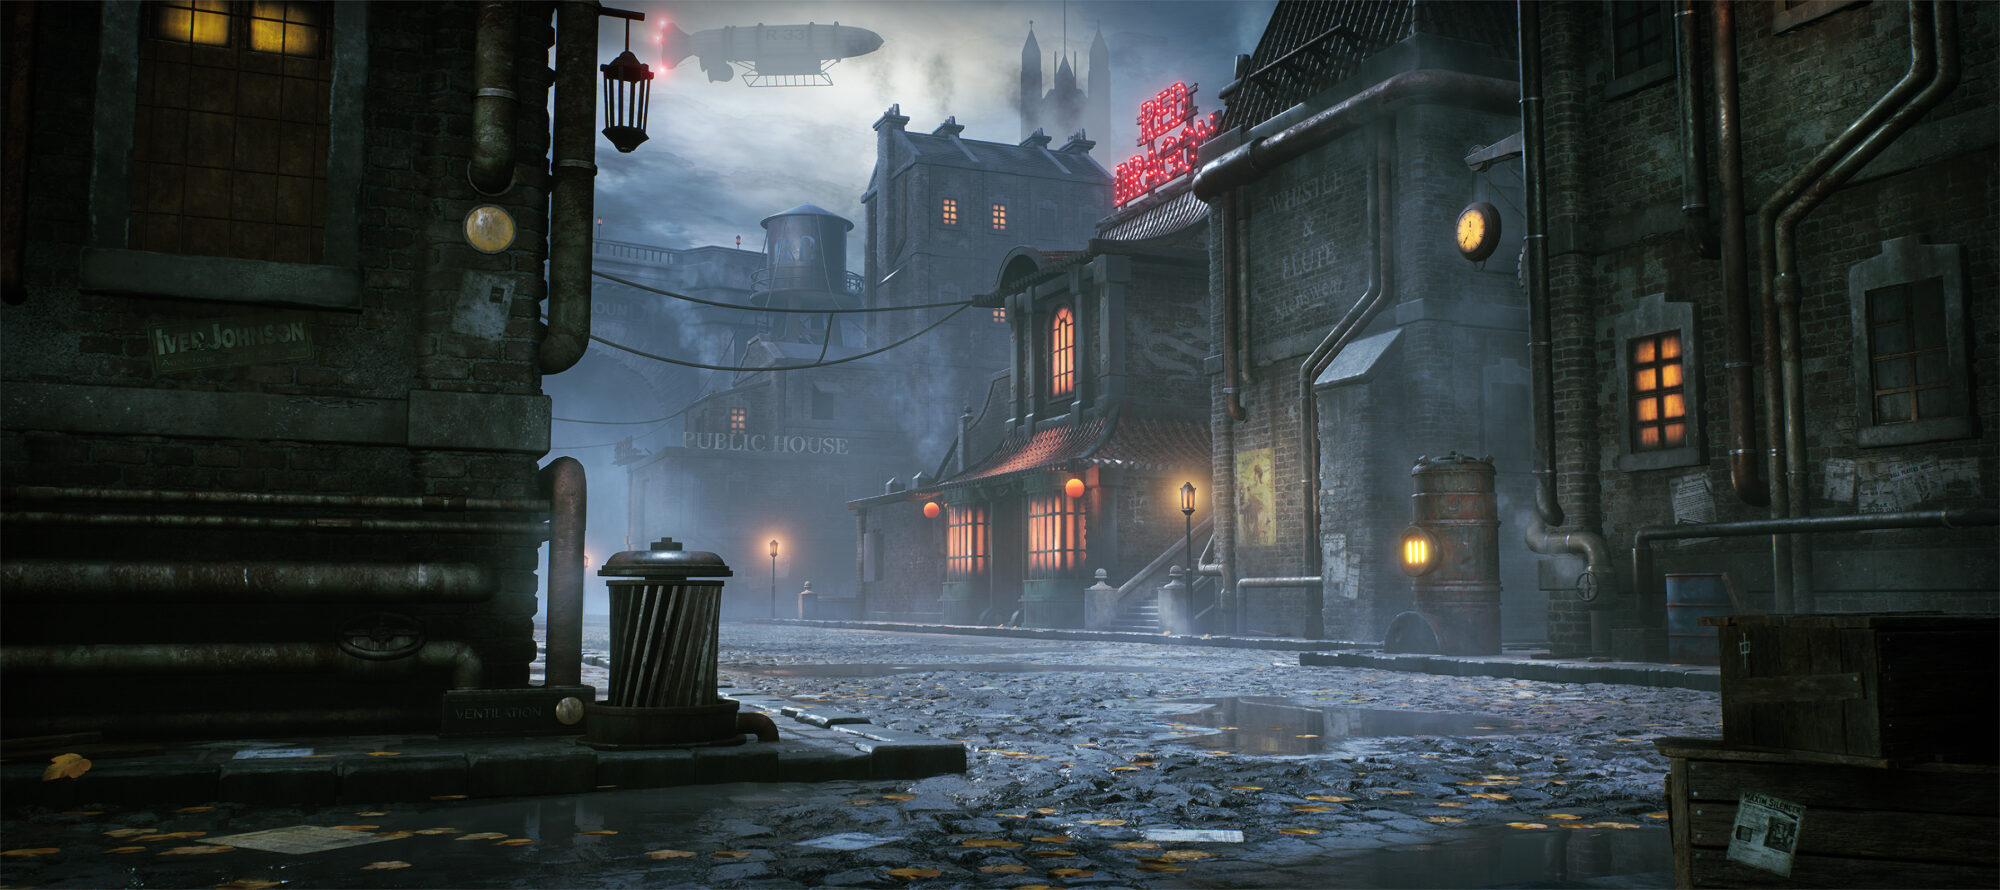
So, first of all, I looked for several references that would inspire me. I saw the amazing concept of Vladimir Manyukhin (https://www.artstation.com/artwork/qNG4R) and thought that it was the kind of inspiration I was looking for.
References and Inspiration
So, I got started.
In order to help me achieve the desired textures and surfaces, I looked for extra images that could help me achieve this task. I started gathering several cool references, mixing between real pictures, videogames; materials from other artists. Anything that could help me tackle this task.
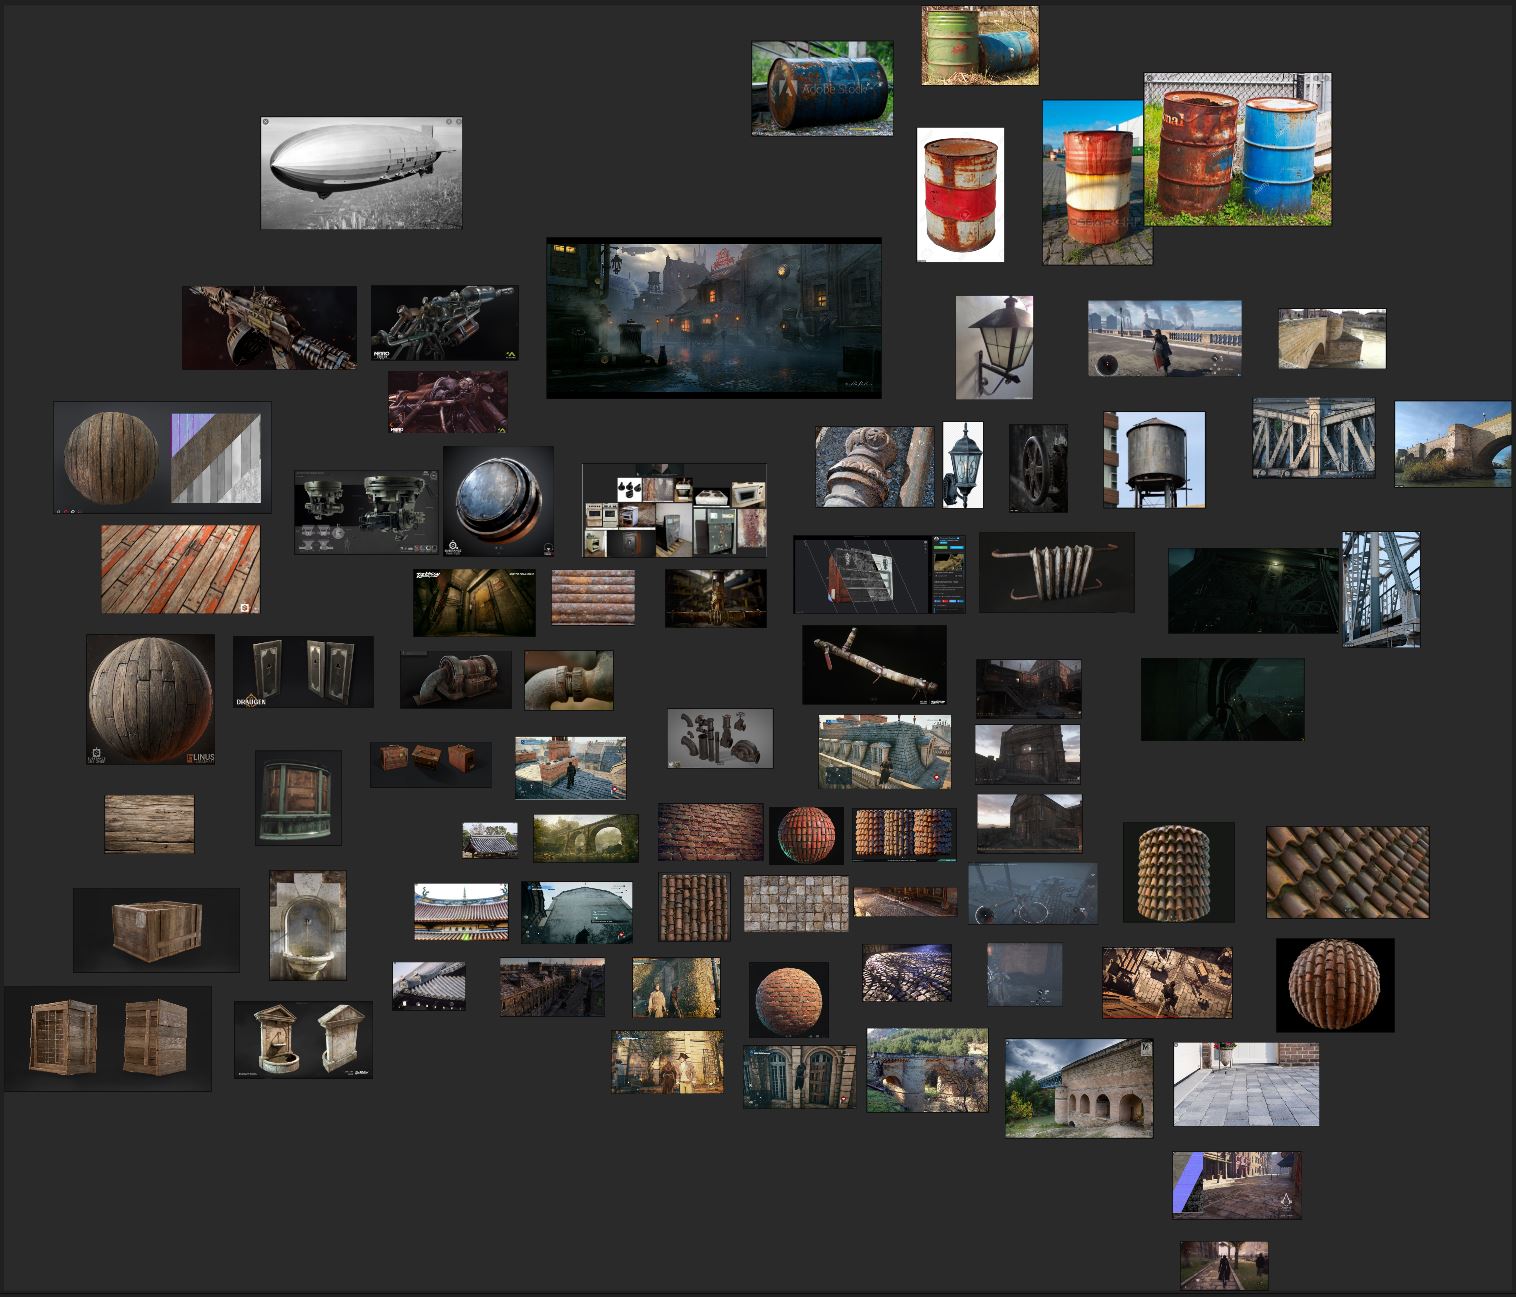
I was also heavily influenced by several video games, such as Assassins Creed Syndicate or The Order 1886, which had that Steampunk vibe I was looking for.
I wanted to get that dirty looking, full of industrial references, steam all around the scene, and lots of rus
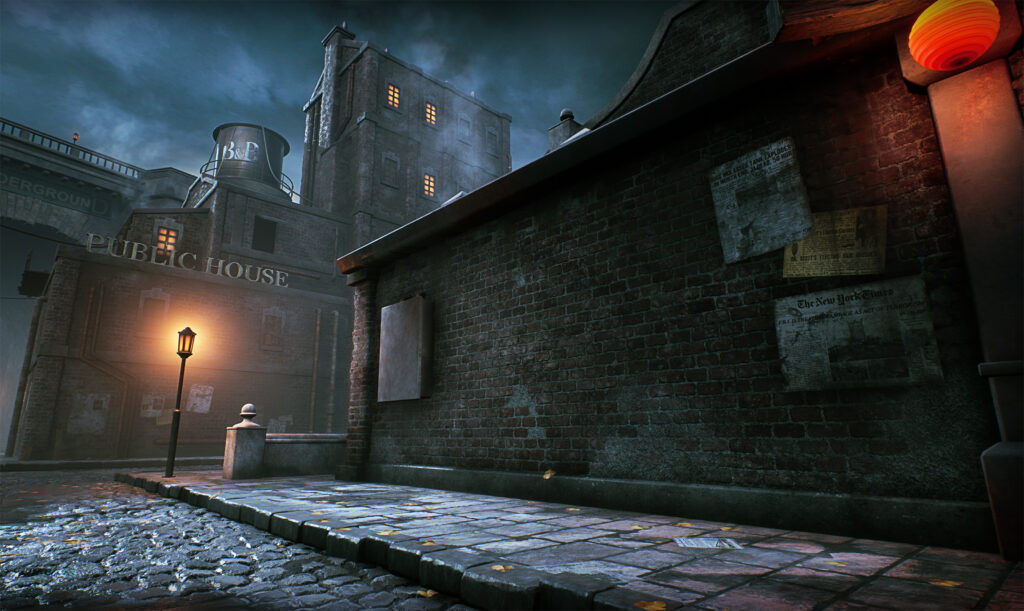
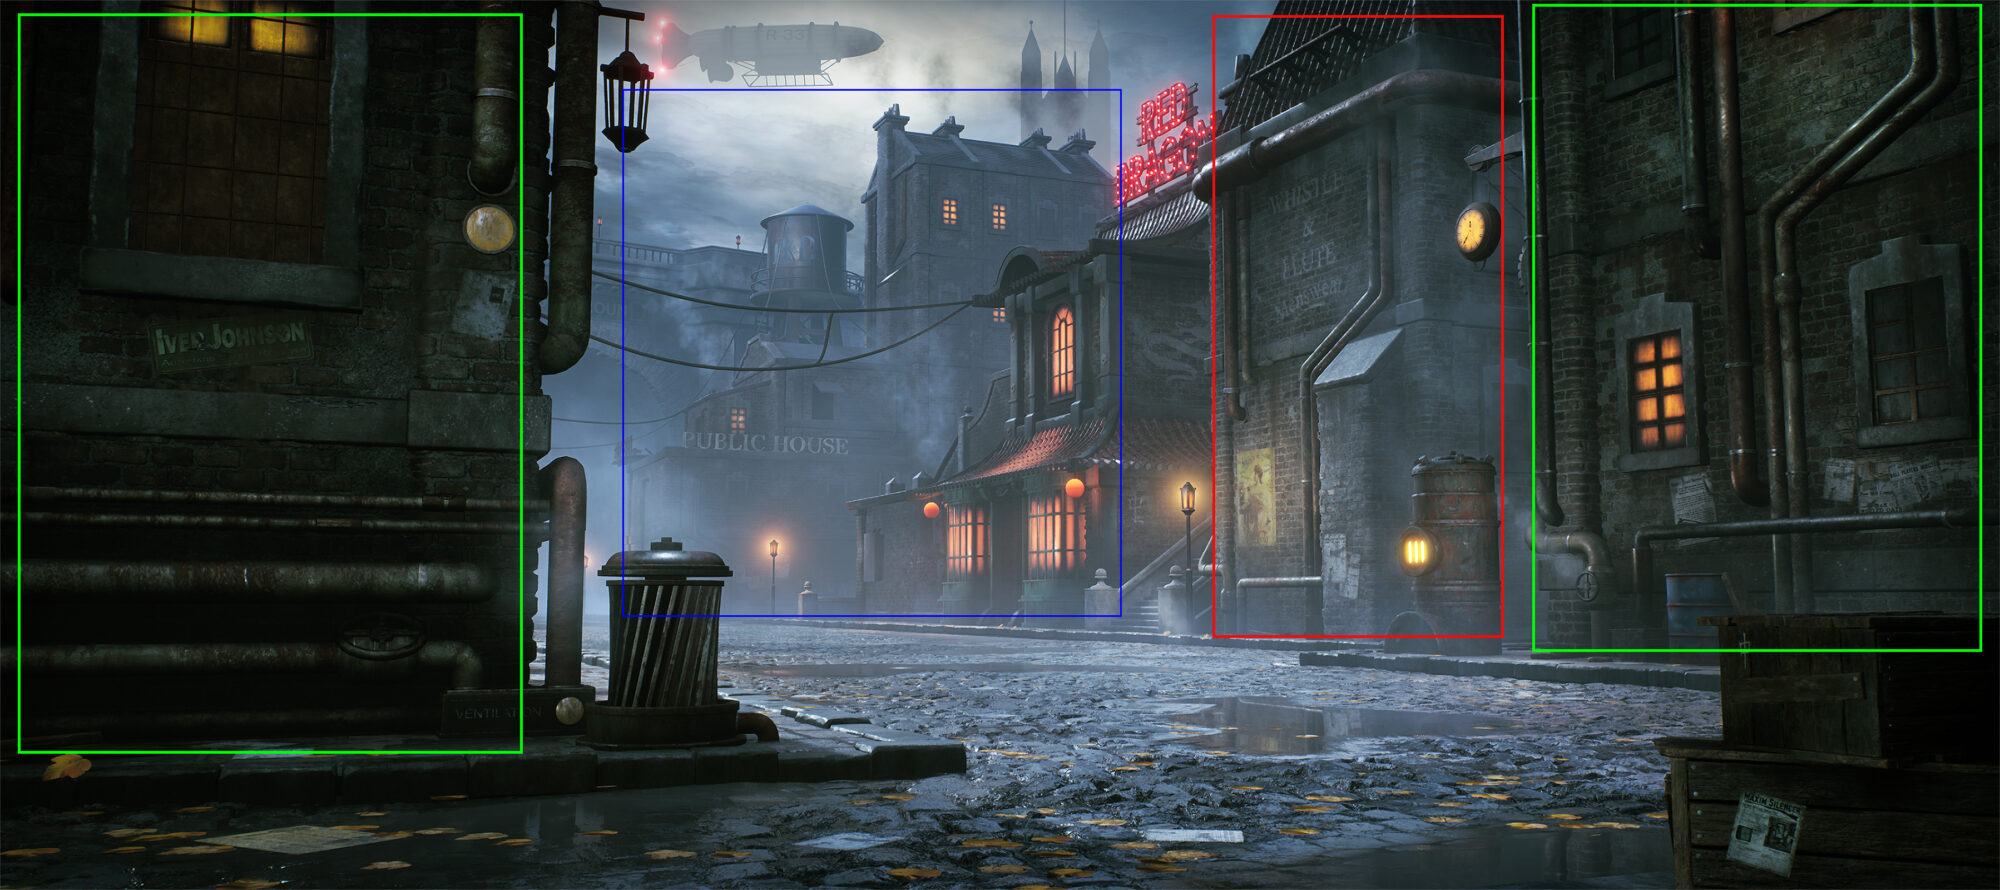
Also, one of my main goals was to get as close as I could to the concept. I wanted to achieve a similar look as if I was working on a production. I knew that the mainframe would, as usually concept artists have really good knowledge of framing and composition.
Blockout & Modelling
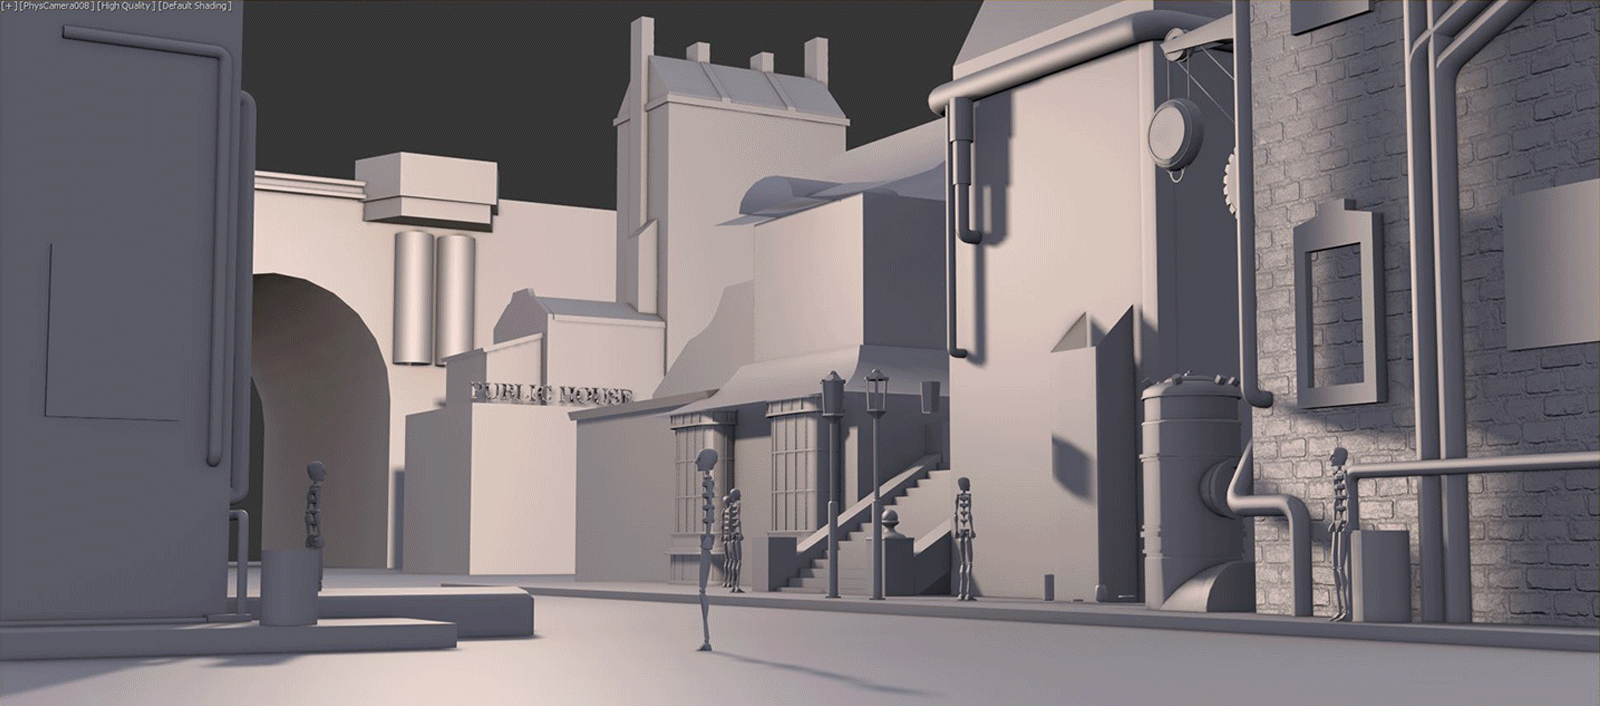
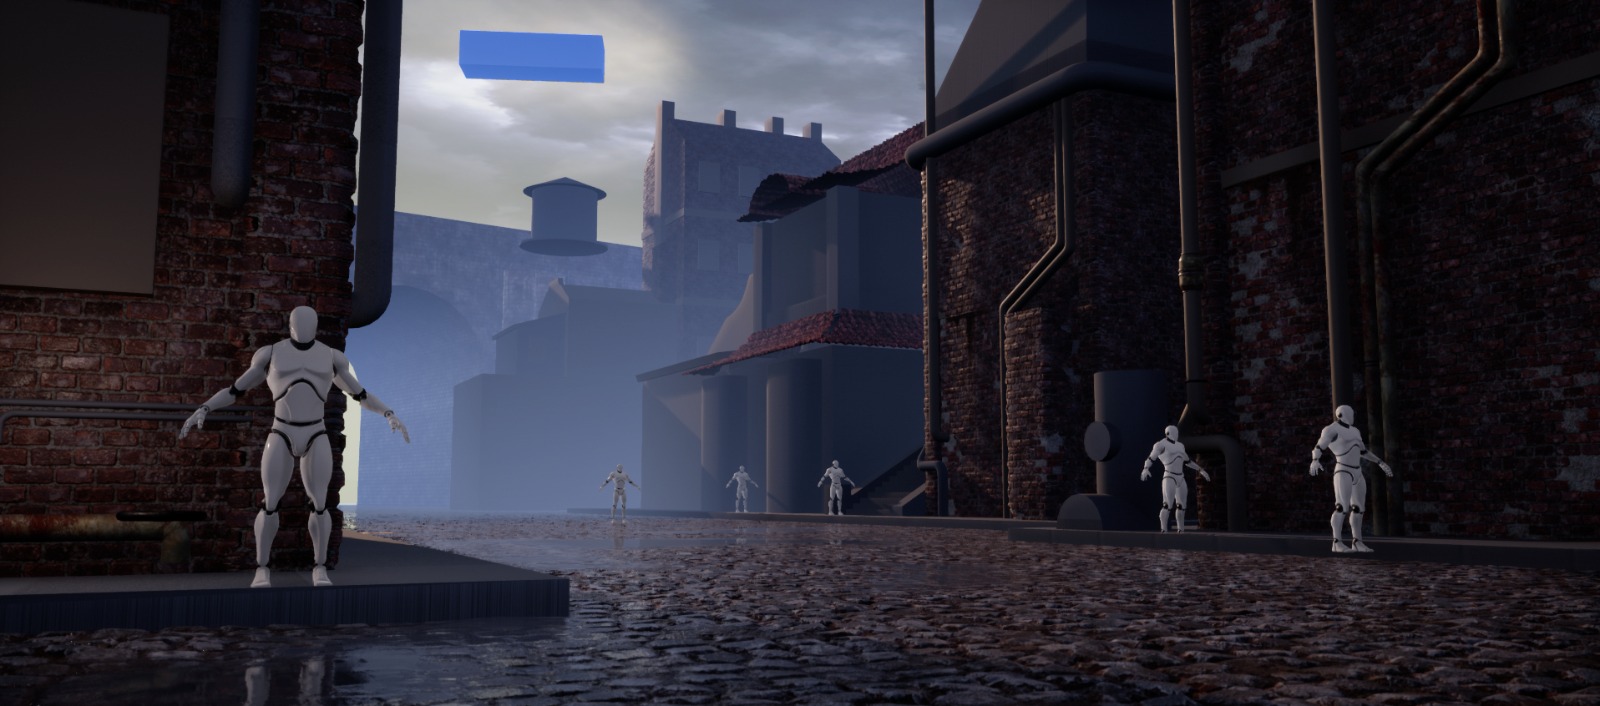
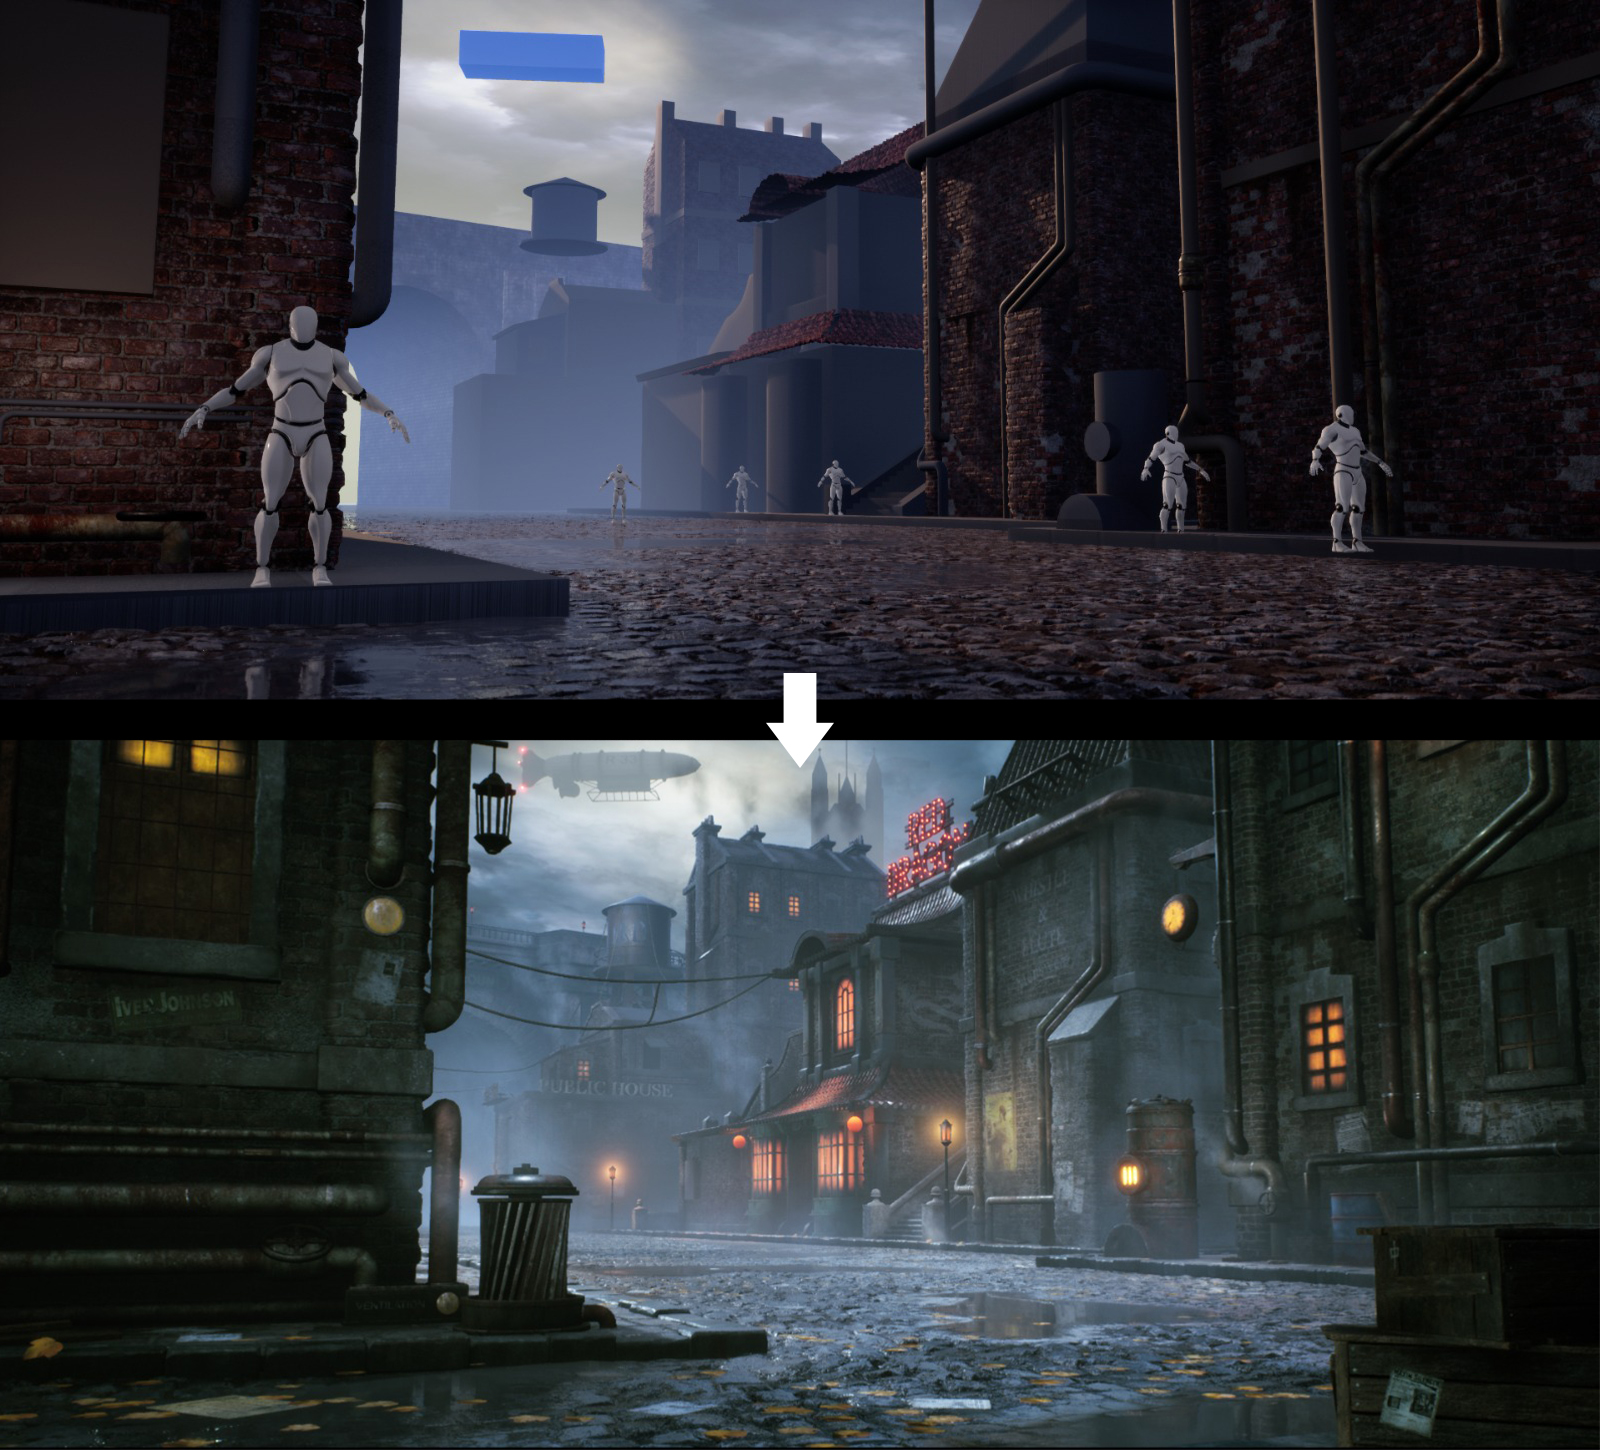
Usually, when I start working on such a big project like this, I prefer to start with a rough blocking scene. For me, it’s quite important to have more or less the same feeling in the blocking (focusing on the big shapes). With this, I could get a good idea of the scale of the building and the scale of the textures I would need to use. Also, in this first process is where I usually plan what parts of the scene are gonna be tileable, trims, or baked objects.
I created the first modules of the buildings, and I was able to export them to the UE4 scene, so I can start adding some details in the engine.
I always do place some characters around the scene, so I am sure I am working with the right scale. Also, helps me a lot to get the idea of the perspective, or if I have to change the size of some modules in order to have a realistic scale (and at the same time, fit the composition of the concept).
Although the lighting usually does not fit at the beginning in my case, I did not worry too much about that, I usually work that part with the post process also, more at the end of the project.
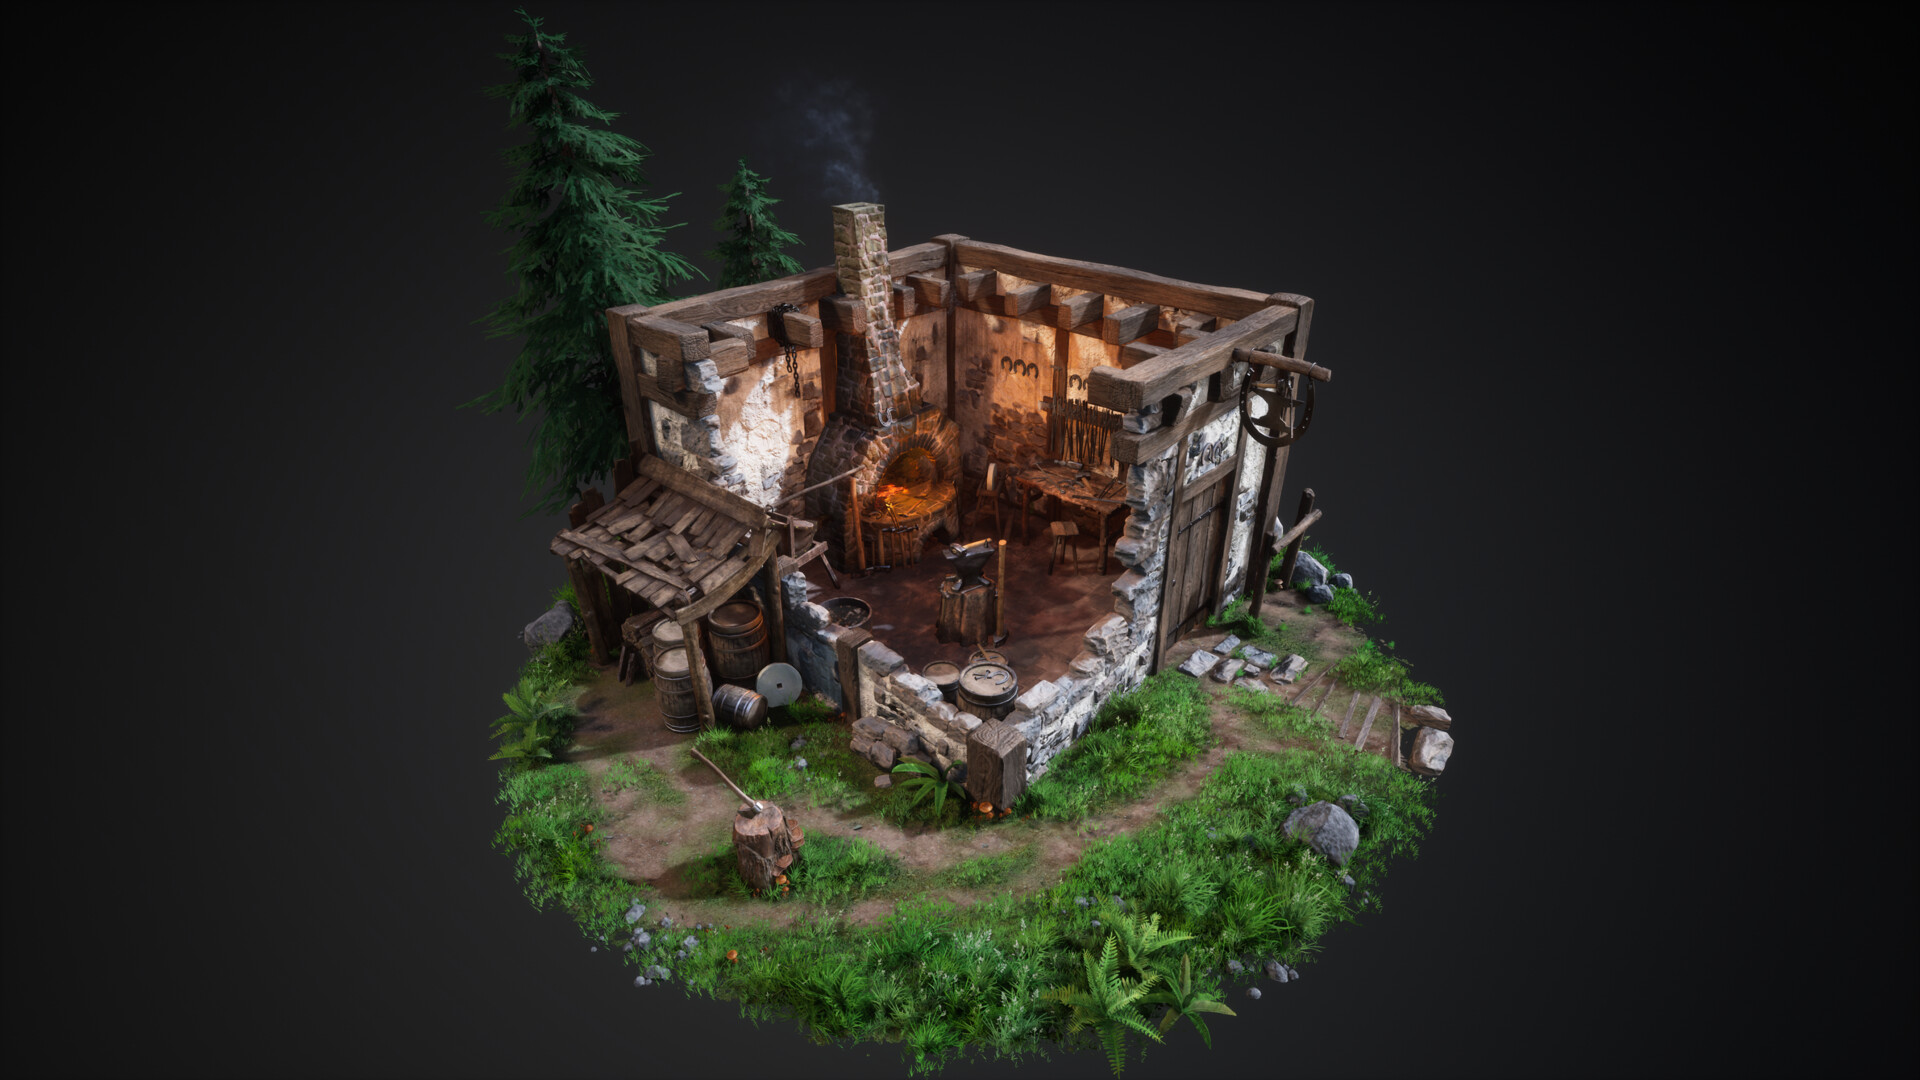
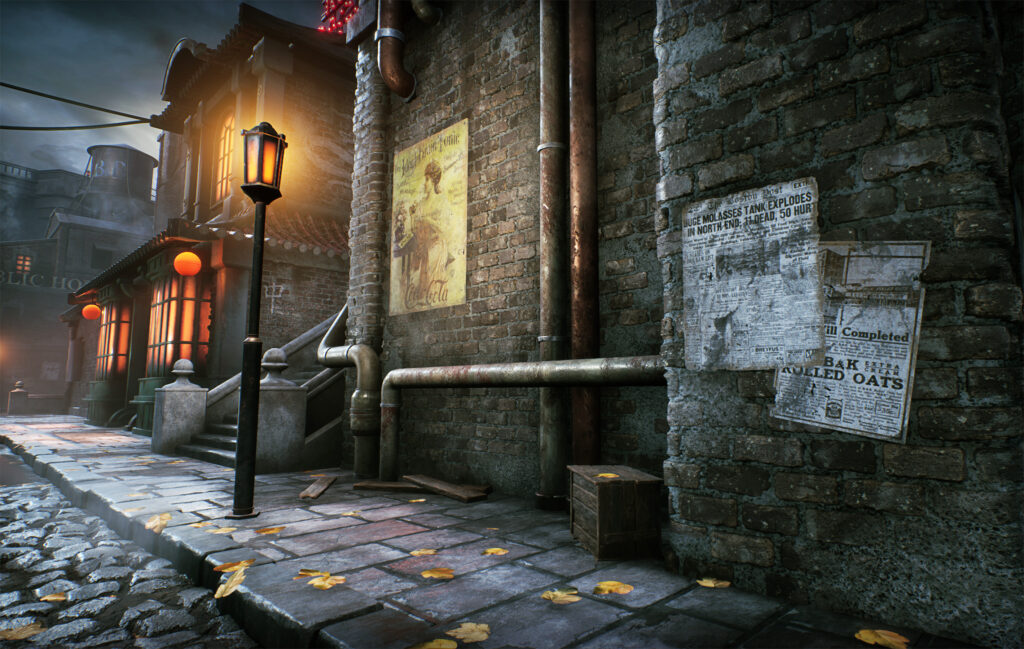
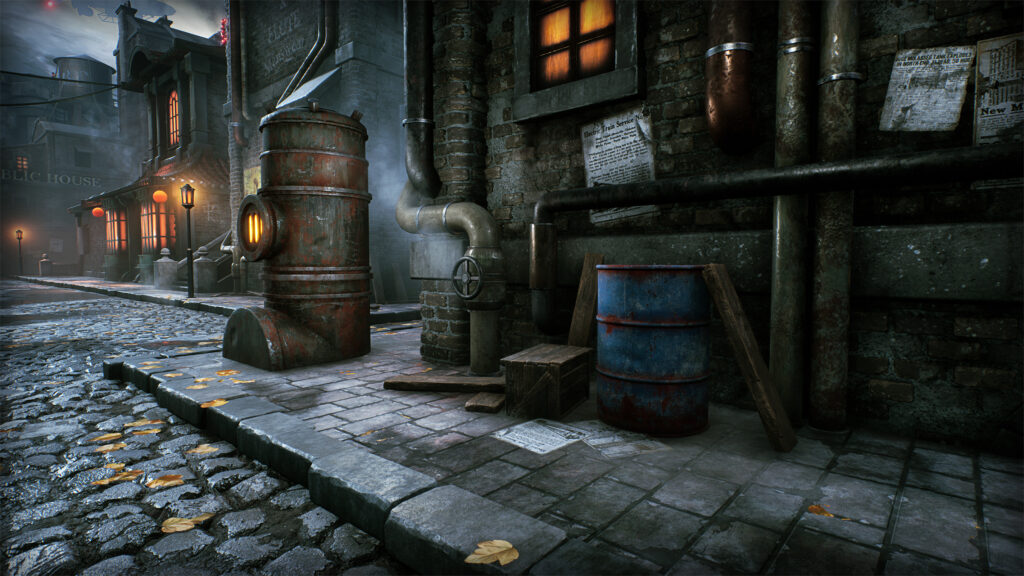
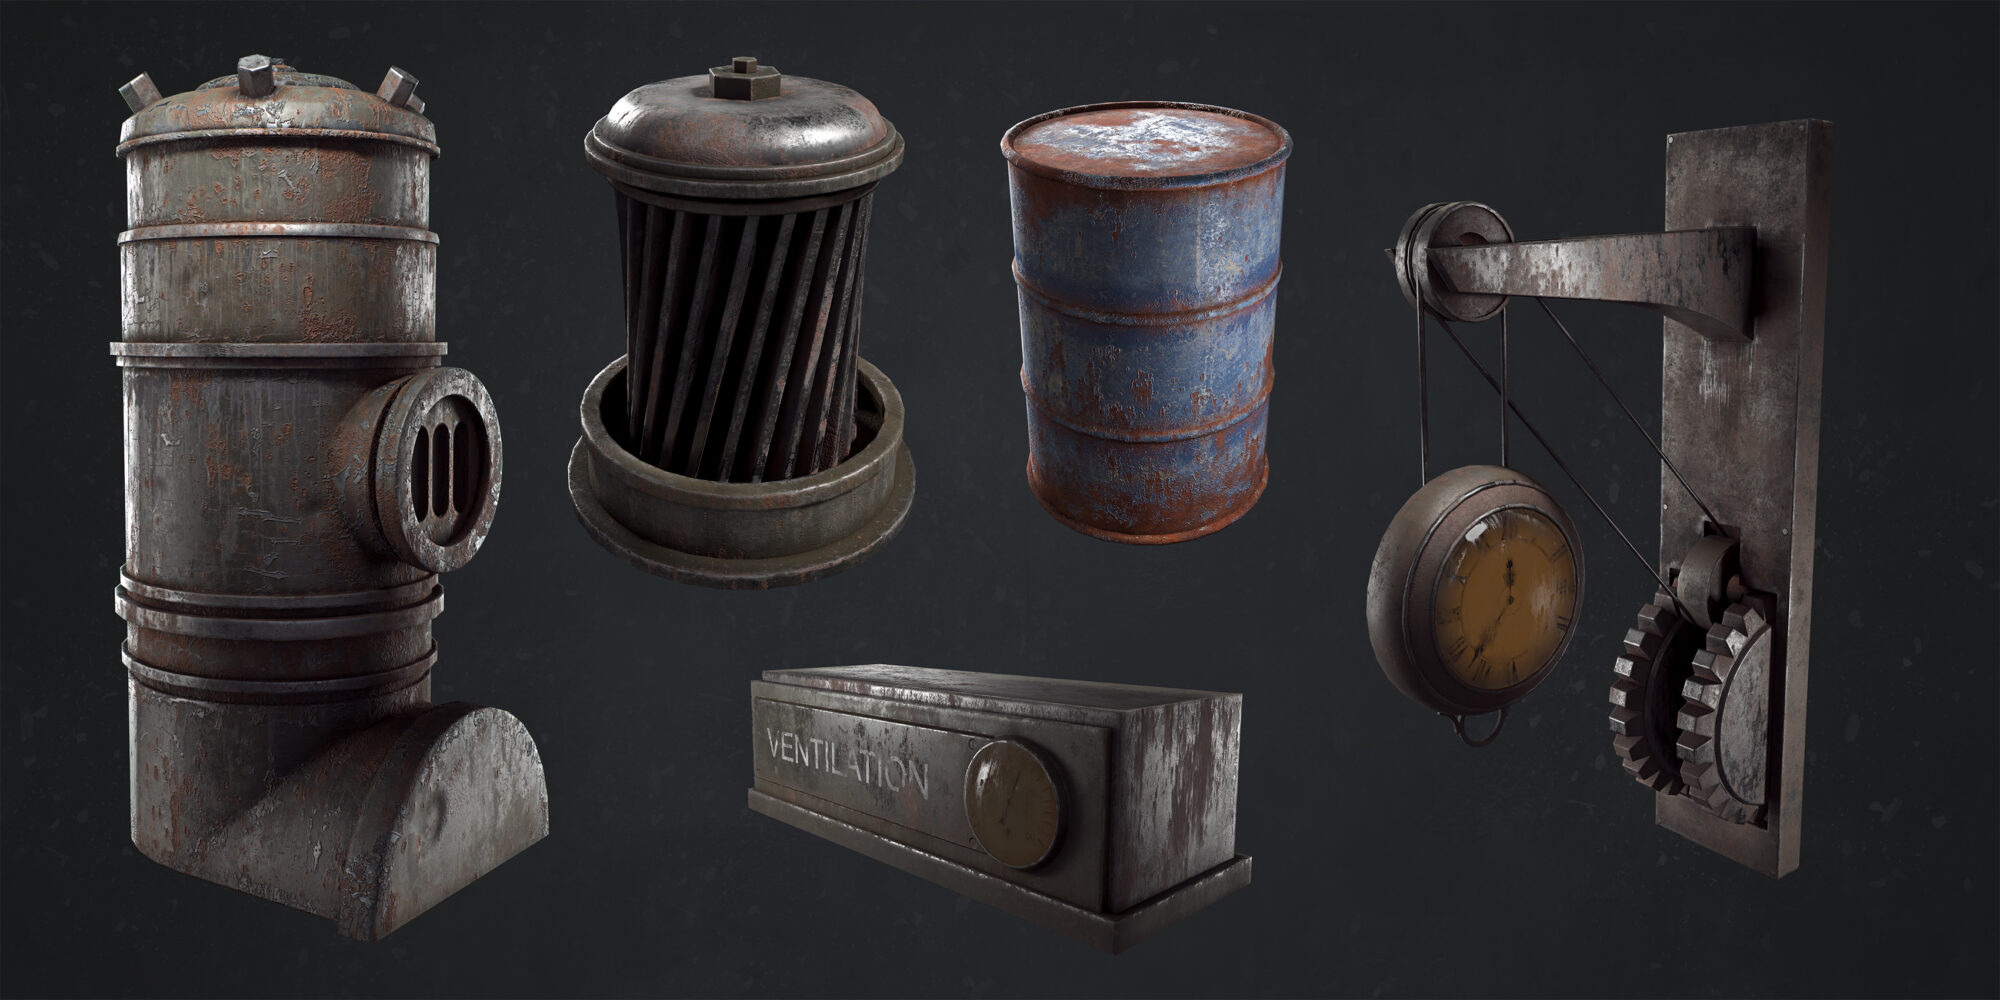
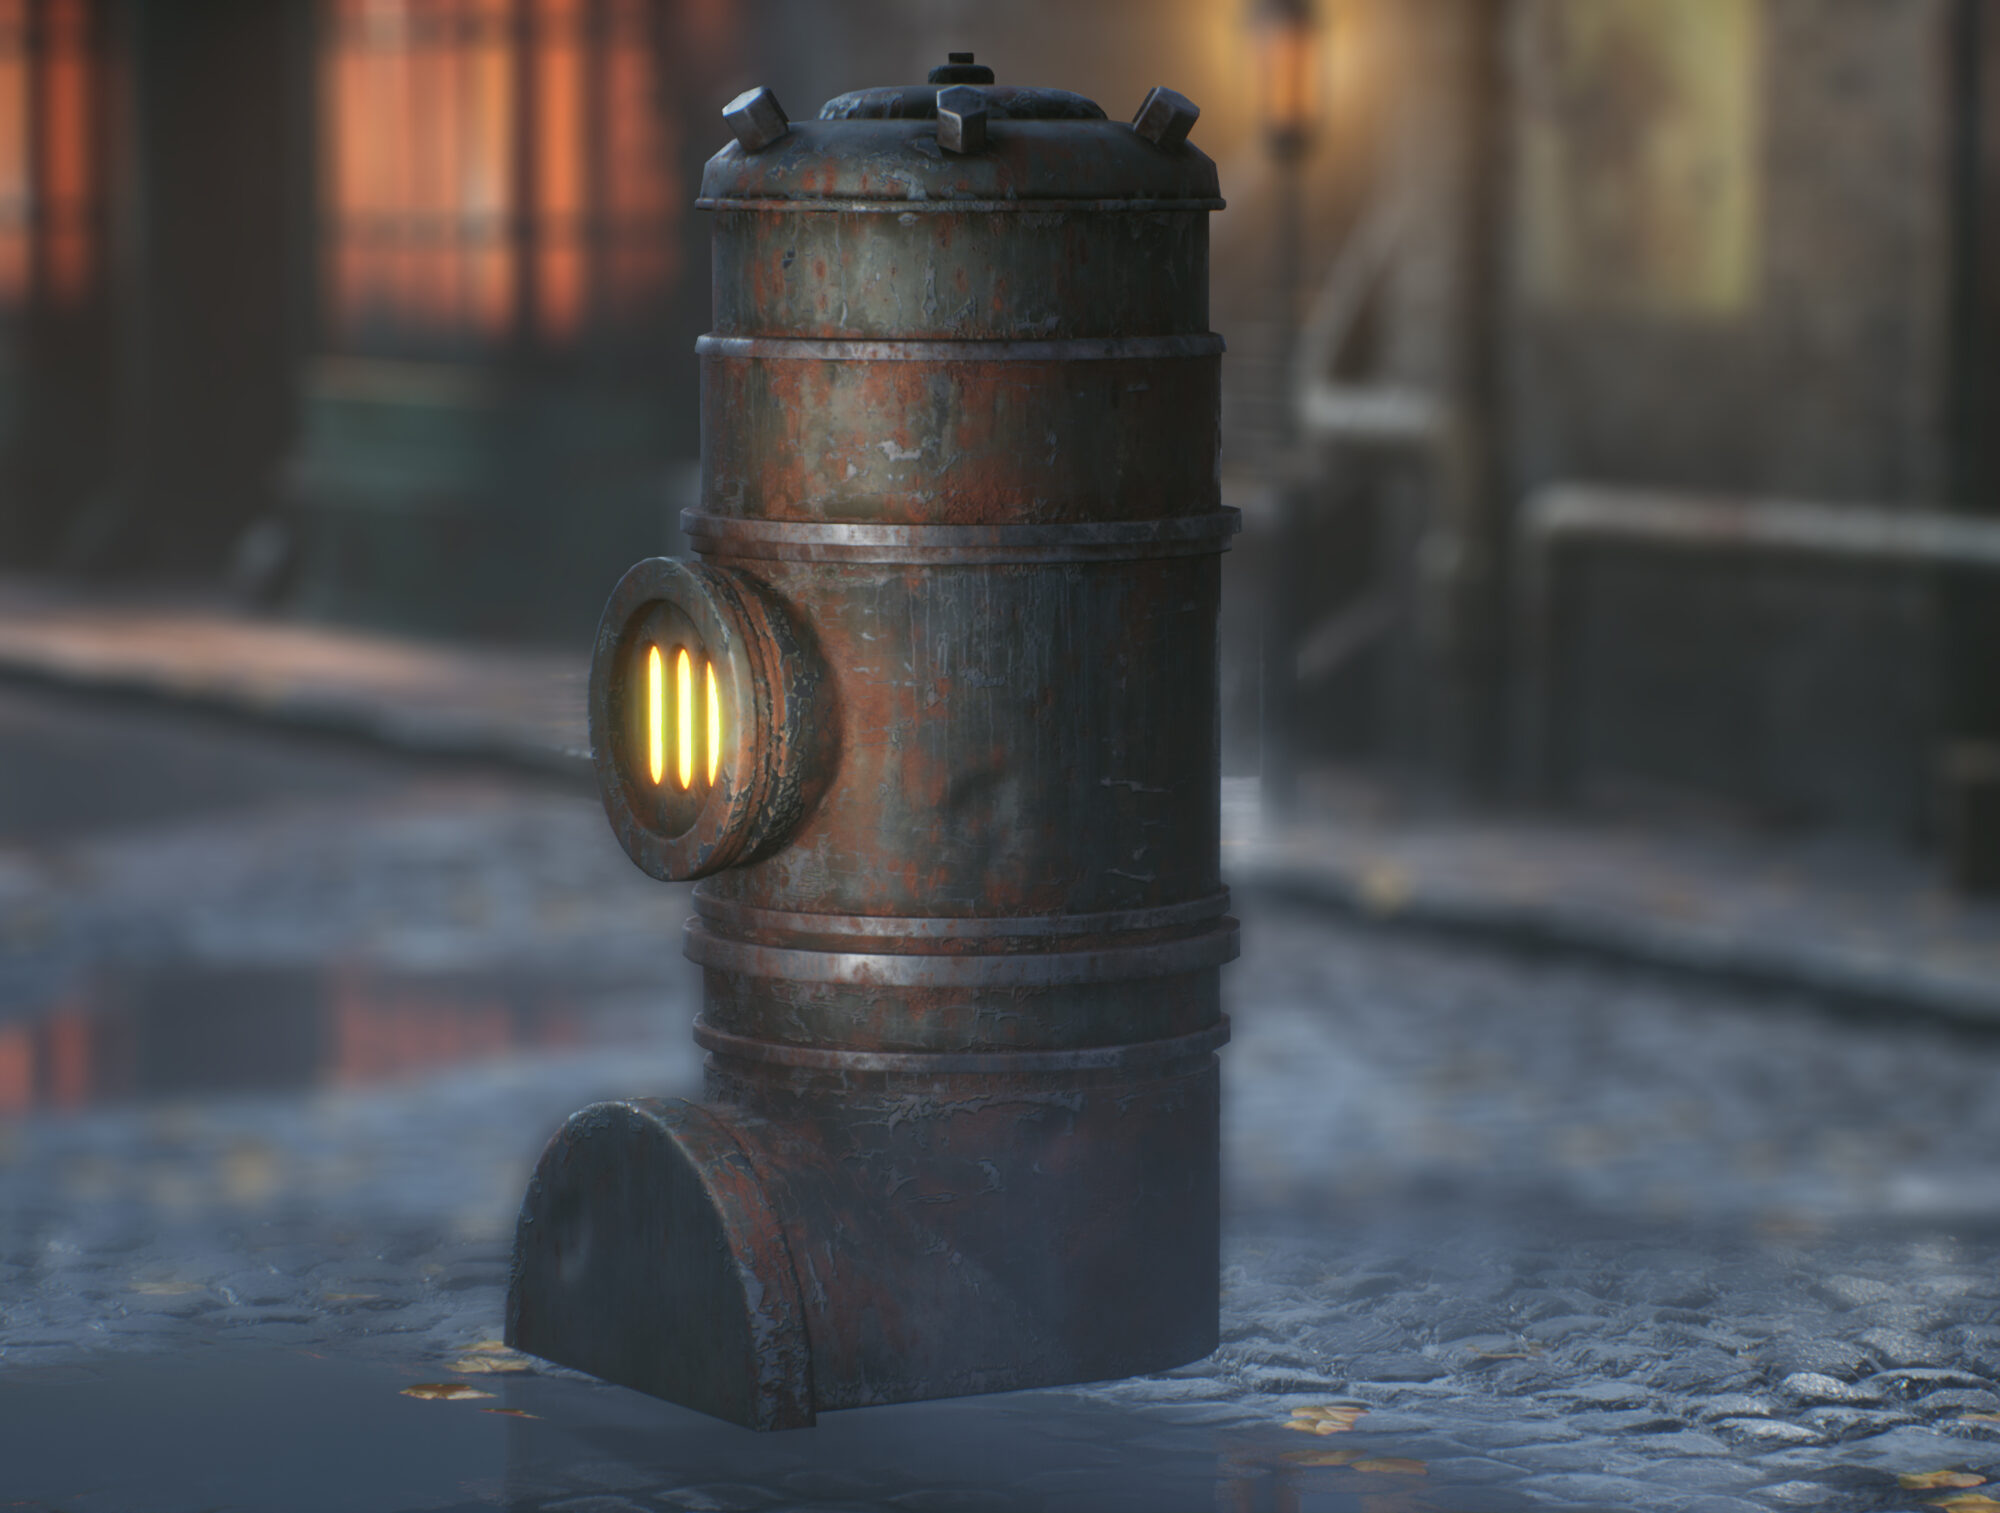
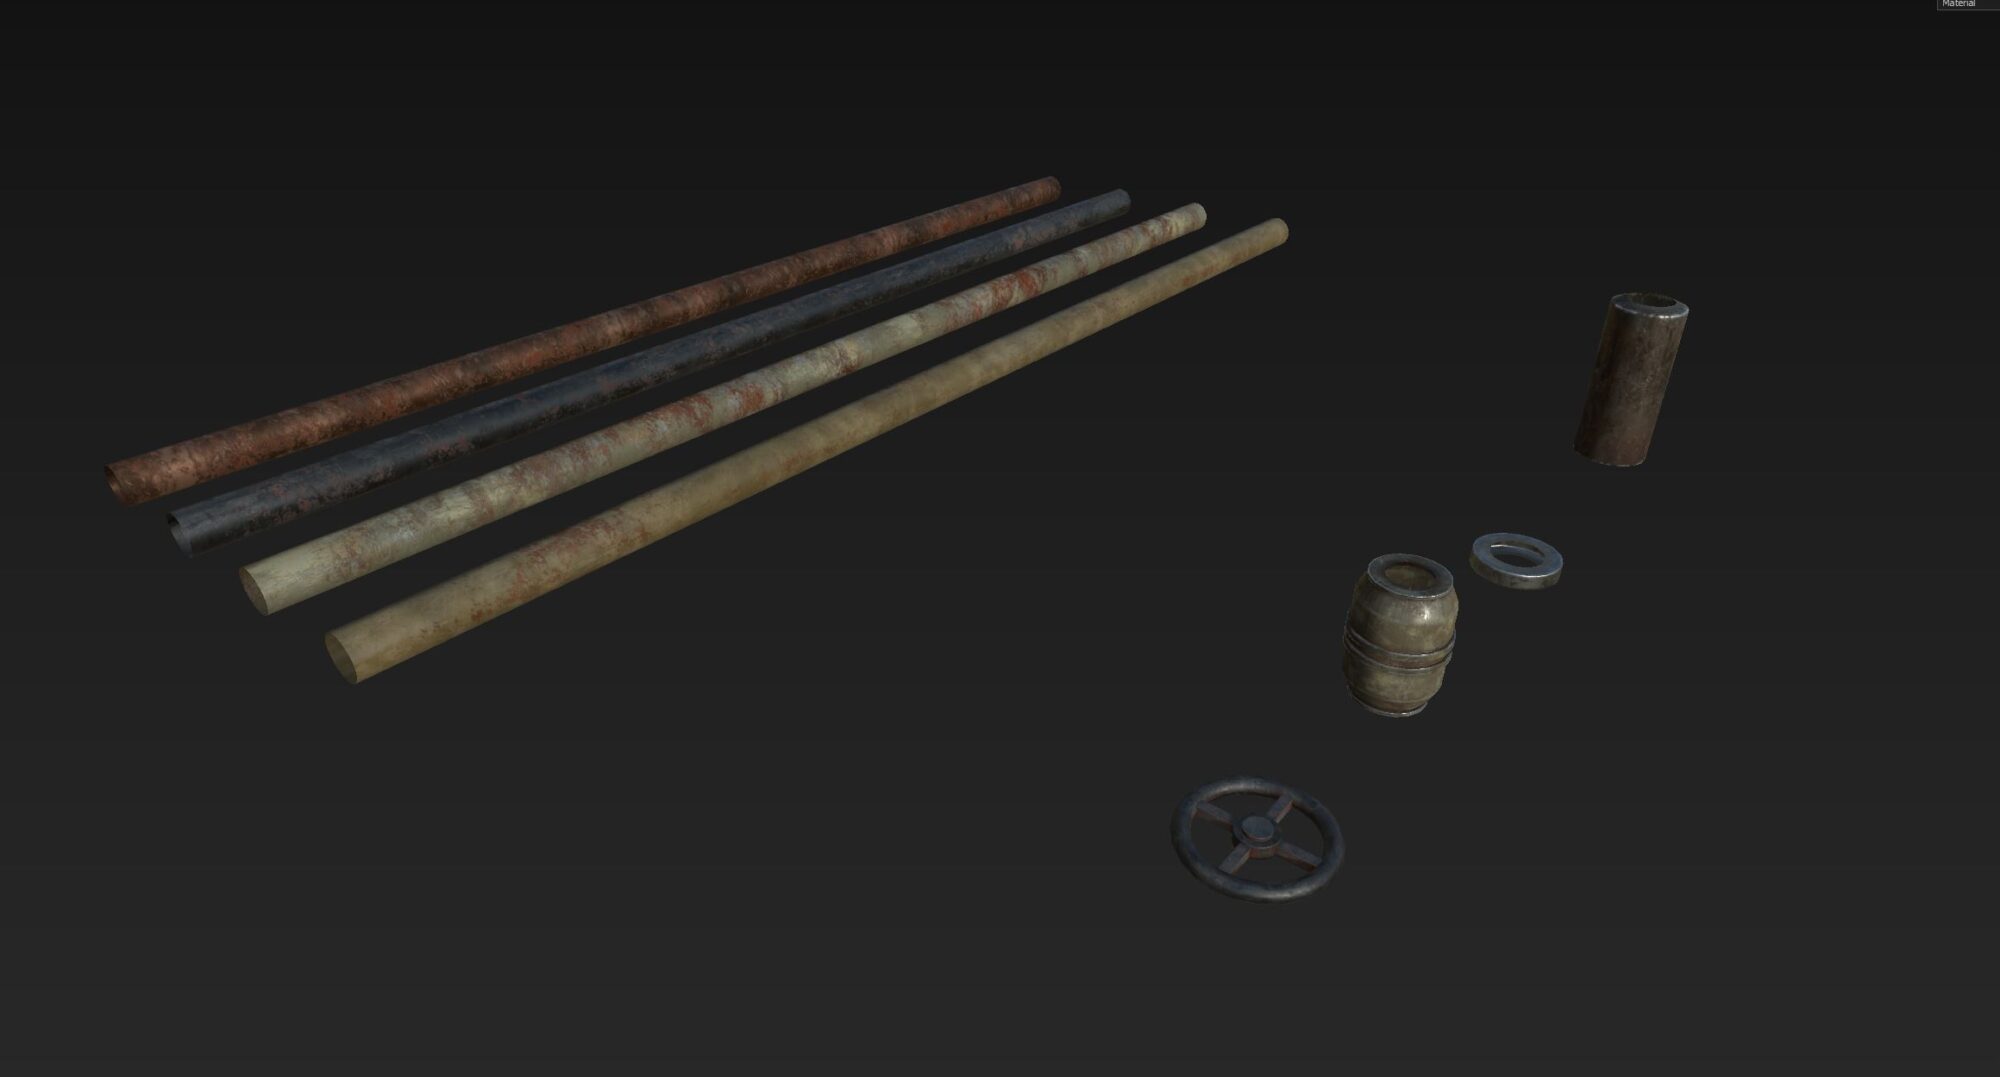
Regarding the assets in the scene, there were a couple of them for I used a custom texture. I decided to do this depending on the amount of detail that the asset may have, or the importance that could have in the scene. Our eyes probably would go to several parts of the environment rather than other ones, and those ones are where I would try to have more detail.
In the picture above are some of the main assets in which I used a baked texture. I focused on giving all of them a rusty kind of look, full of dirt. In my mind, those streets would not be very clean; a lot of industrial dust particles would be accumulated in the air, making the entire scene covered in dark steam.
The assets all use the same pipeline for going from scratch to the final step. I used 3Ds Max for modeling, Marmoset Toolbag for baking (and also the renders above), and Substance Painter for the texture.
Usually, when I integrate an asset in Unreal Engine, there are some properties that need to be tweaked in order to get the same look that I have in Substance Painter.
Although they don’t use exactly the same materials, I tried to keep the same color vibe, quite desaturated, blending between some metals and some rust.
In the case of some of the assets, I added a little emissive effect, to generate interesting points of light in the scene, and also to keep the same style as the concept.
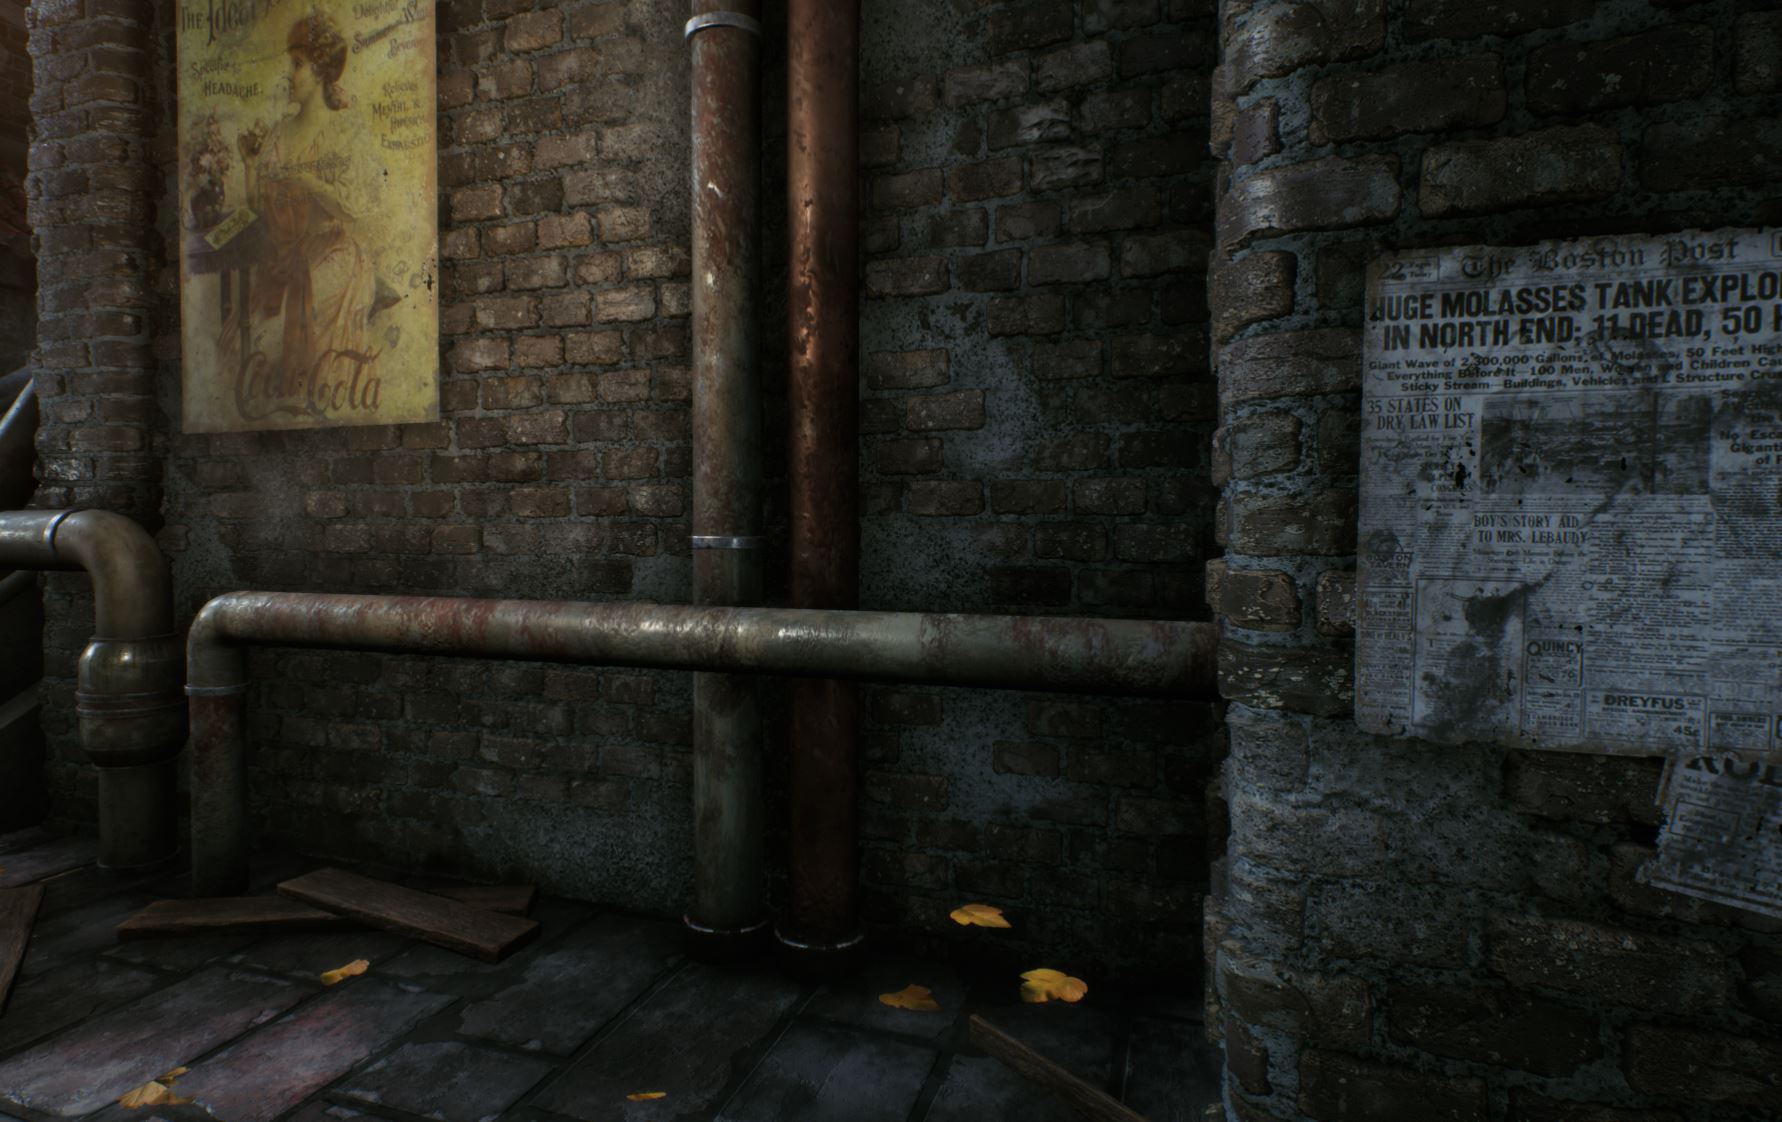
Another element I decided to use a mix between bake texture and tileable trim is the pipes.
I created a set of elements that I would use several times in the whole scene to dress it. These would be handles and other assets that go together with the pipe, and these would use a baked texture. Regarding the pipes themselves, I created a tileable trim, all in the same texture, so I would be able to vary between the different textures just by moving the UVs (this process I did it directly inside the Engine).
Materials and Tileable textures
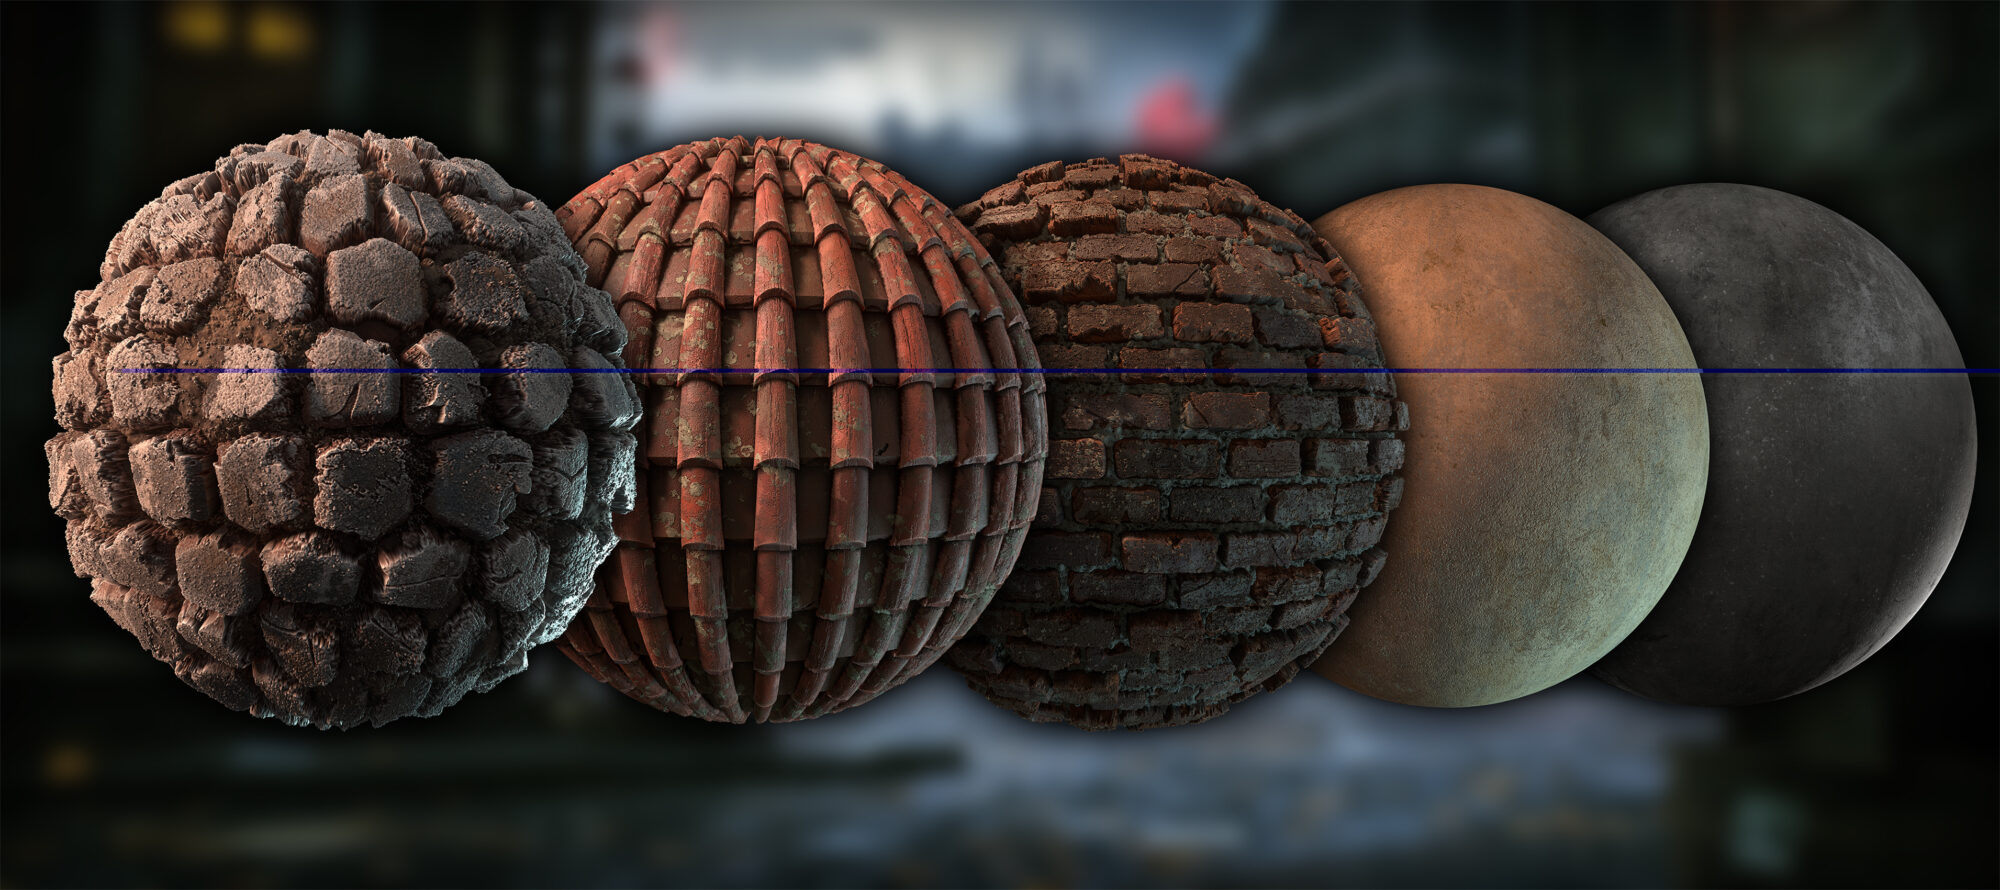
In order to create tileable texture for environments, I usually use either Substance Designer or Zbrush, depending on what I may need. For the materials developed in this scene, I mostly used Substance Designer.
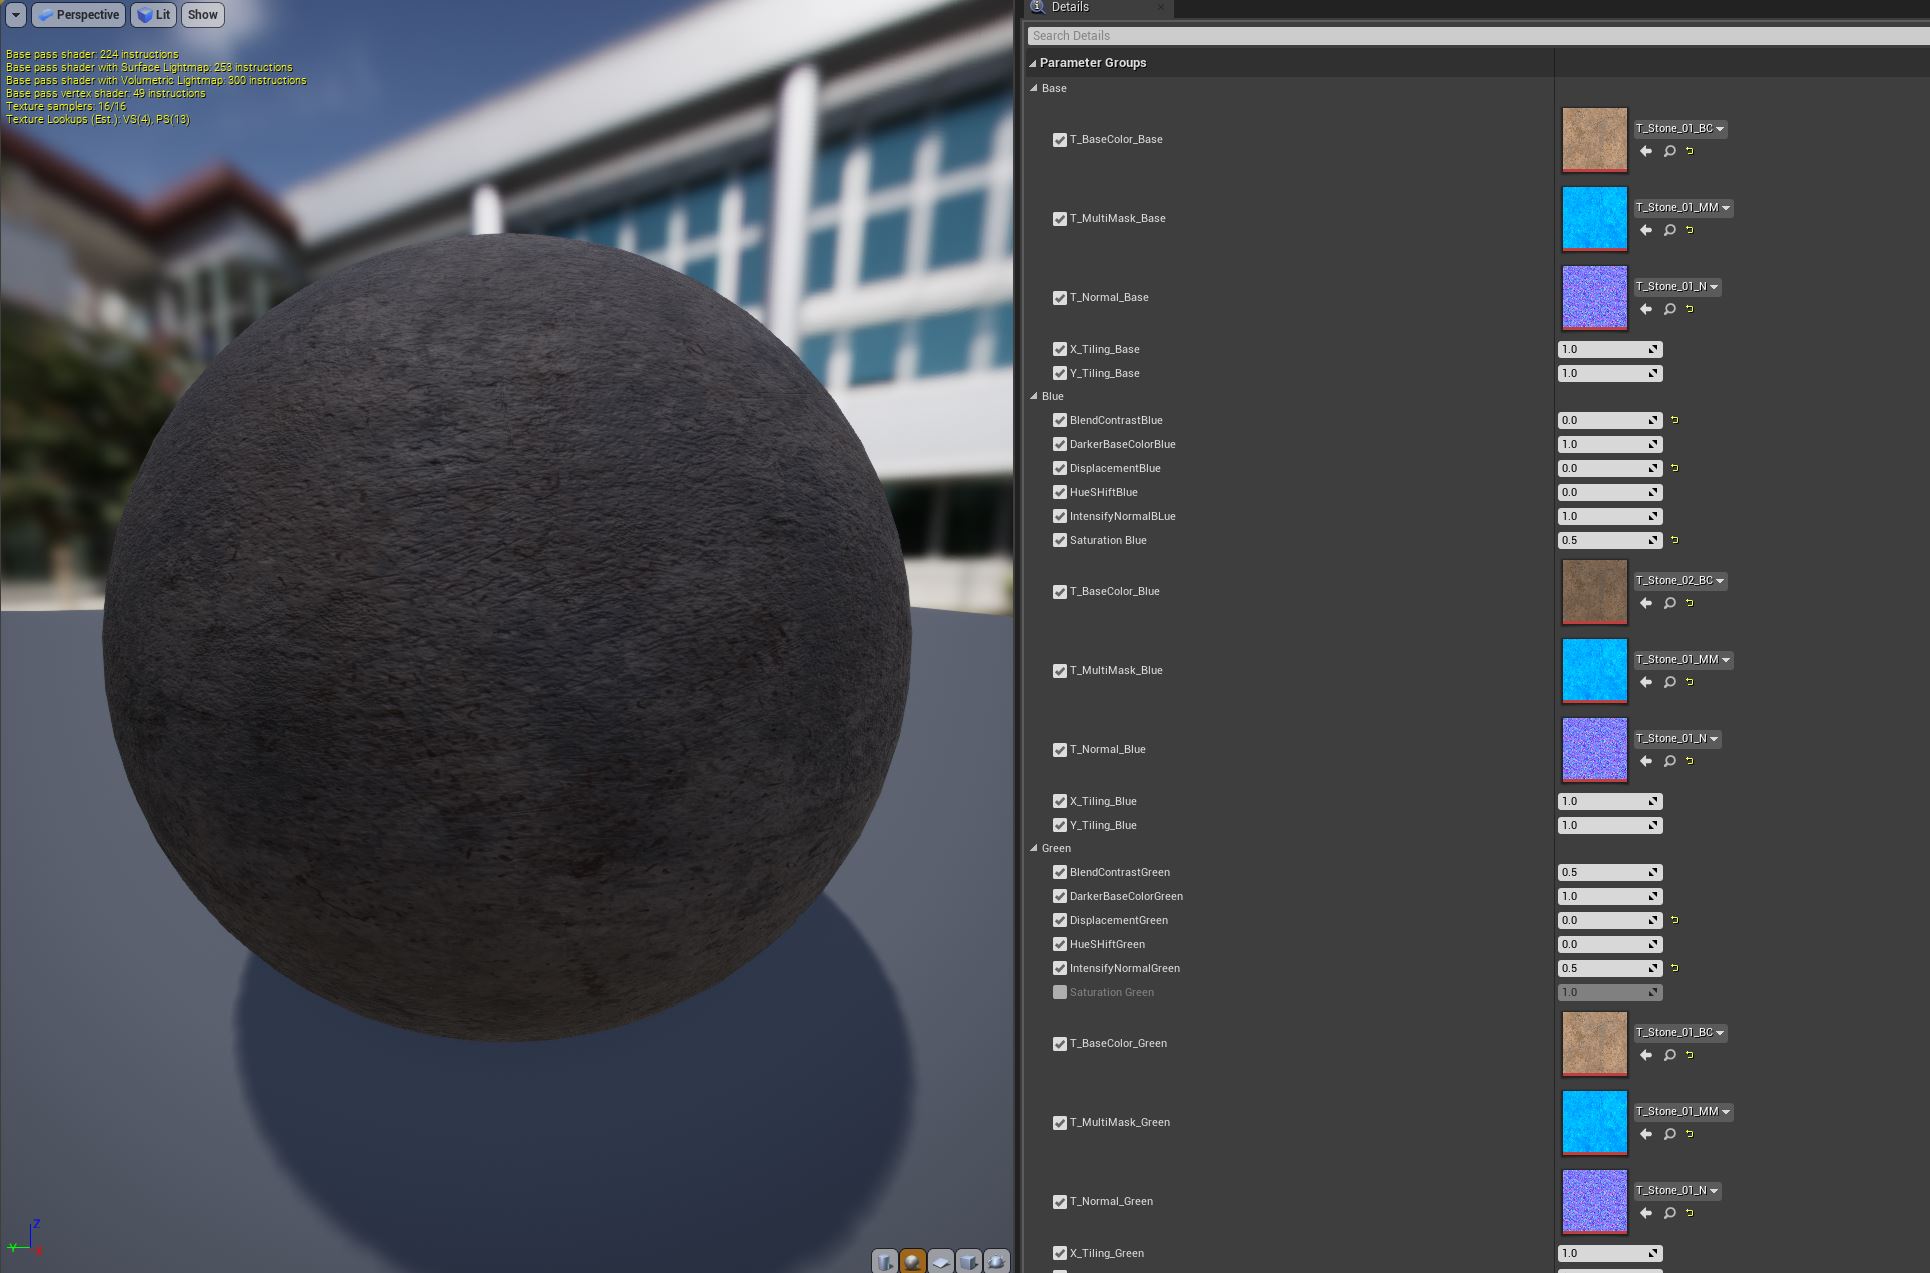
For almost all the materials, I created a Master Material that would be the main one in the hierarchy, and I would use the instances for each material, depending on the needs.
I like to create instances of the material with plenty of properties, in order for me to really easy to tweak values, such us tiling (sometimes different on each axis), the intensity of the normal, roughness value, some color variations…It’s really easy this way to create quick variations of materials using the same source of textures, being able to create varied interesting surfaces, without having to go to external software, just reusing the textures you have inside the engine already.
Also, since most of the materials in the scene would be “child” from the same master material, I don’t use extra memory for calling inside the engine other master material when the only thing I need is to change the texture slots.
I studied the scene; to be sure of how many materials would I need for the whole composition. Some of them also needed to blend with other materials to get the desired effect.
For example, for the bricks, I made also a concrete material that I would blend together, so I could make the effect or parts that were in a worse state. This would help me also to “break” the tiling, and would be a way more interesting surface.
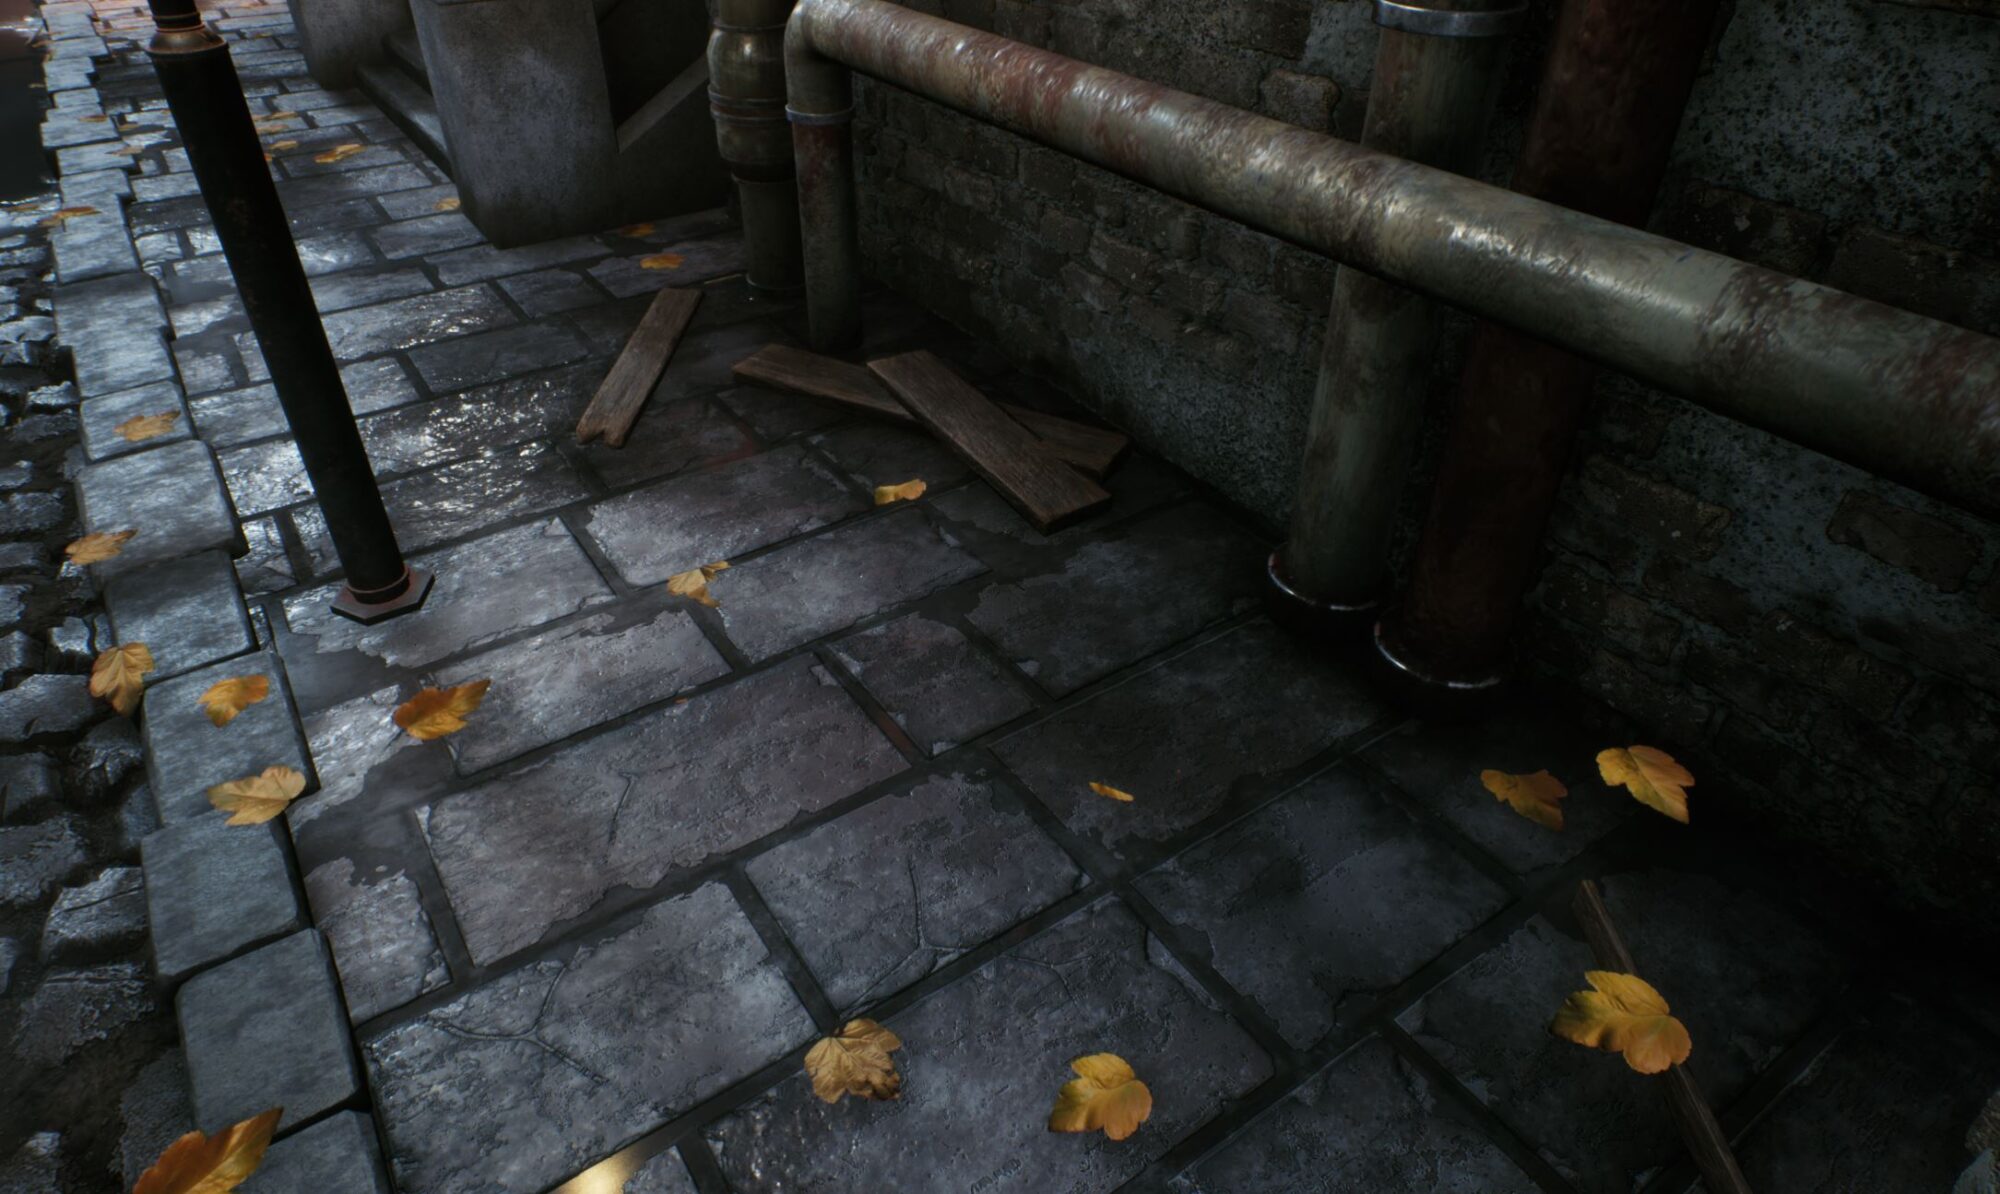
For the storytelling of the building, I thought that it could be cool to make more damaged parts on those surfaces that were closer to the pipes. The pipes could damage the facade of the building.
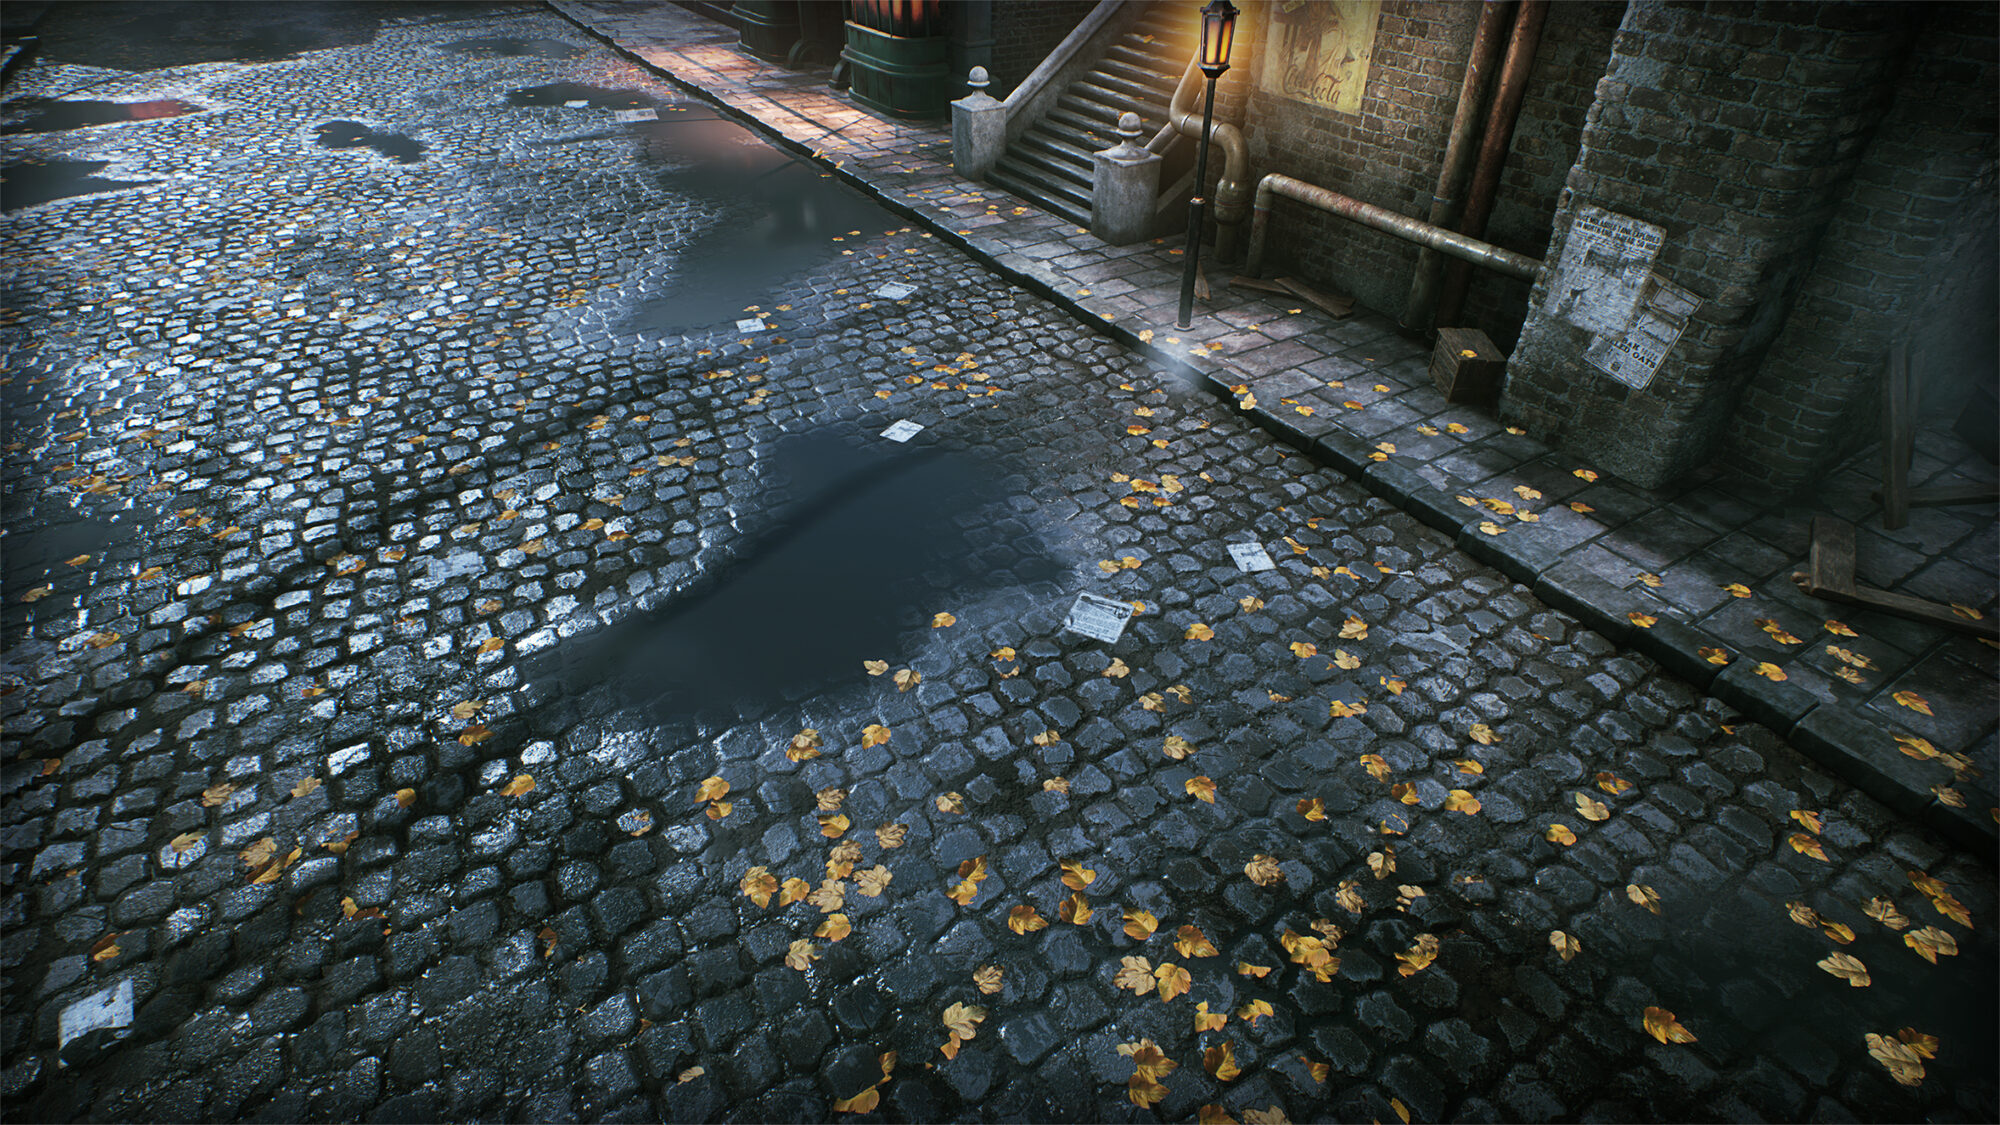
Another example of storytelling would be the little puddles that are on the road. I just reused the same texture but with different values, not only in the roughness but also in the diffuse.
The road is not uniform, so the water could accumulate more in certain parts, breaking that repetitive tiling, and making the roadway more realistic.
For the cobblestone floor, the terrain/landscape tool of Unreal comes really handy. I created a mix of surfaces, between several variations of the cobblestone itself blended with puddles. The puddles would add this layer of dirtiness, and also depending on the frame in which I would do the render, would add a nice reflection. When I made screenshots with the main directional light falling, the differences in the roughness of the floor would appear, contrasting a lot also with the puddles.
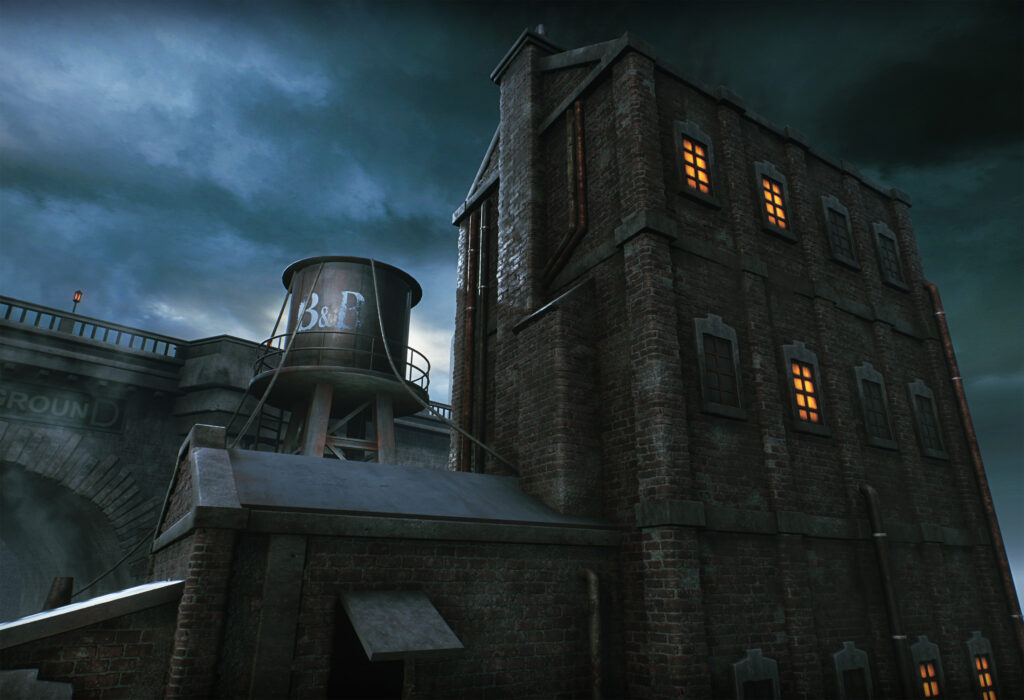
Even for the background parts, such as the walls of the bridge that can be seen in the distance, I used some material blending with the vertex color, to keep always a good layer of details.
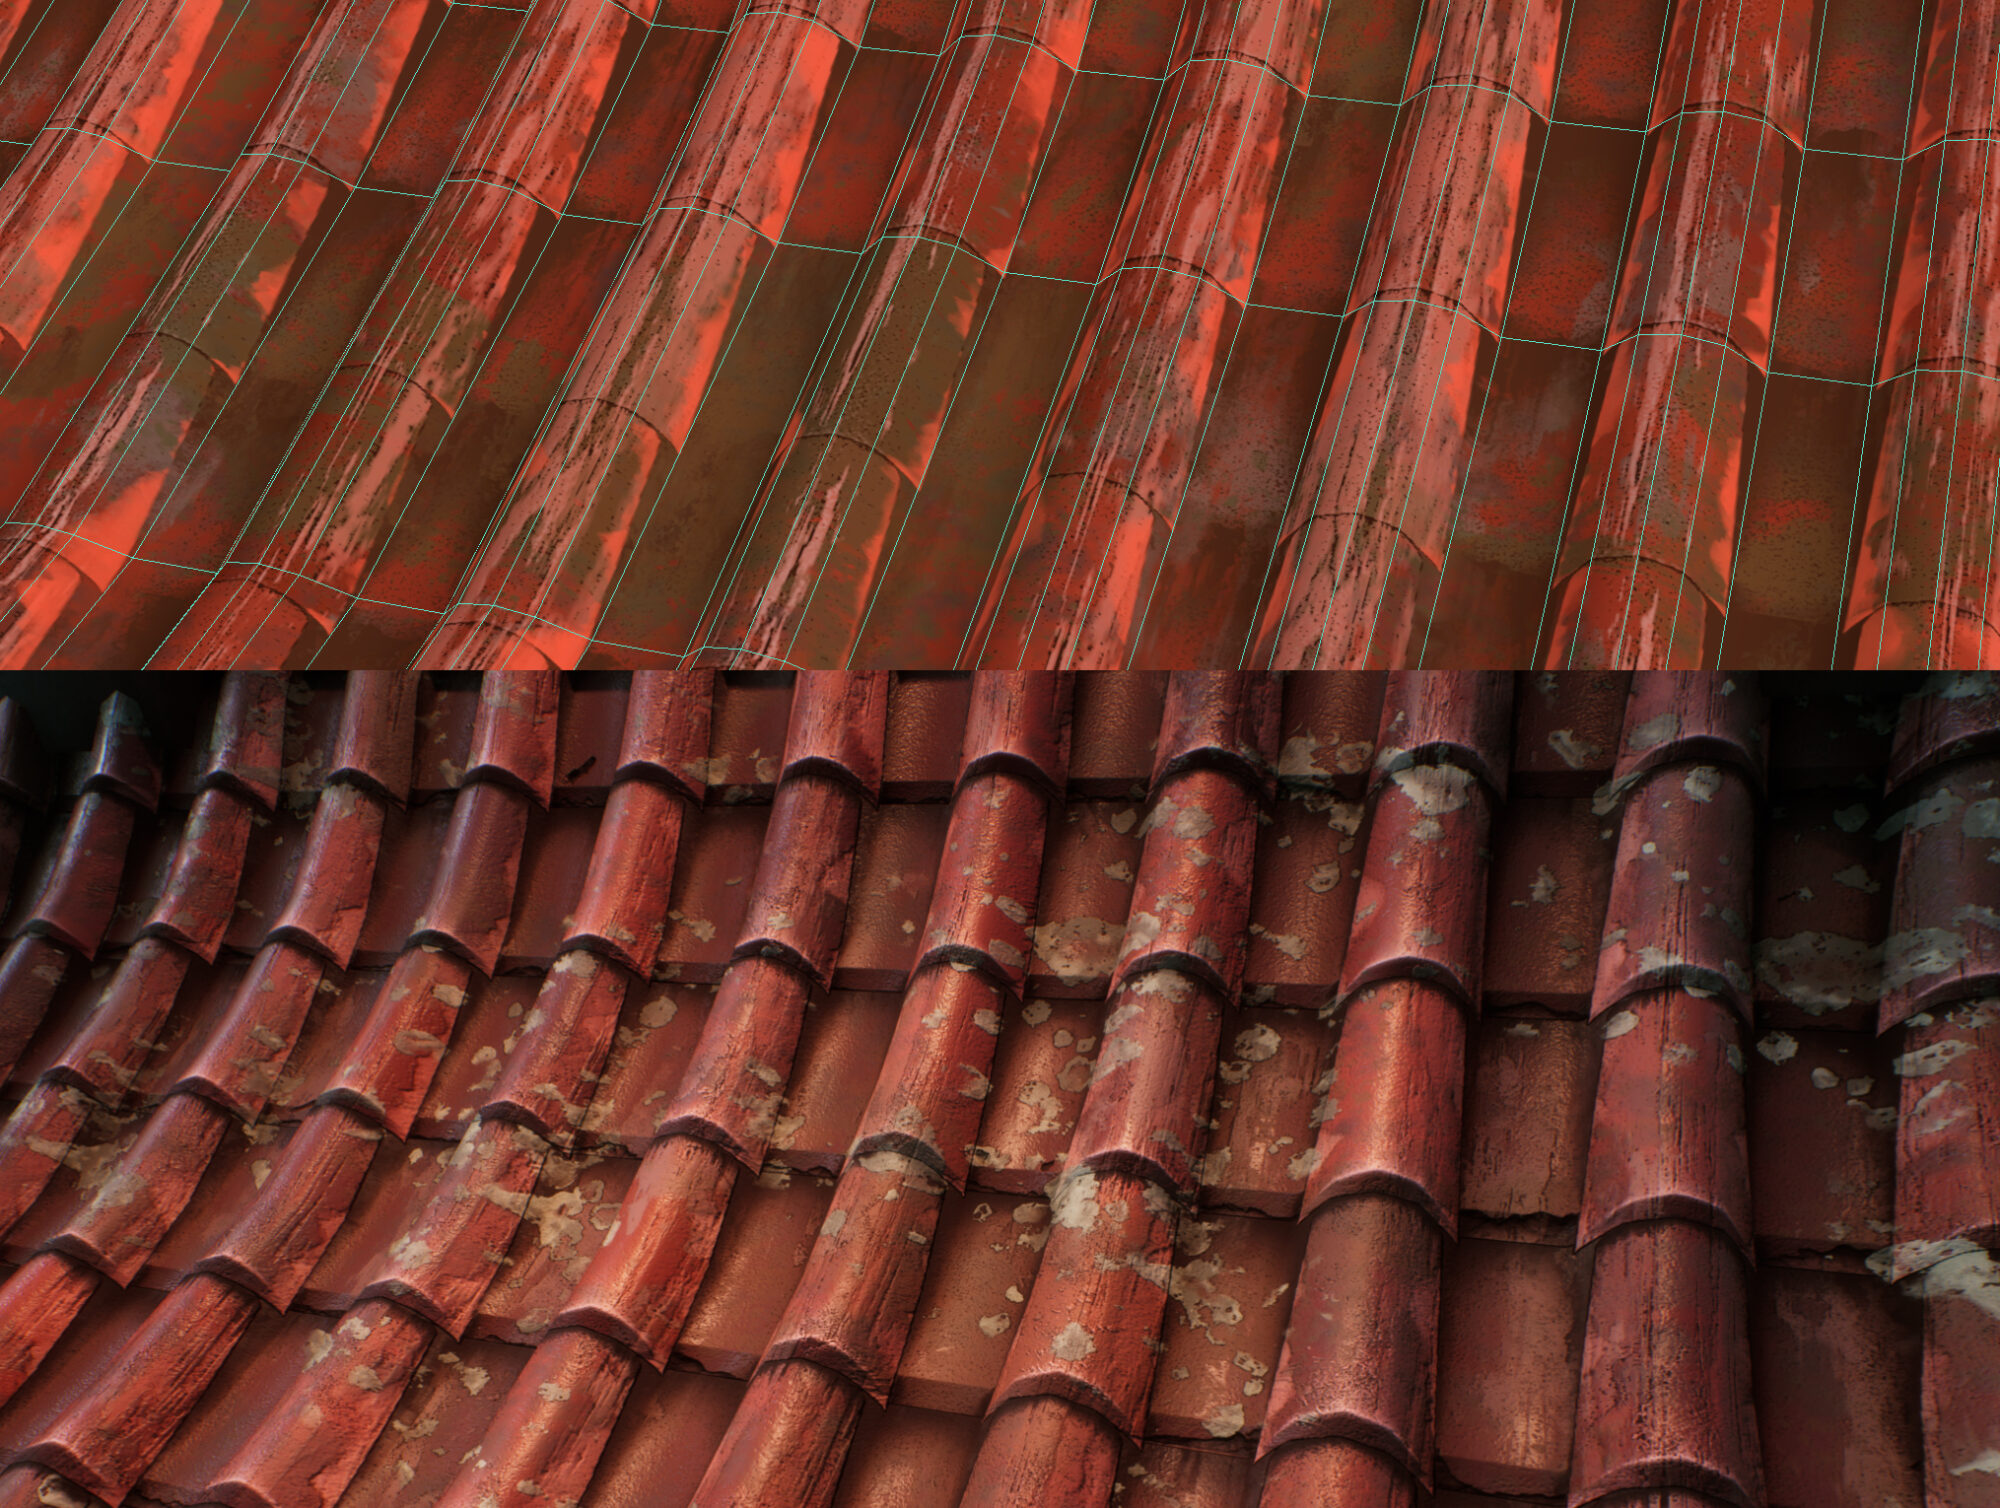
In the case of the red roof tiles, I decided to support the material with some geo-modeling. Although most of the scene was set with tessellation, after some testing, I decided that modeling myself would work much better in this case, and also, would be more “efficient”.
Since I was sure which was the tiling I needed in this material, I was able to add some loops in the geometry exactly where I wanted them in order to fit the texture inside the engine.
And, just like that, the shape of these roofs inside the engine would work perfectly.
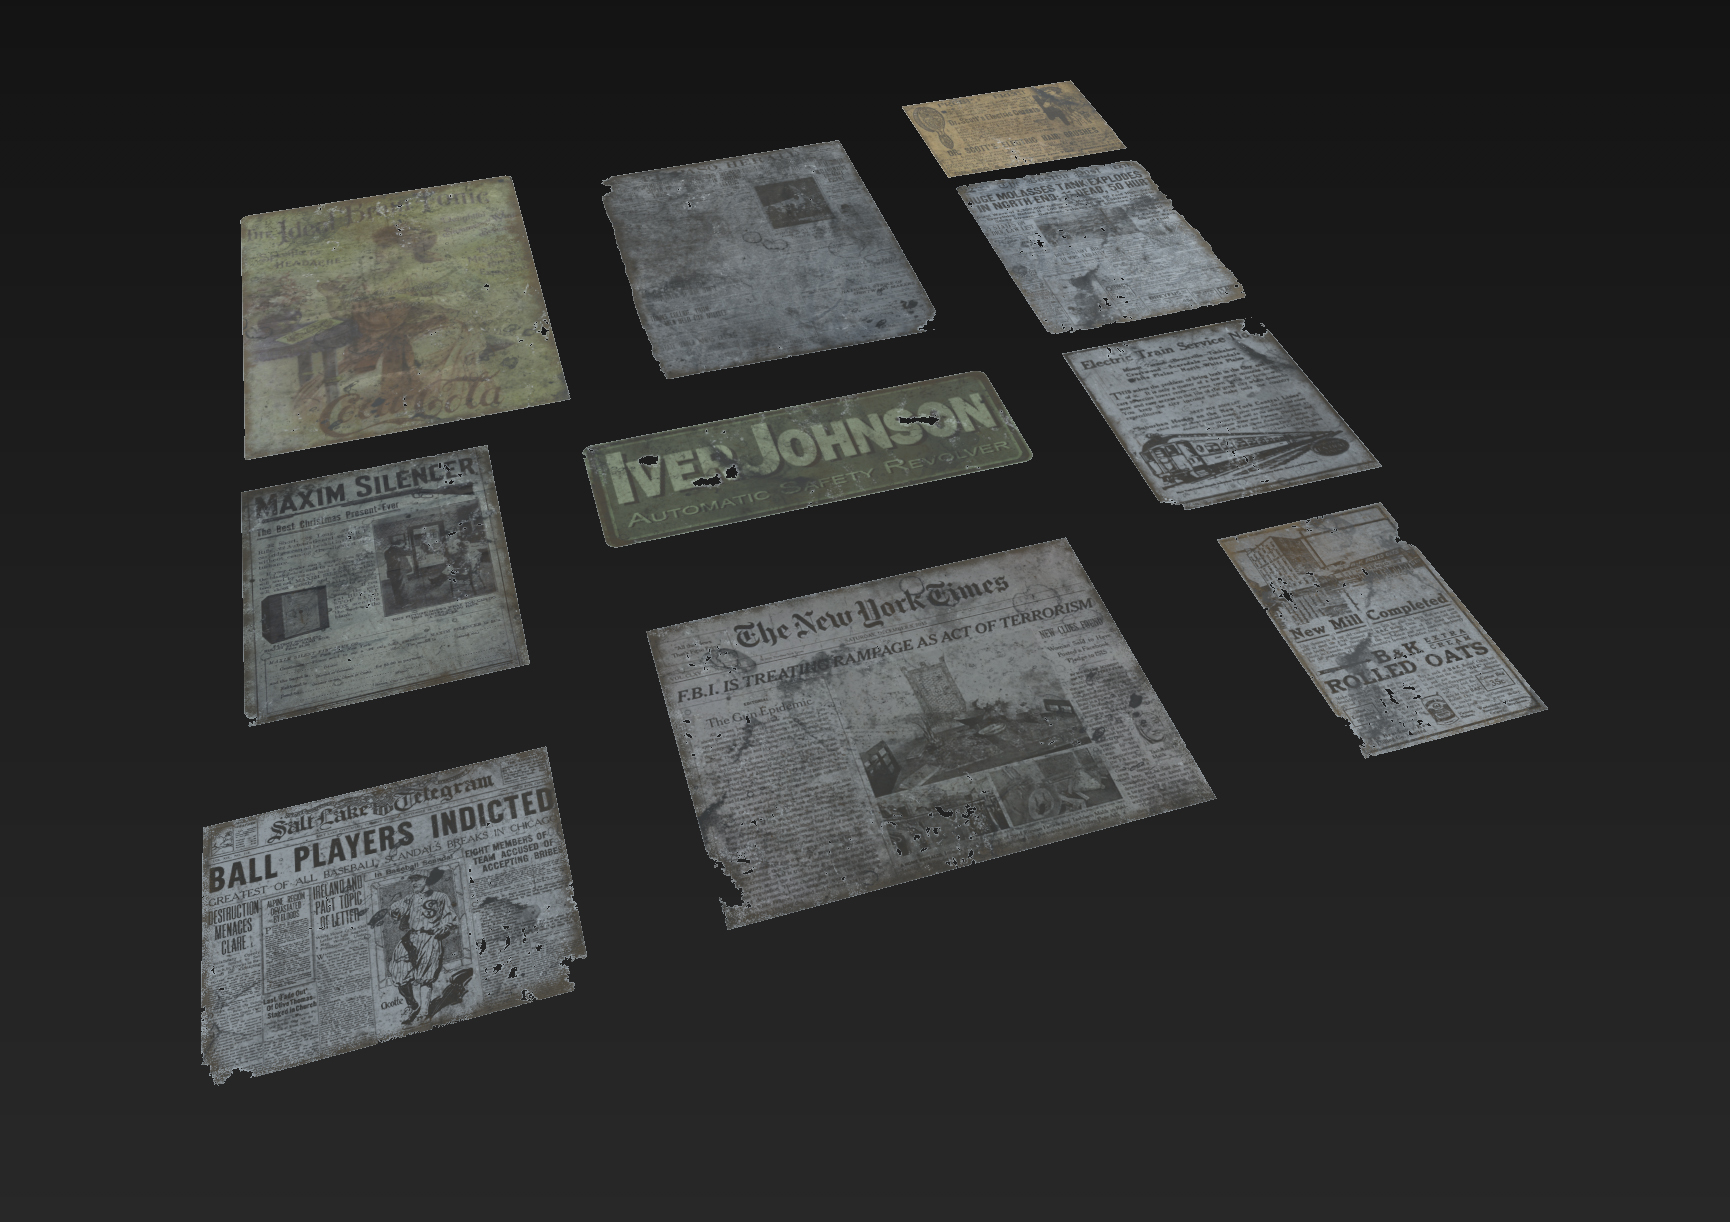
Leaves – Decals – Posters
Those 3 elements formed an extra layer of storytelling and set dressing that would benefit the general composition of my scene. I do believe that working on those tiny details all around the whole environment gives the sensation that the scene is alive, and does not seem empty.
For the leaves, I used source textures from Textures.com, and for the posters, I took some images on google that could help to create the newspaper look.
Although some of the newspaper ads would be placed manually, others are placed using the foliage tool inside Unreal Engine. It was quite comfortable and easy this way to populate the whole scene ground, to make it look more realistic and less empty.
It was really easy for me to manage the density and where I wanted the leaves and papers to appear. I mix between different intensities of foliage (I was able to mix different densities in each foliage actor) so that the distribution wouldn’t seem uniform.
Once I got some cool images that could fit my scene (I tried to get some pictures that could fit the 1920s, steampunk vibe), I send them to Substance Painter, to create the mask of the opacity by myself, and was able to get some nice roughness information.
Regarding the decals, I used Adobe Photoshop and Zbrush, and manually create them. I placed decals all around the scene, in parts that would make sense, and also push the visual quality. In my experience, while working on productions I usually create the geometry for the decal manually inside a poly modeling software, but in this case, I used the Deferred Decal tool. The scene was never intended to be a playable demo, so on some aspects I did not have to worry that much about performance.
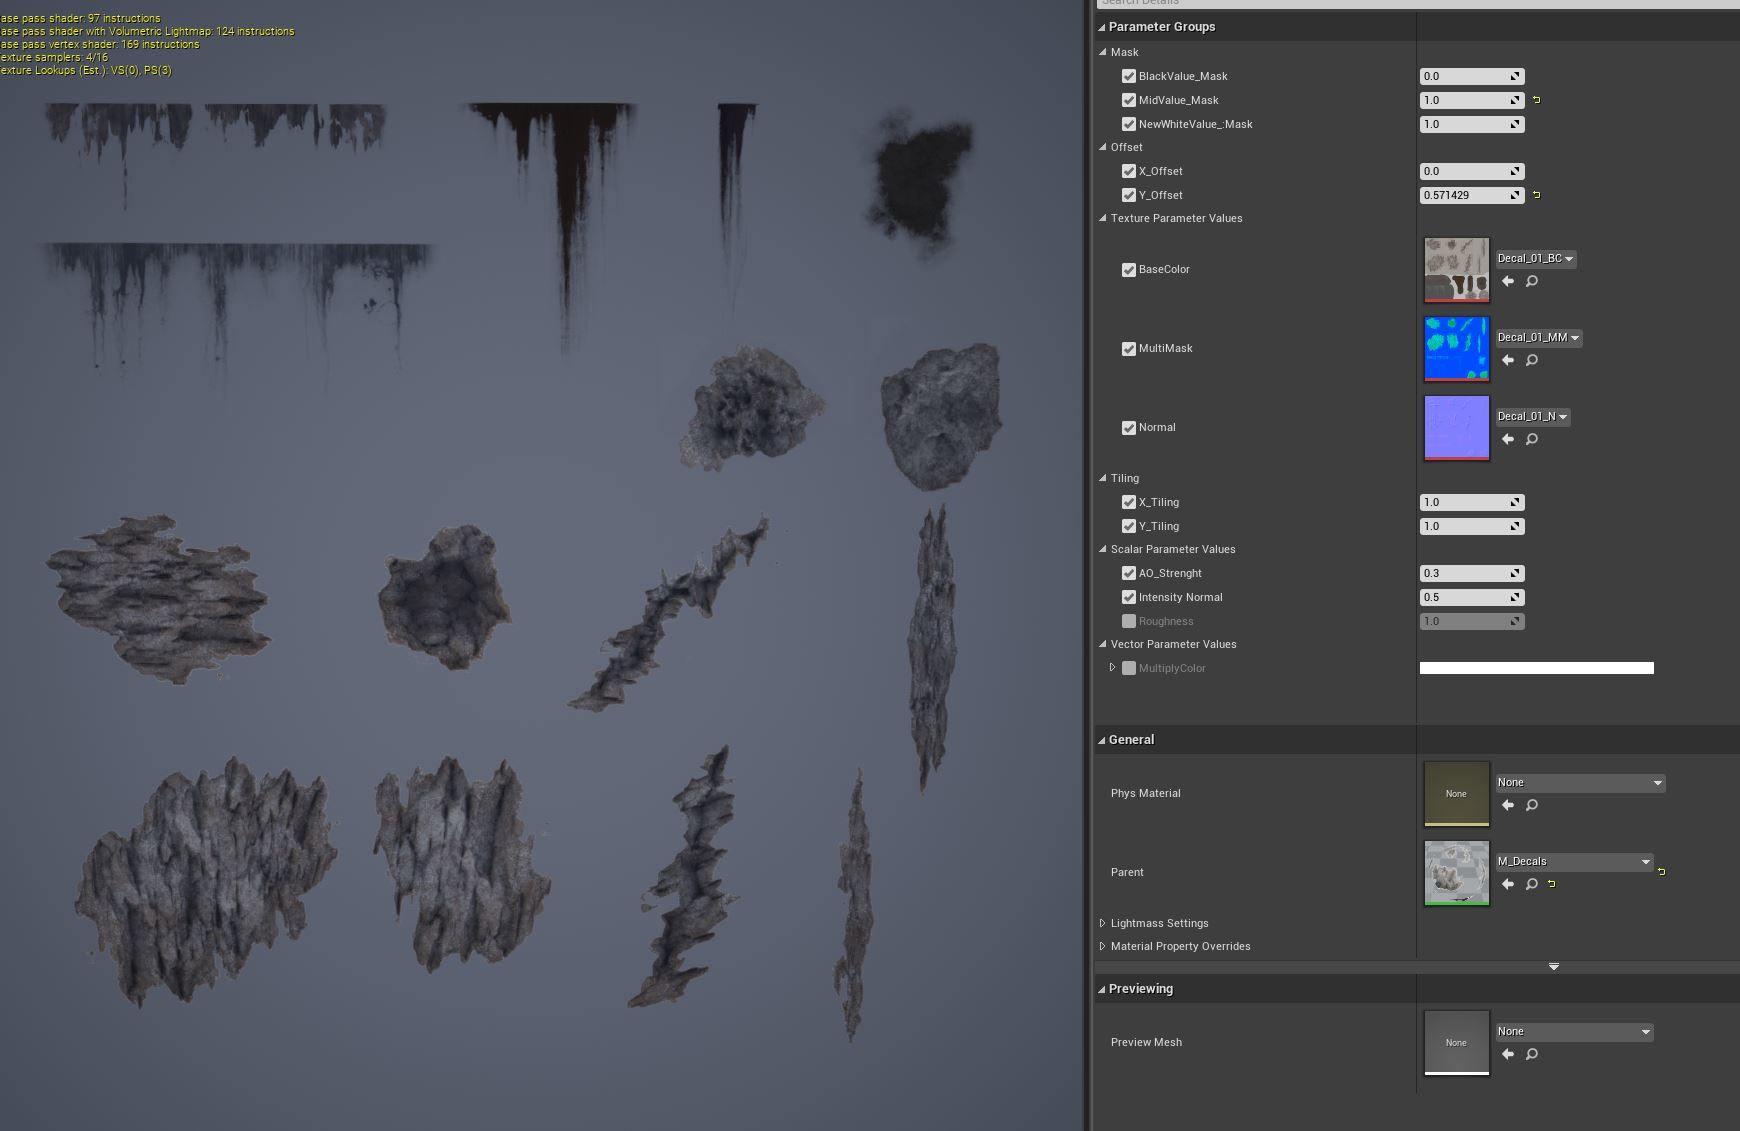
I created a master material that would fill my needs, and all the decals that were around the scene would use it. This way, it was pretty easy to create more instances of material when I needed more or with different source textures. The properties, in this case, are varied, like moving and scaling the Uvs in order to fit the decal I want in my Atlas texture, modifying the intensity of the normal depending on what I needed, or clamping the opacity mask.
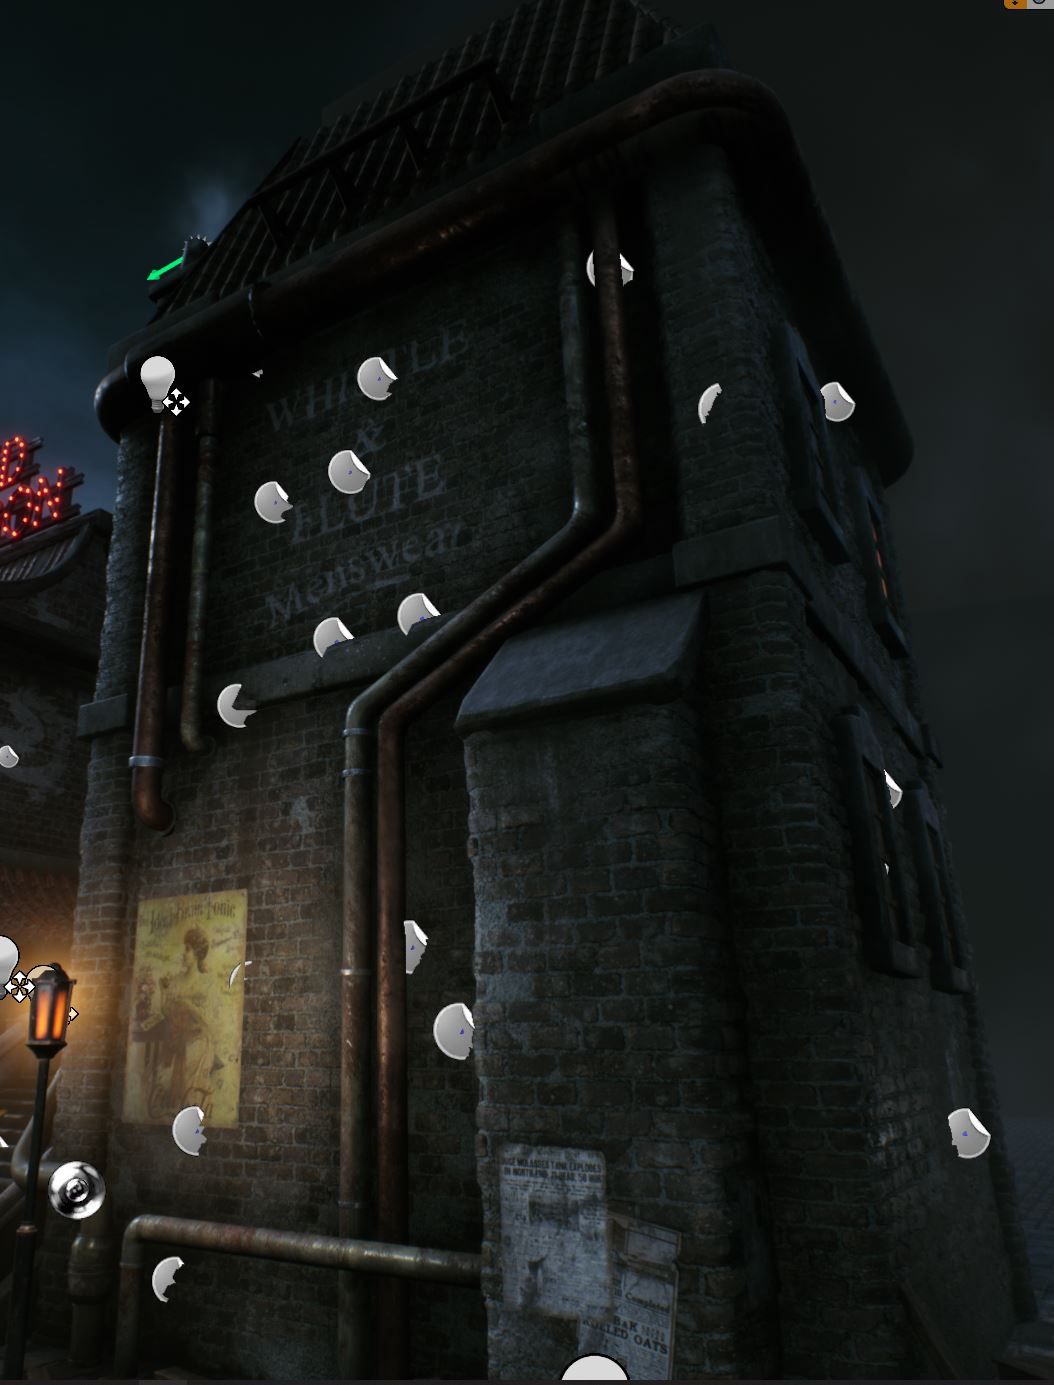
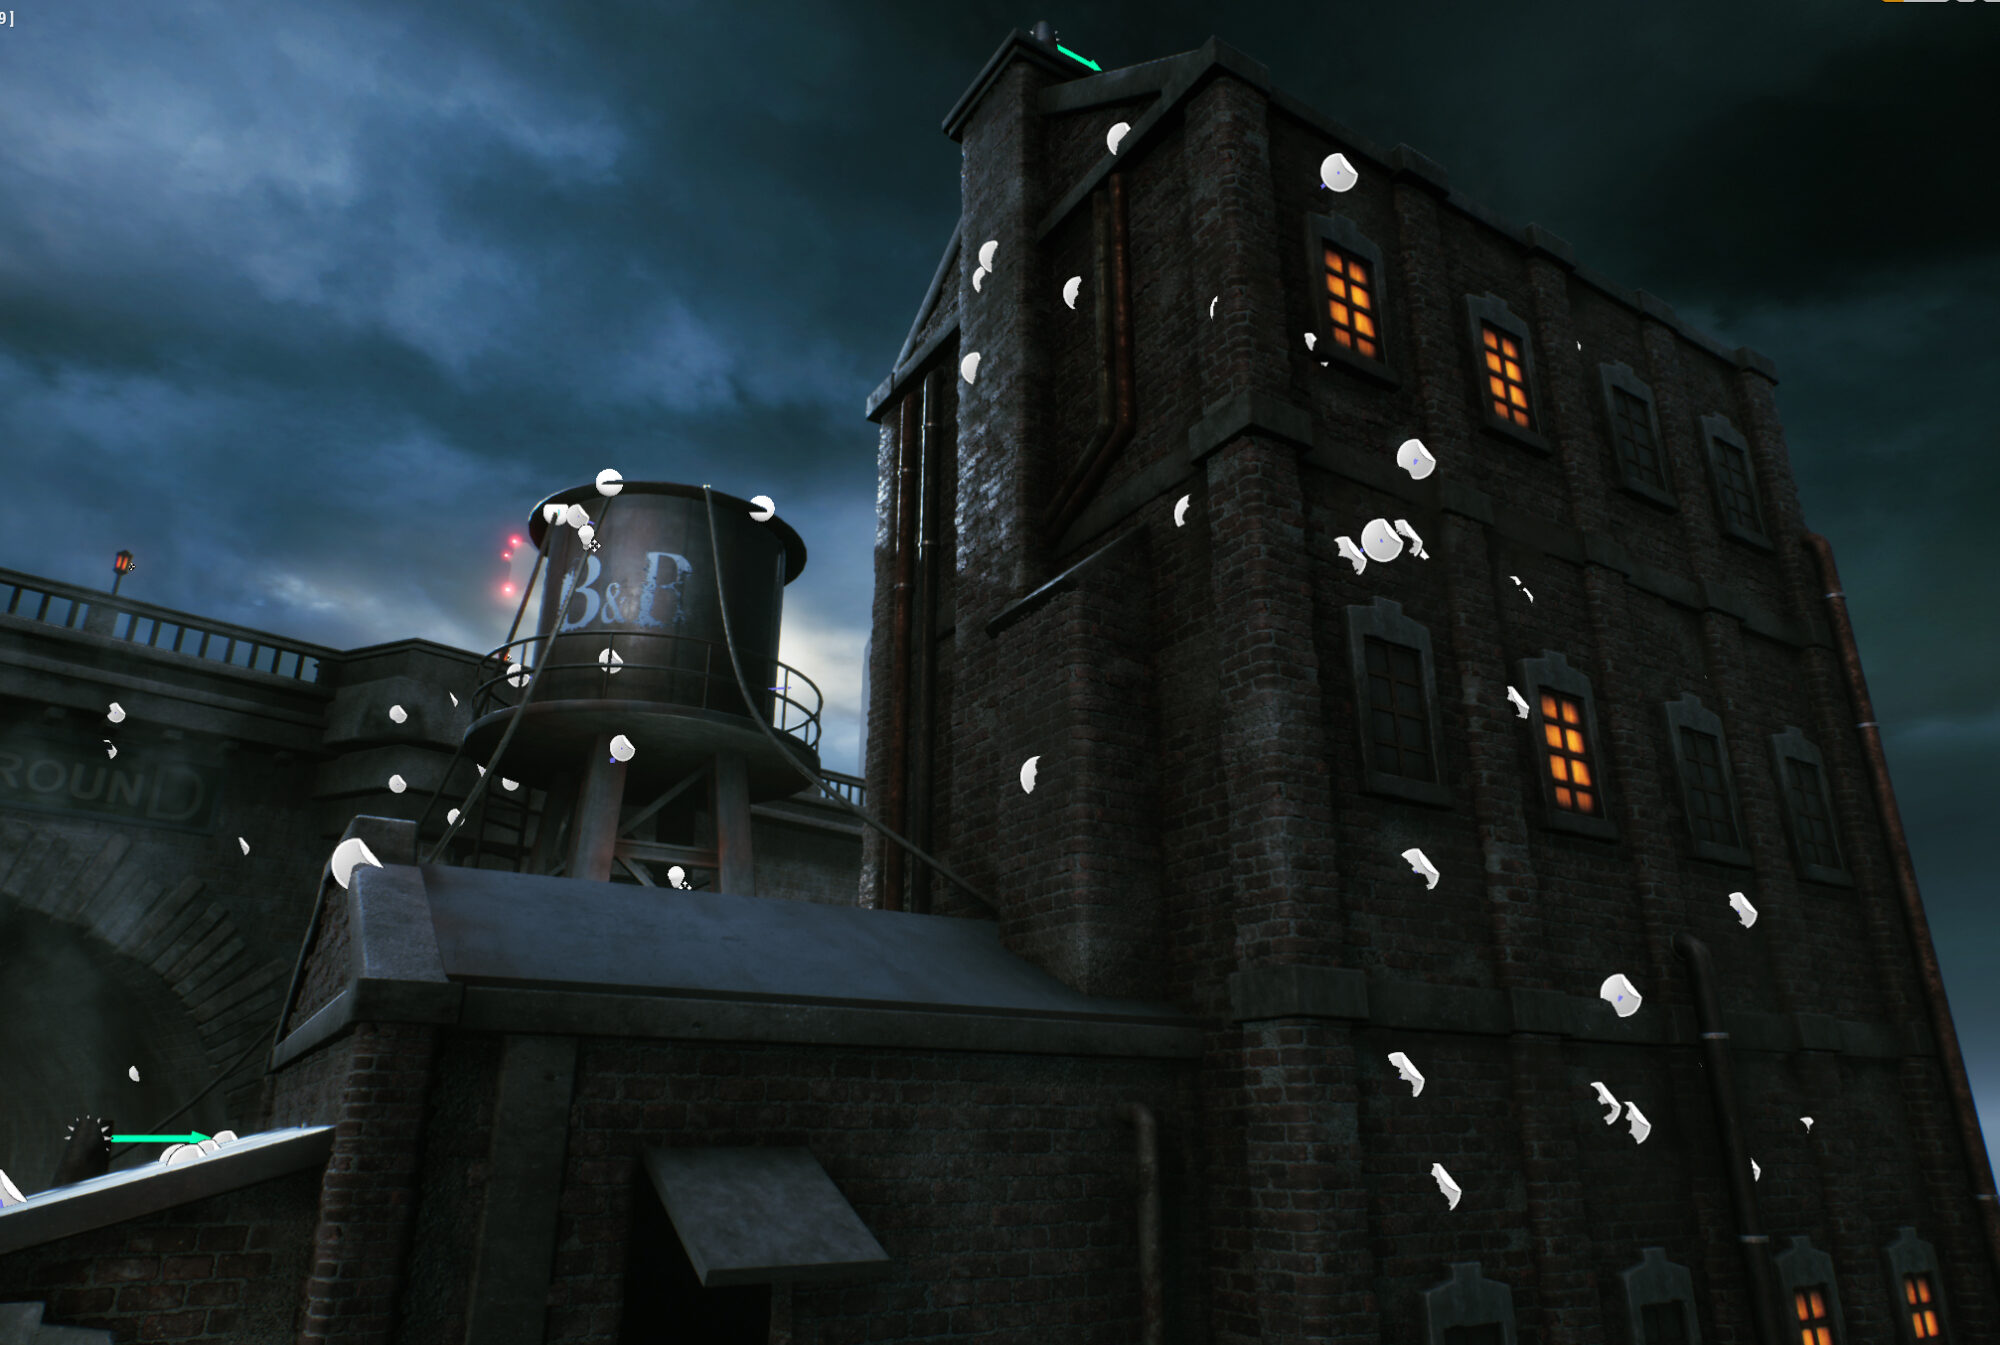
I placed several of them in different places around the building to polish the entire facade and make it way more believable, with some dust, some leaks falling, and dirt in general.
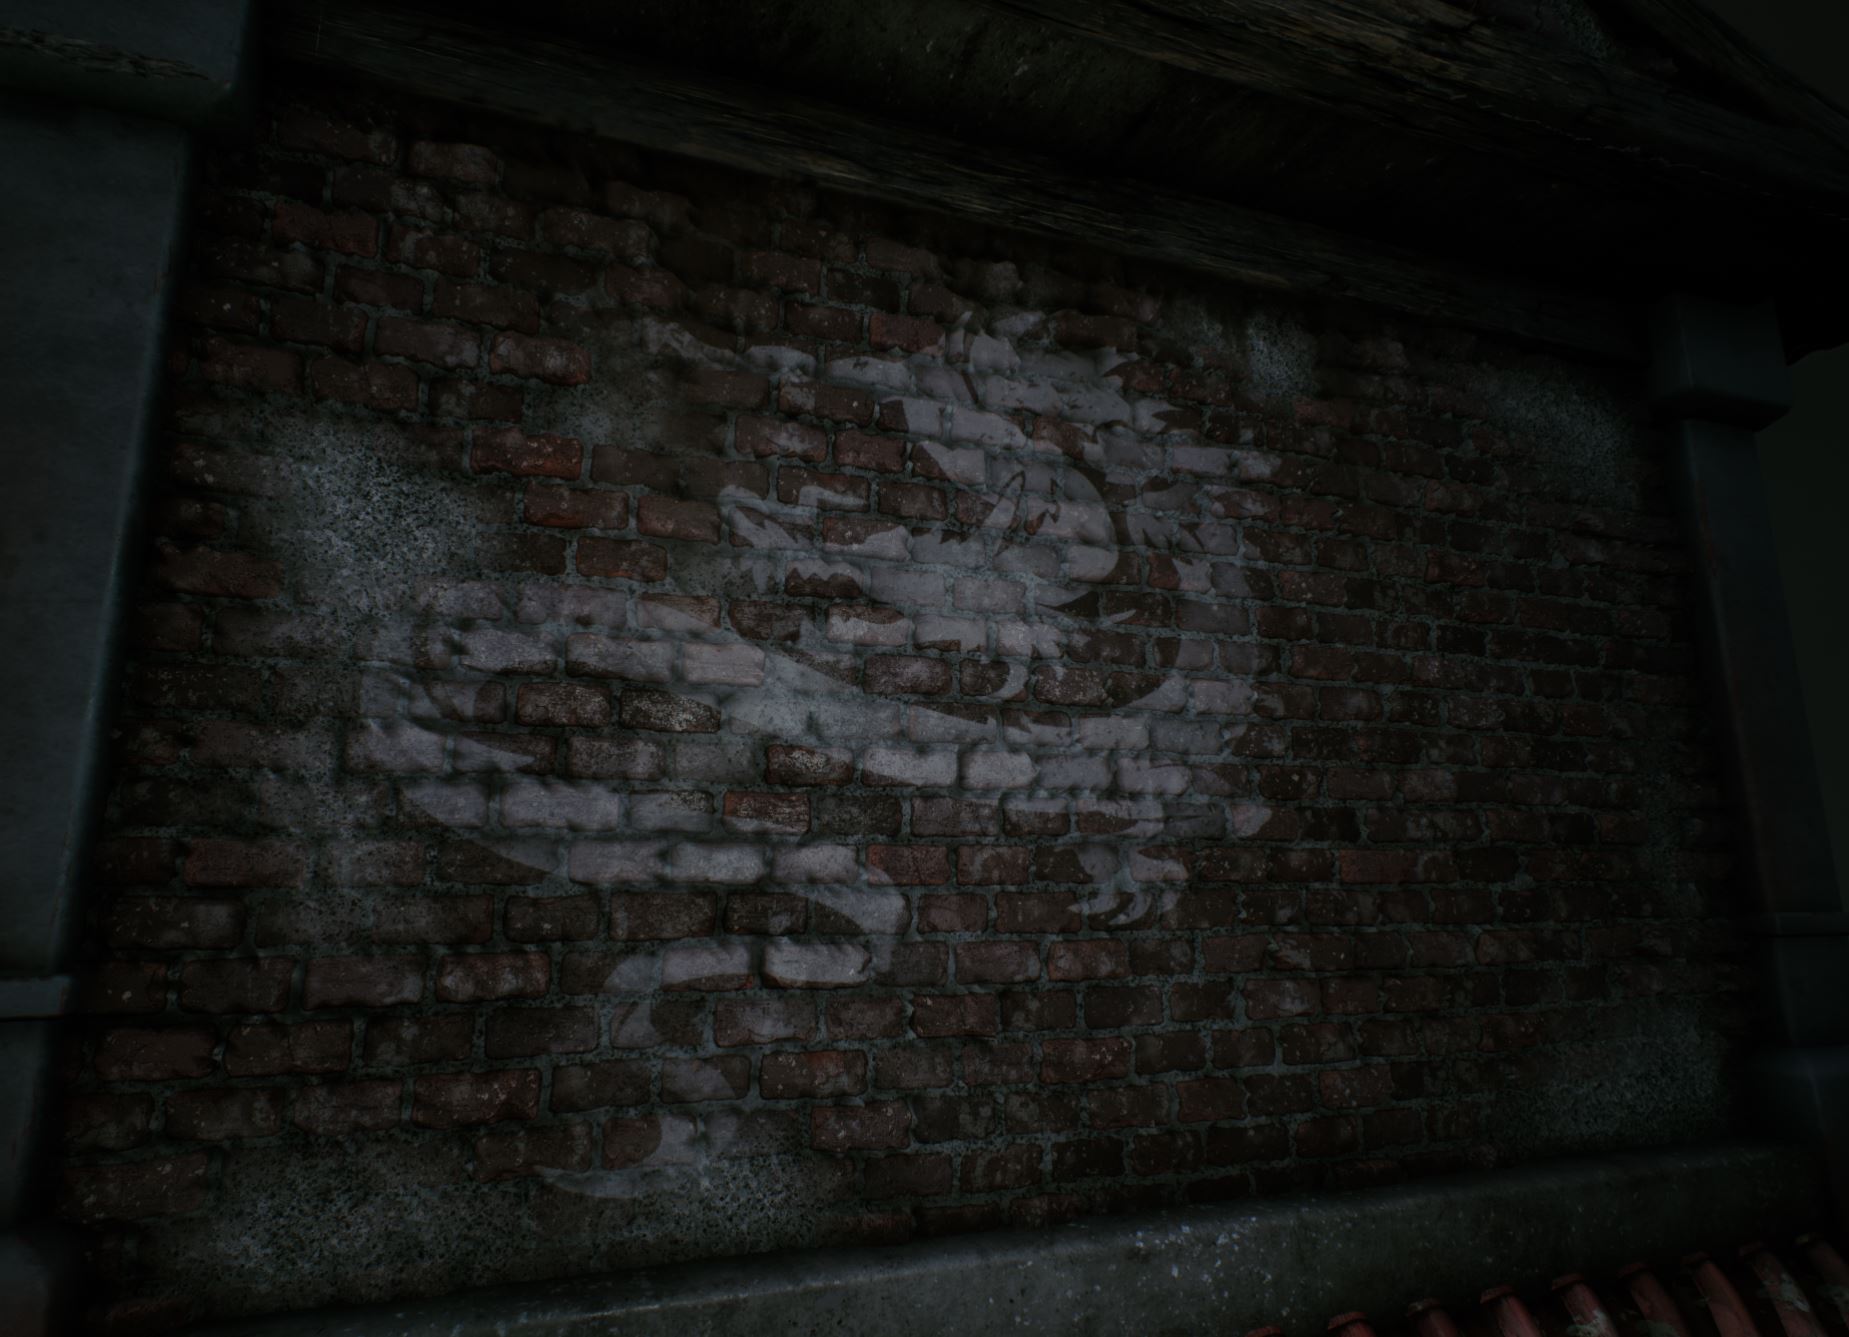
Also, I used decals to place texts in the building, and get the same vibe as in the reference concept. This is a good way of keeping a good texel with this kind of elements. Even the symbol that symbolises the dragon in one of the facades of the “Red Dragon” building is also using a decal, and blends really well with the brick.
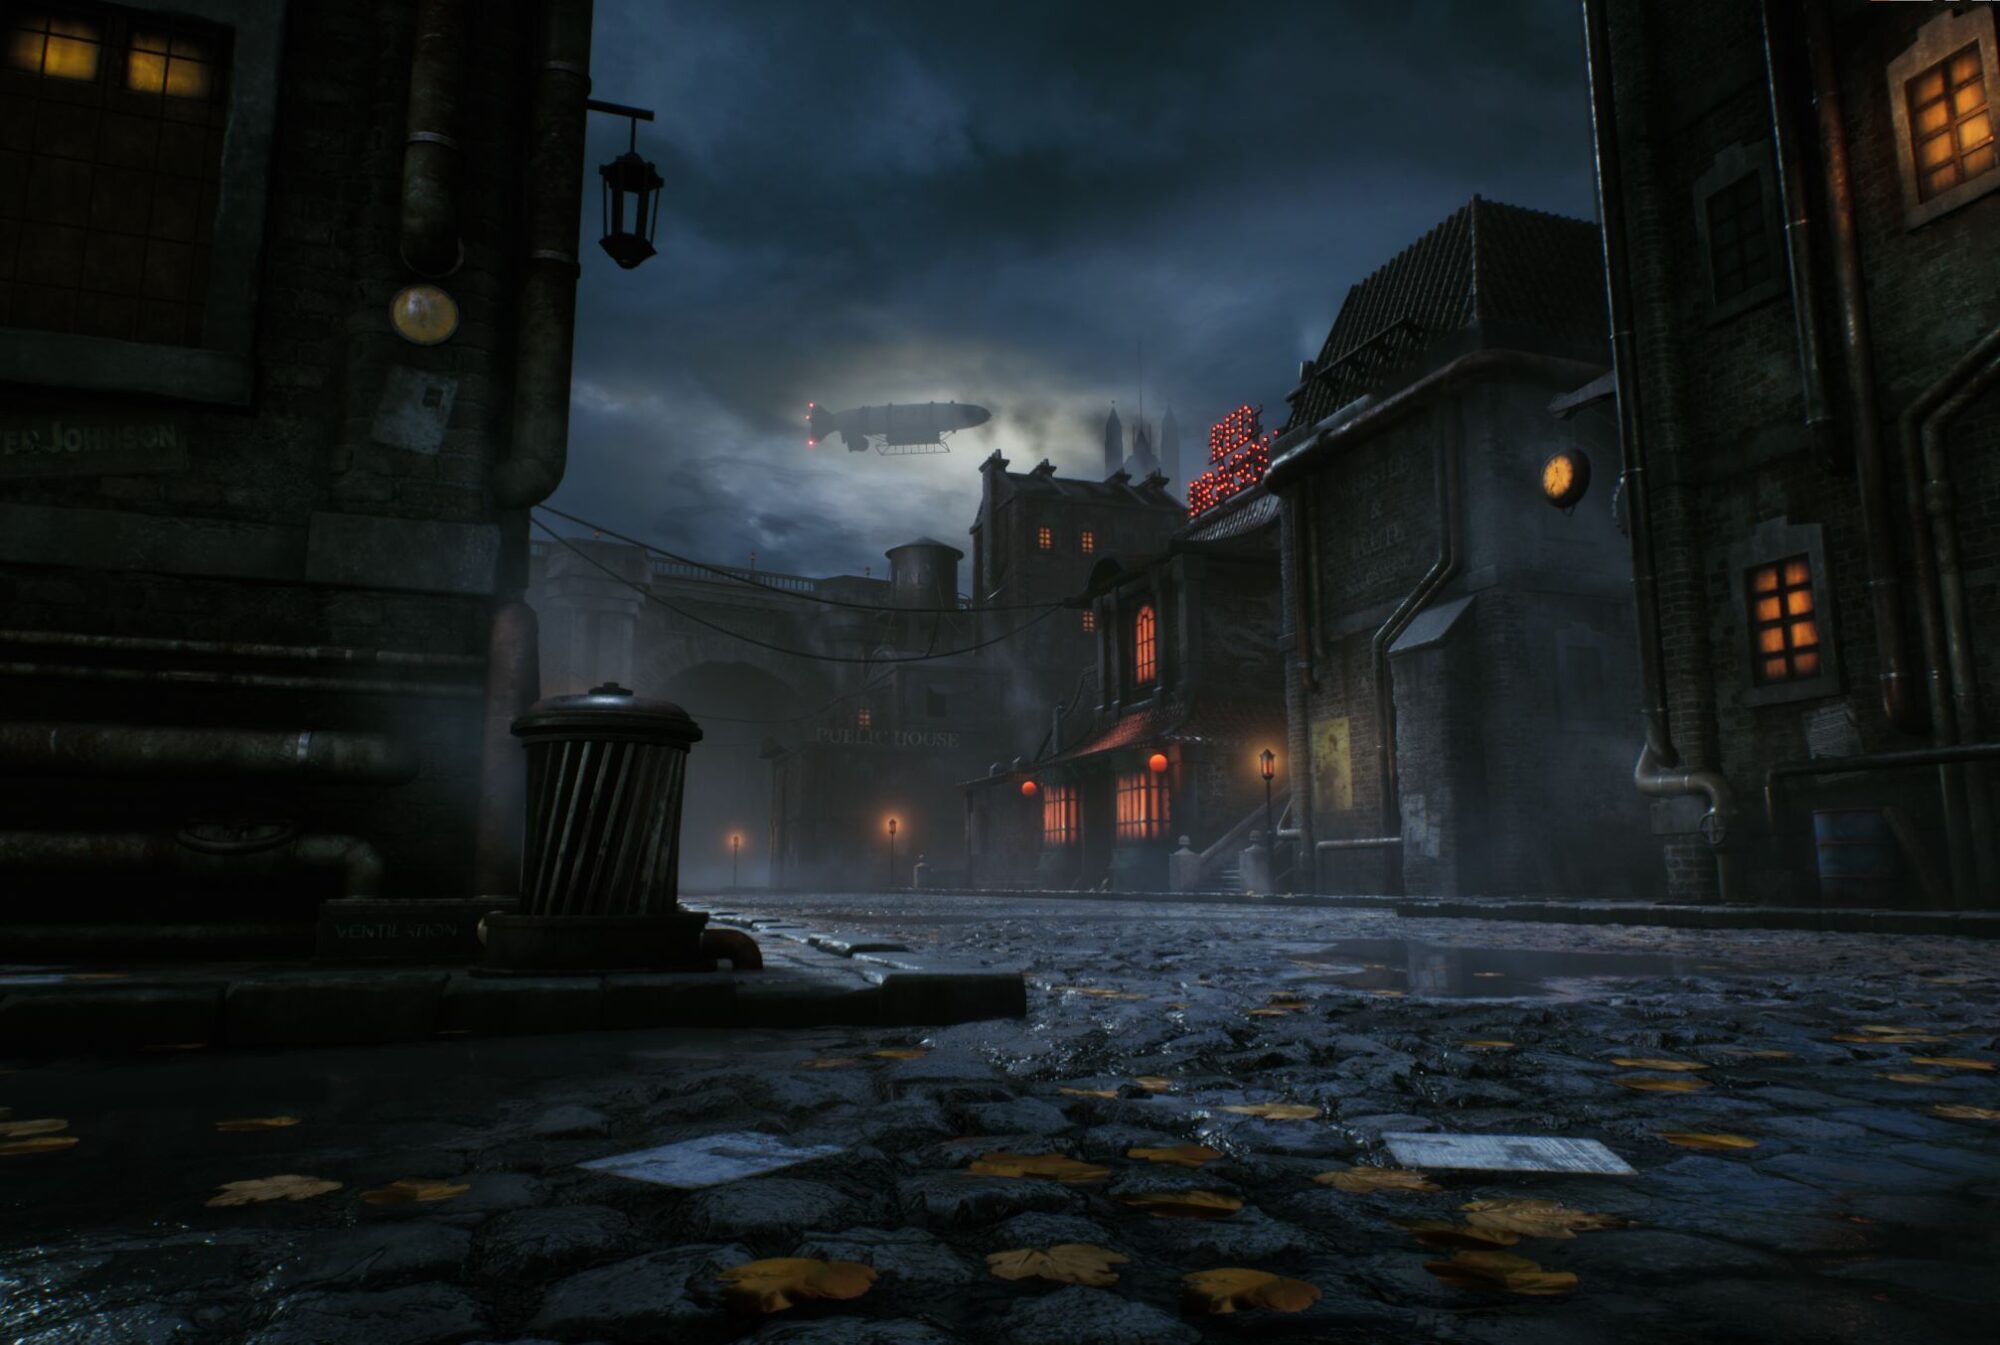
Zeppelin
The majority of the scene uses the same Master Material, as I explained before, blending using the Vertex Color tool to mix between different materials. But in the case of the zeppelin, I thought that it was better to “tweak” it to make it fit the scene since it was going to be always seen from far apart.
In the concept, this element brought a strong feeling of steampunk esthetic and work really well in the composition, so I was sure I needed to bring the same vibe to my artwork.
In my experience, if the zeppelin was a gameplay object, something the player would interact with, or something that could be seen from a close look; for sure you would need a lot of detail in it. If this was my case, I would probably have used the same pipeline as a building for this element, given its size.
So, I needed to fit the zeppelin in the sky, to make it look like it was part of the scene.
I created the hole mesh but did not create a lot of detail, just enough so the shape could be read well. The scale was not a real scale, it was little, but I just needed to fit it into my composition, so that was not a problem.
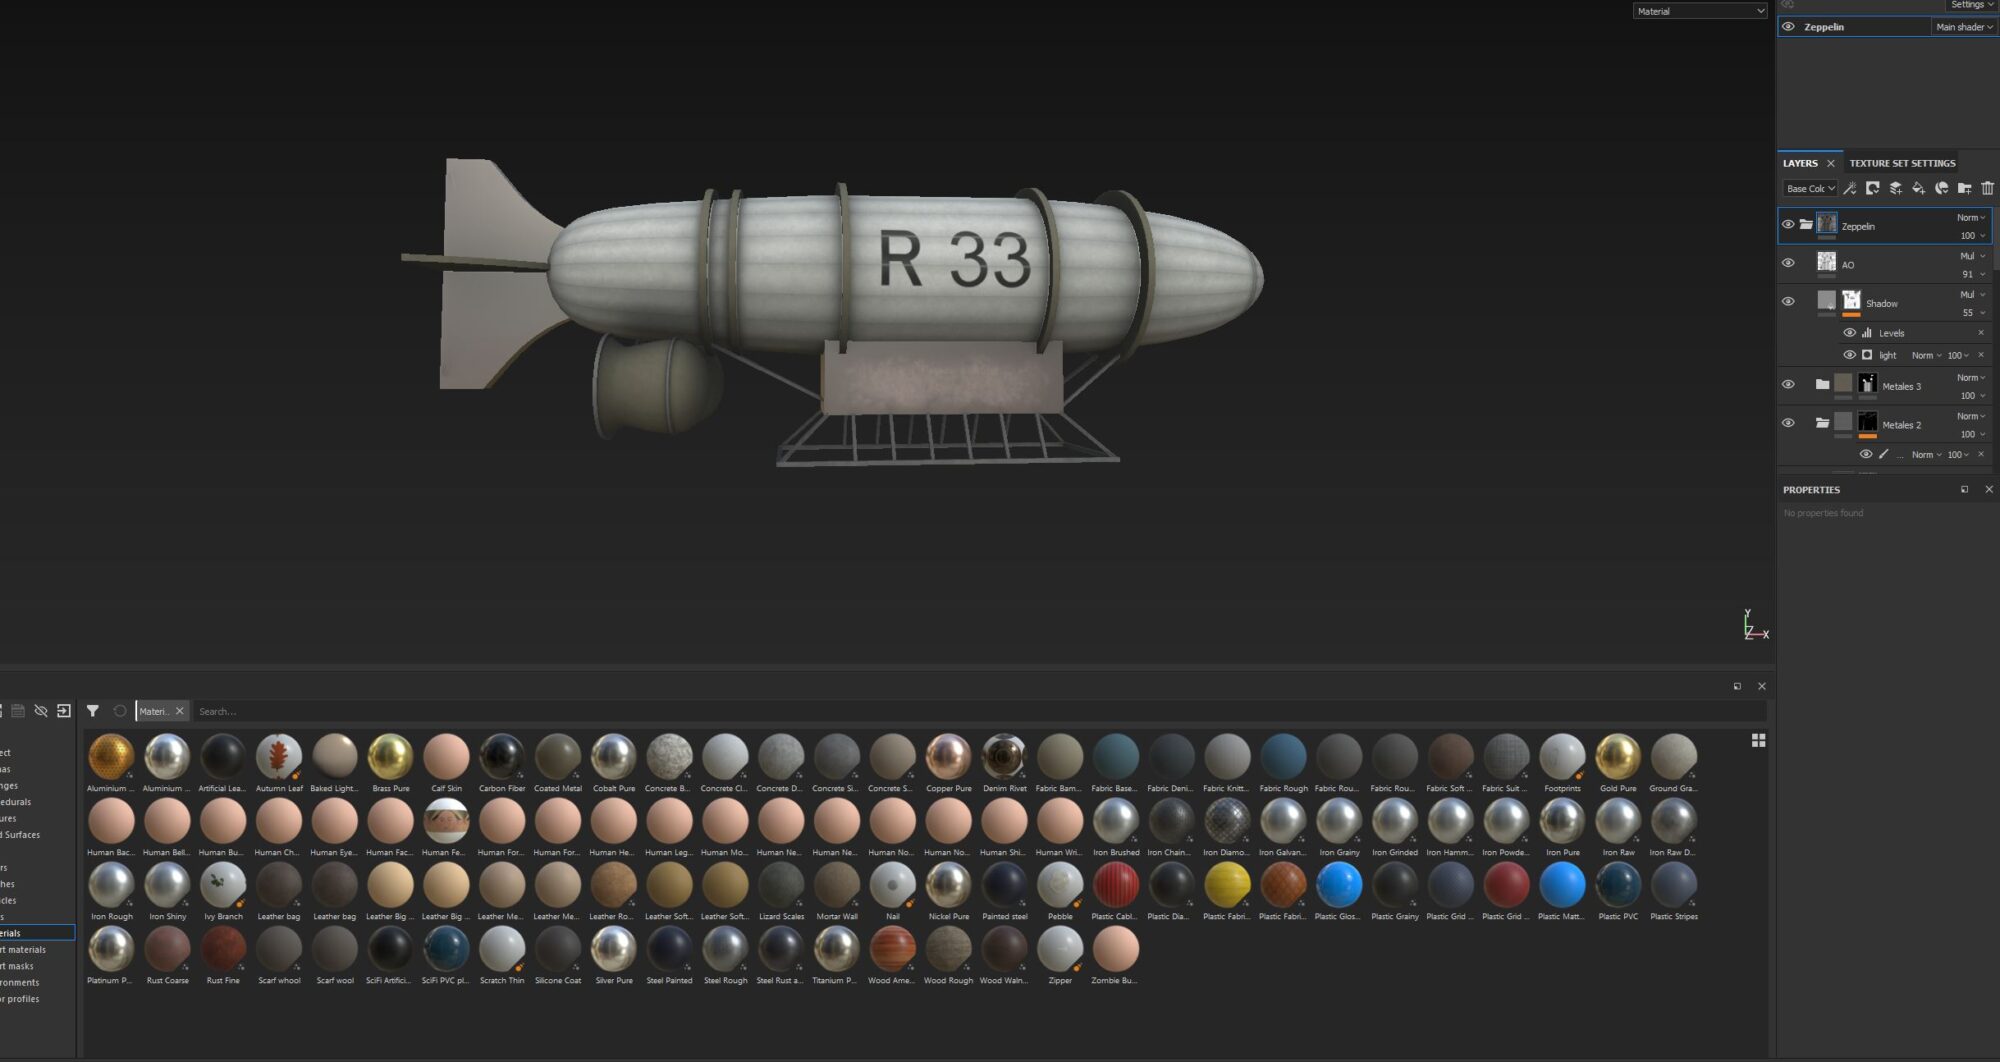
The texture was baked. I did not need too many details, just some subtle colors that would be the effect I was looking for. Also, I set up the shader inside unreal is Unlit since I did not want any light information on it, was easier for me to fake it directly in texture, since it would always be seen from far apart.
Also, I put a slider to desaturate even more the texture, till the point, it blended with the sky the way I wanted. I used the same method for the building that is seen in the background, the aim was to have a visible silhouette.
VFX & Postproccess & Ligthing
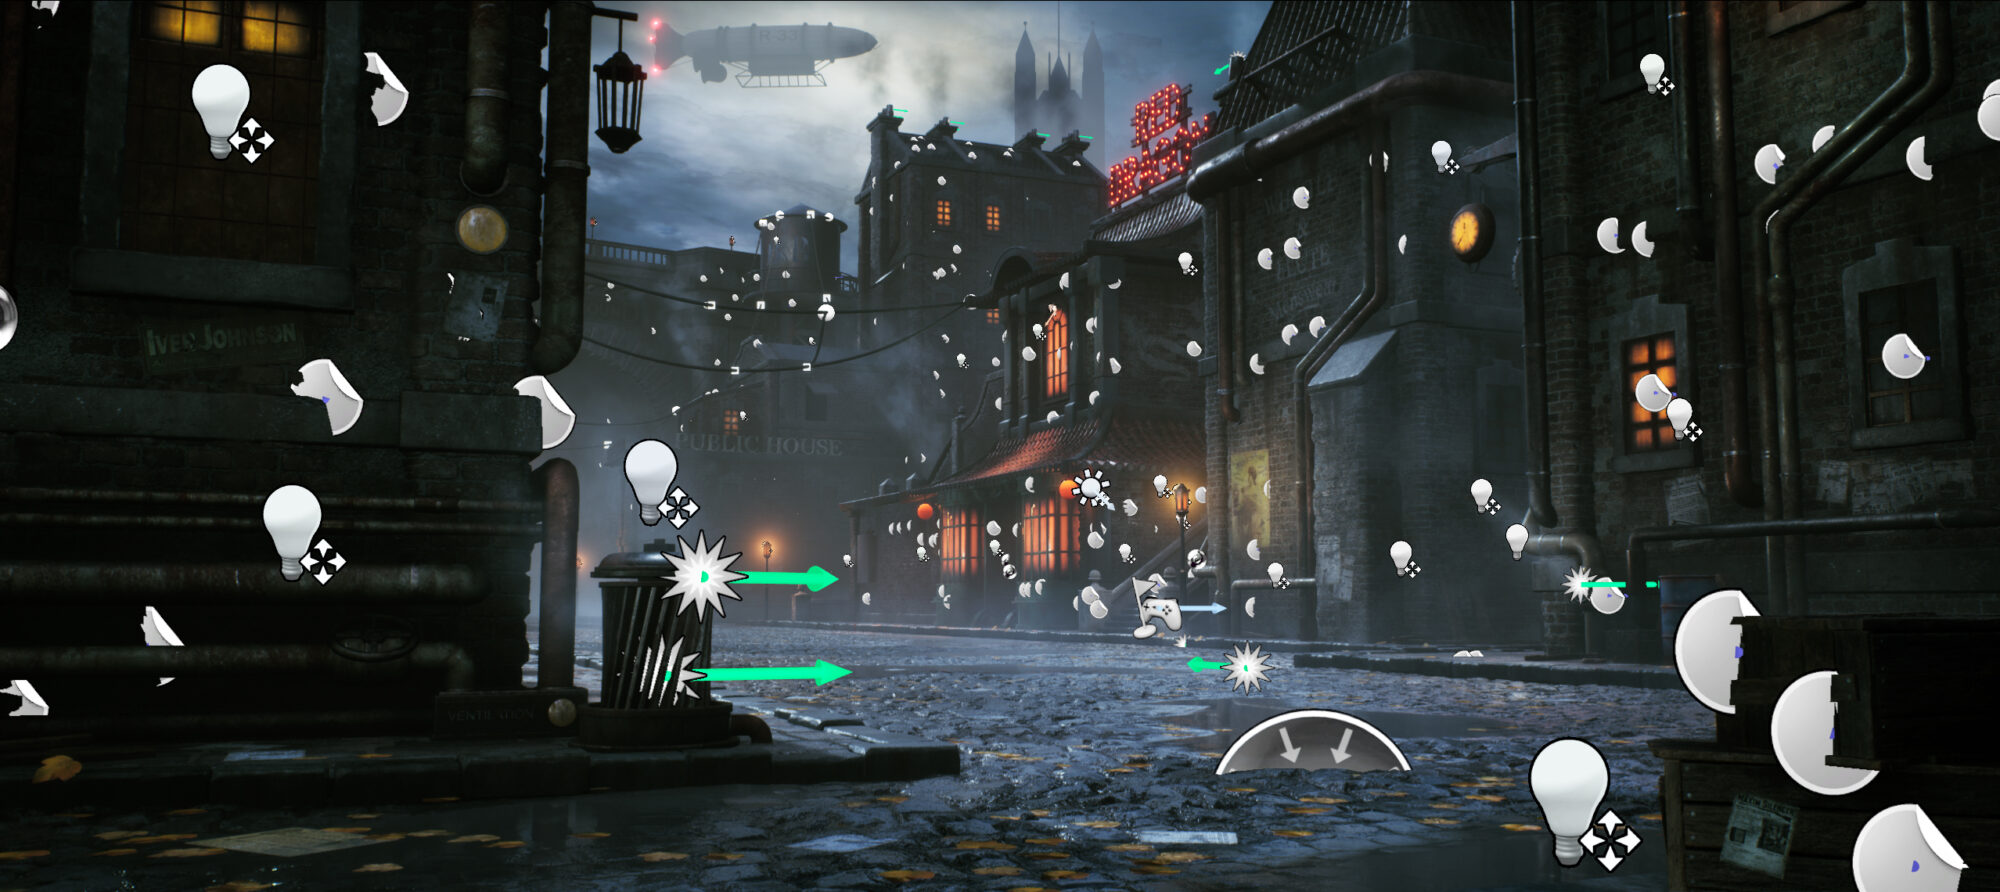
When I work on big personal projects, such as a scene like this, I always like to add some VFX details that can help the storytelling of the environment, and its uniqueness.
Since I am not in the need of complex VFX effects or emitters, nor its a scene meant to be played; I usually manage to do these effects by myself.
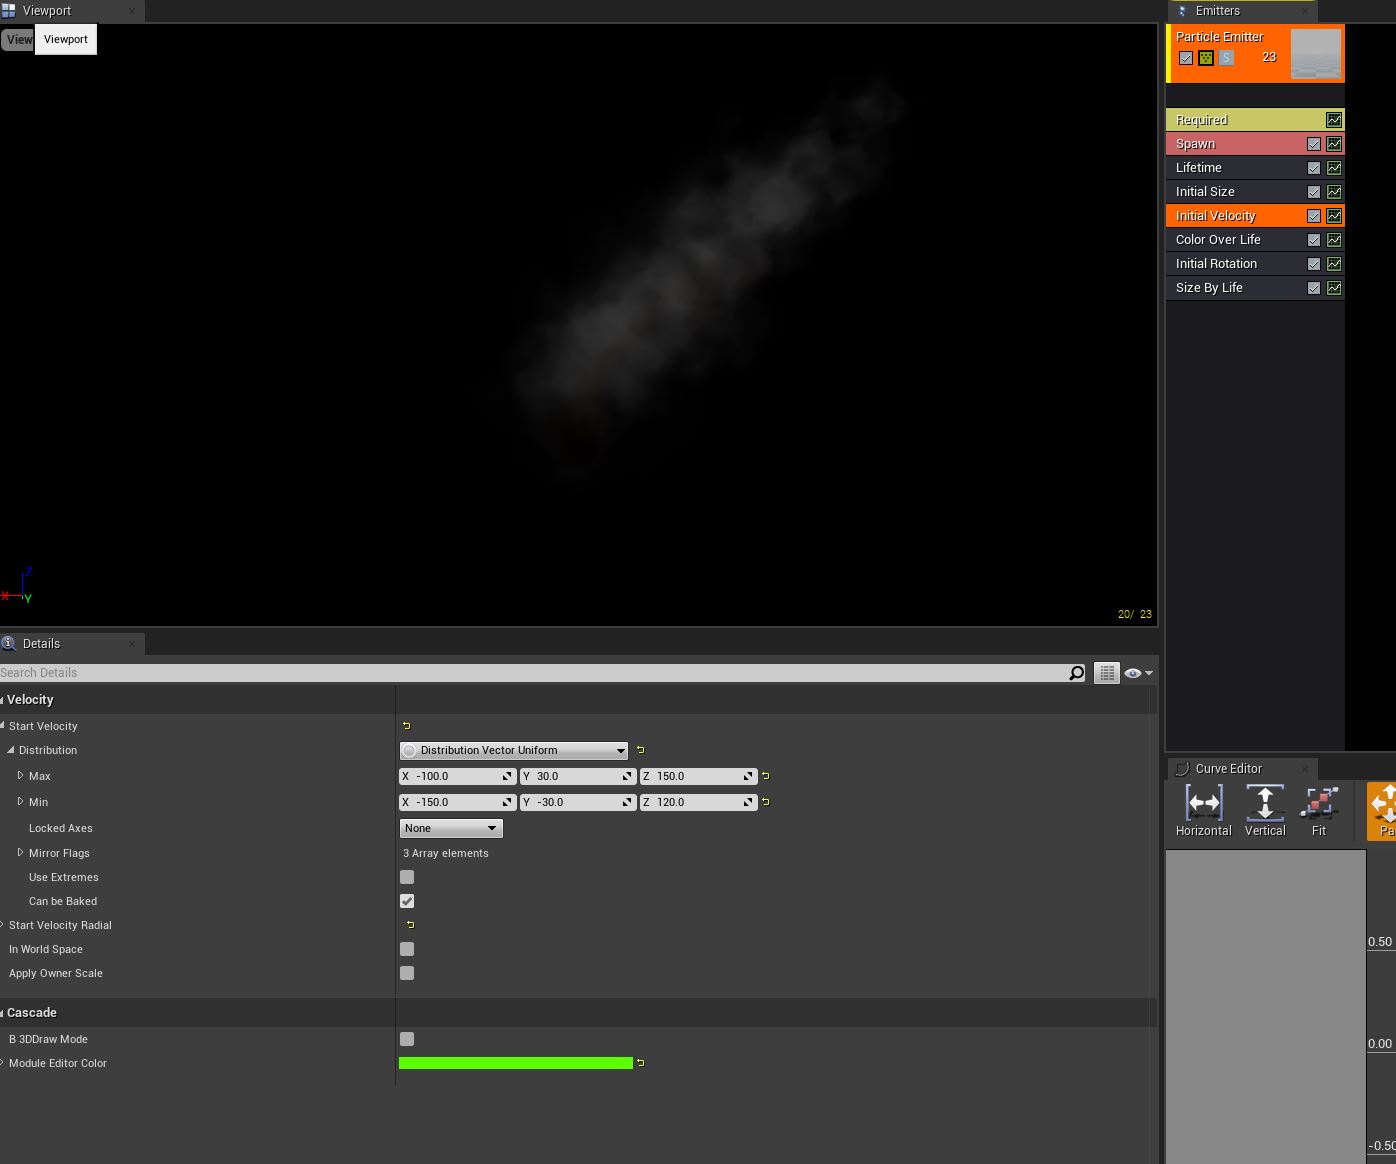
I just set up the basic parameters to create a simple smoke that would be put around the scene. I created a shader with alpha blending to be able to create that smoke visual effect. It uses default billboards.
For the main modules, I just control the alpha at the beginning and at the end of the particle, to avoid popping in my emitter. Also added some rotation and the same scale variation. I created several emitters with different initial velocities, different sizes, and different opacity of alpha… so if would be used in different parts of the scene. Some particle systems would be used to imitate the smoke coming out of a little hole in a pipe due to the pressure; others would just be used as a fog of a steamy street, and other ones could be the smoke from a chimney.
This, combined with the fog tool inside Unreal, would allow me also to differentiate between the closer elements to the camera, and the farthest ones, to make it pretty clear in the render.
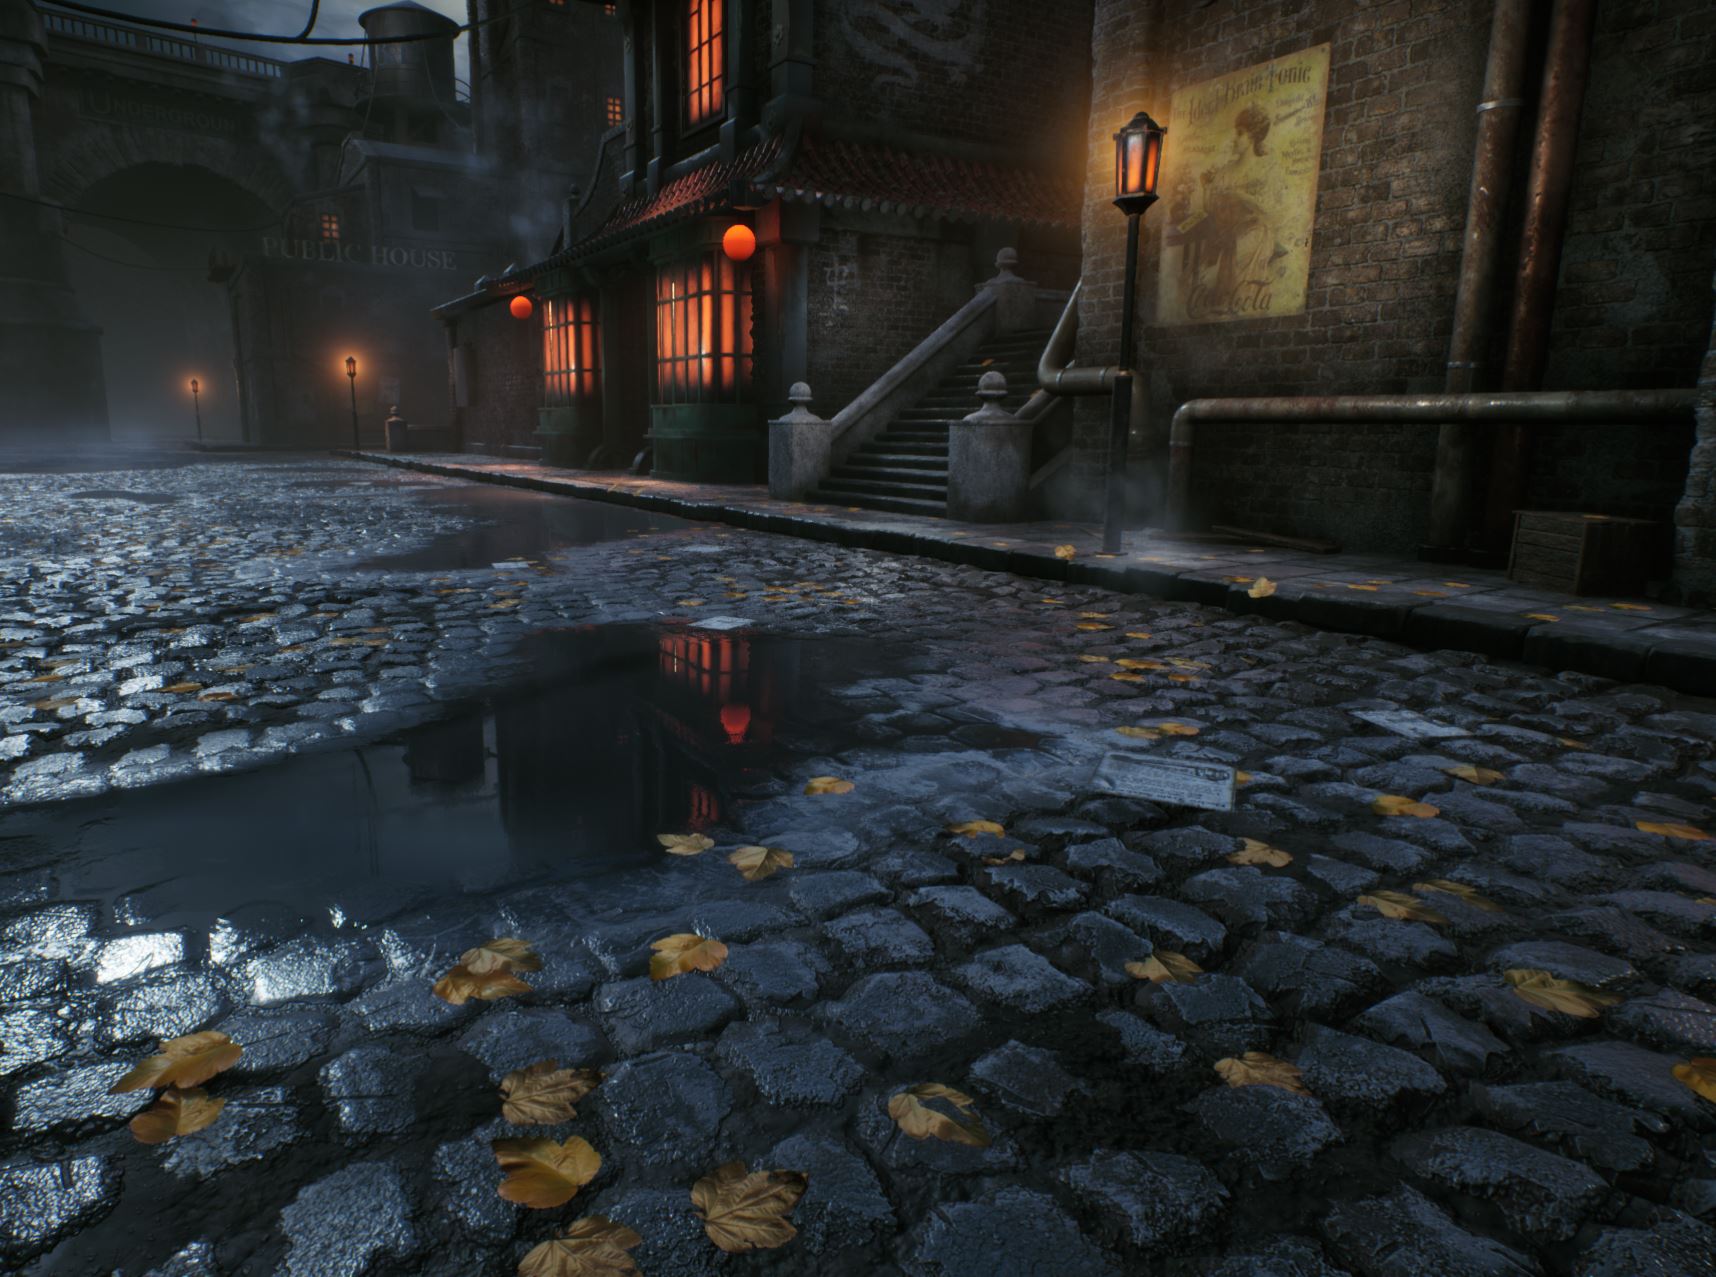
For the lighting, I focused on being able to keep the dark night mood, but at the same time bright enough in order to be visible, so the render would be interesting. The first light, which is the one that illuminates the main part of the road, is a directional one.
From there, I placed several point lights with a warm color (some of them near windows, or streetlights), and even some white point lights on certain points that would brighten some elements that I wanted to be seen.
Regarding the post process, it was something I polished once the scene was more complete.
Like the lighting, I needed to have the composition more advanced in order to know that my steps in this field would be more definitive. I only used one post process cube, since I wanted the same color palette and style for the whole scene.
I just used a little of tone mapping to tint some of the shadows, intensify some greener colors in the scene, reduce the red colors…I adjust the sliders until I have something that was closer to what I was looking for. I wanted a kind of dark theme, going to a little colder colors. This was the last touch that allowed me to deliver the mood I wanted for the scene.
I also added some Ambient Occlusion generated on the scene and intensified the reflections on the puddles (Screenspace Reflections). After some last polishing on some stuff, I felt the scene was complete after this last process.
Conclusion
To summarize a little bit, this project was hard but interesting at the same time. It took me a long time, but I was really happy with the result. I felt I learned a lot while working on it, and it was a great experience to put into practice my environment art skills.
I feel really happy and honored to have been given the opportunity to write this article for Games Artist UK, and hope you find the breakdown interesting to read!
Read more articles
You might also like these articles.