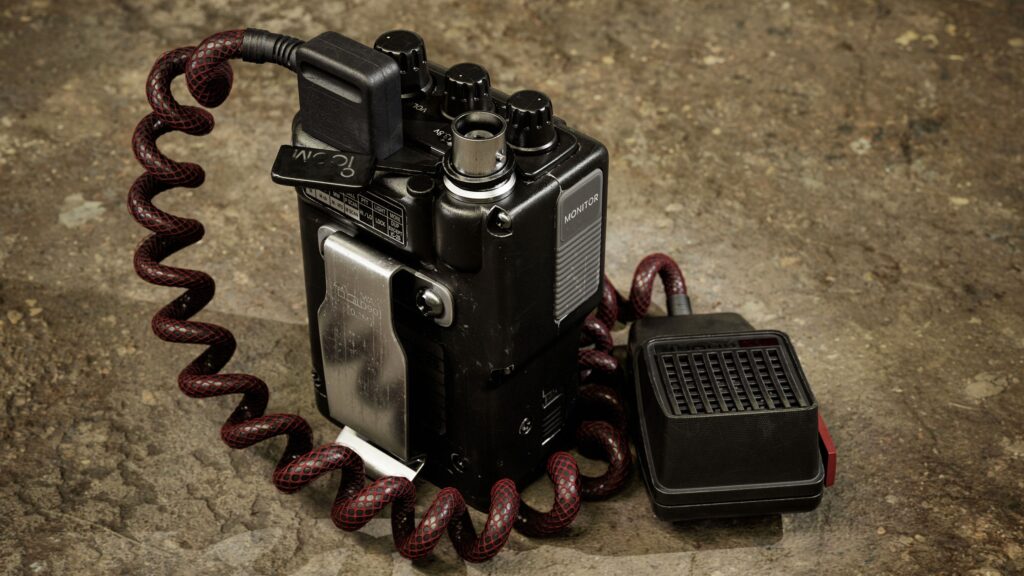
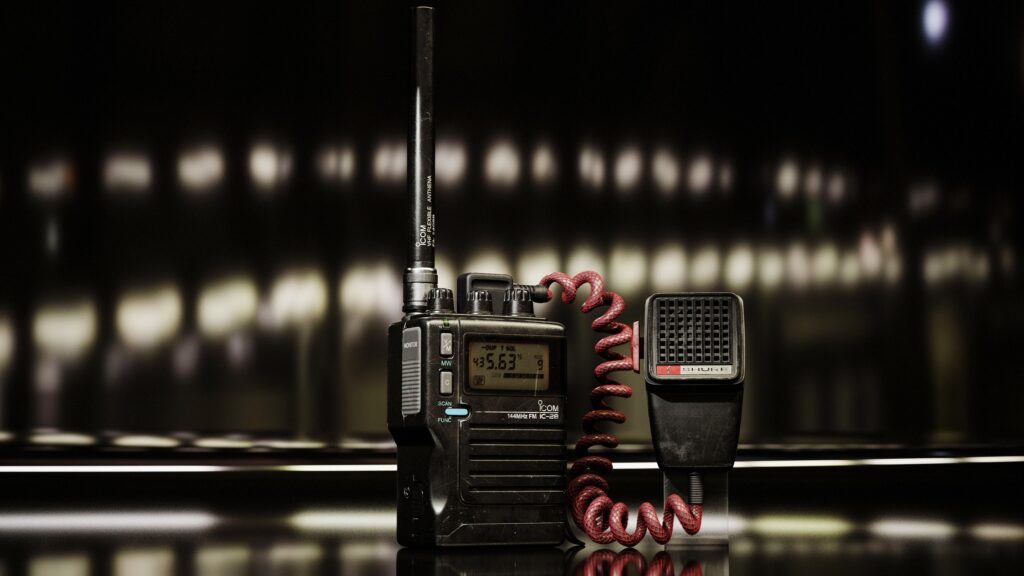
Radio Device

Introduction
Hi, I’m Erfan, freelance 3D artist from Iran.


Project & Goals
In this article, I’ll walk you through some of the techniques and workflows I used to create this radio device, from blocking to final rendering.
Whenever I start a personal project, I usually set a clear goal to improve specific skills.
For this one, I wanted to focus on realistic texturing and aim for a believable result within simple forms, with just enough detail to make it visually engaging.
I also wanted something with a retro vibe, along with some supporting elements that could help with composition in the final renders.
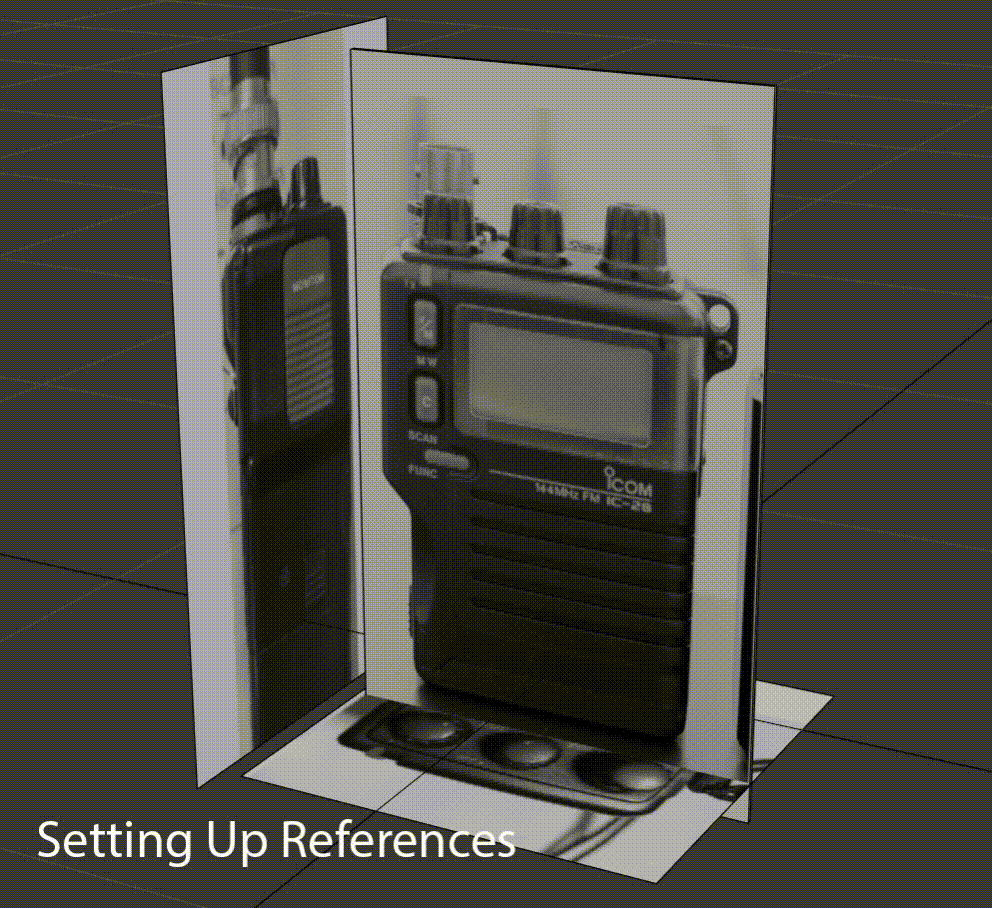
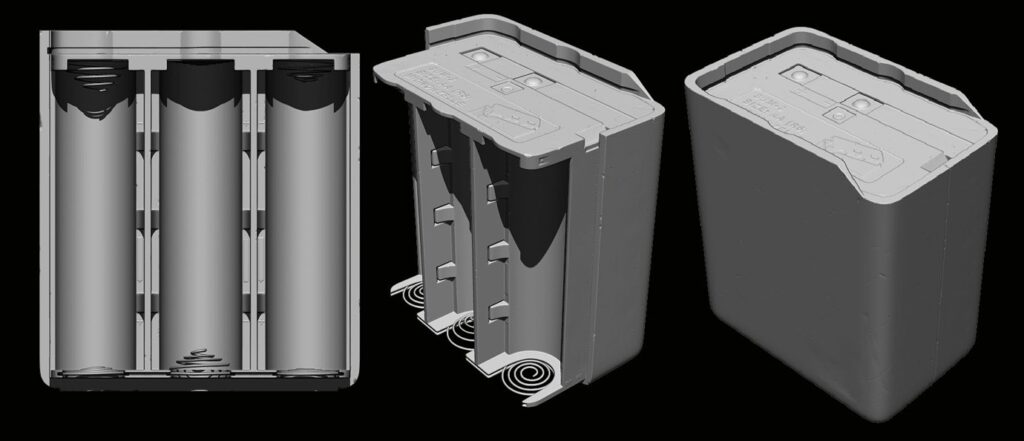
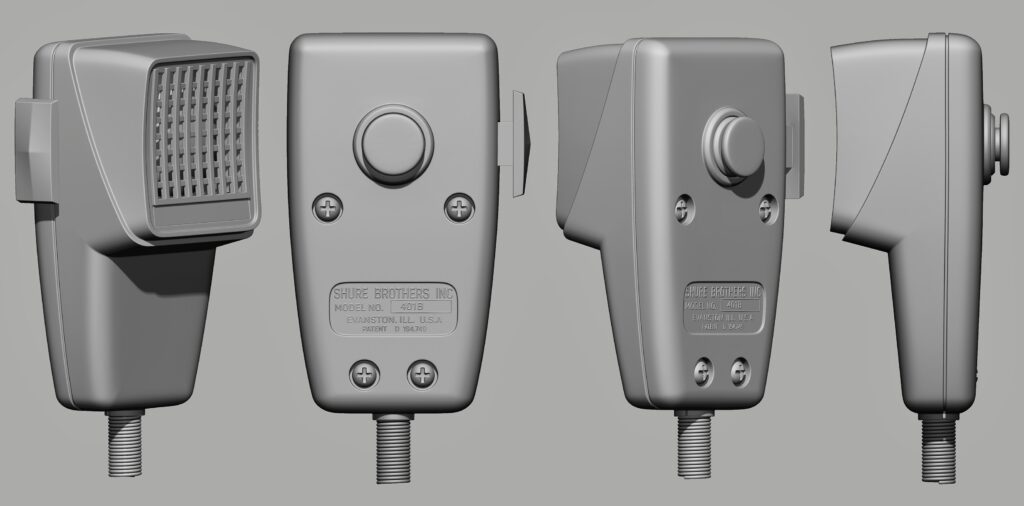
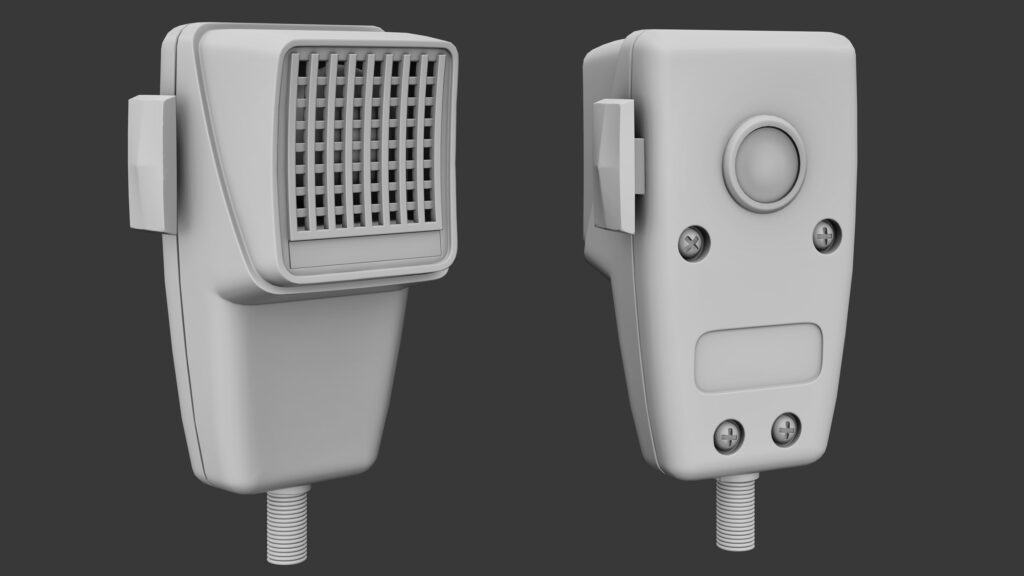
After some research, I chose the iCom IC-2S transceiver and the Shure 401B mic as my main references.

Software
- PureRef – References
- 3ds Max/ZBrush – Blocking
- ZBrush – Highpoly
- 3ds Max/UVPackmaster – Retopo/UV
- Marmoset Toolbag – Baking & Final Renders
- Substance Painter – Texturing
References & Design
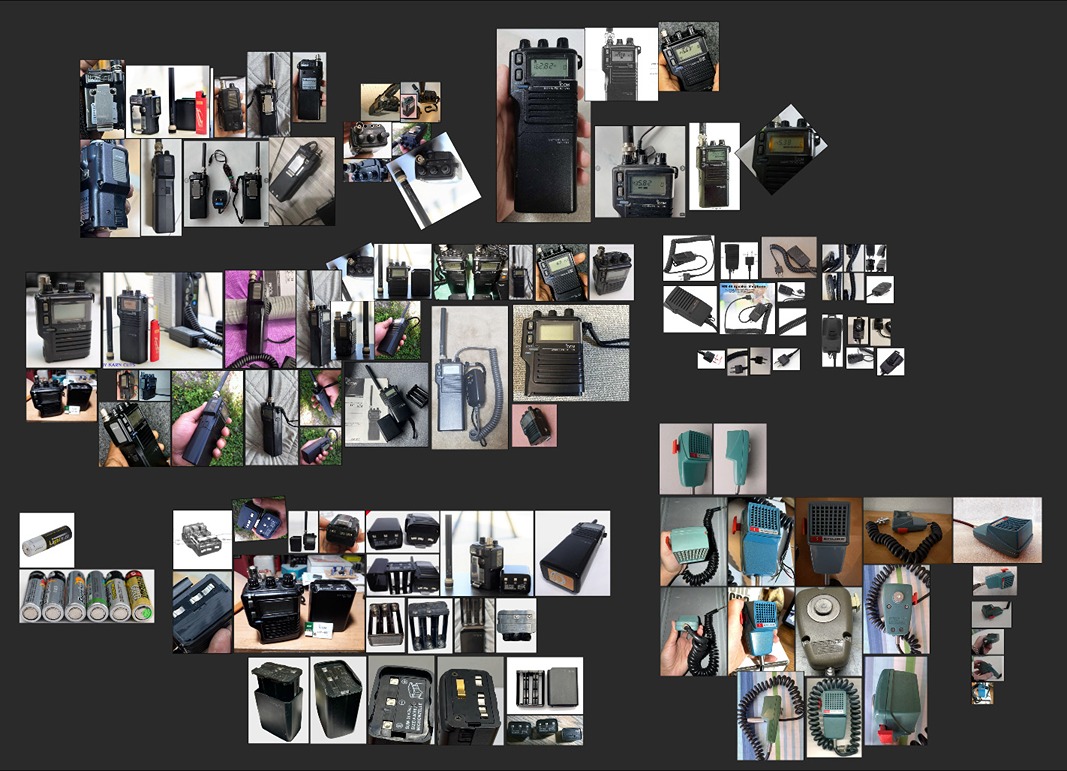
Like most projects, the first step is gathering references.
Since I was working on a real-world object with a specific look, I focused on collecting images from different angles and close-ups for detailing.
Once I had enough, I organized them by view and moved on to the blocking phase in 3ds Max.
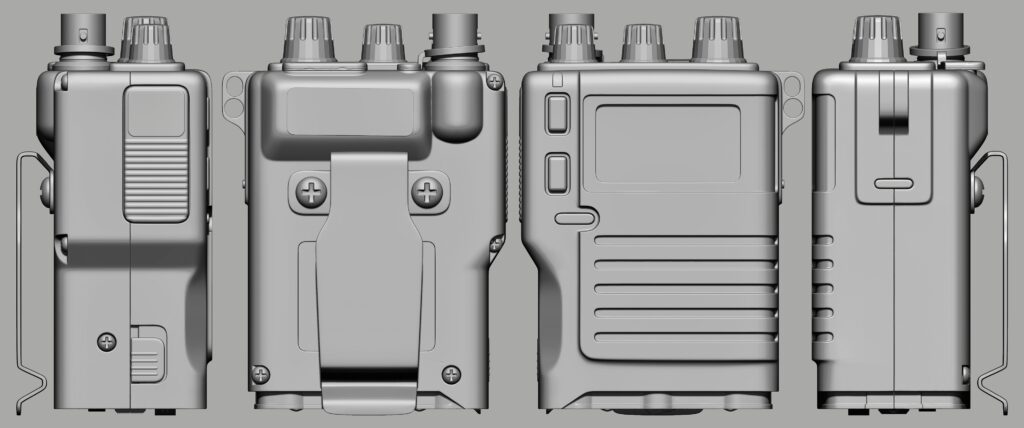
Blockout
I start by setting up the model sheet in 3ds Max. Since this was a fairly simple object, I began with basic box modeling and gradually added details step by step.
Some elements were extruded directly from the base mesh, while others were added using Booleans in a non-destructive way.
The advantage of using Booleans is that all the curves stay perfectly aligned, and with a bit of cleanup, the same object can often be used for the final low poly.
The way I usually approach Booleans is by first placing the original shapes (or placeholders) in their position, then duplicating them.
From there, I simply rescale or extrude parts of it to create the Boolean subtractive shape I need.
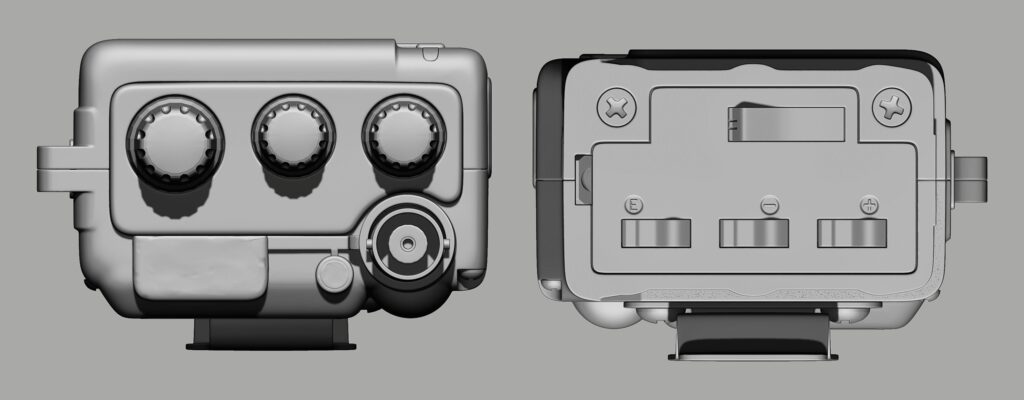
Highpoly
Once the blocking is done and everything’s in place, I bring the model into ZBrush to work on the highpoly. After importing the object into ZBrush, I break it into Groups using “Groups By Normals”.
Then I set a high “crease” value to preserve sharp edges during subdivision. Next, I subdivide to the desired level, duplicate the mesh, and apply “Dynamesh” (preferably at high resolution).
After that, I “Project” it back to maintain clean edges.
At this point, I use “Polish Crisp Edges” to selectively soften the hard edges.
The great thing about this workflow is how controllable and non-destructive it becomes, especially when combined with Morph Targets in the next step.
Here’s how I take advantage of Morph Targets:
After Dynamesh, I apply “Polish Crisp Edges” at a low value, just enough to slightly soften the sharp edges.
Then “Store Morph Target”, crank the “Polish Crisp Edges” to the max level I want, and use the “Morph Brush” to bring back the original edge sharpness exactly how I like.
This pipeline gives full control over how hard or soft each edge feels, and I can tweak it further with brush intensity or use layers for even more flexibility.
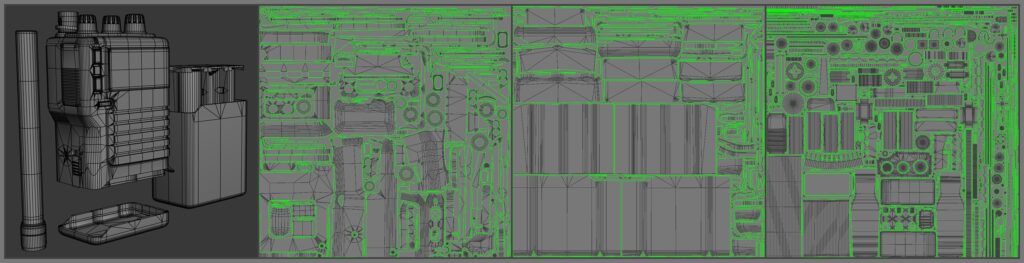
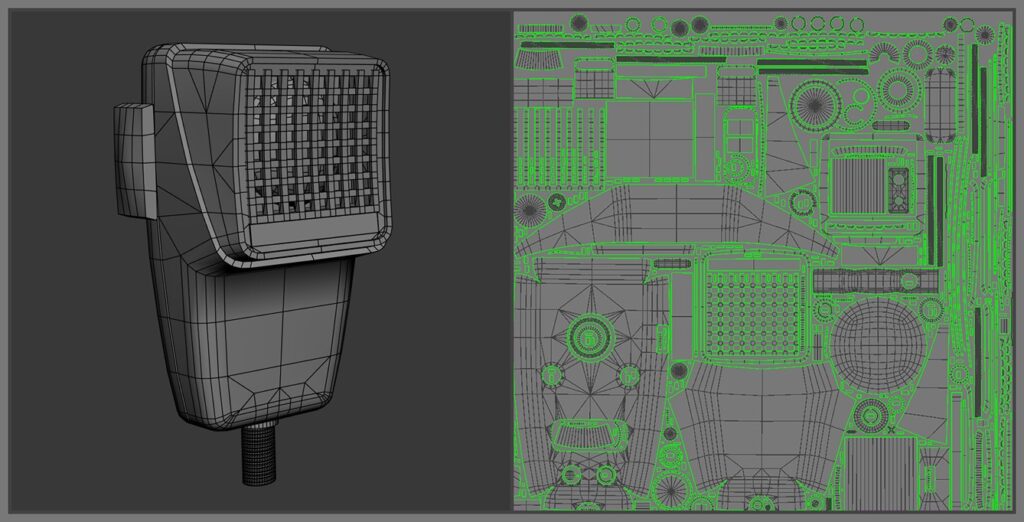
Once the highpoly is finalized, I move on to the lowpoly and UV unwrapping, which in this case, I was just using the cleaned-up and optimized version of the original object.
UVs
For the UV unwrapping, I use a custom tool/pipeline that speeds up both the unwrapping and smoothing group assignment, especially handy for hard surface models.
I bring the low poly model into ZBrush and use “Groups by Normals” to automatically assign poly groups.
Then, I manually adjust the groups where needed, separating parts that will become individual UV patches, each corresponding to a smoothing group.
Next, I import the model into 3ds Max. Make sure that in the import settings, the model is not imported as a single object.
Now we just have to open the UVs using whatever method suits the geometry. Every group now will be a UV patch.
After opening the UVs, weld all the verts, and assign smoothing groups based on the UV islands.
Same process applies to everything else.
Baking
I use Marmoset Toolbag for baking.
The key is to ensure the highpoly and lowpoly are perfectly aligned in the same position, and that they’re named properly for a clean bake.

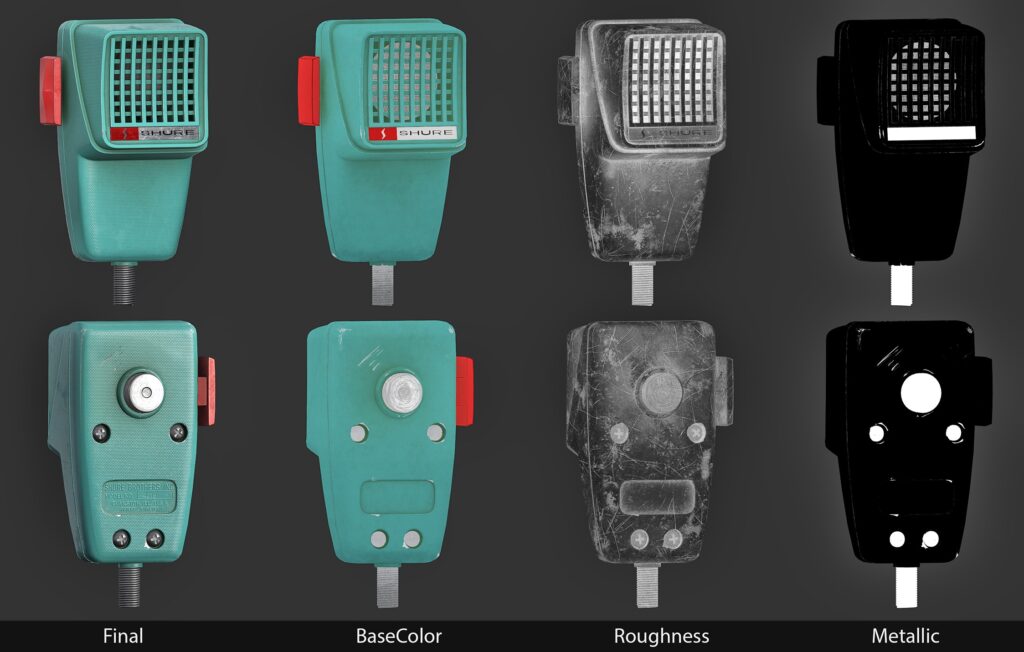
Texturing
When it comes to texturing, I try to follow how materials behave in the real world, starting with base materials and then gradually building up the complexity by adding paint, dirt, and surface variation as needed.
In this layering method, I don’t add extra layers for effects like edge damage, simply subtract them from the top layer/group to reveal what’s underneath.
Combined with careful height control between layers, this approach can lead to much more realistic results.
It’s also very useful to set up a scene in Marmoset from the very beginning of the texturing process, so we can export textures at each stage and instantly check the results in a real-time environment.
I start texturing by creating the base material (beneath layers).
I begin with a simple metal material and try to make it feel more natural by adding subtle roughness variations.
Since these are the base layers, I keep the detailing minimal.
The next group focuses on the object’s main material, which is the plastic.
I also created the screen texture entirely in Photoshop, along with the roughness and emissive maps.

For all the text and signs, I created custom alphas in Photoshop and applied them using stencil where needed.

In the final stage, I complete the texturing by adding scratches and surface imperfections to make it look more realistic, using a stencil or hand-painted.
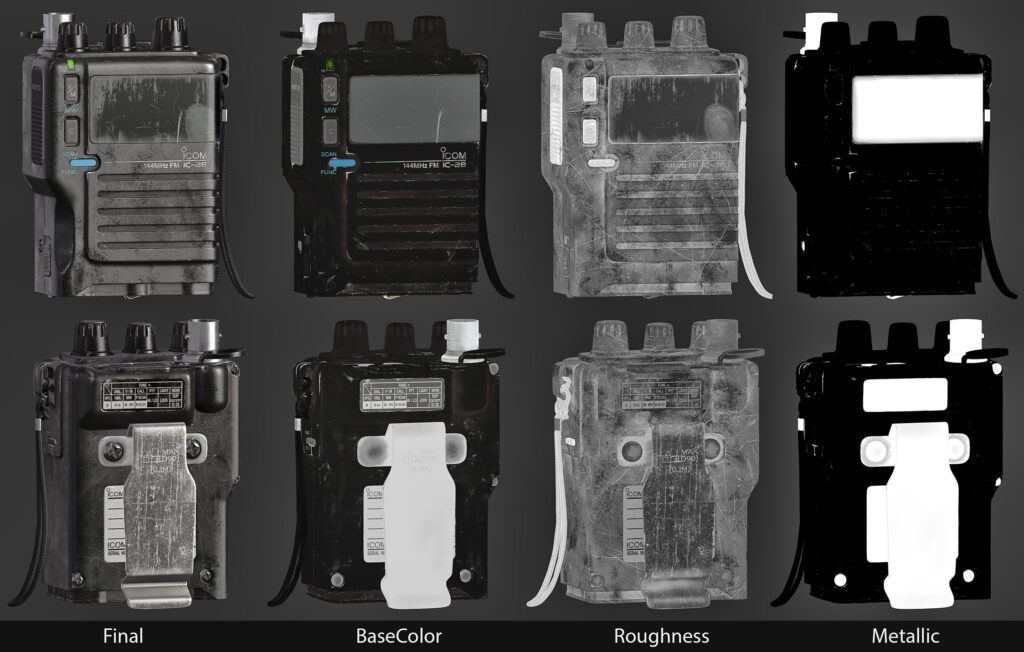

These final touches enhance the overall believability and visual interest of the object and help bring the model to life.
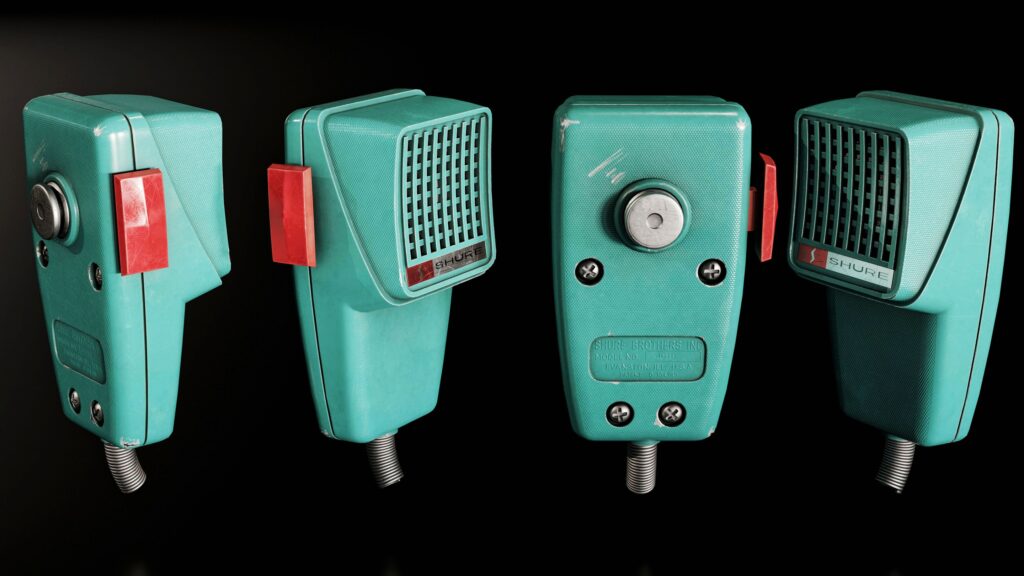
Lighting & Rendering
For lighting and rendering, I primarily use Marmoset due to its ease of use, especially now that it supports UDIMs.
Start by adding individual lights wherever needed to enhance specific areas, while using a low-intensity HDRI for general reflections and overall ambience.
Thanks for checking out this breakdown. I hope you found it helpful!
Big thanks to the GamesArtist.co.uk Team for the platform and support.
Read more articles
You might also like these articles.