Introduction
Hi all! My name is Andrey, I am a 3D artist from Russia.
I am a self-taught artist specializing in character modeling. I like to work in style fantasy and dark fantasy.
Goals
The main goal of this work was to create a visually appealing character for the portfolio and improve the quality of translating the character from a 2D concept to 3D.
Design Concept
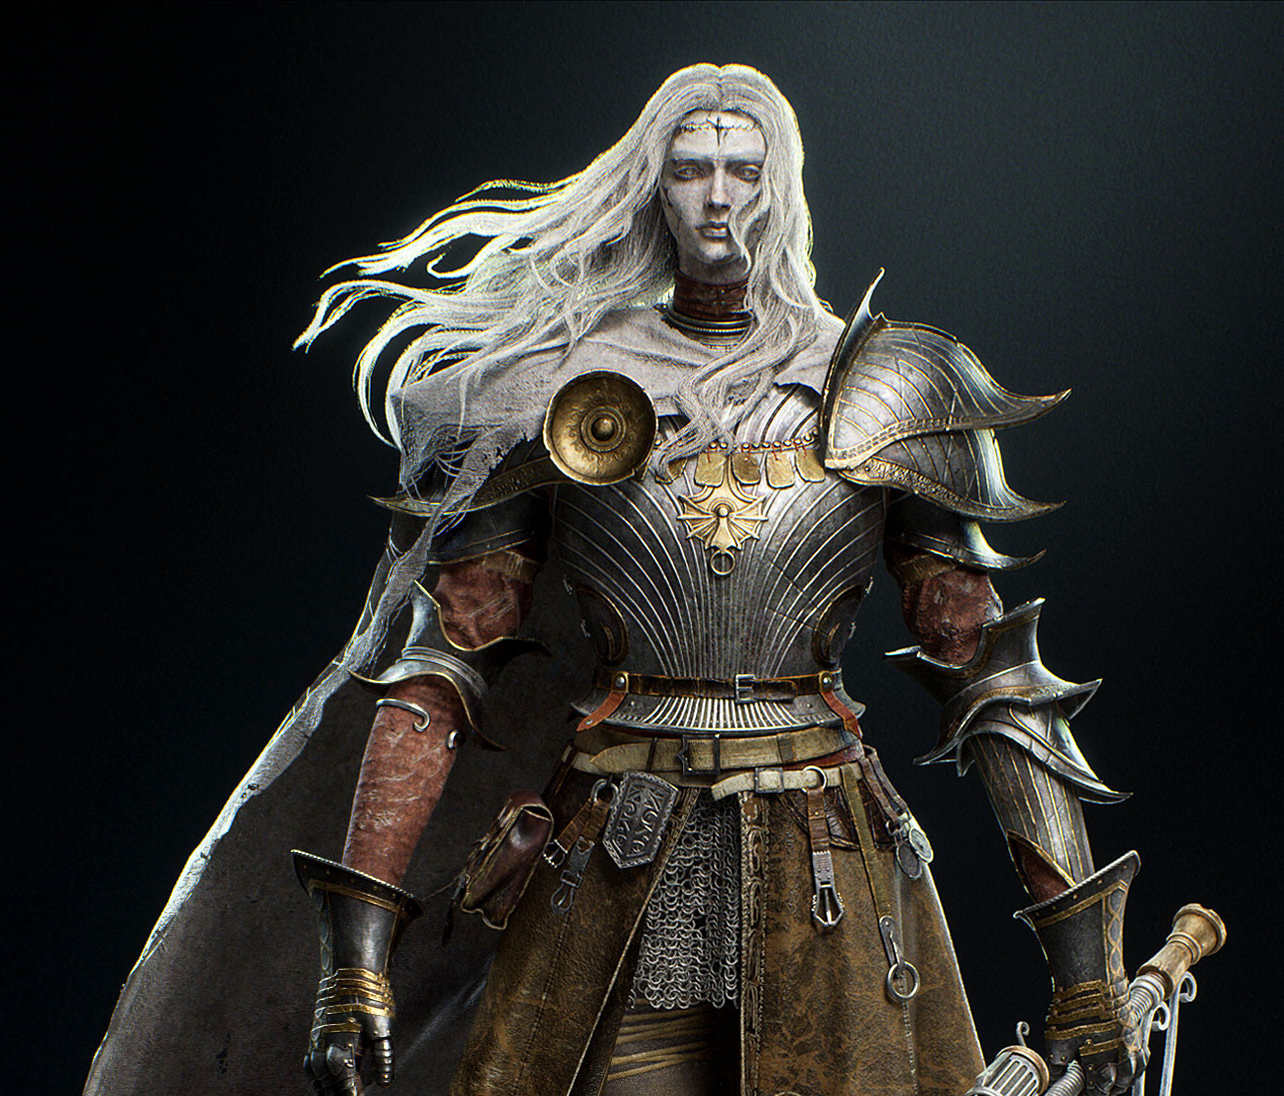
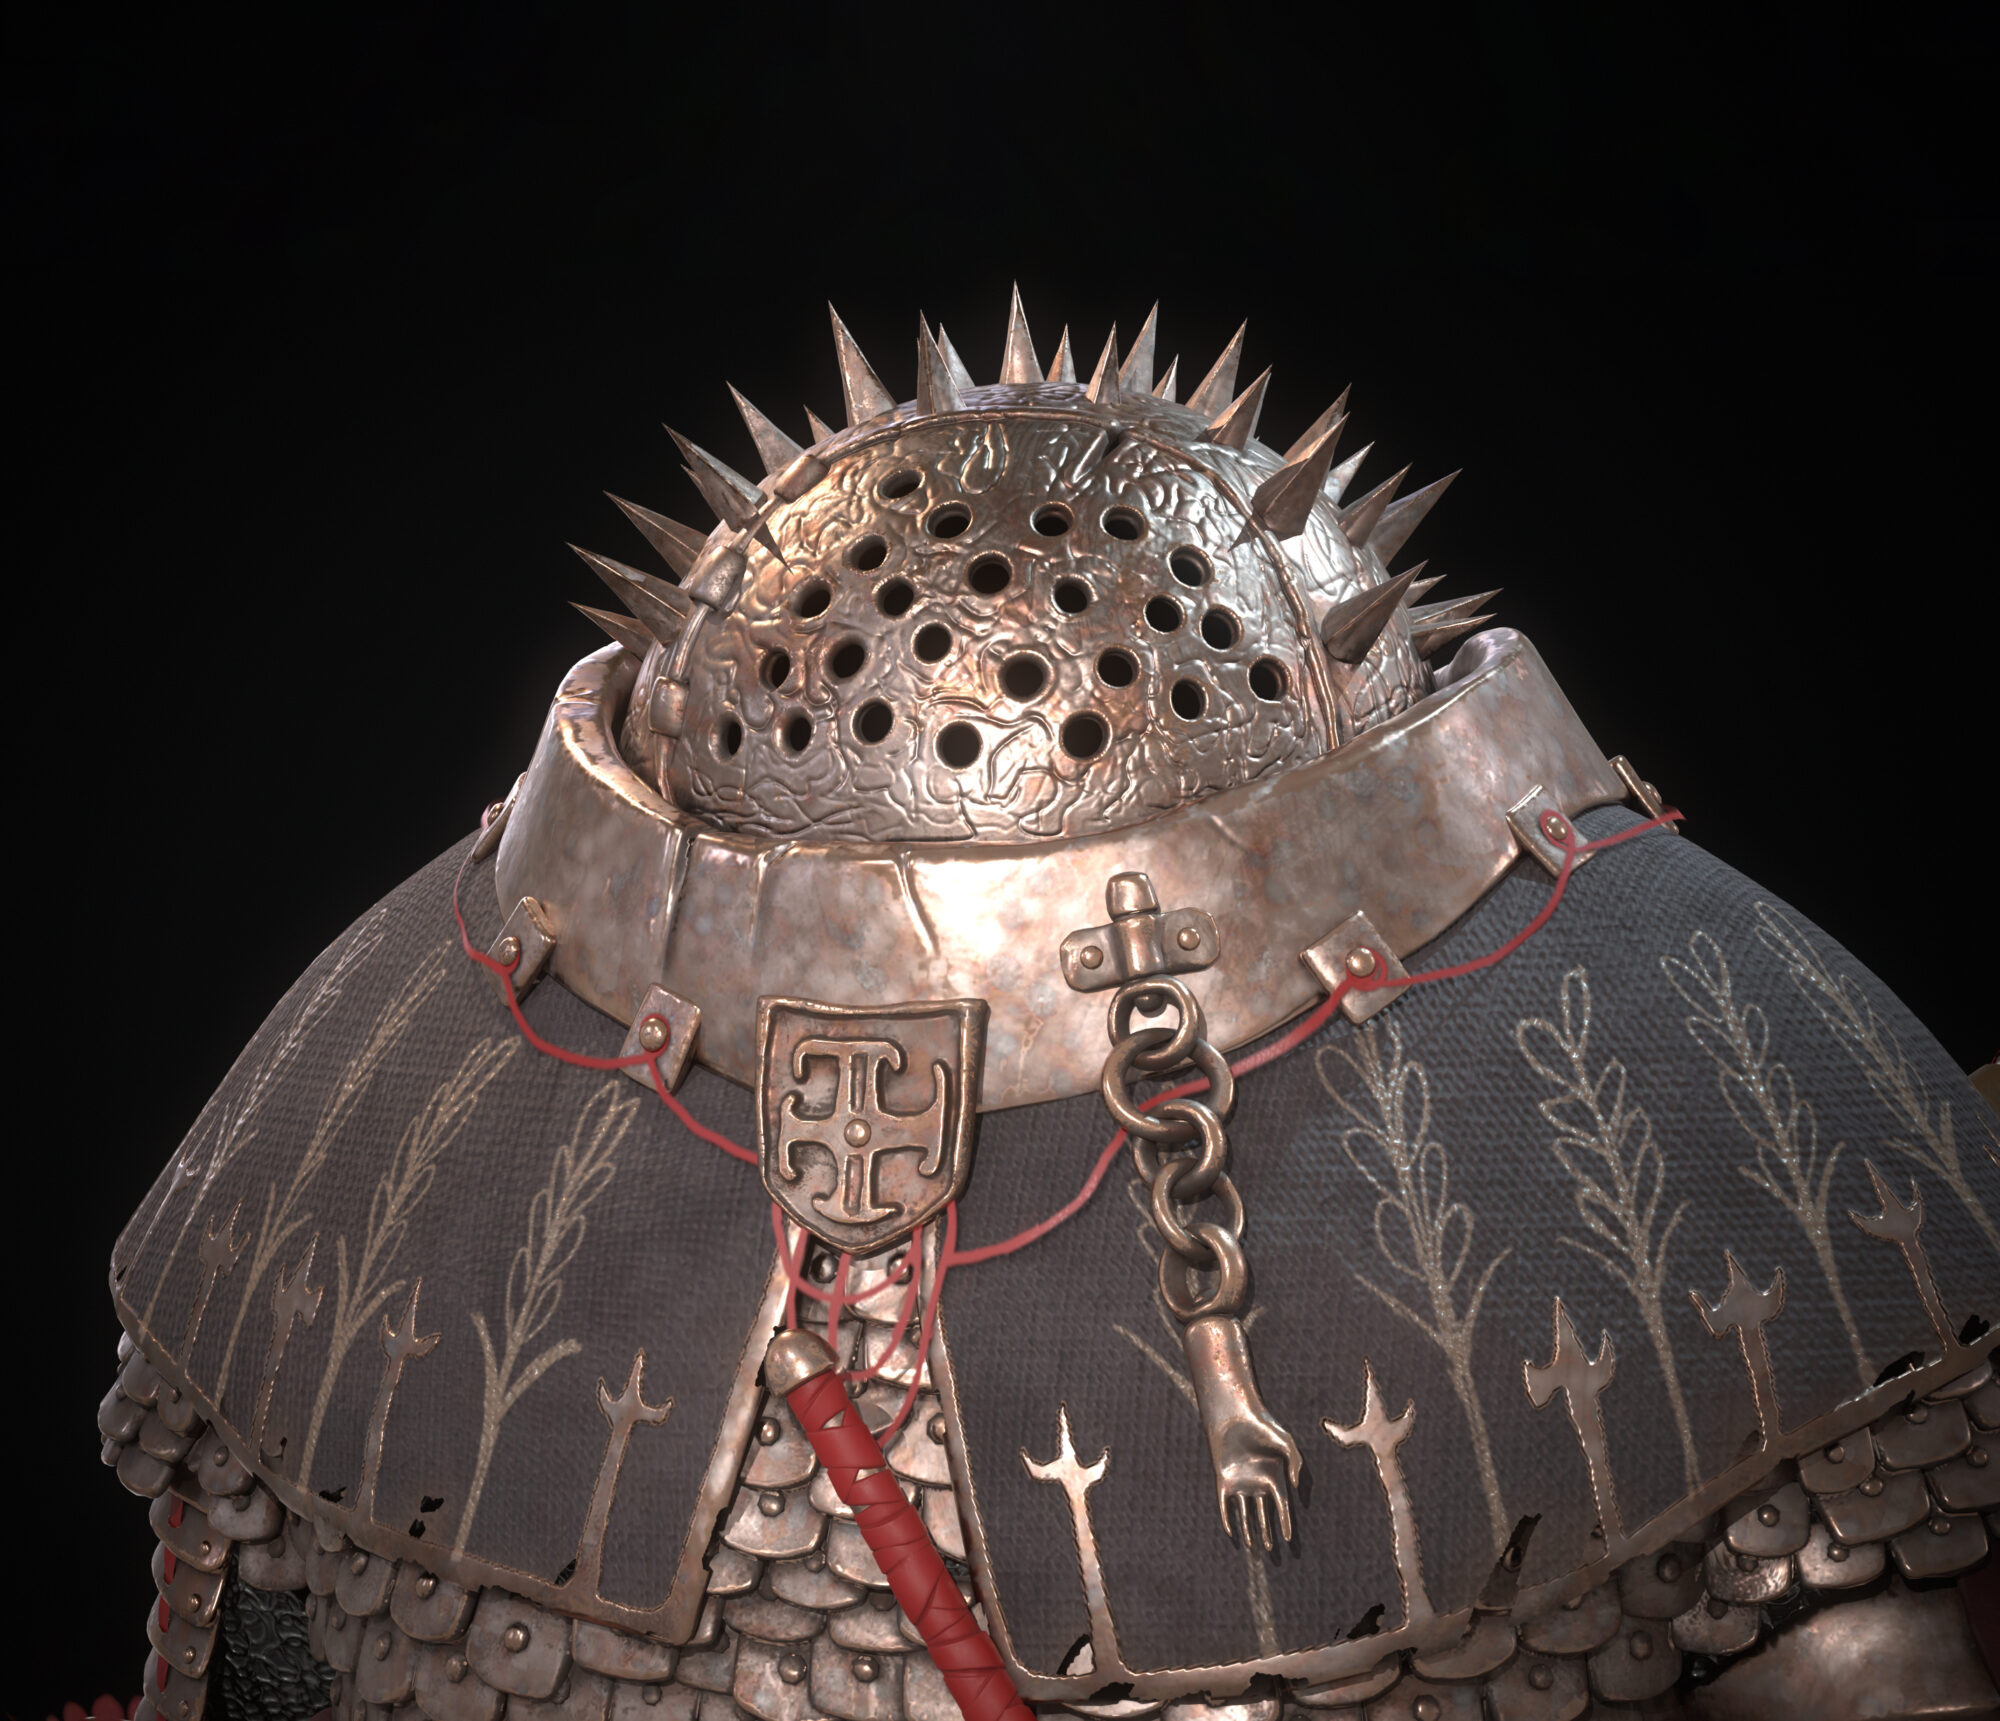
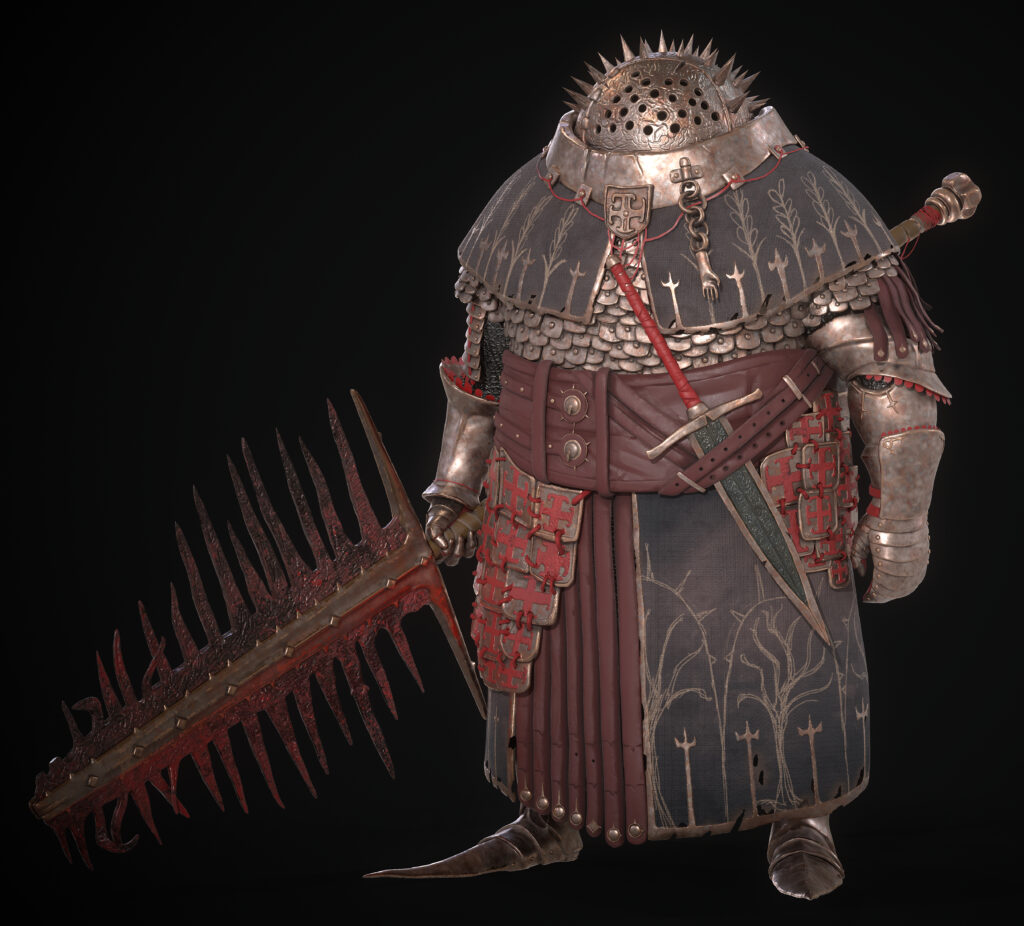
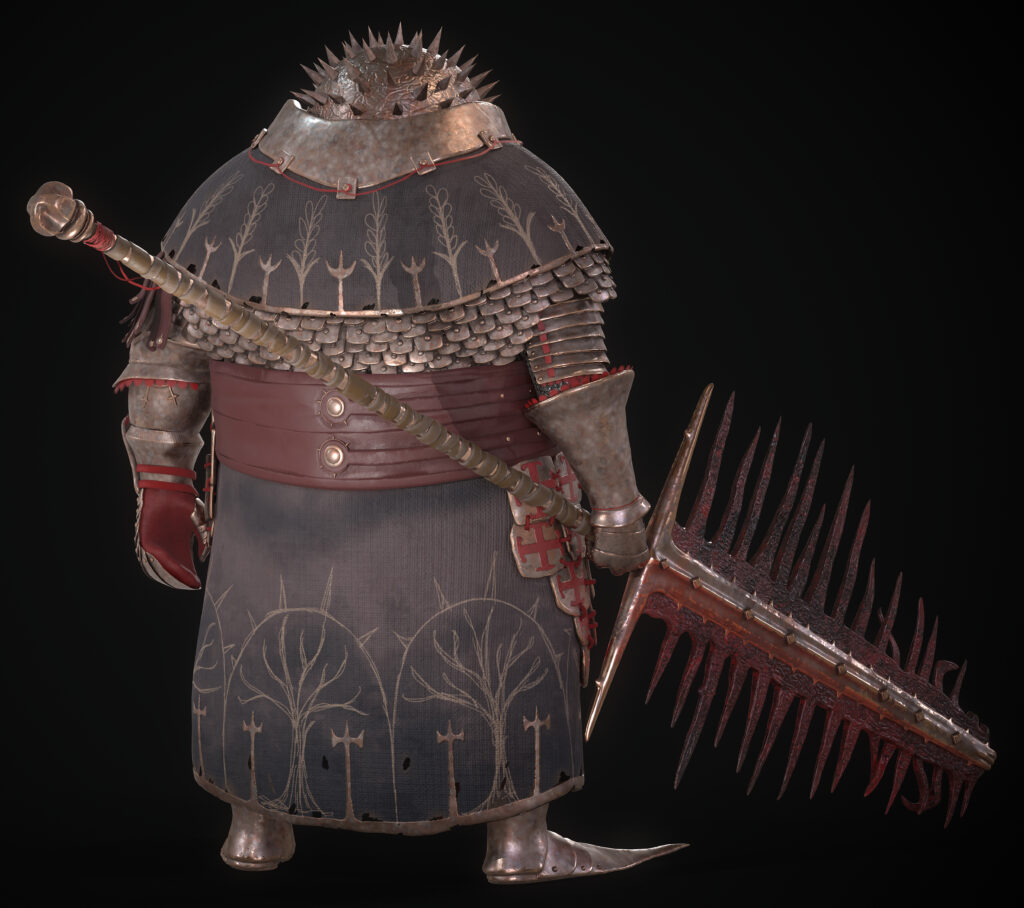
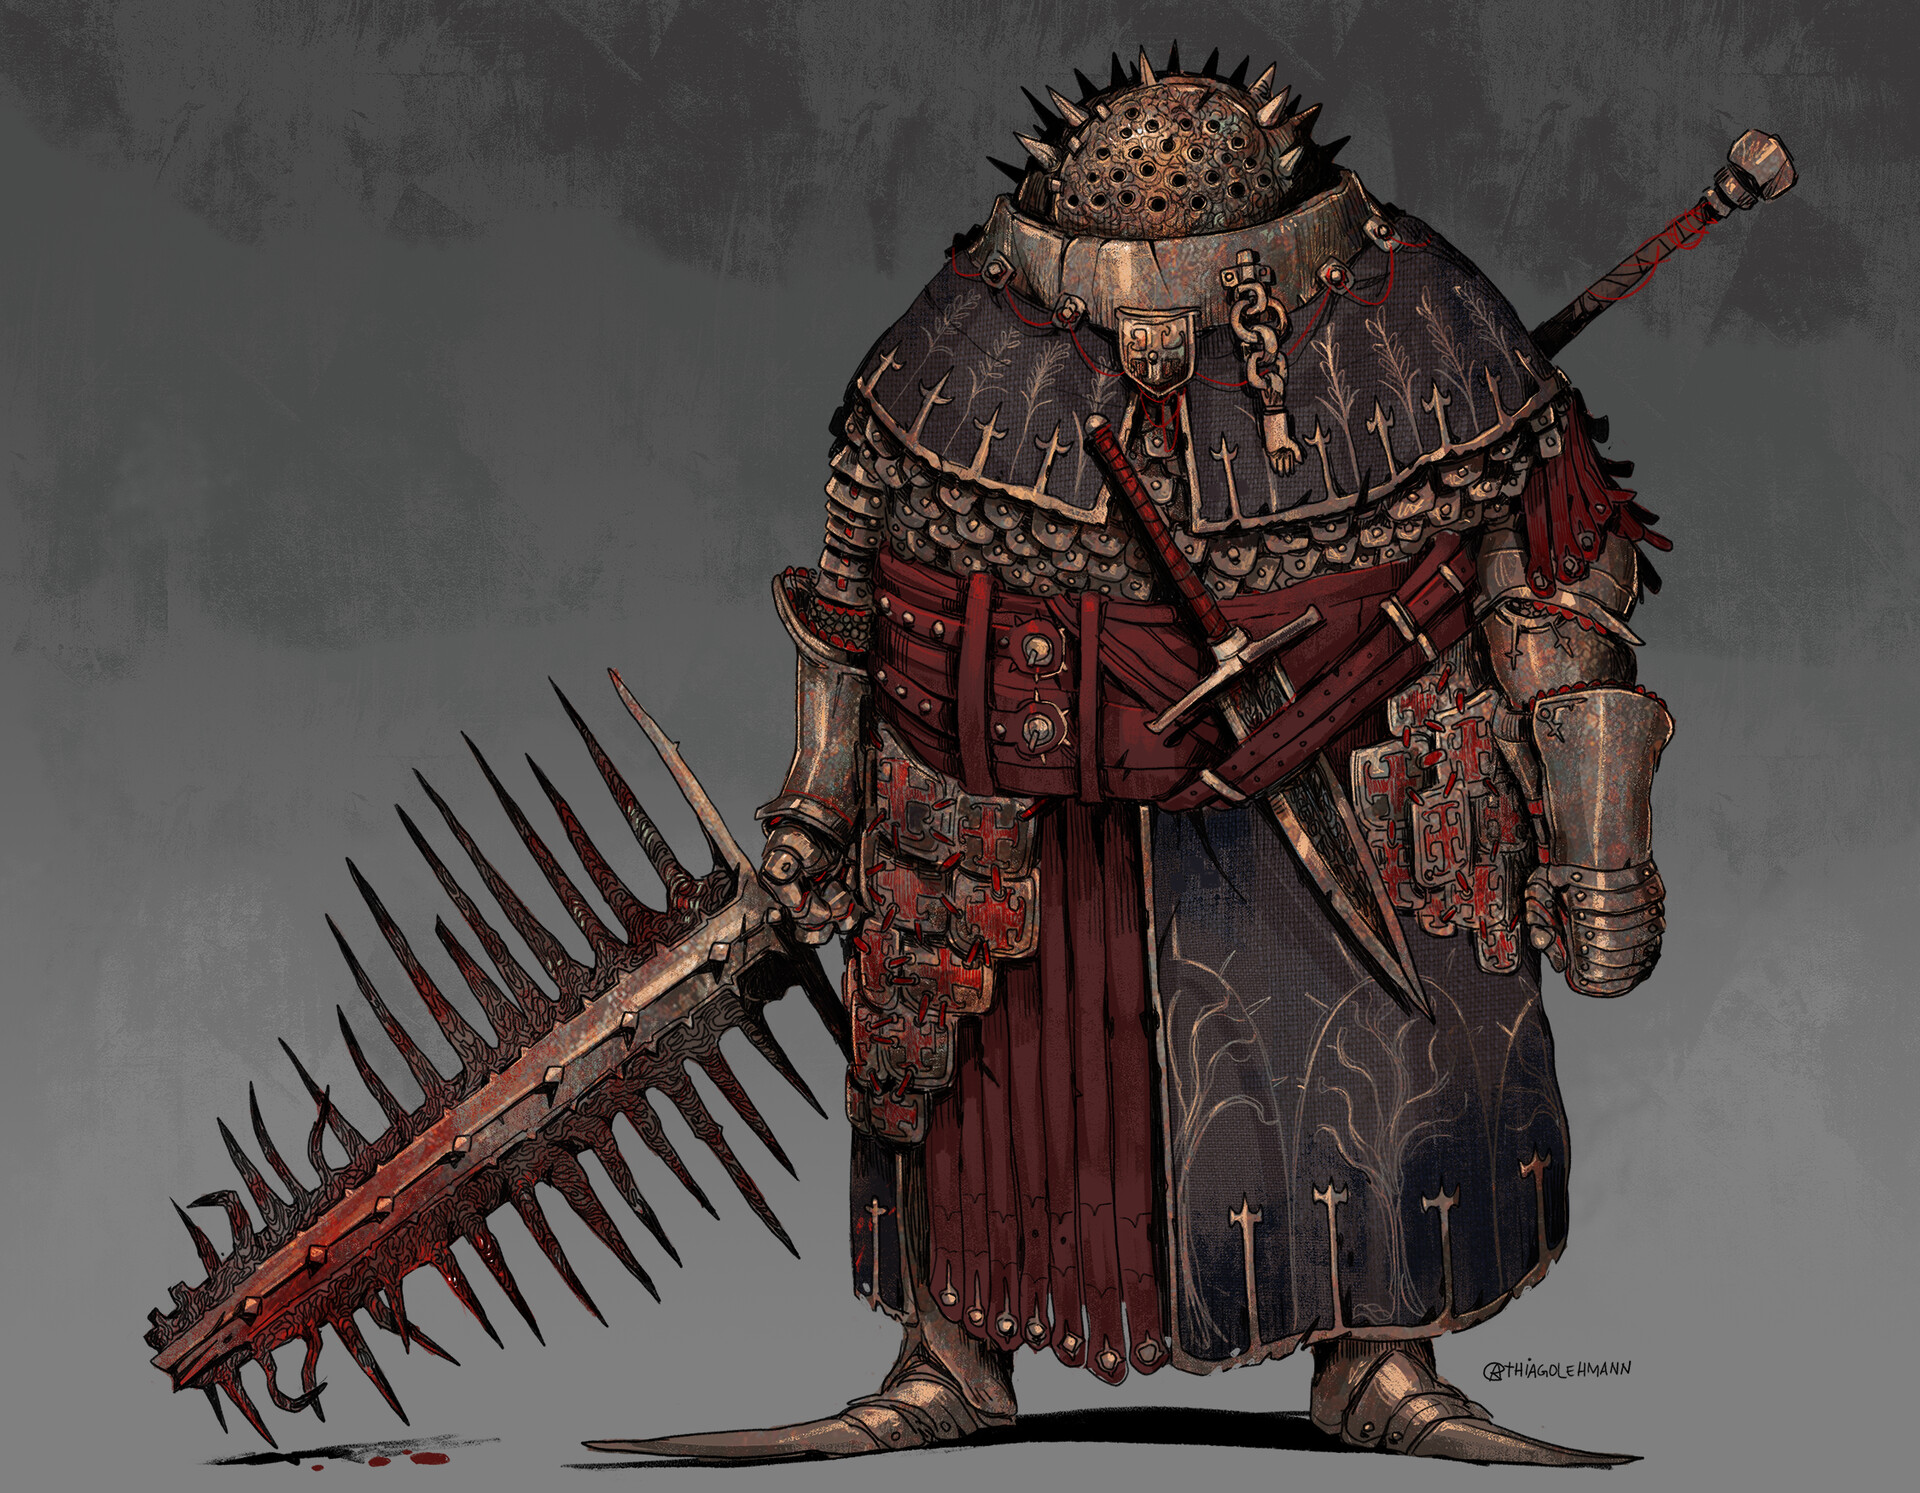
I really love the style of games like Dark Souls and Elden Ring; they serve as a great source of inspiration for me. These games feature dark and somber narratives. That is why I have chosen an intriguing concept by Thiago Lehmann called “Priest of Thorns”.
When I work on a piece, I strive to replicate the concept as faithfully as possible, as the original artist often imbues it with completeness and harmony by incorporating intricate details.
Software
- ZBrush – Creating high-poly sculpts and detailing.
- Substance Painter – Baking and Texturing.
- RizomUV for UV mapping.
- Marmoset Toolbag – Rendering in video format and images.
Sculpting
Reminds me of plasticine work, and from this, I begin my work. You do not fetter yourself; trust the process and know that step by step, iteration by iteration, the process will take you where you need to be, to the completed result. At the very beginning, I create approximate forms to determine the proportional look of the work. Then I define the main silhouettes and shapes.
After that, little by little, I add the main details. When modeling, I do not save polygons and use as many as necessary to achieve the desired result. In my work, I usually use standard brushes such as ClayBuildUp, Move, SnakeHook, hPolish, TrimDynamic, Inflate, and DamStandard.
Low poly
Regarding low poly, I just used the ZBrush ZRemesher tool to reduce the polygon count. However, before that, I typically ensure clean topology by utilizing ZRemesher.
This approach is suitable for static models, but if you plan to incorporate animations, this topology may not suffice. Manual intervention is required in such cases.
UVs
For my work, I used the Rizome automatic UV tool. This method simplified the process and also accelerated further work with textures.
In general, this option is good for a simple presentation, but I do not recommend using it for production work.
Baking & Texturing
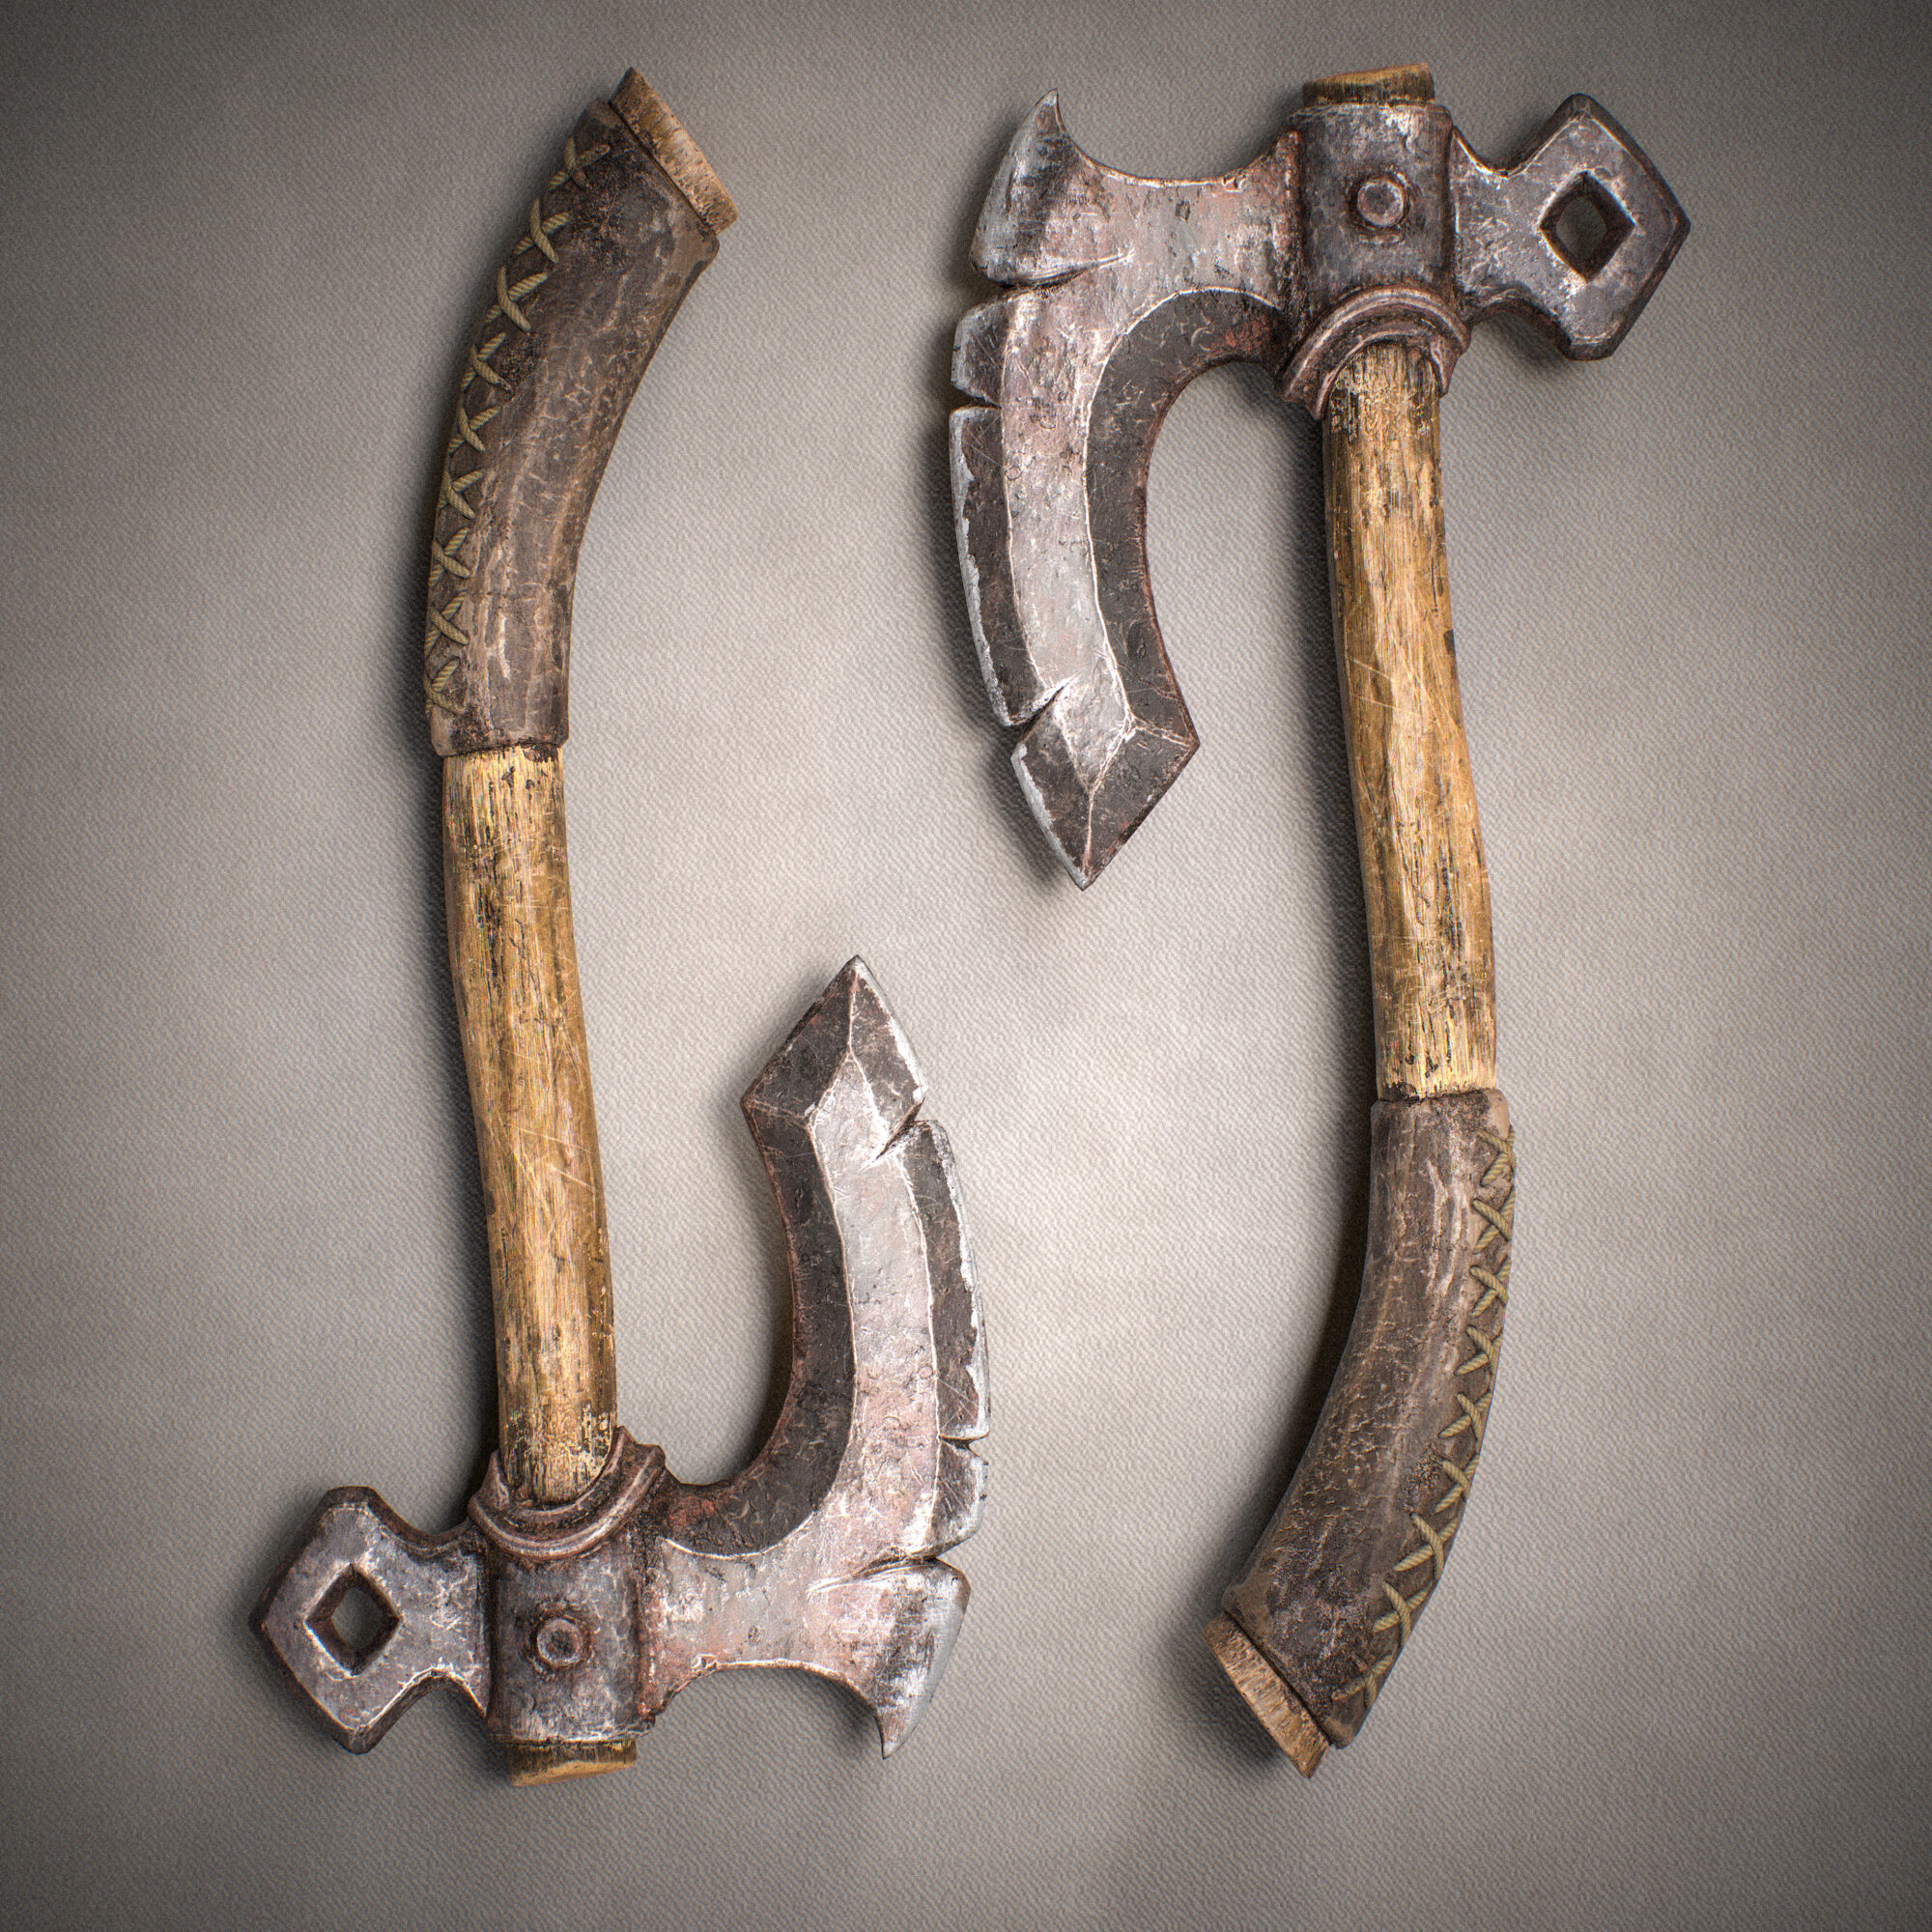
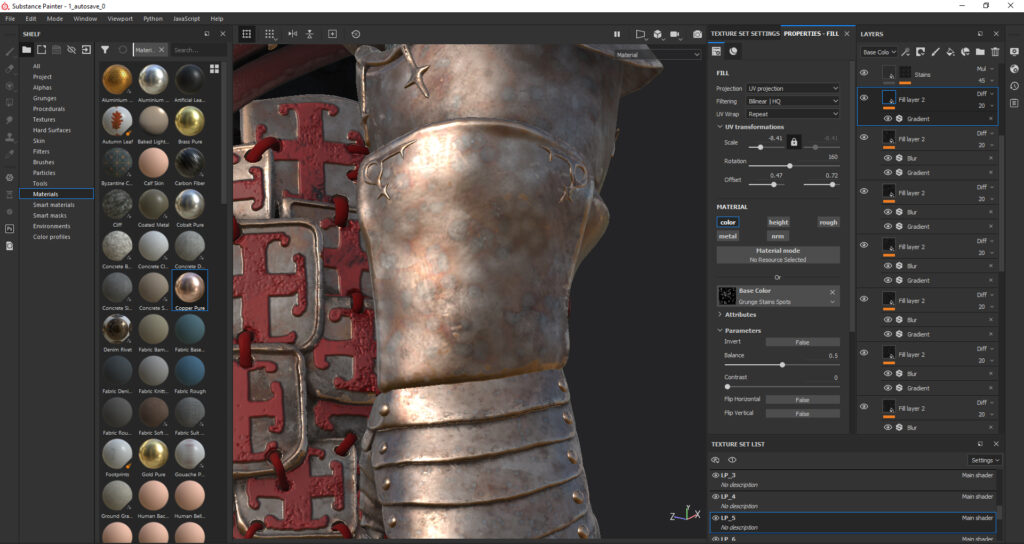
Texturing is really cool! In it, you can see almost the final result of the work on the appearance. For this character, I tried different materials and masks that could help recreate the textures that the author chose for their concept.
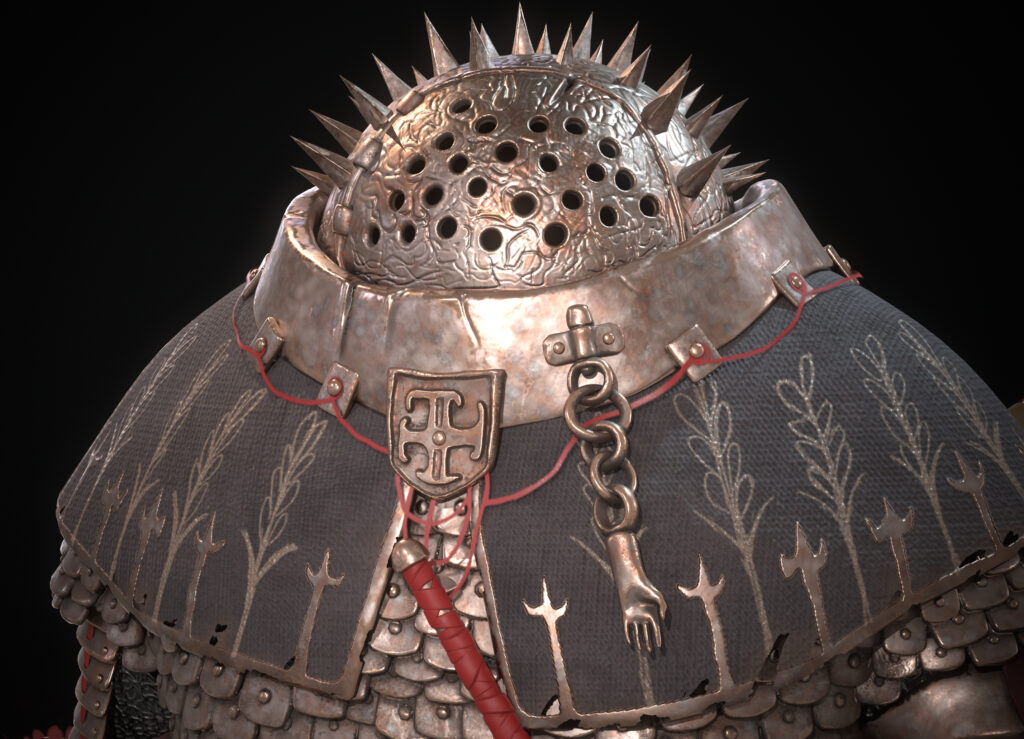
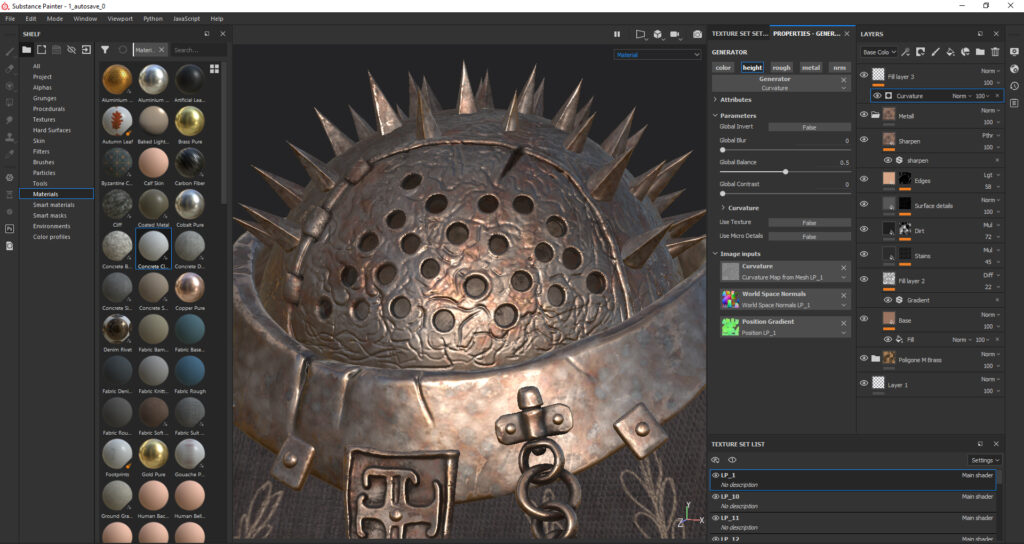
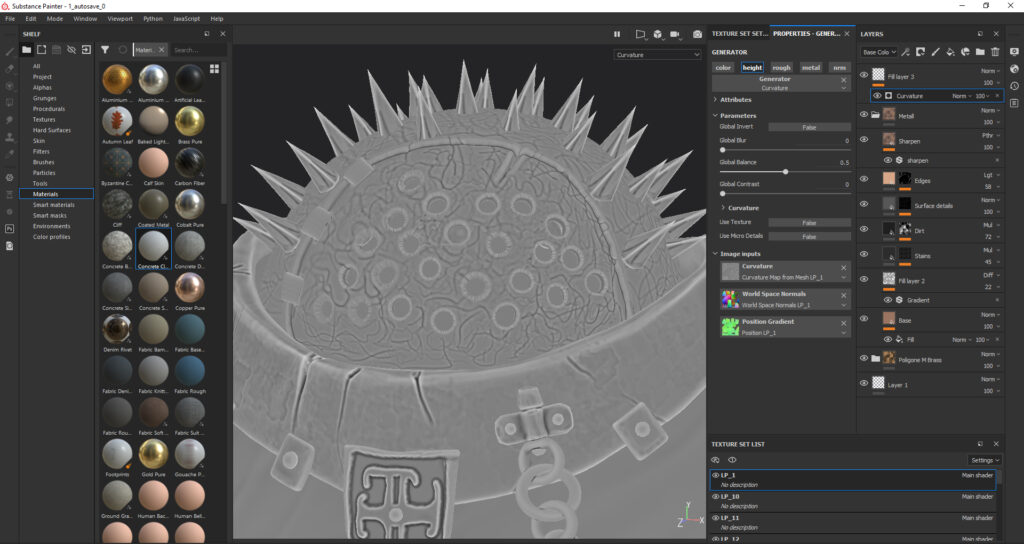
Metal texturing is especially fun. When I wanted to recreate the effect I desired with spots on the metal, I didn’t even know where to start. However, during my search, I discovered that a similar effect is called “metal interference”.
After that, I added the necessary mask and duplicated it several times.
The metallic texture is particularly interesting. When I wanted to recreate the desired effect with metallic flecks, I didn’t even know where to start. However, during my search, I found out that a similar effect is called “metal interference”. After that, I added the necessary mask and duplicated it several times.
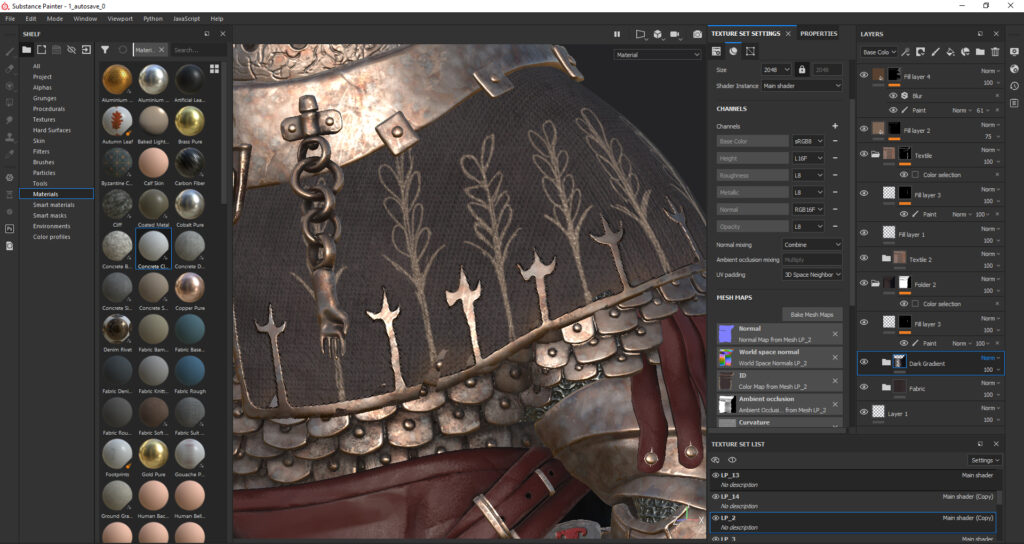
I also used Ambient Occlusion, Curvature, and Height masks, as well as grunge maps, to add some depth and detail.
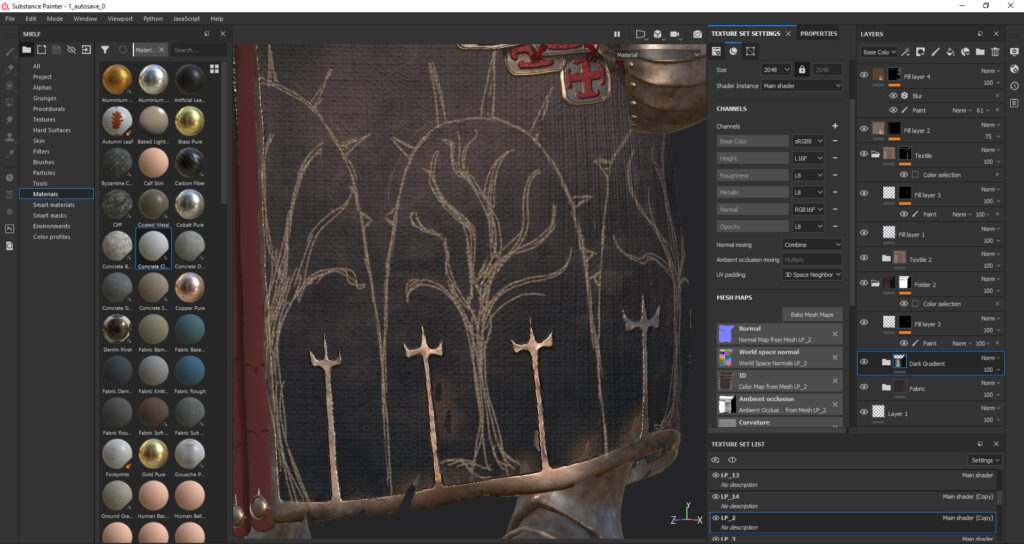
The Height map is especially noticeable on the character’s helmet and weapons. It is used as a pattern there.
When working with fabric, I aim to replicate the desired fabric pattern while staying true to the concept. It was important for me to recreate the same design as in the concept, so I used a brush and painted trees and ears of corn by hand.
Rendering & Lighting
For the final render and preview, I used the 4 Marmoset Toolbag. It has enough settings to create a polished presentation to work with!
In the scene itself, I implemented a fairly simple lighting setup for the character, utilizing a key light and an edge light. I also added additional lights to achieve nice highlights on the metal surfaces.
Regarding the camera settings, I opted for a range of 120-150mm. Such settings typically give the character a more substantial appearance.
Furthermore, I strongly believe that every 3D artist’s work should include an animation or video that presents it in its entirety. Showcasing your work from all angles is the most captivating way to exhibit it. Moreover, I am not in favor of employing Photoshop or various retouching techniques for individual frames in pictures; instead, I prefer capturing real-time shots.

Conclusion
In general, I am pleased with how the work turned out. Additionally, during the process, I learned a lot about new workflows and practiced things that I had never tried before. I feel motivated for new and more challenging projects in the future!
I want to express a special thank you to GameArtist for contacting me and giving me this incredible opportunity to share my vision of workflow with you, as well as my experience in writing similar articles!
Read more articles
You might also like these articles.