Modular Structures Kit


Introduction
Hello everyone! I’m Montasar Feydi, a 24-year-old 3D environment and props artist from Tunisia.
I started my journey in 3D back in 2020 and have taken on various modeling and texturing roles throughout my academic path.
After earning my bachelor’s degree in 3D Animation in 2022, I joined Mob Entertainment as an environment artist, where I had the opportunity to contribute to three shipped titles: Project Playtime, Poppy Playtime Chapter 3, and Chapter 4.
Now, as I approach graduation this month with a master’s in Games Art from Teesside University in the UK, I’m looking forward to the next chapter. I’m passionate about crafting realistic props, immersive environments, and detailed materials.
I’m currently exploring new opportunities where I can bring that passion into exciting challenges and continue growing as an artist.


Goals & Tools
The goal behind this project is to push me to build a huge environment from scratch and I tried to focus on each prop separately to achieve a photorealistic style by maintaining the scene as optimized as possible.
The tools I used for this project are:
3DS Max
Adobe Substance Painter
Marmoset Toolbag 4
Unreal Engine 5
Reference
The mood board was a very important part of the project since I’m working on a complex scene. I collected references for each prop in the scene so I can have a clear vision of the work I have and manage my time by dividing the tasks perfectly. Making each prop into different kits will help you in the modeling and texturing process.
You can divide the props based on the shape which will help speed up your modeling process as you will reuse model parts and make some changes to them to creat other models.
You can divide the props based on the material. That will help speed up your texturing process by reusing the same material in different props with some variations.

Blockout
Based on my references, I started by making very low poly shapes for all the props I have with the real-world scale and the right dimensions. That helped me a lot in building the environment Blockout and seeing if I need to add or delete some props.
Also, the props Blockout helped me in the modeling presence scene as I have the dimension and the scale already done.


Modelling
For the workflow I used, I tried to keep the geometry as lwo poly as possible. Instead of creating a high poly version and baking it to the low poly version later, I used the weighted Normal modifier with a small bevel.


UVs
I used 3dsMax for the UV unraping, with 300px/m texeldencity target.
I used the “Texel Density Tool” script to get and set texel density easily. Make sure to check overlapped polygons and inverted polygons.


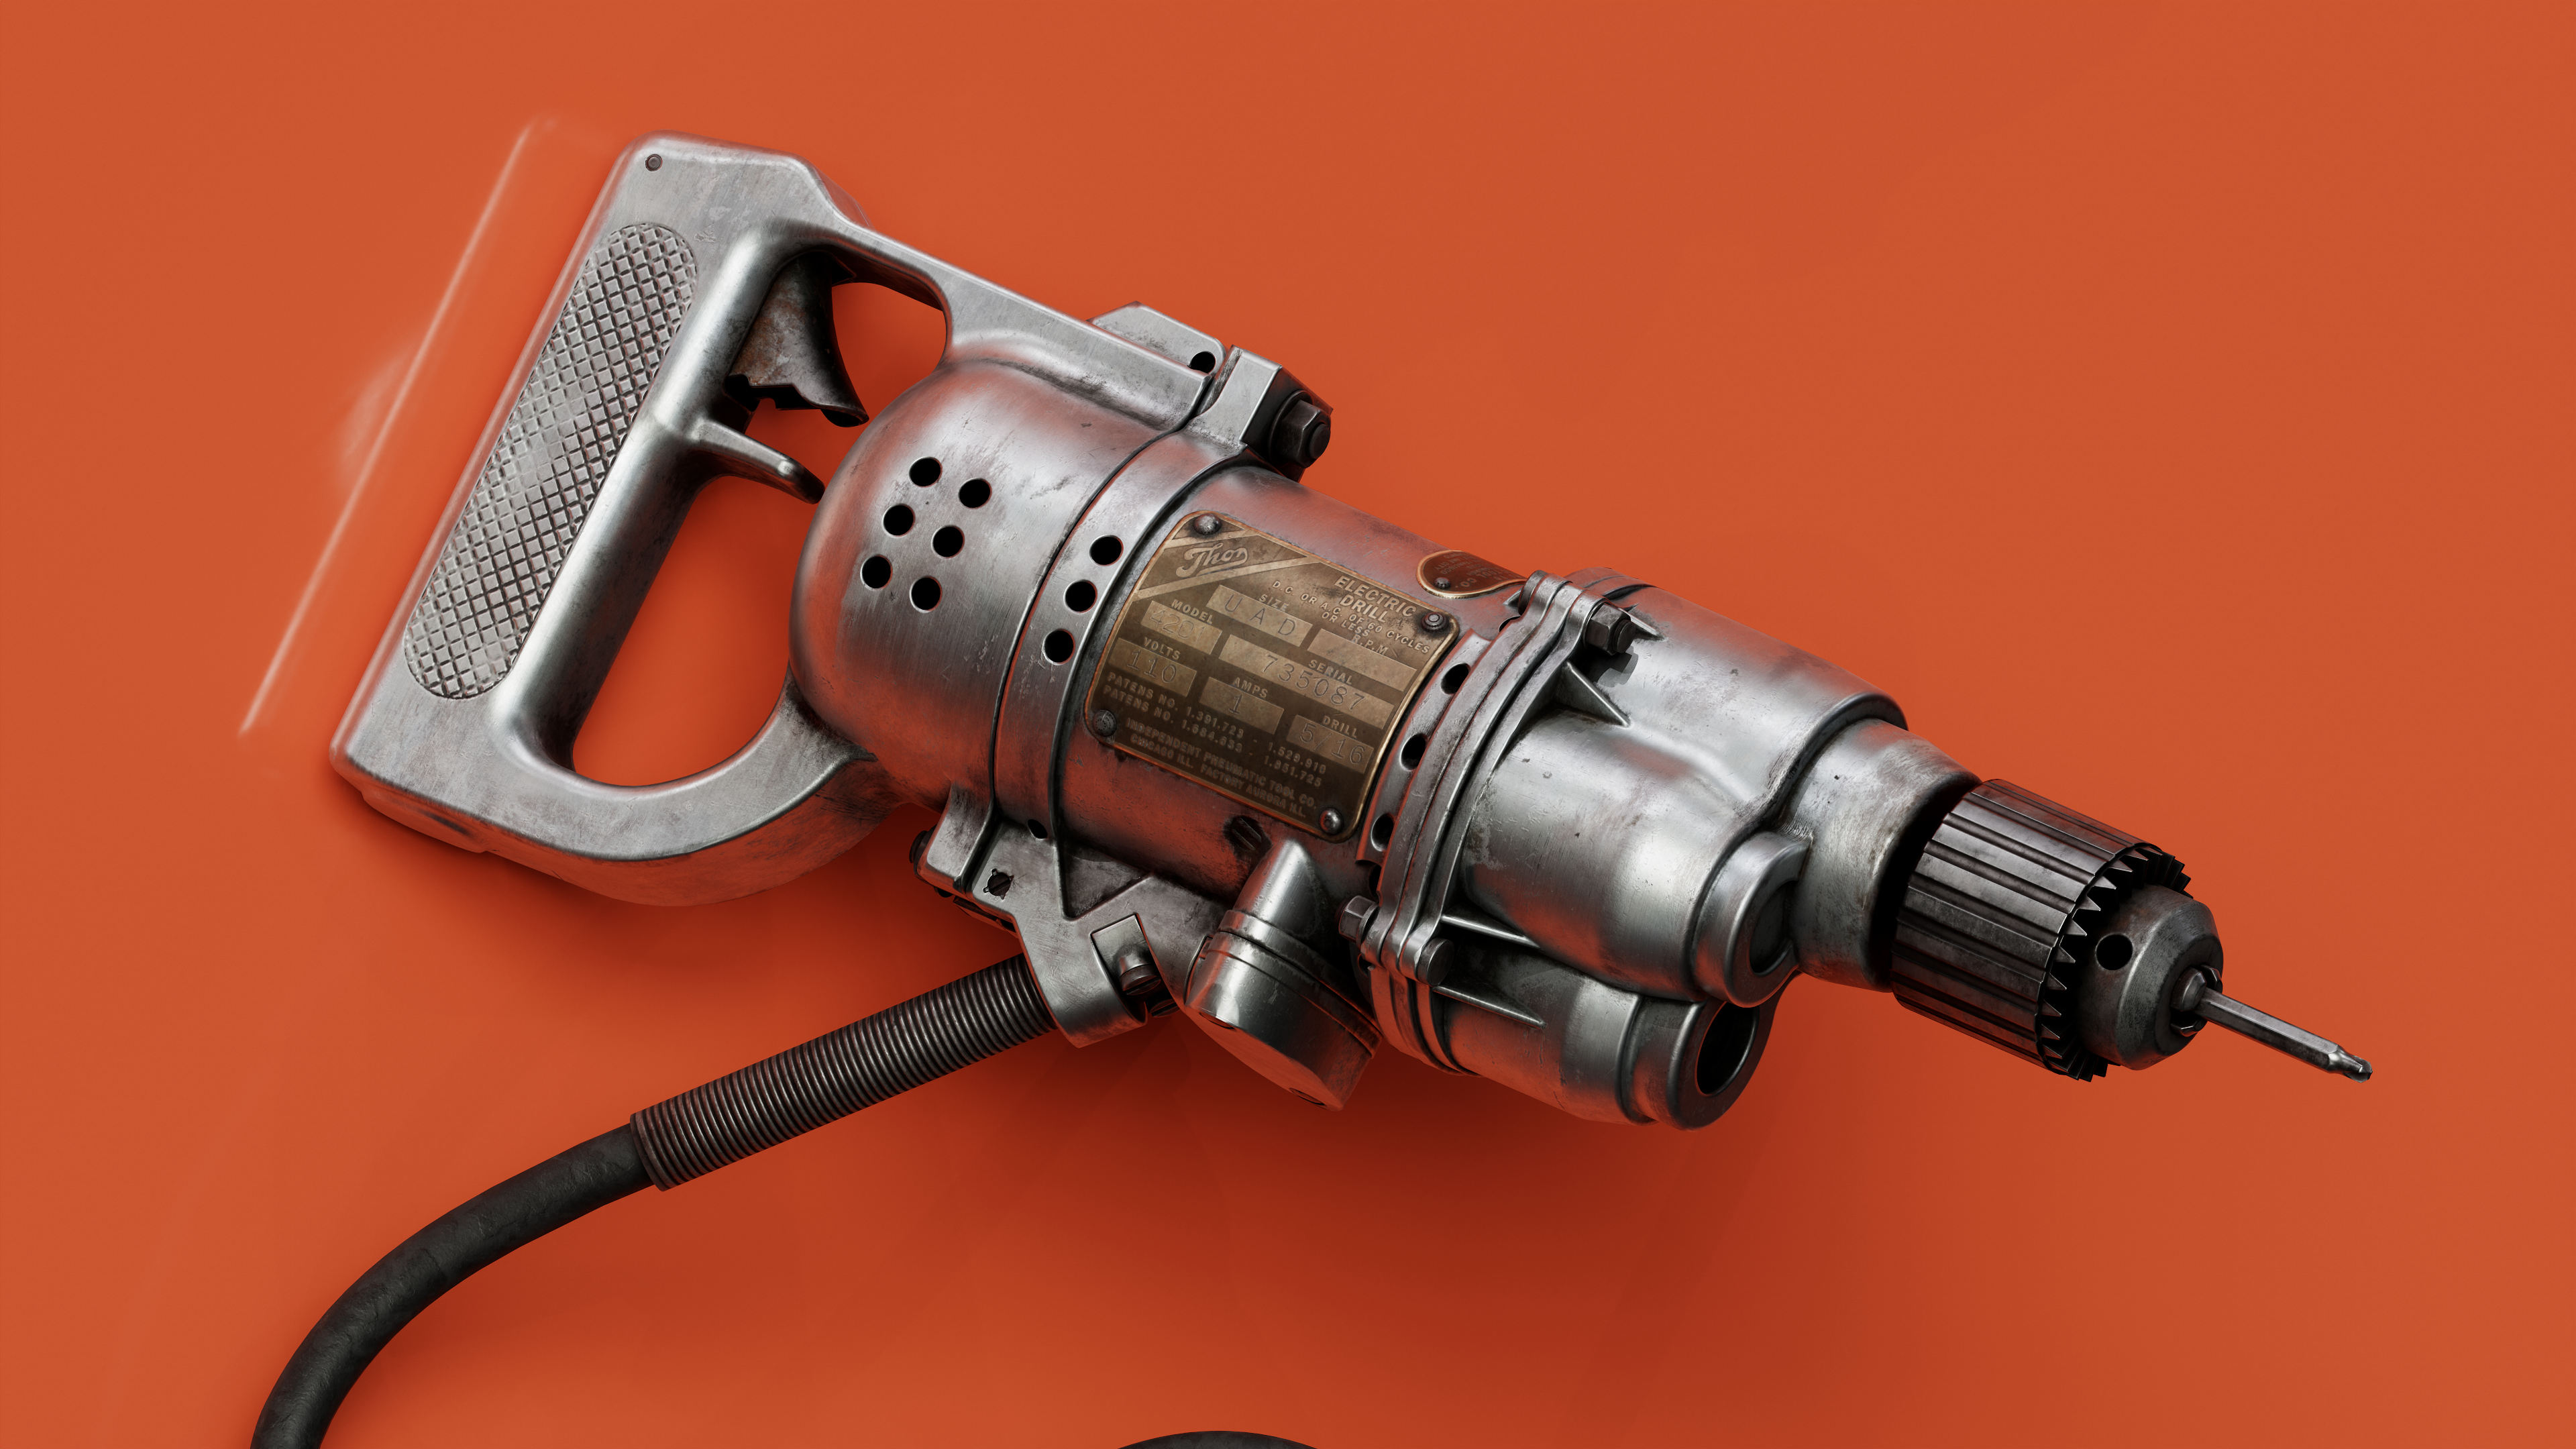
Texturing
I’ve created a master material for the Pipes then I copied it and made some changes to it to achieve new materials, For the texture resolution I’ve exported 4k texture for the Marmoset render
and 2k texture for UE.
It’s good practice to create your material in a separate project before applying it to your model.
That will help you focus just on it without any distractions.
For the pipe’s metal material, I’ve created three principle folders. The first one is for the base metal and normal details. Another one for the dirt and rust.. (using grunge and smart masks)
and the last one for roughness.
You don’t need to create complex materials since you can achieve the same result with simple clicks: “keep it simple”.


Lighting
When I started working at Marmoset Toolbag, I set the background to a dark color, the camera lens to 10mm to avoid any distortion and the render resolution to 4k with transparent background.
For the light, I used one principal light from the front, two side lights, and 1 backlight to separate the model from the background and to create a good rim light effect. I add also have two Omni lights in the place that I want to drive the spectator’s eyes to.
If you want to achieve a realistic render I suggest not using the marmoset post effect or using them with very slight values like (Glow, sharpen and grain…). Doing that on Photoshop or any other specific tool will give you more control over your value.
Exporting your render with a high resolution and then decreasing the image resolution, will help you get more detailed results than rendering it with a low resolution directly
When you think you are done, go away for a while, take a rest, and refresh your eyes. so you can see things from a new perspective.

Render & post-production
For the post-production I try to keep it simple as possible and to don’t go crazy with the values, that will break your work.
I made some adjustments for the brightness contrast and the sharpening value and I used the curve to add some contrast to the render.
You can add a very slight grain value to the render. That will make it look more realistic and not smooth, like the photography camera image.


Conclusion
Set a big goal for yourself. That will guarantee you will learn too much along the way. That will also keep you always motivated to achieve the final result.
I hope you find this article helpful and thanks very much for reading it. Also many thanks to Games Artist for inviting me!
Read more articles
You might also like these articles.