

Introduction
Hello, my name is Allan Politano, I’m 23 years old and I’m a 3D environment and prop artist freelancer, from Sao Paulo, Brazil.
Project Goals
When I started this project I was a long time without focusing on personal projects, so I started looking for references of interesting things to do in the medieval style. Some of my favorite medieval weapons are bows, crossbows, etc. When I play games and have the option I always choose the archer.


References
After much research, I found a great concept-art of a gauntlet Crossbow made by the Éva Kárpáti. I liked it because it had3 different materials: Leather, wood and metal, which would be great for me to train to finish it. I would do identical to the Concept but as I advanced I saw that I was running away from the realistic look I was looking for, the proportions and “mechanics” were getting too cartoon.
So I started researching a lot of references of people building gauntlet crossbows to understand the functionalities and from that, I changed the concept a little bit. In the meantime, I found a museum site (The Met Museum) with incredible photos in high resolution of medieval items such as leather, metal and a lot of crossbows, Iliterallylost more than an hour just catching references there.
I also did a lot of research on how materials were made in medieval times, watched many videos manufacturing leather, metal and assembling/creating crossbows. This was my PureRef at the end of the project:

Blockout/Modelling
I had practically 2 block-outs in the course of the project, I started with a similar to the Éva concept but I changed until I reached a quality that pleased me. In the process of the first blockout I used the arm of the Unreal Scaleman to adjust and make the dimensions right.

And after the review and looking for several references I arrived at this result:

I believe that the main change from the first model to the second was functionality. The arrow had a very large tip, it would weigh a lot for a hand crossbow.
It also didn’t seem to fit very well in the vambrace, in the second model I made an effort to make this idea quite visible, how the parts were fitted or were removed for cleaning and maintenance, and I noticed in the references and videos that there wasn’t a very practical technique to weld the metals in medieval times, the pieces were most often connected by nails.
I also wasn’t sure how the trigger system would work, to reload and so on, so I pulled into something closer than I saw in the common crossbows.
Highpoly

My primary idea for the high poly was to make only small details in the wood and leather, such as the pressure of the nails on the leather, but I ended up making details in most of the pieces.
The one I liked most for sure was the leather which gave me the freedom to make the piece more artistic. I saw several videos of people applying a “pattern” on the sides of the leather but I didn’t know how I would do it in Sculpt. I researched several references and tips but it was taking a lot of work and it wasn’t getting an interesting result.
It was then that I ended up finding a great pack of brushes called Zbrush -60 Ornament Trim Brushes Vol.1 that saved me a lot of work and headaches. The bottom ornament was made using an alpha founded on the internet. To make the rope I used 3 different techniques in Blender. Where it is in red I used curves and array. In blue, I was positioning one by one to create a better uniformity. And in yellow it was using a circle with the Screw modifier and then some adjustments.

Low-poly
For the low-Poly mesh, I wanted to keep as much detail as possible without leaving it too heavy. I didn’t want to optimize to the point of being visible the edges, but I tried to avoid details that would be solved in Bake. Some of the most visible nails I made as mesh, but the most hidden ones were made only in the texture. The whole model was with 59,800 tris.
UV -Baking
I separated the model into 2 UVs to achieve better quality. One filled mostly with leather parts and the other with most wood and metal parts.


The bakeswere made in Marmoset Toolbag 3 and I used the bake group technique to avoid intersection problems, avery good tool that speeds up the bake process.

Texturing
The texturing part for me is always a challenge that I have overcome with each new model. To make the texture of this model I researched both references of 3D models made by other artists and also photos and videos. Leather was the material I worked on most, I researched the history of how they were finished in medieval times, what were the materials and techniques, as well as the cut and construction of pieces.
I noticed that the leather has a lot of color, bumps and roughness variations, mainly an older and used one that was the look I wanted for my model.
The wood I wanted a dirtier appearance as if it had been used for days without cleaning.
For the metal was looking for something shiny but without appearing to be totally clean. And for the rope, I tried something much dirtier, with color and roughness variations to really give the appearance that it was quite handled.

Rendering in Marmoset
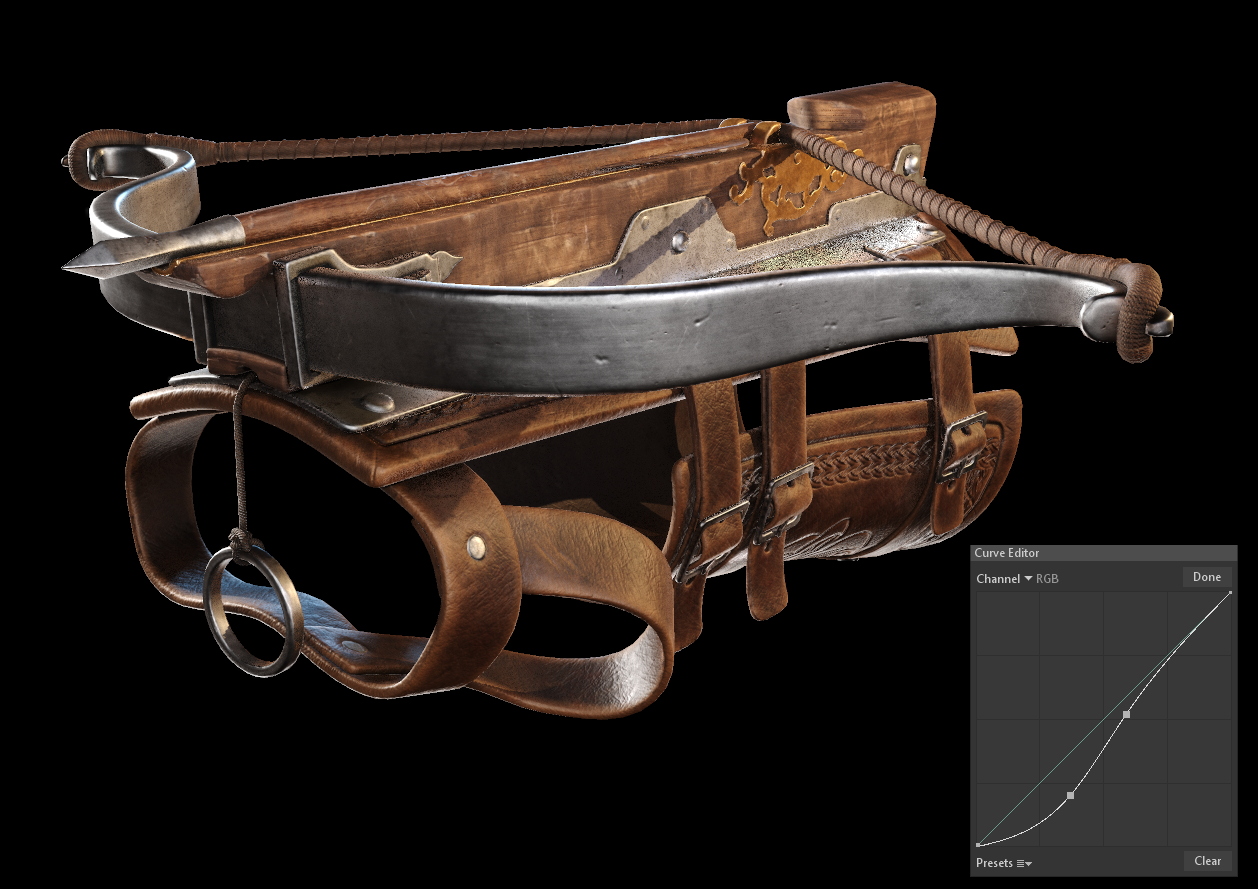
The rendering part for me is one of the most fun steps, is where the project really shines. From the beginning, I wanted something with good contrast between hot/cold with strong lighting but with well-defined shadows to show the color and roughness variations in each material. In Substance Painter, I was using the color profile Aces_ue4_log, but when I put in Marmoset was with a more homogeneous appearance, had lost that interesting contrast between dark and light. I ended up adjusting it on the curve editor of the cameras.

After several tips and seeing content about that, I saw that the presentation was one of the most important parts to show that you went through all stages of the production of the model and it could work inside the game. I finished my marmoset scene with 16 cameras, not all put as final images but were good for testing light and positioning. I made short videos showing parts of the object too and blur takes to show the details better.
Another thing that I was charged in a job interview is to put the highpoly – lowpoly screenshots as well as the UV’s textures maps, I quite liked those final steps.
Conclusion
I arrived at this work in a result that I did not expect to achieve. I achieved this mainly with the help of other artists more experienced than me. A piece of advice from those who have spent a lot of time studying alone.
As soon as you can try to be close to people that make you grow and improve. Alone you can even move forward, but it is not even close to the evolution of when you are if other artists.
The software I used on this project was: Blender/ Zbrush/ Substance Painter/ Marmoset and Photoshop for the final touches thank the Game Artist team for having seen my work and given me the honor to do this article!
Here is the link to the artwork if you’d like to take a look.
If you want to call me to talk or for some work opportunity you can contact me any time on my Artstation or in my email.
Thanks for reading! Allan Politano.

