Introduction
Hi, my name is Aleksandr Lyan and I'm a CGI Artist living in Los Angeles.
Software
Maya, Zbrush, Mari, Marvelous, Arnold render, Character creator.
Paid files
- 3dScanStore / HD Displacement map + Color map + base mesh in one pack
- XYZ / Face Displacement
References
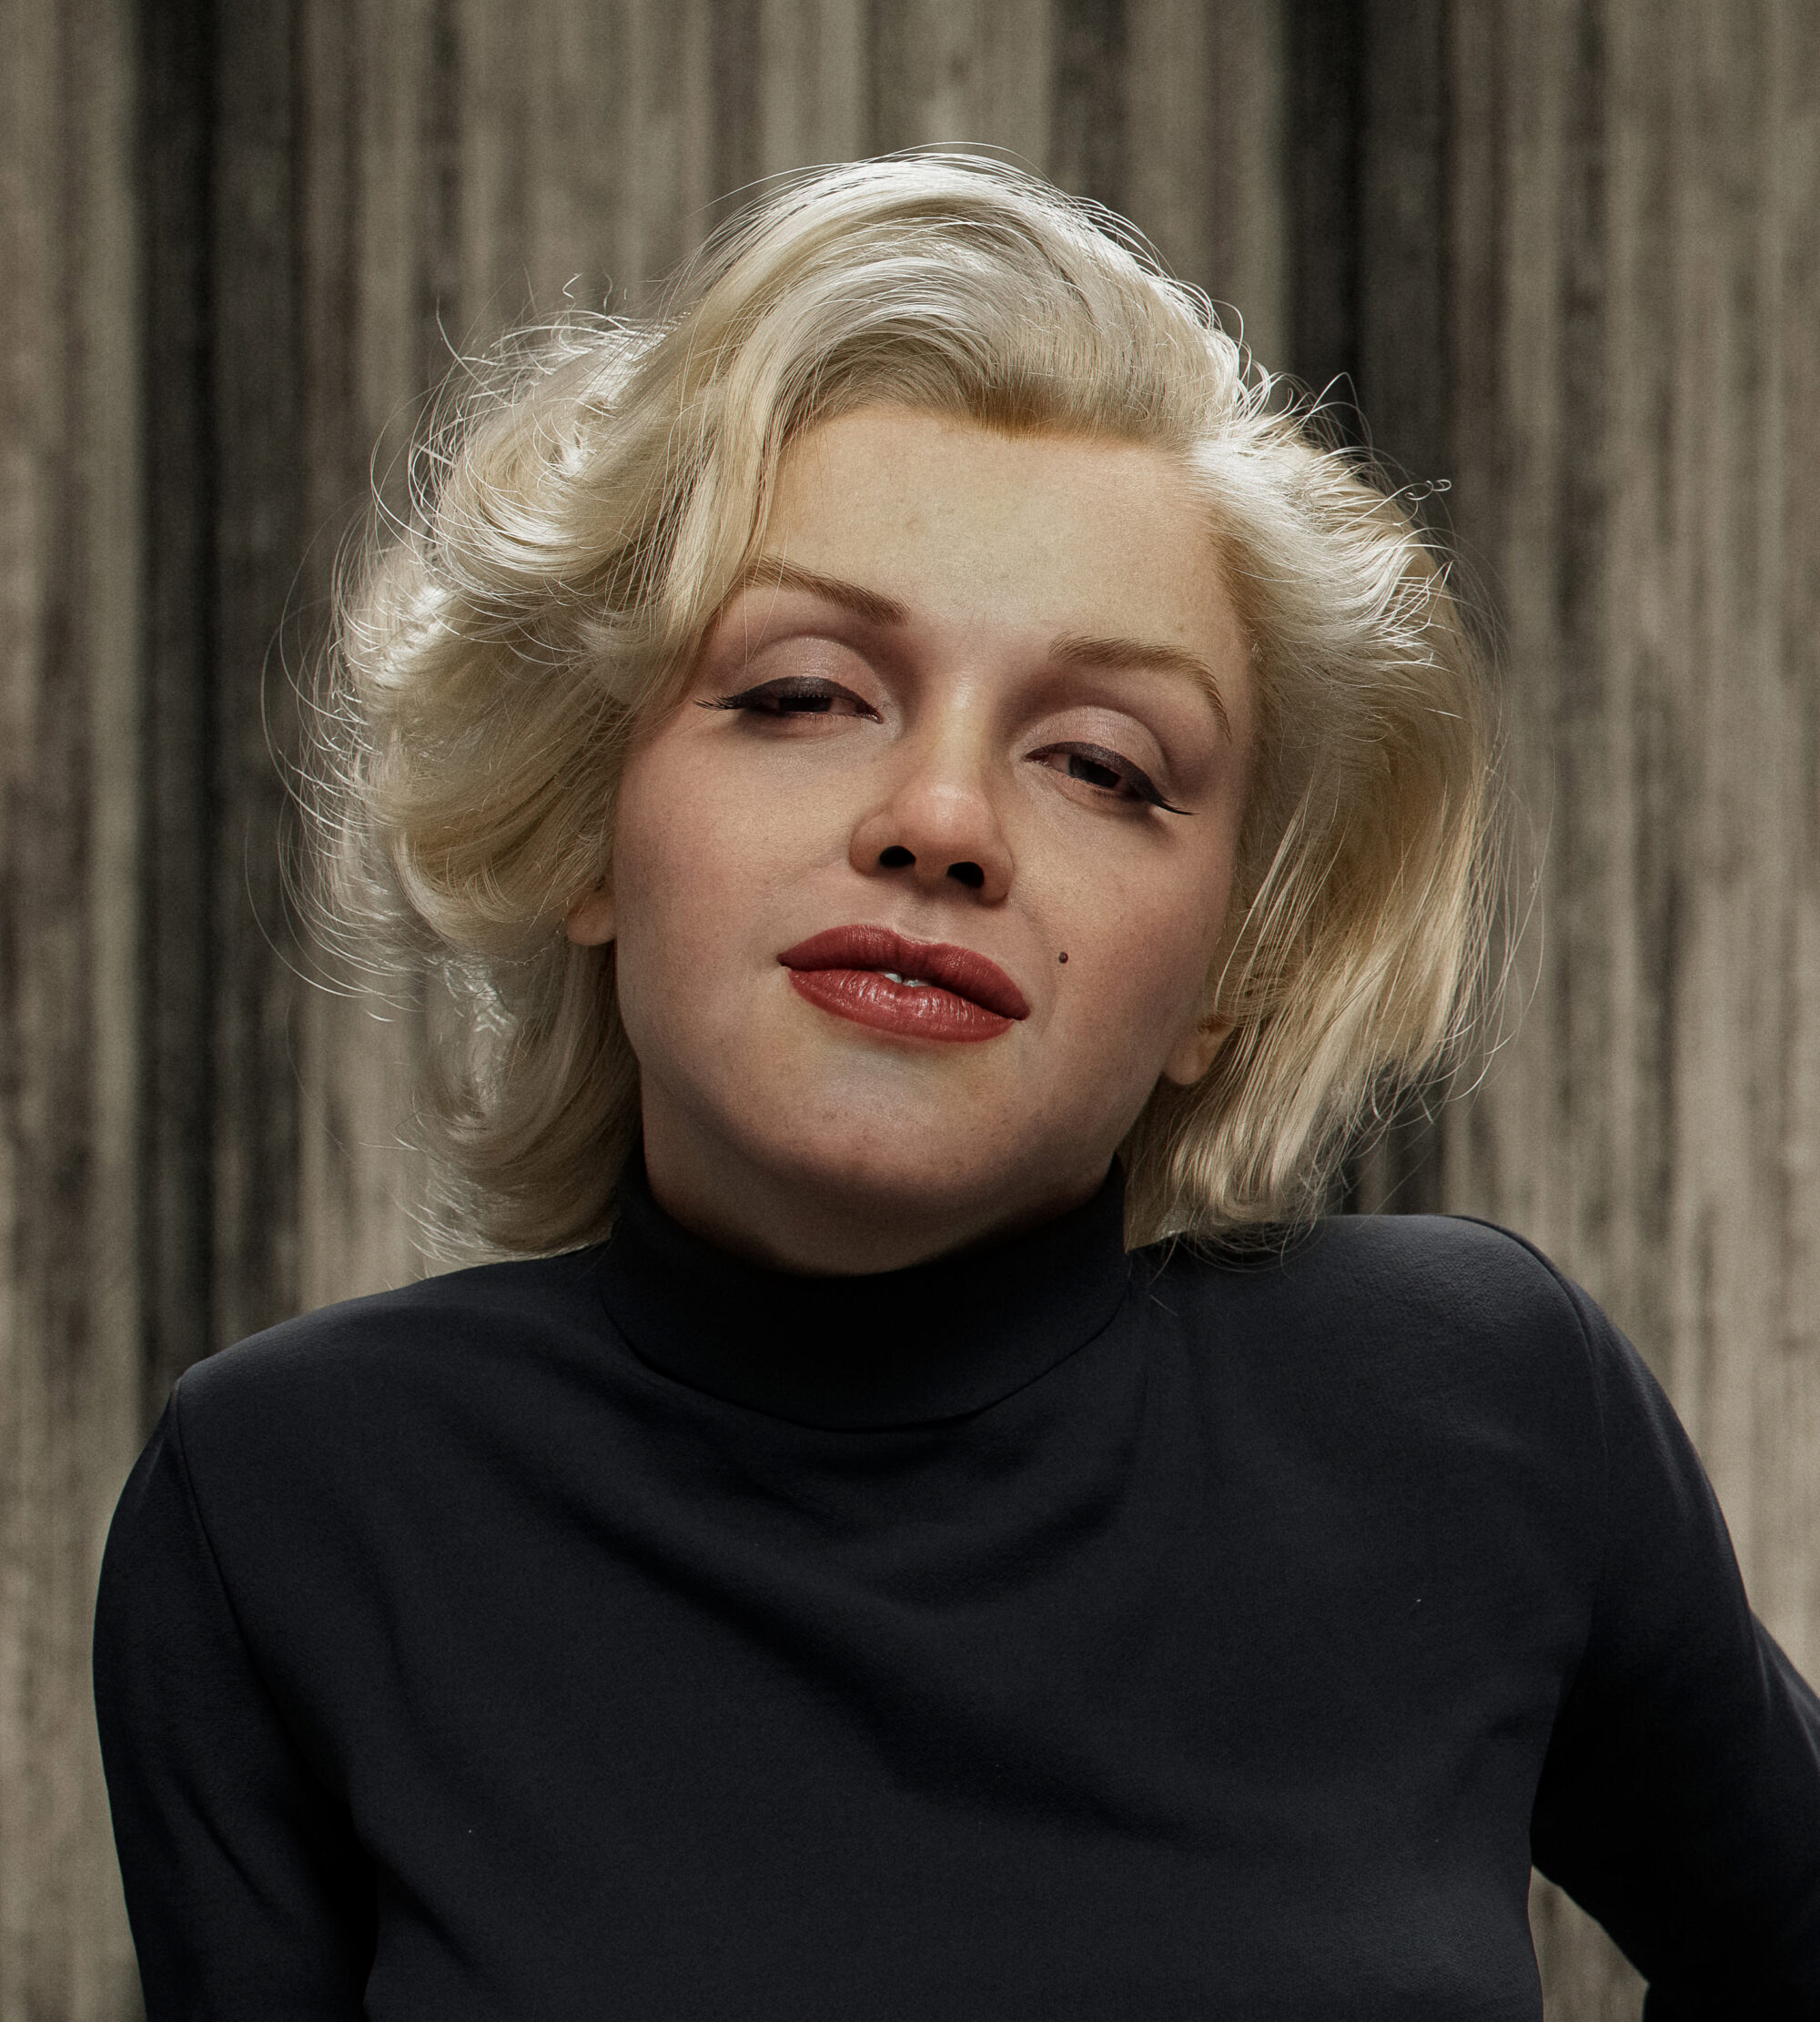
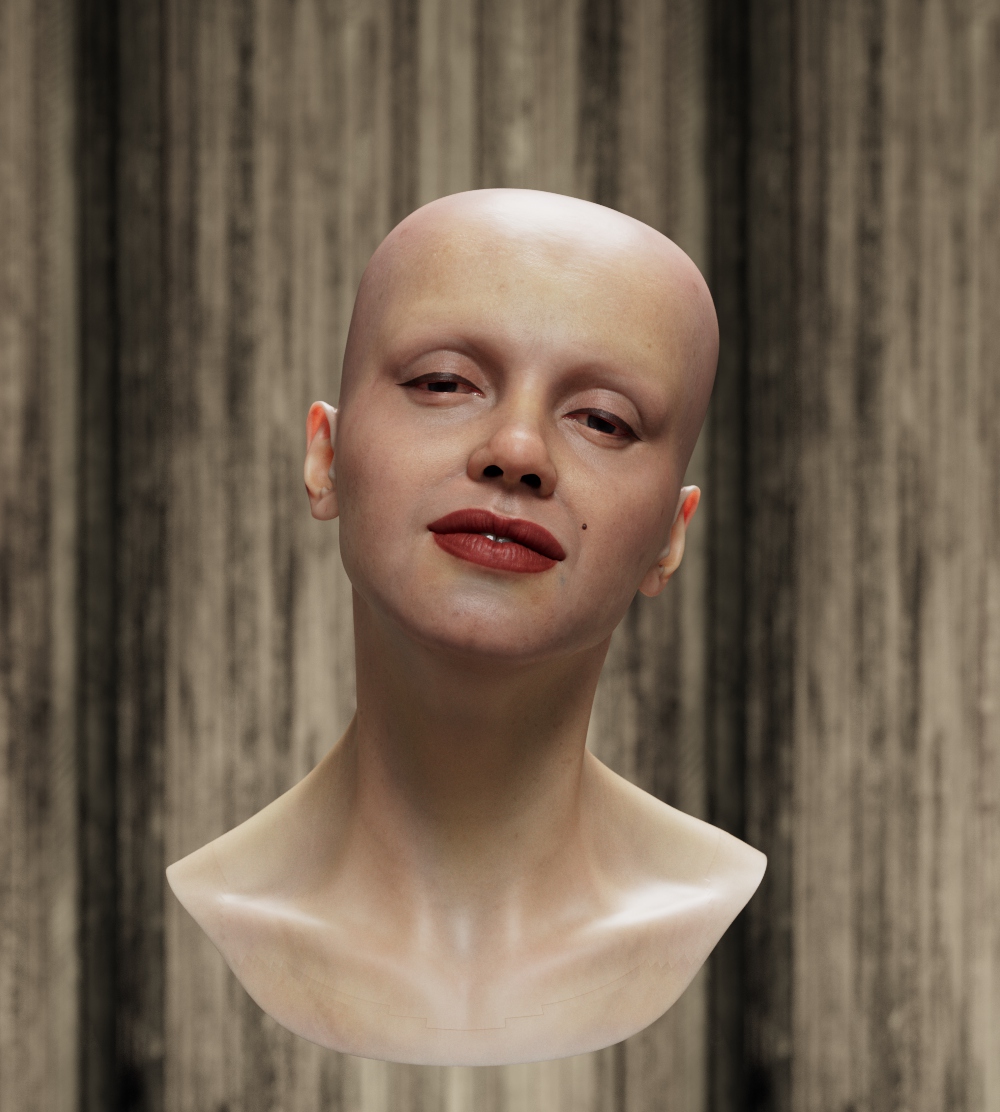
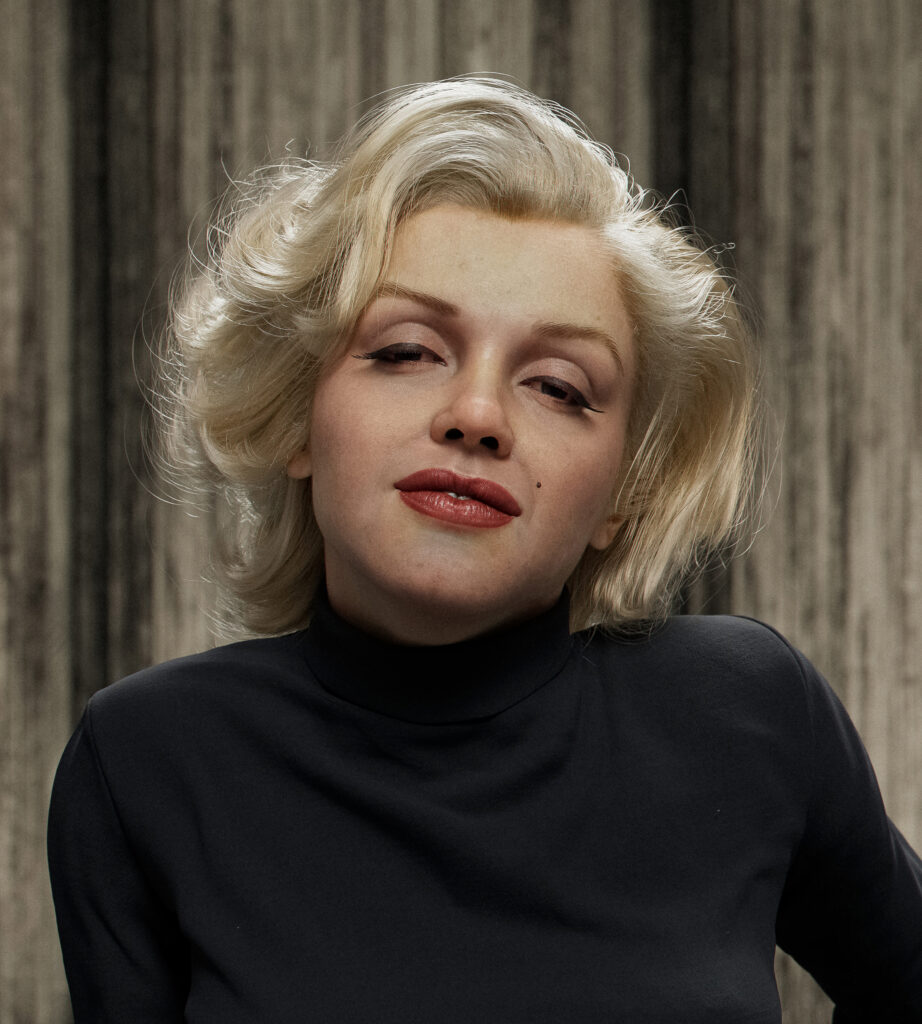
I always start with finding master reference. I will show you my process based on that one:
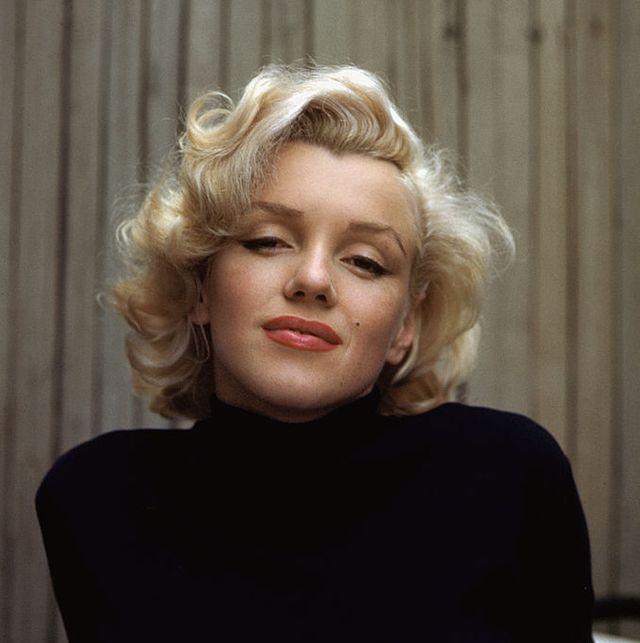
So, my goal is to be to match that iconic shot as close as possible.
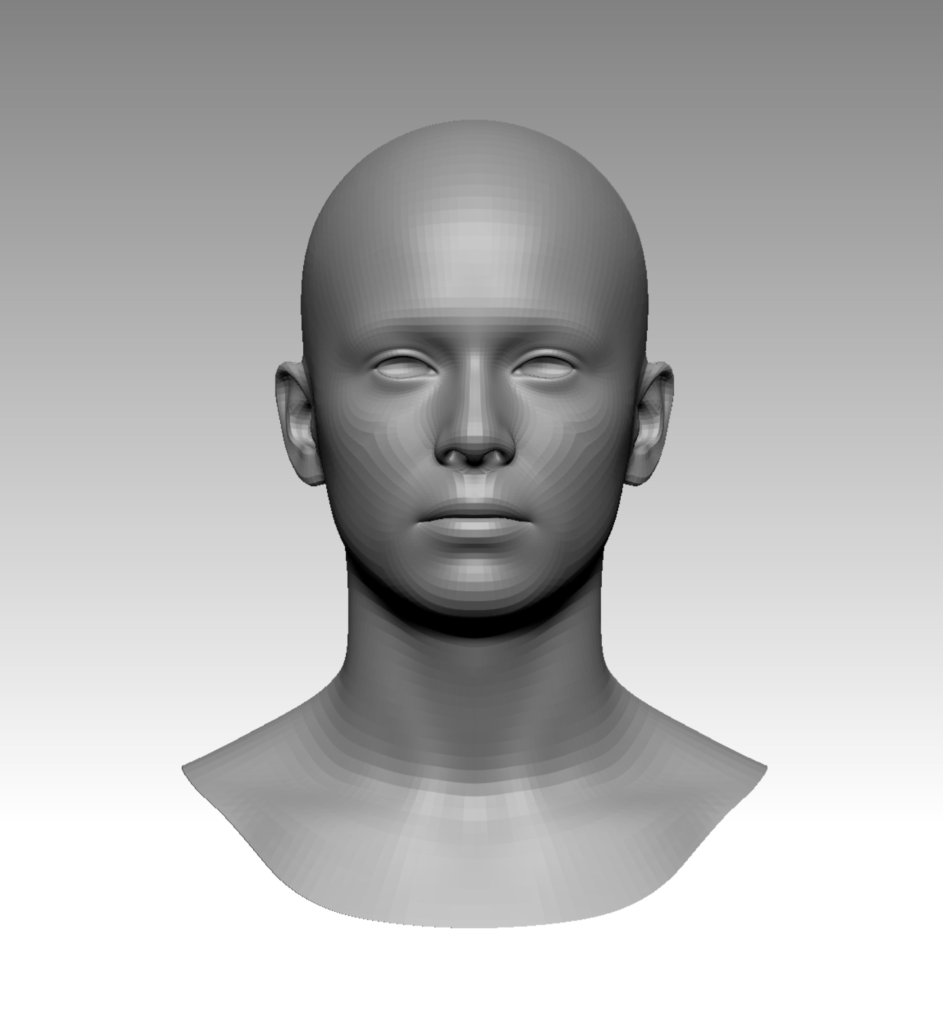
I start with a base mesh, that I purchased in www.3dscanstore.com HD Displacement Map. The pack already has base mesh. I like this base mesh because it has good UV and I can use any diffuse map from the pack for texturing and shading steps.
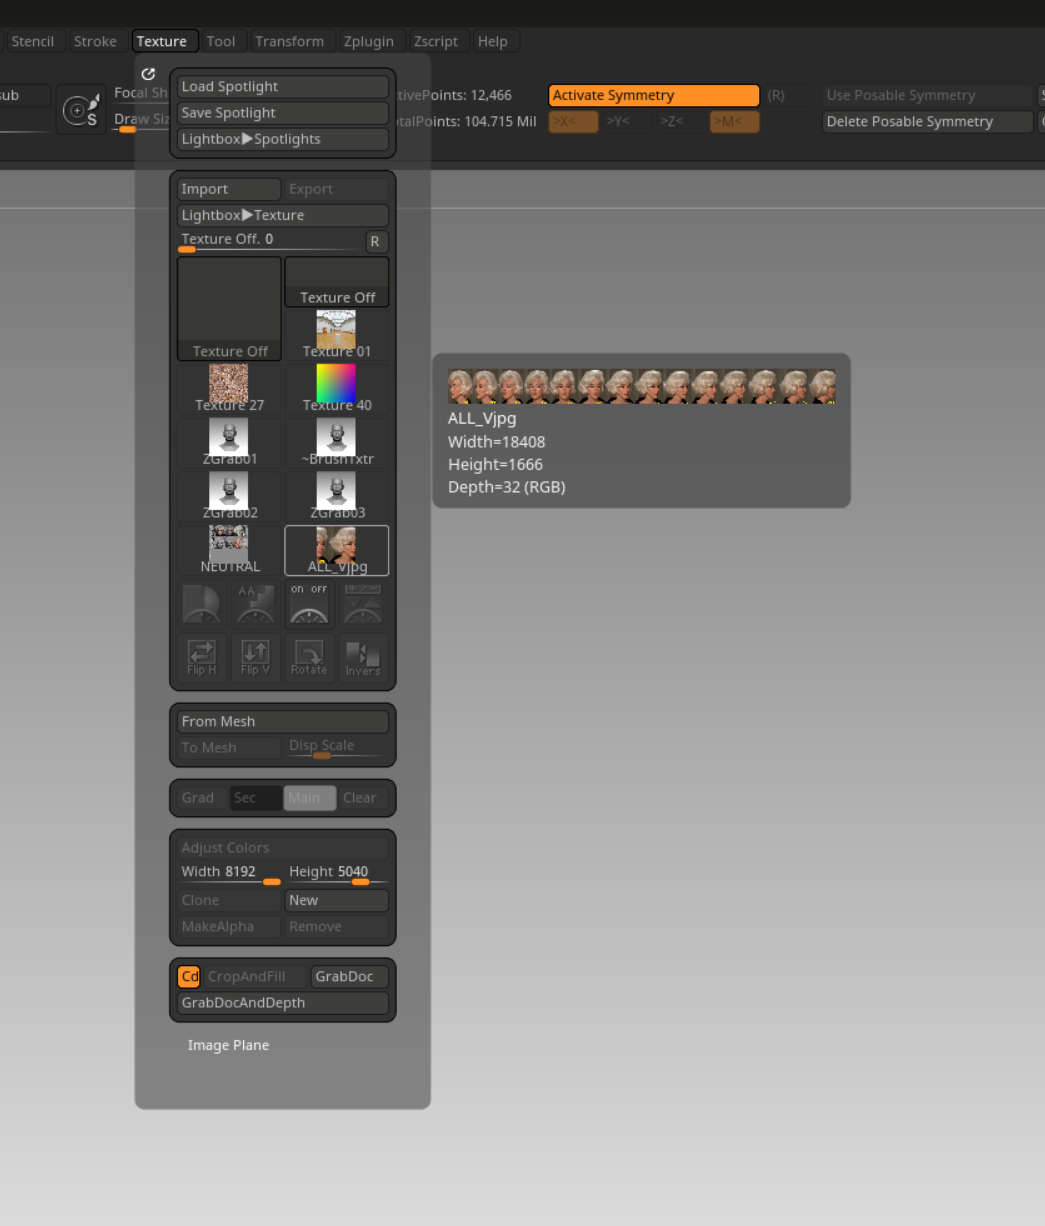
Also, before starting I collect references of her face from different angles, then merge them into a single file from left to right and name each of them.


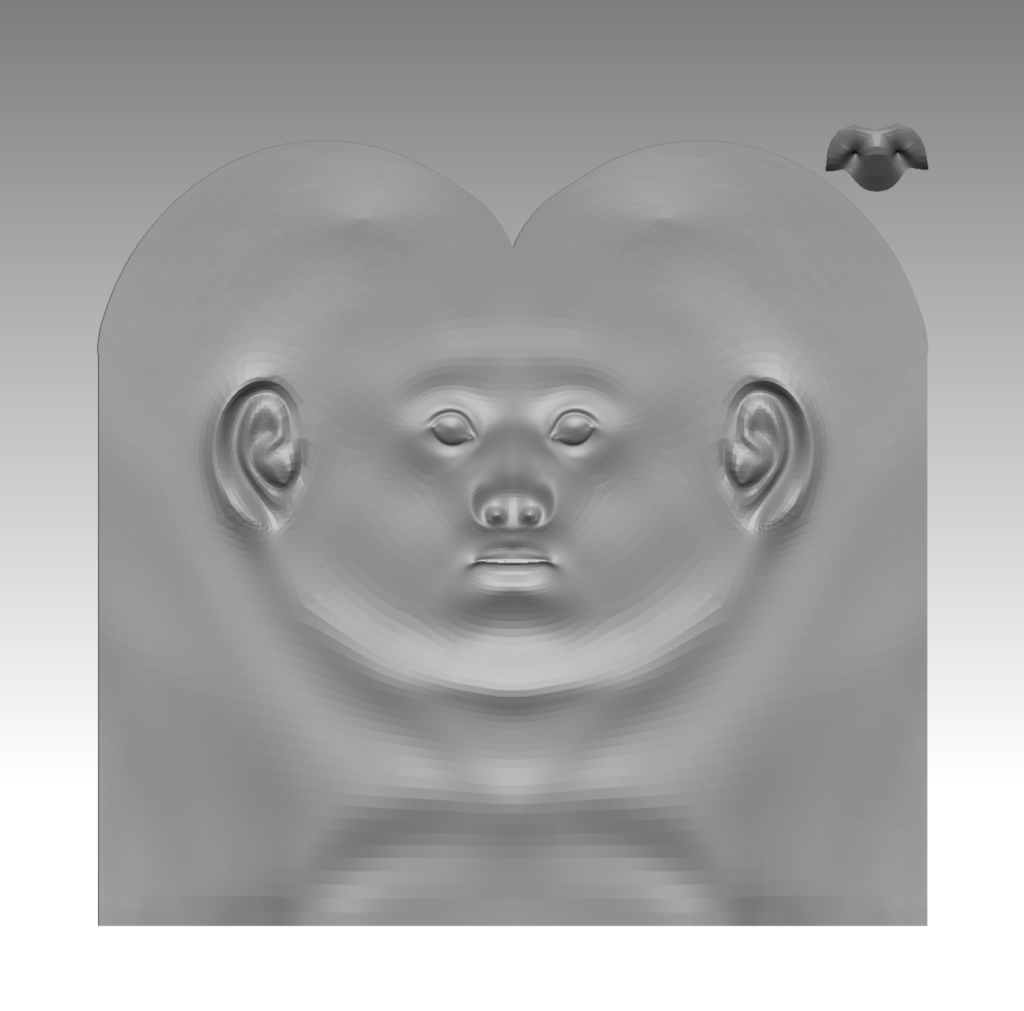
Inside ZBrush, I import my references and add them to Spotlight.
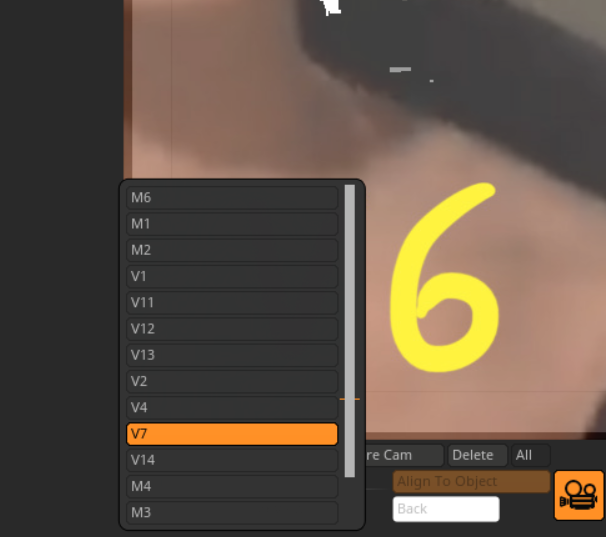
Next step I’m trying to match the camera view with each single reference face, one by one and save the camera position (Store Cam). I name it a sane name I marked on reference.
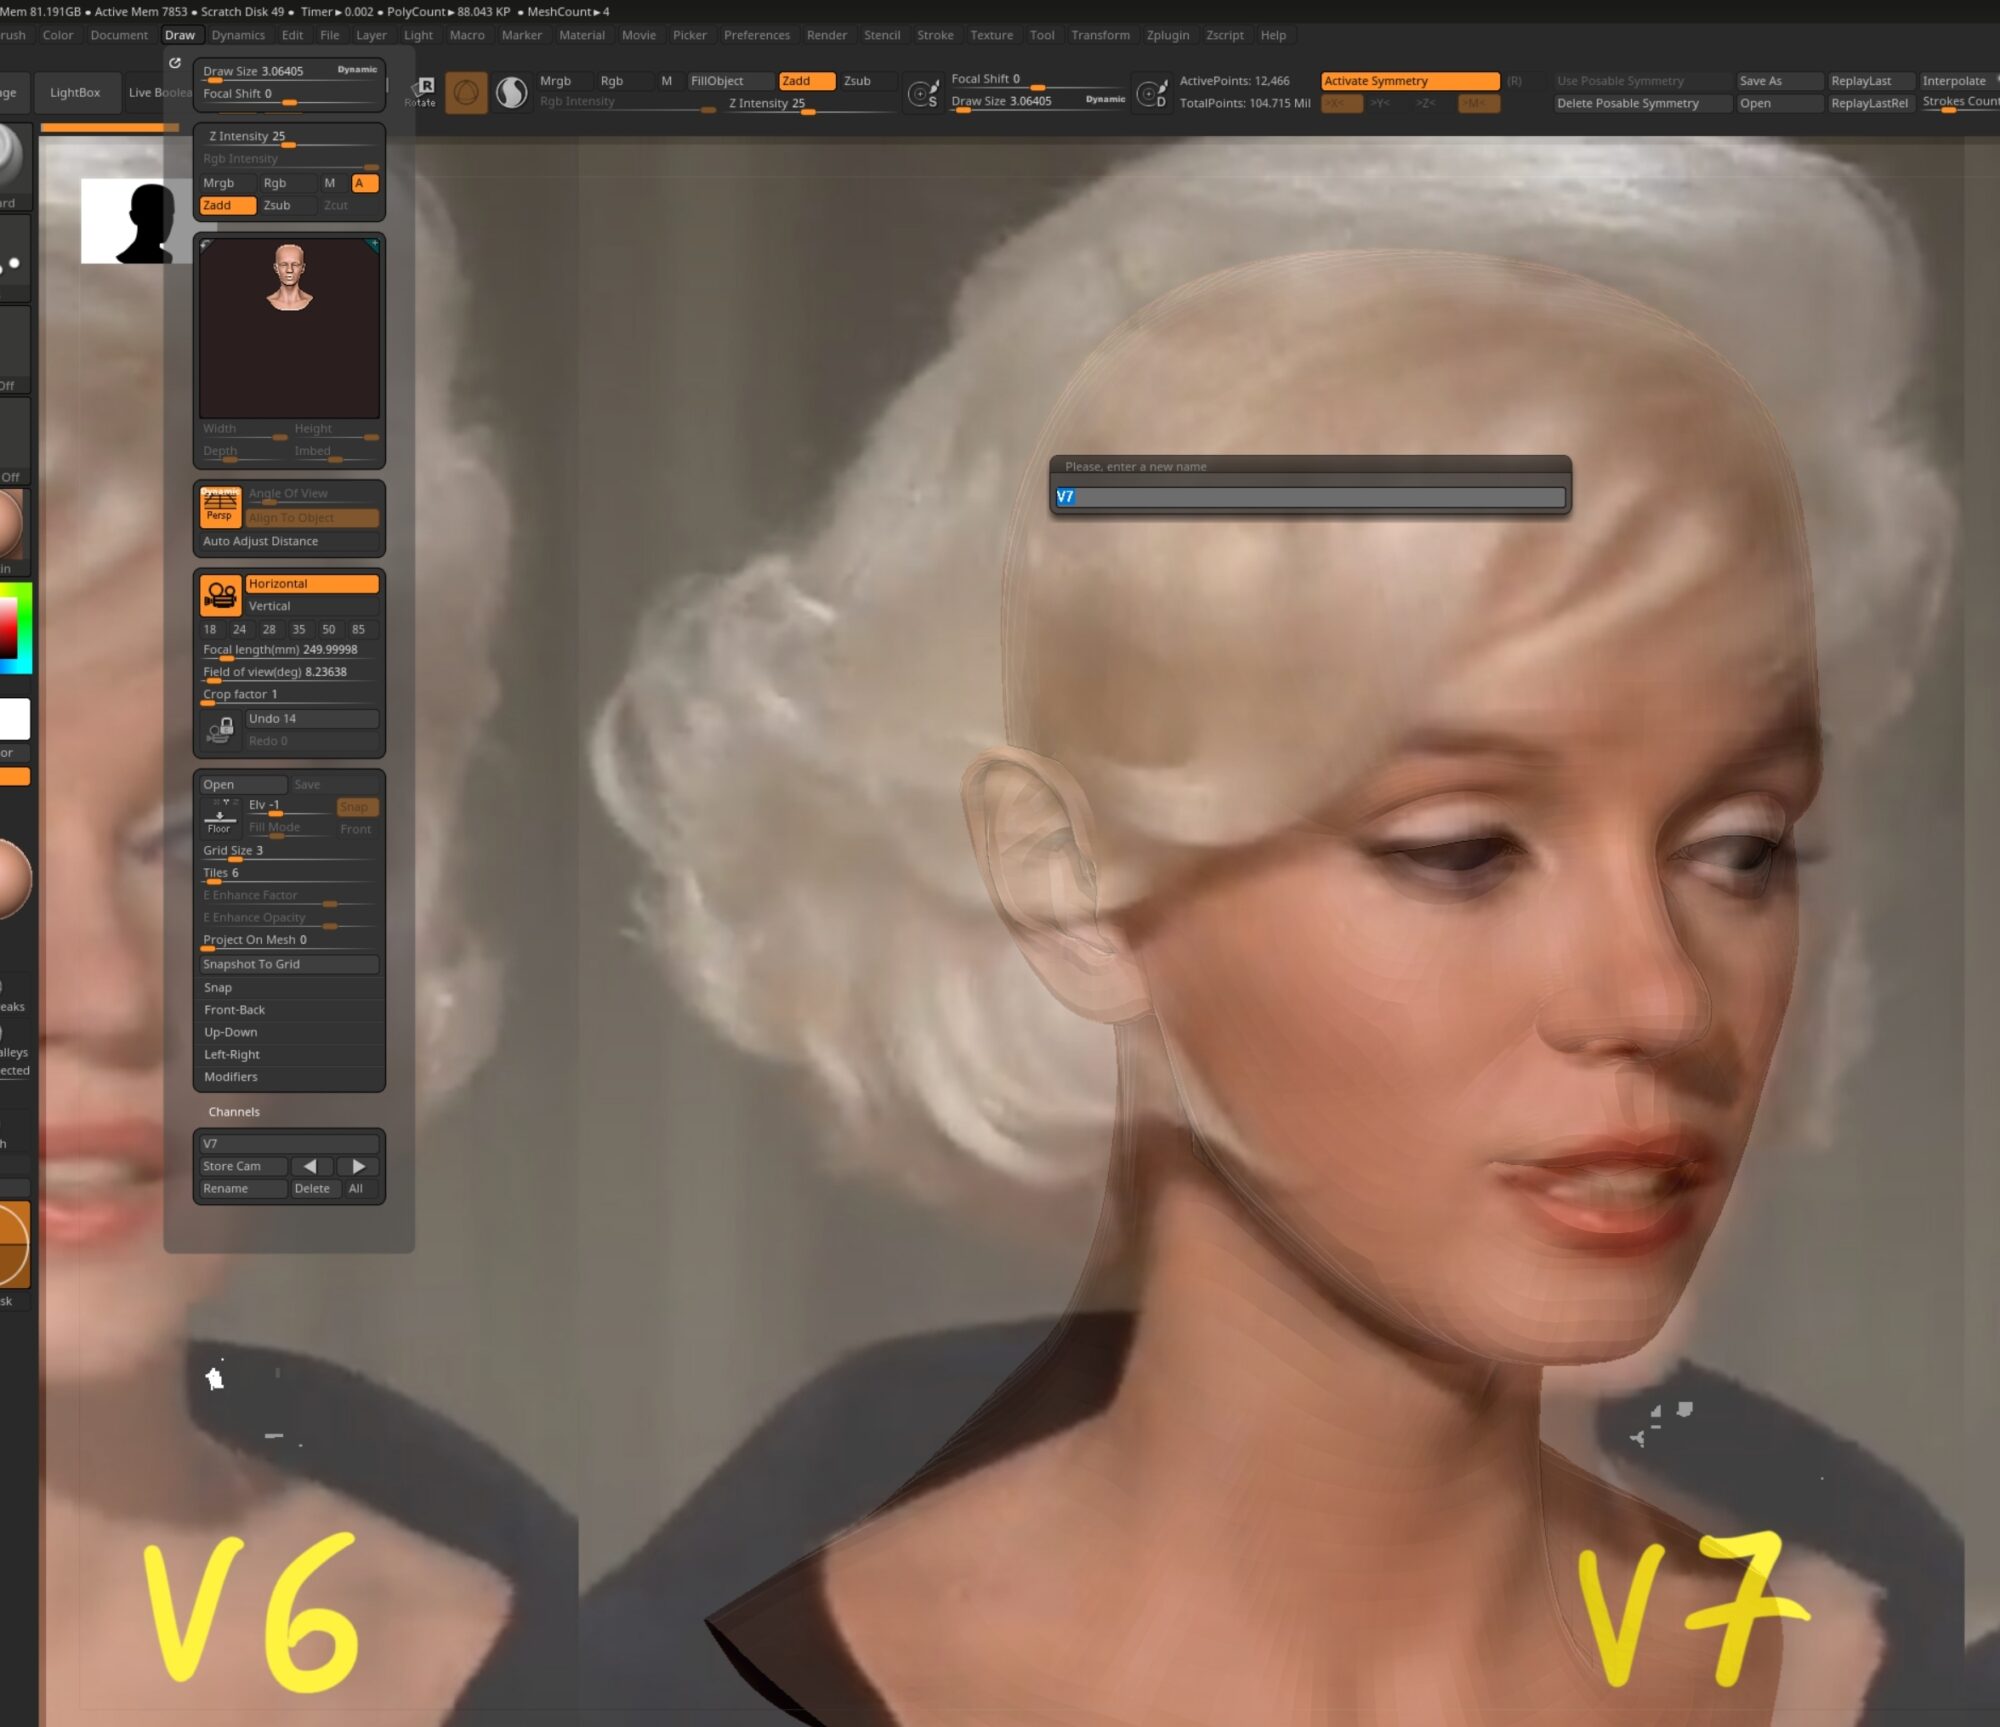
Now I have all cameras to match my reference faces and names, so I can easily back to any without re-setup a camera view. I usually fix all these cameras a bit (angle, zoom and lens) during processing.
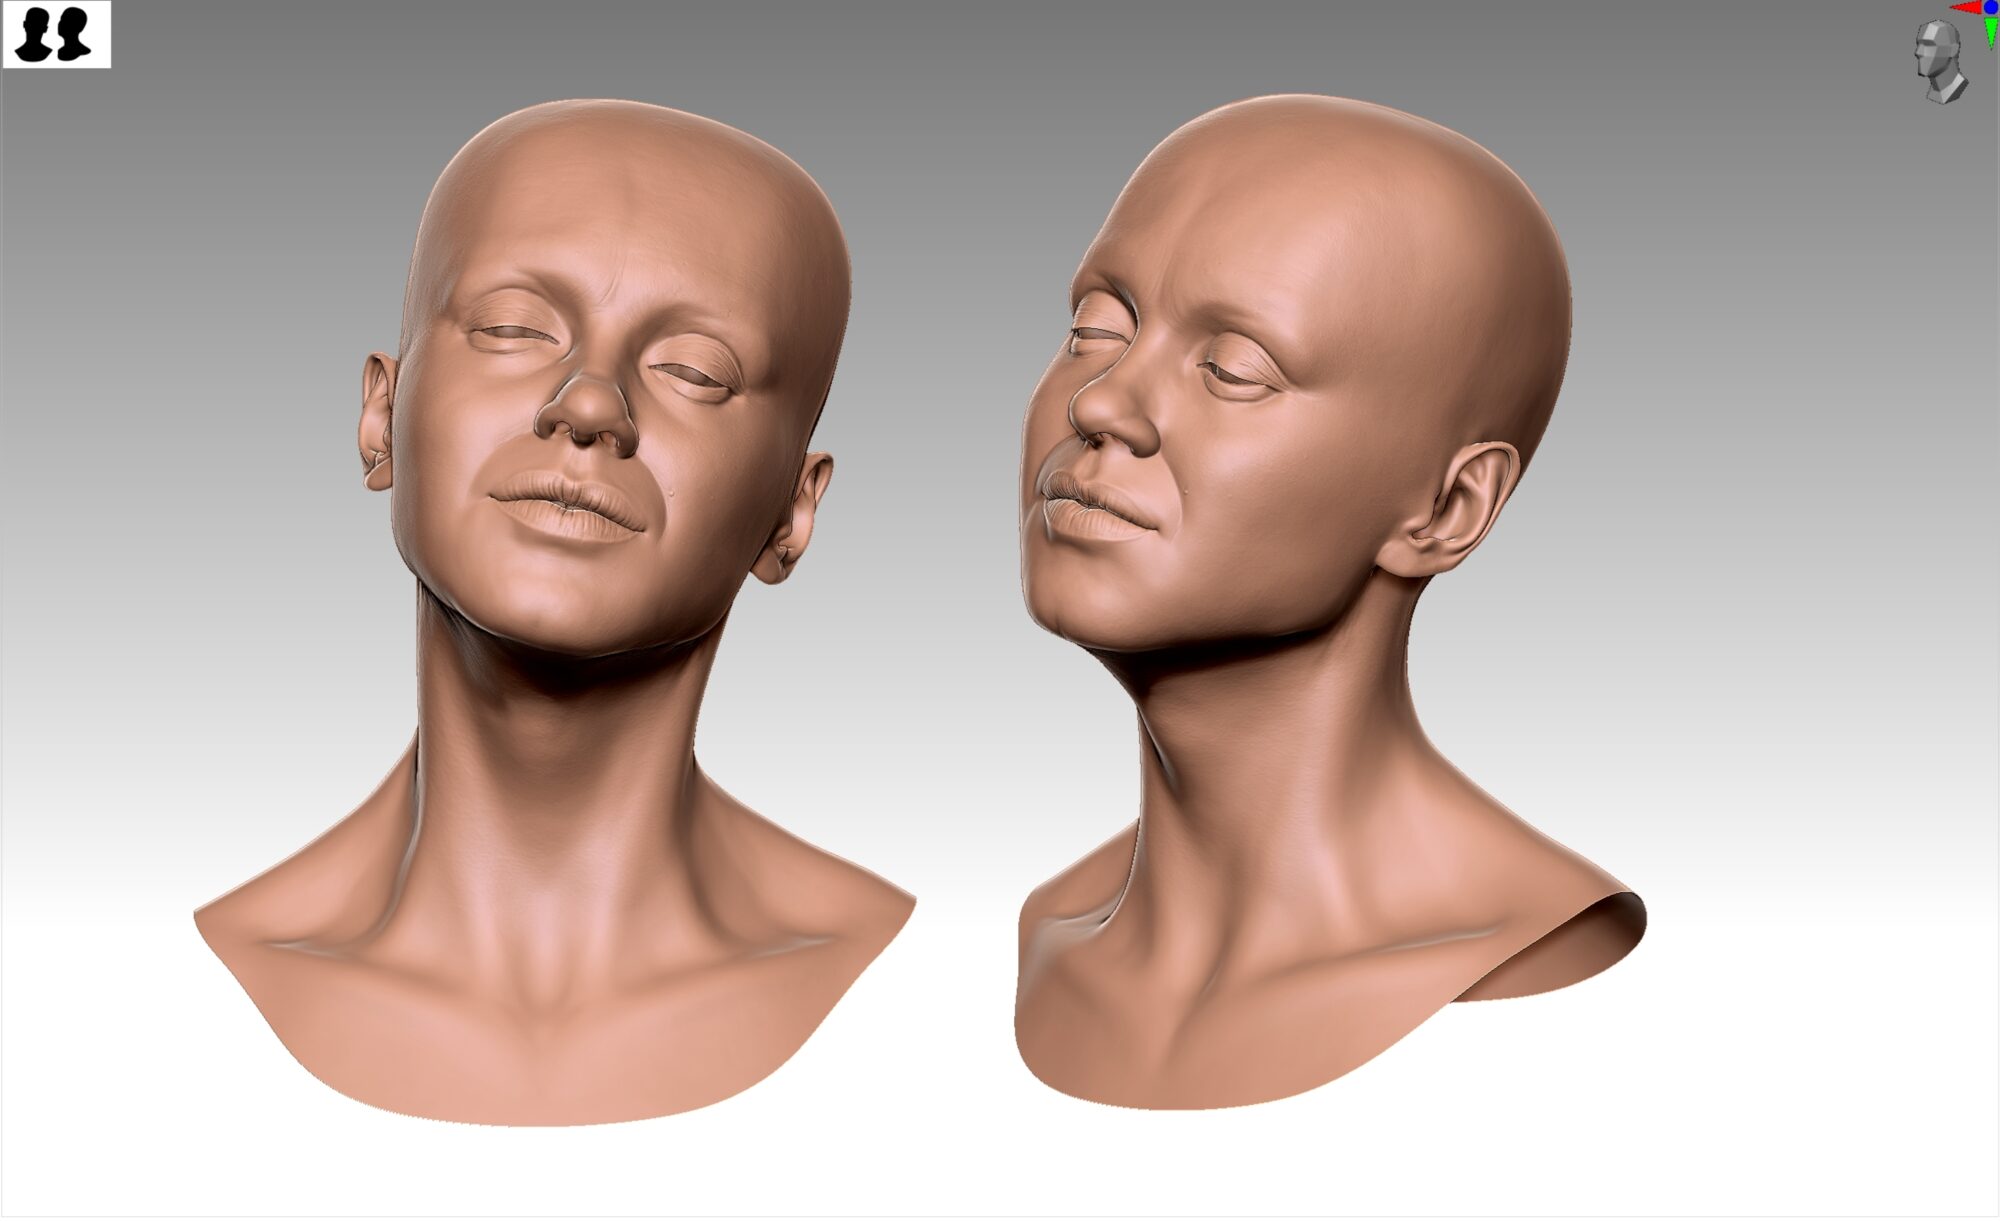
The primary and secondary shape
Nothing new I can say about sculpting. This process consists of matching my head shape with reference faces through Spotlight. I also have the same reference opened in PureRef.
So, I just surfing from one reference to another. The Sculpting process stops when my geo matches all references without any exceptions. If I have some issues with likeness and can’t catch the correct shape, I create another reference file and go the same way.
Skin details
There are 4 basic ways to create skin details that I tested:
- Sculpting everything, using skin brushes/alphas.
(But it is too much time-consuming)
- As I’m using 3dScanStore base mesh, mean I’m able to apply their displacement/bump map.
(But the map from the pack doesn’t give you enough realistic results).
- In theory, I could use VFace from XYZ, if I would start with XYZ base head and UVs.
(But I don’t really like how they unwrapped it, the texture is too much stretching closer to the neck).
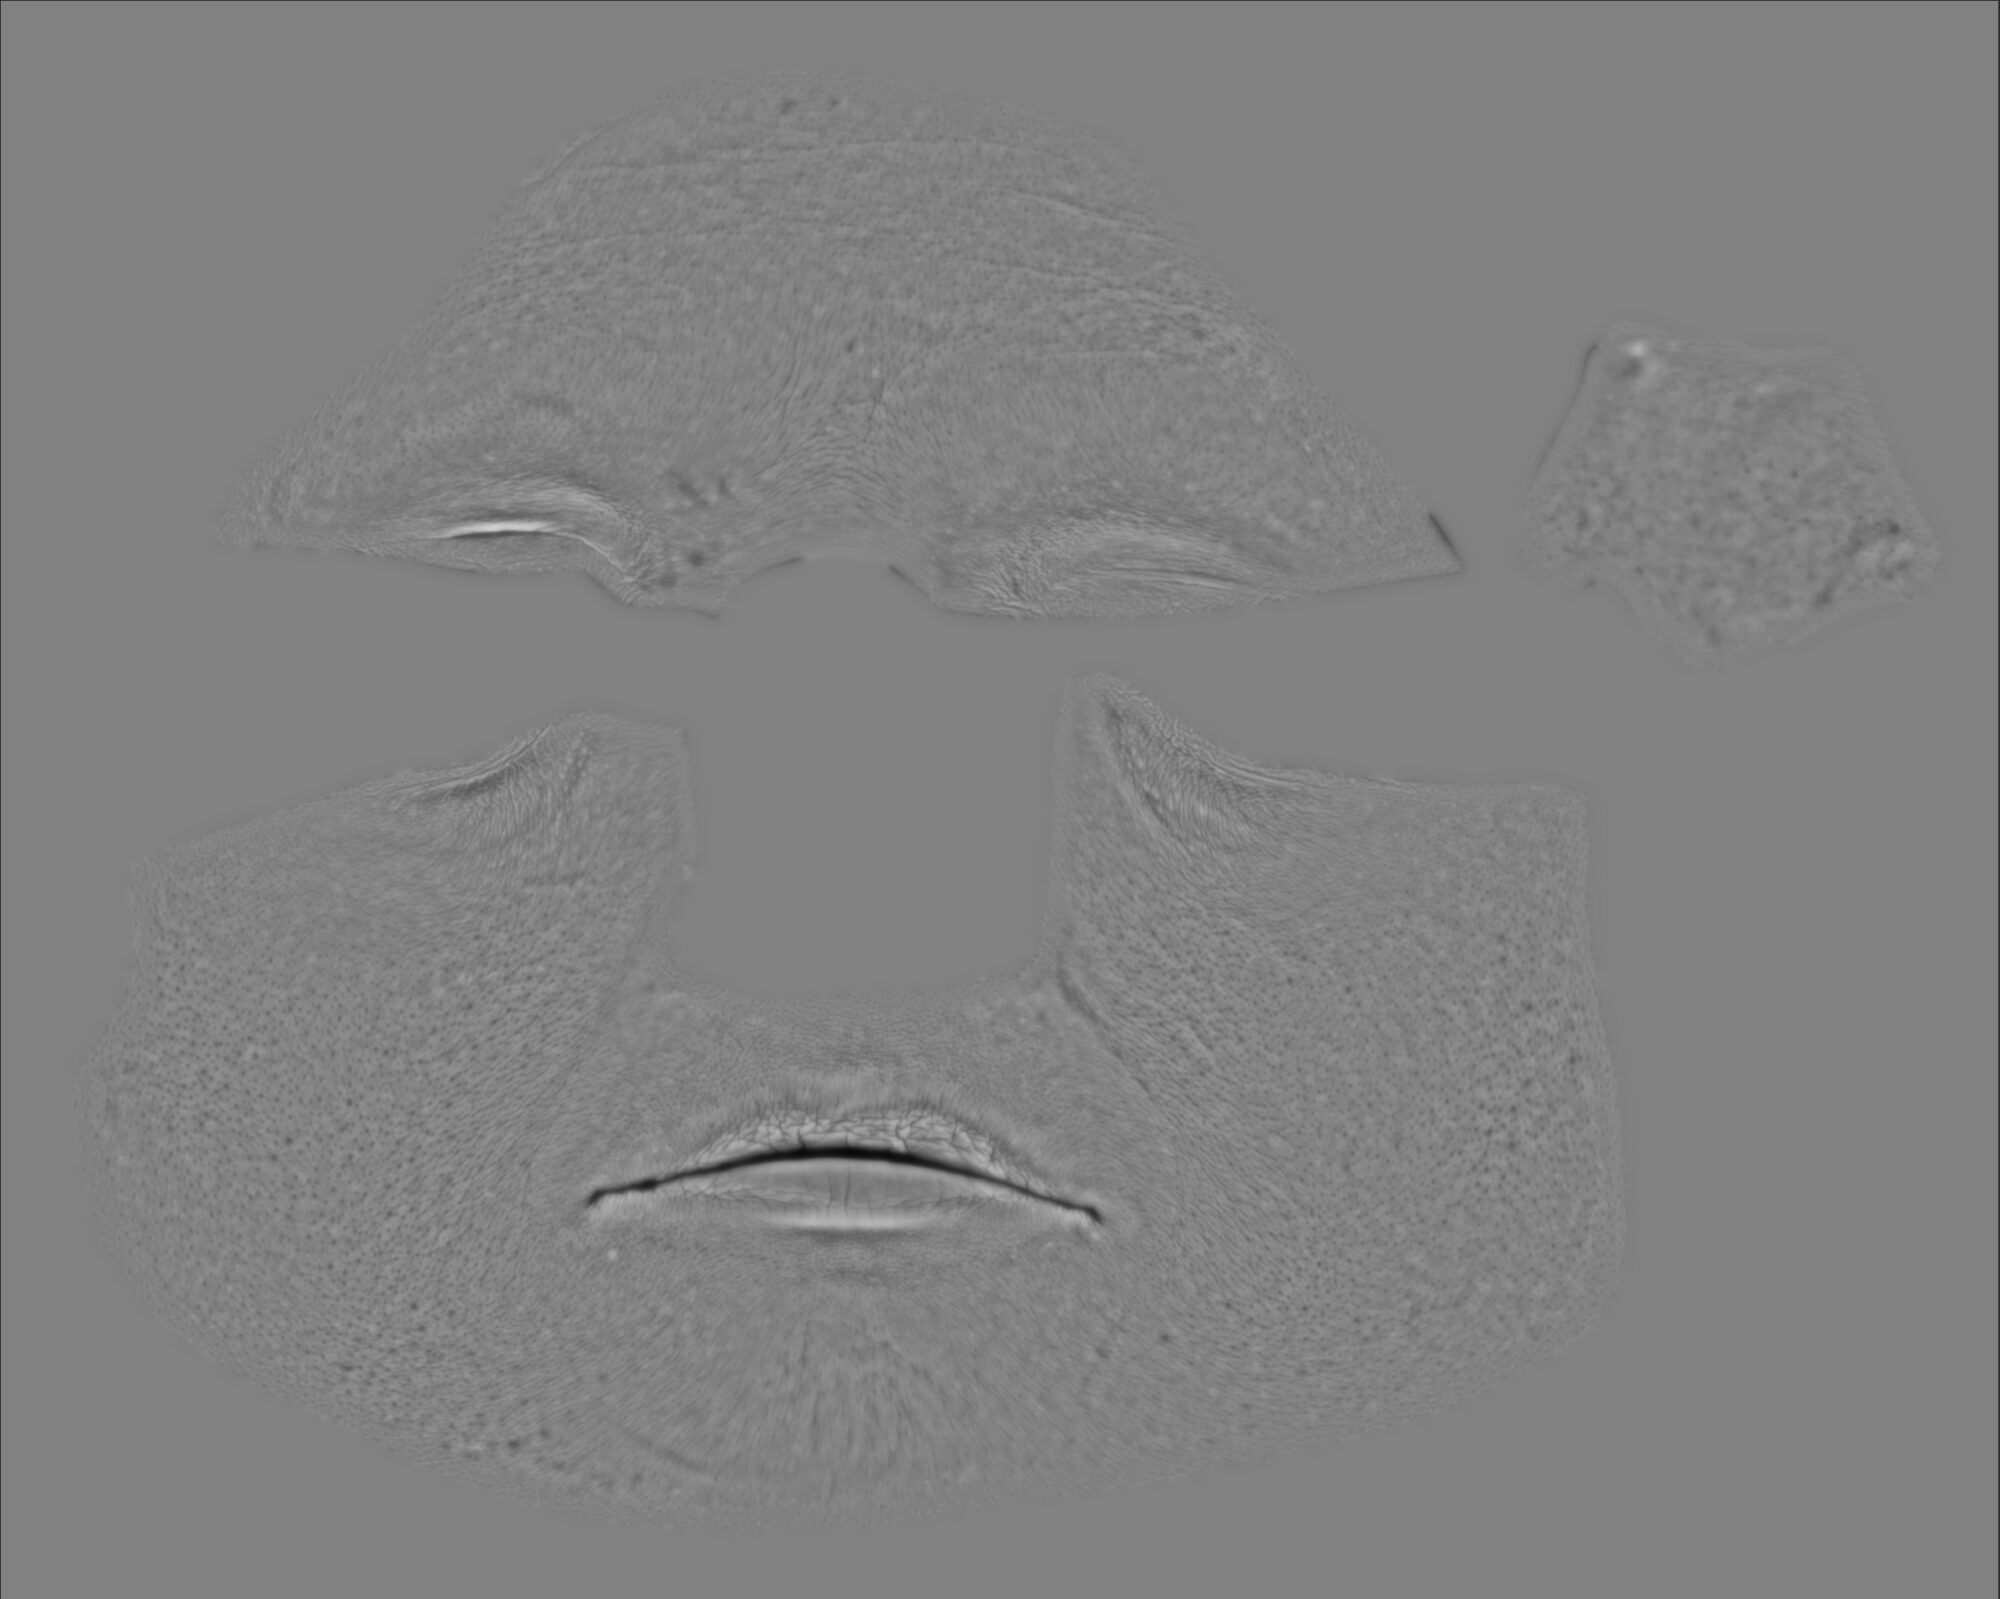
- Projection mapping of XYZ Face Displacement maps inside Mari. This one I prefer most.
Those 4 methods gave me the best results and any of it acceptable to me, but I prefer 4th one.
The XYZ Face Displacement texture is HQ enough if compare with XYZ Multichannel Maps (don’t mix it up). This is what XYZ Face Displacement texture looks like:
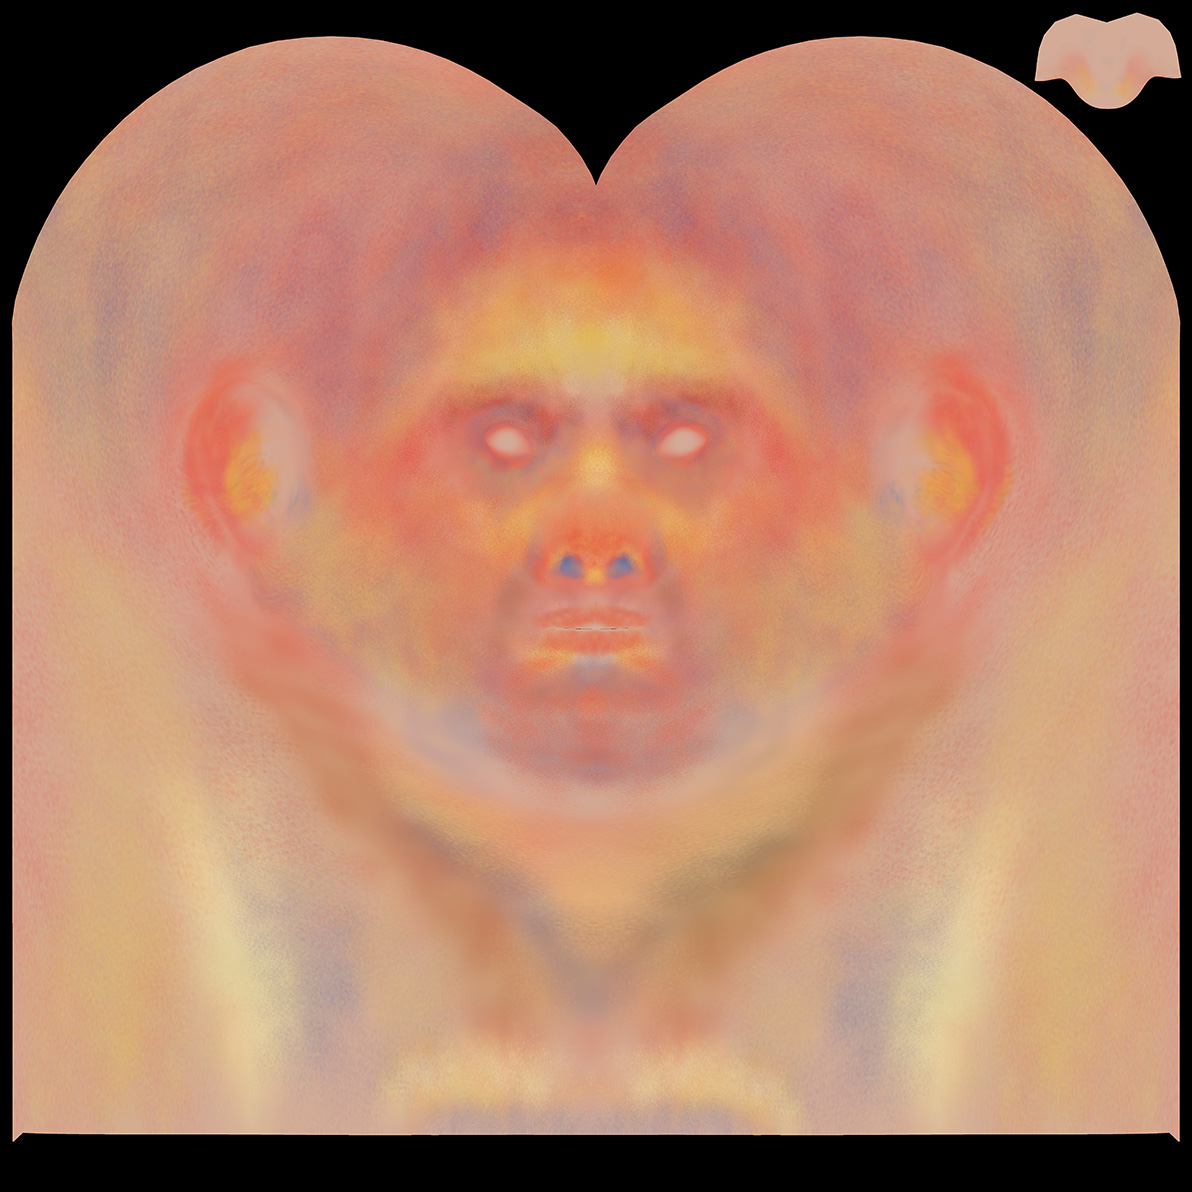
Inside Mari, I use the projection method to cover 100% of the head with that map.
Also, I manually painted an additional color map, because the default 3dScanStore color map looks too flat for me.
Shading
As soon as I finished with likeness Geo and Displacement, I Import it to Maya and start to create a skin shader with aiStandartSurface
Also, on that step, I can back to the sculpting process for adding specific wrinkles and any other marks on the face like moles that I missed. This is why Displacement Map from Zbrush can be replaced several times.
I apply to my Head:
- 3dScanStore Color Map
- Displacement Map from Mari
- Displacement Map from Zbrush
- Additional Color Map
- MakeUp Color Map
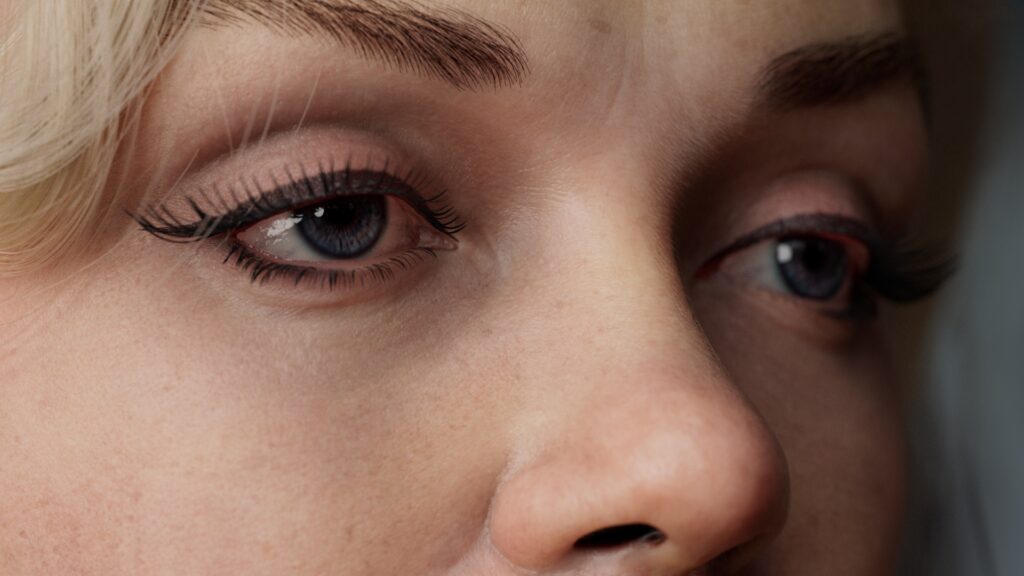
This is how my first render and shader look after some of the adjustments with those maps:
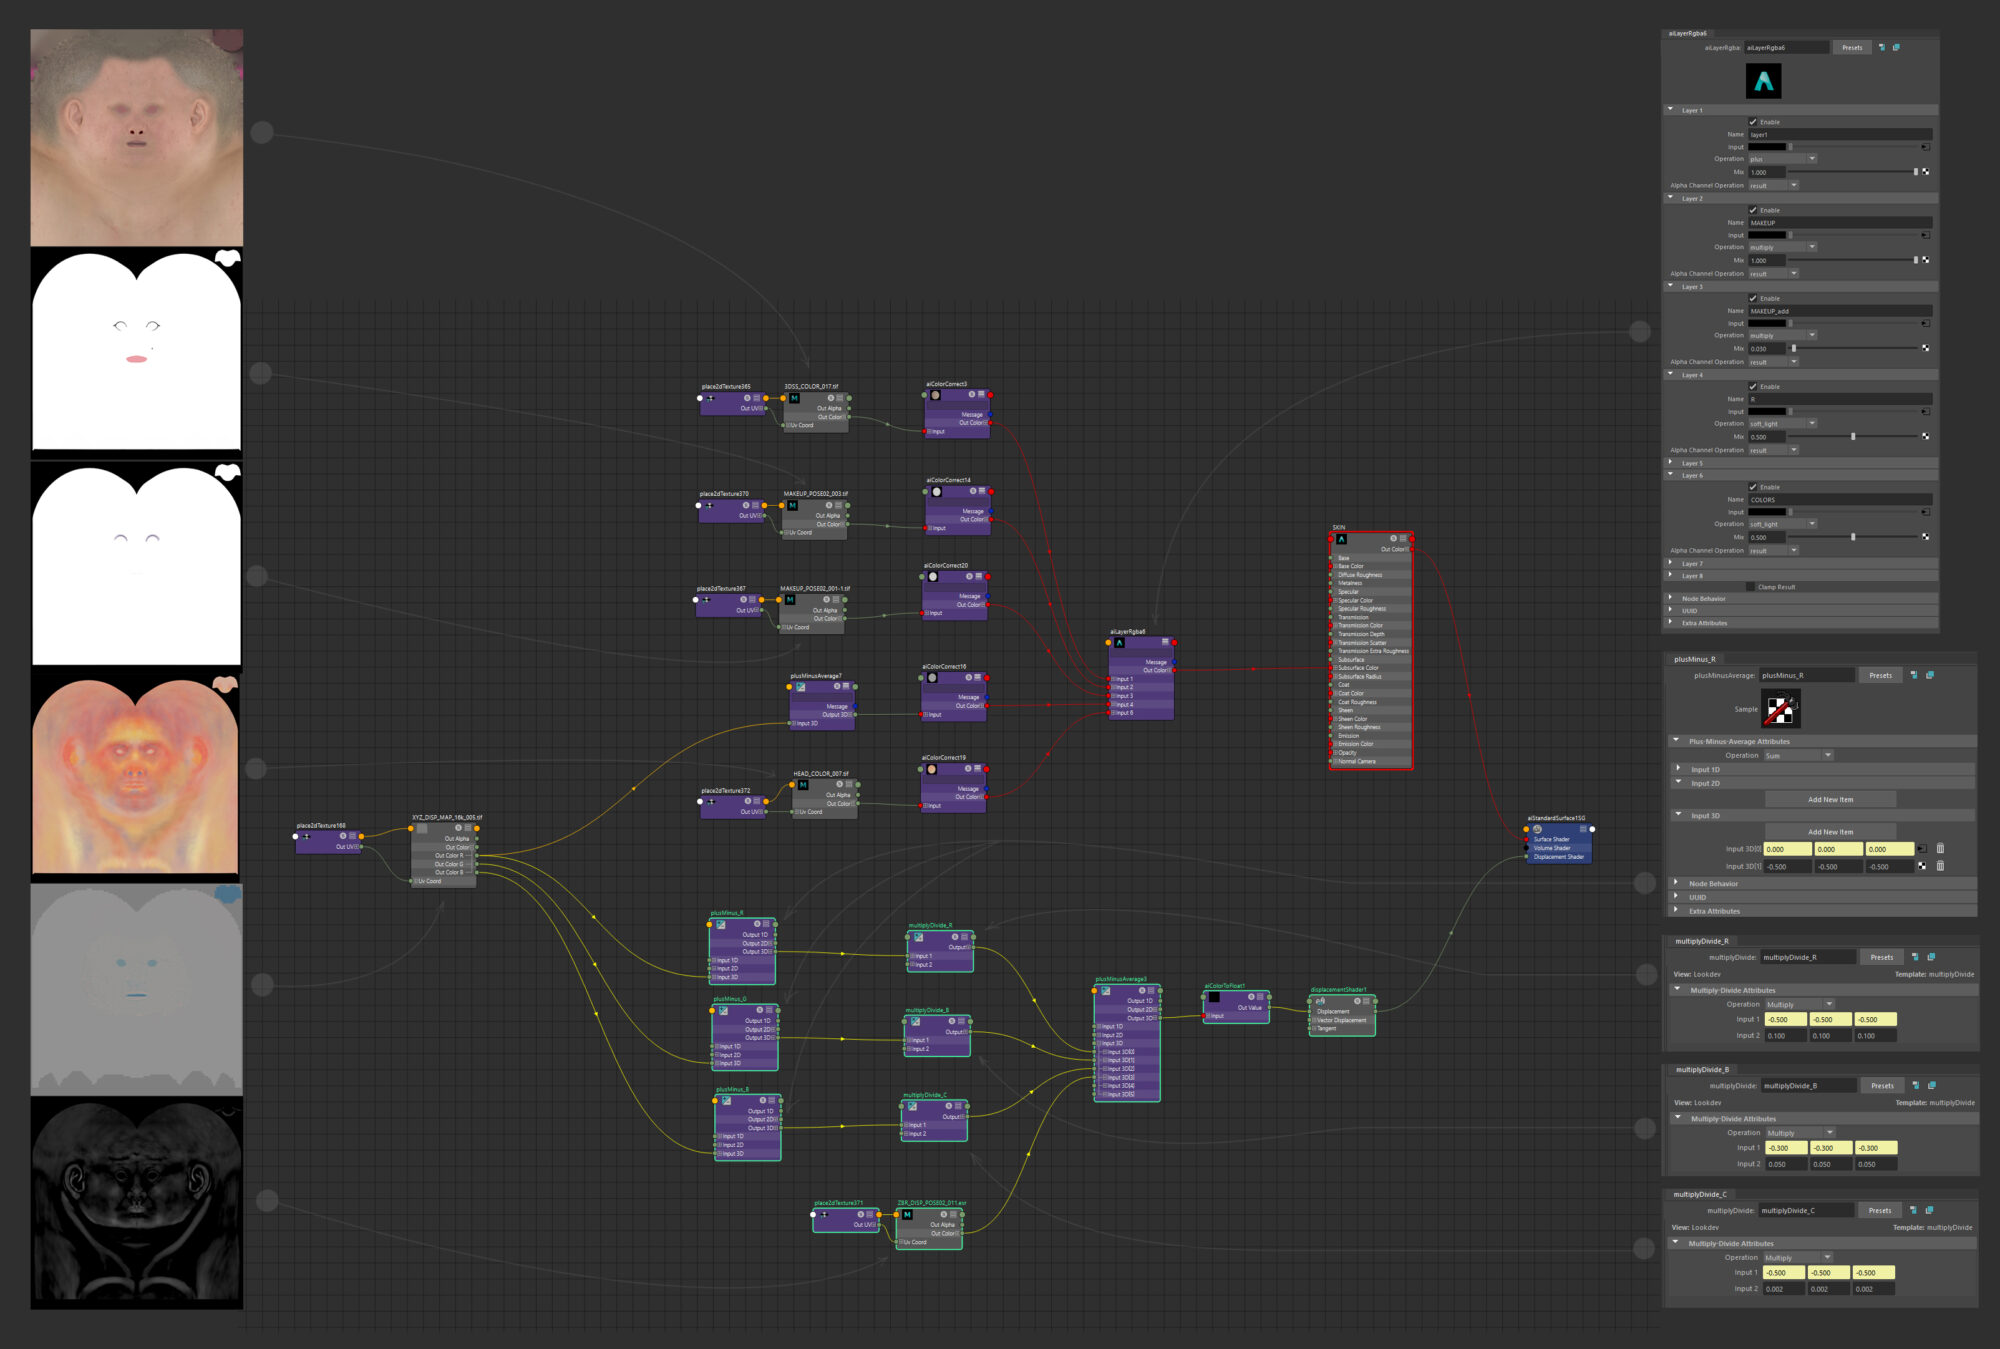
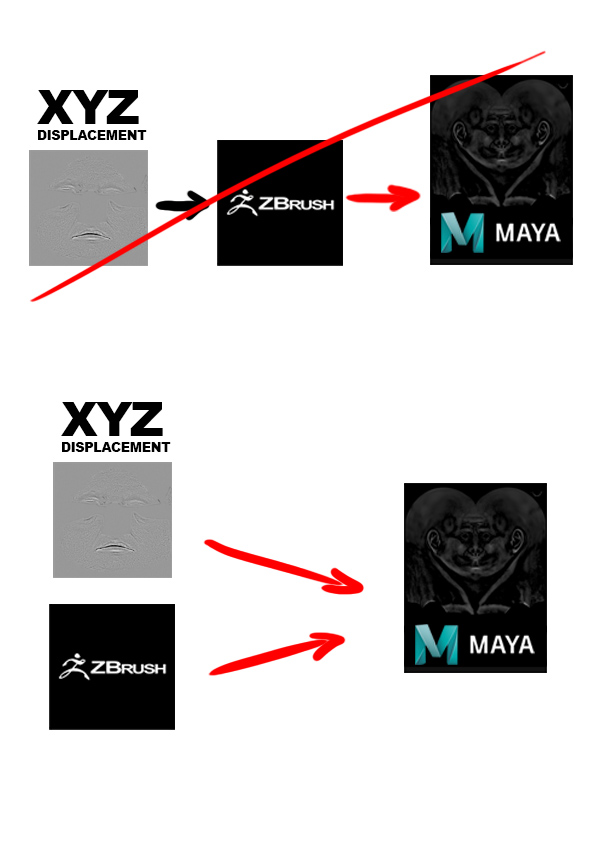
I know that many artists prefer to bake XYZ displacement Map inside Zbrush hi poly geo, but not me. I recommend having all maps like a separate node inside Maya Hypershade.
That gives you more control and you don’t waste a time waiting for ZBrush to bake during multiple refining of your skin detail (ZBrush can do it in over 10 min with Adaptive Mode).
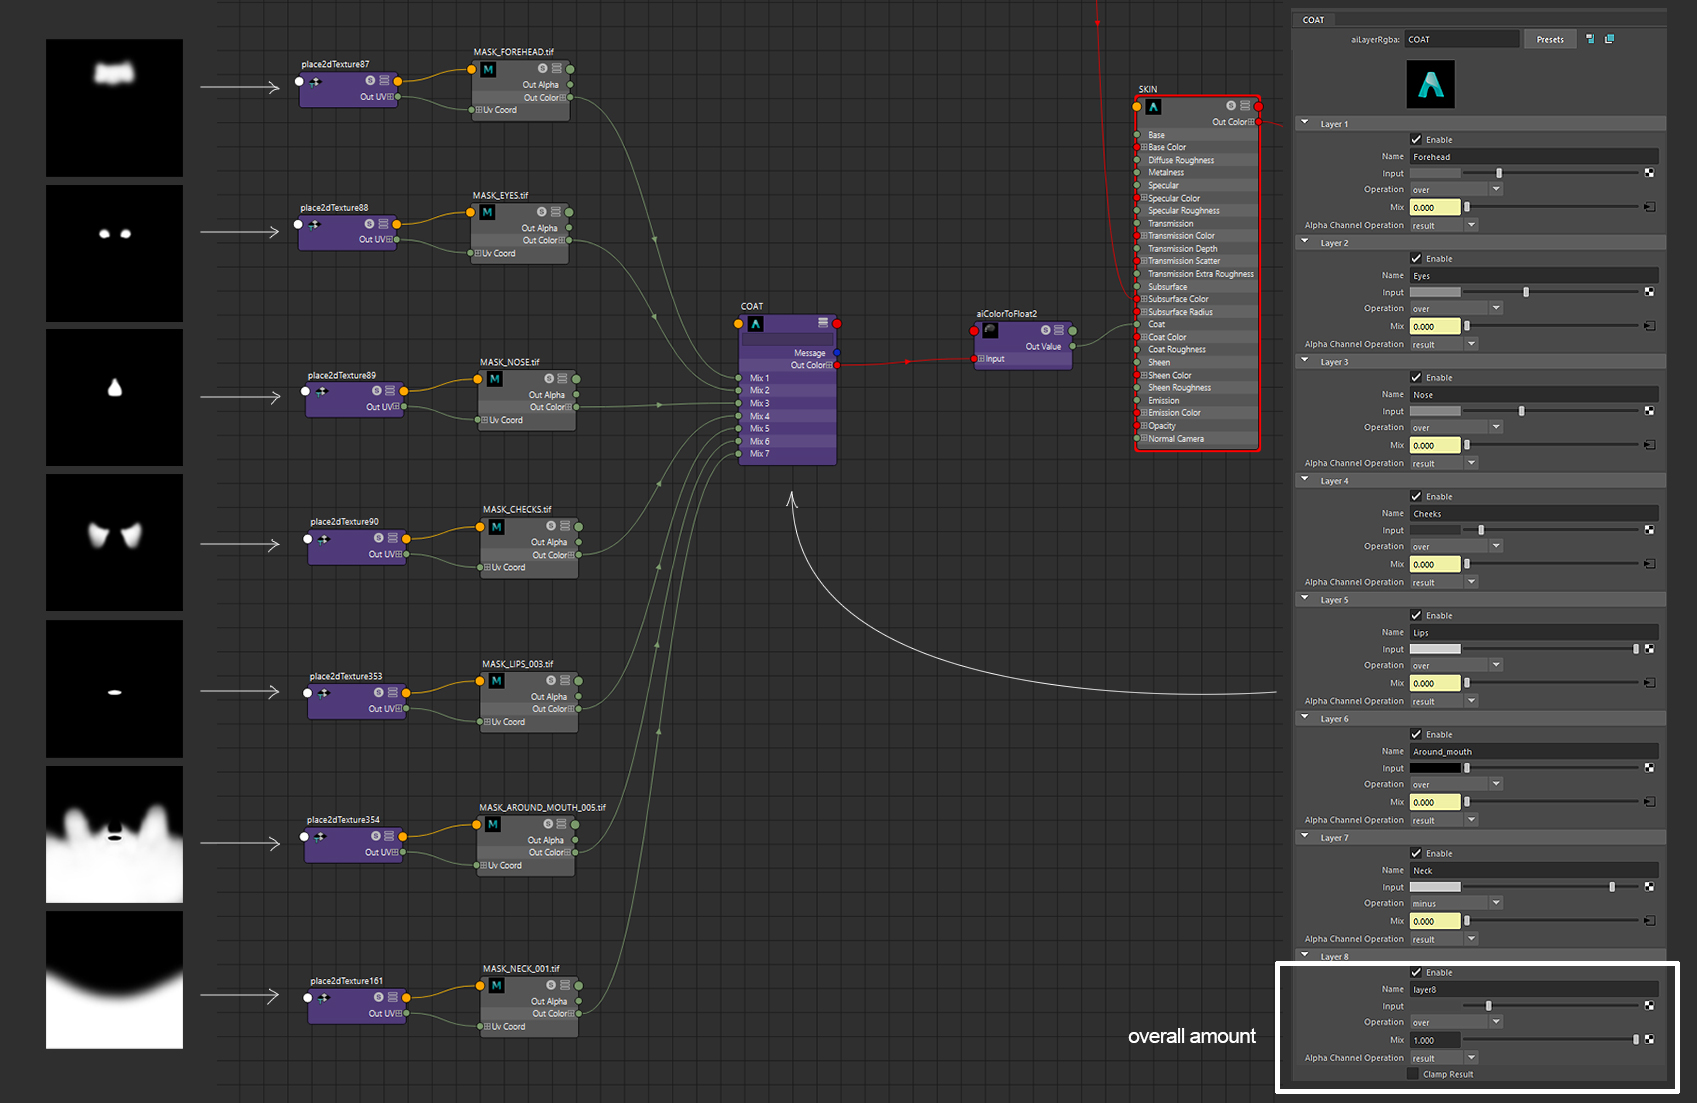
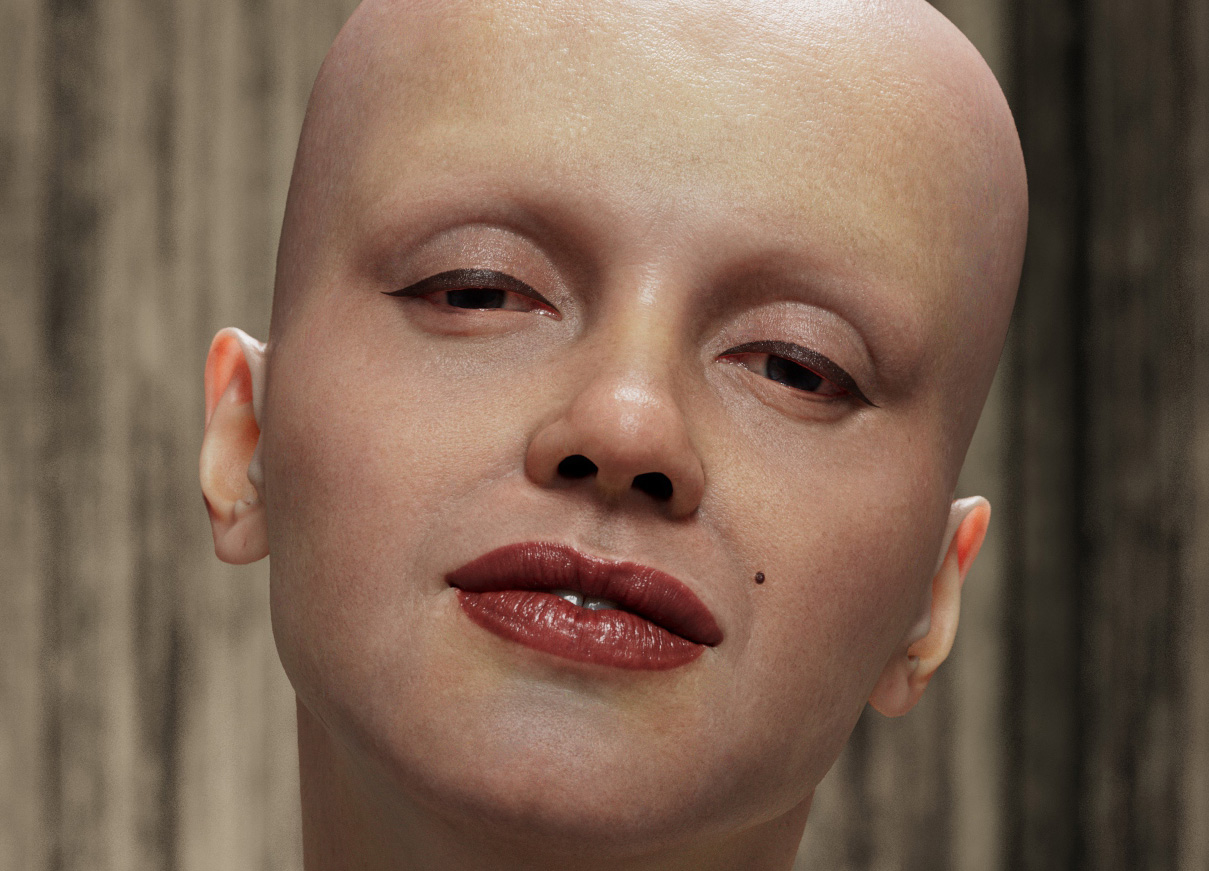
After, I created coat masks for secondary reflection and add them to the Skin shader. Now I can adjust different parts of face secondary reflections.
Render with coat and small adjustments around Color and Displacement maps.
Cloth
Before creating cloth, I needed to create an Avatar for Marvelous.
I usually use Character Creator for posing. I’ve been trying to repeat the head and shoulder position, but the hand position should be moved away, so it more look like A-pose. That way works better when I start making cloth in Marvelous.
So Final Avatar from Character Creator looks like this:

For the cloth, I used Marvelous Designer. Nothing special during the process. I have been trying to keep it simple.
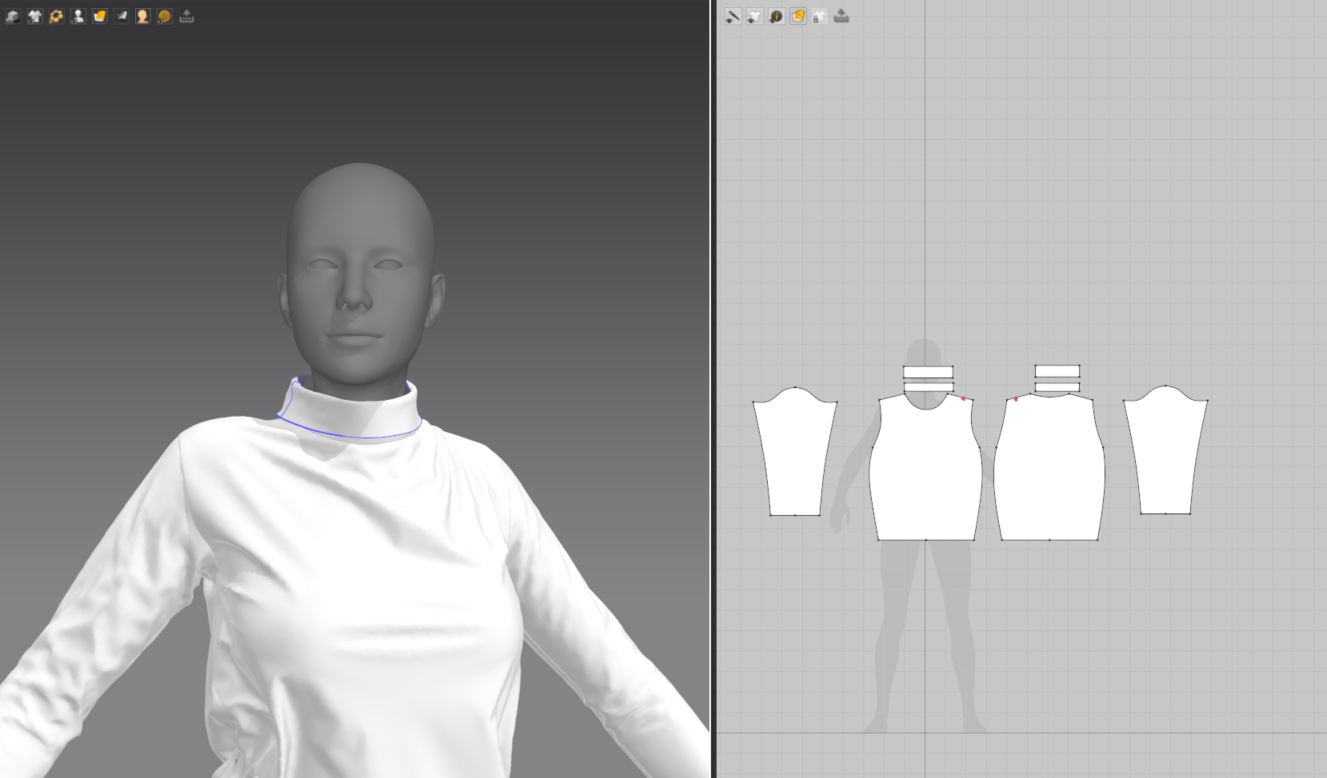
Then I put the sleeves down to match the photo reference.
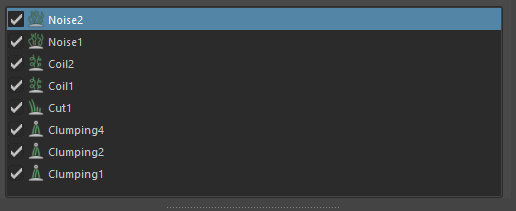
Xgen (Hairs)
For the Hairs I use X-Gen.
I usually start with Eyebrows, move to Eyelashes, then go through the likeness process again if it is needed.
The haircut for Marylin needed to have a lot of hair regions by creating Region Map for making it curl clumps.
Each Hair guide defines the region board or middle of the region area.

Modifiers that I use usually are Clumping, Cut, Coil and Noise. Sometimes a couple of times if it’s needed.
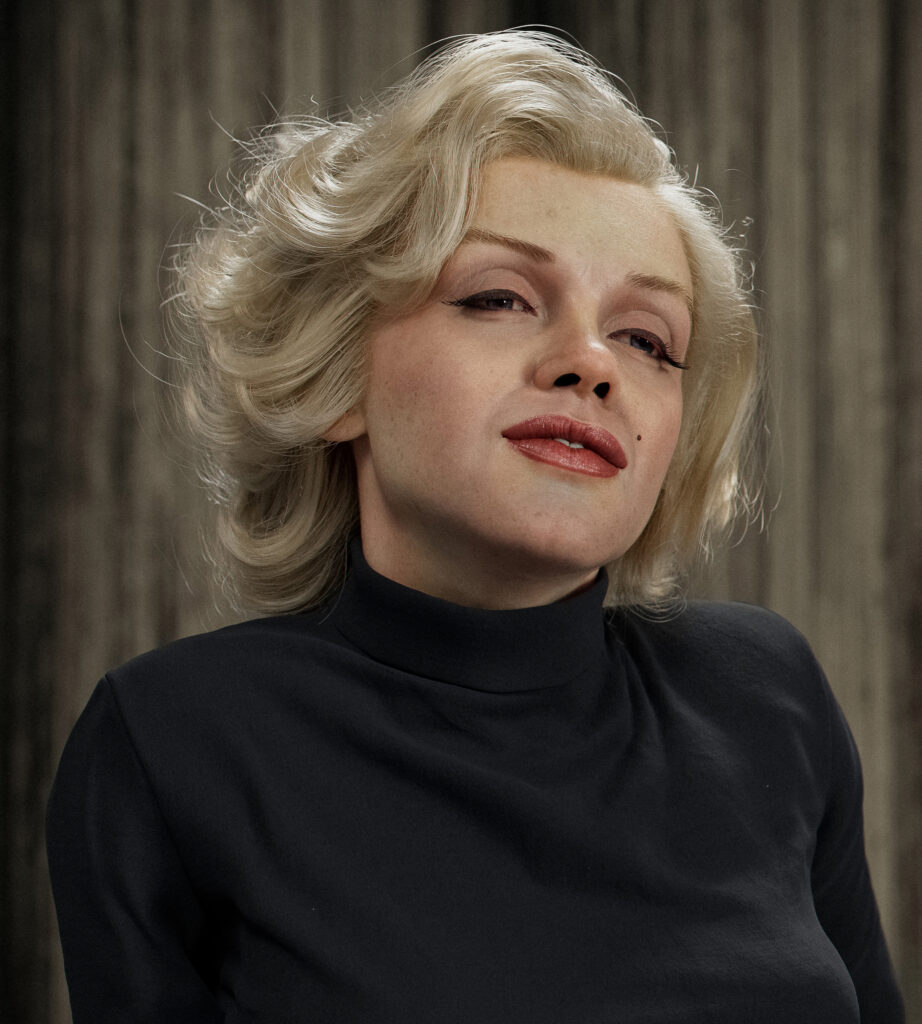
Final render:
Conclusion
I didn’t explain some steps like Eyes, Teeth, Caruncle, etc. It’s because this is something that I build once and always use the same assets with small adjustments in photoshop if it’s needed.
It is good to do everything from the very start, but my general goal is to optimize this hard process and make it simple as I can and quality at the same time. For every new project, I try to make it more and more simple. Therefore, I prefer to use already Unwrapped base mesh and textures that somebody did before me.
Read more articles
You might also like these articles.